
Marc Spagnuolo's Blog, page 96
April 28, 2014
Poll: What Tool Do You Use to Set Blade/Bit Heights
So, you are working at your table saw or router table, and you need to make a hyper-accurate cut. I mean, this thing has to be so spot on, you need to be able to split the ear hair of a mosquito.
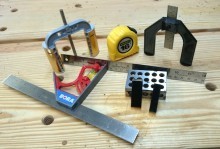 Fortunately, there are a great number of devices that have been invented to make this chore an easy one. Unfortunately, there are a great number of devices that have been invented to make this chore an easy one, and you have to pick which one works for you.
So, today, if you are looking to set up a very accurate height for a bit or a blade, which is your go-to method?
When you need to set a blade or bit height accurately, what tool do you use?


April 27, 2014
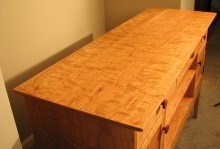
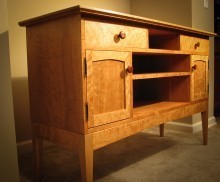
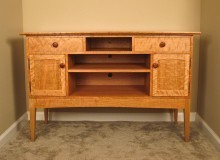
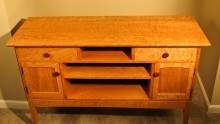
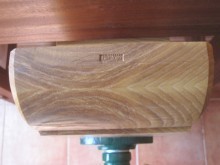
Sean’s Modified Sideboard
By: Sean Walker (Versailles, KY)
Experience: 0-2 Years
Woodworker Type: Hobbyist
Project Type: Cabinetry
Material(s): Solid Wood
Finish Type(s): Oil/Varnish Blend
Finishing Technique(s): Wiping
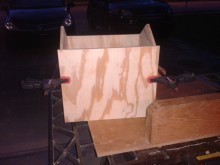
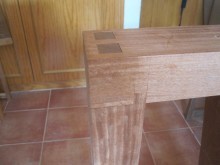
With my parents needing a new entertainment center, and being the generous person I am, I decided to build them a modified version of a sideboard. Most of the pictures found online didn’t seem wide enough for my taste. I wanted to make the width of the sideboard the same width as their LED TV mounted on the wall. I ended up making the piece around 48 inches wide.
After finding some inspiration online, I ended up with the design in the pictures. I constructed the case using dados, locking rabbets for the drawers and mortise and tenons on the legs and aprons.
I saved the best stock for last for the top. The pictures don’t do it justice. I finished the piece using 4 coats of Arm-r-seal satin varnish.
April 25, 2014
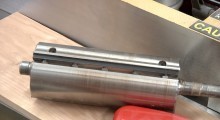
218 – Installing a Segmented Cutterhead in a Jointer
Segmented cutterheads are becoming quite popular these days but most tools come with traditional straight knives. So it’s very likely that at some point you’ll be looking to upgrade to a segmented head, and thankfully you don’t have to purchase an entirely new machine. Instead, you can just swap out the cutterhead for a new one. The process isn’t all that difficult and this video shows you every step as they pertain to a Byrd SHELIX cutterhead and a Powermatic PJ882 8″ Jointer. While your particular brand of tool may vary in the fine details, the concept is the same and I hope this demystifies the process for you.
Is it Worth the Upgrade?
As with anything, it depends on your situation. But I can say without hesitation that this kind of upgrade is by no means a necessity. People have been using straight knives for years with great results and because most are made from high speed steel, the initial cutting edge can actually be “sharper” than the carbide inserts found in segmented heads. But a segmented cutterhead, more specifically the SHELIX cutterhead, brings some nice benefits to the party that could make it worth your consideration:
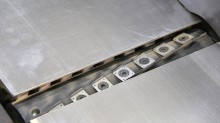
Cut Quality – While you should never expect finish-ready surfaces from any jointer, I find the segmented head produces smooth results for a long period of time. Straight knives are capable of producing an incredibly smooth surface when freshly sharpened, but I find they quickly lose their edge. The carbide inserts of the segmented head start sharp and stay that way for a very long time. In addition, the shearing action afforded by the helical design yields a potentially cleaner cut; a major benefit on highly figured woods or boards with temperamental grain. There’s nothing worse than getting a bunch of tearout on a prized piece of figured stock, knowing you’ll have to waste an additional 1/8″ in thickness just getting rid of the surface flaws. Keep in mind that the “shearing action” I mention is not something you’ll find on every segmented cutterhead. Some cutterheads have inserts that approach the wood head-on so that’s something to look for.
Convenience – In the past I sent my jointer knives out for sharpening about once per year. The cost wasn’t too bad but getting the knives set properly in the cutterhead after the fact was a huge headache. I honestly dreaded the experience. With a segmented cutterhead, the carbide inserts are pre-indexed and never move. So replacing them is as simple as loosening a screw, removing the insert, dropping a new insert in, and tightening the screw. Furthermore, each insert has four sides so all you need to do to expose a brand new sharp edge is rotate the insert 90 degrees. You might find it interesting that I’ve been using a segmented cutterhead in my planer for about three years now and I have yet to turn the inserts even once.
 Noise Reduction – The design of a segmented cutterhead results in much less noise, primarily because there’s less metal making contact with the wood at any one time. And with the helical shearing action, the inserts are approaching the wood at a slight angle which means even less metal comes in contact with the wood at once. My tests in the shop showed a roughly 20 dB reduction in noise level while jointing.
I am incredibly happy with the results of the new segmented cutterhead and because I work with lots of exotic and figured wood, I feel it was a wise upgrade. I should mention that if you’re in the market for a cutterhead upgrade, consider your planer first. Since most of my boards will pass through the planer on both sides as a last step in stock preparation, I feel it’s more important for the planer to produce the smoothest cut possible. The jointer would be the secondary upgrade.
April 24, 2014
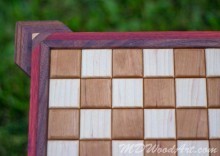
Matthew’s Tiled Chessboard
By: Matthew Wilson (Warren, MI)
Experience: 10+ Years
Woodworker Type: Hobbyist
Project Type: Games
Material(s): Plywood, Solid Wood
Finish Type(s): Oil-Based Varnish, Oil/Varnish Blend, Wax
Finishing Technique(s): HVLP
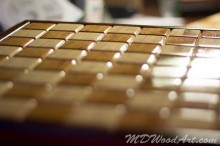
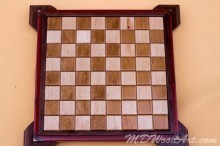
I really love the way Intarsia wood projects look, and I really love playing chess. I thought it was time to make my own chessboard. The tiles were cut one-by-one then rounded over on the tops, sanded by hand, buffed and then glued individually to a 1/4″ backer-board and then framed with solid wood edging. The frame for the board was designed as I went, using what I had in the scrap bin.
For details and more photos, please visit my website. This project was very rewarding and I am really happy with the way it turned out. I hope to one day teach some grand kids how to play on it! Thanks for looking!

April 22, 2014
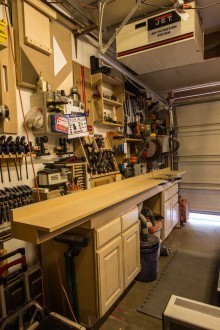
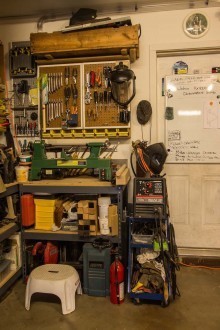
Anthony’s Garage Woodshop
From: Anthony Zeh (Mesa, AZ)
Shop Type: Garages
Shop Size: 250-499
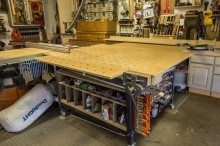
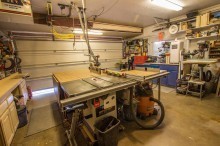
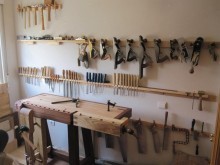
I am now a full time woodworker who has built a very user friendly garage shop for myself. I have a space which is 19′x21’. My main shop tools include a Delta Hybrid Saw with a very super cool tools inspired fence, and a Woodpecker router lift systems with Freud Fence. I have a Jet bandsaw, Porter Cable Drill Press, 12” Dewalt Mitersaw station, Performax 16/32 Drum Sander, Mini Lathe, Worksharp 3000, Ridgid 6” Joiner, 12” Jet Planer, Jet mortise machine, Delta scroll saw, Lincoln Welder, and a horizontal bandsaw. I have also built some shop helpers, like a horizontal mortise which can cut mortises to fit Festool domino tenons, and a moxon vise for dovetail work. My main assembly table, which is also my outfeed table, acts like a MFT table with 20mm holes 4” on center. It also has flip up wings to give me a larger working surface.
I have 4 Festool surface clamps and 2 of their click clamps. I would love to have a whole Festool system, but its out of my price range. I have about 125 other clamps around the shop. I have been collecting the Bosch click and go boxes, an alternative to the Festool box system. I have a number of hand tools and power tools which include several routers, a modified Scheppach track saw, Bosch jigsaw, Bosch drill and impact driver, Fein Multitool and about 6 different power sanders.
All my main tools have autoswitches to run dust collection or vacuum hookups, including the power source above work table to allow vacuuming to sanders and the track saw when working on the assembly table. I made a safety cover for my table saw with a vacuum port which comes from the ceiling rather than an arm across the table saw, which would just get in my way. I am not a big fan of large dust collection tubes in a shop as small as mine, so I prefer vacuums tucked near machines to collect dust. I also have an overhead dust collector for airborne dust.
I am always looking to rearrange my shop to make it more efficient for my needs. I spend most of my days in there, and enjoy when I have time for working on a shop upgrade or doing some fine tuning.


April 21, 2014
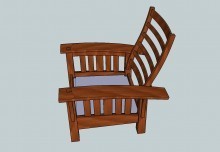
Build a Morris Chair!
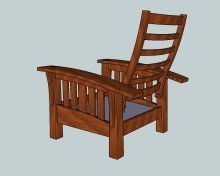
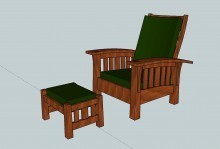 On May 2nd, 2014, the Wood Whisperer Guild will embark on the next big project: A Morris Chair! The design takes influence from various modern and classic interpretations of the Morris Chair and features elegant bowed arms and a contoured back. Of course a chair this comfortable also deserves a footstool, so we’ll build one of those to match!
Techniques Galore!
This project will challenge woodworkers of all skill levels as we delve into fairly advanced techniques like bent lamination and creating mortise and tenon joints on various curved workpieces. The SketchUp rendering doesn’t show it well, but the legs on the chair and the foot stool feature tapers on the outside faces, giving the pieces an additional sense of weight and sturdiness.
Look Ma! Something Different!
This is first Guild project to require upholstery and sewing. While I’m no expert in either area, I am going to try my hand at creating the drop-in cushions. For the back cushion, we’ll have the help of a seamstress. But all steps will be filmed and demonstrated.
How to Get Access!
All active Guild Subscribers will receive this project as part of their membership. If you’re a member, log in and you should see the project already in Your Projects.
Not a Guild member yet? Subscribe before May 30th and receive access to this and the next two projects for FREE. If you’re not interested in a Subscription, you can purchase access to this project alone for $65.
What to Expect!
The project will begin with a Live Virtual Tour on May 2nd and will continue with a video release every Friday until the project is complete.
We do plan on having kits available through Bell Forest Products and we’ll provide links as soon as we have them. Keep in mind, the first few week’s worth of videos focus on introductory topics like history, wood selection, and rough-milling, so there’s plenty of time to get your materials. Not to mention, it’s always better to lag behind the videos by a few weeks so that we can work out any little kinks.
If you have any questions about this project or how the Guild works, I would be happy to help out. Just leave your question in the comments section below.
Poll: Now We’re Smoking
With Easter Sunday comes family gatherings, and most of those revolve around a big meal. Being Italian, one of the most traditional dishes at the table is roasted leg of lamb. In years past, I have simply baked it in the oven, with very good results.
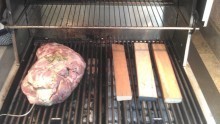 But, recently, I have discovered the joy of smoke roasting the lamb on my grill. With a healthy rub of olive oil, garlic, rosemary and other spices, I put the lamb on the grate with a very low flame and some water soaked boards from my scrap pile to impart a great, smoky flavor to the roast.
Today, we want to know if you have ever used your shop offcuts in your culinary endeavors. Maybe you maple smoked some salmon or hickory smoked some ribs… whatever you may have done, just be sure to let me know when dinner is!
Have you ever used your wood scraps for smoking?
April 17, 2014
Scott’s Little Free Library
By: Scott Betz (Lakeland, FL)
Experience: 0-2 Years
Woodworker Type: Hobbyist
Project Type: Boxes, Outdoor Projects
Material(s): Plywood, Solid Wood
Finish Type(s): Commercial Stain, Oil/Varnish Blend
Finishing Technique(s): Brushing
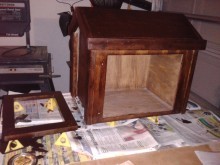
First of all, this was the first project that I’ve ever completed. It’s a little rough around the edges, but I didn’t expect to be perfect from day one. I made plenty of mistakes and even trashed a little bit of wood, but I learned from those mistakes and will be a better woodworker for it.
That being said, my grandmother had read about the Little Free Library in the newspaper and had been asking for one ever since. Knowing that this was something she really wanted, I decided to complete this project for her for Mother’s Day last year. I can’t really say that I had much of a design written down, but went mainly straight off the top of my head (Mistake #1). :)
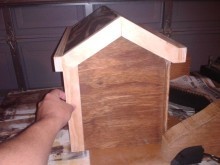
The main body of the library is made of 1/2″ pine plywood. The sidewalls and bottom are connected using dado and rabbet cuts, glued together and brad nailed for good measure. Similarly, I mitered the top and bottom edge of the roof panels and cut dadoes to join the roof to the main body. I lined the exposed edges with 2″ x 1″ pine for a cleaner look and to provide an extended overhang to prevent rain from entering the housing.
The door was constructed using the 2″ x 1″ pine as well. I joined the door segments using mortise and tenons and rabbeted the inside edge to install the plexiglass window. I attached the door with some simple exterior grade hinges and a latch from the hardware store and attached a pine handle I had lying around.
I stained the entire library and applied 2 coats of 50/50 spar varnish/mineral spirits to hopefully protect it from the elements.
I plan on making another Little Free Library to place at my own home. I think after making this one, with all I’ve learned, the second should come out nicely. My late grandfather did a lot of woodworking (which is where I’ve gotten 75% of my tools) and he always built a new project once out of pine to hammer out the mistakes and then a second time with whatever wood choice for the final product. I can see myself doing the same. :)
I highly recommend you visit www.littlefreelibrary.org and consider taking on this project yourself. It is a fairly simp le project and is great for your community. Inspiring reading in all generations definitely a worthy cause, in my opinion.


April 14, 2014
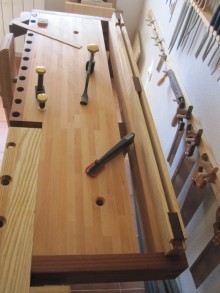
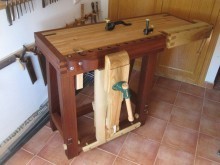
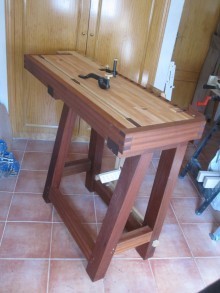
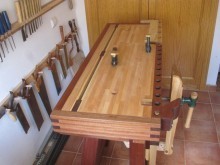
Julio’s Flamingo Workbench
By: Julio Alonso Diaz (Spain)
Experience: 5-10 Years
Woodworker Type: Semi-Pro
Project Type: Shop Projects
Material(s): Solid Wood
Finish Type(s): Oil
Finishing Technique(s): Wiping
This is the workbench I have been designing for the last few years. I was inspired by lots of workbench examples. It’s not a Roubo, though it has got some of they features. I made this Workbench for my own use but I also do custom-made workbenches for others.
The workbench is hand plane finished without any sandpaper. I have a small space where I teach hand tool techniques and furniture making without power tools or other machinery. Just arts and crafts. My workshop is called Aula Flamingo.
April 13, 2014
Quick Poll: Block Planes
 In the world of hand planes, they aren’t fawned over like the gossamer shaving-producing smooth planes, the brutishly-huge jointer planes or the uber-versatile jack plane. Still, they are as handy as all get-out, can do any number of tasks and can be stored in the pocket of a workshop apron.
They are block planes, and they can be found in nearly all workshops. Because of their diminutive size and lower cost, they may be the first plane that many woodworkers ever use.
Today, tell us about your opinions on these planes. Do you think they are essential pieces of shop equipment, or are they a waste of time?
Block Planes…


