
Marc Spagnuolo's Blog, page 103
December 18, 2013
December Giveaway
 Every month we give away something AWESOME here at The Wood Whisperer and December is no exception!
This month we have 2 great prizes: a Festool TS55 REQ with CT26 Dust Extractor and a Wood Whisperer Guild Superfan Subscription! Head on over to the Giveaway Page to learn about the products and enter to win. And be sure to bookmark the Giveaway Page so you can keep up with the latest giveaway details!


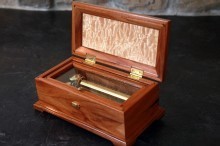
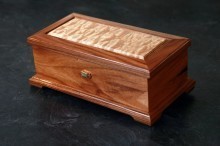
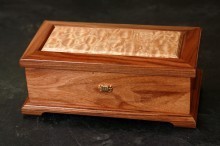
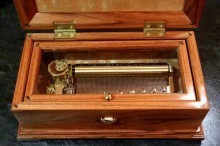
Bill’s Music Box
By: Bill Mitton (Howell, MI)
Experience: 5-10 Years
Woodworker Type: Hobbyist
Project Type: Boxes
Material(s): Solid Wood
Finish Type(s): Lacquer
Finishing Technique(s): HVLP
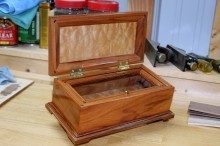
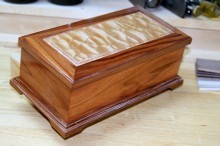
Last year I wanted to build something special for my wife for Christmas, something that every time she sees it (or in this case sees and hears it) she would be reminded of how much she means to me. One day I was cruising the internet and happened upon a web site that was selling music boxes. “What a great idea,” a music box, my wife loves music so what better way to express how I feel then with music. So I decided to build a music box, how hard could that be? Duh!
Well after a considerable amount of research, I discovered that building a music box is a little more involved then I first imagined. It is quite similar in principle to building a guitar or a piano in that the acoustical amplification properties of the sound come from the wood that the box is made from. Generally, more dense woods amplify bass resonance while lighter weight woods are stronger at the treble end of the range. The woods I choose were Bolivian Rosewood (dense and also looks good) and Quilted Maple (softer with good acoustical qualities and looks great). I used a 72 note movement from a company I found on the internet. They were very helpful in providing me with the proper dimensions for the box and also sent me several pages of very detailed information needed to get the best possible sound quality.
Next it was time to design something that would not only look good but would also sound good. As it turned out the box carcass was fairly simple to make. The sides are rosewood, mitered corners reinforced with walnut splines. The bottom, which also serves as the sound board that the movement is mounted to, is made from a thin piece of maple. The glass inner-lid is made from rosewood, also splined. The top was the most difficult part to make due to all the different angles. It is a solid piece of quilted maple framed with rosewood, mitered corners and half blind splines.
The box was finished with several coats of nitrocellulose lacquer using a HVLP spray system and then hand rubbed and waxed. I must say I really enjoyed doing this project, there was a lot more to it then I first thought. But the finished piece was more than I’d hope for. My wife was thrilled, and we were both absolutely amazed with the quality of the tone and the sound coming from this wooden box. The highs are crystal clear and bell like, it also has very nice bass resonance.
December 17, 2013
Marc Adams Video Collection
 It isn’t often that I post a specific product endorsement like this, but when I saw this offer I was immediately compelled to. Why? Not because Marc Adams and I happen to spell our names the same way, but because this DVD set has a very special place in my heart. It contains one of the first woodworking DVDs I ever watched.
When I first started woodworking back in Temecula, CA, I met another local woodworker who introduced me to numerous tools and products I wasn’t aware of. One of those was a DVD from Marc Adams on finishing. The DVD was well lit and concise and Marc’s no-nonsense delivery was clear and easy to understand. After viewing the first DVD, I immediately purchased the whole set and continued to enjoy and learn from Marc.
If you aren’t familiar with Marc Adams, he’s the owner of one of the largest and best-known woodworking schools in the country: Marc Adams School of Woodworking. The man is a wealth of knowledge and he puts a bunch of that brain juice into this DVD set.
So if you’re a new woodworker just getting your feet wet or perhaps you are just looking to fill in some gaps in your knowledge-base, this is a DVD set you should consider. The set is on sale now for $126 and you can use our special discount code (WOODWHISPERER) for an additional 10% off!
And since we are an affiliate with ShopWoodworking.com, buying this DVD set using one of our links also benefits us. So thanks for your continued support!
December 12, 2013
Greg’s Garage Shop
From: Greg (Broken Arrow, OK)
Shop Type: Garages
Shop Size: 0-249
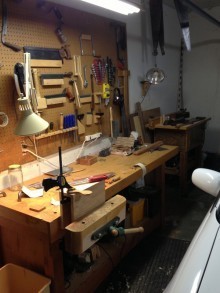
I thought folks might like to see how a little space can be used to do work. The first photo is obviously my workbench which I built long ago. You can see my car right beside it the mirror always gouges me in the back when I’m trying to cut something that’s gripped in the vise.
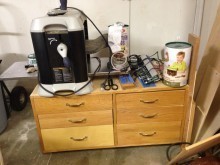
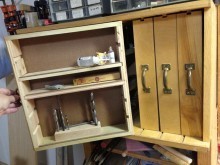
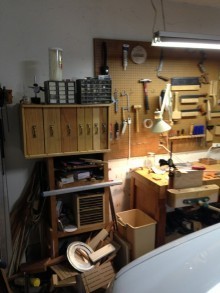
Turning to the left, you can see some of my storage. For some reason, that is a dead corner that collects all sorts of junk and I can’t seem to figure out how to use it and not have wood and seldom used tools piled there. On top is a set of vertical drawers which you can see in the third pic. I built that to store small stuff like nails, screws, etc. I am showing one of the lightly-used ones; most are full. It’s really handy.
Turning left again, you see a bank of drawers. I used to have those under the workbench but I find I work better with only a few commonly used things under the bench (like planes) and I now use this to do planing.
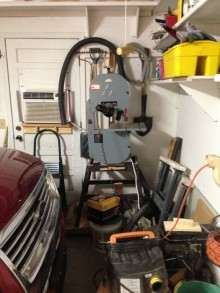
A little further left, is my bandsaw and shopvac on the far wall in front of my truck. That’s pretty tight there and I have a hard time getting big pieces in there but it works after a fashion. The good part is that I keep two vehicles in here out of the weather as well as getting some woodworking done. Some day I hope to move into a dedicated space but till then, I manage to build a few things.
December 10, 2013
Kade’s Toy Box
By: Steve Lyde (Altus, OK)
Experience: 10+ Years
Woodworker Type: Hobbyist
Project Type: Chests, Kids Projects
Material(s): Plywood, Solid Wood
Finish Type(s): Waterborne
Finishing Technique(s): HVLP
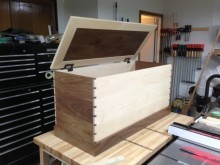
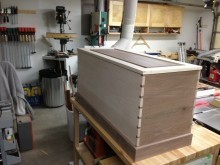
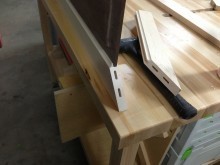
I built this chest, a toy box, for my 3 year old grandson Kade. The chest is made from walnut and maple with a birch ply bottom. I used the torsion hinges from Rockler so he won’t get his fingers smashed by the lid.
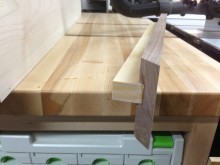
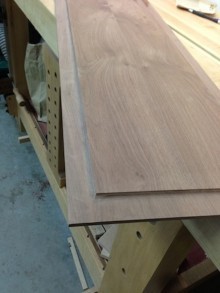
It started with taking a hand cut dovetail class at Woodcraft, highly recommended. Now an entire chest full of hand cut dovetails seemed a little intimidating at first, but once I got going it wasn’t so bad. The lid is a raised panel design I saw on a episode of Wood Works with David Marks. The raised panel was resawn from a piece of 8/4 walnut for a nice book match and the frame of the lid is maple. I used maple for the front and back and walnut for the two ends with walnut trim around the bottom. The bottom of the chest is 3/4″ birch ply.
To be honest most of my woodworking has been what I call “ply boxes” until recently. So this project was a lot of fun using all solid wood except for the bottom and the cutting of the dove tails by hand was an extreme stretch for me and a great learning experience.
The finish used was General Finishes waterborne which I sprayed with a Fuji HVLP that I absolutely love. In my former career I painted cars for living so using a brush or rag on anything just makes my skin crawl.
In the end I’m very satisfied with the way it turned out and I think my grandson will enjoy it and I hope he learns to appreciate it.

December 9, 2013
212 – Hand-Made Wooden Clock
A hand-made wooden clock is one of those projects I like to marvel at. I’m not sure I have enough patience to cut out one wooden gear let alone the multitude required to construct a fully-functional clock! Thankfully, my buddy Rick Urschel is not nearly as impatient as I am. Several years ago, he began dipping his toes into the clock-building world and filmed one of his early efforts at making the Simplicity Clock as designed by Clayton Boyer.
While the clock itself is quick complicated, the plans provided by Clayton Boyer seem to make the process approachable. And as you’ll see, you don’t need a lot in the way of tooling to get the job done. A simple scrollsaw does all of the cutting!
So let’s embark on a fun little journey into the world of clock-building!
December 3, 2013
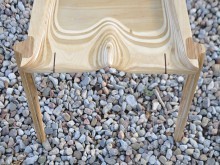
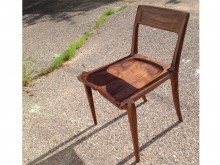
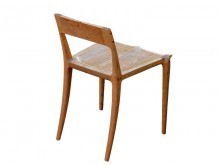
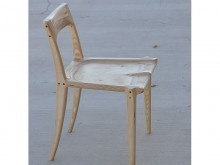
Scott’s Low-Back Chair
By: Scott White (Albuquerque, NM)
Experience: 5-10 Years
Woodworker Type: Semi-Pro
Project Type: Chairs & Stools
Material(s): Plywood, Solid Wood
Finish Type(s): Oil/Varnish Blend
Finishing Technique(s): HVLP
I am a designer/builder in Albuquerque, New Mexico. I heard about Sam Maloof years ago, before I even thought of making furniture. In fact my business began as an experiment, if you will. My need for a coffee table took me on a search to every furniture store in town, even thrift shops. I found nothing, which led me to making something myself. I’ve always been into working with my hands so the idea of coming up with my own creation was exciting, plus the fact that designing has been a love of mine since I can remember.
I bought 2 sheets of 4’X4’ plywood, some all thread, steel tubing and connectors…presto, I had me a nice little coffee table! I even planted a rectangular piece of stainless steel into the top because I was a dumpster diver at various recycling yards and had some nice pieces of metal.
Fast forward 6 years. I kept making pieces, got a business license and made some sales. Sam Maloof stayed in my head. His life, craft and outlook stuck with me. I wanted to learn his joint and inject it into my own designs. This is my latest chair design…a nice, simple low-back chair. I spent the winter of 2012-13 making prototypes (6 total) before resting with this one. It looks great and the sit is marvelous. I think my favorite is the Baltic birch plywood, although I do walnut, cherry, mahogany…. Thank you, Sam Maloof!

November 28, 2013
2013 Black Friday Deals for Woodworkers
If you’re anything like me you hate shopping on the best of days, let alone on the most insane shopping day of all: Black Friday! So Nicole and I decided to collect a bunch of links and deals we found at some of our favorite vendors, all in one place. Now you can do your shopping from the comfort of your own home with a piece of pumpkin pie in one hand and your tablet or laptop in the other! And keep in mind that if you use the links below, you’ll be helping support our efforts here at The Wood Whisperer since all of them are connected to our various affiliate programs. As always, we appreciate your support!
Amazon
Looking for the best price on my book (or any other woodworking book?) Hybrid Woodworking? Use the code BOOKDEAL & get 30% of any book at Amazon! Granted you won’t get the bonus video or signature, but heck of a deal if you are shopping by cost! Deal is good till Dec 1st.
$25 Off a $100 DEWALT Purchase
$25 Off a $100 Bosch Purchase
$20 Off a $100 PORTER-CABLE Purchase
$25 Off a $100 Makita Purchase
Highland Woodworking
Rockler
Woodcraft
Shop Woodworking
Powermatic
WOOD Store
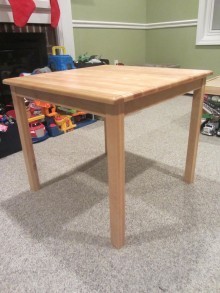
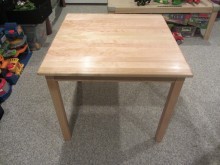
Jim’s Kid’s Table
By: Jim Abbruzzese (Milford, MA)
Experience: 0-2 Years
Woodworker Type: Hobbyist
Project Type: Kids Projects, Tables
Material(s): Solid Wood
Finish Type(s): Oil/Varnish Blend, Wax
Finishing Technique(s): Wiping
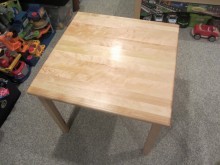
I’m pretty psyched to share the results of my first furniture project. Marc’s site, his videos and the WoodTalk forums have been my main resource for learning the methods used to make this table for my kids. Just about every step of the way was a new experience for me and I thank Marc for the silly amount of free information he has provided. And I thank everyone on the forums, on twitter and google+ for their advice and encouragement.
The inspiration for this table came from one being sold on Amazon that my wife had found, hinting that she wanted to buy it. After convincing her I could build it, I began acquiring tools (mostly used) as I needed them as I progressed though the build.
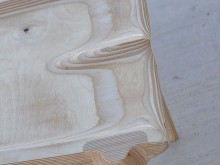
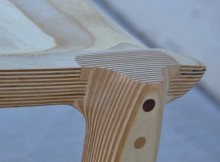
I designed the table (and chairs – that’s the next part of this project) in Sketchup taking reference from the one we saw online as well from the worn out table our boys were already using. The joinery is all done with dowels using a dowel jig and dowel centers. I figured this would be a good way to get my feet wet before taking on mortise and tenons as I have no hand tools (yet). I used dowels in the table top as well to help with making a flat surface.
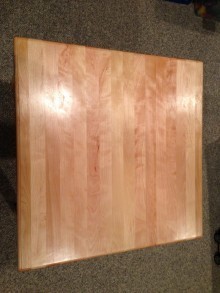
I made my own wipe-on poly by thinning standard poly and finished with a coat of wax. The end result is buttery smooth and may be what I am most proud of in this project. The figure and grain of the table top really shine.
Overall I am very pleased with how the table turned out, though it is not without its flaws which I will not reveal here. If anyone is interested I documented my experience in a blog I started at the same time as this project. You can read my ramblings at moonlightwoodworker.blogspot.com.

November 27, 2013
Non-Woodworking Gifts for the Woodworker in your Life
Years ago, someone bought me one of those little hot plate warmers that keep your coffee at a nice warm drinking temperature. Not sure whatever happened to it but I recently decided I could use one. I’m not a fan of travel mugs and prefer my coffee in an open cup. Obviously, open cups cool much faster. To make matters worse, I frequently step away to make a few cuts only to come back to a cold cup of joe. If this is annoying to me, I can only imagine what it’s like for folks in cold climates. This got me to thinking about some other things that woodworkers might be able to make use of, even though they have nothing to do with woodworking. Nicole and I brainstormed for a while and with the help of some friends on Facebook, we have some cool suggestions for you to consider. Feel free to send this article to your friends and family if you like the list!
 Coffee Warmer – Inspired by the above story, this bad boy will keep your hot beverage nice and warm for the duration of your drinking time. Now I can take a sip, make a few cuts, take another sip, make a few cuts, and just like that I’m more productive and more caffeinated! WIN!
 Keurig – Speaking of hot beverages, how about something that makes individual servings quickly and cleanly. If you have a detached shop or just don’t want to go to the kitchen for a refill you can’t go wrong with a Keurig. Even though I keep mine in the kitchen, it gets used all of the time. It makes coffee, tea, hot chocolate, and even cider!
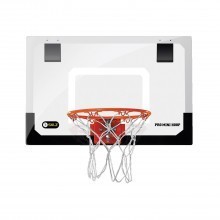 Mini Basketball Hoop – If you’re lost for something to do while your finish dries or while the glue sets up, why not play a little b-ball. A mini basketball hoop is a great distraction and brings an extra element of fun to the wood shop. Just watch those rebounds around the chisels.
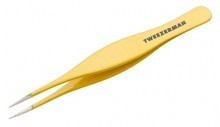 Tweezers – Woodworkers get splinters. It’s a fact of shop life. And there’s nothing worse that using dull crappy tweezers to yank those splinters out of your supple soft skin. A high quality pair of tweezers should be all you need to get those buggers out. Or you could just wait for it to get infected. Whatever floats your boat.
 Tin Signs – Much like TGI Fridays, I believe that every interior space is improved with the addition of tin signs. For me, it’s all about classic comic book characters. While they serve no real purpose, they do make me enjoy stepping into my shop every day. I’m a kid at heart and my shop reflects that.
 Hand & Foot Warmers & Gloves – Recommendeded for the woodworker that doesn’t have a good heat source in their shop. Keep your cute little tootsies warm and cozy! Thanks Becky H. for the suggestion!
 3M Respirator – This is one of the most asked about products that I use in the shop. You need your lungs in order to live so you should treat them well!
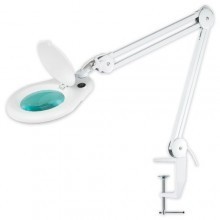 LED Magnifier Lamp with Adjustable Arm – I recently picked up one of these bad boys. It’s great for doing inlay and marquetry work when detail really matters. It can also come in handy when inspecting an edge during sharpening as well as when extracting splinters.
 Mini Punching Bag – Sometimes, our tempers can get the best of us. Ever put a mortise in the wrong spot on a precious workpiece? Yeah, me neither. But for those that occasionally do such things, having a safe place to direct that frustration is a good thing. Thanks for the suggestion Todd M.
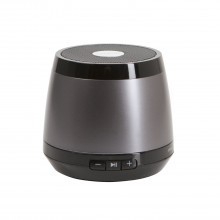 Bluetooth Wireless Speaker – Who doesn’t want to rock out to “I Wanna Dance with Somebody” in the privacy of their own shop? Just me? OK maybe you want to listen to something else, like perhaps an episode of Wood Talk? Well here’s a great way to do it. This bluetooth wireless speaker with work with any bluetooth enabled music device! Pretty awesome! Thanks for the suggestion Stephen M.
 Pandora Subscription – Speaking of music, give your music-loving woodworker a subscription to Pandora. I’ve been using Pandora to fill my shop with great tunes for several years now and I highly recommend it! Thanks for the suggestion Jacob H.
As you can see, there’s no shortage of cool ideas for just about any woodworker. Have more suggestions? Leave them in the comments below.


