
Ali Edwards's Blog, page 39
November 9, 2023
December Daily® Storytelling | Special Guest Alexa Gill
Hey Everyone!
Alexa here. I am so excited to celebrate the season with you via the Daily December project.
This will be my 7th year participating in December Daily. My style and approach to the project has evolved over the years. I am a big fan of foundation pages as they help to set me up for success to finish the project and to get in the spirit of the season. I like to prep some directed stories in advance which can be a real gift on days in December that I am finding it more difficult to pinpoint a story. I especially like to make at least a couple of pages that can be 'no photo' stories. This eases a bit of pressure during December when I might not feel like taking photos every day. A lot of the stories that I like to tell are based on prompts that could be used any time of the year.
For me, planning for December Daily starts really early. When I see the product previews I often have ideas sparked instantly, so I write them down. I have a little notebook in which I sketch my page ideas down in. I usually have more ideas once I have the product in my hands too. Additionally I jot down ideas for stories when they come to me. I use a calendar to note any plans I might have in December that I know I will want to document. During December I like to use Evernote for note taking & journaling.
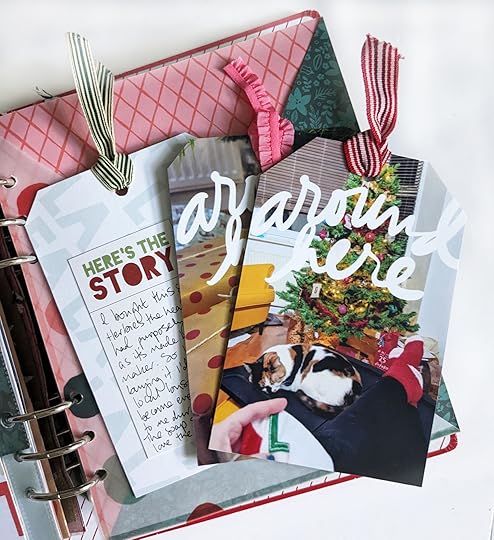
Here are some of the stories that I love to tell in my December Daily project:
December Stuff
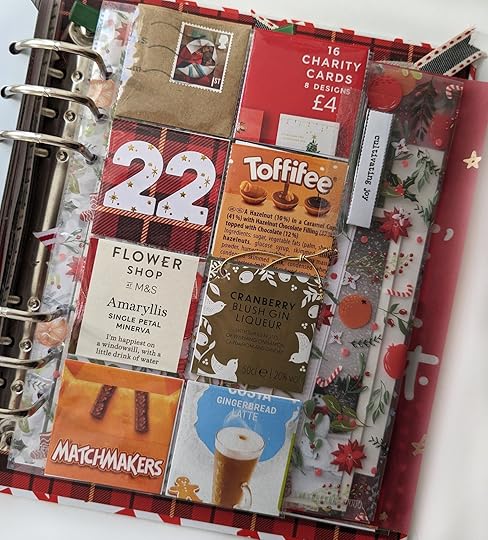
I always set up a 2x2 page protector for this story. Sometimes I end up cutting the page protector down, depending how much I have to fill the pockets with. Throughout the month I gather paper products which I cut into 2x2 squares and pop into the page protector. Sometimes I even start to gather things before December. For example I usually plant an Amaryllis in October/November and I like to use the packaging from that.
This is a great 'filler' idea. It requires no photos or words from you yet it still tells a story of your December. Through the years I have had some things that make a regular appearance and some new things materialise.
'ING words'An 'ing word' is any word ending in ing. This is one of my favourite directed story telling ideas and one I like to prepare in advance since I always use stamps for this prompt. These words are a great jumping off point for journaling but you could also just use photos!
Thankful forThis is another page I like to prepare in advance so that it's ready to go for me to write down things I'm grateful for throughout the month. It helps me to pause and look for the good in a season that can feel very rushed. The first year I moved into my home I picked out things I was grateful for specifically about my flat & I repeated this again a couple of years later once I had made the flat more my own. I love comparing the two pages.
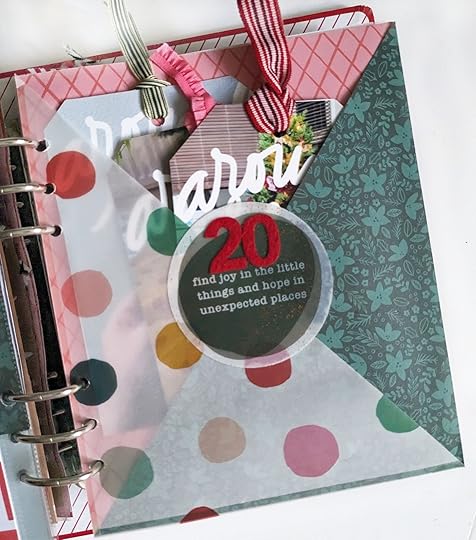
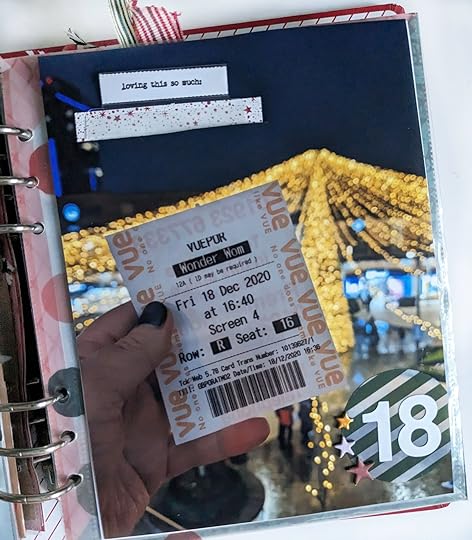
Loving/JoyThis prompt helps me to look a little closer at my life to think about what is making me happy in this season. For me this can be anything from snuggles with my cat to a TV show to a scented candle.
Traditions new & oldSome of my favourite traditions are: opening an advent calendar, decorating my tree, sending cards, growing an amaryllis, watching Christmas films, doing a Christmas themed puzzle. All worthy of documenting!
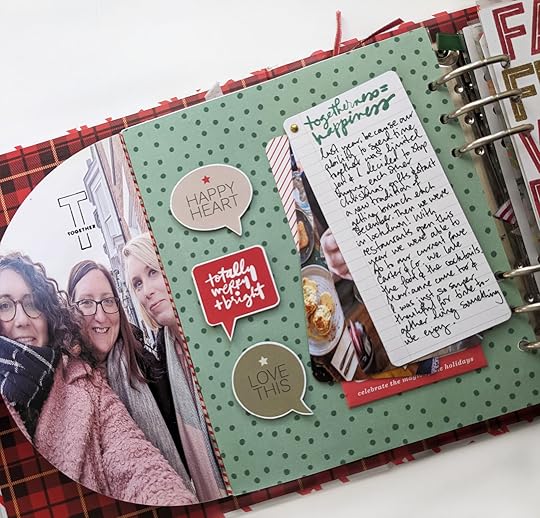
I also go to brunch with a couple of my girlfriends every year which has become a great way to celebrate the season together.
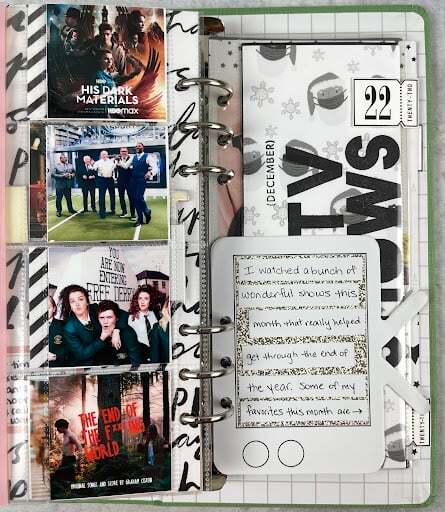
Cinema is a big love of mine and something I document each December. It's fun to look back at what I saw in past years, but it also allows me the opportunity to document what I love about going to the cinema and how important it is to me.
Including other voices in my project
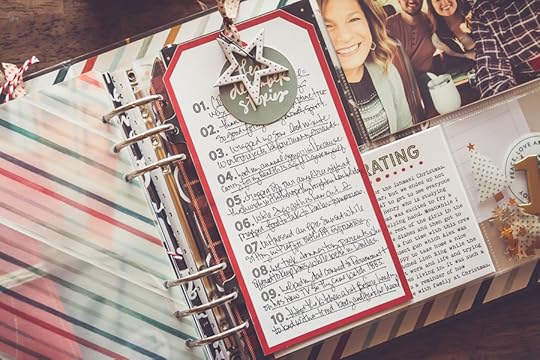
I live on my own with my beloved cat Luna, but I like to include input from my immediate family in my album. How I've done this is to give each family member a tag and asked them to write a few words for me. I will give them a directed prompt to make it easier for them. Prompt's in the past have been 'your favourite memory from this year', 'wishlist' and 'thankful for'.
Giving and receiving cards is a way I love to celebrate the season. I usually have a page set up, wether it be an envelope or a pocket, to include a few cards from friends & family. I have to be selective so it's not too bulky. But these are a real treasure to look back on.
Some years I've photographed the cards I'm sending. And one year I took a picture of myself writing my cards out. My journaling was about why I love the process of sending cards and how it connects me to others.
I hope this has given you some inspiration for stories to tell during December. Thank you so much for joining me today! Find me on Instagram here.


November 8, 2023
December Daily® Storytelling | Special Guest Kelly Ishmael
Hi friends. My name is Kelly Ishmael, and I am delighted and honored to be here with you today to share my insights and experience with December Daily® storytelling as an empty-nester.
As I was going back through previous projects in preparation for this blog post, it dawned on me that I didn’t start documenting December stories until after my daughter went to college. I have been a memory-keeper for over 25 years with dozens of scrapbooks that have multitudes of layouts devoted to the holidays, but my only December Daily® projects have been as an empty-nester.
My first foray into December documenting was in 2012 with a DIY mini-album, and I can still recall the absolute joy I felt while making it.
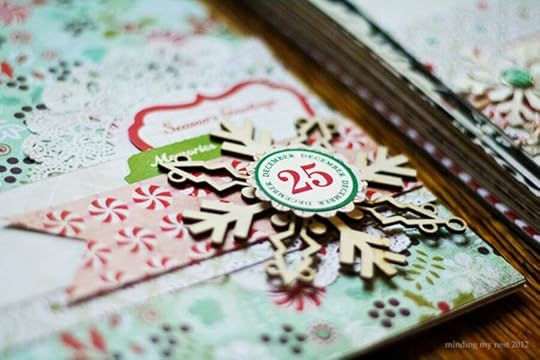
At the time, it was my way of affirming that there were still plenty of things to document and plenty of joy to be found during the holidays even while my daughter was away at college. Something I had struggled with in prior years.
Spoiler Alert…There was then and there still is now.
Fast forward 11 years and December Daily® has become one of my favorite memory-keeping projects. And today I wanted to share a couple of the big “a-ha” moments that have helped me with my approach to this project and inspired me to see the month of December in a new light.
Insight #1 | It’s Not The EndThere is a meme you might have seen along the lines of “You only have 18 Summers (or in this case Christmases) with your kids living at home.” I think the idea behind this sentiment is to encourage us to be present with our children and to cherish the moments we have with them. The problem that I have with this way of thinking is that it can put undue pressure on parents or cause even more anxiety about being an empty-nester.
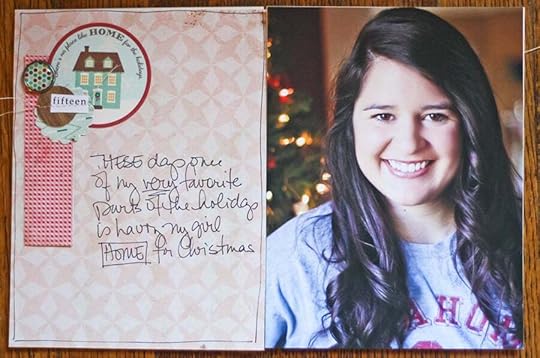
The other issue I have with this notion is that it assumes that these 18 years are the only time that we’ll have to make special memories with our children. Which is just total nonsense and also completely untrue. The simple fact of the matter is that some of my favorite December memories have been with my daughter in the years after she left home.
Now admittedly, it’s a different experience having an adult child, but in some ways, it is even more special because of the way it documents how our relationship has grown and evolved over the years.
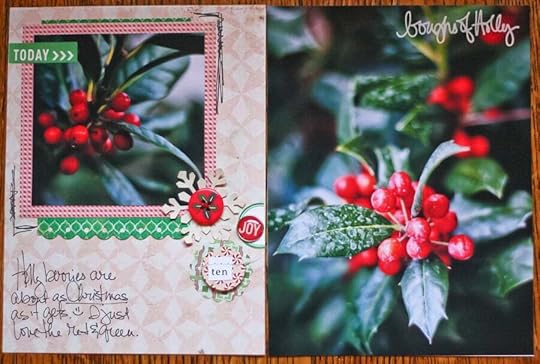
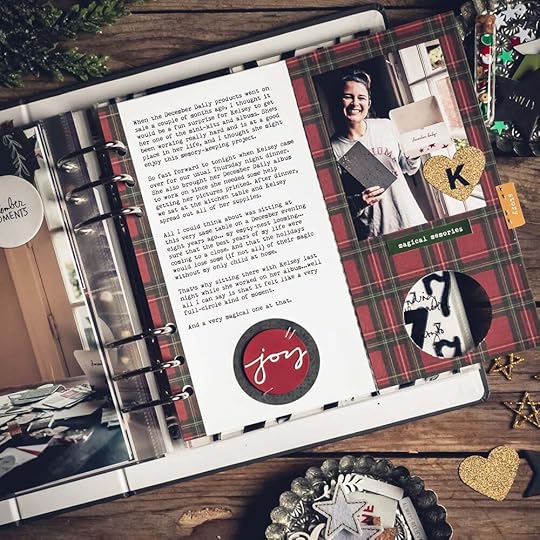
In addition to the memories we share together, one of the other special things about this season of life is being a witness to the story my daughter is writing for herself. I love including photos and stories that Kelsey shares with me about the holiday memories she is making or including stories about some of the big moments in her life during the month of December.
One of the biggest shifts in my December Daily® documenting came from something Ali said in one of her classes, and that is “I am the main character in my story.” What that meant for me was changing my internal narrative from that of “I am preserving my family’s holiday memories” to “I am telling my December story.”
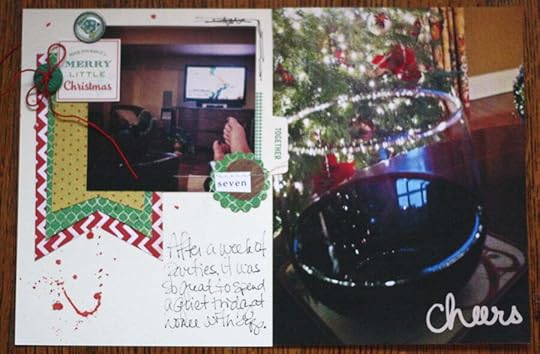
As supporting characters, my family is a very big part of my story, so obviously they are a big part of my December Daily® albums. But in addition to more family-oriented stories, I love including stories that document little moments of delight and joy as I go about my December days.
These days I tend to approach December Daily® as documenting and celebrating everyday life with the holidays as the background or setting to my stories. This mindset has taken the pressure off of looking for or creating holiday stories, and instead allows me to simply be present to the beauty, magic, and wonder of the season in whatever shape that takes.
If you are an empty-nester (or if your empty-nest is looming off in the distance), my hope is that this post encourages you and inspires you to see the holiday season and this season of your life in a new way. I promise you that there is so much good stuff in store, and there are so many awesome new stories waiting to be told.
Thank you so much for allowing me to share my stories with you. You can see more of my December Daily® photos and stories on Instagram and my website.
Finally, a huge thank you to Ali for creating this special project. Her advocacy for personal storytelling has been a huge inspiration to me these past several years.
Love, Kelly
P.S. If you are an empty-nester (or soon to be empty-nester) who is struggling with this big life transition, a few years ago, I created a class on Ali's site called Empty Nest + New Stories. The goal of this workshop is to help you to acknowledge your feelings + emotions, to encourage you to be brave and ask yourself the hard questions, and to inspire you to embrace and enjoy this new chapter of your life.
November 7, 2023
December Daily® Storytelling | Special Guest Kristin Tweedale
Hi friends! I’m Kristin (aka rukristin: Feminist Scrapbooker) and I'm here to share my unique twist on the December Daily project for 2023. This year, I'm combining my love for December Daily with my everyday creative habit -- Daily Pages.
Daily Pages is a creative project that I’ve been doing and sharing for the last several years (you can see Ali’s Daily Pages here) and even more pages at #alpdailypages. Daily Pages, more than anything, have helped me integrate creativity into my everyday life. With that in mind, this year’s project is something I'm calling the December Daily Pages Art Journal.
I believe in tweaking traditions to make them more joyful and manageable. That’s why December Daily and Daily Pages are a great combo. It’s not just a fun twist on either project, it's an easy commitment to make each day in December count creatively.
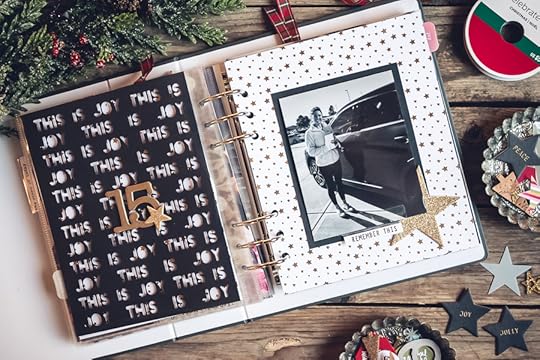
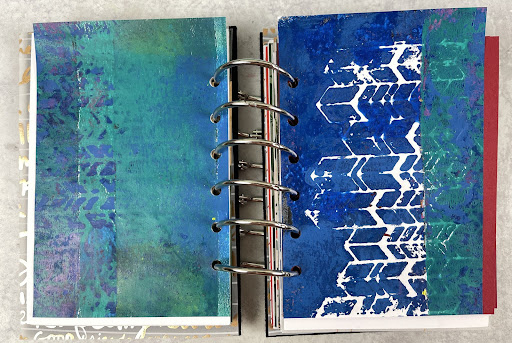
This year, I’ve already got a bunch of foundation pages ready. This is one of the ways I’m definitely still going the traditional route. By setting up a lot of my pages in advance, I’ve got the freedom to include lots of mixed media elements. Foundation pages mean I can take my time and let each layer dry thoroughly, which is essential when working with wet media -- and not possible in a single 20-30 minute time frame.
The Construction of My Art Journal:
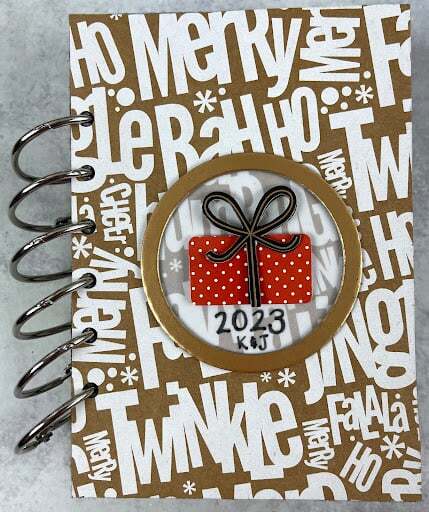
I crafted the covers from last year’s December Daily packaging, adding a cool touch to this year’s album. The covers are slightly larger than the 4"x6" interior pages, leaving room for tabs and decorative edges.
For inside covers, I attached black felt to the inside of the covers for a tactile, cozy element. The album will be held together using a 6 ring binder system, starting with 1.5" rings, though we might need to upgrade to 2" as the project grows.
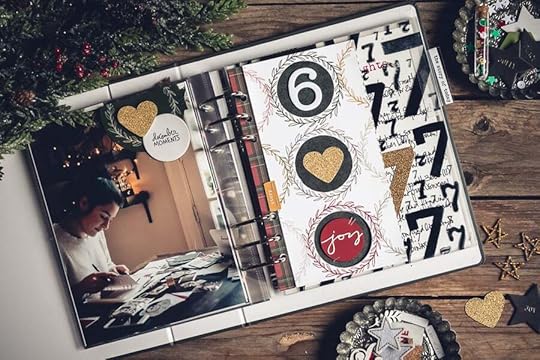
Inside the Album:Already this season, I’ve prepared a bunch of different foundation pages, more of which you can see in today’s video. It's a sneak peek into my process, including fun and interesting supplies for this year.
The small page size is strategic; it encourages me to create during my regular Daily Pages routine, and makes this project very do-able for me, without ever feeling overwhelming. It’s also perfectly suited for the mini printer I just got for some of my recent travels.
See inside the full album set up in this video: rukristin's December Daily Pages Art Journal.
The Format’s Advantages:This compact size doesn’t just make stories easier, it invites stories that may have been otherwise overlooked. Smaller pages challenge me to distill stories into their essence.
Plus, this year is all about the play—experimenting with paints, stamps, stencils, silkscreens, and more. This album’s format is a playground for mixed media exploration. I love that I can mix and match the various supplies to both play around and learn about what I like and what might not be for me.
Setting Up for Success:For me, success is one two-page for each day in December, filled in any way that speaks to the moment. My goal is a completed album that holds a part of each day, no matter how simple or intricate the entry. I would love to make some intricate and interactive pages along the way -- but if I just wind up adding a few things to my foundation pages throughout the month; that’s great too.

To make sure this project is as successful as possible throughout the busy month of December, I’ve organized my supplies on a rolling cart, with clear dividers to make each of my cool little bits, bobs, and embellishments easily accessible. This makes it easy to pull out what I need and put it back so I can still see it all when needed.
Past Projects Informing the Present:Small-format albums have been a hit for me in the past, notably in 2017 and 2020. They were among my favorite December Daily projects, giving me the confidence for this year's book. Returning to this format, my biggest goals are to just jump into the fun, creative process and enjoy every moment.
Here are a few pages from those albums, and what I hope to bring forward into this year’s project.
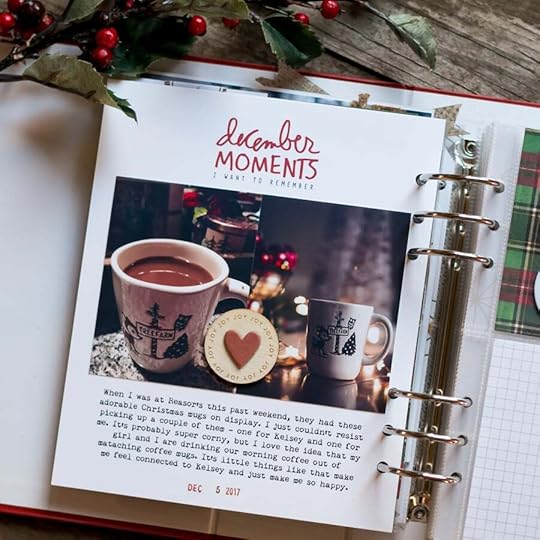
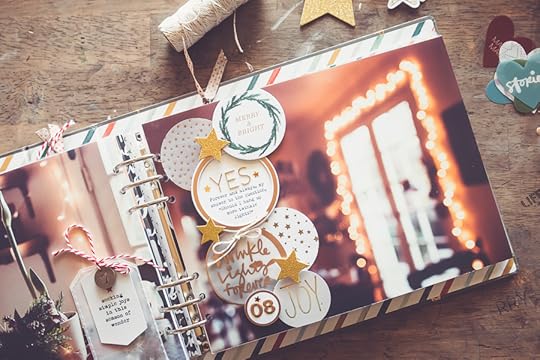
2017 December DailyFor my 2017 project, I used the same 4x6” size that I’ve got this year, also with the six binder rings. It’s such a cute, chunky, little album, and I can’t wait to play around in the same size again this year.
I’m also looking forward to using little photos in this year’s album. Having a small format printer makes it so easy to print little pictures in just a few minutes, right from my phone -- no need to head over to the computer and go through the whole photo process.
One of the coolest things from my 2017 album is how simple I let it be. This made it so easy to work on each day, even days when I had really bad headaches. This size felt doable, even on the hardest of December days.
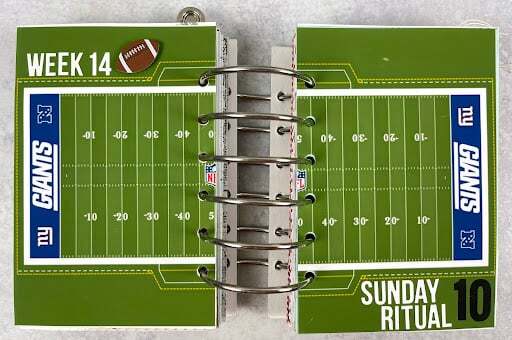
This is still one of my favorite DIY albums I’ve ever created. It’s an early prototype of what my Daily Pages project would come to look like.
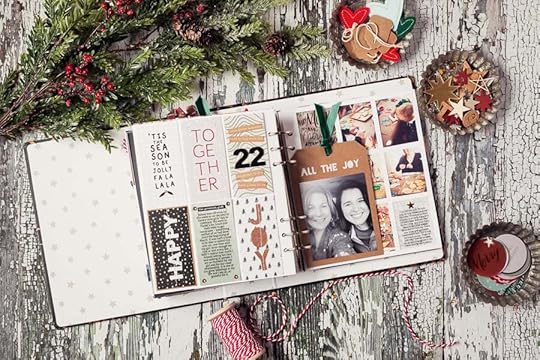
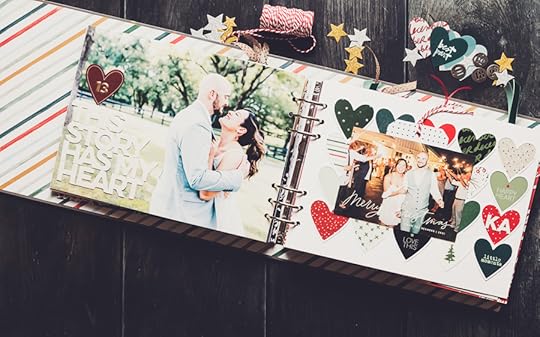
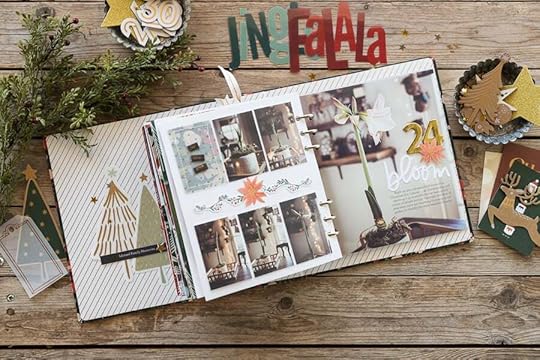
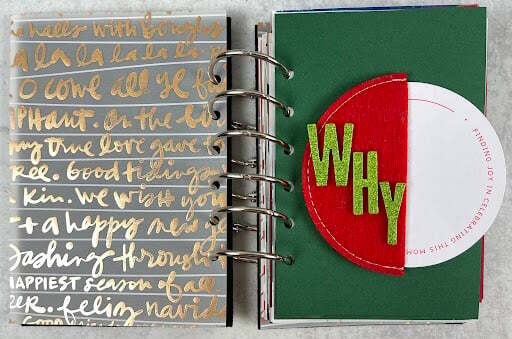
2020 December DailyMy 2020 album is 3x8”. This was also an incredibly fun size to play around with. This book has a lot more interactive pages and has a little bit more of a scrapbook feel than my 2017 album.
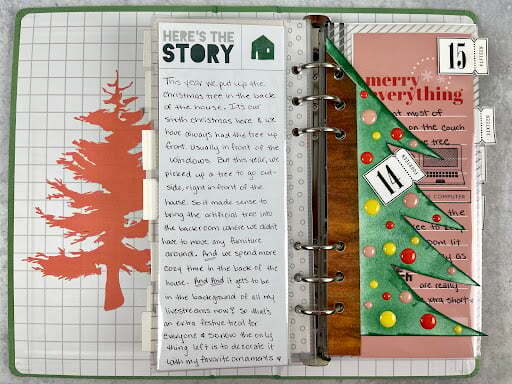
This size lends itself really well to journaling. There’s just a great amount of vertical space to fill up, and writing out your story feels very natural.
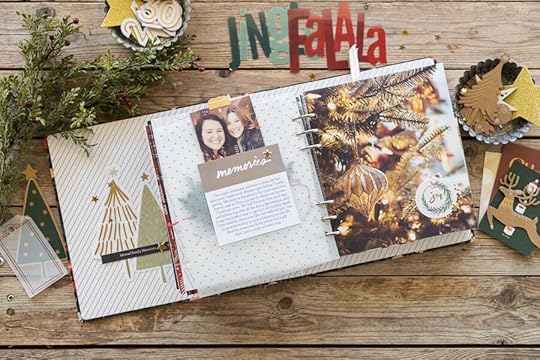
I also loved creating pages that weren’t exactly 3x8 sized. In my 2017 album, every page was exactly 4x6”. With this book I was able to experiment more with size and in-between pages. Both of which I hope to bring into my 2023 book.
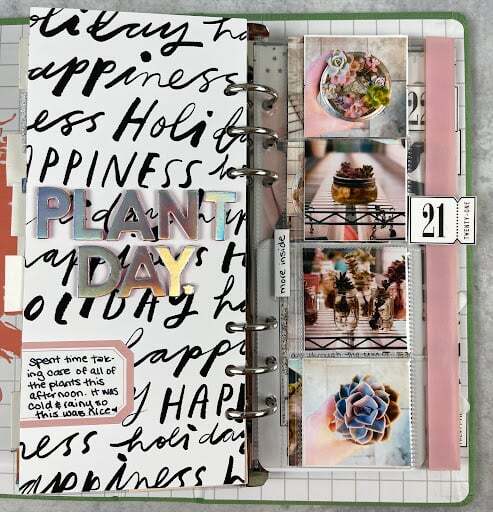
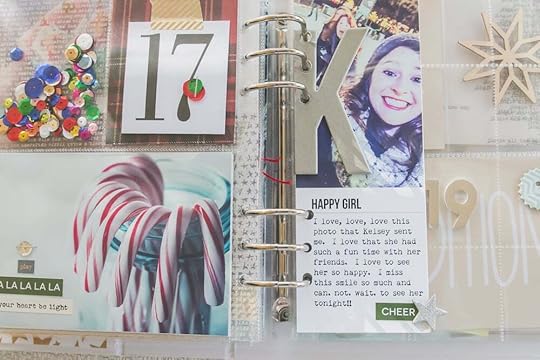
Another fun thing in the 2020 album are all the interactive pages I was able to create. This page here has a pull-tab, letting me show off even more pictures of my cute succulents. It was so much easier to come up with creative ways of being interactive with these pages because I already decided on the small format, and this was just one simple way to step outside the box.
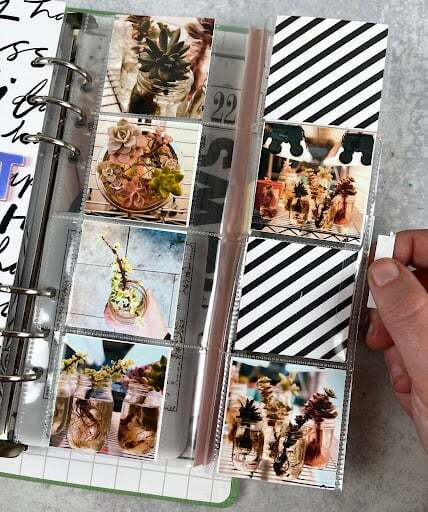
I can’t wait to create more interactive pages in this year’s December Daily Pages Art Journal. Flips, folds, pulls, and more. Playing in this album is going to be so much fun.
Join Me on This Creative Adventure:I’ll be documenting my progress and sharing behind-the-scenes peeks on Instagram at @rukristin. For further inspiration, you can also check out my lesson (and everyone else’s lessons) in the December Daily Product Play class.
I encourage you to make your December Daily practice work for you and your life right now -- and most importantly, have fun with it!
Let's make this December one full of stories, creativity, and personal success.
November 6, 2023
December Daily® Storytelling | Special Guest Jill Kane

Hi! My name is Jill Kane and I’m excited to be a part of this blog series. I’ve been a memory keeper for decades and began my tradition of making a December Daily album in 2007.
And I’m going there — to the elephant in the room — with this topic: Grieving while working on December Daily. I know from reading past comments on the AED social accounts that grief touches countless memory keepers. Whether your grief is fresh or it’s something you’re integrating into your life over time, it’s still a part of us. I think of it as the presence sitting next to me.
Like many of us, I’ve been in the throes of new grief and older grief during December Daily time. I completed albums and it wasn’t because I bypassed my feelings and became a December Daily superhero. I was able to make the project work for me through practicing self-compassion, taking breaks, feeling my feelings, leaning on habits and focusing on a variety of supplies and products. Yes, I said it! Sometimes I focused on finding joy from playing with products instead of focusing on my words and photos.
Three grief experiences have intersected with my December Daily practice. The first occurred in early December 2011, when I received a non-renewal (layoff) notice from a job that I loved. The silver lining with this was that my termination wasn’t final until June 2012. Yet it was still a stressful and sad event heaped onto a typically fun and light-hearted season.
In September 2018, my 84-year-old mom experienced a sudden illness that took her life after a two-week hospitalization. She was expected to recover. She and my dad had been married for 62 years and were living independently in the home they moved to in 1958. While he hadn’t been diagnosed — and was clever at downplaying it— my dad was living with dementia. Within four days time, I realized the extent of his cognitive decline and sat next to my mom as she died.
In May 2019, on my daily visit, I found that dad, also at 84, had passed peacefully at home. While not necessarily unexpected, it was a shock to me. I thought his time living with dementia would be much longer. During the eight months between both deaths, I became dad’s care helper. He remained living at their home and I visited him almost every day, helping with meals, laundry, managing his finances and the house. I’m blessed with a connected family and family friends who helped me (and dad) in many ways during these eight months. It was a hard and amazing time, all at once. Truly bittersweet.
I want to acknowledge that loss takes many forms and grief is both individual and shared. And that how I worked on December Daily amidst all of this was something that worked for me. I’ll share more knowing that what worked for me, won’t work for everyone.

Two ideas:
Ask yourself and trust your response to this question: How do you want to feel while you are creating your December Daily project? In 2018, I wanted to feel like I was escaping into a playful world where I didn’t have to face over and over how much this holiday was different from any other in my lifetime. My answer guided my album choice, the products I used and the stories that I included. I wanted the escape of spending time crafting. I knew that if I went down the path of including some stories, my craft time would become crying time. I was at a point with my grief that I wanted a break from crying. Working on December Daily became that time.
Let the products you have help you build pages. Plan pages around products instead of around your words and photos. I feel brave writing this on Ali’s website, but I would be lying if I didn’t say that I planned most of the stories I included in 2018 around products, especially from past Story Kits.
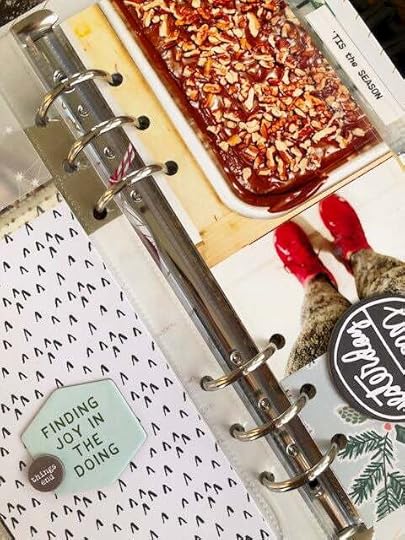
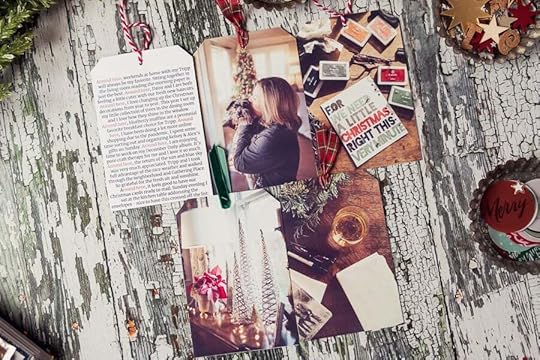
This story was from a really hard Sunday afternoon. I wanted to bake dad’s favorite bar cookies. He loved these so much that mom made them throughout the year. I could visualize her standing right where I was in this photo, spreading the chocolate chips into a frosting. I didn’t want to write those words then, and I wanted to show that I was in my walking gear because right after this, I went for a walk. All the products on this page are intentional. The pattern papers remind me of her Christmas table linens. The “finding joy in the doing, “things end,” and “present/past” chipboards were the only words I wanted to build this page around in December 2018. Yet I look at it now and I know exactly what was going on around me in the house and how I felt that afternoon.
Whew! Nothing like keeping it real. Thank you for reading. If you are grieving loss(es), I am so sorry. If you are looking at your new December Daily purchases or your collection of treasured supplies and wondering, “How will I take this on this year?” you are not alone. Listen to yourself. Be true to yourself. Let your mind change. Take your project in a different direction than what you had planned or how you’ve approached it in the past. I believe that our hobbies are sources of joy and ease. If joy feels out of reach, look for ways to find ease in your crafting. Ali’s created a kind community for all of us. Know that you’re not alone this season.
Jill Kane adores all things paper. Right now, she’s still into modern memory keeping and is excited about her growing interest in art journaling and collage. She just launched a new Substack community, Craft Hobby Habits, where she will share more this season about Documenting December & Grief. She’s a Feel Good Effect certified coach (not practicing), nonprofit fundraiser, lover of sunlight, wife to Chip, and cat mom to Eliza.
Instagram: jillkane25
Blog: Craft Hobby Habits
YouTube: jillkane25
November 3, 2023
In Case You Missed It | November 3

Happy Friday, friends! Welcome to the latest
In Case You Missed It. Just a reminder that this is a quick post that will happen every Friday afternoon with all the updates and links that have happened throughout the week. So, let's get to it:
Class has started in the December Daily® Product Play classroom. It's not too late to sign up! December Daily® Product Play is all about ideas and inspiration for working with physical products from the December Daily® Collection. For 30 days in November, you'll receive one idea per day from the contributors to this class (includes Ali). Ideas in this workshop will focus on physical products from our 2023 December Daily® collection. Whether you are preparing to document 2023 or finishing up telling stories from past years, we hope these fun, creative ideas help you use your products to get your stories told. Register here.
DECEMBER DAILY® DIGITALS
The 2023 December Daily® Digitals are here! Kits, Stamps, Paper, and Embellishments...the same fun & festive designs as the physical @decemberdaily products, only in digital format. We love to see how this incredibly creative community plays with digitals! Resizing elements and cards, adding journaling to papers, creating cut files, transforming files into transparencies, the sky is the limit with digital files. Want to learn more about creating with digital files? Our newest class December Daily® Hybrid Product Play is live and available to watch at your convenience.We have incredible content from six amazing contributors ready to explore at your convenience. Shop digitals here.
NEW CLASSES
2023 DECEMBER DAILY® PREP DAY. Join the December Daily® community for a fun online December Daily® prep day on Saturday, November 18th, 2023. Use this opportunity to finish past December Daily® projects or start working on your project for 2023. The first live video will start on Saturday, November 18th at 10:00 am Eastern. Cost is $5.
DECEMBER DAILY® PRODUCT PLAY | TRY THIS. December Daily® Product Play is all about ideas and inspiration for working with physical products from the December Daily® Collection. For 30 days in November, you'll receive one idea per day from the contributors to this class (includes Ali). Ideas in this workshop will focus on physical products from our 2023 December Daily® collection. Whether you are preparing to document 2023 or finishing up telling stories from past years, we hope these fun, creative ideas help you use your products to get your stories told.
2023 DECEMBER DAILY® HYBRID PRODUCT PLAY. Hybrid scrapbooking combines digital products with physical supplies to create paper (or printed) memory-keeping projects. For this class, our contributors will share with fun, creative ideas and inspiration for working with these digital products from the 2023 December Daily® Collection.
As always, we’re so grateful to have you all as members of this community! Thanks for joining me today and have a great weekend!
December Daily® 2023 | Ali's Pre-December Album Overview
Welcome back to December Daily® 2023!
What I'm showing you in this post is what my album looks like (and the general overall flow) in the beginning of November.
I'm someone who enjoys getting a head start on this project and doing some crafty play before December begins. Remember that there isn't a right or a wrong way to experience this project and the way you approached it last year might be different than how you go about approaching it this year. Let's all celebrate that!
If you are just joining us for the December season make sure to check out our awesome PLAY series we ran in September featuring ideas from Linda Jordan, Pam Baldwin, Lisa Varshine and Jill Drangsholt. There are awesome ideas in those posts for planning, playing with paint, playing with paper, and working on finishing up past projects.
Here's a walkthrough of where I'm at right now:
And here's a look at the individual pages in my album so far:

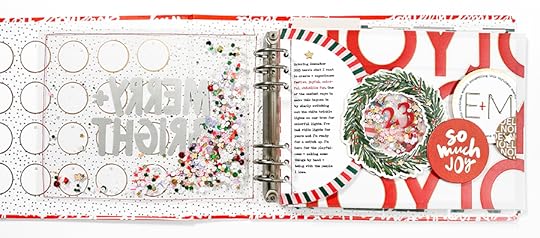
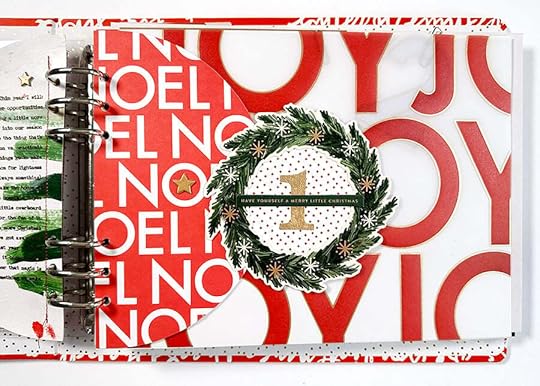
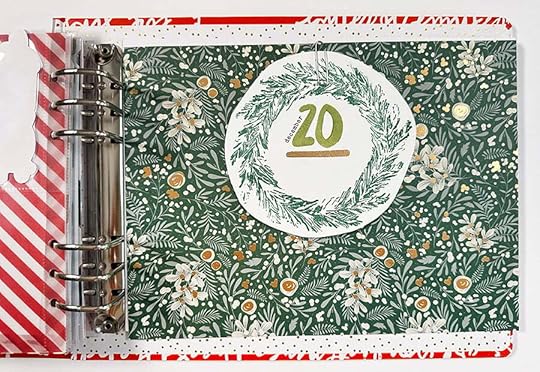
IDEA: Create a table of contents in the inside cover of your album using the gold rimmed circles from the Main Kit.
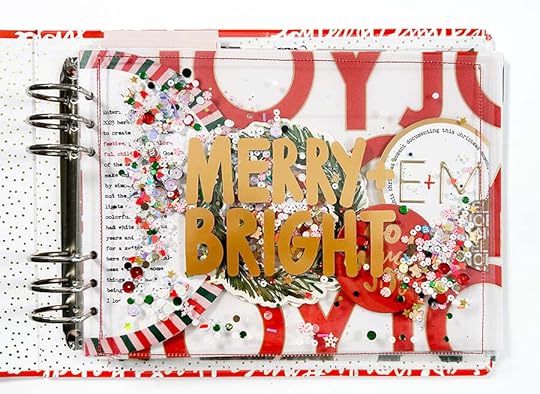
IDEA: Create a fun full page shaker introduction page. Get all the details on this page here.
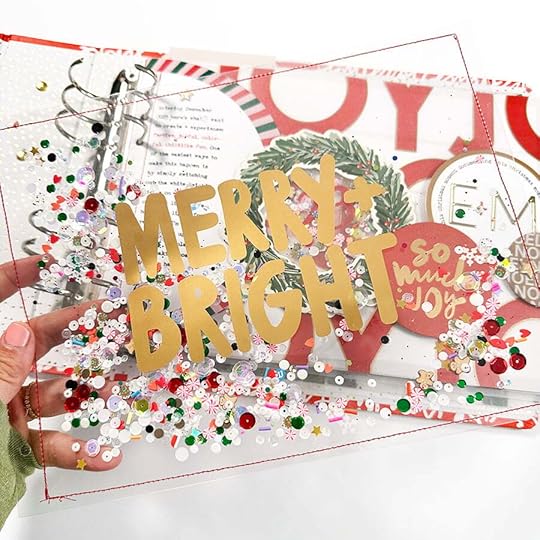
Have you joined our
December Daily® Facebook Group? I've seen some really cool interpretations of this idea in there already! Love seeing how people take a concept as a jumping off point and run with it!
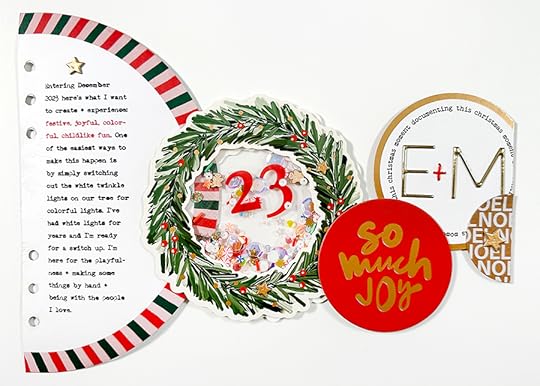
For my Reason Why page this year I went with a full trail of circles.
You can see how that came together here.
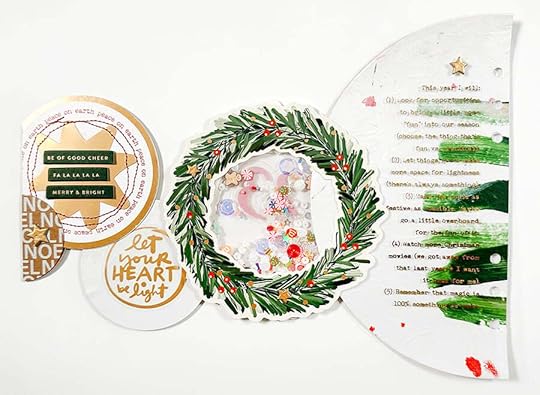
I repeated the same circle shapes on the back and added in a "this year I will" list.
For my first story I decided to create a foundation that repeated some of the same circle shapes from my Reason Why page.
You can see how this page came together here.
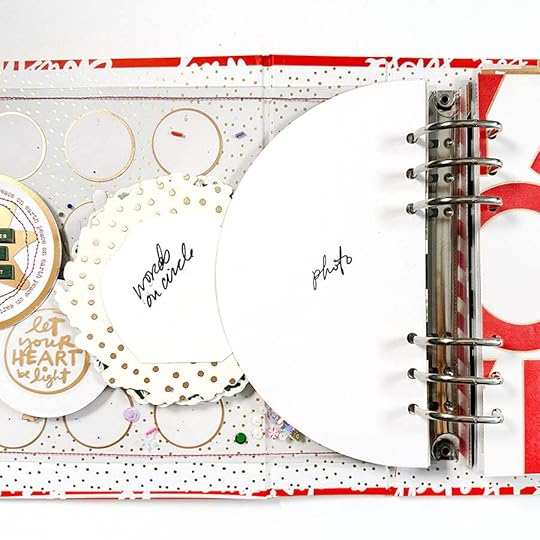
On the back I added a couple notes to myself as a jumping off point when I go to tell a story.
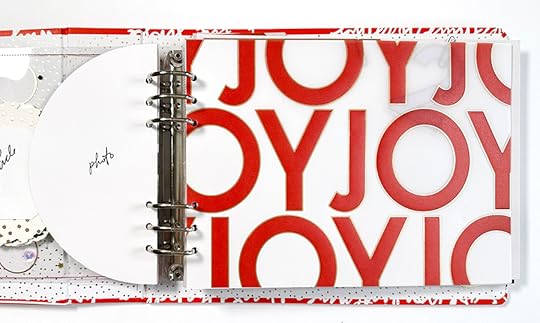
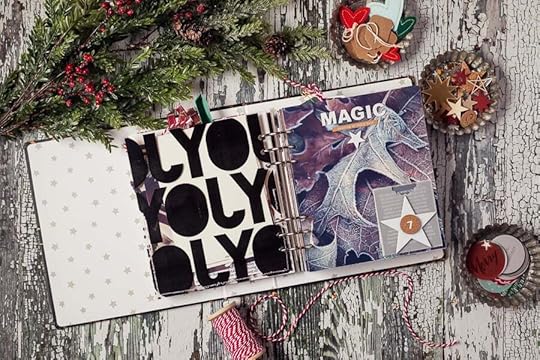
IDEA: Cut out the full "O" from the vellum joy paper and create a peek-through. It could end up being another shaker element or simply a window into the next part of the album. Most likely I will do this at the same time I work on my first story.
IDEA: Full page photo with journaling on top. Maybe use one of this year's digital layered templates.
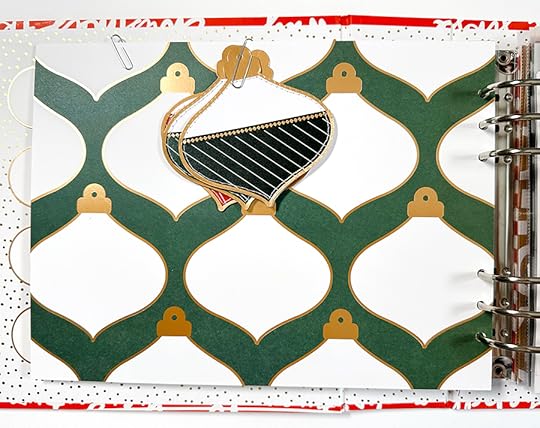
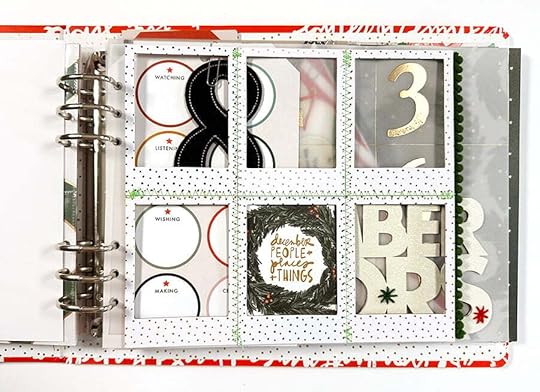
Next up I'm planning to use the ornament pattern paper and three of the pocket ornaments from the Main Kit. I don't know yet what story I will tell but this will be my jumping off point.
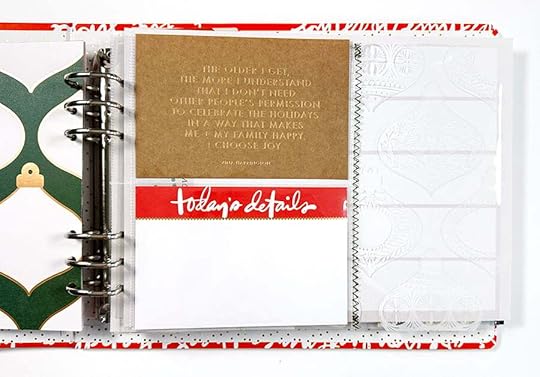
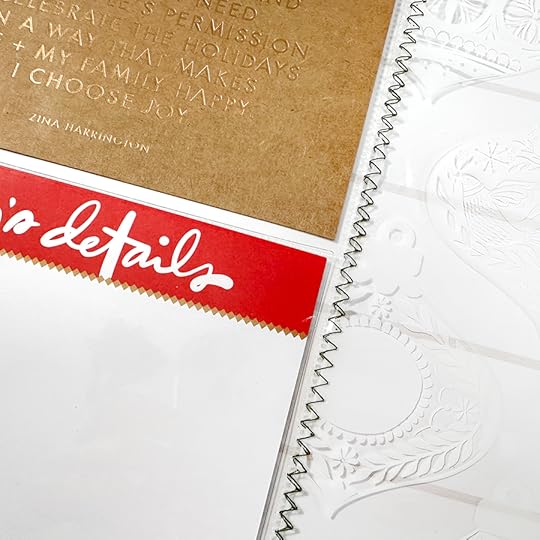
This page might end up being an extension of my third story or it might be story four. For this one I cut up the ornament transparency and stitched it to the 6x8 page protector holding the 4x6 cards.
I love the gold foil sentiment and may use that as a jumping off point for my storytelling.
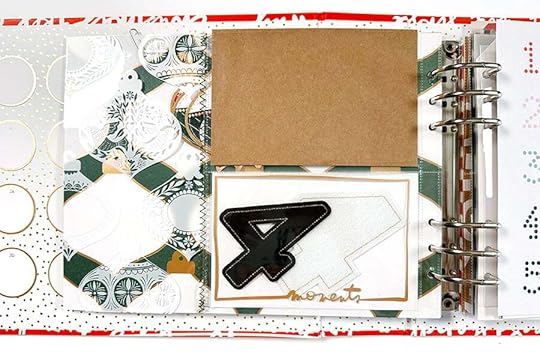
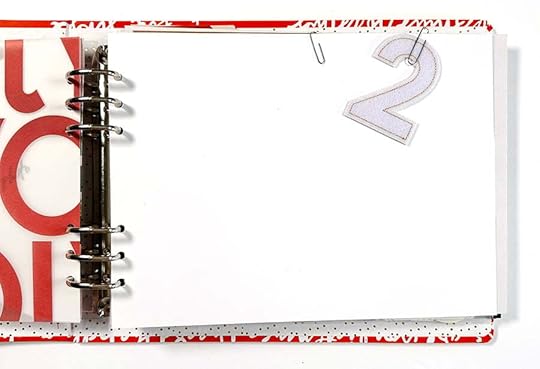
On the back I've tucked in a couple felt fours from past years offerings (love having a mixture of these year over year). If I use the front of this one for story four then I'll likely add photos here to support story five.
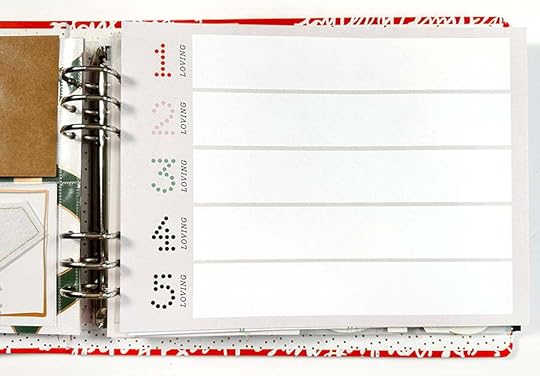
STORY IDEA: Five things I'm loving this season.
NOTE: I'm waiting to punch the holes on some of these papers in case I might want them to go the other way.
Details on the construction of this one using
the chipboard frames can be found here.

The back of the chipboard frames will be the home for story seven.
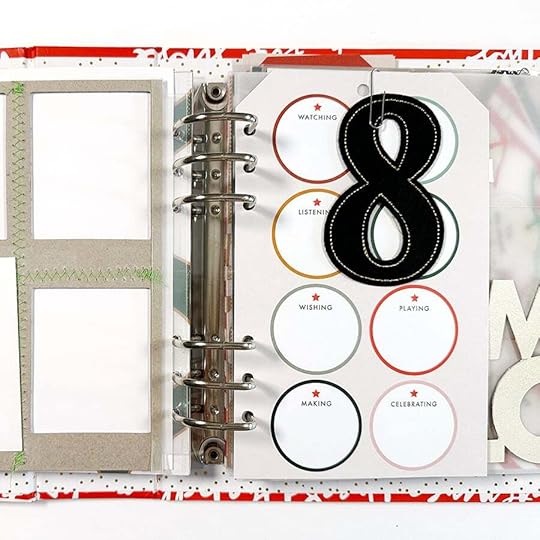
STORY: -ing words with the black felt eight from a few years ago. Might pair this with a photo or might leave it on it's own.
NOTE: The next page in my album is a project I put together for our $5 Prep Day coming up on Saturday, November 18th. You can get details on that fun online event here.
NOTE: This was the project I put together for Product Play (the class includes the cut file and step by step instructions).
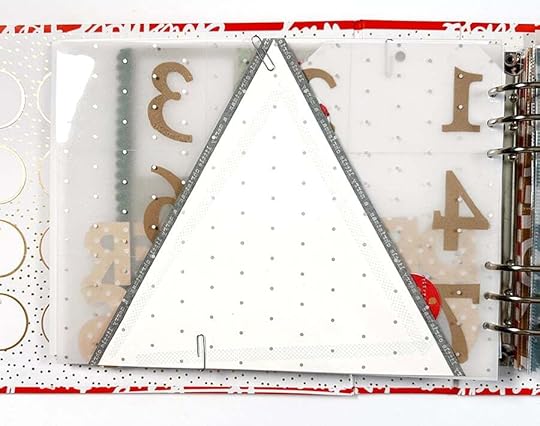
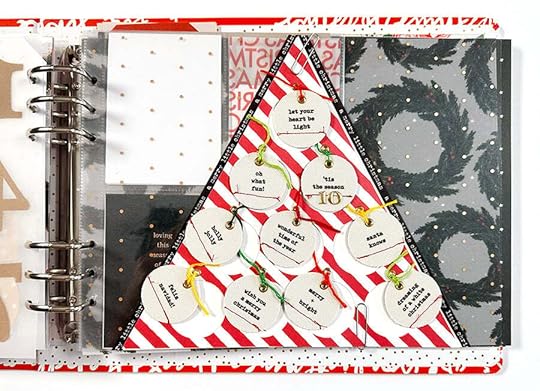
Story elven will happen in this fun triangle shape. I'm excited to see what I decide to build on top (and what story I'll tell).
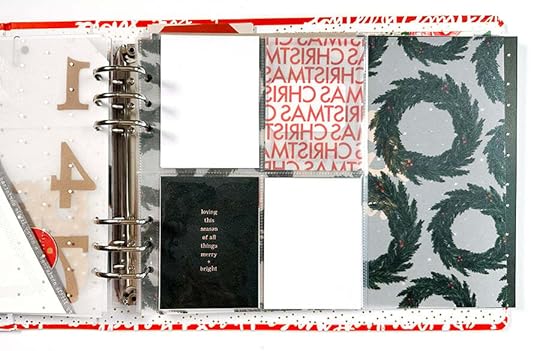
I love adding in some 6x8 page protectors into my album. I wanted to create a spread using some of the 4x6 journal cards from the Main Kit so right now I've just got the "loving this season" card in there as a placeholder.
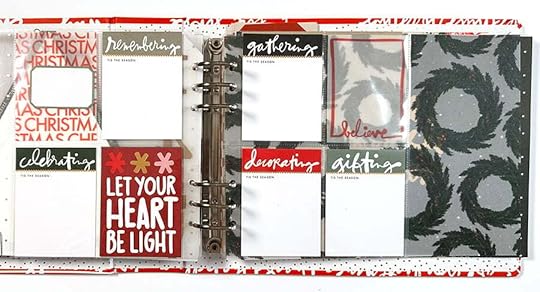
STORY: Additional -ing words to capture more of what's happening around here this season. Paper cards are from the Main Kit and vellum cards are from the Specialty Journal Card pack.
NOTE: Circles are one of my most favorite homes for words and photos. I might cut out the centers of some of these weaths or add circles of photos or words on top. Or maybe I'll make little shaker circles to add on top (more festive fun).
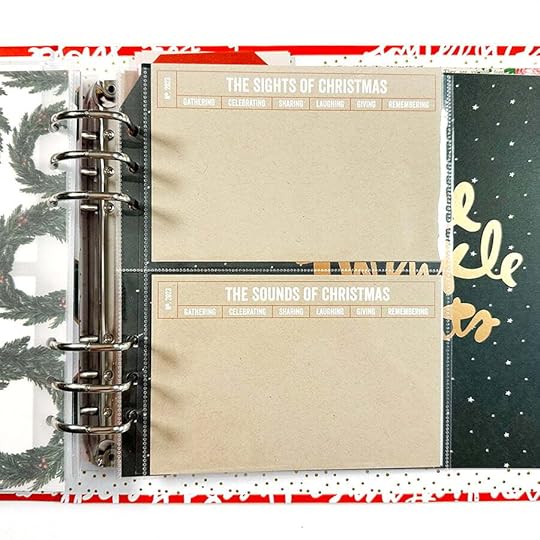
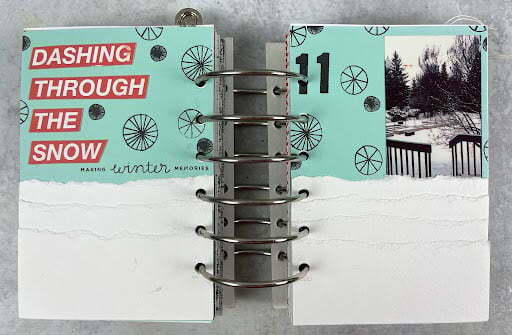
STORY: Use these two cards from the Main Kit to write about the sights and sounds of the Christmas season.
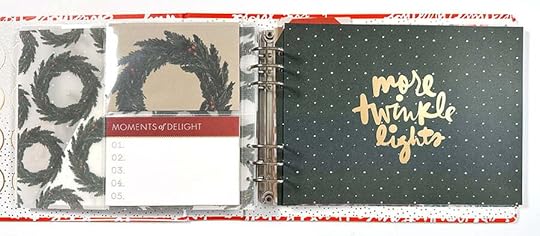
STORY IDEA: Document five moments of delight.
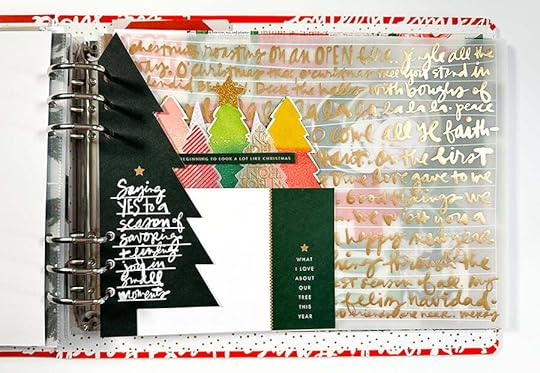
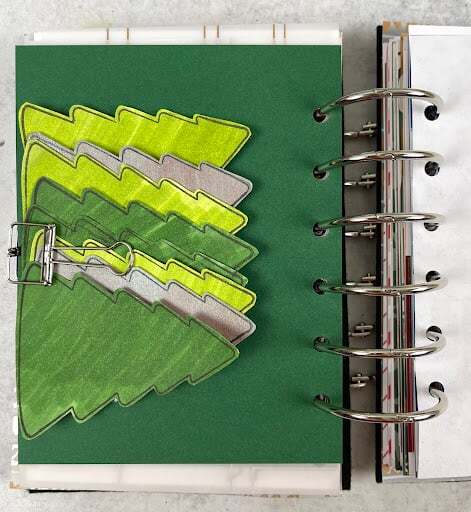
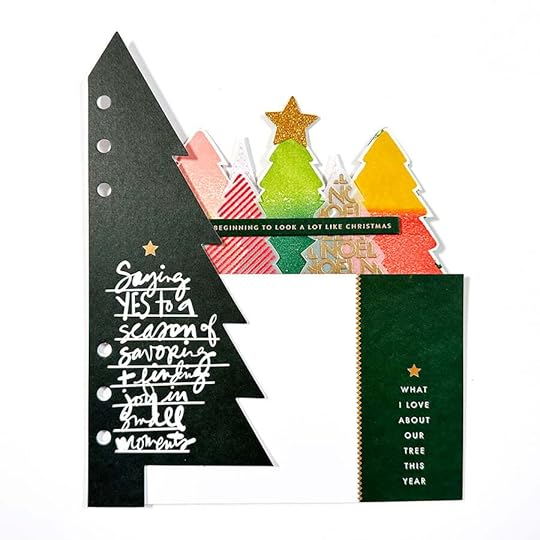
Get all the details of how I created this mini-forest
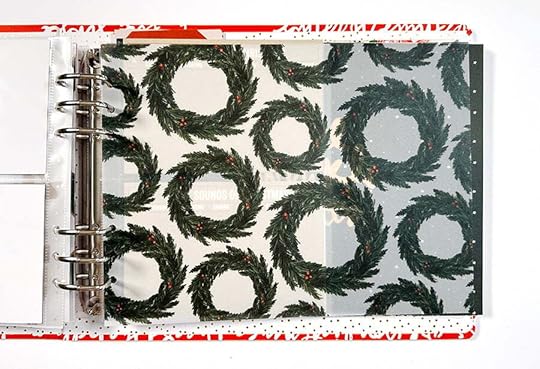
here. My initial plan is to pair this with a full page photo on the left (the back side of the "more twinkle lights" pattern paper.
I love how the back of my tree forest turned out. I'll build the next story on top of the big page of vellum.

Right now I'm storing punched circles from one of the pattern papers along with
some circles I stamped earlier this season. Loved embossing on vellum for a couple of those circles (and mixing and matching circle stamps).
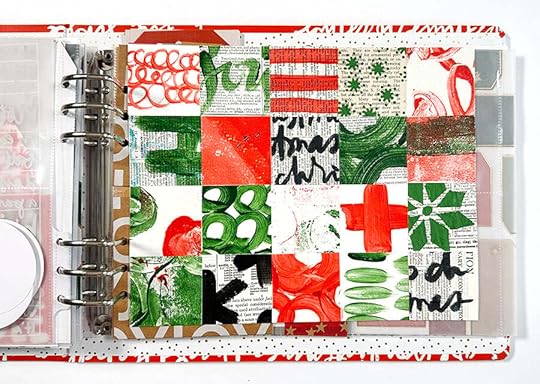
Planning to use this
page of collaged squares in some way when I document the ornaments I've been making this year. Definitely considering creating some flip ups from my collage of squares.
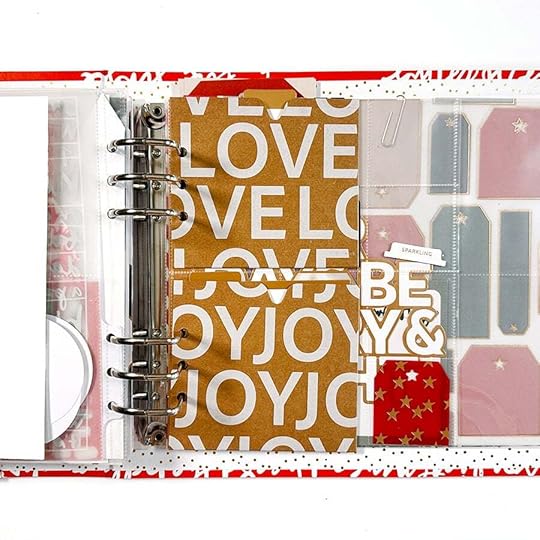
Next up I've got two of the 4x4 kraft pockets from the Main Kit.
Currently I've got some of the 2x2 plastic tags inside of a 6x8 page projector. This might end up becoming a full page - definitely one I'm keeping very open. I love simply sticking a few in the pockets right now as a reminder that the tags are something I want to play with.
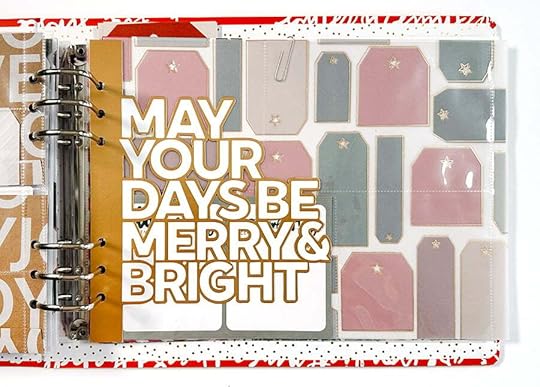
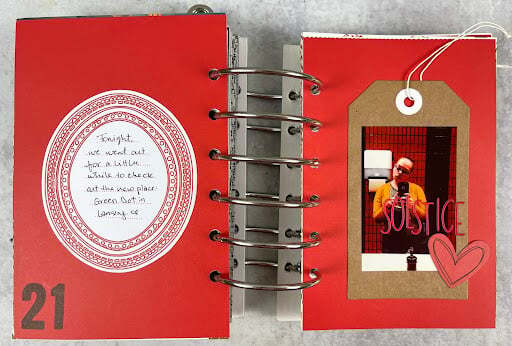
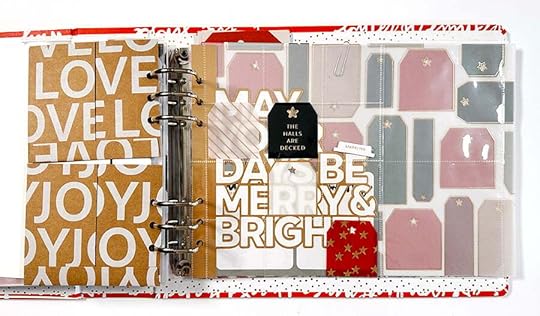
The die cut page insert will be a jumping off point for a story in the second half of the month.
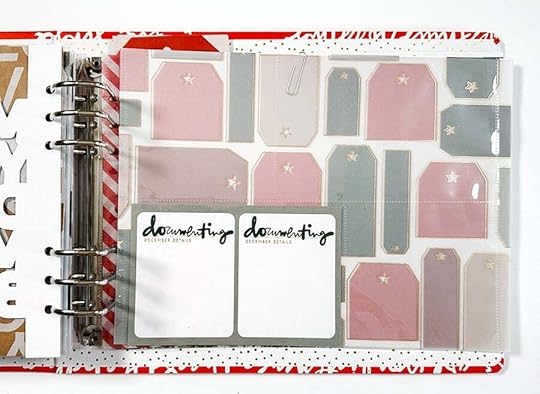
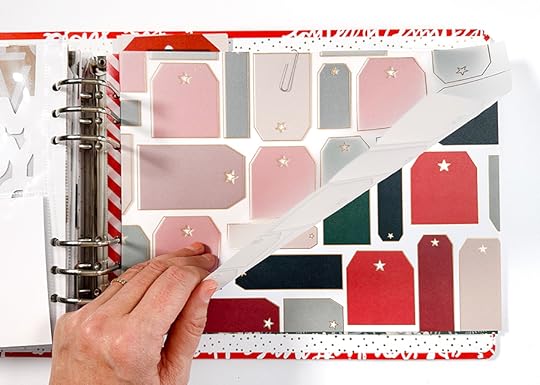
Right now I've got the vellum tag page layered on top of the pattern paper tag page. I haven't punched holes yet to give me more freedom during the month.
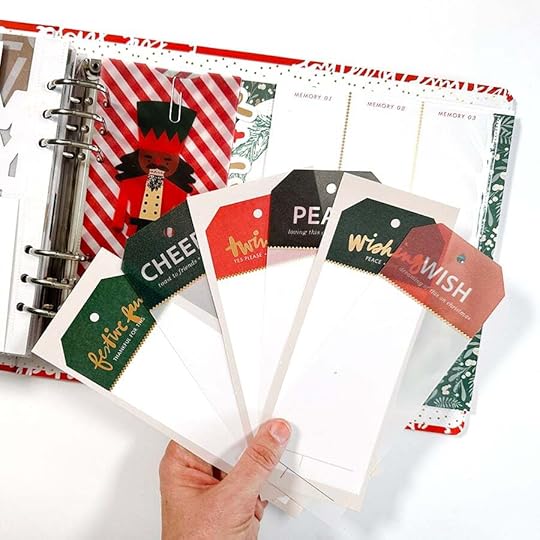
Next up I'll be using the tags from the Main Kit and the tags from one of the pattern papers to create some kind of tag booklet that will live inside the vellum striped pocket with the plastic nutcracker on top.
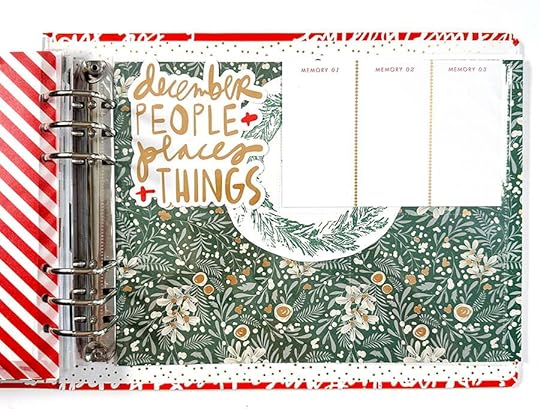
A 10x8 page protector holding one of the die cuts and one of the 4x6 journal cards is next.
When I was working on samples for the collection launch this year I created this
stamped wreath and am planning to use it for story twenty.
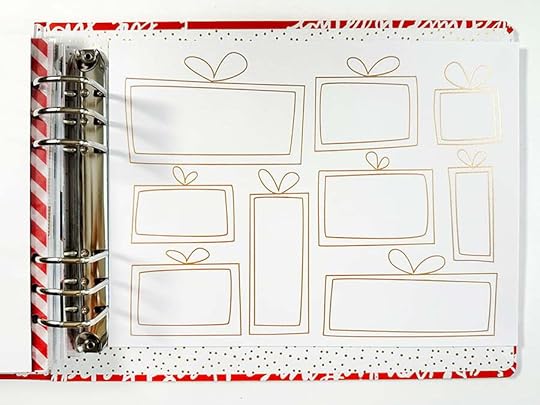
STORY IDEA: Use this paper as a home to document favorite gifts this year.
That's where I'm at so far this year! I'm super excited to add to this album throughout the month and I'll be sharing my ideas and stories with you here daily during December.
I've also created an Amazon page that includes many of the basic products I use regularly including printers, paper, etc.
You can check that out here.
December Daily® Main Kit
December Daily® 10x8 Album
December Daily® Advent Calendar
Holiday Phrases Clear Sticker Sheet
Gold Foil Puffy Alpha Stickers
Minc Machine
Gold Foil for Minc
Laser Printer Transparency (to go through the Minc machine)
Embroidery Thread
Grafix Transparent Sheets
December Daily® Paper Die Cut Inserts (digital available)
December Daily® Variety Die Cut Bundle (digital available)
December Daily® Specialty Paper Pack (digital available)
Red Small Plastic Numbers
Brother Sewing Machine
Big Roll of Foam Adhesive
October 31, 2023
Grow Quarterly Scrapbook Kit | Special Guest Denine Zielinski
Hi friends! This is Denine, and I’m thrilled to be here once again to share one of my projects using the Grow Quarterly Scrapbook Kit. On a previous blog post, I shared eight sketches/ideas for how I plan to use this fun kit. You can check that out here. I included a PDF file of my sketches for you to print, as well!
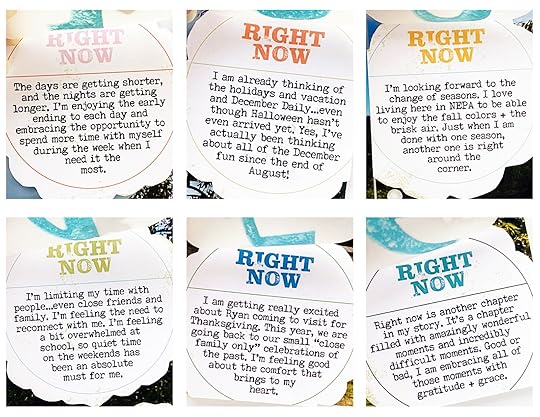
One of my favorite papers from this kit is the Right Now Shapes 7x8.25 paper. I just love the wonky flower shapes, and who doesn’t love the ease of using the directed story papers?
I pretty much stayed true to my original sketch idea with the exception of adding additional smaller photos. I chose not to do that.
Instead, I wanted to just document a little bit about what’s going on in my life right now without any specific photos. The only photo that I used is the one for the background.
Before I printed that background photo, I added “Attitude Gratitude + Grace” word art from the Stories of this Season Class to the left side and reduced the opacity a bit for a more subtle look.
Although I do own a wide format printer, I did not have any large photo paper when I created this spread. I ended up sizing my photo to 14 inches by 8.25 inches in Photoshop Elements and then cropping it to print each side. I cropped the left side of the photo to 7x8.25, printed that, and then did the same for the right side.
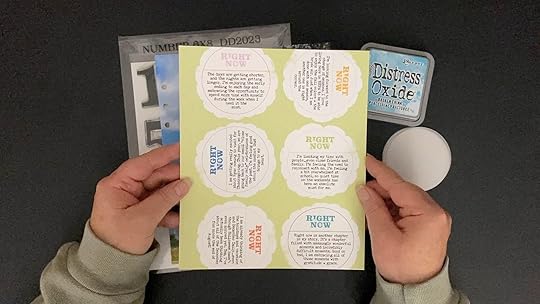
I added my journaling directly onto the Right Now Shapes paper in PSE. I used the digital version to work with and then ran the physical paper through my printer. Alternatively, you could print your journaling on sticker paper or just handwrite it yourself.
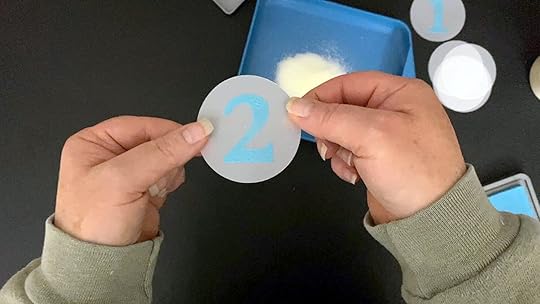
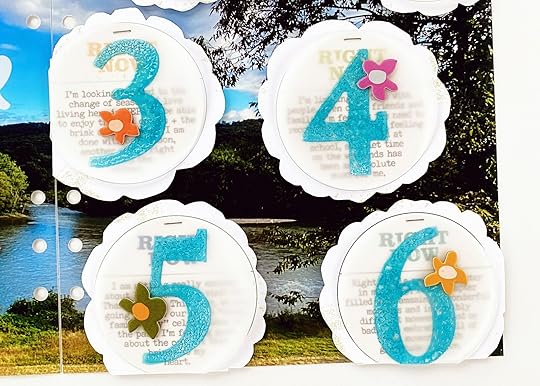
I fussy cut the wonky flowers out and decided that I wanted to add a 2.5-inch numbered vellum circle on top of each one. (Okay, so I just wanted to play with my new December Daily number stamps…you got me!) I’ve also been playing with different embossing powders and inks as I get ready for December Daily, and I wanted to emboss the numbers with Ultra Thick Embossing Enamel. With this particular powder, you get a smoother effect by adding several layers. I did only one layer and liked the textured look it created.
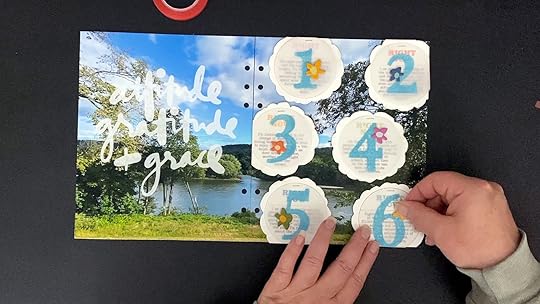
I used my tiny attacher to add the vellum to the wonky flowers and then adhered them to my spread with foam adhesive. In hindsight, I would probably have chosen to use regular adhesive as opposed to the foam since it ended up not being very noticeable on top of the photo. Oh well, we live, and we learn, right? To finish this side of the spread, I added a chipboard flower by each one of the numbers.
For the left page, I picked a canvas phrase to place underneath the word grace. I used redline tape to adhere it and then a staple to match the staples on the other page. Oh, and one last chipboard flower, of course, to bring the pages together.
Here is my finished spread:
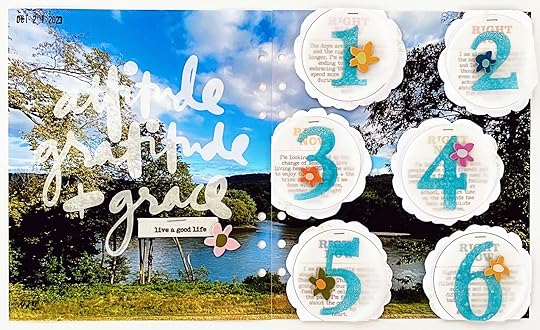
Here’s a close up of the wonky flowers with the embossed numbers + chipboard flowers:
And here is my journaling that you can read when you flip up each of the numbered vellum circles:
You can see in my process video below how everything came together for me:
Thank you all for joining me as I created this spread with the Grow Quarterly Scrapbook Kit. I hope that you have been inspired to use this kit to just play around and have fun while telling your stories!
Keep your eyes open for other pages from this kit on my Instagram @Denine2 as well as my YouTube channel @Denine2. Feel free to let me know if you have any questions about this spread or any of my other sketches. Happy storytelling, my friends!
Grow Quarterly Scrapbook Kit | Special Guest Linda Jordan
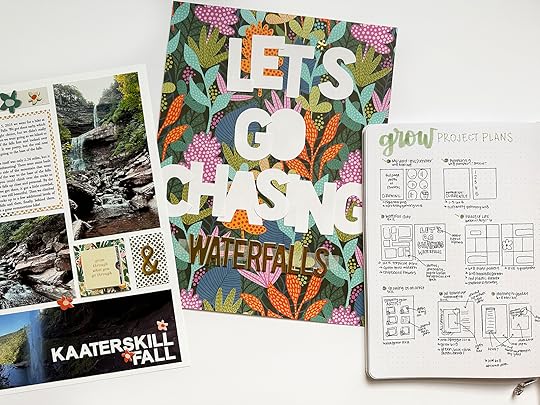
Hi there! This is Linda and I’m so excited to be here today to share with you my process for putting together a project using the Grow Quarterly Scrapbook Kit. I love this kit because it has a very loose theme, Grow, which is great for outdoor stories, plant stories, and children/life growth stories! But, it’s also very loosely themed so you can use this kit to tell most stories. In an earlier post, I planned out ten projects using this kit. If you missed that post you can find it here.
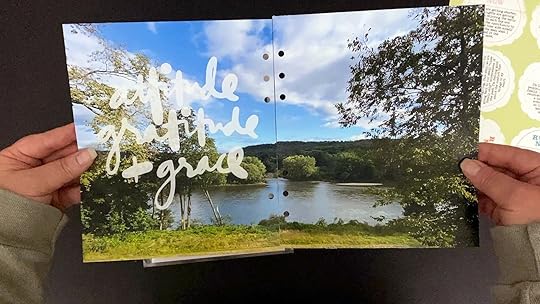
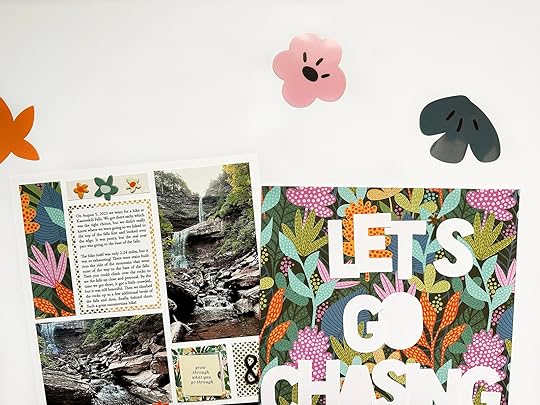
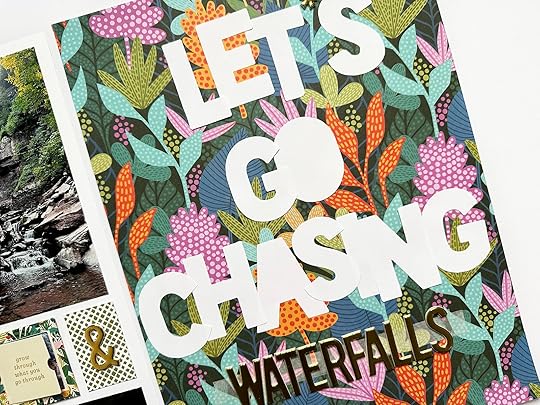
Today I decided to use this kit to tell the story of a hike I went on to see a waterfall. I was super inspired by the gorgeous 12x12 plant print that looks somewhat tropical to me, perfect for a waterfall hike! I forgot to take a photo of it by itself before I created my page, but you can see it in the below image behind my journal.
I keep a 9x12 ongoing stories album that I add to every so often. I decided adding this story into that album was perfect because I wanted to create a larger page to hold more photos and really get the most out of this paper.
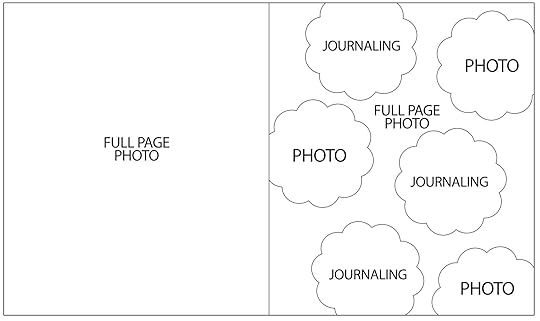
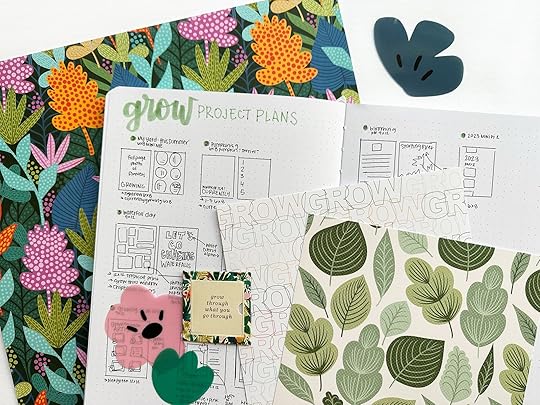
Back when I sketched out this project, I decided I would use this gorgeous paper as a decorative page to hold my title. On the other page, I would include a grid of photos + words + patterned paper and one of the window pockets.
This project was the third one I sketched out in my initial planning session. You can see the plan in the photo below. You can also see that I’ve checked off a few of the other projects already, I talk more about that in my video (or you can see those projects on my instagram).
The first step was to work on my computer. Note: I ended up using quite a few tools in Photoshop to make this work. I tried to simplify my explanation so hopefully this will make sense regardless of your skill level or the program you are using. If you are a beginner I would 100% suggest taking a hybrid or digital class to learn the basics, plus there are lots of free tutorial videos on youtube for whatever software you use. But, if you have specific questions related to my tutorial, feel free to leave them below and I will try my best to answer!
I started by creating a 9x12 canvas in Photoshop and adding my photos (the left image in the below photo of my screen). The plan was to lay out my digital elements on this canvas in a make shift grid to get an idea of sizing/spacing for my physical page. This is not my actual project, because I am going to put it together in physical form, but just a mock up to give me an idea of how large I wanted to print my elements.
For photos, I dragged in the photos from my folder on my computer that I wanted to use. I used the photoshop tools to brighten some of the images, but most of them were already edited using the Color Story app on my phone at the time I went for the hike (to share on instagram stories). When the photos weren’t the dimensions I wanted, I created a rectangle shape in photoshop to the dimensions I wanted, and then used the clipping mask function to add my photos into the rectangle.
For the photo I included inside the window I added guide lines (the blue lines) to get a feel for how wide the window would be. I ended up including it in a different spot on my finished page, but this way I knew I’d have enough room to include everything I printed on my page. To fit inside the window, I sized my photo 1.5 x 1.5 inches and trimmed slightly smaller than this. (Note: I also printed a small photo to fit inside the window, but I had to omit it here for privacy.)
I also typed up my journaling in a block that would fit on the page. Once I was happy with the layout of everything I needed to print for this page, I opened a second document.
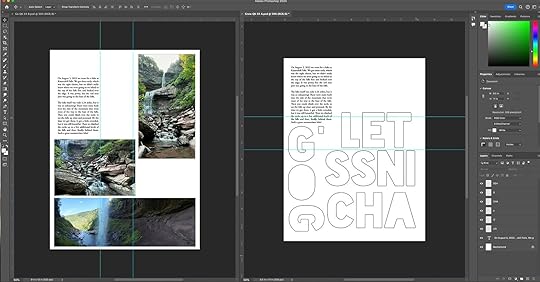
My second file (seen on the right side of the photo above) is my print page. This is an 8x5 x 11 canvas, which is the size of photo paper/printer paper that I use. I needed to print out two print pages for this project. One, to hold the items that would be printed on luster photo paper (the photos) and two, to hold the items that would be printed on matte photo paper.
In the photo above, you can see what I printed on matte photo paper. This included the journaling and letters for the title. To add the journaling, I simply dragged and dropped it from my mock up page to the print page.
To create the title, I found a font that I liked, typed out the letters I needed, and sized the letters to be the size I would want. I arranged the letters on the page so they would all fit, no need to be in the correct order since I planned to cut them out.
Once I had finished typing out the letters, they were solid black. I wanted them to be white for my page, so I rasterized the layers (so they were no longer editable text), then used the wand tool to select each one, contract the selection by 5 pixels, and then cut out the center. This left me with an outlined letter.
You will see below that I end up cutting out these letters and using the ones I printed. But you can use this same technique if you want to print letters to use as a template to hand cut them out of a different paper. Even if you’re doing this, you would want the letters to be white to save ink.
To print my photos, I deleted everything from the print page (after printing it out) and then dragged and dropped my photos onto the print page. I had to rotate/rearrange them to fit, but I was able to get them all on one page to print.
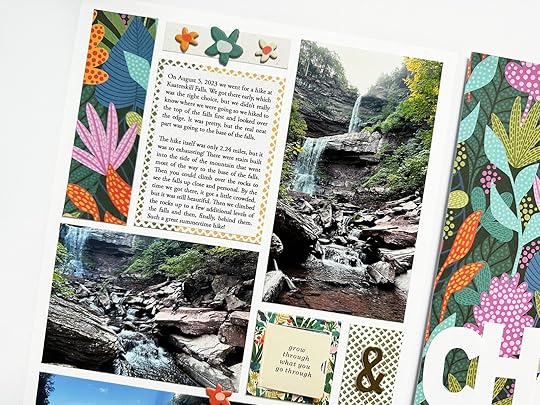
Then I got to putting together my project! In the video, I walk through my process for assembling this page.
And then here is a look at the completed project:
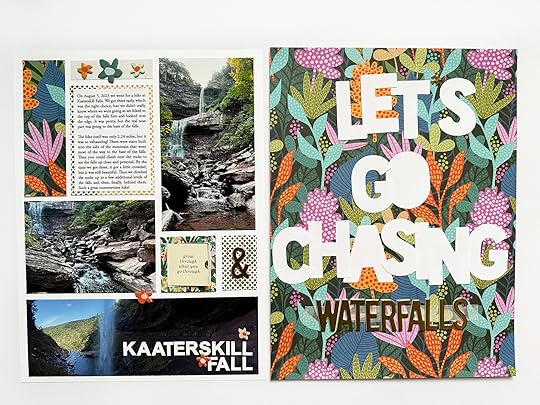

I’m thrilled to have this story told and living in my stories album. I hope you enjoyed my process and that this helped give you the nudge to pull out your Grow Scrapbook Kit and get crafting!
If you want to see more of my projects, you can find me over on instagram and on my YouTube.
October 27, 2023
December Daily® 2023 | Ali's Foundation Page Idea 02

One of the stories I know I am going to want to tell in my December Daily® this year will be the story of colorful lights on our tree.
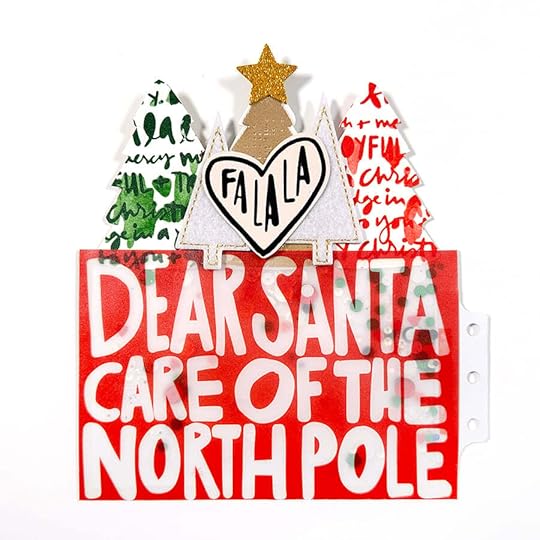
For this foundation page I started with the die cut tree from the Die Cut Page Insert Pack and one of the 4x6 journal cards from the Main Kit. Because one of my intentions this year is colorful, festive fun I decided to grab the 6x8 Tree Stamp and a selection of inks and create a mini forest of colorful trees that could be adhered to the top of the journal card.
Check out the video to see how this foundation page evolved:
And here's a closer look via photos:
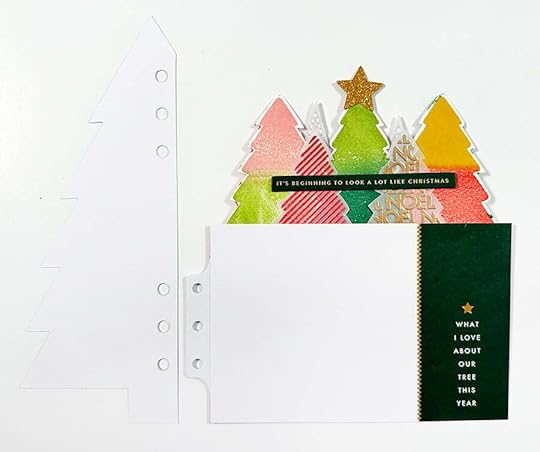
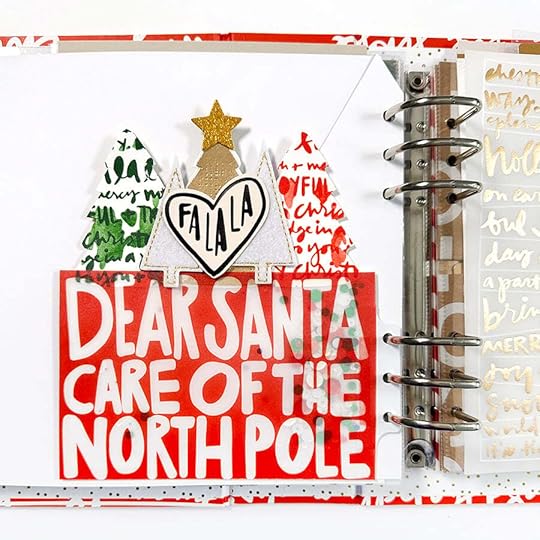
I'll add something to the back of the tree and on the front of the journaling card during December. I'm also initially planning to pair this with a full page photo to the left.
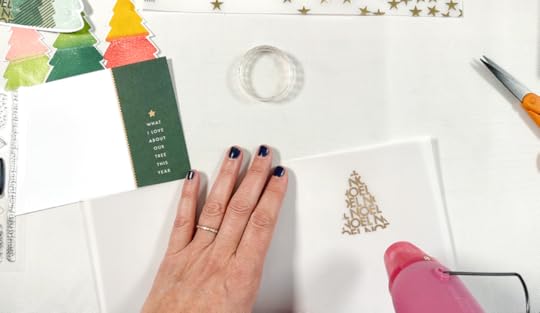
I'm using a Attacher Sticker to add this card to my album.

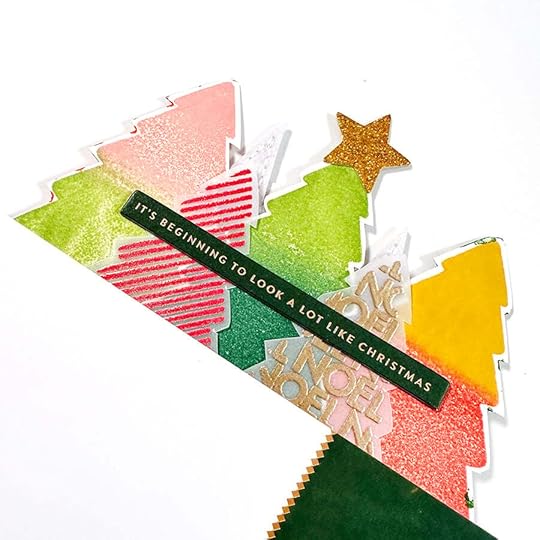
This page started with using the large tree stamp. To bring in some color I played around with stamping the tree using two different colors per tree and I seriously loved how that looked. They were inspired by these super cute ornaments I recently pinned to Pinterest. I used McKenzie, Willamette, Rose Garden, Redwoods, and Honeyman.
After stamping the trees I cut them out using scissors and reminded myself that IT DOESN'T NEED TO BE PERFECT.
After the colorful trees were done I stamped and embossed two smaller trees using gold and red embossing powder on vellum.

I layered the vellum trees on top of the stamped trees and stapled them together on the bottom. I added one of the dark green chipboard phrases and added a gold glitter star from the Sticker Advent Calendar.
I used a strip of red line tape to adhere the mini forest behind the 4x6 journal card.
BIG NOTE: Learn from my mistakes and if you want to do anything to the backs of the large trees do it before you adhere and staple. Ha. It's all good.
While creating my mini forest I decided to take care of the back of the trees now vs. waiting until December.

On the backs of the two outside trees I used the text silkscreen and the red and green paint from our paint pack. Much, much easier to do this before you attach the trees together but I made it work.
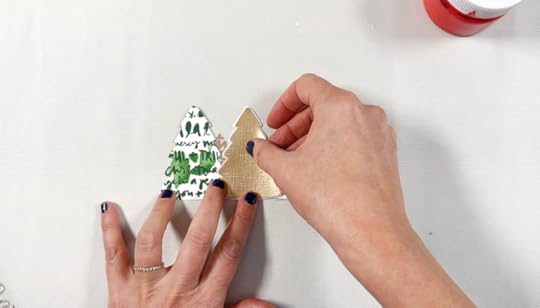
For the middle tree I stamped and embossed in gold on vellum and adhered that to the back of the other tree.
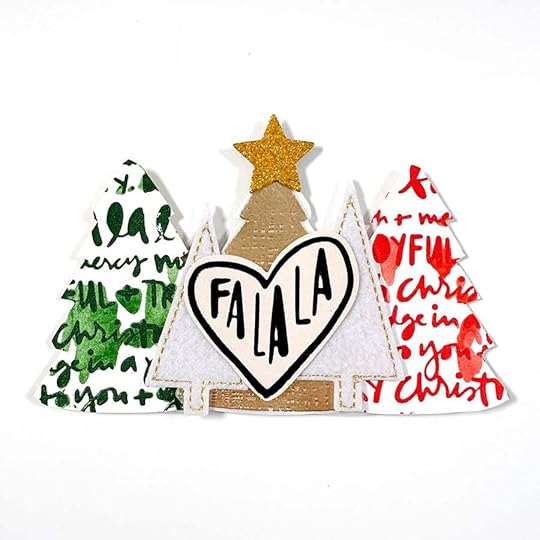
On top of the three large stamps I added two of the felt tress from the Main Kit and the pleather Fa La La heart sticker from the Advent Calendar.
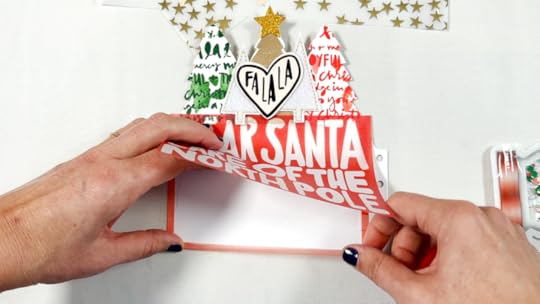
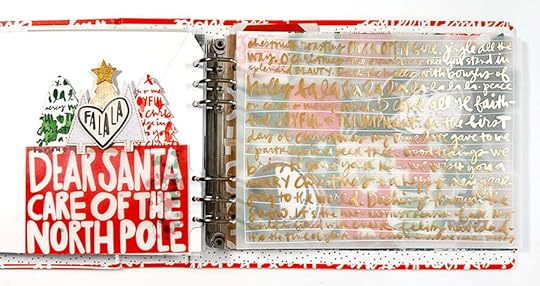
Rather than leaving the back of the 4 inch x 6 inch journal card open I decided to add the Dear Santa vellum from the Specialty Journal Card Set and another mix of sequins from . This time I just used red line tape around the outside edge to hold the squins in place.
I super love how this turned it! So fun + festive.
December Daily® Main Kit
December Daily® 10x8 Album
December Daily® Die Cut Inserts (digital available)
December Daily® Sticker Advent Calendar
December Daily® Specialty Journal Card Pack (digital available)
6x8 Tree Stamp
Gold Embossing Powder
Red Embossing Powder
Versamark Embossing Ink
AED Inks: McKenzie (dark green), Willamette (light green), Redwoods (red), Rose Garden (pink), Honeyman (yellow)
Vellum
Attacher Stickers
AED Paint Pack
December Daily® Silkscreen
Red Line Tape
(restock coming November 4th)
In Case You Missed It | October 27
Happy Friday, friends! Welcome to the latest
In Case You Missed It. Just a reminder that this is a quick post that will happen every Friday afternoon with all the updates and links that have happened throughout the week. So, let's get to it:
Buy our 2023 Halloween Kit before 11:59pm tonight, 10/27, and receive the Halloween Painted Wood Veneer Pack free! Cart must include a physical Halloween Kit at checkout and the Halloween Painted Wood Veneer Pack will be automatically added to your cart for free when you enter the promo code TREAT4YOU. We can’t wait to see your spookiest stories! Shop the kit now via the link in our bio. Terms: Offer valid through 11:59pm ET on 10/27/23. Shop the kit here.
DECEMBER DAILY® DIGITALS
The 2023 December Daily® Digitals are here! Kits, Stamps, Paper, and Embellishments...the same fun & festive designs as the physical @decemberdaily products, only in digital format. We love to see how this incredibly creative community plays with digitals! Resizing elements and cards, adding journaling to papers, creating cut files, transforming files into transparencies, the sky is the limit with digital files. Want to learn more about creating with digital files? Our newest class December Daily® Hybrid Product Play is live today. We have incredible content from six amazing contributors ready to explore at your convenience. Shop digitals here.
NEW CLASSES
2023 DECEMBER DAILY® PREP DAY. Join the December Daily® community for a fun online December Daily® prep day on Saturday, November 18th, 2023. Use this opportunity to finish past December Daily® projects or start working on your project for 2023. The first live video will start on Saturday, November 18th at 10:00 am Eastern. Cost is $5.
DECEMBER DAILY® PRODUCT PLAY | TRY THIS. December Daily® Product Play is all about ideas and inspiration for working with physical products from the December Daily® Collection. For 30 days in November, you'll receive one idea per day from the contributors to this class (includes Ali). Ideas in this workshop will focus on physical products from our 2023 December Daily® collection. Whether you are preparing to document 2023 or finishing up telling stories from past years, we hope these fun, creative ideas help you use your products to get your stories told.
2023 DECEMBER DAILY® HYBRID PRODUCT PLAY. Hybrid scrapbooking combines digital products with physical supplies to create paper (or printed) memory-keeping projects. For this class, our contributors will share with fun, creative ideas and inspiration for working with these digital products from the 2023 December Daily® Collection.
As always, we’re so grateful to have you all as members of this community! Thanks for joining me today and have a great weekend!


