
Ali Edwards's Blog, page 36
December 8, 2023
December Daily® 2023 | Story 07
Story 07 in my 2023 December Daily® album is titled merry + bright + anxiety. It's what's real.
I'm loving the fact that I got our house all merry + bright really early this year AND I'm also feeling general anxiety related to "adulting" responsibilities. I know I'm not alone.
Let's dive right in:
For my Table Of Contents today I used a Micron pen along with a POSCA Paint Pen:

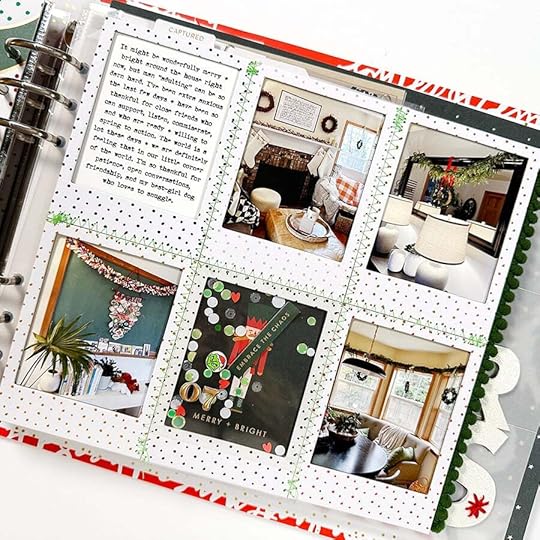
Here's a look at the finished page in my album:

For Story 07 I was working off a foundation page that features the chipboard frames from this year's collection. When working on my foundation pages earlier this year I stitched these all together with my sewing machine. I originally had a different card from the Main Kit for my title card but ended up switching it out for this one because it fit my story better.
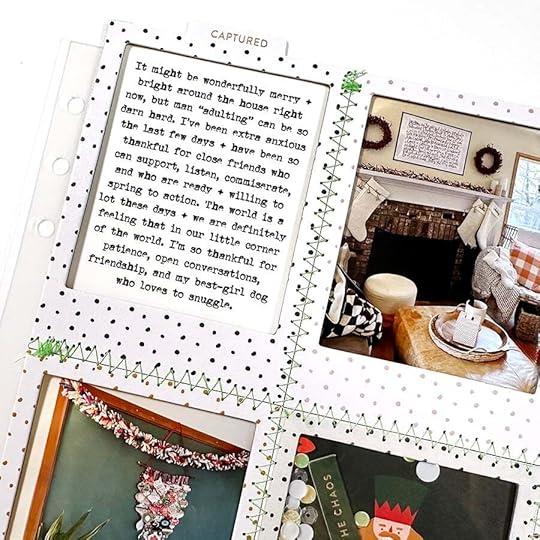
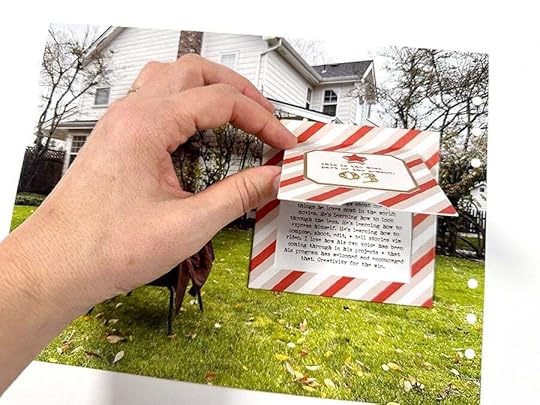
Before typing up my journaling I went around the house and took a few photos of the merry + bright areas of our home. I paired those photos with journaling that documents some adulting anxiety I've felt this past week. Along the top I added the "captured" sticker tab.
In addition to my words and photos I also decided to create a little shaker on top of the merry + bright card. I added a chipboard phrase "embrace the chaos" and more sequins from The Diary Of Belle Rose. Originally I envisioned I'd add one of the red plastic letters here too but I forgot and simply ended up adding puffy numbers on top of the plastic piece that creates the shaker.
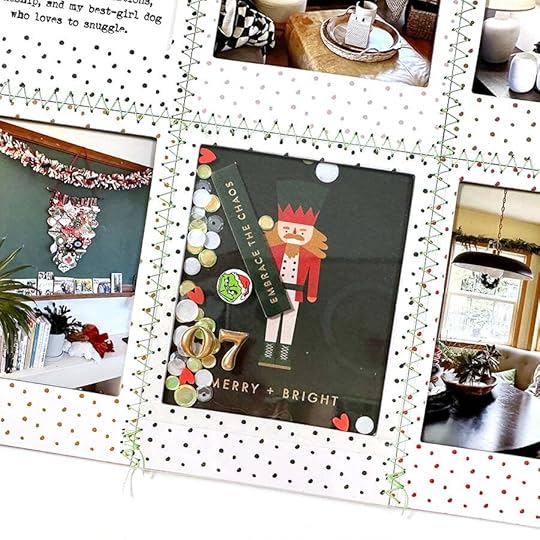
I used red line tape around the edge of the frame and added a 3x4 plastic piece on top.
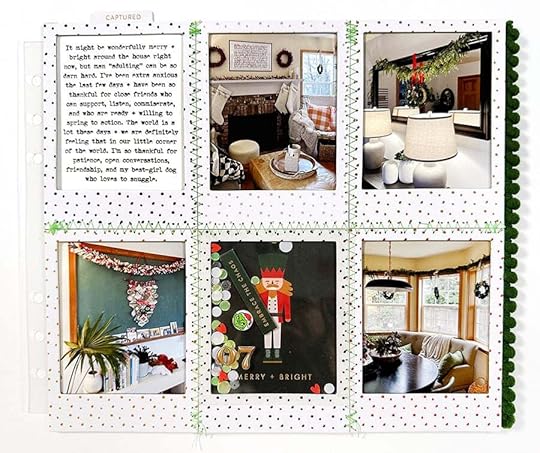
I love combining shapes together to create homes for my words and photos. In the video I mention that you could create something like this without the chipboard frames simply by laying out the elements in a grid.
SUPPLIESDecember Daily® 10x8 Album
December Daily® Main Kit (journal card, chipboard phrase) (digital available)
December Daily® Chipboard Frames
December Daily® Tab Stickers
Grafix Plastic Sheet
POSCA Paint Pen
Micron Pen
Sewing Machine
Mystery Typewriter Font
Pom Trim
Basic Supplies via my Amazon Storefront


December 7, 2023
December Daily® 2023 | Story 06
Welcome to Story 06 in my December Daily® 2023 album.
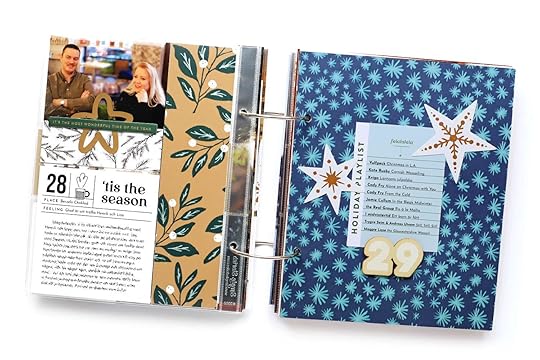
In Story 05 I documented what the kids are loving so today I decided to document three things from me, Aaron, and our dog Betty using the ornament pattern paper and some of the ornament pockets from the Main Kit.
Let's dive in to the process video:
For today's Table Of Contents entry I used a Brush Pen:
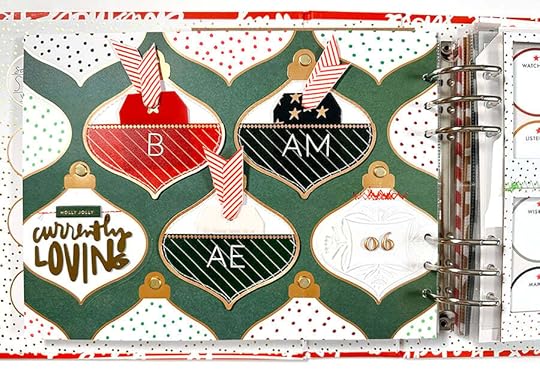
And here's how this page looks via images:
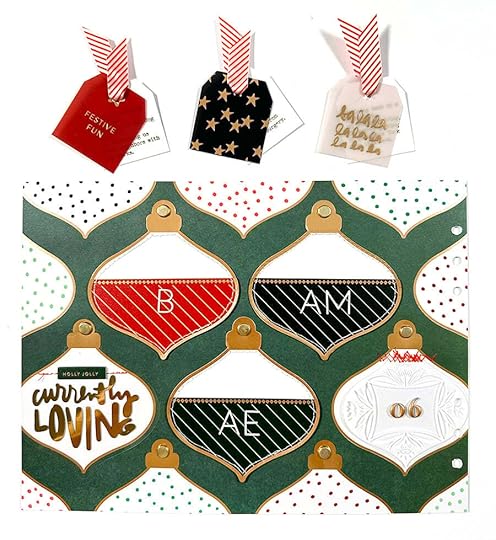
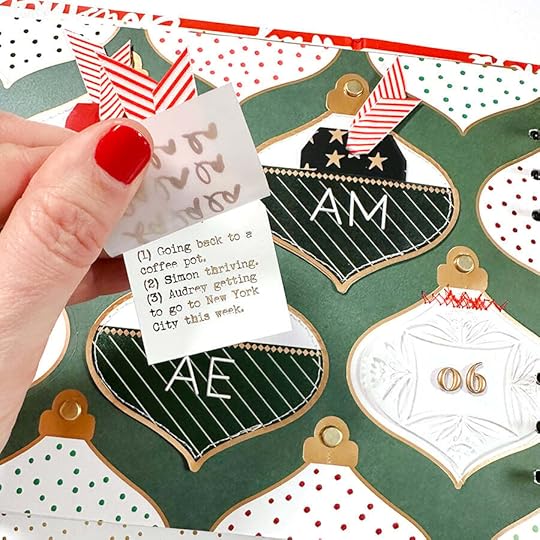
The foundation for this story is the ornament pattern paper and three of the ornament pockets from the Main Kit. Inside each of the pockets I added one of the plastic tags and a printed tag with what I'm loving, what Aaron is loving, and what Betty is loving.
I used ribbon from this year's Trim Pack to hold the plastic tag and my printed journaling together. I use a small glue dot to hold both sides of the ribbon together.
On top of the ornaments around the outside edges I used POSCA Paint Pens to add the dots. I did individual colors and spread them around the page but you could also do multi-color dots which would have been really fun!
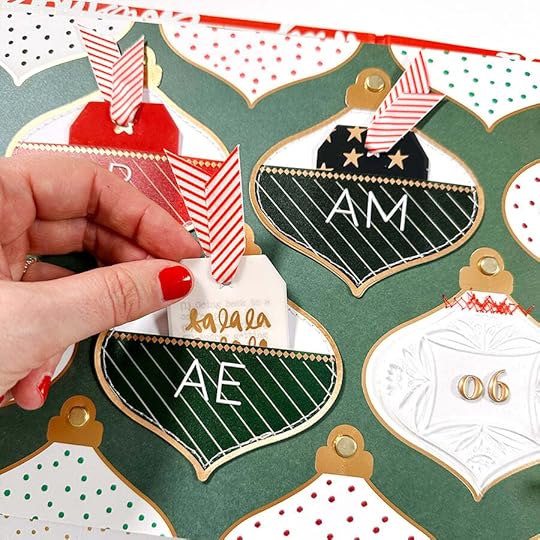
The little tag sets fit right into the pockets and I added puffy alphas on the top of the pockets for our initials.
I ran these through the Minc Machine to add the gold foil on top of the text.
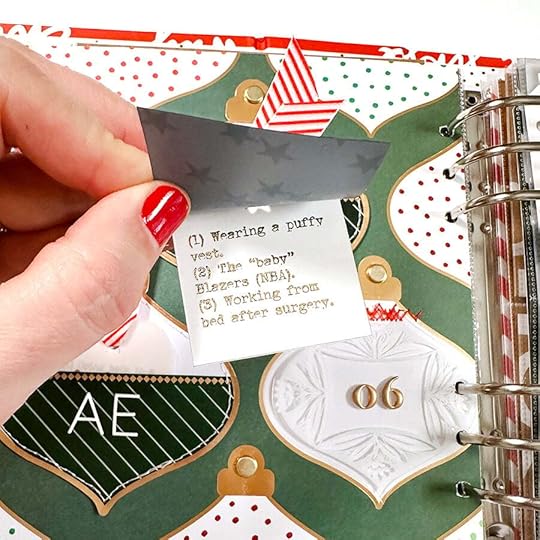

It was fun to think of what Betty might be loving right now. Ha.
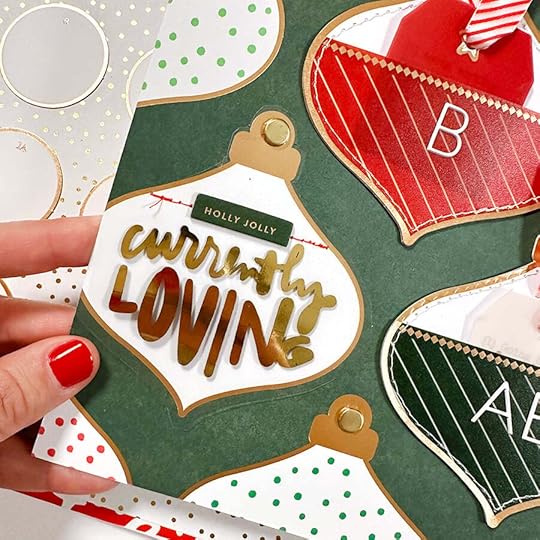
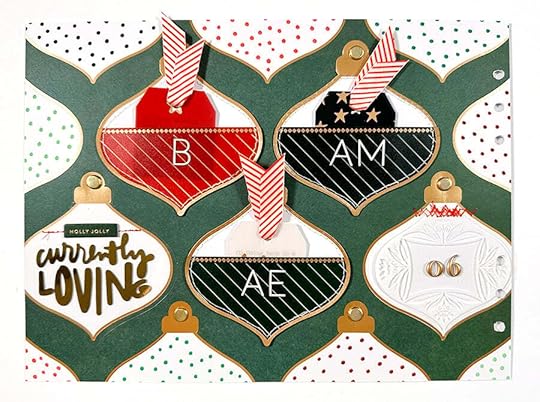
After considering a few different ideas for the other two large ornaments I decided to create a custom title that says "currently loving." I printed that on transparency with a laser printer and then ran it through the Minc Machine to add the gold foil. I used one of the other pocket ornaments as a guide to cut out the ornament shape.
Download the Currently Loving word art here.
I ended up running that section through the sewing machine but the gold brad works just fine.
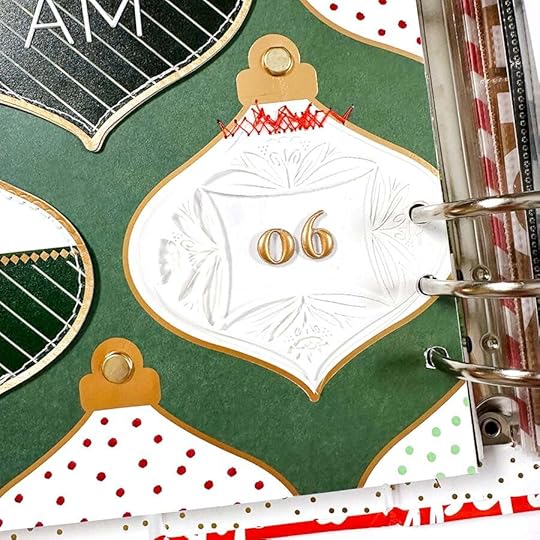
For the story number I cut out one of the white ornaments from the 10x8 transparency paper and stitched it along the top. I also added brads to the top of any ornament visible on the page. On top of the transparency I added gold puffy numbers from the Main Kit.
December Daily® 10x8 Album
December Daily® Main Kit (digital available)
December Daily® Plastic Tag Set (digital available)
December Daily® Specialty Paper Pack (digital available)
December Daily® 6x8 Tag Stamp Set
POSCA Paint Pens
December Daily® Red + White Trim Pack
AED Puffy Alpha Stickers
Minc Machine
Laser Printer
Minc Gold Foil
Laser Transparency
Sewing Machine
Gold Brads
Brush Pen
December 6, 2023
December Daily® 2023 | Story 05
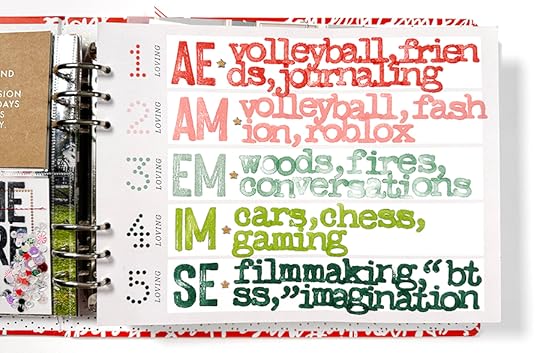
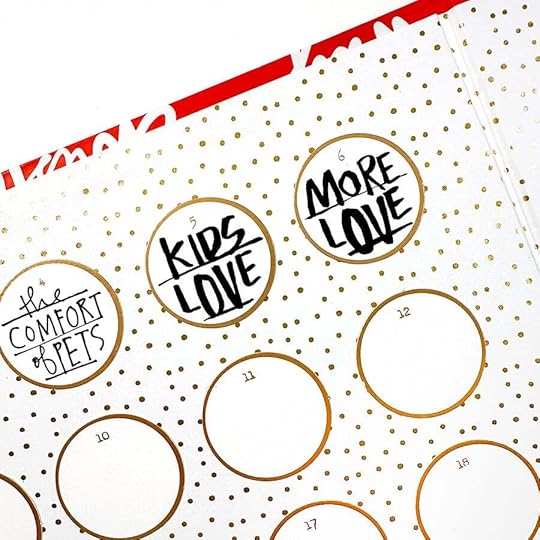
I've known since I worked on kit designs last year that I'd be using this paper for Story 05 in my December Daily® album in 2023. What I didn't know is that I'd be using it as an opportunity to bring in my family's voices into the project. I often do a list of what I'm loving/into in this project (and I might still do one for myself later in the month) but I decided to send a text to our kids and ask them to tell me three things they are each loving in their own lives right now. Super happy with how this turned out!
STORY IDEA: Write out five things you are loving right now and/or invite friends/family to participate.
PROJECT IDEA: Alpha stamp your story.
Here's a look at how this story came together:
For today's Table Of Contents entry I used a brush pen:
And here's a look at the completed story spread:
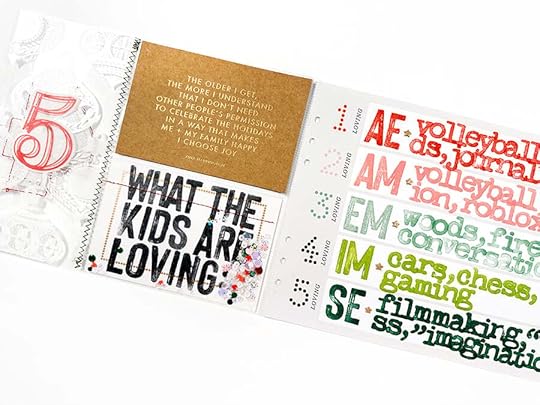
I am a huge fan of filling up a page with alpha stamping. For today's story I had a lot of space to work with including two 4x6 pockets, the back of the transparency from yesterday, and the full page "loving" pattern paper from the Main Kit.

I've been hanging on to these vellum numbers (they were originally offered in the Numbers Scrapbook Kit - we do have a few of those available) knowing that I would love to incorporate one or more into this particular project. I ended up stapling it to the back of the ornament transpareny.
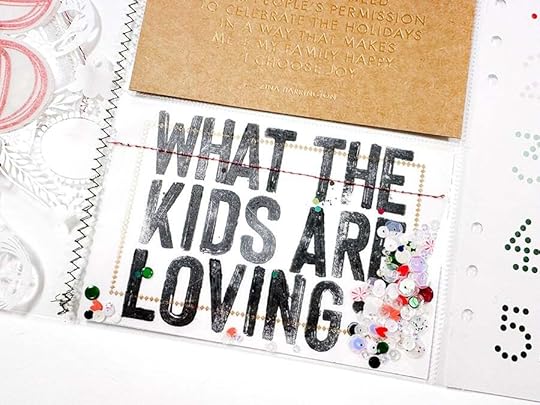
After stamping out the kids responses I felt like what I most wanted to do in this pocket was stamp a title. I chose to stamp on one of the 4x6 vellum cards using Staz On ink. I ended up turning it into a shaker (to get a little more color on this side of the spread) by adding some sequins and stitching across the pocket to close it up.

The biggest piece of today's story are the responses I got from the kids. I used this stamp set for their initials and then used an older typewriter alpha for their responses. In between their initials and their response I added chipboard stars. I loved pairing the colors from the paper with the colors of ink for each kid.
Seriously so fun.
SUPPLIESAlphas Are Awesome Stamps Uppercase Alpha Stamp Illustrated Faith Jill's Typewriter Stamp December Daily® Main Kit (digital paperpack available) December Daily® 4x6 Specialty Card Pack (digital available) Redwoods AED Ink Rose Garden AED Ink Olympia AED Ink Willamette AED Ink McKenzie AED Ink Staz On Ink Circle Stamp Block 6 Hole Punch Numbers Scrapbook Kit Vellum Numbers Sewing Machine
December 5, 2023
December Daily® 2023 | Story 04
Welcome to December Daily® 2023 Story 04.
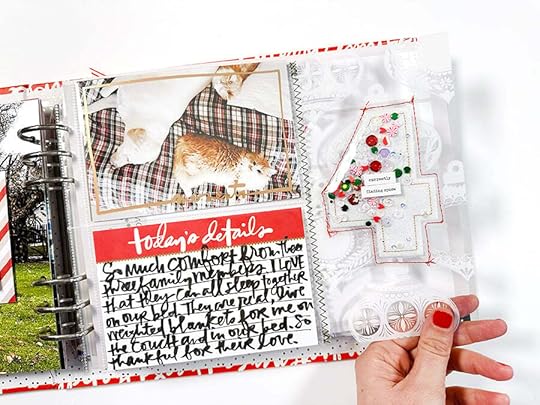
Part of what I enjoy when documenting my December is the opportunity to get playful and curious and say "what happens if I try this?" In today's video I play around with a couple different options for creating an "enclosed" shaker and write about how much comfort I get from my pets.
Let's dive in to today's video and see how it all comes together:
Here's my Table of Contents:
Today I used a Slick Writer pen.
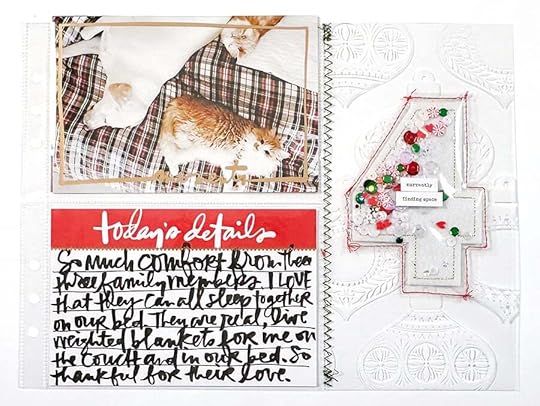
My foundation today includes a 6x8 page protector stitched to a section of pattern transparency. I love that by doing a zig zag stitch the transparent portion can actually fold over if I wanted to (it wasn't what I intended for this particular page but it's cool to see how that works).
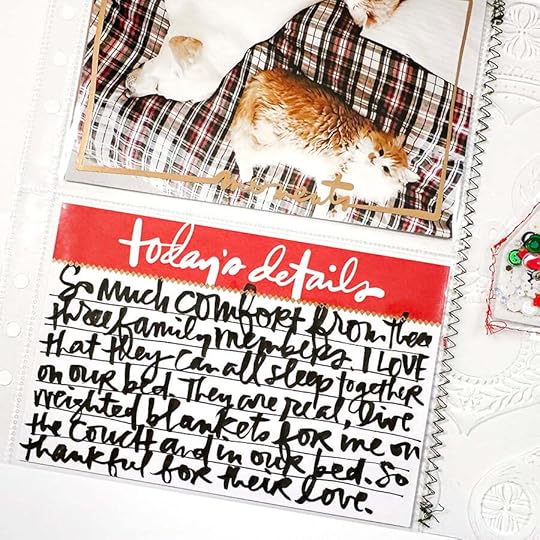
For my story I'm pairing a 4x6 photo of my pets + a 4x6 "moments" transparency + a 4x6 journal card from the Main Kit. I used a fun, bold brush pen for my journaling. I love the graphic quality of these pens.
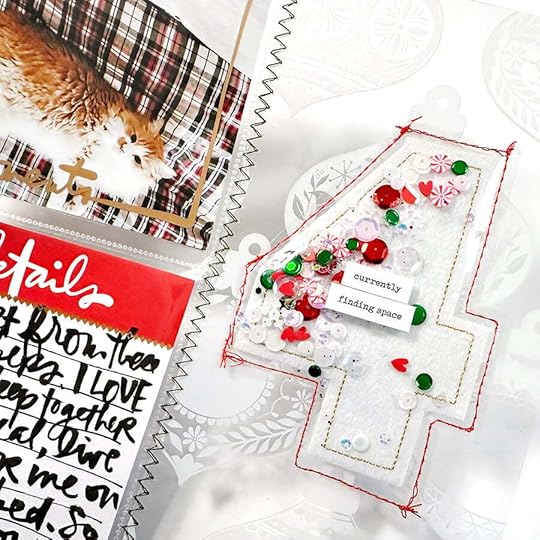
The "what happens if I try this?" portion of my creative adventure today was centered around "encasing" a felt number between two pieces of plastic from a page protector to create a shaker. In the video you'll see my try using the Fuse Tool a few times and then end up back at my sewing machine in the end. Inside the encasement I added a sequin mix from . Playing around with the encasement idea you might try an embellishment or even a letter for your last name.
On top of the large number four I added a couple word/phrase stickers about "finding space" - mostly in reference to finding space in our bed when all three of the pets are there too. Real life, my friends, real life.
December Daily® 10x8 AlbumDecember Daily® Specialty Journal Card Set (digital available) December Daily® Main Kit (digital available) December Daily® Specialty Paper Pack (digital available) December Daily® Word/Phrase Sticker Pack Kuretake Brush Pen Fuse Tool Sewing Machine Past December Daily® Felt Number Slick Writer Pen
December 4, 2023
Stories By The Month™ | 2024 Changes
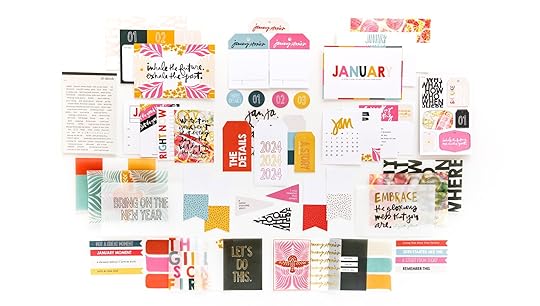
We are excited to reveal new changes to our
Stories By The Month™ subscription for 2024 starting with our January themed kit which launches Sunday, December 10th, 2023.
The 2024 monthly kits will consist of:
(8) 3x4 and (6) 4x6 Cardstock Journal Cards
(8) 3x4 and (6) 4x6 Vellum Journal Cards
4x6 Chipboard sheet
4x6 Sticker Sheet
Variety Die Cut Paper Pack
The biggest change you will see this year is that we are removing the 3x4 stamp from the kit and will be offering it to subscribers as an add-on. Moving forward this change will mean that the new SBTM add-on stamps will be consistent with the quality of the stamps we sell in the shop. Our goal with removing the stamp from the kit is to be able to provide you with a higher quality product, as well as an opportunity to choose the stamp if you would like to purchase it, since not everyone participates in stamping in our community.
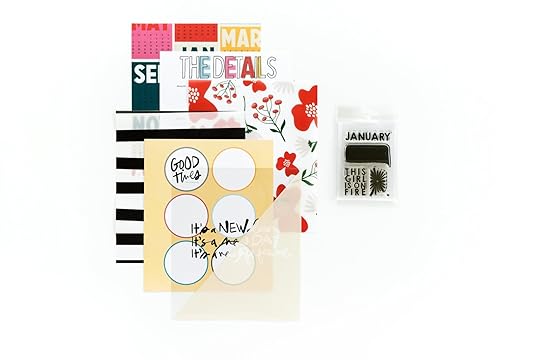
For those of you who were fans of the bigger 6x8 paper sizes included in the 2023 kits, we will have a quarterly offering of a 6x8 Seasonal Specialty Paper Pack (sized at page protector dimensions of 7x8.25 in) available as an add-on. These papers were designed to coordinate with the first three themes for 2024 (January, February, and March). The next 6x8 Seasonal Specialty Paper Pack will be available with April's theme that goes live in March of 2024.
Each Quarterly Paper pack will consist of:
(2) 7x8.25 in Cardstock papers
(2) 7x8.25 in Vellum sheets
(2) 7x8.25 in Transparencies.
Our Customer Service team is happy to help with any questions or concerns. Please reach out by Friday, December 8th to make any changes to your subscription.
Here is a video walkthrough from Ali:
We are also excited to announce that we will be adding a new lesson into the Inspiration By The Month™ classroom each month from a Guest Storyteller from the community, similar to what we offer in the Story Class classroom. This online class subscription will continue to include the digital version of Stories By The Month™ and inspirational lessons using both the physical and digital kit by members of the Ali Edwards community. All physical Stories By The Month™ kit subscribers will be continue to receive access to the Inspiration By The Month™ class content as part of your subscription. Physical Stories By The Month™ kit subscribers will still have the opportunity to add on the digital Stories By The Month™ kit to their orders for $5 during the add-on period.
December Daily® 2023 | Special Guest Kristin Ladstrom
Hello again!
It’s Kristin
here, back with some practical tips and design concepts I used when I batch made my 2022 December Daily album. (I talked about the planning and laying out of the album in my last blog post
.)

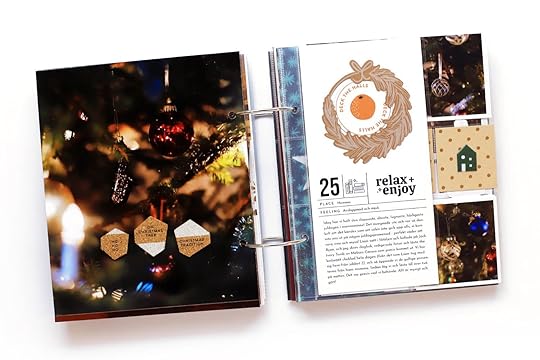
When I first made the digital mockup of my album (see my last post!) I realised I wanted to simplify my design choices. The easiest way for me to do that was to come up with a black and white journal card design that I could repeat throughout the album, but still add variations to. I was inspired by a digital stamp set I had, Quarantine by In A Creative Bubble for Studio Calico, but I needed something similar that I could use for 4x4 and 4x8 cards. So, inspired by that design, I created my own journal card design by drawing a few black lines in Photoshop.
My card has ...
+ a number in the top left corner (the font is Bebas)
+ two spaces for digital stamps (one illustration + one wordart). I have many, many new and old sets of digital stamps designed by Geralyn Sy, so I could switch out the digital stamps to add variation, while keeping the design cohesive (also - not all the illustrations I used are from Christmas sets!). If you want to keep your design cohesive without having to think much about it, I’d recommend sticking to one designer, but you could of course mix and match as well.
+ rows to add "place" and "feeling"
As you can see in the examples, some of the wordart files I used were a bit taller than others, so then I "cut into" the "place" and "feeling" rows to fit it in nicely. This was a personal preference but is totally not necessary if you're not a nerd about shapes and spaces in design. :)
Most of the cards are 4x4, but I made some other sizes too to fit specific stories I wanted to tell - one 4x8 with space for a tall photo, one 4x8 with space for lots of words and one 4x8 with space for physical embellishments as well (since I knew I didn’t have any other photos or words to go in that space for that day).
All in all, I love how this turned out - simple but versatile! I found this concept so easy and fun to use. I'm definitely doing a similar journal card design this year (or maybe I’ll use the same), even though I'm hoping to make a "craftier" album with more interactive pages this year.
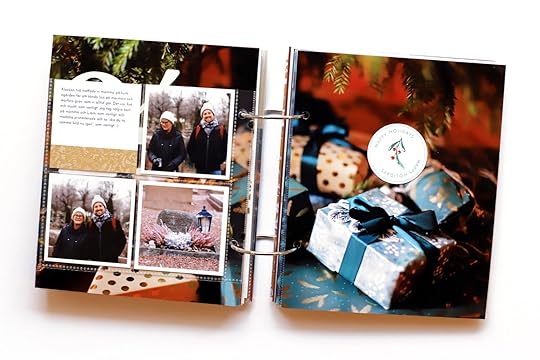
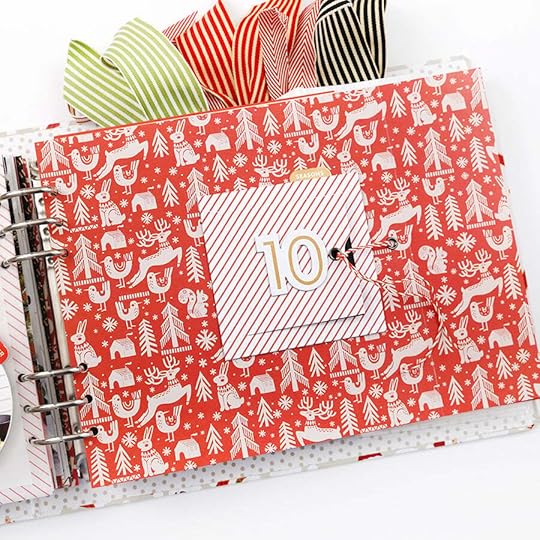
FULL PAGE PHOTOS WITH MINIMAL EMBELLISHMENTSAnother simple concept I decided to stick to to make this process easier was choosing full page photos, and then embellishing each page very sparingly. A trio of matching embellishments here ... a small pocket with a number on it and journaling tucked inside there ... and often just one single embellishment on a page - that was both doable and fun for me, so that's what I did! It's not rocket science, I know - but I think I needed to remind myself that I'm "allowed" to keep decorations minimal. (Give yourself time to think about what you could simplify to make this process doable for you.)
To choose embellishments, I looked through what I had left from previous collections, and chose the ones I was the most drawn to. This sounds like it should be obvious, but like many crafters I have a tendency to want to save my favourite pieces. But I knew I would buy more supplies this year, so I told myself (with my stern voice!) that it was time to put my favourite embellishments to good use! From there, it was easy to pair them with full page photos I'd already printed (when I pair embellishments with photos, I go first by colour scheme, and when I find something that matches, I check that the sentiment matches the story, too), adhering them down and calling the pages done.
I found after a while that I really love this look, because it lets both the photo AND the embellishment shine. And just like the journal cards I talked about above, I realised how much I loved working this way, and that I'll probably make many pages like this in this year's December Daily album too - full page photos with minimal embellishments. It turns out batch processing has been really good to help me figure out what design elements - and what parts of the process - I enjoy the most!
DAILY JOURNALING/ NOTE-TAKINGI also have to add a note on the concept of journaling every day. For me, it is the only way I’d ever be able to make a project like this several months (or years) later. I want to emphasise that you don’t need to write THE journaling every day, as in, the literal journaling that will necessarily go into the album. Just write SOME journaling. My personal journal is very chatty, spontaneous and personal, and while I might not want to put all of that word for word in my scrapbook albums, it is a very valuable resource when I go back months later. In this project, when I wrote all the journaling at the same time, I used journaling I’d written during December but rewrote it to flow nicely and convey what was most important about the story, editing out some details that didn’t really matter.
And if I can give one more word of advice on this subject - please remember to write down how you feel about what’s going on in your life! That is what I most care about reading when I look through my older scrapbook albums.
DON’T SKIP THE THING YOU LOVE THE MOST
My last tip is my most important one: When batch processing, don’t skip the part of the process that you love the most!
Don't make a project a chore by simplifying, or excluding entirely, what you most love about scrapbooking. Even if your favourite part of this hobby is the most time-consuming, don't skip it just to save time. Because in the end, what's the point of having a hobby if all you want to do with it is save time?
No, I say: Keep the parts you love the most. Simplify, streamline or cut out entirely the parts of the process that don't bring you as much joy!
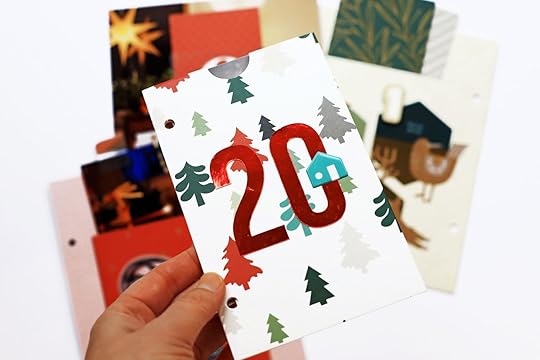
For me, choosing and mixing patterns is the most fun, so I made sure to use lots of patterned papers throughout the album. I specifically chose the page protectors with a 2x8 pocket (by Simple Stories) so I could fit more patterned papers in, and folded a couple of pockets and envelopes (for journaling or extra photos) out of favourite patterns.
I also added a couple of full page patterns with a journal card in the middle and a few embellishments around it, to really let the patterns shine. (That is something I'm definitely keeping for this year, because I love the look of it - and I have a bunch of 3x4 journal cards that would look great on a patterned background like this.) I let this part of the process take time, because I enjoy it so much.
It's when people try to simplify so much that it's not a hobby anymore, just work, that they lose the creative spark. So what you need to do is figure out what part brings you the MOST joy - and keep it, or even amplify it! I feel like that is the most potent cure for crafty burnout I know. <3
I hope my two posts have been inspiring for any of you who may be considering batch processing an album this year (or for a previous year)! Find me over on instagram @paperandphotographs, where I will share more of my completed album over the next few weeks, including a flip through as soon as I can get to it.
I wish you a marvellous, colourful December!
December Daily® 2023 Kick Off | Pep Talk + Community Advice

Let's get this December Daily® party started! All last week,
Ali and Lisa were live on our @decemberdaily Instagram account chatting about a different December Daily®-themed topic each day. These conversations happened at the same time each day, 1pm ET. All of our conversations will be recorded and available here to watch/listen to at your convenience.
Monday, 27th: All About Preparation. Find the recording here.
Tuesday, 28th: All About Stories. Find the recording here.
Wednesday, 29th: All About Photos. Find the recording here.
Thursday, 30th: All About Finishing + Playing With Product. Find the recording here.
Friday, December 1st: Kick-Off + Pep Talk
Here's the recording of Friday's chat. Thanks so much for those of you that were able to join us.
Here are a few of the resources/links mentioned during Wednesday's conversation:
December Daily® 2016 | My Hopes For You ForJust Write subscription
Storytelling With December Daily®
Ali's Amazon shop
Ali's current printers
Our lineup of December Daily® classes
Please let me know if there was a link I've missed!
December Daily® 2023 | Story 03

Welcome to December Daily® 2023 Story 03.
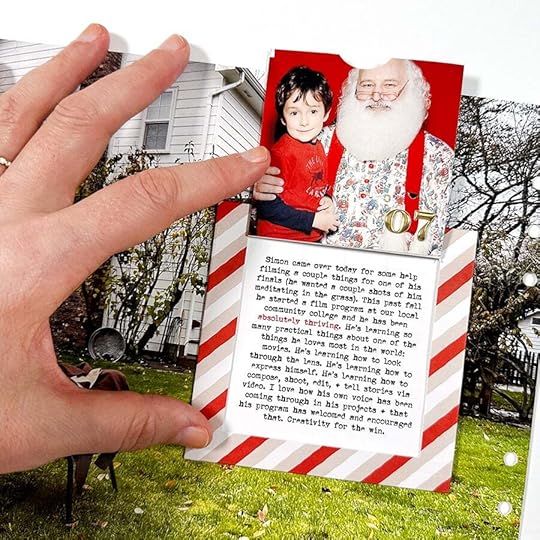
Simon stopped by yesterday for some assistance with a film project he's working on so I took it as an opportunity to take a photo and tell a little story about him right now.
STORY IDEA: Combine a present + past December photo to illustrate the passage of time.
Here's how this page come together:
Table of contents for Story 03:
Today I used a Micron Pen for my Table Of Contents entry.
And let's take a look at how this story was documented:
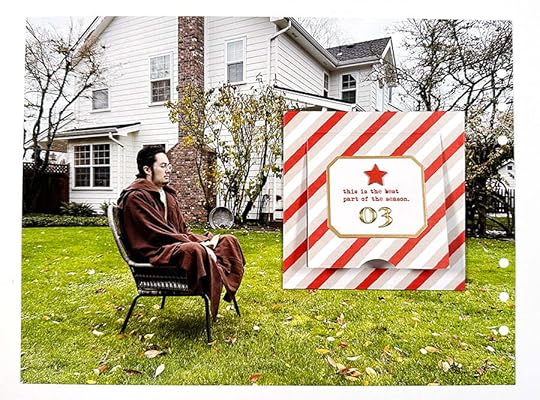
Full page photo foundations continue to be one of my favorite ways to document my stories. This photo was sized 11 inches wide x 8.25 inches tall.
On top of the photo I added one of the window cards to hold my words and a second photo of Simon back in 2007. On the outside of the window card I added a chipboard star and gold puffy numbers.
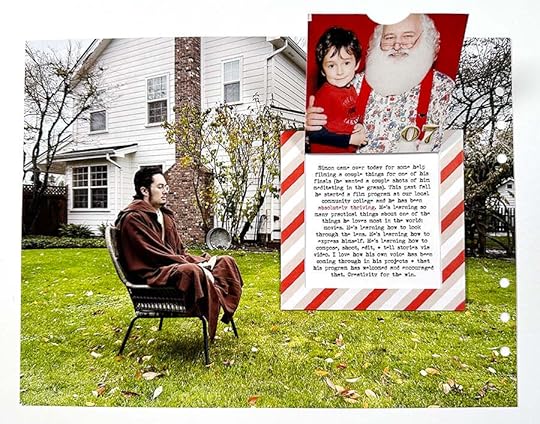
Both the journaling block and the secondary photo are 3 inches x 3 inches. It was so fun to look back at my first December Daily® and find this photo of Simon + Santa to pair with the grown-up photo of him now.
I also added a couple more puffy numbers on top of the 2007 photo to designate the date.
These window cards are such a great way to create a little home for photos and words. Last one I used one on top of a pattern paper and I love the simplicity of that one too.
As I'm looking at that now I love how I added the tab sticker along the top. I might add something similar to today's story too.
December Daily® Main Kit (chipboard stars, gold puffy numbers)
December Daily® Window Cards
Red Line Tape
Scrapbook.com Adhesive
6 Hole Punch
Epson Xp15000 Printer
Fiskars Trimmer
1 Inch Cicle Punch
Micron Pen
See all my basic supplies on my Amazon Storefront here
December 3, 2023
December Daily® 2023 | Story 02
Welcome to Story 02 in my 2023
December Daily® project.
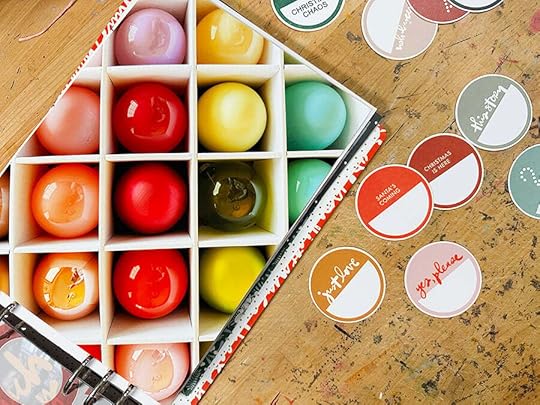
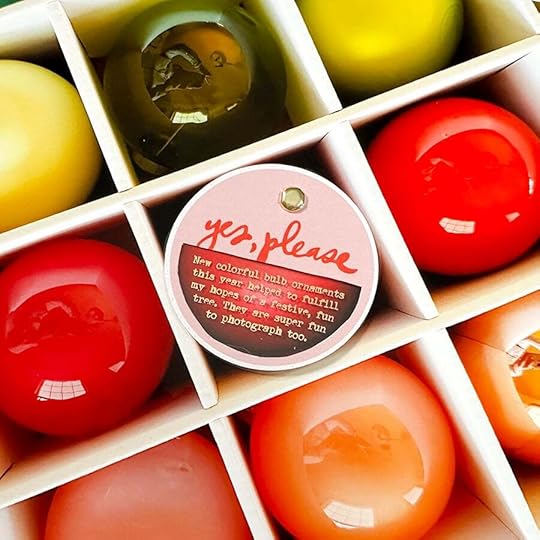
My story for today features a full page photo of new colorful ornaments I got earlier this season to help with my colorful tree visions. I took a photo looking down into the box of ornaments so it includes my reflection. I also had a bunch of fun playing with the circle pattern paper from the 10x8 paper pack (similar design in
this stamp set too) and creating a peek-through window on the big piece of "joy" vellum from the Main Kit.
STORY IDEA: What are you saying "yes, please" to this month?
As I was deciding which of the circles from the pattern paper I might want to use (love that each of them is essentially a story prompt) the "yes, please" one was a great match for how I felt about these colorful bulbs this year. I decided to do a tiny story but you could also take the "yes, please" story prompt and write out a whole list of things you are saying "yes, please" to during this month.
Let's get started with today's video where I share my starting point all the way through to the finished page:
For today's Table Of Contents entry on the inside cover of my album I'm using a
brush pen. I did this on purpose for a couple reasons:
Using the same pen everyday feels like more pressure to make it look a certain way (whatever that might be in my own head). By using a few different pens (maybe thicker and thinner) I'll give myself a bit more freedom and also hedge against mistakes I might make that will make it look "messy" (and I'm totally here for the handmade messiness that comes from using my own handwriting).
I just like the variety and leaving it open to ideas that might pop up along the way.
Also, if I was going to do it over I would write "yes, please" instead of "say yes."
And now let's get to the storytelling:
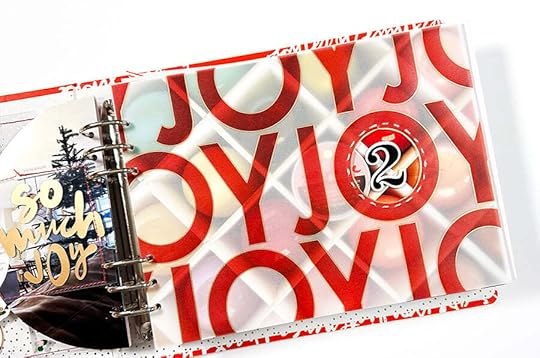
When the kit arrived at my house a few months ago this vellum was one of my favorites (from the Main Kit). I've known for awhile that I was probably going to try cutting out the inside of the full "o" and using that as a home for something.
Steps for this part include:
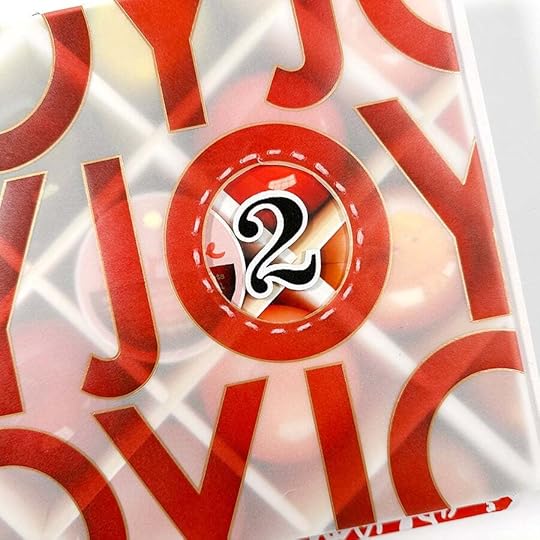
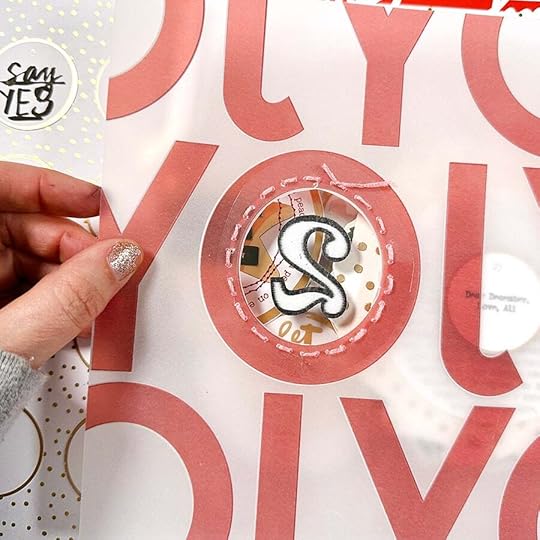
Use a craft knife to cut out the center of the "o" on the vellum and replace it with a small piece of plastic that is larger than the part you cut out. Temporarily adhere the plastic to the back of the vellum (I cut this in a similar shape to what I cut out from the "o").
Use a paper piercer to punch holes around the "o" going through both the vellum and the plastic.
Used a needle and pink embroidery thread to stitch the plastic piece in place.
Add a number on top. I'm using a black + white fabric number that was offered as an add-on earlier this year.
You could run this through a sewing machine or use a vellum adhesive or some other method to attach the pieces together.
Here's a look at what the back looks like:
That was fun! In the video you'll hear me talk about the fact that there are lots of ways you can simplify the ideas I'm sharing if you want to create something with fewer steps. Instead of cutting out the center you could simply add a number on top (an embellishment or a stamped number or an embossed number).
I had more time today so I let myself be an explorer!
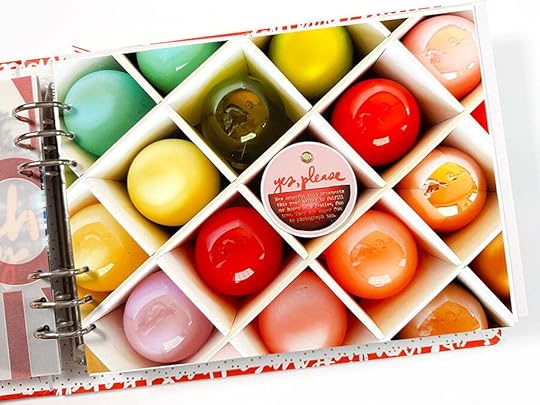
After thinking through a few different ideas for what I wanted to do on top of the photo I decided to just do a tiny bit of journaling. I love the contrast between the big photo and the little journaling and my reflection in the ornaments.
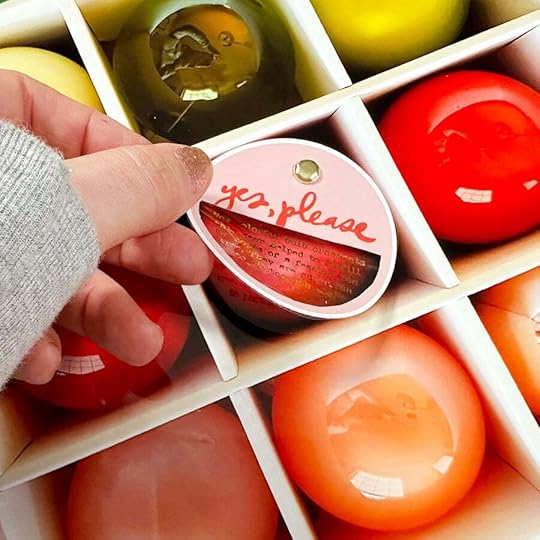
I cut out the white portion of the circle using a craft knife from the pattern paper to create a peek-through. For my journaling I printed out my text (arranged in a half-circle on the bottom) on a sheet of laser transparency so I could run it through the Minc machine and add gold foil.
I used rolling adhesive to attach the two pieces together and then used a gold brad through it all to attach it to the photo.
What are you saying "yes, please" to this year?
December Daily® 10x8 Album
December Daily® Main Kit (digital available)
December Daily® 10x8 Pattern Paper (digital available)
Epson XP15000 Printer
Embroidery Floss
Minc Machine
Gold Foil for Minc Machine
Laser Printer
Laser Transparency (for use with Minc machine)
Paper Piercer
Craft Knife
Gold Brad
Black + White Fabric Sticker Numbers (previous kit add-on)
Brush Pen (for Table Of Contents entry)
Plastic Sheet
Circles 6x8 Stamp
December 1, 2023
December Daily® 2023 | Story 01
Welcome to Story 01 in my
December Daily® album for 2023!
I have been eagerly anticipating the storytelling + living portion of this project and can't wait to see what stories we all tell throughout the holiday season.
To see what I've been up to with this project in advance of December
check out the project archives here.
Let's dive right in and see how my first story came together:
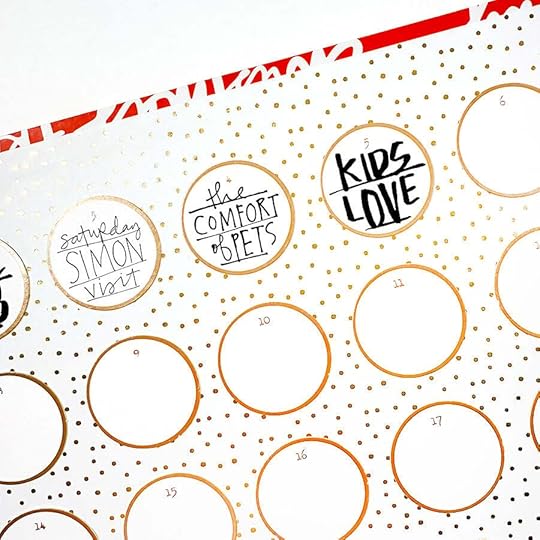
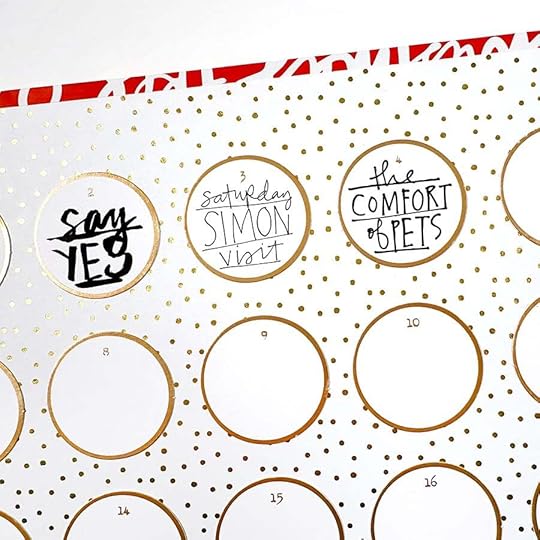
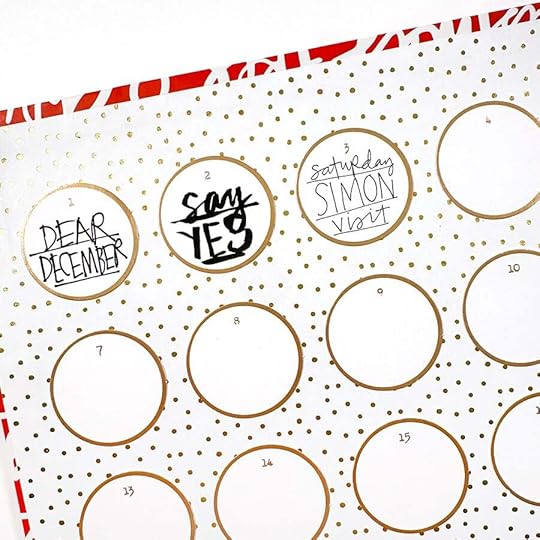
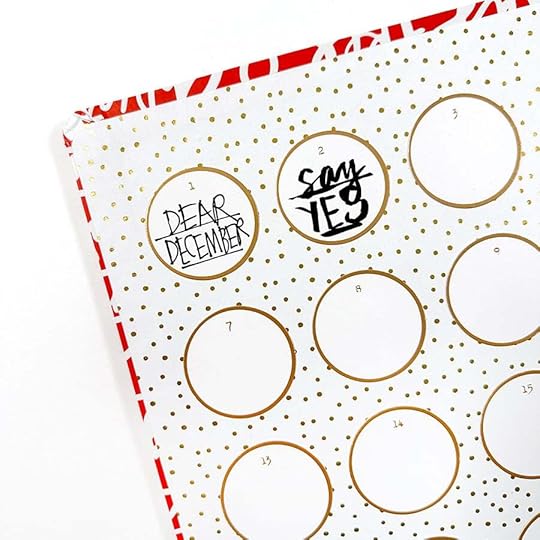
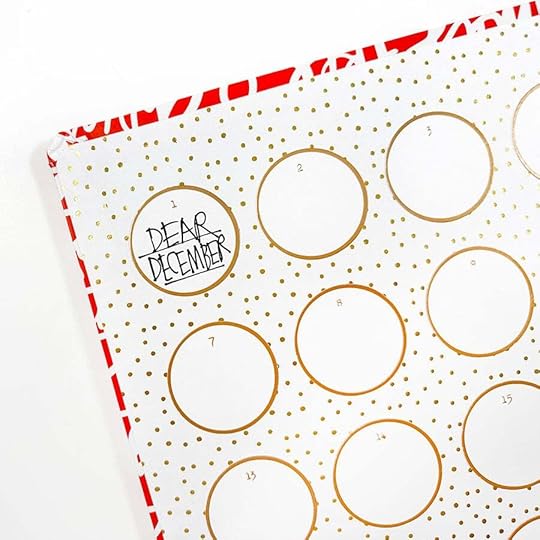
This year I created a table of contents in the inside cover of my album using the gold rimmed number circles from the Main Kit. I will be handwriting a story "title" for each story throughout the month. I'm using a
Slick Writer to add my titles.
As a reminder, here's the start of my Story 01 from some of the work I did on
my foundation pages in the last few months:
You can get more information on how this came together here.
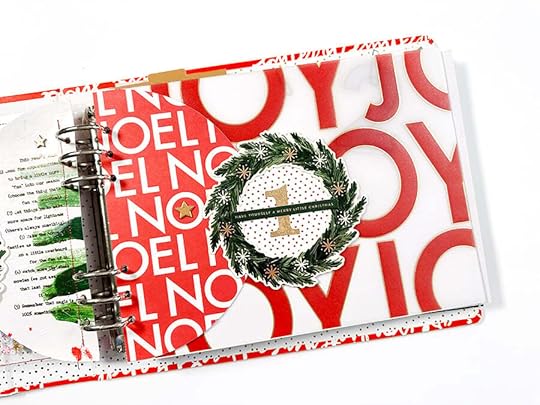
And here's what I ended up adding to the back for my story:

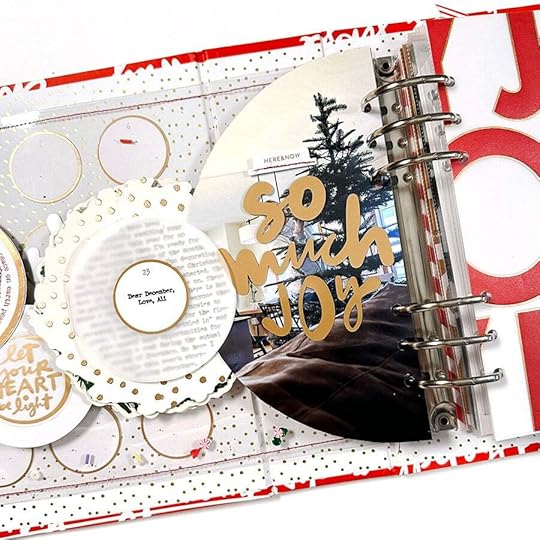
For my first story this year I decided to write a letter to December and reference some of the things I've been doing around here in advance this year. I paired my words with a photo of my setting up the tree (taken with the timer on my iPhone).
I ended up printing my photo 5 inches x 8.25 inches and using the 1/2 circle as my template for cutting out my photo. On top of my photo I added one of the 4x6 transparencies and cut it so that flips open to reveal the photo underneath.
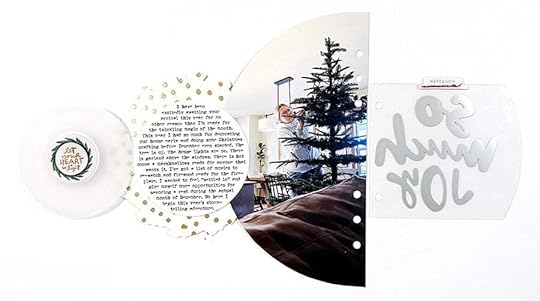
I wrote out my story and then added it to a 3.5 inch circle in Photoshop before printing and punching it out with a 3.5 inch circle punch.
I put together a quick tutorial showing you how to arrange your text in a circle in Photoshop here:

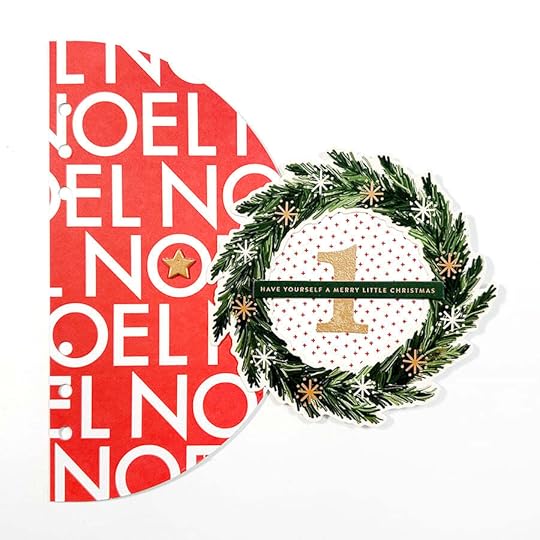
To create the vellum circle flap I designed a 3.5 inch circle + flap and cut it out with my Silhouette. I saved the file for you (includes a png, a svg, and a .studio file) and you can download it below.
Download the Digital Package here.
On the outside of the vellum circle I added one of the gold rimmed number circles from the Main Kit. On top of the circle I printed "Dear December, Love, Ali."
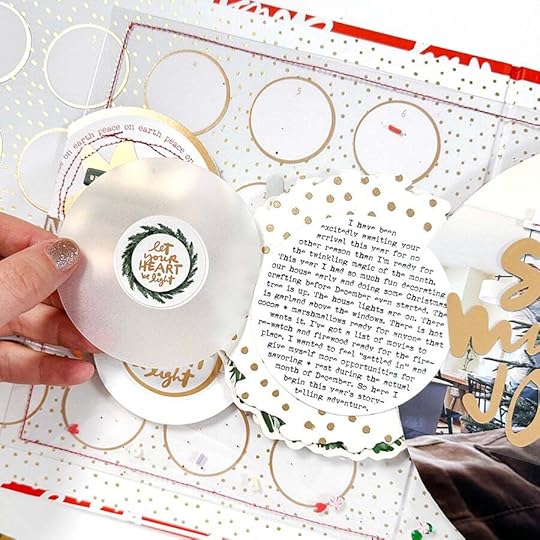
On the inside of the vellum flap I layered two circle stickers from one of the sticker sheets in this year's
Sticker Advent Calendar.
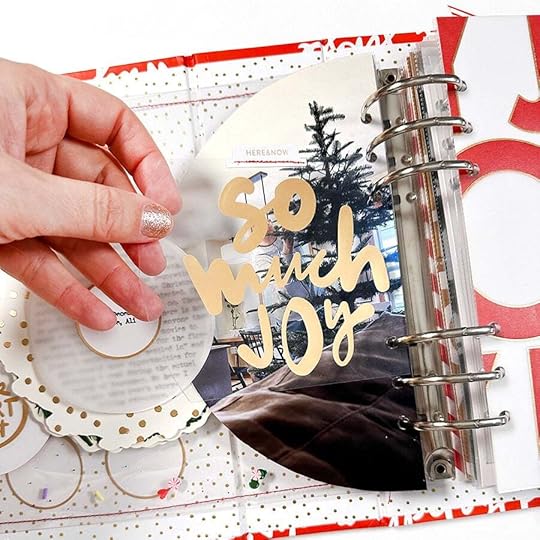
Along the top of the "so much joy" transparency I added a
gold foil tab sticker and ran it through my sewing machine to add that little bit of red.
Again, welcome to December! Let's have some fun getting our stories told this month.
December Daily® 10x8 Album
December Daily® 2023 Main Kit (digital available)
December Daily® 2023 Advent Calendar
December Daily® Gold Foil Tab Stickers
December Daily® 4x6 Specialty Journal Card Set (digital available)
3.5 Inch Circle Punch
Basic Supplies listed on my Amazon Storefront (trimmer, 6 hole punch, etc)
Printers + Papers (printable vellum, etc)
Scrapbook.com Rolling Adhesive


