
Ali Edwards's Blog, page 43
September 20, 2023
December Daily® 2023 | Paint + Play with Jill 03
Welcome back to Paint + Play with Jill! This week I am keeping it simple by showing you a few examples of how to create patterns with the stencils and stamps that have homes for journaling. My hope is that these projects will inspire you as a jumping off point to come up with even more ways to create journaling spots using this year's mixed media supplies!
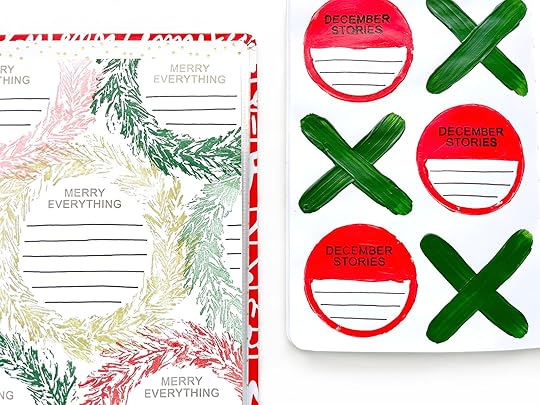
For my first pattern, I was inspired by the patterned paper in this year's collection with the tiny hand drawn red and green X's and O's. I thought it would be really fun to blow up this pattern big enough to fit journaling in the O's. Then I remembered that we have a fun 6x8 Circles stamps set that would make the perfect O shape!
I chose to create this pattern in the Floral Art Journal because it perfectly fits a 3x4 grid of X's and O's and because it is an easy size to make a sample pattern in. But you could easily do this on cardstock to fit into your album.
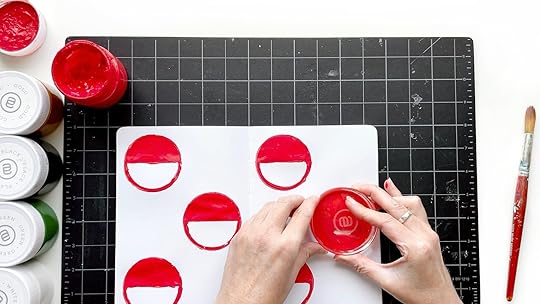
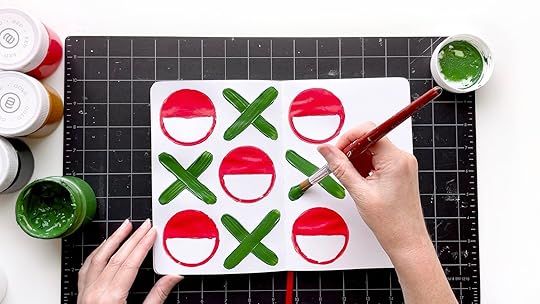
To create this pattern, I cut out a sample X and O to help me figure out the configuration of my pattern. Then I stamped all of the O's with red acrylic paint using my sample X for spacing. I did have to fill in the stamped O's with more paint after stamping them but that's just part of the process of stamping with acrylic. Then, I took a big round paint brush and painted green X's in between the O's. I tried to keep them loose (and not perfect) to maintain the painterly look.
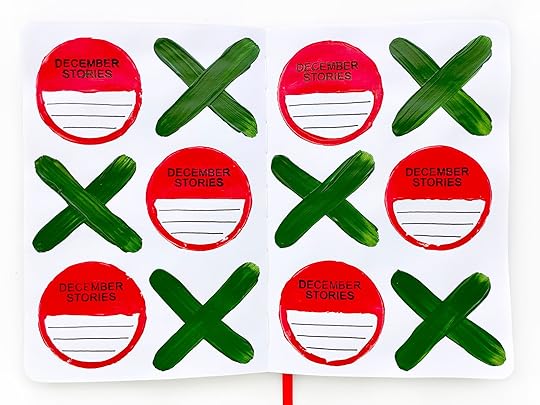
To finish off this pattern, I stamped the tops of the O's with "December Stories" in black Stazon ink and hand drew some black journaling lines.
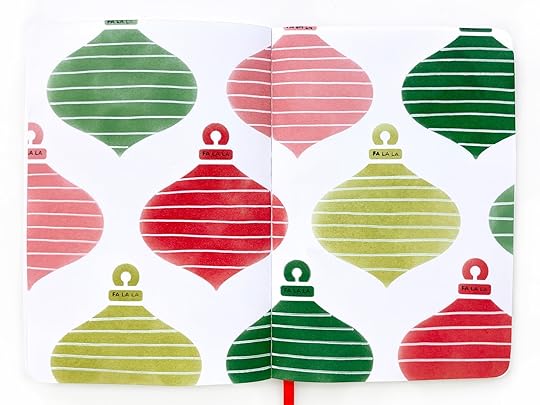
For my second project, I pulled out the large ornament stencil because it has a nice big surface for journaling on. I envisioned a page of colorful ornaments for my journaling spots, so I pulled out Ali's crafters inks so I could use the red, pink and all three of the greens. I created most of this one off camera so if you would like to see how to use the paper pouncers with the ink pads, check out Ali's example videos in the product blog post. However, it is a very similar technique to what I've been showing you with the makeup sponges and acrylic paint. If you do not have the paper pouncers or other ink blending tool, you could try the makeup sponges for a similar effect.
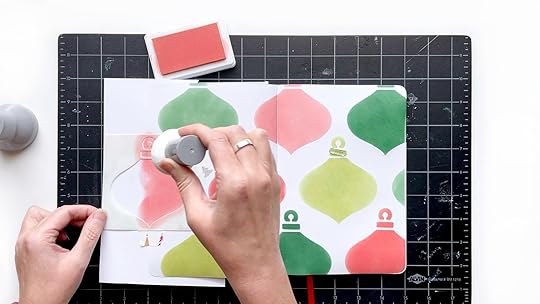
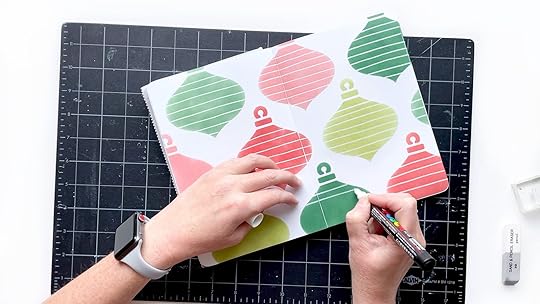
After creating the ornaments in a rainbow of Christmas colors, I grabbed a white Posca paint pen and hand drew white journaling lines on all of the ornaments. Then to finish it off, I used the little "falala" stamp from the tab stamp set to add a little detail to the top of the ornaments.
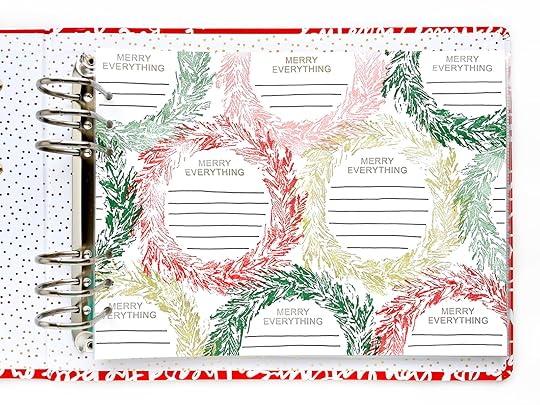
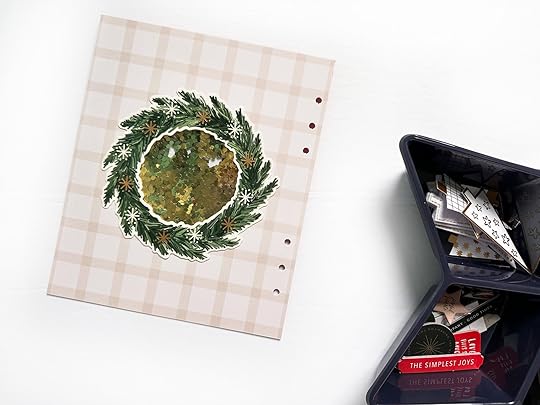
For my last project, I grabbed the 6x8 wreath stamp set because it has a huge spot in the middle that is perfect for journaling. I loved the rainbow of Christmas colors I used in the previous ornament page, so I grabbed the same colors for a similar look. I chose to do this one on cardstock rather than in the journal, because it is much easier to get a clear impression on a large stamp like this when you have a perfectly flat surface.
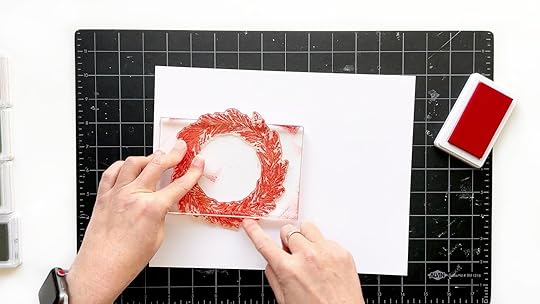
This wreath stamp is very large and will not fit most standard stamp blocks. If you have a stamping platform, that might be your best bet for this stamp (as Pam showed us in her first lesson). However, I do not have one so I grabbed the 4x6 block from Ali's shop and made it work! You can see that it just hangs over the edge a little on two sides so when I stamped, I just used my fingers to press down on those parts to get an even stamp. It worked out just fine, and I only had to do that for the first two impressions because the rest were just partial wreaths.
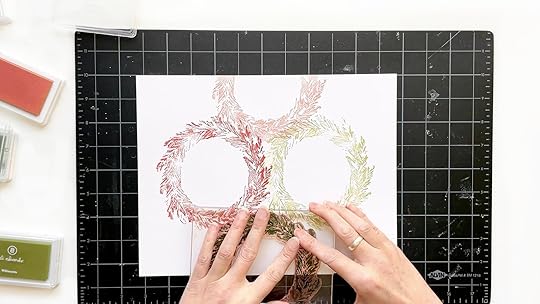
After creating a colorful grid of wreaths, I stamped "merry everything" in gold ink at the top of all of the wreaths and hand drew black journaling lines. I trimmed a quarter inch off the bottom of my paper to make it an outside of the page protector size and punched holes to add to the 10x8 album.
I hope this post inspired you to look at your supplies in new ways, and I challenge you to come up with even more ways to use this year's collection to make your own patterns with journaling spots! Let me know if you have any questions about my project and I will see you next week with more mixed media play!
You can find me on Instagram as @jill.drangsholt
SUPPLIESWreath 6x8 Stamp Set Tabs 4x6 Stamp Set Circles 6x8 Stamp Set Paint Pack Holiday Stencil Pack Paper Pouncers Stamp Shammy 2.75" Ali Edwards Round Acrylic Stamp Block 4x6" Ali Edwards Rectangle Acrylic Stamp Block Crafter's Ink (Redwoods, Rose Garden, Willamette, Olympia, McKenzie, Gold) White Posca Paint Pen


September 19, 2023
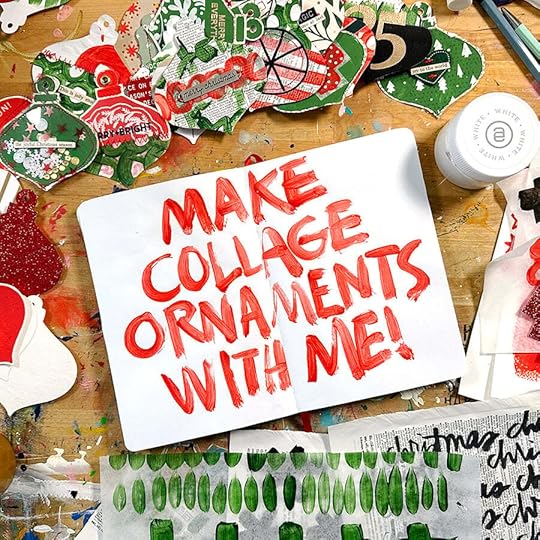
Mixed Media Collage Ornaments With Ali | Creating Layers
I'm back today with the next video in my series where I'm making mixed media/collage ornaments.
In the video I'm sharing how I'm building these ornaments using layers. I also photographed each one I've done so far so you can see them up close and see the magical mess!
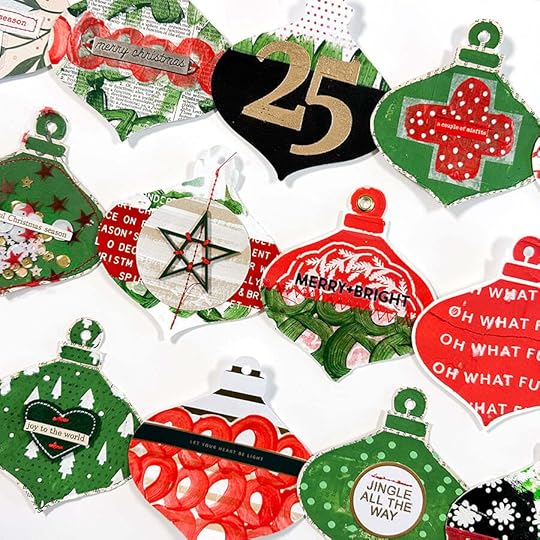
I think I'm at 37 on my way to 100 and I got out the gelli plate to make some more papers today.
Here's a fun image of all of them together so far:
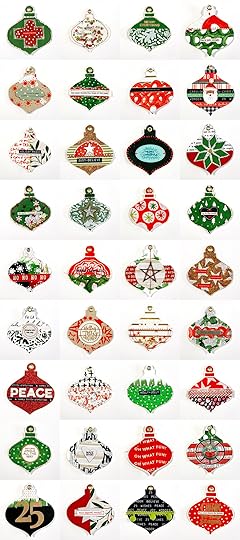
Most of the ornaments above include our new paints, stencils, and silkscreens.
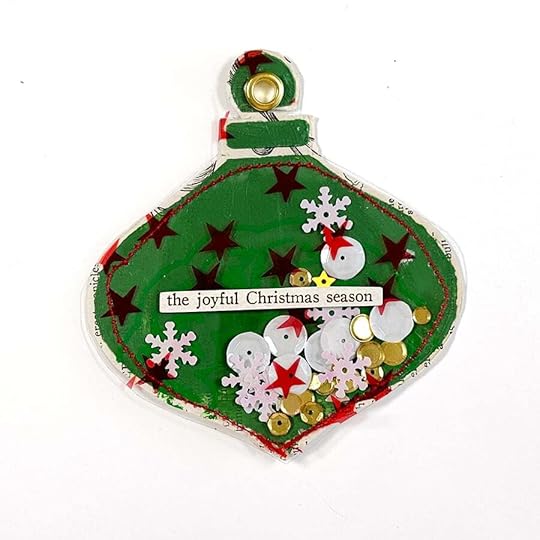
Here's a closer look at each one I've made so far:

Book paper + green paint + red paint on deli paper + white POSCA paint pen dots + word/phrase sticker (stitched on).
Watercolor paper background + silkscreen on top of transparency using green paint + sequin mix.
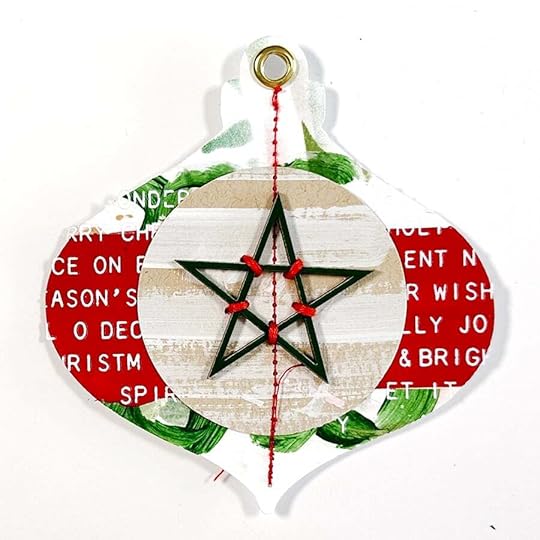
Star stencil + red paint mixed with texture paste + Kraft cardstock + chipboard + stitching.
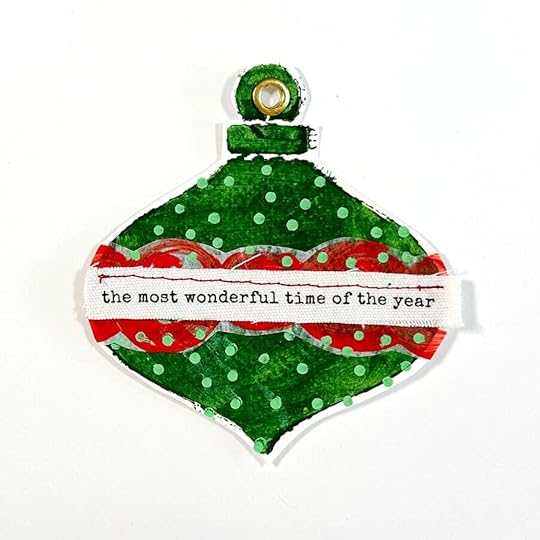
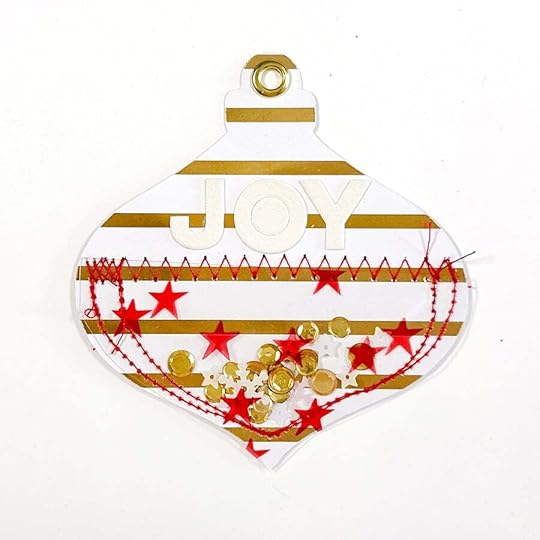
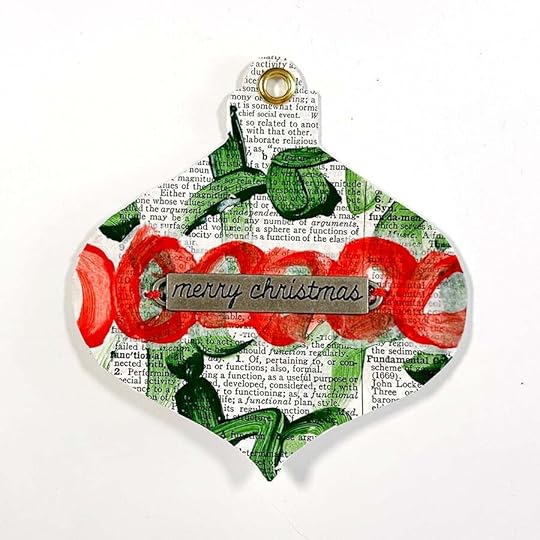
Green painton white cardstock + red circles painted on deli sheets using red paint (adhered with gel medium) + canvas word strip + POSCA paint pen dots.
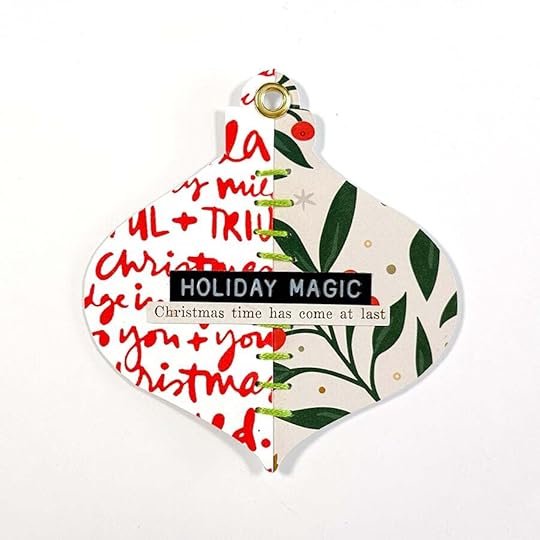
Text silkscreen with red paint on white cardstock + pattern paper from 2022 December Daily® collection + Tim Holtz label maker sticker + Tim Holtz phrase sticker + embroidery thread down the middle.
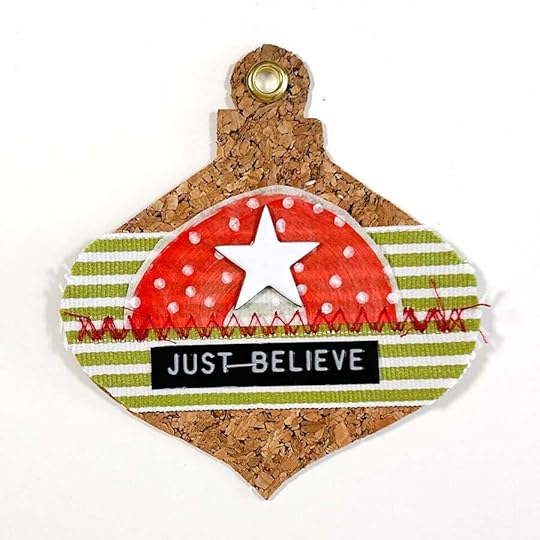
Cork paper + green stripe ribbon + painted 1/2 circle on deli sheet + stitching + cork star + Tim Holtz label sticker.
Old book paper + green paint mixed with texture paste with stencil + sequin mix + pattern transparency + stitching + Tim Holtz phrase sticker.
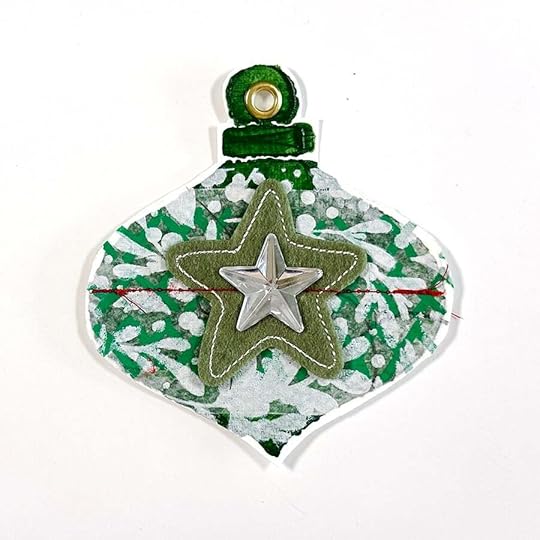
White cardstock + green paint and stencil + green Posca paint pen on deli sheet + white paint with silkscreen + felt star + glass star + stitching.
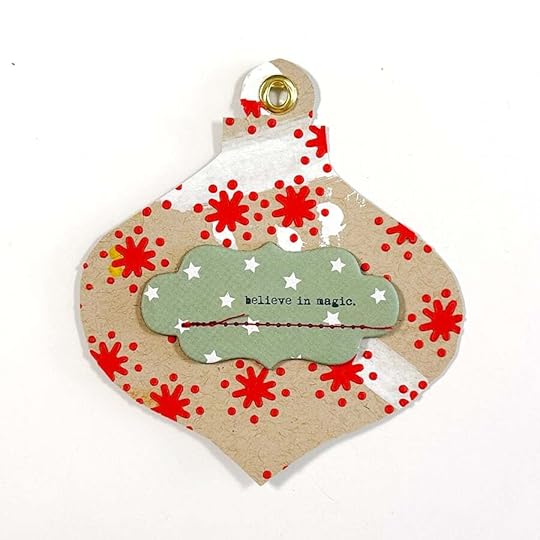
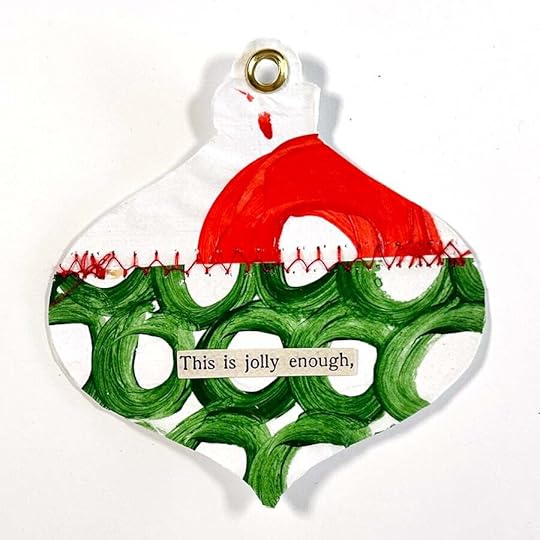
White cardstock with messy paint + stencil with texture paste + dotted stamp + washi tape + stitching.
Watercolor paper + red paint and stencil + silkscreen wreath with white paint + green paint on deli sheet + stitching + Tim Holtz rub on.

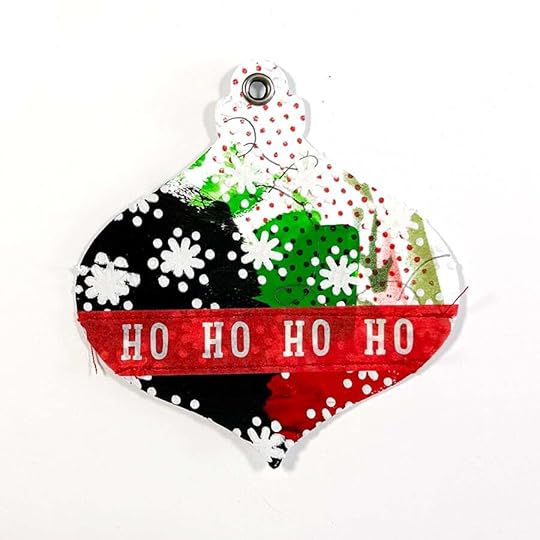
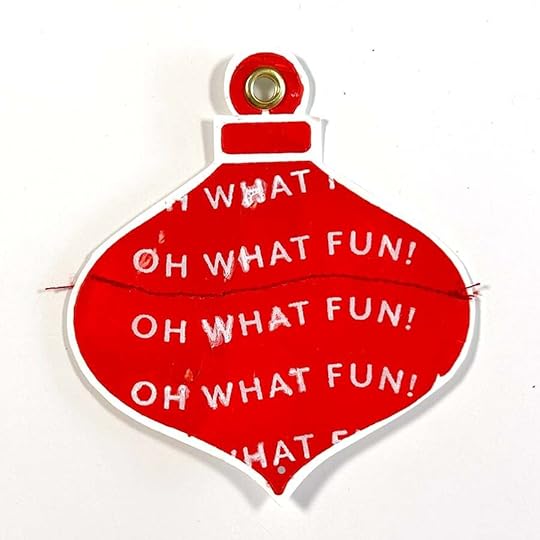
White cardstock + fa la la tissue paper + silkscreen with black paint + canvas holiday phrases with stitching.
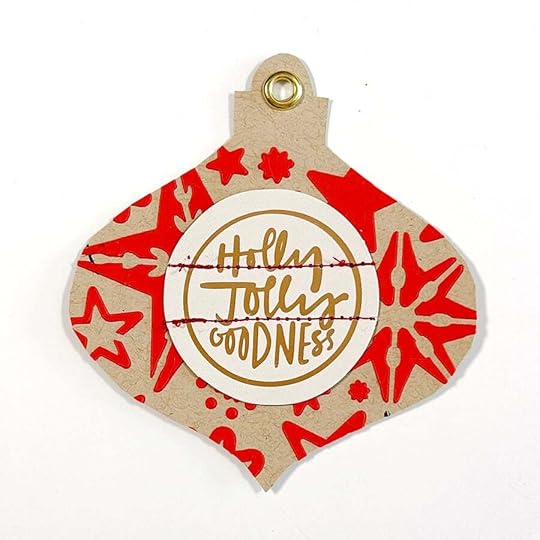
Kraft cardstock + red paint mixed with texture paste and star stencil + circle embellishment + stitching.
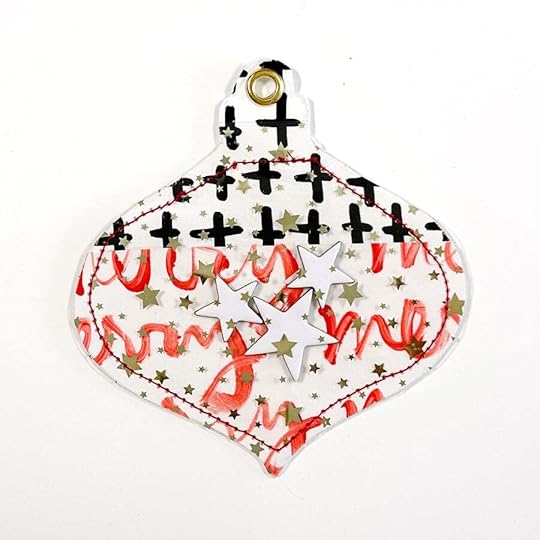
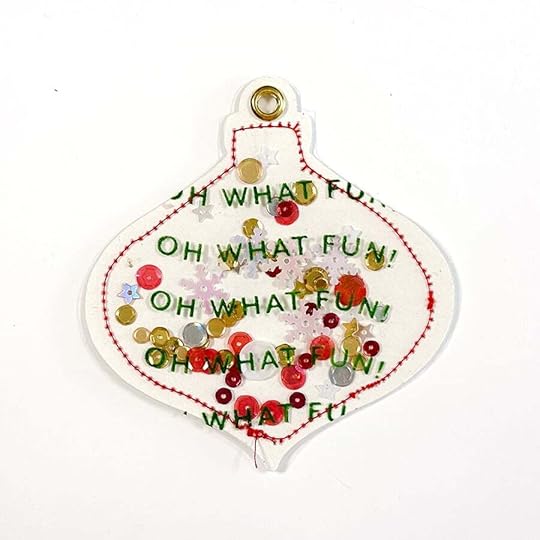
Watercolor paper + hand painted deli sheets with red paint and black posca paint pen pattern + star transparency to create the shaker page + chipboard stars inside.
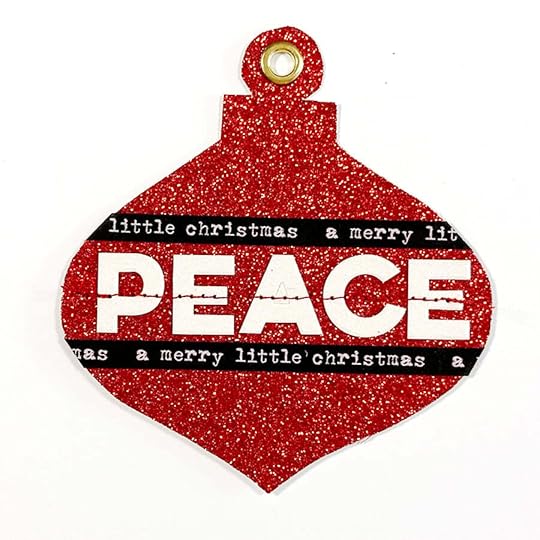
Red glitter paper + white cardstock stickers (stitched on) + washi tape.
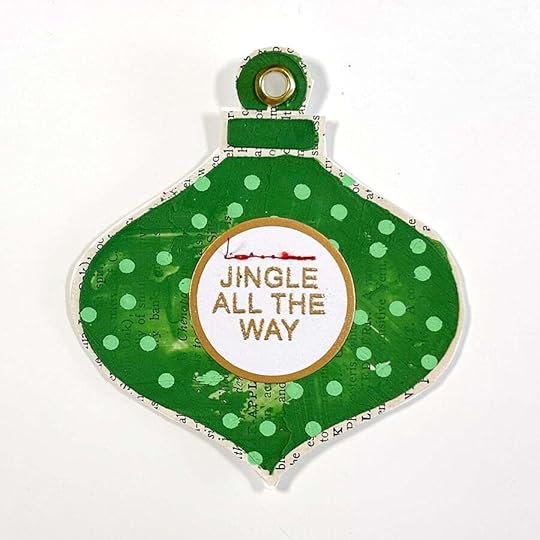
Book paper background + green paint with texture paste and stencil + Posca paint pen dots + gold circle sticker + Jingle All The Way stamp with gold embossing powder.
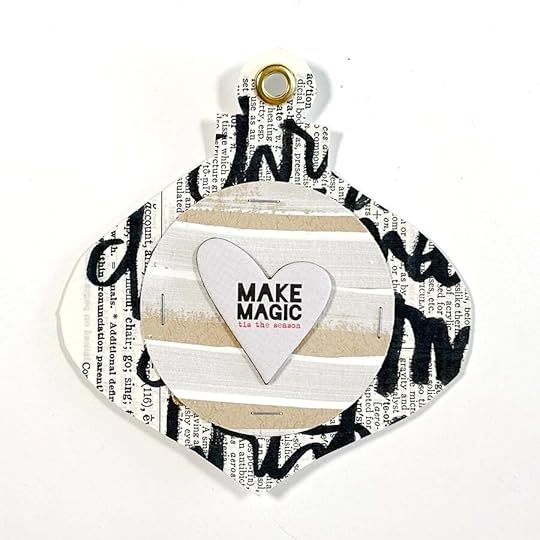
Black paint on book paper + white painted strips on Kraft cardstock + heart chipboard + Tiny Attacher.
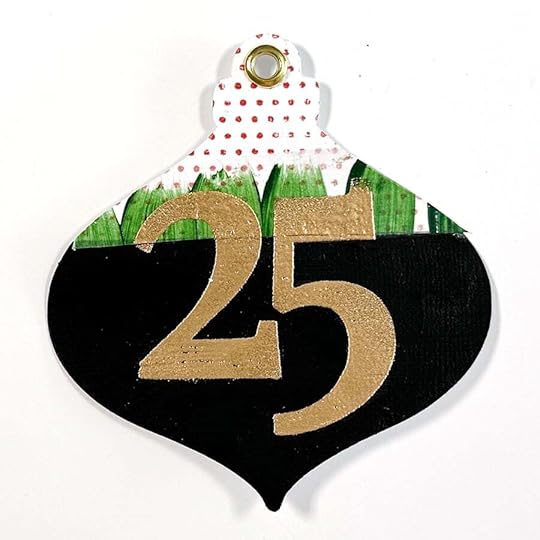
White cardstock + dotted stamp + green paint on deli sheet + black paint + number stamps + gold embossing powder.
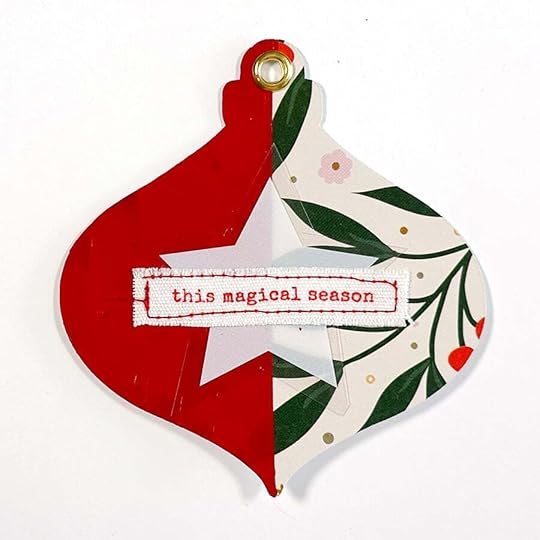
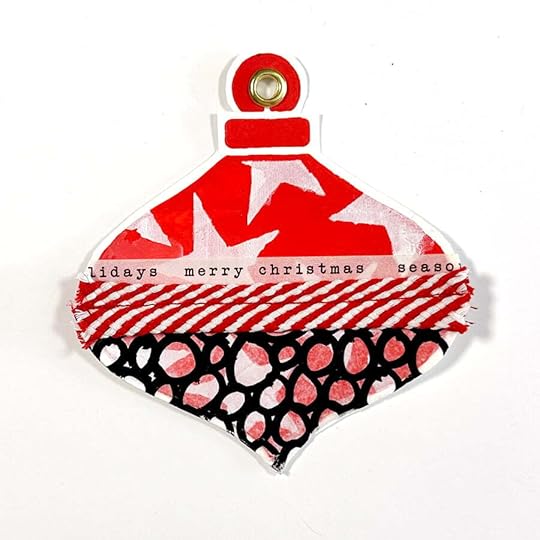
Pattern paper + red paint + white star from transparency + canvas phrase strip + stitching.
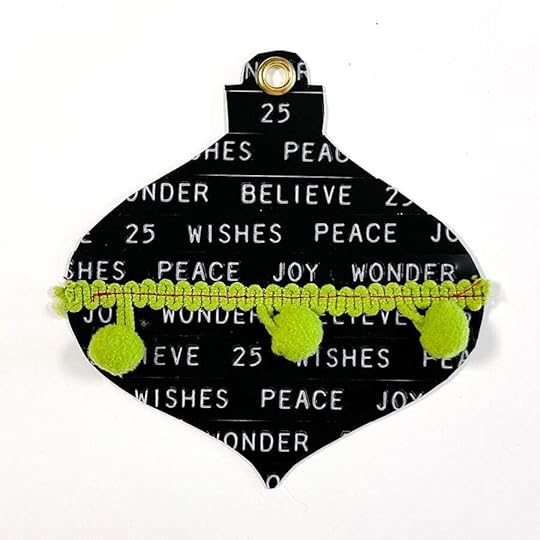
White cardstock + Tim Holtz label tape + green ball trim + stitching.

Watercolor paper + red paint and texture paste and stencil + white Posca paint pen + "cheers to the season stamp" + gold embossing powder + Tim Holtz label sticker.
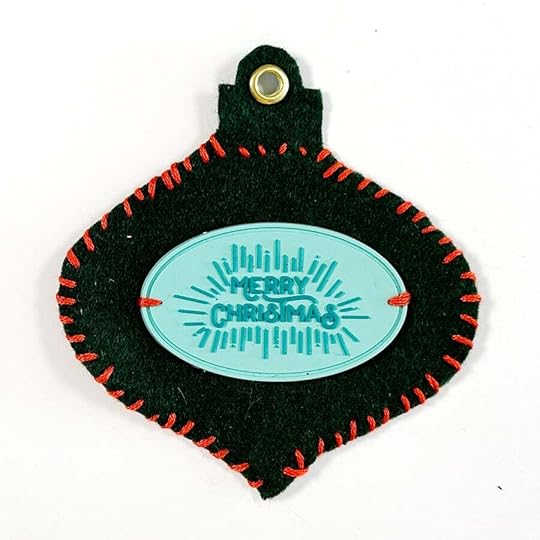
Dark green felt + rubber embellishment (from a December Daily® collection a few years ago) + red embroidery thread.
White cardstock background + red paint + green painted deli sheets + Tim Holtz white rub ons + painted Kraft circle + stitching + wood veneer stars + embroidery thread.
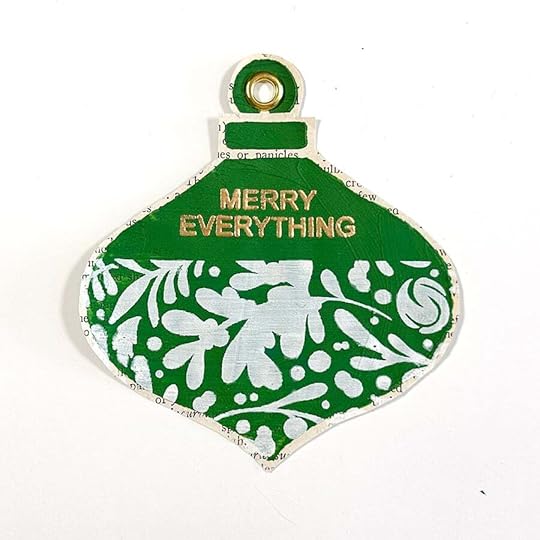
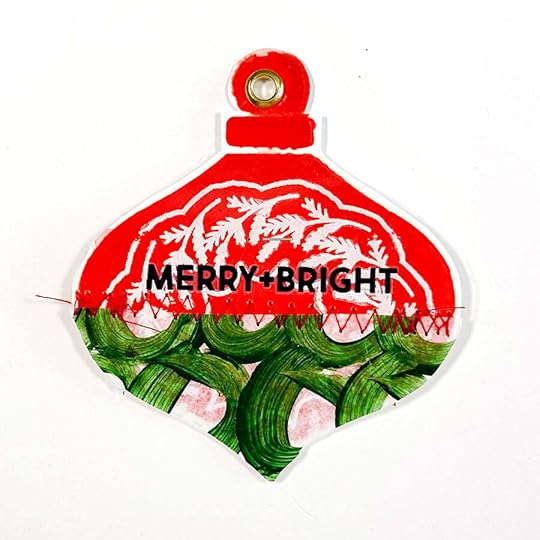
Book paper + green paint with texture paste with stencil + white paint and silkscreen + "merry everything" stamp with gold embossing powder.

Watercolor paper + red paint mixed with texture paste with stencil + white paint circles + embroidery thread.
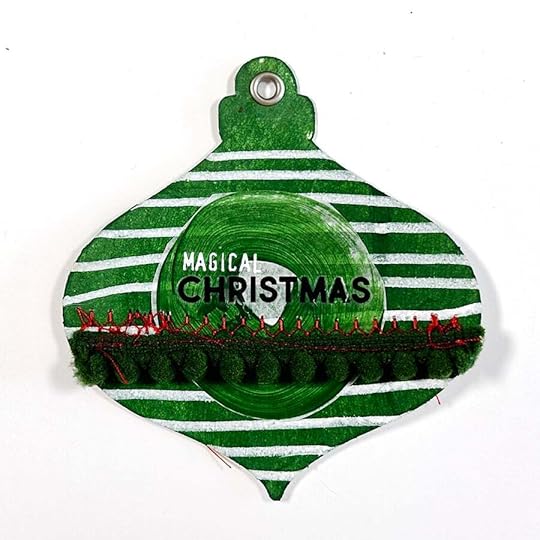
Watercolor paper with green paint + white Posca paint pen lines + green circle paint on deli sheet + red stitching + green pom trim + Tim Holtz rub ons.
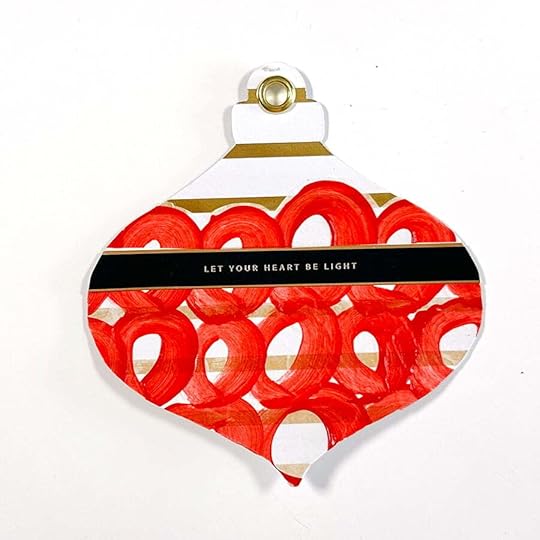
Gold foil pattern paper background + red painted circles on deli sheet + strip sticker from 2023 Advent Calendar.
Gold stripe pattern paper + glitter cardstock alpha + red star transparency + sequin mix + stitching.
Watercolor paper + red paint mixed with texture paste + white paint and silkscreen.
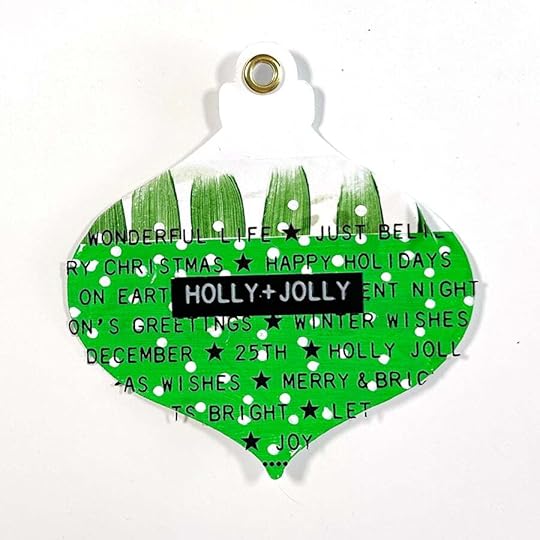
White cardstock + green painted lines on deli sheet + bright green paint + Tim Holtz rub ons + Tim Holtz label stickers.
Watercolor paper + red paint with texture paste and stencil + white paint and silkscreen + red stripe ribbon stitched + washi tape + black Posca painted pen circles on deli sheet.
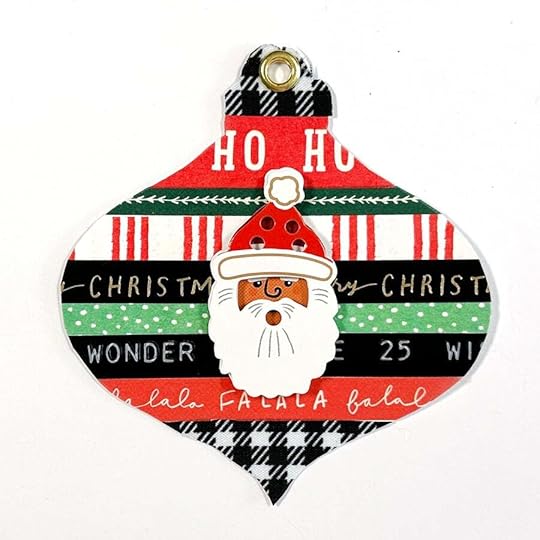
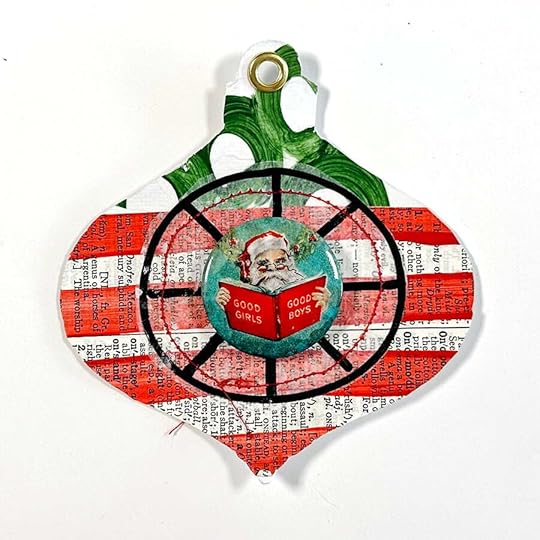
White cardstock + a variety of washi tapes on top (so fun) + Santa from 2022 December Daily® collection.
White cardstock + red circle painted deli paper + green painted circles on deli paper + stitching + Tim Holtz phrase sticker.
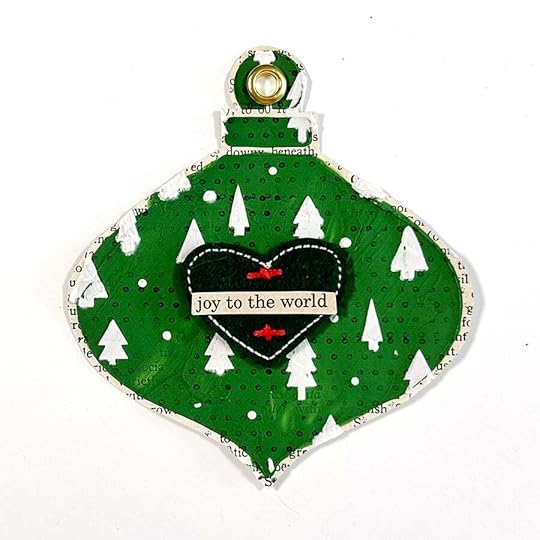
Book paper + green paint with texture paste mixed in with stencil + tree stencil with texture paste + felt heart + embroidery floss + Tim Holtz phrase sticker.
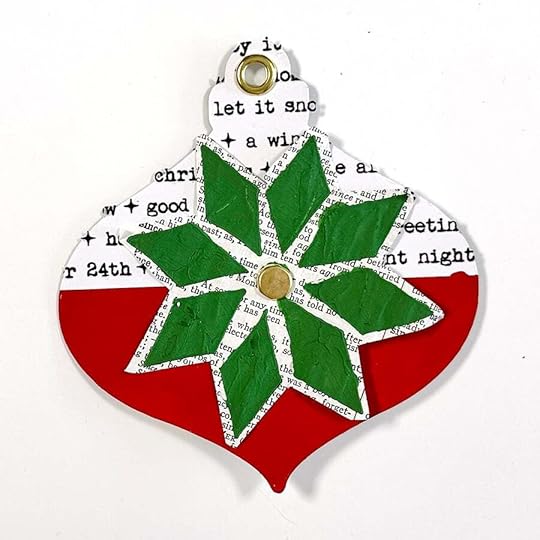
White cardstock + Tim Holtz rub ons + red paint + star stencil with green paint with texture paste on book paper.
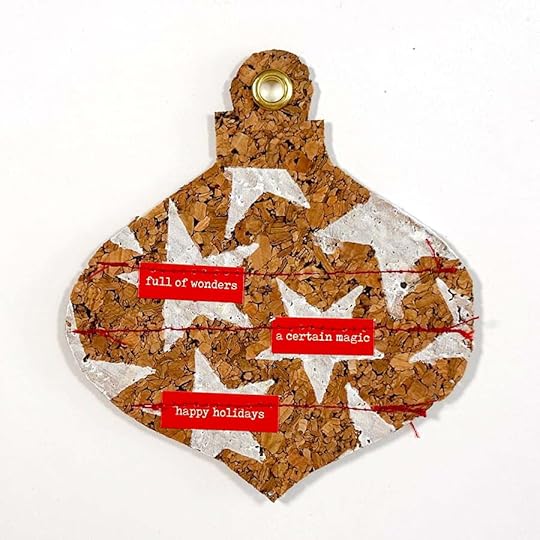
Cork paper + white paint with star silkscreen + phrase stickers + stitching.
Book paper with green painted words on top + red painted circles on deli sheets + Tim Holtz metal charm + embroidery floss.
White cardstock + green painted circles on deli sheet + book paper with red painted lines + black Posca paint pen pie chart + stitching + Tim Holtz metal circle button.
SUPPLIESDecember Daily® Stencils
December Daily® Paints
December Daily® Silkscreens December Daily® Stamps Watercolor Paper (originally offered with One Little Word®) Watercolor Paper from a notebook (140lb) Dylusions Star Flurry Stencil (this is the one I called a poinsettia) Tim Holtz Rub Ons (similar) Tim Holtz Christmas Sticker Book (similar to the one from my stash)Tim Holtz Label Stickers Embossing Powders Versamark Embossing Ink We R Memory Keepers Hole Punch Texture Paste Deli Sheets Paint Brushes Matte Medium or Gel Medium (use either as an adhesive) POSCA Paint Pens Gold Eyelets Crop A Dile Eyelet Setter Embroidery Floss Sewing Machine Sequin Mixes Felt Plastic Pots for Paints
September 18, 2023
December Daily® 2023 | Plan + Play with Linda 03
Hi everyone! It’s Linda and I’m back again for the third segment of the Plan & Play December Daily series. This project is tons of fun, and there is no “right” way to do it, but it can also be intimidating because it is a lot of work. That said, there are things you can do before December to get yourself ready for the project and make it more manageable.
Last week we discussed how you can organize your products and come up with a plan to collect your stories/ideas during the month. Today we are going to be diving into creating with the products and setting up some ideas for your album. This is where the play really comes in!
FOUNDATION PAGESOne way that you can really set yourself up for success in this project is by creating foundation pages in your album. Before you say “foundation pages aren’t for me” and skip this section, I want to say, just like this project overall, there is no “right” way to create foundation pages. In this section I am going to go over 3 “levels” of foundation pages, from the most prepped to the most minimal. And, even if you decide that foundation pages in any form truly aren’t for you, some of these ideas can be adapted for your album during the month of December as well!
Before we dive into some ideas for foundation pages & using the supplies, let’s go over some basics.
What is a foundation page? The concept of foundation pages is the idea of creating a base page using products or other ideas that will serve as a starting point for you during or after December when you go to put your album together.
Why create foundation pages?
So you can have fun playing with products now when you’re excited for it! To make putting your album together easier/quicker if your holiday season gets busy. To make putting your album together easier/quicker if you start feeling burned out by this project towards the end.One way to create foundation pages is to completely design and create a page so that all you have to do during the month of December is add in your words + photos. This can be great if you expect to have a super busy month and/or you want to play off your excitement for playing with the products now.
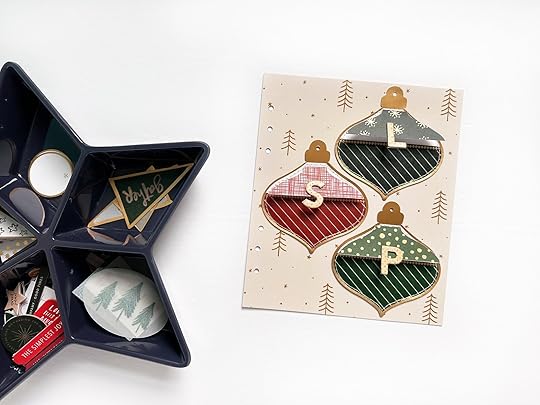
Creating a Full Foundation PageIn the video below I put together a full foundation page so that, in December, I only need to come back and add words + maybe photos. This will be a great one to put together on a day that I am busy and/or don’t have a day specific story.
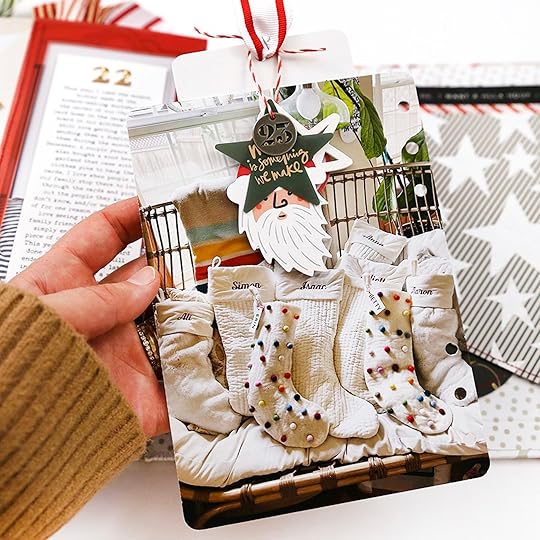
For this page I used the ornament pockets + some papers from the main kit to create flip up inserts for 3 of the ornaments. I added alphas from my stash as tabs for each flip up that represent the initials of my family members. During the month of December, I can use this page on a busy day when all I want to do is add a number + some words. Or, if I have more time, I can print photos to add under the flaps.
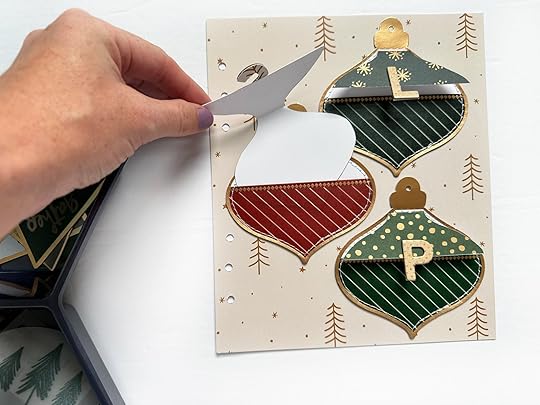
For a lot of people, foundation pages like the one above don’t work because you don’t want to be so constrained when it comes to telling your story because you don’t know what is going to happen yet on any particular day. Personally, I can only do a few fully prepped foundation pages and instead prefer to work with loose foundations. You can see that, even with the page above, I didn’t glue the number down so I have some flexibility as to when I use it during the month.
Creating Loose Foundation Kits/PiecesIf full foundation pages are too much for you, or you don’t want to make a ton of them, you can also use loose foundation kits or pieces to help get a head start on your album without being too constrained.
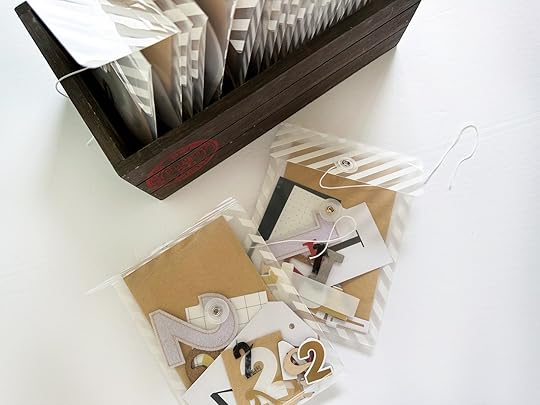
To create a loose foundation, I will pair products together, collect ideas, and slip them into a pocket to store in my album or with my supplies. You can also premake pieces, especially if you want to work with something that will take more time/effort, like mixed media. Instead of a premade page, this is similar to making myself a kit to work with. When it comes to the day I plan to use the foundation kit, I will already have a page idea + products to work with, which will cut down on the time/energy it takes to put it together.
In the video above, I put together a few loose foundation ideas that I can work with in December. I also saved some inspiration images from Ali’s project last year that I can use to work with the products for this year.
Loose Foundation #1: Tags
For the first page, I am using this image from Ali’s 2022 album as my inspiration.
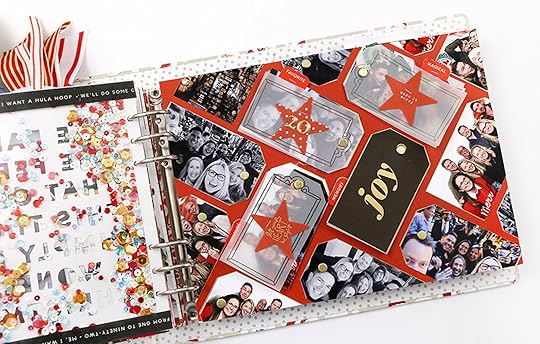
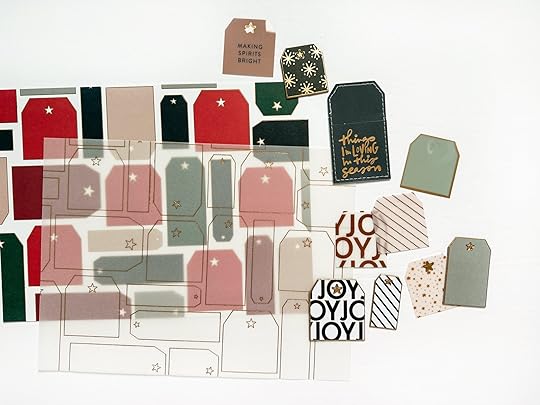
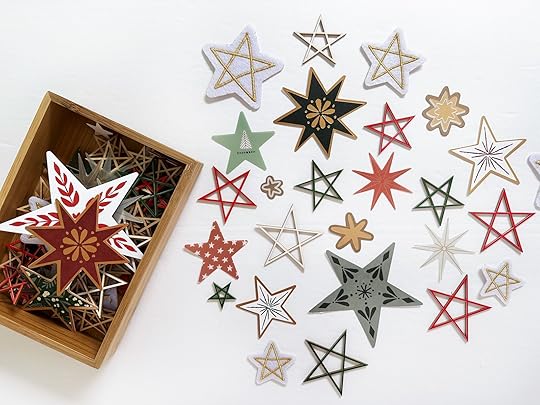
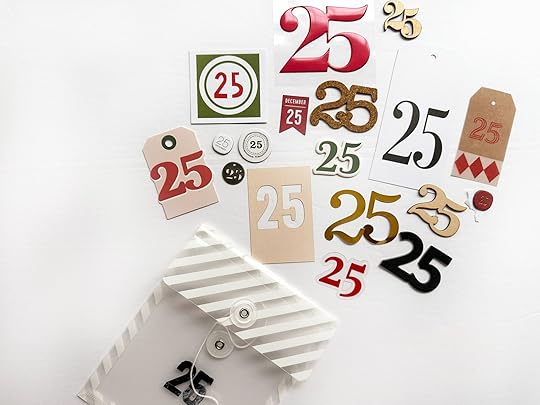
I am going to adapt it to my 6x8 size and this year’s products. Because the tags this year are a variety of shapes I plan to stagger them in a more random pattern. I also have a smaller album to work with, so I will do a full spread rather than just one side, so I have more space to work with. Here is the “kit” I put together. When I am ready to put this spread together, I will pull from these supplies instead of my entire stash to streamline the process.
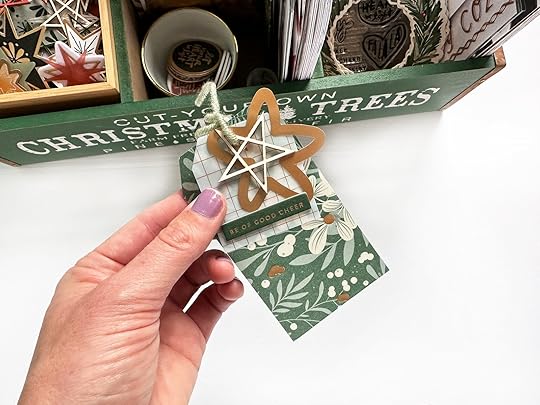
Loose Foundation #2: Charms
For this idea, I started with this image from Ali’s 2022 album as my inspiration.
I love the cluster of charms that Ali added to the top of her page. I decided to create a cluster of charms from this year’s kit/my stash as a foundation piece. During the month of December I will decide where to adhere it in my album.
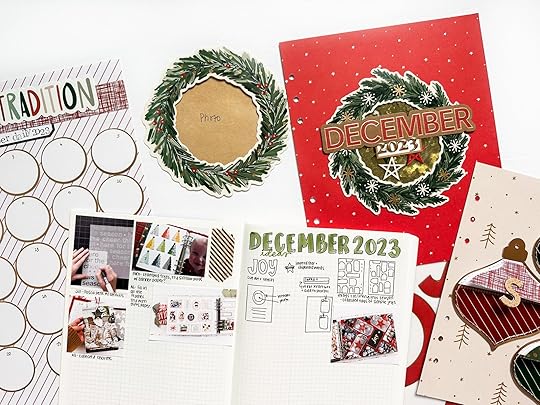
Finally, if creating anything before the month begins is too much, I encourage you to collect ideas. As I shared in my last post, I have a craft planner where I am collecting inspiration that I see online + sketching out some ideas. In the video below I talk through some ideas for using some of the pieces from the main kit.
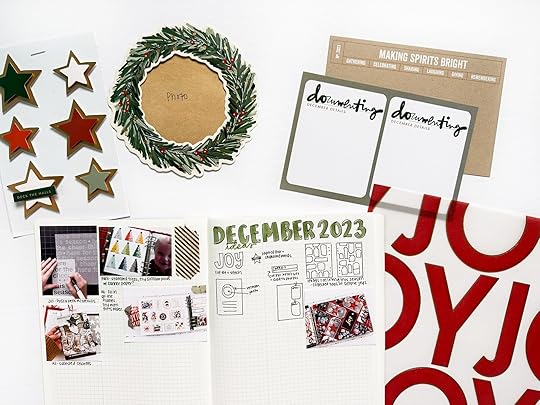
And here are my sketches in my planner so far. I will also share more ideas for using the main kit in my post next week as we wrap up this series.
Whether you want to create foundation pages or not, there are still some things you can do before December gets here. Namely, there are a few pages you might want to include in your album before you get to the daily documenting.
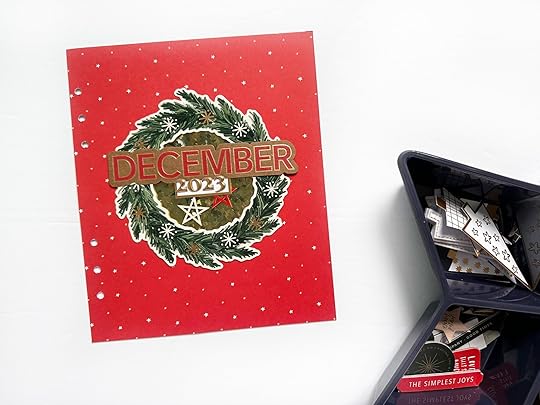
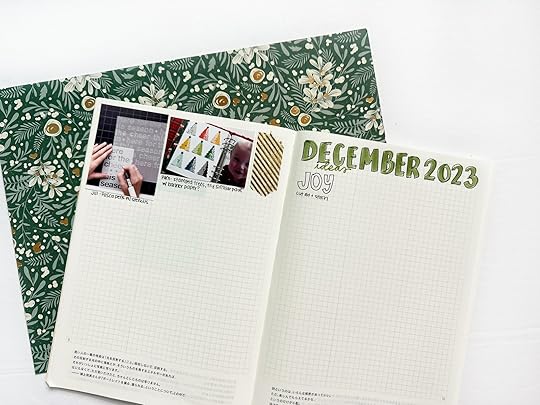
Title PageIn the video below I am creating my title page for my album this year.
In some past years I have included a family photo as my title page and in others I have played with products to create a decorative title page. This December will be a little different for me. Although my daughter is a big part of my life and holidays, this album is going to be primarily just me because she won’t come home from college until more than halfway through my album. So, instead, I this year I wanted to create a decorative start for my album.
If you want to include a photo, you can always create the rest of your title page and save a spot to insert the photo later.
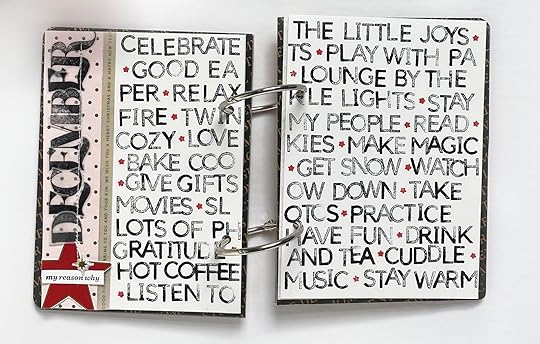
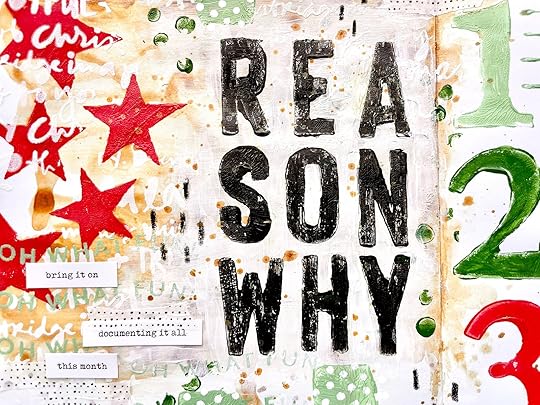
Many people also include a reason why page in their album. Last year I included one with alpha stamping and I intend to make something similar this year closer to December. This is a great way to dig into your products and start playing before December! Here is my reason why from last year.
Last year, Ali created an index in her album where she stamped out the story for each day as she put the album together. This was a fun way to tie the album together. Here is a picture of her index from last year.

You could create a similar set up this year with the circles from the main kit. Then, during the month, go back and add a note to each circle about what happened that day.
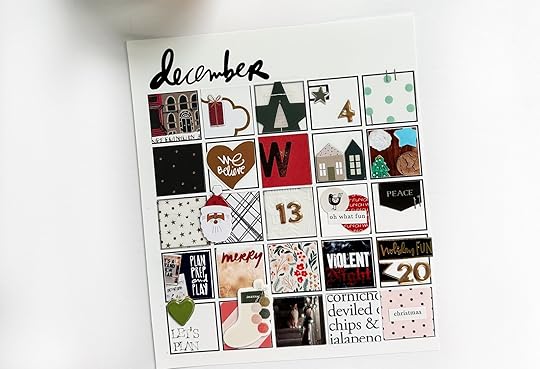
SamplerSimilar to an index, but slightly different is a sampler page. Instead of being a collection of your stories, this is a collection of the products/design you used in your album. Last year, I created a sampler page, and I intend to do that again this year. Instead of going in the album, this was a stand alone scrapbook page to basically document the fact that I was creating December Daily, which is a huge piece of my holiday season.
To create the sample page, I added extra embellishments or pieces to a grid everyday that represented the page I had created for that day. Here is a picture of my sampler page from last year.
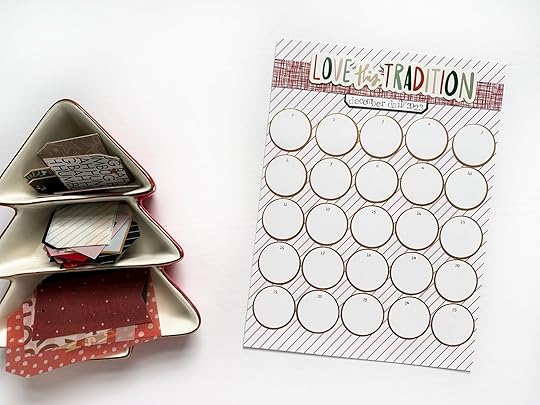
This year, I plan on using the circles from the main kit to create a sampler page. I think it will be a fun challenge to work with the circles and I hope to keep the numbers visible most days. Here is my set up sampler page this year.
I used one of the papers from the main kit as my background and this page is 8x10. I plan to take a letter sized page protector and use my sewing machine to alter it to fit. I added a few embellishments to create a fun title and I adhered the circles down in a grid using temporary adhesive. The circles aren’t perfectly straight because they are temporarily glued down in case I need to lift them up when adding my design for that day. Once the day is completed, I will glue it down with permanent adhesive.
I hope that this post gave you lots of ideas for ways you can begin setting up your album before December. Next week I am going to share even more ideas for using the main kit + adapting ideas for various album sizes.
You can find me on instagram & youtube @lindalovescreating. I will also be over on the @decemberdaily instagram account LIVE today, September 18, at 3 PM EST to answer your questions and chat about the things we talked about in today’s post. Hope to see you there!
September 15, 2023
In Case You Missed It | September 15
Happy Friday, friends! Welcome to the latest
In Case You Missed It. Just a reminder that this is a quick post that will happen every Friday afternoon with all the updates and links that have happened throughout the week. So, let's get to it:
SEPTEMBER RELEASE IS LIVE
This week we released a new Story Kit, Story Stamp, and Stories By The Month kit. This month we also have a One Little Word® Mini Kit and a new Halloween Kit. Find all the details, including Ali's walkthrough videos on the blog now.
DECEMBER DAILY® APPAREL
December Daily® apparel is now available. The tee and sweatshirts fit true to size and are perfect for the holiday season. We will not be able to guarantee the availability of these items after September 17th at 11:59pm ET. The boxing period closes September 30th. Boxes begin shipping October 2nd. Shop the collection here.
LET'S PLAY SERIES
Plan + Play Monday will be led by Linda Jordan, creative team alum, Story Planning contributor, and the instructor behind Plan, Prep, and Play. Linda will be sharing how to set yourself up for success with the project focusing primarily on the main kit. She'll have planning and organizational tips and tools, guidance on selecting your format, streamlining your stash, finding inspiration, and more. Find her posts here. Paint + Play Wednesday will be led by Jill Drangsholt, a creative team alum and frequent class contributor. Jill will be sharing her expertise as a mixed media artist, offering tips and inspiration on using stencils, silkscreens, acrylic paint, and more. Jill's posts will include fun ideas that can translate directly to our December Daily® spreads. Find her posts here. Paper Play Friday will be led by Pam Baldwin, another creative team alum, frequent class contributor, and the instructor behind Playing With Paper. Pam will be doing what she does best: working her magic with products from this year's collection. She'll be demonstrating creative ideas for fun, easy, DIY and interactive elements. Find her posts here.
30% OFF SELECT DIGITALS + CLASSES
Calling all hybrid scrapbookers! We’re offering select digitals and classes at 30% off all month long. This sale is designed to support the members of our community who enjoy telling stories in the digital or hybrid format. From now until September 30th at 11:59pm ET use promo code FALL30 and get 30% off most digitals in the shop. Excludes December Daily® digitals + classes and the Start Here workshop.
NEW CLASSES
2023 DECEMBER DAILY® PREP DAY. Join the December Daily® community for a fun online December Daily® prep day on Saturday, November 18th, 2023. Use this opportunity to finish past December Daily® projects or start working on your project for 2023. The first live video will start on Saturday, November 18th at 10:00 am Eastern. Cost is $5. DECEMBER DAILY® PRODUCT PLAY | TRY THIS. December Daily® Product Play is all about ideas and inspiration for working with physical products from the December Daily® Collection. For 30 days in November, you'll receive one idea per day from the contributors to this class (includes Ali). Ideas in this workshop will focus on physical products from our 2023 December Daily® collection. Whether you are preparing to document 2023 or finishing up telling stories from past years, we hope these fun, creative ideas help you use your products to get your stories told. 2023 DECEMBER DAILY® HYBRID PRODUCT PLAY. Hybrid scrapbooking combines digital products with physical supplies to create paper (or printed) memory-keeping projects. For this class, our contributors will share with fun, creative ideas and inspiration for working with these digital products from the 2023 December Daily® Collection.
PRODUCT Q+ A WITH ALI ON INSTAGRAM
Ali has been answering a wide range of questions, sharing creative product ideas, and more over on our December Daily® Instagram account. All of her content has been saved as a highlight on that account to be enjoyed at your convenience. Find it here.
ORDER ISSUES
If you experienced any issues at checkout, or have questions about the release please reach out to our Customer Service team and they will be happy to help you! Contacting them ensures we are keeping track of these questions and answering them in a timely manner. It's difficult for our team to keep track of all of the questions left on multiple threads/posts on social media with all the excitement-- we are doing our best and we want to make sure your questions get answered! Click here to start a new conversation.
As always, we’re so grateful to have you all as members of this community! Thanks for joining me today and have a great weekend!
December Daily® 2023 | Paper Play with Pam 02
Hello friends! I am very happy to be back with you again, sharing some projects created with the December Daily 2023 Main Kit! You’ll see that I’ve added just a handful of additional pieces from the 2023 collection to these projects; all of them can easily be substituted with supplies you may already have in your stash or other elements from the main kit.
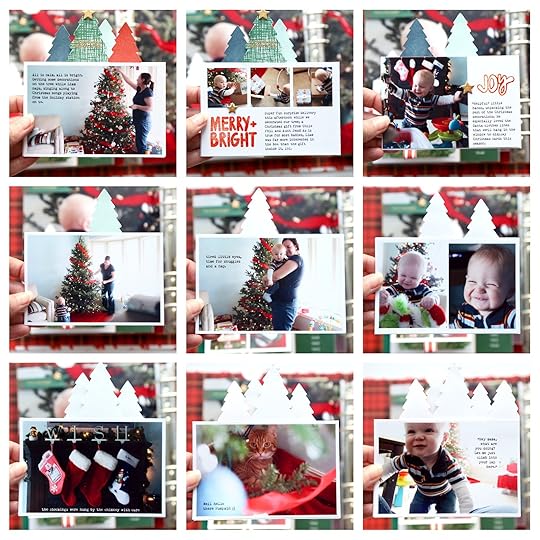
I’m going to switch things up just a bit this week and start with a video overview of the 6 (and a half) projects I made with the Main Kit. In this video, I’m sharing a few ideas for adapting these 6x8 pages into a 10x8 album, as well as some suggested alternatives to the supplies I used that are NOT included with the main kit.
Let’s break these ideas down a little more.
Project #1
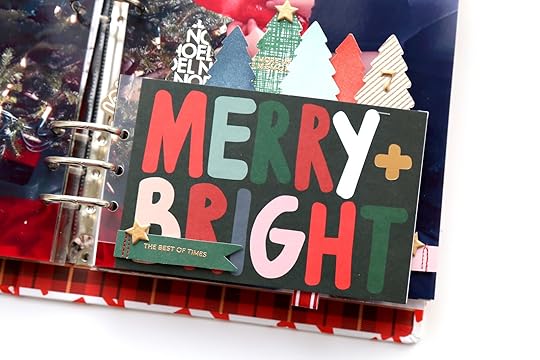
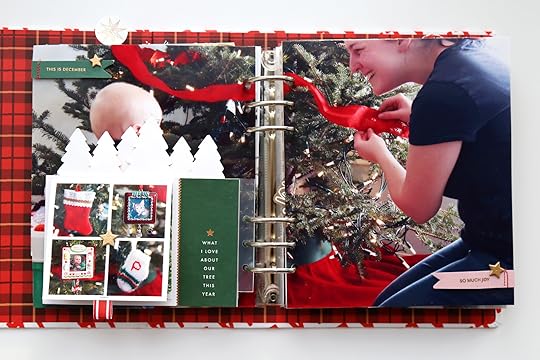
This layout is the perfect combination of many of my favourite things! Super enlarged photo, interactive pockets, flip-ups and a total photo count of 19 images in this single spread.
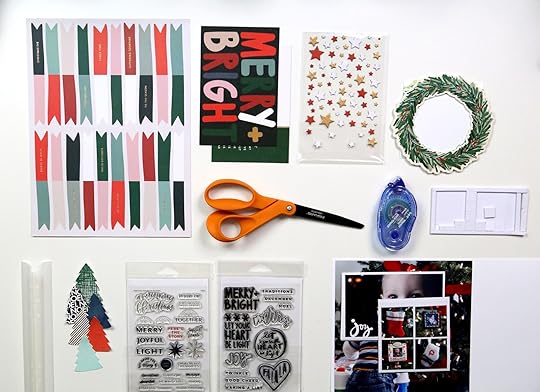
Main kit supplies: Patterned paper, 4x6 journaling cards x2, chipboard stars, cardstock wreath, puffy gold numbers (not pictured). Additional supplies: December Daily 2023 stamps (Trees, Paislee Press, “Merry and Bright”), Rolling adhesive, Dimensional foam adhesive, Scissors, Crafter’s Inks (Deschutes, McKenzie, Columbia, Redwoods, Black Butte), Versamark, Gold embossing powder, Tiny attacher, Red and White Trim pack, Plastic attacher stickers
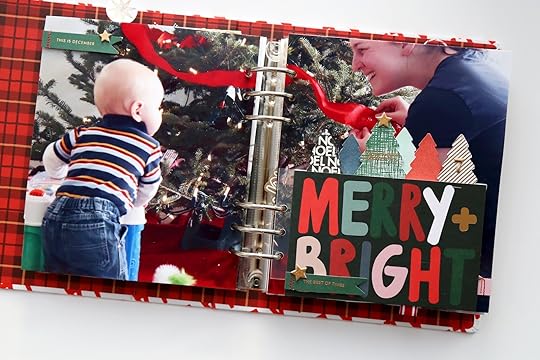
The structure of this layout is based on a full page photo as the background. It spans all the way across 2 pages of my 6x8 album. It could easily be reconfigured to a 10x8 design with a single enlarged photo.
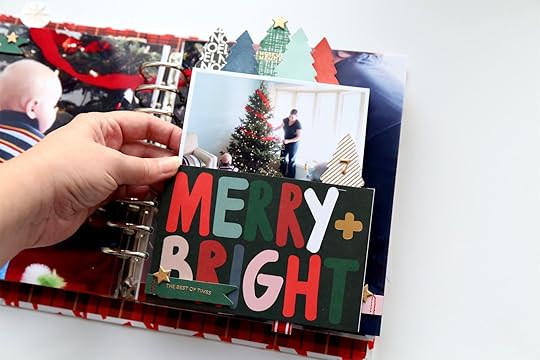
The really fun part about this spread is the pocket that holds a series of additional photos and stories. It’s constructed from 2- 4x6 cards in the main kit, dimensional foam adhesive, and a plastic attacher sticker. I used some of my leftover stamped Christmas trees from last week and converted them into tabs that make it possible to pull the photos out of the pocket. One of my favourite details here is the addition of the Paislee Press “More merry memories” stamp with gold embossing powder on top of the largest tree; just a little nudge to let people know those trees lead to something more.

The photos inside are sized at 3.5” x 5.25”. Some of them have additional journaling, and some of them have some decorative stamping or chipboard stars for a little bit of fun.
On the back of the pocket is the 2nd journaling card with the prompt, “What I love about our tree this year”.
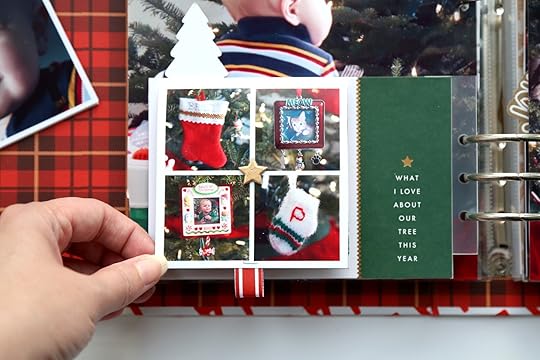
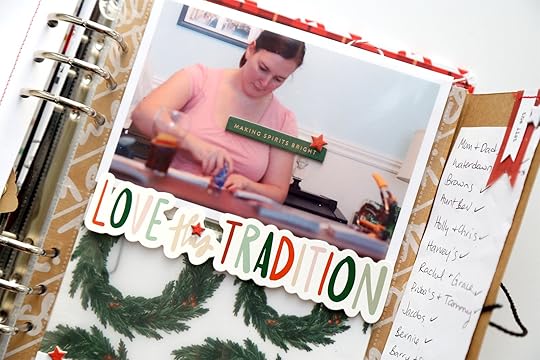
I added a few additional photos and a flip up with this prompt in mind.
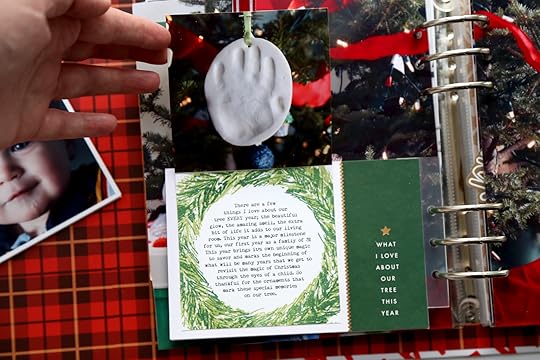
I cut out flags from the patterned paper, adding some stamping with gold embossing powder to create sentiments that felt like a good fit for this story (plus just a little bit of stitched detail with my sewing machine).
And here’s the process video of how this first project came together.
Project #2This little folio holds the story of making our Christmas cards in 2010, starting with the plan, and right through to the finished product. It holds lots of fun ephemera, and the folio keeps it all contained as one unified story.
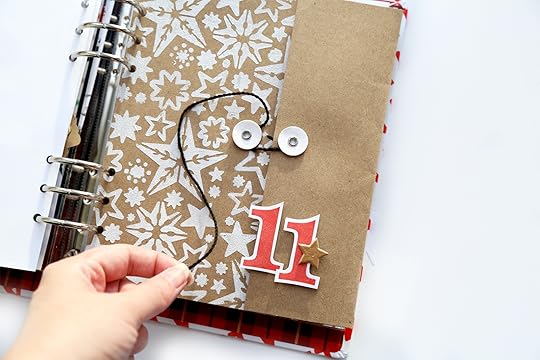
This folio is constructed out of the packaging that held the 10x8 papers in the main kit. I cut the envelope down to fit my 6x8 album, and kept the string closure as a functional element for this spread. Totally inspired by Jill’s mixed media post last week! I very much wanted to try using the stencil and white paint on some of the packaging from the main kit. It turned out so great!
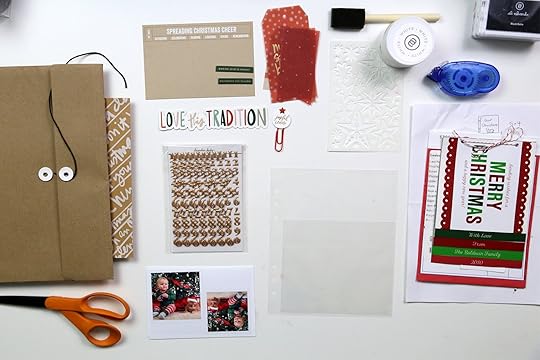
Main kit supplies: 10x8 paper packaging/kraft envelope, main kit box, 4x6 kraft journaling card, chipboard word strips, cardstock title, gold puffy stickers, vellum tags, 10x8 vellum wreath paper (not pictured), chipboard stars. Additional Supplies: DIY paper clip (see week 1), holiday stencil pack, paint pack (white and red), rolling adhesive, scissors, page protectors, number stamps, “Redwoods” crafter’s ink.
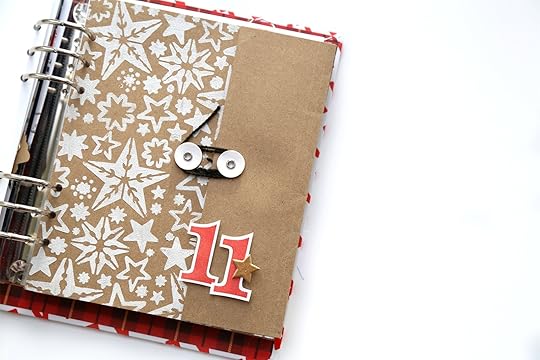
A very helpful feature that makes this layout functional is that the side of the envelope where the holes have been punched is not connected. The left and right side of the page are independent of each other, with the exception of the string closure that keeps them together. This makes it much easier to open fully inside the album and makes turning the pages much easier.
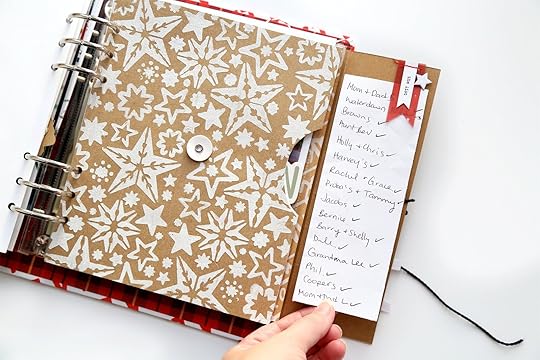
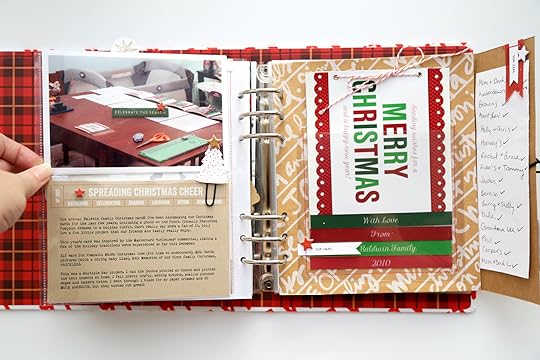
As the folio opens up, each new page reveals a different piece of the story, starting with some ephemera (Christmas card list).
Quick note to mention that any stitching you might like to add to the pieces inside the folio should be done BEFORE you adhere the pages down to avoid the stitching showing on the other side.
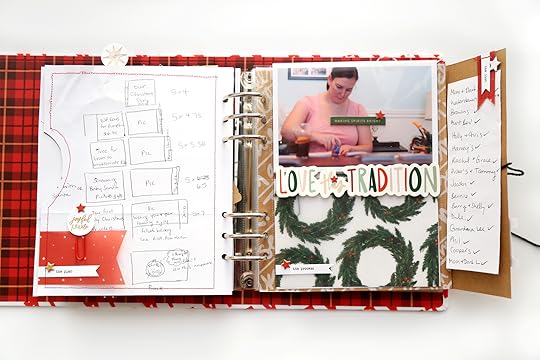
You’ll see in the video a different version of the bottom half of this page protector. After sleeping on it for the night, I decided to try using the wreath vellum pictured here, and I’m very happy with my decision!
The second feature that I really love in this spread is the addition of the page protector inside the folio. I’m pretty sure this idea was inspired by Veronica Milan, and I think it’s brilliant!

The sentiment on the 4x6 kraft card was the perfect addition for this story about making our Christmas cards! I realize it has a 2023 title on it, but I’m totally okay with leaving it as is.
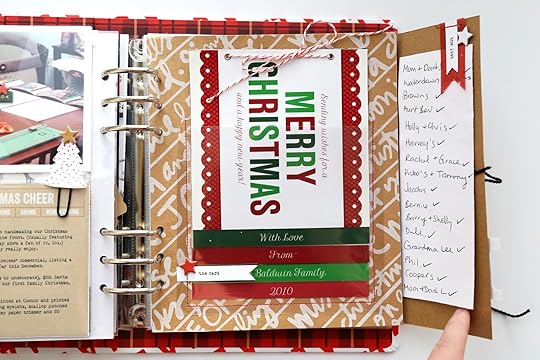
And the final element of this spread is the inclusion of our Christmas card. I cut down a 6x8 page protector and used my sewing machine to attach it. The background pattern here is actually the outside of the box this year’s main kit comes in.
Here’s the process video for a closer look at how this layout came together.
I’m calling this one “Project #2.5”. It’s constructed on the back of the folio, but it could also function as a layout on it’s own. It’s simple and lovely!
Very quick little video to share a bit about how this page came together.
Okay friends, the first 2 projects were definitely a bit more on the challenging side, but I’ve got a few lovely “easy” ones that really highlight some of my favourite pieces in this year’s main kit.
Project #3
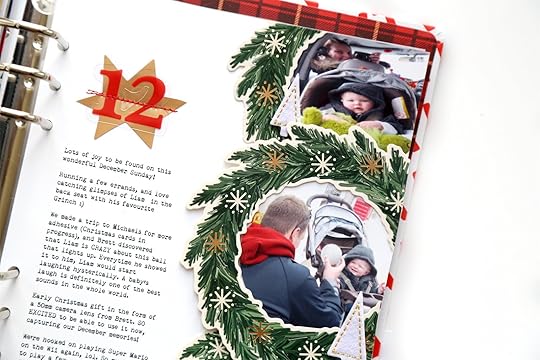
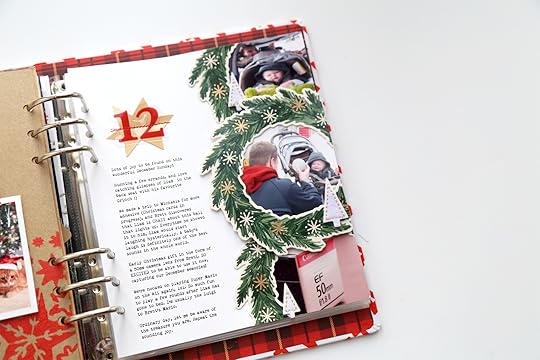
The story for this spread is just a few things that were bringing us/me joy! I went with a very simple design. 6x8 white cardstock background, typed journaling, and 3 of the main kit wreaths that held a few photos from the day.
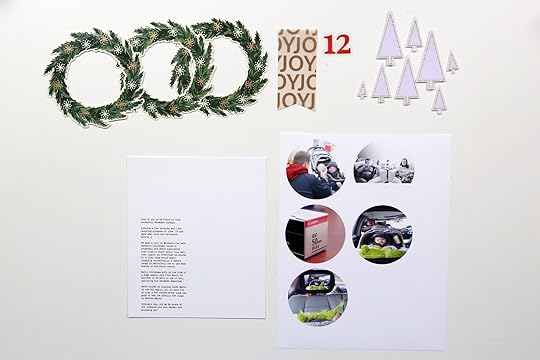
Main kit supplies: Cardstock wreaths, felt trees, plastic gold star. Additional supplies: Red plastic numbers, 3” circle punch, rolling adhesive, dimensional foam adhesive.
Here’s a look at the entire page
And the process video for how this page came together.
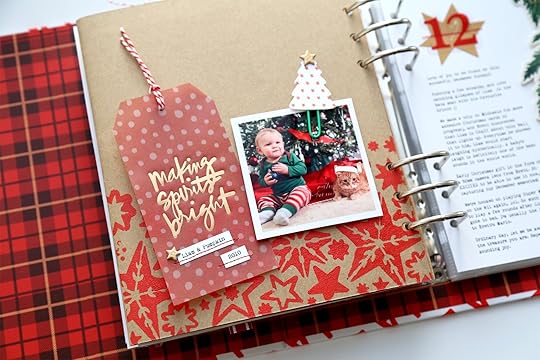
Project #4
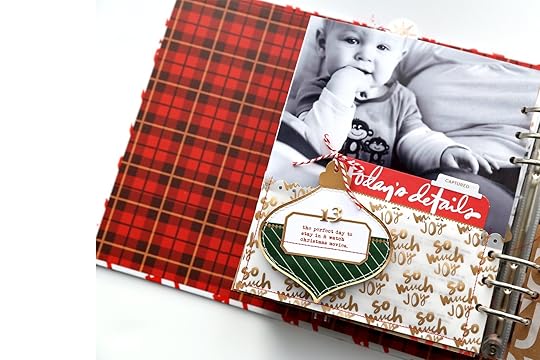
The 4th project also features an enlarged photo and a pocket to hold additional journaling and photos. The starting place for this story was really just about an ordinary day around the house.
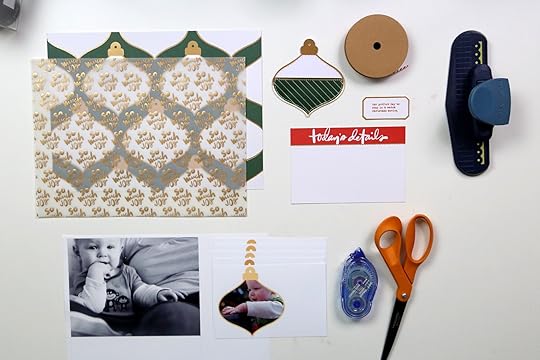
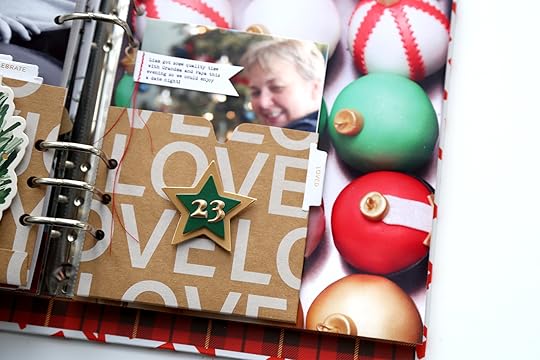
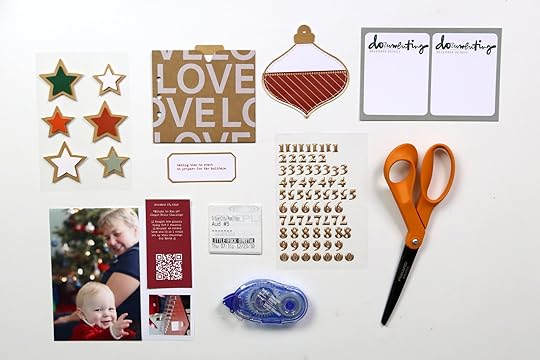
Main Kit supplies: Ornament patterned paper, “so much joy” vellum, gold rimmed phrase labels, 4x6 journaling card, puffy number stickers. Additional supplies: White tab stickers, bakers twine, paper punch, rolling adhesive.

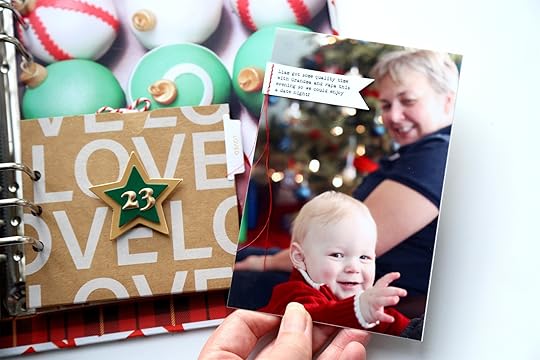
I had a series of cute photos that I wanted to include. When I tool a closer look at the time stamps in my organizer, I realized all of these photos were taken within a 2 hour time span. It gave me a different perspective of what an “ordinary day” looked like then with a 9 month old versus now.
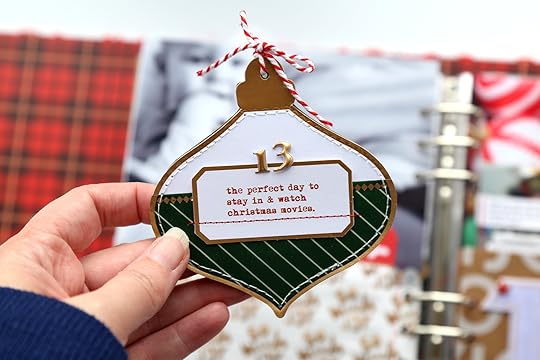
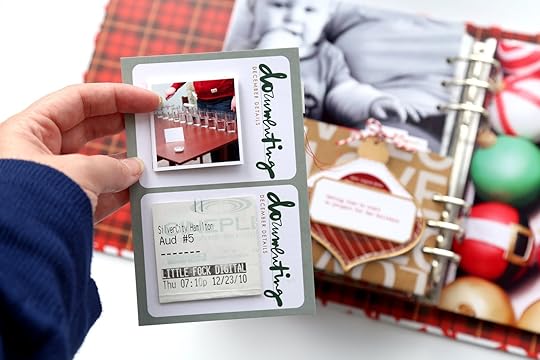
One of the key features of this page is the use of the ornament shape! I was excited to use the ornament patterned paper plus the ornament pockets to make a mini photobook.

Here’s the process video with additional information on how this page came together.
Project #5
The kraft pockets are an awesome addition to this year’s main kit! If you haven’t picked up on it yet, I LOVE pockets! This was the perfect element to include a short little story in a fun and interesting way.
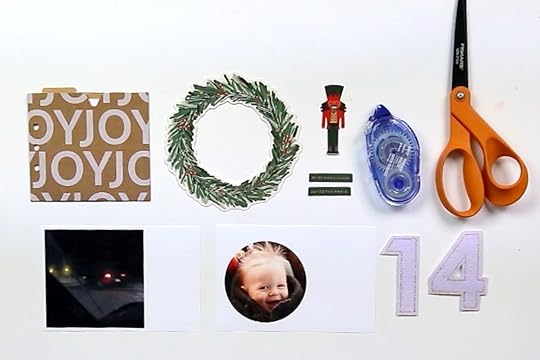
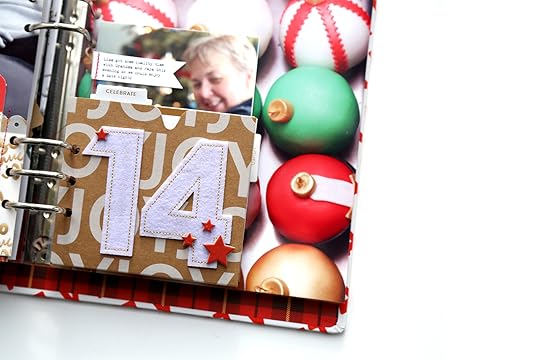
Main kit supplies: Kraft pocket and journaling card, chipboard stars, cardstock wreath, chipboard phrases, plastic nutcracker. Additional supplies: Felt numbers, white tab stickers, dimension foam adhesive.
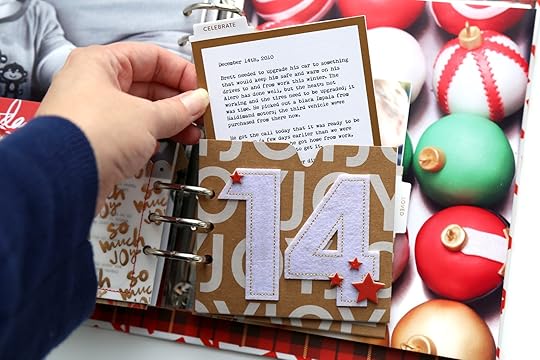
I typed up the journaling for this story on my computer and ran it directly through my printer. While we’re talking about printers, I use a Canon Pixma iP8720. I currently print all my photos at home.
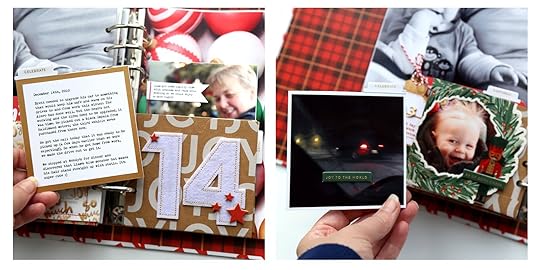
I dressed up the back of the pocket using one of the cardstock wreaths as a photo frame. I debated on whether I’d leave the entire wreath intact or trim off the edges that hung over the pocket. I decided to go ahead and trim it down so the back of the wreath wouldn’t be visible from the front of the pocket. I also adhered it to the pocket with dimensional foam adhesive. I love the way foam adhesive adds that extra dimension to my projects! The only downside is that it does create some rather bulky pages. This album is just about at max capacity after 14 stories, so I’ll need to move into a second one very shortly.
It’s also worth noting that I’ve been using “glossy accents” glue to securely attach several of the embellishments in this album. You’ll probably see in the video below that when I added it to the back of the felt numbers, it looked as though it was showing through to the front. Now that it’s dried, it’s no longer visible (thank goodness!).
Project #6
Last but not least, one more variation of the kraft pocket to hold a short story!
Main kit supplies: Kraft pocket, dimension star stickers, puffy gold numbers, ornament pocket, 4x6 journaling card, gold rimmed phrase label. Additional supplies: baker’s twine, rolling adhesive, tiny attacher.
The dimensional star stickers + the gold puffy numbers are a perfect fit! I added them onto the front of the pocket to get this story started. I added a bit of stitching onto a hand cut flag that hold the journaling for this 4x6 photo and opted to keep the extra threads long a loose. It’s a fun bit of extra texture and I like the way it looks!
The real inspiration for the structure of this story was the 4x6 journaling card. I loved the prompt to “document December details”. The little squares there seemed like the perfect homes to hold some ephemera from the day. One option would have been to put an attacher sticker directly on the journaling card and slip it into my album “as is”. I felt that there was more about this story that I wanted to include, so I opted to use another Kraft pocket to hold everything in one place.
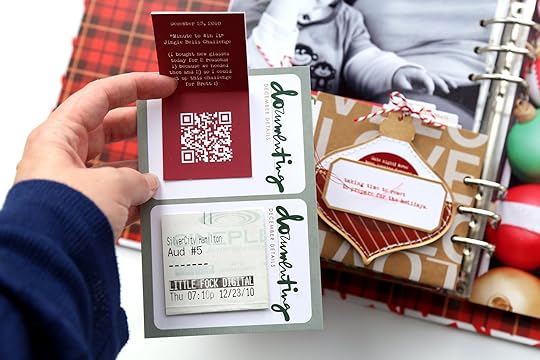
A fun feature in this project is the QR code that holds a video recorded from the day. The Minute to Win It, “Jingle Bells” water glass challenge. Super fun!
Here’s the final process video for this week.
I hope you found some inspiration and fun ideas to try in today’s post! Please don’t hesitate to leave your questions or comments below.
September 13, 2023
December Daily® 2023 | Paint + Play with Jill 02
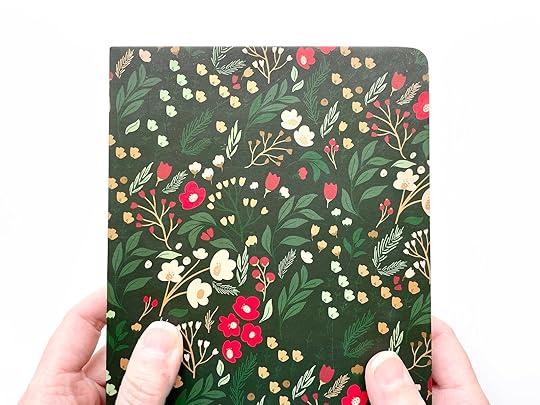
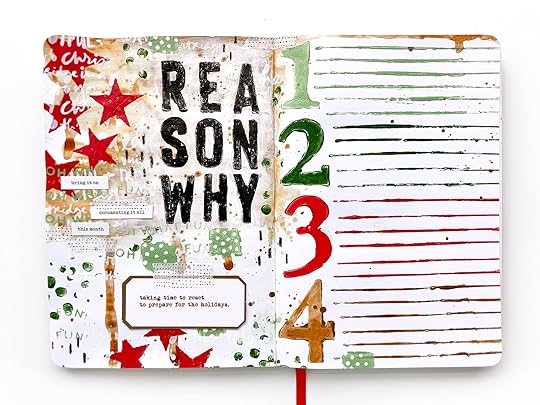
Welcome back to Paint + Play with Jill! This week I am creating a reason why page in the new Floral Art Journal, but you can definitely translate this page idea into something to go into an album by creating on loose mixed media paper.
Part one is a simple numbered page for those of you who just want to dip your toes in mixed media without going too wild. I will show you how to stamp using acrylic paints to create a really fun texture, and how to create easy painted journaling lines. This page would very easily translate into a page for an album and should appeal to all of my friends who prefer a cleaner look. If this is you, feel free to stop here!
Part two is where I will play around with the silk screens, lots of paint, and more stamping for a beautifully messy and layered page. I will also be showing you how I like to hold texture stamps directly in my hand while stamping to create a more organic impression in my mixed media pages.
Let's get started!
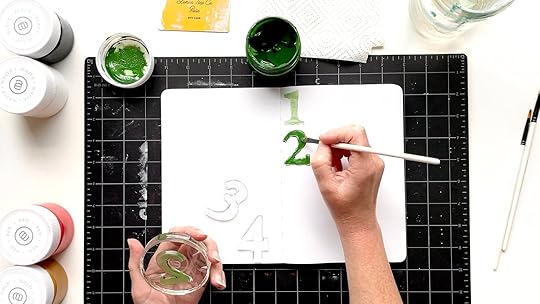
Did you know that you can stamp with acrylic paint? It doesn't work for every stamp (I recommend chunky simple shapes), but it is a fun way to get even more texture from your stamping. For my first page, I have chosen to use the new number stamp to create journaling spots for my reason why.
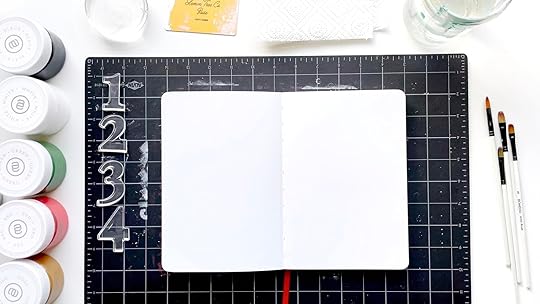
First, let's gather our supplies.
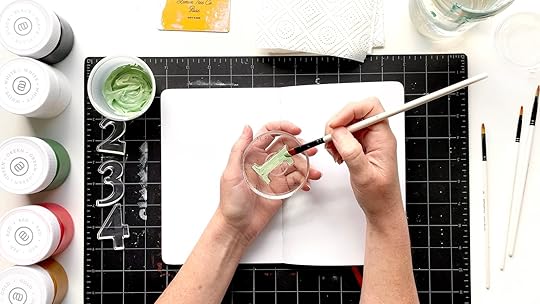
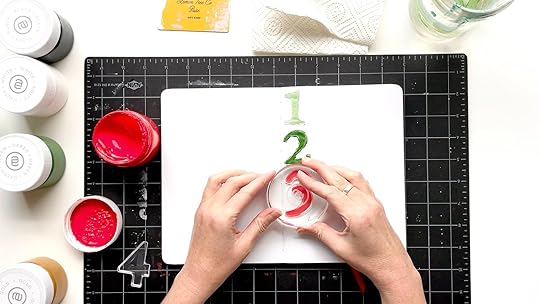
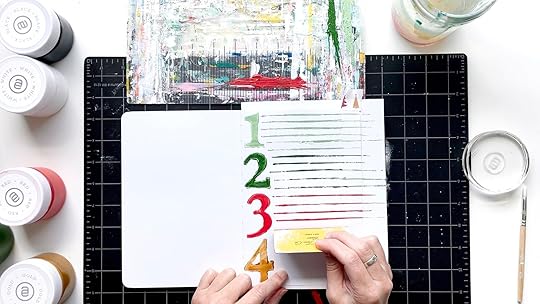
Pick out your stamp and paint colors. I wanted to stamp 4 numbers in different colors so I mixed my own light green from the white and green paints. You will want a fresh paintbrush for every color because you do not want to use a wet paintbrush for this technique.
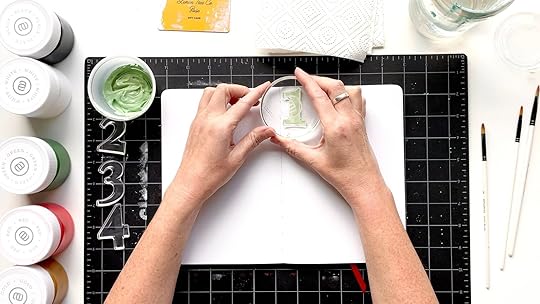
Have a bowl or glass of water nearby to put your stamps in after you stamp with them. This will keep the paint from hardening on your stamp while you finish the rest of your page and make the clean up of the stamps really easy with just a quick rinse. Have baby wipes handy to wipe off paint from your acrylic block when needed as well as a paper towel to dry it off.
Now we are ready to make some painty stamp impressions!
Put your first stamp on the acrylic block. If it is a brand new stamp, rub it on the skin of your arm to prime it so your impressions turn out cleaner. You will see the difference between when I did that and didn't do that in the video. Apply a thin layer of paint to your stamp with a paintbrush. Do not worry about the brush lines. They will even out. Also don't worry about getting paint over the end of the stamp. That just creates more texture.Stamp down firmly while trying to not let the stamp slide around. The acrylic paint makes it more slippery than you may be used to! Pull straight up and see how it turned out!You can fill in any blank spots in the impression using your paint brush, but I like to leave as much texture as I can. Repeat! Don't wash off your paint brushes just yet if you would like to also try the acrylic journaling lines.
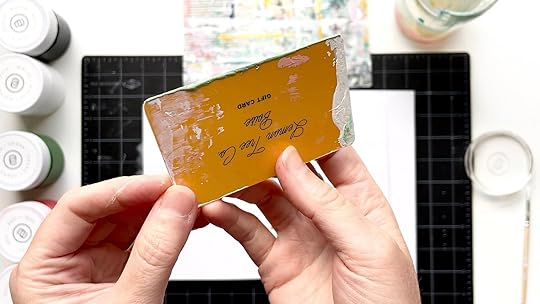
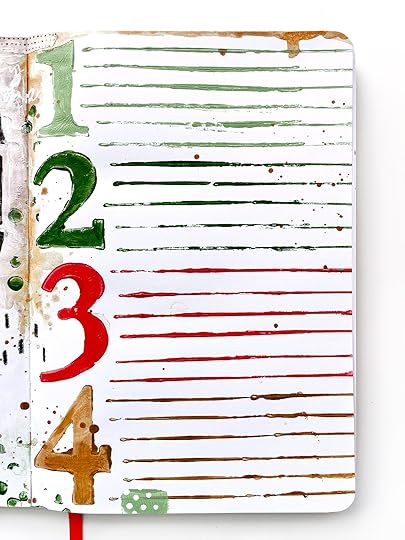
To finish this part of the page, we are going to create journaling lines using our 4 paint colors. Grab a paint pallet or paper plate, an old gift card, and the paint brushes you were just using.
Pick up some paint with your brush and spread it in a line on your paint pallet.Dip the long edge of your gift card into the paint several times until you have a layer of paint along the entire edge.Stamp the edge of the gift card down on your page to create a line. Stamp again right next to it to extend the line to the edge of the page. Reapply the paint and keep going until you have a page of fresh journaling lines!
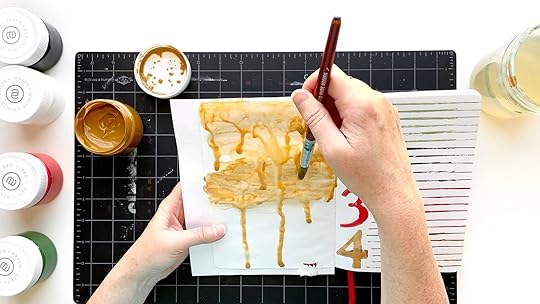
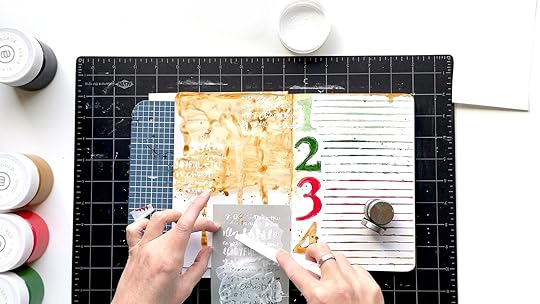
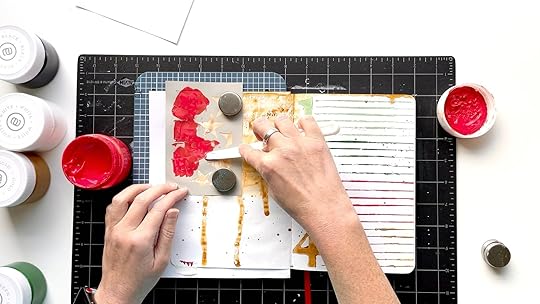
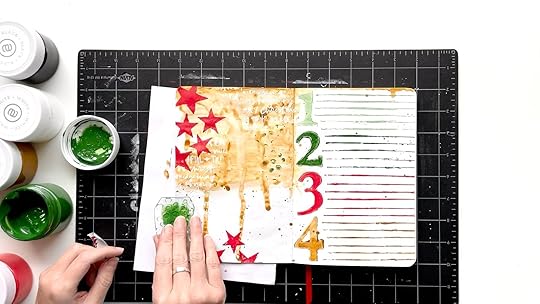
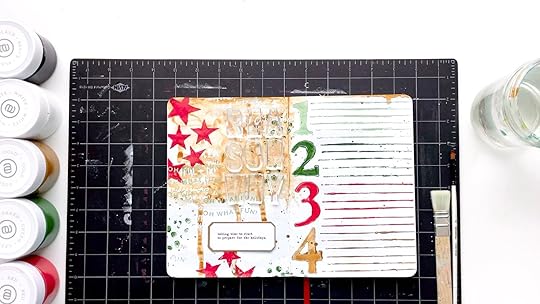
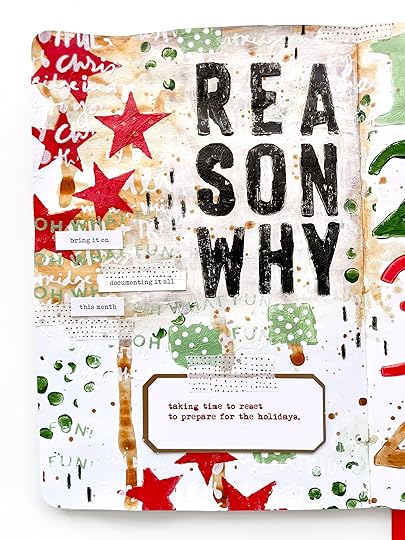
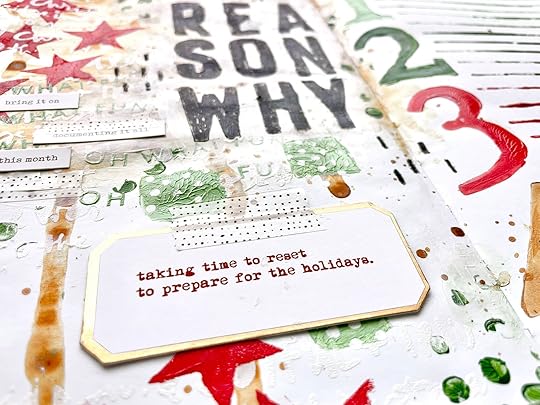
Now it's time to create our title page and I give you permission to get messy! I knew that I wanted to start this page with a drippy watered down acrylic wash, so the day before I applied two thin layers of watercolor ground to my page. This is totally optional, but does help the page to be able to handle heavy amounts of water better.
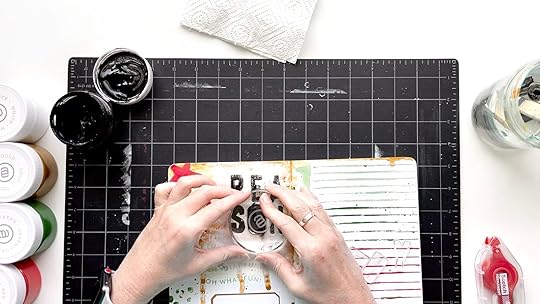
Mixed media pages like this are very intuitive for me so I don't have an exact list of steps for you to follow. Be sure to watch the video to get a better look at how it all came together. I will walk you through how I added a layer of gold using watered down acrylic paint (complete with drips and splatters!), how to use the silk screens, and how I like to hold texture stamps in my hands (rather than on an acrylic block) to get a more organic impression in my mixed media pages. You will also see more stamping with acrylic paint when I make my "reason why" title.
Here are some photos of my process:
And here is my final spread! I'd like to remind you here to not be too precious with your journal if that's what you are creating in. I give you permission to get it messy! Break it in with some paint and splatters that get on neighboring pages. Embrace the crinkly pages. This journal is gorgeous and I totally understand not wanting to mess it up, but it is not meant to stay pristine and white on a shelf. Happy painting, friends!
I hope this post inspired you to try stamping with acrylic paint and perhaps doing some messy mixed media layering! Let me know if you have any questions about my project and I will see you next week with more mixed media play!
You can find me on Instagram as @jill.drangsholt
SUPPLIES: Floral Art JournalPaint PackA Very Merry Christmas Silkscreen PackNumber 6x8 Stamp SetAlphas Are Awesome #2 6x8 Stamp SetTags 6x8 Stamp Set2023 Main Kit (label)Word Phrase Sticker Sheet BundleMiscellaneous art supplies: Daniel Smith Watercolor Ground, paint brushes, white Posca paint pen, black Neocolor II crayon, washi tape, old gift cardSeptember 12, 2023
Mixed Media Collage Ornaments With Ali | Starting Place
Earlier this year I participated in the Fodder Challenge out on by Willa Wanders and Fodder School (you can see some of the things I made here). It was a super fun, very inspiring adventure into more mixed media crafting and I loved it so much.
As I was thinking about what kinds of crafting I might like to do this holiday season (in addition to December Daily®), I started getting excited about the ornament shape you'll find throughout this year's December Daily® collection. There are stitched pocket ornaments in the Main Kit, this particular ornament shape in the stencil set, and a couple ornaments in the Variety Die Cut Bundle, What I decided sounded fun to me this year was to make myself a whole bunch of these paper collaged ornaments using that shape as the jumping off point. My goal is to make at least 100 and then display them altogether in some kind of a wall hanging (still figuring that part out). I'm not personally planning to put these on a tree mainly because I am only working on one side but I can imagine an entire tree of handmade ornaments would be amazing.
Maybe you'll decide to join me on this adventure do collaged tags or hearts or circles or trees or some other shape entirely! This kind of project is such a fun way to play and use pieces from your stash along with items from our 2023 collection.
You can make yours as simple or as complex as you want. Maybe you love the idea but just want to work with already made patterns + embellishments from your stash: DO IT! Or maybe it sounds fun to dive into the messy, imperfect play of making collage ornaments like the ones below:
I'm using a variety of papers as the foundations for my ornaments including pattern papers, cardstock, old book pages, cork paper, textured papers, watercolor paper, felt, etc.
My next layer is often paint or papers I've created using the paints. On top of that I'm adding stickers, felt, transparencies, vellum and other embellishments from my stash + this year's December Daily® collection.
One of the biggest things I love about projects like this is it isn't at all about making anything perfect - it's really just a chance to play with paints and inks and patterns and all the fun stuff.
Let's dive into my starting place video:
I'll be back next week to share some of the processes of building with these fun layers!
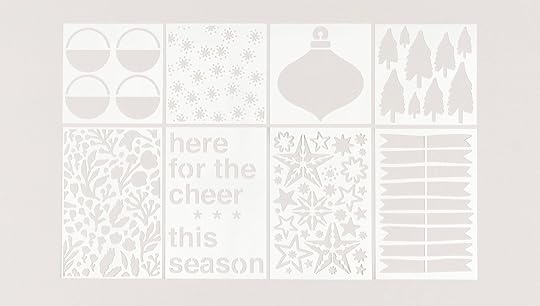
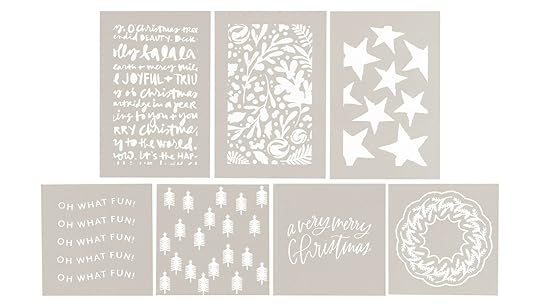
SUPPLIESDecember Daily® Stencils
December Daily® Paints
December Daily® Silkscreens December Daily® StampsWatercolor Paper (originally offered with One Little Word®)Watercolor Paper from a notebook (140lb)Dylusions Star Flurry Stencil (this is the one I called a poinsettia) Tim Holtz Rub Ons (similar) Tim Holtz Christmas Sticker Book (similar to the one from my stash) Embossing Powders Versamark Embossing Ink We R Memory Keepers Hole PunchTexture Paste Deli Sheets Paint Brushes Matte Medium or Gel Medium (use either as an adhesive) POSCA Paint Pens Gold Eyelets Crop A Dile Eyelet SetterEmbroidery FlossSewing MachineSequin MixesFelt
September 11, 2023
December Daily® 2023 | Plan + Play with Linda 02
Hi everyone! It’s Linda and I’m back again for another fun Plan & Play December Daily post to help get you prepared for your project. Last week we looked back on our previous projects and older supplies. If you haven’t yet seen that post, you can find it here. Today, we are going to talk about getting your supplies and ideas prepped for this year’s project!
Organizing: SuppliesLast week we spent some time going through our older supplies and making room for the new ones. Today I am going to share how I am organizing all of the supplies I am going to be pulling from this year.
In this first video, I go through the process of organizing most of my supplies for this year. As a note, while I am organizing, I put the video on 4x speed and am playing music, but I do jump back in at the end the talk you through how everything is organized, so feel free to skip to that portion if you only want to see the final result.
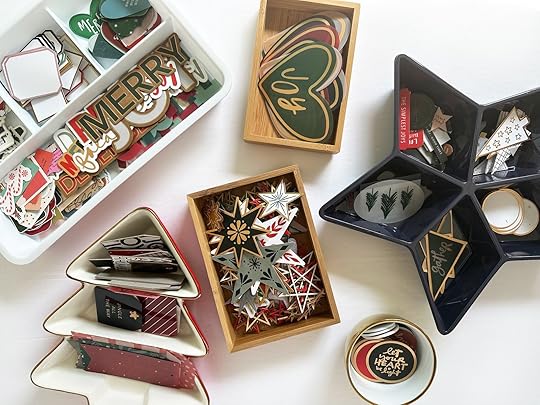
One of my favorite parts of organizing my supplies, is finding all the cute little containers to keep them in! But, more important than being cute, your containers need to be functional.
(01) Open or enclosed? For me, I like my containers being open so I can see all of the supplies out on my desk, and this works in my current season of life. However, this is not functional for a lot of people. If you have small children or pets that might get into your products, you might want to consider enclosed containers.
(02) Stationary or moveable? I like having my supplies out on my desk for the entire month of December because I primarily work on December Daily at that time. However, if you are planning on working on other projects during the month of December or do you reuse your craft space for other things, this might not make sense. If so, you might need your supplies to be moveable. I have seen people put their supplies on a rolling cart which is a great solution if you need them easily moved out of the way.
(03) Lots or a little? I like having containers with lots of little trays to hold different things, but you can see that I mix & match different supplies in the same section. This is because I like similar things grouped together. If you prefer to have everything separate, you might want to consider containers with more sections.
Another thing to keep in mind with containers is that you don't need to go out and buy anything! Many of my containers are reused packaging or things I have picked up throughout the years, often repurposed from other projects. My star tray was from the dollar spot at target. My tree tray I got on clearance one year after the holidays. As much as I love organizers, I focus my budget on supplies, and these are just extra.
Organizing embellishments is one of the hardest, but most fun, parts of supply organization. That’s because there are just so many cute pieces! The most important thing to keep in mind when organizing your embellishments is how will you use them?
(01) Shape or color or style. You should organize your embellishments based on how you design a page. Meaning, what do you look for when grouping embellishments on a project? I tend to focus on shapes. If you saw in my post last week, one of the things I love to do in my album is use a repeated shape across a spread. So, I have grouped all stars together in one container. However, if you think based on color, I would suggest grouping all gold embellishments together instead. Alternatively, if you like to keep things with similarly styled products, I would suggest keeping an entire set of products together rather than splitting them up.
(02) Non-December Products. Do you want to pull out supplies that are not December Daily themed to include with your stash? Maybe you have some gold alpha stickers or decorative washi tape that would work nicely with your album. Consider whether or not you want to pull these items out of your regular product organization to include with your December Daily products for the season.
I don’t plan to do this, but I would suggest it if you would otherwise forget to look for those supplies when working on a page.
(03) Decision Fatigue. Decision fatigue is a real thing and it hits a lot of scrapbookers. This is the concept that after making many decisions, your ability to focus and make more decisions becomes worse and slower.
In the context of scrapbooking, this means that if you have too many supplies to choose from, you’re going to spend all your crafty time trying to decide which supplies to use and lose out on valuable crafting time. To avoid running into this issue, it’s important to know yourself and know how many options are too many for you. It might make sense for you to limit the amount of supplies you have to work with on this project or use foundation pages or something similar to help you through the project. (More on foundation pages coming next week!)
Not everyone uses numbers for this project, but a lot of people do, including me! I have tried out a few systems for organizing numbers over the years and have found that my current system works best. I walk you through it in the video below.
Basically, my number organization system consists of envelopes for each number and I stash every style of that number that I have inside the envelope. When I’m creating, if I’m looking for a number 4, all I have to do is pull out my 4 envelope and I have all of my options available.
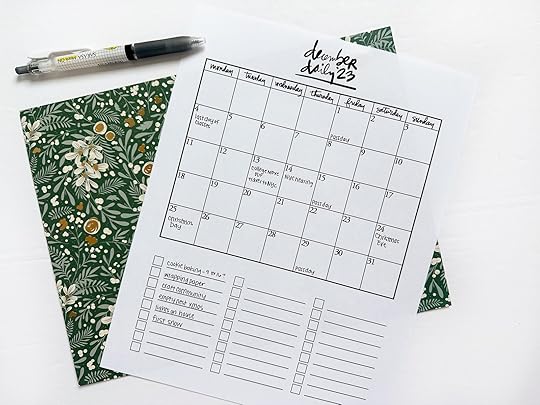
Both before December (starting now!) and through the project, it is important to have a system in place to organize your stories and ideas so that they are available when you are ready to put your project together. The past few years I have been really successful by using a printable calendar for this purpose. Today I have a free download available (at the bottom of this post) where you can print your own version of my 2023 calendar. I have made it available in a variety of sizes + both Sunday and Monday start.
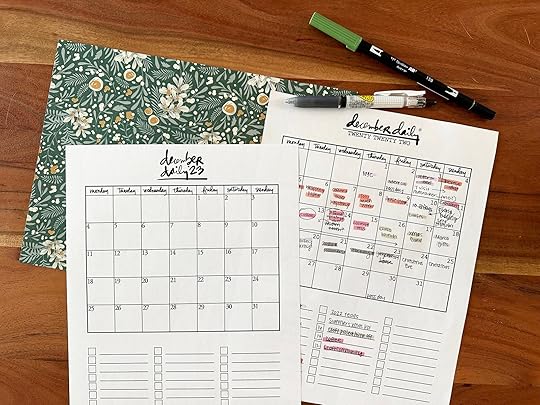
The 2022 calendar pictured above was the one I used last year and is available for download in the 2022 prep party classroom. I am using the 8 1/2 x 11 version of the 2023 calendar and it will live on my desk with my supplies during the month of December.
This calendar is not intended to be pretty, it’s intended to be a place to jot down your ideas and plans! That said, if you want to print one of the 6x8 or 10x8 calendars to use in your album, I think it would work nicely for that as well.
How I use the CalendarI fill in my calendar prior to December and then use it throughout the month and until I am done with my project.
(01) Specific Events. In the calendar section, I will write in specific events that I know are going to occur on specific days in the month. These might be events that will be the story for the day, or they might not, but they are specific events that I know are going to happen. Since it is now early September, I don’t have a ton of specific events written in yet, but I will add to it as we get closer to September.
(02) Story ideas. If I have stories in mind that I want to tell, but am unsure which day they will fall on, I write them in on the bulleted lines. Once I have a specific day in mind, I will write that number in the box next to the story.
(03) Design ideas. I will add notes for design ideas to the boxes or the margins, depending on when they come to me.
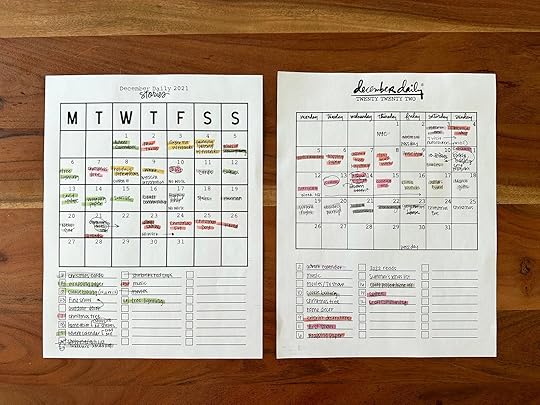
(04) Checking off progress. And, as a planner, one of my favorite things is checking off completed tasks! When I finish a page or a story I will highlight it to show that it is completed. The photo below are my last two years worth of completed calendars.
(01) Instagram. Instagram is a great place for inspiration! I save projects that I love by clicking the little save icon and then have a folder created for December Daily specific inspiration. When I am wanting some page inspiration while creating my album, going to that saved folder is my first spot to look.
(02) Pinterest. Pinterest is still a great place to collect ideas. Especially if you’re finding a ton of ideas here on the blog or elsewhere on the internet, it’s a great place to start a December Daily inspiration board. A note about Pinterest: Everything you pin becomes public, unless your Pinterest board is private. So, if you’re pinning projects from paid classes, I would suggest making your board private so that you are not sharing that paid content. For this reason, my December Daily pinterest board is private.
(03) Notebook. I shared in my live on instagram last week (you can find it saved to the @decemberdaily account!) that I like to jot down ideas for all my craft projects in a notebook. For the last few years, I have been using a B5 notebook from Archer & Olive, and that notebook holds project sketches for past December Daily as well as many other projects. For the upcoming year, I am going to be moving into a Hobonichi Day Free for my project sketches and I am going to start using it for December Daily project sketches/ideas for this year.
The final thing I want to share with you today is my plan for collecting stories & photos during the month of December. December is a busy time for most of us and, even if we have the best intentions to create this project daily, that doesn’t always happen. That’s okay!
But, what you need to prioritize, are collecting your words + photos + ephemera. You should enter the month with a plan to collect these things so that, no matter how much of your album you finish, you’ll have these things available when you’re ready to create.
(01) Photos. In my opinion, collecting photos is my top priority. That’s because you can’t recreate (mostly!) photos from the month and photos are such a huge part of this project. The saying is also true, a photo is worth 1000 words, because just a photo can tell such a story.
Some tips to make sure you capture/organize your photos this December:
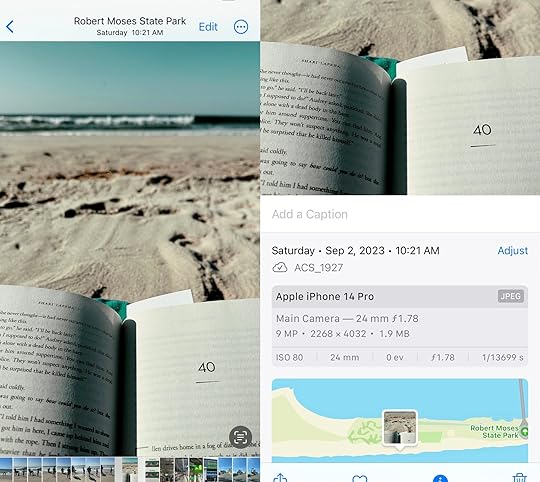
Use your phone camera. Phone cameras have gotten to be such great quality, there is no reason to not use them! While DSLR and other cameras are great, phones are perfect for this project because they are always on you + they record metadata. Metadata are additional details your phone stores whenever you take a photo that will help you document later, such as the location, date, and time. The photo below is one I took last week when traveling on my iPhone. On an iPhone you can swipe up to see additional the metadata.
(02) Words. As a close second to photos, you need to collect your written stories during the month of December. As much as you think you’ll remember the details, I find myself forgetting things just a few days later! Have a plan to capture your words as you go through the month, even if you don’t get anything in your album.
Keep a digital journal. In past years, I have used the Day One app to document my stories for the day. I actually used to use this app daily to document stories for project life throughout the year, but it worked well for December Daily. If you can type it on your phone or iPad, that’s a bonus. Anything where you can set aside a few minutes a day to jot down notes. Keep a physical journal. Whether you carry around a small notebook or just a pad of sticky notes, having a place where you can jot down notes during the day or at the end of each day is the goal. Rely on your planner or social media. If you worry that you won’t make time to jot things down in a specific place, or you just don’t have the time, that’s okay. You can use other methods that you are already doing to collect your stories throughout the month. Maybe jot a few extra details on your regular planner or write a bit more in a caption to a photo on instagram. You can always go back to refer to these when putting together your album.(03) Ephemera. Finally, you can collect ephemera during the month. I have not always done this in my December Daily album, but on the years that I did I really loved how it came out. That said, if you are worried you’re going to get overwhelmed or fall behind, this is a step that is totally fine to skip. To collect ephemera, you might want to leave out a tray or zipper pouch to slip things into as you live life during the month. All the collected ephemera from the month can make one story, or you can work it into multiple stories during the month.
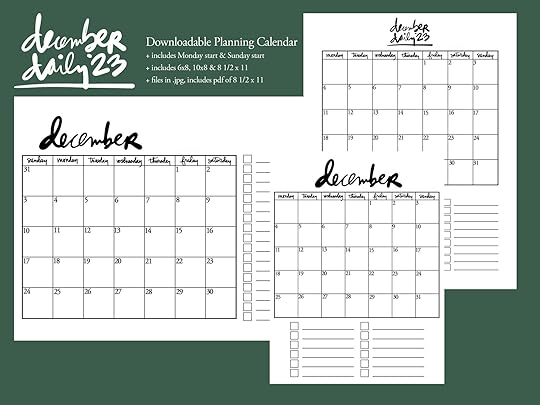
Download the full calendar set here.
I hope this post inspires you to get your products and ideas organized for this project!
You can find me on instagram & youtube @lindalovescreating. I will also be over on the @decemberdaily instagram account LIVE tonight, September 11, at 7 PM EST to answer your questions and chat about the things we talked about in today’s post. Hope to see you there!
September 10, 2023
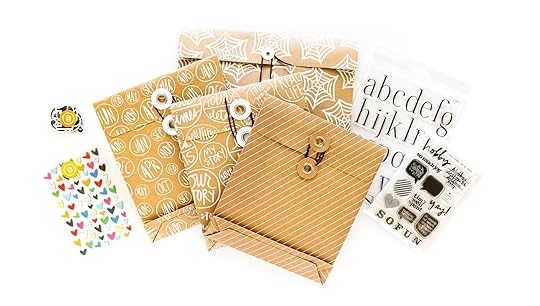
Hobby Story Kit, October 2023 Stories By The Month Kit, + New Halloween Kit
Today's the 10th of the month and that means a new
Story Kit, Story Stamp, and Stories By The Month kit. This month we also have a One Little Word® Mini Kit and a new Halloween Kit.
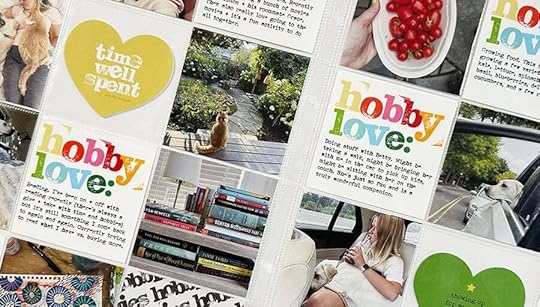
This month we are focusing on stories related to the theme of Hobby.
Technically a hobby is "an activity done regularly in one's leisure time for pleasure." If you are reading this right now it's likely that this subscription is part of one of your own hobbies. This month we are celebrating the activities that bring us joy and round out the edges of our lives. Let's tell stories together.
Initial story ideas for this theme include:
Make a list of your favorite hobbies and tell a little story about each one (or dive deeper into one). Tell a story about "your hobby" vs. "my hobby." It's a fun jumping off point! What hobbies have you let go of over the years? What has stayed a part of your life? STORY KIT
The
Story Kit™ includes:
Here's a video overview of the
Story Kit™ and Add-On options this month:
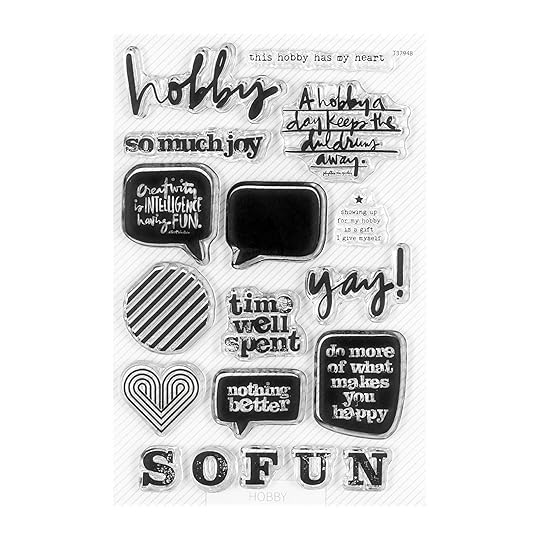
STORY STAMP™
The
Stamp Set:
Here's a video overview of the Story Stamp:
STORY CLASS // INCLUDES DIGITAL STORY KIT
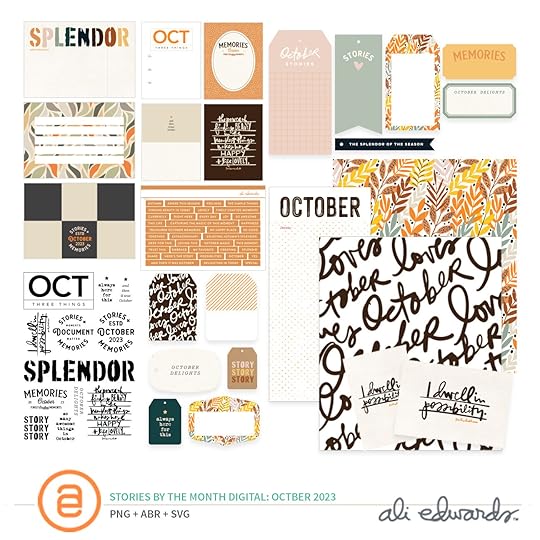
Here's a look at what's included in the Digital Story Kit™:

Your digital kit and the classroom and any Add-Ons purchased will be available to you on the 12th once your card has been charged for the month.
This kit is also available to physical kit subscribers as an Add On each month.
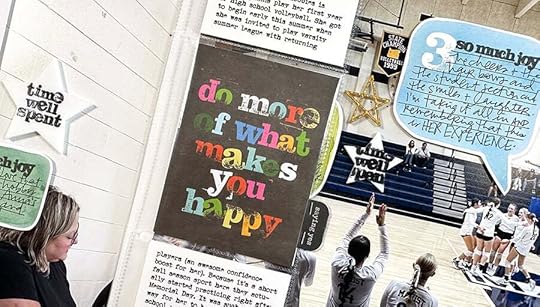
Here are a few project samples from Ali:

Again, thanks so much for subscribing and/or considering our
Story Subscription program! If you have any questions about this program please let us know below in the comments.
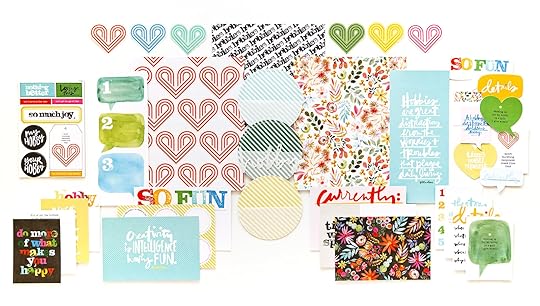
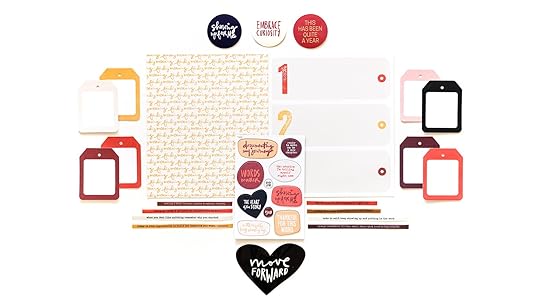
Here is a full look at the kit this month:
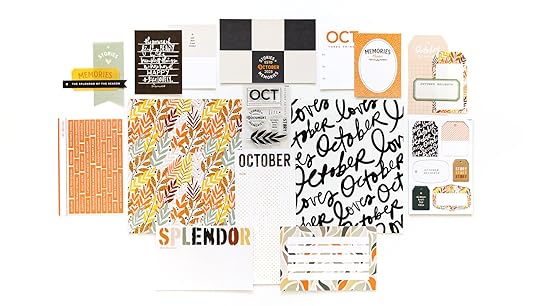
The kit now includes a sheet of vellum or transparency (sized outside the page protector in a 6 inch x 8 inch album), a pattern paper, a 3 inch x 8 inch (outside the page protector) journal card with the month at the top which will be repeated each month, a 3 inch x 4 inch stamp set, chipboard, 4, 3 inch x 4 inch journal cards, 3, 4 inch x 6 inch journal cards and an embellishment.
And a video overview:
This subscription is a great option for those who are looking to tell more calendar/everyday life sorts of stories.
Our Digital Stories By The Month™ kit is now called Inspiration By The Month™. With this subscription you receive access to the Inspiration By The Month™ classroom and the digital kit.
This kit is also available to physical Stories By The Month™ kit subscribers as an Add On each month.
This stamp set is available to subscribers to add to their box during the Add On period and also offered in the shop for anyone else!
Here's a video of Ali using this:
Here's a look at the next One Little Word® Mini Kit:
And a video overview:
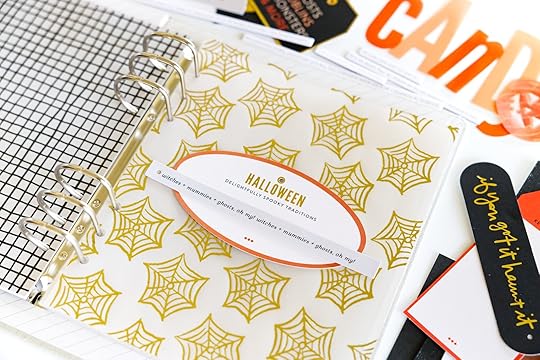
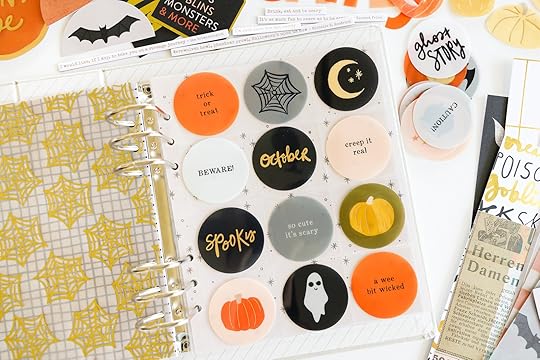
HALLOWEEN KIT 2023
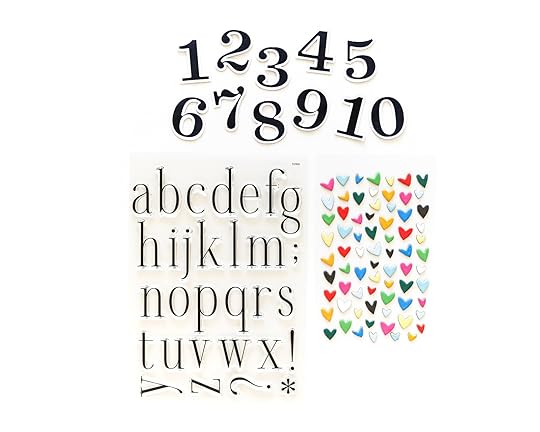
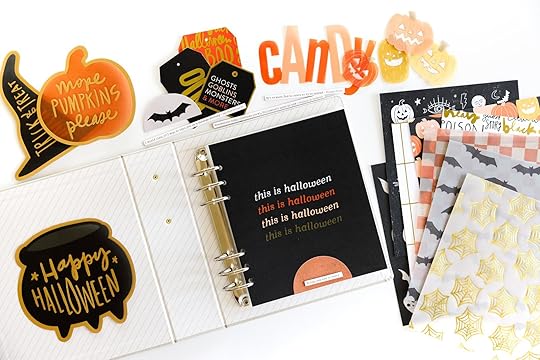
We also have a brand new Halloween Kit available this year. Physical Kit subscribers can add this to their box for no additional shipping. This is also available in our regular shop today.
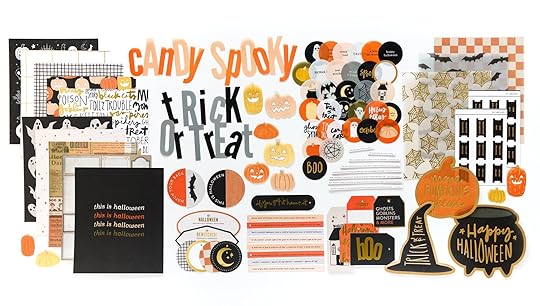
Here's a video walkthrough of this kit:
Here are a few styled photos from Kelly:
September 8, 2023
In Case You Missed It | September 8
Happy Friday, friends! Welcome to the latest
In Case You Missed It. Just a reminder that this is a quick post that will happen every Friday afternoon with all the updates and links that have happened throughout the week. This week we launched our 2023 December Daily® Collection and this edition will be focused on the updates surrounding this release. We’ll return to our normal format next week. So, let's get to it:
FINAL DAYS FOR DECEMBER DAILY® STAMPS
Only two days left to place your @decemberdaily stamp orders! In order to meet the high demand for stamps this year, we are asking you to add the stamp sets you would like to receive in your box by 9/10 at 11:59pm ET to guarantee your order for shipping with your box in early October. The boxing period closes September 30th. Boxes begin shipping October 2nd. Shop the collection here.LET'S PLAY SERIES
Plan + Play Monday will be led by Linda Jordan, creative team alum, Story Planning contributor, and the instructor behind Plan, Prep, and Play. Linda will be sharing how to set yourself up for success with the project focusing primarily on the main kit. She'll have planning and organizational tips and tools, guidance on selecting your format, streamlining your stash, finding inspiration, and more. Find her first post here.Paint + Play Wednesday will be led by Jill Drangsholt, a creative team alum and frequent class contributor. Jill will be sharing her expertise as a mixed media artist, offering tips and inspiration on using stencils, silkscreens, acrylic paint, and more. Jill's posts will include fun ideas that can translate directly to our December Daily® spreads. Find her first post here.Paper Play Friday will be led by Pam Baldwin, another creative team alum, frequent class contributor, and the instructor behind Playing With Paper. Pam will be doing what she does best: working her magic with products from this year's collection. She'll be demonstrating creative ideas for fun, easy, DIY and interactive elements. Find her first post here.30% OFF SELECT DIGITALS + CLASSES
Calling all hybrid scrapbookers! We’re offering select digitals and classes at 30% off all month long. This sale is designed to support the members of our community who enjoy telling stories in the digital or hybrid format. From now until September 30th at 11:59pm ET use promo code FALL30 and get 30% off most digitals in the shop. Excludes December Daily® digitals + classes and the Start Here workshop.
NEW CLASSES
2023 DECEMBER DAILY® PREP DAY. Join the December Daily® community for a fun online December Daily® prep day on Saturday, November 18th, 2023. Use this opportunity to finish past December Daily® projects or start working on your project for 2023. The first live video will start on Saturday, November 18th at 10:00 am Eastern. Cost is $5. DECEMBER DAILY® PRODUCT PLAY | TRY THIS. December Daily® Product Play is all about ideas and inspiration for working with physical products from the December Daily® Collection. For 30 days in November, you'll receive one idea per day from the contributors to this class (includes Ali). Ideas in this workshop will focus on physical products from our 2023 December Daily® collection. Whether you are preparing to document 2023 or finishing up telling stories from past years, we hope these fun, creative ideas help you use your products to get your stories told. 2023 DECEMBER DAILY® HYBRID PRODUCT PLAY. Hybrid scrapbooking combines digital products with physical supplies to create paper (or printed) memory-keeping projects. For this class, our contributors will share with fun, creative ideas and inspiration for working with these digital products from the 2023 December Daily® Collection.
PRODUCT Q+ A WITH ALI ON INSTAGRAM
Ali has been answering a wide range of questions, sharing creative product ideas, and more over on our December Daily® Instagram account. All of her content has been saved as a highlight on that account to be enjoyed at your convenience. Find it here.
ORDER ISSUES
If you experienced any issues at checkout, or have questions about the release please reach out to our Customer Service team and they will be happy to help you! Contacting them ensures we are keeping track of these questions and answering them in a timely manner. It's difficult for our team to keep track of all of the questions left on multiple threads/posts on social media with all the excitement-- we are doing our best and we want to make sure your questions get answered! Click here to start a new conversation.
As always, we’re so grateful to have you all as members of this community! Thanks for joining me today and have a great weekend!


