
Ali Edwards's Blog, page 44
September 8, 2023
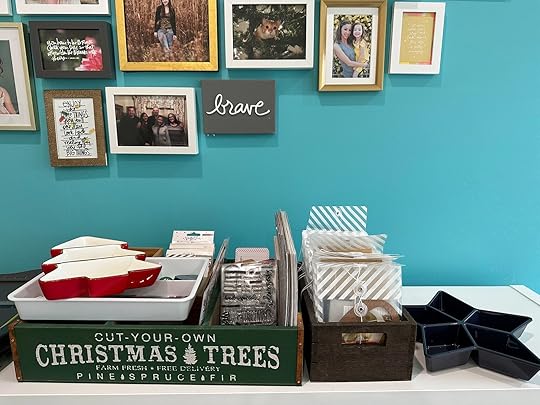
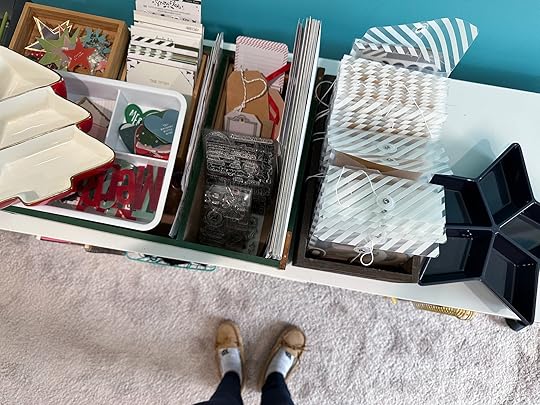
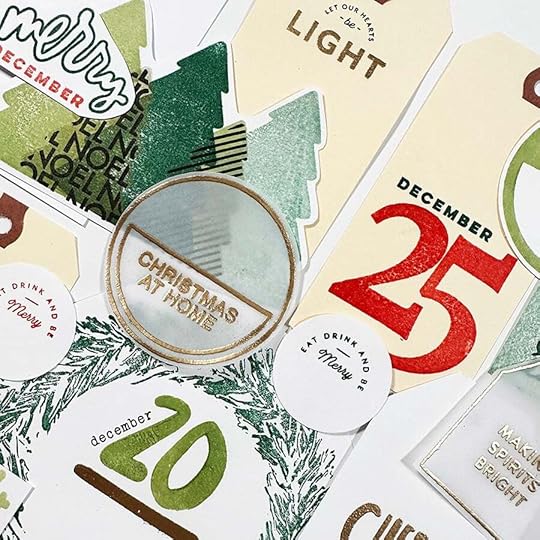
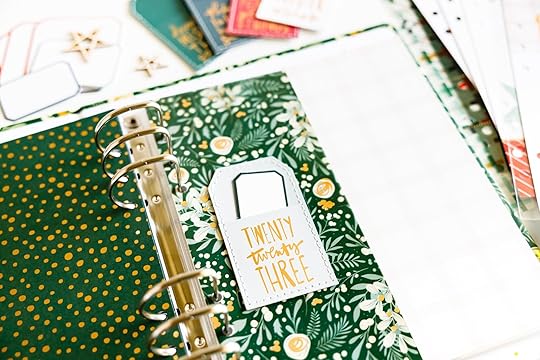
December Daily® 2023 | Paper Play with Pam
Hello, hello friends! I am thrilled to be spending some time with you this month, playing with the December Daily 2023 collection and getting my hands dirty. (My hands are literally dirty this week, because we’re playing with stamps, lol!)
First, very important information; Saturday, September 10th is the last day to guarantee availability of the stamps in this years December Daily Collection. If you have not yet added them to your box (and checked out), please do so ASAP. AFTER September 10th, the availability of stamps cannot be guaranteed.
I consider myself to be a stamping novice; I am not a person who does a lot of stamping in my projects. I like dimension, layers and texture. Those things seemed beyond my stamping skill level, but I made a short list of things I wanted to try. My list included:
make a mini book(s) with a stamped foundationstamp custom journaling/filler cards stamp a background create dimensional embellishments create some interactive elements (nothing crazy! Just a little bit of hands on to engage.) stamp a titlemake custom pockets.
I believe I hit all the points on my list at least once (with varying degrees of success) and I’m excited to share what I came up with! (Even as I sit here writing this, my brain is swirling with more things I’d like to try.) In this post, you’ll find process videos for 7 different projects. You’ll also find several “Bob Ross, happy little accident” moments, but I do hope this sparks a sense of playfulness and creativity for you! Rest assured, there will be more stamping content from amazing contributors and community members in the coming weeks. Thanks again for being here!
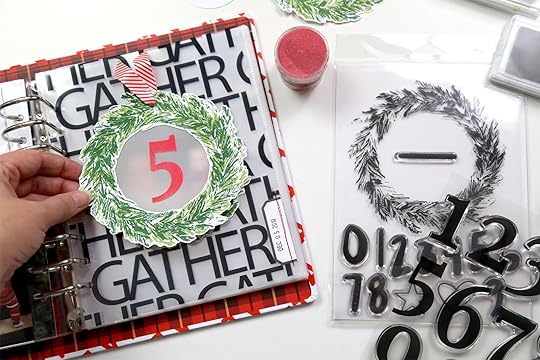
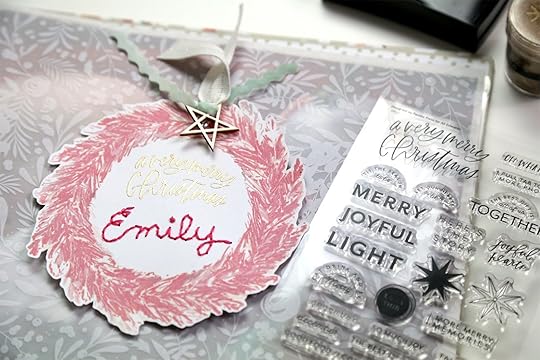
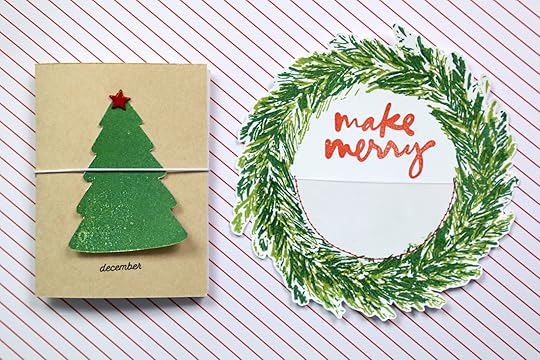
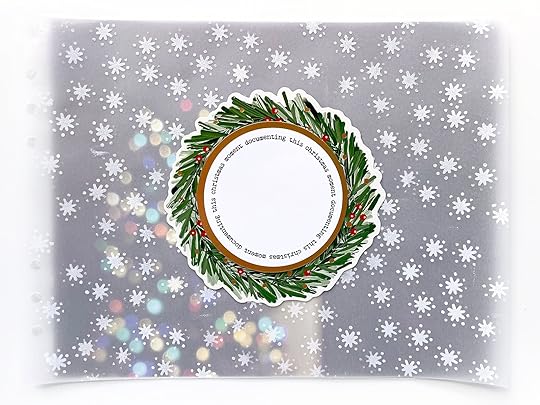
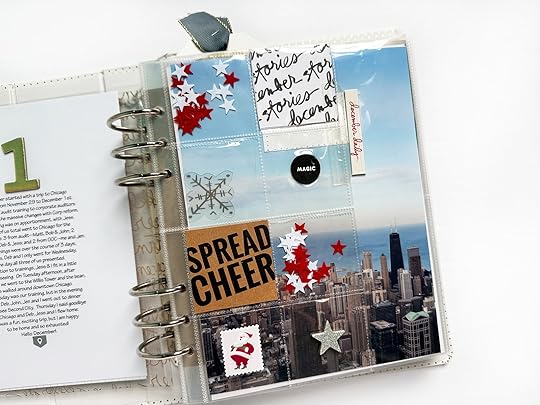
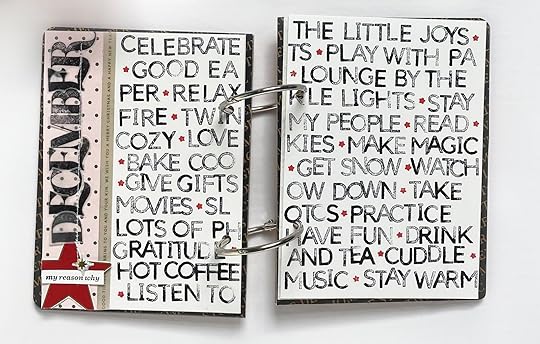
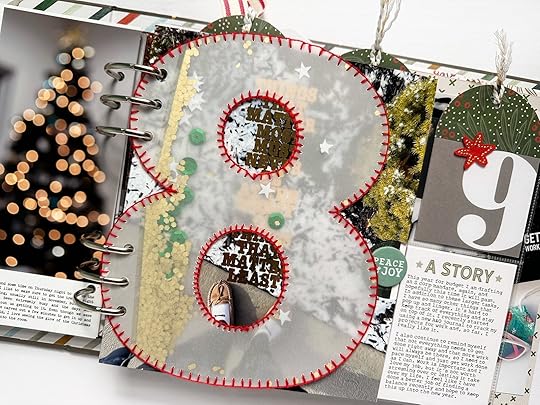
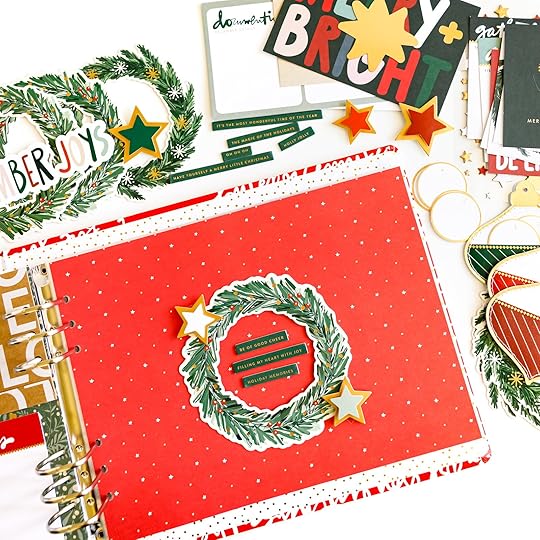
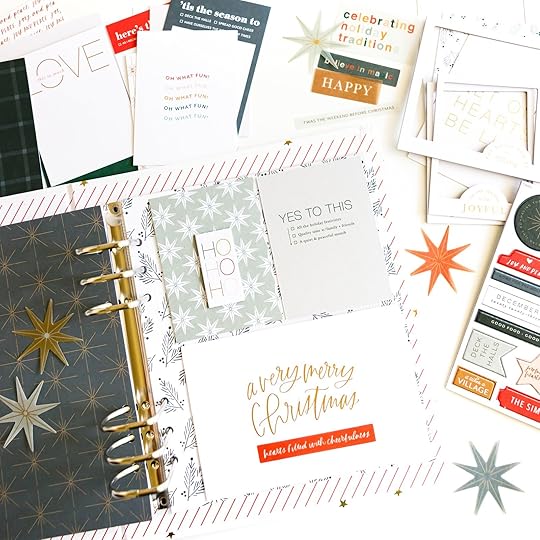
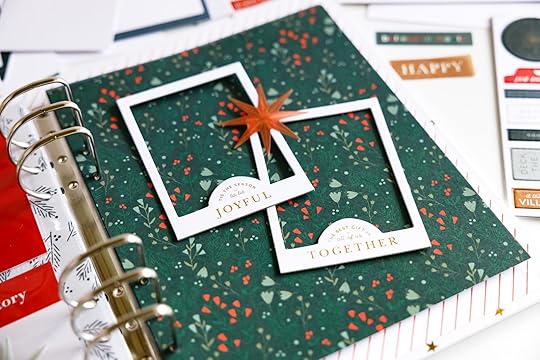
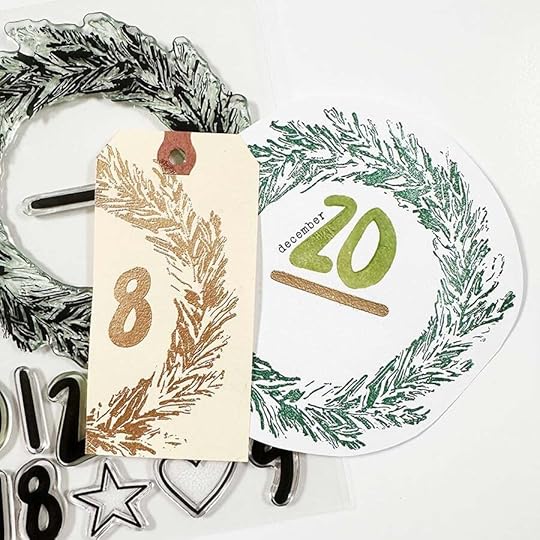
The wreath stamp is AWESOME, and very large. App 5.25 inches in diameter. Definitely recommend a stamping platform to get the most out of this stamp. Use two or more ink colors in multiple layers to create visual depth and fullness. Start with lighter colours and layer dark colors on top. Rotate the stamp with each impression to vary the location of the stamped branches. Consider using alternative holiday colours (pinks and blues and yellows) for a non-traditional twist. In this video, I’m demonstrating 4 different ways to use the wreath stamp. (There are many more!). 1) mini-book / interactive cover, 2) home for photos and hidden journaling, 3) home for a stamped and stitched title, 3) ideas to turn the wreath into a pocket.
That’s a wrap for our first Paper Play Friday! I hope you’ve found some inspiration here today. I’ll be back next week with a plan to continue working on my (many) projects with a focus on the 2023 Main Kit. Please don’t hesitate to leave questions or comments below!


September 7, 2023
Using The 2023 Advent Calendar Cards To Create A Circle Shaker Advent Calendar
This year I've got a couple fun projects I'm playing around with in addition to documenting my December using our December Daily® collection.
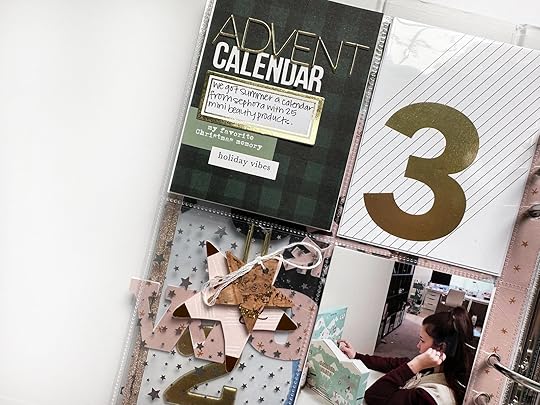
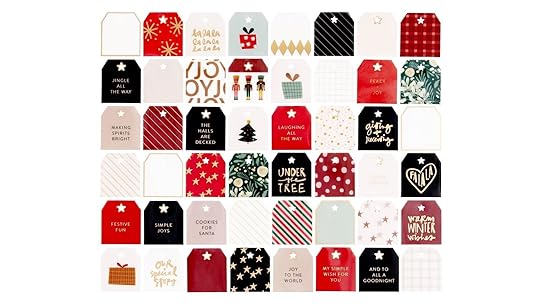
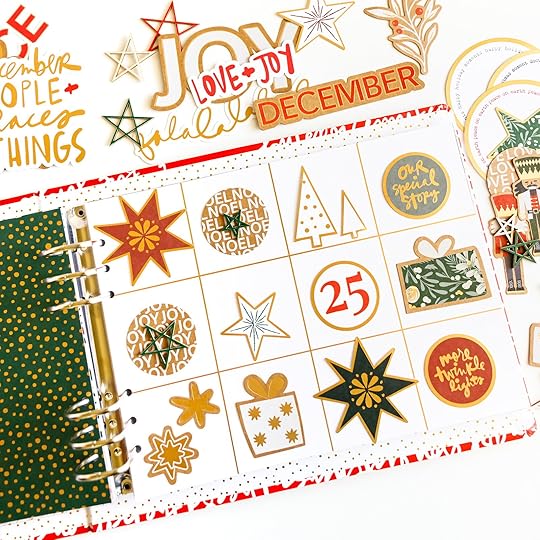
The first is one came about while I was doing a video prior to the launch talking about the 2023 Sticker Advent Calendar. This year's Advent Calendar includes 4x6 number cards - these are packaged in front of the fun seasonal stickers + sticker embellishments that you can open all at once or one day at a time for your own Advent Calendar. I love that this is a product that has multi-uses: not only can you use the stickers to support your December storytelling, you can also do something with those 4x6 number cards.
You could easily punch holes in the number cards to create a 4x6 December Daily® album and pair the number cards with photos and words. You could use the number cards here and there in your album to support your stories.
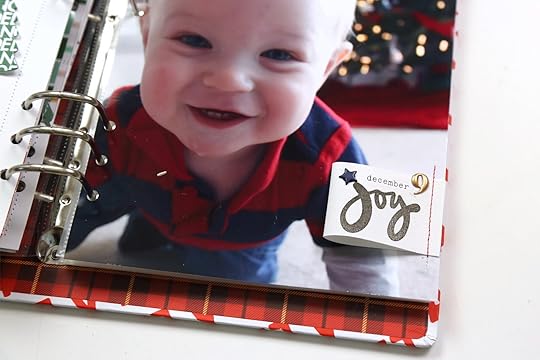
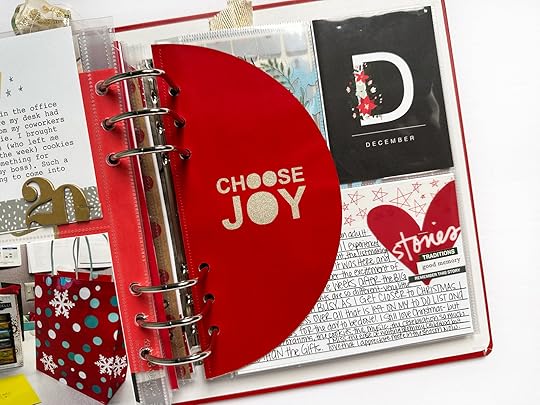
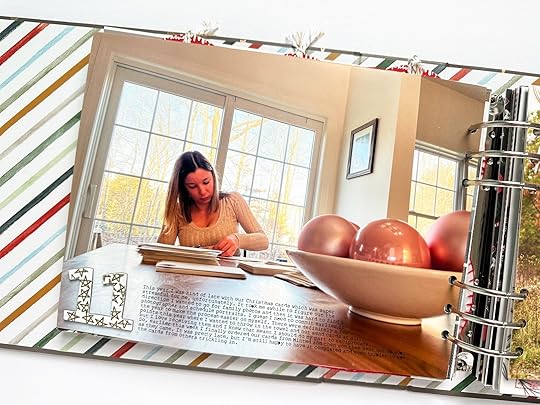
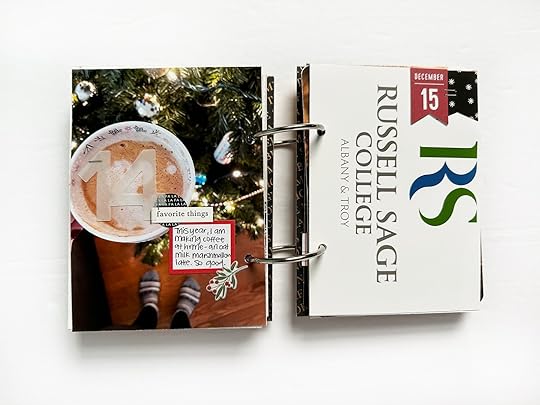
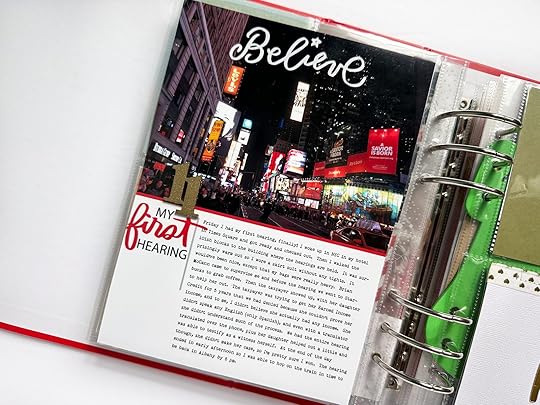
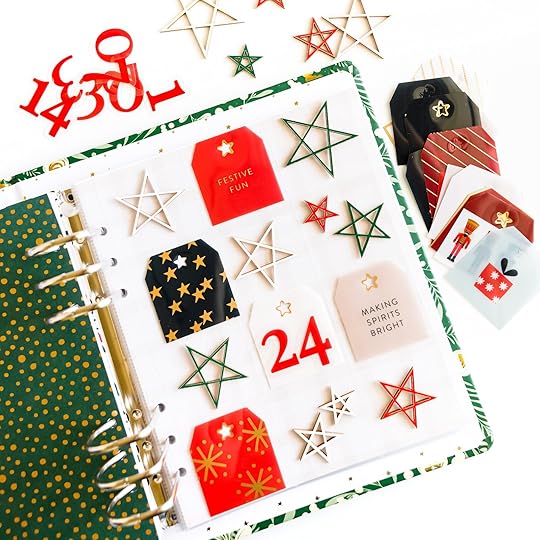
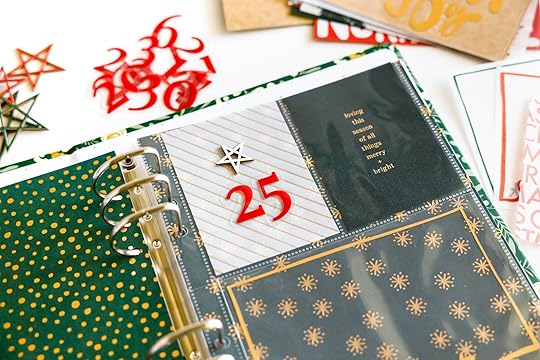
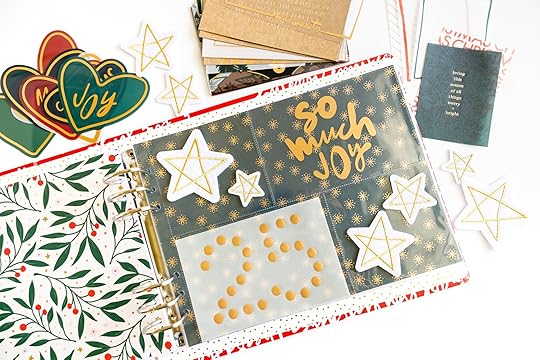
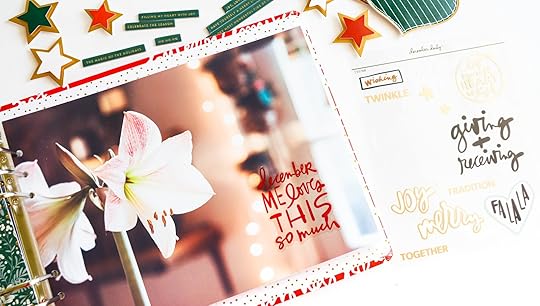
I considered those ideas and then decided to go in a different direction after flipping back through my 2022 December Daily® album and seeing this 1/2 circle shaker page.

I loved recording a little story about our Sunday morning but I also really loved the 1/2 circle shaker page: the color (red type on white), the messy red stitching, and the sequin mix.
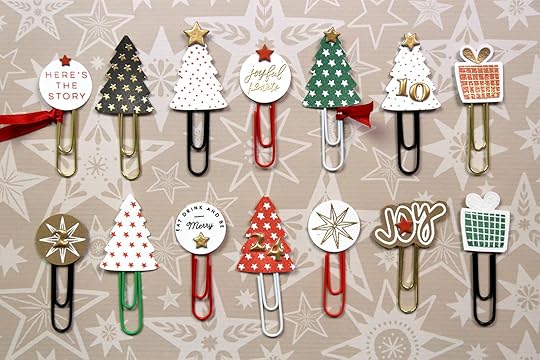
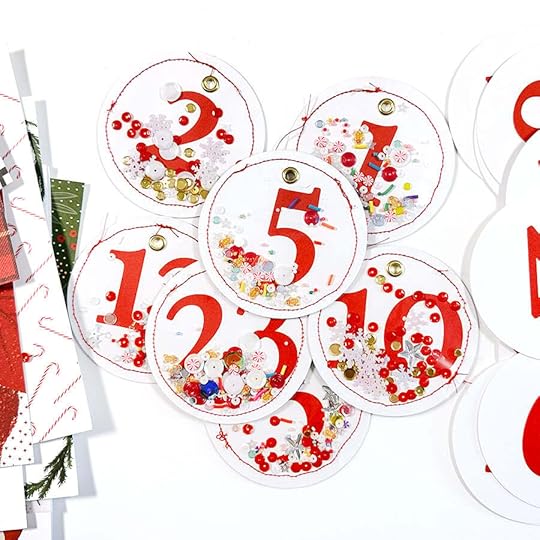
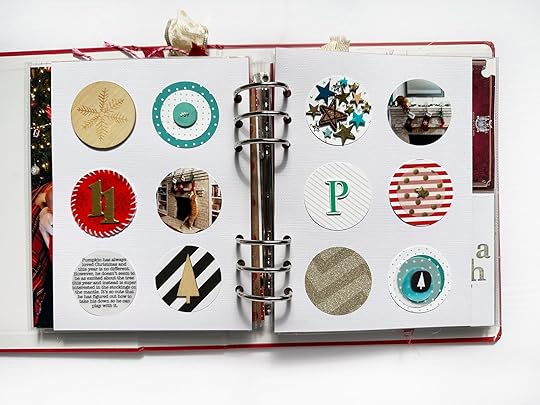
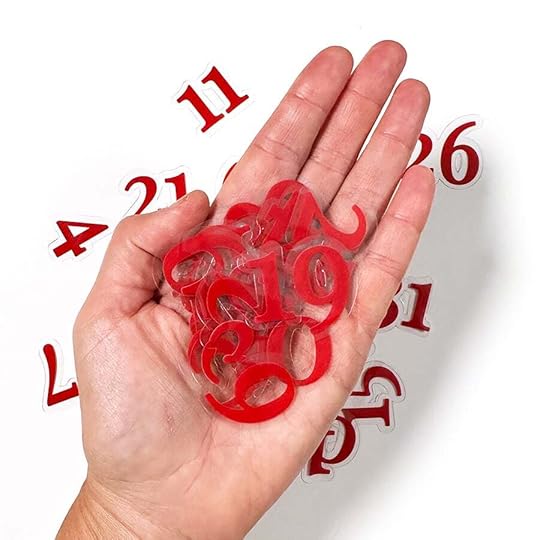
Seeing that page pushed me over the edge to decide to turn the number cards from the Sticker Advent Calendar into a series of circle shakers with December Daily® pattern papers on the back. My plan is to make all 24 cards into shakers and add one simple December activity to the back. These could be hung on a tree (that would be so fun) or hung together using a dowel to create a mobile of hanging circles.
I love that this is something I could bring out year after year when I get out my holiday decor.
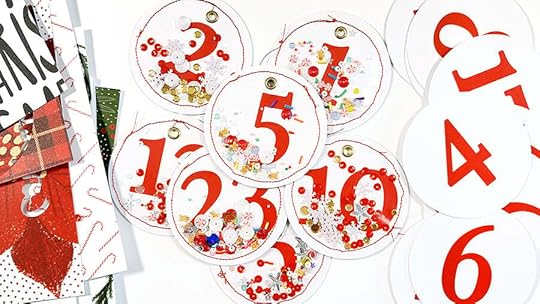
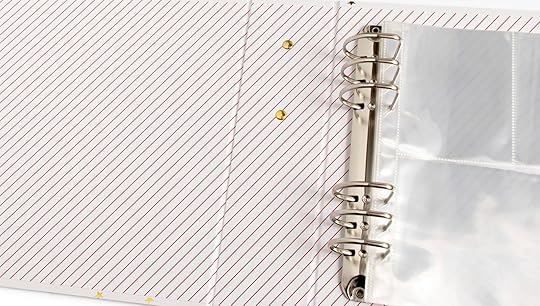
I used a 3.5 inch circle punch to punch out each number. To create the shakers I'm using pieces of plastic cut from page protectors from my stash. I'm stitching the messy circles with my sewing machine and adding in the sequin mixes/charms/embellishments before completing the stitched circle. I'm punching circles from past + present December Daily® pattern papers and adhering those to the back. I'm using gold eyelets for the holes to hang the circles. Once I finish all the circles I'll add a simple activity to the back of each circle.
Here's a video that walks through the process for putting these circle shakers together:
I'll share once again when I have all the rest of the circles finished and I figure out how I want to display these during the holiday.
If you have fun ideas for simple activities to add to the back please add them in the comments below!
SUPPLIES2023 Advent CalendarPattern Papers3.5 Inch Circle PunchWe R Memory Keepers Hole PunchGold EyeletsCrop A DileBrother Sewing MachineSequin MixesPage Protectors (or other plastic) to stitch on top
September 6, 2023
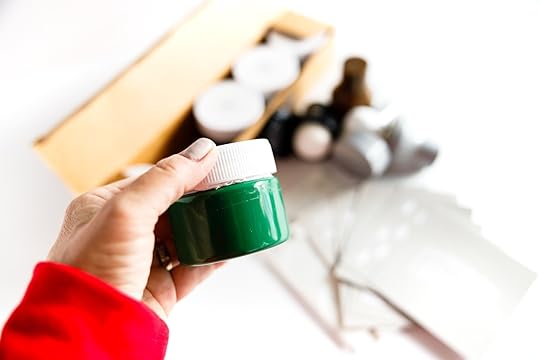
December Daily® 2023 | Paint + Play with Jill
Hello friends! Welcome to Paint + Play with Jill! My intention for this series is to experiment with this year's December Daily® mixed media products to either inspire you to give them a try or give you new ideas for how to use them.
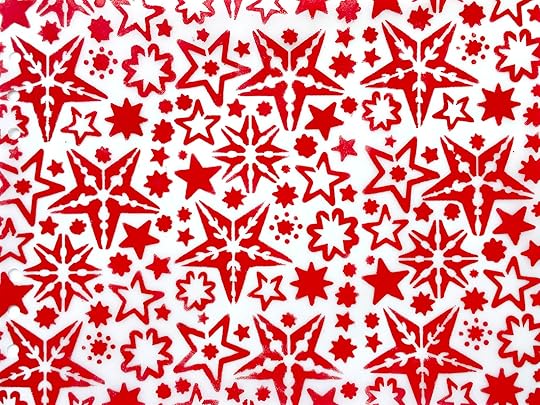
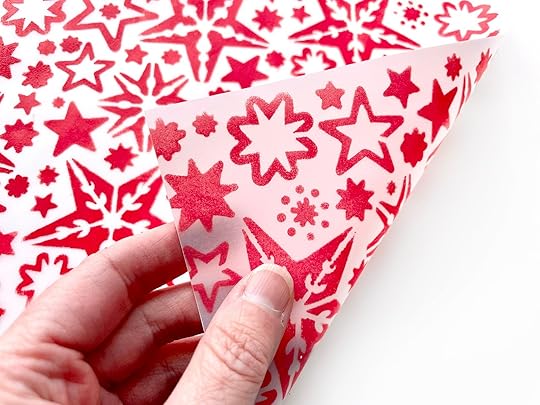
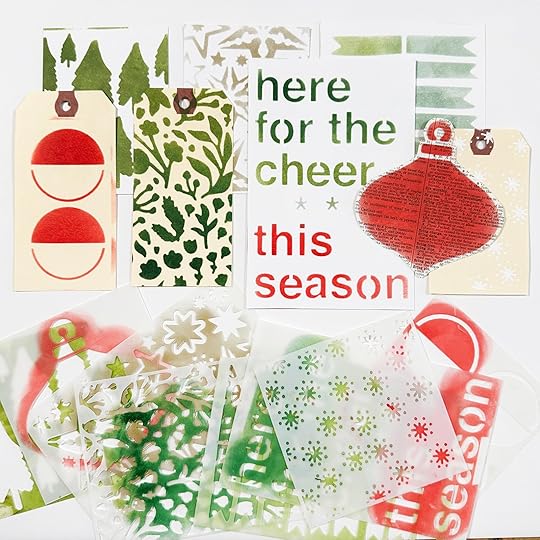
To start the series, I want to show you simple ways to use the stencils to create your own patterns on vellum. You can also try these techniques on regular paper but I went with vellum because I'm obsessed with see through elements in my December Daily projects and can never seem to have enough vellum! So whether you missed out on the specialty paper pack this year, want to add some different colored vellum patterns to your stash (I'm obsessed with the red!), or, like me, you want to expand your vellum options, I hope you give these a try!
Notes:
The vellum I am using here is a medium weight vellum that has been in my stash for a very long time. I do not have the exact weight or brand available but if you are shopping around for vellum, I recommend looking for a heavier weight variety because it holds up better as a full page in an album.
I have created all of my patterns on 8.5 x 11 sheets of vellum because I have not yet decided on my album size and they can be easily cut down to 6x8 later.
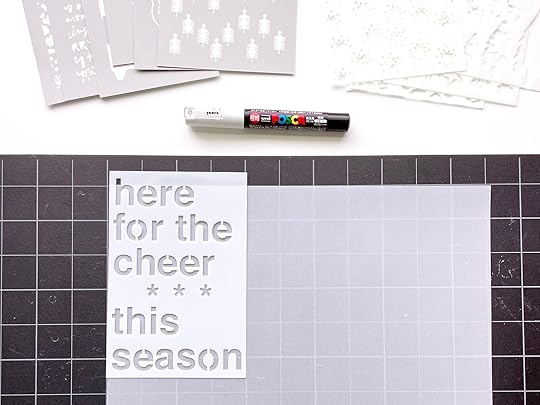
FINE TIP POSCA PAINT PEN TRACING
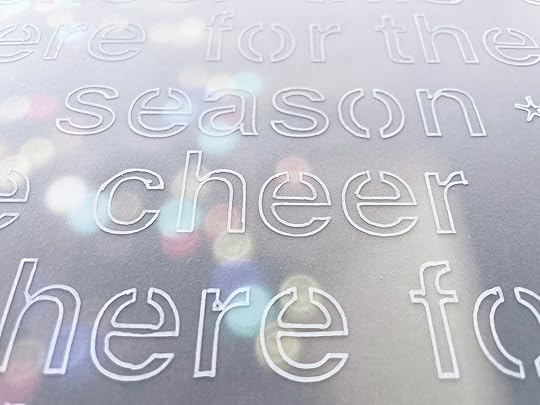
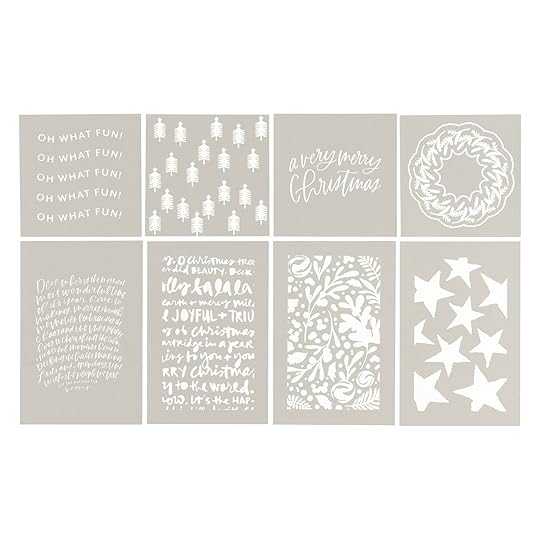
This is my favorite way to use text based stencils because it's quick and not messy. All you have to do is trace the inside of each letter with a fine tip Posca Paint pen. The paint dries relatively fast so you can pretty quickly reposition your stencil as you go along without waiting for drying time. Just be sure to lay the stencil directly down flat without skidding to prevent any smearing. I've used this technique many times without any issues.
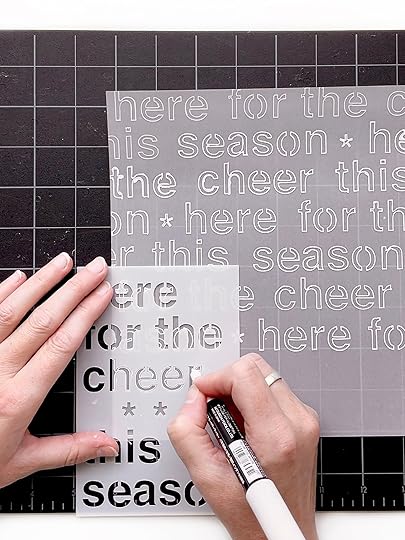
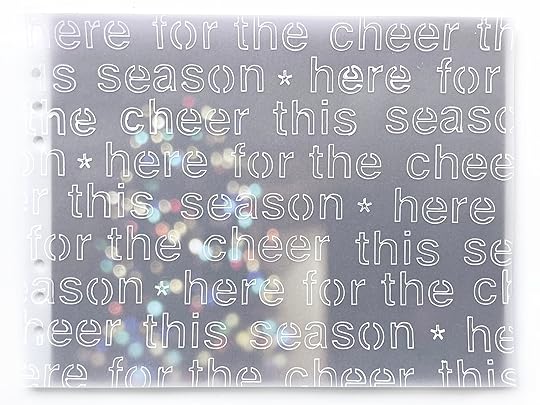
The "here for the cheer this season" stencil worked perfectly for creating an all over pattern. Just stencil each word one at a time in subsequent rows. I like to do it over a cutting mat with a grid to help me keep the lines straight. In between each complete phrase, I added one of the little asterisks from the stencil.

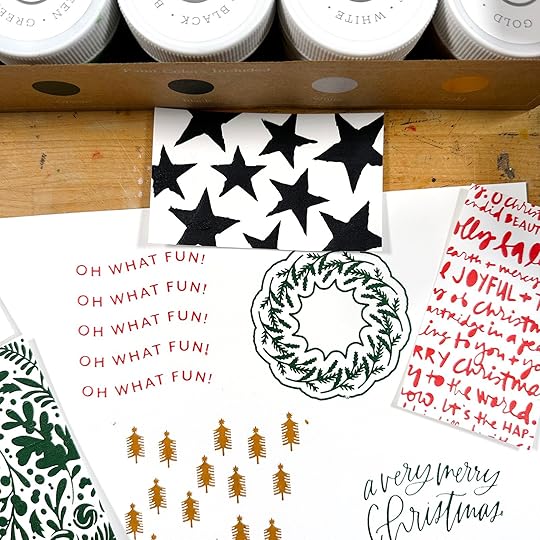
DABBING ACRYLIC PAINT WITH A MAKEUP SPONGE
This technique is very similar to what you've probably seen Ali doing with the ink pads and paper pouncers, except with acrylic paint. To check that out, refer to the full collection blog post in the stamp section. The ink pads work great on regular paper and card stock and offer a lot of fun color options, but if you would like to stencil on something slick or non porous, I recommend acrylic ink because it dries significantly faster.
Ali's new paint is a heavy body acrylic so when you apply it in a thin layer like I'm going to show you, it dries very fast. Fast enough that by the time you are ready to move the stencil to continue a pattern, you are able to layer it on top of fresh paint pretty quickly. I also tried this on a sheet of transparency, and while it worked, the coverage was not quite as even and could be scratched off. So I recommend sticking with vellum if you are going for a hand stenciled see through paper.
Because acrylic will ruin the paper pouncers by clogging them up, you'll want to pick up some cheap makeup sponges at the dollar store that can be thrown out after each use.
For my examples, I will be showing you how to create all over patterns, not smaller tags or cards, so not all of the stencils will work for that. But most of them do! The stencils that work the best for creating a pattern are the ones that have full shapes without any portions being cut off at the edge, like the trees or stars. However I will show you how I got around that to use the little starburst/snowflake pattern a little later.
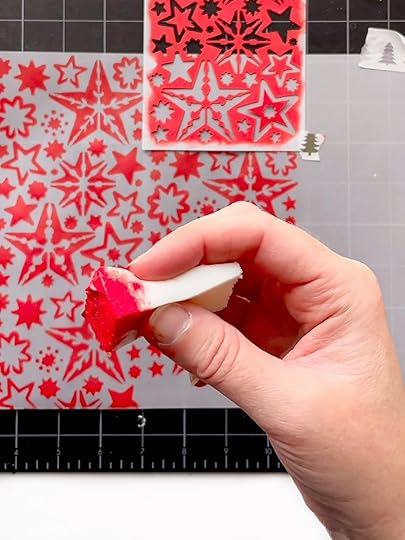
Let's start with my favorite star pattern stencil!
Start out by taping a sheet of vellum to your work surface with washi tape. Then tape the stencil on a few sides as well. I also use my fingers to hold it down, but the washi tape helps keep it in place. Gently dip your makeup sponge in the paint so you have a very small amount on it, and then dab it off a few times on a scratch paper or excess plastic packaging you have laying around. You just don't want it to be globby and want an even layer on your sponge before taking it to your stencil. Start quickly dabbing or pouncing the sponge all over your stencil and reapply more paint as needed. You'll want to keep doing this until you have even coverage on your design and the texture of the paint stops looking sponged on. It will start out with a spongy texture but as you keep dabbing, it should even out to a nice solid thin layer of paint. Note that my tests with transparency sheets did retain more of the sponge texture than the vellum does.If it looks like you have added too much paint when you start dabbing, just keep going and dabbing over that part. The sponge will pick up some of the paint and redistribute it throughout your design. When you go to reposition your stencil to continue the pattern, gently peel up the washi tape and pull the stencil away. Then check to see if what you've just added is dry by gently touching it. If you have been applying the paint with the correct thickness, it shouldn't take more than a minute or two to dry. For the stars stencil, you will want to overlap your stencil a bit with what you previously did to create a seamless design. Try to get the edge of the design to be right next to the part you just stenciled, which means overlapping the border of your stencil over the previous design. I'll admit that the first time I tried this, I did not get them close enough, so I tried again and it ended up looking much better. I also staggered the placement of the stencil to help give it a less blocky pattern.It only took me about 20 minutes to finish one sheet of 8.5 x 11 paper with this stencil. If you don't love your results, try again and see what tweaks you need to make. Experiment and have fun!
Now let's try one of the 4x4 stencils that has cut off elements. I really love the little snowflake looking pattern so I was determined to make it work.
First I took some washi tape and used it to mask off any snowflake that was cut off. Now it's read to create a pattern!Use the same dabbing technique as before. I chose white to make it look like snowflakes but gold could also be really pretty! Because the shape of your pattern does not have straight edges as last time, you will have to do some puzzling together this time. Consider rotating your stencil to try to get them to fit together. In the end you may have some small blank spaces. I fixed that by carefully dabbing in just one or two snowflakes at a time.
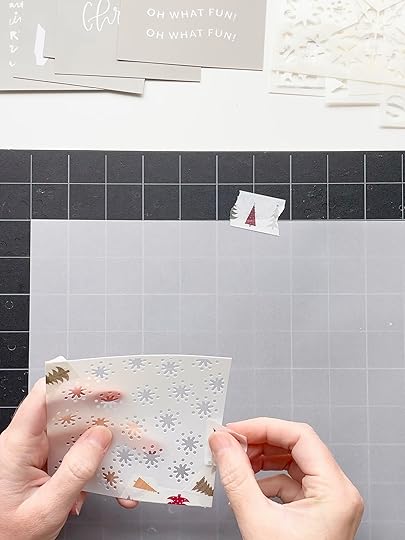
My end result was a little messy and I accidentally dabbed paint over the edge a few times but am able to easily hide that by layering over some other elements.

USING STENCILS TO MASK A PATTERN
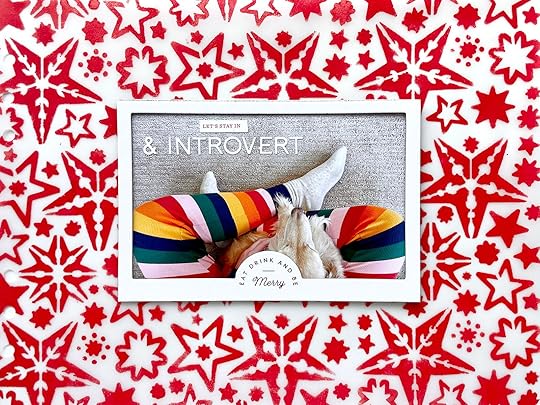
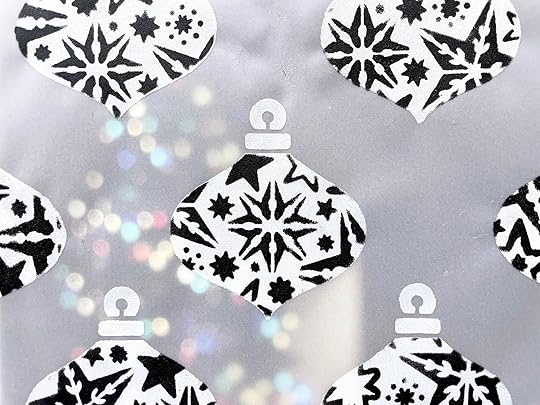
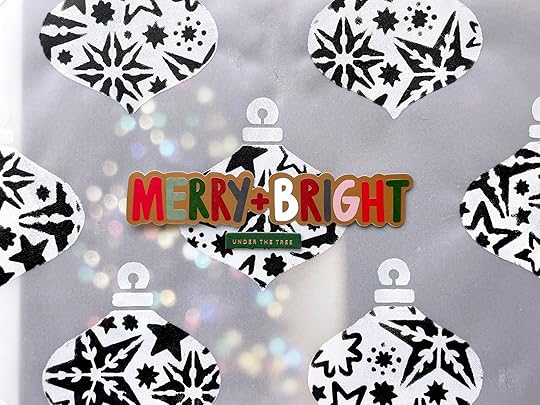
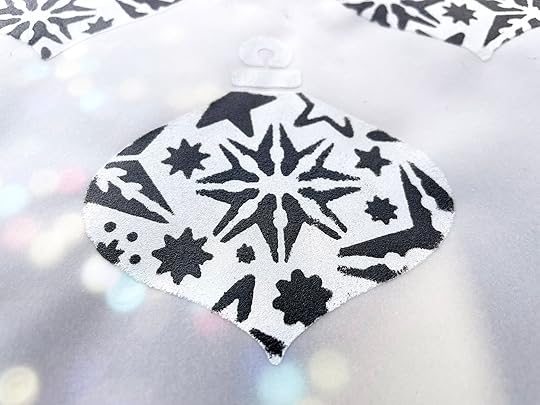
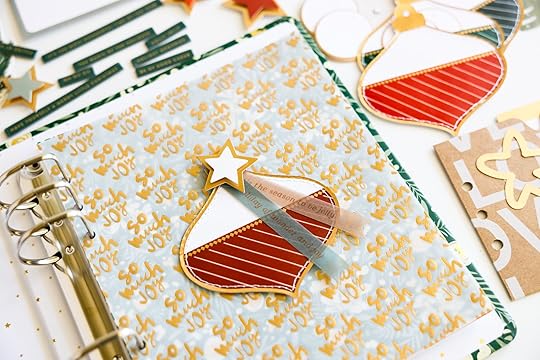
When I saw the large ornament stencil, I knew I wanted to try masking in one of the other stencil patterns inside. The floral, stars, or the snowflakes would all work great for this, but I went with the stars because they are my favorite.
I had a hard time choosing my color combination (so many fun options!), but ended up trying a fun black and white ornament pattern. I used the ornament pattern papers from the collection as my inspiration for how to lay them out (as well as using my grid for spacing), but if I were to create this again I think I would make the ornaments a bit close together. I guess that means I need to play with more colors!
Ornament Pattern Instructions:
Start with the ornament stencil and your base color. I chose white. Tape down your paper and stencil like described above and then start dabbing your paint on. Since this is a stencil with a large open area, you will need to do a bit more dabbing to create an even texture. But keep going until you get a nice matte finish.Move the stencil to create the rest of the ornaments in your pattern. I recommend lining up the point of the ornament with a an intersection of a grid to help you measure how much space is in between each ornament. Once the white ornament bases are all created, put the ornament stencil back onto the one you originally created, making sure to line it up as close as you can. Tape it down with washi tape and then use another piece of washi tape to mask off the ornament topper. Then tape down your desired pattern stencil directly on top. Now you can dab your next acrylic paint color onto your ornament through the second stencil to create the pattern. You may consider making off the edges of the ornament to prevent excess paint from going off the sides. Peel up both stencils and you should now have a lovely patterned ornament! Continue with the rest of the ornaments, shifting the placement of your pattern stencil so that the pattern on each ornament varies.
I hope this post inspired you to give the stencils and acrylic paint a try and I can't wait to see what fun patterns you create!
You can find me on Instagram as @jill.drangsholt
I will be back next week with more mixed media play! Now that we've warmed up with some simple patterns, I have some fun ideas using lots of layers that I want to try. But if you have any requests for something you'd like me to try in the next few weeks, leave a comment below and let me know!
September 5, 2023
December Daily® 2023 | Classes

DECEMBER DAILY® PRODUCT PLAY | TRY THIS
December Daily® Product Play is all about ideas and inspiration for working with physical products from the December Daily® Collection. For 30 days in November, you'll receive one idea per day from the contributors to this class (includes Ali). Ideas in this workshop will focus on physical products from our 2023 December Daily® collection. Whether you are preparing to document 2023 or finishing up telling stories from past years, we hope these fun, creative ideas help you use your products to get your stories told.
Our goal for this class is to provide inspiration to support your December storytelling by showcasing a wide variety of voices and project styles. For this workshop each contributor has selected a different product to create with. Some ideas shared in this workshop will be completed spreads with images and journaling, some ideas will be for foundation pages, and others will be mock-up examples to spark your creativity and help you to create homes for your December stories.
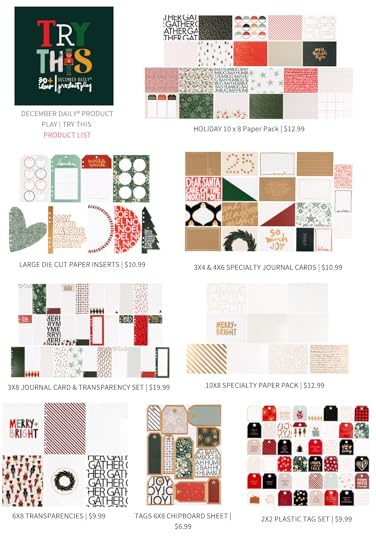
Download a printable December Daily® Product Play | Try This product list here
Here are the products that will be featured in this workshop (click to download list above). Many of these products are still available during our Order Selection Period.
10x8 Paper Pack 10x8 Specialty Paper Pack 2x2 Plastic Tag Set 3x4 + 4x6 Specialty Journal Card Set 3x8 Transparency & Journal Card Set 6x8 Chipboard Sheet 6x8 Transparency Papers Canvas Holiday Phrase Circles Die Cut Paper Inserts Envelope Bundle Large Felt Numbers Plastic Hearts Polaroid Chipboard Frames Silkscreen Pack Stencil Pack Variety Die Cut Bundle Window Cards Wood Veneer Stars 6x8 Tags Stamp Set 6x8 Trees Stamp Set Canvas Circles
Registration will open on Tuesday August 29th at 10am ET. Sign up during the boxing period for $20. After the boxing period ends the class will be $25.
2023 DECEMBER DAILY® HYBRID PRODUCT PLAY
Hybrid scrapbooking combines digital products with physical supplies to create paper (or printed) memory-keeping projects. For this class, our contributors will share with fun, creative ideas and inspiration for working with these digital products from the 2023 December Daily® Collection:
December Daily® 2023 Digital Main Kit Digital Large Plastic Hearts Digital Holiday Phrases Large Sticker Sheet Ali's Christmas Phrases Digital Stamp Set
Note: These products will be available for purchase on October 13, 2023.
All of the projects and techniques provided in this self-paced class will demonstrate how versatile digital products can be in helping you get your stories told. Our hope is that you will come away with ideas for using digital products to create homes for your December stories.
The price for this class will be offered for $12 during the boxing period. After the boxing period ends on 9/30 the price will go up to $15. Please Note: This workshop is not meant as an in-depth software workshop. The contributors of the class will be using either Photoshop, Photoshop Elements or Canva, and the examples and projects they share will show you the steps they take to create physical projects using digital memory-keeping products.
Join the December Daily® community for a fun online December Daily® prep day on Saturday, November 18th, 2023. Use this opportunity to finish past December Daily® projects or start working on your project for 2023. The first live video will start on Saturday, November 18th at 10:00 am Eastern.
Cost is $5.
Each lesson will be open for you to access 15 minutes prior to the live content which will be available at the top of each hour. Then after the discussions and/or project ideas, you are free to work on your own projects, clean up, prep, etc.
Note: We will have more details about the schedule and content in the coming weeks.
Each topic will have its own Lesson within the 10 Hour Classroom. Inside each lesson you'll find the live video, a free download, a challenge, and a spot for conversation in the comments section of the lesson. Live chat will be available for anyone who wants to converse back and forth during the live event. Note: All videos will be recorded so you can watch them at your own pace. You don't have to be online on the 18th to access the content.
September 4, 2023
December Daily® 2023 | Plan + Play with Linda
Hi everyone! It’s Linda and I’m so excited to be hanging out with you here on the blog all month as we get ready for December Daily 2023. 2023 is going to be my 12th year participating in this project in one way or another and, after doing it so many times, I can safely say that this project is one of my absolute favorites, but it can also easily get overwhelming, even if you’ve done it a few times.
So, whether it’s your first time or your seventeenth, I will be here on the blog every Monday in September, and over on the @decemberdaily instagram account, to help you plan out and get ready for this project.
Looking Back: AlbumsBefore we even dive into this year’s project and products, it’s so important to look back on prior years’ projects. Looking through your projects from previous years can be so helpful in figuring out what stories, products, and styles you want to use in the year ahead.
Even if this is your first year, this section is for you! I would suggest to look back on previous year albums from Ali Edwards and other creators in the community to get an idea of things you might want to include in your album this year.
When flipping back through your old albums or watching flip throughs of others’ old albums, here are some things to look for to take notes for this year.
Page Styles.Do you want to use divided page protectors? No page protectors? Do you like interactive elements? Simple or busier? Think about the various styles of pages that you use and like.
Small divided page protectors. I love the look of the 2x2 pocket squares filled with embellishments, photos + words. I want to make sure that I have some of the page protectors + elements that will fit in them for this year.

Interactive pages. There is a range of interactive pages you can create from simple flip-ups to some very complicated elements that I’ve seen in other’s projects. For me, I love simple pockets + flip-outs.
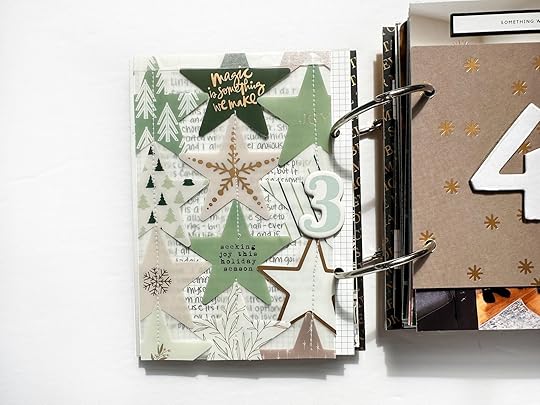
Interesting shapes & layered elements. I am someone who loves the look of layered pages of different sizes and shapes. I want to make sure to include some fun shapes in my album this year.
Design Elements.Similar to page style, but rather than looking at the overall page style, instead look at the elements that go into the design of that page. Do you like a lot of embellishments or more minimal? Do you like mixed media or clean lines?

Transparent overlays. I love transparent elements in my album! Whether they are fully transparent or vellum, I just love the look. I am going to make sure to include these in my album this year.
Full page photos. I love the impact of a full page photo. Sometimes unembellished and other times with something small.
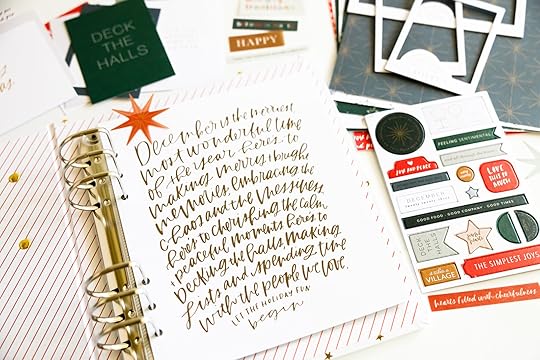
Grid design. I love a grid, and this slanted grid was an incredible idea I got from Jennie Rey’s lesson in product play that year. If you love more detailed designs like this one, consider product play as a great jumping off point for your layouts.
Products.We all love them, the products! But some products we actually love to use and others we love to just collect. Looking back on your albums can be a great way to see which products you’re actually going to use and get ideas for how you want to use product this year.
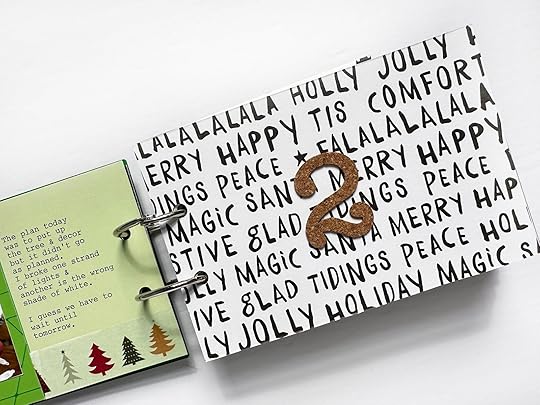
Alpha stamps. One of my go to designs is stamping large words. I know if I purchase an alpha stamp set, I am going to use it.
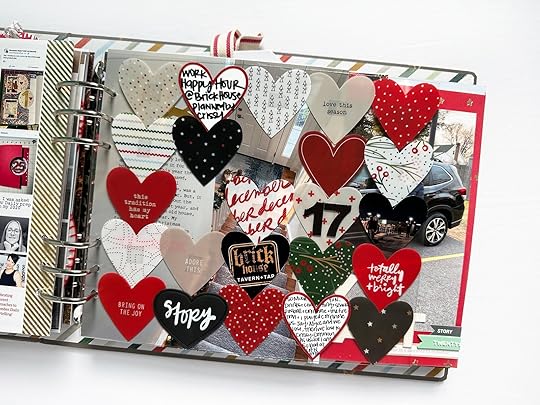
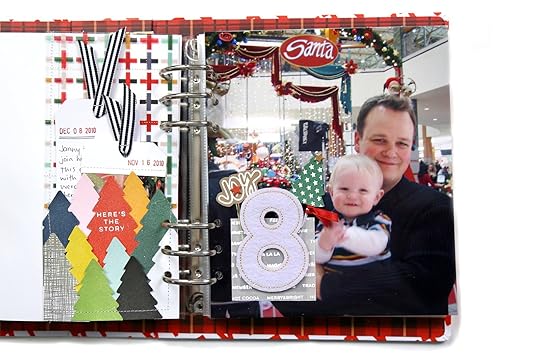
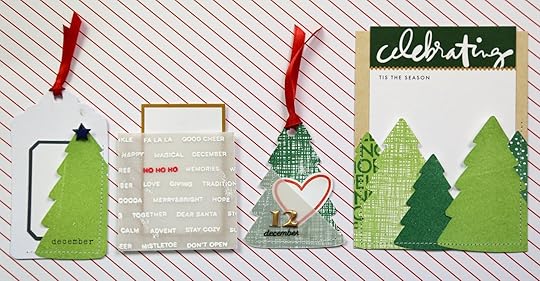
Repeated shapes. I also really love to use a repeated shape element. In the past I’ve done circles, stars and hearts. From looking at this year’s products, I think I’m going to want to repeat tags in my project this year.
Embellishment clusters. I love layering embellishments in clusters, primarily around a label for journaling. I like having a mixture of flat + dimensional embellishments. This year, I want to make sure to have labels and a mixture of textures in my embellishments.
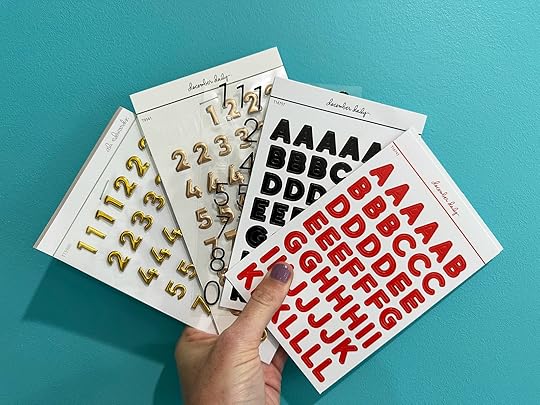
Numbers.Do you do 25 daily stories or just stories? Do you number your pages? Do you want all your numbers to match or all be different? Do you want the number to be a prominent design element on your page or minimal.
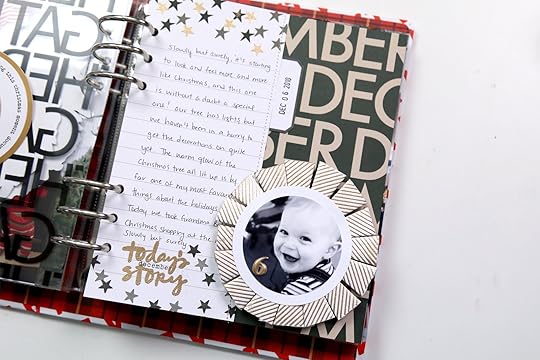
I really love my mix & match numbers, these are some of my favorites through the years.
Stories.What stories do you want to tell?
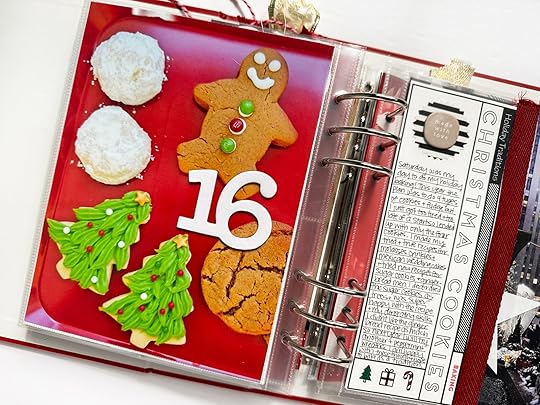
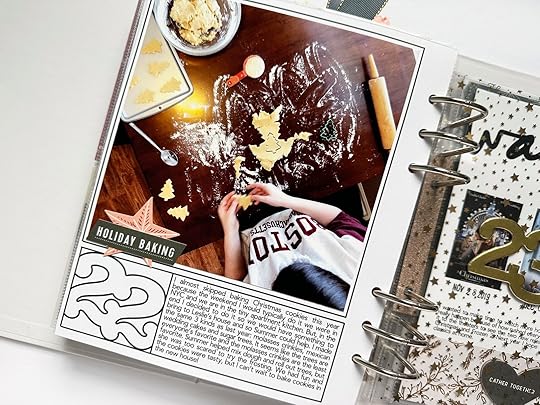
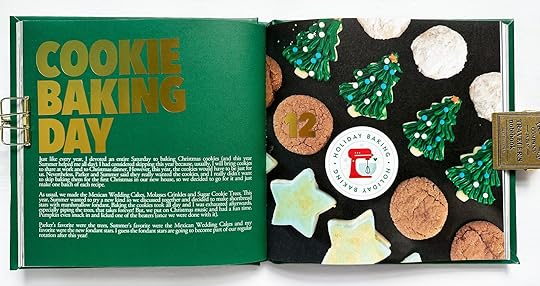
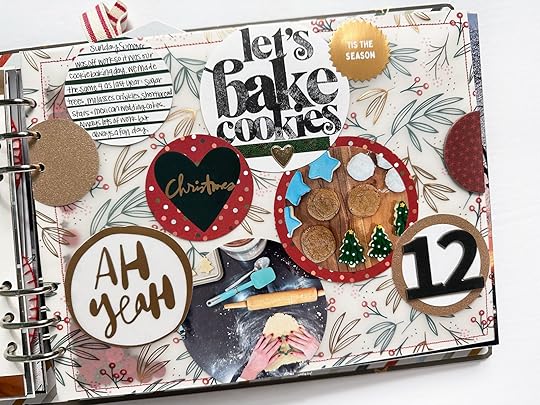
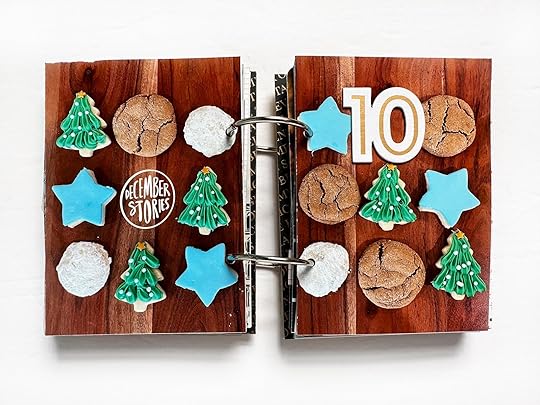
The same story year after year. There are a few stories that I tell every year, and I love seeing how they change (or stay the same) as time goes on. I also love coming up with new (and similar) ways to document them. Here is how I documented my annual Christmas cookies in a few different years.
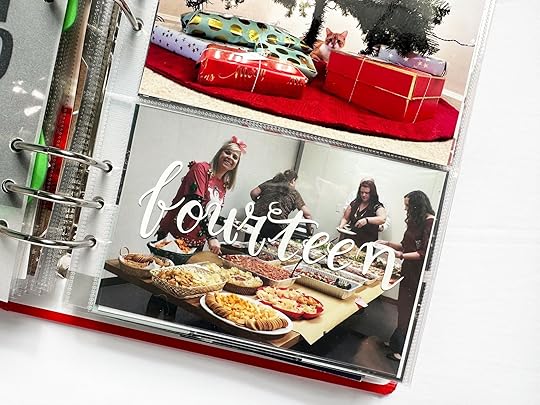
Non-holiday stories. Do you want all of your stories to be related to the holidays or just your December over all? For me, I love including various non-holiday related stories, such as what is going on at work, or end of the year recaps.
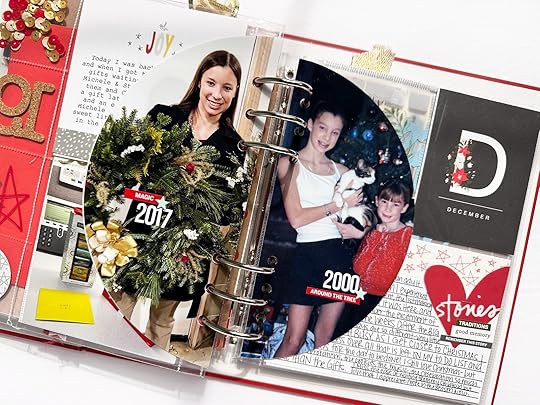
Looking back stories. Do you want to only document current year stories or do you use this project as an opportunity to just tell a story per day, even if it’s reflecting on older times? One year, I reflected on Christmas as a child. In 2020, I told the story of what was missing that year, because of the events of 2020, that had been in many of my previous albums.
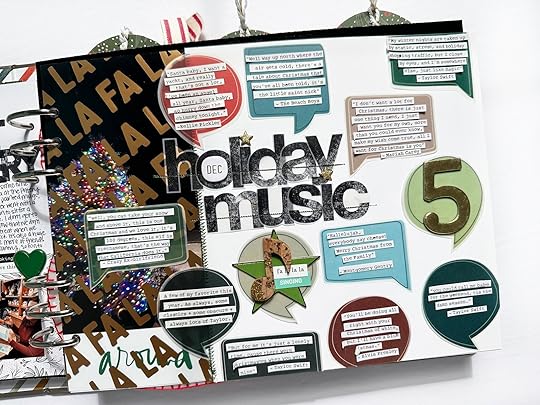
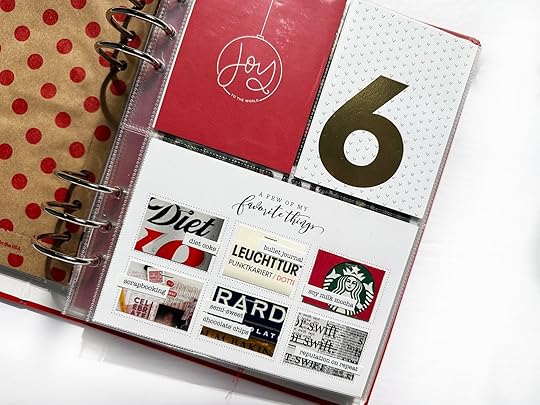
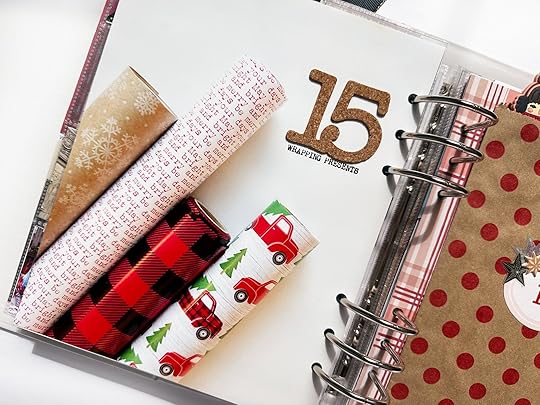
“Filler” stories. There are some stories I like to tell that don’t have to fall on a specific day. I like having a list of these stories that I might want to include in case there is a day when nothing really happened to document. Some of these stories have included the music I was listening to, current favorites, my wrapping paper.
I hope this inspires you to look back through your albums + other people’s albums to prep for this year’s project.
See Ali’s old albums here.
See flip throughs of some of my albums here.
See photos of some of my pages on instagram with the hashtag #lindalovesdecemberdaily
Looking Back: SuppliesUnless this is your first year doing December Daily, you probably have a box of supplies for this project sitting somewhere in your home. And, even if this is your first year doing this project, unless this is your first time scrapbooking, you probably have some other scrapbooking supplies that would work for this project. Before purchasing new products for this year, I encourage you to look back through what you already have!
When looking through your supplies, here are some things to think about.
What from your stash can you/should you purge?My first step is always to remove the obvious trash from my stash. These might be scraps of paper or notes that were related to last year’s album. Just getting this stuff out of the bin is helpful to move forward.
Next, select products that you no longer want in your stash that you can donate/get rid of. When determining what to purge from your stash, here are some things to consider:
Why didn’t I use this product? If you didn’t use it because your album last year was small, but this year your album is going to be larger, that would be a good reason to keep it. If you didn’t use it because it’s not your style, that would be a good reason to get rid of it. How old is this product? If it’s something you picked up last year and you haven’t gotten to using it yet, you might want to keep it. If it’s been sitting in your stash for five years, maybe it’s time to let it go.
Keep in mind, your entire “December Daily” product bin doesn’t need to be purely December Daily supplies. If you have some beautiful red alphas that have sat in your December Daily bin all year without being touched, maybe now is the time to move those to your regular alpha bin so you can use them in other projects.
Alternatively, if you feel like your December Daily is short on basics like stars or numbers, it’s worth looking through your non-holiday scrap supplies to see if you can find anything to pull in that would coordinate nicely with this project.
What from your stash do you want to keep, but not for this year?If you’re like me, you’ve already taken a look at the current year products and have ideas swarming in your mind. Basing your album around the new products that excite you is a great idea! But that doesn’t mean your stash has to get ignored. Think about what products from your stash would coordinate nicely with the products you plan to purchase this year.
Everything else can get boxed up for another holiday season to limit your selections for this year. I stashed a lot of these products in the main kit box from last year and put them back in the closet so that they are out of my way while working on this project this year.

If you are still trying to narrow down your shopping list this year, going through your stash is a great way to determine what you should pick up. What do you already have that you don’t need to get? If you have a huge stack of various star shapes, maybe you can skip purchasing extra stars this year.
Alternatively, what are you missing? If you are running low on numbers, you might want to make sure to pick up a few extra sets of those. Don’t forget about basics too, like adhesive and page protectors.
What from your stash do you want to make sure to use this year?Are there some large embellishments in your stash that you absolutely love, but never got around to using? What about some patterned papers? Look through your stash and pick out the products you want to make sure to get into your album this year.
For me, I want to use a lot of the patterned papers I picked up last year. My album last year was only 4 x 5.5 so I didn’t have an opportunity to use a ton of paper and there are so many pretty ones that I missed out on using! I am going to make sure to keep those papers in my organizer for this year.
I like to have my products readily available during the month in a few different organizers. I will share a lot more about this later this month once I add the new products into the stash, but now is a great time to think about how you plan to store your supplies and how much space you have.
In determining which products from my stash I wanted to keep, I organized them in my organizers, making sure to leave a lot of extra space for new products. During the month of December, these will live on my desk so I have everything on hand for when I want to create.
I hope this post helped encourage you to pull out your old projects & products and start prepping for this year’s project! If you have any questions/thoughts to add please leave them in the comments below.
You can find me on instagram & youtube as @lindalovescreating
I will be back next week when we will be focusing on selecting an album size & format for this year’s project. Happy crafting!
September 1, 2023
In Case You Missed It | September 1
Happy Friday, friends! Welcome to the latest
In Case You Missed It. Just a reminder that this is a quick post that will happen every Friday afternoon with all the updates and links that have happened throughout the week. This week we launched our 2023 December Daily® Collection and this edition will be focused on the updates surrounding this release. We’ll return to our normal format next week. So, let's get to it:
THANK YOU!
First and foremost, thank you all so much for your support and enthusiasm surrounding this year’s December Daily® release. This collection is the result of months of hard work from our team, as well as our team members at Inked, and this community makes it all worthwhile. Shop the collection here.
LOW QUANTITY ITEMS + RESTOCKS
Thank you so much for your enthusiasm and support for this collection! Due to manufacturing timelines and constraints, we won’t be able to restock sold-out items. We will be offering digital versions of the majority of items across this collection. Those will be released on October 13th. This includes 6x8 and 10x8 layered templates.
LOW QUANTITIES AS OF FRIDAY AT 4PM ET
NEW CLASSES
2023 DECEMBER DAILY® PREP DAY. Join the December Daily® community for a fun online December Daily® prep day on Saturday, November 18th, 2023. Use this opportunity to finish past December Daily® projects or start working on your project for 2023. The first live video will start on Saturday, November 18th at 10:00 am Eastern. Cost is $5.
DECEMBER DAILY® PRODUCT PLAY | TRY THIS. December Daily® Product Play is all about ideas and inspiration for working with physical products from the December Daily® Collection. For 30 days in November, you'll receive one idea per day from the contributors to this class (includes Ali). Ideas in this workshop will focus on physical products from our 2023 December Daily® collection. Whether you are preparing to document 2023 or finishing up telling stories from past years, we hope these fun, creative ideas help you use your products to get your stories told.2023 DECEMBER DAILY® HYBRID PRODUCT PLAY. Hybrid scrapbooking combines digital products with physical supplies to create paper (or printed) memory-keeping projects. For this class, our contributors will share with fun, creative ideas and inspiration for working with these digital products from the 2023 December Daily® Collection.
PRODUCT Q+ A WITH ALI ON INSTAGRAM
Ali has been answering a wide range of questions, sharing creative product ideas, and more over on our December Daily® Instagram account. All of her content has been saved as a highlight on that account to be enjoyed at your convenience. Find it here.
ORDER ISSUES
If you experienced any issues at checkout, or have questions about the release please reach out to our Customer Service team and they will be happy to help you! Contacting them ensures we are keeping track of these questions and answering them in a timely manner. It's difficult for our team to keep track of all of the questions left on multiple threads/posts on social media with all the excitement-- we are doing our best and we want to make sure your questions get answered! Click here to start a new conversation.
As always, we’re so grateful to have you all as members of this community! Thanks for joining me today and have a great weekend!
December Daily® 2023 | Let's Play Series
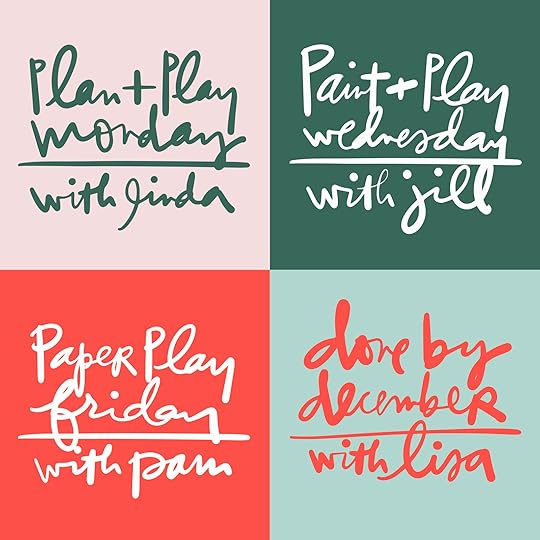
On Tuesday we launched our boxing period for the 2023 December Daily® collection. As we countdown to December and the end of the boxing period (learn more here), we're thrilled to introduce four new series designed to support and inspire your December storytelling! Each of the Let's Play series will be led by incredibly talented community members and will include a weekly post and video. We're kicking off the party on Monday September 4th. Consider this your invitation to play!
Plan + Play Monday with LindaPlan + Play Monday will be led by Linda Jordan, creative team alum, Story Planning contributor, and the instructor behind Plan, Prep, and Play. Linda will be sharing how to set yourself up for success with the project focusing primarily on the main kit. She'll have planning and organizational tips and tools, guidance on selecting your format, streamlining your stash, finding inspiration, and more. Linda will be live on our December Daily® instagram account at 1pm ET on Monday, September 4th to say hi, chat about the series, and answer questions. If you can't join us live, that conversation will be recorded and available to view at your convenience.
Paint + Play Wednesday with JillPaint + Play Wednesday will be led by Jill Drangsholt, a creative team alum and frequent class contributor. Jill will be sharing her expertise as a mixed media artist, offering tips and inspiration on using stencils, silkscreens, acrylic paint, and more. Jill's posts will include fun ideas that can translate directly to our December Daily® spreads. Jill will be chatting live soon and we'll share that information as soon as it's finalized.
Paper Play Friday with PamPaper Play Friday will be led by Pam Baldwin, another creative team alum, frequent class contributor, and the instructor behind Playing With Paper. Pam will be doing what she does best: working her magic with products from this year's collection. She'll be demonstrating creative ideas for fun, easy, DIY and interactive elements. A live chat with Pam is also in the works, and we'll share that information as soon as it is finalized.
Each of the ladies will be featuring ideas that can easily be translated across album sizes and formats, and can be replicated using either products from this year's collection, or your stash. Check back in the coming weeks for some incredible stamping inspiration from Laura Wonsik .
Done by December with LisaDone By December will be back this year and led by Lisa Varshine, AED team member, creative team alum, class contributor, and the instructor behind Magic of Moments. Lisa will be completing spreads from her 2022 album using product from this year's collection. She'll also be joined by the original #donebydecember guru, Jess Forster, as well as other community guests.
We're so excited to share the inspiration these ladies have in store for you! In addition to these series, we're looking forward to sharing other phenomenal voices from this community during our December Daily® Product Play 2023 | Try This, Hybrid Product Play, and December Daily® 2023 Prep Day classes, in addition to other fun content we'll be sharing both here and on our Instagram channels.
Bring on the December Stories!
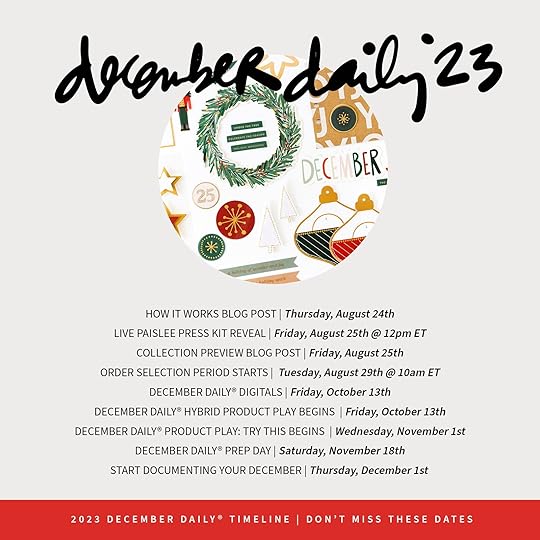
August 25, 2023
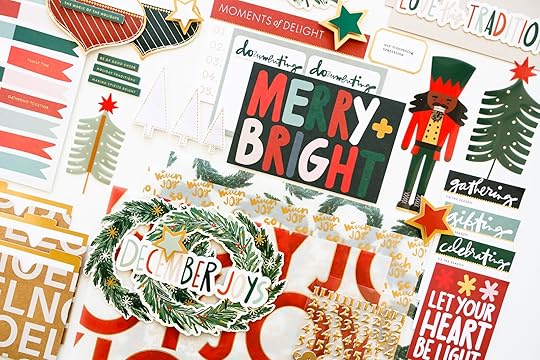
December Daily® 2023 | Full Collection Overview + Price List
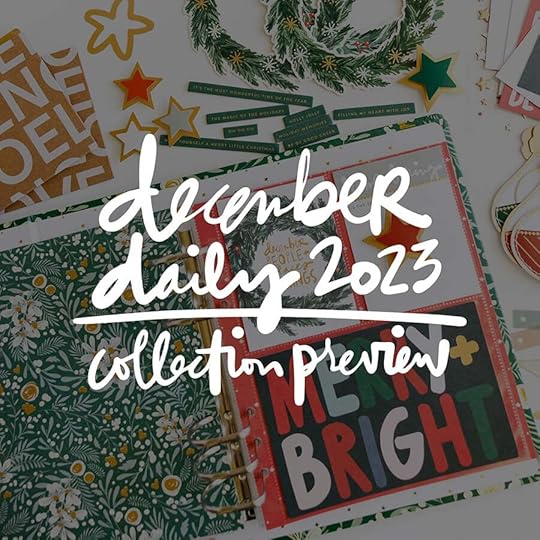
In this post we are sharing all the products we are offering for December Daily® 2023. All products will all be available on Tuesday, August 29th at 10am Eastern.
In addition to the new products shown below we will have some past December Daily® products available to add to your box at various times throughout the boxing period (read more about our Boxing Period schedule here) as well as some basic items from our shop (such as page protectors, tools and inks).
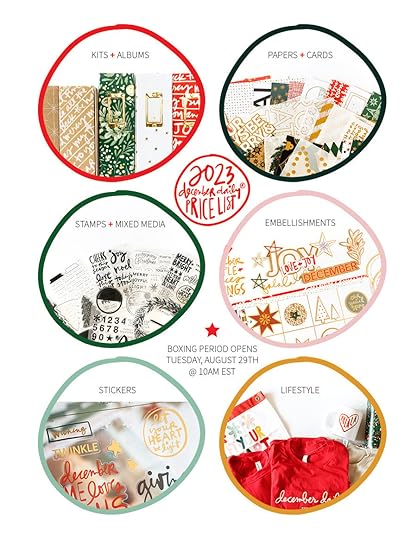
PRICE LIST: Download the 2023 Printable Price List here.
UPDATES + REMINDERS
Make sure to read our How It Works post for all the details about how our box ordering process works and few new updates for this year's process & schedule (it's different from our regular shopping interface). That post also includes shipping details. Follow December Daily® on Instagram for additional information and inspiration and/or join our December Daily® Facebook group. You can get more details on the schedule for the December Daily® season here.
DIGITAL PRODUCTS
All items listed below that translate easily to a digital format/product will be included in our December Daily® digitals release for 2023. The digital versions of the items below along with new layered templates + overlays will be available in our regular shop on Friday, October 13th.
CLASSES/EVENTS
This year you will be able to register for any or all three workshop/event registrations through our box order system:
December Daily® Product Play | Try This workshop registration will open on Tuesday August 29th (DD launch day) and will be available at an intro price of $20 during the Order Selection Period. After that time it will move to the official price of $25. More details on this year's workshop can be found at the bottom of this post (workshop begins November 1). December Daily® Hybrid Product Play workshop will open on Tuesday August 29th (DD launch Day) and will be available at an intro price of $12 during the Order Selection Period. After that time it will move to the official price of $15. Read below for more details (workshop begins on October 13th to correspond with our December Daily® Digitals release the same day). December Daily® Prep Day is happening this year on Saturday, November 18th starting at 10am ET. You can sign up for this $5 online event on Tuesday August 29th during Order Selection Period as well.
Our team put a lot of love, effort and thought into our 2023 December Daily® release and we are so excited to share it with you! Let's dive right in!
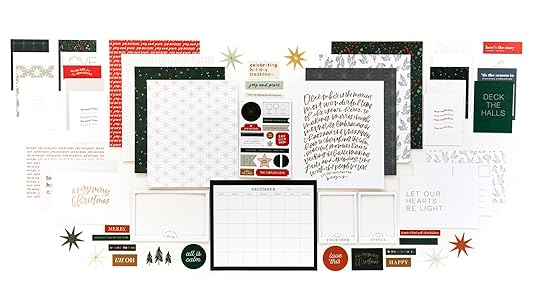
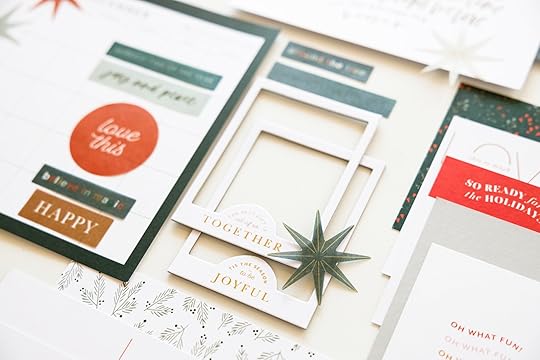
MAIN KIT | $59.99
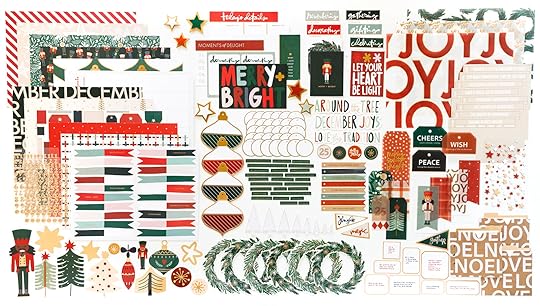
Components this year include:
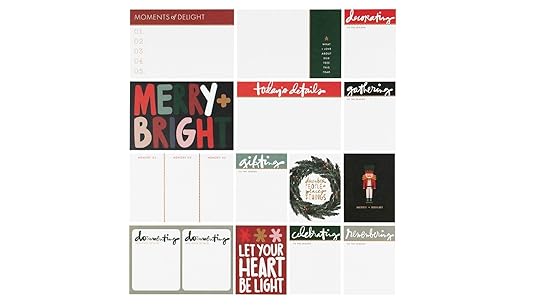
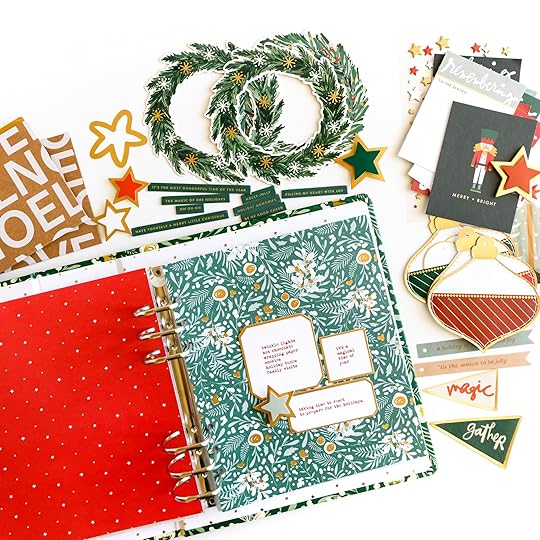
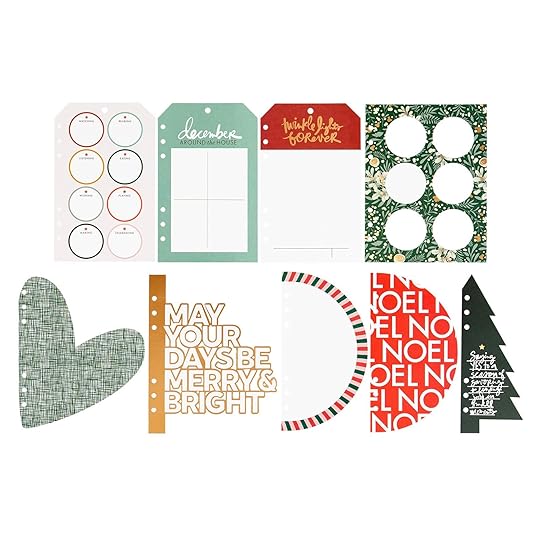
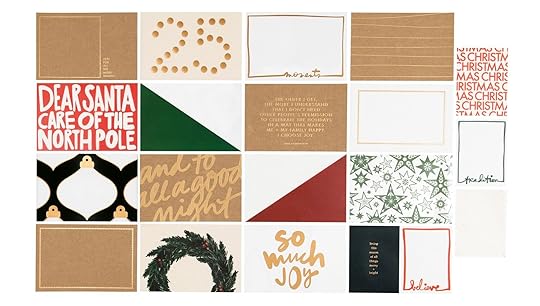
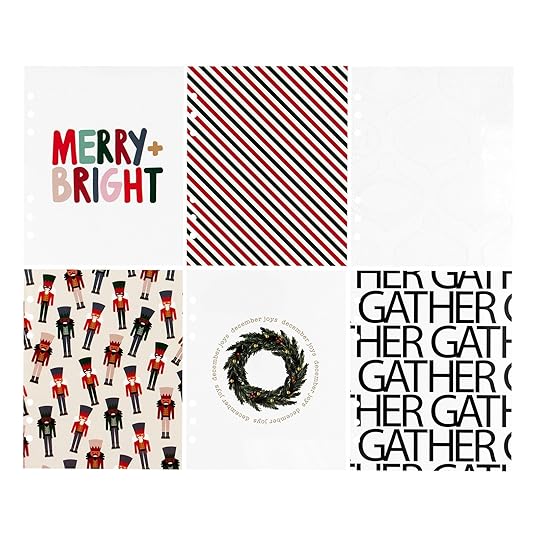
12 - 10x8 single-sided papers3 - 10x8 vellum papers6 - 4x6 single-sided journal cards8 - 3x4 single-sided journal cards8 - 4x6 single-sided Kraft journal cards3 - 4x4 pocket envelopes with cards2 - 4x6 gold foil number puffy sticker sheets1 - 4x6 chipboard adhesive-backed star sheet1 - 4x6 layered stars sticker sheet3 - 6" die cut cardstock phrases8 - 1" to 3" felt trees4 - 4" ornament stitched pockets6 - 5" die cut wreaths8 - 1.2" to 3" die cut quote cards31 - 1.5" circle labels14 - 1" to 6" plastic die cuts26 - 0.50" to 3" vellum die cuts25 - chipboard phrase strips
Here's a video walkthrough of this kit:
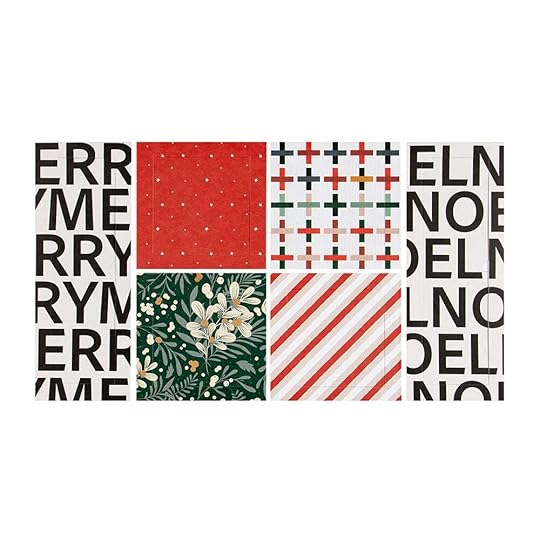
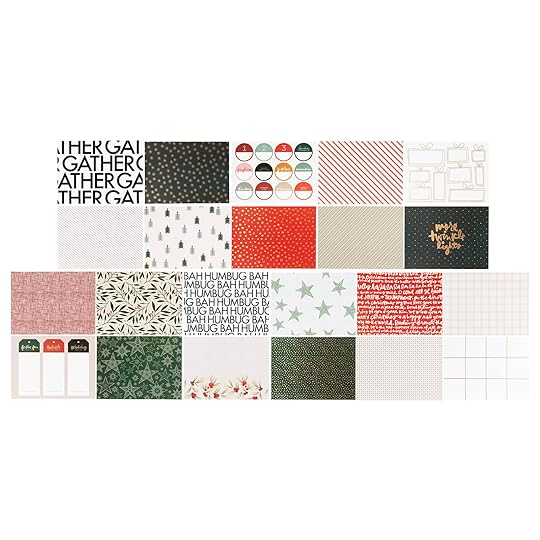
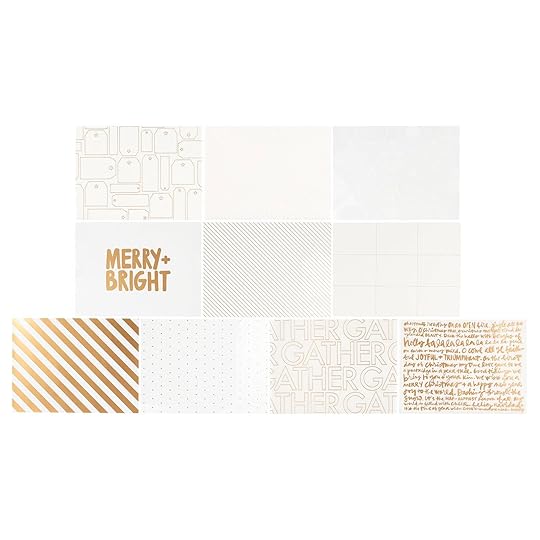
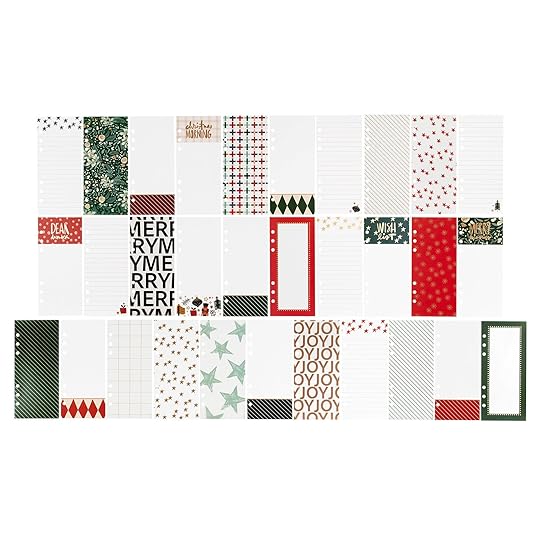
Here's a closer look at the papers - includes 3 sheets of vellum (patterns on the left column are vellum):
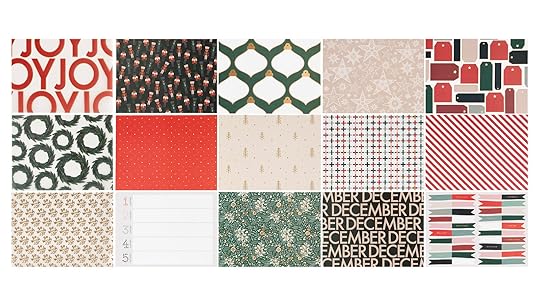
The 4x6 and 3x4 cards:
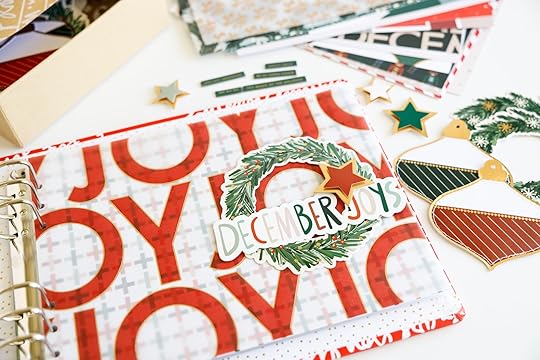
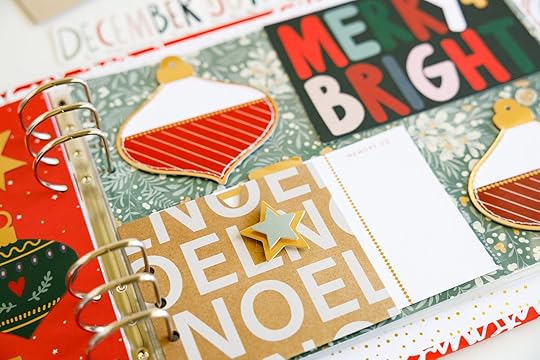
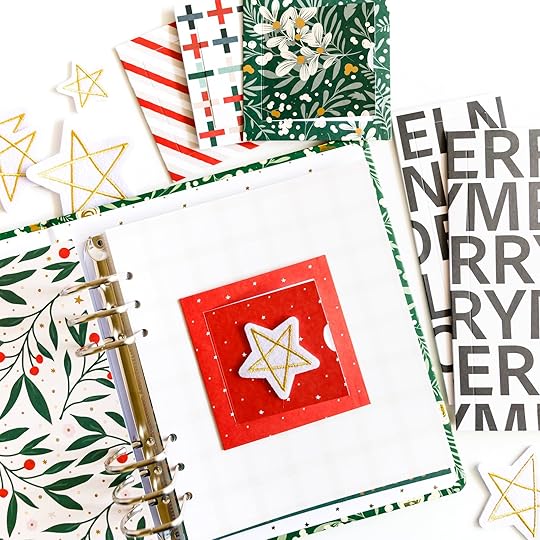
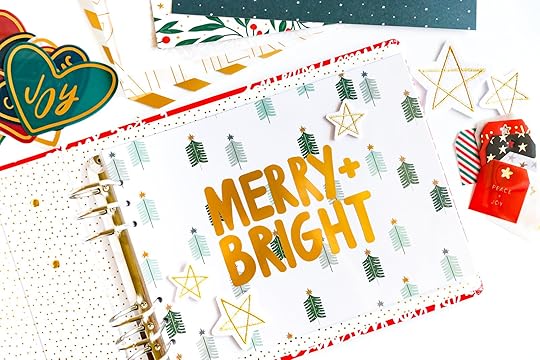
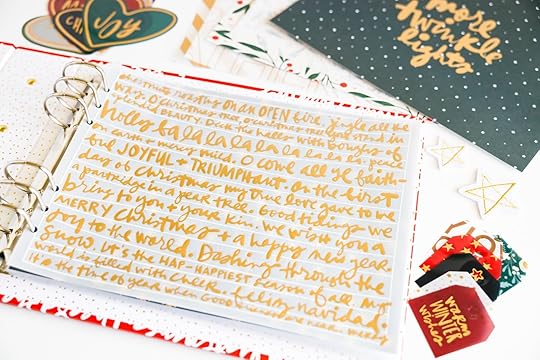
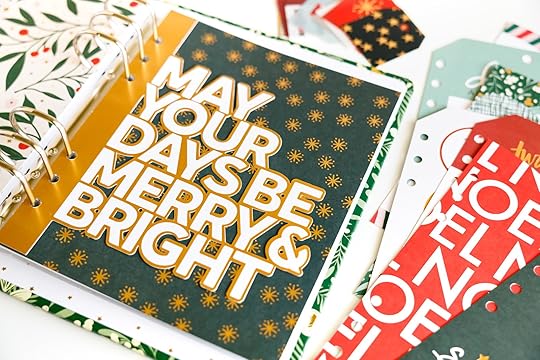
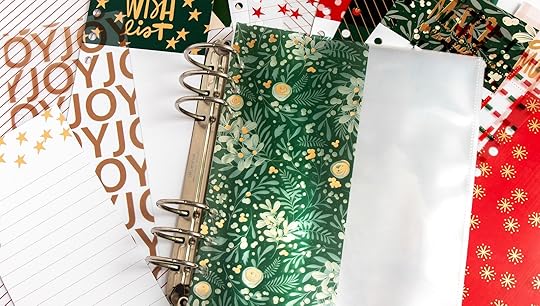
And here are some images of the kit in action:
PAISLEE PRESS MINI KIT | $26.99
We are super happy to have Liz Tamanaha creating a mini kit for us again this year!
Here's a video overview of this kit:
And an image of some pieces in an album:
ALBUMS + SHOP PRODUCTS
In addition to the above kits we offer a variety of additional supplies to support your December storytelling.
Let's dive in with an overview video:
ALBUMS
Please note that we are standardizing the number of page protectors for our December Daily® albums.
Going forward all DD albums we offer will include 25 page protectors and all non-DD albums will include 21 page protectors. Additional page protectors will be offered.
10x8 ALI SCRIPT ALBUM | $32.99
This is the album Ali will be using this year.
Includes 25 page protectors:10, full page page protectors + 10, 4 pocket page protectors (4x6 and 4x4), and 5 of the 2 pocket page protectors (pockets are 10 inches x 4 inches)
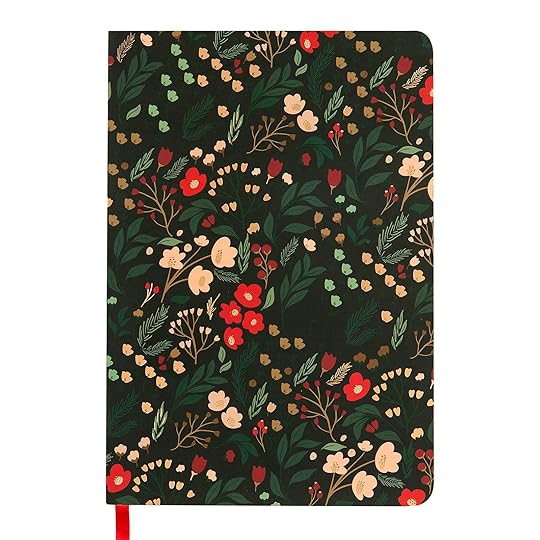
6x8 FLORAL ALBUM | $29.99
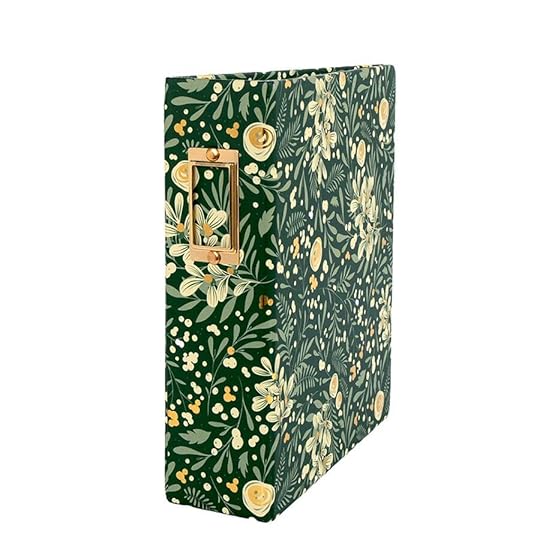
25 Total Page Protectors: (7) - 6x8 one pocket (2) - 2x2 twelve pockets (6) - 3x4 two pockets and 4x6 one pocket (5) - 3x4 four pockets (5) - 4x6 two pockets
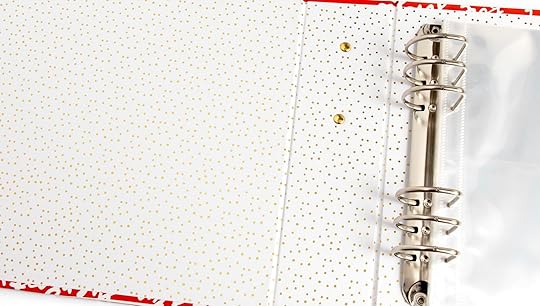
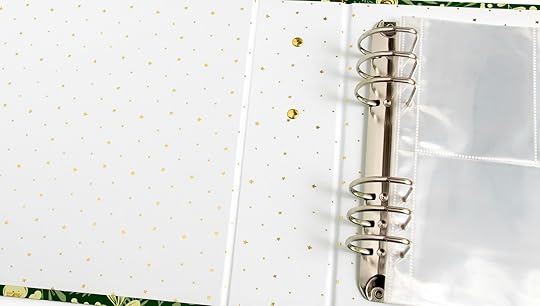
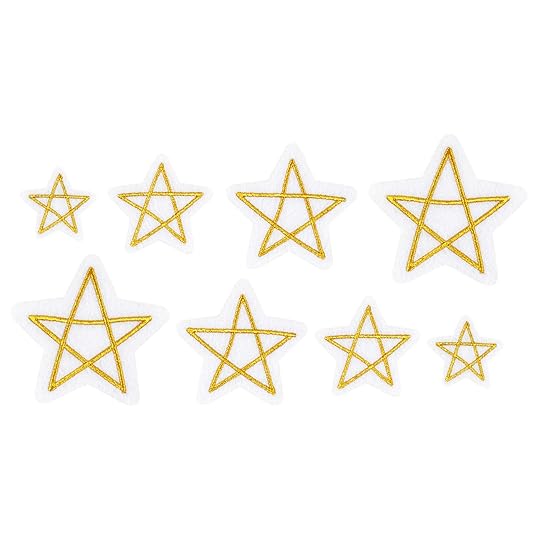
6x8 WHITE WITH GOLD STAR ALBUM | $29.99
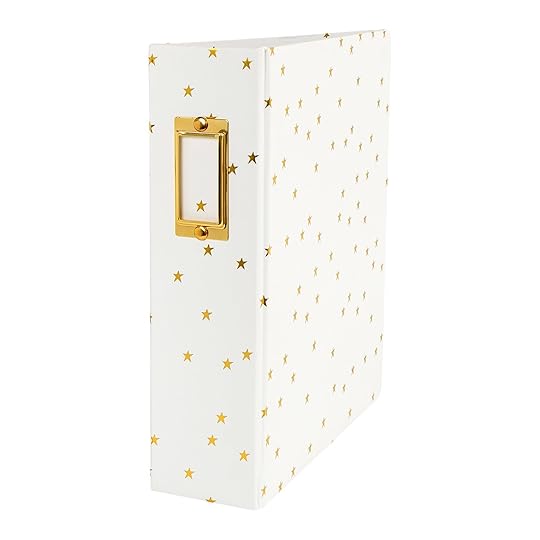
Includes 25 page protectors. 25 Total Page Protectors: (7) - 6x8 one pocket (2) - 2x2 twelve pockets (6) - 3x4 two pockets and 4x6 one pocket (5) - 3x4 four pockets (5) - 4x6 two pockets
NOTE: We are following a new process this year for securing your stamp orders. In order to meet the high demand for stamps this year, we are asking you to add the stamp sets you would like to receive in your box by 9/10 at 11:59pm ET to guarantee your order for shipping with your box in early October. We will be ordering a limited amount of each design in addition to stamps sets secured by customers that will be available after 9/10. If you do not secure the stamps you would like by 9/10 at 11:59pm we cannot guarentee we will have enough quantity to fulfill demand and they may sell out.
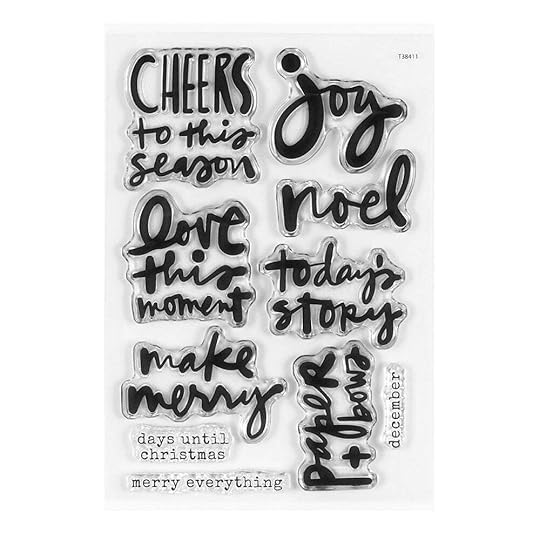
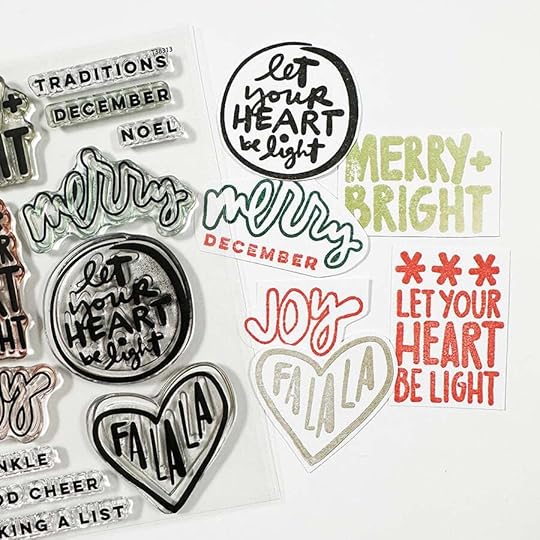
4X6 ALI'S CHRISTMAS PHRASES STAMP SET | $19.99
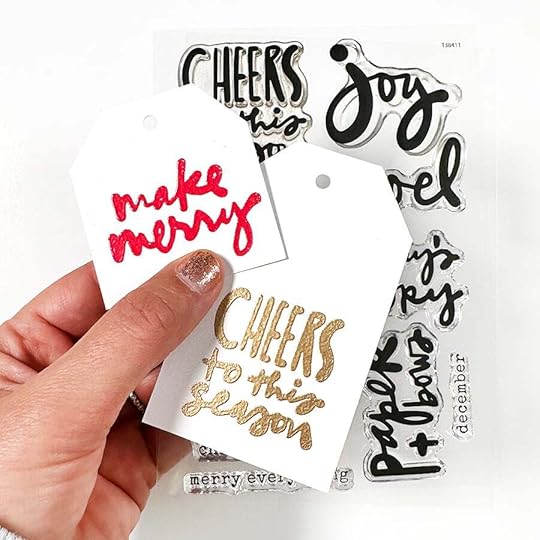
We will also have some embossing powder + versamark embossing ink available to order.
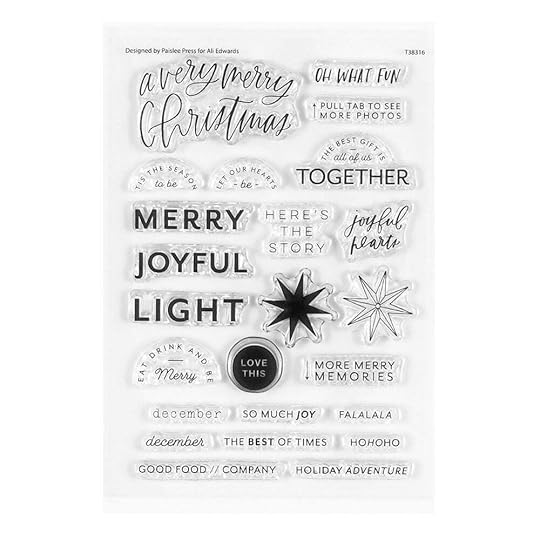
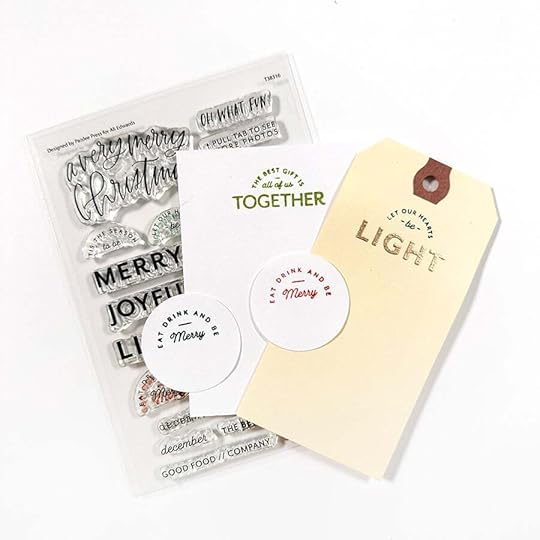
4X6 A VERY MERRY BY PAISLEE PRESS STAMP SET | $19.99
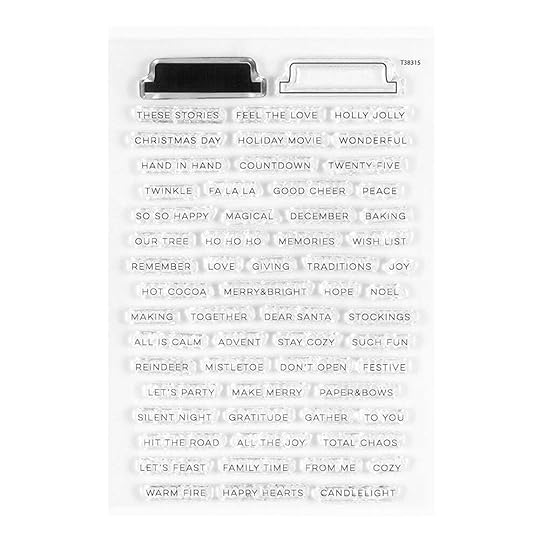
4X6 TABS STAMP SET | $19.99

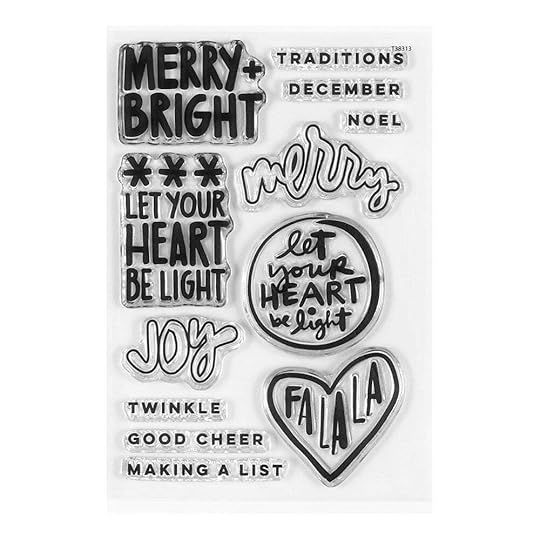
4X6 MERRY & BRIGHT STAMP SET | 19.99
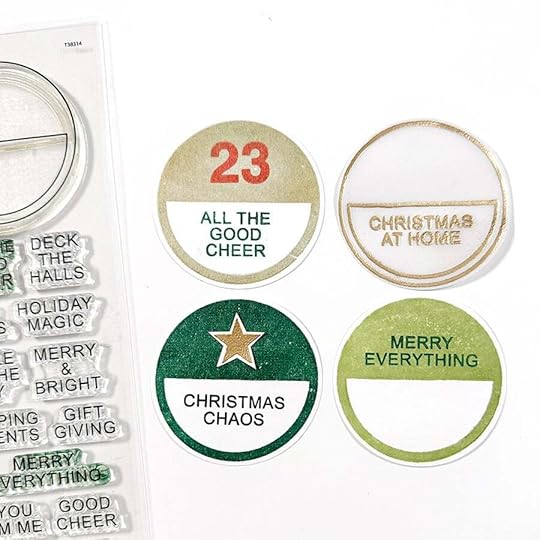
6x8 CIRCLES STAMP SET | $28.99
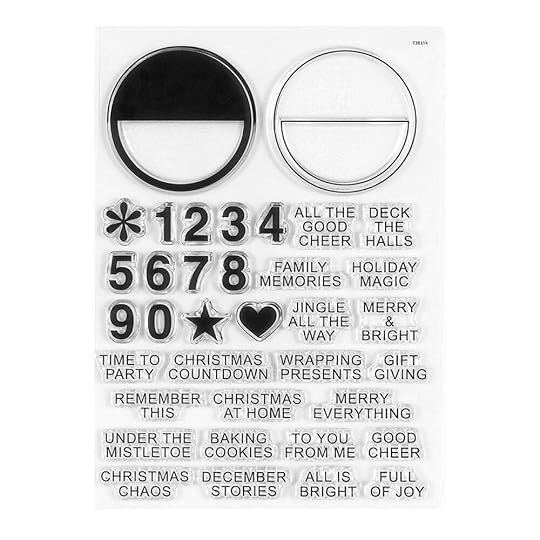
Circles are just about 2.5 inches wide. Ali used a 2.5 inch circle punch to punch these out.
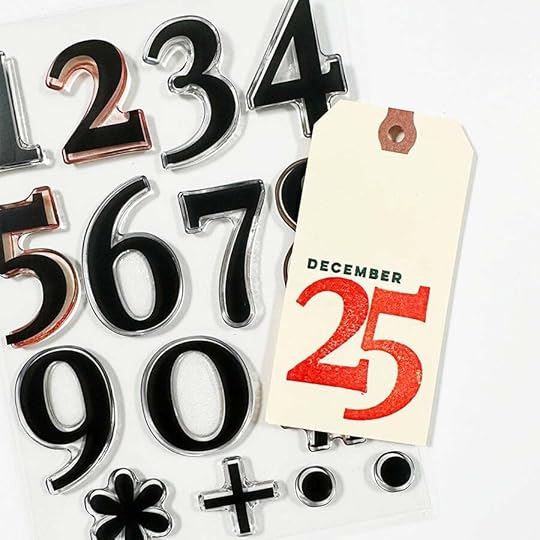
6x8 NUMBER STAMP SET | $28.99
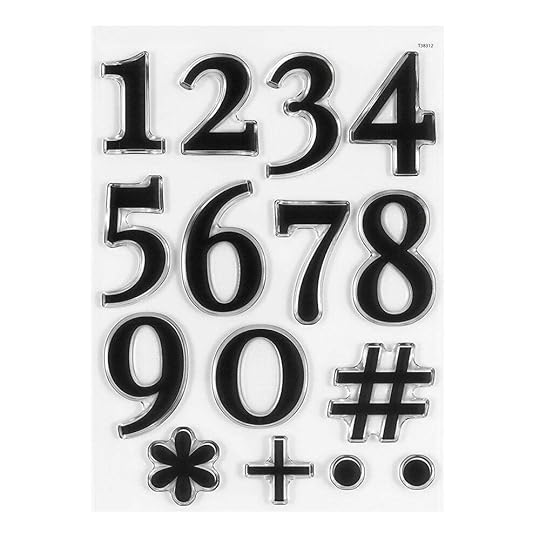
The "1" and "2" are 1.5 inches and the other numbers 2 inches.
6x8 WREATH SET | $28.99
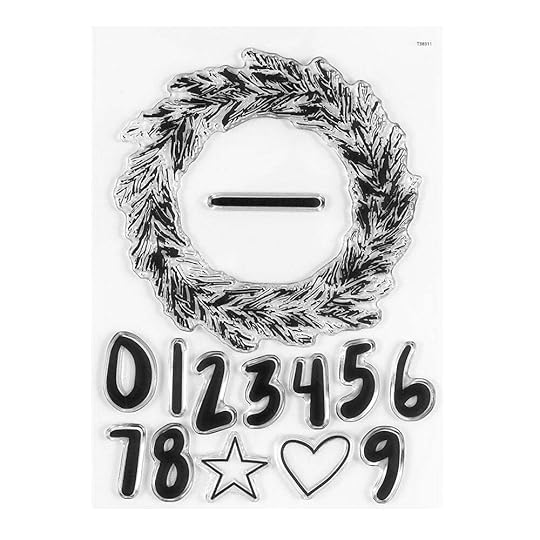
The wreath measures about 5 inches across. Ali used a Misti Stamp Platform to create the full wreath stamped image.
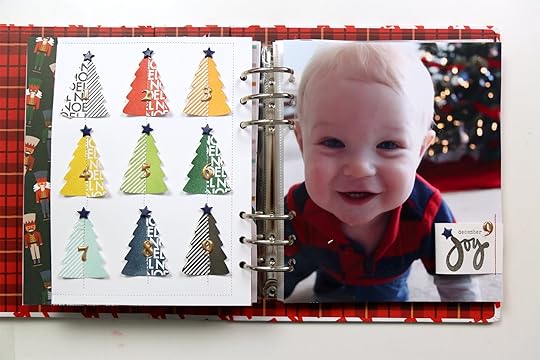
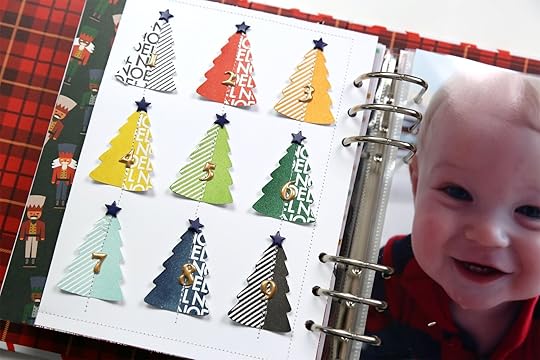
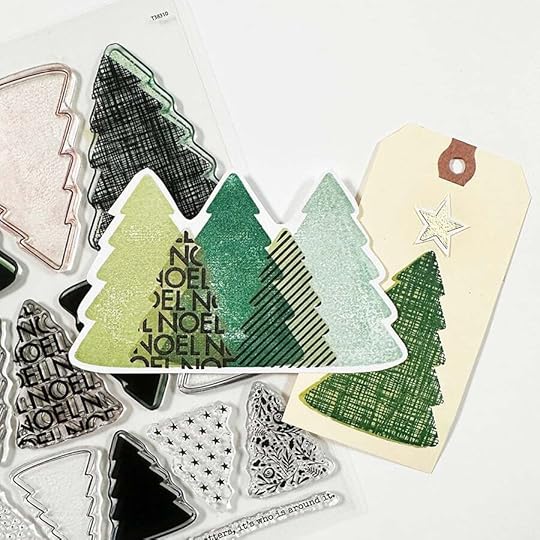
6X8 TREES STAMP SET | $28.99
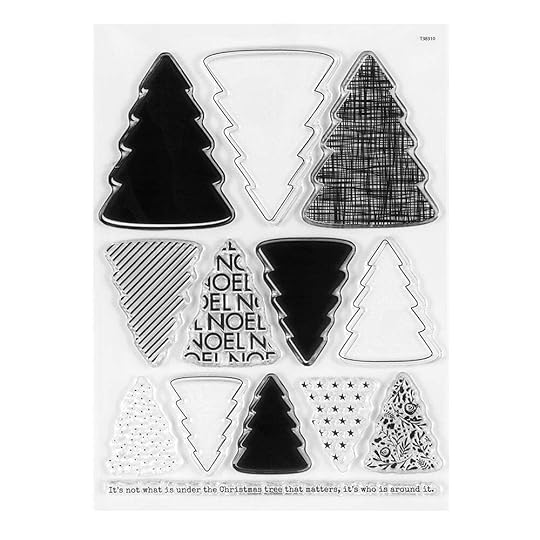
The top row of trees are 2.75 inches. The middle row are 2 inches. The bottom row are 1.5 inches.
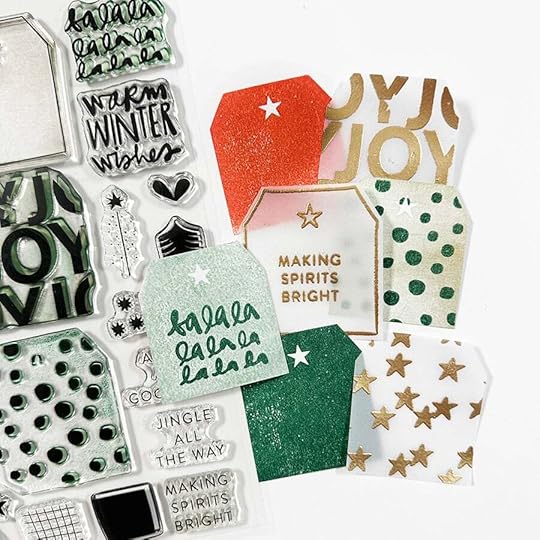
6X8 TAGS STAMP SET | $28.99
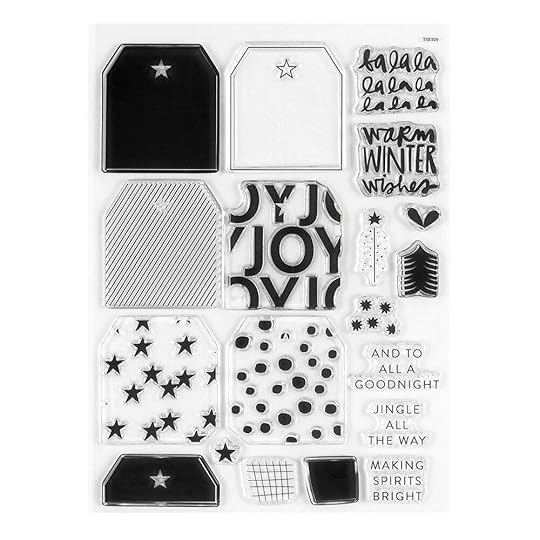
The tags are 2 inch x 2 inch.
HOLIDAY STENCIL PACK | $14.99
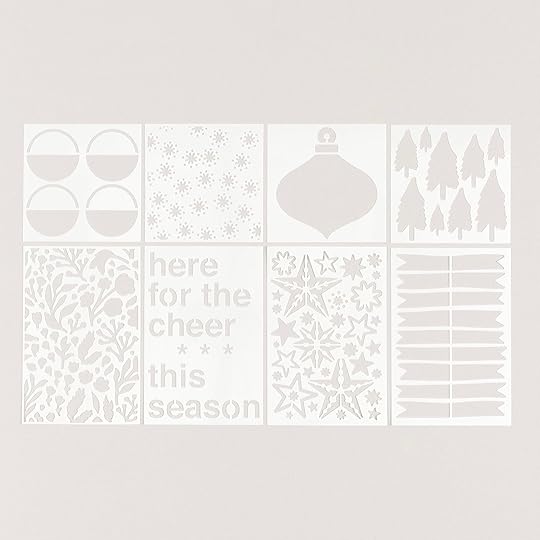
These are matte stencils in 4x4 and 4x6.
Here's a video of Ali working with the stencils, inks, and Paper Pouncers (these will also be available for purchase - see the price list for details):
A VERY MERRY CHRISTMAS SILKSCREEN PACK | $14.99
Silkscreens are so fun + work really well with paint! Here's a video of Ali playing with the silkscreenss + paints:
PAINT PACK | $19.99
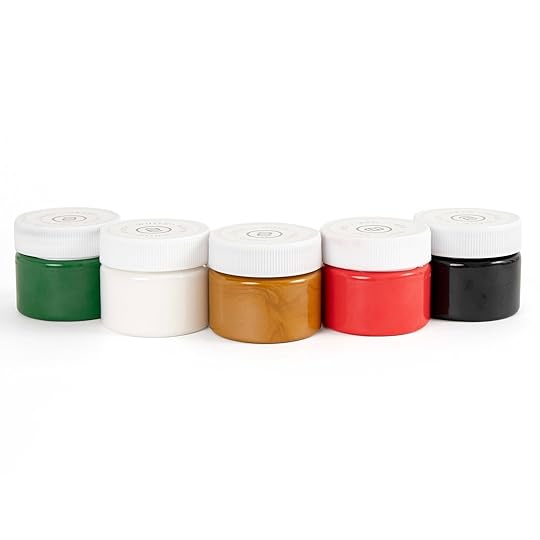
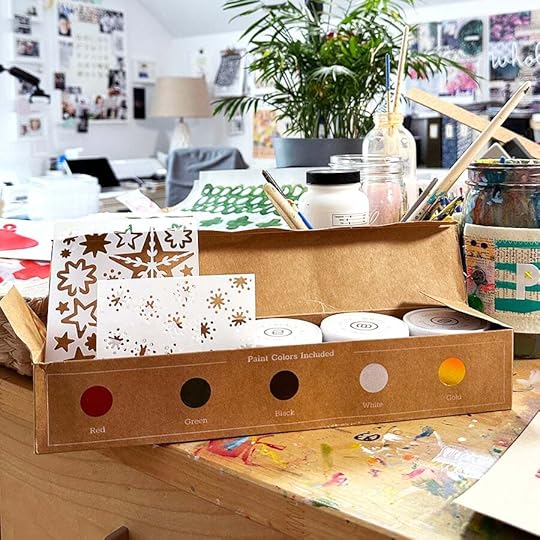
You can see Ali playing with these paints in the silkscreen video above.
INKS
Individual inks + ink bundles will be included in the box ordering options this year. We are not releasing any new colors this year.
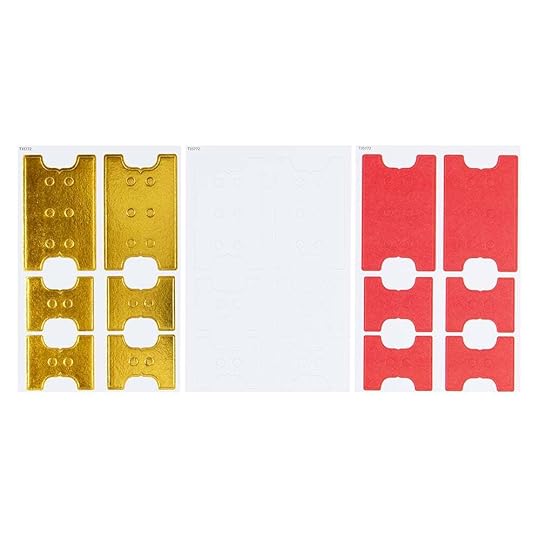
HOLIDAY PLASTIC TAG SET | $9.99
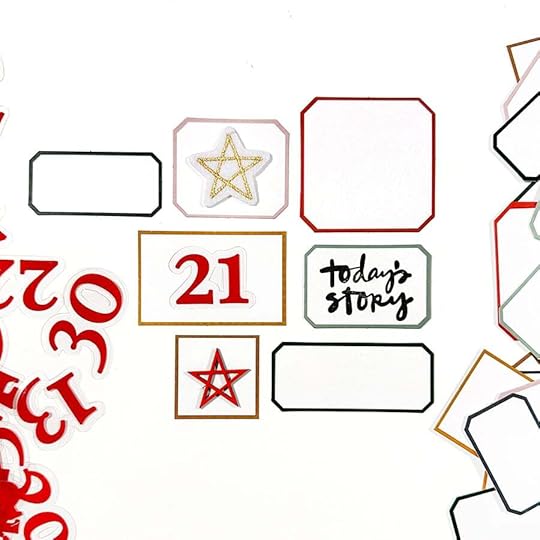
DIE CUT LABELS | $6.99
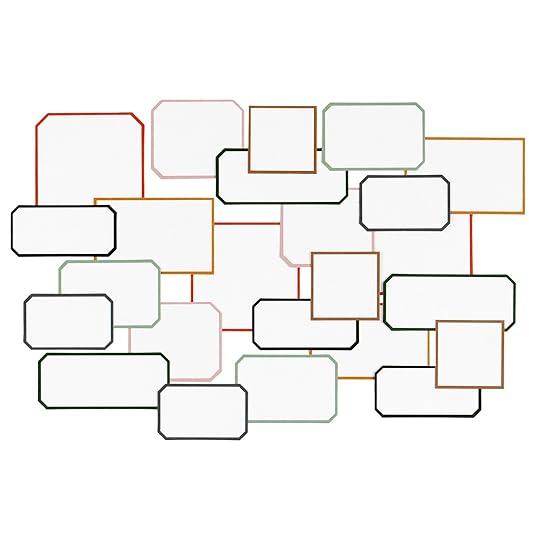
These are great as homes for numbers, stamps, short journaling and embellishments! Sizes vary from 1.5 inch to 3 inches.
HOLIDAY VARIETY DIE CUT BUNDLE | $8.99
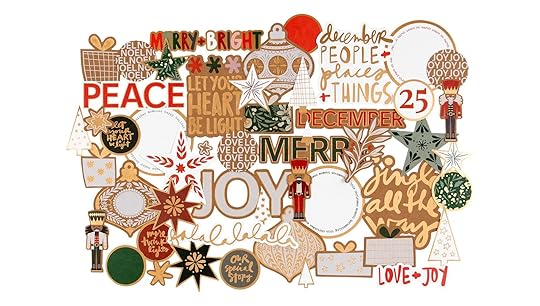
There are 51 die cuts included in the bundle and they vary in size from 2 inches to 6.25 inches.
HOLIDAY WINDOW CARDS | $8.99
Includes (2) 3x8 inch cards and (4) 4x4 inch cards
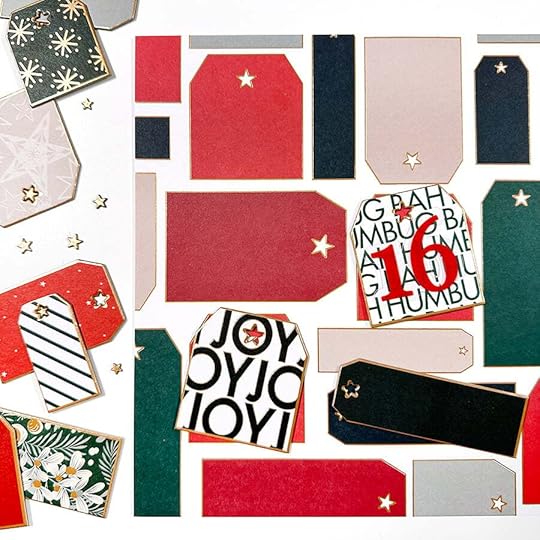
TAGS 6X8 CHIPBOARD SHEET | $6.99
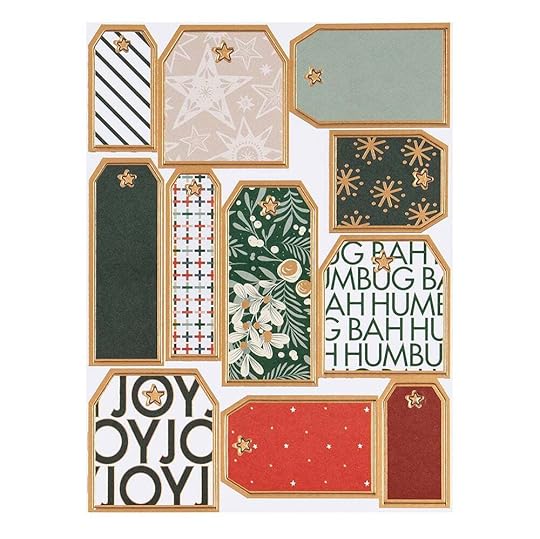
Some of these fun gold foil chipboard tags fit perfectly on pattern paper in the Main Kit. Make sure to hang on to the little gold stars that punch out of the tags to use on your project!
STITCHED TAG POCKETS| | $9.99

These are 2 inches x 3.5 inches.
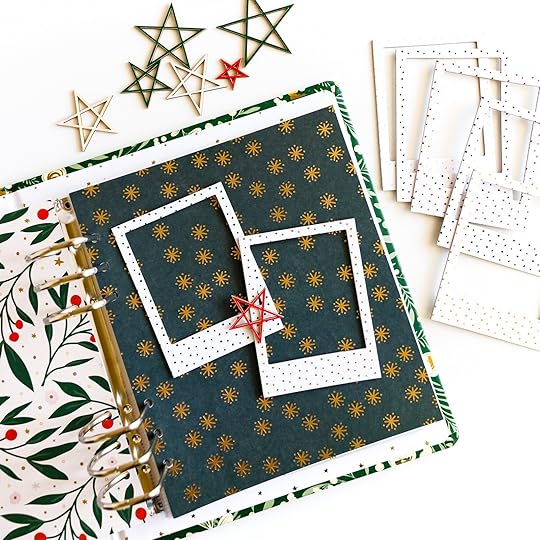
3x4 POLAROID CHIPBOARD FRAMES | $5.99
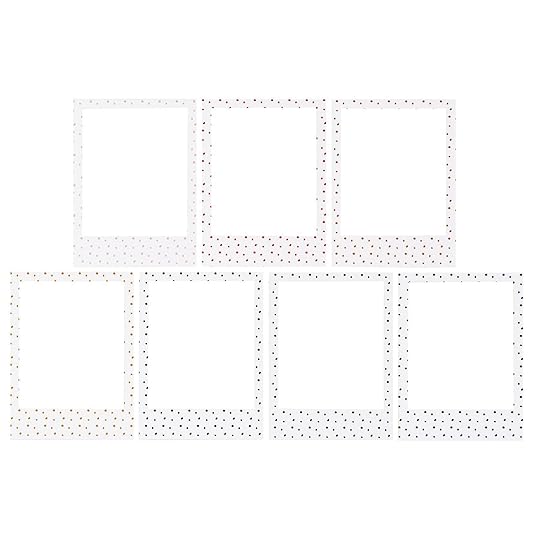
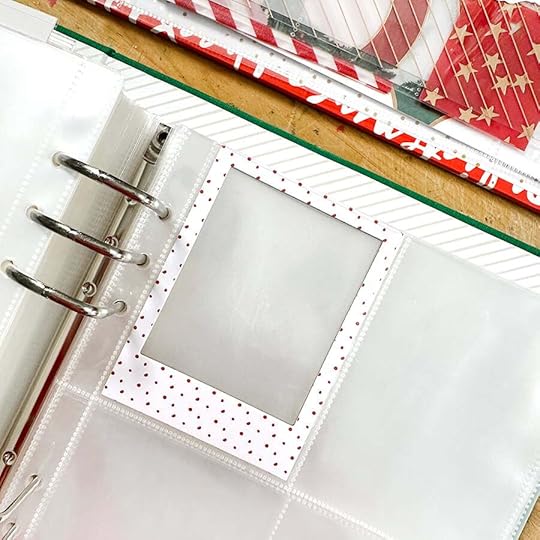
These fun 3x4 chipboard frames fit into the 3x4 pockets.
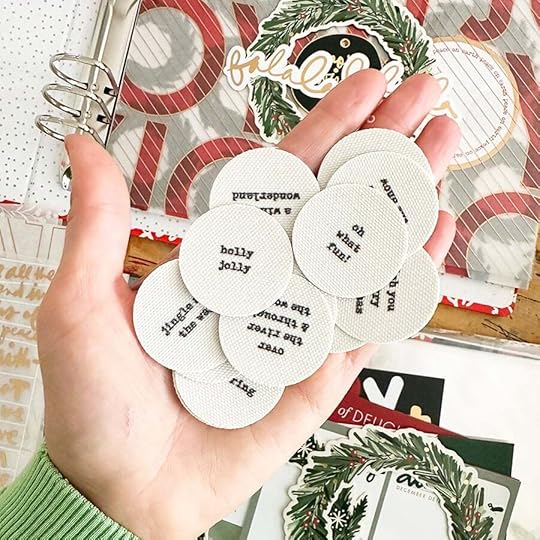
CANVAS HOLIDAY PHRASE CIRCLES | $6.99
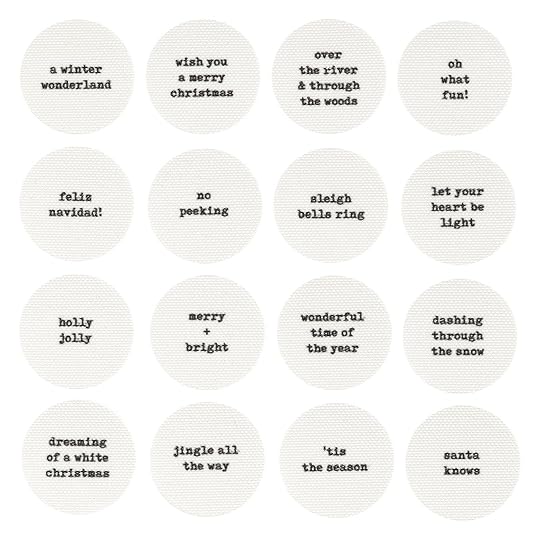
1.5 inch circles.
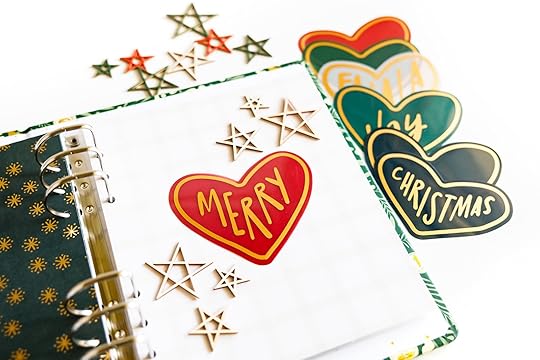
LARGE PLASTIC HEARTS | $9.99
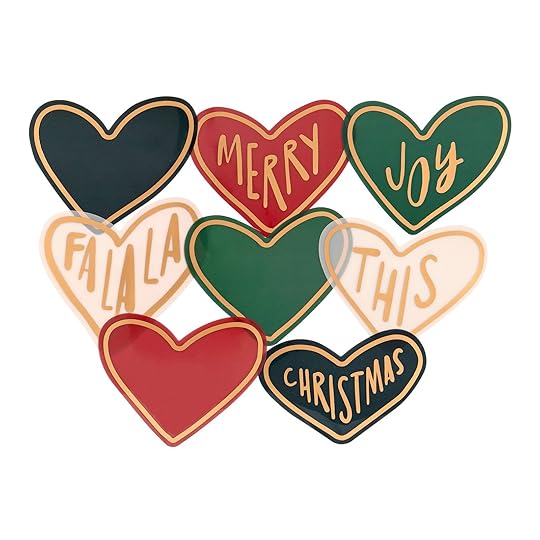
These are about 4 inches x 4 inches.
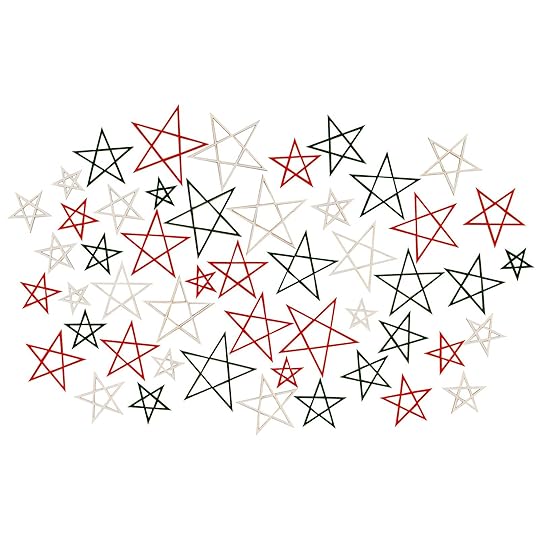
PAINTED WOOD VENEER STARS | $8.99

WHITE FELT STARS | $6.99
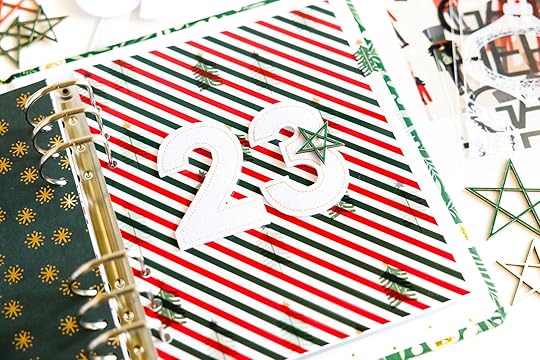
WHITE FELT LARGE NUMBERS | $9.99
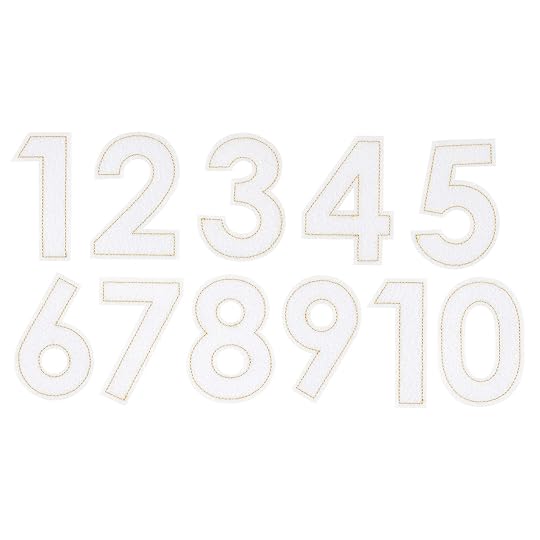
These are about 3 inches tall.
RED SMALL PLASTIC NUMBERS | $8.99
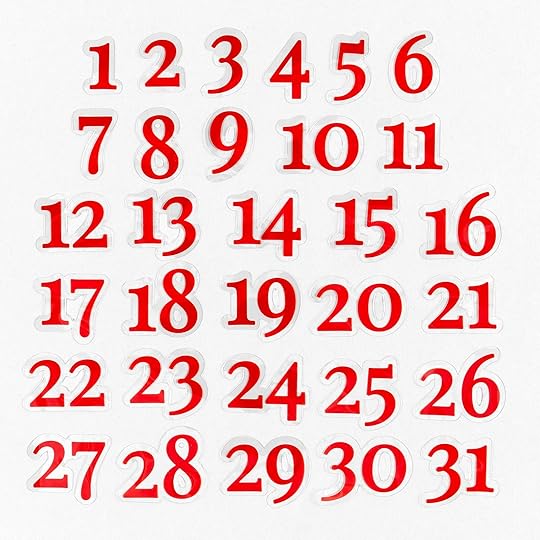
These are about 1.5 inches tall.
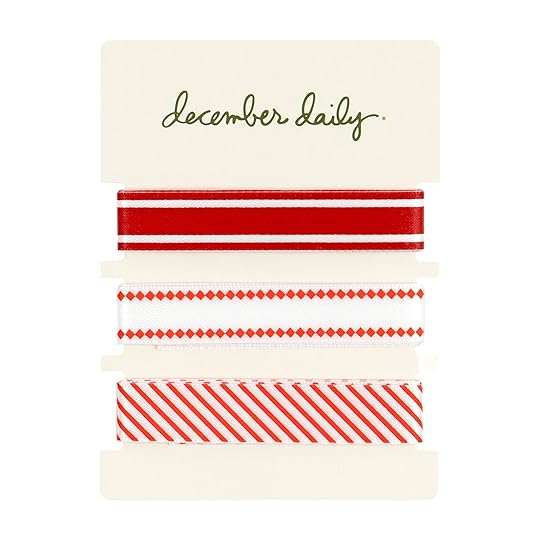
RED & WHITE TRIM PACK | $6.99

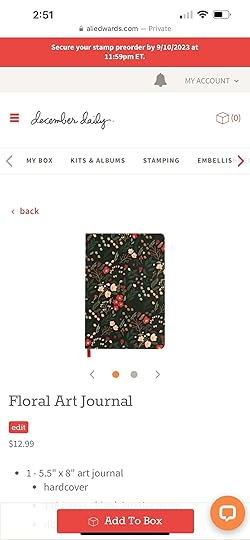
LAY FLAT FLORAL ART JOURNAL | $12.99
Size: 5.5 inches x 8 inches
This beautiful lay flat journal could be the home for words, lists, mixed media play, etc.
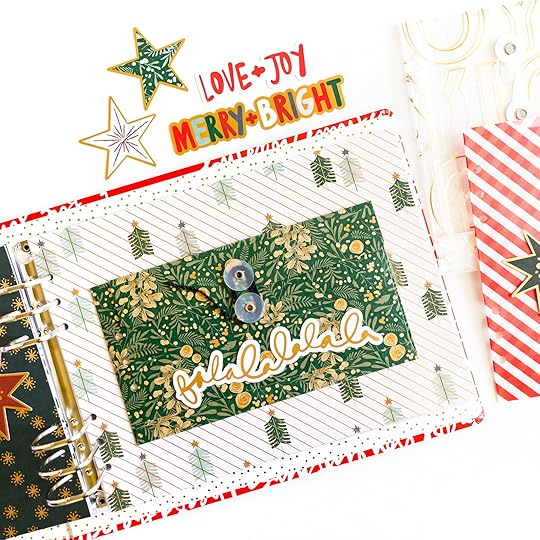
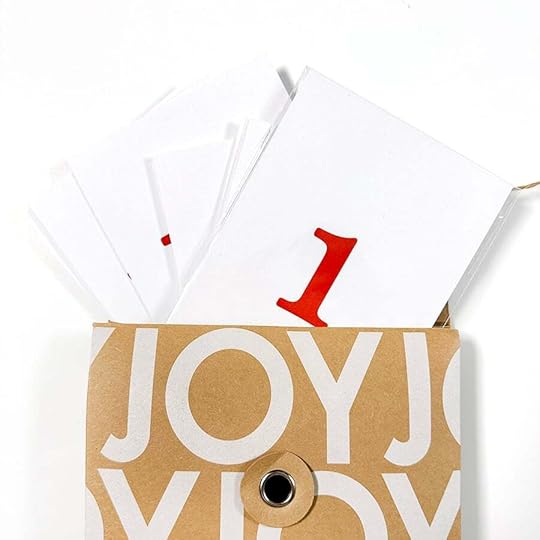
ENVELOPE BUNDLE | $14.99
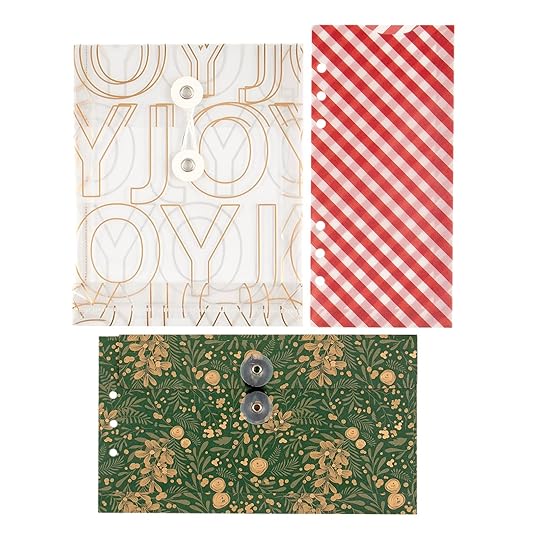
The plastic Joy envelope measures approximately 6.25 in x 7.75 in. The vellum red striped envelope measures approximately 3.75 in x 8.25 in. The cardstock green f÷loral envelope measures approximately 8.5 in x 4.75 in.
HOLIDAY 10X8 PAPER PACK | $12.99
SPECIALTY 10X8 PAPER PACK | $12.99
Includes vellum and transparency.
LARGE DIE CUT PAPER INSERTS | $10.99
All inserts are 8 inches tall and vary in width from approximately 3- 6.5 inches wide
HOLIDAY 3X8 TRANSPARENCY & JOURNAL CARD SET | $19.99
HOLIDAY 3X4 & 4X6 SPECIALTY JOURNAL CARD SET | $10.99
Includes vellum, transparency, and Kraft with gold foil cards.
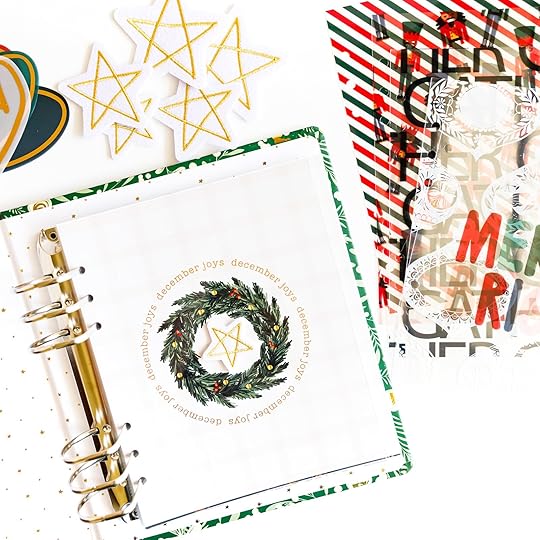
6X8 DECEMBER JOYS TRANSPARENCIES SET | $9.99
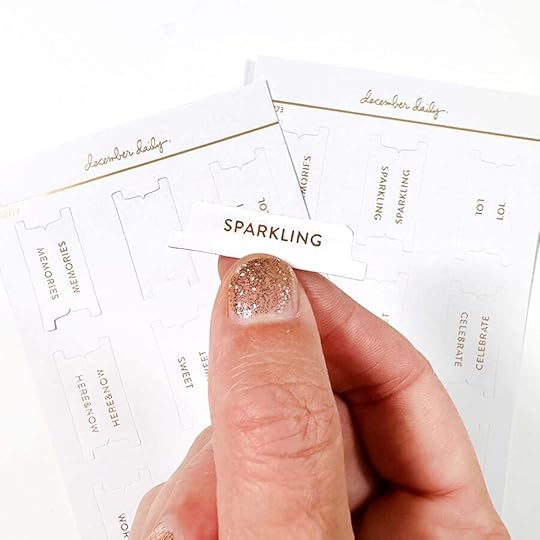
GOLD FOIL 4X6 TAB STICKER SHEETS (SET OF 2) | $3.99
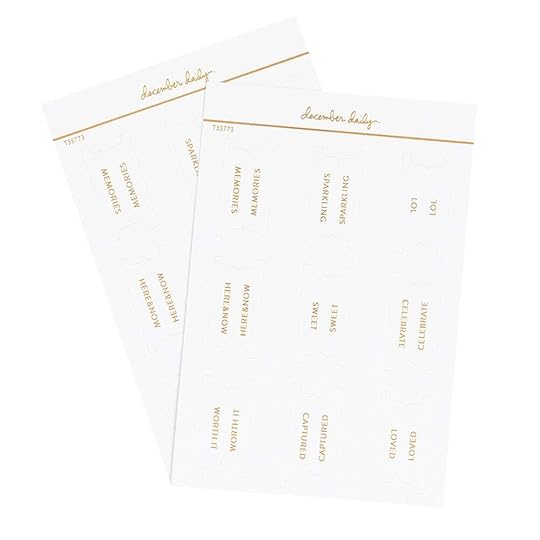
Tab stickers measure just under 1.5 inches wide
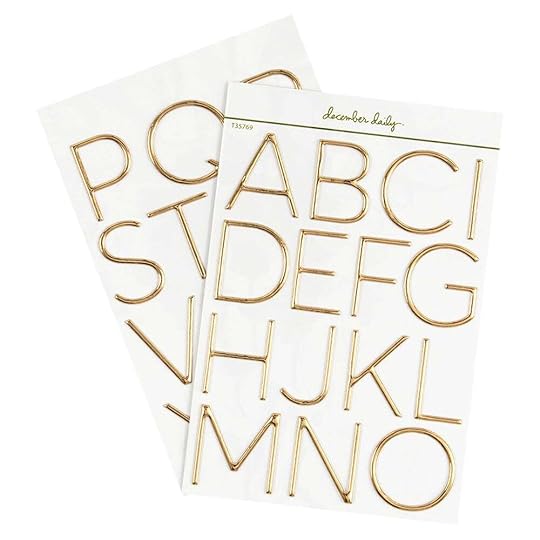
GOLD FOIL 4X6 ALPHA PUFFY STICKER SHEETS | $5.99
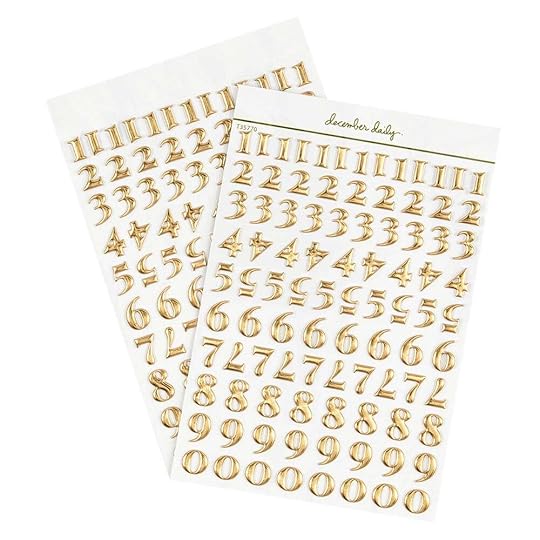
GOLD FOIL 4X6 NUMBER PUFFY STICKER SHEET | $5.99
RED, WHITE & GOLD FOIL ATTACHER STICKER BUNDLE | $3.99
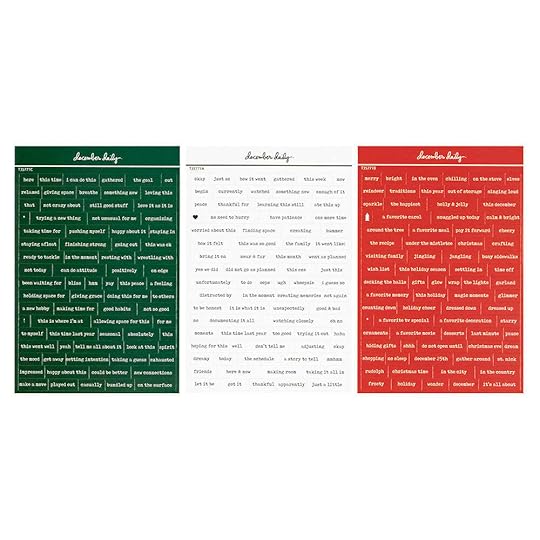
RED, WHITE, & GREEN PHRASE 4X6 STICKER BUNDLE | $3.99
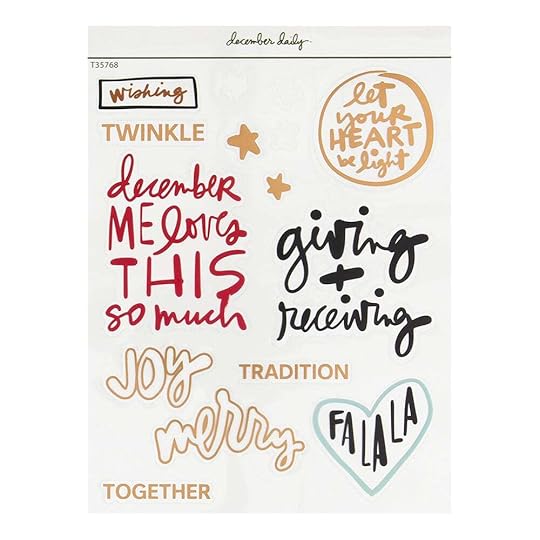
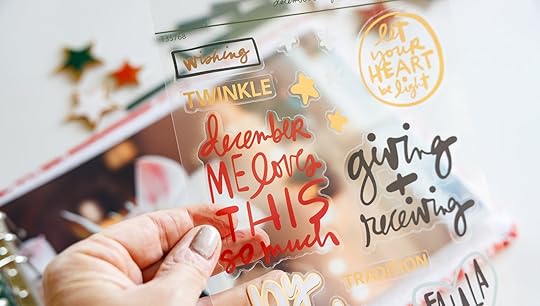
HOLIDAY PHRASES 6X8 CLEAR STICKER SHEET | $6.99
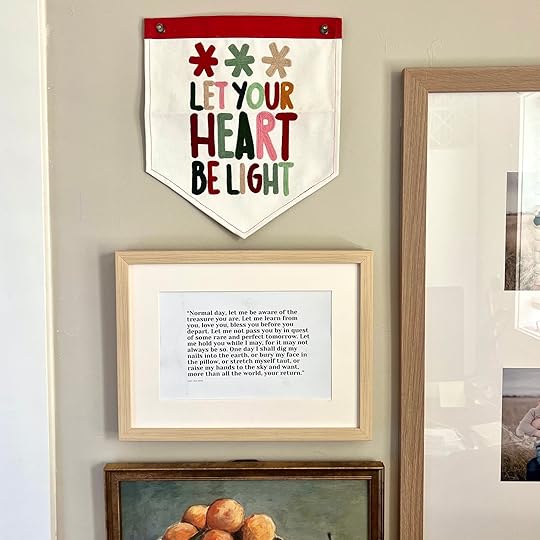
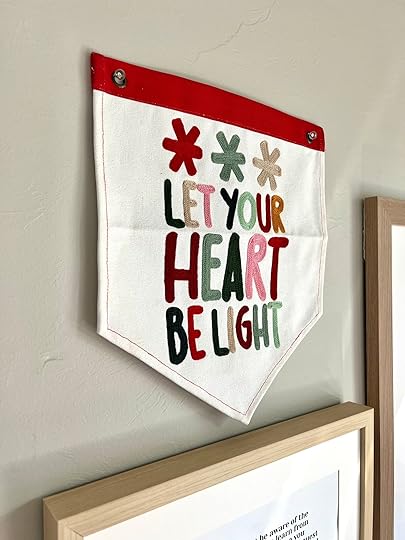
LET YOUR HEART BE LIGHT STITCHED TAPESTRY | $34.99
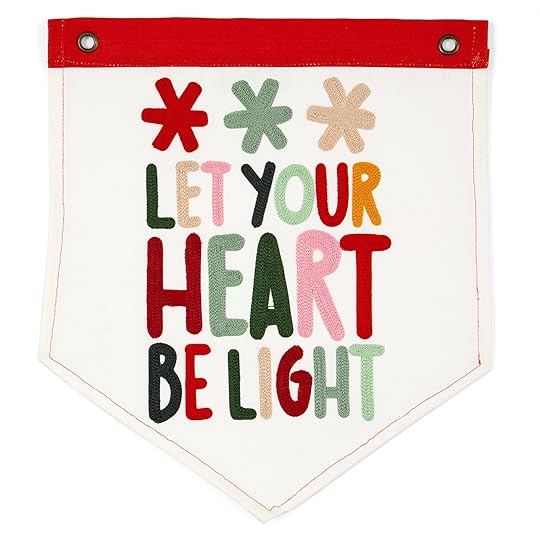
Tapestry measures 14 inches tall by 12.24 inches wide
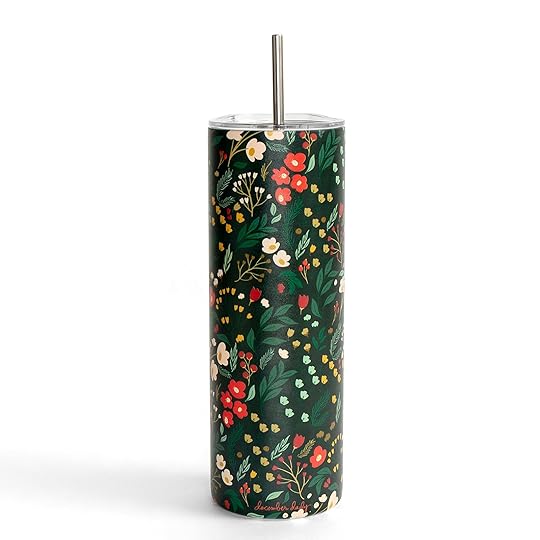
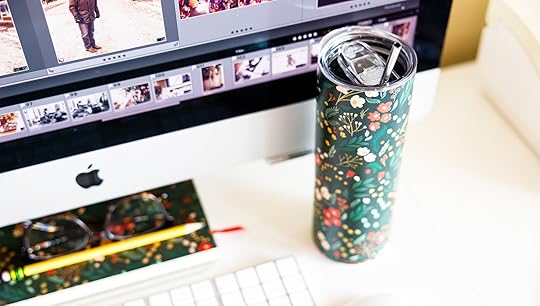
20oz FLORAL TUMBLER | $24.99
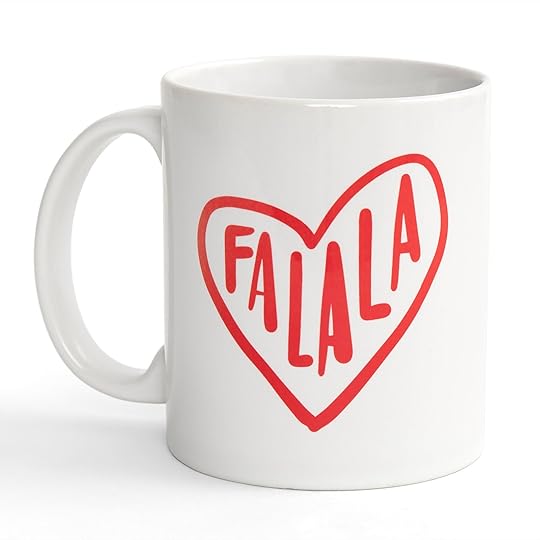
FA LA LA MUG | $12.99

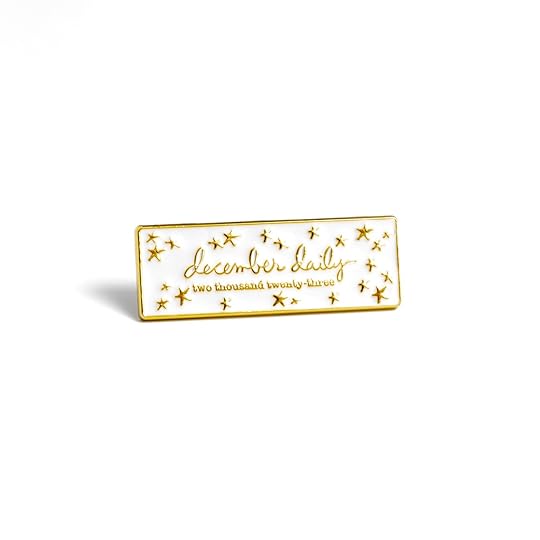
2023 DECEMBER DAILY ENAMEL PIN | $4.99
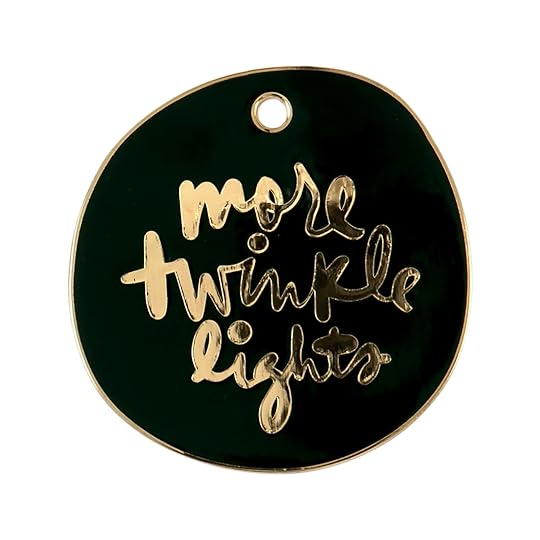
MORE TWINKLE LIGHTS ENAMEL ORNAMENT | $9.99
DECEMBER DAILY® RED SWEATSHIRT | $51.99
Starting on 9/11 you will be able to secure your apparel items and we ask that you add these items to your box by 9/17 at 11:59 PM ET in order to guarantee your items are included in your box that will ship out in early October. If you choose to wait to add apparel items to your box after 9/17 at 11:59 PM ET quantities will be limited and may sell out.

Ali is 5'9 and wearing a M. She usually gets a M or L sweatshirt or a size 10 top.
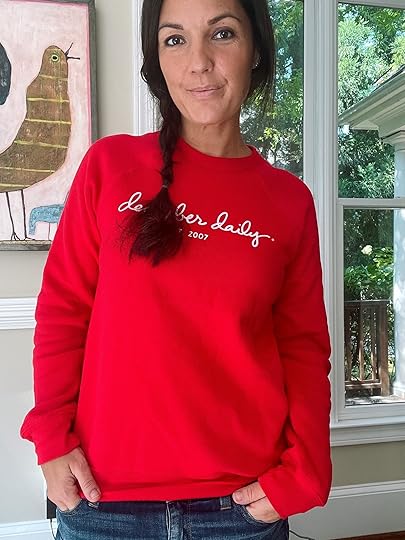
Lisa is 5'6 and is wearing a S. She usually gets a size S or M sweatshirt and wears a size 6 top.
DECEMBER DAILY ® RED T-SHIRT | $31.99
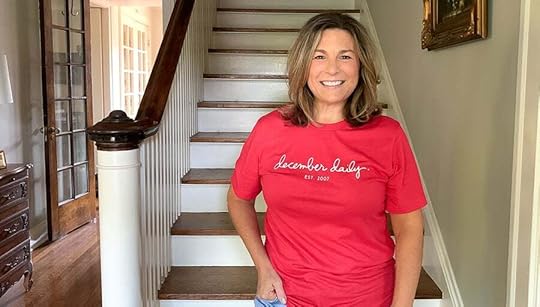
Kelly is 5'2 and wearing a M. She usually gets a M t-shirt.
DECEMBER DAILY® JOY TO THE WORLD SWEATSHIRT | $51.99

Katie is 5'1 and is wearing a S. She usually gets a size M/or 6 in sweatshirts/tops.
STICKER ADVENT CALENDAR | $44.99Our sticker advent calendar is filled with 24 adhesive backed stickers + embellishments. It's become a community favorite! You might choose to open one per day before December (so you can use the elements in your album or during December! If you'd like to see all the contents we've got a spoiler video available below.
If you are someone who likes to see all the contents in advance you can check out the spoiler video here. If you want to be surprised,
SKIP THIS VIDEO.
2023 DECEMBER DAILY® CLASSES
DECEMBER DAILY® PRODUCT PLAY | TRY THIS
December Daily® Product Play is all about ideas and inspiration for working with physical products from the December Daily® Collection. For 30 days in November, you'll receive one idea per day from the contributors to this class (includes Ali). Ideas in this workshop will focus on physical products from our 2023 December Daily® collection. Whether you are preparing to document 2023 or finishing up telling stories from past years, we hope these fun, creative ideas help you use your products to get your stories told.
Our goal for this class is to provide inspiration to support your December storytelling by showcasing a wide variety of voices and project styles. For this workshop each contributor has selected a different product to create with. Some ideas shared in this workshop will be completed spreads with images and journaling, some ideas will be for foundation pages, and others will be mock-up examples to spark your creativity and help you to create homes for your December stories.
Here are the products that will be featured in this workshop:
10x8 Paper Pack 10x8 Specialty Paper Pack 2x2 Plastic Tag Set 3x4 + 4x6 Specialty Journal Card Set 3x8 Transparency & Journal Card Set 6x8 Chipboard Sheet 6x8 Transparency Papers Die Cut Paper Inserts Envelope BundleLarge Felt Numbers Plastic Hearts Polaroid Chipboard Frames Silkscreen Pack Stencil Pack Variety Die Cut Bundle Window Cards Wood Veneer Stars6x8 Tags Stamp Set 6x8 Trees Stamp SetCanvas Circles
Registration will open on Tuesday August 29th at 10am ET. Sign up during the boxing period for $20. After the boxing period ends the class will be $25.
2023 DECEMBER DAILY® HYBRID PRODUCT PLAY
Hybrid scrapbooking combines digital products with physical supplies to create paper (or printed) memory-keeping projects. For this new class, our contributors will share fun, creative ideas and inspiration for working with digital products from the 2023 December Daily® Collection via written and video tutorials.
All of the projects and techniques provided in this self-paced class will demonstrate how versatile digital products can be in helping you get your stories told. Our hope is that you will come away with ideas for using digital products to create homes for your December stories. The price for this class will be offered for $12 during the boxing period. After the boxing period ends on 9/30 the price will go up to $15. Please Note: This workshop is not meant as an in-depth software workshop. The contributors of the class will be using either Photoshop, Photoshop Elements or Canva, and the examples and projects they share will show you the steps they take to create physical projects using digital memory-keeping products.
2023 DECEMBER DAILY® PREP DAY
Join the December Daily® community for a fun online December Daily® prep day on Saturday, November 18th, 2023. Use this opportunity to finish past December Daily® projects or start working on your project for 2023. The first live video will start on Saturday, November 18th at 10:00 am Eastern. Cost is $5.
Each lesson will be open for you to access 15 minutes prior to the live content which will be available at the top of each hour. Then after the discussions and/or project ideas, you are free to work on your own projects, clean up, prep, etc.
Note: We will have more details about the schedule and content in the coming weeks.
Each topic will have its own Lesson within the 10 Hour Classroom. Inside each lesson you'll find the live video, a free download, a challenge, and a spot for conversation in the comments section of the lesson. Live chat will be available for anyone who wants to converse back and forth during the live event. Note: All videos will be recorded so you can watch them at your own pace. You don't have to be online on the 18th to access the content.
August 24, 2023
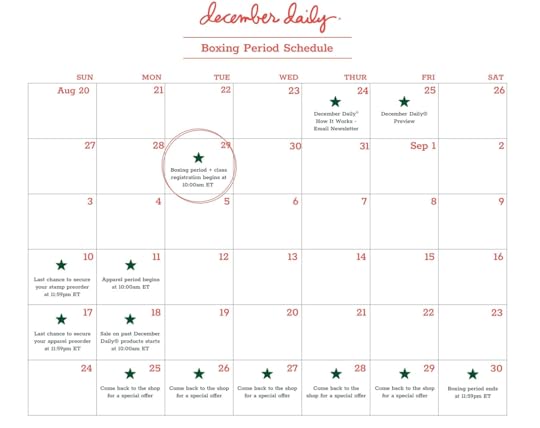
December Daily® 2023 | Schedule & How It Works
Each year before the release of the
December Daily® collection our team likes to go over how the Order Selection Period works to refresh everyone's memory and introduce newcomers to the community about how ordering works for these specific products as well as go over the schedule for how things are going to flow this holiday season as we all prepare to document our December
We are hopeful that the changes we made to the order process the last few years will continue to alleviate some of the slow loading and other issues we've faced in the past for this very popular release. That said, we are imperfect people trying to get it right and it's totally possible that there will be issues on the day the products go live (next Tuesday, August 29th at 10am ET). We thank you in advance for your patience if issues do arise. Our goal is to create an awesome experience for you and we don't like it just as much as you don't like it when things don't run smooth.
Below we are showing screen shots of what the shopping experience looks like on desktop and mobile so you will have the opportunity to be more familiar with the process before the page goes live.
Take a few minutes to read through the details.
Feel free to ask questions in the comments below.
We are switching things up a bit this year and will be offering some past December Daily® items at various discounts throughout the second half of the month. Be sure you are signed up for our newsletter and follow us on Instagram to be the first to hear when those items are available to add to your box.
We also are following a new process this year for securing your stamp and apparel orders. In order to meet the high demand for stamps this year, we are asking you to add the stamp sets you would like to receive in your box by 9/10 at 11:59pm ET to guarantee your order and that they will be shipped with your box in early October. We will be ordering a limited amount of each design in addition to stamps sets secured by customers that will be available after 9/10. If you do not secure the stamps you would like by 9/10 at 11:59pm we cannot guarentee we will have enough quantity to fulfill demand and they may sell out. We will follow the same process for our apparel items. Starting on 9/11 you will be able to secure your apparel items and we ask that you add these items to your box by 9/17 at 11:59 PM ET in order to guarantee your items are included in your box that will ship out in early October. If you choose to wait to add apparel items to your box after 9/17 at 11:59 PM ET quantities will be limited and may sell out.
When the products go live on Tuesday morning there will be an option under the December Daily® dropdown menu to shop (right now the main drop down menu is for the "Travel Collection" - that will be updated when the products go live).
When the December Daily® shopping experience is live you will see that we have broken the products down into seven categories. Each one will have their own tab across the top of your browser window:
My Box, Kits + Albums, Stamping, Embellishments, Stickers, Paper, Lifestyle, and Classes.
Kits + Albums: Includes kits, albums, page protectors.
Stamping: Includes stamps*, inks, stencils, silkscreens, paint, stamping tools, pens.
*In order to meet the high demand for stamps this year, we are asking you to add the stamp sets you would like to receive in your box by 9/10 at 11:59pm ET to guarantee your order and that they will be shipped with your box in early October. We will be ordering a limited amount of each design in addition to stamps sets secured by customers that will be available after 9/10. If you do not secure the stamps you would like by 9/10 at 11:59pm we cannot guarentee we will have enough quantity to fulfill demand and they may sell out.
Embellishments: Includes chipboard, paper, plastic, etc.
Stickers: Includes puffy, phrase, label stickers, etc.
Paper: Includes paper packs, journal card sets, transparencies, inserts, December Daily® Art Journal, etc.
Lifestyle: Includes advent calendar, ornaments, enamel pin, t-shirt*, sweatshirts*, etc. **Apparel items will be added to the box page on 9/11 at 10am ET
Classes: For the first time ever this year, you will be able to add new December Daily® classes to your box to purchase at the same time as the physical products. We will be offering two December Daily classes as well as December Daily® Prep Day this year. Check back here on the blog tomorrow for full class descriptions in our December Daily® Collection Preview Post . You will not be charged for shipping if you only are checking out with classes in your box.
Checkout: Once you have added any items to your box a sixth tab will appear in red. You can click this to checkout or use the red button under your box in the top right corner. You will also be able to check out via the red box icon on the top right corner.
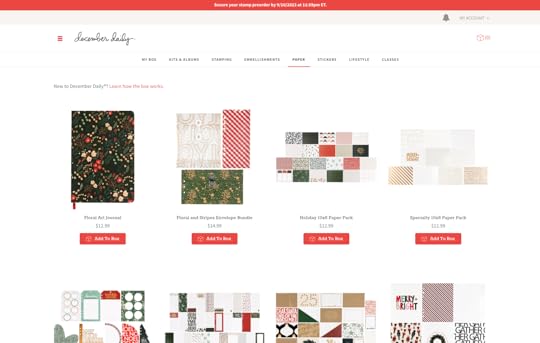
When the products are live you will be able to click on any product image and will be taken to a product page that includes a description and additional product details. You will also be able to add to your box from the main shopping page (as you see above) or from the individual product page.
When you add an item to your box from this main shopping page the red "add to box" will temporarily turn green showing you that the item has been added to your box. It will return to red enabling you to add more if you want of that product.
PLEASE NOTE: We highly recommend identifying the items you are most interested in and checking out with those things first. Let's say you know for sure you want the Floral Art Journal + The Floral and Stripes Envelope Bundle and the Holiday 10x8 Paper Pack. Add those three items to your "DD cart" (the red box icon in the top right) and then go through the checkout process to secure those items. Those items will then appear in your "My Box" tab - as will any additional items you add to your "DD cart" and "checkout" before the 29th. Items in your "DD cart" aren't secure until you have actually checked out.
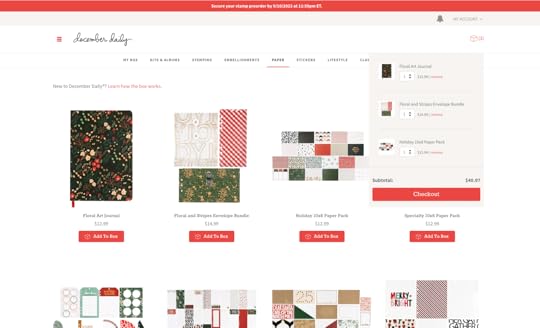
The above screen shot shows where your "DD cart" is located while you are shopping the December Daily® products. You will not be able to add products from our regular shop to this cart - it is a completely separate cart for December Daily® during the Order Selection Period.
You can adjust the amount of the item you want to order or remove the item from your box (only before checking out) in this area. Please make sure to double-check your quantities before checking out.
Once you have clicked "checkout" and gone through that process your products will then appear under the "My Box" tab.
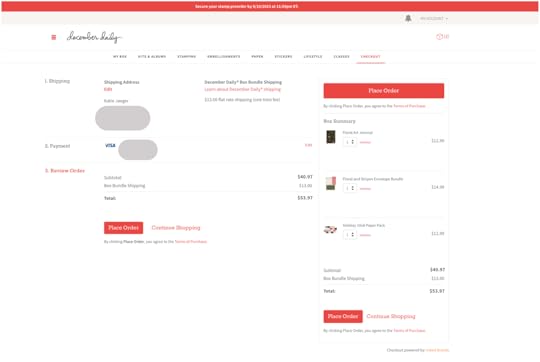
Above is a screenshot of the checkout page for desktop users. We are able to offer flat rate shipping again this year ($13 for domestic, $16 for Canada, and $29 for all other international locations) you will be charged this flat fee the first time you check out. After that it will note "PAID" in green for "Box Bundle Shipping" on any future checkouts.
MOBILE USERS
Did you know that almost 50% of you use a mobile device for shopping on my site?
Here's a look at what you will see on your mobile device. Again, the navigation between the different categories will be right there along the top:
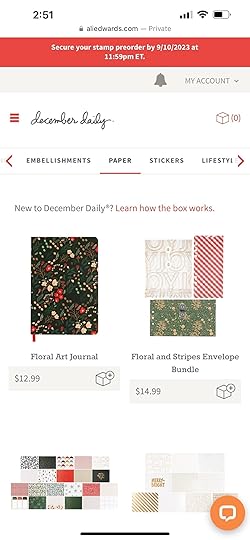
From this screen you are able to add products directly to your box by clicking the small box icon under the product. The small red box in the upper right corner is what you currently have in your "DD cart." Once you complete the checkout process your products will then be viewable under "My Box" in the main navigation.
You will also be able to click on the individual product to see more images or get more details:
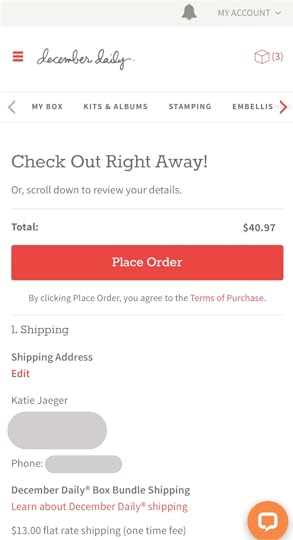
If you are shopping from a mobile device you will have an option when you are checking out to "Check Out Right Away"
OR to scroll down to review your details before checking out. Please note that once you have completed checkout you will not be able to remove items or edit order. Please be sure to review your order quantities before checking out.
IMPORTANT REMINDERS
The Order Selection Period for December Daily® begins on Tuesday August 29th, at 10am ET and will end on Saturday September 30th at 11:59pm ET. After the Order Selection Period closes we will box up your order and ship it to you starting Monday October 2nd. Please note that we will be prioritizing shipping international shipments first due to the project timeline and extended shipping delays internationally. Make sure you have an updated credit card and shipping address on file with us and that you are signed in under your "My Account" before starting to shop. Go do that now. Once you have checked out you CAN NOT remove products from your box or edit your order. Customer Service will not be able to make adjustments to your order after you have checked out. Please verify the numbers of product placed before checking out - you will be able to see an adjust the quantity of an item before you check out via the box icon on the top right of your page. The project will always be more important than the products. You will be able to use Paypal or Gift Cards for the December Daily® Box Orders this year. If there are complications, please know our team will be working hard behind the scenes to solve them as quickly as possible. FLAT RATE SHIPPING RATES FOR 2023
For 2023 the Box Shipping rates will be as follows:
$13 Domestic Flat Rate $16 Canada Flat Rate $29 International Flat Rate
This will be charged on your first "checkout" and that will be the only time you are charged shipping. After that if you checkout again under "Box Bundle Shipping" it will say "PAID."
Our hope in sharing this information with you today is that it will help you have a better idea of what the shopping experience will look like. Please let our team know if you have any questions below.
We will be posting walkthrough videos and images of the full 2023 December Daily® collection (kits, albums, shop products) here on Friday August 25th along with a printable price list to help you decided what you'd like to purchase. Be sure to check out our @decemberdaily instagram account where we are revealing the kit and album offerings for 2023 during some fun lives with Ali and Lisa. They are saved there for you to view at your own convenience. If you don't use Instagram you can view the live conversations here: https://www.instagram.com/decemberdaily/
August 23, 2023
Grow Scrapbook Kit | Special Guest Linda Jordan
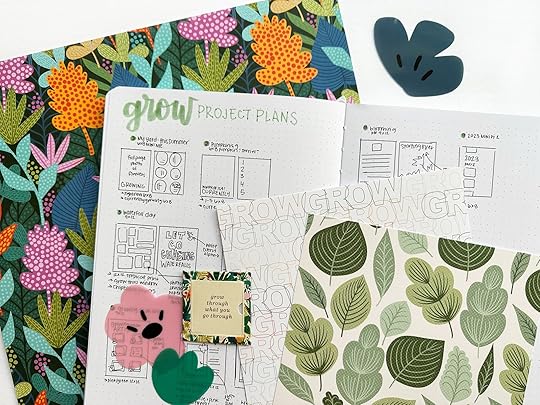
Hi there! This is Linda and I’m so excited to be here today to share with you my project planning for the Grow Quarterly Scrapbook Kit. Most of the scrapbook kits don’t have a specific story prompt (like a story kit), which gives you more flexibility, but sometimes makes it difficult to come up with story ideas. I love this kit because it has a very loose theme, Grow, which is great for stories of your garden, outdoors, or aging! But, it’s also very loosely themed so you can use this kit to tell most stories.
Because this kit has such a loose theme, I kept in mind photos + stories from the past couple of months, as my jumping off point for most of my projects and then use the kit itself to spark design ideas.
My first step is always to look through the kit in its entirety. As I get to each item, I think about a few things:
Is this something I want to add into my stash because it’s a great basic, or do I want to use it in a specific project? For embellishments, is this something I want to use all on one project, or should I use these a little at a time as additional embellishments?Does this include a story prompt I want to use as a jumping off point for a story?For papers, is this something I want to cut up or keep whole?Does this product lend itself well to project life?Next, I go through the products again and begin lumping together the products I want to use in a specific project and sketching out the project ideas. I also make note of the album I will add it into, the specific story I want to tell, any specific photos I want to include, and which products I want to use.
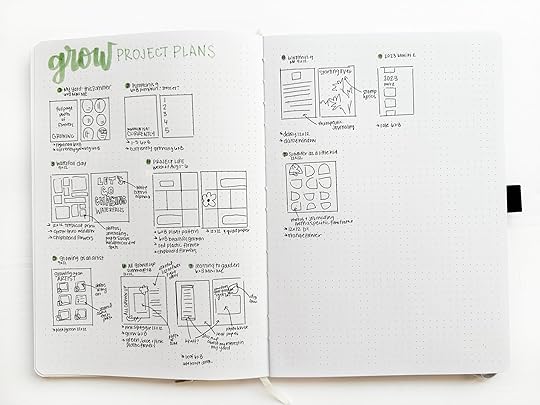
In the video, I walk through my process for planning out 10 projects using this kit, as well as talk through some other ideas. If you prefer still images, or if you want them to reference, I have also included photos of each of my plans below with some additional thoughts.
STORY PLANS1. My yard: this summer
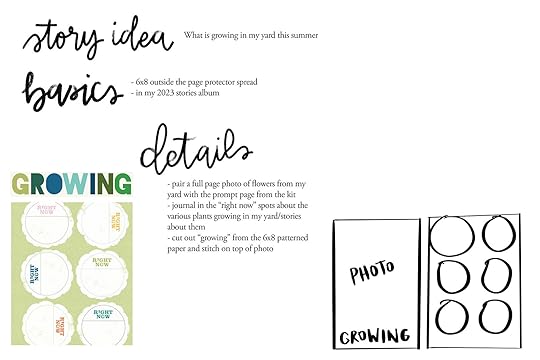
This kit came with some fun prompt pages, like this “right now” one. This paper can easily be used to document things related to the theme of grow, or you can use it to document anything that is going on right now.
2. Pumpkin is 9
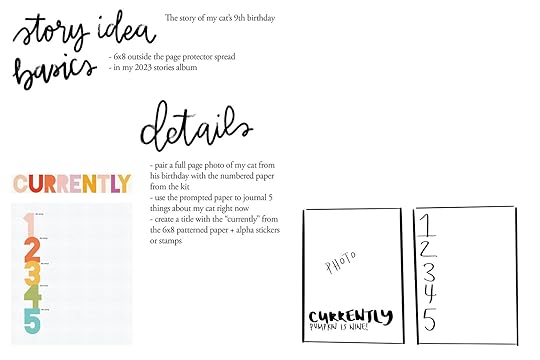
I love a good list! The 1-5 numbered list is a great place to document any 5 things. I chose to use it to document 5 things about my cat right now at his current age. This kit is great for documenting birthdays/aging and I love the idea of making a list of “currently” things about someone on their birthday. (But keep in mind there is a “birthday” story kit coming up!)
3. Waterfall Day 9x12
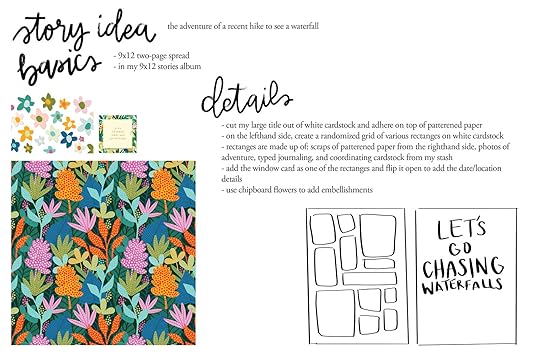
This kit is great for documenting all things nature related, I am using it to document a recent hike to see a waterfall, but it would be an ideal kit for anything outdoors.
Some of the patterns in this kit are beautiful and bold, like the 12x12 paper I chose for this layout. Sometimes it can be hard to balance such a bold pattern with a scrapbook layout, a good way to do that is to make the paper the star of one page on a two-page spread. I decided to use it to simply hold my title, which will be contrasting white letters.
4. Project Life: week of August 1 - 6
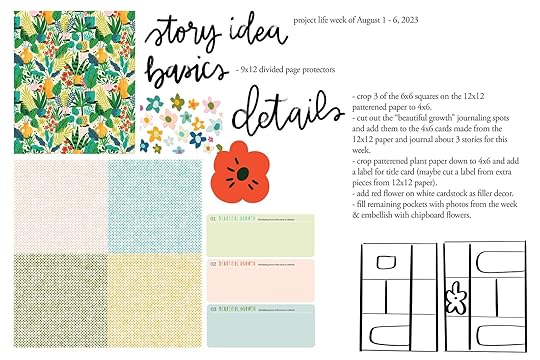
I love using scrapbook kits in project life! Just because these kits don’t come with pocket page cards, doesn’t mean you can’t use them in this style of project. Look for papers that contain patterns that are easily cut down.
Additionally, look for prompt papers that can be cropped to fit inside of a 4x6 or 3x4 pocket. If you’re unsure how a paper will look cut down, you can place an empty divided page protector on top of the paper and see where the divided lines fall on your patterned paper.
5. Growing as an artist
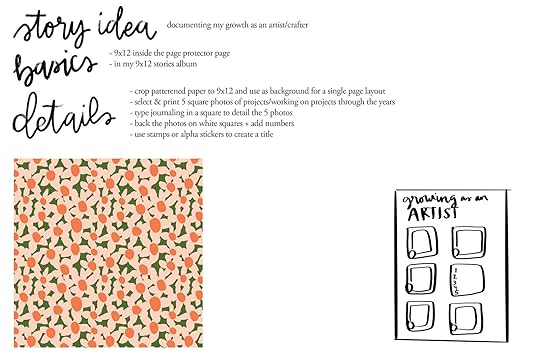
There are so many ways to interpret the theme grow. A fun growth story to tell is about either your own growth or someone else’s growth at something. For me, I’m talking about my growth as a crafter and how I have improved/evolved in my crafting over the years. But this could be your growth/progress at anything! A hobby, a sport, through your education, a career, etc.
6. All grown up: Summer @ 18
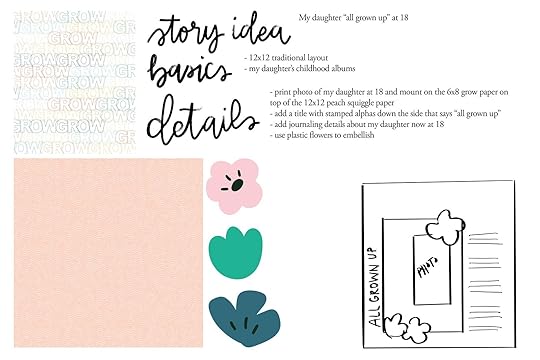
I love the theme of “grow” to literally document a person’s growth. I decided to use this theme twice to document a similar story but in very different ways. My second project (above) was about my cat at age 9, this project is about my daughter at age 18. This theme is perfect to document facts about a person (or pet) at a specific age!
7. Learning to garden
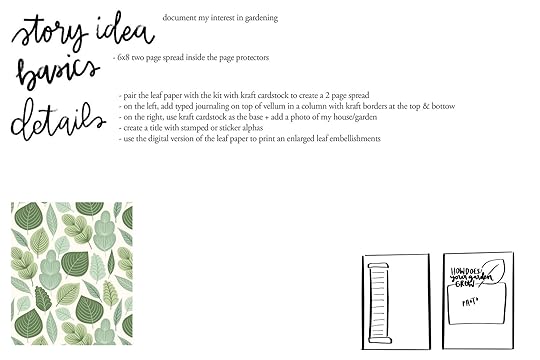
This year I have gotten a little more invested in my yard, even though I am very much a newbie and don’t know what I’m doing! I thought this kit was perfect to document where I am now in this journey of growing things.
The leaf paper was the perfect jumping off point for this story for me. This paper is great for any stories about the outdoors or the changing seasons. I love it as a home for my journaling paired with a photo on the other page.
8. Blooming
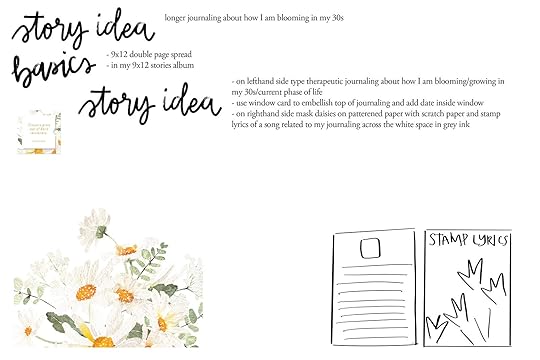
This theme is great for prompting longer journaling. I am someone who loves journaling, in addition to scrapbook, and often find the hobbies overlapping. I use scrapbooking not only to document stories of the past, but also reflect on my current life and plan for the future.
Take this kit as an opportunity for some longer journaling. You can journal about blooming or growth, or you can journal about something else on your mind. If you are a subscriber to just write, you can use this as an opportunity to get some of those words onto a layout. This kit would work well for many of the recent Just Write prompts, but “seeds” and “age” stand out in my mind as working particularly well.
9. 2023 Mini Me album title page
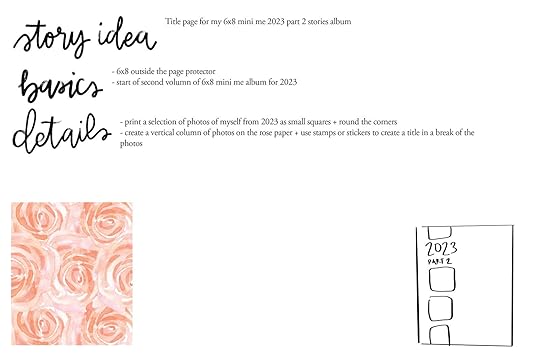
Title pages & ending pages in albums are great ways to use patterned papers that stand out to you. I love this floral paper in the kit and didn’t want to cover most of it up, so I decided to use it as a title page in my next 6x8 stories album (I recently started this album when my first one for the year got too full).
If you don’t always create title pages (or ending pages) for your albums, take this as an opportunity to go fill in those gaps and finish off your albums with a gorgeous patterned paper from this kit!
10. Summer as a little kid
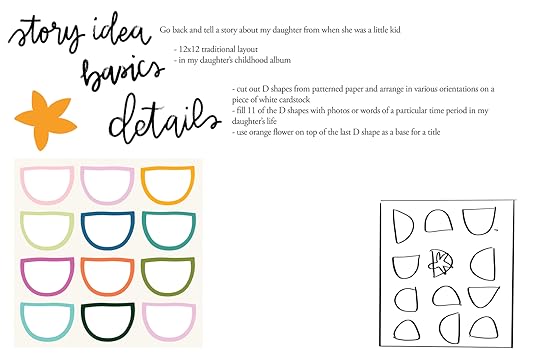
The designs in this kit seem to “grow” up themselves—some, like the pieces used in this spread, are very childlike, and others, like the pieces used in the last two spreads, are more adult.
This kit is great to fill in older stories that might be gaps in your albums from various ages. These could be stories of your child or of yourself.
NEXT STEPSMy next step to tackle these projects will be to break them down into action items. This is a process I shared in my class Plan, Prep & Play (https://aliedwards.com/shop/classes/p...) that is still available for purchase.
Essentially, this means I will break down each project into the steps I need to get it created and work on a few of the projects at a time to speed up my process. These steps will include things like selecting/editing/printing my photos, writing out my journaling, and assembling my pages.
Here is a final look at all my story plans in one place:
Thank you so much for joining me today in story planning with the Grow quarterly scrapbook kit. I hope this gave you some ideas for projects with this kit! If you found this post helpful, I create a similar styled lesson for each of the story kits in the story kit classroom.
If you want to see these projects come together, I will share them on my instagram as I complete them: @lindalovescreating . If you have any additional ideas or questions please leave them below. I hope you have fun telling stories with this kit!


