
Ali Edwards's Blog, page 42
September 29, 2023
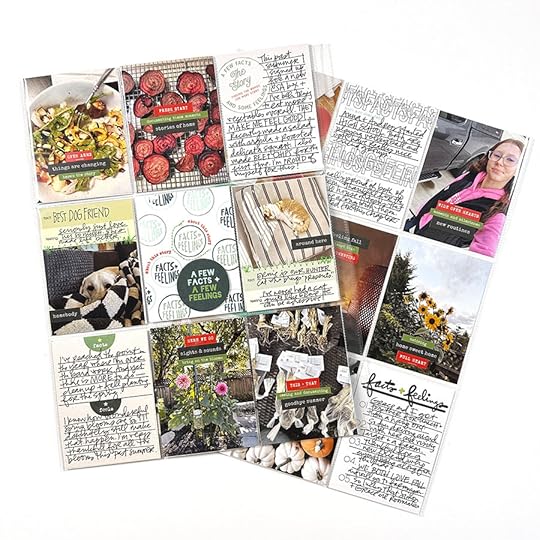
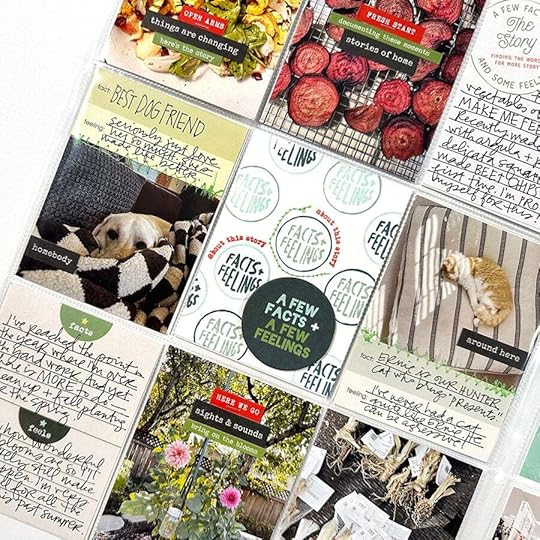
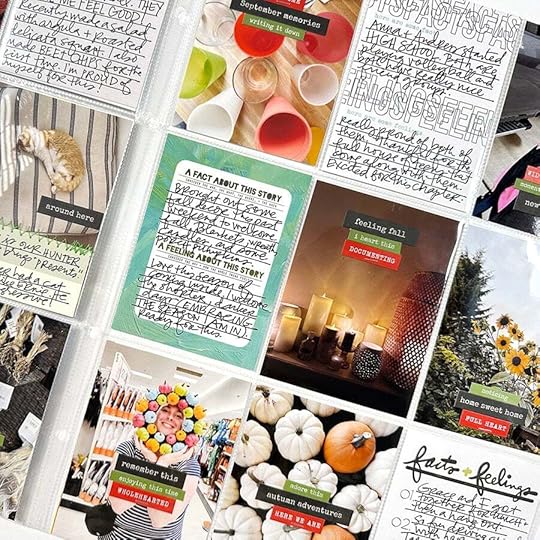
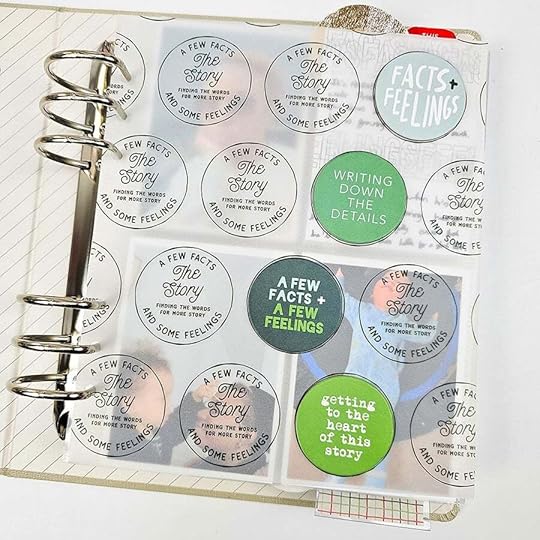
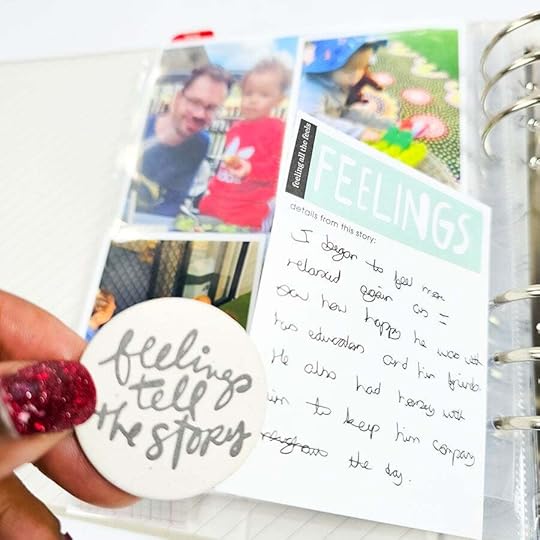
Story Play | Facts + Feelings 05
Welcome back to the final post in our Story Play | Facts + Feelings series. I'll be back with the final series this year "Little Moments" during the week of November 13th.
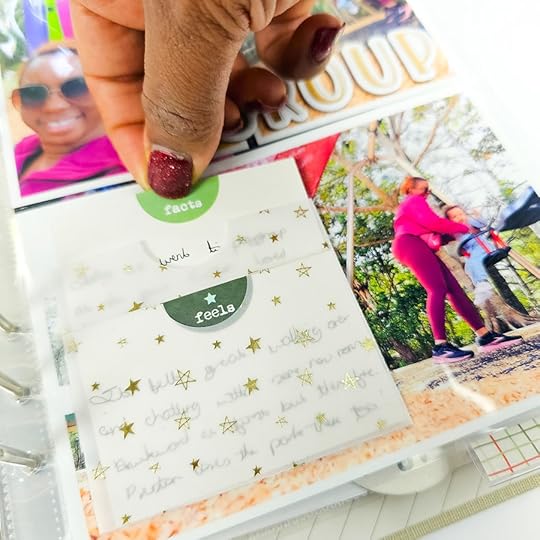
In today's video + post I'm walking you through how I used the 3x4 journaling cards from the
Facts + Feelings Mini Kit.
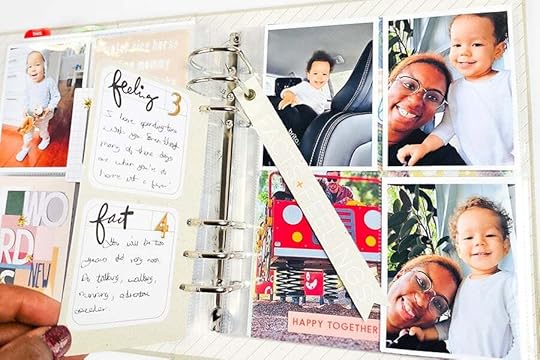
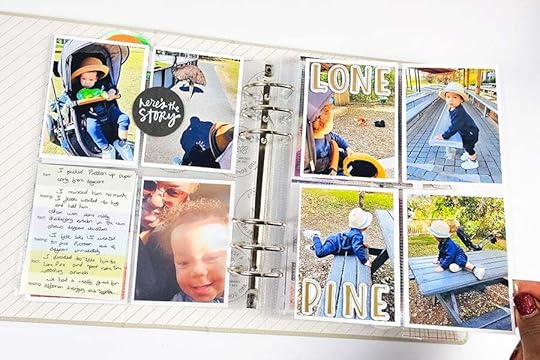
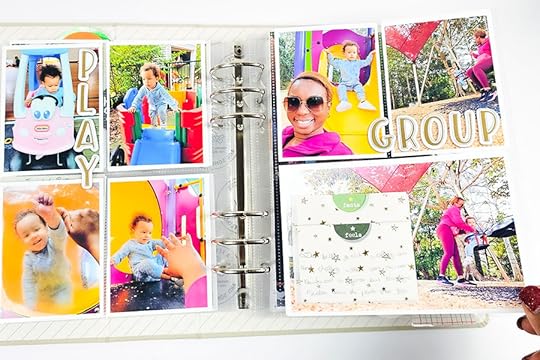
Today I'm also joined by Nolana Lynch who is sharing how she used the cards in this kit for documenting some of her stories.
Let's dive into the video:
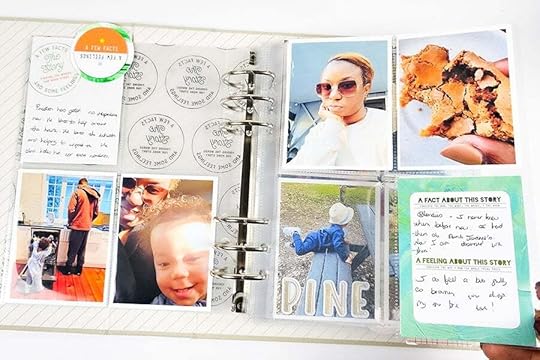
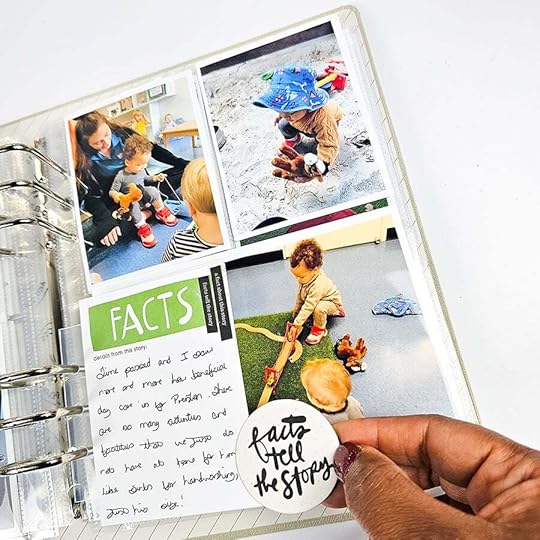
And here are additional images and details:
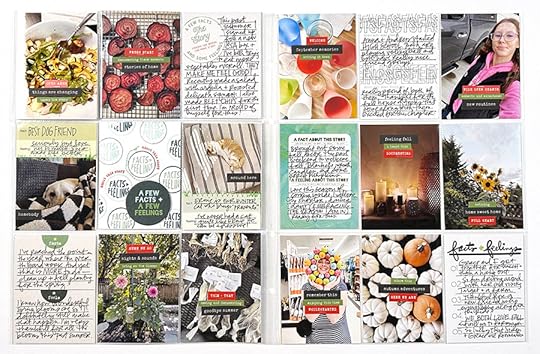
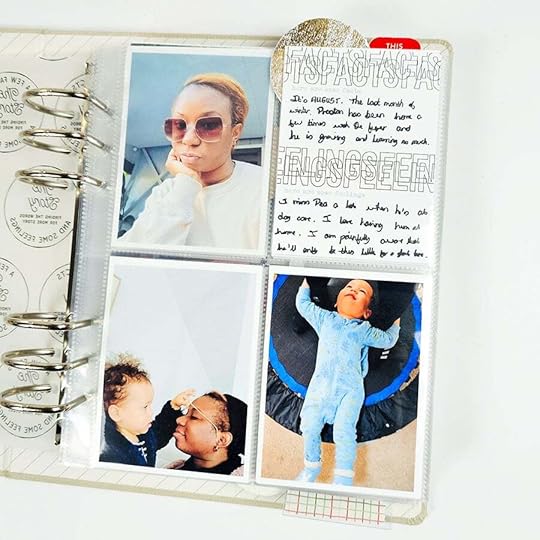
START HERE: 3x4 Pocket Page Foundation
If you like this idea you can easily create something similar if you are grouping your Story Play projects in their own album this year. I'm doing that for most of my projects but for this one I decided to go 9x12.
Facts + Feelings Mini Kit
Facts + Feelings Stamp Set
Columbia Ink, Olympia Ink, Deschutes Ink, Redwoods Ink
Tiny Attacher
Word Phrase Stickers from January, August, and September Stories By The Month™ kits
9x12 Album
9x12 Page ProtectorsNOLANA'S PROJECT
Connect with Nolana via Instagram!


Thank you so much for joining in this series! I hope it helps you get more of your stories told!


September 28, 2023
Story Play | Facts + Feelings 04
Welcome back to Story Play | Facts + Feelings.
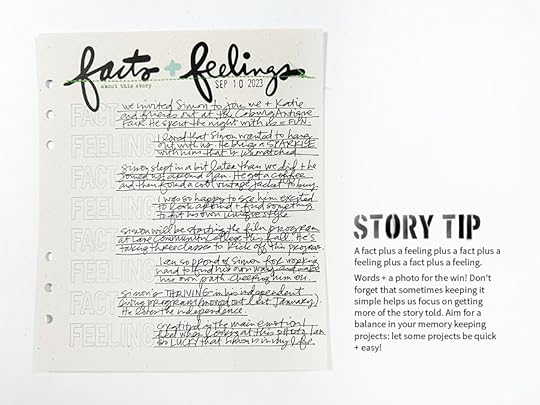
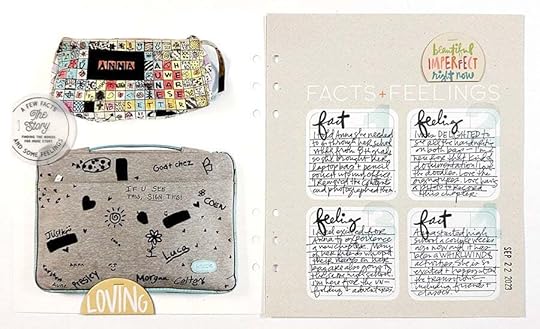
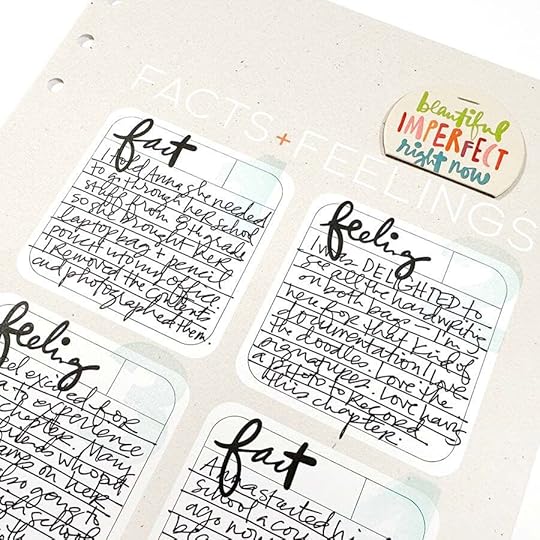
In this video + post I'm walking you through how I use the prompted pages in the Facts + Feelings kit to get more of both into my storytelling.
Let's dive into the video (includes both projects):
Here's a closer look at both projects:
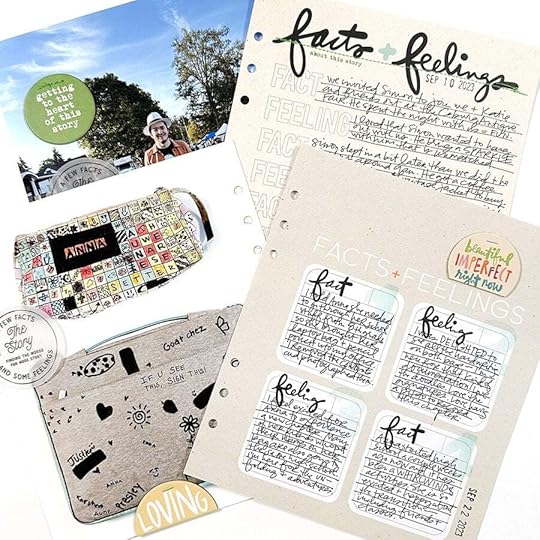
PROJECT ONE
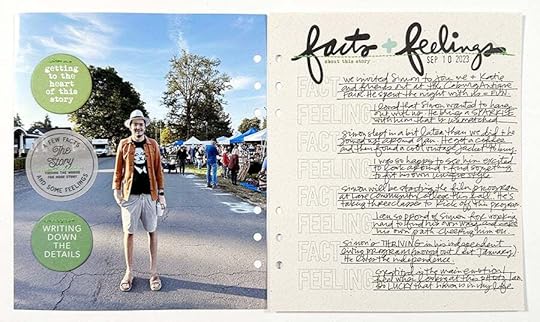
START HERE : Full page photo + circle trail + full page journaling.
START HERE: Full page photo + full page journaling.
Facts + Feelings Mini Kit Number Stamp Columbia Ink 2 Inch Circle Punch Tiny Attacher Rolling Adhesive 6 Hole Punch
September 27, 2023
December Daily® 2023 | Paint + Play with Jill 04

Welcome back to Paint + Play with Jill! This week I am sharing a bunch of foundation pages I made using the mixed media supplies! I have finally decided on my album for this year and that has freed me up to actually get started in it.
After seeing both the red Good Tidings 10x8 and the white Star 6x8 next to my previous albums, I have decided to go with the 6x8 stars album because it looks way better next to last year's album (the FALALA 6x8 from the 2021 collection). Something about having two text based albums next to each other wasn't working for me. I'm glad to finally have found a way to decide because I love both the red and the white star equally!
One thing I noticed when looking back at my 2022 6x8 album was that I had included so many pockets for my journaling that I either put on transparencies or patterned papers. And because I'm still loving pockets, and Ali has created even more pocket options for us this year, I am leaning into that and creating a handful of foundation pages with pocket journaling.
But first, I wanted to make a bunch of monochrome papers using the stencils and stamps for my projects. I love having a bunch of more subtle patterned papers in my stash because they allow my embellishments and photos to really shine!
Here is a photo of all of the patterns I created plus close ups of my two favorites! You can also check out my intro video for more of my thoughts and a closer look at the patterns. But be sure to keep scrolling to see what I created with them!
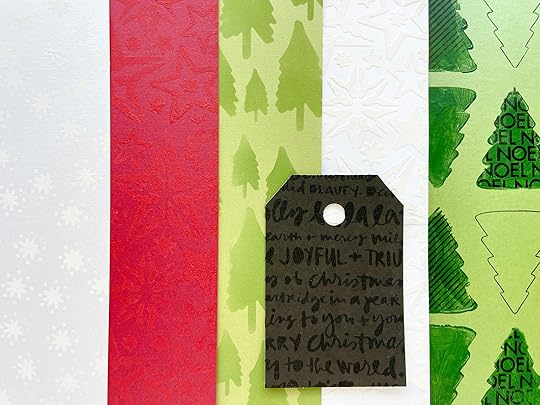
For my first two foundation pages, I used white on white patterns to allow the stitched pockets from this year's collection to pop on my page.
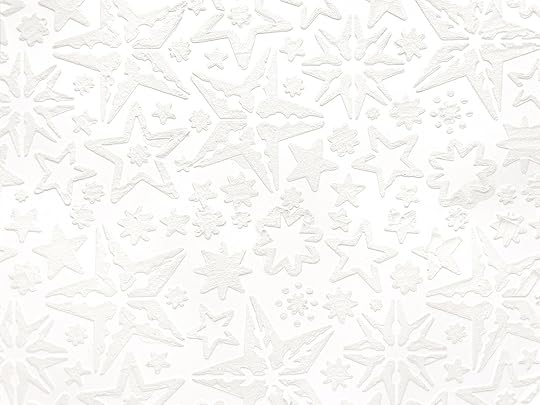
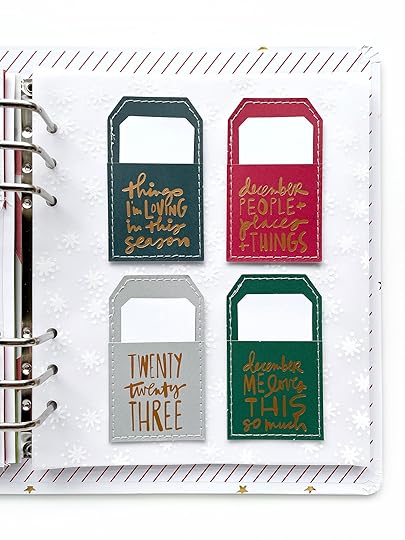
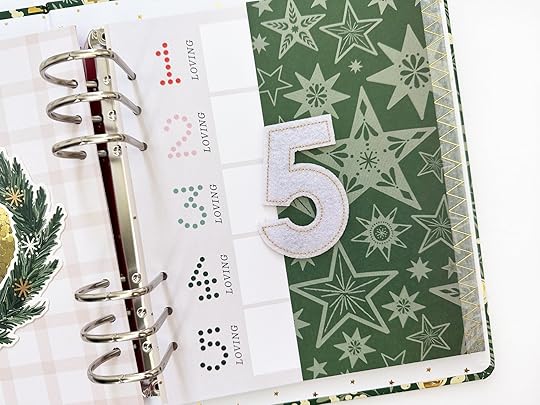
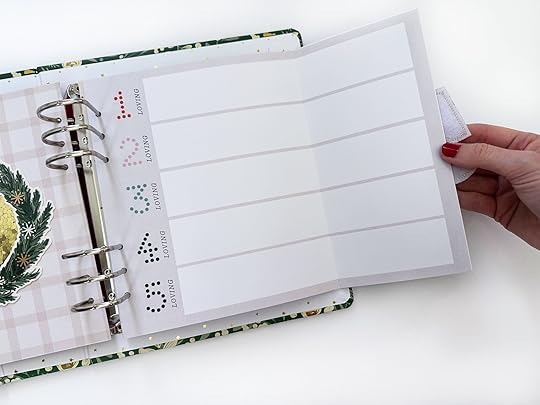
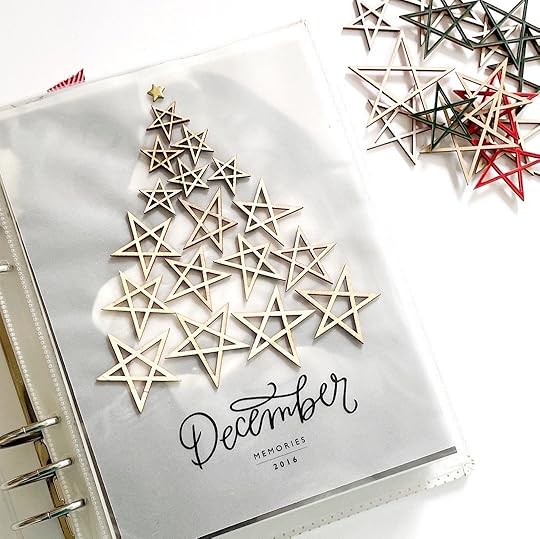
Stitched Tag PocketsI attached the stitched pocket tags to the vellum sheet with white snowflakes that I created in week one. I will either attach more tags to the back side or attach the vellum to a white cardstock base for the white on white look. My intention is to create a "4 things I'm loving in December" page inspired by the text on two of the tags, with inserts created from labels from this year's label pack.
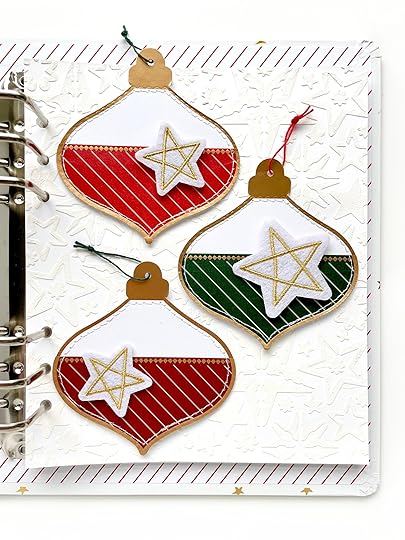
For this second white on white page, I used white texture paste on top of white paper to create a really fun page that is both subtle and also allows the pattern to really pop. It may be just me, but this background gives me an old fashioned wallpaper vibe that pairs great with the old fashioned ornaments! On top of each ornament I attached a white felt star to go with the star background, and to create more texture while staying subtle. For the inserts in the pockets, you can either trace the ornament and cut an extra 1/8 inch or so off the edge, or you can use the stencil which is already a bit smaller than these pockets.
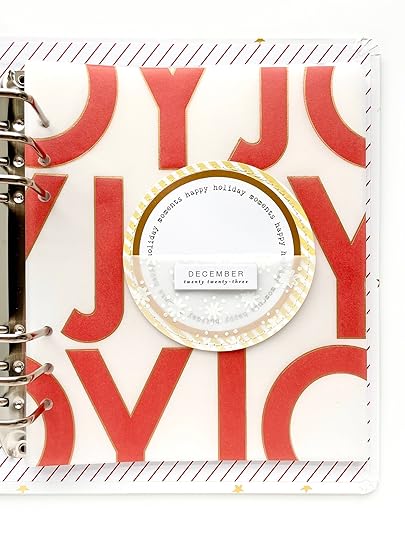
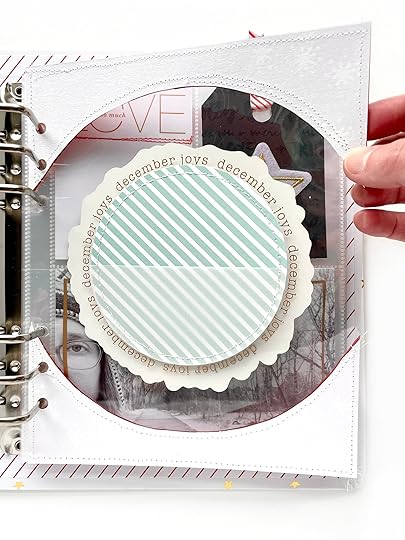
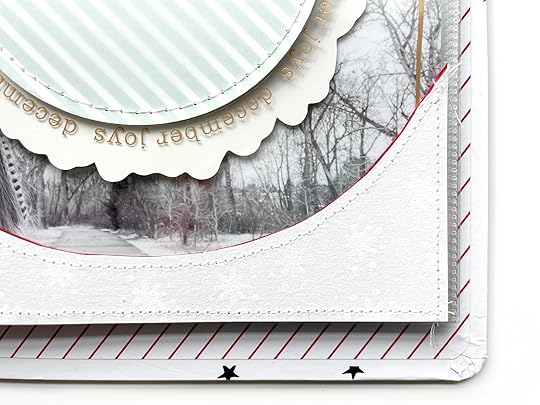
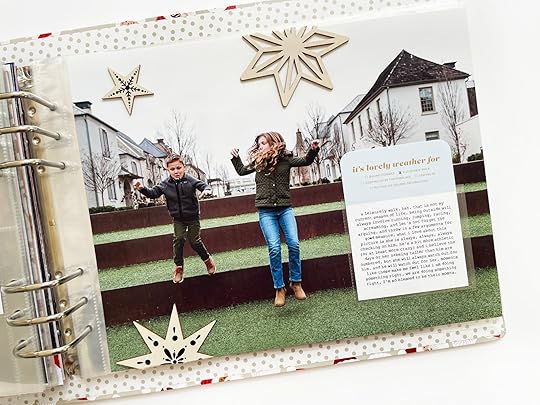
While I created this page with the intention of it being my opening "reason why" page, it could also easily be a journaling spot later in my album if I change my mind! I really loved the circle pocket "reason why" I did last year (inspired by Ali) and also love this Joy vellum from the main kit, so I was excited when I realized I could combine them! This bright green striped circle pocket is from the Hobbies story kit, which is still available at the time this blog post goes live. The circle insert I used is from the die cut bundle. To add even more interest (and use my mixed media supplies!), I stenciled some white snowflakes right on top of the vellum on the pocket. Check out the video to see how I did that.
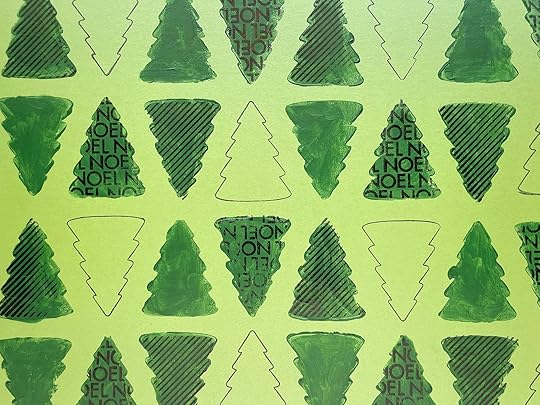
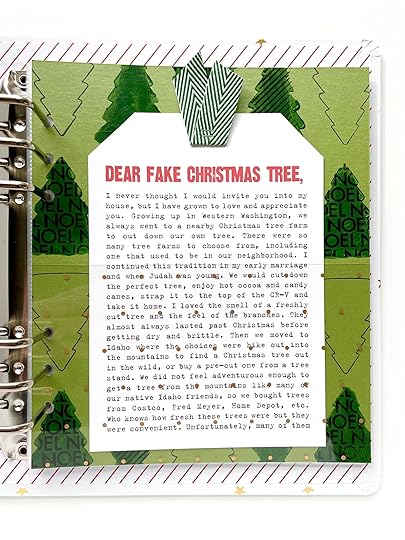
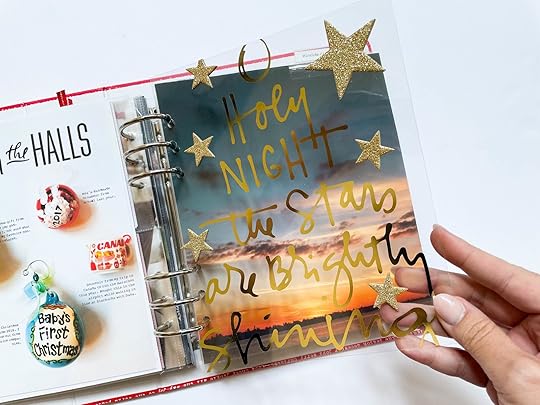
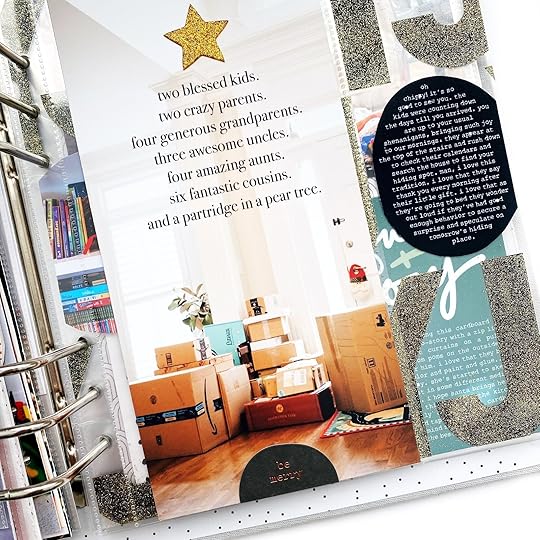
I decided to make my stamped tree paper into a pocket page with a transparency on top so that I could still see the whole pattern. My inspiration for this page was the pocket I made last year to hold a giant tag with a long story about my fake Christmas tree. I plan for this year's pocket to simply be a space for one or more tags to hold a longer story that is not necessarily about my tree. For the transparency on top, I chose the gold dot from the specialty paper pack because it allowed the pattern beneath to be seen. I cut the original 10x8 transparency down to an outside the page protector 6x8 size to use another time and the leftover scrap was the perfect size for my pocket! I will sew the transparency on later so that I have the flexibility for whether it is the front or back side of a page.
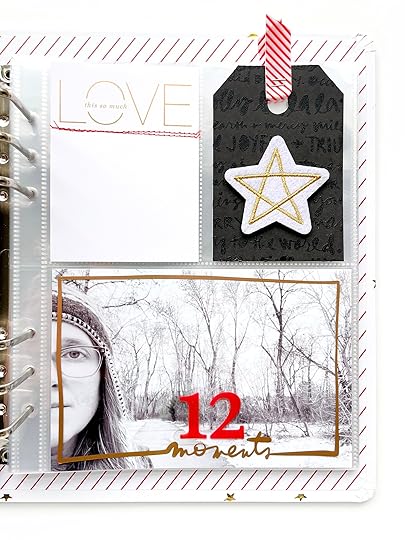
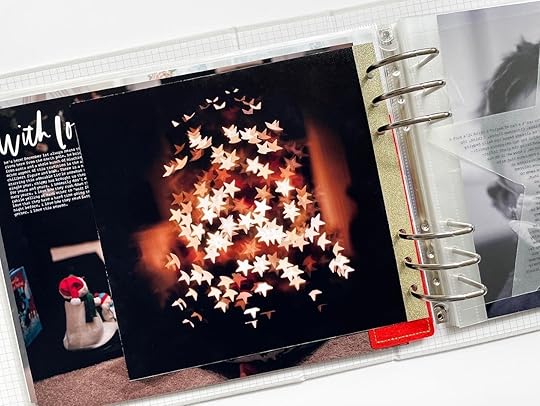
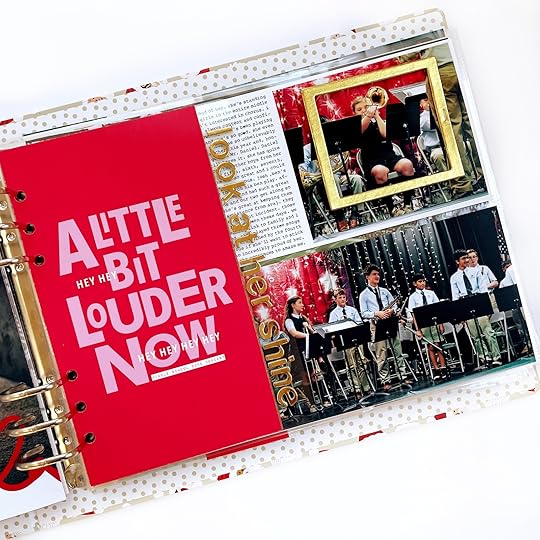
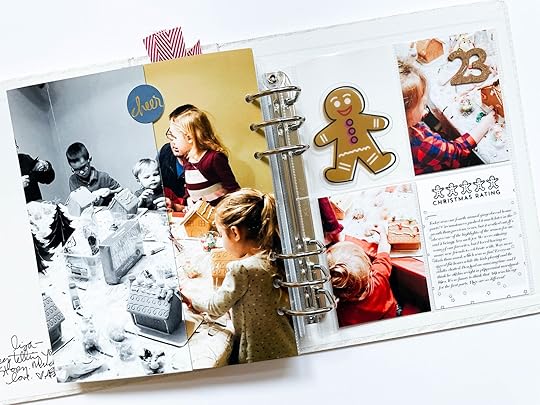
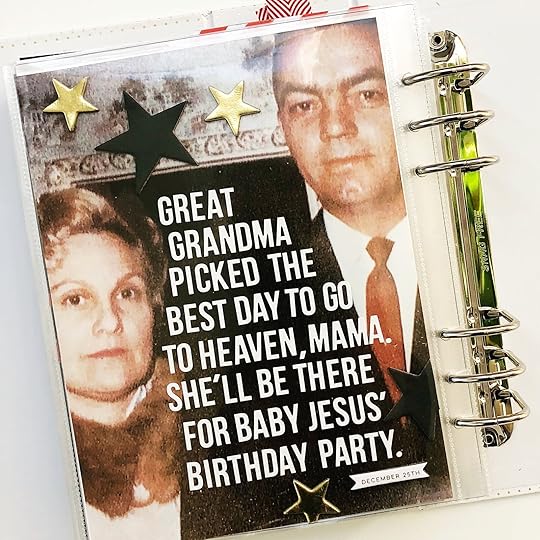
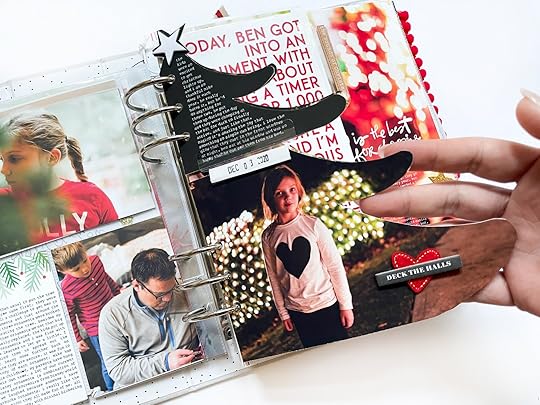
I was inspired by my black silk screened tag to lean into a black and white color scheme with pops of red and gold. I could have done a lot of fun things with this tag, but I like to have some simple pocket pages sprinkled into my album so I went that direction instead. I pulled a white felt star, red ribbon from the trim pack, the LOVE card from the Paislee Press kit, the gold foil "moments" 4x6 transparency, and a red plastic number. Then, I finished the page with a line of red stitching along the top of the 3x4 card to create a visual triangle of red. I love the simple colors in this one... especially with a black and white photo!

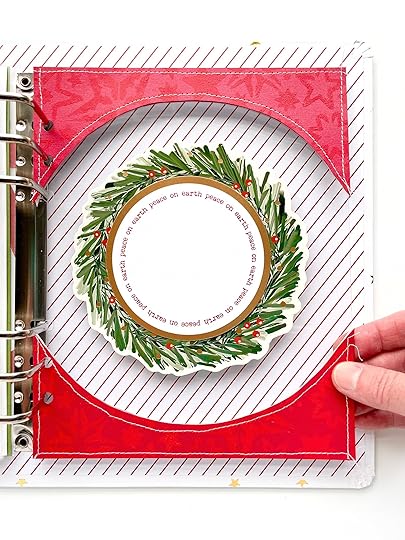
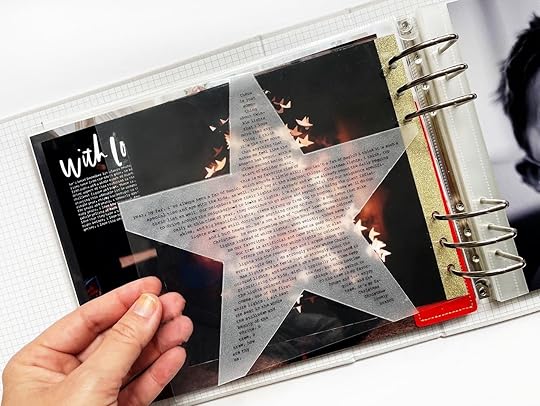
My last foundation page is a double sided transparency with another circle pocket from the Hobbies story kit on one side and a large wreath die cut on the other side with a circle journaling spot in the centy. I wanted to use some of my tone on tone papers and also have a see through element. So I hand cut my papers to create a circular frame to do around my center journal spots and chose a transparency from the 6x8 pack. I liked this one because I could use the gold foil circle to frame my circle pocket. To adhere my papers to the transparency, I stitched the white side directly on with white thread. For the red side, I stitched them before putting them onto my page for a faux stitched look before adhering them with red line tape. I did it this way because I wasn't sure if my sewing machine could handle two thick cardstocks and a transparency page. Then I attached the wreath and circle pocket with washi tape to give me flexibility later. If you watch the video of me putting these pages together, you will notice that I switched out the green striped circle pocket for the blue one because it thought it worked better with the snowflake vibe my white paper was giving. I'm thinking I may need to add some silver stars or something like that to this page to give it an extra something. But I like it as a foundation for a future story.
I hope my projects this week inspired you to go create some of your own papers and then make a few simple foundation pages! I am not much of a foundation page person but I do appreciate having these 6 flexible journaling spots to work with when December comes!
Let me know if you have any questions and be sure to follow me on Instagram if you would like to see my album progress in December! You can find me on Instagram as @jill.drangsholt
SUPPLIESStitched Tag PocketsDie Cut LabelsWhite Felt StarsA Very Merry Christmas Silkscreen PackHoliday Stencil PackPaint PackTrees 6x8 Stamp SetSpecialty 10x8 Paper PackBlack Stazon Ink2.75" Round Acrylic Stamp Block2022 Stories of Christmas Pasts Kit (black tags)Paislee Press Mini Kit (3x4 love card)Specialty Journal Card SetRed Small Plastic NumbersRed & White Trim PackMain Kit (ornament stitched pockets, joy vellum paper, wreath)Holiday Variety Die Cut Bundle (circle journal cards)Hobbies Story Kit (stitched circle pocket)December Joys 6x8 Transparency PackStar 6x8 Chipboard AlbumStory Play | Facts + Feelings 03
Welcome back to our
Story Play | Facts + Feelings series!
In the previous post we talked about using lists as a way to excavate facts + feelings. Today I want to invite you to start your storytelling from a photo. From one photo you can gather all kinds of facts + feelings when you are willing to take a closer look at (and once again excavate) the layers of stories within the photos.
LINKS
The Emotional Lives Of Teenagers by Lisa Damour Feelings List
You can 100% do this.
Looking for more inspiration related to getting your stories told? During September we are offering
30% off classes (
excludes new December Daily® + the new Start Here workshop) with the code Fall30. Offer valid thru 10/1/2023 at 11:59pm ET on your purchase of select digitals and select classes. Must enter code at checkout. Cannot be combined with other offers. Not responsible for missed or forgotten codes. Offer subject to change.
WANT A REGULARLY SCHEDULED WRITING PROMPT?
We also have a monthly subscription that invites you to focus just on the writing piece of memory keeping. It's called Just Write and it's $5 a month for two writing prompts.
You can read more about it here.
September 26, 2023
Story Play | Facts + Feelings 02
Welcome back to our
Story Play | Facts + Feelings series!
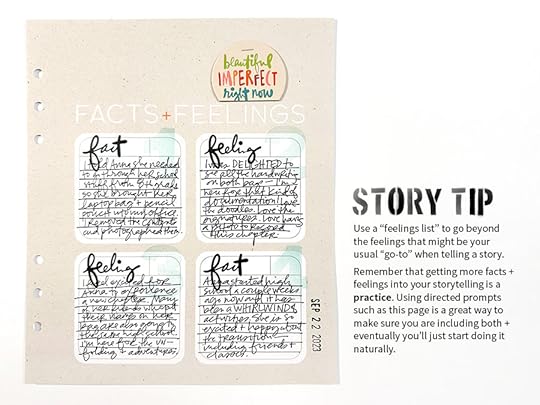
One of the best tools in my journaling toolbox is using lists to excavate the facts + the feelings of a story. Lists can be visually fun (they are such a great place to bring in embellishments) but they also serve an awesome purpose in removing academic writing pressures you may have internalized from your education. Don't get me wrong, I absolutely love a beautifully crafted paragraph/story but what I love more is simply getting the facts + feelings of a story out of my head and heart and onto a page. Lists organize our facts and feelings and help us focus more on that rather than worrying about grammar and punctuation.
In the video above I reference a list of feeling words. You can access that here.
Simply put, practice and repetition can make you a more confident journaler/writer. You can start today by grabbing a piece of paper or opening the notes app on your device and following this prompt:
Write down 3 facts from today/this week/this season. Write down 3 feelings from today/this week/the season.
Repeat daily/weekly/seasonally to practice telling more of the story (or getting more of your own feelings included in your memory keeping). The facts and feelings might related to each other (here's a fact and here's how I feel about it) or they might not be directly related. Both are perfectly fine.
Another option/approach is to tackle your next storytelling project by simply listing out one fact and then one feeling and repeating that until you feel satisfied. Use numbers or bullets or stars or some other graphic element to designate each item on your list.
Write down a fact. Write down a feeling. Write down a fact. Write down a feeling. Repeat. Use the phrase "tell me more" to encourage yourself to add another layer to your story. Keep going (this is the process of excavation).
You can 100% do this.
Looking for more inspiration related to getting your stories told? During September we are offering 30% off classes (
excludes new December Daily® + the new Start Here workshop) with the code Fall30. Offer valid thru 10/1/2023 at 11:59pm ET on your purchase of select digitals and select classes. Must enter code at checkout. Cannot be combined with other offers. Not responsible for missed or forgotten codes. Offer subject to change.
WANT A REGULARLY SCHEDULED WRITING PROMPT?
We also have a monthly subscription that invites you to focus just on the writing piece of memory keeping. It's called Just Write and it's $5 a month for two writing prompts.
You can read more about it here.
September 25, 2023
December Daily® 2023 | Plan + Play with Linda 04
Hi everyone! It’s Linda and I’m back again for the fourth and final segment of the Plan & Play December Daily series. Today we are going to be talking about albums! Whether you already have an album selected or you’re still on the fence, today’s post will hopefully give you some ideas to decide which album size is best for you + adapt the products/projects to the size and style you are working with.
ALBUM SIZESThere are lots of album sizes that you can use for December Daily, really there is no wrong way to do this project! In the past I have done: 4 x 5.5 (vertical), 4 x 6 (horizontal), 6 x 8, 10 x 8, 7 x 7 photo book, a DIY cover that was roughly 5 x 8 and included the project in my 12 x 12 project life album.
So whether you have already selected on a size or are still deciding, it’s important to consider how this project adapts to the album you are using.
In the video above, I talk you through the various sizes I have done and considerations for each. Here are some things to consider if you’re still undecided:
(01) How much time do I have to devote to this project? Larger albums take more time. If you have limited time, you might want to consider using a smaller album.(02) Do I like to include multiple photos per day? The super small albums lend themselves well to one photo per day. If you don’t think you could limit yourself to only one or a few photos per day, you might want to consider using a larger album. (03) Do I want to use a lot of products? Smaller albums just hold less stuff. So if you want to use a lot of products, you might want to consider using a larger album.(04) Do I prefer vertical or horizontal photos? If you prefer taking photos in one orientation rather than the other you might want to consider using an album that is also that orientation so you can easily print full page photos to add into your album.(05) How large can I print photos easily? If you print at home and are limited to a specific size print, you might want to keep your album under that size so that you can easily complete this project.(06) Where will I store my album once it’s completed? If you have limited storage space, you might want to consider smaller albums. Alternatively, if you plan to keep your albums lined up on a shelf, make sure you’re selecting an album size that is conducive to that. (07) How do I feel about page protectors? Divided page protectors are great for many reasons, but there are also lots of benefits of not using page protectors. If you want to use page protectors for most of your pages you will likely want to select a size that has a lot of page protector options. If you don’t want to use page protectors, this would be less of a concern and you could go with a non-standard size.(08) How much flexibility do I want? I have never used a bound book as my album base (such as a traveler’s notebook or the art journal [https://aliedwards.com/december-daily...]), but I’ve always thought they would make a super fun album. If you want the flexibility of being able to move your pages around, this might not be for you.(09) Do I want to do a lot digitally? If you want to work with a lot of digital supplies, consider how you intend to put those into your album. Do you want to do a lot of hybrid spreads? Would you prefer to create your album digitally and have it printed after the month?(10) What inspiration am I hoping to find? If this is your first year, or if you really like to take inspiration from others literally, then you might want to do a 6x8 album as that is the most common when seeking out inspiration online. You also might want to consider 10x8 because Ali plans to use that size for her album. That said, your album should be what you want it to be, not what others are doing, so I would strongly suggest doing the size you are most drawn to regardless of what others are doing.
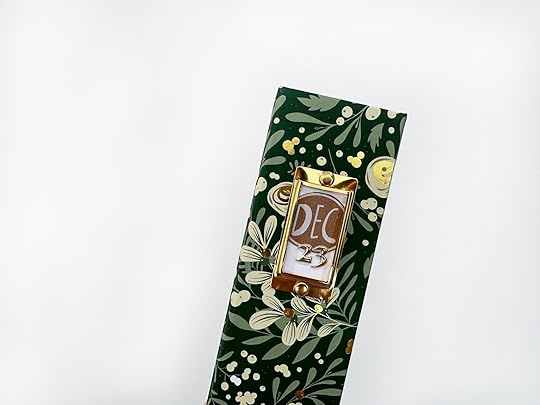
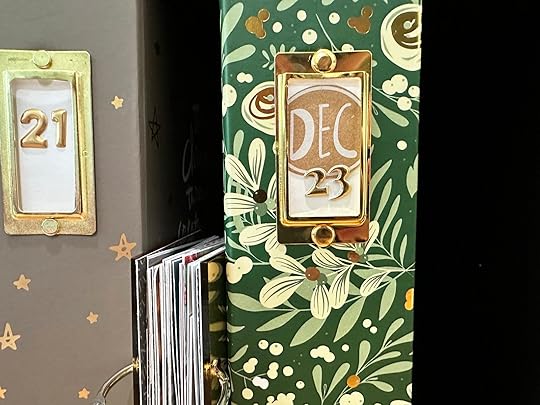
For this project, I plan to use the green floral 6x8 album. I created a spine label for my album by cutting out the “DEC” circle from one of the kraft envelopes that the Stories by the Month kits come in and pairing it with numbers from this set.
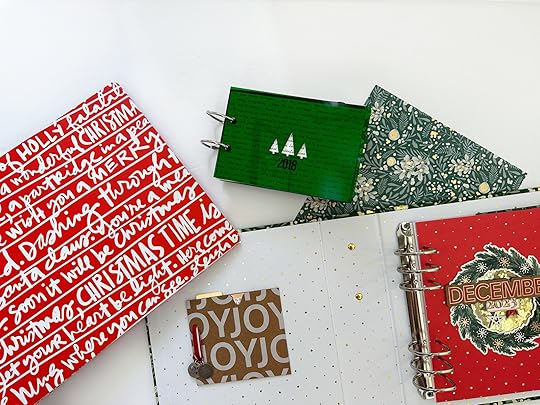
In addition to thinking about what size you want to work with, you might want to consider other things, such as color. Do you want all your albums to match on your shelf? Or do you want them to at least coordinate? For me, I like that they don’t match and enjoy mixing up the size each year. I am working with a 6x8 this year partially because I haven’t done that since 2019. You can see in the photo above how most of my albums look on my living room shelf.
The main kit was designed so it could be adapted to various album sizes, styles, and formats. But, sometimes it’s hard to see how supplies can adapt, especially if you don’t yet have them in your hands. Here are some ideas to help you translate the products to work for your project.
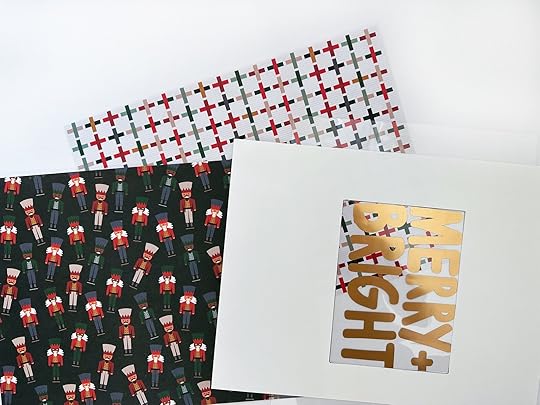
Patterned PapersA lot of patterned papers have simple patterns that can easily be cropped to any size. But what about larger patterns and prompt papers? You can often make those work in smaller sized albums as well!
In the video below I talk through some ideas for adapting the patterned papers in the main kit + add on paper pack to smaller albums.
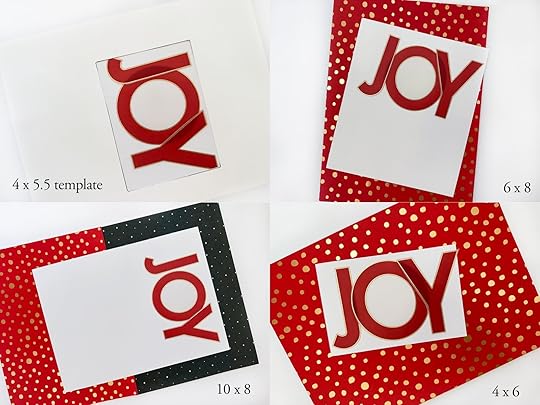
Create a template. If you are using a smaller album, a great way to visualize how papers will fit in your album is to create a template. To do this, create a cut out in a piece of scratch paper so that your scratch paper has a hole in it to match your album page size (see photo below or video). Then lay this template over the papers to get an idea of how they will look in your album size. The template I made below is sized 4 x 5.5 inches, which matches the album size I used last year.
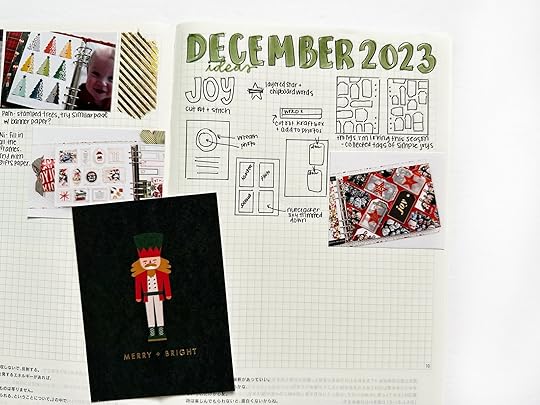
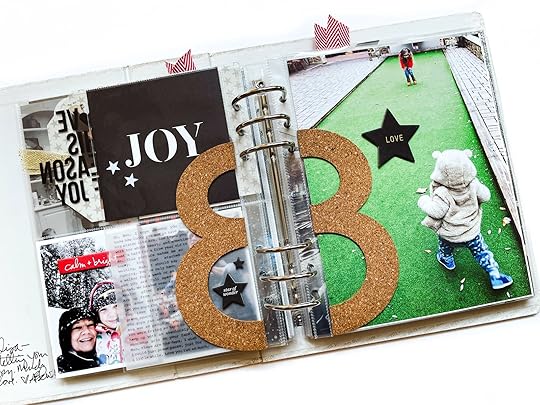
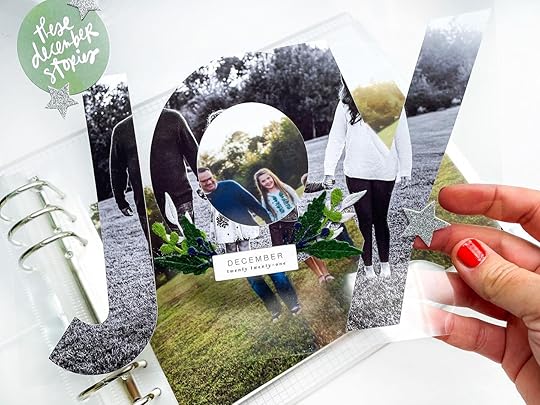
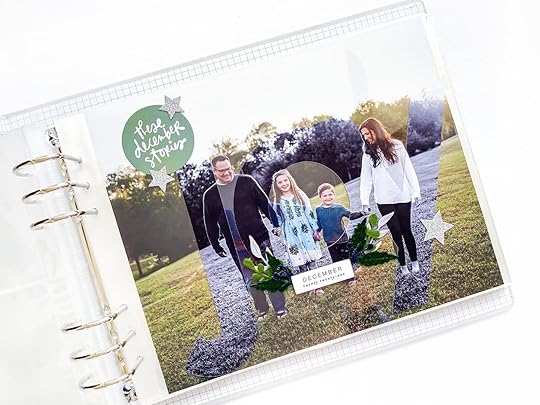
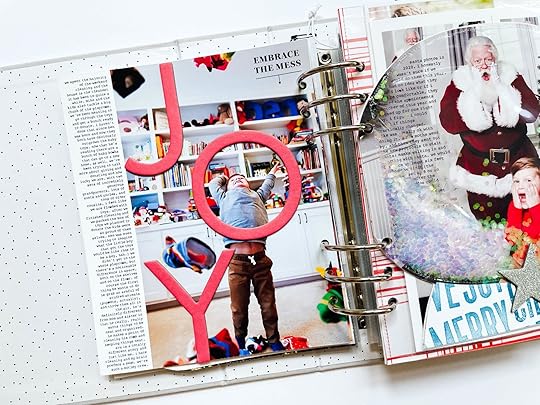
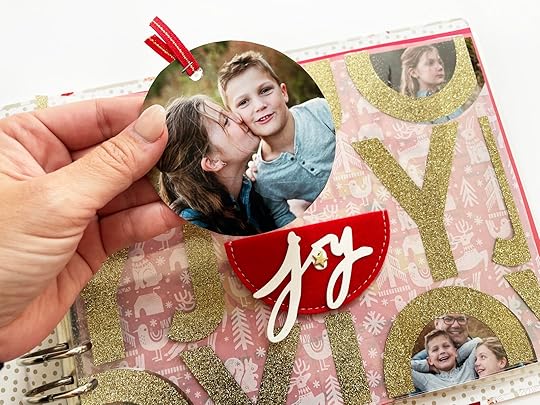
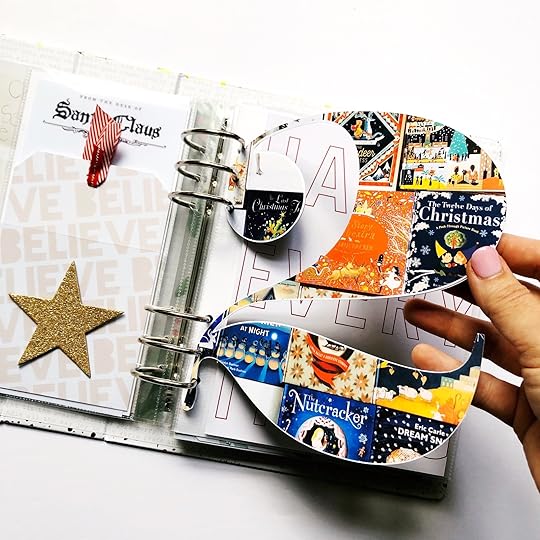
Consider rotating or cutting up the paper. Lots of the papers this year lend themselves well to being cut up, such as the tags and banner page in the main kit, or the circles and gifts in the paper add on pack. I loved the JOY vellum in the main kit but, because the type is so large, you really needed the full 10x8 to get a good visual of the pattern. But, that’s okay. I cut out the full letters of JOY and am able to use them in a smaller album.
Consider spanning two pages. If you love the large scale pattern on a 10x8 paper, consider cutting the paper to fit across two spreads. For example, you could turn a 10x8 paper into a 6x8 and a 4x8 for a 6x8 album.
Consider flip outs. You can also use a larger paper in your album by turning it into a flip out. In the video above a created a foundation page using the 1-5 paper that will fit in my 6x8 album. If you are using a shorter album, you can cut off some of the numbers and make your list only 1-4 or 1-3.
Consider pocket pages. Just because you are working with patterned paper, doesn’t mean that you can’t still use pocket pages. Even if you’re using a larger album, you might want to cut down papers to slip into pockets. If you are unsure how a page will look cut down, create a template like the one I shared above to match the pocket size you’re considering.
Pocket CardsThe main kit comes with an assortment of 4x6 and 3x4 cards. There are also some add-on cards. If you want to use these products, but don’t want to do divided page protectors, there are still a lot of ways you can make them work.
Cut out the cards. Last week I shared an idea for cutting out the documenting blurbs on the 4x6 card in the main kit to adhere on top of a full page photo. Lots of the cards in the kit can easily be cut out and adhered on top of photos or used as embellishments in layouts.
Create a grid. Pocket cards are really, at their most basic, just rectangles. You can create a lot of fun layouts with these cards as rectangles of patterned paper on top of your spread. I really love the nutcracker 3x4 card but am unsure if I want to use any page protectors in my album. I sketched out an idea to crop the card down to 2.25 x 3 and pair it with a photo + words + patterned paper of the same size in a grid.
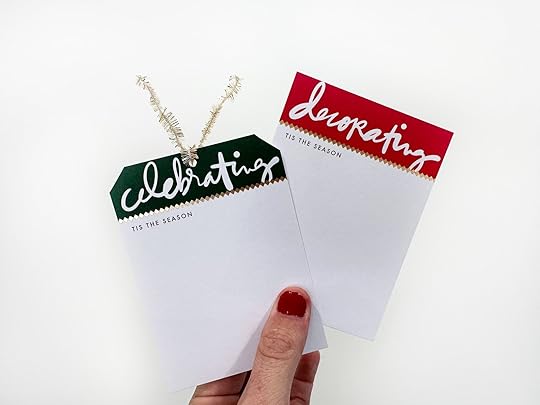
Turn them into tags. You can easily turn most 3x4 cards into a tag by cutting off the top two corners at an angle, punching a hole, and adding some ribbon.
Add pockets on top of photos. Even if you don’t want to use divided page protectors on their own, you can cut one of the pockets out and adhere it on top of a full page photo or patterned paper to add your pocket card. I first saw Ali do this in a travel album and have since used the technique myself.
Embellishments & ExtrasMost of the embellishments are small enough to fit into most sized albums. But, you still might need to get creative! You can use the same techniques as discussed above to adapt the embellishments to your album.
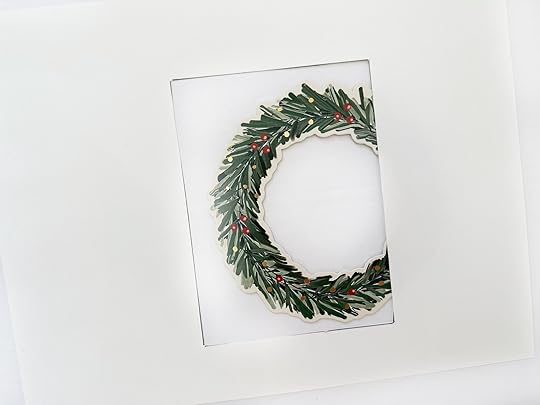
Wreaths. If your album is too small to include an entire wreath, you can purposefully have it go off the page (see template above). You can also fold it over to create a flip up with the side of the wreath you cut off (similar to my 1-5 page above).
Kraft pockets. These are super fun and small enough to fit in most sized albums as is! But, there are lots of other things you can do with them besides add them into rings! You can adhere a pocket on top of a photo or patterned paper to create an interactive page. Alternatively, you can adhere a pocket on the inside of your album cover to hold your reason why.
If you’re not going to use the pre-punched holes you can cover them with washi tape, tie ribbon through them, or add brads in the holes to adhere it to your page.
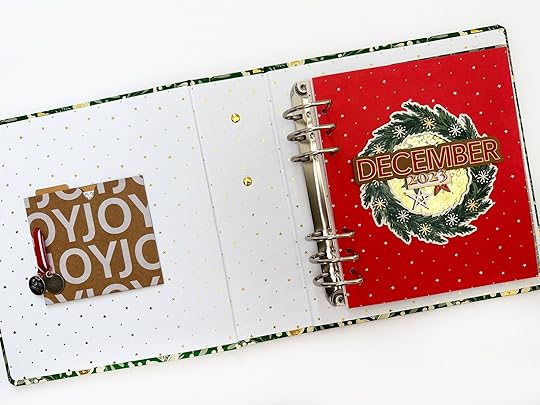
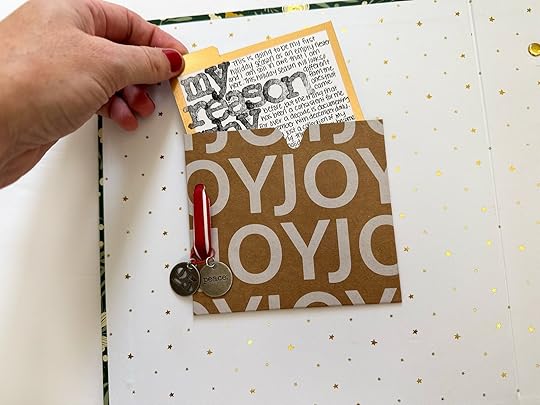
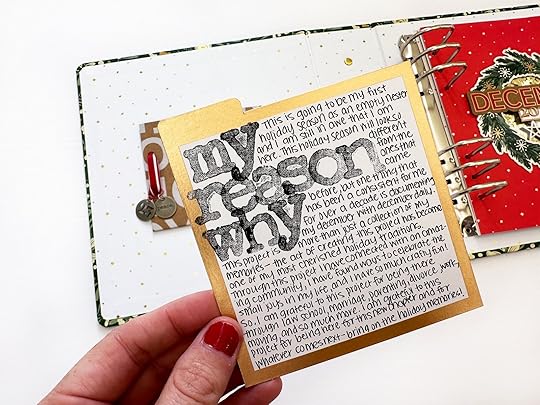
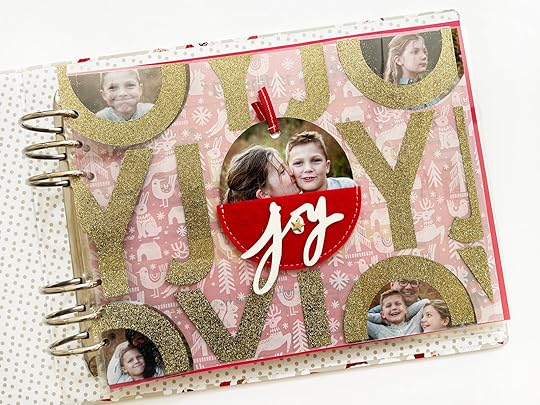
I used the JOY craft pocket to create my reason why and adhered it to the inner cover of my album using red line tape. To cover the holes, I used one of the red ribbons from this set and some metal tags from my stash (I believe they are from Tim Holtz).
I hope that this post gave some ideas for ways you can use the main kit no matter the album size or style you decide to go with. I have enjoyed hanging out with everyone on the blog and on instagram each Monday in September. Even though the plan + play series is over, I intend to continue sharing my ideas and set up for my album as we get closer to December. You can find me on instagram & youtube @lindalovescreating to see all of my updates!
I will also be over on the @decemberdaily instagram account LIVE today, September 25, at 4 PM EST to answer your questions and chat about the things we talked about in today’s post. Hope to see you there!
Story Play | Facts + Feelings 01
Welcome to the next installment of our
Story Play series for 2023.
This week I'm sharing all about why I love the concept of "facts + feelings" as a writing formula I return to again + again in my journaling/storytelling adventures.
Using Facts + Feelings To Organize Your Stories (more examples + another video from Ali on this topic)20 Journaling Benefits: Why You Should Keep A JournalSUPPLIES
Facts + Feelings Mini Kit (available in a bundle)30% OFF CLASSES DURING SEPTEMBER
Looking for more inspiration related to getting your stories told? During September we are offering 30% off classes (excludes new December Daily® + the new Start Here workshop) with the code Fall30. Offer valid thru 10/1/2023 at 11:59pm ET on your purchase of select digitals and select classes. Must enter code at checkout. Cannot be combined with other offers. Not responsible for missed or forgotten codes. Offer subject to change.
WANT A REGULARLY SCHEDULED WRITING PROMPT?
We also have a monthly subscription that invites you to focus just on the writing piece of memory keeping. It's called Just Write and it's $5 a month for two writing prompts. You can read more about it here.
September 22, 2023
In Case You Missed It | September 22
Happy Friday, friends! Welcome to the latest
In Case You Missed It. Just a reminder that this is a quick post that will happen every Friday afternoon with all the updates and links that have happened throughout the week. So, let's get to it:
It's almost here! Mark your calendar for this Monday, September 25th for our next Story Play series featuring the Facts + Feelings Kit. During the week we'll be sharing thoughts, ideas and examples using the kit to celebrate storytelling through the combination of facts and feelings. Looking for products related to the week? We still have the Story Play Mini Kit Bundle of 3 available, as well as the digital version of the kit. Shop the kit here.
LET'S PLAY SERIES
Plan + Play Monday will be led by Linda Jordan, creative team alum, Story Planning contributor, and the instructor behind Plan, Prep, and Play. Linda will be sharing how to set yourself up for success with the project focusing primarily on the main kit. She'll have planning and organizational tips and tools, guidance on selecting your format, streamlining your stash, finding inspiration, and more. Find her posts here.
Paint + Play Wednesday will be led by Jill Drangsholt, a creative team alum and frequent class contributor. Jill will be sharing her expertise as a mixed media artist, offering tips and inspiration on using stencils, silkscreens, acrylic paint, and more. Jill's posts will include fun ideas that can translate directly to our December Daily® spreads. Find her posts here.
Paper Play Friday will be led by Pam Baldwin, another creative team alum, frequent class contributor, and the instructor behind Playing With Paper. Pam will be doing what she does best: working her magic with products from this year's collection. She'll be demonstrating creative ideas for fun, easy, DIY and interactive elements. Find her posts here.
30% OFF SELECT DIGITALS + CLASSES
Calling all hybrid scrapbookers! We’re offering select digitals and classes at 30% off all month long. This sale is designed to support the members of our community who enjoy telling stories in the digital or hybrid format. From now until September 30th at 11:59pm ET use promo code FALL30 and get 30% off most digitals in the shop. Excludes December Daily® digitals + classes and the Start Here workshop.
NEW CLASSES
2023 DECEMBER DAILY® PREP DAY. Join the December Daily® community for a fun online December Daily® prep day on Saturday, November 18th, 2023. Use this opportunity to finish past December Daily® projects or start working on your project for 2023. The first live video will start on Saturday, November 18th at 10:00 am Eastern. Cost is $5.
DECEMBER DAILY® PRODUCT PLAY | TRY THIS. December Daily® Product Play is all about ideas and inspiration for working with physical products from the December Daily® Collection. For 30 days in November, you'll receive one idea per day from the contributors to this class (includes Ali). Ideas in this workshop will focus on physical products from our 2023 December Daily® collection. Whether you are preparing to document 2023 or finishing up telling stories from past years, we hope these fun, creative ideas help you use your products to get your stories told.
2023 DECEMBER DAILY® HYBRID PRODUCT PLAY. Hybrid scrapbooking combines digital products with physical supplies to create paper (or printed) memory-keeping projects. For this class, our contributors will share with fun, creative ideas and inspiration for working with these digital products from the 2023 December Daily® Collection.
PRODUCT Q+ A WITH ALI ON INSTAGRAM
Ali has been answering a wide range of questions, sharing creative product ideas, and more over on our December Daily® Instagram account. All of her content has been saved as a highlight on that account to be enjoyed at your convenience. Find it here.
ORDER ISSUES
If you experienced any issues at checkout, or have questions about the release please reach out to our Customer Service team and they will be happy to help you! Contacting them ensures we are keeping track of these questions and answering them in a timely manner. It's difficult for our team to keep track of all of the questions left on multiple threads/posts on social media with all the excitement-- we are doing our best and we want to make sure your questions get answered! Click here to start a new conversation.
As always, we’re so grateful to have you all as members of this community! Thanks for joining me today and have a great weekend!
December Daily® 2023 | Paper Play with Pam 03
Hello friends, happy Friday! This week I’m sharing 5 projects that came together thanks to the inspiration in this year’s Paislee Press Mini Kit. Although this kit is currently sold out, all of my ideas can be easily translated to projects of your own using the digital kit, coming to the shop October 13th.
I’ve arrived at the point in this album where some of the 2010 stories are fuzzy and my brief notes are no longer providing much direction about what the story is. The good news is this kit is full of thoughtful and clever prompts to keep me going!
Here’s where I’m starting.
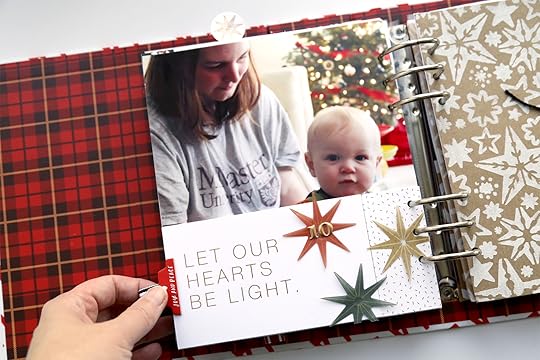
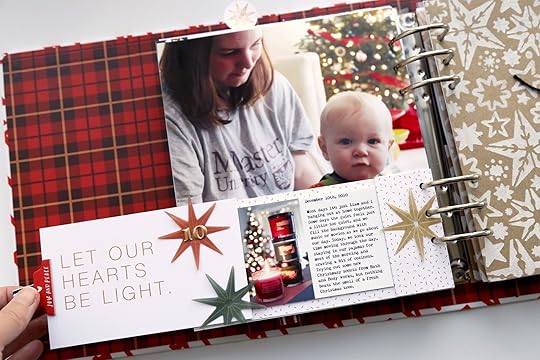
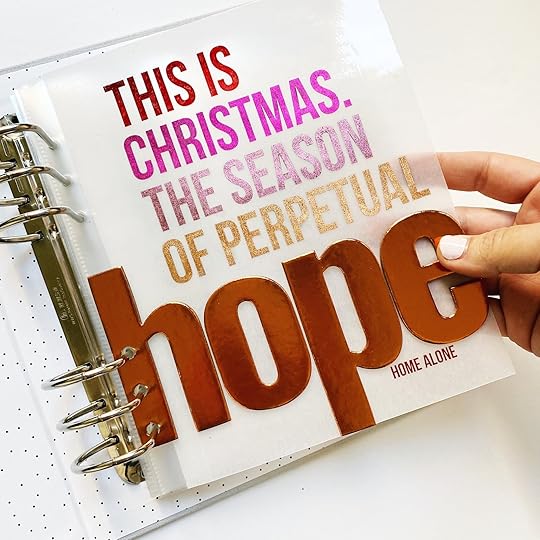
Project #1The first project started out with just 2 photos. What brings this story to life is the “Let our hearts be light” sentiment and a little bit of investigative work to figure out the missing details.
Supplies:
Paislee Press Mini Kit (4x6 journaling card, patterned paper, vellum stars, chipboard tab)Main kit (gold puffy stickers)Other: ribbon.
Simplicity is such a lovely thing, but I was excited to try a new technique using the journaling card and patterned paper to make a slider that reveals hidden journaling and one additional photo.
This slider technique was very much inspired by Heidi Swapp’s brilliance. She creates all kinds of cool interactive techniques in her Memory Planners and I love figuring out how to translate them to other formats. Highly recommend checking her out!
Here’s the process video to make a slider of your own.
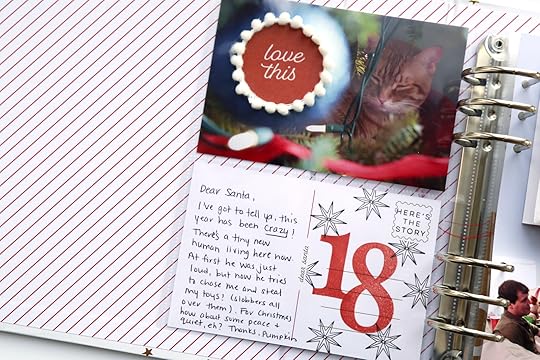
Project #2My second project is a very simple 2 – 4x6 pocket page. The inspiration for this story came from the postcard in the Paislee Press Mini Kit. I adore this card! I thought it would be fun to include our furry family members by writing a letter to Santa from our cat Pumpkin’s perspective.
Supplies:
Paislee Pres Mini Kit (4x6 journaling card, vellum circle)Paislee Press “A very Merry Christmas” 4x6 stamp6x8 Number stampCrafters Inks (Redwoods, Black Butte)
I added a fun little pom-pom trim to one of the vellum circles from this kit, adhering the altered embellishment to the outside of the page protector.
I opted to hand write the letter to Santa directly on the postcard/journaling card. I used the Numbers Stamp from this year’s collection along with the Paislee Press stamp set to add a few fun details.
Here’s the process video and thoughts on this project.
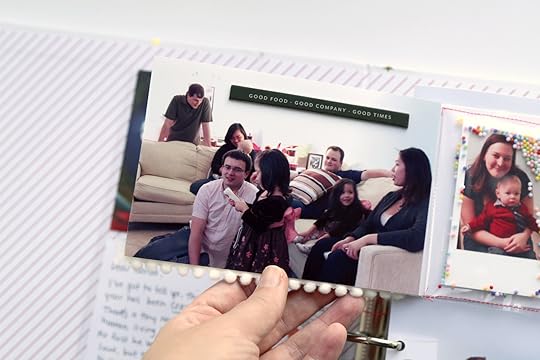
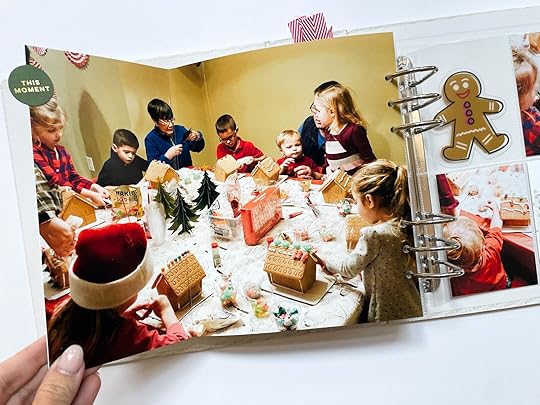
Project #3This story of our Friends Christmas party gathering was one I knew needed to be in the album, and I was so happy to find some fun elements in the mini kit that supported it.
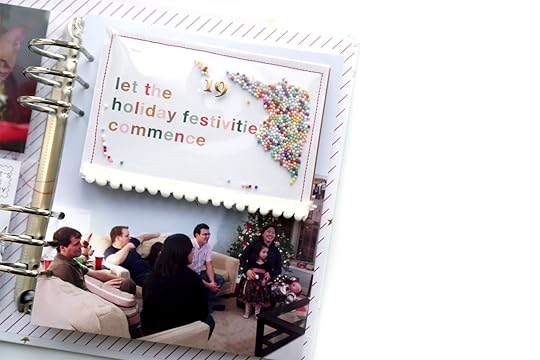
This layout features an enlarged photo base with a mini-book on top. Inside the mini book are additional photos from our event along with journaling to tell the story.
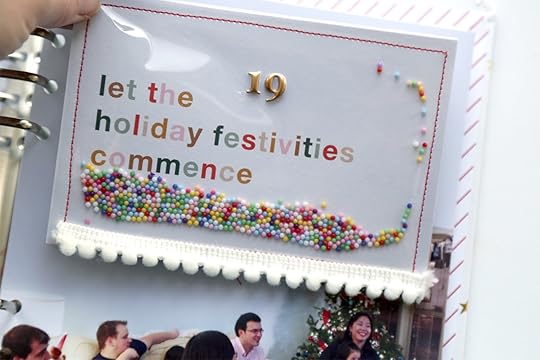
The colourful text on the 4x6 journaling card is super fun and I was inspired to play it up a little bit more, adding some tiny colourful beads to make a shaker pocket mini-book cover.
Supplies:
Paislee Press Mini Kit (4x6 and 3x4 journaling cards, chipboard shapes)Main kit (gold puffy numbers)Other: rainbow mini beads, pom-pom trim
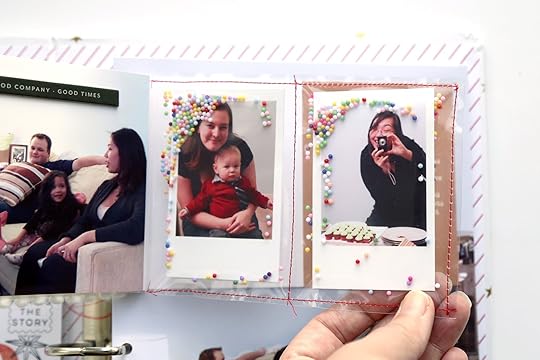
I looked up the dimensions of a mini instax photo and printed my own version of an instax for the mini photo insert. They “float” inside a page protector that’s been stitched to size, along with more of the rainbow beads (they’re just so fun!)
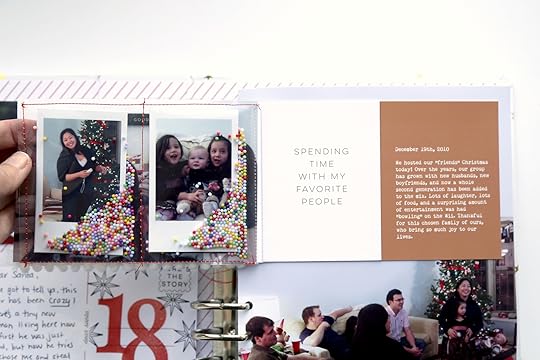
I had a moment of remorse as I applied adhesive to the back of the “spending time with my favourite people” 3x4 card. On the reverse of this design is the same sentiment but sized slightly smaller with a vertical line that suggests adding details or a photo below. In retrospect, I wish I had used the back of this card instead and added the names of the people who were at our party.

I would note that this is one of the bulkier pages in my album. The beads make a fun little wooshing sound when the pages move!
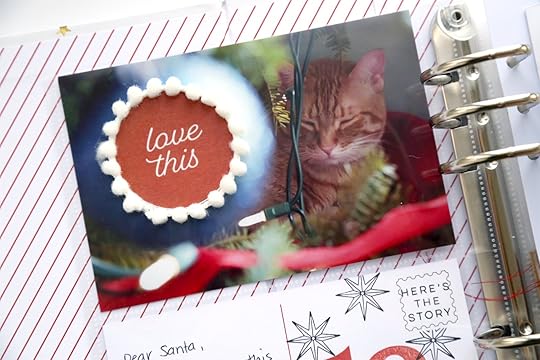
Project #4As I mentioned earlier, there are a few consecutive days at this point in my album that do not have a clearly defined story. This was certainly one of those days. The Paislee Press mini kit was the perfect tool to support some of the everyday stories and point me in the right direction to keep moving forward.
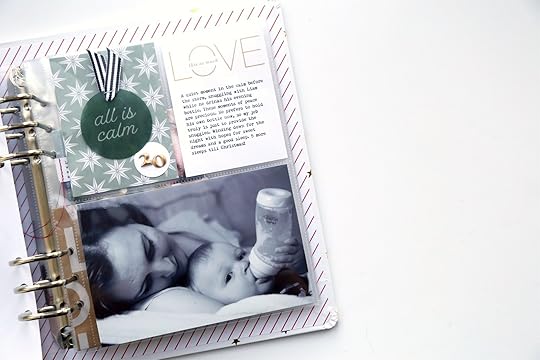
I paired a much loved photo with the 3x4 journaling card sentiment “Love this so much”, and the “all is calm” velum circle for this short and sweet memory.
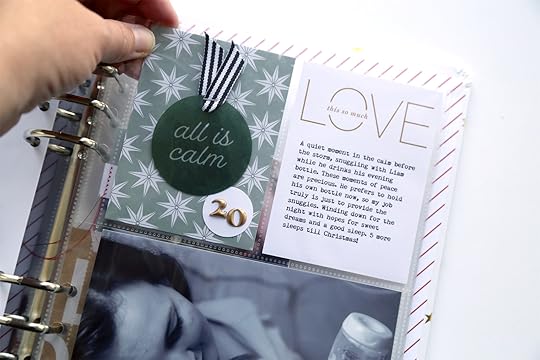
Supplies:
Paislee Press Mini Kit (3x4 journaling cards, vellum die cut)Main kit (gold puffy number stickers)Other: ribbon, tiny attacher, circle punchProject #5
Two of my favourite pieces in the Paislee Press mini kit are that beautifully hand scripted 6x8 paper and the chipboard frames. I couldn’t possibly end this post without incorporating them into a project. I decided to use them for the cover page of my album.
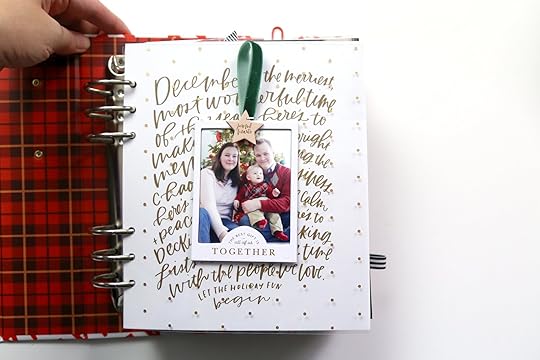
Supplies:
Paislee Press Mini Kit (patterned paper, 3x4 journaling cards, chipboard frame)Other: Specialty paper gold polka dot transparency
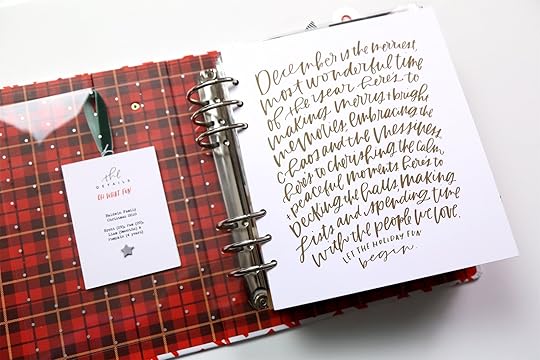
You’ll see in the process video below that I originally intended to create another shaker pocket as the overlay for that beautiful patterned paper, but in the end I opted to use a transparency instead.
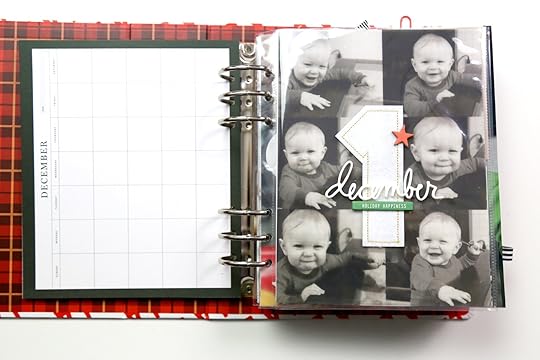
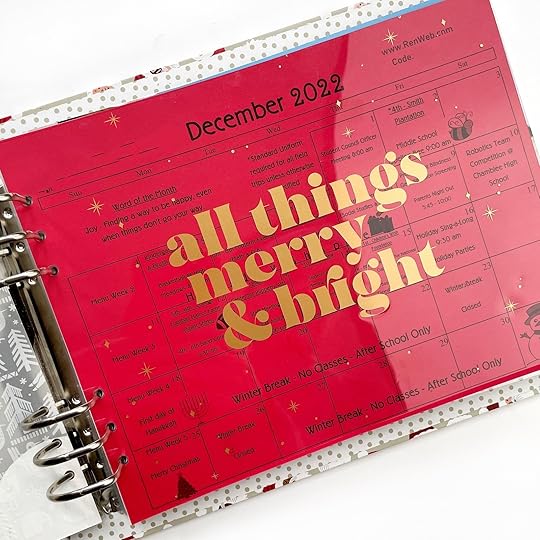
I plan to fill in a few details on the calendar when my album is complete. I’ve got 7 more stories to add yet for my 2010 album to be “complete”, and I’m determined to make it happen! Looking forward to sharing a full walk through when it’s all done.
Well friends, that brings this week’s Paper Play post to an end. I truly adore the Paislee Press Mini Kit! It will definitely be making an appearance in more of my projects. Next week I’ll be playing with a few of the shop items! Thanks so much for being here!
September 20, 2023
December Daily® 2023 | Done By December With Lisa
Hi guys! This is Lisa and today I’m going to share my starting place and strategy as I dive into completing my 2022 album. I’m feeling especially motivated to get my album done this year since I have really fallen behind in any kind of weekly/monthly documenting. In the absence of a family album this year, a completed December Daily® album becomes particularly precious.
The first scrapbook page I ever made was a December Daily® spread back in 2016. I have always joked that this project was my gateway drug. Since then this project has held a special place in my heart. Since 2016 I have completed a few of my December Daily® albums, probably half. I’m a big believer in the fact that there is joy in the process. That doesn’t mean I don’t begin every December with the goal of a finished album, it just means that I don’t carry around a lot of guilt if I don't.

One unintended perk of NOT finishing my album, is that when the Fall rolls around I can take advantage of all of the excitement that inevitably happens around our December Daily® release and dive into finishing the previous year. And I love that I’m not alone! Throughout the years we’ve had some amazing guests here on the blog share their #donebydecember strategies and progress. Check out that hashtag for some great advice and beautiful pages.
So, without further ado, here are some of things I'm doing as I get ready to finish my December Daily® album.
Before getting started, I like to manage my own expectations. Sort of like a pep-talk before I can fall into any kind of comparison trap. Seven years into this project, and memory keeping in general, I am becoming more confident in my style and my process. What I do and how I do it often looks very different from everyone else in the community. And that’s ok. It’s actually pretty awesome. One of the things I love the most about embarking on this project with the community is the wide variety of styles and approaches when it come to documenting our December stories. After lots of trial and error and experimenting with different styles and approaches here’s what I’ve learned about myself:
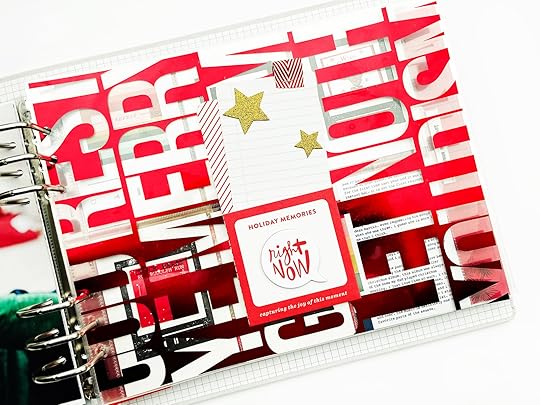
Simple + Graphic spreads for the win. That will always be my style. Is that boring for some folks? Yep! For me? Nope. I think simple can be beautiful. This is the project where I will occasionally step out of my comfort zone, but it will always be more important to me to get more stories told versus creating gorgeous, interactive spreads. But I sure do love looking at them!
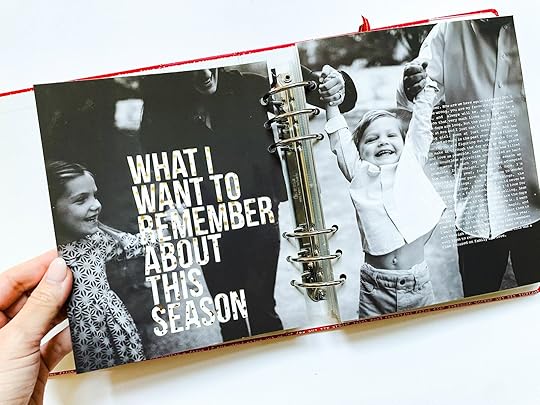
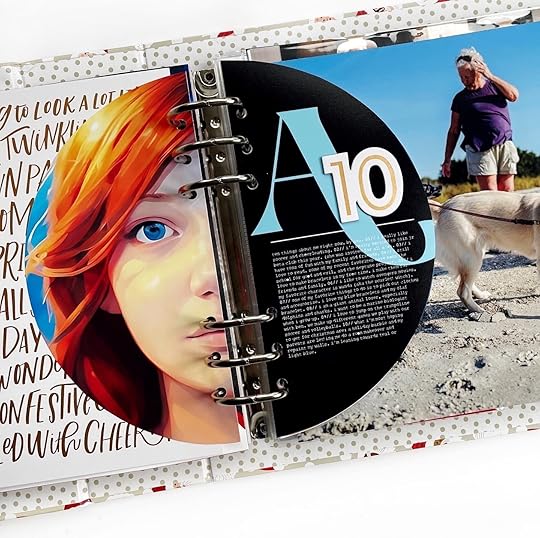
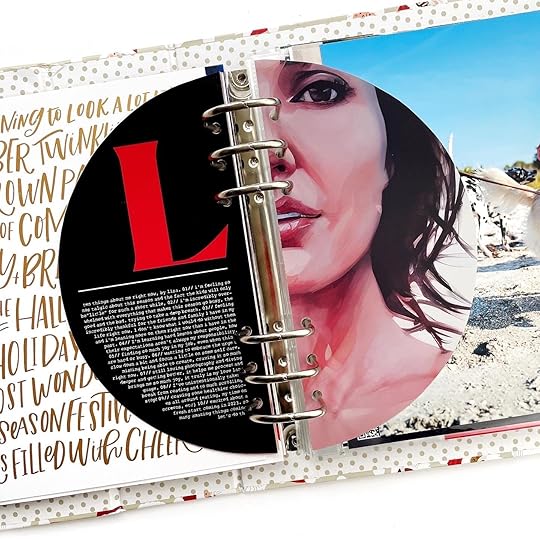
Big photos, always and forever. I love to take pictures. For me, photos often convey the feelings I’m not to able to express with words.
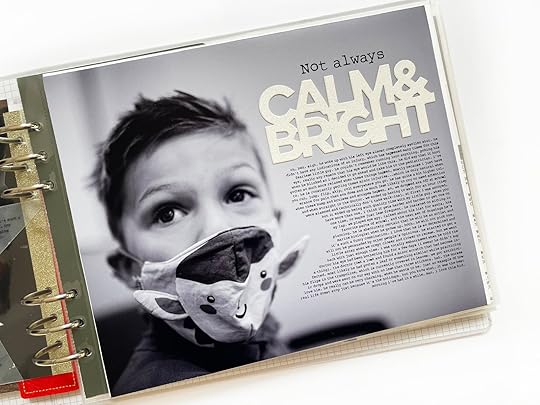

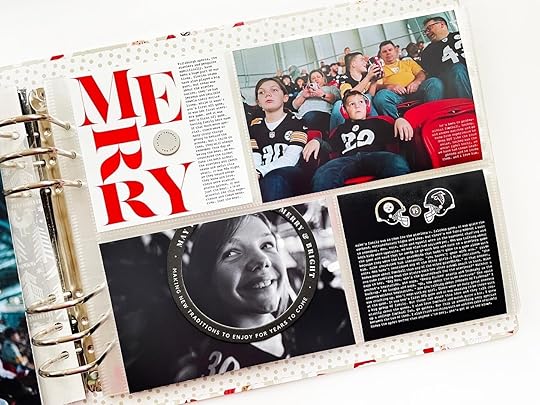
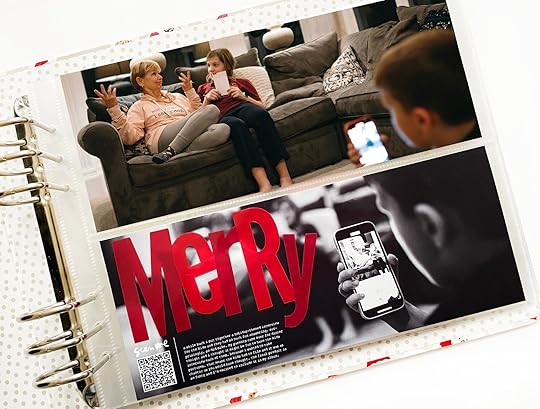
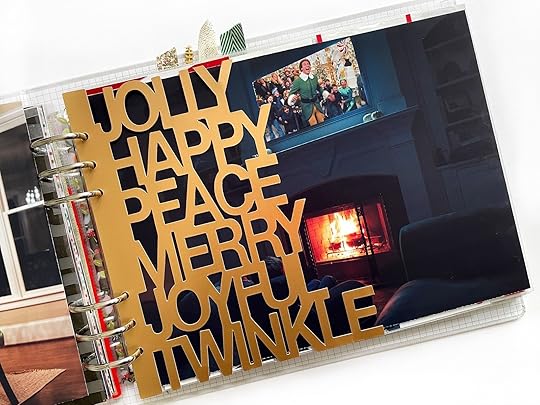
I love to play with type. I enjoy using typography in fun, creative, and unexpected ways. Also, I apparently have a thing for the word joy.
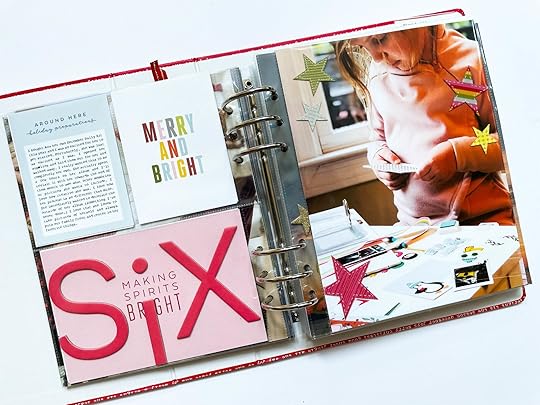
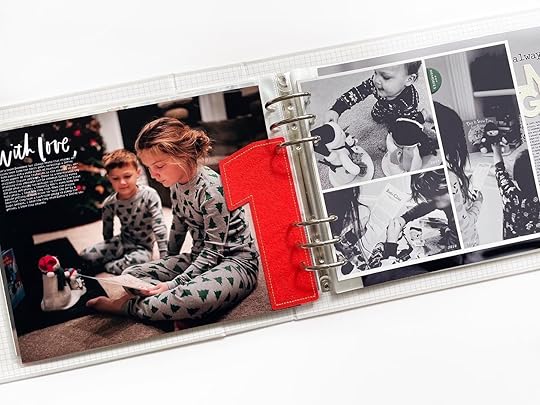
My next step is to take a look at what I've actually completed. I was surprised by how few pages I completed in 2022. Maybe half a dozen. In the beginning of the month I lost my godfather and had to fly home for his funeral and celebration of life. I remember it was hard to find my rhythm after that. But I’ve been here before. I know that it’s important to me to take photos and jot down the notes because I will come back to the project even if it’s a year (or several years) later. Here are my completed pages:
A year later it can feel overwhelming to revisit a project like December Daily®, especially when I have so little of the album complete. But even without a dedicated journal, it can definitely be done. And I’ve done it before. Here’s how I reconstruct my month:
My phone. A quick search in photos will pull up all of my photos for the month. For me, that includes a lot of screenshots. Things like emails and text messages. I’ve gotten into the habit of taking screen shots so I know they will be in one place when I come back to the project. Your calendar/schedule is also a great resource for what was going on during the month. Social media. I'm typically sharing updates over on Facebook for out of town friends and family and sometimes I can grab captions (or even photos) from there. School calendar. With school age kids, the school calendar basically dictates my life. I make sure that I keep the physical copy the school hands out with my supplies when I pack them up each year. Lightroom Catalog. This is where all of my DSLR photos live. I export and organize by year, then by month. You can sync your smartphone to your Lightroom catalog to simplify, but I choose not to for a variety of reasons. My husband. I also do a quick search of his photos for the month of December. He will sometimes have photos of me or the kids that he never shared. We’re also in the season where we have to divide and conquer for practices or events, etc, so he will have photos I don’t. Additionally, there are sometimes photos I like to grab that share pieces of his life I’d like to include in our album.
Once I've done all of the above, I sit down and make a spreadsheet of stories. I take inventory of the stories I have photos for, and those I don't. I have a column that is the chronological list of what happened each day in December. Then I make a list of the micro stories (or filler stories) that are not really associated with a date. Then I put together my numbered list of stories, 1 to 25, that will comprise the album. This is different from my chronological list. On occasion we have days where we have three events and I'd like each of them to be a story. Or, alternatively, we have a day where we didn't really do anything. Some people approach the project where story one is December 1st, story two is December 2nd. That's not the approach I take. I'm putting together an album of roughly 25-30 stories. I know a lot of folks in our community do the same.
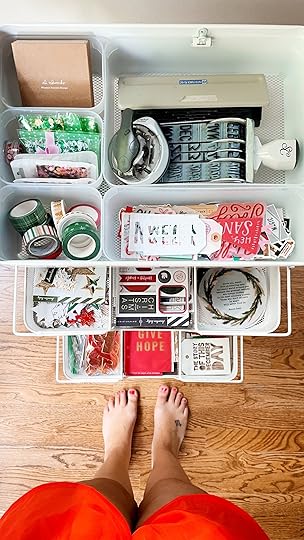
Like most people, I pack away all of my December Daily® supplies at the end of each season. Since joining the AED full-time a few years ago, I’ve been lucky to receive the entire collection. That translates to a lot of product. Before I get started, I decided to go through and pare down my options to my favorites. I recently bought a little cart (really late jumping on that bandwagon) and I love that everything is organized and ready to go.
I love revisiting these albums and wish I did it more often. As I flip through each album I’m looking for a few things:
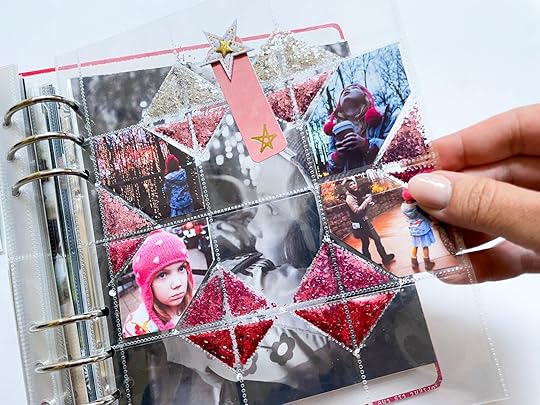
Recurring stories I want to be sure to include or look for. That incudes repeated pictures. I can’t go back in time to take these pictures, but it’s helpful as I get ideas flowing for documenting 2023. Things that I'm missing or want more of. Also for 2023, but I can potentially still fill those gaps for 2022 by digging a little deeper. Page designs I like and want repeat. Or things that didn’t hold up well. For instance, Minc on transparency does not hold up well. I love the look and have found if I laminate it, it lasts longer and feels more like our shop transparencies. Also, I hate glitter. It always seems like a good idea and I always regret it later. Perspective. This may seem silly, but revisiting these albums and reminding myself that it’s the stories and not the pages that I love…keeps me motivated and focused on my goal. It’s also a great reminder that I am not looking at any imperfections…so stop stressing about the little stuff. I will also ALWAYS have typos. It is what it is.
Linda has shared some incredible content that takes a deeper dive into this topic. I highly recommend you check it out here.
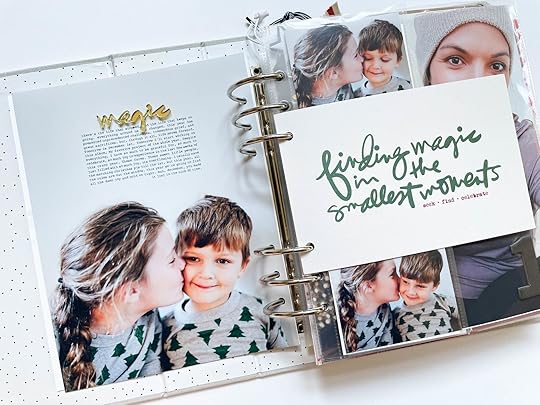
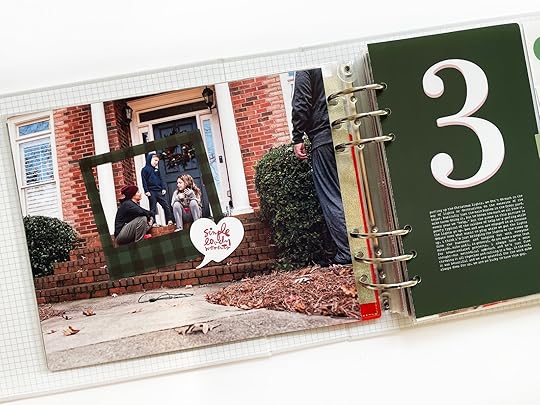
I love how I included older photos in this spread. I rarely do that and it adds context to these stories. Especially for years where I have not completed an album.
Always a goal to include more photos and stories about me, while also giving myself grace because I refuse to carry any guilt about it.
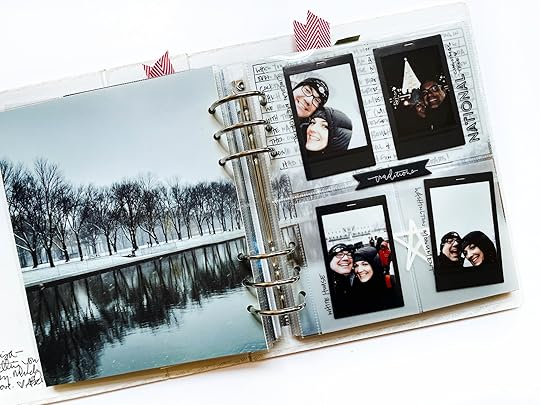
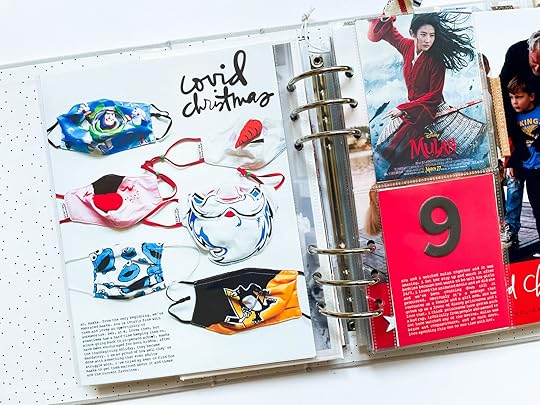
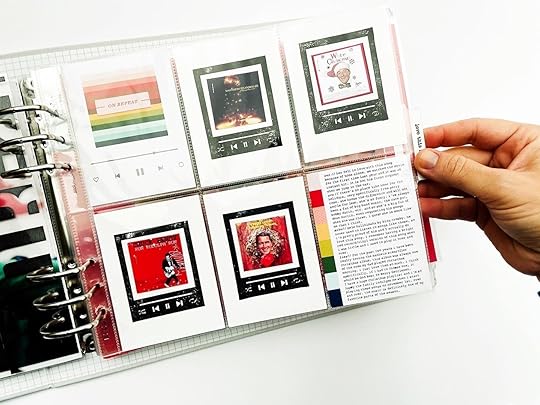
More micro stories like these. Stories about the stuff and the things we're watching. Not enough of these stories in my albums.
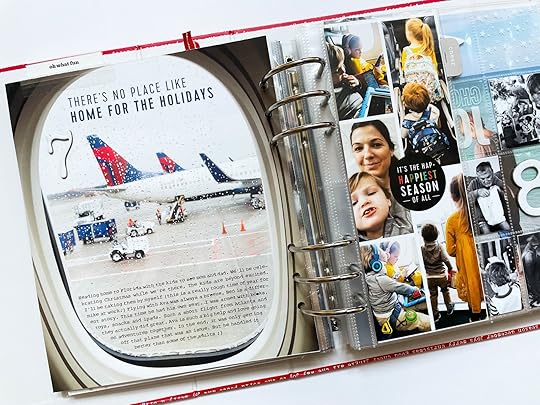
More stories about our spaces. Love seeing this view of the house in Florida. After we've been hit by a few hurricanes, some of this landscaping has changed. It's always the same until it isn't.

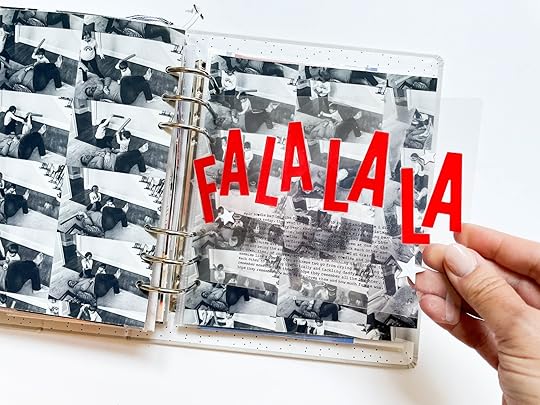
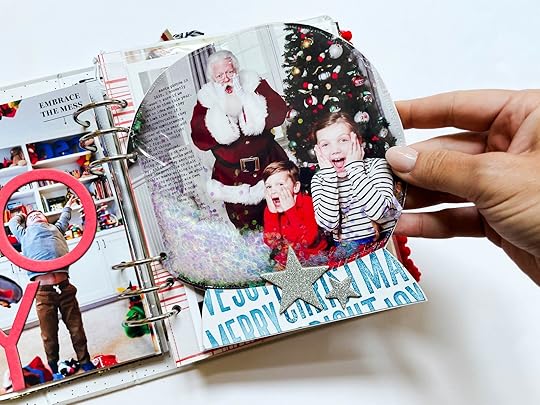
Make space for "bad" photos. This is a page about a noodle fight Mike had with the kids and we were all laughing so hard we were crying. None of these photos are any good, but together they tell a great story.
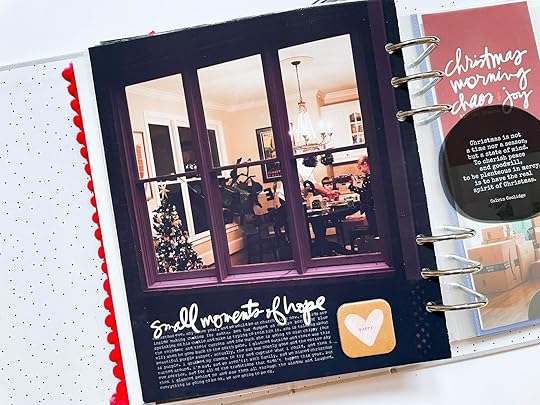
Look around. I stepped outside to take a picture of the gorgeous and weird purple sunset (that's not a filter!) but realized the story I really wanted to tell was this sweet moment between my husband and kids. My spouse hates being in photos, so I have to be creative.
Make space for the hard stories. This is a personal choice. You may not want to include hard stories in your album. But I do, with certain constraints.
Know your strengths. There are a few spreads that I've made in the past that turned out pretty cool, but that I would never make again. This may be somewhat controversial...but here they are. Maybe it's because they took too long to execute...or the final product looks great, but that comes at the cost of telling the story. But these are spreads that I learn from, too.
At this point I’m ready to get started. I need to decide if I'll stay with the 10x8 size or change to 6x8. I had been thinking it might be easier to move through a 6x8, rather than a 10x8. I've completed more 6x8 albums than I have 10x8. I’m second guessing that. I’m also seriously contemplating a design formula. In terms of a specific series of page protector configurations to further simplify the process. There are currently 10 weeks till December 1st. That’s roughly two pages a week. I would love any opinions you guys would like to share regarding switching album size and also whether you’d consider a design formula for this project!
You can find all of my December Daily spreads from the past seven years on IG: @frecklepickle


