
Ali Edwards's Blog, page 41
October 17, 2023
December Daily® 2023 | Special Guest Zoe Kennedy
Hi everyone! Zoe here. This will be my ninth year participating in December Daily and even after eight years it continues to be my absolute favourite project. I remember when I first discovered December Daily in 2015, I felt a little overwhelmed as to where to start and what to do. For me it made sense to follow along closely with Ali’s process. That way I could enjoy playing with the product and telling my stories without getting stuck on what each layout needed to look like.
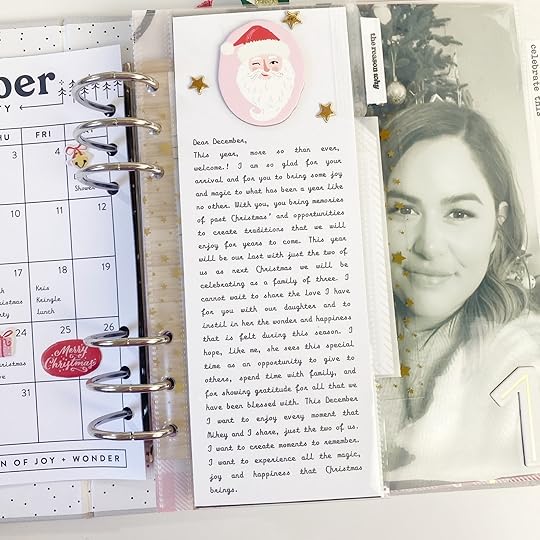
One thing I have included in all of my December Daily albums has been an ‘Intentions’ or ‘Reason Why’ page. Over the years I have found that beginning my album this way allows me to reflect on what I’m hoping for for the upcoming season and what I want to focus on during a time that can often feel quite busy and overwhelming. I don’t know about you, but when I receive all of the new December Daily products, and I’ve opened them all up and sorted them and enjoyed them for how beautiful they all are, I tend to feel a little bit like ‘Okay, what now?’. This is exactly what happened this year when I first sat at my desk to begin my album.
I know you’re probably thinking, ‘It’s October, that’s a little early to start’. Well due to the fact that we have baby two due in the first week of December, I figured the more time I can spend working on my album and building foundation pages now, the better chance I have at getting it finished while still enjoying the process.
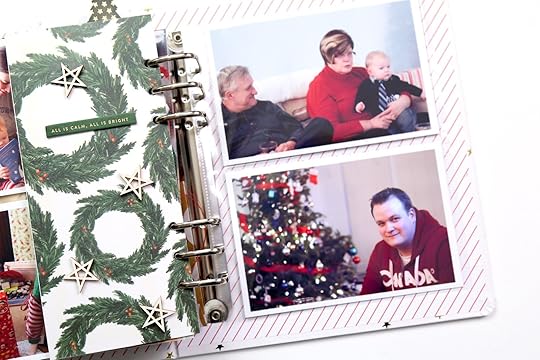
So, after I sorted all my new goodies I began thinking about my ‘Reason Why’ for this year and I thought what better place to start than to look back on all the ones in my previous albums. This is the first time since beginning this project that I’ve looked at these pages in sequence, and for me, it was quite an emotional experience.
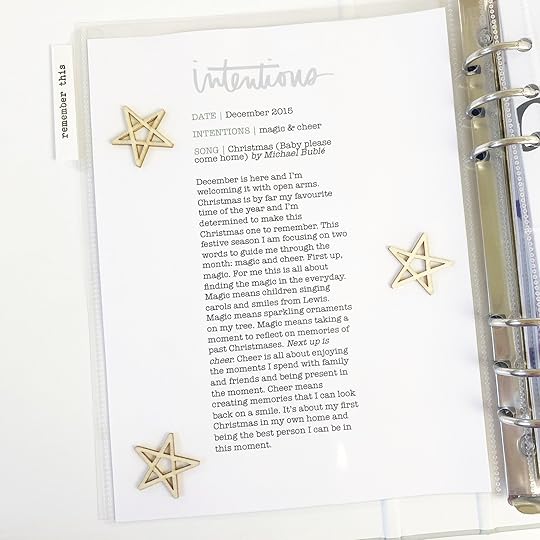
Being my first year, the intentions page for my 2015 album was almost identical to Ali’s. I used wood veneer stars from my stash but kept the layout the same. One thing I noticed and really liked about my earlier intentions pages was that they included words that I wanted to focus on, as well as a song that captured the mood for the season.
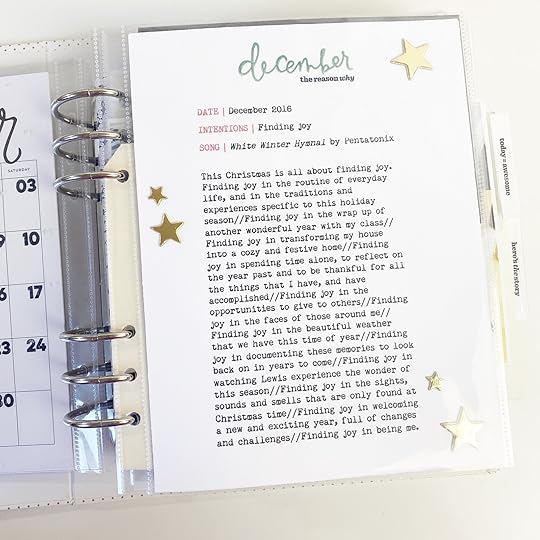
2016 was a similar page to the previous year however I wanted to experiment with stamping more in this album so chose to use one of the December Daily stamp sets to create my title.
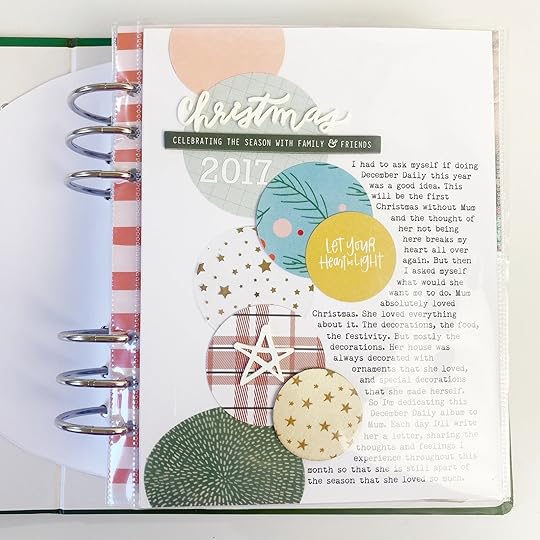
2017 was a tough year. I lost my mum in June and wasn’t sure I had it in me to celebrate the season let alone document it. Mum absolutely loved Christmas, so after a bit of thinking I came to the conclusion that if she could talk to me right now, she’d tell me to do it, and to be happy doing it. So, I did. I used my intentions page to document how I was feeling about entering December, and how I was going to be approaching my journaling for the month. The design of the page also shows I was beginning to experiment with more crafty elements. I do believe the circle design was scrap-lifted from a fellow December Daily participant, but I unfortunately can’t find who they are to credit them. If it was you, thank you!

2018 was the first year I deviated from the 6x8 album and chose to work in the 4x4 album that Brandi Kincaid had designed for Ali’s kids kit that year. I found this size really fun! And I was able to complete my pages relatively quickly while still being ‘crafty’. My intentions page was super simple. I used a template from Brandi Kincaid and wrote my hopes in a way that to me feels a little more ‘poetic’ perhaps than it had previously.
My 2019 ‘Reason Why’ is one of my favourites. Not because of the design, which I do still love, but because it marks a change. This is the year I met my future husband. Reading this I remember how incredibly happy I was to have found someone to share this season with, and how excited I was to document the season not only from my point of view, but from his as well.
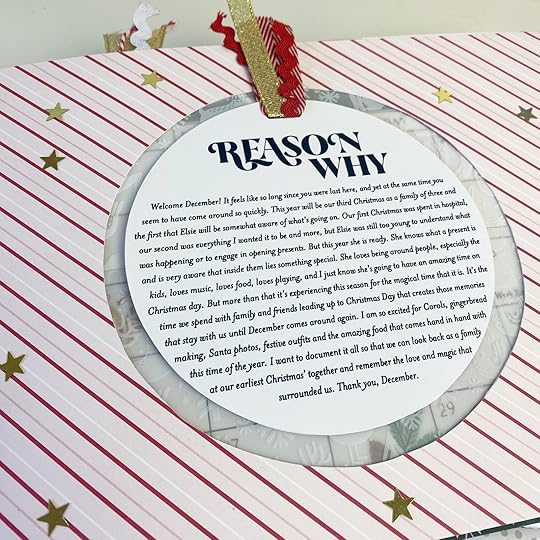
This is what I love so much about this project. It captures exactly where you are in life and gives an insight into your thoughts and feelings at the time. To me, my 2020 ‘Reason Why’ is pure happiness. It reflects the season of life that I was in and shows how excited I was for what was to come. It’s also funny to see how I wrote about it being our last Christmas before we became a family of three, when in fact baby ended up arriving Christmas Eve so it was in fact our first Christmas as a family of three!
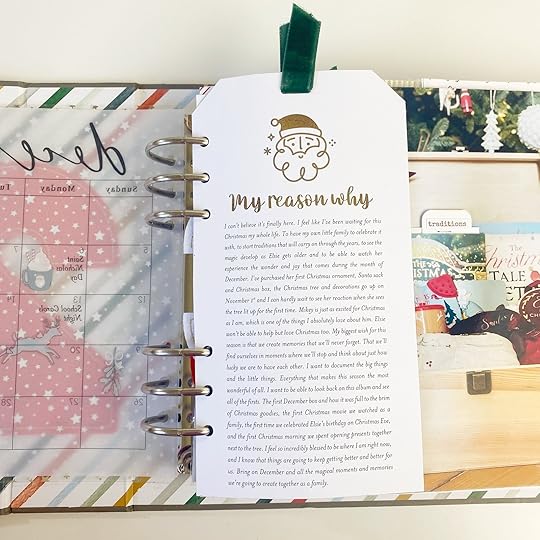
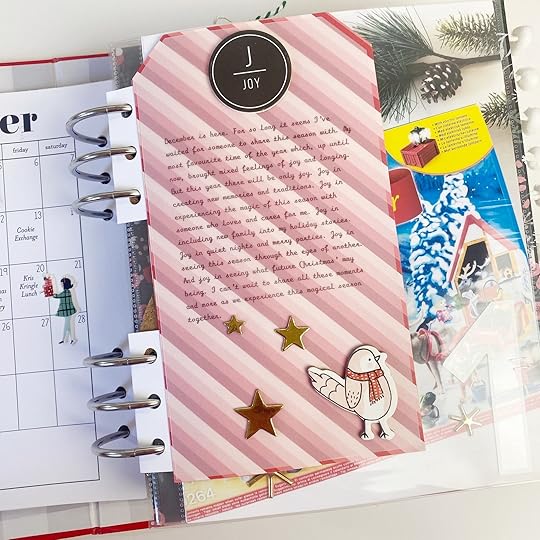
As you can see, the last few years I really enjoyed creating my ‘Reason Why’ page on a smaller insert or tag shape. Spoiler alert, I still love this, and you may see it again this year. This year my journaling was significantly longer than it has been in the past, which is likely due to the fact that it was my first Christmas as a mum. My journaling has changed from what I want for myself this season, to what I want this season to be for my family. My whole outlook changed and I love how this project captures that shift.
I absolutely loved the design Ali used for the ‘Reason Why’ page in her 2022 December Daily album, so decided to replicate it in mine. Reading this back, I can just sense the excitement and happiness I was feeling at the time as I got ready to experience this season with my two-year-old who was now able to share in my delight for all things Christmas. How things have changed since my first entry in my 2015 album, and how grateful I am to compare the words I wrote almost ten years ago, to the ones I’m writing today.
I really hope you’ve enjoyed looking back through my past ‘Reason Why’ pages as much as I have. I love this project so much because it gives a true snapshot of what life is like at the same time each year. These albums are already treasured by me and my family, and I know that as the years pass, they will become even more special. I am so thankful for Ali for creating this project and for helping me tell our Christmas stories.


October 16, 2023
Part 03 | Ali's Completed "Halloween Through The Years" Scrapbook

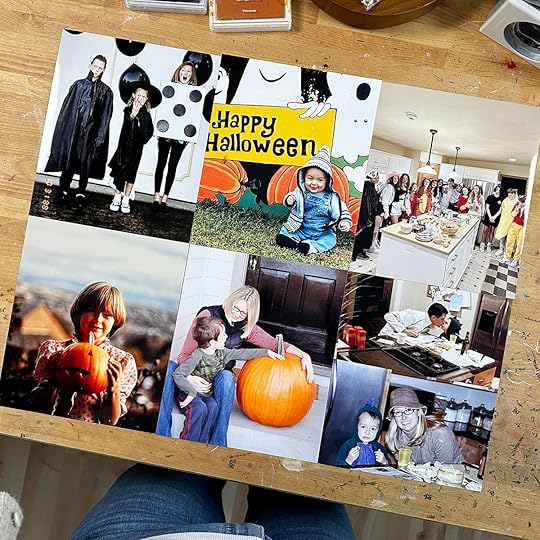
I wrapped up my Halloween Through The Years album this past weekend and am excited to share it with you today!
I broke my process video into two separate videos (each are about 30 minutes) and also filmed a walk-through without talking for those of you who just want to see the finished project.
I loved, loved, loved working on this project and am so excited to share it with you!
EMBELLISHING | PART ONE
EMBELLISHING | PART TWO
COMPLETED WALKTHROUGH (NO TALKING)
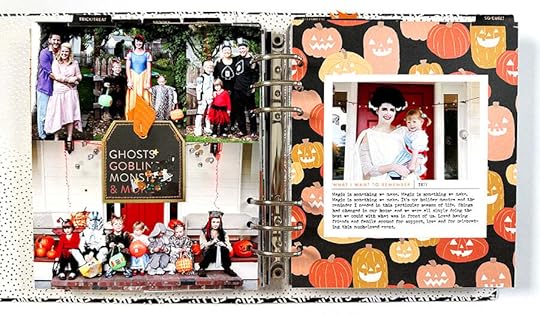
Here's a look at the spreads with additional details:
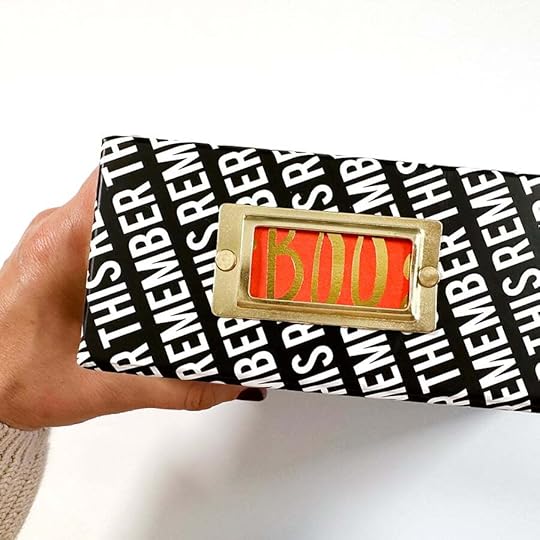
I'm using the
Remember This 6x8 album as the home for my project. I cut up one of the tags from the 2023 Halloween Kit and added it inside the metal label on the spine.
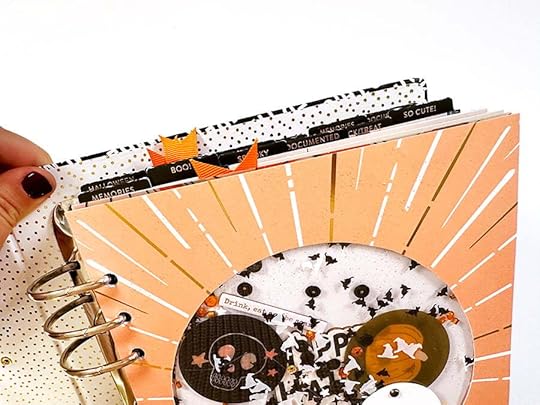
Along the top edges of all my journaling pages I added the black sticker tabs from the
2023 kit.
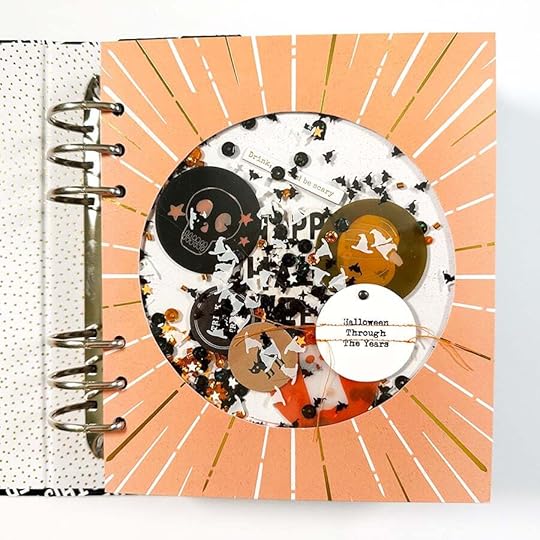
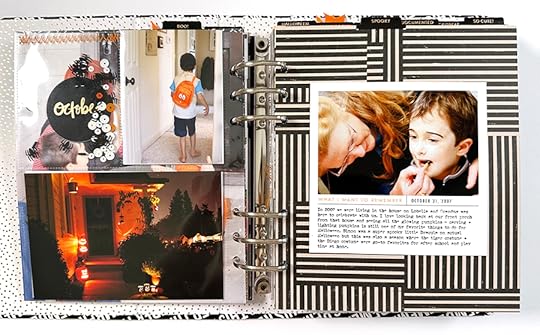
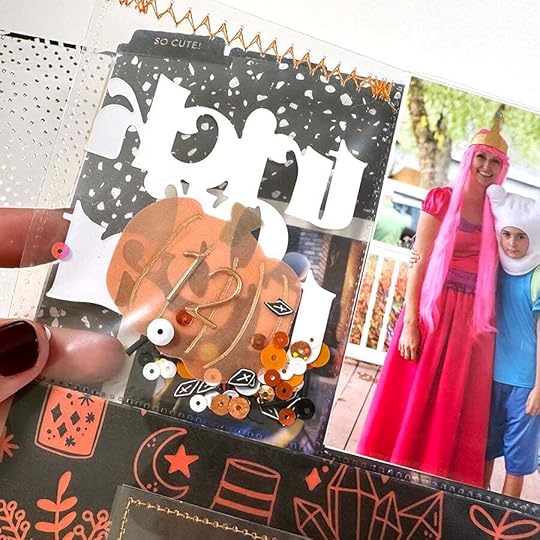
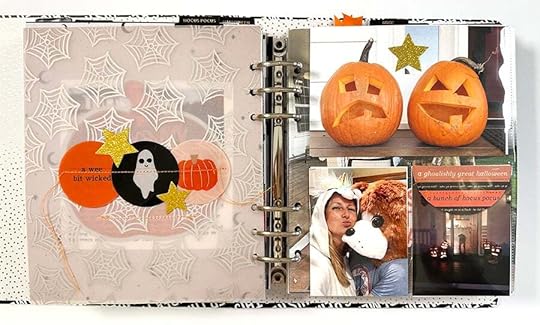
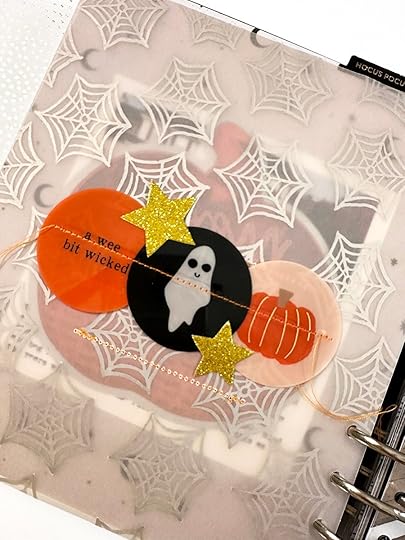
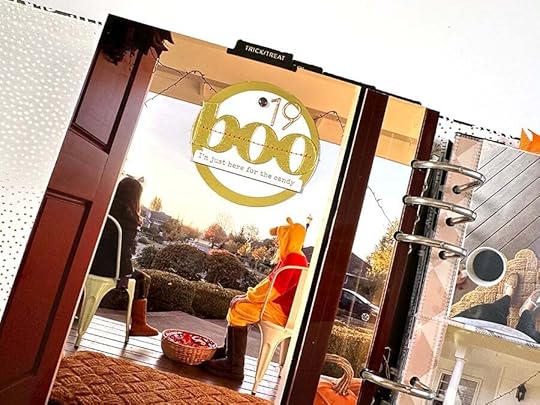
I started my album off with a fun shaker page using the circle pattern paper as my jumping off point. Inside the circle I added sequins from
Picket Fence Studios and circles from both kits. On the outside I added a custom title circle that I ran through my sewing machine. You can see the full process for building this page in the first process video above.
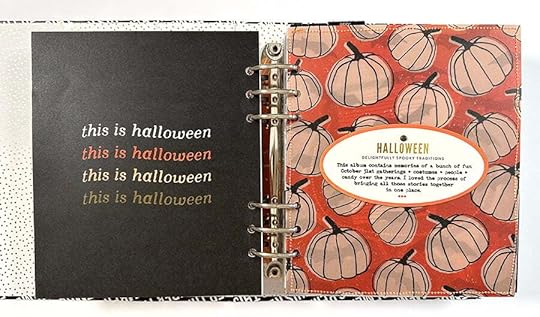
On the back of the shaker page I adhered the "this is halloween" pattern paper. I then created an intro page using the pumpkin vellum and one of the large die cuts from the 2023 kit. I used the digital version of this tag to set up my journaling and then temporarily adhered the actual tag to the printed paper in order to print directly onto the tag.
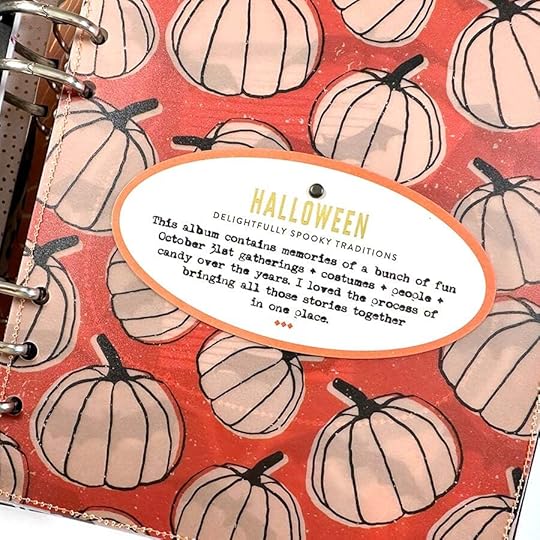
Love having a little written intro to this project.
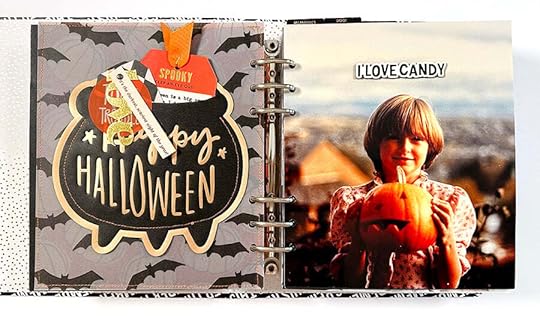
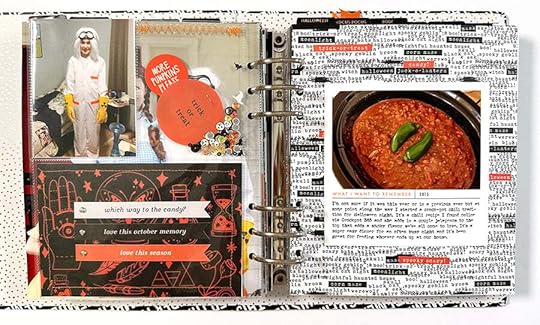
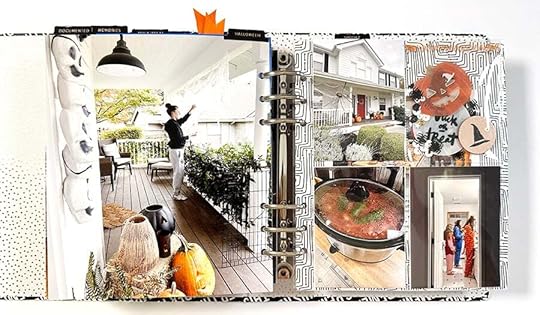
On the back of the pumpkin vellum I created a fun interactive page using the bat vellum and the large vellum cauldron. First I used a craft knife to cut out the top part of the cauldron and then I used my sewing machine to stitch around the outside edge - leaving the top open so I could slip in some tags.
On the full page photo of me on the opposite page I used red line tape to adhere the "I love candy" wood veneer.
I also ran both pieces of vellum through the sewing machine to hold the two pages together.
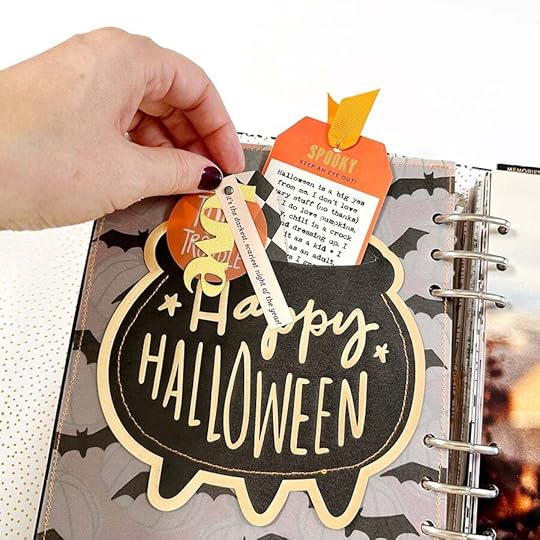
Inside the cauldron I added a tag cluster (includes pieces from both kits) and a journaling tag.
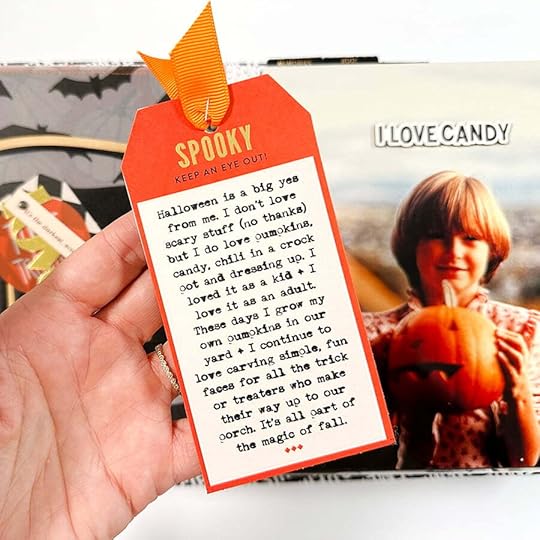
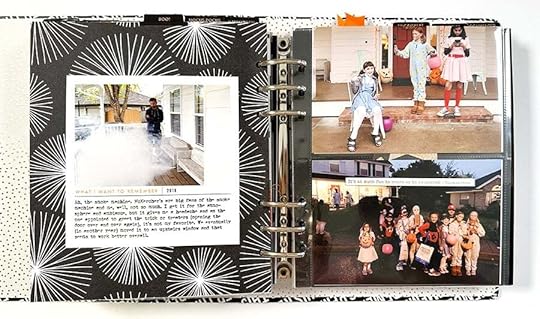
I was so happy to find a few photos of me as a kid either on Halloween or during that season.
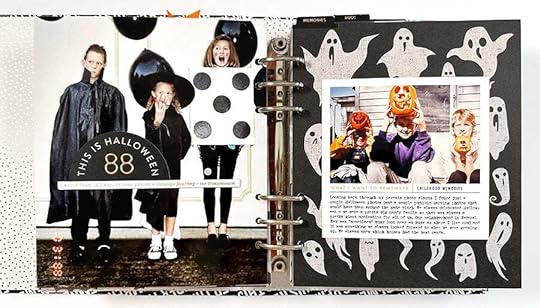
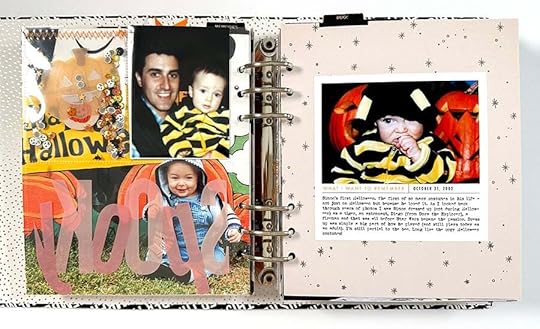
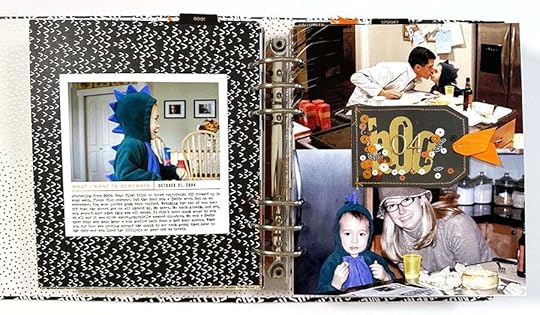
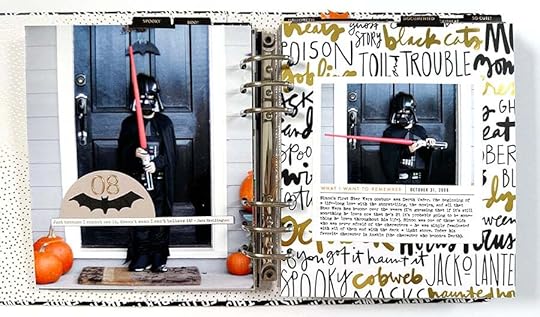
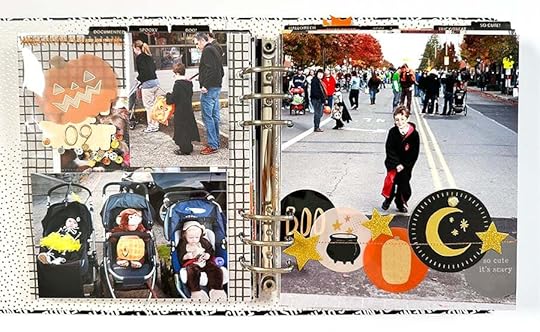
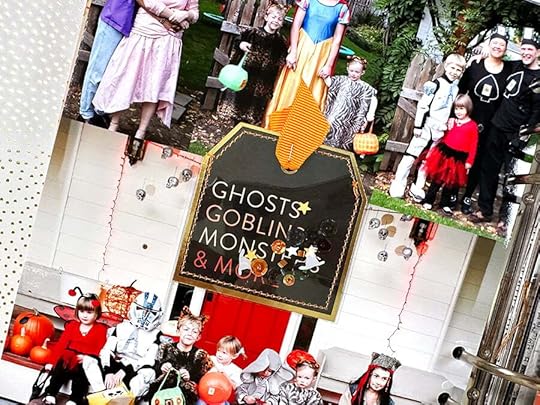
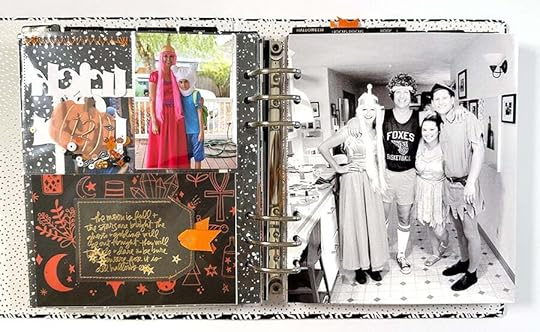
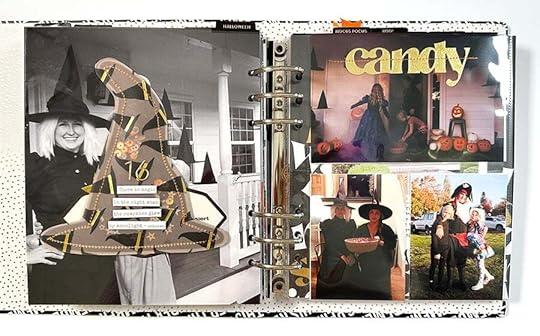
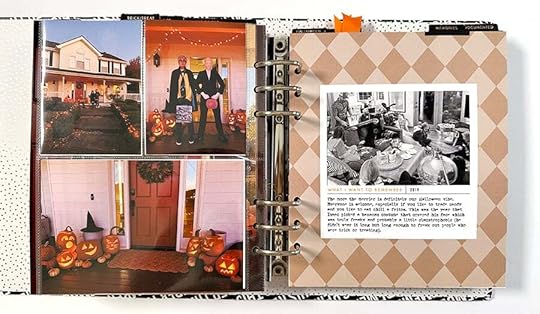
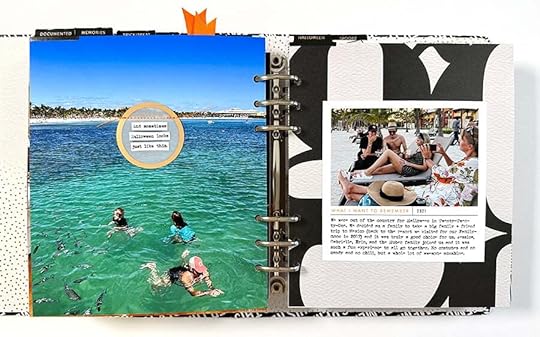
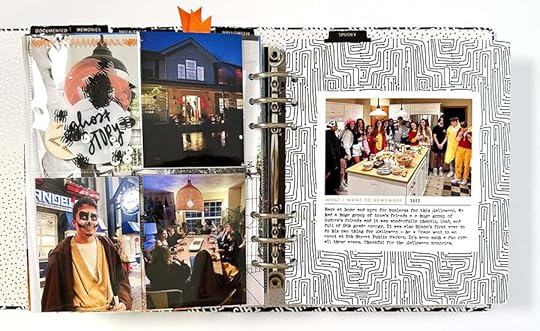
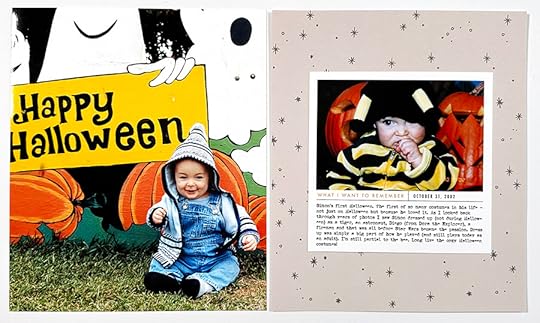
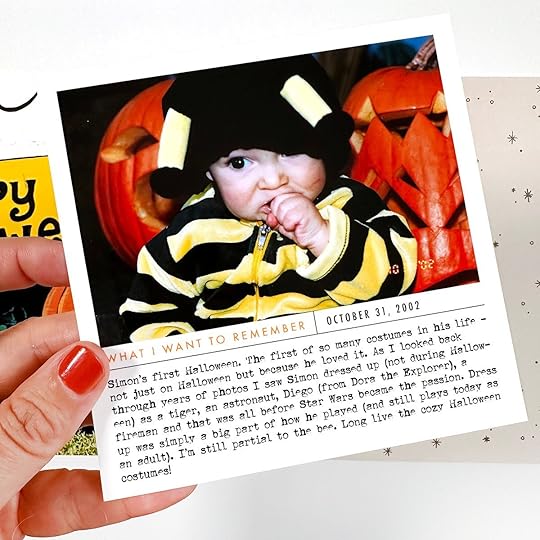
As seen in my previous post about this project my basic design formula for this project was a full page photo + a journaling/photo section adhered on top of pattern paper. Some years have a page protector in between and other years are just the two pages (depending on how many photos I had). I added a half circle with the year and one of the chipboard phrases on top of my full page photo.
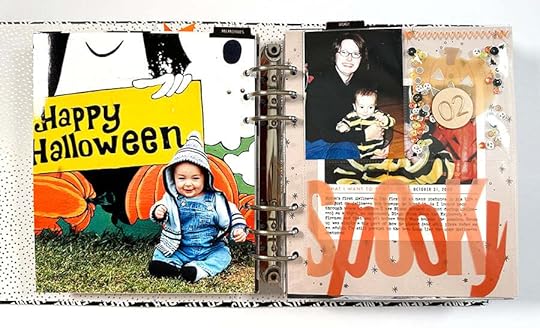
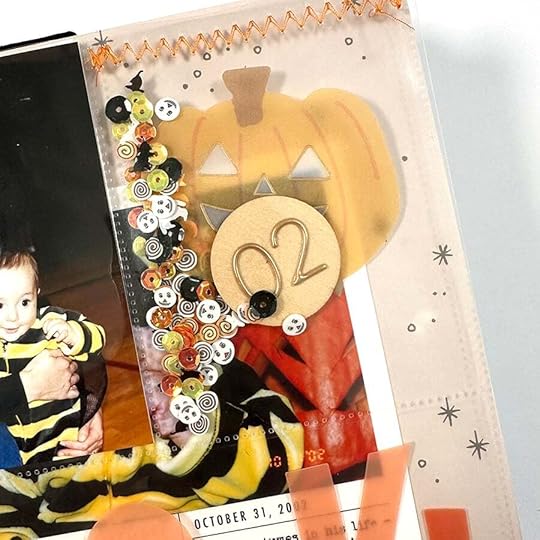
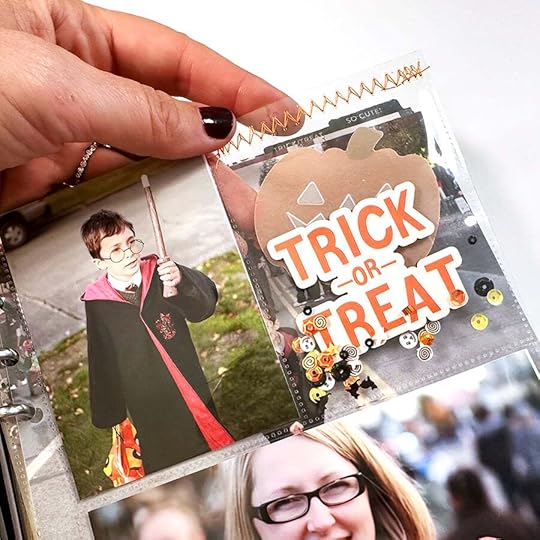
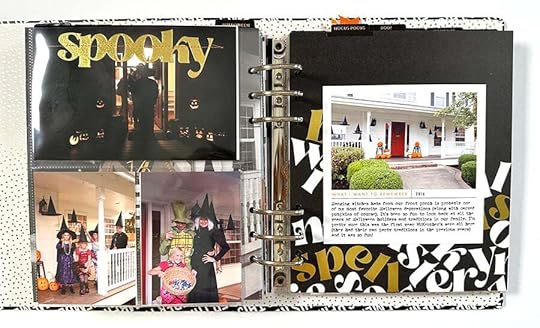
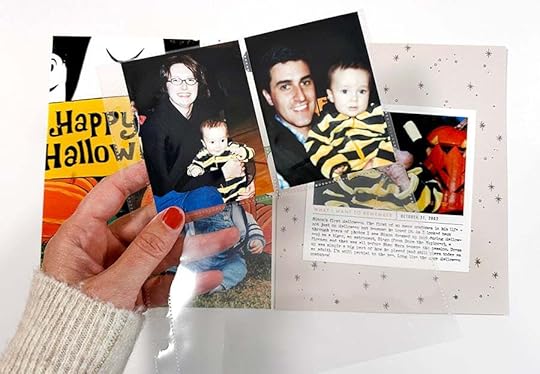
2002 was Simon's first Halloween. In addition to the photos in the spread I had 2, 3x4 photos and two empty pockets. To the 4x6 pocket I added the large plastic word "spooky" from the 2023 kit (I trimmed the edges to fit) and then I created a shaker pocket using elements from the kits and sequin mixes from Picket Fence Studio. The shaker pockets became a repeated element throughout the album and most include two embellishments - one with the year on it using the puffy number stickers - and the sequins. I ran the pocket through my sewing machine to close it off. You could also use washi tape, hand stitch, or use a fuse tool to close off the pocket.
It's such a fun and easy way to bring some playfulness into the album.
The wood veneer circles from the 2022 kit were great for adding the numbers on the back.
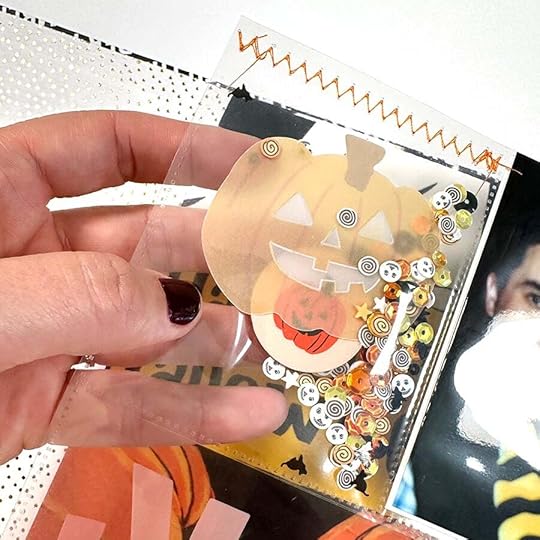
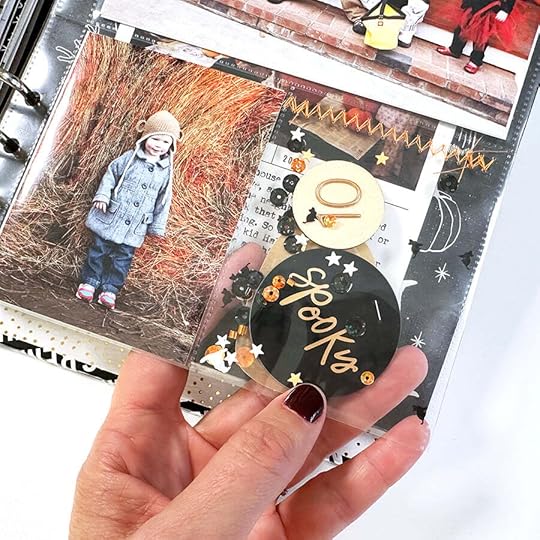
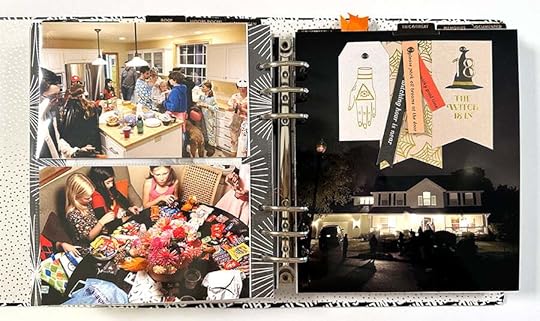
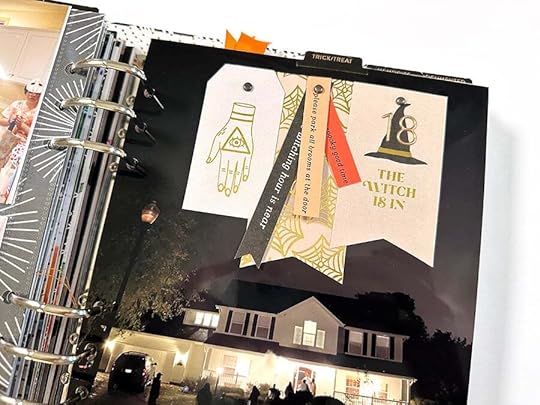
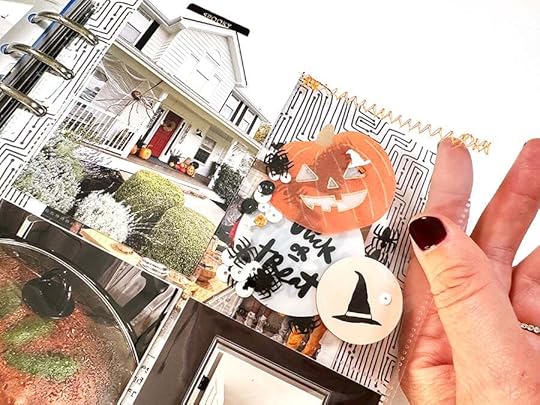
For the spreads that didn't have a page protector I had fun creating shaker tags using tags from both kits. I cut a piece of Grafix Plastic the same shape as the tag and then ran it through the sewing machine on three sides. I slipped in some sequins and then stitched it closed. I used fun orange ribbon to finish it off.
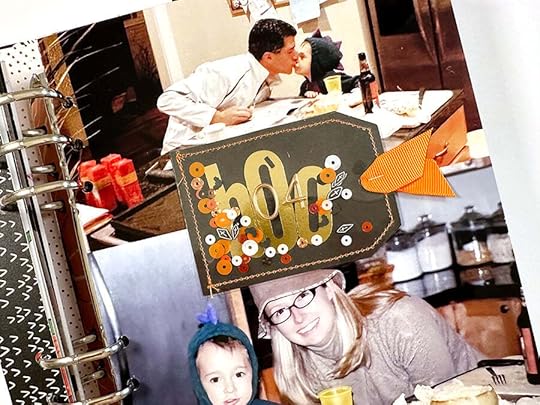
I love how this continues the sequin theme on the spreads that don't have a pocket page.
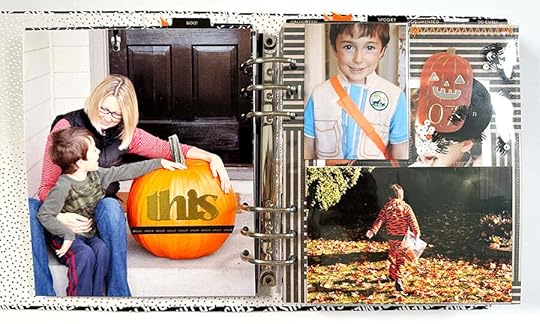
On this full page photo I added the gold word "this" from the 2022 kit along with one of the vellum phrases.
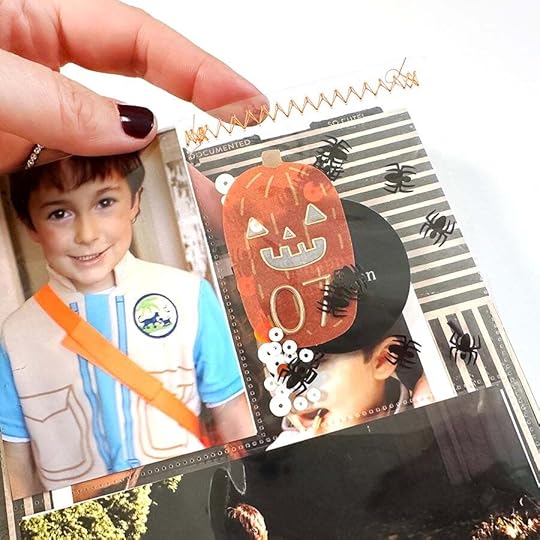
And followed the same steps as above for creating another shaker pocket. This one includes the numbers for the year on the vellum pumpkin and I added two plastic circles stapled back to back.
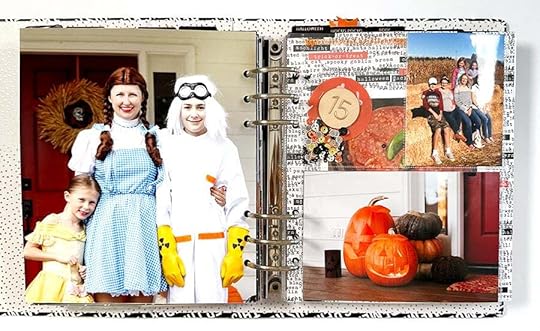
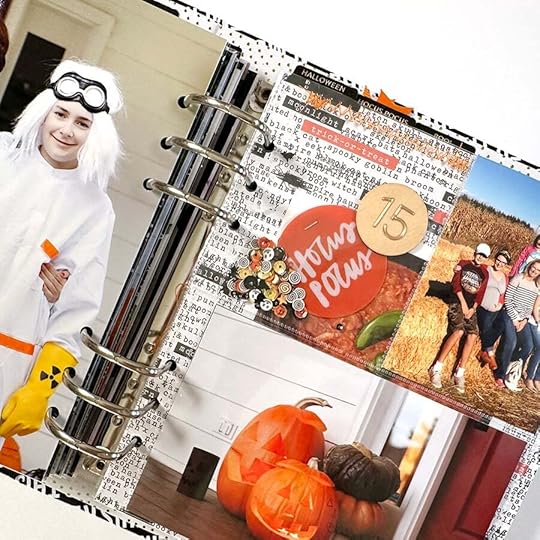
For this speed I repeated one of the design formulas that I used earlier in the album with the half-circle + numbers + chipboard. I love having a few formulas to choose from as I decide to add embellishments onto my photo enlargements.
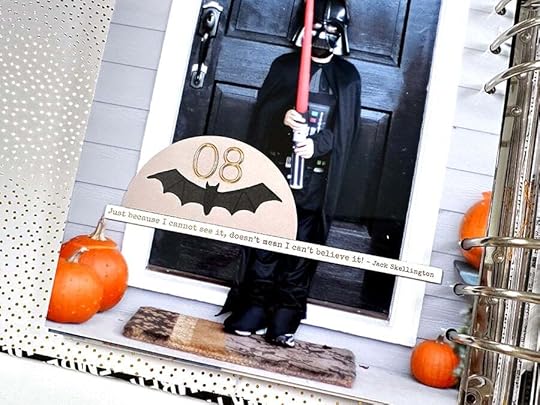
I used foam adhesive to adhere the 1/2 circle.

This time I added one of the wood veneer phrases along with the vellum pumpkin + sequins.
On top of my photo enlargement I decided to create a circle trail across the page. I temporarily adhered them and then ran it through my sewing machine. I also added three glitter paper stars.
So fun! This is something that would also be easily repeatable on multiple photos.

On this photo enlargement I added a strip of vellum phrases (two) and one of the wood veneer titles.
I seriously love coming up with a simple idea like this and repeating it!
Here's another shaker tag I created using a tag + a piece of Grafix plastic + sequins + a ribbon.
I had a 4x6 empty pocket here so I decided to cut up one of the vellum papers for the background and then created another shaker tag using some gold sequin stars from my stash.
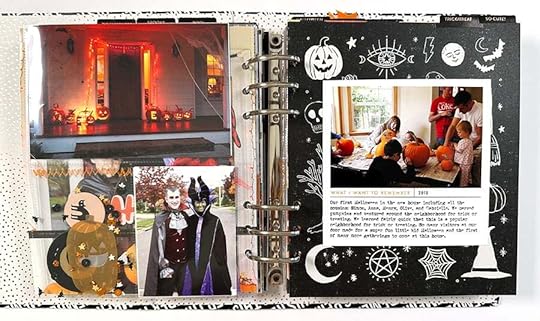
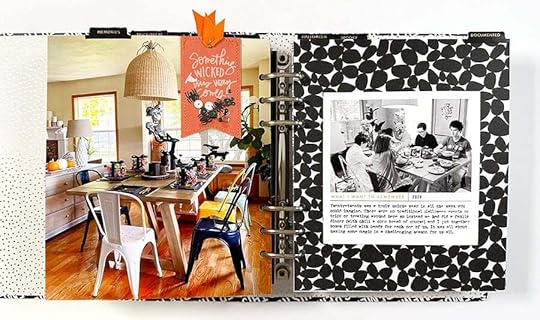
And sometimes it's so great to just leave our photos as they are without any embellishments on top.
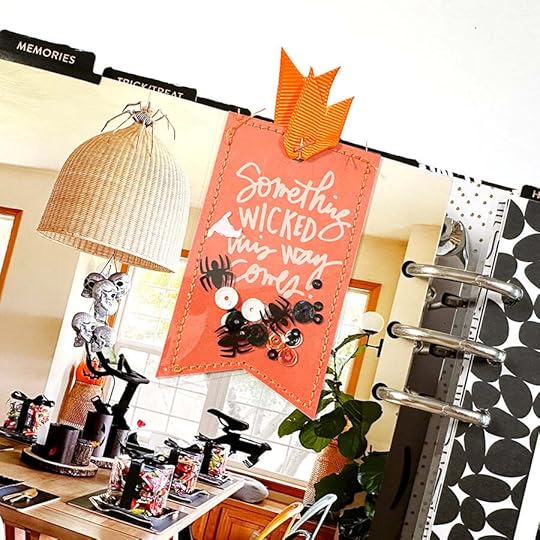
I used the other half of the vellum pattern paper along with some of the phrase banners to fill up this pocket.
I used another one of the large die cuts with journaling on top and a glitter star.
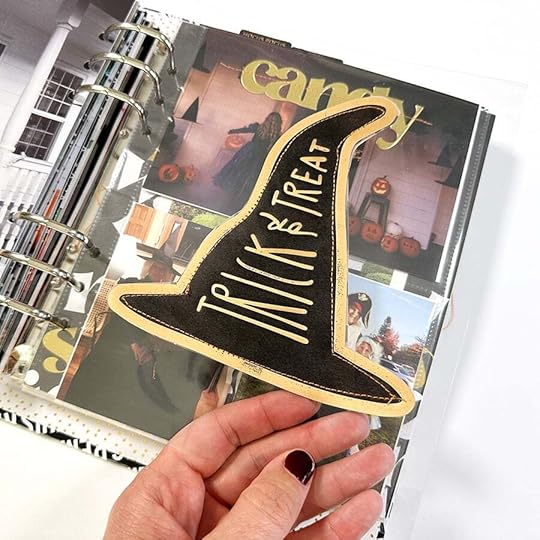
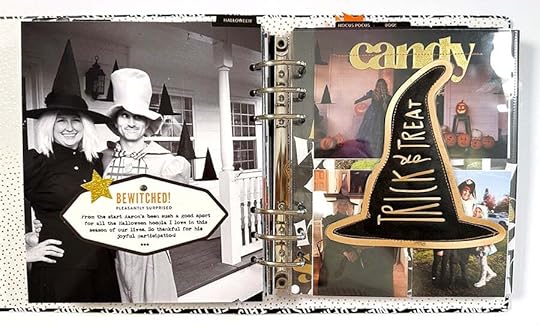
I used a piece of Grafix plastic as the base for my witches hat page. I placed the original vellum hat on the front and used that hat as a template to cut the same shape from the witches hat vellum - this one is on the other side of the plastic page. I ran it through the sewing machine and added in a few sequins before closing it off with stitching.
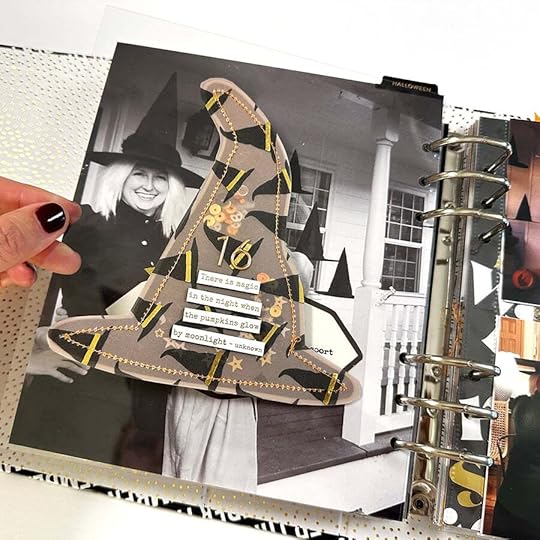
On the back I cut up one of the chipboard phrases and added the year.
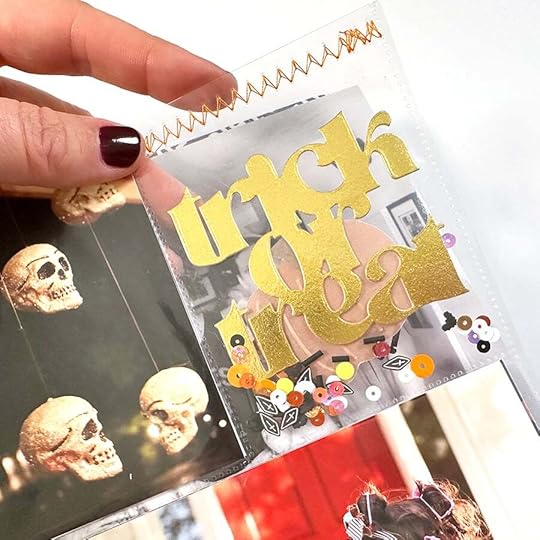
I added one of the gold die cut words to a 4x6 photo and ran that through the sewing machine.
And I did the same thing on the photo in the otter side of the pocket.
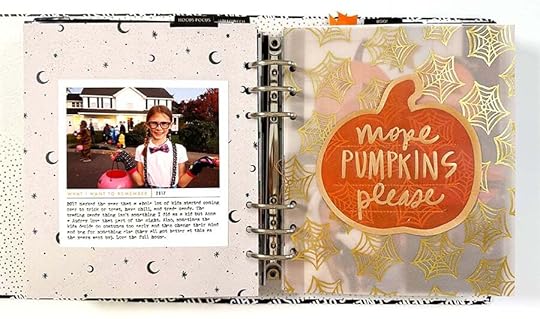
I stitched the vellum pumpkin onto the vellum web pattern. This time I just did lines but you could also turn this one into a pocket.
On the back I stitched three of the plastic circles together and and added a couple more of the glitter stars.
It's just so fun.
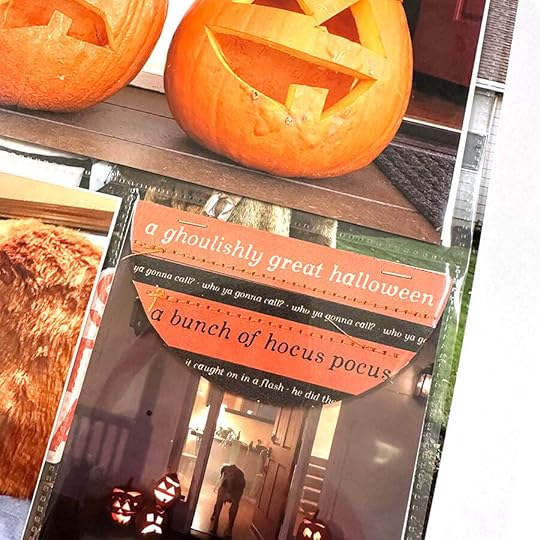
Here's another idea for an easy embellishment to add to your photos. I took one of the 1/2 circles from the die cuts and added phrases on top (mixing vellum and paper and running it through the sewing machine).
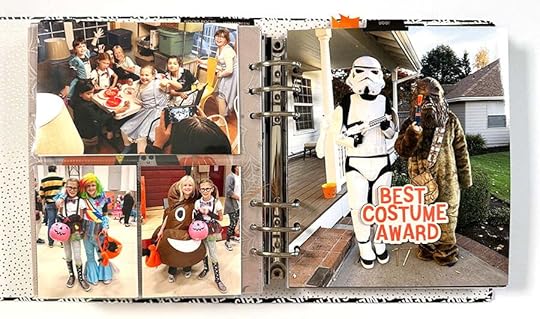
Added the "best costume award" wood veneer to one of the full page photos.
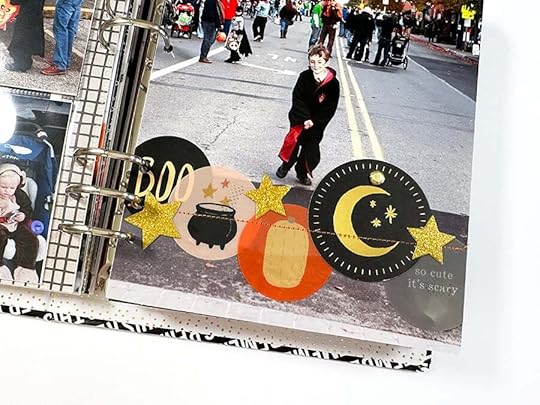
Another fun way to work with the tag embellishments is to create a gathering of them along the top of one of your photos.
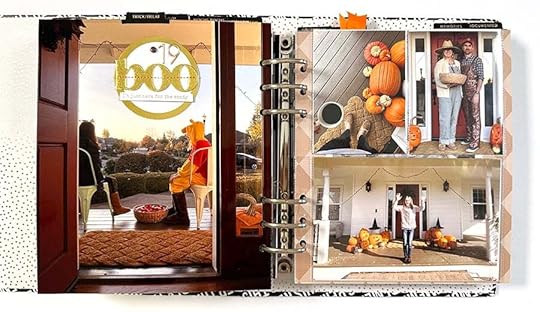
For this one I grabbed a paper circle + the die cut word "boo" and ran that through the sewing machine. I also added the numbers for the year and one of the chipboard phrases.
I trimmed this tag just a little bit off the top and turned it into a shaker tag. 2020 Halloween was definitely different.
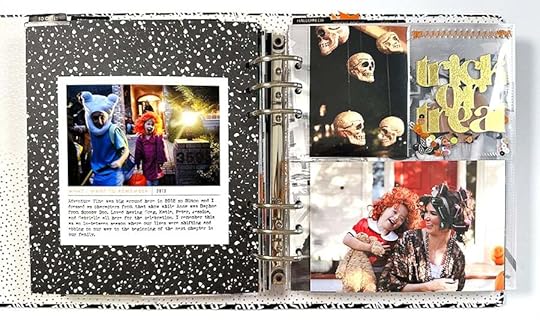
For Halloween 2021 we took a big family trip to Mexico. I decided to add it in because I like mixing in what was real in that season.

And for 2022 we were back and super into it all over again!
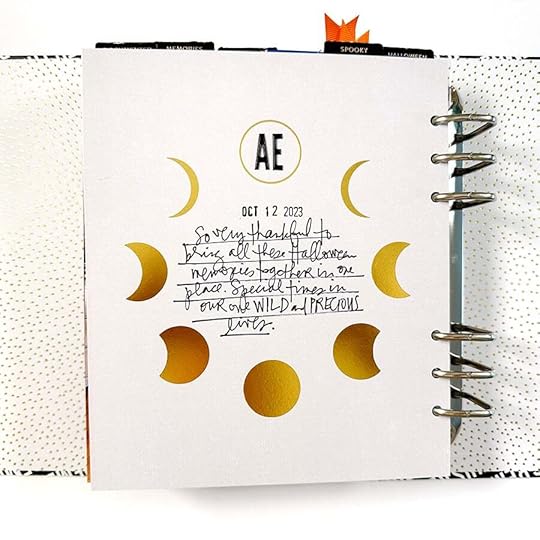
To finish off my album I used one of the pattern papers and added the date I completed the project and a couple puffy alpha stickers for my initials.
Halloween Kit 2022 Halloween Kit 2023 Black+ White Remember This 6x8 Album 3 pocket, 6x8 page protectors Epson XP15000 Printer Rolling Adhesive Picket Fence Studio Sequin Mixes Grafix Plastic Sheets Brother Sewing Machine Tiny Attacher Black Puffy Alpha Stickers We R Memory Keepers Hole Punch 6 Hole Punch Red Line Tape Orange Grossgrain Ribbon
October 13, 2023
In Case You Missed It | October 13
Happy Friday, friends! Welcome to the latest
In Case You Missed It. Just a reminder that this is a quick post that will happen every Friday afternoon with all the updates and links that have happened throughout the week. So, let's get to it:
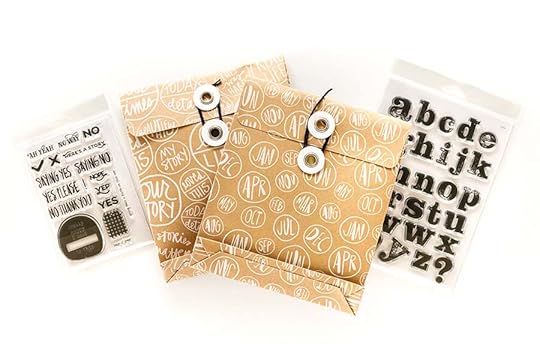
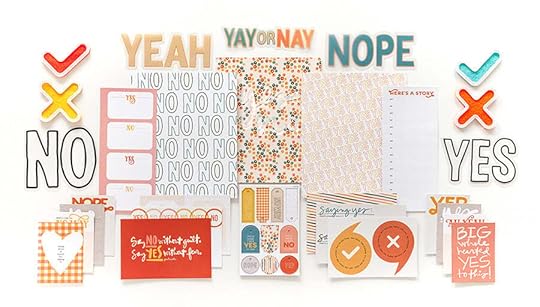
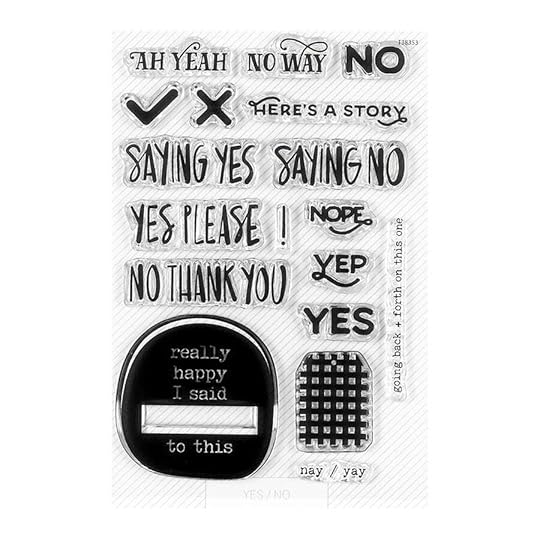
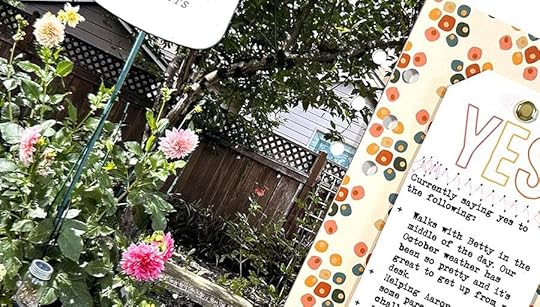
This week we revealed anew Story Kit™ theme: YES/NO! Throughout the course of our lives we say yes to a lot of things and no to a lot of other things. Sometimes we start off saying yes and end up wishing we had said no. Sometimes we say no and wish we would have said yes. Sometimes YES is all you can say when you are super excited about a turn of events. Sometimes it's simply a big wholehearted NO. This month we are coming together to document stories of saying yes and saying no. In addition to our new Story Kit™ theme, we also have a brand new Stories By The Month™ kit, and the next edition in our Alphas Are Awesome series. Head to the blog for Ali's post with all the details about this month's release.
DECEMBER DAILY® DIGITALS
The 2023 December Daily® Digitals are here! Kits, Stamps, Paper, and Embellishments...the same fun & festive designs as the physical @decemberdaily products, only in digital format. We love to see how this incredibly creative community plays with digitals! Resizing elements and cards, adding journaling to papers, creating cut files, transforming files into transparencies, the sky is the limit with digital files. Want to learn more about creating with digital files? Our newest class December Daily® Hybrid Product Play is live today. We have incredible content from six amazing contributors ready to explore at your convenience. Shop digitals here.
NEW CLASSES
2023 DECEMBER DAILY® PREP DAY. Join the December Daily® community for a fun online December Daily® prep day on Saturday, November 18th, 2023. Use this opportunity to finish past December Daily® projects or start working on your project for 2023. The first live video will start on Saturday, November 18th at 10:00 am Eastern. Cost is $5.
DECEMBER DAILY® PRODUCT PLAY | TRY THIS. December Daily® Product Play is all about ideas and inspiration for working with physical products from the December Daily® Collection. For 30 days in November, you'll receive one idea per day from the contributors to this class (includes Ali). Ideas in this workshop will focus on physical products from our 2023 December Daily® collection. Whether you are preparing to document 2023 or finishing up telling stories from past years, we hope these fun, creative ideas help you use your products to get your stories told.
2023 DECEMBER DAILY® HYBRID PRODUCT PLAY. Hybrid scrapbooking combines digital products with physical supplies to create paper (or printed) memory-keeping projects. For this class, our contributors will share with fun, creative ideas and inspiration for working with these digital products from the 2023 December Daily® Collection.
ORDER ISSUES
If you experienced any issues at checkout, or have questions about the release please reach out to our Customer Service team and they will be happy to help you! Contacting them ensures we are keeping track of these questions and answering them in a timely manner. It's difficult for our team to keep track of all of the questions left on multiple threads/posts on social media with all the excitement-- we are doing our best and we want to make sure your questions get answered! Click here to start a new conversation.
As always, we’re so grateful to have you all as members of this community! Thanks for joining me today and have a great weekend!
October 11, 2023
Part 02 | Ali's "Halloween Through The Years" Scrapbook
Welcome to a quick update on my Halloween Through The Years Scrapbook.
In this video I'm showing you what my album looks like after getting all my photos printed, all my journaling complete, and all my pages adhered back to back. I love setting up a strong foundation that focuses on the words + photos and now I'll move on to the fun part of the process: embellishing!
Check out Part 01 of this series (including a freebie layered Photoshop template) here.
SUPPLIESHalloween Kit 2022
Halloween Kit 2023
Black+ White Remember This 6x8 Album
3 pocket, 6x8 page protectors
Epson XP15000 PrinterRolling Adhesive
October 10, 2023
Yes/No Story Kit + November 2023 Stories By The Month
Today's the 10th of the month and that means a new
Story Kit, Story Stamp, and Stories By The Month kit.
This month we are focusing on stories related to the theme of Yes/No.
Throughout the course of our lives we say yes to a lot of things and no to a lot of other things. Sometimes we start off saying yes and end up wishing we had said no. Sometimes we say no and wish we would have said yes. Sometimes YES is all you can say when you are super excited about a turn of events. Sometimes it's simply a big wholehearted NO. This month we are coming together to document stories of saying yes and saying no.
Initial story ideas for this theme include:
What are you saying yes to right now? What are you saying no to right now? When was the last time you were so happy to say YES to something immediately? Think of a story from your life where you might have said both yes and no. What were the circumstances and how did it unfold? STORY KIT
The
Story Kit™ includes:
Here's a video overview of the
Story Kit™ and Add-On options this month:
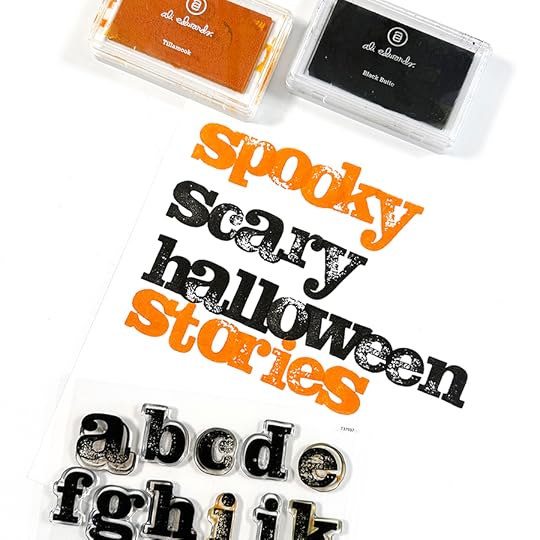
STORY STAMP™
The
Stamp Set:
Here's a video overview of the Story Stamp:
STORY CLASS // INCLUDES DIGITAL STORY KIT
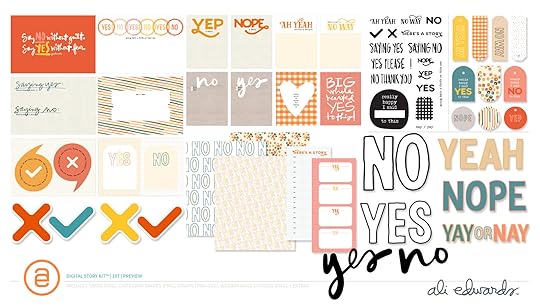
Here's a look at what's included in the Digital Story Kit™:
Your digital kit and the classroom and any Add-Ons purchased will be available to you on the 12th once your card has been charged for the month.
This kit is also available to physical kit subscribers as an Add On each month.
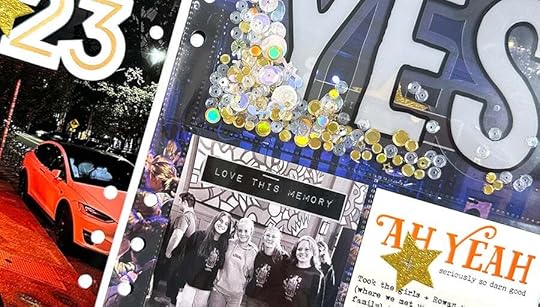
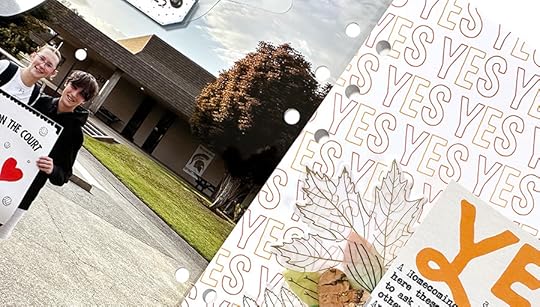
Here are a few project samples from Ali:
Again, thanks so much for subscribing and/or considering our
Story Subscription program! If you have any questions about this program please let us know below in the comments.
Here is a full look at the kit this month:
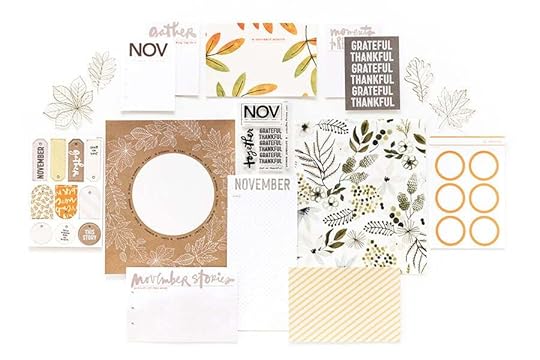
The kit now includes a sheet of vellum or transparency (sized outside the page protector in a 6 inch x 8 inch album), a pattern paper, a 3 inch x 8 inch (outside the page protector) journal card with the month at the top which will be repeated each month, a 3 inch x 4 inch stamp set, chipboard, 4, 3 inch x 4 inch journal cards, 3, 4 inch x 6 inch journal cards and an embellishment.
And a video overview:
This subscription is a great option for those who are looking to tell more calendar/everyday life sorts of stories.
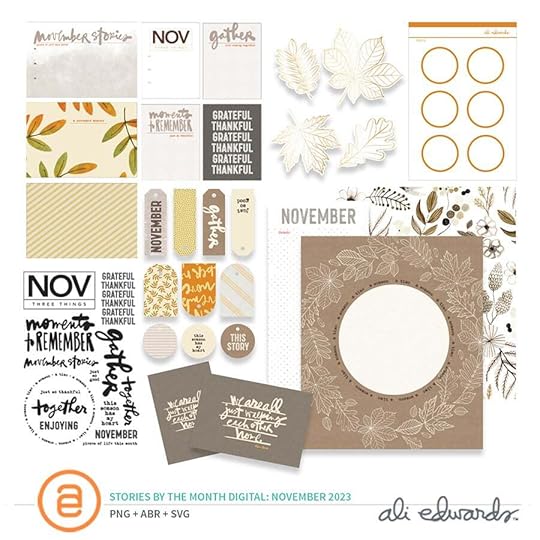
Our Digital Stories By The Month™ kit is now called Inspiration By The Month™. With this subscription you receive access to the Inspiration By The Month™ classroom and the digital kit.
This kit is also available to physical Stories By The Month™ kit subscribers as an Add On each month.
This stamp set is available to subscribers to add to their box during the Add On period and
also offered in the shop for anyone else.
Here's a video of Ali using this:
October 6, 2023
In Case You Missed It | October 6
Happy Friday, friends! Welcome to the latest
In Case You Missed It. Just a reminder that this is a quick post that will happen every Friday afternoon with all the updates and links that have happened throughout the week. So, let's get to it:
Ali is over on the blog with part one of her new Halloween Through The Years album. In her post, Ali is sharing her process for starting compilation albums. She is using pieces from both our 2022 + 2023 Halloween kits, available in the shop now. Don't forget that if you are a monthly physical kit subscriber you'll be able to add either or both Halloween kits as an Add On to your monthly shipment on reveal day, Tuesday the 10th and 11th of this month. If you aren't a subscriber you can order the kits through our regular shopping process. Head to the blog for Ali's post.
NEW CLASSES
2023 DECEMBER DAILY® PREP DAY. Join the December Daily® community for a fun online December Daily® prep day on Saturday, November 18th, 2023. Use this opportunity to finish past December Daily® projects or start working on your project for 2023. The first live video will start on Saturday, November 18th at 10:00 am Eastern. Cost is $5.
DECEMBER DAILY® PRODUCT PLAY | TRY THIS. December Daily® Product Play is all about ideas and inspiration for working with physical products from the December Daily® Collection. For 30 days in November, you'll receive one idea per day from the contributors to this class (includes Ali). Ideas in this workshop will focus on physical products from our 2023 December Daily® collection. Whether you are preparing to document 2023 or finishing up telling stories from past years, we hope these fun, creative ideas help you use your products to get your stories told.
2023 DECEMBER DAILY® HYBRID PRODUCT PLAY. Hybrid scrapbooking combines digital products with physical supplies to create paper (or printed) memory-keeping projects. For this class, our contributors will share with fun, creative ideas and inspiration for working with these digital products from the 2023 December Daily® Collection.
ORDER ISSUES
If you experienced any issues at checkout, or have questions about the release please reach out to our Customer Service team and they will be happy to help you! Contacting them ensures we are keeping track of these questions and answering them in a timely manner. It's difficult for our team to keep track of all of the questions left on multiple threads/posts on social media with all the excitement-- we are doing our best and we want to make sure your questions get answered! Click here to start a new conversation.
As always, we’re so grateful to have you all as members of this community! Thanks for joining me today and have a great weekend!
October 5, 2023
Part 01 : Ali's "Halloween Through The Years" Album Project | How To Part One
The next album project I'm embarking on over here is a compilation of past Halloween's.
Over the last year I've enjoyed making a few different compilation albums - albums that combine the same event or activity over a span of years. It started with the Stories Of Christmas Past kit that included a class on how to build a Christmas Past album. Currently that class is available with the purchase of the kit (at some point in the future we will likely offer it as a stand alone class). In that album I combined Christmas photos from my childhood along with any and all other years from the time I've been taking photos. I loved the end result so much.
Earlier this year I created another compilation album for our Start To Finish Travel Workshop. The album I put together for that class brought together photos and stories from all my travel adventures to see Dave Matthews Band. It's definitely a personal favorite album now.
Last year I didn't have a chance to create anything with our 2022 Halloween kit so I decided to combine last year's kit with this year's kit to build an album of Halloween stories. NOTE: Heads up that if you are monthly physical kit subscriber you'll be able to add either/or/both Halloween kits (from 2022 + 2023) as an Add On to your monthly shipment on the 10th and 11th of this month. If you aren't a subscriber you can order the kits through our regular shopping process.
Rather than offer this album process as a class I decided I wanted to share it here on the blog (videos will also be posted to YouTube).
Today's post is a look at my starting place, including the three things I focus on when I'm embarking on a compilation album project: (1) collecting + organizing photos, (2) establishing a foundation design that can be repeated throughout the album, and (3) printing my photos and journaling. The beginning process for me is always about establishing some kind of structure to hold my stories. My own particular brain wants to have the photos + words organized before playing around with the rest of the fun stuff. This does two things for me: (1) it keeps the primary focus on the words + photos and (2) it gives me a base to build on top of (with embellishments, stamps, etc).
Right now I'm in the photo + journaling printing process. I'll be back to share more once I have this phase complete.
Here's a video overview of my starting place:
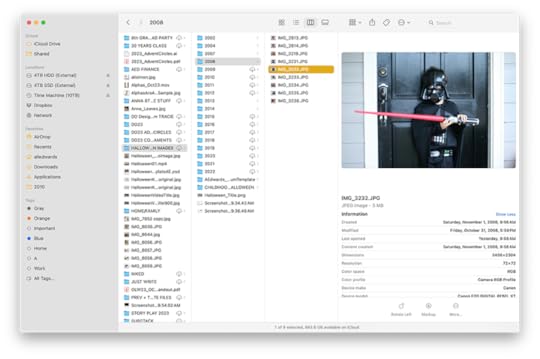
For a project like this I begin by going through my Photos and older Aperture archives to locate the photos that fit the theme. I've never set myself up for success by using tags or other methods of organizing so I most often search by month. In the case of Halloween I was able to search by dates. I drag and drop the images I may want to use from Photos into a folder organized by year on my desktop. This folder will be deleted once I'm done printing out my photos (I can still access the photos via Photos or Aperture if I need them again in the future).
This simple folder method has worked well for me for a number of past projects. For this album I knew that I wasn't going to be using a ton of photos (some years I have more and other years I have less) because I already know that I'll be spanning a number of years and I don't need to include every photo I took during any of our Halloween adventures.
STEP TWO | ESTABLISH A DESIGN FORMULA FOR THE ALBUM
As many of you are already aware, I'm a big believer in creating a simple design foundation and sticking with it as a way to simplify the entire process especially when you are working on an album that combines a number of years together. If you'd like to see + hear me take a deep dive into design forumulas for memory keeping check out my Start Here workshop that came out a couple months ago.
For this one I'm going with a full page photo (7 inches x 8.25 inches) + a pocket page protector insert for additional photos and play + a full page pattern paper background from the 2022 or 2023 kit with a photo/journaling layered template added to the top.
This same basic foundation will be repeated throughout the album for each year I'm featuring.
Currently I've been adding in this 3 pocket page protector but I might mix that up and use a different one (maybe the 2x2 pockets) for years when I have more photos or I feel like have more pockets for play.
I saved my Photoshop layered template for those of you who might want to use a similar design formula for a compilation project. The template itself isn't specific to Halloween and could be used in any memory keeping project. The template is sized 5 inches x 5 inches because that was the size I wanted to use on top of the pattern papers.
If you need a refresher on working with layered templates in Photoshop here's a past post that walks you through those steps.
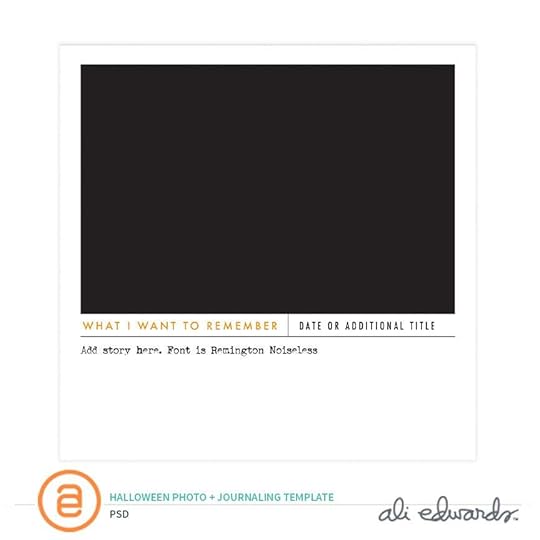
Download the layered PSD file.
Once I've got all my photos collected and I've established my design formula I'm ready to start printing. This is where I'm at in the process right now. I was able to find a couple childhood Halloween photos so I'm excited to be adding those to the beginning of my album with some random Halloween memories from when I was a kid.
I'm printing here at home using an Epson XP15000 printer.
At the same time I'm printing both the full page photos and any smaller photos I might want to include, I'm also inputting a story and photo into the layered template. My journaling for this project will be a mixture of things I can remember (when I can remember anything) paired with feelings when I look back at these memories. In one case already I transferred journaling I'd done on a traditional scrapbook page into the layered template so it will have a home in this project.
This is the kind of storytelling project that's really filling me up right now! I'll be back again - most likely sometime next week - with my next steps in the process.
SUPPLIESHalloween Kit 2022 Halloween Kit 2023 Black+ White Remember This 6x8 Album 3 pocket, 6x8 page protectorsEpson XP15000 Printer
Ali's "Halloween Through The Years" Album Project | How To Part One
The next album project I'm embarking on over here is a compilation of past Halloween's.
Over the last year I've enjoyed making a few different compilation albums - albums that combine the same event or activity over a span of years. It started with the Stories Of Christmas Past kit that included a class on how to build a Christmas Past album. Currently that class is available with the purchase of the kit (at some point in the future we will likely offer it as a stand alone class). In that album I combined Christmas photos from my childhood along with any and all other years from the time I've been taking photos. I loved the end result so much.
Earlier this year I created another compilation album for our Start To Finish Travel Workshop. The album I put together for that class brought together photos and stories from all my travel adventures to see Dave Matthews Band. It's definitely a personal favorite album now.
Last year I didn't have a chance to create anything with our 2022 Halloween kit so I decided to combine last year's kit with this year's kit to build an album of Halloween stories. NOTE: Heads up that if you are monthly physical kit subscriber you'll be able to add either/or/both Halloween kits (from 2022 + 2023) as an Add On to your monthly shipment on the 10th and 11th of this month. If you aren't a subscriber you can order the kits through our regular shopping process.
Rather than offer this album process as a class I decided I wanted to share it here on the blog (videos will also be posted to YouTube).
Today's post is a look at my starting place, including the three things I focus on when I'm embarking on a compilation album project: (1) collecting + organizing photos, (2) establishing a foundation design that can be repeated throughout the album, and (3) printing my photos and journaling. The beginning process for me is always about establishing some kind of structure to hold my stories. My own particular brain wants to have the photos + words organized before playing around with the rest of the fun stuff. This does two things for me: (1) it keeps the primary focus on the words + photos and (2) it gives me a base to build on top of (with embellishments, stamps, etc).
Right now I'm in the photo + journaling printing process. I'll be back to share more once I have this phase complete.
Here's a video overview of my starting place:
For a project like this I begin by going through my Photos and older Aperture archives to locate the photos that fit the theme. I've never set myself up for success by using tags or other methods of organizing so I most often search by month. In the case of Halloween I was able to search by dates. I drag and drop the images I may want to use from Photos into a folder organized by year on my desktop. This folder will be deleted once I'm done printing out my photos (I can still access the photos via Photos or Aperture if I need them again in the future).
This simple folder method has worked well for me for a number of past projects. For this album I knew that I wasn't going to be using a ton of photos (some years I have more and other years I have less) because I already know that I'll be spanning a number of years and I don't need to include every photo I took during any of our Halloween adventures.
STEP TWO | ESTABLISH A DESIGN FORMULA FOR THE ALBUM
As many of you are already aware, I'm a big believer in creating a simple design foundation and sticking with it as a way to simplify the entire process especially when you are working on an album that combines a number of years together. If you'd like to see + hear me take a deep dive into design forumulas for memory keeping check out my Start Here workshop that came out a couple months ago.
For this one I'm going with a full page photo (7 inches x 8.25 inches) + a pocket page protector insert for additional photos and play + a full page pattern paper background from the 2022 or 2023 kit with a photo/journaling layered template added to the top.
This same basic foundation will be repeated throughout the album for each year I'm featuring.
Currently I've been adding in this 3 pocket page protector but I might mix that up and use a different one (maybe the 2x2 pockets) for years when I have more photos or I feel like have more pockets for play.
I saved my Photoshop layered template for those of you who might want to use a similar design formula for a compilation project. The template itself isn't specific to Halloween and could be used in any memory keeping project. The template is sized 5 inches x 5 inches because that was the size I wanted to use on top of the pattern papers.
If you need a refresher on working with layered templates in Photoshop here's a past post that walks you through those steps.
Download the layered PSD file.
Once I've got all my photos collected and I've established my design formula I'm ready to start printing. This is where I'm at in the process right now. I was able to find a couple childhood Halloween photos so I'm excited to be adding those to the beginning of my album with some random Halloween memories from when I was a kid.
I'm printing here at home using an Epson XP15000 printer.
At the same time I'm printing both the full page photos and any smaller photos I might want to include, I'm also inputting a story and photo into the layered template. My journaling for this project will be a mixture of things I can remember (when I can remember anything) paired with feelings when I look back at these memories. In one case already I transferred journaling I'd done on a traditional scrapbook page into the layered template so it will have a home in this project.
This is the kind of storytelling project that's really filling me up right now! I'll be back again - most likely sometime next week - with my next steps in the process.
SUPPLIESHalloween Kit 2022
Halloween Kit 2023
Black+ White Remember This 6x8 Album
3 pocket, 6x8 page protectorsEpson XP15000 Printer
September 29, 2023
In Case You Missed It | September 29
Happy Friday, friends! Welcome to the latest
In Case You Missed It. Just a reminder that this is a quick post that will happen every Friday afternoon with all the updates and links that have happened throughout the week. So, let's get to it:
Only a few days left before the December Daily® boxing period closes TOMORROW, September 30th. This is your last chance to add any remaining items to your wish list. Low quantity alert! We are down to our final few Main Kits. Have you added yours to your box? Boxes begin shipping October 2nd. Shop the collection here.
STORY PLAY | FACTS + FEELINGS
All this week Ali has been sharing her thoughts, ideas and examples using the Facts + Feelings kit to celebrate storytelling through the combination of facts and feelings. Check out Ali's posts here.
LET'S PLAY SERIES
Plan + Play Monday will be led by Linda Jordan, creative team alum, Story Planning contributor, and the instructor behind Plan, Prep, and Play. Linda will be sharing how to set yourself up for success with the project focusing primarily on the main kit. She'll have planning and organizational tips and tools, guidance on selecting your format, streamlining your stash, finding inspiration, and more. Find her posts here.
Paint + Play Wednesday will be led by Jill Drangsholt, a creative team alum and frequent class contributor. Jill will be sharing her expertise as a mixed media artist, offering tips and inspiration on using stencils, silkscreens, acrylic paint, and more. Jill's posts will include fun ideas that can translate directly to our December Daily® spreads. Find her posts here.
Paper Play Friday will be led by Pam Baldwin, another creative team alum, frequent class contributor, and the instructor behind Playing With Paper. Pam will be doing what she does best: working her magic with products from this year's collection. She'll be demonstrating creative ideas for fun, easy, DIY and interactive elements. Find her posts here.
30% OFF SELECT DIGITALS + CLASSES
Calling all hybrid scrapbookers! We’re offering select digitals and classes at 30% off all month long. This sale is designed to support the members of our community who enjoy telling stories in the digital or hybrid format. From now until September 30th at 11:59pm ET use promo code FALL30 and get 30% off most digitals in the shop. Excludes December Daily® digitals + classes and the Start Here workshop.
NEW CLASSES
2023 DECEMBER DAILY® PREP DAY. Join the December Daily® community for a fun online December Daily® prep day on Saturday, November 18th, 2023. Use this opportunity to finish past December Daily® projects or start working on your project for 2023. The first live video will start on Saturday, November 18th at 10:00 am Eastern. Cost is $5.
DECEMBER DAILY® PRODUCT PLAY | TRY THIS. December Daily® Product Play is all about ideas and inspiration for working with physical products from the December Daily® Collection. For 30 days in November, you'll receive one idea per day from the contributors to this class (includes Ali). Ideas in this workshop will focus on physical products from our 2023 December Daily® collection. Whether you are preparing to document 2023 or finishing up telling stories from past years, we hope these fun, creative ideas help you use your products to get your stories told.
2023 DECEMBER DAILY® HYBRID PRODUCT PLAY. Hybrid scrapbooking combines digital products with physical supplies to create paper (or printed) memory-keeping projects. For this class, our contributors will share with fun, creative ideas and inspiration for working with these digital products from the 2023 December Daily® Collection.
PRODUCT Q+ A WITH ALI ON INSTAGRAM
Ali has been answering a wide range of questions, sharing creative product ideas, and more over on our December Daily® Instagram account. All of her content has been saved as a highlight on that account to be enjoyed at your convenience. Find it here.
ORDER ISSUES
If you experienced any issues at checkout, or have questions about the release please reach out to our Customer Service team and they will be happy to help you! Contacting them ensures we are keeping track of these questions and answering them in a timely manner. It's difficult for our team to keep track of all of the questions left on multiple threads/posts on social media with all the excitement-- we are doing our best and we want to make sure your questions get answered! Click here to start a new conversation.
As always, we’re so grateful to have you all as members of this community! Thanks for joining me today and have a great weekend!
December Daily® 2023 | Paper Play with Pam 04
Hello friends!! Welcome to our last Paper Play Friday December Daily 2023 post 😊 This week, I’m working with many of the shop items that can be added to your box. Quick reminder that the boxing period ends at 11:59 pm September 30th (just one more day!). I’m so excited to share that I FINISHED MY ALBUM!! Lots to share with you in this post, so we’ll jump right in.
Project #1
I believe I shared with you last week that I hit the maximum capacity of my first 2010 album and started moving things into a second volume. I settled on a title page for volume 2 using the 6x8 wreath transparency and gold puffy stickers from the main kit.
Supplies:
6x8 transparenciesDecember Daily Main Kit (gold puffy sticker numbers, chipboard stars)
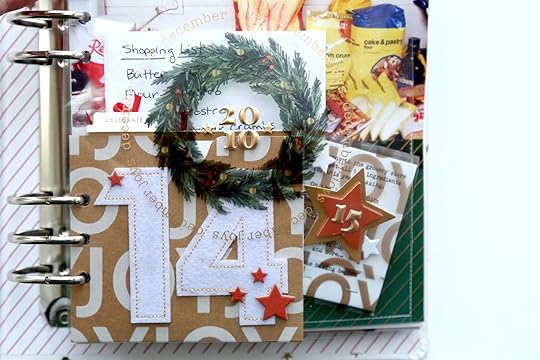
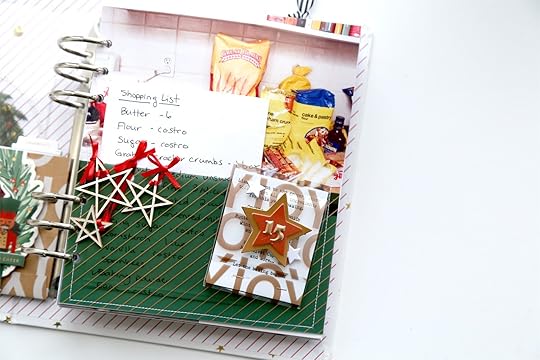
My story for day 15 was about grocery shopping for my baking ingredients. Baking is a big deal for me around the holidays. My baked goods list is long and my shopping list is MUCH longer! I happened to have the original list saved in my ephemera pile and I thought it would be fun to include in my album. Ephemera + pockets makes for an easy page design.
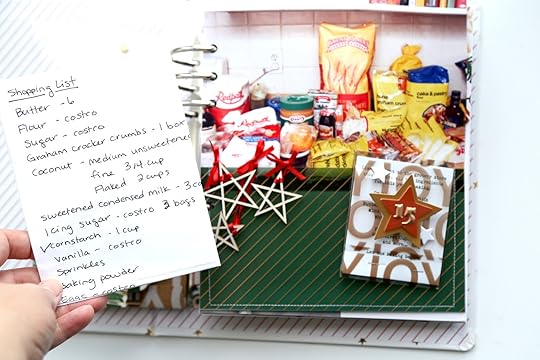
One of my favourite shop items every year is the 3x8 journaling card and transparency pack. I had a few ideas to get a bit more playful with those transparencies. For this layout, I printed an enlarged photo of my ingredients all layed out on the counter as a background. I then stitched one of the transparencies to the bottom of the photo to create a pocket that holds my shopping list.
Supplies:
3x8 transparency and journaling card packwood veneer starsribbonDecember Daily Main Kit (dimensional star stickers, gold puffy number stickers)tiny attacher
The second thing I wanted to try with the transparencies was to make a matchbook mini-book. This idea originates from one of the products Heidi Swapp offered in the past, and man is it fun!! I attached it to the outside of the pocket with adhesive Velcro circles so it stays in place but can easily be removed for anyone who wants to take a closer look.
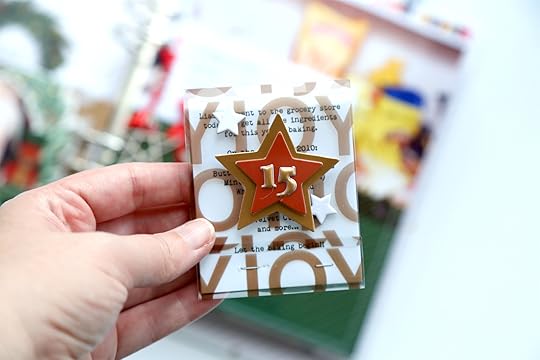
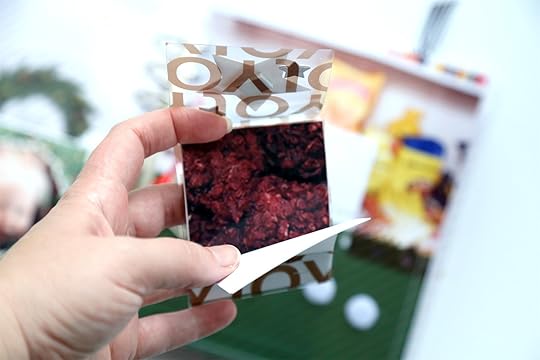
I cut down one of the transparencies to create a cover for my mini book, stacked together my journaling and a few photos of my baked goods, then stapled them inside the cover. The bottom flap keeps the cover closed.

Happy to share the process video for how this came together.
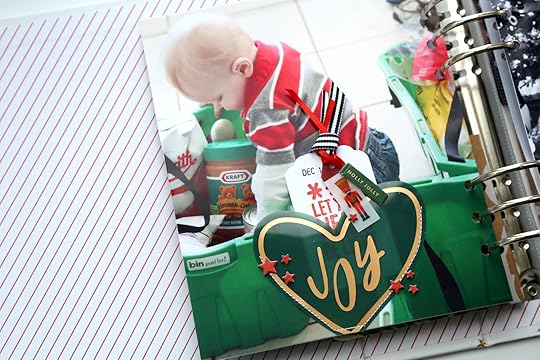
Project #1 (Part 2)There is a little bit more to this story that I wanted to include in my album. Liam “helped” with the shopping, and I had a few cute photos to work with.
Supplies:
Large Plastic heartsPlastic tag setMerry and Bright 4x6 Stamp SetRedwoods Crafters InkDecember Daily Main Kit (chipboard stars, chipboard phrases) ribbon cardstock tag
I may be a little pocket obsessed right now, but I knew right away that I wanted to turn one of those big plastic hearts into a pocket. I stitched around the left and right edges with my sewing machine and it worked really well!
I stashed a tag inside the pocket with some stamping on the front and a short note on the back. I was really hoping to get a layered look of embellishments to hang off the top of the tag, but I think I could use some more practice with this part.

Process video below!
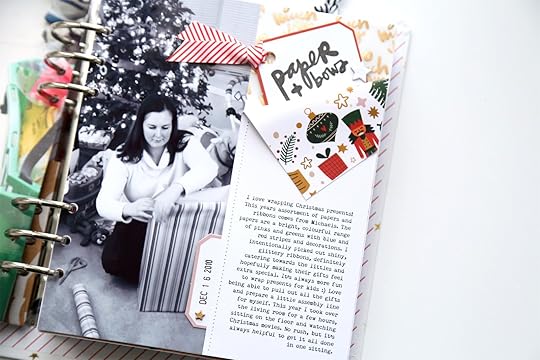
Project #2Wrapping presents! It’s a story I include pretty much every year! I always love it when the design of a layout actively contributes to the story I’m trying to tell. I wanted to play with the idea of peeling back “wrapping paper” for this one, so I used one of my favourite 3x8 journaling cards from the 3x8 transparency and journaling card set, printed my journaling on the back of the card and positioned it to be able to peel down one corner.
Supplies:
3x8 transparency and journaling card setdie cut labels Ali’s Christmas phrases 4x6 stamp set Red and white trim packDecember Daily Main Kit (patterned vellum, chipboard stars)Project #3
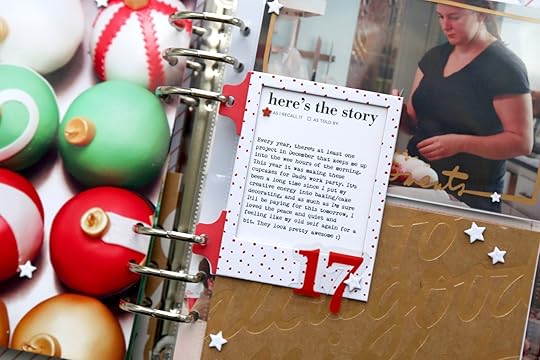
I love December AND it’s a lot of work! Every year, I end up with at least one project that keeps me up into the early hours of the next morning. In 2010, it was these cupcakes I made for my Dad’s work party. (worth it! They turned out so good!). This was the story for day 17.
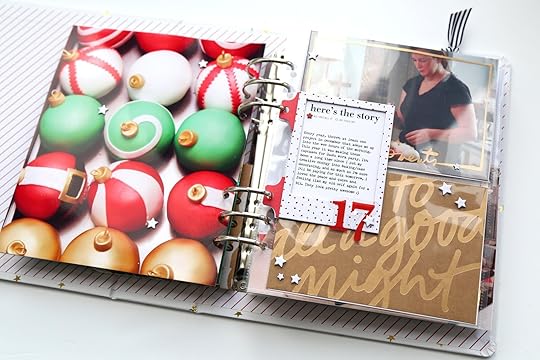
I wanted a way to include the journaling without covering up the photo I loved so much, so I used one of the chipboard polaroid frames to create a journaling insert along with one of the 3x4 journaling cards from the Paislee Press Mini Kit. This is held in the album with some of the 4x6 attacher stickers.
I decided to keep the back of the journaling spot fun and simple, using a 3x4 vellum card from the Holiday 3x4 and 4x6 specialty journal card set, and a plastic ornament from the December Daily Main Kit.
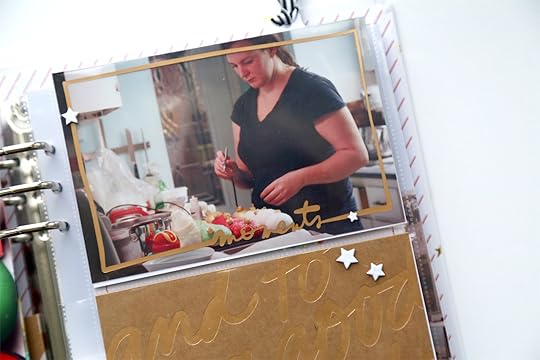
I added a transparent overlay from the Holiday 3x4 and 4x6 specialty journal card set on top of my photo and included a very fitting 4x6 kraft card from the same set in the bottom pocket. Also kind of obsessed with the chipboard stars in the December Daily Main Kit. I used every. Single. One in this album.

Supplies:
Polaroid chipboard framesRed plastic numbers 4x6 attacher stickers Holiday 3x4 and 4x6 specialty journal card set Paislee Press Mini Kit (journaling card) December Daily Main Kit (plastic ornament, chipboard stars)Project #4
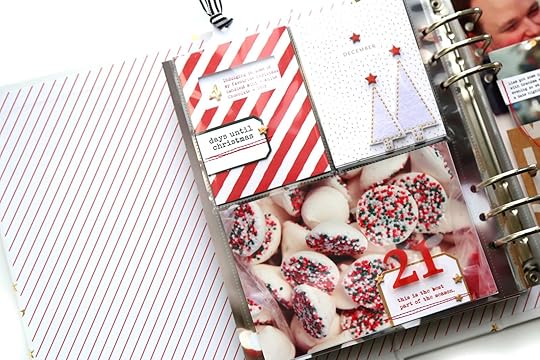
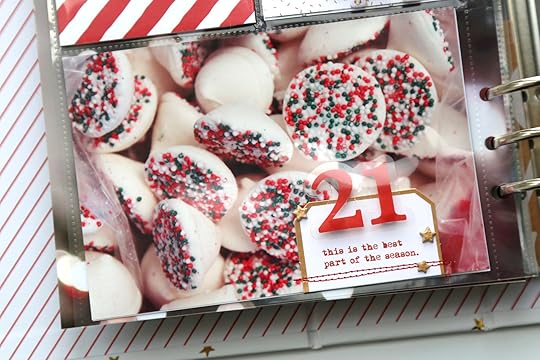
Not many photos in my library from December 21st, but I did have this one of my favourite candies! I also pieced together that with this being just 4 days before Christmas, there were lots of preparations happening around here. With that in mind, and the very cute “days until Christmas” stamp, I decided to craft a countdown pocket.
Supplies:
Die cut labels, Red plastic numbers Ali’s Christmas phrases 4x6 stamp set 4x6 attacher stickers December Daily Main Kit (patterned paper, gold puffy number stickers, chipboard stars, gold rimmed quote labels, felt trees) Paislee Press Mini Kit (jouranling card)
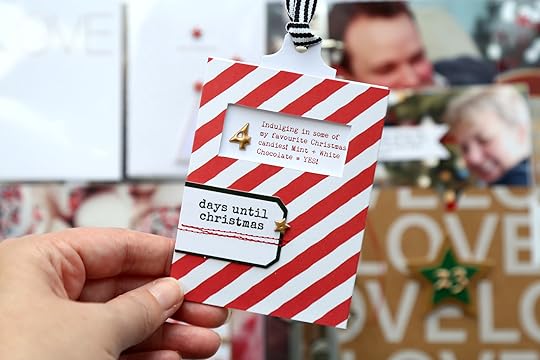
The slider pocket is constructed from patterned paper, sized 4” x 6.25”. I made a cardstock template first so I could play with the dimensions and figure out how much room I had to work with. Each numbered note is approximately 2 cm tall, so I was able to fit 4 of them on the 3x4 card that sits inside the pocket.
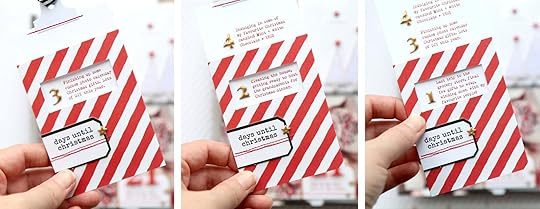
I added an attacher sticker to the top of the 3x4 card to make it easier to pull from the pocket. It is a little bit snug when it’s inside the page protector, but definitely still functional.

Process video!
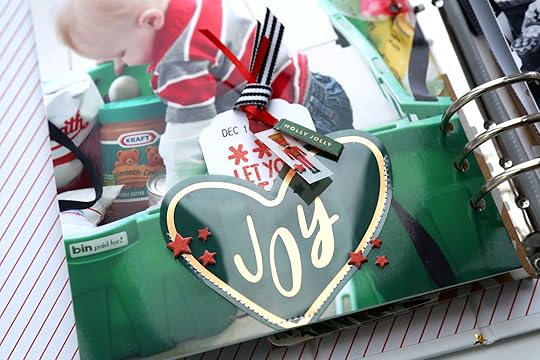
Project #5Playing with transparencies as pockets again! (I really got a LOT of use out of the 3x8 journaling card and transparency pack, but don’t forget that you could repeat these strategies with ANY transparencies you happen to have.)

I also cut out the J-O-Y letters from the main kit vellum, definitely inspired by Linda! I wanted to preserve a bit section of the vellum to be able to use on a future project, so I intentionally cut out the letters at the edges of the page and arranged them on top of the pocket to continue running off the edges. But I think the real fun was discovering that the clear stickers are a perfect fit with these letters!
I ran the 4x6 journaling card through my printer to add the text, and all that was left to do was tuck it inside the pocket for safe keeping. The functionality of the see through elements in this layout make me so happy! I love the look of the stars layered on top of the Christmas lights in the background!
Supplies:
3x8 transparency and journaling card set Holiday phrases 6x8 large clear sticker sheet December Daily Main Kit (4x6 journaling card, chipboard stars)
Process video below!
Project #6Christmas Eve! It’s usually a toss up which day will have more photos, Christmas Eve or Christmas Day. Either way, I’m usually looking for a solution or strategy to include lots of photos into my album on these days. For Christmas Eve, I decided to use a 2x2 pocket page protector and the Holiday plastic tag set.
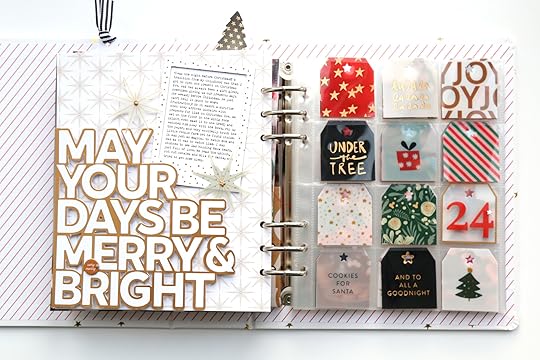
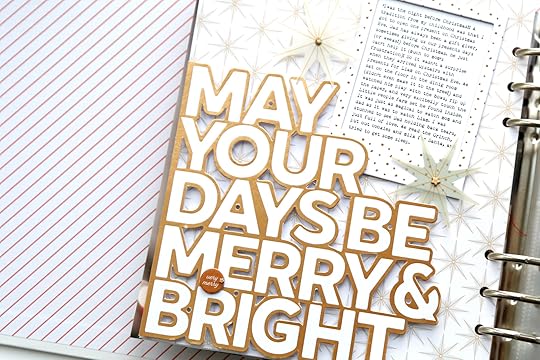
I also had a full 7x8.25 blank spot on the left that I needed to figure out. I decided to play a bit with this space. I cut the punched edge off one of the die cut insert pages for a giant title. I added my journaling inside one of the polaroid chipboard frames, and used the lovely star patterned paper from the Paislee Press mini kit for a background.
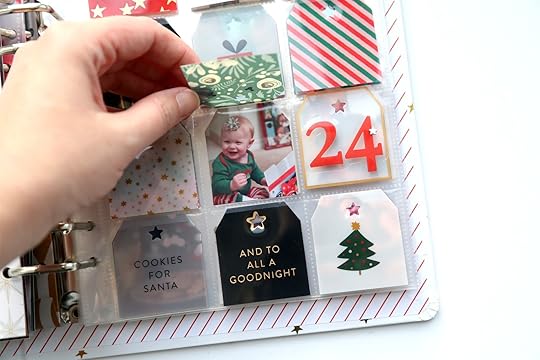
Those tags look so great all together in the 2x2 pockets! I used some clear/invisible tape to attach them to a series of photos that were cut in the same shape as the tags.
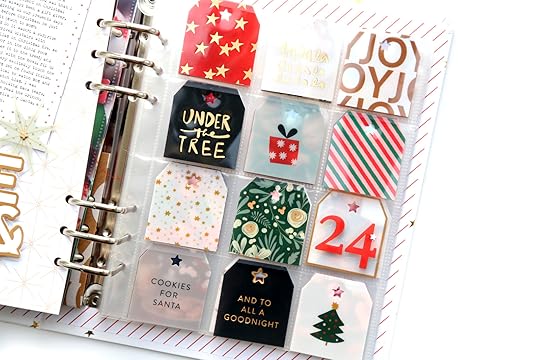
Each tag lifts to reveal a photo underneath. They are just a little bit loose inside the pockets. Still thinking if there’s another way to secure them inside the pockets to prevent them from sliding around. But they really do look great!
Supplies:
Holiday plastic tag set Red Plastic numbers Large die cut paper inserts Chipboard polaroid frames Paislee Press Mini Kit (patterned paper, chipboard, vellum stars)
Process video below!
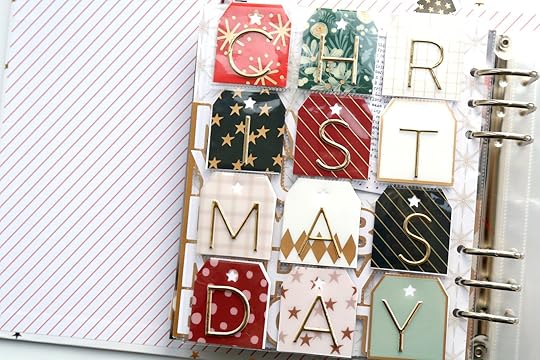
Project #7Christmas Day! I don’t know if I’ve seen this somewhere before, but I honestly don’t remember ever realizing that the 12 pockets of the 2x2 page protector have the exact right number of squares to spell out “Christmas Eve” OR “Christmas Day”. Sometimes figuring out what will go on the back of all those pockets feels a bit tricky. There are so many tags in the holiday plastic tag set that I had more than enough to fill the front and back of the page protector and still had leftovers!
I continued my Christmas Day story with an enlarged photo, die cut wreath and big felt numbers + a chipboard phrase from the main kit.
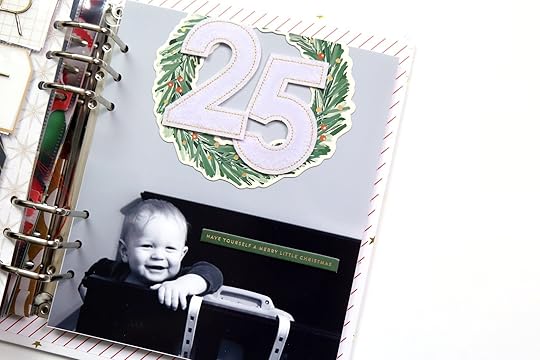
This was another photo heavy day, and I think what I really wanted out of this design was to let the photos do the heavy lifting on their own. I printed 6 – 4x6 photos and simply added them to the page protectors. They really bring me joy just as they are.

Supplies:
Holiday plastic tag set Gold puffy alpha stickers Large felt numbers 3x8 journaling card and transparency set wood veneer stars Holiday 3x4 and 4x6 specialty journaling card set December Daily Main Kit (chipboard phrases, wreath vellum, die cut wreath) Paislee Press mini kit (4x6 chipboard frame, 4x6 journaling card) pom pom trim
Normally I’d finish my album on December 25th, but on this year we had a bit of an extended Christmas running into the 26th. I kept things super simple with just one photo and a bit of journaling. And that brings us to the end of my album!
Here’s a quick walk through video of my completed 2010 December Daily album(s). **Note: Days 1-4 were not included as part of this series, but you’ll definitely see them in the video below! These pages were made with supplies from past December Daily releases, you just might have some of them in your stash too!
Just want to say a sincere, whole hearted thank you for being here and cheering me on! I so appreciate your comments and kind words. Please feel free to leave your questions below, and Happy December Daily Season!


