
Renee Wilkinson's Blog, page 26
February 28, 2012
Tutorial: DIY Upholstered Headboard
There are some long nights ahead of us with the coming arrival of our baby. Those nights will be spent sitting up in bed, half awake, nursing our little girl. We have never had a proper bedframe, so we decided to kill two birds with one stone by making a headboard that frames the bed and provides some comfort sitting up on those long nights.
 I found a great tutorial on Sutton Grace about her homemade upholstered headboard and decided to use that as a guide for making ours. Funny how our motivation for making them was quite similar… We simplified the design by leaving off the buttons since our quilt adds lots of visual interest already. Here's the step-by-step process we took for this really simple DIY project.
Step 1: Cut a plywood sheet to size.
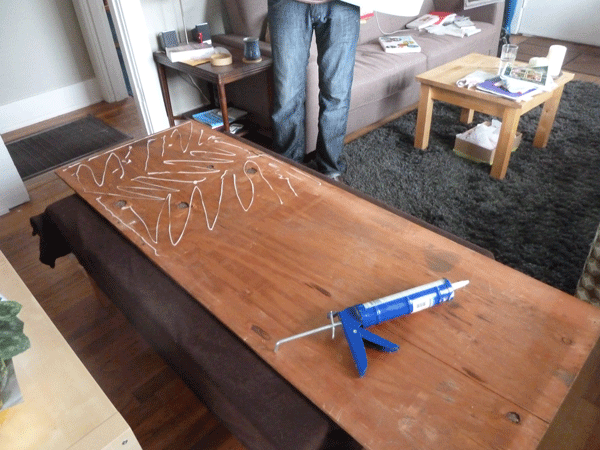 We were planning to hang our headboard from the wall, so we used thin plywood around 1/4″ thick. It acts as a frame, so it doesn't need to be heavy duty. Our sheet was cut to 2 feet high (so our backs could rest comfortably) by 66″ long (so it would overhang the bed by a couple inches on both sides).
Step 2: Glue thick foam to the plywood sheet.
 We used 2″ foam from the fabric store, which is pricey, but we waited for a 40% off coupon to purchase it. It was already 2 feet wide, so we had the fabric store cut it exactly to 66″.
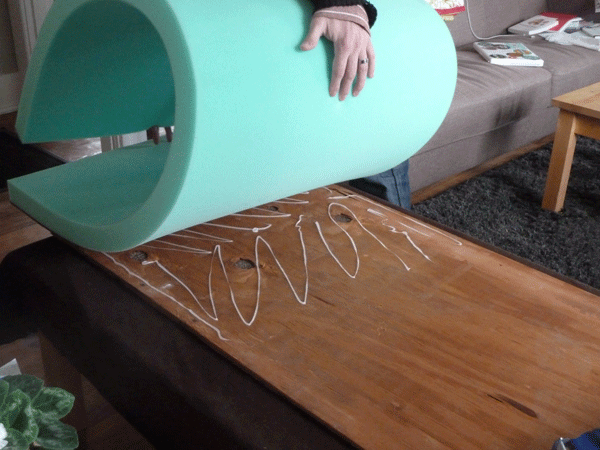 For glue, you could use lots of options. We actually used clear caulking because we had some leftover from another project. One person laid the caulking while the other unfolded the foam into place. We worked our way down the plywood sheet, caulking and pressing the foam into place.
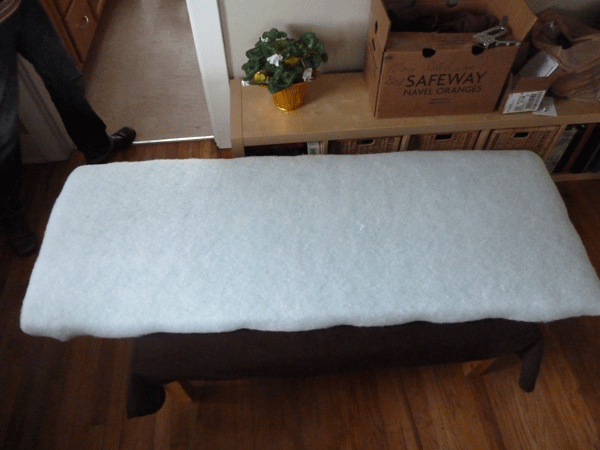
Step 3: Place batting over the foam so it wraps around to the back of the plywood by a couple inches. Staple into place.
 We used 1/4″ thick batting sized for a queen bed, which gave us enough batting to have 3-4 layers folded over the headboard. Our cheap-o staple gun was strong enough to secure it into place.
 Step 4: Place fabric on top of batting and staple into place.
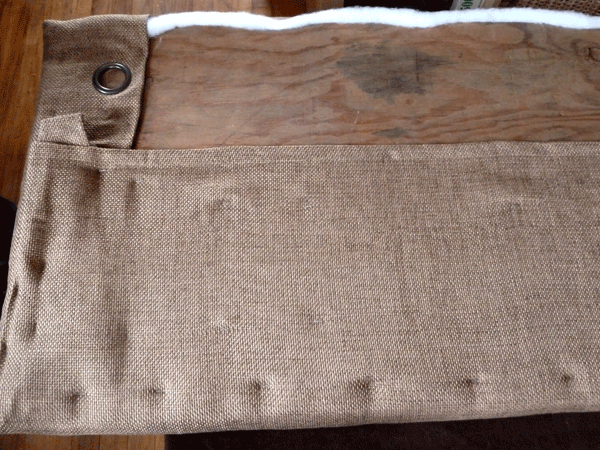 Pull taut while you staple (helpful to have a second person here – one to pull while the other staples). Don't pull tight! Otherwise it might indent the foam.
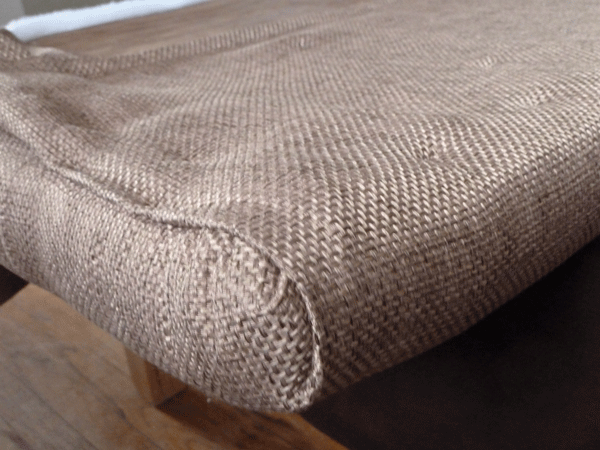 We carefully folded the corners until they looked neat enough, then stapled into place. Don't worry about over-stapling or having the fabric look neat from the back – no one will see that.
Step 5: Hang headboard on the wall using picture hanger hooks.
 This part took a while because you want to make sure it hangs level. We have lathe and plaster, so first we found the studs and used a small nail to mark them. We then went back and hammered in picture hook hangers on each stud at the same height.
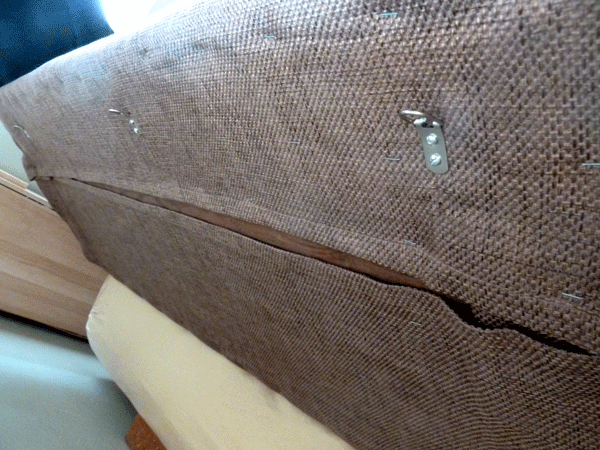 Carefully, we matched the placement of the hangers to the hooks that we screwed into the back of the headboard – same distance apart from each other and same height. Being careful paid off and the headboard hung perfectly.
 The finished product looks just as cozy as we hoped! The total cost of the project breaks down as follows and the whole process took about an hour with two people:
Fabric – used a thick curtain found at Goodwill, $10
Foam – $35
Batting – $13
Plywood – found at estate sale, $1
Picture hanger and hook hardware: $5
Total cost: $64
Not too shabby for a simple, comfy headboard. We are officially ready for those late nights in bed with Bug!


February 23, 2012
Dividing Bulbs
Flowering bulbs are my favorite way to add color to the garden. They take just a few minutes to plant, need very little maintenance and multiple every year making them a small investment in your garden's future. After a couple years away from our homestead, the bulbs in our garden have gotten crowded!
 The best time to divide spring flowering bulbs is probably in the fall, as they all get ready for a long winter's nap. Already the tulip greens have surfaced in our garden. Still, I couldn't help myself and had to divide them now before they really get blooming.
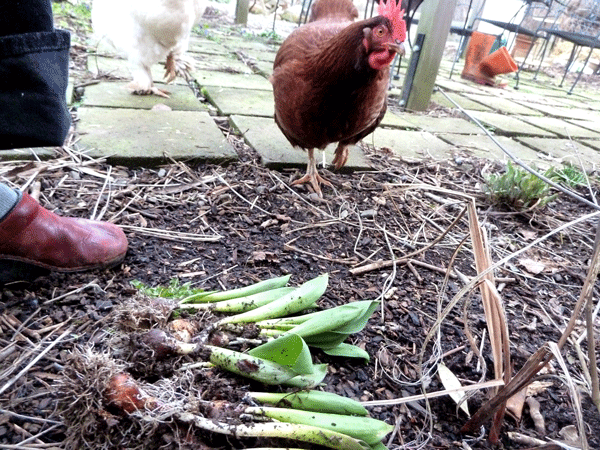 I used a big shovel to dig deep below them and loosen the soil – I didn't want to risk cutting into the bulbs. Then I gently tugged the bulb clusters apart, teasing out individual bulbs. It helped that the soil was moist. I clustered them in small groups, spacing them about 6″ apart – close enough to make an impact in the garden, but have enough room between them to multiple between seasons.
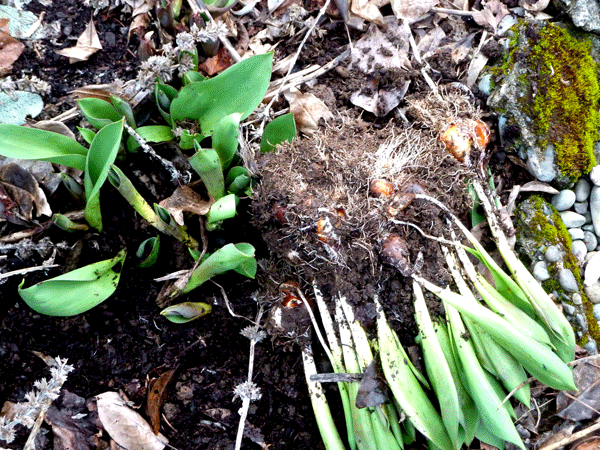
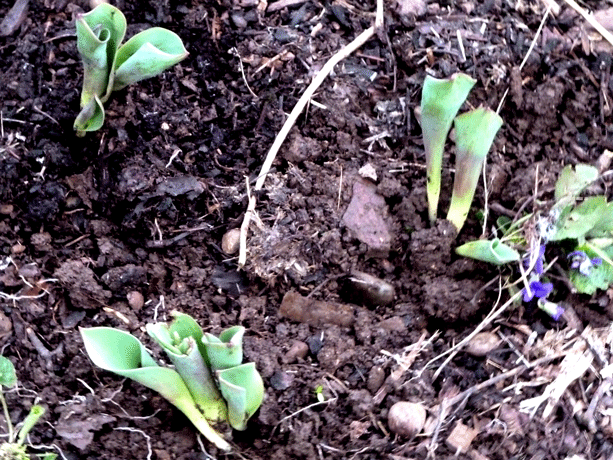 As I dug through the garden, I discovered my huge flowering alliums were getting ready to emerge as well. Like the tulip bulbs, they had also multiplied and were crowded. I used the same method to gently separate the tender bulbs and replanted them in pockets throughout the garden.
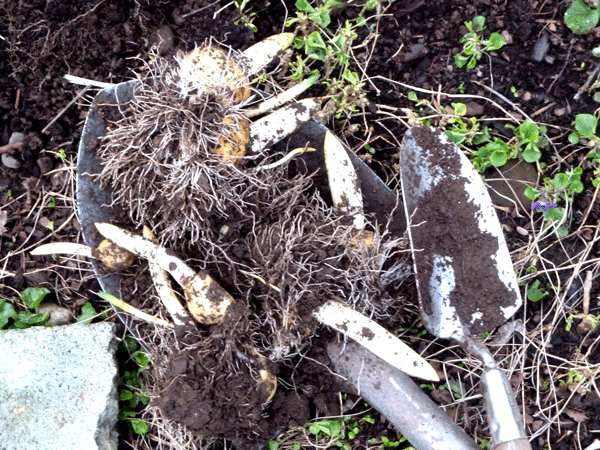 These were Allium gigantum which is a really fitting name as they are huge, purple puffballs in the garlic/onion family (pictured below). We grow them just for decorative purposes and they typically bloom in April/May. The flowers stick around for most of the summer, then dry standing up in the fall. I remember they were pricey when I originally bought them, with a package containing just 2-3 bulbs. I probably replanted about 15 though from those initial bulbs.
 Still on the agenda are dividing and replanting the irises and daylilies, but time is running out. Signs of spring are emerging on the cherry and quinces. Plus this gigantic baby belly of mine is really making it difficult to kneel down and dig up bulbs and tubers. If this is on your agenda, better get busy now before they bloom!
February 21, 2012
New Fruit Trees
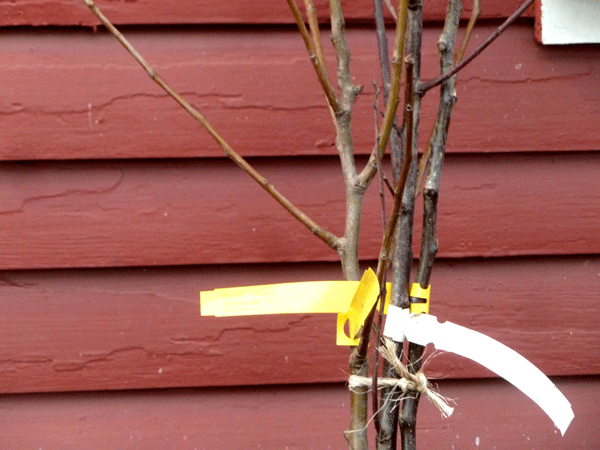
We have three new additions to our homestead! No, the baby is not one of them – yet. This past weekend we purchased three new, bareroot fruit trees to fill in some holes in our garden. Nothing makes me happier than adding new, exciting plants to our food forest.
 We lost two fruit trees during the two years we rented our house, so it was important to me to get new ones in the ground asap. Fruit trees often take three or more years after planting to produce fruit. And as the saying goes, the best time to plant a fruit tree was ten years ago.
 I picked up an European Pear called Rescue that promises to be vigorous, productive and well-suited for the Pacific NW. The fruit will be yellow with a reddish-orange blush on it, which should stand out nicely in the garden. This replaced the pear tree we lost and will provide cross-pollination for the our other pear tree that survived. (Florence supervised the planting)
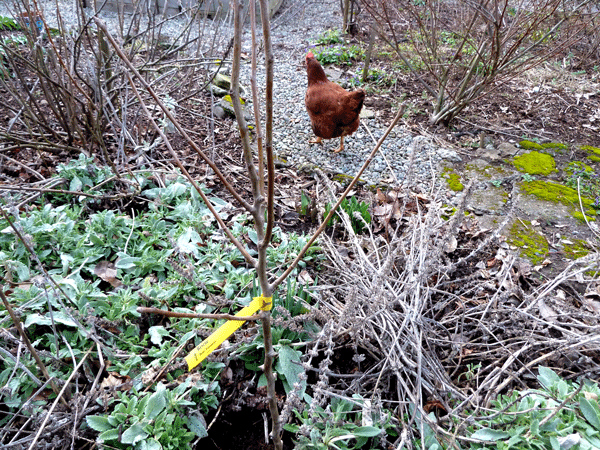 In the back corner of our homestead was a Goldenchain tree, initially planted to fix the nitrogen in our soil which would help the understory plants thrive. Unfortunately, the tree has never done well and I discovered recently that Portland lists this species as noxious! Often that is one step on the road to plants being considered invasive, so I decided to pull the tree and replace it with something more productive.
 I planted a semi-dwarf apple tree called Enterprise in its place. The semi-dwarf size will be bigger than our other trees – probably around 15-16 feet at maturity. That should "anchor" the back northeastern corner of the garden and provide more fruit without shading any competing trees. Enterprise is a disease-resistant variety, good for fresh eating or baking, and claims to be easy to grow. It looks like a stick right now, but come springtime this apple tree will take off!
My most exciting new fruit tree is a Mirabelle Plum – a tree I have been obsessed with since discovering it four years ago during a One Green World fruit tasting. At the time, the nursery was unsure if they would cultivate them, but they got a great response from customers and now have it available for sale. Oh my goodness – one of the best plums I have ever tried!
Mirabelle Plums are an old French type of plum and this particular variety was golf ball-sized with a tiny, cherry-sized pit. So you can pop the whole thing in your mouth! The yellow fruit had a pink blush and sweet flavor. After four years of pining for that plum, finally we have one planted in our backyard! Plums are self-fertile, so just one tree should give us some tasty fruit in a few seasons.
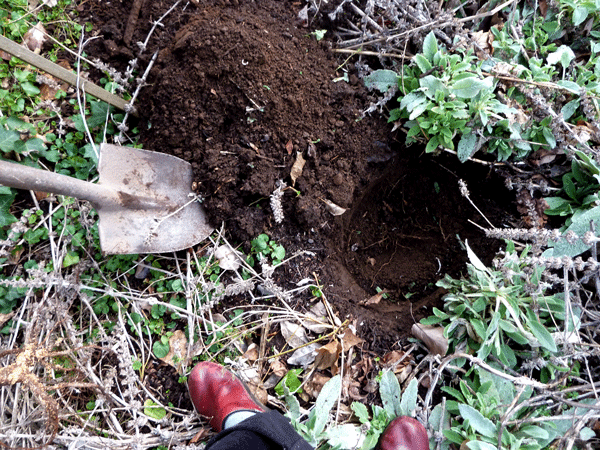 These beloved trees were very carefully planted, which is no easy task at 39 weeks pregnant… It's so important not to skimp on the planting process. I dug hole slightly larger than the root areas, carefully placed the trees, then covered with soil right to the soil line. Burying the trees too deep or too shallow will eventually kill them, so the right height is key. Don't supplement the soil yet either – the trees need to get used to your soil type and babying them with lush soil could discourage them from stretching out their roots.
Gentle rains came later in the evening to soak them in. A month or two from now they will wake up from winter with blooms in their new home. It's amazing how $60 bucks spent on trees can transform a garden and a gardener's mood. If you are planning to add some new ones, now is the best time to plant so get growing!
February 17, 2012
Recipe: Insomnia Teacake
Insomnia has begun to really kick in for me on this home stretch of pregnancy. The combination of waking up every two hours to use the bathroom and being kicked in the ribs throughout the night (it's okay, Bug… I'd rather you move too much than too little!) has made for some rough nights of sleep. Some nights it's just better to throw in the towel and make nighttime productive time.
 In the wee hours I decided to bake up a teacake – a little treat for the morning when I am feeling sleepy or maybe a tasty snack in the afternoon when I wake up from a nap. It uses lots of eggs for such a small cake and would be divine with some preserves served alongside. You can find the original recipe here and my summarized recipe below:
1 c. sugar
3/4 c. unsalted butter
zest and juice of one lemon
2 1/4 c. flour
1 tsp. baking powder
1 tsp. salt
 Cream together the sugar, butter, lemon zest and juice. Add eggs one at a time, beating well after each one. In a separate bowl, mix flour, baking powder and salt. Add dry ingredients to wet ingredients and stir until just combined. Pour into a buttered loaf dish and bake at 350 degrees for 35-45 minutes, or until golden and a toothpick comes out clean.
 Rather than ice the cake, I dollop some of my strawberry-lemon marmalade onto each slice. It didn't fully set when I cooked it up last fall, so it will make the perfect accompaniment to a sweet cake. A great way to incorporate some preserves and make use of these small windows of time.
February 15, 2012
Easy Spring Veggies
I'm keeping it simple with my spring vegetable garden this year. Baby could arrive anytime between now and the next 3-4 weeks, which means I will be down for the count come March for planting. Instead, I am planting some easy-going veggies now that can stand some neglect this spring.
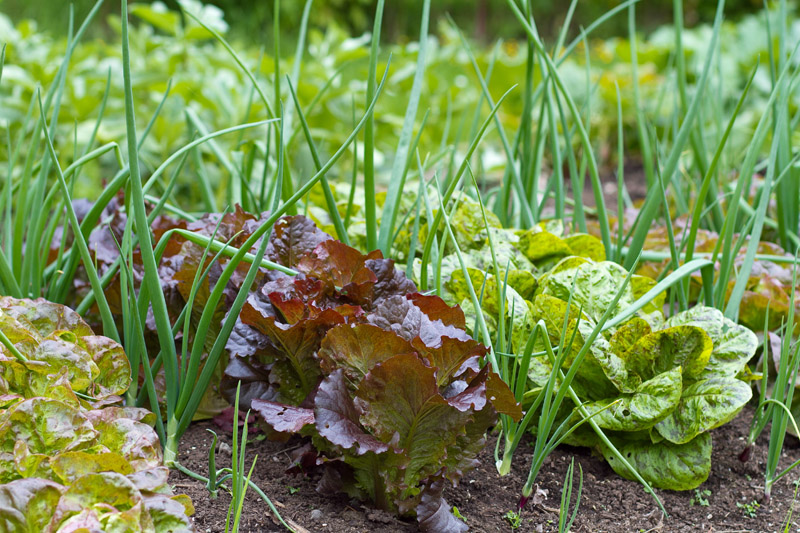 Lettuce & Green Onions – this is a classic companion planting combination that looks great in the bed and enjoys the cool maritime spring. We eat salad at almost every meal, so we definitely need a good supply in the garden.
Potatoes – Perhaps the easiest of all easy vegetables to grow, potatoes get dug into the ground sometime around St. Patrick's Day. Mine are going in a bit early, but should be fine. I bury them about 4-8″, wait for the greens to pop up, then keep mounding soil around them so just 4″ of greens are above ground.
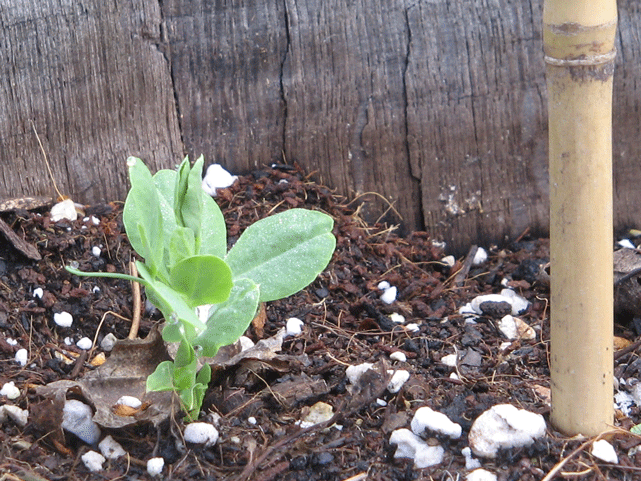
 Peas – These are said to be Thomas Jefferson's favorite veggie and who can blame him? They say "plant your peas on President's Day" – that's this next week! I'm planning to trellis mine with smaller sticks in the raised beds and along the teepee I have out in the garden. By the time the peas wilt from the heat of June, beans will take their place.
 Onions & Shallots – I am planting onion sets and shallots in the next week out in the garden, as there is always a small corner to fit these into. Once planted, I can walk away and ignore them until the hotter season when I will hand irrigate them.
These easy veggies should give me a start on the season without requiring much maintenance for the first few months of Spring. Some April/May, I am planning to "cheat" with plant starts from the nursery. It pains me not to have the variety choices that come with growing from seed, but I am also trying to be realistic (somewhat) about the challenges having a newborn will bring. I am optimistic that we'll get the hang of baby duties by the time tomatoes go in the ground!
Easy-Going Spring Veggies
I'm keeping it simple with my spring vegetable garden this year. Baby could arrive anytime between now and the next 3-4 weeks, which means I will be down for the count come March for planting. Instead, I am planting some easy-going veggies now that can stand some neglect this spring.
Lettuce & Green Onions – this is a classic companion planting combination that looks great in the bed and enjoys the cool maritime spring. We eat salad at almost every meal, so we definitely need a good supply in the garden.
Potatoes – Perhaps the easiest of all easy vegetables to grow, potatoes get dug into the ground sometime around St. Patrick's Day. Mine are going in a bit early, but should be fine. I bury them about 4-8″, wait for the greens to pop up, then keep mounding soil around them so just 4″ of greens are above ground.
Peas – These are said to be Thomas Jefferson's favorite veggie and who can blame him? They say "plant your peas on President's Day" – that's this next week! I'm planning to trellis mine with smaller sticks in the raised beds and along the teepee I have out in the garden. By the time the peas wilt from the heat of June, beans will take their place.
Onions & Shallots – I am planting onion sets and shallots in the next week out in the garden, as there is always a small corner to fit these into. Once planted, I can walk away and ignore them until the hotter season when I will hand irrigate them.
These easy veggies should give me a start on the season without requiring much maintenance for the first few months of Spring. Some April/May, I am planning to "cheat" with plant starts from the nursery. It pains me not to have the variety choices that come with growing from seed, but I am also trying to be realistic (somewhat) about the challenges having a newborn will bring. I am optimistic that we'll get the hang of baby duties by the time tomatoes go in the ground!
February 10, 2012
Portland Prospects
Although I am in the midst of writing my thesis, I am already looking ahead toward June when I get to walk across that stage and accept my masters degree in landscape architecture. Focusing on graduating is helping my motivation stay strong amongst the many distractions around me – namely the baby kicking my rib cage.
 Last week I had the pleasure of shadowing a great local firm, GreenWorks, for the day. They do lots and lots of work with stormwater and green streets, as well as fun public projects like parks and the new MAX line. We visited a few sites around town and got the impression that they were a really positive, supportive firm.
 In part that has spurred me to revamp my design portfolio and get feedback from some of my favorite designers in town before baby arrives. (If you want to kill some time looking at pretty pictures, take a look at the link above.) It's hard to know how baby Bug will change my life, but I have always been very career driven. After being home with her this spring, I am expecting to want to get out into the job work and make my mark.
 My posts have not come as frequently over the last couple weeks because I have been pouring over my portfolio and jamming on my thesis. Just like the process of gardening, I'm planting lots of seeds this month and hoping it leads to something exciting this summer.
February 7, 2012
Serious Nesting
It's hitting me more and more that in a few short weeks there will be a baby living here. The pregnancy has been great, but I almost just expect on some level to stay pregnant forever now. No so…
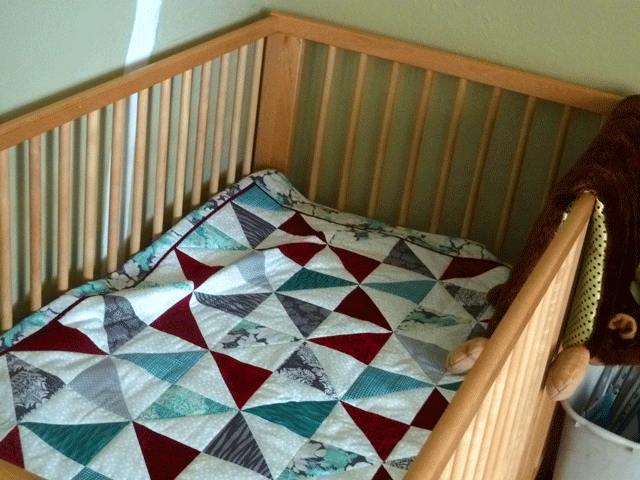 This weekend Jay and I attacked Bug's room – putting in shelves, unpacking gifts from family and friends, and all around "nesting". My mother made this gorgeous quilt with some very un-baby fabrics I picked out – something to balance out the other very baby-ish things in the room.
 Our Eugene pals set us up with her very own pair of rubber boots. I feel like she will surely NEVER be this big, but I hear it happens before you know it. It's waiting for her next to a natural wood rattle and some brightly colored toys.
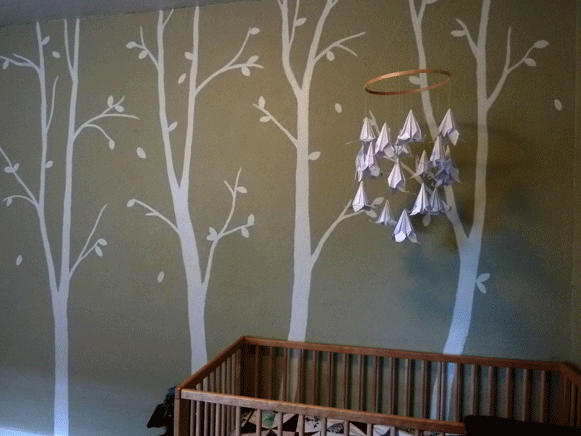
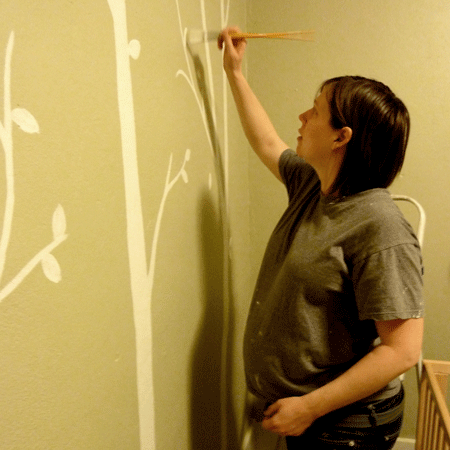 I have been planning to paint a wall mural in her room and just went for it free-hand on Sunday evening. I am so happy with it! I'm planning to add maybe 2-3 birds in red and an owl in turquoise to finish it off. My feet were super swollen from standing too long, but it was so worth it.
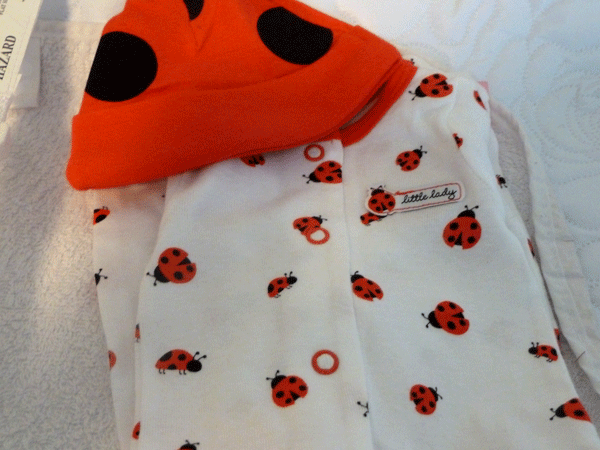
 And finally I spent some time folding all those little clothes for little Bug. It's time to pack my bag for the big day, which includes her first outfit: a labybug onesie with matching hat. Cute overload!
 It's getting really exciting around here. Still lots of prep work to do in the garden before Bug arrives and forces me to take a couple months off from projects. But we're as ready as we should be for her to come and turn our lives upside down in the most fantastic way possible.
January 31, 2012
What & When to Grow
The time for starting seeds is upon us! Not sure what to sow this year? My advice is plant what you already buy on a regular basis from the grocery store. You are more likely to use what you grow and make a dent in your grocery budget.
 When I lived in Brooklyn, I unloaded our weekly groceries and took an inventory: kale, spinach, butter lettuce, figs, onions, dried fruit, eggs, etc. Now we typically have some form of all these things growing or available at home. We preserve the figs and other fruits to get through winter, but eggs and dark leafy greens get gobbled up year round in our garden.
Not sure when to start growing? Here are some of my favorite resources to help you figure out when to plant. Typically I review some combination of these, then make my own calendar based on what I want to grow that season.
Portland Nursery has an excellent planting calendar that I often print off and keep on my fridge. They also have a great pdf on companion planting, in case you can't remember who likes who in the veggie patch.
YouGrowGirl has an awesomely nerdy "Lazy Gardener's Seed Starting Chart" created as an Excel spreadsheet. It is really handy for whatever planting zone you live in. Just enter your frost date info and the chart tells you what date to plant various crops.
Oregon Tilth has another great planting calendar. I also recommend the skinny book Maritime Northwest Gardening by Seattle Tilth that gives you a month-by-month guide on what to be working on and planting outside. It's a great read with lots of other goodies on beneficial insects, composting basics, etc.
Get your soil mixed and soil pots prepped! My flowering quinces are already hinting that Spring is coming.
January 26, 2012
Get Busy!
The growing season is not too far around the corner! Witch hazel is already blooming and my flowering quince buds are days away from opening. If we can get a handle on some garden chores now, we'll be in good shape to maximize the harvest from our homesteads this year.
 When it comes to growing your own food, here is my short list of what to get busy working on over the next couple weeks:
Finalize your planting plan
Prune your fruit trees
Cut and divide any perennials
Organize a seed swap with pals
Get your indoor seed growing operation ready
Plant new trees (now while they are dormant)
Build row covers to extend the growing season
If you are planning to start seeds indoors, check out my tutorials on making your own seed pots from newspaper. I even put up a YouTube video a year or two ago walking you through it.
Photo by Isaac Viel
When it comes to raising livestock, there are also several ways for you to get busy and prepare now for the critters:
Research breeds
Meet your neighbors
Plan and construct housing
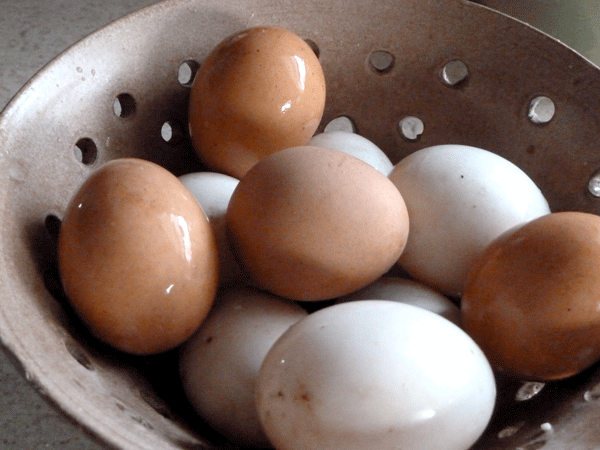
Even if livestock is legal in your city, knowing your neighbors and sharing your plans with them opens up a communication line before any potential problems crop up. If they are worried about the noise or smell, it's better to have those conversations now and reassure them, rather than have them call the city. Periodically bringing over eggs or honey is a great way to check in with them later and give them a little perk from helping your homestead.
 I'm not sure about you, but my to-do list is already getting pretty long and it's only January! My plans for new fruit trees, honeybees and a packed veggie garden is going to be challenging with our other plans this spring (i.e. this baby in my belly). But getting some of the legwork done now means I may just be able to manage new additions better this Spring.


