
Nancy Zieman's Blog, page 41
February 21, 2023
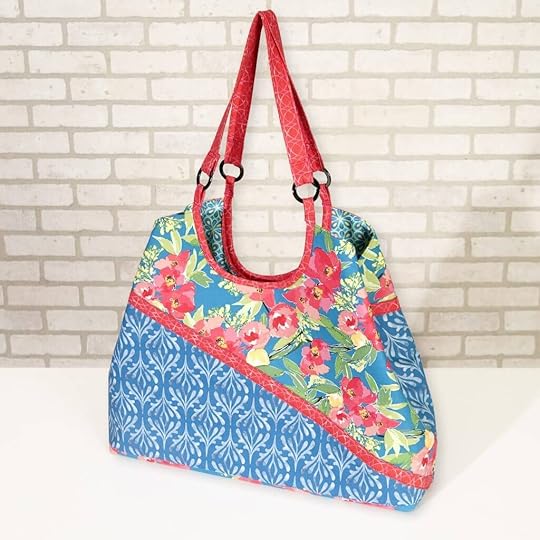
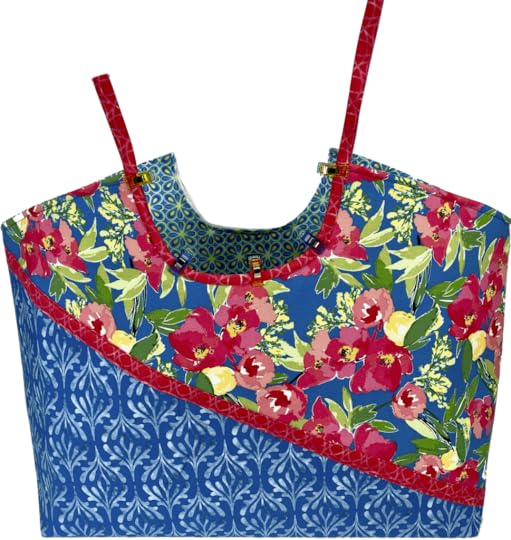
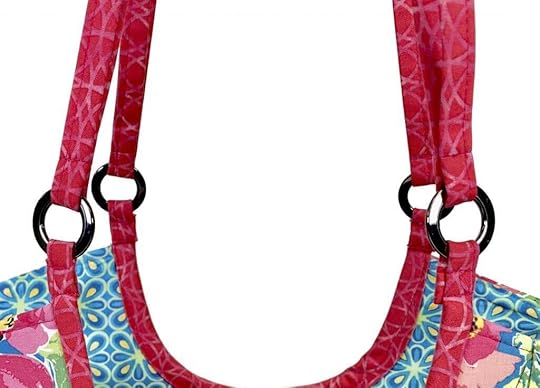
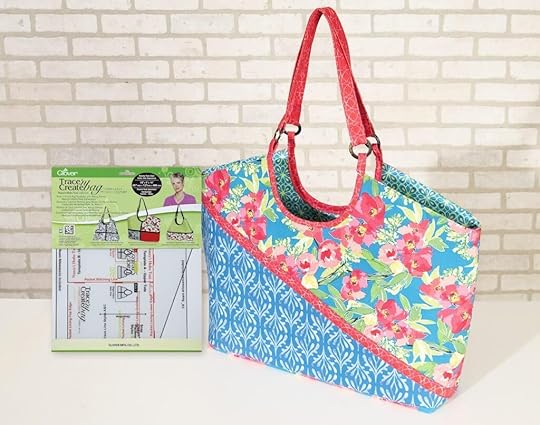
Colorblocked Shoulder Bag Bias Trim Sewing Tutorial

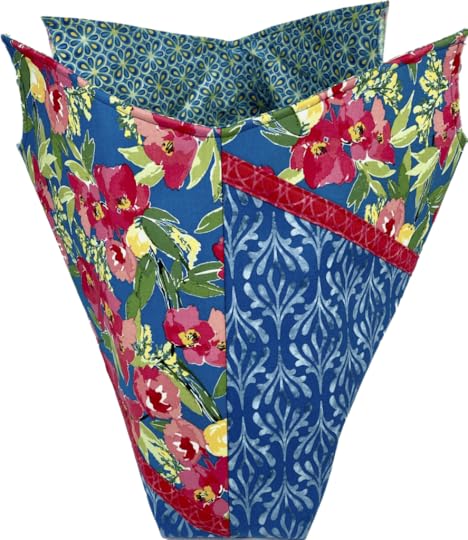
In today’s blog tutorial, we’re sharing easy tips for constructing our Exclusive Colorblocked Shoulder Bag! The outer bag assembly and inner lining assembly is magically completed with a combination of turning the bag right sides out and finishing with bias cut fabric strips! Plus Save up to 30% Off on Select Sewing Patterns & Supplies, sale ends tonight at ShopNZP.com!

Watch Stitch it! Sisters Program 207, Colorblocked Shoulder Bag!
Watch Stitch it! Sisters Program 207, Colorblocked Shoulder Bag! with hosts Deanna Springer and Dana Casey from Team NZP! In this video, the Stitch it! Sisters share how to make our Colorblocked Shoulder Bag.
Make our Colorblocked Shoulder Bag from two or more fabrics. Or, choose a fashionable fat quarter collection. Our roomy Colorblocked Shoulder Bags are beautiful – and functional for toting essentials. Our Colorblocked Shoulder Bag made with Clover’s Trace ‘n Create Bag Template Set by Nancy Zieman is a great sewing project for beginners sewers and seasoned sewists, alike!

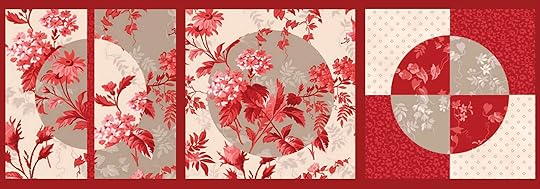
Purchase the Exclusive Colorblocked Shoulder Bag Diagonal Bag Bundle Box featuring four coordinating Glohaven floral by Lila Tueller for Riley Blake Designs, Pellon Peltex, Pellon Sof-Shape, and bag hardware, along with Team NZP’s Colorblocked Shoulder Bag Sewing Tips Sheets and Clover’s Trace ‘n Create Bag Template by Nancy Zieman – with step-by-step instructions and illustrations! You’ll supply the thread. Now available -at the lowest prices of the year- exclusively at ShopNZP.com!
Exclusive Colorblocked Shoulder Bag Diagonal Bag Bundle Box

 Exclusive Colorblocked Shoulder Bag Two-Fabric Bag Bundle Box


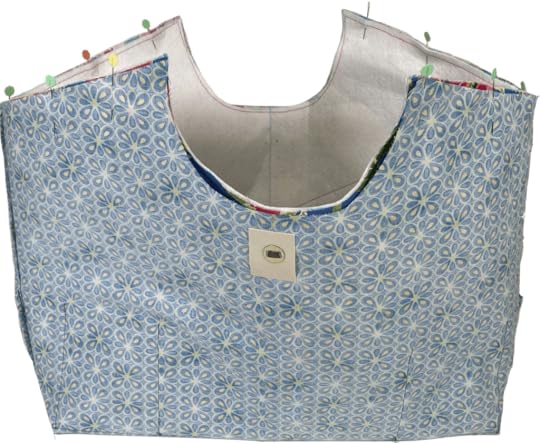

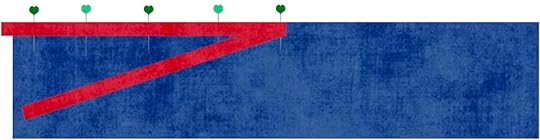
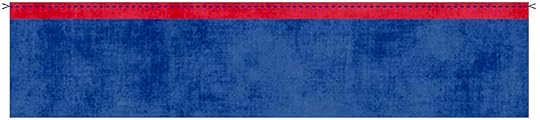
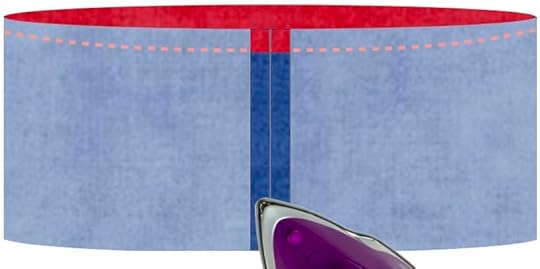
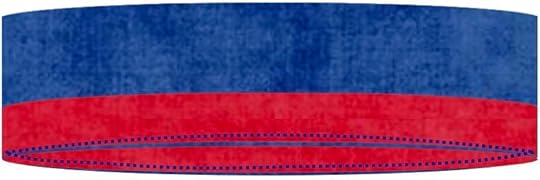
Topstitch bag top side edges as shown.Baste stitch curved edges.

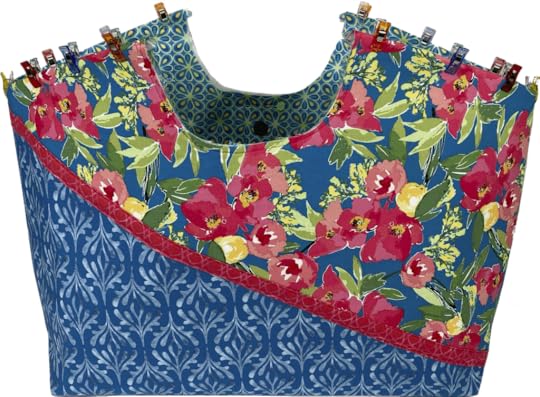
Create Trim for Bag Curve
Using rotary cutter, ruler, and mat, cut two 3″ x 21″ bias fabric strips for curve trim.Fold 3″ x 21″ bias strips right sides together. Press.


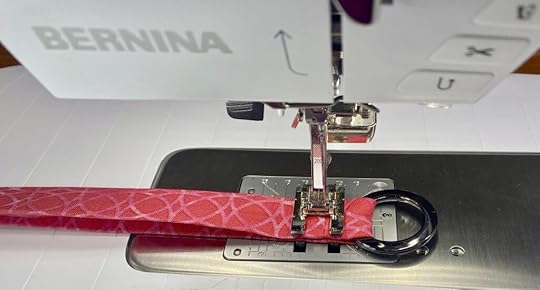
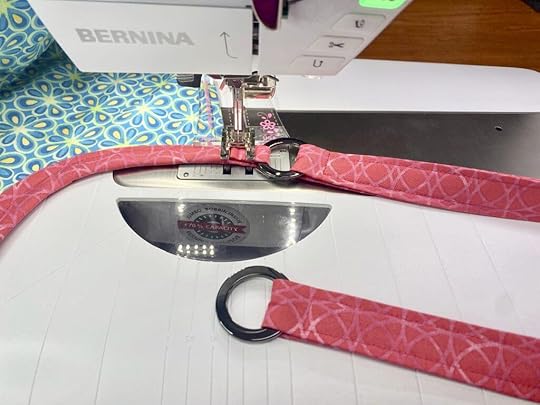
Create Handles
Using rotary cutter, ruler, and mat, cut two 2″ crosswise fabric strips for handles.Using rotary cutter, ruler, and mat, cut four 2″ x 20″ strips Sof-Shape Interfacing for handles.Following manufacturer’s instructions, press Sof-Shape Interfacing to wrong side of crosswise fabric strips.Using 1″ Bias Tape Maker, create bias trim.Insert fabric strips into wide end of 1″ bias tape maker, using a stiletto awl.Press folded fabric at narrow end of bias tape maker, while advancing maker.


Watch Stitch it! Sisters Program 207, Colorblocked Shoulder Bag Video at YouTube.com/StitchitSisters
Make one, or all four styles, of our Colorblocked Shoulder Bag! The bag templates are designed to be used over and over again!

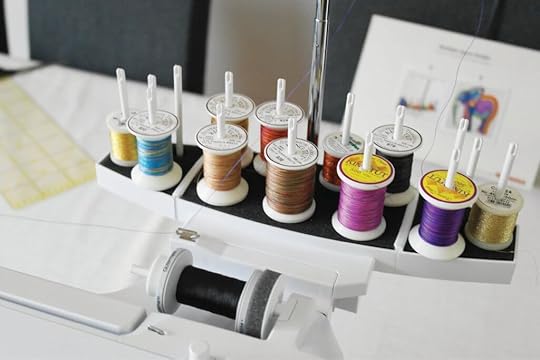 Stop in and see the BERNINA National Embroidery Accessory of the Month: The Multi Spool Stand–and SAVE 25% Off at
The Nancy Zieman Sewing Studio
in Beaver Dam.
Stop in and see the BERNINA National Embroidery Accessory of the Month: The Multi Spool Stand–and SAVE 25% Off at
The Nancy Zieman Sewing Studio
in Beaver Dam.


Happy Sewing!
Team Nancy Zieman & The Stitch it! Sisters
Nancy Zieman Productions. LLC.

Stitch it! Sisters is a production of NZ Productions LLC. Content in this feed is © copyright 2023 by Nancy Zieman Productions, LLC and may not be republished without written permission. You’re welcome to forward the email to a friend or colleague but it’s not okay to add the RSS feed automatically as content on a blog or other website. The FTC requires us to tell you that Nancy Zieman Productions, LLC has provided products by other companies in the course of doing business. The FTC requires us to advise you to take this information into consideration when reading this posting.
Make sure you are subscribed to Nancy Zieman Productions, LLC enews mailing list so you won’t miss a thing. Sign up at nancyzieman.com/blog/enews. And join us on YouTube,Facebook,Instagram and Pinterest!

September 26, 2020
NEW! Halloween Applique Coaster Sewing Tutorial & FREE! Applique Printable
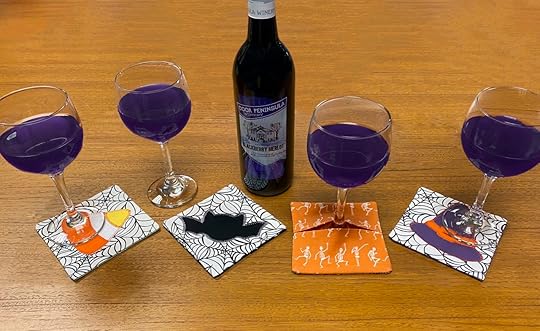
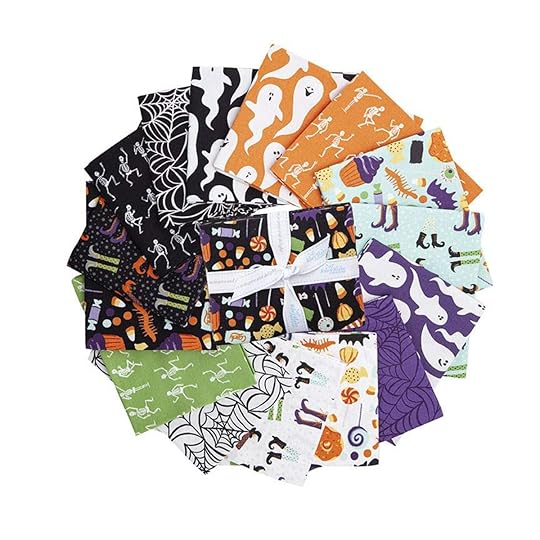
Celebrate Halloween Sewing and stitch a set of Reversible Palette Coasters with our Spooky-Fun Halloween Appliques! We stitched this easy sewing project with four fat quarters from the NEW! Hocus Pocus Fat Quarter Bundle! Our reversible drink coasters, or mug rugs, feature an envelope back and a front flat surface — an ideal “palette” for showcasing seasonal appliques! The reverse side opens to wrap around the base of a stemmed-glass.

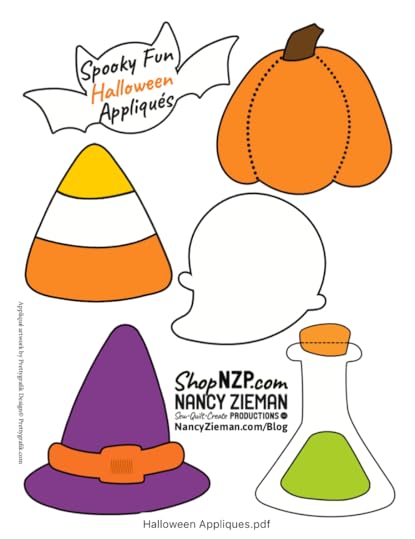
Download and print our FREE! Halloween Spooky Fun Applique Printable Patterns.
Halloween Palette Coasters Supply Listing
Team NZP’s FREE! Halloween Spooky Fun Applique Printable Patterns
Four coordinating cotton quilting fabrics from the NEW! Hocus Pocus Fat Quarter Bundle.
Assorted fabric scraps – for appliques
Quilter’s Starch Savvy
Pellon’s® ShirTailor Interfacing by the Yard
Eze-View Pressing Cloth
Non-Stick Teflon Pressing Sheet
Wonder-Under Paper Backed Fusible Web
Clover’s 5-1/8″ and 6-3/4″ Bordeaux Ultimate Scissors
Open Toe Applique Presser Foot
Clover’s Straight Tailor’s Awl/Stiletto
Clover’s Point 2 Point Turner
Clover’s Wonder Clips
Clover’s Rotary Cutter and Mat, & Ruler
Schmetz Chrome Embroidery Needles, Size 75/11
Optional: 1/4″ Quilting Presser Foot, and use Nancy Zieman’s Wrapped Corner Technique to stitch and “wrap” coaster seams toward center – folding along previous stitching lines. Stitch seams twice, for durability! Find Nancy Zieman’s Wrapped Corner Technique in our previous Blog Posting.
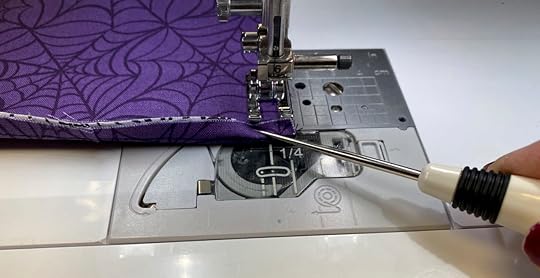
 Use Clover’s Straight Tailor’s Awl Stiletto to assist feeding fabric layers under presser foot.
.

Turn Reversible Palette Coaster right side out, using Point 2 Point Turner to push out corners.
Press.
Repeat steps above and complete additional coasters.
Our Reversible Palette Coasters are so fun to make, you’ll be stitching new coasters for every holiday! And, they make a great addition to a gift basket!
Halloween Palette Coasters Supply Listing
Team NZP’s FREE! Halloween Spooky Fun Applique Printable Patterns
Four coordinating cotton quilting fabrics from the NEW! Hocus Pocus Fat Quarter Bundle.
Assorted fabric scraps – for appliques
Quilter’s Starch Savvy
Pellon’s® ShirTailor Interfacing by the Yard
Eze-View Pressing Cloth
Non-Stick Teflon Pressing Sheet
Wonder-Under Paper Backed Fusible Web
Clover’s 5-1/8″ and 6-3/4″ Bordeaux Ultimate Scissors
Open Toe Applique Presser Foot
Clover’s Straight Tailor’s Awl/Stiletto
Clover’s Point 2 Point Turner
Clover’s Wonder Clips
Clover’s Rotary Cutter and Mat, & Ruler
Schmetz Chrome Embroidery Needles, Size 75/11
Optional:
September 24, 2020
10-20-30 Minutes to Sew A Tunic – the Nancy Zieman Way
 Watch Stitch it! Sisters Program 114: 10-20-30 Minutes to Sew A Tunic – The Nancy Zieman Way!
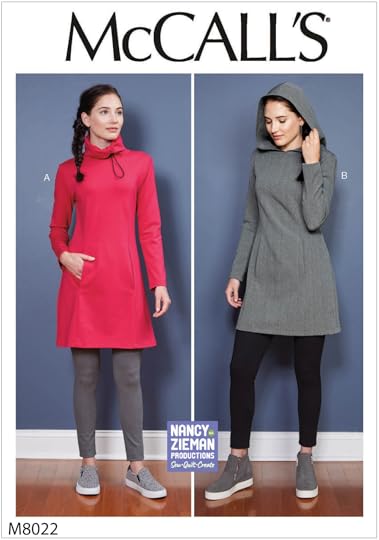
Watch the Stitch it! Sisters Program 114, 10-20-30 Minutes to Sew A Tunic – The Nancy Zieman Way with hosts Deanna Springer and Dana Casey. In this video, the Stitch it! Sisters share Nancy Zieman’s tried and true knit garment sewing tips, and easy pattern assembly steps for sewing our McCall’s Tunic & Dress Pattern, M8022. Gain the confidence and know-how to sew with knit fabrics, every time!
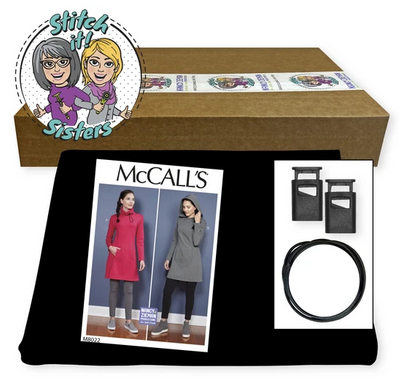

Then, head over to ShopNZP.com and purchase one of our NEW! Sew a Tunic Bundle Box with Black Ponte Fabric curated by the Stitch it! Sisters! Each Tunic Bundle Box includes McCall’s M8022 Tunic & Dress Pattern by Team NZP – a stylish pullover tunic/dress pattern with flattering side front and side back seams, a center front pocket hidden between the seams, long sleeves, and a cinching cowl collar — with elastic cord and stopper; Ponte Knit Fabric with 5% spandex for durability and sag-free comfort while wearing; 1/2 yd. 1/8″ Black Elastic Shock Cord and two Black Rectangle Barrel Cord Locks – for creating our unique cinching cowl collar! Now available at ShopNZP.com! Quantities are limited.

SHOP our NEW! Patterns and Exclusive Bundle Boxes at ShopNZP.com
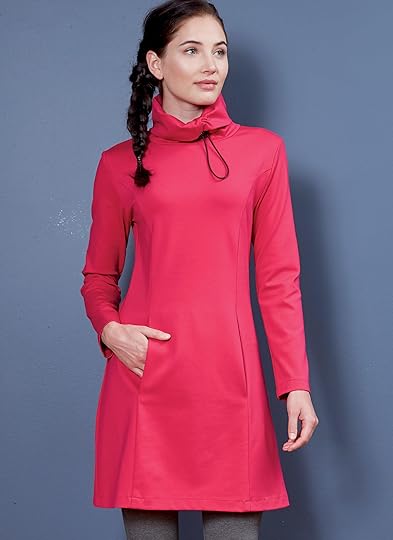
Nancy Zieman’s 10-20-30 Minutes to Sew A Tunic McCall’s – M8022
See how to easily complete our McCall’s M8022 Tunic Pattern by grouping garment construction steps into Nancy’s units of 10, 20, or 30-minutes or less – and maximize your sewing time. ⏰

⏰ Nancy’s Classic Timesaving Tips makes the sewing process easy, even for beginners!
10-20-30 Minutes to Sew A Tunic – The Nancy Zieman Way Tools & Supplies:
NEW! Sew a Tunic Bundle Box with Black Ponte Fabric
McCalls’ M8022 Tunic/Dress Pattern by Team NZP
Clover’s Supersize 5-in-1 Sliding Gauge
Clover’s Clip ‘n Glide Bodkin
Clover’s Hot Ruler
Clover’s I Sew For Fun Heart-Shaped Pins
Clover’s Pin ‘n Stow Magnetic Wrist Pin Cushion
Pellon’s Easy-Knit Interfacing, 5 yd. Pack
Eze-View Press Cloth
Clear Elastic
Sewer’s Fix-it Tape
Schmetz Chrome Jersey Stretch Ball Point Needles Size 80/12
Iron
Shop Pattern Sewing Supplies & Bundle Boxes at ShopNZP.com!
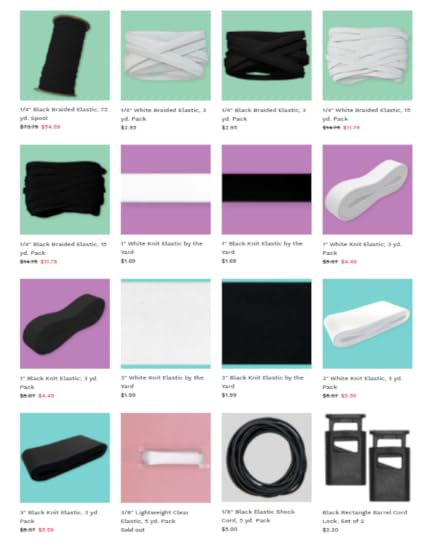
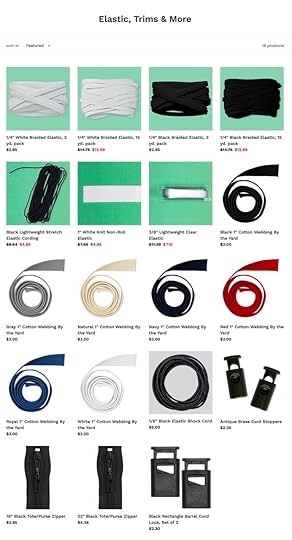
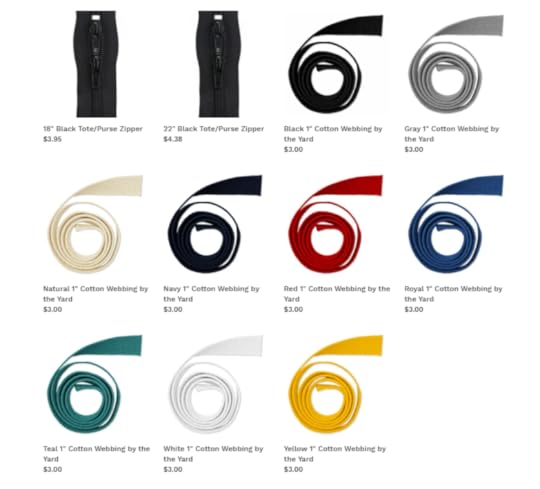
Shop Elastic, Cotton Webbing, Zippers & More at ShopNZP.com!
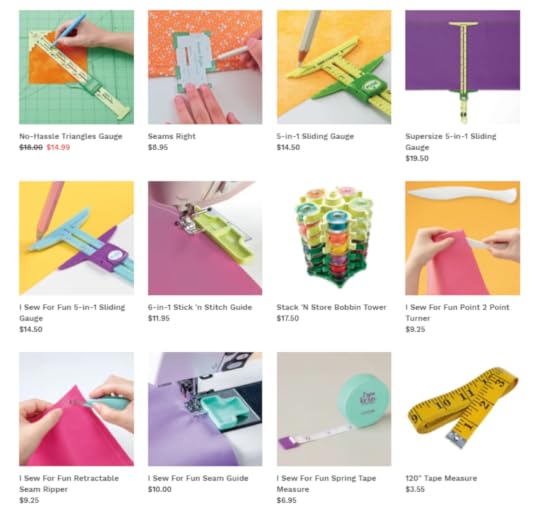
Shop Clover Tools & Sewing Supplies at ShopNZP.com!
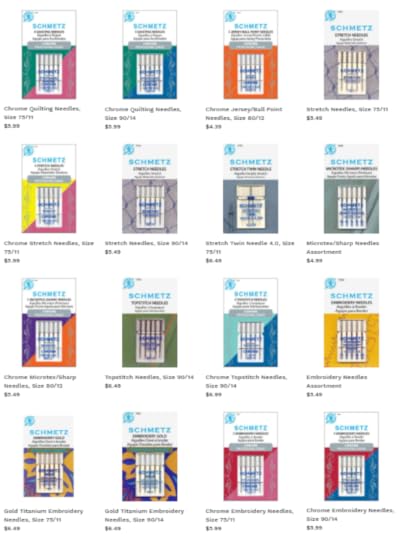
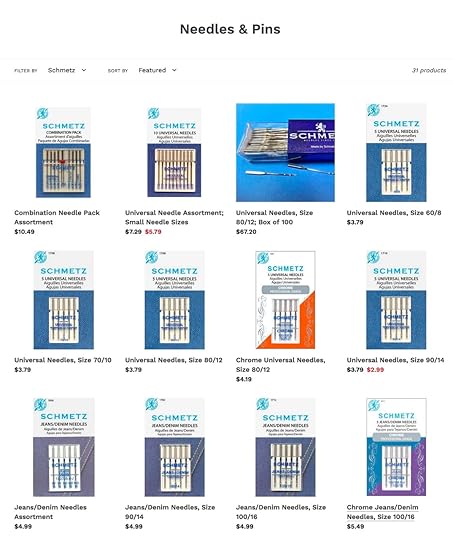
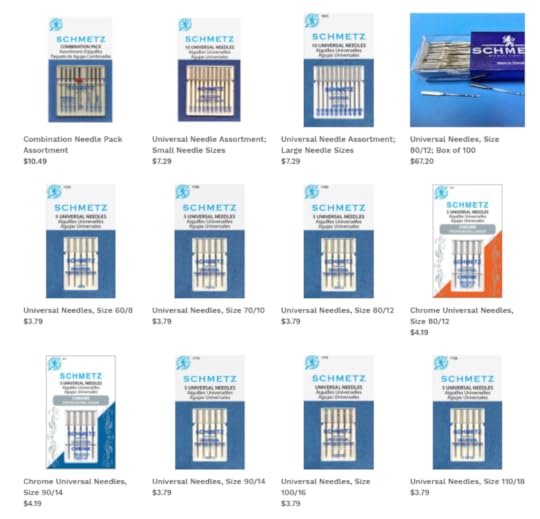
Shop Schmetz Sewing Machine Needles at ShopNZP.com!

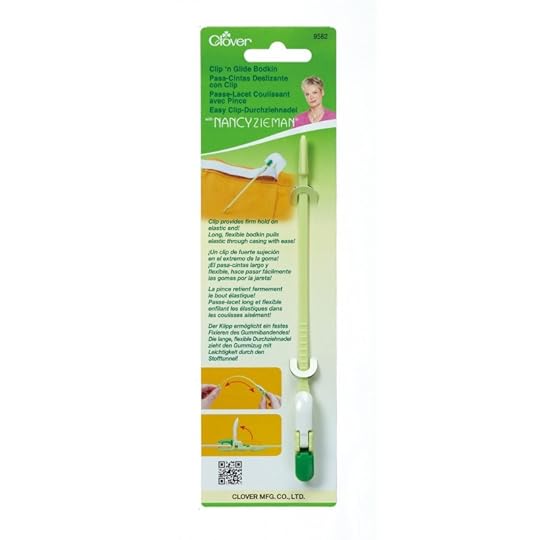
For a chance to be the random winner of a Clover’s Clip’ N Glide Bodkin, please leave a comment below.
Clover will give away one Clover Clip ‘N Glide Bodkin to one US resident in the 48 contiguous states. Winner must reply within 30 days to the official giveaway announcement email message – sent from Nancy Zieman Productions. Email Team NZP at info@ziemanproductions.com.
Happy Sewing!
Team Nancy Zieman
Nancy Zieman Productions. LLC.
[image error]
Stitch it! Sisters is a production of NZ Productions LLC. Content in this feed is © copyright 2020 by Nancy Zieman Productions, LLC and may not be republished without written permission. You’re welcome to forward the email to a friend or colleague but it’s not okay to add the RSS feed automatically as content on a blog or other website. The FTC requires us to tell you that Nancy Zieman Productions, LLC has provided products by other companies in the course of doing business. The FTC requires us to advise you to take this information into consideration when reading this posting.
Make sure you are subscribed to Nancy Zieman Productions, LLC enews mailing list so you won’t miss a thing. Sign up at nancyzieman.com/blog/enews. And join us on YouTube, Facebook, Instagram and Pinterest!

September 22, 2020
Tunic Pattern Fitting Tutorial – the Nancy Zieman Way
Watch the Stitch it! Sisters Program 113, Tunic Pattern Fitting – The Nancy Zieman Way with hosts Deanna Springer and Dana Casey. In this video, the Stitch it! Sisters share Nancy Zieman’s tried and true pivot and slide pattern fitting techniques for fitting our McCall’s Tunic & Dress Pattern, M8022.
Watch Stitch it! Sisters Program 113: Tunic Pattern Fitting – The Nancy Zieman Way!
Then, head over to ShopNZP.com and purchase our Pattern Fitting – The Nancy Zieman Way Bundle Box curated by the Stitch it! Sisters! Each Pattern Fitting – The Nancy Zieman Way Bundle Box includes Nancy’s Confident Sewing Collection Book featuring Nancy’s Pattern Fitting Techniques for sewing a perfect fit for jackets, skirts, and pants, along with a roll of Pattern Making Paper. Quantities are limited.
SHOP Team NZP’s McCall’s Patterns and Exclusive Bundle Boxes at ShopNZP.com
Watch Stitch it! Sisters Program 113: Tunic Pattern Fitting – The Nancy Zieman Way!
Watch the Stitch it! Sisters Program 113, Tunic Pattern Fitting – The Nancy Zieman Way. Learn Nancy Zieman’s tried and true pivot and slide pattern fitting techniques. Nancy’s techniques and expert advice give you the confidence and know-how to create perfectly fitting garments, every time, even for beginners!
Pattern Fitting Tutorial for McCall’s Tunic & Dress Pattern M8022
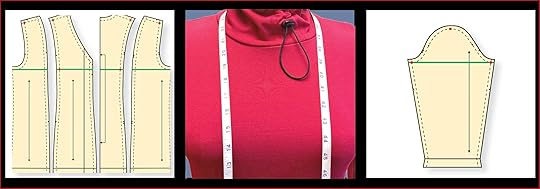
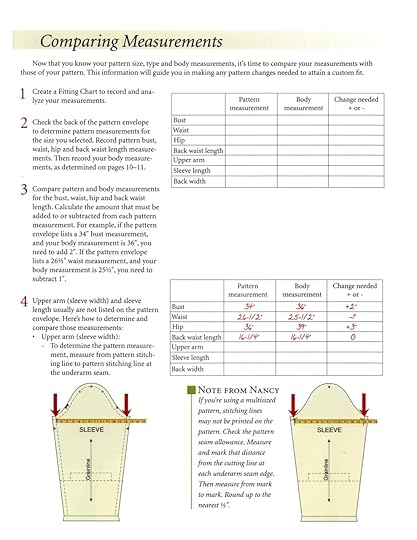
Use Nancy’s Right•Size Measurement Fitting Chart to determine your pattern size to cut out.

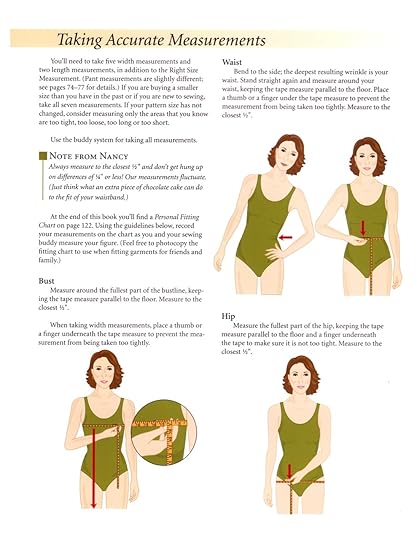
Find your Right•Size Front Width Measurement by measuring straight across the front chest, between the creases in your skin–where your arm meets your body.

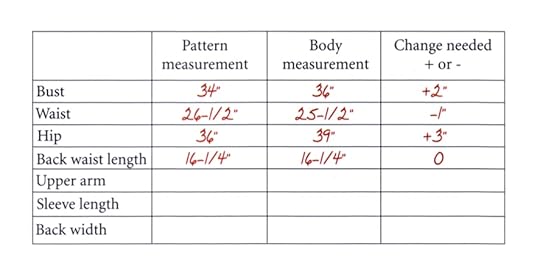
Use Nancy’s Personal Fitting Chart to record your body measurements and plan your pattern alterations.
Take a small amount of time and follow Nancy’s step-by-step body measuring and fitting techniques for a pattern that is “fit to be tried.”
In the Stitch it! Sisters Program 113, Tunic Pattern Fitting – The Nancy Zieman Way Video , we share Nancy’s tried and true pivot and slide pattern fitting techniques for fitting our McCall’s Tunic & Dress Pattern, M8022.
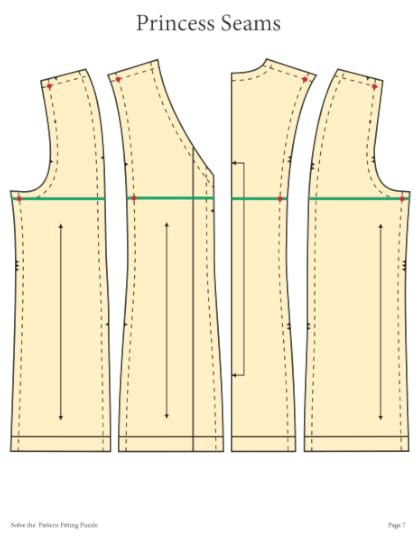
Our McCall’s Tunic & Dress Pattern, M8022 features princess seams–for a flattering fit for all sizes, along with an optional hidden front pocket between the side front seams! Because our McCall’s Tunic & Dress Pattern, M8022 features princess seams–you’ll divide your needed increases (above) by eight, as we’ll have eight seams to when we’re later sewing our princess-style tunic.
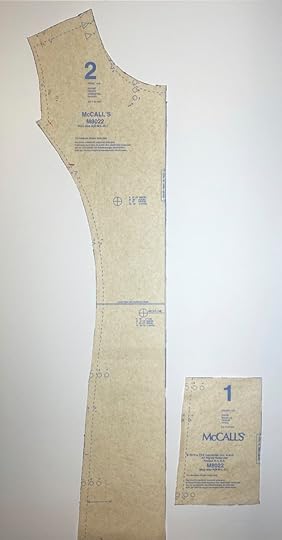
When the pocket pattern piece is stacked onto the center front pattern piece–you’ll see this pocket is located perfectly between the side front seams!

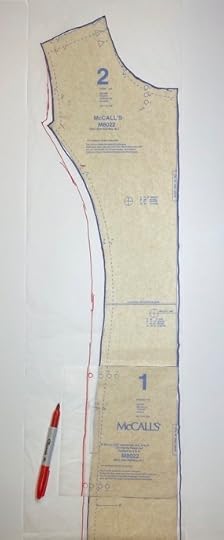
In our Stitch it! Sisters Program 113, Tunic Pattern Fitting – The Nancy Zieman Way Video , we show step-by-step how to increase the bust line, waistline and hip line with Nancy’s easy pivot and slide pattern fitting techniques. Using Pattern Making Paper trace original center front pattern piece with a black marker. Using Clover’s 5-in-1 Sliding Gauge , measure and mark desired pattern increase amounts with a red marker.
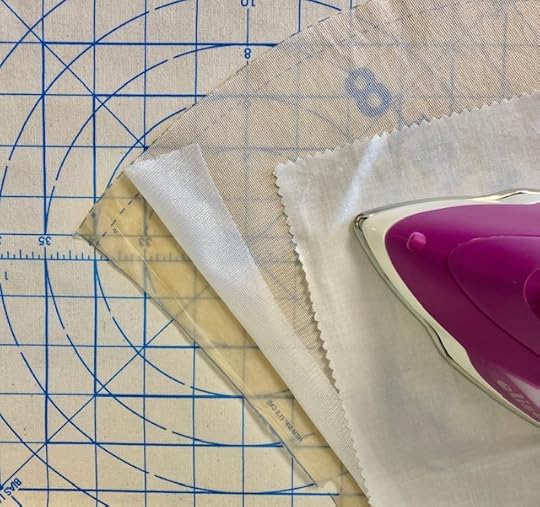
Before beginning the pattern fitting process, press Pellon’s Easy-Knit Interfacing to the back of each pattern piece, for ease in handling–plus durability! Be sure to press with an Eze-View Press Cloth and no steam.
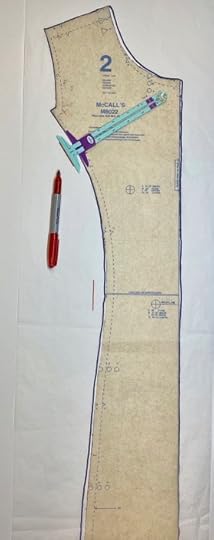 Place a pin at the stitching line where the shoulder and armhole intersect. “Pivot” the pattern to the desired bust line increase amount, and trace the outline of the original pattern edge.
Keeping the pattern pivoted, move the pin to the stitching line where the armhole and side front seam intersect, pivot the pattern to meet the desired waistline increase, and trace the outline of the original pattern edge.
Keeping the pattern pivoted, move the pin to the stitching line at the waistline, pivot the pattern to meet the desired hip line increase, and trace the outline of the original pattern edge.
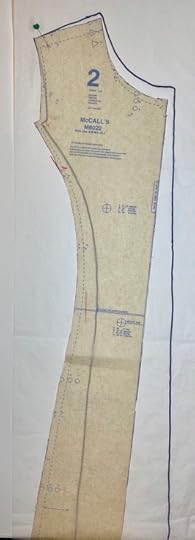
Keeping the pattern pivoted, move the pin to the stitching line at the hip line, pivot the pattern to meet the hem, and trace the outline of the original pattern edge to the lower hem.
Repeat pivoting steps on the pattern side front, center back, and side back pattern pieces.
Optional: Repeat pivoting steps on the sleeve pattern, if needed.
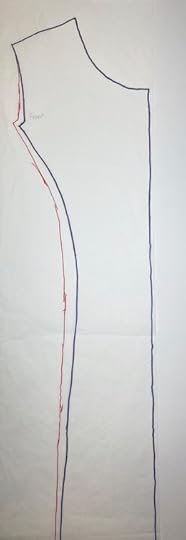
The pattern is increased in the bust line, waistline, and hip line–all while maintaining the original seams! The original cowl and sleeve pattern pieces will stitch together with the altered Right•Size pattern pieces!
Prepare the center pocket pattern piece: Using Sewer’s Fix It Tape , tape a rectangle of Pattern Making Paper to the pocket pattern piece.

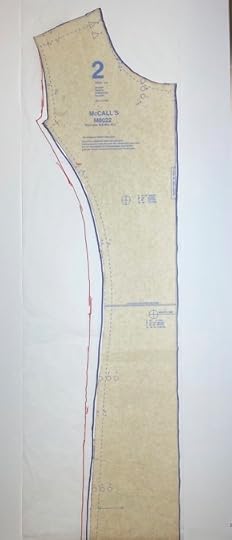
Stack the pocket pattern onto the altered center front pattern piece, matching circles, and trace the Right•Size red marked lines onto the Pattern Making Paper of the pocket pattern piece.
Transfer circle placement markings onto the Pattern Making Paper of the pocket pattern piece.
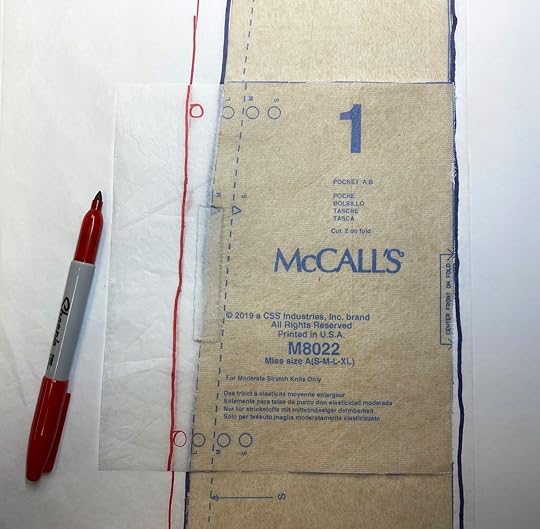
All “Right•Size pattern marked lines”–in red–are now the new pattern cutting lines. Using Sewer’s Fix It Tape , tape original pattern pieces to Right•Size pattern pieces, and cut out pattern and fabric.

Practice Nancy’s tried and true pivot and slide pattern fitting techniques using Nancy’s FREE! Mini-Pattern Pieces. Download and print Nancy’s Mini-Pattern Pieces, today!
Then, head over to ShopNZP.com and purchase our Pattern Fitting – The Nancy Zieman Way Bundle Box curated by the Stitch it! Sisters! Each Pattern Fitting – The Nancy Zieman Way Bundle Box includes Nancy’s Confident Sewing Collection Book featuring Nancy’s Pattern Fitting Techniques for sewing a perfect fit for jackets, skirts, and pants, along with a roll of Pattern Making Paper. Quantities are limited.
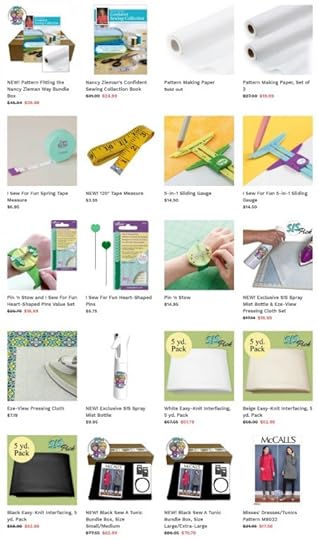
NEW! Pattern Fitting – The Nancy Zieman Way Tools & Supplies:
Pattern Fitting – The Nancy Zieman Way Bundle Box
NEW! Sew A Tunic Bundle Box with Black Ponte Fabric
McCalls’ M8022 Tunic/Dress Pattern by Team NZP
Pattern Making Paper
Sewer’s Fix It Tape
Clover’s I Sew For Fun Spring Tape Measure
Clover’s 5-in-1 Sliding Gauge
Clover’s I Sew For Fun Heart-Shaped Pins
Clover’s Pin ‘n Stow Magnetic Wrist Pin Cushion
Pellon’s Easy-Knit Interfacing, 5 yd. Pack
Eze-View Press Cloth
Red and Black Sharpie Markers
Iron
Shop Pattern Fitting Supplies & Bundle Boxes at ShopNZP.com!


Shop Pattern Fitting Supplies & Bundle Boxes at ShopNZP.com!
Shop Team NZP’s McCall’s Patterns & More at ShopNZP.com

Shop Clover Tools & Sewing Supplies at ShopNZP.com!
Shop Pellon Interfacing & Supplies at ShopNZP.com!
Shop Schmetz Sewing Machine Needles at ShopNZP.com!

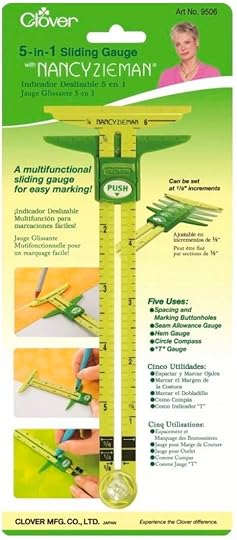
For a chance to be the random winner of a 5-in-1 Sliding Gauge from Clover, please leave a comment below.
Clover will give away one 5-in-1 Sliding Gauge to one US resident in the 48 contiguous states. Winner must reply within 30 days to the official giveaway announcement email message sent from Nancy Zieman Productions.
Happy Fitting!
Team Nancy Zieman
Nancy Zieman Productions. LLC.
[image error]
Stitch it! Sisters is a production of NZ Productions LLC. Content in this feed is © copyright 2020 by Nancy Zieman Productions, LLC and may not be republished without written permission. You’re welcome to forward the email to a friend or colleague but it’s not okay to add the RSS feed automatically as content on a blog or other website. The FTC requires us to tell you that Nancy Zieman Productions, LLC has provided products by other companies in the course of doing business. The FTC requires us to advise you to take this information into consideration when reading this posting.
Make sure you are subscribed to Nancy Zieman Productions, LLC enews mailing list so you won’t miss a thing. Sign up at nancyzieman.com/blog/enews. And join us on YouTube, Facebook, Instagram and Pinterest!
September 19, 2020
September 2020 Block of the Month: Block Row Assembly Begins!

Nancy’s Red Elegance
2020 Block of the Month
September – Block Row Assembly Begins!
Introducing the ninth tutorial in our FREE! 2020 Nancy Zieman Productions Nancy’s Red Elegance Block of the Month Mystery Quilt Series! Starting this month, we’ll begin the block row assembly – featuring the JANUARY, MARCH, JULY & AUGUST Blocks! If you haven’t already, finish stitching your January through August blocks this month. Then, assemble three different block rows – as detailed below in today’s blog posting.
In January, Team Nancy Zieman introduced the NEW! 2020 Nancy Zieman Productions Nancy’s Red Elegance Block of the Month Mystery Quilt Series. Join the NEW! 2020 Nancy Zieman Productions Nancy’s Red Elegance Block of the Month Mystery Quilt Series, anytime, by viewing the Basic Supplies and Tools Listing in the January 1, 2020 NZP BoM20 Kick Off Blog Posting.
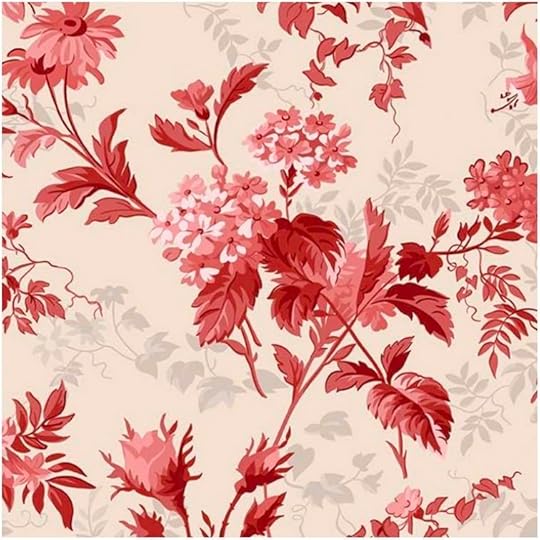
On the third Saturday of each month, we’ll feature one block design and/or tutorial, and we’ll be stitching one or more blocks of the same design each month. The blocks are created using Our NEW! Red Elegance Fabric Collection by Riley Blake and the Carefree Curves Trace ‘n Create Template Set by Nancy Zieman for Clover.
Follow along as we show step-by-step how to begin the block row assembly this month – featuring the JANUARY, MARCH, JULY & AUGUST Blocks!
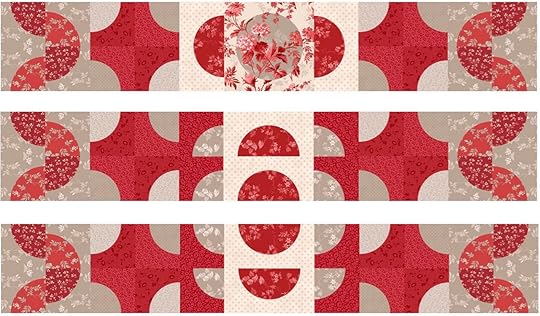
September – Block Row Assembly Begins!
NOTE: Block rows measure 8-1/2″ x 51″; 8″ x 48″ – when sewn into finished quilt.

Row One Block Assembly
 This month we’ll begin the block assembly! Gather all JANUARY, MARCH, and JULY & Blocks! And, gather Six August Blocks.
January – 1 block

March – All block assemblies
July – All blocks
August – Six blocks

Prepare your blocks for the block assembly process by pressing and starching with June Tailor’s Starch Savvy. Press and starch, press and starch.
September – Block Row Assembly Begins!
To assure blocks sections fit together – when later assembling all monthly blocks into one finished quilt – be sure to stitch the September Block Assemblies using a scant 1/4″ seam allowance, and Size 75 Schmetz Quilting Needles.

Stitch Block Row 1

Layout blocks and block segments into one row, rotating blocks, as shown.

Place blocks right sides together in pairs. Pin. Stitch.

Place blocks right sides together in pairs. Pin. Stitch.

Place blocks right sides together in pairs. Pin. Stitch.

Stitch block pairs together into one row.
Sew ONE Block Row 1, as shown, above. Set Row 1 aside, until later assembled into the finished quilt!
Stitch Block Row 2

Repeat steps above and create One Block Row 2 from the MARCH, JULY & AUGUST Blocks! Set block row aside, until later assembled into the finished quilt!


Stitch Block Row 3

Repeat steps above and create One Block Row 3 from the MARCH, JULY & AUGUST Blocks! Set block row aside, until later assembled into the finished quilt!


The September Block Assembly Rows are complete for Nancy’s Red Elegance 2020 Block of the Month!

Shop Timesaving Tools & Sewing Supplies at shopnzp.com!
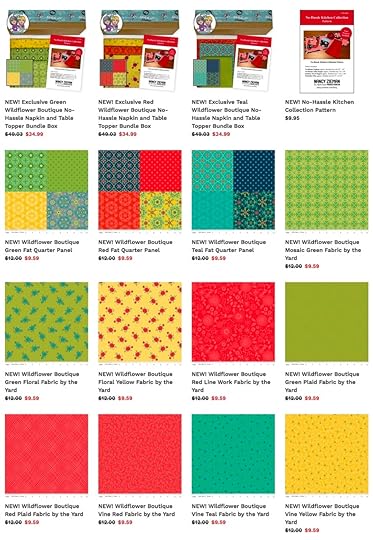
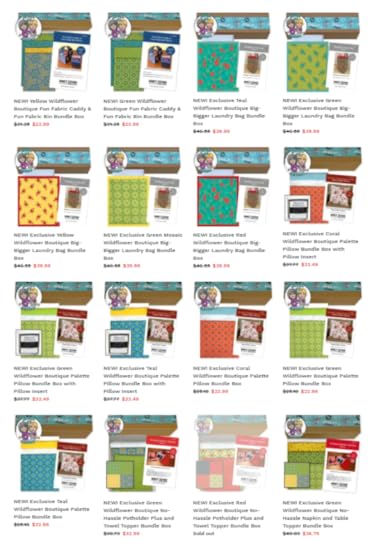
Shop NEW! Exclusive Bundle Boxes and Wildflower Boutique Fabrics at ShopNZP.com


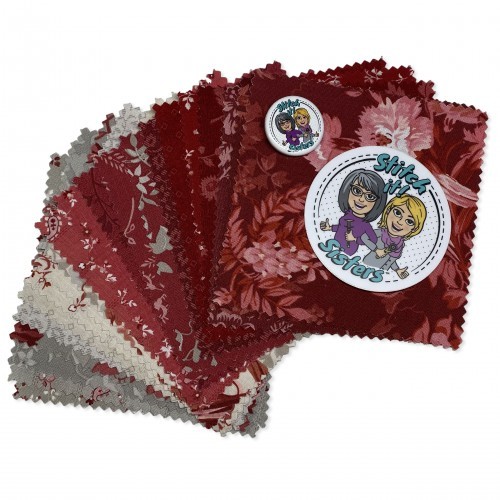
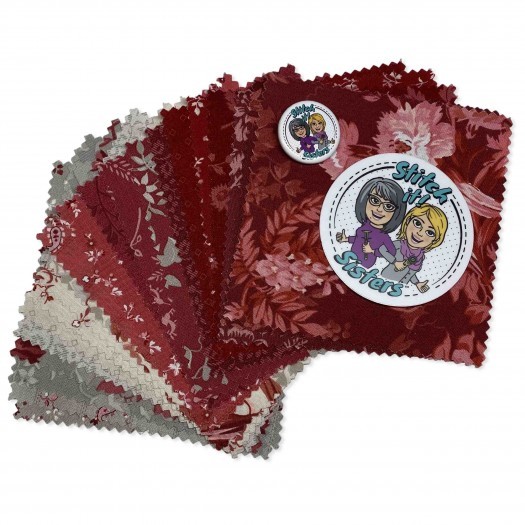 For a chance to be the random winner of a Stitch it! Sisters 5″ Fabric Short Stack with S!S button & sticker, please leave a comment below sharing your thoughts about the NEW! 2020 Nancy Zieman Productions Free! Block of the Month Mystery Quilt Series.
Nancy Zieman Productions will give away one Stitch it! Sisters 5″ Fabric Short Stack to one US resident in the 48 contiguous states. Winner must reply within 30 days to the official giveaway announcement email message – sent from Nancy Zieman Productions.

The randomly selected winner of a Stitch It! Sisters Mini Swag Bag with stickers, pin and magnet, from NZP, from the September 5 Blog Post, NEW! Wildflower Boutique Sewing Project Round Up, is Janey.
Her comment is: We are moving into a new home and the Wildflower Boutique laundry bag and kitchen bundles would add a splash of color for sure. Thanks for this opportunity!.
Happy Quilting!
Team Nancy Zieman
Nancy Zieman Productions. LLC.
[image error]
Stitch it! Sistersis a production of NZ Productions LLC. Content in this feed is © copyright 2020 by Nancy Zieman Productions, LLC and may not be republished without written permission. You’re welcome to forward the email to a friend or colleague but it’s not okay to add the RSS feed automatically as content on a blog or other website. The FTC requires us to tell you that Nancy Zieman Productions, LLC has provided products by other companies in the course of doing business. The FTC requires us to advise you to take this information into consideration when reading this posting.
Make sure you are subscribed to Nancy Zieman Productions, LLC enews mailing list so you won’t miss a thing. Sign up at nancyzieman.com/blog/enews . And join us on YouTube, Facebook, Instagram and Pinterest!
September 17, 2020
Carefree Curves in Quilts Block Sewing Tutorial and Red Elegance Fabric Clearance at ShopNZP.com
Watch Stitch it! Sisters Program 112: Carefree Curves in Quilts!
Watch Stitch it! Sisters Program 112 – Carefree Curves in Quilts Video with hosts Deanna Springer and Dana Casey. In this video, the Stitch it! Sisters share step-by-step fabric cutting and stitching techniques for making Circle Blocks, Half-Circle Blocks, and Quarter-Circle Blocks with Classic Timesaving Tips by Nancy Zieman featuring our Carefree Curves Trace ‘n Create Template by Nancy Zieman for Clover.
 Then, head over to ShopNZP.com and purchase Carefree Curves in Quilts Template Set by Nancy Zieman for Clover, a 5-yd. Pack of Pellon’s Sof-Shape Interfacing, and CLEARANCE Red Elegance Fabrics sold by the yard at ShopNZP.com.
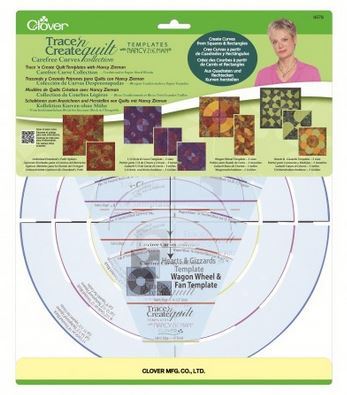
The Carefree Curves in Quilts Template Set includes:
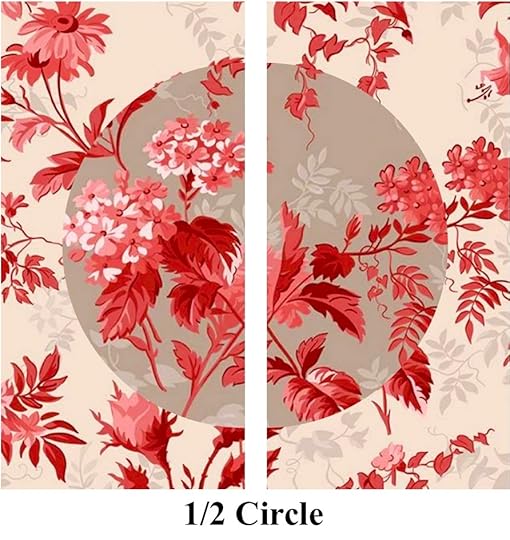
• 1/4 Circle/1/2-Circle/Circle Template—4″, 6″, and 8″ finished blocks / 8″, 12″, and 14″ finished blocks.
• Hearts & Gizzards Template—8″, 10″, 12″, 14″, and 16″ finished blocks.
• Wagon Wheel & Fan Template—16″, 18″, 20″, 22″, and 24″ finished blocks / 8″, 9″, 10″, 11″, and 12″ finished blocks.
Templates are made of sturdy, reusable plastic and are designed to be used over, and over again!
Quantities are limited.
Watch Stitch it! Sisters Program 112: Carefree Curves in Quilts!
Watch Stitch it! Sisters Program 112: Carefree Curves in Quilts!
Watch Stitch it! Sisters Program 112 – Carefree Curves in Quilts Video. See how easy it is to stitch Circle Blocks, Half-Circle Blocks, and Quarter-Circle Blocks with the Carefree Curves Trace ‘n Create Template by Nancy Zieman. Plus see a gallery of virtual quilt designs. The sewing is streamlined with Nancy’s Techniques and is an ideal project for beginning quilters!
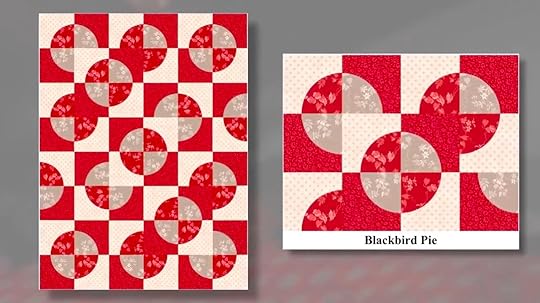
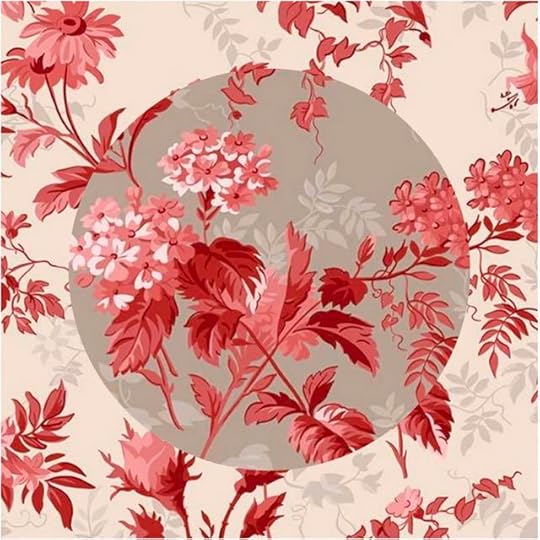
Carefree Curves in Quilts Half-Circle Block Sewing Tutorial: 14″ Half-Circle Block – featuring The Waxing & Waning Quilt Block
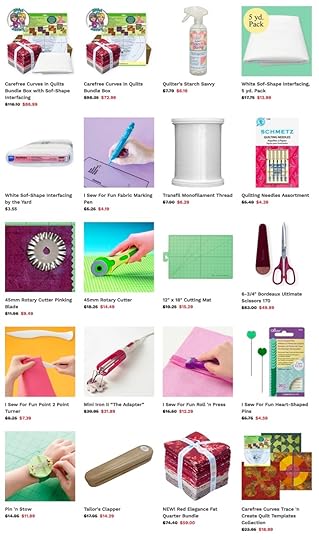
Carefree Curves in Quilts Tools & Supplies:
Carefree Curves Template Set
CLEARANCE Red Elegance Fabric sold by the yard at ShopNZP.com
Pellon Sof-Shape Fusible Interfacing
Clover’s I Sew For Fun Fabric Marking Pen
Clover’s Point 2 Point Turner
Rotary Cutting Tools: 45 mm Rotary Cutter, Cutting Mat, and Ruler
45mm Rotary Cutting Pinking Blade
Neutral Sewing Thread for piecing
Monofilament Thread
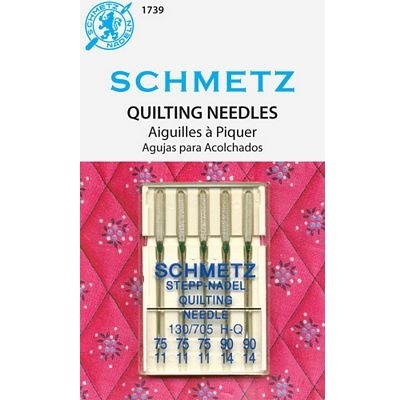
Size 75 Schmetz Quilting Needles
June Tailor’s Starch Savvy
Bordeaux Ultimate Shears
Iron
Optional: Mini Iron II “The Adapter”
To stitch our Carefree Curves in Quilts 14-Inch Half-Circle Block, follow the step-by-step instructions include with Carefree Curves Template Set, with Classic Timesaving Tips by Nancy Zieman – and see how using the right tools makes the sewing process enjoyable, even for beginning quilters!
Half-Circle Block Sewing Tutorial
NOTE: This block is 14-1/2″ square; 14″ finished square when sewn into finished quilt.
NOTE: Quilt blocks are 14-1/2″ square; 14″ finished square when sewn into finished quilt.
Block Fabrics
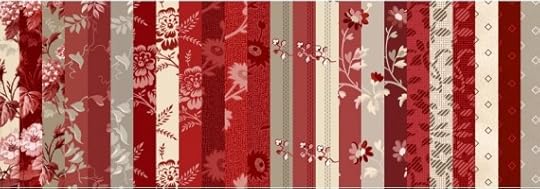
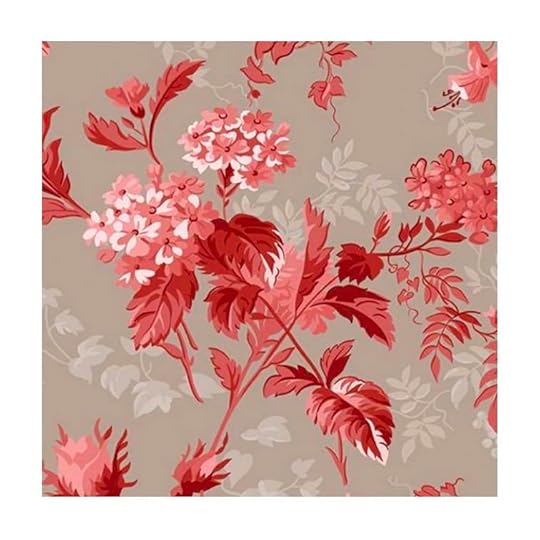
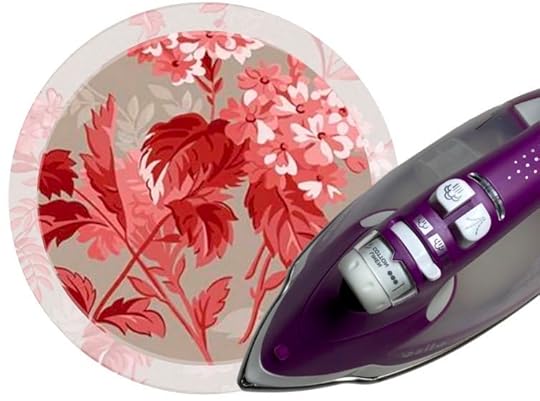
Select three Red Elegance Fabrics sold by the yard at ShopNZP.com. Choose one Cream, one Taupe, and one Brick Red.
Quilt Block Fabric Requirements are listed on the back of the Carefree Curves Template Set Package.
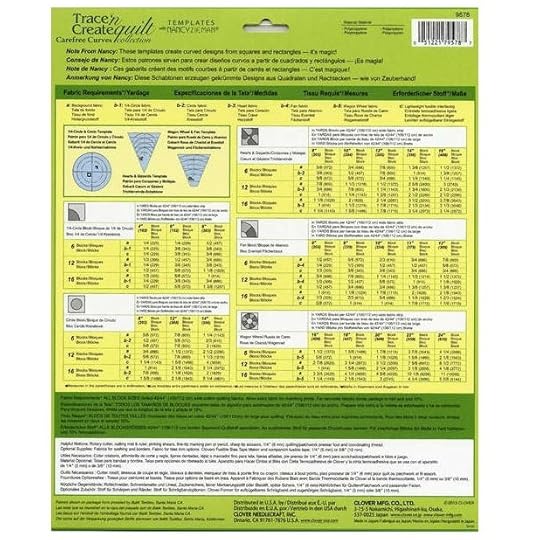
Twelve 14″ finished Half-Square Waxing & Waning Moon Quilt Blocks requires 2 yd. Cream Fabric, 2 yd. Taupe, and 5/8 yd. Brick, along with 4 yd. Pellon Sof-Shape. NOTE: Add additional fabric for backing, borders, binding, and for sashing strips between finished blocks.
Prepare Fabrics
Pre-shrink project fabrics by steaming and pressing, and steaming and pressing a second time, and then spray starch and press one more time – using June Tailor’s® Starch Savvy.
Select the “Circle” Template from the Carefree Curves Template Set by Nancy Zieman for Clover.
Cut Fabric for Blocks
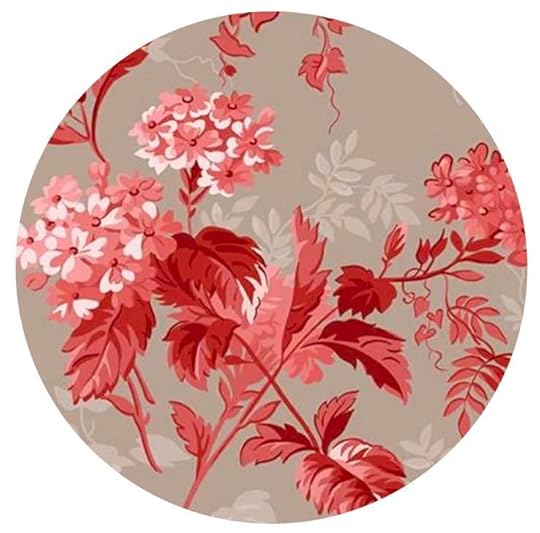
To make Half-Circle Blocks, first create super-simple circle blocks with Cream and Taupe fabric squares, and Pellon Sof-Shape squares!
Cut 14-1/2″ background squares from Cream fabric.
Cut 11-1/2″ squares from Taupe fabric – for center circles.
Cut 11-1/2″ squares from Pellon Sof-Shape Fusible Interfacing.
Construct Circle Blocks
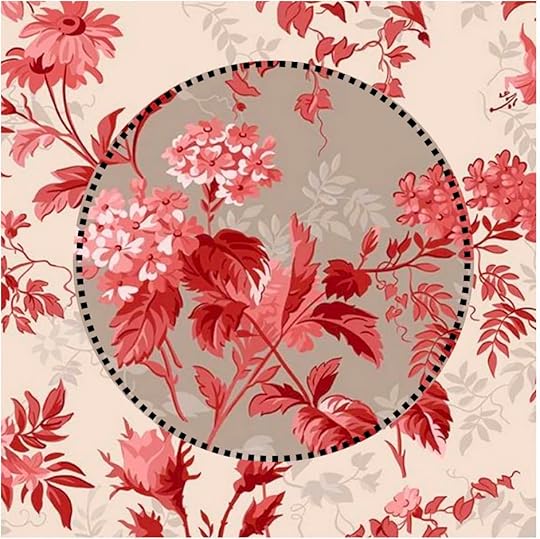
Create Center Circle Appliqués
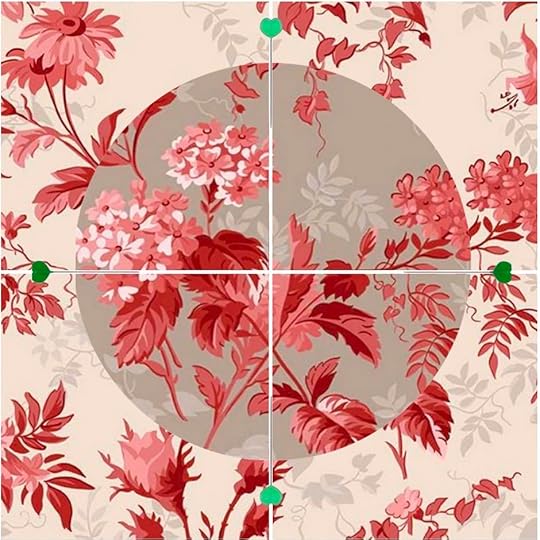
Place 11-1/2″ background square Taupe to 11-1/2″ square Pellon Sof-Shape Fusible Interfacing – matching smooth side of the fusible interfacing to right side of fabric. Pin.

Position the Circle Template on the interfacing , centering the template on the interfacing square.
With a fabric marking pen and Circle Template, trace largest 9″ circle on the onto the interfacing – tracing along the blue lines along the outside of the Circle Template.
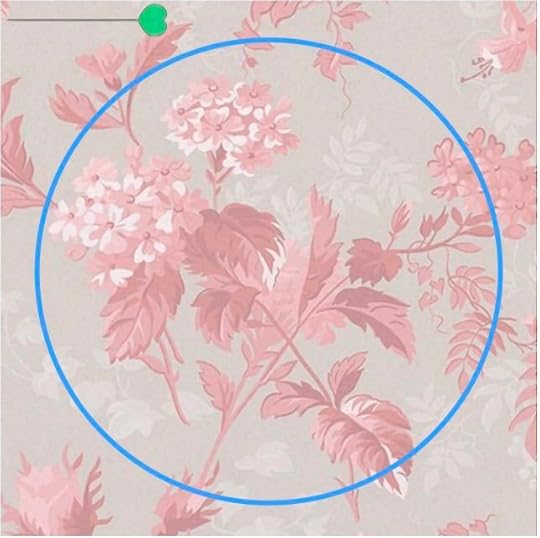
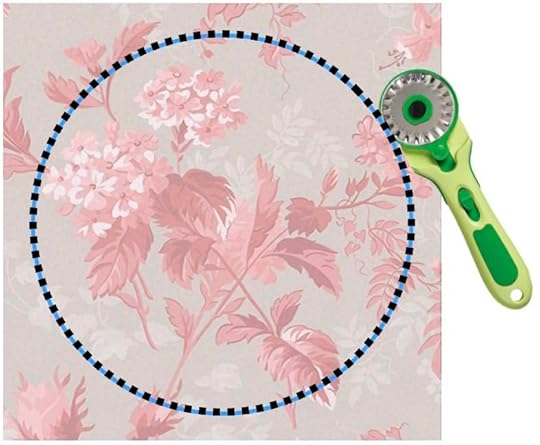
Using a Size 75 Schmetz Quilting Needle, stitch directly on the marked line using a slightly shorter stitch length.
It’s always easier to stitch smooth curves with a shorter stitch length, such as a 2.0 mm setting.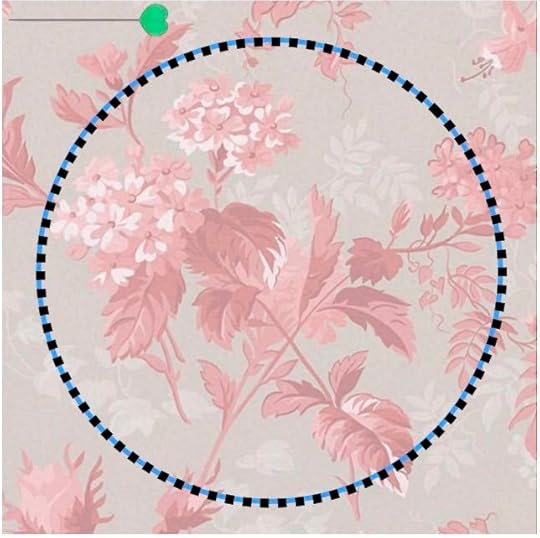
With a 45mm Rotary Cutting and Pinking Blade , trim away excess fabric, leaving about a 1/4″ seam allowance on the outside of stitching line.
Carefully cut away the center of the interfacing, leaving about 1″ of interfacing on the inside of stitching line.
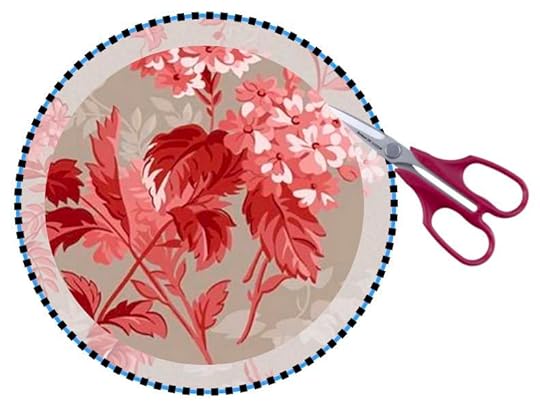 Save interfacing scraps for a later project when making, perhaps, smaller circles
.
Save interfacing scraps for a later project when making, perhaps, smaller circles
.
Use Clover’s Point 2 Point Turner, and smooth the curved edge as the interfacing is turned to the wrong side.
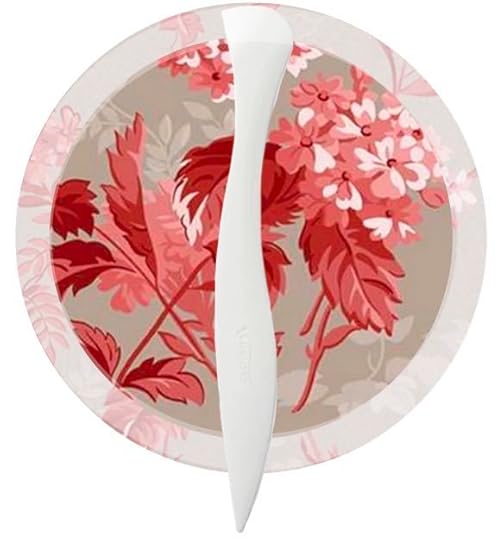
Press.
Topstitch Circle “Appliqué” to Block Background
Fold one 14-1/2″ Cream background square in half, then in quarters to determine the center, use a Roll ‘n Press , or ‘finger press’ along the folded edges.

Open.
Fold center circle appliqué in half, then in quarters to determine the center, use a Roll ‘n Press, or ‘finger press’ along the folded edges. Open.

Layer the circle appliqué onto the background square, aligning fold lines. Pin.
Thread sewing machine with Monofilament Thread in the top thread of your sewing machine, and regular all-purpose sewing thread in the bobbin.
Use a narrow blind hem stitch, blanket stitch, zigzag stitch, or straight stitch to “machine appliqué” the circle to the background.
Press.
Repeat steps above and create additional Circle Blocks (as many as you’d like) with Cream Backgrounds & Taupe Circle Appliqués. Set completed blocks aside.
Construct Opposing Blocks
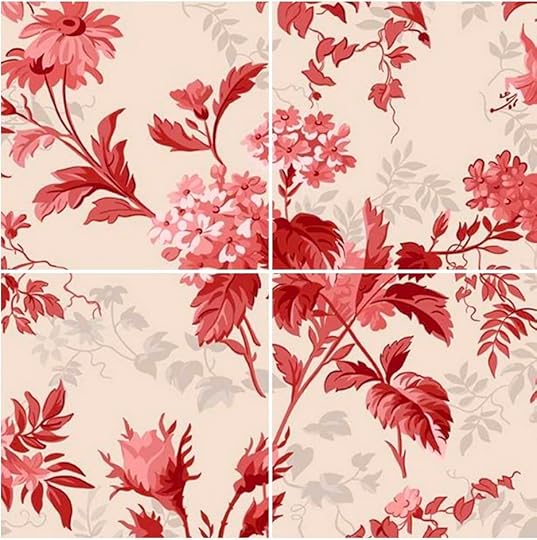
Following cutting steps above, cut the same number of opposing circle blocks elements: Cut 14-1/2″ background squares from Taupe fabric, cut 11-1/2″ squares from Cream fabric–for center circles, and cut 11-1/2″ squares from Pellon Sof-Shape Fusible Interfacing.
Following sewing steps above, stitch the same number of opposing Circle Blocks (as many as you’d like) – with Taupe Backgrounds & Cream Circle Appliqués.
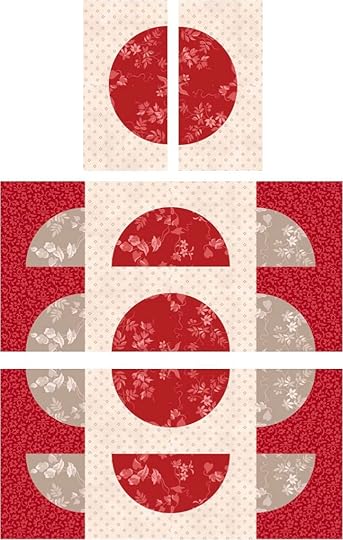
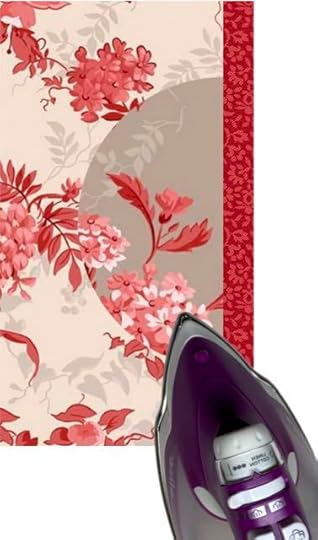
Construct Half-Circle Waxing & Waning Moon Blocks
Using a Rotary Cutter, Mat and Ruler, cut each Circle Block in half, creating two equal Half-Circle Blocks.
When Circle Blocks are cut in half, each Half-Circle Block will measure 7-1/4″ x 14-1/2″.
Also cut each Opposing Circle Block in half. Each Opposing Half-Circle Block will measure 7-1/4″ x 14-1/2″.
For each block, cut 1″ x 14-1/2″ Brick Red crosswise fabric strips.

Place Brick Red crosswise fabric strip to Half-Circle Block, right sides together, aligning long edges. Pin .
Using a scant 1/4″ seam allowance and Size 75 Schmetz Quilting Needle, stitch Brick Red crosswise fabric strip to Half-Circle Block.
Press seam toward Red Brick fabric strip.
Place remaining long edge of Brick Red crosswise fabric strip to Opposing Half-Circle Block, right sides together. Pin .
Stitch.
Press seams to block center.
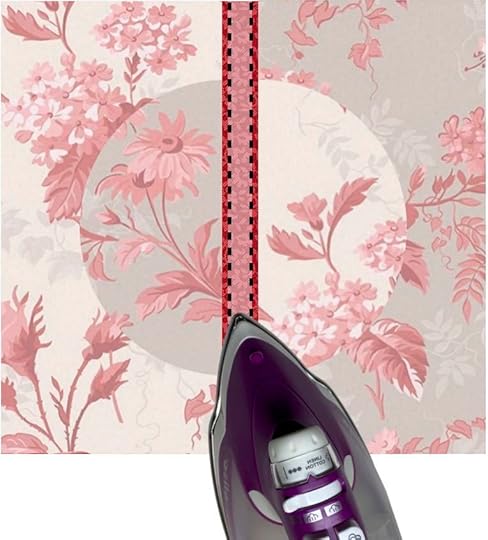 Waxing & Waning Moon Quilt Block is complete!
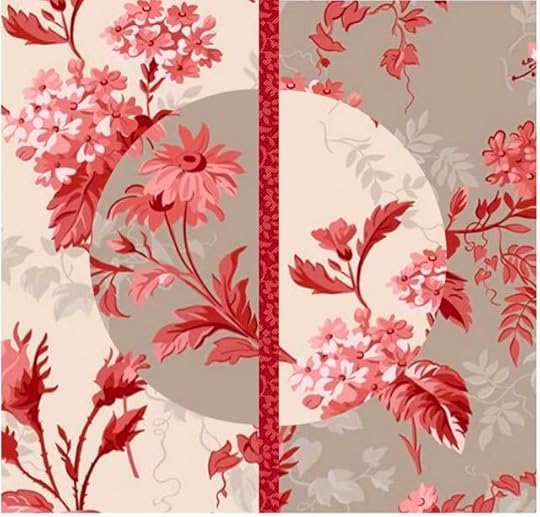
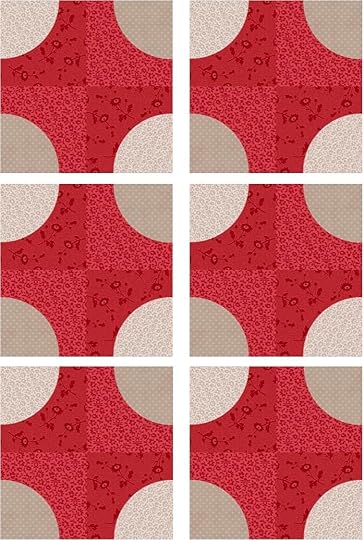
Rotate Waxing & Waning Moon Quilt Blocks to achieve desired quilt design.
Sew Brick Red crosswise fabric strips between blocks – to achieve desired number of rows.
Sew Brick Red crosswise fabric strips between rows.
Add outer sashing and/or outer borders using Brick Red crosswise fabric strips – to create desired quilt size.
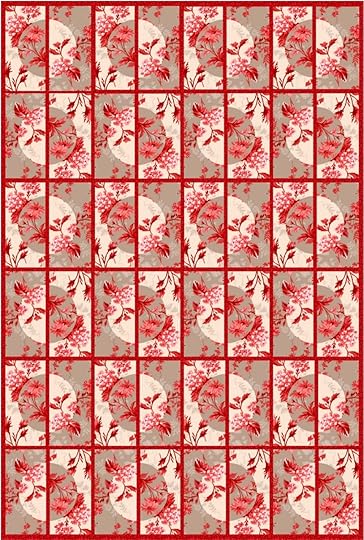
Twelve 14″ Blocks makes a quilt top approx. 44″ x 58-1/2″
The above virtual quilt is a “three-fabric” quilt. If you’re making a scrappy-style quilt with the Red Elegance Fat Quarter Pack, make assorted circle blocks by selecting three different fabrics, for each block: Cream for background, Taupe for Circle Applique, and Brick Red for center 1″ strips. Be sure to make the same number of Opposing Circle Blocks with Taupe Backgrounds, Cream Circle Appliqués, and Brick Red center 1″ strips.
Watch Stitch it! Sisters Program 112: Carefree Curves in Quilts!
Find our FREE! Circle Quilt Block Sewing Tutorial in our January 18, 2020 Blog Posting.
Find our FREE! Quarter-Circle Quilt Block Sewing Tutorial in our March 21, 2020 Blog Posting.
NEW! Carefree Curves in Quilts Tools & Supplies:
Carefree Curves Template Set
CLEARANCE Red Elegance Fabric sold by the yard at ShopNZP.com
Pellon Sof-Shape Fusible Interfacing
Clover’s I Sew For Fun Fabric Marking Pen
Clover’s Point 2 Point Turner
Rotary Cutting Tools: 45 mm Rotary Cutter, Cutting Mat, and Ruler
45mm Rotary Cutting Pinking Blade
Neutral Sewing Thread for piecing
Monofilament Thread
Size 75 Schmetz Quilting Needles
June Tailor’s Starch Savvy
Bordeaux Ultimate Shears
Iron
Optional: Mini Iron II “The Adapter”
Shop CLEARANCE Fabrics at ShopNZP.com!
Shop Elastic, Cotton Webbing, Zippers & More at shopnzp.com
Shop Clover Tools & Sewing Supplies at shopnzp.com!

Shop Pellon Interfacing & Supplies at shopnzp.com!
Shop Schmetz Sewing Machine Needles at shopnzp.com!
For a chance to be the random winner of a Stitch it! Sisters 5″ Fabric Short Stack with exclusive S!S button & sticker, please leave a comment below sharing your thoughts about Nancy’s Carefree Curves in Quilts!
Nancy Zieman Productions will give away one Stitch it! Sisters 5″ Fabric Short Stack to one US resident in the 48 contiguous states. Winner must reply within 30 days to the official giveaway announcement email message – sent from Nancy Zieman Productions. Email Team NZP at info@ziemanproductions.com.
Happy Quilting!
Team Nancy Zieman
Nancy Zieman Productions. LLC.
[image error]
Stitch it! Sisters is a production of NZ Productions LLC. Content in this feed is © copyright 2020 by Nancy Zieman Productions, LLC and may not be republished without written permission. You’re welcome to forward the email to a friend or colleague but it’s not okay to add the RSS feed automatically as content on a blog or other website. The FTC requires us to tell you that Nancy Zieman Productions, LLC has provided products by other companies in the course of doing business. The FTC requires us to advise you to take this information into consideration when reading this posting.
Make sure you are subscribed to Nancy Zieman Productions, LLC enews mailing list so you won’t miss a thing. Sign up at nancyzieman.com/blog/enews. And join us on YouTube, Facebook, Instagram and Pinterest!
September 15, 2020
NEW! I Sew For Fun Kids Sewing Challenge 2020: Pillowcase Sewing Tutorial
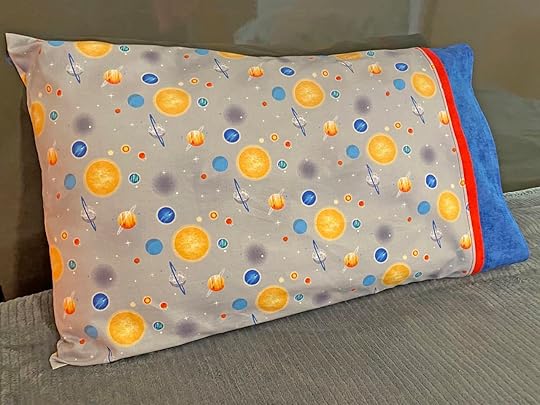
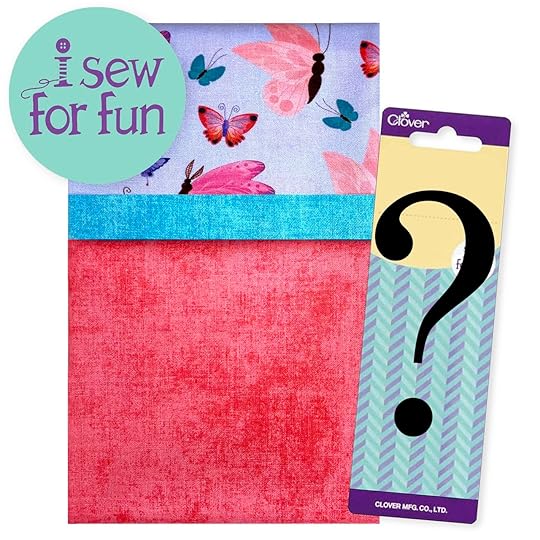
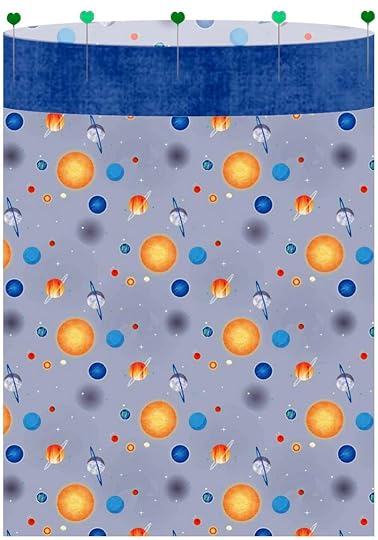
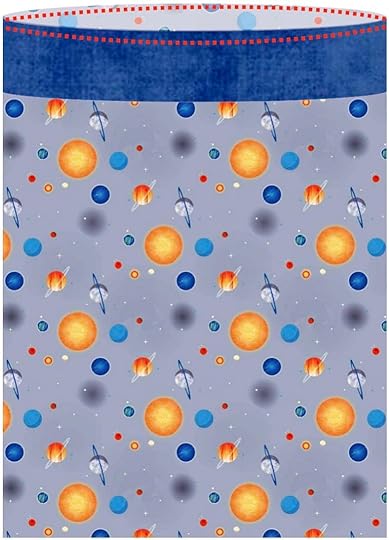
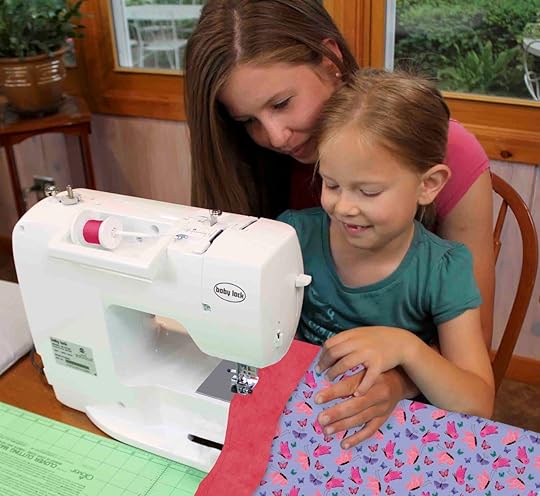
NEW! I Sew For Fun Kids’ Sewing Challenge sponsored by Nancy Zieman Productions, Clover Needlecraft, and Riley Blake Designs. Youth ages 15 and under are invited to share how they “sew for fun”— while making a pillowcase with NASA Out of this World Planets fabric or Butterflies on Light Purple fabric with coordinating Shades fabrics by Riley Blake Designs; along with an I Sew For Fun sewing tool by Clover.
Youth age 15 and under may participate in the NEW! 2020 I Sew For Fun Kids’ Sewing Challenge by reading and understanding the contest guidelines listed below, sewing a pillowcase using one of the Official 2020 I Sew For Fun Kids’ Sewing Challenge Pillowcase Project Packs purchased by an adult, and emailing two photos to info@ziemanproductions.com on or before September 29, 2020: One photo showing youth sewing/working on the challenge project using the I Sew For Fun Tool (included in the Official 2020 I Sew For Fun Kids’ Sewing Challenge Pillowcase Project Pack), and a second photo of youth with completed pillowcase. Note: It’s okay if you prefer not to show youth’s face in photos. Be sure to include challenge participant’s first name, city, state, and age–when emailing photos to info@ziemanproductions.com.

To reserve a spot in the NEW! 2020 I Sew For Fun Kids’ Sewing Challenge, an adult parent or guardian must purchase the Official 2020 I Sew For Fun Kids’ Sewing Challenge Pillowcase Project Pack. Purchase the Official 2020 I Sew For Fun Kids’ Sewing Challenge Pillowcase Project Pack at ShopNZP.com. Quantities are limited!
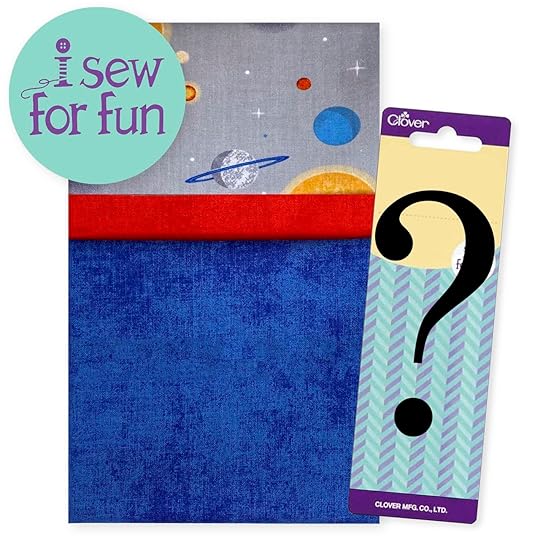
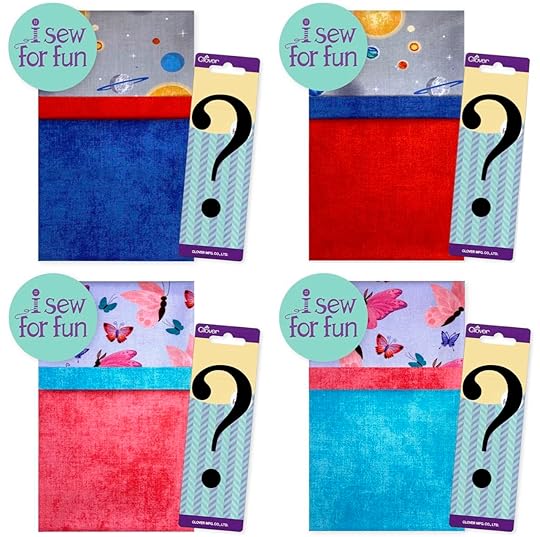
2020 I Sew For Fun Kids’ Sewing Challenge Pillowcase Project Pack– Planets Blue
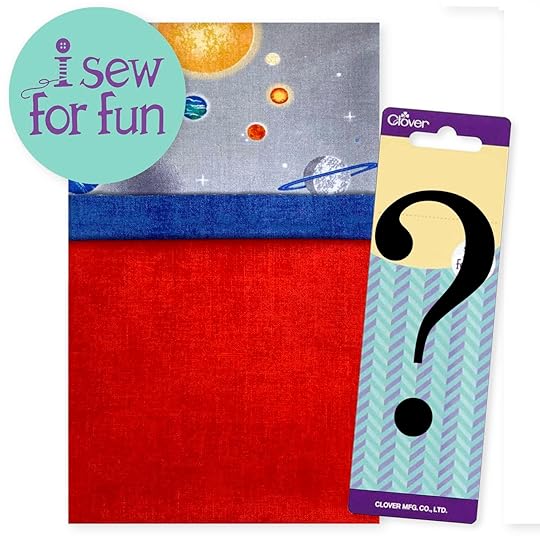
2020 I Sew For Fun Kids’ Sewing Challenge Pillowcase Project Pack– Planets Red
2020 I Sew For Fun Kids’ Sewing Challenge Pillowcase Project Pack– Butterflies Aqua
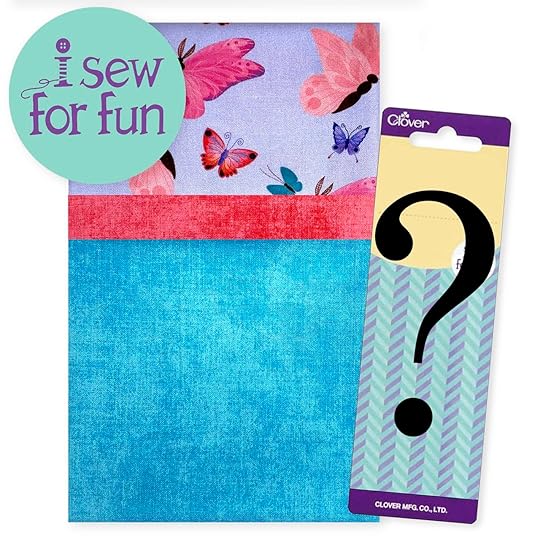
2020 I Sew For Fun Kids’ Sewing Challenge Pillowcase Project Pack– Butterflies Pink
Supplies Needed
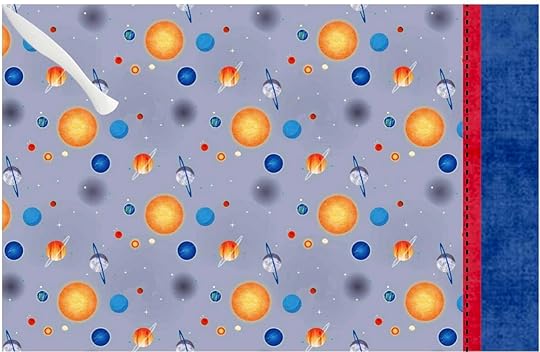
Official 2020 I Sew For Fun Kids’ Sewing Challenge Pillowcase Project Pack includes 3/4 yard NASA Out of this World Planets or Butterflies on Light Purple , coordinating Shades fabrics by Riley Blake Designs, and one mystery I Sew For Fun Sewing Tool by Clover.
The FREE! I Sew For Fun Pillowcase Sewing Tutorial, below.
Sewing Machine, sewing thread, and basic sewing tools.
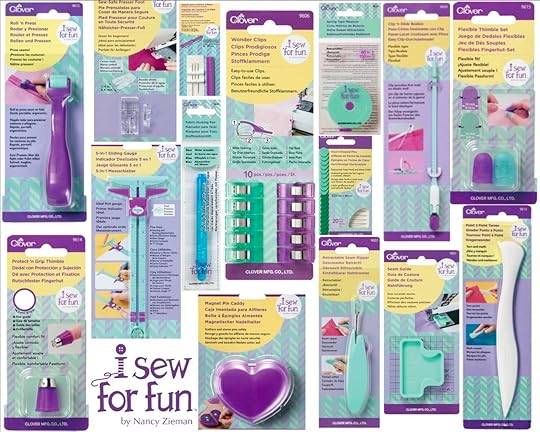
Helpful Notions
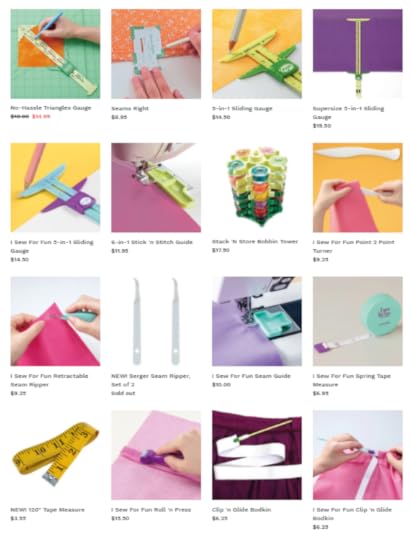
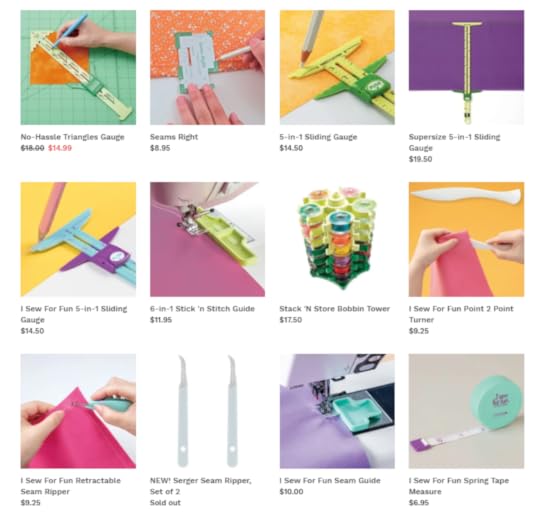
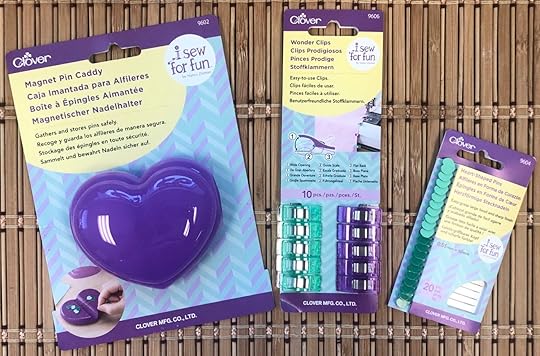
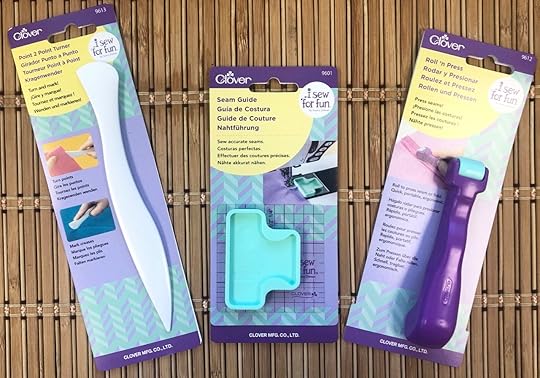
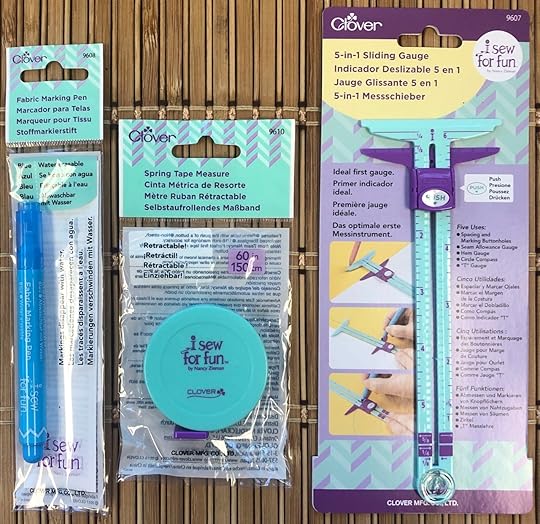
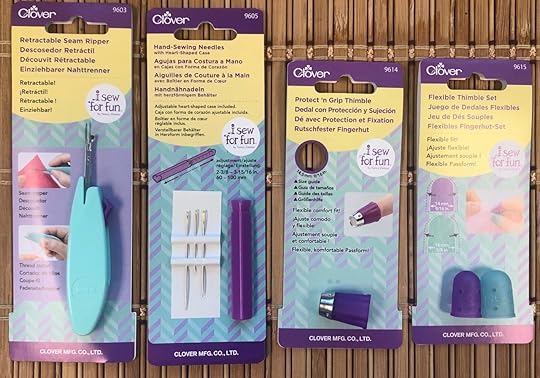
 Using the right sewing tools assists with creating a successful sewing project! Above is a photo showing all the I Sew For Fun Tools by Nancy Zieman Productions for Clover. You may use any of the above I Sew For Fun sewing tools while sewing your pillow case challenge project! Show us What You’re Making! We love to hear from you, so email your photos—anytime—to The NZP Team at info@ziemanproductions.com, and/or share your experiences and photos with us on Facebook or Instagram!
Pillowcase Sewing Tutorial
Approximate Finished Size: 20″ x 30″
Makes one standard size pillowcase.
Supplies Needed
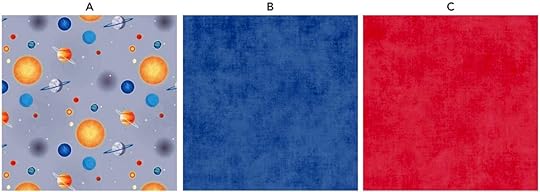
3/4 yd. Novelty Print Fabric A –main pillowcase fabric
1/4 yd. Fabric B –border
1/8 yd. Fabric C–trim
Coordinating all-purpose thread
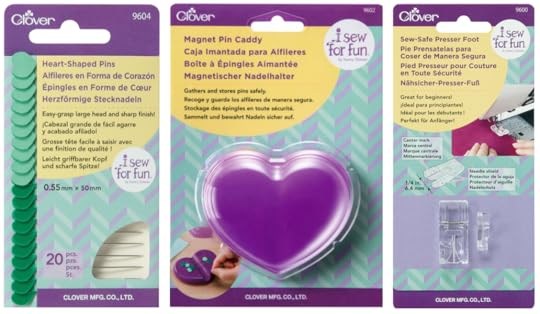
Optional Notions: I Sew For Fun Heart Shaped Straight Pins, I Sew For Fun Magnetic Heart-Shaped Covered Pin Caddy and I Sew For Fun Sew Safe Presser Foot.
Instructions
Please read all instructions before beginning. Use the width of the presser foot as the depth of the seam allowance.
Prep Before You Sew
Gather your sewing supplies and prep your fabric for sewing. Included with the Official 2020 I Sew For Fun Kids’ Sewing Challenge Pillowcase Project Pack you’ll find everything you’ll need to complete the I Sew For Fun Pillowcase Project, you’ll supply the thread! When you receive your challenge project pack, open the package and prep your fabrics. Then find the FREE! I Sew For Fun Pillowcase Sewing Tutorial, below. Read all directions, before beginning.
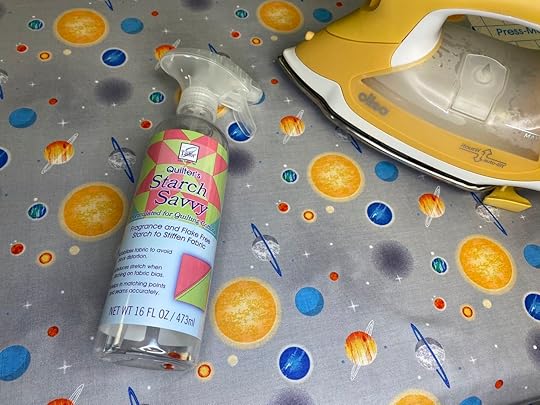
With the help of your big Sewing Partner, Press & Starch, and Press & Starch fabrics, before cutting and sewing your pillowcase.
Press and cut the fabrics:
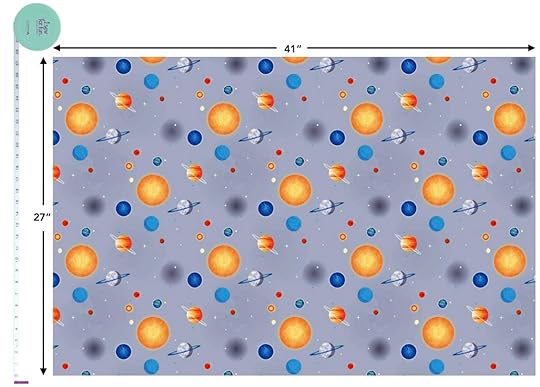
Cut one 27″ x 41″ rectangle from Fabric A – for main pillowcase.
Cut a 9″ x 41″ rectangle from Fabric B – for wide border; set aside.

Cut a 2″ x 41″ rectangle from Fabric C for accent trim.

Fold the 2″ strip of trim fabric in half, wrong sides together, aligning the lengthwise edges; use Clover’s I Sew for Fun Roll n’ Press ,or iron, to press fold.

Assemble trim and border:
Wonder Clip or Pin folded trim to right side of the 9″ x 41″ border fabric, aligning cut edges of trim with one lengthwise edge of the border fabric.
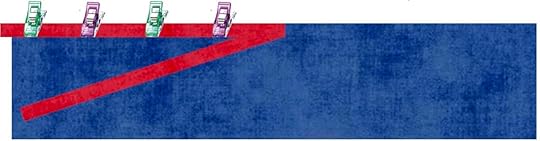
Machine baste.
Fold border fabric in half, right sides together.
Stitch the short ends of the border fabric.
Press seam open I Sew for Fun Roll n’ Press or iron.
Fold wrong sides of border together, aligning the lengthwise edges. Press; set aside.
Stitch the pillowcase:
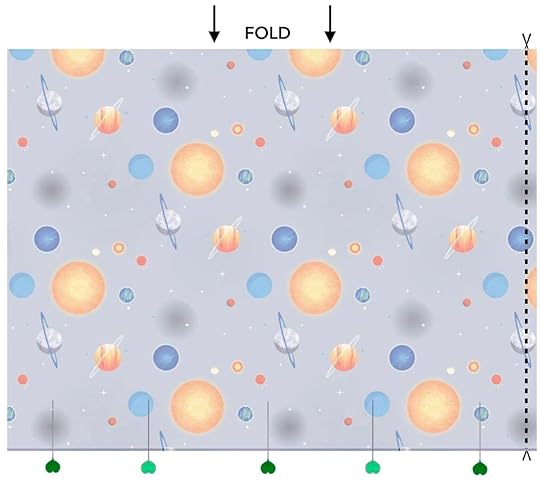
Fold Fabric A rectangle in half, right sides together, aligning 27″ edges.
Wonder Clip or Pin and stitch 21″seam. Be sure to backstitch at the beginning and ending of the seam. Or, use a serger!
This is a great spot to teach your little partner one of Nancy Zieman’s favorite techniques—the wrapped corner!
Wrap the corner by folding the 21″ seam toward the pillowcase along the stitching line and stitch the 27″ side seam. Be sure to backstitch at the beginning and ending of the seam. Or, use a serger!
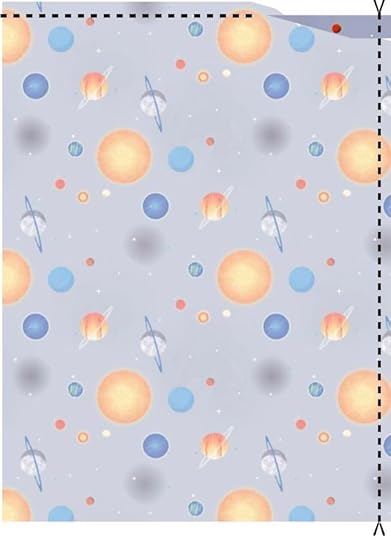
Turn pillowcase right side out.
Pin or Wonder Clip border fabric over the main pillowcase fabric meeting cut edges, with right sides together.
Stitch layers together. Clean finish cut edges using either a zigzag stitch or serger overlock machine. Press seam toward main body of pillowcase.
Optional: Topstitch trim along the border fabric edge, catching the seam within the seam allowance.
Use Clover’s I Sew For Fun Point 2 Point Turner for turning crisp corners.
NEW! I Sew For Fun Kids’ Sewing Challenge Guidelines
1. Challenge is open to all youth, ages 15 and under, residing in the continental US.
2. The challenge is limited to the first 30 persons whose parent or guardian purchases the Official 2020 I Sew For Fun Kids’ Sewing Challenge Pillowcase Project Pack. Purchase project pack as soon as possible at ShopNZP.com to reserve challenge spot. Quantities are limited.
3. Stitch your pillowcase with the NEW! I Sew For Fun Kids’ Sewing Challenge Pillowcase Sewing Tutorial, above.
4. Sew a pillowcase using the official Official 2020 I Sew For Fun Kids’ Sewing Challenge Pillowcase Project Pack fabric, along with any sewing and/or serging techniques. Construction may be done by hand or by machine. Participants may use any type of embellishment, decorations, and may add designer touches. Work may be done exclusively by the participant, and/or with the assistance of an adult. One pillowcase per participant. Challenge participants, and/or an adult parent/guardian must email two photos to info@ziemanproductions.com on or before September 29, 2020: One photo showing youth using Clover’s I Sew For Fun Tool(s) while sewing and/or working on the project, and a second photo of youth with the completed pillowcase. Note: It’s okay if you prefer to not show youth’s face in photos. Be sure to include challenge participant’s first name, city, state, and age when photos to info@ziemanproductions.com.
Participants will be judged on workmanship, creativity, and overall appearance. Participants photos will be shared on sponsoring companies social and web sites to promote the love of sewing.
Prizes will be awarded to those making the top three cinch sacks, along with additional prizes awarded randomly. Winners will be announced on the Nancy Zieman Productions Blog on September 30, 2020.
Challenge Prizes
Clover - I Sew For Fun Sewing Notions Bundles, four different. $125 value
Nancy Zieman Productions - I Sew For Fun Sewing Cinch Sack Bundle Box, four different. $100 value
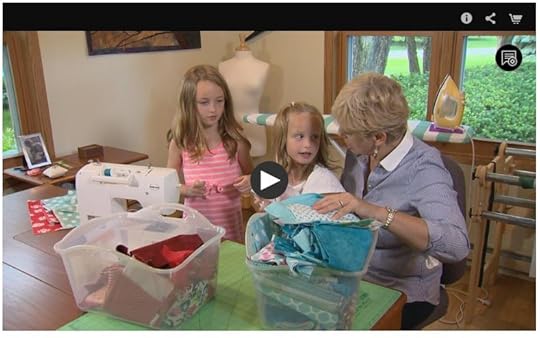
Tune in and watch Nancy and her granddaughters, along with friends, take a modern approach to sewing. Nancy shares her team sewing-for-fun experience along with many tips for a big partner, and numerous insights for involving a little sewing partner—all while making simple, easy to sew kid-friendly projects. Watch I Sew For Fun on Sewing With Nancy!

Watch I Sew For Fun on Sewing With Nancy online at NancyZieman.com.
For a complete selection of I Sew For Fun companion sewing Tools by Nancy Zieman, visit ShopNZP.com
The randomly selected winner of The Ultimate Quilt ‘n Stitch Presser Foot from Clover, Dresden Columns Table Runner Sewing Tutorial and Facebook Live Announcement, is Tere.
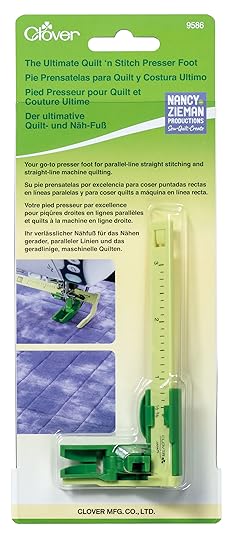 Her comment is: I gravitate towards modern quilting and I love how a traditional element like a Dresden fan template can be modified into something modern. I need a new table setting and will have to make this table runner. So cool!
Happy Sewing!
Team Nancy Zieman
Nancy Zieman Productions. LLC.
[image error]
Stitch it! Sisters is a production of NZ Productions LLC. Content in this feed is © copyright 2020 by Nancy Zieman Productions, LLC and may not be republished without written permission. You’re welcome to forward the email to a friend or colleague but it’s not okay to add the RSS feed automatically as content on a blog or other website. The FTC requires us to tell you that Nancy Zieman Productions, LLC has provided products by other companies in the course of doing business. The FTC requires us to advise you to take this information into consideration when reading this posting.
Make sure you are subscribed to Nancy Zieman Productions, LLC enews mailing list so you won’t miss a thing. Sign up at nancyzieman.com/blog/enews. And join us on YouTube, Facebook, Instagram and Pinterest!
September 12, 2020
Quick Quilting in the Hoop at The Great Wisconsin Quilt Show TODAY!
The Great Wisconsin Quilt Show –Virtual Event , Sept. 10-12, 2020
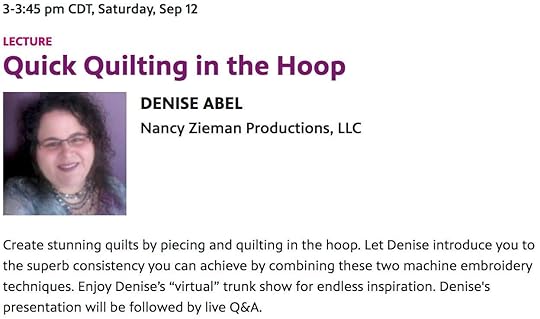
Join Team NZP and Stitch it! Sister, Denise Abel TODAY at 3 pm CDT for her Lecture, Quick Quilting in the Hoop at The Great Wisconsin Quilt Show –Virtual Event. If you haven’t already, register for free today at QuiltShow.com
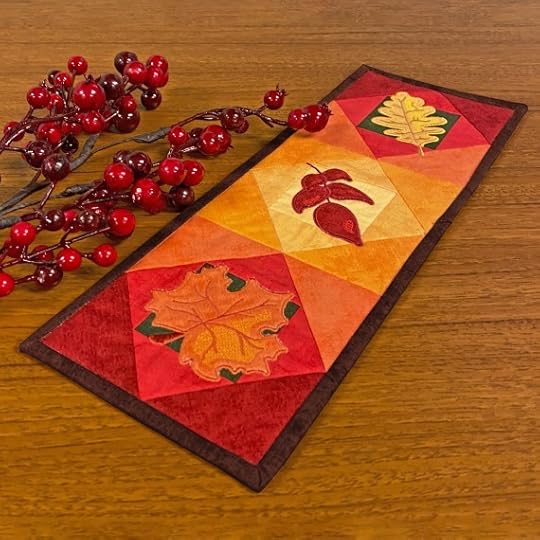
Make a New! Fall Leaves Mini Wall Hanging or Table Runner – all within the hoop of an embroidery machine! Below find our step-by-step instructions for preparing and cutting fabrics, piecing quilt blocks in the hoop, and how we added “automated” fall leaves appliques – with our new NEW! Exclusive Quick Quilting in the Hoop: Fall Leaves Embroidery Collection Book and Embroidery Designs.
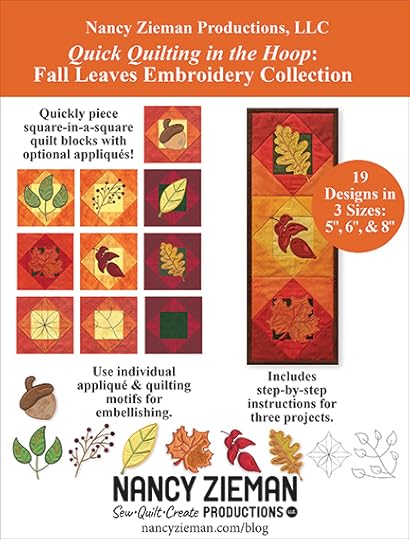
Find additional projects – to piece with your embroidery machine – in NZP’s NEW! Exclusive Quick Quilting in the Hoop: Fall Leaves Embroidery Collection Book available exclusively at ShopNZP.com!
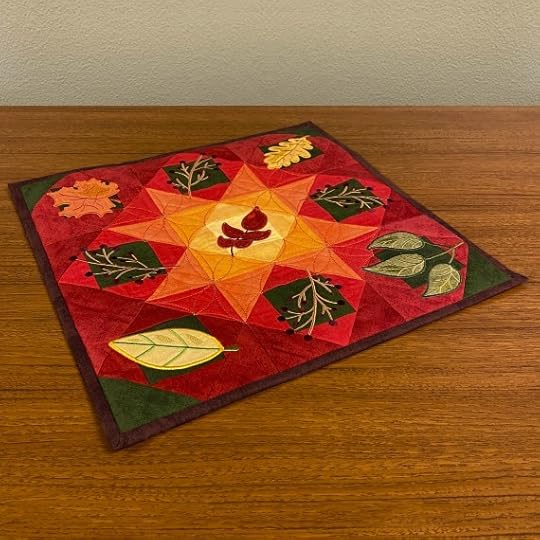
Fall Leaves Wall Quilt or Table Topper
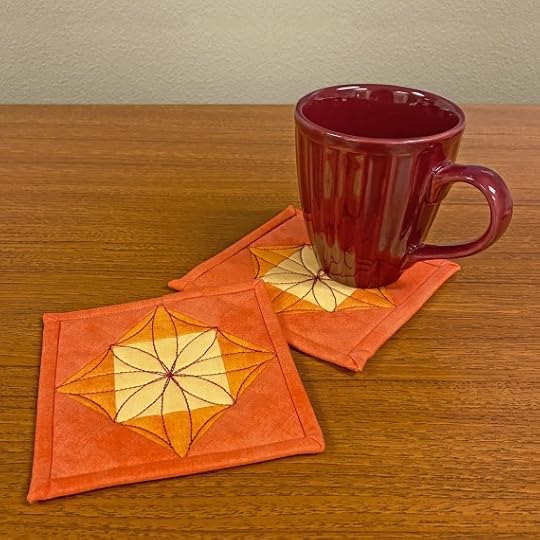
Machine Quilted Beverage Coasters
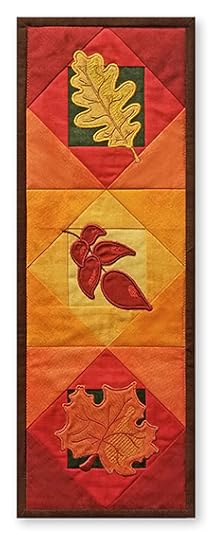 Mini Wall Hanging or Table Runner
NEW! Stitch it! Sisters Quick Quilting in the Hoop: Fall Leaves Mini Wall Hanging/Table Runner Tutorial
Tools & Supplies:
NEW! Exclusive Quick Quilting in the Hoop: Fall Leaves Mini Wall Quilt Bundle Box
Quilter’s Starch Savvy
Fusible No-Show Cut Away Stabilizer
Mini Iron II “The Adapter”
Chrome Embroidery Needles, Size 90/14
Chrome Quilting Needles, Size 90/14
Hoop Mat
Point 2 Point Turner
1″ Sewer’s Fix it Tape
6-1/2″ x 6-1/2″ Square Omnigrid Ruler
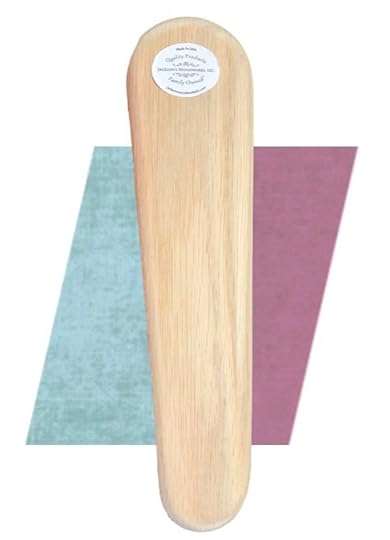
Tailor’s & Quilter’s Clapper
September 10, 2020
No-Hassle Triangles in Quilts: The Nancy Zieman Way at The Great Wisconsin Quilt Show TODAY!
The Great Wisconsin Quilt Show –Virtual Event , Sept. 10-12, 2020
Join Team NZP and Stitch it! Sisters host, Deanna Springer TODAY at 2 pm CDT for her Lecture, No-Hassle Triangles in Quilts: The Nancy Zieman Way at The Great Wisconsin Quilt Show –Virtual Event. If you haven’t already, register for free today at QuiltShow.com


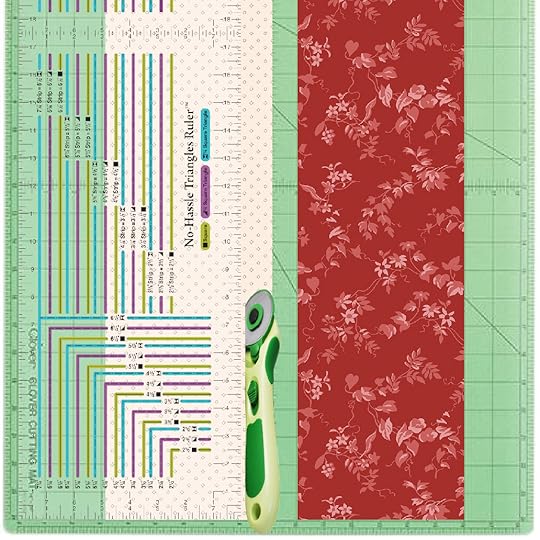
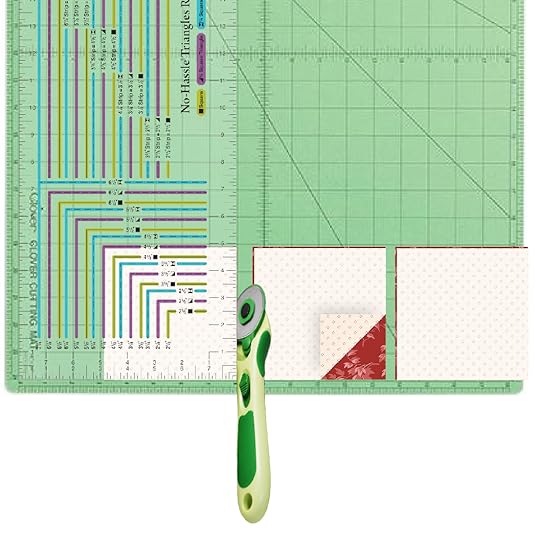
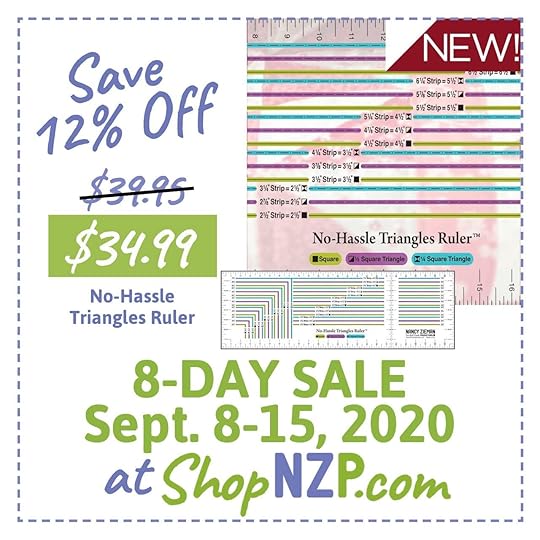
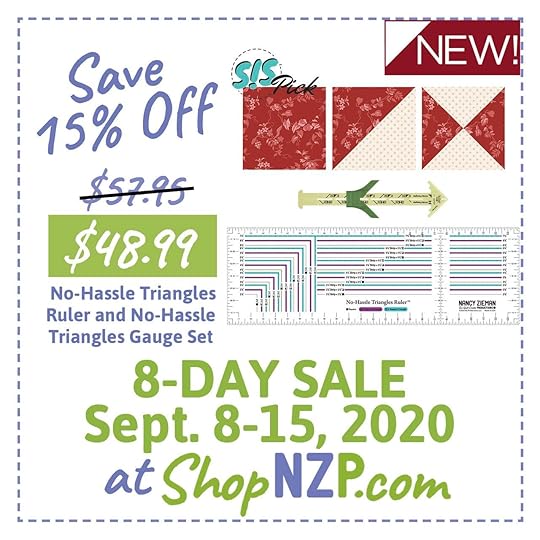
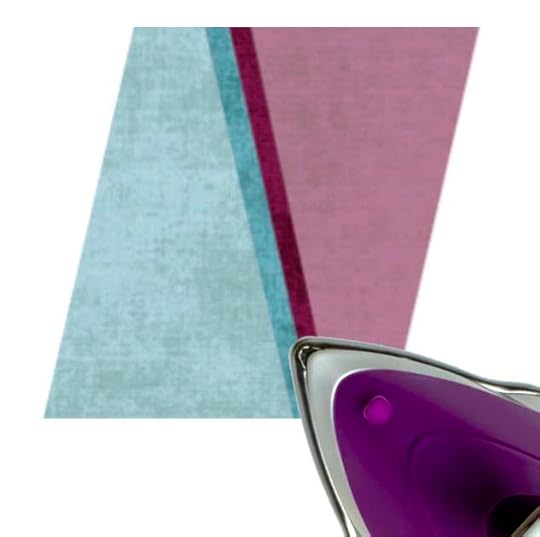
In Deanna lecture, she demos our NEW! Exclusive No-Hassle Triangles Ruler by
Nancy Zieman Productions! Effortlessly cut, mark, and stitch 1/2-square or 1/4-square triangles without ever cutting a triangle, or guessing at the sizes.
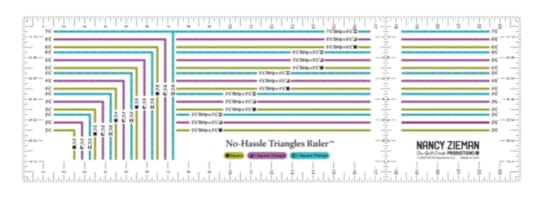 Create 1/2 -square and ¼-square triangle quilt blocks without ever cutting triangles with our NEW! No-Hassle Triangles Ruler!
Use our NEW! No-Hassle Triangles Ruler to make five block sizes for both 1/2- & 1/4-square triangles: 2-1/2”, 3-1/2”, 4-1/2”, 5-1/2”, and 6-1/2”.
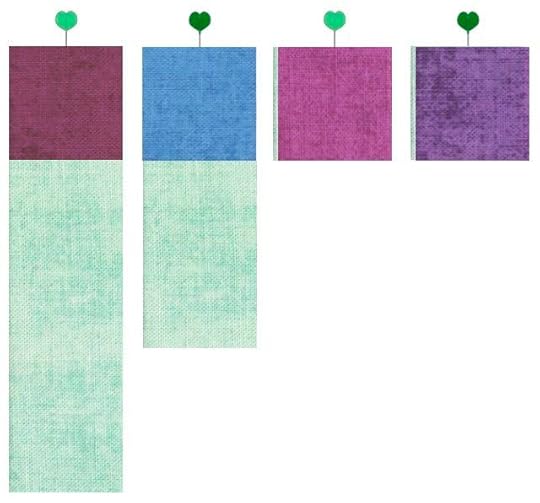
Reference markings on the NEW! No-Hassle Triangles Ruler for cutting solid square quilt blocks, 1/2-square triangles, and 1/4-square triangles.
Solid Square Quilt Block Cutting Lines are marked on Ruler in GREEN.
1/2-Square Quilt Block Cutting Lines are marked on Ruler in PURPLE.
1/4-Square Quilt Block Cutting Lines are marked on Ruler in AQUA.
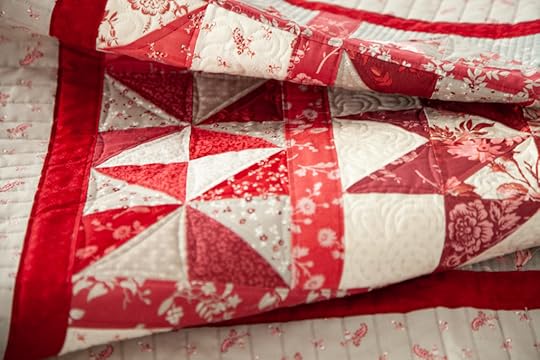
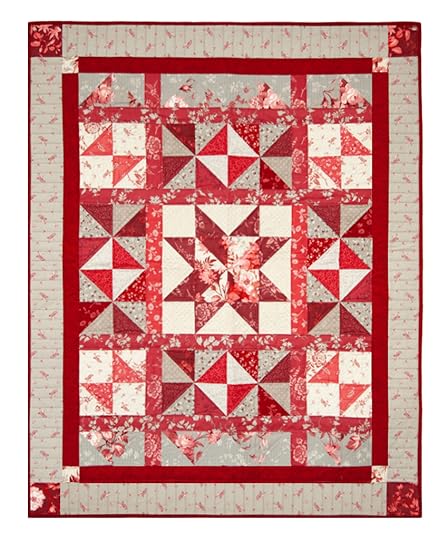
Use our NEW! No-Hassle Triangles Ruler with our NEW! Red Elegance Wall Hanging or Double/Queen Quilt Pattern!
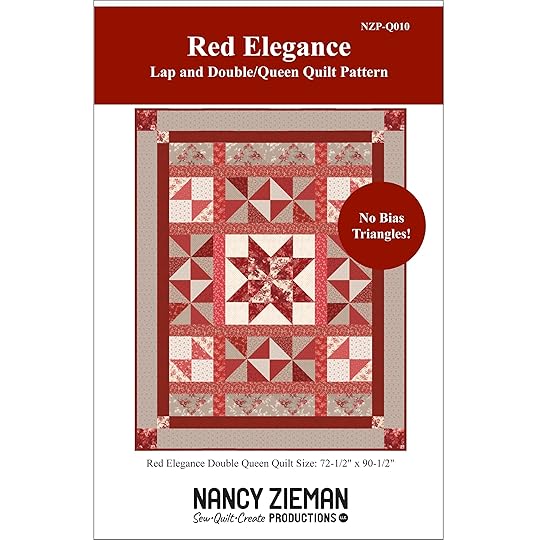
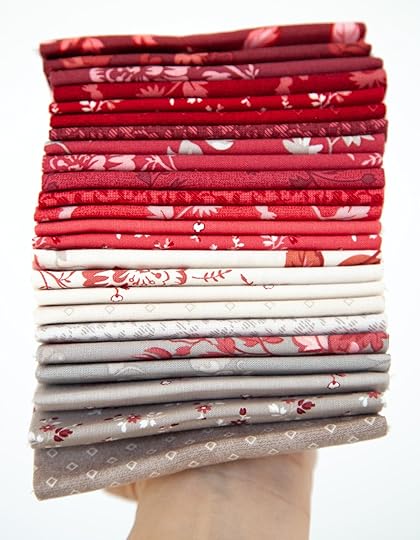
Our NEW! Red Elegance Quilt Pattern features Team NZP’s Red Elegance Fabrics by Riley Blake Designs.
Make a NEW! Red Elegance Double/Queen Quilt! Approx. Finished Size 72-1/2″ x 90-1/2″. 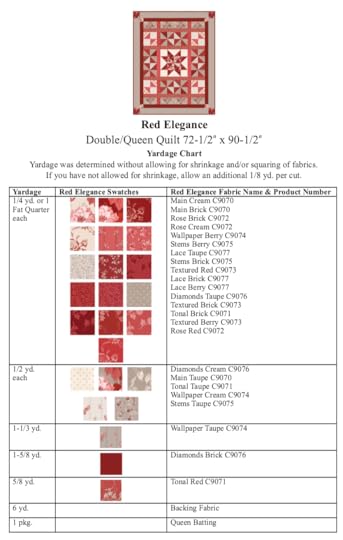
Or, make a NEW! Red Elegance Wall Hanging! Approx. Finished Size 36-1/2″ x 45-1/2″.
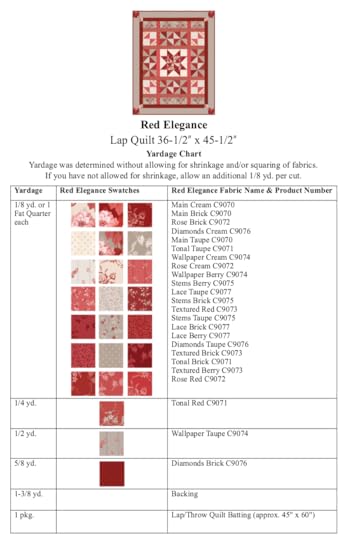
With our easy step-by-step pattern directions, you’ll be piecing our Double/Queen size Red Elegance quilt top in almost the same time it takes to make a wall hanging!
NEW! Red Elegance Quilt Pattern: Half-Square Triangle Block Sewing Tutoiral
Prepare your fabrics! Pre-shrink fabrics by steaming and pressing, and steaming and pressing a second time. Then, stabilize fabrics for the sewing process by pressing and starching fabrics with June Tailor’s Starch Savvy. Press and starch, press and starch.
Follow the 1/2-square triangle blocks: Marked on Ruler in Purple
Cut crosswise strips of two fabrics the “cut” measurement printed on Ruler. (Example: For a 4-1/2” block, cut 4-7/8” crosswise strips.)
Stack and align fabric strips, right side together with lightest fabric on top. Subcut into squares, using the same “square cut” measurement on the ruler. (Example: For a 4-1/2” block, cut 4-7/8” squares.)
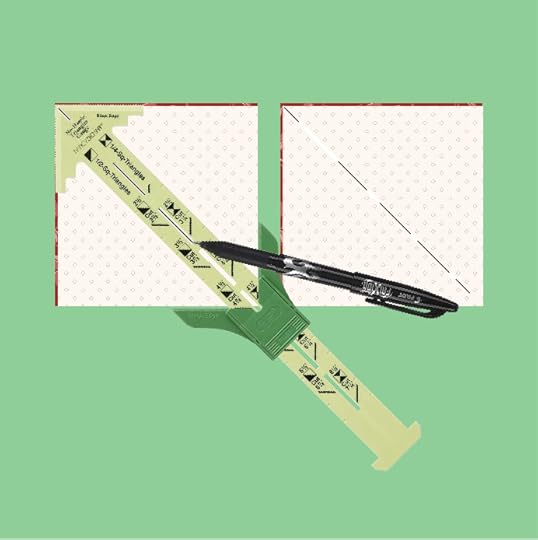
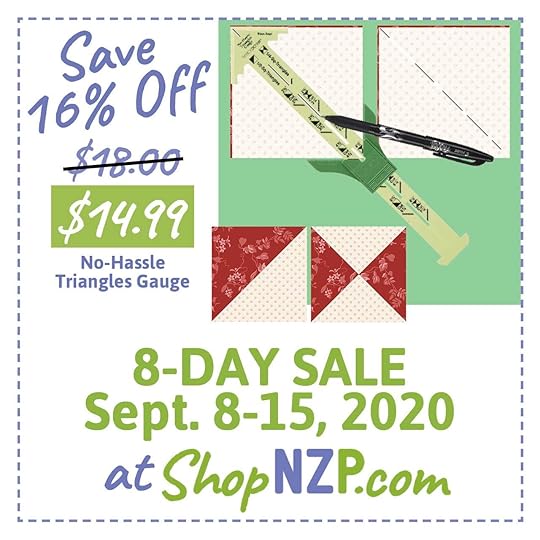
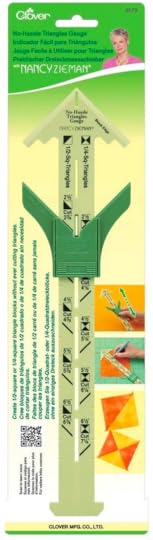 Use Clover’s No-Hassle Triangles Gauge to accurately and quickly mark blocks. Depress button to slide and align No-Hassle Triangles Gauge with the “cut” measurement of the 1/2-square triangle block size. (Example: For a 4-1/2” block, set gauge at 4-1/2” Half-Square Block squares.)
Set sewing machine for a straight stitch (2.0-2.5 mm). Attach a 1/4″ quilting presser foot. Straight stitch, guiding right side of foot along marked line. Note: Stitching line will be scant 1/4″ away from marked line.
After stitching along one side of marked line of all square sets, rotate chained blocks and stitch along the other side of the marked line. Note: Stitching line will be scant 1/4² away from marked line.
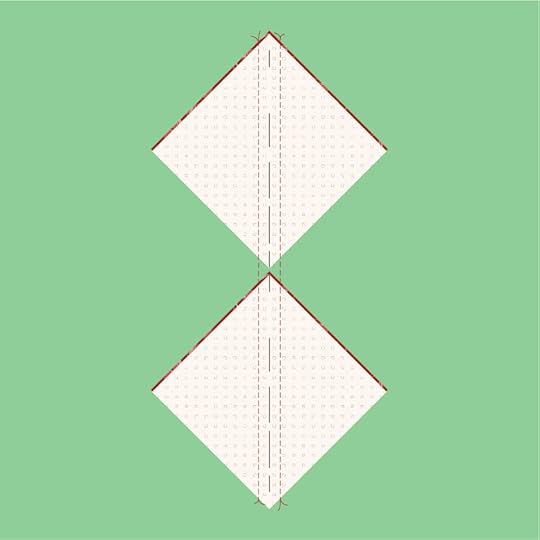
At end of block, place next block on bed of sewing machine. Stitch continuously from one block to the next – “chainstitching” blocks continuously.
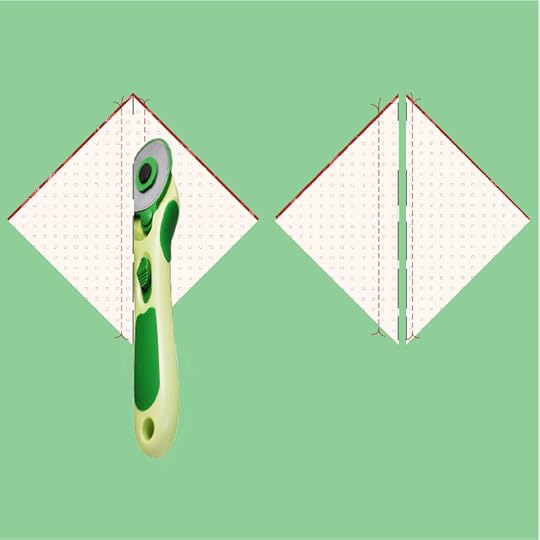
Clip threads between blocks. Cut blocks apart along diagonal marked line, using rotary cutter, ruler, and mat.
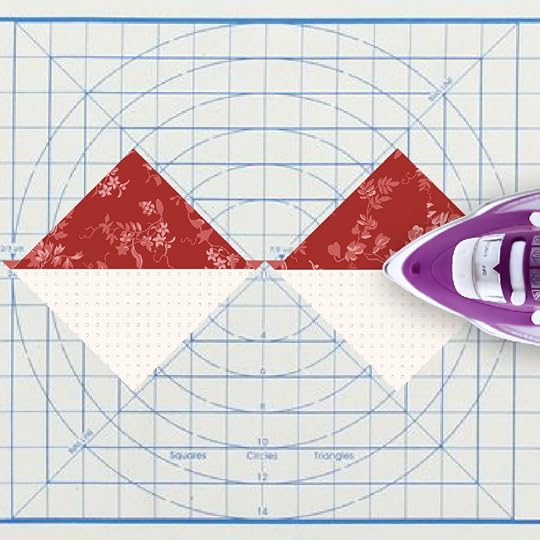
Press seam allowance flat to set seam, then press seam allowance toward dark fabric.
Each square set will make two 1/2-square triangle blocks!
Follow the step-by-step directions – included in the pattern – for assembling our NEW! Red Elegance Wall Hanging or Double/Queen Quilt!


NEW! No-Hassle Triangles Ruler and Red Elegance Fabrics & Quilt Pattern at ShopNZP.com!
All youth, age 15 and under, are invited to participate in the NEW! 2020 I Sew For Fun Kids’ Sewing Challenge! Enter the challenge by purchasing one of the Official 2020 I Sew For Fun Kids’ Sewing Challenge Pillowcase Project Packs at ShopNZP.com. Quantities are limited! Find challenge details in the September 3, 2020 Blog Post.
Join Team NZP this week for The Great Wisconsin Quilt Show –Virtual Edition– September 10 -12, 2020


The Great Wisconsin Quilt Show –Virtual Event– September 10 -12, 2020 at QuiltShow.com
Deanna Springer, Dana Casey, and the NZP Team – along with PBS Wisconsin – are pleased to co-produce The Great Wisconsin Quilt Show –Virtual Event, Sept. 10-12, 2020. If you haven’t already, register for free today at QuiltShow.com
Join the Stitch it! Sisters this Thursday thru Saturday, Sept. 10-12, for our daily Facebook Live – beginning at 10 a.m. Central Time – at the Nancy Zieman Productions Facebook page! Join us as we celebrate The Great Wisconsin Quilt Show – Virtual Edition – LIVE from NZP with Quilt Show Specials & New Fabrics starting tomorrow at ShopNZP.com.
The randomly selected winner of a NEW! I Sew For Fun Hand-Sewing Needles with Heart-Shaped Case from Clover, from the September 10 Blog Post, NEW! I Sew For Fun Kids’ Sewing Challenge 2020 Kick Off and Order Your Challenge Project Pack Today, is Phyllis H. Lewis.
Her comment is: I have two eligible granddaughters who are creative and would love to show off their sewing skills in this fun way.
Happy Quilting!
Team Nancy Zieman
Nancy Zieman Productions. LLC.
[image error]
Stitch it! Sisters is a production of NZ Productions LLC. Content in this feed is © copyright 2020 by Nancy Zieman Productions, LLC and may not be republished without written permission. You’re welcome to forward the email to a friend or colleague but it’s not okay to add the RSS feed automatically as content on a blog or other website. The FTC requires us to tell you that Nancy Zieman Productions, LLC has provided products by other companies in the course of doing business. The FTC requires us to advise you to take this information into consideration when reading this posting.
Make sure you are subscribed to Nancy Zieman Productions, LLC enews mailing list so you won’t miss a thing. Sign up at nancyzieman.com/blog/enews. And join us on YouTube, Facebook, Instagram and Pinterest!
September 8, 2020
Dresden Columns Table Runner Sewing Tutorial and Facebook Live Announcement

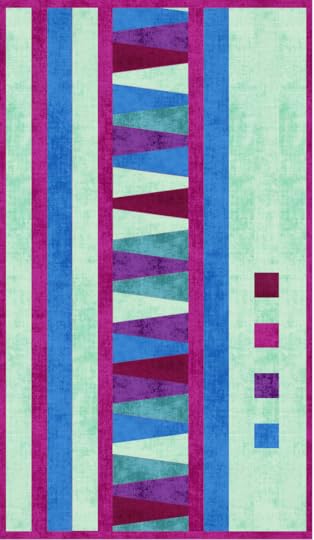
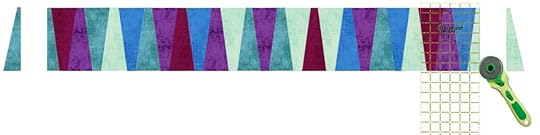
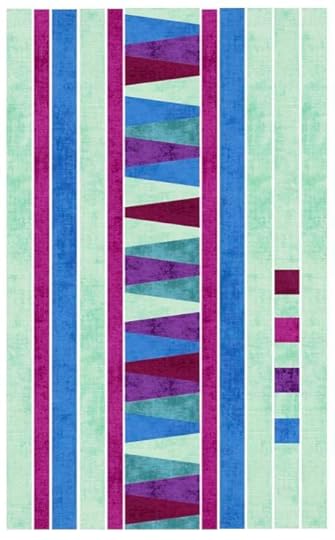
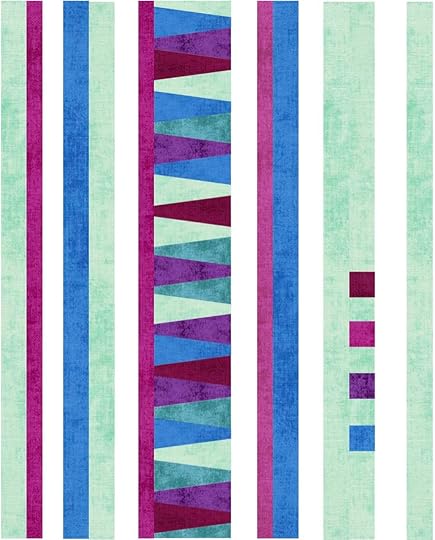
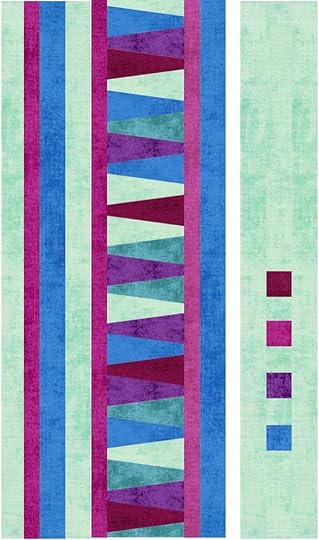
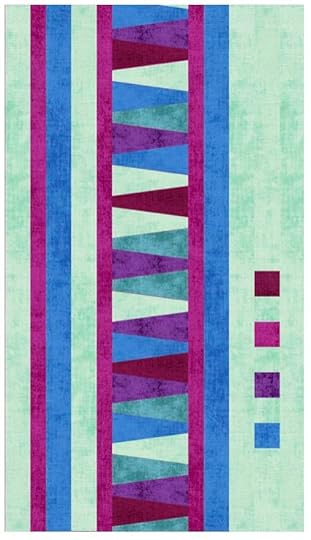
Learn how easy it is to stitch our quick column quilt with a modern twist with our Exclusive Dresden Columns Table Runner Sewing Tutorial today! Crosswise fabric strips, Dresden wedges, and a few fabric squares make this an easy piecing project–even for beginnes! The 23″ x 39″ quilt size is ideal for display on a table or wall—you decide! PLUS a Special Announcement (below) about The Great Wisconsin Quilt Show –Virtual Event!
Watch Stitch it! Sisters Program 102: Dresden Columns Table Runner
Watch Stitch it! Sisters Program 102: Dresden Columns Table Runner video with hosts Deanna Springer and Dana Casey. In this video, the Stitch it! Sisters share step-by-step fabric cutting and sewing techniques for making NZP’s NEW! Dresden Columns Table Runner or Wall Hanging Project.
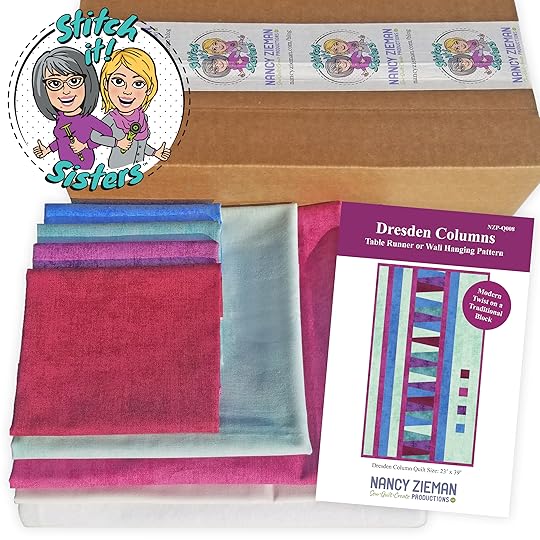
 Then, head over to ShopNZP.com and purchase our exclusive Dresden Columns Table Runner or Wall Hanging Bundle Box! This NEW! Bundle Box features an array of jewel-toned light, medium, and dark fabrics for amazing contrast: Dramatic colorful Shades by Riley Blake Designs. The Bundle Box also includes backing and binding fabric, plus batting and pattern–with full-color step-by-step instructions! You’ll supply the thread.
Dresden Columns Table Runner or Wall Hanging Sewing Tutorial
Approximate finished size: 23″ x 39″
Dresden Columns Table Runner or Wall Hanging Tools & Supplies
Exclusive Dresden Columns Table Runner or Wall Hanging Bundle Box
I Sew For Fun Heart Shaped Straight Pins
Clover’s Pin ‘n Stow Magnetic Wrist Pin Cushion and/or I Sew For Fun Heart-Shaped Magnetic Covered Pin Caddy
1/4″ Quilting Presser Foot
Clover’s Straight Tailor’s Awl/Stiletto
Quilter’s Starch Savvy
Tailor’s Clapper
Clover’s Rotary Cutter and Mat, & Ruler
Schmetz Size 90/11 Chrome Quilting Needles
Optional: Quilt Basting Spray
Optional: Schmetz Size 90/14 Super Nonstick Sewing Machine Needles
Create Column Strips
Pre-shrink fabrics by steaming and pressing, and steaming and pressing a second time, and then spray press and starch fabric with June Tailor’s Quilter’s Starch Savvy — press and starch, press and starch.
All seam allowances are scant 1/4″ unless otherwise stated. Read all instructions prior to beginning project.
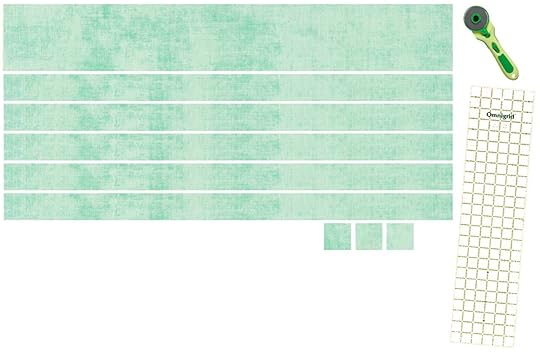
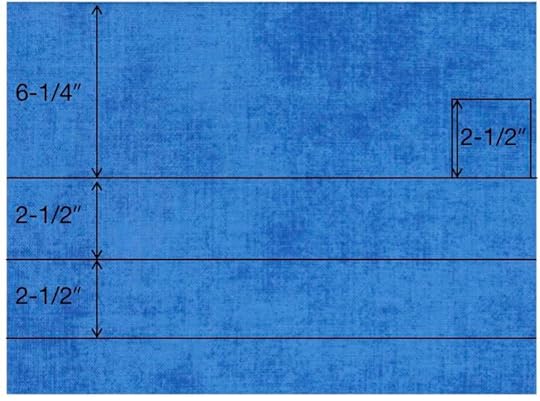
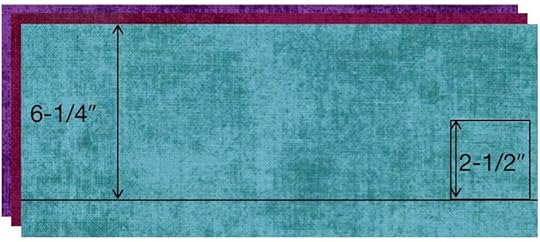
Cut Column Strips
Bottlegreen Cotton Shades: Cut one 6-1/4″ crosswise strip, cut five 2-1/2″ crosswise strips, cut three 2-1/2″ squares.
The following illustrations show 42″ wide fabrics.

Cobalt Cotton Shades: Cut one 6-1/4″ crosswise strip, cut two 2-1/2″ crosswise strips, subcut one 2-1/2″ square from end of 6-1/4″ one crosswise strip.
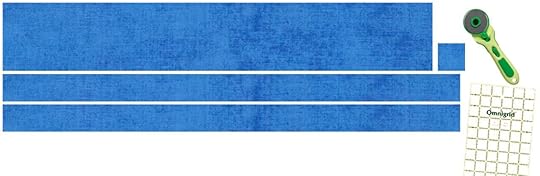
If using fat quarters for the column fabric strips, cut double crosswise fabric strips to create 40/41″ column strips. Place strips right sides together, in pairs. Pin at one short edge. Stitch. Press seams to one side.
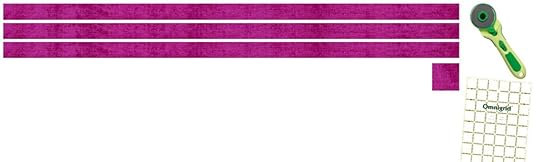
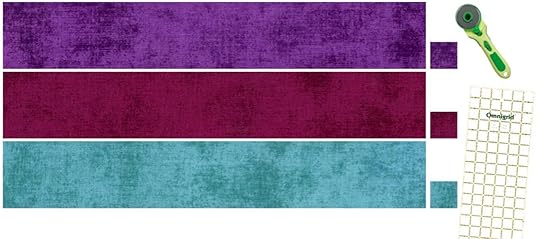
Fuschia Cotton Shades: Cut three 1-1/2″ crosswise strips, cut one 2-1/2″ square.
Reserve remaining Fuschia Cotton Shades fabric for binding.

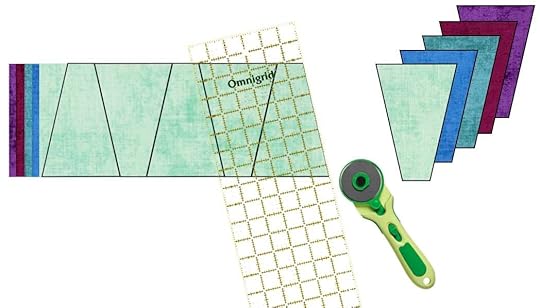
Cut Dresden Column Wedges and Squares
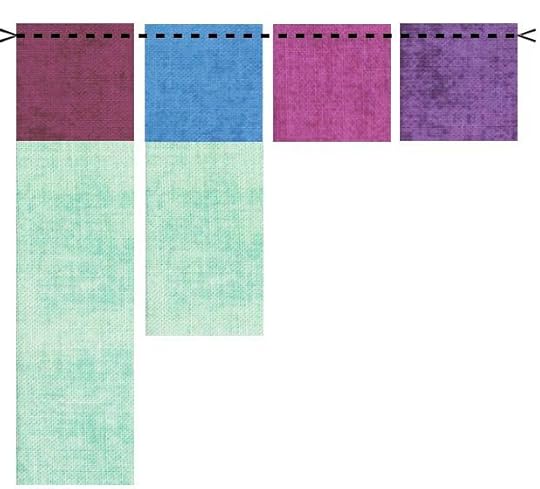
Stack three fabrics: D-Teal Cotton Shades, E-Burgundy Cotton Shades and F-Grape Cotton Shades.
Cut one 6-1/4″ crosswise strip from each fabric.
Subcut one 2-1/2″ square from end of each of the three crosswise fabric strips.
Make the Dresden Wedges
Stack random pairs of the 6-1/4″ crosswise fabric strips; A-Bottlegreen Cotton Shades, B-Cobalt Cotton Shades, D-Teal Cotton Shades, E-Burgundy Cotton Shades and F-Grape Cotton Shades.
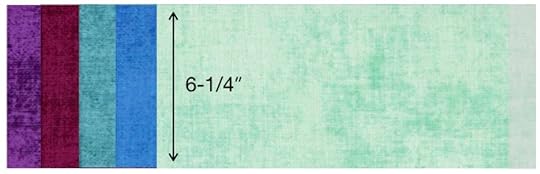
Trace Dresden wedge template (page 6 of the pattern) on paper. Cut out paper template.
With fabric marking pen, trace Dresden wedge template on crosswise fabric strip pairs, rotating template 180º as needed to trace six Dresden wedges from each fabric.
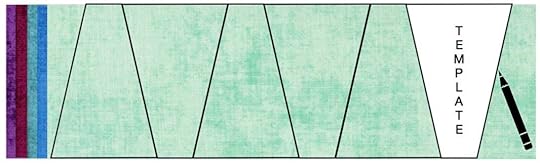
Using a rotary cutter and ruler, cut six Dresden wedges from each of the five fabrics, cutting on traced lines.
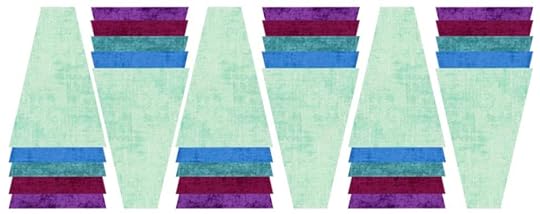
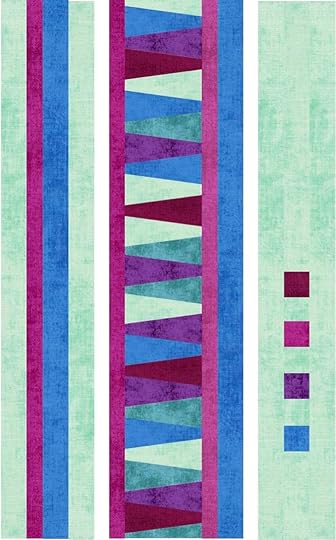
To make the following step easier, randomly place the Dresden Wedges within the column. The illustrations depict the featured Table Runner but you are welcome to personalize the design.
Prepare Dresden Wedge Column for Quilt
Lay out, assemble and stitch the Dresden wedges according to diagram for the column.
Alternate Dresden shape to create a parallelogram shaped column.

Stitch Dresden wedges together in pairs.
Align the right sides and edges of the Dresden wedges, creating a slight V shape.
Pin.
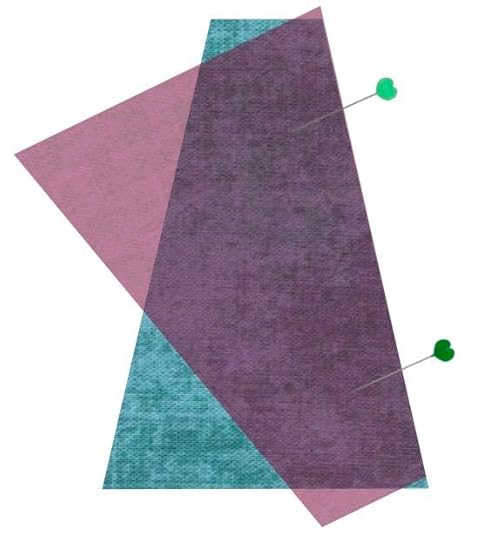
Align the edge of the sewing machine’s presser foot with the edge of the fabric. Stitch the seam. The first and last stitches should land at the V shapes created by the overlapping seam allowances.
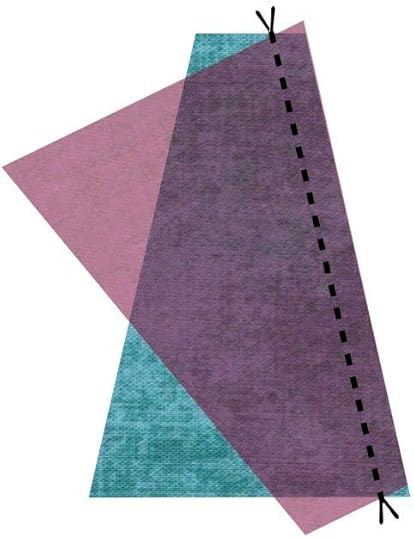
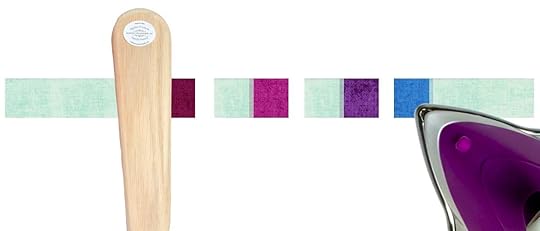
Press seams open.
To set seams, press with a steam iron. After pressing, place a Tailor’s Clapper over the pressed area and apply even pressure.
Continue adding Dresden wedges until column is complete.

Using a rotary cutter and ruler, trim column length to 39″.

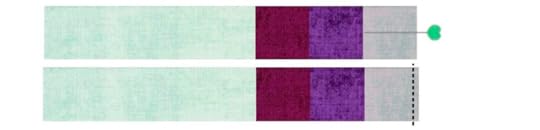
Prepare Floating Squares Column for Quilt
Subcut one 2-1/2″ crosswise fabric strip A-Bottlegreen Cotton Shades into: One 2-1/2″ x 20″ and one 2-1/2″ x 7″
Create Subsets:
Place Fabric A-Bottlegreen Cotton Shades 20″ strip to Fabric E-Burgundy Cotton Shades 2-1/2″ square, right sides together.
Pin at one short end.
Place Fabric A-Bottlegreen Cotton Shades 7″ strip to Fabric B-Cobalt Cotton Shades 2-1/2″ square, right sides together.
Pin at one short end.
Place one Fabric A-Bottlegreen Cotton Shades 2-1/2″ square to Fabric C-Fuchsia Cotton Shades 2-1/2″ square, right sides together.
Pin.
Place one Fabric A-Bottlegreen Cotton Shades 2-1/2″ square to Fabric F-Grape Cotton Shades 2-1/2″ square, right sides together.
Pin.
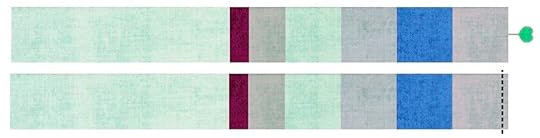
Stitch subsets:
Stitch one short edge, of each subset pair.
Kiss one subset pair to the other and chain stitch from one subset pair to the next. Clip threads between subset pairs.

Press seams to darker fabric.
Following diagram, place four subsets, and one remaining Fabric A-Bottlegreen Cotton Shades 2-1/2″ square, end to end to create column.

Place subsets right sides together, in pairs, pin.
Stitch the short edges.


Press seams toward dark fabric.

Arrange and Join Columns for the Quilt
Using the diagram, join Columns 1–11 to finish piecing the table runner top.
Trim each column strip to 39″ in length.
Place column strips right sides together, in pairs. Pin.
Stitch.
Press seams flat, then to one side.
Layer, Quilt, and Bind
Layer finished quilt top on batting and backing fabric. Quilt Layers using your favorite quilting techniques.
Finish your quilt, using your favorite binding technique or use Nancy Zieman’s Favorite Quilt Binding Method!
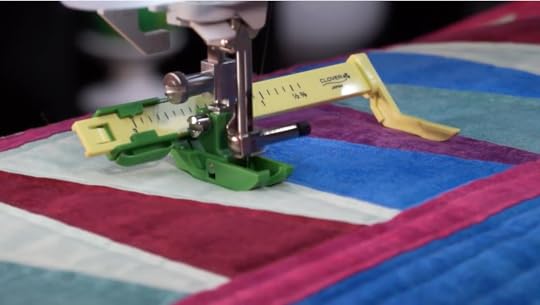
Use the Ultimate Quilt ’n Stitch Presser Foot to straight-line machine quilt your Dresden Columns Quilt. Easily Stitch multiple parallel rows of quilting – without marking lines, and echo stitch inside floating squares.
Dresden Columns Table Runner or Wall Hanging Tools & Supplies
Exclusive Modern Floating Triangles Wall Hanging and Table Runner Bundle Box
I Sew For Fun Heart Shaped Straight Pins
Clover’s Pin ‘n Stow Magnetic Wrist Pin Cushion and/or I Sew For Fun Heart-Shaped Magnetic Covered Pin Caddy
1/4″ Quilting Presser Foot
Clover’s Straight Tailor’s Awl/Stiletto
Quilter’s Starch Savvy
Tailor’s Clapper
Clover’s Rotary Cutter and Mat, & Ruler
Schmetz Size 90/11 Chrome Quilting Needles
Optional: Quilt Basting Spray
Optional: Schmetz Size 90/14 Super Nonstick Sewing Machine Needles
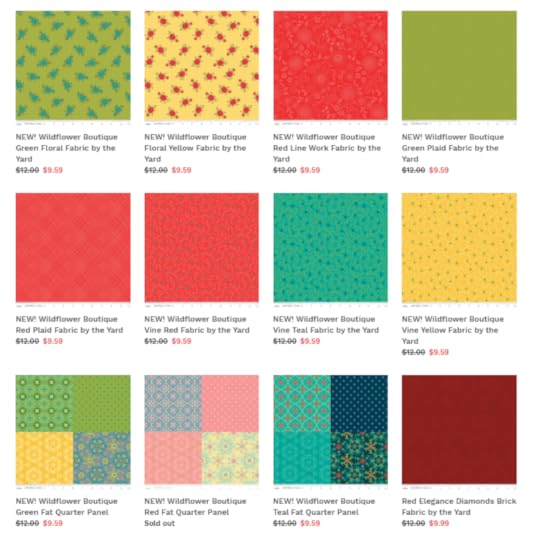
Shop NEW! Wildflower Boutique Fabrics at ShopNZP.com
Shop Cotton Webbing, Zippers & More at ShopNZP.com
Shop Wildflower Boutique Bundle Boxes at ShopNZP.com!
Shop Clover Tools & Sewing Supplies at ShopNZP.com!
Shop Schmetz Sewing Machine Needles at ShopNZP.com!
Join Team NZP this week for The Great Wisconsin Quilt Show –Virtual Edition– September 10 -12, 2020

The Great Wisconsin Quilt Show –Virtual Event– September 10 -12, 2020 at QuiltShow.com
Deanna Springer, Dana Casey, and the NZP Team – along with PBS Wisconsin – are pleased to co-produce The Great Wisconsin Quilt Show –Virtual Event, Sept. 10-12, 2020. If you haven’t already, register for free today at QuiltShow.com
Join the Stitch it! Sisters this Thursday thru Saturday, Sept. 10-12, for our daily Facebook Live – beginning at 10 a.m. Central Time – at the Nancy Zieman Productions Facebook page! Join us as we celebrate The Great Wisconsin Quilt Show – Virtual Edition – LIVE from NZP with Quilt Show Specials & New Fabrics starting tomorrow at ShopNZP.com.
For a chance to be the random winner of The Ultimate Quilt ‘n Stitch Presser Foot from Clover, please leave a comment below sharing your favorite quilting memory.
Clover will give away one of The Ultimate Quilt ‘n Stitch Presser Foot, to one US resident in the 48 contiguous states. Winner must reply within 30 days to the official giveaway announcement email message – sent from Nancy Zieman Productions.

The randomly selected winners of one of the I Sew For Fun Sewing Tools from Clover, from the September 1 Blog Post, We’re Celebrating September as National Sewing Month with a Few of our Favorite Sewing Tools!, are:
Robbin Golden – As I age, the Flexible Thimble Set would be really useful. Thank you for your consideration!
Jan Nelson – Thank you for continuing Sewing with Nancy, I enjoy the TV series immensely and trusting it continues for a long time to come. It is so helpful.
Mary Gray – Clover tools have always been great. The few tools that I own are quality tools. Unfortunately, I do not have a store in my shopping area that carries a lot of the clover tools.
Janet Duff – Sewing for fun has gotten me through many times that less than fun things were happening around me. I believe I would use the seam roller the most. What a great set of tools!

Happy Stitching!
Team Nancy Zieman
Nancy Zieman Productions. LLC.
[image error]
Stitch it! Sisters is a production of NZ Productions LLC. Content in this feed is © copyright 2020 by Nancy Zieman Productions, LLC and may not be republished without written permission. You’re welcome to forward the email to a friend or colleague but it’s not okay to add the RSS feed automatically as content on a blog or other website. The FTC requires us to tell you that Nancy Zieman Productions, LLC has provided products by other companies in the course of doing business. The FTC requires us to advise you to take this information into consideration when reading this posting.
Make sure you are subscribed to Nancy Zieman Productions, LLC enews mailing list so you won’t miss a thing. Sign up at nancyzieman.com/blog/enews. And join us on YouTube, Facebook, Instagram and Pinterest!
Nancy Zieman's Blog

- Nancy Zieman's profile
- 21 followers

