
K.M. Weiland's Blog, page 47
June 26, 2017
How to Calculate Your Book’s Length Before Writing
 Story structure is all about timing. It’s about making sure your rhythm and pacing align for maximum impact, both in keeping readers glued to the page and in resonating emotionally.
The reason this timing works is that it is largely instinctive, for both writers and readers. When I first started learning about story structure, I pulled my two published novels off the shelf, flipped through their pages to the quarter, halfway, and three-quarters marks—where my First Plot Point, Midpoint, and Third Plot Point were supposed to show up—and lo and behold, they were there!
As a reader, whenever I find myself immersed in a story in which something just isn’t right—either it’s slow and boring, or feels rushed and unrealistic—almost inevitably, I discover the structural timing is also out of whack.
This is really great news for writers. It means we have a solid structural skeleton on which we can rely when building our stories. We don’t have to guess when it might be best for certain big scenes to take place. We know.
On the other hand, for all our awesome storyteller instincts, sometimes it’s still ridiculously hard to force unruly stories to line up with the proper timing. Recently, on Facebook, Abigail Welborn reiterated one of the most common structural questions I’m asked:
I’ve been studying story structure for about a year, and I’m working on the second outline for my current WIP. (By the way, SO much easier to outline first!) I came up with all the plot points first, but when I went to fill in what happened in between, I noticed a plot problem. Solving it caused the First Half of the Second Act to balloon until I didn’t get anywhere close to being at the Midpoint I was aiming for. I’d love to read a post on how you know how much in the outline translates into how many words, or what happens when you need to rejigger an outline, which ripples down the line and disrupts all your carefully plotted points.
Let’s take a look!
The Basics of Structural Timing
First off, let’s review what proper structural timing looks like. I have, of course, discussed story structure in detail elsewhere, including my book Structuring Your Novel. But here’s a crash course:
The First Act (1%-25%): presents the foundational period of setup for the story to follow.
The Hook (1%): offers the opening moment that grabs reader curiosity.
The Inciting Event (12%): officially kicks off the plot halfway through the First Act.
The Key Event (20%/25%): officially engages the protagonist in the events of the plot and occurs just prior to or coincides with the First Plot Point.
The First Plot Point (25%): marks the end of the First Act and the end of the story’s setup in the character’s “Normal World.”
The First Half of the Second Act (25%-50%): notes a period of reaction for the protagonist, in which he tries to cope with the events of the First Plot Point.
The First Pinch Point (37%): provides a reminder of the antagonistic force’s power and a setup for the Midpoint.
The Midpoint (50%): creates a moment of revelation for the protagonist as he comes into a clearer understanding of the true nature of the conflict.
The Second Half of the Second Act (50%-75%): notes a period of action for the protagonist. Armed with his new understanding, found at the Midpoint, he can now take the action right to the antagonistic force.
The Second Pinch Point (62%): bookends the First Pinch Point as an emphasis or reminder of the antagonistic force and a set-up for the Third Plot Point.
The Third Plot Point (75%): creates a moment of seeming defeat for the protagonist.
The Third Act (75%-100%): finally resolves the conflict, one way or another.
The Climax (88%-98%) : starts halfway through the Third Act and is heralded by a final turning point that pits the protagonist against the antagonistic force in the final battle.
The Climactic Moment (98%): occurs at the end of the Climax and is the true ending of the story, the moment when the conflict is finally resolved.
The Resolution (98%-100%): ends the story with a final scene or two to tie up the loose ends.
(For myriad examples of how all these elements play out in popular books and movies, check out the Story Structure Database.)

How Long Should Your Book Be?
So here you are, sitting in front of the first blank page of a brand-new story. Naturally, you want it to be perfectly structured from the get-go, if only to save yourself all that editing on the other side. But how are you supposed to take a blank canvas and just know where the first structural beat is supposed to take place?
There are two ways to do this, both of which we’ll talk about further in the sections below:
1. You can wing it.
Just start writing and trust your instincts. You’ll probably make mistakes, but you’ll also probably do better than you might think (remember those two novels I structured before I even knew what structure was?).
2. You can calculate your book’s length.
Timing in a novel is based on word count. If you know how long the book is, you can divide it into eighths to find the perfect timing for all your major turning points.
So how long should your book be? There are a few factors to consider:
1. What’s your genre?
Genre is a major player in any equation calculating your book’s length. This is particularly true if you’re hoping to be published traditionally, since an over-long manuscript will risk an insta-no from agents and editors. But it’s also true of independent authors. There are sound marketing reasons for why genre word counts are enforced.
In her article “Word count by genre: How long should my book really be?,” editor Kit Carstairs notes:
A manuscript over 40,000 words is considered to be a novel. However, very few novels these days are as short as that. Generally a 50,000-word novel would be the minimum word count. Most novels are between 60,000 and 100,000 words. A single novel can be longer, but once the length is above 110,000 words publishers may look at cutting it back, unless it is a particular kind of book—books over the 110K word count are usually considered “epics.”
You can find suggested lengths for specific genres in her article.
2. How long do you want the book to be?
Although genre expectations are a good place to start deducing your story’s optimal word count, you don’t have to adhere perfectly to these suggestions. A story’s gotta be what a story’s gotta be.
Consider the type of story you’re wanting to tell, as well as the time investment you’re willing to put in. Both will influence the size of your desired finished product.
3. Are you an underwriter or an overwriter?
Finally, consider your own work habits. Do you consistently struggle with turning out manuscripts that are shorter than what you were hoping? Or (like me) do you churn out big fat monsters that are twice as long as anybody else’s finished drafts?

Knowing your own proclivities will help you adjust accordingly in the prep stage. Knowing my tendency to explode my projected word counts, I estimate conservatively. For example, I don’t want my portal fantasy sequel work-in-progress Dreambreaker to outstrip Dreamlander‘s 180k—so I’ve aimed for 120k to give myself plenty of wiggle room.
How to Calculate Plot-Point Timing in the Outline
Once you know how long you want your book to be, figuring out the timing of the plot points is easy. Divide your estimated word count by eight to discover how long each structural segment should be.
Let’s just make this easy and say you’re writing an 80k-word story. That means each section of your story should be approximately 10k words:
1. Hook–Inciting Event: 0–10,000 words
2. Inciting Event–First Plot Point: 10,001–20,000 words
3. First Plot Point–First Pinch Point: 20,001–30,000 words
4. First Pinch Point–Midpoint: 30,001–40,000 words
5. Midpoint–Second Pinch Point: 40,001–50,000 words
6. Second Pinch Point–Third Plot Point: 50,001–60,000 words
7. Third Plot Point–Climax: 60,001–70,000 words
8. Climax–Resolution: 70,001–80,000 words
But . . . you’re an outliner. You’re trying to outline your structure, which means you have no idea of the actual word count. What to do?

You can use the Outlining Your Novel Workbook software to help you start your scene list by building your story structure skeleton.
 Easy. You don’t outline your structural timing according to word count; you outline it according to scene count, using these three steps:
Step 1: Estimate Scene Length
First thing to do is estimate the average length of a scene. For convenience’s sake, I usually treat each scene in the outline as a chapter (although, remember, chapter divisions are arbitrary; structural scene divisions are not). If you’ve written previous books, take a look at a handful of scenes and figure out the average length. For example, 3,500 words is pretty average for me, so I assume most of my scenes in any new story will continue the trend.
Step 2: Divide Scene Word Count Into Total Word Count
Once you know how many words each of your scenes is likely to be, you can then divide that into your projected word count to figure out approximately how many scenes need to be in your story. If you’re writing that 80k-word novel and you’re shooting for 2k-word scenes, you know you’ll end up with around 40 scenes.
Step 3: Divide Scene Count by Eight
Remember, there are eight major structural beats. To discover where those beats should ideally end up within your outline, divide your number of scenes by eight. For that 40-scene novel you’re writing, you’ll discover you’ll get five scenes per structural section.
Once you know that, you can start outlining accordingly, arranging your story’s events to fill out each section’s five scenes to maximum effect.
The great bonus here is that this approach will also help you identify what role each scene needs to play in your overall story.
The first five scenes? Setup, baby.
The five scenes between the First Plot Point and the First Pinch Point? Reaction and determined pursuit of the Thing the Character Wants.
Etc.
How to Calculate Plot-Point Timing in the First Draft
But what if you’re not an outliner? What if you’re trying to time your plot points while writing the first draft?
That, admittedly, is a little trickier, but can still be done.
Again, all you have to do is estimate your total word count, then divide it by that magic structural number—eight. If you’re also writing an 80k-novel, then you know you have 10,000 words per structural section. Keep an eye on the ol’ word count as you’re writing along. Once you’re cruising toward the 10k mark, you know you’ve got to get your Inciting Event ready to go.
And so it goes on down the line.
How to Correct Faulty Timing After the Fact
Now, what about “rejiggering” your timeline, as Ashley calls it at the beginning of the post, when something goes wrong with your initial estimate?
Gotta tell you: that’s no fun. This is why it’s so valuable to figure out both your timing and your structure before you start writing.
Still, it’s almost inevitable that vagaries will occur, even in the cleanest outline:
Some structural sections may turn out much longer/shorter than you anticipated.
The causal effects that seemed sound in the outline may prove entirely infeasible in the first draft, prompting new plot events.
You might just get carried away by awesome new ideas during the first draft.
Whatever the cause, you might discover one of your structural sections is either emaciated or obese. In these instances, the only option is returning to the drawing board. Reconfigure your math to set goals for the problem section—and then start brainstorming ways to tighten or fatten up your word count.
How Perfect Does Structural Timing Have to Be Anyway?
About now, you might be wondering just how perfect your structural timing has to be. If you’re off by 1% of your word count, are you in trouble?
It’s important to remember structural timing is a guideline. It shows us the ideal and gives us a rule of thumb against which to check our progress. But it’s not an absolute judgement of your novel’s success or failure.
What’s most important is that all the structural elements are present. Timing exists to make certain each of those elements is then given the proper amount of space to develop realistically.
But you do have leeway. I aim to hit my structural timing to within 5%, but depending on the story, sometimes even a margin of 10% may be acceptable. In general, the shorter your story, the more precise you must be. And vice versa, the longer your novel, the less likely readers are going to start fidgeting if you don’t absolutely nail the timing of your story’s exciting turning points.
As with everything in writing: techniques such as structural timing are your servants, not your masters. Use them to make things easier on yourself, not harder. Used wisely in the prepatory stage, proper timing can help you create a solid first draft that negates the need for massive rejiggering on the back end.
Wordplayers, tell me your opinion! How long do you hope your work-in-progress will be? Tell me in the comments!
http://www.podtrac.com/pts/redirect.mp3/kmweiland.com/podcast/how-to-calculate-your-books-length-before-writing.mp3
Click the “Play” button to Listen to Audio Version (or subscribe to the Helping Writers Become Authors podcast in iTunes).
The post How to Calculate Your Book’s Length Before Writing appeared first on Helping Writers Become Authors.


June 25, 2017
How to Ace the First Act in Your Sequel
 Part 15 of The Do’s and Don’ts of Storytelling According to Marvel
Sequels are special. On the one hand, they still must follow all the same basic rules of good storytelling. But on the other hand, they both simplify and complicate various aspects of that approach. While the burden of introducing important elements (characters, settings, conflicts) is often lessened, the stakes will be raised in bringing greater depth to the existing story without allowing it to become repetitious. Nowhere is that more important—or challenging—than in the First Act in your sequel.
Let’s be honest: the First Act is always tricky, whether you’re writing a standalone or a sequel. Authors must juggle any number of important tasks, including:
Hooking readers’ attention.
Opening with a “first domino” event.
Introducing characters.
Introducing primary conflict.
Introducing thematic principles.
Creating a suitable Call to Adventure (and refusal) in the Inciting Event.
Building up to the First Plot Point.
Pacing all the above so it’s neither too slow, nor too frenetic.
That’s quite a checklist. The First Act in your sequel must still accomplish all of that. But the good news is that, because the foundation for at least the first five items was already laid in the first story, you get to focus a little less on introductory stuff and a little more on creating awesome hooks.
This only works if you’re taking advantage of everything you already know about your story—and kicking it up to the next notch.
Which brings us to…
Guardians of the Galaxy, Vol. 2 and (Arguably) Marvel’s Best Opening for a Sequel
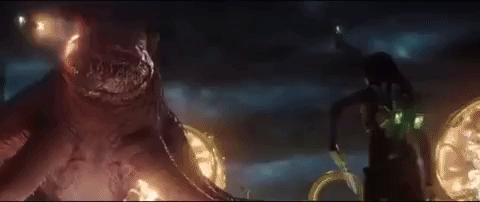
Welcome to Part 15 of our ongoing series exploring the highs and lows of the Marvel Cinematic Universe. After Guardians of the Galaxy shocked everyone a few years ago with how good its rompy brand of space humor turned out to be, its follow-up to the original Awesome Mix was going to have to be very, very good to keep up.
As with many sequels, it’s a bag of trail mix—but, happily, there’s more M&Ms in there than raisins.
It’s funny—and in the best way, with character-centric humor that ultimately urges us to love this ragtag bunch of sentients rather than despise them (as so much of modern humor is apt to do).
Trying to chart the structure in the theater (without a clock) was kind of like somebody shooting confetti in my face. Which is to say: I honestly can’t say, after one watch, how well the structure holds up. Sometimes complicated is good, sometimes not. In light of the fact that the story does wobble about a bit with protagonist Peter Quill being something less than active in the Second Act, my first reaction is that we’re seeing the latter here. But I’ll have to wait for VOD to finish its structural analysis and add it to the Story Structure Database.

Awesome Mix, Vol. 2, was indeed awesome—perhaps even better and more apt than the original’s soundtrack.
And possibly my two favorite moments in the whole movie (with the exception of the one we’re going to talk about in just a second) are:
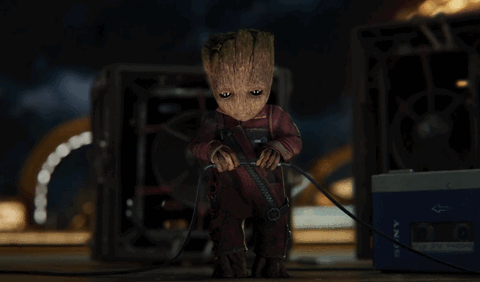
Drax and Baby Groot.
And the look in Peter’s eyes when Rocket indicates his fears the Guardians will leave him over his problematic relationships skills: “Of course not.”

In writing this series, my approach in deciding whether a movie will be about a “writing do” or a “writing do not” is largely dependent on whether or not I liked the movie. Vol. 2 is not a perfect movie, and I could probably have done a post about that laggy Second Act. But, at the end of the day, I enjoyed it, as I think most people did. And that enjoyment all started with a slam-bang opening in its First Act.
Learn to Effortlessly Juggle These 3 Vital Elements in the First Act of Your Sequel
Of all the vital First-Act elements mentioned in the post intro, the three that are arguably the most difficult to fuse in your opening are:
1. The Hook
2. The First “Domino” Event of the Plot
3. The Introduction of Characters, Conflict, and Theme
The reason these are so tricky is they pretty much have to happen all at the same time in your opening scene. Come up with a great Hook? Yeah, no problem. But come up with a Hook that is also the first domino in your plot that also introduces prominent characters, their relationships to the conflict, and their thematic orientations?
Totally why authors end up emotionally eating all the M&Ms out of their trail mix.
I’ll be honest with you: there’s no secret sauce here. Every story is different. The perfect combo that works for Guardians isn’t going to work for Captain America, and what’s for Cap isn’t going to work for my story or yours.
But in identifying how other stories balance this trifecta of a perfect opening, we can learn how to find exactly the right elements for our own openings.
Doing so may be a little easier in a sequel, since with the burden of introduction lifted a little, you’re freer to focus on being awesome. But don’t be fooled: this very opportunity for awesomeness means you’re under that much more pressure to fulfill it.
Here’s how.
1. What’s the Hook in Your Sequel’s First Act?
The Hook is the first structural moment in your story. It starts everything off by grabbing readers’ attention. Since we’re studying the action genre here, you might think the obvious way to do this is simply to blow something up (which Vol. 2 does). But not so much. Explosions—or anything high-octane—aren’t so interesting in themselves.
The only way to capture your readers’ interest is to surprise them, even if it’s just a little. The foundation of this surprise is juxtaposition. Take two varied elements that don’t quite go together and mix them all up.
1. All Is Not As It Seems
Often, creating juxtaposition is as simple as engineering an opening paragraph that immediately tells readers all is not as it seems. In a sequel, this is even easier and more fun since readers already have definite expectations about what is normal within this story world, based on your first book. You can riff on that in the opposite direction, which is what I did in my portal fantasy sequel WIP Dreambreaker:
This was a dream. That was the entirely obvious explanation. Except Chris Redston hadn’t dreamed in three years.
2. The Characters Are In Medias Res
This is why the technique of opening in medias res (or, in the middle of things) is so popular. When readers encounter characters after their adventure has already started, authors have the opportunity to hook readers’ curiosity by making them wonder how the characters got here to begin with.
Granted, this technique is often abused and overused. You can’t just open in the middle of the explosion. Even in a sequel, you must ground readers enough to remind them why they care what happens to these characters.
3. The Opening Episode Is Entertaining
What is it that makes something entertaining? It’s surprise. It’s juxtaposition. It’s the unexpected (even when it is kinda expected). The First Act in your sequel gives you an unparalleled opportunity to revisit the material from your first book, but to riff on it in a slightly different way. You can tap readers’ nostalgia for and love of the first book, while steering them around the corner into the newness of this second installment.
Take a moment to consider what you believe readers enjoyed most about your characters, plot, and the general tenor in the first book. How can you give them a second helping of that in the first chapter of your sequel—but in a way that expands upon the existing material?
In the first book, you likely couldn’t bring all your big guns onto the screen right in the first chapter. But in the sequel, you can.
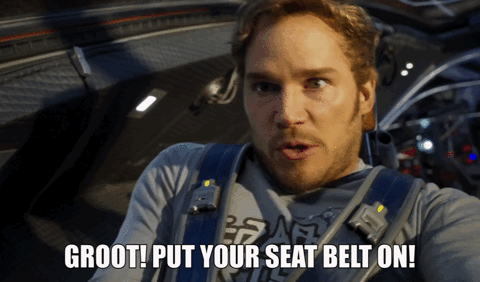
How Vol. 2 Created a Fabulous Hook
When readers or viewers embark on sequel, they’re usually excited, but a little unsure. How will this story measure up to the first one? It’s the writer’s job to create an opening Hook that promises fans they’re back in good hands. Vol. 2 does this in spades by opening in medias res with the Guardians up their elbows in galaxy-saving work (and alien entrails), just as expected.

But instead of simply throwing readers into yet another opening battle montage, the film approaches its Hook through the creative portal of its predecessor and gives us an immediately grin-inducing opening sequence, in which Baby Groot dances obliviously and joyously to “Mr. Blue Sky,” through life-threatening chaos in a way that cleverly gives each of the primary characters a one-line characteristic moment.

2. What’s the Plot’s “First Domino” in Your Sequel’s First Act?
Now it’s time to complicate things. Not only must your opening scene entertain readers by both reminding them of everything they loved about the first book and piquing their curiosity about this new story—you also have to kick off the plot.
It’s important to remember that within the structural framework, the characters will progressively immerse themselves in the main conflict. Full immersion (i.e., inextricable immersion) won’t happen until the First Plot Point at the end of the First Act (25% of the way through your story). The character’s first distinct impact with the main conflict doesn’t happen until halfway through the First Act at the Inciting Event (the Call to Adventure that occurs here is basically the universe smacking the hero upside the head and saying: “Hey, this is what’s happening here—you gonna play or not?”).
So if the main conflict doesn’t come into view until the Inciting Event, how can you introduce that conflict in the Hook?
It’s important to distinguish the Inciting Event (the first brush with the main conflict) from the first domino that sets the character’s feet on the path toward that first brush. Inherent within the setup period in the first half of the First Act is the setup of the conflict itself. The protagonist’s ability to engage with the main conflict doesn’t just happen out of the blue. It must first be set up via several factors:
What is the fundamental Thing the Protagonist Wants?
How will this spark a specific plot goal (which will be opposed by the conflict, first in the Inciting Event, then definitively in the First Plot Point)?
What does the antagonist want (if he’s a human)?
How will the antagonistic force (human or not) present obstacles to your character’s plot goal?
What events will lead the protagonist and the antagonistic force to intersect and roadblock each other?
How Vol. 2 Introduces Its Plot’s First Domino
Vol. 2 encapsulates its Hook in the opening battle, via the neat little trick of creating what is, essentially, a standalone episode at the beginning of its story. This allows the story to hook readers while still giving itself space to get its “plot feet” under itself.
Note, however, that this opening episode is not a prologue. Even though it presents its own tidy little narrative (which opens in medias res and basically ties off what amounts to a previous plot goal/conflict/outcome), it leads directly into the main conflict—via Rocket’s needlessly stealing the “Harbulary” batteries and angering the Sovereign into pursuing and attacking Peter’s ship the Milano (which leads right into the Inciting Event, in which Ego saves them).
3. What Characters, Conflicts, and Themes Need to Be Introduced in Your Sequel’s First Act?
The First Act is the bookend to your Third Act. Whatever important elements will come together to create the final confrontation—within both the inner and outer conflicts—in your story’s Climax, they must be introduced here.
That can be a tall order, since finding creative seamless ways to introduce a large cast can easily become an exercise in clunkiness. Sowing these important elements seamlessly into your First Act requires forethought and attention. Optimally, you want to create early scenes that allow you to organically introduce, or at least foreshadow, all important elements.
Not everything, of course, needs to appear in the first chapter, but it’s best if you can at least give them a nod before the Inciting Event. The first half of your First Act is all about setup, so the second half can then focus on the build-up to the First Plot Point.
Start by introducing your characters—everything else flows from them. Ideally, you should be able to discover characteristic moments (either via an action or a line of dialogue) that show readers who these people are in ways that are entertaining enough to be Hooks, in themselves, while also introducing the plot via these characters’ desires, goals, and ability to present obstacles to one another.
The great news in a sequel is that you’re not really introducing these people. You’re just reminding readers who they are—which gives you even greater leeway for characterization. You don’t have to run through a whole long list of who these characters are within their worlds (as, in for example, Tony Stark’s excellent introduction in Iron Man), but rather just hit upon their single greatest defining characteristic (as, for example, demonstrated in Tony’s grand entrance to the Stark Expo in Iron Man 2).
How Vol. 2 Introduces Its Characters, Conflicts, and Themes
Vol. 2 mirrors the original’s opening with a jazzy song-and-dance routine. But unlike the original, we have no need for Peter’s self-introduction: “I come from Earth, a planet of outlaws. My name is Peter Quill. There’s one other name you may know me by. Star-Lord.”
We already know these characters, their relations to one another, and their general desires. This frees up a ton of space. The characters each get to introduce themselves through opening dialogue and characteristic actions:
Peter trying and largely failing to mother-hen everyone into following his half-baked plans.
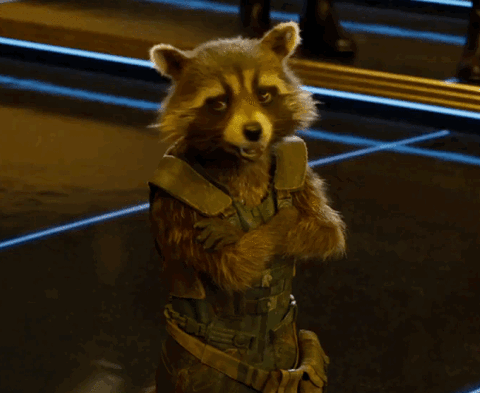
Rocket fiddling with gadgets and complaining about everything.
Drax refusing to cooperate and wear his safety gear.
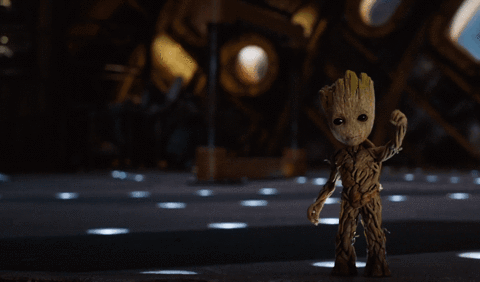
Baby Groot speaking in monosyllables and picking fights with lizards.
Gamora demonstrating wry practicality in focusing on the job at hand and using the appropriate tools (gun vs. sword).
Inherent in all of this are the desires and thematic underpinnings that will be further developed as the First Act continues. Although you could open a standalone or first story with these exact same characteristic moments, they would lack the subtextual depth they offer here, thanks to our existing familiarity with the characters. And, by the same token, had the filmmakers chosen to rehash all the characters’ roles and identities, they would have missed out on the prime opportunity of a sequel—to dive deeper into expanding and developing their cast.
***
Most of these principles hold true in any type of story. But particularly in the First Act in your sequel, make sure you’re taking full advantage of the groundwork you’ve already laid in your previous book. Much of your hard work in hooking readers with these characters is already done. Now you get to reap that labor by creating even stronger and better openings!
Stay Tuned: Next month, we’ll visit one of my all-time favorite Marvel characters in Spider-Man: Homecoming.
Previous Posts in This Series:
Iron Man: Grab Readers With a Multi-Faceted Characteristic Moment
The Incredible Hulk: How (Not) to Write Satisfying Action Scenes
Iron Man II: Use Minor Characters to Flesh Out Your Protagonist
Thor: How to Transform Your Story With a Moment of Truth
Captain America: The First Avenger: How to Write Subtext in Dialogue
The Avengers: 4 Places to Find Your Best Story Conflict
Iron Man III: Don’t Make This Mistake With Your Story Structure
Thor: The Dark World: How to Get the Most Out of Your Sequel Scenes
Captain America: The Winter Soldier: Is This the Single Best Way to Write Powerful Themes?
Guardians of the Galaxy: The #1 Key to Relatable Characters: Backstory
The Avengers: Age of Ultron: The Right Way and the Wrong Way to Foreshadow a Story
Ant-Man: How to Choose the Right Antagonist for Your Story
Captain America: Civil War: How to Be a Gutsy Writer: Stay True to Your Characters
Doctor Strange: 3 Ways to Test Your Story’s Emotional Stakes
Wordplayers tell me your opinions! Have you written any sequels? If so, what did you find either easier or harder about writing the First Act in your sequel? Tell me in the comments!
http://www.podtrac.com/pts/redirect.mp3/kmweiland.com/podcast/how-to-ace-the-first-act-in-your-sequel.mp3
Click the “Play” button to Listen to Audio Version (or subscribe to the Helping Writers Become Authors podcast in iTunes).
The post How to Ace the First Act in Your Sequel appeared first on Helping Writers Become Authors.
June 23, 2017
4 Reasons You Should Outline Your Settings
 When you think of all the important story elements you need to outline, setting may not be at the top of your list. It might not even be on your list. But it should be. Setting provides the foundation for every other important element in your story—starting with plot, character, and theme, and progressing right on down to dialogue and narrative tone.
Usually, authors immediately know at least the general setting the story takes place in . . . NYC, Mars, Renaissance Italy, colonial Kenya, the Tetons.
But that’s just the beginning. Your story will never take place “in NYC,” but in very specific and intimate settings within that setting: the ladies’ room at the Met, that one bench in Central Park, that one backseat in that one taxi on the way to that one apartment.
Every single scene you write demands a specific, grounded setting. And every single one of those settings offers you the opportunity to either deepen and strengthen your story—or weaken it.
Worth planning ahead of time, don’t you think?
4 Reasons to Outline Your Settings
In my experience, the two best ways to tap your story’s best possibilities are to:
1. “Dreamzone” them up from your subconscious in sessions of intense and vivid visualization.
2. Consciously look beyond the first obvious choices.
Although you can certainly use both approaches while in the outlining stage, you’re more likely to be tapping into the second, via your logical brain. In so doing, concentrate on finding settings that help you take full advantage of the following opportunities.
1. Consciously Choose Awesome Alternatives
Whenever I sit down to outline a new scene, one of my first questions is: “Where is this taking place?” In fact, if ever I find myself stuck on plotting a scene, very often it’s because I haven’t yet asked this question. As long as my setting remains nebulous, my conflict never kicks into high gear.
Same goes for boring or expected settings. If one of my scenes seems flat or cliché, I step back and consider the setting. If I changed things up and put the characters in an unexpected setting, how would that alter the conflict, either explicitly or implicitly?
Consciously outlining your settings gives you the opportunity to look past the obvious choices to find the most interesting niches within your story world. Don’t give readers the usual 20-buck bus tour. Show them the true beating heart of this unique place.
2. Create Thematic Cohesion
Setting offers perhaps the most integral and vivid symbolism of your story’s theme. The backdrop against which your characters’ adventure plays out will always provide a commentary on that adventure. Choose well and that commentary will offer a subtext all its own.
Just as important, when you make conscious choices about your setting’s impact upon your theme, you’re also able to ensure that setting remains consistent and resonant throughout the story. Instead of selecting random settings for random scenes, you can purposefully bring your theme full circle by reusing certain settings at crucial moments in your plot.
Much better to reuse the same setting five times than to introduce five meaningless settings you never revisit.
3. Deepen Your Understanding of Character
Just as setting provides symbolism to your theme, it is also a commentary on your characters. You can use setting to provide visual dramatization of your character’s inner self. But even if you don’t want to take the subtext to quite this degree, your setting will still frame your readers’ perception of your character.
Why is this character in this place at this moment?
What’s his opinion of this place?
Does he want to stay or go?
If he’s been here long, how has this place shaped his life and his viewpoint?
The more you know about your settings during your outline, the better you will also understand your important characters and their motivations.
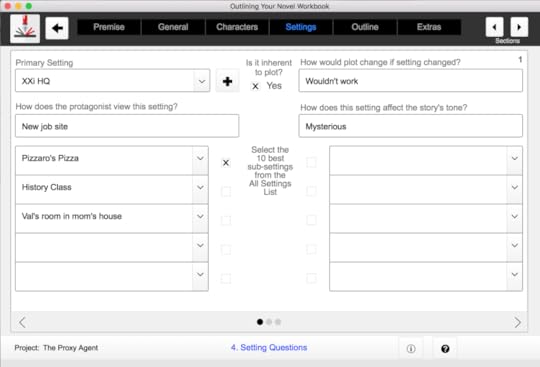
You can brainstorm and track your best setting options in the Outlining Your Novel Workbook software.
4. To Help You Write Faster Drafts
Finally, figuring out how to outline your settings will help you write better and faster in the first draft. When you’ve planned the setting for each scene, you will never have to stop in medias res to try to figure out the best options.
Even better, you can get your most important research questions out of the way right from the start. Realistic settings are the life’s blood of realistic fiction. Bringing to life foreign (or just plain imaginary) places begins with the little details. If you know what details you’ll need before you start the first draft, you can place them at your fingertips when the writing starts in earnest.
As you’re planning the many other important elements of your story, don’t overlook setting. It not only underpins everything in your story, it also gives you the opportunity to take it all to the next level. Plus, it gives you the excuse to mentally visit some very cool places!
Wordplayers, tell me your opinions! What made you choose the setting you ended up with in your current scene? Tell me in the comments!
The post 4 Reasons You Should Outline Your Settings appeared first on Helping Writers Become Authors.
June 19, 2017
Learn How to Make the Most of the 5 Stages of the Writing Process
 Finding success as an author largely depends on how effective your actual writing process is. The key to not just getting words on paper, but to getting good words on paper is finding a daily system that invites you to enjoy your work, optimizes your creativity, and provides the support of feasible daily habits.
The writing process is different for every writer. The only commonality is the act of writing. Otherwise, I may prefer solitude, you may prefer a bustling cafe. I may prefer percussive music, you may prefer silence. I may write for two hours, you may write for one–or for four. I may need a familiar surrounding, you may be able to write anywhere, anytime.
Whatever the case, there are two truths to be recognized here:
1. You must find the unique writing process that works for you.
2. You can glean tidbits and insights from what works for other writers.
Reader Roberto emailed me, asking me to share my own current writing process:
I’d like to suggest a new post about your writing process. Can you explain in detail how you write? A typical session of writing, with all good and bad things and stuff you use daily.
5 Steps to a Complete Writing Process
For years, I used daily rituals (what I called “warming up“) to help me ease into the writing zone. The more I write, however, the less I require artificial aids. My writing process becomes simpler and simpler. Today, I’m going to share the basics of my creative process—all the way from the first spark of an idea, right on through to the end of revision.
1. What My Conception Stage Looks Like
The earliest breathings of inspiration, when a story is still congealing into something solid enough to write about, is of course the least structured part of the process. Really, there isn’t any structure at all. There’s just me daydreaming and occasionally taking notes. But there are some commonalities that show up in this part of the process from book to book.
1. Dreamzone
This is where it all starts. Sometimes it’s just random daydreaming. But I also consciously pursue inspiration by creating conducive creative environments. My favorite is listening to music in front of a fire pit on a moonlit night. I let the music guide me and my visual imagination take over. The spontaneous images and scenes that arise are usually random, but almost always vivid and organic. These will form the core of my story when I start outlining. The more of these visual ideas I store up, the more I will have to work with later.
2. Name the Characters
I never have a story until I have at least two characters. The relationship dynamic—whether it’s romantic, familial, antagonistic, or something else—provides the reason for the story and sparks all the questions and possibilities to come. As soon as I can see my characters, I have to name them, which is often one of the most difficult parts.
3. Title the Story
No, I take that back. Titling is always the hardest part. But story ideas never truly gel for me until I have at least a credible working title. It’s like I don’t have a place to put a story in my imagination until the title creates a box for it. Once I have a title, everything solidifies, finds its focus, and starts coalescing thematically.
4. Write a Summary
I’m never in a hurry to start writing things down. Once I write something down, it becomes a fact. In the early stages of conception, I don’t want to harden the possibilities into facts. I want them to breathe, to grow, to go in directions my logical brain isn’t capable of thinking about.
But at a certain point, when the main conflict is starting to gel, I know I’m ready to write down a short, back-cover-blurb-style summary—both to finally give my ideas a set focus and to make sure I don’t forget anything important down the road.

5. Record Early Notes
This is also where I start keeping a file of very sparse early notes. When a good idea comes to me during my dreamzoning sessions, I give it just a little snippet in my note file—just enough to capture the essence of what I saw in my head. I probably won’t use all of these ideas; but I can’t risk forgetting them either.
2. What My Outlining Stage Looks Like
My stories “brew” in the conception stage for a long time—years sometimes. But eventually, there comes a point when I know a story is ready to be written. Partly, this is because I’ve finished up my last book and am looking around for the next thing. And partly, this is because the new story just feels ready.
There is so much I don’t know about the new story yet. All I’m likely to have at this point is a sense of the main characters, the progression of their relationship, their desires and motivations, their world, and the gist of the conflict.
 But there’s something else too: the sense that the story is straining against the bounds of my subconscious imagination. It’s ready to burst forth like a butterfly from a cocoon. That’s when I know it’s time to outline. I have, of course, written at length about the specific techniques I use when outlining. So today, here’s what the daily process looks like.
1. Choose Music
Music is integral to my writing, at all stages. During outlining, I tend to prefer music that offers “thinking space,” something with a range of emotions that offers both epic energy and quiet introspection. For example, when I was outlining my portal fantasy sequel work-in-progress Dreambreaker, I returned often to Secret Garden’s Once in a Red Moon, which is mostly lyrical Celtic/New Age instrumentals, with just one or two wistful lyrics.
2. Take Notebook on the Run
I write my outlines longhand in a WriteMind Planner, using an ergonomic pen. I like to take my outlines on the run—away from my computer and, weather permitting, outside.

 However, for those who prefer to write on the computer and/or want a guided approach to the brainstorming process of the outline, this is why we’ve created the Outlining Your Novel Workbook software, based on my own process.

3. Date/Write/End With Highlights
My daily outlining process begins with dating the page for easy reference later on. And then I just start brainstorming, asking and answering questions, moving through the intuitive set of techniques I’ve evolved over the years to help me understand my story on both the macro and micro levels of plot, character, and theme.
When I’m done for the day, I go back over my notes and use highlighters to mark areas that are “keepers” or that will need to be addressed further in the next outlining session.

4. Transcribe
Because I write my outlines longhand, I’m forced to take the extra step of transcribing pertinent notes. At every logical junction in the outlining process (e.g., after “general sketches” or “character sketches”), I will stop and use Dragon Naturally Speaking to transcribe my “keeper” notes into Scrivener for future reference.
3. What My Researching Stage Looks Like
Depending on what kind of story I’m writing, the outlining process may reveal the need for extensive research. For example, my historical superhero work-in-progress Wayfarer required several months of research into post-Regency London.
I still count this crucial step as “writing time.” It’s my sole creative focus during this period, and I devote several hours a day to it.
1. Compile Bibliography
My first step is to compile a bibliography of necessary resources. I check my local libraries, but I will order most of what I need from Amazon. I start with a list of the various topics I need to research, then hunt down at least one or two books on each subject.
2. Read/Make Notes
Then I start reading. For at least two hours a day, I will sit down with my pile of books and read steadily, taking notes as necessary. I have a variety of approaches to marking interesting passages.
E-books are great, since I can simply highlight and copy/paste (either from my Kindle highlights or from an email to myself).

With paperback books, sometimes I will use highlighters.

But more likely, to avoid marring the pages, I will use Book Dart bookmarks to note the beginning line of the pertinent passage.

3. File Notes
At the end of each day’s research session, I will review my notes, type them up if necessary, and organize them by subject. Within my Scrivener project, I create folders for various topics, such as Clothing, Language, and Social Mores.

Typing up the notes not only provides me an easily searchable database, but by further organizing my findings by subject, I’m left with an easy way to quickly locate any pertinent fact without bringing my writing to abrupt halt during the first draft.
4. What My Writing Stage Looks Like
And now the main event! I used to have all kinds of little magic rituals to get myself into the right head space for writing. But the longer I adhere to good writing habits, day in and day out, the less I have to psyche myself out. These days, my daily writing process is very simple.
1. Provide Time to Prepare
Perhaps one of the most important things I’m doing right now is giving myself a little space before writing. I used to jump immediately from project to project—usually, from email or social media right into writing. This was one of the reasons I needed all those “warm-ups” to shift my brain from work mode to writing mode.
Now, I try to schedule things better. I stop whatever I’m doing thirty minutes before writing. This gives me plenty of time to tie off any loose ends as I close down the previous project. Then I’ll go for a quick walk to clear my head, do a full-body stretch, and brew coffee.
2. Choose Music
Another thing that has changed in my writing process is the way I choose music. I used to keep a list of inspiring instrumental albums (mostly movie scores), and I’d just cycle through the list, in order. Even if the music didn’t perfectly jibe with what I was I writing, I liked that it might bring out interesting elements I wouldn’t otherwise have found (don’t believe me? try writing a romantic scene to “The Battle” on the Gladiator score).
However, I now prefer to take more conscious control of my background inspiration—which, actually, can be dangerous, since it means I have to sit and think about my scene’s mood and then perhaps experiment with a couple albums before finding the right one. I’ll stick with the same album for the entirety of a chapter before choosing something new.
Unlike outlining, my musical preferences for writing lean toward the more amped. I like albums with lots of power and adrenaline. I want music that not only informs what I’m writing, but that keeps me pumped and my fingers flying over the keyboard. I cannot just sit and daydream while listening to Two Steps From Hell’s Skyworld or the Pacific Rim score—and that’s a good thing.
3. Reread Previous Session
The one “warm-up” exercise that remains steady in my daily writing process is re-reading my previous session’s writings. I fire up the music and dive in. It’s important to me to start the music right away, even though I’m not writing yet, since the continuity of background energy makes it easy to transition from reading the last line to writing the next one.
At this stage, I’m rereading primarily to get myself back into the same head space as yesterday’s writing session, but I also take the opportunity to do a little bit of editing—typo-correcting and sentence-straightening as I go.
>>Click here to have me walk you through a “real-time” edit of a day’s writing.
4. Write
Finally, I write my first draft into Scrivener. And that’s pretty much all there is to it. I feel the music, shut out the outside world, and dive in as deep as I can. I type quickly, trying to keep the words flowing. I do censor as I go, quickly replacing words, reading over what I have to make sure the flow is working. But I keep moving. My goal is to write at least 300 words every 15 minutes—although I don’t always rigorously chart the word count unless I feel I’m slipping into procrastination or inertia.
Generally, I give my writing process two hours of my day. Late morning and late afternoon are my two favorite times to write. That way, either I get to start my day with a rush of creativity, or I get to save my favorite activity as something to look forward to while I work through less enjoyable tasks.

I’ve found that two hours is a good balance for me. It’s long enough to allow me to really sink into my creative zone and complete a sizable chunk of work. But it’s not so long that it eats up my day. Any longer than two hours, and I find the intensity of sustained concentration completely zaps my mental and emotional energy.
5. What My Revising Stage Looks Like
Once I’ve finished the first draft, it’s time to revise. This step is the most interrupted of any part of my writing process. I let long chunks of time—months, even—pass between edits, both to give my betas a chance to return their opinions, and also to allow my own brain to distance itself and gain objectivity.
1. Read on the Computer
After finishing the first draft, I will do my initial revision on the computer. Since this is likely to be my most intensive edit, I like the instant flexibility of making corrections on the computer. I can change large chunks of text and move things around with the least amount of effort.
Once again, when I’m in the revision stage, I devote the entirety of my writing session to editing. Just as I do when outlining or writing, I’ll brew my coffee and sit down at my computer for two hours of focused effort.
When editing, I tend to like video-game soundtracks—the more monotonous, the better! They help me sink into concentration, while providing just enough stimulation to keep me going. Ori and the Blind Forest is a favorite right now.
2. Read Hard Copy
For my second edit, I’ll print out a hard copy. Seeing my words on paper gives me an ever-so-slightly different perspective. I’ll either mark up the hard copy with a red pen and make corrections into the computer later—or I might just sit with the hard copy at my desk and make any necessary corrections directly into my manuscript file to save myself the extra step of writing them down.

3. Read on Kindle
My third edit is a proofreading run. I put my manuscript on my Kindle Keyboard and read along while it reads to me. I’m not likely to be making any major changes to plot or prose. I’m just hunting out typos, so I can give my betas a clean copy.
4. Give to Beta Readers
Then I’m ready to send the manuscript to my first round of beta readers. I let them know of any major concerns or questions I may have—and then forget about the book for a couple months until they get back to me.
5. Organize and Edit/Proof if Necessary
After all of my first-round betas have responded, I will review and organize their notes to create a “revision outline.” Then I’ll go through my manuscript, on the computer, from beginning to end, making changes as necessary.
If it was a particularly extensive revision, I may decide I need to finish with another proofreading round on the Kindle.
6. Repeat
Then I send it off to the second round of betas and repeat Steps 4-5.
***
Your writing process doesn’t have to be glamorous. Indeed, it probably shouldn’t be. You want to create a writing process that is simple, steady, addresses your weaknesses, and provides a solid foundation you can return to with confidence every single day.
It should also be fluid. As you evolve—both as a person and a writer—your process will undoubtedly need to evolve as well. Stay tuned to what grants other writers success. Don’t feel you must mimic their processes to also mimic their results. But be open to stealing any little bit of their process that appeals to you. And have fun!
Wordplayers, tell me your opinion! What does your daily writing process look like? Tell me in the comments!
http://www.podtrac.com/pts/redirect.mp3/kmweiland.com/podcast/make-the-most-of-your-writing-process.mp3
Click the “Play” button to Listen to Audio Version (or subscribe to the Helping Writers Become Authors podcast in iTunes).
The post Learn How to Make the Most of the 5 Stages of the Writing Process appeared first on Helping Writers Become Authors.
June 16, 2017
5 Ways to Use Myers-Briggs for Characters
 I must now put my foot in my mouth. Once upon a time, I rather publicly said a big fat “NO” to the idea of personality-typing, particularly when it came to using Myers-Briggs for characters.
Some of you may even remember this gem from my book Outlining Your Novel:
In general, I’m not a fan of using personality tests (such as the popular Myers-Briggs Type Indicator) to flesh out characters. Trying to force a character to fit a personality framework, rather than allowing him to evolve organically, can leave you with a cardboard cutout, instead of a unique and compelling character.
The irony today is that I have two great passions: writing and . . . Myers-Briggs.
Some of you are now cheering wildly, since you share these intermingled passions. Others of you are crinkling your noses and going: “Huh?” And still others might be ready to hang up the phone, insisting Myers-Briggs is a pseudo-science, little better than zodiac descriptions.
So . . .
What Is Myers-Briggs and How Can It Help You Write Better?
In its simplest iteration, Myers-Briggs is a system of sixteen personality types, based on formative analytical psychologist Carl Jung’s idea of cognitive functions. The system assigns each personality type a label of four letters based on eight possible choices (which I was very excited to get to include in our new Outlining Your Novel Workbook software).

Introvert (I) or Extrovert (E)
Sensor (S) or Intuitive (N)
Feeler (F) or Thinker (T)
Judger (J) or Perceiver (P)
From these choices, a “type” emerges (for example, my type is INTJ). Each of the resultant sixteen types can be given a general label or personality description which is basically true. Take any MBTI test online (even the one on the official MBTI site), and that’s what you’re likely to get.
That’s all fun and good, but if that’s as far as you’re taking the possibilities of Myers-Briggs for characters, then it really is kinda like the zodiac. Hence, my initial rejection of the system’s usefulness for typing my characters
But Myers-Briggs is so much more than just descriptions of sixteen different “types” of people. The true beauty of Myers-Briggs arises from its analysis of the cognitive functions–Sensing, Intuition, Feeling, and Thinking—which can then be expanded yet again into introverted and extroverted versions of each function.
For example—and not to totally blow your minds or anything—but all types include both introverted and extroverted functions, as well as judging and perceiving functions. The Introvert/Extrovert and Judging/Perceiving labels merely exist to tell us which functions a specific type extroverts (for example, as Judgers, INTJs like me extrovert our Judging function of Thinking) and which function is dominant (for example, as Introverts, INTJs like me lead with our dominant introverted function of Intuition).
If you’re new to these ideas, then your eyes are probably crossing right now, and that’s okay, because a full-on discussion of cognitive functions is far beyond the scope of this blog. Indeed, it took me several years to really get my head around the underlying psychology.
Suffice it that Myers-Briggs is far more than the simple fill-in-the-blanks personality quiz I initially assumed when I wrote that misguided passage in Outlining Your Novel. If you’re interested in learning more about Myers-Briggs for characters, I recommend:
1. This amazing Tumblr account, which types popular characters and offers insightful discussions on the functions.
2. The book Was That Really Me? by Naomi Quenk, which specifically addresses our weaker functions (i.e., the ones not visible in your type’s name, which, for me, as an INTJ, would be Introverted Feeling and Extroverted Sensing).
3. Play very carefully with online Myers-Briggs tests. They’re a good place to start to help you figure out the basics, but they’re only accurate perhaps 50% of the time. Most of them do not take into account the introverted/extroverted cognitive functions and often skew results toward Intuitives over Sensors.
5 Ways to Use Myers-Briggs for Characters
Interestingly, Myers-Briggs was created by author Katherine Cook Briggs, who was searching for a way to better explore and understand her characters. Writing good fiction must always arise out of a quest for meaning and understanding in life. We cannot write comprehensive and complex people until we first are able to recognize and understand the complexities we find in ourselves and those around us. Indeed, the key to writing great characters is psychology itself.
Here are five ways I now use my understanding of Myers-Briggs for characters that are bigger, better, and more realistic.
1. Keeping Characters in Character
Perhaps the most obvious advantage of any personality-typing system—but especially one as intricate as Myers-Briggs—is that it gives us a basis against which to test our characters’ consistency. An understanding of the personality types, and especially the cognitive functions, will give you a litmus test for your character’s actions.
What would someone like this do in a situation like this? How will his brain work to provide him options and solutions? It’s not just about saying “oh, yes, this personality type would be impulsive, while this type would be more calculated.” It’s about understanding the actual thought patterns that create these visible actions.
2. Creating a Variety of Personalities
My entry point into using Myers-Briggs for characters was a curiosity about whether my characters might all share the same personality (please, no), or perhaps even whether they might all share my personality. So I started doing basic typings on all my characters, just to see what I’d find.
I did find some patterns (I tend to favor SP characters, and I hardly ever write characters of my own type), but what was most fascinating was the realization that I was instinctively creating varied casts. Now that I consciously understand what I’m doing, I’m able to use Myers-Briggs to help me write even more diverse personalities, which in turn creates more colorful and complex story possibilities.
3. Creating Inter-Personality Conflict
Once you’ve peopled your story with a cast of varied personality types, you can then take advantage of the inherent conflict that arises between types who share no or few cognitive functions—and who therefore often struggle to understand one another’s motives and choices.
This is a fabulous way to create interpersonal conflict even between characters who are allies. In fact, this is one of the reasons Marvel’s The Avengers and Civil War ended up working so well.
Tony Stark (ESFP) and Steve Rogers (ISFJ) share zero cognitive functions and consistently clash with each other’s values and methods as a result. Even better, it sets up their stories with the ability to explore more personal issues of relationships and contrasting character arcs—born not arbitrarily, but of consistently realized personalities.

4. Brainstorming Character Motives and Actions
Ever get yourself and your character stuck in a plot corner, in which you’re uncertain how your character will get himself out? You can use an understanding of the cognitive functions to figure out how your character’s brain works. And, unless he’s the same type as you, his brain probably wouldn’t come up with the same first option as you would.
For example, in writing my ISTP protagonist in my historical-superhero work-in-progress Wayfarer, I repeatedly returned to his dominant functions (Introverted Thinking, Extroverted Sensing) to help me determine his actions and mindset, as well as the way in which he interacted with characters around him. This was particularly useful when playing him against the main relationship character, a nine-year-old girl, who was an ENTJ (whose dominant functions are Extroverted Thinking and Introverted Intuition).
Their contrasting views of life (the protagonist’s ability to live and react in the moment; the girl’s skills for thinking about long-term consequences) not only created fun opportunities for some of that interpersonal conflict, it also allowed their skill sets to nicely complement each other’s.
5. Learning More About Your Characters
Our characters provide neverending depths for us to explore. Just as with any complex human being, there is always more to discover about them. Myers-Briggs can provide a framework for helping us dig ever deeper.
Currently, I’m working on the sequel to my portal fantasy Dreamlander. I’ve already written an entire book about these characters, so I know them very well. And yet, I’m still discovering new things. In considering how best to keep the characters consistent with their cognitive functions, I’ve opened up new areas of understanding and possibility.
For example, just yesterday as I worked on a scene in the POV of my female lead Allara (one of my few INTJ characters), my growing understanding of my own Introverted Intuition led me to a deeper and more realized understanding of how her brain must work and how this would have influenced her entire backstory—and thus her future story as well. The new possibilities for making this character better, more realistic, and more thematically potent are incredibly exciting. And I would never have found them without the insights Myers-Briggs has provided me into my own life.
***
Myers-Briggs offers a theoretical framework through which we can interpret our own lives and the world around us. Seeking a greater understanding of life is worthwhile whether you want to use it in your writing or not. Be warned, it is a deep rabbit hole, every bit as complex as (more than?) story theory itself. But the deeper you delve into both personality-typing and story theory, the more insight they’re able to bring to one another.
Wordplayers, tell me your opinion! How would you describe your protagonist’s personality? Tell me in the comments!
The post 5 Ways to Use Myers-Briggs for Characters appeared first on Helping Writers Become Authors.
June 12, 2017
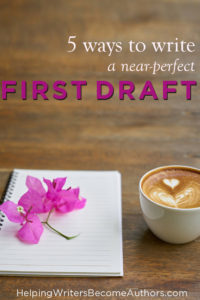
5 Ways to Write a Perfect First Draft (or Nearly)
 “The first draft.” Is there any phrase more likely to evoke such a poignant mix of anticipation and dread?
Anticipation, of course, because we get to write—we get to tell our story!
And dread, of course, because we’re about subject ourselves to months, even years, of agony and frustration as we blindly slog toward a finish line we aren’t even sure exists yet.
And then, when we reach that finish line, the manuscript we end up with is likely to be in such a disastrous state that we have to start all over again with equally difficult revisions.
That’s just how it is, right? No less than Ernest Hemingway colorfully and famously told us first drafts are never any good. Them’s the breaks, kid, deal with it.
Except—is that really true? Do first drafts have to turn out awful?
Well, maybe not if you’re a genius, right? Maybe not if your story sensibilities and writing skills are so mad all you have to do is touch your fingertips to the keyboard for perfection to come tumbling out like glittery little unicorns tap-dancing all over the keys.
Sadly, of course, that’s not you, and that’s not me. So it looks like we’re just going to have to keep the ol’ stiff upper lip and continue churning out those rubbishy first drafts.
Except—nope. Today, I’m here to tell you that just about anyone can write a nearly perfect first draft.
Why We Like the Idea of the Rubbishy First Draft
Before you can even think about writing a perfect first draft, you first have to consciously address why so many writers believe it’s an impossible idea (kinda like Shangri-La or the Fountain of Youth).
Very few writers can read statements like Joyce Carol Oates’s Writing Tip #2 without at least a little part of us cheering raucously in commiseration:
First drafts are hell. Final drafts, paradise.
Why are we cheering?
Because we resonate, of course. We’ve all written horrible, miserable first drafts. It’s just nice to know we’re not alone. If Hemingway and Oates and so many other geniuses struggle with their first drafts, well, then, phew!, I guess I’m not doing so bad after all.
Also, bad first drafts are just part of the writing journey. When we start out (and perhaps for many years after), we are writing rubbish. Nothing wrong with that. (I won’t show you my early manuscripts if you promise not to show me yours.) But who says rubbishy first drafts can’t be just a part of the process? Who says you have to stay stuck in Ow-This-First-Draft-Hurts-So-Bad Land for the entirety of your writing career?
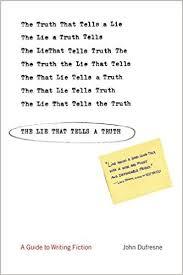 Who says that? All right, all right, so yeah, actually, there are a lot of respected writers who seem to say exactly that. For example, in his book The Lie That Tells a Truth, John Dufresne says:
Expecting too much from an early draft is the most common mistake beginning writers make, and it leads to frustration and disappointment…. You must allow yourself to fail. You only write a first draft in order to have something to revise.
To which, I would like to point out two things:
1. He says, “beginning writers”—not all writers until the end of time.
2. He says, “you only write a first draft to have something to revise.” Maybe yes, maybe no. That depends entirely on your process and your priorities—which we’re going to talk about in just a sec.
But then he goes on to say something very interesting:
Nelson Algren said he just kept writing until his story found its own plot. (I’d have to confess I work in the same inefficient way.)
Hmm, inefficient. That doesn’t sound like the end of the road to me. That sounds like a problem that can be solved!
4 Drawbacks of a Rubbishy First Draft
When you purposefully allow yourself to sit down and write a rubbishy first draft—on the notion that it’s going to create a better story in the long run—you may indeed garner some good returns.
For example, you may write faster and more intuitively. You may be more motivated to get words on paper, which, of course, is the whole sum of the game. You may find it easier to initially stymie your infernal internal editor. Some of you may even have more fun writing this way.
Nothing wrong with that. It’s important to know what you’re gaining by whatever methods you’re employing. But it’s also important to know what you’re sacrificing, so you can determine whether the gains and losses are balancing.
Here are four of the most common drawbacks writers encounter when writing purposefully rubbishy first drafts:
1. You Get a… Rubbishy First Draft
Obviously, the biggest drawback—as Hemingway, Oates, and Dufresne would all tell you—is that you don’t end up with a tight, clean manuscript. Rather, you’re much more likely to end up with that promised big fat mess.
2. You Wonder if You’re a Rubbishy Writer
The result of that rubbishy draft is that you’re very likely to look at it despairingly and fight depressing feelings that tell you you’re also a rubbishy writer. After all, the proof is in the pudding, right? Instead of feeling proud of your accomplishment when you start reading it over, you may instead find yourself wanting to just hide under the bed covers for a few days.
3. You’re Faced With Exhausting, Frustrating Revisions
But of course, you don’t hide. You’re a writer, and writers tend to suffer from that infamous Never-Never-Never-Give-Up compulsion. So you get out of bed and start editing the heck out of that slobby thing. And editing. And editing. And editing. And editing. It’s exhausting, and, even worse, it’s often frustrating because you still don’t have a clear idea of what went wrong or how to fix it. You’re just gutting your way through it.
4. Your Story Misses Out on Organic Perfection
Speculative novelist and publisher William Sloane pointed out:
More fiction fails because the author has not had the discipline and ingenuity to provide and sustain a means of perception than for any other single reason.
You will only ever get the chance to write one first draft. That draft is your single greatest opportunity to not just create cohesion and beauty, but to create them organically. Revisions are great—heaven knows we all need them—but they rarely match the energy and brilliance that emerges in that first chronological rush of storytelling.
5 Ways to Write an (All But) Perfect First Draft
I used to wholeheartedly believe in all that stuff about rubbishy first drafts. Mostly, I believed in it because I wrote rubbishy first drafts—and then slogged through the agony of difficult revisions.
But then something pretty cool started happening. About the time I started writing Book 8 of my current 11, my revisions started getting infinitely easier. Almost laughably easier.
Why?
Because my first drafts were so darn clean. There for a while, I started wondering if I had somehow turned into a delusional fathead. But, nope, my critique partners and editors were telling me pretty much the same thing. I still had to do revisions, of course. But they were edits, not rewrites. The final drafts of my last two novels have been extraordinarily close to the first drafts. And, what’s more, they were a blast to write.
This happened because I started rejecting the idea that first drafts couldn’t be excellent and started using the following five steps to help me plan and create the best possible first drafts I had in me. As acclaimed short story writer Brent van Staalduinen says:
There’s a beauty, I think, in writing quality first drafts. I’m loath to call them “rough,” because I write slowly and deliberately and enjoy readable early work. I’ve tried to write with a … first-draft abandon, but the work isn’t as satisfying.
1. Don’t Start With the First Draft
What’s the secret to writing a great first draft? Easy. You don’t start with the first draft. As we talked about last week, storytelling and writing are actually two entirely different skill sets. Too often, when we try to do them both at once in the first draft, they end up getting in each other’s way.
Stephen Covey explains:
…all things are created twice. There is a mental (first) creation, and physical (second) creation. The physical follows the mental, just as a building follows a blueprint.
Check out the Outlining Your Novel Workbook software!
That’s why outlining is such a powerful tool in the writer’s arsenal. It allows you to organize your thoughts, consider the logical train of cause and effect in your plots, and create a road map before you jump into the wild dune buggy of actually putting beautiful words on paper.
2. Ask All the Right (and Hard) Questions
Storytelling is an equation of questions and answers. Something doesn’t make sense within the progression of our characters’ actions and reactions? All right, so we have to question that. We have to acknowledge the plot holes and find the right answers to fill them in.
This is not only vastly easier and less time-consuming in the outlining phase, it’s also more powerful. It allows you to bring your logical brain into play to examine your choices. Are you just copping to the first obvious answer that comes along—and writing away with it? Or are you taking a moment to really consider, not just the plot consequences of your choice, but also whether you’re digging as deep as possible for the single most creative and original possibility?
In the actual writing of the first draft, our brains are cluttered by a hundred different demands—to the point it’s easy to be too distracted to step back objectively and realize we’re not taking full advantage of all the possibilities.
3. Find and Harmonize Plot/Character/Theme
One of the chief reasons slapdash first drafts fail is that they have improperly presented the symbiotic triangle of plot, character, and theme. If the author wasn’t aware of any one of these going into the first draft, then she had to discover them in the first draft.

This rarely happens in a cohesive way in a rushed first draft. The plot might be there from the beginning, but the character arc doesn’t become clear until halfway in, and the theme is then twisted around in an effort for it make sense in time for the climactic encounter.
Although this can (and, indeed, must) be fixed in revisions, you’ll never get the chance to do it as organically as you will during the initial writing of the first draft.
4. Organize Your Brain’s Tasks
The brain’s various facets don’t so much work simultaneously as they work in concert—pushing and pulling, each part in its proper place. The problem here is that the first draft is largely a creative endeavor. Logic requires us to step back out of the zone of rapid-fire word-crafting, so we can thoughtfully examine the big picture.
Because most writers instinctively understand that employing logic in the wrong place can easily throw them off their groove, they usually enter rubbishy first drafts through the door with the sign that says: Abandon Logic, All Ye Who Enter Here.
But, of course, you can no more write a good story without logic than you can without creativity.
This is why it’s valuable to do as much of your logical figurings-out as possible before you throw yourself into the intoxicating embrace of the word-crafting muse. Don’t tax your brain making it do things it doesn’t want to. Instead, work with it to optimize its abilities and output.
5. Trust Your Planning: Write Like the Wind
Okay, great, you say. But all that stuff isn’t actually about writing the first draft. What about that?
That, my friend, is now the easy part. That is where you sit down at the keyboard and you start typing like a gleeful lunatic. You’ve already created a solid story. You’ve already answered your own most important questions: Does this work? How does this work? What plot pitfalls do I need to be aware of and how can I sidestep them?
The key now is to trust your planning. Don’t start second-guessing yourself. Write with exactly the same abandon you did before in your rubbish phase. No, actually, write with even more abandon. Write quickly, trust the organic process, and don’t get hung up on doubts.
Will you write a perfect first draft? No. You’ll still have typos, clunky sentences, and, yep, probably a few little plot holes that slipped through the cracks. But I guarantee you’ll have written a comparatively perfect first draft that requires far fewer revisions on the back end.
Wordplayers, tell me your opinion! What was the most rubbishy draft you’ve ever written and what was the most perfect first draft you’ve ever written? What do you think made the difference? Tell me in the comments!
http://www.podtrac.com/pts/redirect.mp3/kmweiland.com/podcast/how-to-write-a-perfect-first-draft.mp3
Click the “Play” button to Listen to Audio Version (or subscribe to the Helping Writers Become Authors podcast in iTunes).
The post 5 Ways to Write a Perfect First Draft (or Nearly) appeared first on Helping Writers Become Authors.
June 9, 2017
How to Use the Outlining Your Novel Workbook Software
 Today, I’m pleased to get to share with you a special guest post from Bob Miller, the developer of our new Outlining Your Novel Workbook software. I’ve asked him to give you a tour of the program, his own process for using it, and what inspired him to create it in the first place.
Here’s Bob…
The Creation of the Outlining Your Novel Workbook Software
I love origin stories, don’t you? The Outlining Your Novel Workbook software (available for PC and Mac, as well as internationally) originated at the intersection of my desire to write novels, my programming skills, and Katie’s fabulous Outlining Your Novel Workbook.
 I found Katie probably like most of you did: I searched online for instruction on how to write a novel. I’ve been listening to her podcast for years. I learn new things from her every week.
Since I’m in the process of writing a five-book series, I purchased the Outlining Your Novel Workbook to plan my second novel, and then I purchased another copy for my third novel. That’s when I got the idea of making a digital version of the workbook. I do database development for my job, so I thought that it would be a quick, easy task.
Turns out, not really…
I contacted Katie about the idea, and we agreed to work on it. Eleven months later, we’ve just finished it!
Although much of the programming was just a fill-in-the-blanks type of application, there were a number of tricky programming tasks that took much longer than anticipated, such as:
Project export and import
The built-in music player
The Scene List
Scene List export
For those of who already have the program, let me share with you a few tips about how you can use some of these features.
How to Export and Import Your Projects
There are three uses for the export-import of projects:
1. To easily save backups of projects. Since all of the projects created in the program are auto-saved, the export option allows you to save specific projects without copying all the info in the program.
2. For upgrades. In the future, when we’re able to offer upgrades of the program, exporting your data from the old program and importing it into the new one will be an easy process.
3. For sharing. If you wish to work on a story simultaneously with another writer, you may export a project to share.
How to Use the Music Player
This feature really highlights the benefit of having a digital, interactive workbook. The printed workbook had a section to list songs that may give inspiration for certain elements in your novel. With the interactive music player, you can now listen to your novel playlist as you write.

How to Use the Scene List
It took as much effort to perfect the Scenes List and Scenes Export as it did to write every other part of the program combined.
I decided immediately I wanted users to be able to simply rearrange scenes by dragging them to new locations. This click and drag functionality isn’t something that’s natural to the database system I use, so I had to create a system that stretched the normal abilities of the development program.
As I started to use the program to write my own novel, I realized I also needed to group scenes together so they could be treated as a unit and rearranged together. That’s why I created the folder system. Now scenes can be grouped into chapters that can be shuffled around, just like index cards, to change the story order.
This second video shows you how to easily add a structural guide to your outline’s scene list:
This third video shows you how to use the Scene Checklist feature in concert with your scene creation:
How to Export the Scene List
Another part of the program that took much effort was the ability to export the Scene List so it can be used in other writing programs, such as Scrivener.
Scrivener is a great program. I’ve used it to write all five of my novels. But there is some essential planning that needs to happen before starting the actual writing process in Scrivener.
The Outlining Your Novel Workbook software assists writers in asking questions about character background and other story development questions that must be thought of before any actual writing occurs.
The writing process is so much easier when adequate planning is done. I recently listened to a writing podcast with some experienced screenwriters. They said one of the reasons writers get writer’s block, or write themselves into a dead-end, is inadequate planning. The writers don’t really know their characters: the character’s motivation, needs, and goals. The characters aren’t real to the writer because they haven’t spent enough time with them before they started throwing tasks and obstacles at them.
Katie and I view the Outlining Your Novel Workbook software as a pre-Scrivener program that will allow you to know your characters and key story beats before you start writing in Scrivener.
You can export the Scene List section as separate text documents, which you can then import into Scrivener (or Word, etc.) for further editing. The Scene List section is currently the only section that offers this feature. However, you can also “print” the rest of the program as pdfs (you will need a pdf printer, such as Cute PDF, installed on your computer), and then import the pdfs into Scrivener. These will be Read Only and cannot be edited anywhere but within the Outlining Your Novel Workbook program.
7 Advantages of the Workbook Software Over the Book Version
My goal was always to be true to Katie’s original Outlining Your Novel Workbook. That’s why the main titles of the selectors within the program match the main chapter titles in the paperback and e-book versions of her workbook. However, the interactive programming environment has allowed us exceed the limits of a book.
For example:
1. You can include photos or drawings of people representing your characters.

2. The Scene List allows you to rearrange scene order in a way that never was possible with the printed workbook.

3. Although the book version of the workbook included the concept of choosing inspiring songs for each main character and section of the book, the program takes it a step further and allows you to create a Novel Playlist and to play those inspiring songs while writing.
4. The ability to import characters and settings from other projects within the Workbook software saves time and allows for easier continuity between books in a series.
5. The flexibility of the calendar allows you to create a chronological list of every scene in your novel. Even if the novel covers years or decades, you can include only the required months in the program, skipping all of the intervening, unnecessary months.

6. Another great advantage of the program is that all fields are expandable. Writers aren’t confined to the printed limitations of the lines in the original workbook.
7. The feature that gave me the idea to start this programming journey eleven months ago is that any number of projects can be saved in the program. This resource can be a repository of all of your creative works in one place.
Although our program accurately represents every section and question in the book version of the workbook, I don’t consider it to be finished. I see this as just a beginning! We already have fielded suggestions from many of you about features you’d like to see in the program, and we’re open to more!
You can find out more about the program on our Support page, which offers FAQs and more video tutorials. You can find the PC version here, the Mac version here, and the international version here.
And now that the main programming is done, I get to return to writing and using this program to help me finish my own books!
Wordplayers, tell us your opinion! Is there a feature you’d particularly like to see included as we continue to perfect the Outlining Your Novel Workbook software? Tell us in the comments!
The post How to Use the Outlining Your Novel Workbook Software appeared first on Helping Writers Become Authors.
June 5, 2017
Are You a Writer or a Storyteller?
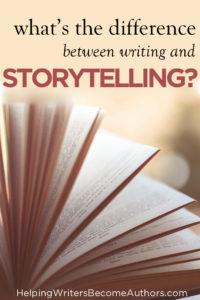 “I am a writer!”
This is one of the most important and freeing statements any of us ever makes. It’s almost a rite of passage. The moment you can look your banker/hairdresser/pastor/aunt in the eye and tell them (without mumbling) that you are writer, hear you type—well, then, congratulations, you’ve crossed an important threshold in claiming your power as an artist.
However, not to complicate your victory or anything, but what you may really be trying to tell Pastor John and Aunt Lucy is that you’re a storyteller. Or maybe you’re a storytelling writer. Or is it a writing storyteller?
Or maybe I’m just nitpicking, because aren’t they basically the same thing? Aren’t “writer” and “storyteller” pretty much interchangeable?
Yes and no.
Yes, we pretty much assume that if someone is a fiction writer, then they’re also a storyteller. And vice versa: if they’re a storyteller, then, more than likely, they’re writing those stories down.
But also, no: because “writing” and “storytelling” are, in fact, totally separate skill sets. One does not automatically come as a BOGO with the other. Even though we are all interested in both, most of us still gravitate more strongly to one or the other. One of them was the reason we started creating novels, and the other was something we learned along the way.
Understanding whether you are more naturally a writer or a storyteller can help you take better advantage of your strengths and address your weaknesses in the most holistic way possible.
What Is Writing?
Definitions first, please. If there’s such a big difference between writing and storytelling, then what is it?
Writing is, well, writing. It’s the art of putting words on the page in a pleasing way that accurately, efficiently, and sometimes artfully conveys information. It’s what I’m doing right in creating this blog post. What I’m not doing is telling a story.
Writers come in all stripes and sizes. Some of us do indeed tell stories. Others report facts, offer inspiration and encouragement, or create technical guidance. However, for our purposes, we are, of course, interested in those who create stories—specifically, fiction.
The moment you put words on the page to evoke a story, you’re a writer. But just because you’re telling a rip-roaring old yarn doesn’t mean your writing is, perforce, equally riproaring. You can be a fabulous storyteller and a downright awful writer.
Writing is the skill of evoking the reader’s imagination. It’s wordcraft. It’s the mastery of narrative technique. Following is a sample listing of skills that fall under the heading of writing:
Grammar
Voice
Description
Dialogue
Pacing
POV
Word choice
What Is Storytelling?
Storytelling, on the other hand, has no inherent connection to writing. Storytelling is the tradition of discovering and portraying the dramatic patterns of life—and if you’re a good storyteller, sharing them with enough suspenseful emotion and resonant truth to steal the hearts of your audience.
Storytelling happens across media. We find it not only in novels, but in movies, television, poetry, song, painting, photography, even dance. Humans, by nature, are storytellers. We seek to translate our experiences into cohesive snapshots—both to capture them as memories and to discover any deeper meaning they might offer.
Storytelling is the skill of finding the universal truths of human experience and translating them into cohesive drama. When we talk about any of the following, we’re actually referring less to writing and more to storytelling:
Theme
Character arc
Plot
Story structure
Suspense
Conflict/tension
Story theory
How to Develop These Two Different Skill Sets
Story, by itself, is little more than raw emotion and imagination. Transforming it into a medium others can appreciate and understand requires a skillful translation technique. By the same token, writing alone is nothing more than sensible, and possibly pretty, words strung across the page. To tell truly great stories, we must master both skills.
So which is your strength—writing or storytelling?
One clue may be your preferred approach to your books. Do you prefer to discover your stories in an outline before writing the first draft? Or do you prefer to discover your stories while actually writing the first draft?
As I’ve discussed elsewhere, all successful writers must use a mix of writing techniques: plotting and pantsing, logic and creativity, storytelling and writing. Each of us organizes these processes differently within our own approaches.
My experience in teaching outlining to thousands of writers over the years has shown me that much of the resistance to outlining is simply due to writers not having yet understood outlining for what it really is—brainstorming—and/or not having yet found a flexible system of outlining that works for their creativity and lifestyle.
However, something I realized about myself recently helped me see this from an even better perspective. I realized what I love most about the craft is not actually writing but rather storytelling. In turn, this is one of the main reasons I love outlining so much.
Outlining allows me to separate and further focus my two necessary skill sets. In outlining, I get to focus on the storytelling without having to simultaneously worry about creating a perfect narrative technique that will convey that story to my readers. Once the outline has afforded me a complete and solid story, I can then focus on using my writing stills to bring that story to life for readers in the most evocative way possible.
This isn’t to say this is the only way, or even the best way, to balance these two very different skills. But it’s important to at least be aware they are different. If you’re struggling with trying to tell your story from scratch in the first draft, or wondering why you always end up with messy first drafts that require a lot of revising, it may well be because you’re trying to do two things at once: discover the story while telling it to readers.
At the end of the day, it doesn’t matter at all whether you were first drawn to fiction out of your love of story or your love of wordcraft. What matters is that you learn to perfect both.
3 Ways to Become a Better Storyteller
1. Learn to View Story From Both the Inside and the Outside
The psychology and technique of story is vast and complex. It’s like a massive diamond. You hold it in your hand and turn it every which way, trying to see all the different ways the light catches its facets. And even then, you still don’t see all there is to see; you have put it close to your eye, maybe get out your magnifying glass, and look deeper, all the way to its glistening heart.
Storytelling is like that. To truly understand and master it, you can’t look at it from just one perspective. You must move back and forth, looking at it from afar to see the big picture of how all its pieces fit together, then closing in to consider the beat-by-beat cause and effect of how it develops paragraph by paragraph.
Arguably, a good story’s most important qualification is cohesion. The halves must align. The questions asked in the first half must find their answers in the second half.
This is where outlining can prove a valuable aid (and why I’m so excited about our brand-new Outlining Your Novel Workbook computer program!).
By stepping back from the story and first considering its big picture, you’re able to make sure its questions are finding the right answers, and that its answers are paired to the right questions. Outlining allows you to address the throughline of your story’s structure, so you can make sure the big pieces are all in their proper places before you start sorting through the little pieces and trying to figure out where they go.
2. Look for the Story Beneath the Story
What is story? It’s many things, of course. But if we strip it down to its beating heart, what we find is theme. A story (no matter how casual or puerile) is a statement about the world.
When you start out by looking for that statement, you will be able to immediately identify what your story is about. This, in turn, allows you to choose the right plots and characters to best support that story.
You can then use this knowledge to see your story clearly. You can strip away the pieces that don’t belong or that are resulting in dead ends, and focus on creating a story that resonates thematically in the most powerful way possible.
3. Study Story Theory
Ultimately, storytelling is really all about story theory. If you start studying and perfecting any of the subjects we mentioned above (plot, character, theme, etc.), you are learning how to be a better storyteller.
Storytelling is a creative art form that wells up, instinctively, from the human psyche. As a result, perfecting its conscious mastery is, in fact, a pursuit of human psychology. It is a perfecting of our veneration and respect for life itself. It is a study in awe and humility. It is a search for Truth.
You can’t be an excellent storyteller without first being a devoted student of life.
3 Ways to Become a Better Writer
1. Learn How to “Show”
If storytelling is about gathering and organizing metaphoric interpretations of life, then writing, in its turn, is about more than just sharing these gleanings. Rather, it is about bringing them to life.
Writing fiction is the art of dramatizing. We don’t just want to tell readers about our story; we want them to live it.
This is why perhaps the most fundamental tool of narrative writing is “show versus tell.” This is the technique of dramatizing, rather than summarizing events. It is the skill of choosing vivid nouns and verbs and parsing them in active and immediate sentence constructions.
It is also, arguably, the single most challenging aspect of writing excellence. That’s as it should be, though, since if you can master the balance of showing and telling, you will have mastered the ability to go all Inception on your readers and bring your visions to life in their own imaginations.
2. Practice the Art of Information Dissemination
What are you doing when you’re telling a story? You’re sharing information, right? But anybody can do that. The trick to good writing is disseminating that information in the most aware and artful manner possible.
This, too, ties back into an awareness of psychology. Basically, what you’re wanting to do is create an intricate dance that mesmerizes readers into allowing you to temporarily control their minds. You give them just the right bit of info at just the right time to help them visualize the scene, to nudge their emotional reaction to a character, to inspire them to ask the right questions.
This technique works hand in hand with that of “showing,” and like showing, we might say it is the whole art of writing all to itself. Although certain of its principles can be taught (e.g., “scatter descriptive details throughout a scene” or “share backstory only as it becomes necessary” or “use action beats to ground your setting during dialogue“), this is ultimately a skill that must be developed through personal experience.
Which is why it is so important to…
3. Practice
The art of storytelling can largely be learned without practicing. All you have to do is study stories and study life. (There are many excellent students of story theory who are not, in fact, particularly skillful conveyers of those stories.) Writing, however, you must practice.
The rhythm and flow of good prose, the ability to choose evocative details that “show” readers, and the instinctive understanding of what info to share and when—these are all largely skills that cannot be taught. Rather, writers learn to perfect them through, first, a conscious observation of the techniques of other writers, but then, most importantly, by actually getting down and dirty with the words on the page and learning how to control them.
This is yet another reason, I prefer to separate the storytelling and writing processes, via outlining. If I can get the largest of the vital storytelling questions out of the way before I start writing, this frees my focus in the first draft so I can concentrate on the intricate task of narrative wordcraft.
Perhaps, like me, you were a storyteller from your earliest memory, and it was this love that led you to the companion love of words and writing. Or perhaps you have always been a logophile, addicted to the rhythm and grace of words on paper—and this love gave you the further cathartic and enlightening gift of storytelling. Either way, both gifts are ours to explore, to expand upon, and to use in writing amazing stories. Recognizing the differences in these two skill sets can help you improve upon both, as you optimize your writing process to best suit your creative needs.
Wordplayers, tell me your opinion! Were you drawn to fiction first as a writer or a storyteller? How do you think this propensity has shaped your personal process? Tell me in the comments!
http://www.podtrac.com/pts/redirect.mp3/kmweiland.com/podcast/are-you-a-writer-or-a-storyteller.mp3
Click the “Play” button to Listen to Audio Version (or subscribe to the Helping Writers Become Authors podcast in iTunes).
The post Are You a Writer or a Storyteller? appeared first on Helping Writers Become Authors.
June 2, 2017
Before You Outline: How to Discover Your Story’s Big Moments
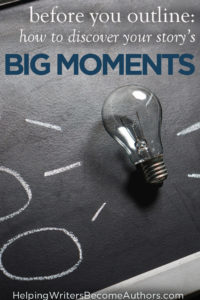 Too often, writers maintain a limiting viewpoint of outlines as “a list of scenes.” But outlining can (and should) be so much more. For starters, there’s all that good stuff in the outline before you outline.
Before you ever get to the scene list, there are a gabillion important questions for you to ask about your story. So, so many awesome things to explore. After all how can you know what scenes you want to include in your story if you don’t first know the answers to questions of plot, theme, and character?
This is why I never start my outlining process with a scene list. In fact, the scene list is the very last thing on my outlining to-do list. Instead, one of the very first things I do when I sit down to start brainstorming a new story is figure out all its big moments.
The Spine of Your Story: Finding Your Story’s Big Moments
Whether you prefer to start out with by outlining or just jumping straight into your first draft, you will undoubtedly begin with some knowledge of the story. You might know everything about it—how it begins and how it ends. Or you may know only one or two interesting things that have piqued your curiosity. Or, like me, you may be somewhere in between.
I’m never quite ready to start physically writing a story until that story has had a little time to gel in my imagination. By that point, I will have a general sense of the story and a handful of scenes, in the form of visual clues. I may not know how it will end, and I will probably have ideas for only two or three of the main structural moments.
But right now, that’s all you need to know.
These known elements are what I call your story’s Big Moments, and they’re the foundation upon which you’ll build the entirety of your story.
How to Use Your Story’s Big Moments
The first thing to do is mine your conscious imagination. Sit down with a pad of paper and start making a list of every thought you’ve ever had about this story. (This is what the Big Moments feature in our just-released Outlining Your Novel Workbook computer program is for.)
This might include a handful of characters—some of them with names and faces, others who are just shadowy catalysts in the background. You might have a handful of fully fleshed-out scenes; some may even include dialogue conversations. Others may be only snapshots: a vivid image of your characters doing something exciting or intriguing (a kiss, a battle, a scream).
At this point, it doesn’t matter how complete any of the ideas are. What’s important is getting them out of your head and onto the page. The reason for this is twofold:
1. It allows you to consciously assess your story’s big picture (such as it is) thus far.
2. It cleans out your head, allowing room for more pertinent ideas.
Use Your Story’s Big Moments as a Springboard to Find More Big Ideas
At this point, what you’ll find in front of you on the page is probably a pretty random and comparatively sparse list. It’s certainly not likely to be a whole story. But it’s a start: it’s the backbone of the story to come.
By viewing what’s there on page, you also get the opportunity to clearly see what isn’t there. And that’s where the fun kicks up a notch.
This is where you get to start connecting the dots, filling in the blanks, and fixing potential plot holes. In order to bridge the gap between two great, but so far unrelated, ideas, you start brainstorming causal possibilities and—most fun of all—complications.
If this happens now and that happens later, what’s is the most interesting way to take the characters from Point A to Point B? What if this happened? What if that happened? What if…?
And you’re off! From this point on, every moment in your process will use the initial foundation of your story’s Big Moments as the jumping off point for bigger ideas. But it all starts here—with a conscious iteration of the possibilities. And the possibilities are indeed vast, so have fun with them!
Wordplayers, tell me your opinion! Which of your story’s big moments did you know about before you started writing? Tell me in the comments!
The post Before You Outline: How to Discover Your Story’s Big Moments appeared first on Helping Writers Become Authors.
May 30, 2017
Big News! Introducing the Outlining Your Novel Workbook Software
 The various approaches authors bring to outlining their novels are vast. But the one thing we all have in common is the desire for an effective, streamlined process that helps us create a solid foundation for our stories—as painlessly as possible.
I have long been a proponent of outlining, through my many resources both here on the site and via my books Outlining Your Novel and the Outlining Your Novel Workbook. Hundreds of authors have written to tell me they’ve found the workbook an invaluable tool, both as a guided process in helping them brainstorm all the most important parts of their stories, and in giving them a place to actually write out and organize their notes.
But what happens when you need to transcribe your notes to the computer—or you begin a new book and need to start the workbook process all over again? What if you had a computer program for that—one that would let you do all the exercises and answer all the questions (and more) from the paperback workbook—and then transport your scene list to Word or Scrivener—and then let you start all over for your next book?
Whelp (you know what’s coming, right?), I am geek-squeaking all over the place with the announcement that the Outlining Your Novel Workbook software (available for PC, Mac, and international readers) is finally here!
Introducing the Outlining Your Novel Workbook Software
 This project has been in the works for almost a year now, and I know many of you are just as excited as I am. So let me tell you the very cool story of how all this came about…
I have long been a connoisseur of organizational software that makes my writing process easier and simpler. That was why, when a user of my workbook emailed me a copy of a computer program he’d put together for himself, based on my Outlining Your Novel Workbook, I flipped out.
Meet Bob.
Programmer, novelist (and magician) Bob Miller from Minnesota is both the muscle and the brain behind the Outlining Your Novel Workbook program. He created the framework for an easy-to-use program that offers all the questions and exercises in my workbook, but in a fun, intuitive digital format that allows you to brainstorm your outline right onto the computer, then export scenes as needed—and reuse over and over again.


We’ve worked together to refine the program into a tool that can help writers figure out their premises, characters, story structures, and scene outlines.
Use the Outlining Your Novel Workbook Software to Take Your Stories to the Next Level
Join me for a full tour of the program!
(You can find lots more video tutorials and information on the Support page.)
The Outlining Your Novel Workbook program is a powerful brainstorming tool for writers. It is designed to help you discover the brilliant possibilities in your ideas, so you can create a solid story that will both entertain and move your readers.
Writing a novel is a complex process that often leaves writers uncertain about where to begin or what questions to ask. By applying an outlining approach to your writing (at any stage in the process), you can gain a big-picture view of your plot, character, and theme. You’ll be able to identify potential plot holes before they ever get started, dig past obvious ideas to those that are truly unique and interesting, and create a plot that taps into the power of a solid Three-Act Structure.

The Outlining Your Novel Workbook provides an intuitive and easy-to-use fill-in-the-blanks format that will guide you through every step of the process. Creating your own outline is as simple as starting on the first screen, using its prompts and lessons to work through your story in the most intuitive way, and clicking through the tabs at the top of the screen to access important sections such as Premise, Characters, and Settings.

Create your scene outline by identifying questions and plot holes still to be addressed, map your character’s arc and theme, and play with fun features that allow you to “cast” your characters and create story-specific playlists (which you can listen to without ever leaving the program).
When you’re finished, you can print your finished outline or export it to popular writing programs such as Scrivener to help write your first draft.

The Outlining Your Novel Workbook program makes outlining a fun and empowering process that will help you write your best story.
Features:
Outline – Create a story with a solid Three-Act plot structure and perfect scene structure.
Premise – Easy fill-in-the-blanks give you a perfect elevator pitch every time.
General Sketches – Brainstorm the big picture of your scene list, character arcs, and theme.
Character – Get to know your characters with an extensive character interview, featuring 100+ questions.
Settings – Keep track of your settings, explore your best options, and answer helpful world-building questions.
Fun Extras – Import your mind maps and world maps, keep track of your story’s timeline, cast your characters, and create story-specific musical playlists.
Print and Export – Print your outline or export your scene list for use in popular writing programs.

Mac Version Here – PC Version Here – International Version Here
(Please note: Due to the constraints of the programming engine, this software will only run on 64-bit computers. If your computer has more than 4 GB of RAM installed, it’s probably a 64-bit. Most Windows 7, 8, and 10 operating systems are running 64 bits. However, earlier version of Windows, such as XP, are probably incompatible with the program. Check your system properties for a description your computer.)
Help Me Celebrate the Program’s Launch: Win Prizes!
What that’s? A squeal-worthy new computer program to help you write better isn’t enough? Well, of course, not! That’s why we have launch prizes too! For the rest of the week, you will have the opportunity to win one of three prizes:
Grand Prize Winner: A Writer’s Care Package, featuring:
Bark-covered pocket notebook
Handmade twig pencils
Roll-up pencil case
The Lost Book of Fantasy writing-music CD by Peter Gundry
“I write. What’s your superpower?” mug
$25 Starbucks gift card

Second-Place Winner: Three-month Audible subscription.

Third-Place Winner: Bookends

Bonus—Hourly Prize Today Only: E-book versions of my Outlining Your Novel and Bob Miller’s thriller novel The Smart Kid.
 From 6 AM to 11 PM, I’ll be drawing a winner from the overall pool of contestants every hour for the digital version of my writing-craft book Outlining Your Novel, which is the perfect companion for the computer program, and Bob Miller’s “thriller with a heart” The Smart Kid. Winning this prize does not exclude you from the Grand Prize drawing on Saturday, but the sooner you enter this one, the better your chances of winning! Check back throughout the day to discover hourly winners, listed below:
6 AM: Cheryl Shih
7 AM: Ali
8 AM: Kate Duncan
9 AM: Jean
10 AM: David
11 AM: Lauren
12 PM: Melanie
1 PM: Terry
2 PM: Kristina
3 PM: Samantha
4 PM: Ted
5 PM: Kate
6 PM: Tom
7 PM: Nate
8 PM: Catherine Wu
9 PM: Hannah
10 PM: Maia Menschik
11 PM: Alexis
To Enter
The contest will run through Saturday, June 3rd. You can earn contest points and increase your chances of winning by sharing your “lucky URL.” The more people who enter via your URL, the more entries you gain for yourself. (Note: no purchase is necessary to enter.)
Good luck to everyone in the drawing, have fun, and thank you for helping Bob and me celebrate the launch of the Outlining Your Novel Workbook computer program! Happy outlining!
The post Big News! Introducing the Outlining Your Novel Workbook Software appeared first on Helping Writers Become Authors.


