
Learn How to Make the Most of the 5 Stages of the Writing Process
 Finding success as an author largely depends on how effective your actual writing process is. The key to not just getting words on paper, but to getting good words on paper is finding a daily system that invites you to enjoy your work, optimizes your creativity, and provides the support of feasible daily habits.
The writing process is different for every writer. The only commonality is the act of writing. Otherwise, I may prefer solitude, you may prefer a bustling cafe. I may prefer percussive music, you may prefer silence. I may write for two hours, you may write for one–or for four. I may need a familiar surrounding, you may be able to write anywhere, anytime.
Whatever the case, there are two truths to be recognized here:
1. You must find the unique writing process that works for you.
2. You can glean tidbits and insights from what works for other writers.
Reader Roberto emailed me, asking me to share my own current writing process:
I’d like to suggest a new post about your writing process. Can you explain in detail how you write? A typical session of writing, with all good and bad things and stuff you use daily.
5 Steps to a Complete Writing Process
For years, I used daily rituals (what I called “warming up“) to help me ease into the writing zone. The more I write, however, the less I require artificial aids. My writing process becomes simpler and simpler. Today, I’m going to share the basics of my creative process—all the way from the first spark of an idea, right on through to the end of revision.
1. What My Conception Stage Looks Like
The earliest breathings of inspiration, when a story is still congealing into something solid enough to write about, is of course the least structured part of the process. Really, there isn’t any structure at all. There’s just me daydreaming and occasionally taking notes. But there are some commonalities that show up in this part of the process from book to book.
1. Dreamzone
This is where it all starts. Sometimes it’s just random daydreaming. But I also consciously pursue inspiration by creating conducive creative environments. My favorite is listening to music in front of a fire pit on a moonlit night. I let the music guide me and my visual imagination take over. The spontaneous images and scenes that arise are usually random, but almost always vivid and organic. These will form the core of my story when I start outlining. The more of these visual ideas I store up, the more I will have to work with later.
2. Name the Characters
I never have a story until I have at least two characters. The relationship dynamic—whether it’s romantic, familial, antagonistic, or something else—provides the reason for the story and sparks all the questions and possibilities to come. As soon as I can see my characters, I have to name them, which is often one of the most difficult parts.
3. Title the Story
No, I take that back. Titling is always the hardest part. But story ideas never truly gel for me until I have at least a credible working title. It’s like I don’t have a place to put a story in my imagination until the title creates a box for it. Once I have a title, everything solidifies, finds its focus, and starts coalescing thematically.
4. Write a Summary
I’m never in a hurry to start writing things down. Once I write something down, it becomes a fact. In the early stages of conception, I don’t want to harden the possibilities into facts. I want them to breathe, to grow, to go in directions my logical brain isn’t capable of thinking about.
But at a certain point, when the main conflict is starting to gel, I know I’m ready to write down a short, back-cover-blurb-style summary—both to finally give my ideas a set focus and to make sure I don’t forget anything important down the road.

5. Record Early Notes
This is also where I start keeping a file of very sparse early notes. When a good idea comes to me during my dreamzoning sessions, I give it just a little snippet in my note file—just enough to capture the essence of what I saw in my head. I probably won’t use all of these ideas; but I can’t risk forgetting them either.
2. What My Outlining Stage Looks Like
My stories “brew” in the conception stage for a long time—years sometimes. But eventually, there comes a point when I know a story is ready to be written. Partly, this is because I’ve finished up my last book and am looking around for the next thing. And partly, this is because the new story just feels ready.
There is so much I don’t know about the new story yet. All I’m likely to have at this point is a sense of the main characters, the progression of their relationship, their desires and motivations, their world, and the gist of the conflict.
 But there’s something else too: the sense that the story is straining against the bounds of my subconscious imagination. It’s ready to burst forth like a butterfly from a cocoon. That’s when I know it’s time to outline. I have, of course, written at length about the specific techniques I use when outlining. So today, here’s what the daily process looks like.
1. Choose Music
Music is integral to my writing, at all stages. During outlining, I tend to prefer music that offers “thinking space,” something with a range of emotions that offers both epic energy and quiet introspection. For example, when I was outlining my portal fantasy sequel work-in-progress Dreambreaker, I returned often to Secret Garden’s Once in a Red Moon, which is mostly lyrical Celtic/New Age instrumentals, with just one or two wistful lyrics.
2. Take Notebook on the Run
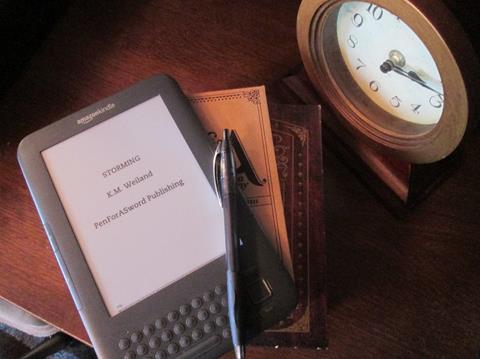
I write my outlines longhand in a WriteMind Planner, using an ergonomic pen. I like to take my outlines on the run—away from my computer and, weather permitting, outside.

 However, for those who prefer to write on the computer and/or want a guided approach to the brainstorming process of the outline, this is why we’ve created the Outlining Your Novel Workbook software, based on my own process.

3. Date/Write/End With Highlights
My daily outlining process begins with dating the page for easy reference later on. And then I just start brainstorming, asking and answering questions, moving through the intuitive set of techniques I’ve evolved over the years to help me understand my story on both the macro and micro levels of plot, character, and theme.
When I’m done for the day, I go back over my notes and use highlighters to mark areas that are “keepers” or that will need to be addressed further in the next outlining session.

4. Transcribe
Because I write my outlines longhand, I’m forced to take the extra step of transcribing pertinent notes. At every logical junction in the outlining process (e.g., after “general sketches” or “character sketches”), I will stop and use Dragon Naturally Speaking to transcribe my “keeper” notes into Scrivener for future reference.
3. What My Researching Stage Looks Like
Depending on what kind of story I’m writing, the outlining process may reveal the need for extensive research. For example, my historical superhero work-in-progress Wayfarer required several months of research into post-Regency London.
I still count this crucial step as “writing time.” It’s my sole creative focus during this period, and I devote several hours a day to it.
1. Compile Bibliography
My first step is to compile a bibliography of necessary resources. I check my local libraries, but I will order most of what I need from Amazon. I start with a list of the various topics I need to research, then hunt down at least one or two books on each subject.
2. Read/Make Notes
Then I start reading. For at least two hours a day, I will sit down with my pile of books and read steadily, taking notes as necessary. I have a variety of approaches to marking interesting passages.
E-books are great, since I can simply highlight and copy/paste (either from my Kindle highlights or from an email to myself).

With paperback books, sometimes I will use highlighters.

But more likely, to avoid marring the pages, I will use Book Dart bookmarks to note the beginning line of the pertinent passage.

3. File Notes
At the end of each day’s research session, I will review my notes, type them up if necessary, and organize them by subject. Within my Scrivener project, I create folders for various topics, such as Clothing, Language, and Social Mores.

Typing up the notes not only provides me an easily searchable database, but by further organizing my findings by subject, I’m left with an easy way to quickly locate any pertinent fact without bringing my writing to abrupt halt during the first draft.
4. What My Writing Stage Looks Like
And now the main event! I used to have all kinds of little magic rituals to get myself into the right head space for writing. But the longer I adhere to good writing habits, day in and day out, the less I have to psyche myself out. These days, my daily writing process is very simple.
1. Provide Time to Prepare
Perhaps one of the most important things I’m doing right now is giving myself a little space before writing. I used to jump immediately from project to project—usually, from email or social media right into writing. This was one of the reasons I needed all those “warm-ups” to shift my brain from work mode to writing mode.
Now, I try to schedule things better. I stop whatever I’m doing thirty minutes before writing. This gives me plenty of time to tie off any loose ends as I close down the previous project. Then I’ll go for a quick walk to clear my head, do a full-body stretch, and brew coffee.
2. Choose Music
Another thing that has changed in my writing process is the way I choose music. I used to keep a list of inspiring instrumental albums (mostly movie scores), and I’d just cycle through the list, in order. Even if the music didn’t perfectly jibe with what I was I writing, I liked that it might bring out interesting elements I wouldn’t otherwise have found (don’t believe me? try writing a romantic scene to “The Battle” on the Gladiator score).
However, I now prefer to take more conscious control of my background inspiration—which, actually, can be dangerous, since it means I have to sit and think about my scene’s mood and then perhaps experiment with a couple albums before finding the right one. I’ll stick with the same album for the entirety of a chapter before choosing something new.
Unlike outlining, my musical preferences for writing lean toward the more amped. I like albums with lots of power and adrenaline. I want music that not only informs what I’m writing, but that keeps me pumped and my fingers flying over the keyboard. I cannot just sit and daydream while listening to Two Steps From Hell’s Skyworld or the Pacific Rim score—and that’s a good thing.
3. Reread Previous Session
The one “warm-up” exercise that remains steady in my daily writing process is re-reading my previous session’s writings. I fire up the music and dive in. It’s important to me to start the music right away, even though I’m not writing yet, since the continuity of background energy makes it easy to transition from reading the last line to writing the next one.
At this stage, I’m rereading primarily to get myself back into the same head space as yesterday’s writing session, but I also take the opportunity to do a little bit of editing—typo-correcting and sentence-straightening as I go.
>>Click here to have me walk you through a “real-time” edit of a day’s writing.
4. Write
Finally, I write my first draft into Scrivener. And that’s pretty much all there is to it. I feel the music, shut out the outside world, and dive in as deep as I can. I type quickly, trying to keep the words flowing. I do censor as I go, quickly replacing words, reading over what I have to make sure the flow is working. But I keep moving. My goal is to write at least 300 words every 15 minutes—although I don’t always rigorously chart the word count unless I feel I’m slipping into procrastination or inertia.
Generally, I give my writing process two hours of my day. Late morning and late afternoon are my two favorite times to write. That way, either I get to start my day with a rush of creativity, or I get to save my favorite activity as something to look forward to while I work through less enjoyable tasks.

I’ve found that two hours is a good balance for me. It’s long enough to allow me to really sink into my creative zone and complete a sizable chunk of work. But it’s not so long that it eats up my day. Any longer than two hours, and I find the intensity of sustained concentration completely zaps my mental and emotional energy.
5. What My Revising Stage Looks Like
Once I’ve finished the first draft, it’s time to revise. This step is the most interrupted of any part of my writing process. I let long chunks of time—months, even—pass between edits, both to give my betas a chance to return their opinions, and also to allow my own brain to distance itself and gain objectivity.
1. Read on the Computer
After finishing the first draft, I will do my initial revision on the computer. Since this is likely to be my most intensive edit, I like the instant flexibility of making corrections on the computer. I can change large chunks of text and move things around with the least amount of effort.
Once again, when I’m in the revision stage, I devote the entirety of my writing session to editing. Just as I do when outlining or writing, I’ll brew my coffee and sit down at my computer for two hours of focused effort.
When editing, I tend to like video-game soundtracks—the more monotonous, the better! They help me sink into concentration, while providing just enough stimulation to keep me going. Ori and the Blind Forest is a favorite right now.
2. Read Hard Copy
For my second edit, I’ll print out a hard copy. Seeing my words on paper gives me an ever-so-slightly different perspective. I’ll either mark up the hard copy with a red pen and make corrections into the computer later—or I might just sit with the hard copy at my desk and make any necessary corrections directly into my manuscript file to save myself the extra step of writing them down.

3. Read on Kindle
My third edit is a proofreading run. I put my manuscript on my Kindle Keyboard and read along while it reads to me. I’m not likely to be making any major changes to plot or prose. I’m just hunting out typos, so I can give my betas a clean copy.
4. Give to Beta Readers
Then I’m ready to send the manuscript to my first round of beta readers. I let them know of any major concerns or questions I may have—and then forget about the book for a couple months until they get back to me.
5. Organize and Edit/Proof if Necessary
After all of my first-round betas have responded, I will review and organize their notes to create a “revision outline.” Then I’ll go through my manuscript, on the computer, from beginning to end, making changes as necessary.
If it was a particularly extensive revision, I may decide I need to finish with another proofreading round on the Kindle.
6. Repeat
Then I send it off to the second round of betas and repeat Steps 4-5.
***
Your writing process doesn’t have to be glamorous. Indeed, it probably shouldn’t be. You want to create a writing process that is simple, steady, addresses your weaknesses, and provides a solid foundation you can return to with confidence every single day.
It should also be fluid. As you evolve—both as a person and a writer—your process will undoubtedly need to evolve as well. Stay tuned to what grants other writers success. Don’t feel you must mimic their processes to also mimic their results. But be open to stealing any little bit of their process that appeals to you. And have fun!
Wordplayers, tell me your opinion! What does your daily writing process look like? Tell me in the comments!
http://www.podtrac.com/pts/redirect.mp3/kmweiland.com/podcast/make-the-most-of-your-writing-process.mp3
Click the “Play” button to Listen to Audio Version (or subscribe to the Helping Writers Become Authors podcast in iTunes).
The post Learn How to Make the Most of the 5 Stages of the Writing Process appeared first on Helping Writers Become Authors.


