
Gesine Bullock-Prado's Blog, page 8
January 9, 2015
LINZER MACARON TORTE with RED CURRANT GERMAN BUTTERCREAM

I had one cup of coffee too many this morning. It's a shame since that means I should reign in my afternoon coffee consumption. This would put a damper on 3pm Kaffee und Kuchen. I've made a Linzertorte, one of my mother's favorites, but I've put a little French pastry spin on it. She'd have appreciated the hybrid, with it's delicate hazelnut meringue layers and rich German Johannisbeere (currant) buttercream filling.

Linzertorte is believed to be the oldest cake in history. It's etymology, like most historically significant foodstuffs, is the subject of numerous legends. Most believe the Linzer is named after the town of Linz in Austria. Totally reasonable. Others claim that it's named for a Viennese confectioner by the name of Linzer. Fair enough. This version also keeps the cake squarely in the Austrian culinary tradition. But there's another possibility, that a Franconian pastry chef by the name of Johann Konrad Vogel invented the tasty delight and came to mass produce it in the city of Linz.

It's the last version that I prefer above all others. It ties a pastry that brings to mind my mother's wonderful baking to her hometown, Nürnberg, the jewel in the heart of Franconia. And what would we have enjoyed with our slice of torte if we could savor it together? Coffee. So let's hope that my caffeine jitters subside just enough that I can eat this beauty properly.

LINZER MACARON TORTE

For the macaron layers
7 ounces hazelnut flour
7 ounces confectioner's sugar
7 ounces granulated sugar
3 ounces egg whites, liquid
2 scant tablespoons egg white powder
1/4 teaspoon salt
1/4 teaspoon cinnamon
pinch ground cloves
squirt lemon juice
In a large bowl, combine the hazelnut flour, confectioner's sugar, egg white powder, cinnamon and cloves. Whisk for 30 seconds and then run through a fine sieve onto a piece of parchment and then run back through the sieve back into the bowl. Set aside.
Fit a large pastry bag with a large open pastry tip. Line 2 half sheet pans with parchment plus one more lined sheet pan in reserve. Using a 9" cake pan and a Sharpie, trace around the cake pan to create a 9" circle and flip the parchment over so that you can still see the outline of the circle. Do the same on the 2nd piece of parchment. Set aside.
In the bowl of a stand mixer fitted with the whisk attachment, combine the egg whites and salt.
In a small, heavy saucepan, combine the granulated sugar, 1/4 cup of water and the lemon juice. Stir over low heat until the sugar has completely melted. Attach a candy thermometer and raise the heat to medium and cook until the sugar syrup has reached 240ºF.
With the mixer running on high, carefully pour the sugar mixture down the side of the mixing bowl and into the egg whites. Continue whisking until you get stiff white, shiny peaks.

Stir another 1/4 cup water and 1/4 of the meringue mixture into the hazelnut flour mixture to create a paste. Add the remaining meringue and carefully fold into the paste with a large rubber spatula until the mixture is the consistency of thick ketchup. Do not over mix and don't stir vigorously. Be gentle.

Transfer the meringue to the prepared pastry bag and pipe the meringue in a large spiral, just large enough to fill the 9" circle, by starting in the very center and piping tight circles to the edge of the outline. Pipe the second circle. Gently tap the sheet pans on a work surface a few times to release any air bubbles and allow to sit at room temperature for 20 minutes to form a "skin." Preheat the oven to 300ºF.
If you have more hazelnut batter than you need for the 2 layers, pipe small quarter sized dollops on the third sheet pan for traditional macaron shells and bake for 10-14 minutes at 300ºF until the shells get "pied" and lose their wet sheen.
Bake the macaron layers in the middle of the oven for 10 minutes, turn the sheet pans 180º and then bake 10-12 minutes more or until the macaron are baked through but not hard (macaron have a slightly crisp exterior and that gives way to a soft interior. They are NEVER crispy through and through). Allow to cool completely.
For the German/custard buttercream
German buttercream is simply a pastry cream (PC) with added butter, whisked into the PC to create a spreadable filling.
6 egg yolks
1/3 cup granulated sugar
1/3 cup smooth red currant jam
1/4 cup cornstarch
1/8 teaspoon salt
1 cup heavy cream
1 cup whole milk
6-8 ounces unsalted butter, room temperature
Combine the egg yolks, sugar, cornstarch and salt into the bowl of a stand mixer fitted with the whisk attachment. Whisk until smooth.
In a large saucepan, combine the red currant jam, heavy cream and whole milk. Bring to a simmer, stirring to allow the jam to melt a bit.
With the mixer running on medium speed, slowly add the hot cream/milk to the bowl by pouring it down the side and into the egg yolk mixture. Add all the cream/milk and mix until combined. Transfer the mixture back into the saucepan and whisk over medium/low heat CONSTANTLY until the mixture thickens to the consistency of mayonnaise. Can take about 5 minutes.
Transfer the hot pastry cream into the CLEAN bowl of a stand mixer fitted with a CLEAN whisk attachment and mix until the mixture has cooled to room temperature (about 10 - 15 minutes).

Add the butter, a few tablespoons at a time, and whisk between each addition. Continue adding and whisking until the mixture thickens and smooths into a spreadable filling. You may not need all 8 ounces of the butter.
Transfer the filling to a large pastry bag fitted with a large open tip. Pipe dollops around the perimeter of the flat side of a macaron layer, and then continue piping inside the shell, continuing with a second layer of buttercream to create an inch thick filling.

Top with the second macaron layer, spiral side up. Place in the freezer 20 minutes to set and then pipe decorative filagree at the edge of the top macaron if you like and add berries as desired (I had frozen red currants from my garden but red raspberries work just as well.).
Serve immediately.


January 5, 2015
BANANA-CARAMEL CREAM PIE

According to the weather report, the thermometer is supposed to drop to well below 0 this week. There are harrowing tales of towns a bit farther north from here that might see -40...or worse.

My job on such frigid occasions is to make sure our pipes don't freeze and that our farm animals have enough heat in their homes that they may snuggle up at night with little fear of turning into ice sculptures. We've even set up a heated cat house for our feral cat, Abner, who's been overwintering and supping in our barn the last 3 years.

On the advice of a cat whisperer friend, I've sprinkled cat nip willy nilly onto the warm mattress of the feline enclosure to entice him in. It gives me the warm and fuzzies imagining lil' Abner lolling around in the snuggly confines of his new domain with a kitty buzz and a full belly.

My job is to also take care of keeping the bipeds toasty and what better way than with a creamy, caramel doused banana cream pie? It is the cat nip for humans, afterall.
BANANA CARAMEL CREAM PIE(Makes 1 cream pie)

For the Quick Puff
(enough for 2 bottom crusts or 1 double crusted)
Adapted from my book Pie it Forward
1 pound flour
1 pound unsalted butter, cold and cut into inch cubes
1 1/2 teaspoons salt
1 teaspoon sugar
3/4 cup ice cold water
NOTE: I recommend that you consult THIS post for a visual of the dough process.
In a large mixing bowl, combine the flour, salt and sugar. Whisk for a few seconds to combine. Add the butter cubes and toss to coat. Using the tips of your fingers, massage the butter into the flour until the dime sized pieces of butter remain throughout the mixture.
Pour the water over the mixture and using a wooden spoon, stir the mixture. Then using your hands, toss the mixture and stir it about with your fingers to ensure that the moisture is evenly distributed. Press down on the mixture to compact it in the bowl and cover the bowl with plastic wrap and allow to hydrate for 10 minutes.
Turn the mixture out onto a clean work surface lightly dusted with flour. Dust a rolling pin with flour and roll out the dough to a rough 22" by 9" rectangle. The dough will be an unholy mess but it will come together soon.
Perform a letter fold by carefully folding the right side of the dough over toward the middle (I use a bench scraper to do this since the dough is more piecey than a workable piece of dough at this point). Fold the left side over to cover the first fold, like a business letter.
Turn the dough 90º and roll out as before and fold again. Do this one more time. By the third and last roll and fold, the dough should hold together beautifully and be smooth. Cover the block of dough with plastic wrap and refrigerate for at least 20 minutes before using.
Cut the dough in half (keep the other half frozen for another yummy occasion). Roll out the dough into a rough 14" round to about 1/8" to 1/4" thick. Line a 9" pie plate with the dough and trim the dough so that it just hangs over the edge of the pie plate. Dock the bottom of the dough and freeze for 20 minutes. Preheat the oven to 350º.
Cover the dough with parchment paper and fill with baking weights or dry beans (uncooked rice works well too). Bake for 20 minutes and then remove the weights and parchment paper. Bake for 15 minutes more or until the crust is golden brown and baked through. Allow the crust to cool completely.
For the caramel
1 cup dark brown sugar
1/4 cup water
squirt lemon juice
1/2 teaspoon salt
1/2 teaspoon vanilla
1/2 cup heavy cream
In a heavy bottomed sauce pan, combine the brown sugar, water, lemon juice and salt. Stir over medium heat until the sugar has completely melted. Stop stirring and continue cooking until the caramel turns a deep, deep amber, hard to tell when the dark brown sugar is already so dark, so add a candy thermometer and cook to 375ºF. Immediately add the heavy cream. The mixture will boil up quite violently but it dies down quickly. Stir together over low heat until the caramel is completely melted and the mixture is well combined. Allow to cool to room temperature.
For the filling

1 cup heavy cream
1 cup whole milk
1/3 cup Monin banana flavored syrup
1/4 granulated sugar
1/4 cup cornstarch
6 egg yolks
1/4 teaspoon salt
In the bowl of a stand mixer fitted with the whisk attachment, whisk together the sugar, cornstarch, egg yolks and salt.
In a large saucepan, combine the heavy cream, milk and syrup. Bring to a simmer. With the mixer running, add the hot cream mixture to the sugar/egg yolk mixture and whisk until smooth. Transfer the mixture back to the saucepan and whisk constantly over medium heat until the pastry cream has thickened to the texture and thickness of mayonnaise.
Scrape the pastry cream into a large bowl. Cover with plastic wrap, making sure the plastic wrap touches the surface of the cream so that a skin doesn't form. Cool in the fridge, about 1 hour.
To finish
1 large banana, ripe but not brown, sliced into 1/4 inch thick rounds
2 cups heavy cream
1/4 cup Monin banana syrup
Line the bottom of the cooled pie crust with the banana rounds. Pour the caramel over the bananas. Smooth all but 1 cup of the cooled banana pastry cream over the caramel and refrigerate until set, about 20 minutes.
In the bowl of a stand mixer fitted with the whisk attachment, combine the heavy cream, reserved 1 cup pastry cream and 1/4 cup Monin syrup. Whisk until stiff peaks form.
Transfer half of the whipped cream mixture to a large pastry bag fitted with a large decorative pastry tip (I used a St. Honoré tip). Set aside.
 The pastry cream is in. Now to add half of the whipped cream.
 First half of the whipped cream added. Now for the fun part.
 Add a little rose bud.
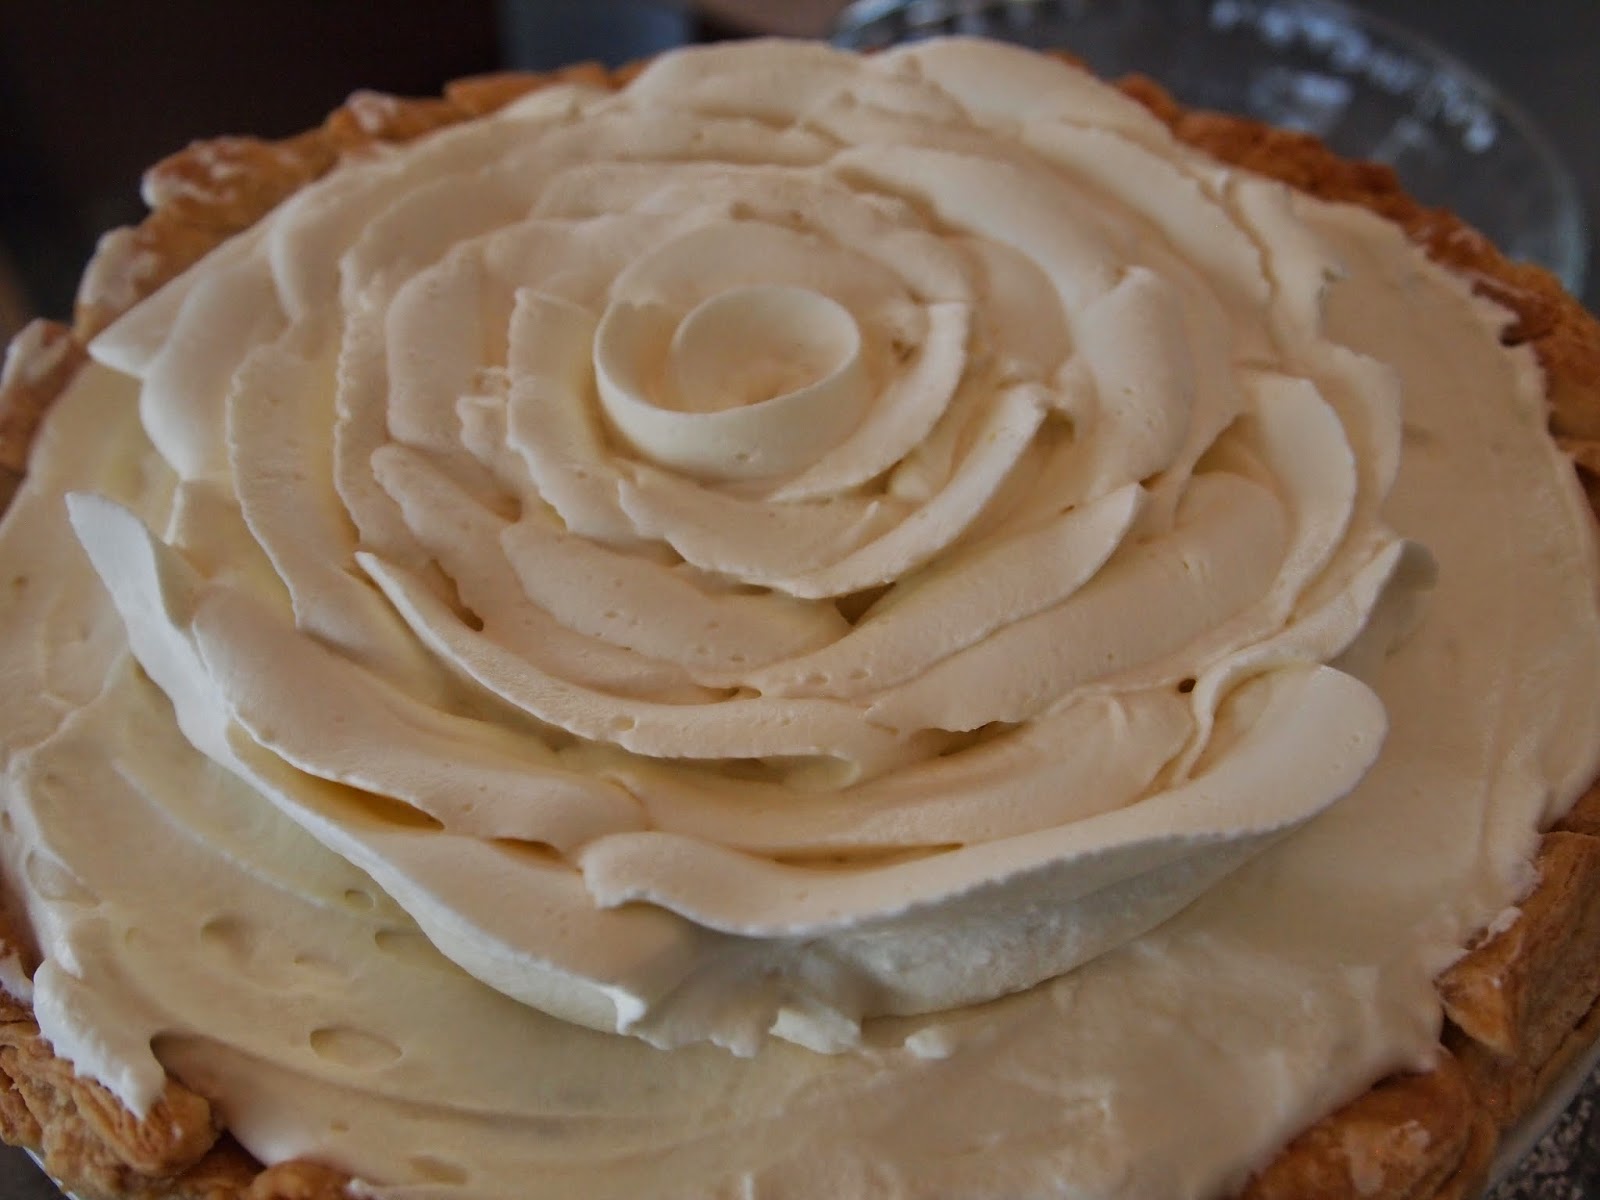 Add the rest of the petals.
Add the remaining whipped cream to top of the pastry cream and smooth flat with a small offset spatula. Pipe the set aside whipped cream in the piping bag in decorative swirls over the smoothed whipped cream mixture. I start by making a small rose bud and then add bands of whipped cream in 3-4 inch sections around the starting bud. This gives the top of the cake the look of a rose in full bloom. You can also use a large leaf tip to get this look by piping the leaves on their side as opposed to flat.
Serve immediately.
January 1, 2015
HAPPY NEW YEAR!

Happy New Year, sweet people!

Let's make this a beautiful one, full of kindness and joy. And pastry. To celebrate this new year, I made loads of croissant (recipe to come later in the year),
 chocolate croissant
 pistachio/apricot croissantwater bagels (recipe also coming in the new year),
 NY water bagelsand sable topped cream puffs with frozen chocolate custard (RECIPE COMING RIGHT NOW!).
In Germany, pigs are a sign of good luck. A harbinger of things moving forward if not fatter. Sounds good to me!

NEW YEAR'S PIGGY PASTRY
(Makes 2 dozen)

For the sable
2 sticks unsalted butter, room temperature
2/3 cup super fine sugar
1 whole egg, medium sized not large
1 teaspoon sea salt (otherwise, 1/2 teaspoon table salt)
2 cups all purpose flour
red gel dye (1 drop)
In the bowl of a stand mixer fitted with a paddle attachment, combine the butter and sugar and mix until smooth and combined Scrape down the bowl, add the egg and mix until combined. Add the drop of dye, the flour and salt and mix until combined.
Transfer the dough to a large piece of plastic wrap and cover completely. Refrigerate for 20 minutes.
Preheat oven to 350º.
Take a small amount of the dough, no more than 1/4 of it, and roll out on a lightly floured surface to 1/4" thick. Using a small round cutter (I use the small end of a large open pastry tip) cut out 24 small rounds. Cut the rounds on the top and bottom to make a rectangular shaped cookie. Bake for 5 minutes or until baked through. Allow to cool completely.
For the choux
1 1/2 cups water
1 stick unsalted butter
2 tablespoons sugar
1/2 teaspoon salt
1 1/2 cups all purpose flour
5 eggs
Preheat oven to 400ºF. Line 4 sheet pans with parchment. Set aside.
In a large saucepan, combine the water, butter sugar and salt. Bring to a simmer over medium heat, making sure that the butter and sugar have completely melted. Add the flour all at once and stir over medium heat with a wooden spoon until the paste is smooth, pulls away from the sides of the saucepan and is very shiny and thick.
Transfer the paste to the bowl of a stand mixer fitted with the paddle attachment. Mix on medium speed and add the eggs, one at a time until the paste is smooth and pipeable.
Transfer the choux paste to a pastry bag fitted with a large open tip. Pipe silver dollar sized dollops, about 2 inches apart, onto the parchment lined sheet pans.

Roll out the remaining sable onto a lightly floured work surface to about 1/8" thick. Cut rounds, slightly smaller in diameter than the choux and top the choux with the sable rounds. Bake at 400º for 10 minutes and then reduce heat to 350º and bake for 1/2 hour more.
Allow to cool completely.
For the custard
1 cup half and half
3 egg yolks
1/4 cup sugar
1 1/2 tablespoons tapioca flour
pinch salt
8 ounces bittersweet chocolate, finely chopped
2 cups heavy cream
In a saucepan, bring the half and half to a simmer.
In a mixing bowl, whisk together the sugar, egg yolks, tapioca flour and salt until smooth. While whisking, slowly add the half and half until well combined. Transfer the mixture back into the saucepan and whisk over medium heat until the mixture thickens to the consistency of mayonnaise. Take from the heat and immediately add the chocolate. Stir until combined. Transfer to a large bowl and cover the top with plastic wrap to keep the custard from forming a skin. Refrigerate until cool, about 1 hour.
Whip the heavy cream to stiff peaks. Fold into the custard. Transfer to a large bowl, cover with plastic wrap and freeze until frozen but still scoopable.
To assemble
a few tablespoons melted chocolate
a small amount of royal icing (1 cup confectioner's sugar, 1 teaspoon egg white powder, enough water to create a pipeable paste)
48 almond slices, cut in half for ears
Cut the cream puffs in half, just under the sable line. Place a small dollop of royal icing onto a sable rectangle and adhere onto the middle of the sable covered portion of the cream puff. Place a small dollop of the royal icing onto the almond slivers for the ears and place towards the top of the sable topped puff. Pipe small dollops of royal icing for eyes and then a small dot of melted chocolate for the pupils of the eye and for nostrils on the sable nose. Allow to set, about 20 minutes.
Using an ice cream scoop, scoop the frozen custard and place on the bottom of the puff and cover with the piggy half. Serve immediately.
December 18, 2014
AZTEC COCOA CUBES with SWIRLY HOMEMADE MARSHMALLOWS

I started making hot cocoa from homemade chocolate truffles years ago. At our shop, while playing with cocoa recipes, I dug into a vat of freshly made chocolate ganache, from whence truffles are made. I whirled a heaping tablespoon into steaming milk. Goodness gracious, that was a sublime mug of cocoa.

Since then, I've created a failsafe method for making the perfect cup of cocoa: I evenly divide the ganache among silicone ice cube trays that measure an inch wide and tall. For an added zing, I stir a little cinnamon and a pinch of cayenne into the hot ganache before divvying up.

For a small cup of cocoa, I combine 1 truffle cube with 2/3 cup whole milk. For each large mug of cocoa, I add 2 cubes of truffle and a 1 1/4 cups whole milk.

Top it off with a giant, homemade marshmallow and you'll never leave your comfy chair unless you need to get more cocoa.
AZTEC COCOA CUBES with MARSHMALLOW
(Makes 6-12 servings)
For the ganache
8 ounces bittersweet chocolate, at least 70%
1/2 cup heavy cream
2 tablespoons unsalted butter
1/4 teaspoon cinnamon
pinch cayenne pepper
pinch salt
Chop the chocolate finely and place in a heatproof bowl.
In a small saucepan, combine the heavy cream, butter, cinnamon, cayenne and salt. Stir over low heat until the mixture just begins to simmer.
Pour the hot cream mixture over the chocolate, making sure the chocolate is completely covered, and allow to sit for 2 minutes undisturbed. Whisk until smooth.
Divide the ganache into 12 cavities of a square ice cube tray that measures 1" wide and 1" tall.
Allow to set in the fridge, about 1 hour.
For the cocoa
For a large mug, place 1 1/4 cups whole milk in a small saucepan along with 2 cocoa cubes. Stir over medium heat until the truffle has completely melted into the milk and the milk is steaming. Pour into your waiting vessel and top with a marshmallow. The same method applies to a small cup of cocoa: 1 truffle cube + 2/3 cup milk in a saucepan. Stir until melted and steamy.
For the marshmallow
4 envelopes plain gelatin
3 1/4 cups granulated sugar
3/4 cup water
1 tablespoon vanilla
1 cup corn syrup
1/4 teaspoon salt
1 tablespoon melted bittersweet chocolate or gel dye (color your choice)
For flavored marshmallows, see my recipe in Better Homes and Gardens HERE.
1/2 cup cornstarch or confectioner's sugar
Line a 9" x 13" pan with parchment and lightly spray with non-stick cooking spray, make sure the parchment hangs over the long side of the pan. Set aside.
Pour the water and vanilla into the bowl of a stand mixer fitted with the whisk attachment. Sprinkle the gelatin over the water in an even layer and allow to sit until the gelatin looks soaked through and appears like wet sand.
In a large saucepan, combine the corn syrup, sugar and salt. Stir over medium heat until the sugar is melted. Attach a candy thermometer and heat to 240ºF. With the mixer running on high, carefully pour the sugar mixture down the side of the bowl into the gelatin and whisk on high until the marshmallow has quadrupled in volume, bright white and the bowl is cool to the touch.
Scrape the marshmallow into the prepared pan using a large rubber spatula sprayed with non-stick cooking spray.
Place small drops of melted chocolate or dye on top of the marshmallow. Using a toothpick, swirl the chocolate or dye into the marshmallow.
Allow the marshmallow to set in a cool dry place, 2 hours to overnight. Sprinkle the top of the marshmallow with cornstarch or confectioner's sugar. Lift the marshmallow out of the pan. Using a hot knife sprayed lightly with non-stick cooking spray, cut the marshmallows into large cubes, dredging the cut edges in cornstarch/confectioner's sugar as you go along. Cover the marshmallows in an airtight container and they can last for up to 2 weeks.
December 16, 2014
CRANBERRY-ORANGE POLKA DOT CHEESECAKE

We're at that portion of our holiday program where we let go of any pretense that we're holding steady on the scale and all dietary hell breaks loose.

That's where cheesecake comes in. Up until now it's been a stray cookie or a nibble of candy but there's a weak plank in your wobbly bridge of restraint. Some small part of your discipline is ready to dislodge. Any and all food stuffs are welcome to take a trip down your gullet and as long as you're in this sublime state of culinary dishabille, cheesecake is an option. Perhaps it's the only option.

For there will be regrets and resolutions come January 1st but today let's have cheesecake.

CRANBERRY-ORANGE POLKA DOT CHEESECAKE
(Makes one 9" cheesecake)
*NOTE: In order to make this recipe you need special equipment not special skills. You'll need a 9" springform, cake pan or cake ring that's at least 3" tall. You'll also need a 6" cake ring that's also at least 3" tall. I find it best to also have large pastry bags, a large open plain tip and a large open star tip.

For the crust
1 1/2 packs (12 whole cookies) graham crackers
3/4 stick unsalted butter, melted
1 tablespoon sugar
Preheat oven to 350ºF. Spray a 9" springform, cake pan or cake ring with non-stick cooking spray. Place on a foil lined half sheet pan. Set aside.
Pulverize the graham crackers in a food processor along with the sugar until very fine. Transfer to a large bowl and pour the butter over the crumbs. Stir until the butter is evenly distributed, using your fingers if you need to. Dump the crumbs into the 9"' cake pan and pat down with your fingers into an even layer and then use a small measuring cup with a flat bottom to truly flatten out the crust. Bake for 10-15 minutes or until the edges just barely begin to brown.
Take out of the oven and reduce the heat to 300ºF.
For the cheesecake
5 packages cream cheese, room temperature
1 1/2 cups sugar
5 eggs
1/4 cup flour
1/2 cup heavy cream
juice of one orange (about 1/3 cup)
zest of one orange
1 teaspoon orange extract
1/2 can (from a 14oz can) cranberry sauce (you'll use the other half for the glaze)
1/4 teaspoon salt
red gel dye
In the bowl of a stand mixer fitted with the whisk attachment, combine the cream cheese and the sugar. Whisk on high until smooth. Add the eggs, one at a time, and whisk to combine. Add the heavy cream, zest and extract and whisk to combine. Add the flour and salt and mix until the flour is completely distributed.
In a saucepan, combine the cranberry sauce and the orange juice. Stir over low heat, using a fork to mash down the cranberry sauce. Continue stirring and mashing until the mixture is smooth and slightly thickened. Add a drop or 2 of red dye and stir.
Divide the cheesecake batter in half. Run the cranberry mixture through a fine sieve into one of the bowls of cheesecake batter, leaving the other plain. Remove 1 1/2 cups batter from each of the bowls of batter and place in 2 separate smaller bowls. Refrigerate the larger bowls of batter and place the smaller bowls of batter in the freezer, for about 30 minutes.
Spray the inside andn outside of the 6" cake ring with non-stick cooking spray and place on top of the crust, making sure it sits right in the center. Press very lightly and turn just slightly. ***Before you start with the next process, make sure that the 2 smaller batches of batter in the freezer are VERY stiff but not frozen, especially the cranberry batter*** Transfer the large bowl of plain batter into a large pastry bag and pipe the batter into the outside ring. Pour the large batch of cranberry batter into the center ring.
Transfer the small amount of plain batter to a pastry bag fitted with a large open tip. Insert the tip half way down into the cranberry batter and press gently. Keep lifting and inserting the bag and adding small dollops to the cranberry batter, evenly distributing the dots all throughout the cranberry batter. Transfer the small batch of cranberry batter to a clean pastry bag fitted with a large plain tip and pipe small dollops all along the outside ring of plain batter.
Bake for 25 minutes at 300ºF in the center of the oven (if you can , remove any racks that sit above the center rack). After 25 minutes have passed, carefully pull out the center rack enough for you to take a pair of tongs or an oven mitted hand to carefully lift out the center ring. Lift straight up, if you can, otherwise the line delineating the two batters won't be even. Reduce the heat to 275º and bake for 1 hour to 1 1/2 hours or until the cheesecake slightly shimmies in the center. Turn the oven off and open the oven doors and allow the cheesecake to come to room temperature slowly. Once cool, place the cheesecake in the refrigerator.
For the glaze
1/2 can (from a 14 oz can) cranberry sauce
1/2 cup plus 2 tablespoons orange juice
1/2 teaspoon plain gelatin
red gel dye
In a small saucepan, combine the cranberry sauce and 1/2 cup orange juice. Stir over low heat, using a fork to mash down the cranberry sauce and continue stirring and mashing until the mixture is smooth.
Pour the 2 tablespoons orange juice into a small bowl. Sprinkle the gelatin evenly over the juice and allow to sit until it looks soggy. Once the cranberry mixture is smooth, take from the heat and stir in the gelatin mixture and the dye. Stir until the gelatin has completely melted and the dye is evenly distributed. Pour the glaze through a fine sieve directly on the top of the cheesecake. Transfer to the freezer to set, about 20 minutes.
To finish
1 cup heavy cream
2 tablespoons confectioner's sugar
1/2 teaspoon orange extract
small cranberries or red currants, about 13
1 tablespoon granulated sugar
Whisk together the heavy cream, confectioner's sugar and extract until medium stiff peaks form. Transfer the cream to a pastry bag fitted with a large open star tip and pipe decorative swirls onto the top edge of the cake. Dip one half of a cranberry or currant into the granulated sugar and place onto the cream.
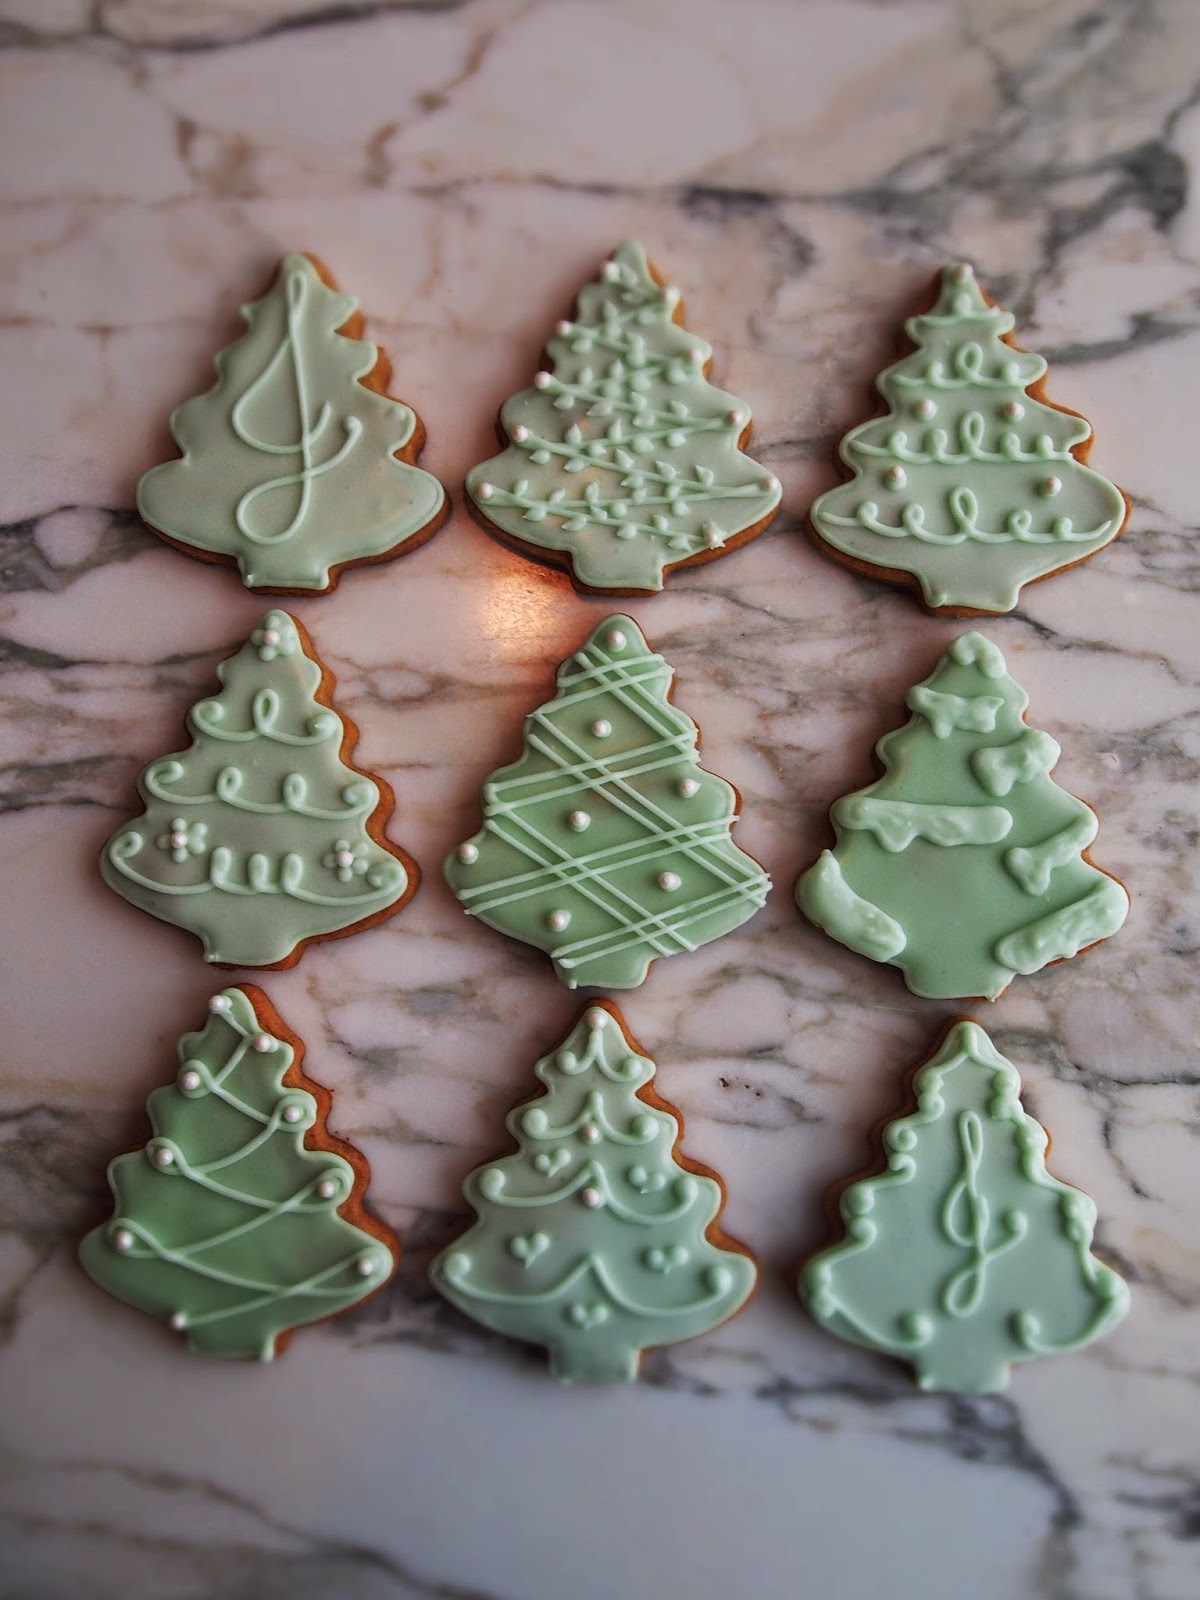
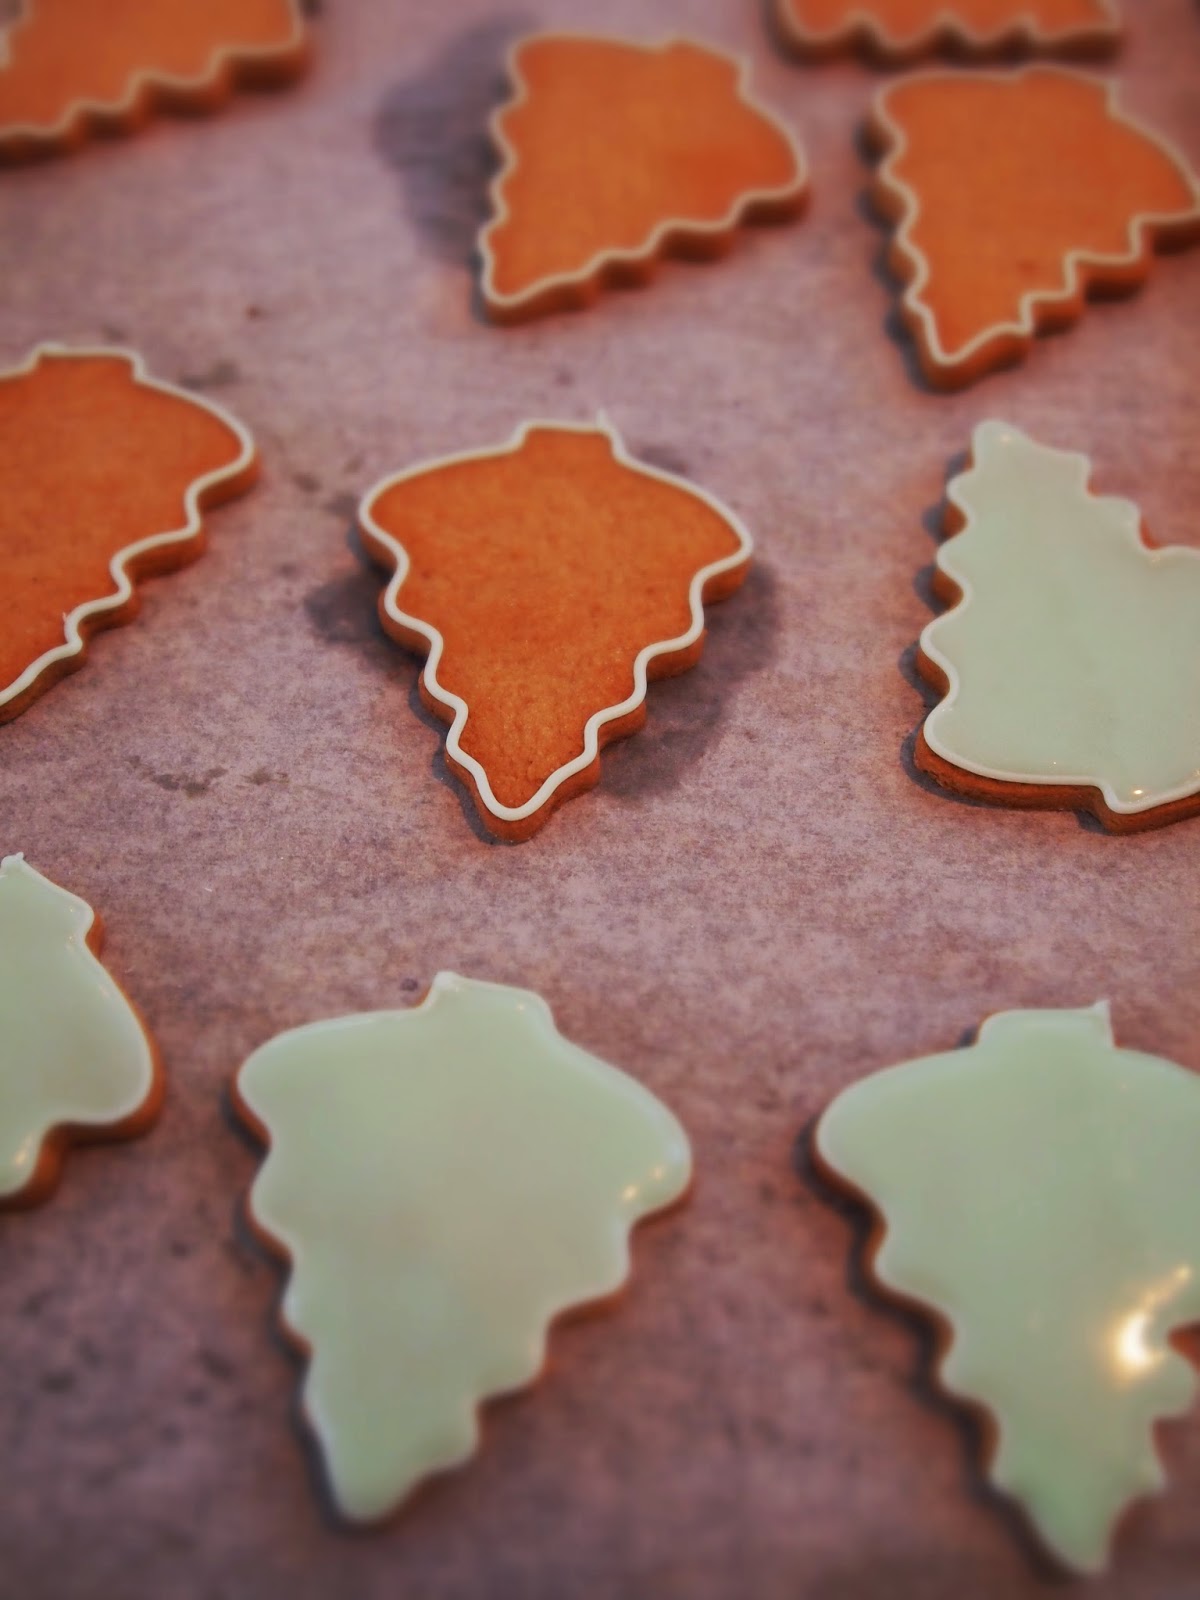
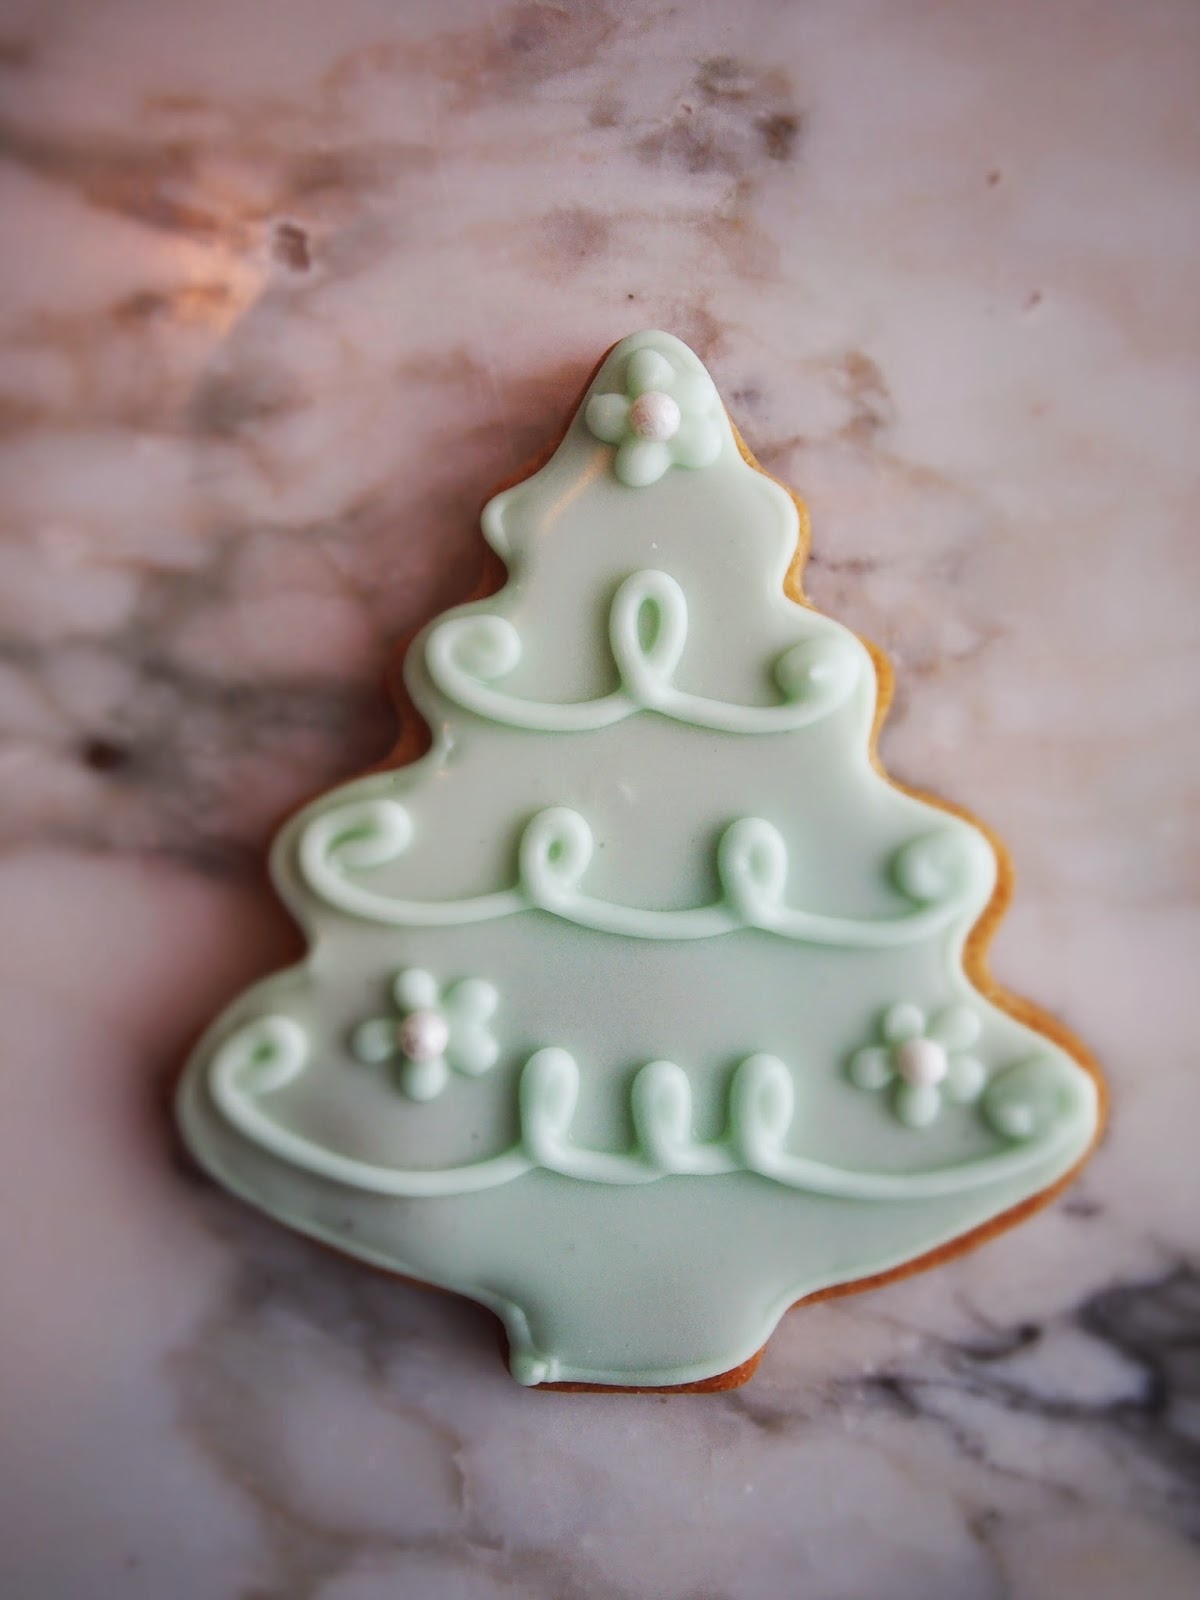
BROWN BUTTER-BROWN SUGAR COOKIES
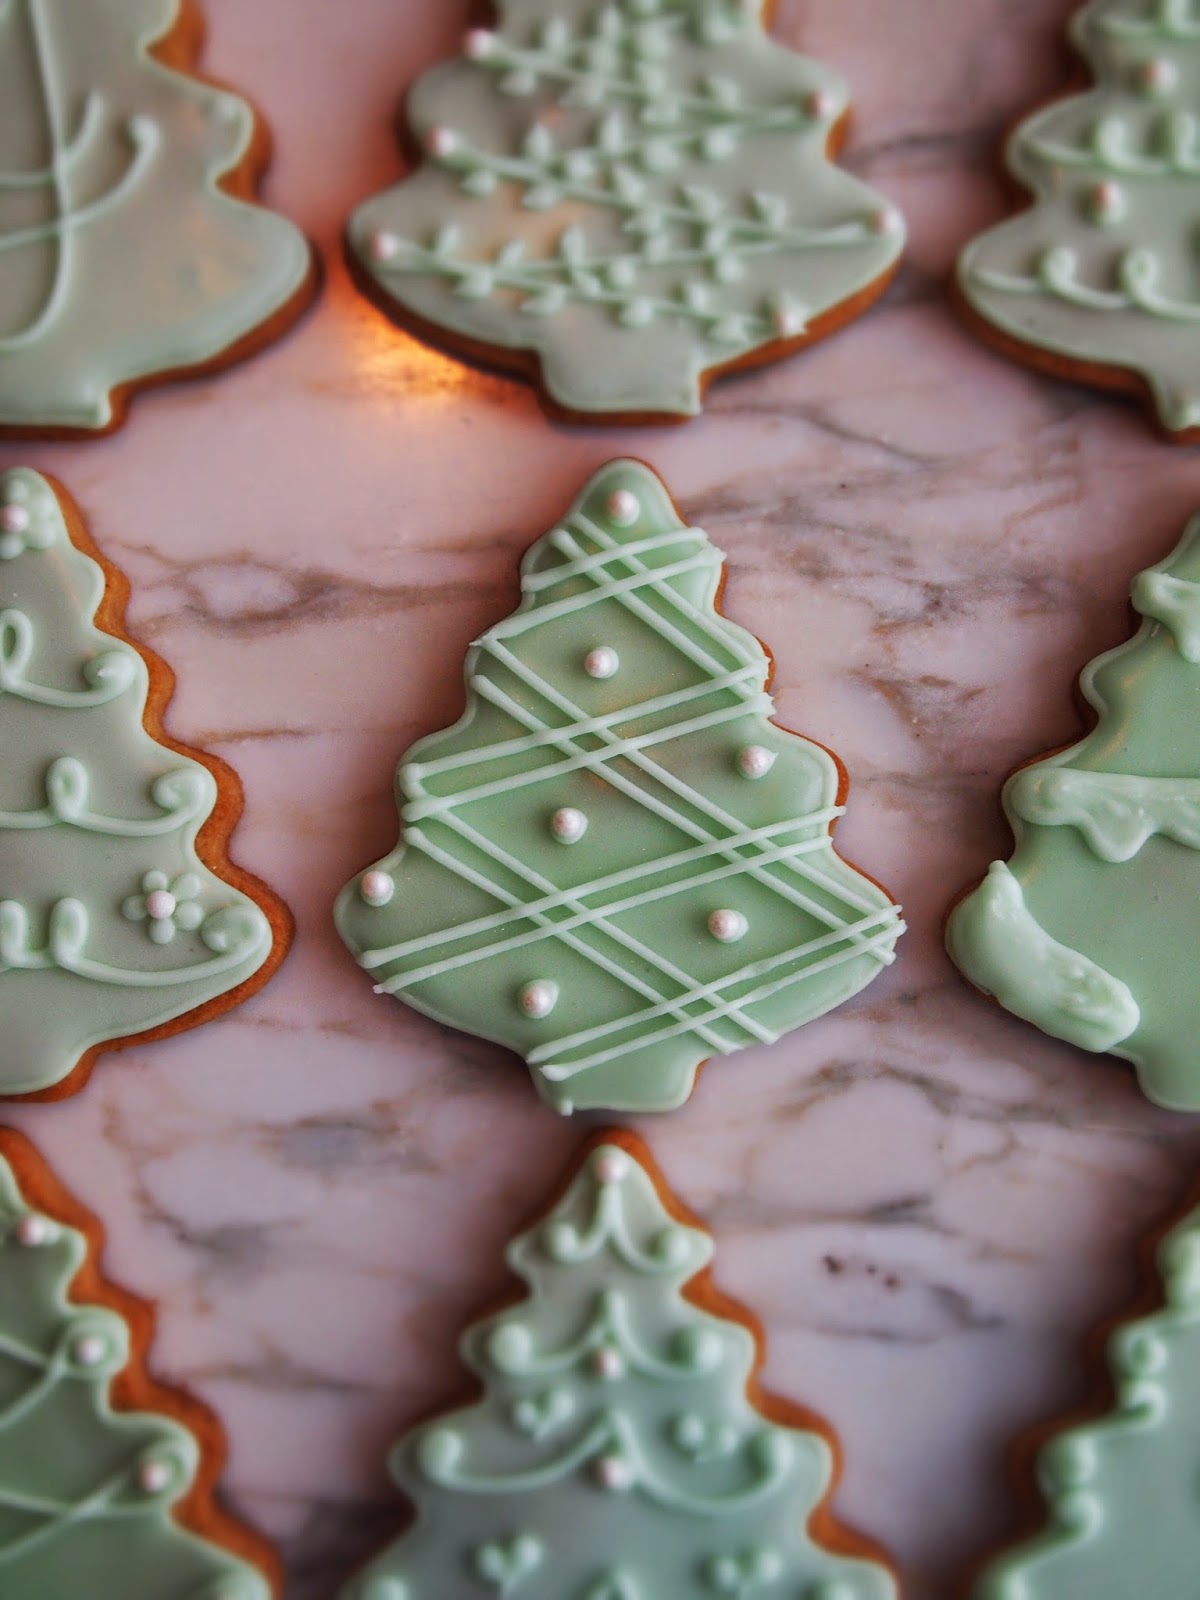
I like sugar cookies well enough. What I don't like is a sugar cookie that's gloriously embellished, the kind that draws exclamations like, "That's just too pretty to eat!" but has all the flavor of sweetened drywall.

So let's add some flavor to the party, shall we? How about browning that butter so our cookie has a nutty, deep caramel flavor? And let's switch up that sugar to dark brown and bring a little butterscotch yumminess to our cookie soiree. Up the vanilla and the salt a bit and we've got a decorated cookie worth eating by the dozen.


BROWN BUTTER-BROWN SUGAR COOKIES
(Makes approximately 30 cookies)
1 cup unsalted butter, room temperature plus 2 tablespoons
1 cup dark brown sugar, packed
1 large egg
1 large egg yolk
1/4 cup sweetened condensed milk
1 tablespoon vanilla bean paste or extract
3 cups all purpose flour
1 teaspoon salt
In a large saucepan, melt the one cup butter over low heat. Continue cooking the butter until it simmers, starts to brown and gives off a nutty aroma. Carefully pour the melted butter into a small container, leaving as much of the brown bits on the bottom of the pan behind. Immediately add the reserve 2 tablespoons of butter and allow to melt into the body of the brown butter. Stir and refrigerate to solidify, about an hour.
Combine the solidified brown butter and the brown sugar in the bowl of a stand mixer fitted with the paddle attachment. Mix on high until light and fluffy. Add the egg and egg yolk, mix to combine.
Scrape down the bottom and sides of the bowl. Add the sweetened condensed milk and vanilla. Mix to combine. Add the flour and salt all at once and mix until just combined.
 Finished dough.
Transfer the dough to sheet of plastic wrap and press into a disk. Cover completely and refrigerate for 20 minutes.
Line a few sheet pans with parchment. Preheat oven to 350ºF.
Lightly flour your work surface and roll the dough to between 1/8" and 1/4" thick. Stamp out shapes, I obviously chose a tree, and place on a parchment lined sheet pan about an inch apart.
Bake for 10 minutes, turn the sheet pan 180º and bake for 5 - 10 minutes more or until the edges of the cookies start to brown. I'm not a fan of "blonding" pastry, that habit of some to not letting the dough properly bake and caramelize, a process that gives pastry the best flavor. In the case of sugar cookies of any sort, this practice of blonding is common in order to keep the cookie pristine and evenly colored for presentation. To that I say, PHOOEY! The main function of any cookie, no matter how beautifully it's decorated, is to eat the damn thing. Ergo, use the best cookie recipe and bake it properly. Everyone will be that much happier.
Allow the cookies to cool completely.
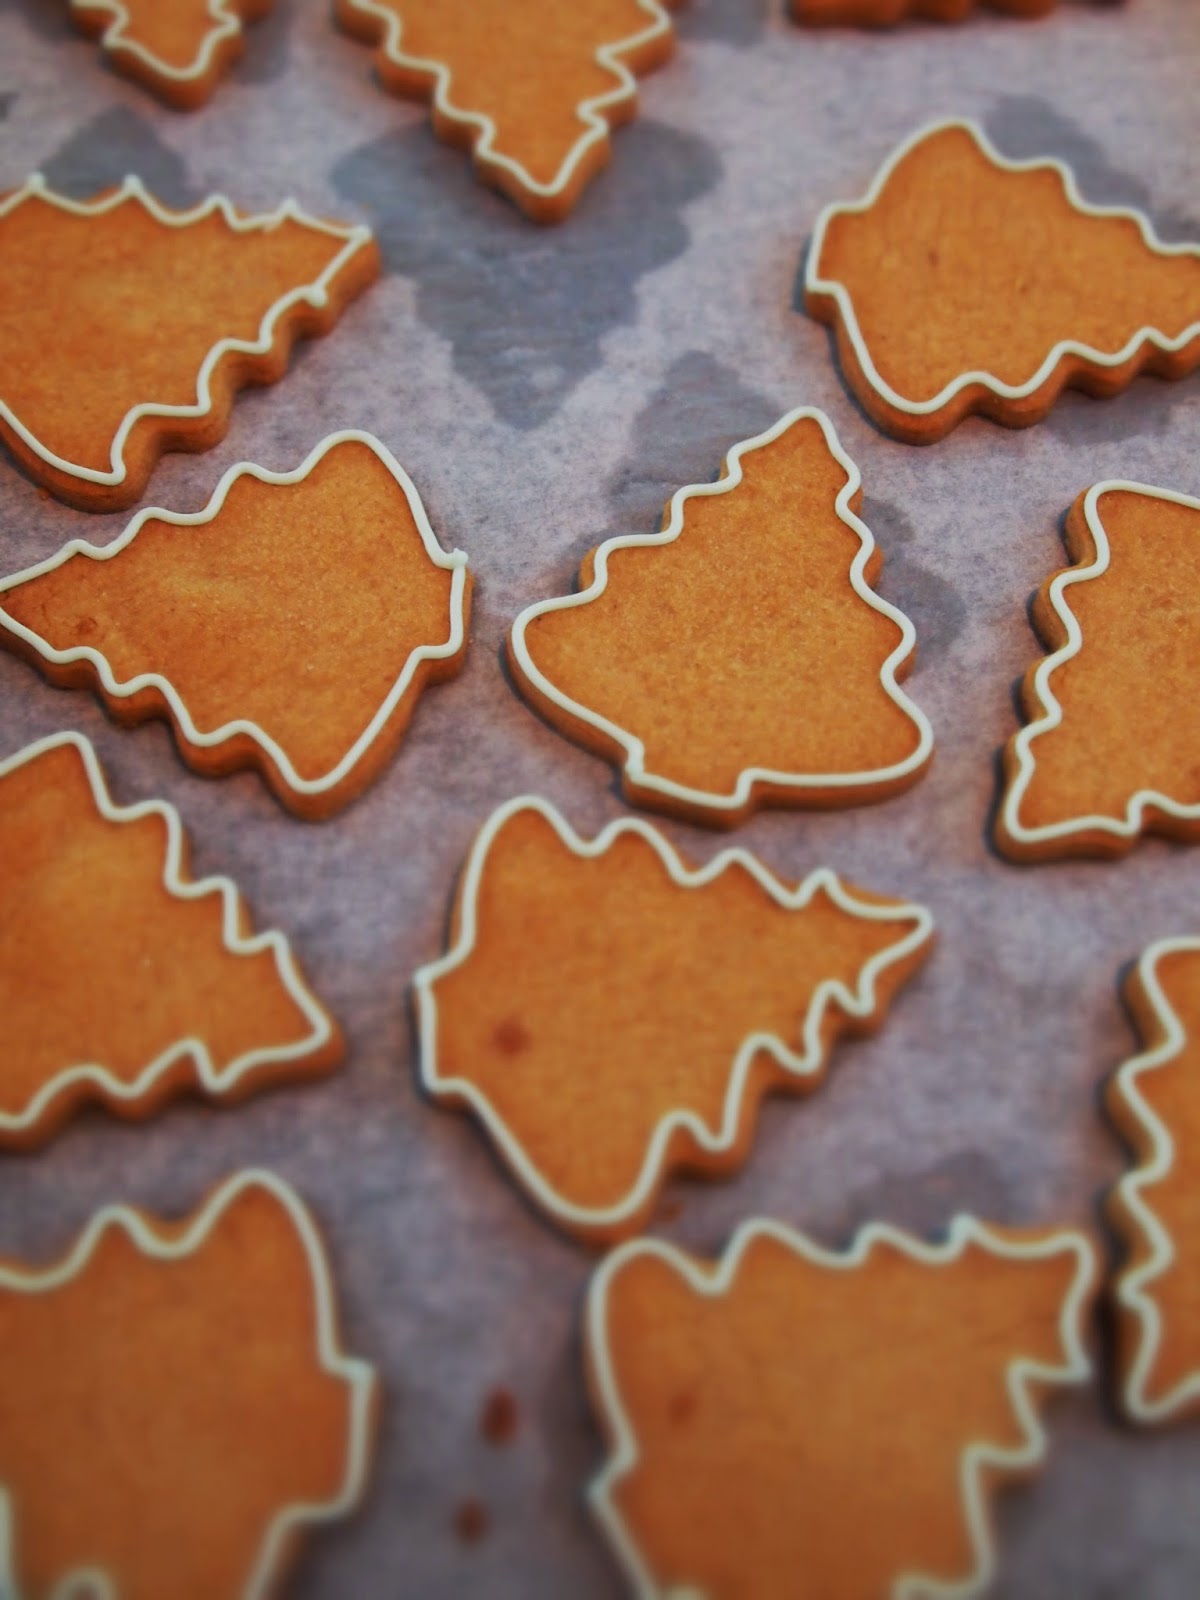
ROYAL ICING(Makes approximately 1/2 cup)
2 cups confectioner's sugar1 1/2 teaspoons powdered egg whitesgel food coloring
For piping
Whisk together the confectioner's sugar and egg white powder. Add water and just a touch of dye, add water 1teaspoon at a time until you create an icing with an almost paste like consistency that, when piped from a small open tip, keeps its shape. Stir well so that there are no lumps but don't stir so much that you aerate the icing.
Fill a pastry bag with a small open tip with the royal icing. Use a piece of baker's twine to tightly close the bag up top to keep the icing form crusting inside the bag.
(TIP! Place a damp paper towel at the bottom of a tall glass. Whenever you take a break from piping, place the bag and tip in the glass, tip touching the paper towel, to keep the tip from crusting over)
Outline each cookie and allow the royal icing to crust over, about 1/2 hour.
This is also the consistency of icing you'll use for piping decorations on top of the cookie. You can keep the icing in the bag overnight in a cool in your moist paper towel filled glass to use the next day while your cookie icing sets.
For flooding
Same as for piping but add enough water that the icing spreads. You don't want it to be watery, about the consistency of ketchup. When flooding, have a toothpick handy to push the icing into corners. You can use a pastry bag with a slightly larger open tip than for piping. However, I prefer to use plastic squeeze bottles (think a ketchup bottle in a diner, just smaller). They are easier to handle when icing flows easily. Allow the flooded cookies to set. This can take much longer than you'd like, usually a few hours. If your flooding icing is too thin, it can take a VERY long for the moisture to evaporate (think days). If you add too much dye there's a chance that the icing will never set and will have an almost marshmallow fluff consistency. This happens most often with high pigment dye like red and royal blue. The key is to be patient in finding the right consistency and in waiting for the icing to set.
December 14, 2014
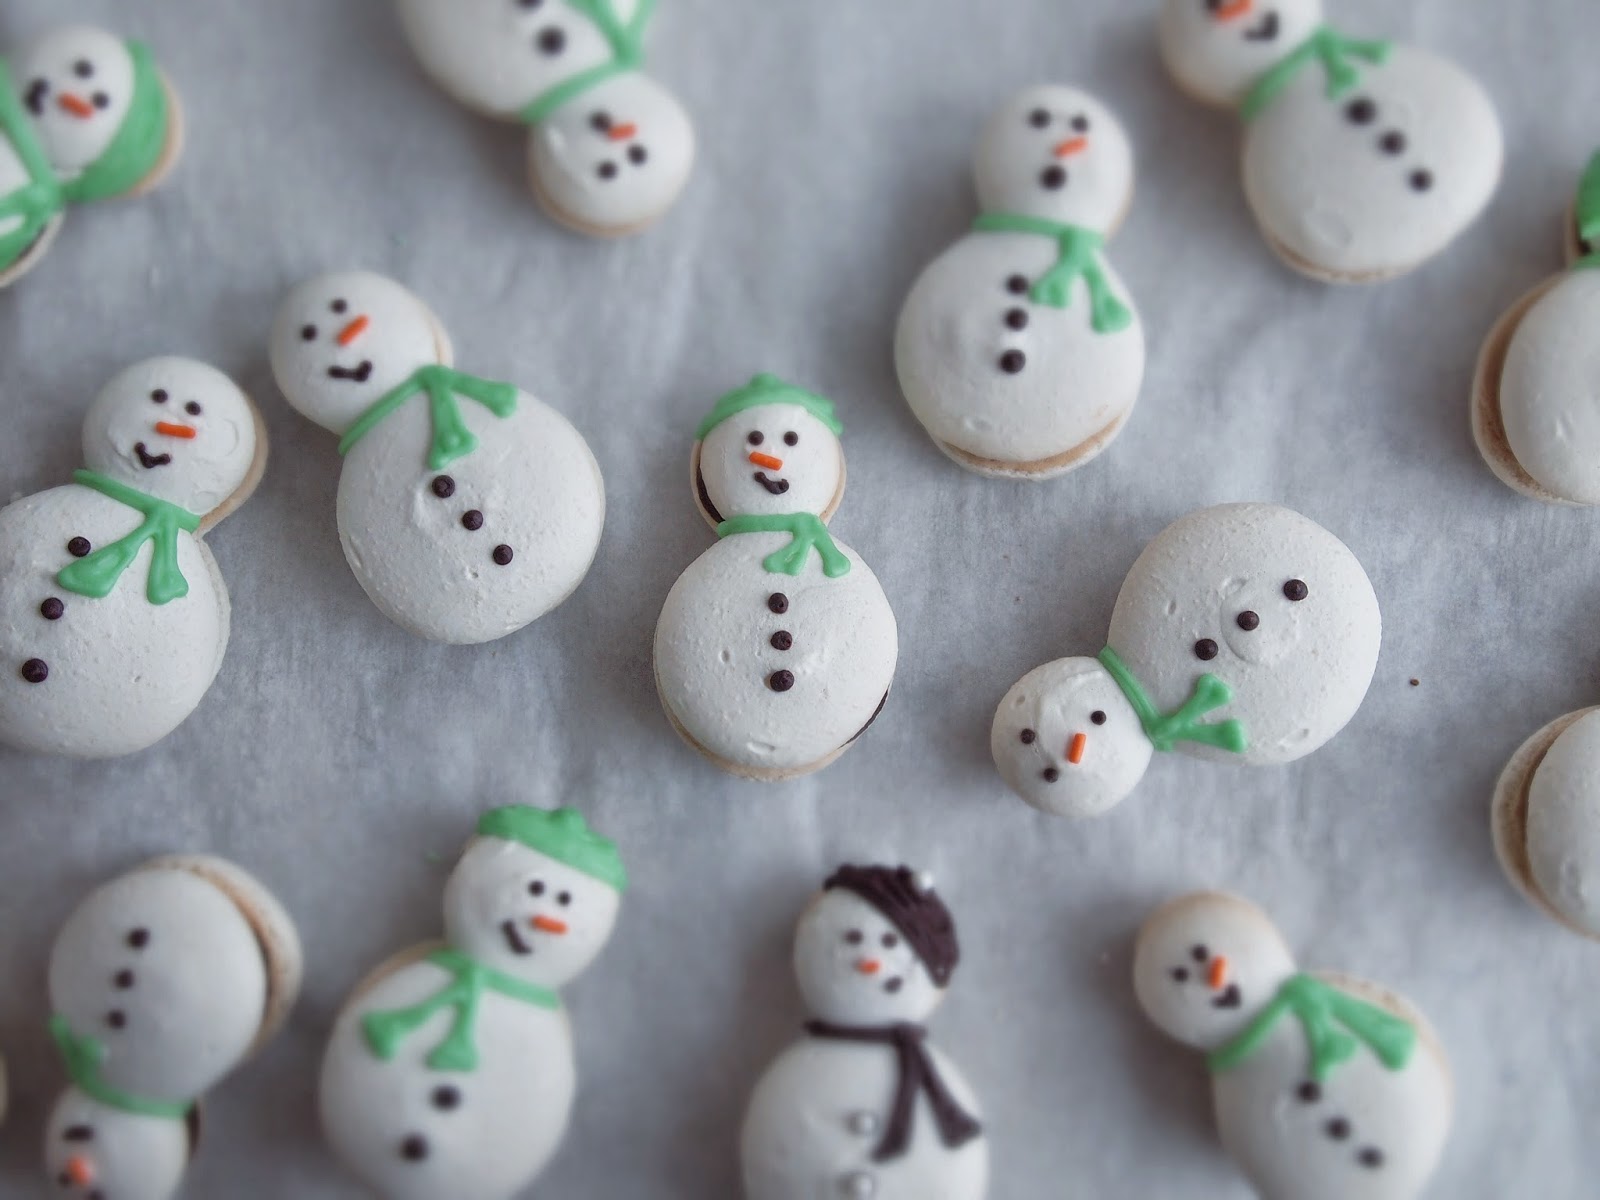
SNOMACS: Macaron Snow Folk

Winter isn't coming. It's here. No matter that the official start date isn't for a few more days, a foot of snow is a fine indicator that the coldest months have arrived.

If there was ever a time to try your hand at making these beauties, it's now.
Before you start, click HERE to watch a video of me making macaron so you can get a sense of consistency, etc.
SNOMACS: PEPPERMINT MACARON with CHOCOLATE GANACHE FILLING
Adapted from the recipe in my book Sugar Baby
(Makes about 24 snowfolk)
For the shells
7 ounces almond flour7 ounces confectioner's sugar7 ounces granulated sugar3 ounces egg whites, liquid2 scant tablespoons egg white powder1/4 teaspoon salt2 drops peppermint extract, NOT oil1/2 cup water, divideda squirt of lemon juice
In a large bowl, combine the almond flour, confectioner's sugar and egg white powder. Whisk for 30 seconds and then run through a fine sieve onto a piece of parchment and then run back through the sieve back into the bowl. Set aside.
Fit a large pastry bag with a large open pastry tip and line 4 half sheet pans with parchment. Set aside.
In the bowl of a stand mixer fitted with the whisk attachment, combine the egg whites, peppermint extract and salt.
In a small, heavy saucepan, combine the granulated sugar, 1/4 cup of the water and the lemon juice. Stir over low heat until the sugar has completely melted. Attach a candy thermometer and raise the heat to medium and cook until the sugar syrup has reached 240ºF.
With the mixer running on high, carefully pour the sugar mixture down the side of the mixing bowl and into the egg whites. Continue whisking until you achieve medium stiff peaks. In most cases with macaron, I go for softer peaks for a flatter macaron. But with Snow Folk, I beat the whites to a stiffer meringue consistency for a plumper shell to better mimic the shape of snowmen.
Stir the remaining 1/4 cup water and 1/4 of the meringue mixture into the almond powder mixture to create a paste. Add the remaining meringue and carefully fold into the paste with a large rubber spatula until the mixture is the consistency of thick ketchup.
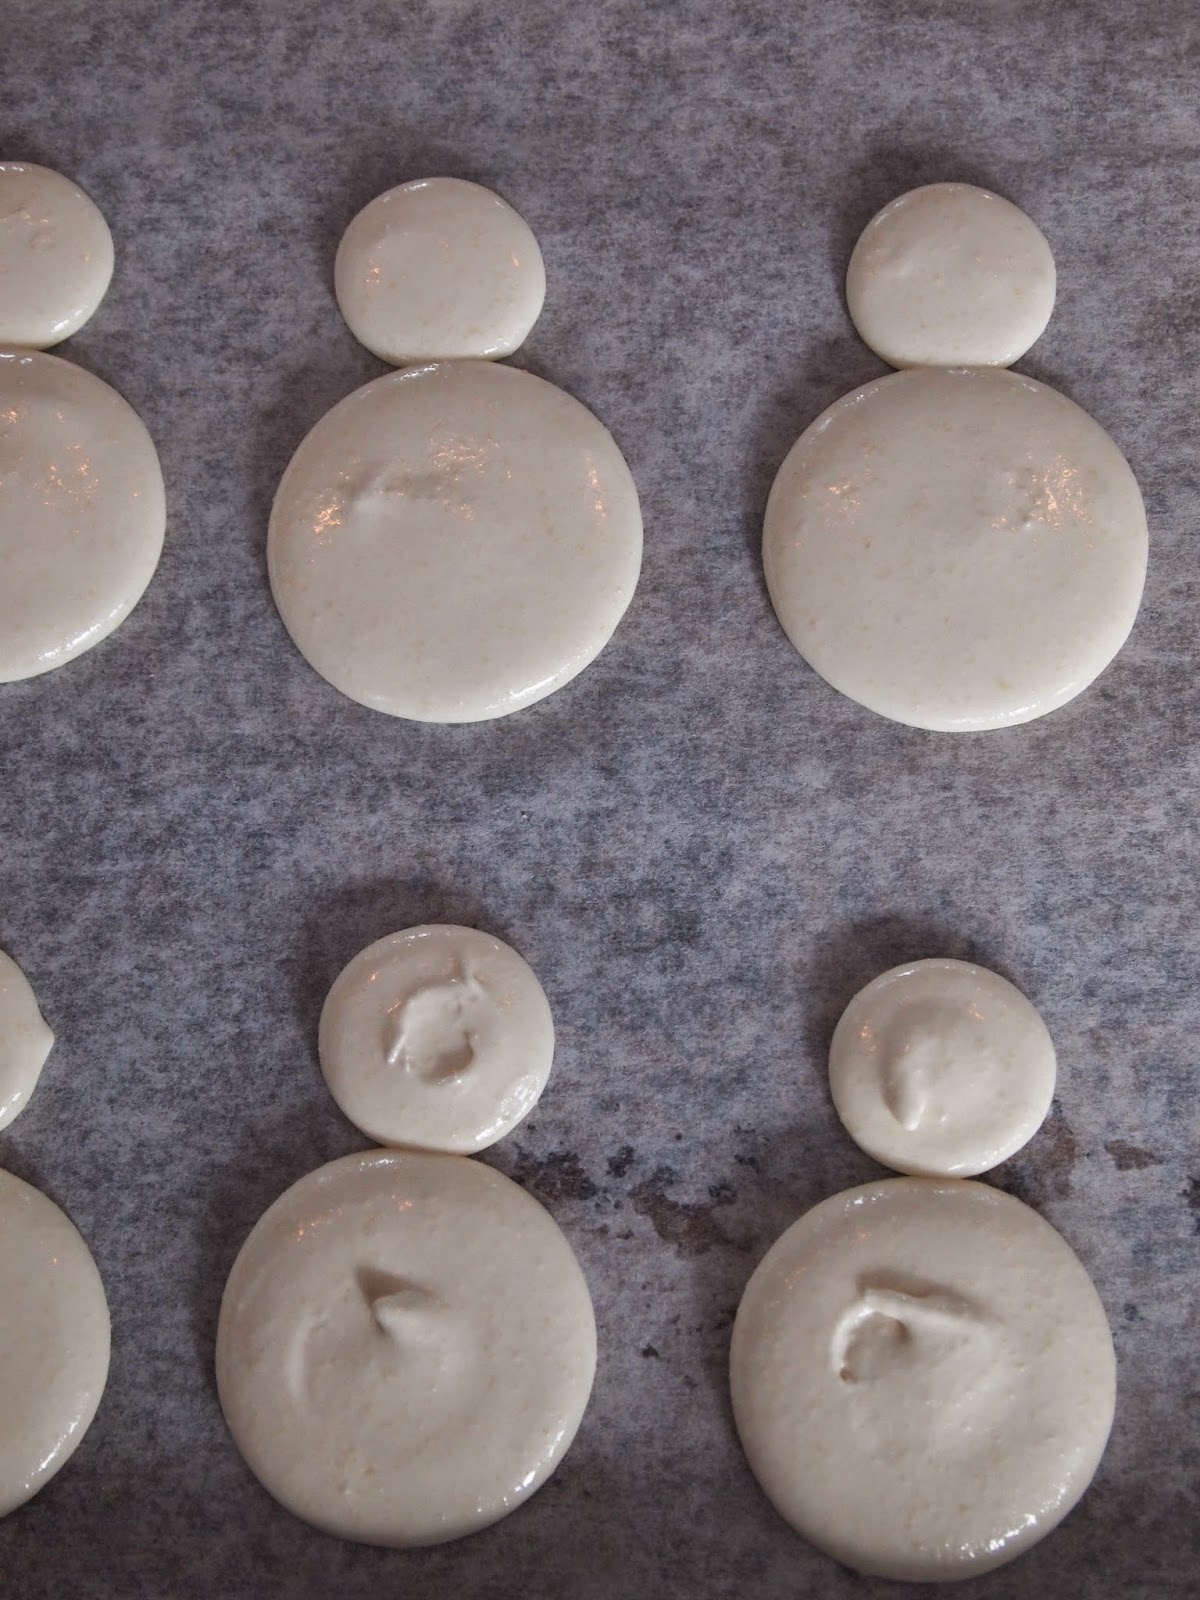 The top macaron were piped first and the lower ones right after. They were all originally spaced like the macaron below.
Transfer the batter to your pastry bag and pipe a dime sized round and then pipe a silver dollar sized round closely beneath it but not quite touching it. The batter should spread so that they just attach to each other.
 This is a good spacing for piping the head and body.Gently tap each sheet pan on your work surface to release any air bubbles and allow the batter to spread properly and allow to sit out for 20 minutes before baking. In the meantime, preheat your oven to 300ºF (I bake macaron between 275ºF and 300ºF, depending on the oven. If your oven runs hot, bake towards 275ºF).
Bake the macaron in the middle of the oven, one tray at a time, fan off, for 8-10 minutes or until you start seeing pied. Rotate the pan and bake for about 8 minutes more, making sure that the macaron don't brown.
Allow to cool completely.
For the filling
8 ounces bittersweet chocolate, at least 60%
1/2 cup heavy cream
2 tablespoons unsalted butter, room temperature
pinch salt
Chop the chocolate very finely and place in a heatproof bowl. Set aside.
In a saucepan, combine the cream, butter and salt. Bring to a simmer and make sure the butter is melted. Pour over the chocolate, making sure that all the chocolate is submerged. Allow to sit for a few minutes undisturbed and then whisk until smooth. If there are still bits of unmelted chocolate, place the ganache over a double boiler and stir until melted.
Place all but 1/4 cup of the ganache in a piping bag and pipe dollops onto the flat side of one macaron, a small dollop on the head portion and a larger one on the body, and then top with another and gently press together. Continue filling.
Fill a small piping bag fitted with a small open tip with the remaining ganache and pipe eyes, mouths and buttons.
For the royal icing for scarves and hats
1 cup confectioner's sugar
1 teaspoon egg white powder
water
Stir together the confectioner's sugar and egg white powder. Add water, a scant teaspoon at a time, until the mixture is thick but easily piped while still holding its shape. If it's too thick, add a drop of water at a time. If too thin, add a little more confectioner's sugar. Add a touch of dye of you like!
Transfer the icing to a small piping bag fitted with a small open tip. I use orange sprinkles for the nose and take a toothpick and just dip the tip in the royal icing and place a tiny speck of it on the sprinkle and adhere to the little snowman face.
Pipe scarves and hats with the remaining royal icing.
December 13, 2014
CARAMEL-MARSHMALLOW PINWHEELS
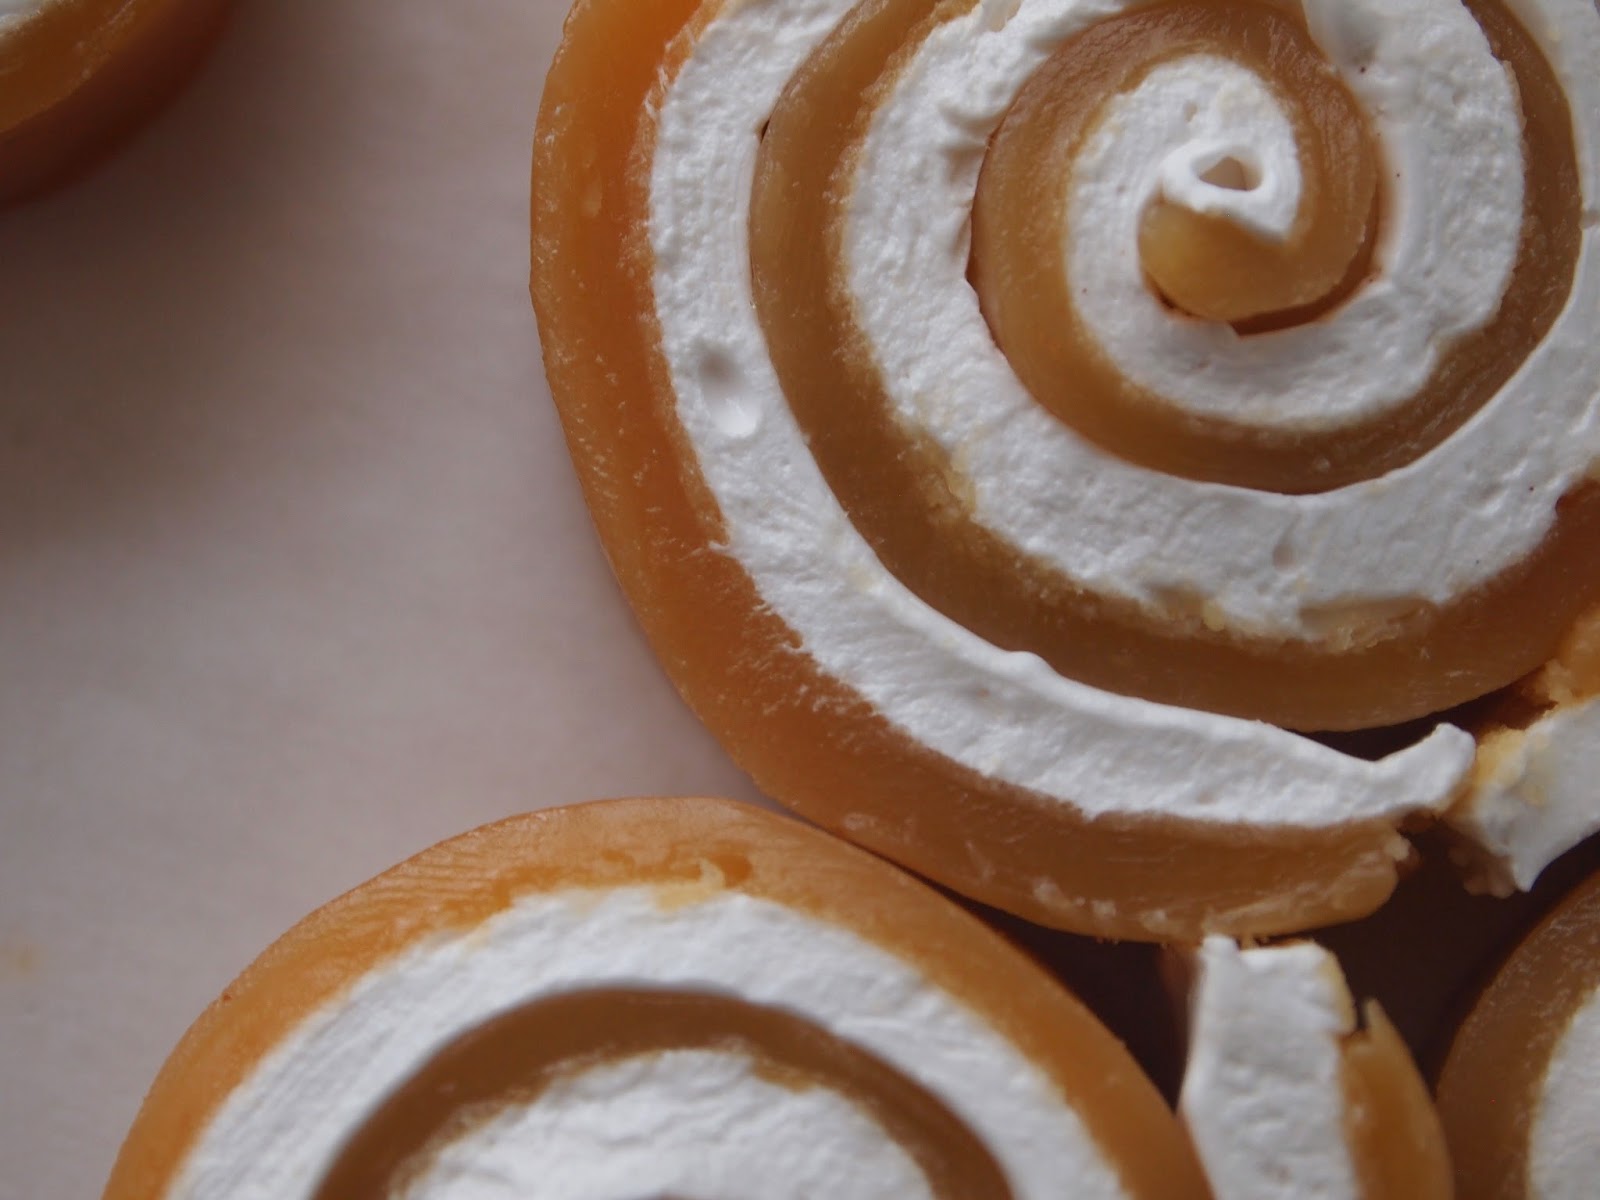
I am equally caramel and marshmallow obsessed. After a 17 hour baking day, I've been known to whip up a batch of caramel, park in front of the t.v. and gnaw on the chewy stuff until my jaw hurts or I fall asleep, whichever comes first.
And marshmallow? Forget it. I'm lost in the face of a pan of homemade sugar pillows.
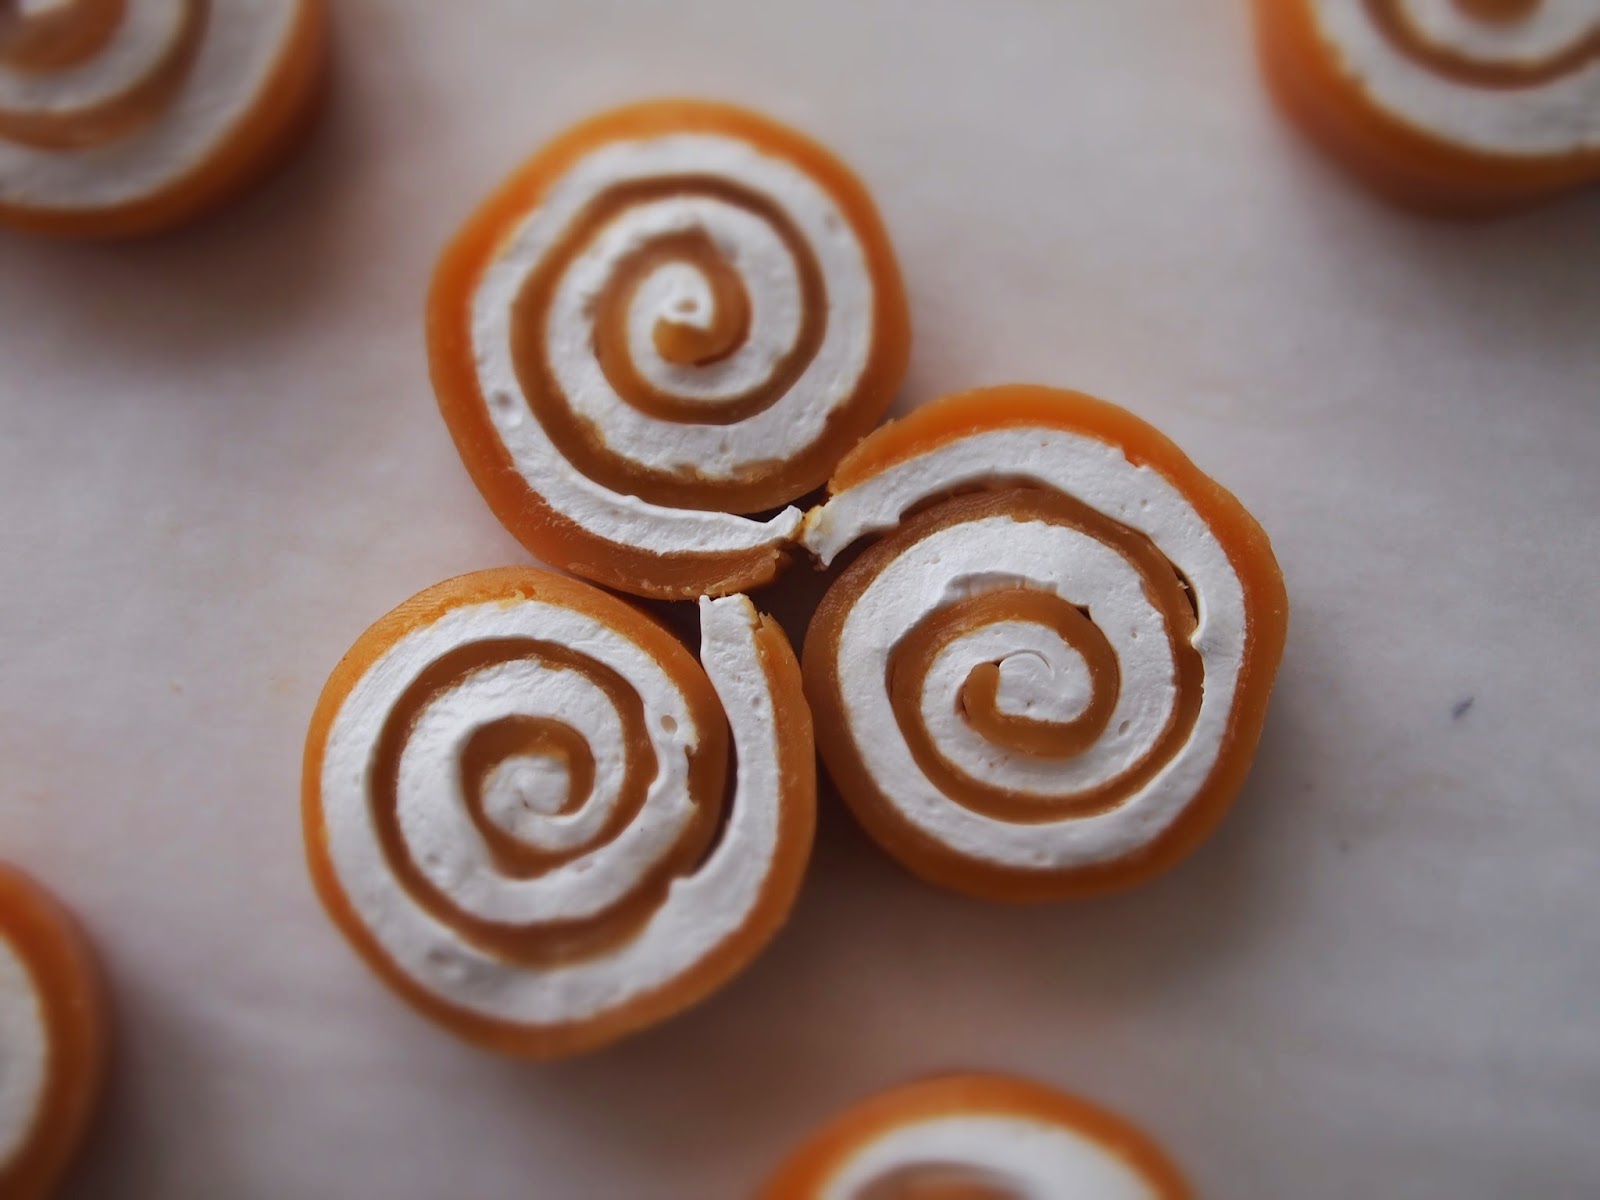
I even dream of caramel/marshmallow mash-ups. Shall I inject the marshmallow into the caramel? Should I hide the caramel in an otherwise innocent looking square of marshmallow? Dare I roll them up in a psychedelic pinwheel?
Why yes! Yes I would dare!
CARAMEL-MARSHMALLOW PINWHEELS(Makes about 40+ pinwheels)
For the caramel
1 cup unsalted butter1/2 cup heavy cream2 cups light brown sugar, packed1 teaspoon vanilla1 teaspoon salt
Line a half sheet pan with parchment. Spray lightly with non-stick cooking spray. Set aside.
Place all ingredients in a large, heavy saucepan. Stir over low heat until the butter and sugar have melted. Attach a candy thermometer, continue stirring until the caramel reaches 243ºF - 245ºF.
Pour the caramel into the prepared sheet pan and tip the sheet pan back and forth so that it spreads evenly. Allow to cool and set, about 1 hour.
Candy thermometers are notoriously "off" so you can also do the ice water test by dropping a small amount of caramel into a glass of ice water. The caramel should "sieze" into a soft ball of caramel but still hold its shape.
Once the caramel is set, the sheet should hold its shape but still be very malleable.
 A bendy sheet of caramel.
For the marshmallow
1 packet plain gelatin (.25 oz)1/4 cup warm water1 cup sugar1/2 cup light corn syruppinch salt1 teaspoon vanilla
In the bowl of a stand mixer fitted with the whisk attachment, add the gelatin and water. Stir to combine and saturate the gelatin.
In a large, heavy saucepan, combine the sugar, corn syrup, salt and vanilla. Stir over low heat until the sugar has melted. Attach a candy thermometer and heat to 240ºF.
Carefully pour the hot sugar mixture down the side of the mixing bowl and into the gelatin while the mixer runs on medium speed. Once all the sugar syrup is added, increase the speed to fast and whisk until the marshmallow is white, fluffy and the bowl is cool to the touch.
Spray a large rubber spatula and a large offset spatula with non-stick cooking spray. Cut the caramel in half width wise. Using the rubber spatula, scrape the marshmallow from the bowl and divide evenly among the two halves of caramel. Using the offset spatula, spread the marshmallow in an even layer over the caramel, keeping a slim section of the caramel exposed where the cut's made. Allow to set, about 2 hours.

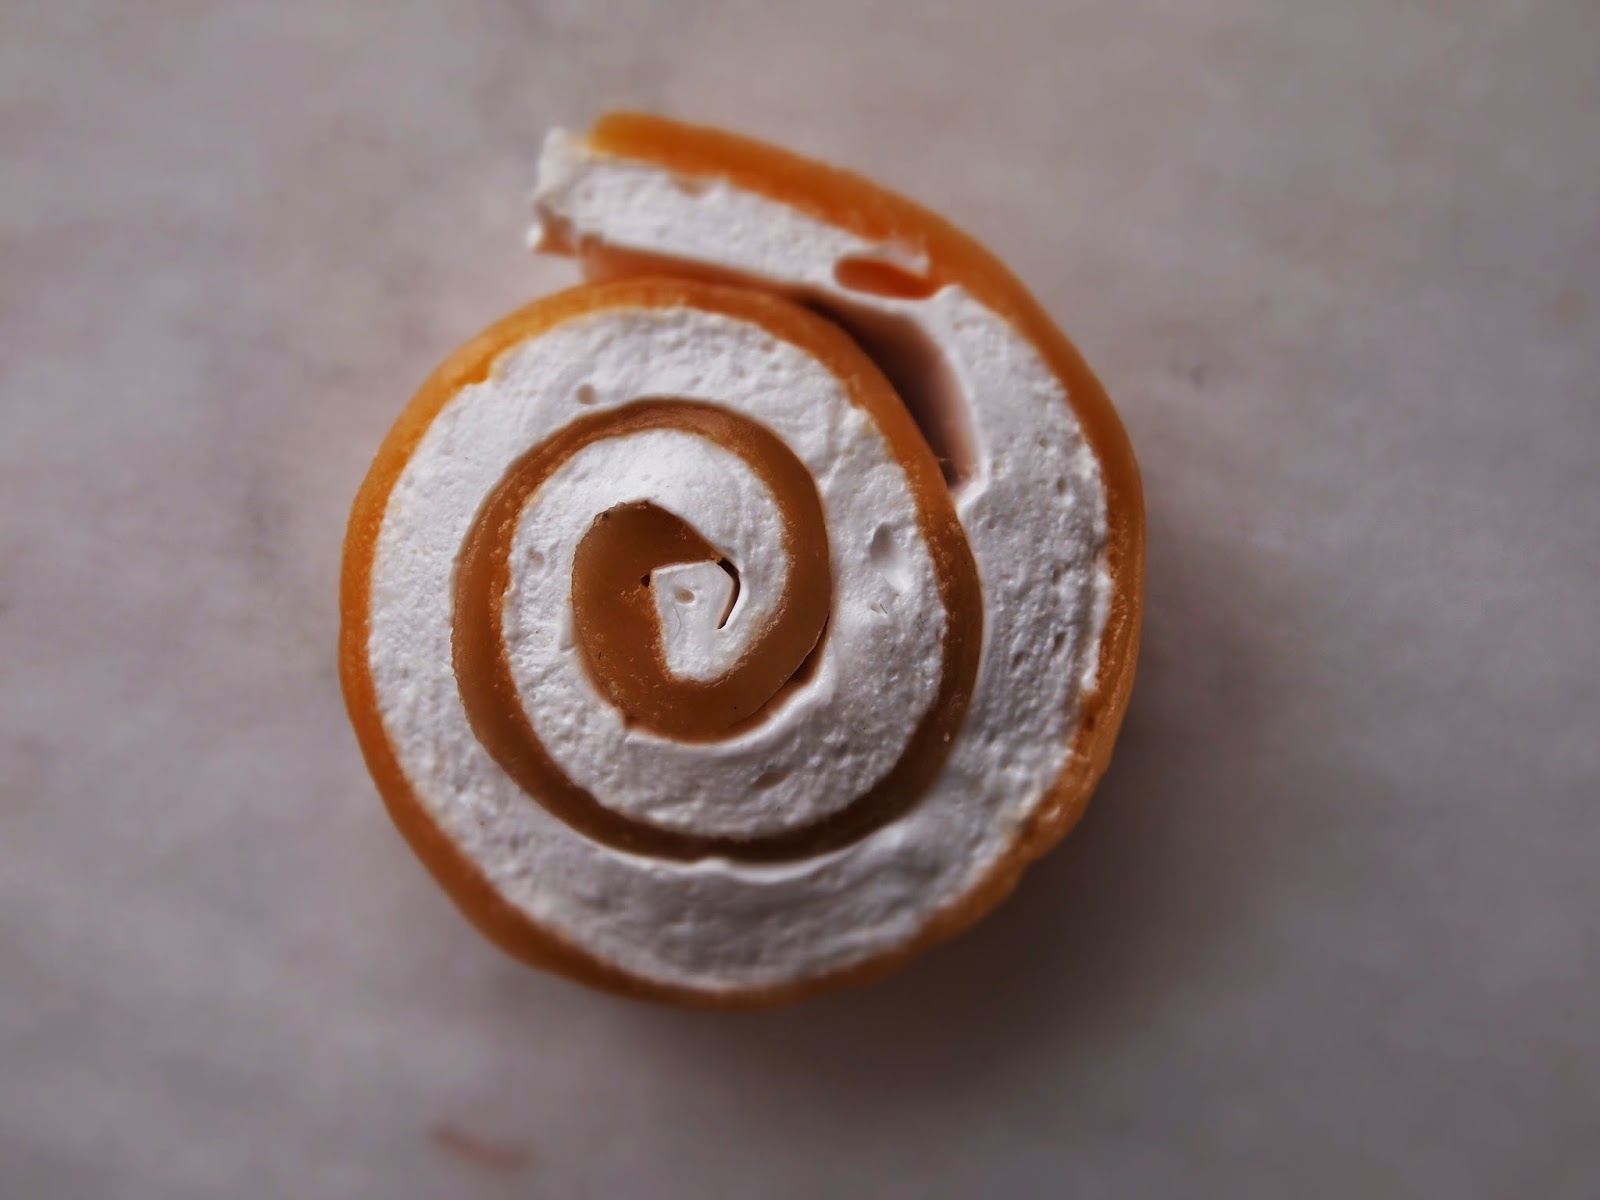
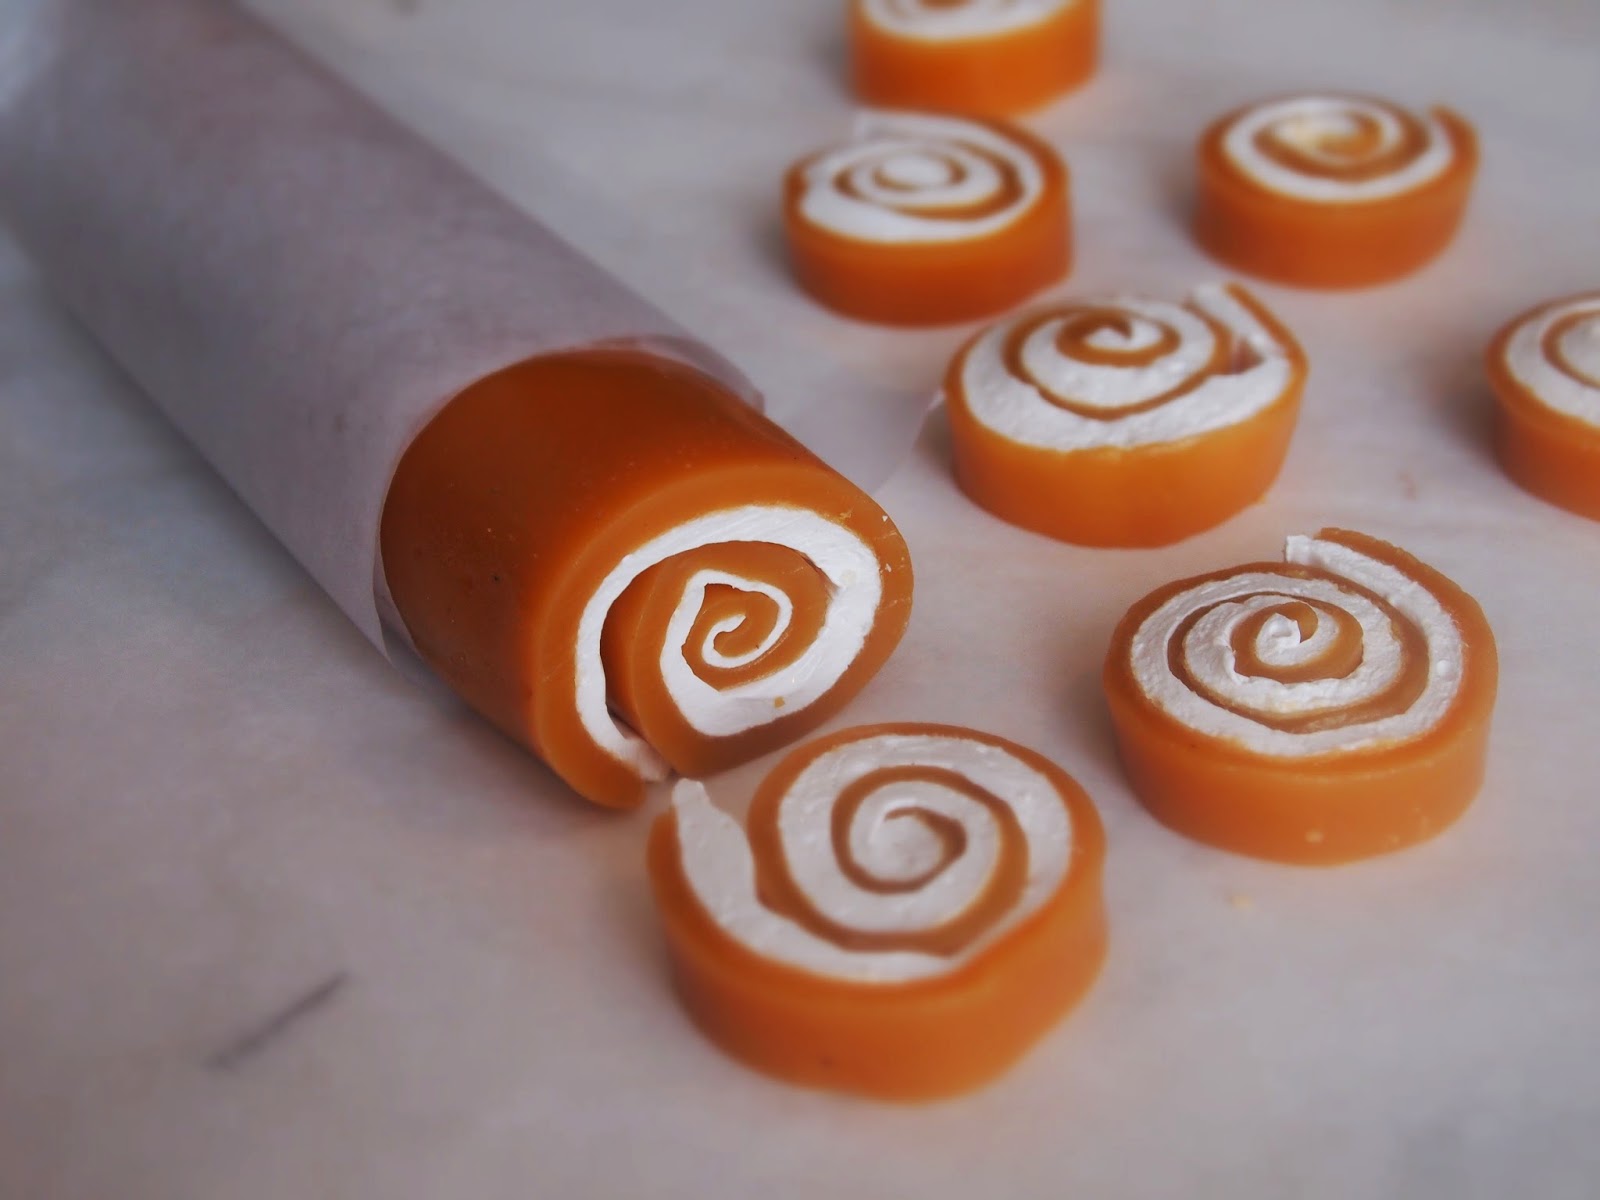
Roll each side of the marshmallow caramel into a tight roll, starting at the "naked" end. Wrap in a piece of parchment tightly and refrigerate for 10 minutes. Cut the roll into 1/2" rounds with a sharp, serrated knife. Wrap each individual round in wax paper.
December 12, 2014
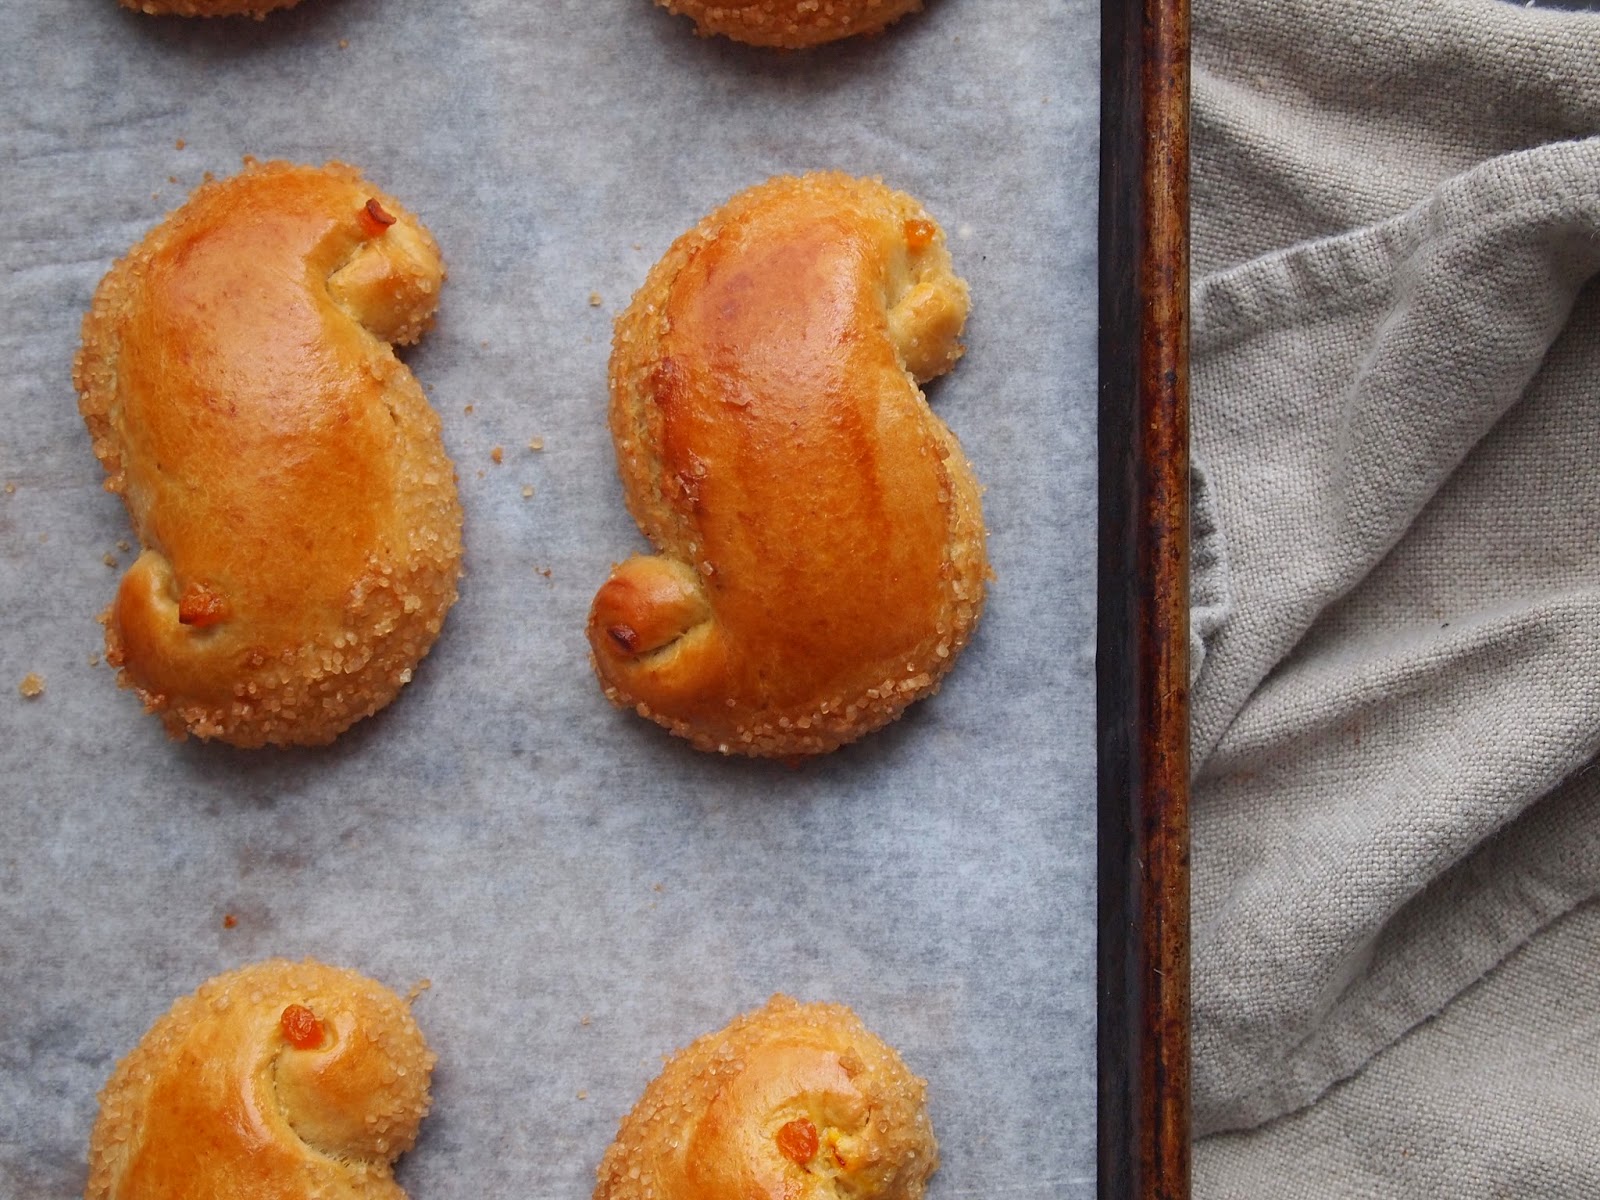
St. LUCIA BUNS

On the morning of December 13th, I arrived at my pastry shop to find a lantern sitting upon the front stoop. The candle inside was bright enough to light the dark path leading to the front door. A note attached wished me a Happy St. Lucia Day.

Who, at 4 am, would leave such a lovely message on the darkest of days?
Larry, of course.

Our favorite customer (we had loads of favorite customers but Larry managed to shine bright) had a habit of leaving wonderful surprises for us. He's also an insomniac.
When we opened the doors to our customers that morning, Larry was one of the first to come through. And what did he find waiting for him? St. Lucia Buns. What better way to thank a friend for brightening your day?
ST. LUCIA BUNS
(Makes 15-16 buns)
St. Lucia Buns are a staple in Sweden to mark the "the darkest day" and the death of St. Lucia. At the time of her death, solstice fell upon December 13th, not the 21st. Today, the towns of Sweden still honor the sainted woman on the 13th by crowning a "Queen of Light" who dons a wreath adorned with candles, bringing light to her townsfolk along with cardamom and saffron laced Lucia buns and coffee. That would brighten anyone's day.
4 1/3 cups all-purpose flour plus 1/4 cup more on reserve, I use King Arthur Flour
1/2 cup light brown sugar, packed
1 tablespoon ground cardamom
1 teaspoon salt
1/2 teaspoon saffron
1 (1/4 ounce) packet of instant yeast, I use Platinum Superior Baking Yeast
1 cup lukewarm whole milk
2 eggs
3 1/2 ounces softened, unsalted butter
To finish
30-32 small pieces of dried fruit like raisins, currants, craisins or dried apricots cut into small pieces
egg wash (1 egg whisk together with 1 tablespoon water)
1/2 cup Swedish sugar or 1/2 cup Sugar in the Raw (or both)
In a large bowl, combine the flour (all but the reserve 1/4 cup), brown sugar, cardamom, salt, and instant yeast. Whisk to combine. Set aside.
In a small bowl, combine the saffron with 1 teaspoon warm water. Allow to sit for 1 minute.
In the bowl of a stand mixer fitted with the dough hook, combine the milk and eggs. Whisk to combine. Add the saffron and butter. Add the flour mixture and mix on low until the dough is smooth and glossy, about 10 - 15 minutes. Add the reserve flour a teaspoon at a time in the event the dough sticks to the side of the bowl after a few minutes of mixing. This dough is meant to be very soft, so don't worry if the dough still sticks a small amount to the bottom of the bowl.
Cover the bowl with plastic wrap and allow to rest for 20 minutes.
Divide the dough into 15-16 pieces, each weighing approximately 2.5 ounces each.
Roll each piece into an 11" rope, with the ends tapered.

Shape each piece into an "S." Place the "S"s onto 2 parchment lined sheet pans, spacing them a few inches apart. Place a raisin, a currant, a cranberry or an apricot round (I only had dried apricots and punch currant sized holes into them with a medium sized open pastry tip) onto the "S"s as shown.

Cover each sheet pan with plastic wrap and allow to rest for 1 hour or until they are about 1 1/2 times bigger than their original size. Preheat oven to 400ºF.

Brush the buns with egg wash and sprinkle with Swedish sugar or Sugar in the Raw (I like to coat only the sides in the sugar). Bake for 15 20 minutes or until golden brown and baked through. Serve warm.
December 11, 2014
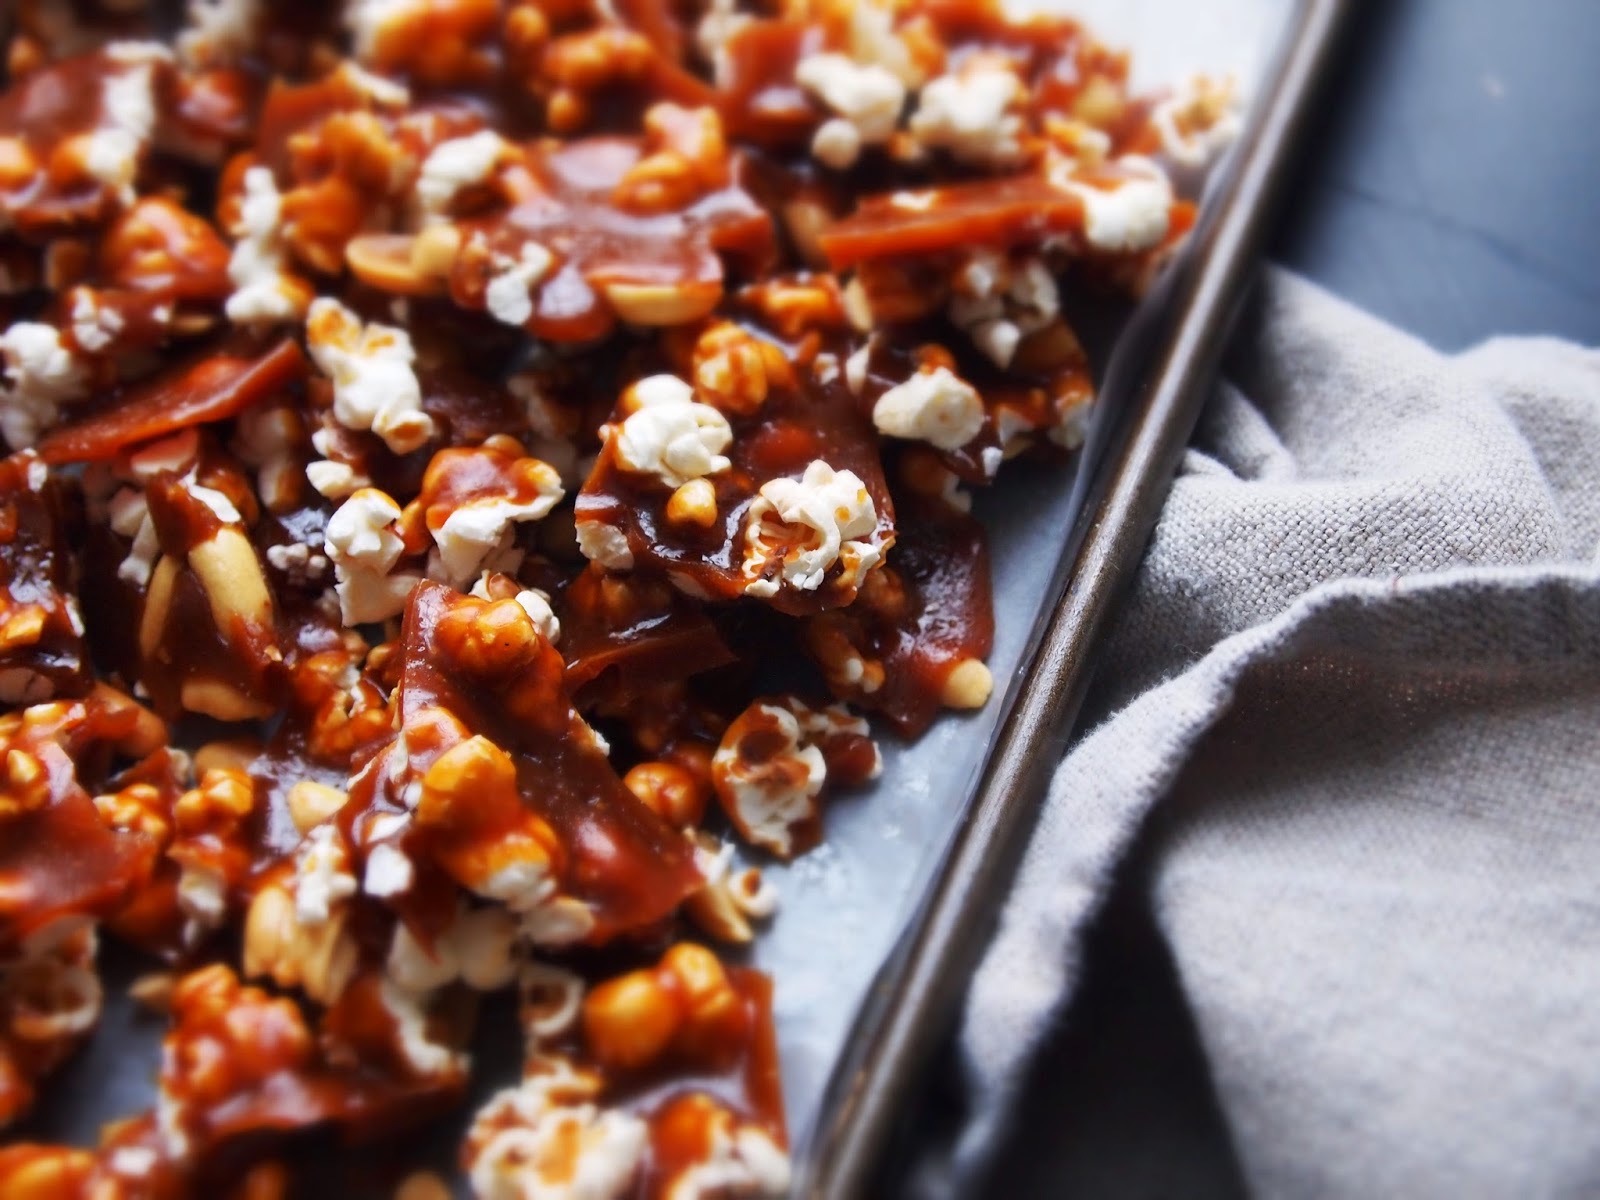
MAPLE TOFFEE with POPCORN & SALTED PEANUTS
Sweet. Buttery. Crunchy. Toffee is a delightful addition to holiday snacking. And with diets and treat abstinence right around the corner come New Years, gluttony is the rule of the day.
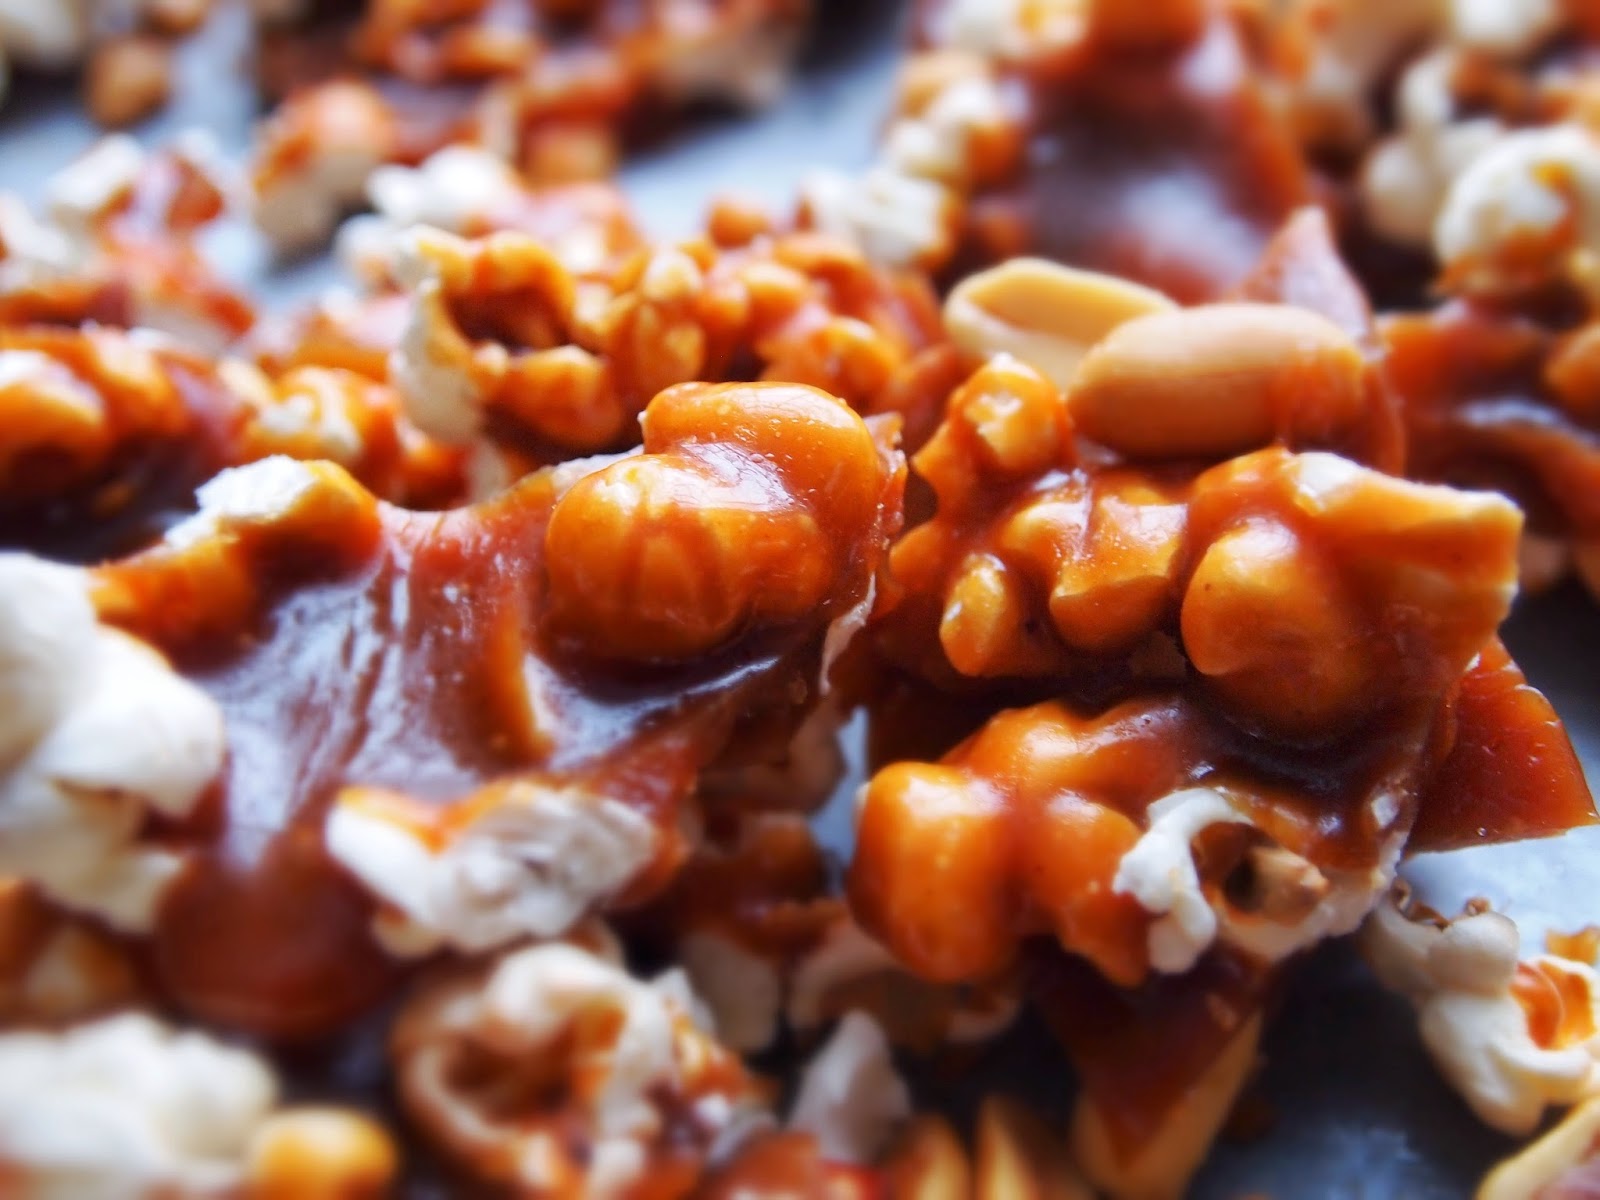
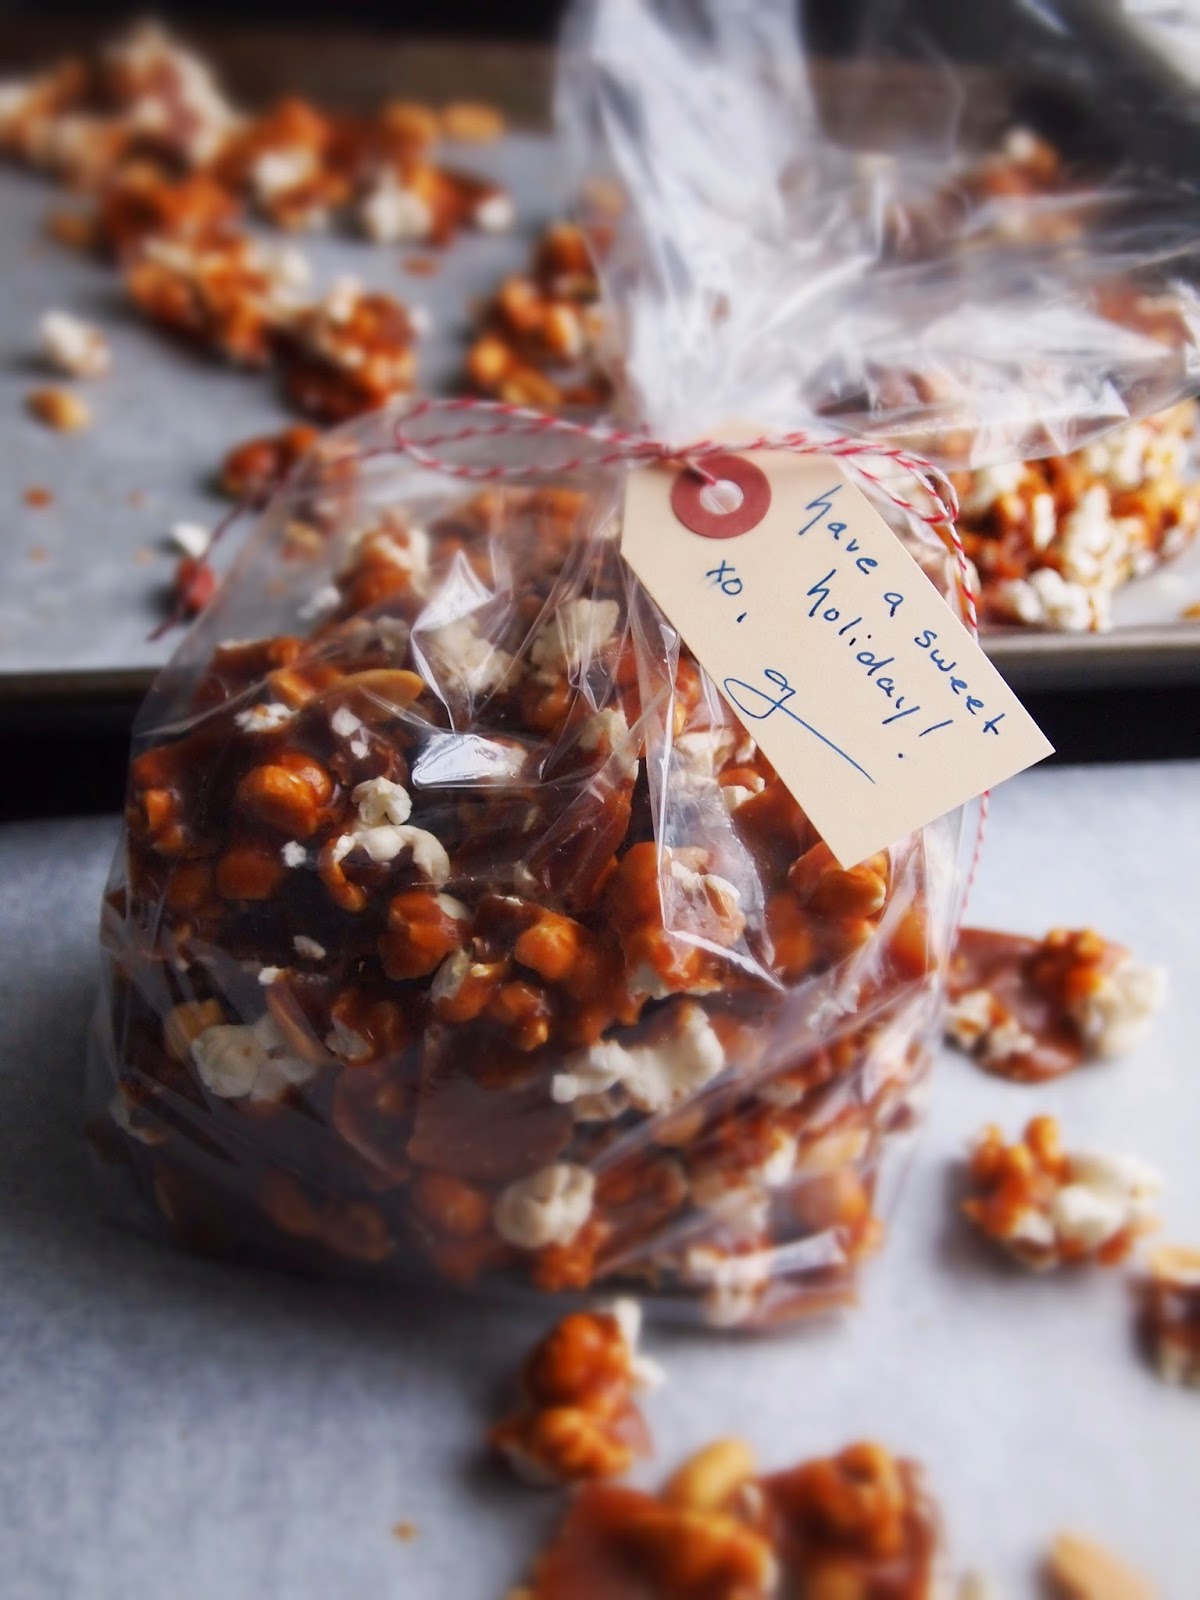
This particular toffee, with rich maple flavor and delightful bits of popcorn and peanuts, is especially good. If you can abstain from eating it all, wrap it up for friends and family as the perfect gift. It travels long distances very well and keeps for weeks.
MAPLE TOFFEE with POPCORN & SALTED PEANUTS
1/4 cup popcorn kernels1 cup salted peanuts1 cup light brown sugar, packed1/2 cup maple syrup1 1/2 cups unsalted butter1 teaspoon salt1/4 teaspoon baking soda
Pop the popcorn according to the package instructions. Allow to cool.
Line a half sheet pan with parchment and lightly spray with non-stick cooking spray.
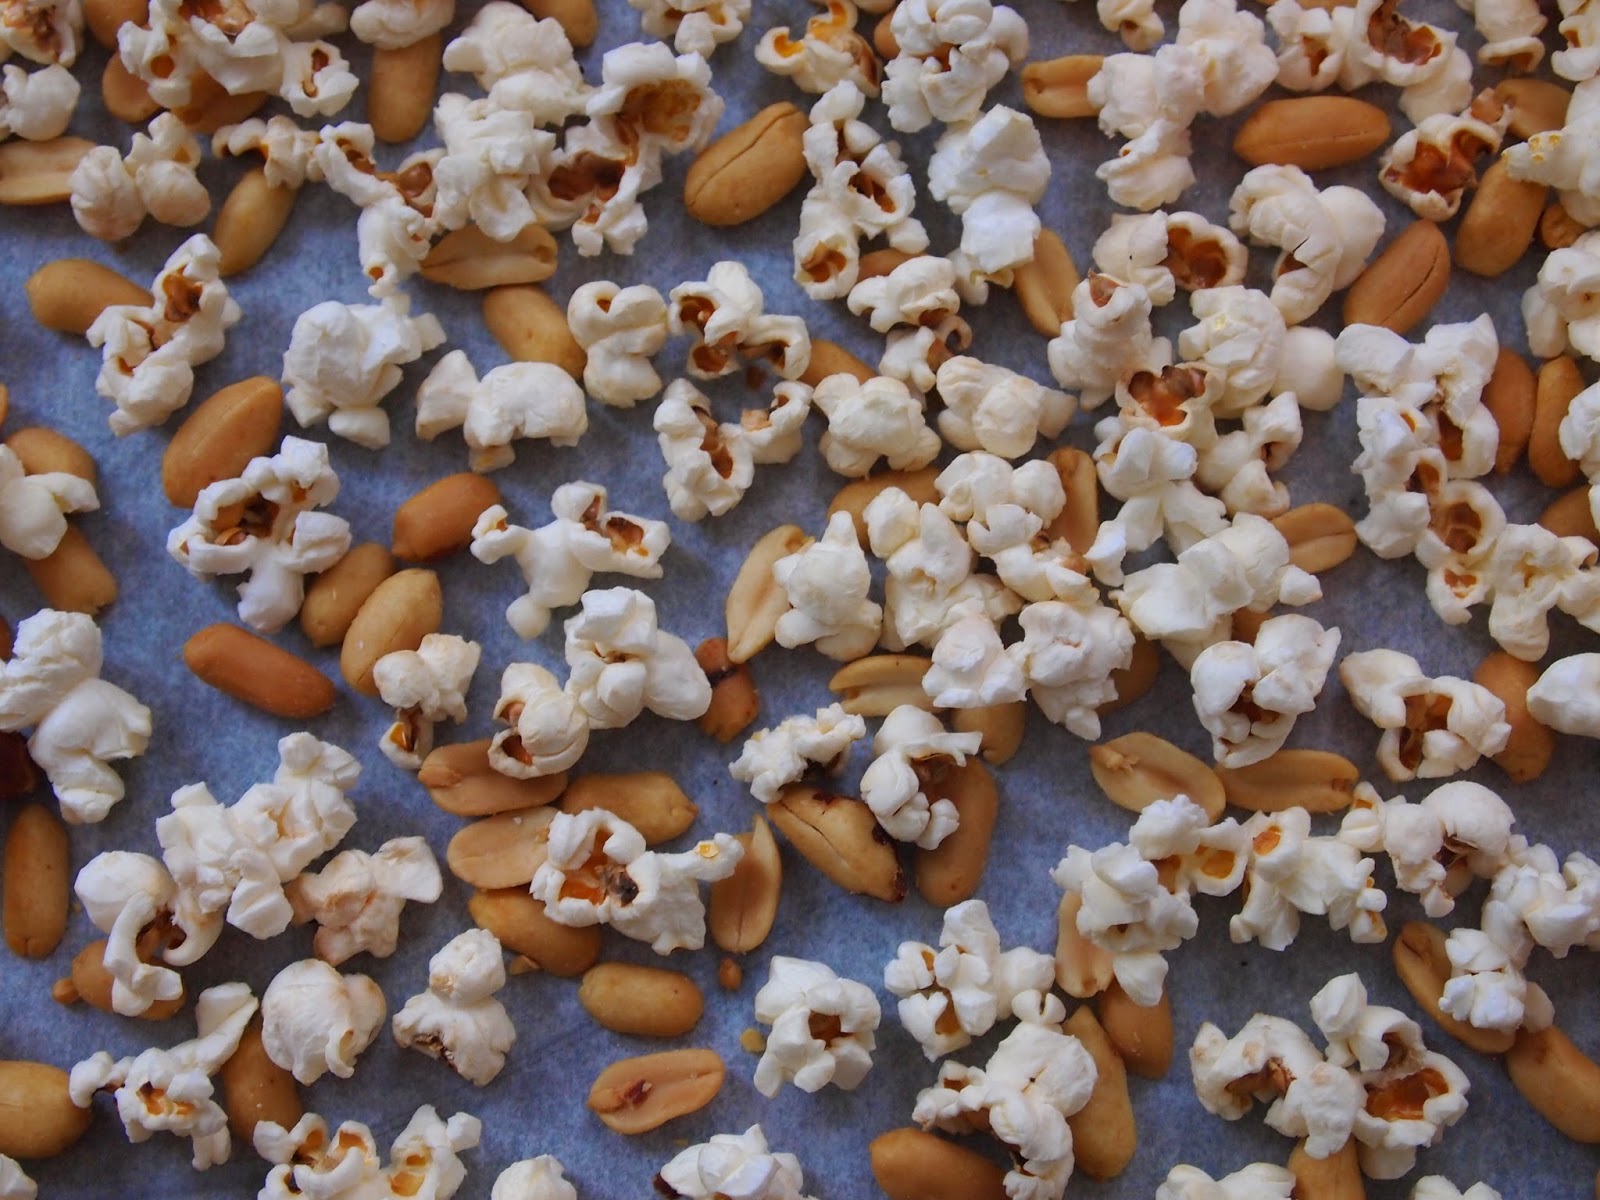
Sprinkle the popped popcorn and peanuts in an even layer onto the parchment. Set aside.
In a large, heavy saucepan melt the butter and then add the brown sugar, maple syrup and salt. Stir constantly until the sugar has completely melted. Clip on a candy thermometer and continue stirring over medium low heat until the temperature reads from 295º to 301º. Take from the heat and immediately sprinkle the baking soda in an even dusting over the toffee and then quickly stir it in until completely incorporated. Make sure there are no lumps in the baking soda before adding.
Pour the toffee over the popcorn and peanuts and allow to cool and set, about 30 minutes.
Break the toffee into small pieces and bag up! Well sealed, toffee keeps for a few weeks...but will it last that long? Doubt it.
Gesine Bullock-Prado's Blog

- Gesine Bullock-Prado's profile
- 69 followers
Gesine Bullock-Prado isn't a Goodreads Author
(yet),
but they
do have a blog,
so here are some recent posts imported from
their feed.

