
Gesine Bullock-Prado's Blog, page 10
November 18, 2014
SUPER EPIC CARAMEL DELIGHTFULLS™ FILLED GOLDEN EGGS

In 2005, I introduced the Golden Egg to the world via my pastry shop, Gesine Confectionary. You might think that Aesop and his fables brought the Golden Egg into the universal consciousness in the 1700s through their fancy and meaningful idioms. You’d be right, of course. But did that egg taste like a delicious old-fashioned donut that’s baked not fried and covered in a sprinkling of sparkling cinnamon and sugar? No. It was solid gold. It wasn’t even edible. Clearly, my Golden Egg was far superior.

When I rolled out this delicious confection, I thought it was the baker’s equivalent of dropping the mic. Little did I know that Toll House would grace us with Nestlé® Tollhouse® DelightFulls™ filled morsels, those little pockets of love teeming with caramel, peanut butter, mint and cherry fillings. I took one look at that bag of caramel DelightFulls™ and realized that the Golden Egg was getting an epic upgrade.

I made a batch. I had to leave town and told my husband where the magic tasties were hidden for our houseguests. The next morning, my phone exploded with happiness. One text read: “Golden EGGS! HOLY JAMOLEY!” Pictures of Golden Egg fueled happy people came pouring in.

The lesson I learned from this experience, a la Aesop’s Fables? If you have houseguests coming into town but you have to skip town for work, leave behind a batch of Golden Eggs brimming with caramel filled DelightFulls™. They’ll never notice you’re not there. Which is sad, quite frankly, but that just shows you the awesome power of a delicious DelightFulls™ laden treat.
SUPER EPIC CARAMEL DELIGHTFULLS™ FILLED GOLDEN EGGS
(makes 20 eggs)
Special Equipment: non-stick egg baking mold
Ingredients
For the eggs3 cups all-purpose flour1 tablespoon baking powder1 teaspoon salt½ teaspoon nutmeg2 sticks unsalted butter, room temperature2 cups sugar5 large eggs, room temperature1 teaspoon vanilla extract1 ¼ cups low-fat buttermilk1 cup caramel filled DelightFulls™1 extra tablespoon flourTo coat the eggs1 stick unsalted butter, melted1 cup sugar and 1 teaspoon cinnamon stirred together in a small mixing bowl
Procedure
In a mixing bowl, whisk together the flour, baking powder, salt and nutmeg for 30 seconds to distribute the leavening. Set aside.
In the bowl of a stand mixer fitted with the paddle attachment, combine the butter and sugar. Mix until light and fluffy. Scrape down the bottom and sides of the bowl and continue mixing on high for 30 more seconds.
Add the eggs, one at a time, scraping the bowl between each addition. Add the vanilla.
With the mixer on slow, add the 1/3 of the flour mixture and ½ the buttermilk, alternating between flour and buttermilk until all the ingredients are added to the batter. Using a large rubber spatula, scrap the bottom and sides of the bowl again and stir gently. Cover the bowl with plastic wrap and refrigerate to set, at least ½ hour to 2 hours.

Preheat the oven to 325°. Spray the egg mold with non-stick baking spray. In a small mixing bowl, combine the caramel DelightFulls™ and the 1 tablespoon flour. Toss the DelightFulls™ with the flour to coat (this helps suspend the morsels in the batter).
Fill the egg molds ¾ full (place the remaining batter back in the fridge until you need it again). Place 6-7 DelightFulls™ morsels on top of the batter. Bake for 15 minutes or until the cakes spring back when gently poked. Turn the cakes out and while still warm, brush the eggs with the melted butter with a pastry brush and sprinkle liberally with the sugar/cinnamon mixture so it’s fully coated.


Continue baking off the rest of the batter with the DelightFulls™.
PAID/AD


October 21, 2014
Toll House Ice Cream Sandwiches with Mint Filled DelightFulls
 I spent a splendid day baking with the always delightful group of ladies at The Talk yesterday. What made it even more delightful? DelightFulls™ Filled Baking Morsels.
One problem. It's tough to get through a segment when all you want to do is start eating because if there's anything I love more than a chocolate chip cookie ice cream sandwich, it's a MINT filled morsel strewn ice cream sandwich.
 We managed to take a quick selfie while shooting our segment.
 If I'd known as a kid that Nestlé Toll House would call me up one day and ask me to be their brand ambassador, that they would pay me to play with their morsels, I'd have danced a gangly limbed jig across my elementary school cafeteria without a care in the world that the boy I had a deep and abiding crush on would see my goofy display. Why? Because if there was anything I loved more than a pocket-sized, dark eyed boy who wore his Izods with his collar jauntily UP, it was Toll House cookies. I had the recipe memorized by the time I was 7. I had cultivated a scam wherein I'd cut open the seam of the Toll House bag that my mother kept tucked in the back of the freezer for special occasions. I'd slip out a generous handful and then I'd KrazyGlue the seam back together. I'd keep doing this until the bag was almost 100% globules of hardened glue and -1% yummy morsels. I'd even invented a method of softening butter to get the cookies into the oven IMMEDIATELY in the event my mother gave me permission to bake, I grated it with a box grater.
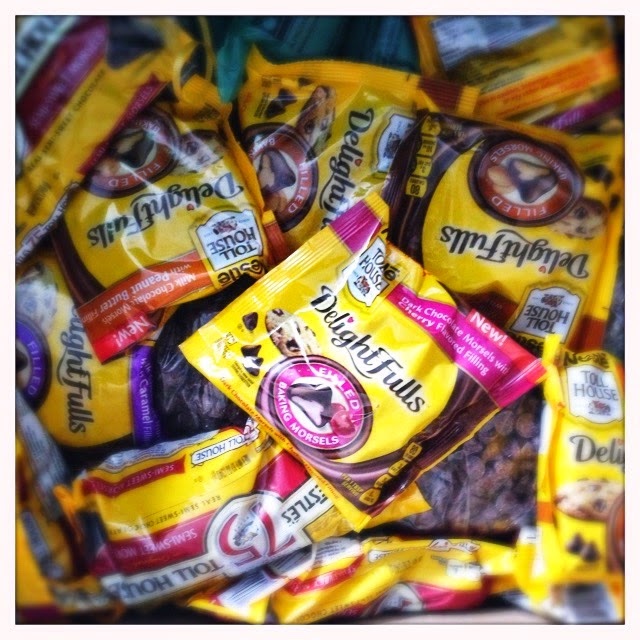 My day got infinitely sweeter when Nestlé sent me a box full of DelightFulls. My baking cup runneth over.
And guess what? While my crush for the slight lad has long since dissipated, my love for Toll House cookies has only grown. And it's deepened now that Toll House has graced us with FILLED morsels. Caramel, peanut butter, minty AND cherry flavored filled morsels are now available in your baking aisle and you can only imagine the whirlwind of baking that's taking place in my bakery. More posts are coming with new DelightFulls recipes. In the meantime, enjoy the video and recipe for ice cream sandwiches with mint filled morsels from The Talk. You'll thank me later.
ICE CREAM SANDWICHES with MINT FILLED DELIGHTFULLS
1 1/4 cups all-purpose flour1/2 teaspoon baking soda1/2 teaspoon salt1/2 cup (1 stick) butter6 tablespoons granulated sugar6 tablespoons packed brown sugar1 large egg1 teaspoon vanilla extract1 1/2 cups (9-oz. pkg.) · NESTLÉ® TOLL HOUSE® DelightFulls™Mint Filled Morsels3 3/4 cups slightly softened Vanilla DREYER’S/EDY’S® Light Ice CreamPREHEAT oven to 375° F.
COMBINE flour, baking soda and salt in small bowl. Beat butter, granulated sugar, brown sugar and vanilla extract in medium bowl until creamy. Add egg and beat until smooth. Gradually beat in flour mixture. Stir in 3/4 cup DelightFulls morsels. Drop by rounded teaspoons onto ungreased baking sheets.
BAKE for 9 to 11 minutes or until golden brown. Cool on baking sheets for 2 minutes; remove to wire racks to cool completely.
COARSELY CHOP remaining 3/4 cup DelightFulls morsels. Place ice cream in the refrigerator for 15 minutes to soften. Place 1/4 cup of ice cream between two cookies to make a sandwich. Gently press cookies together (ice cream should spread to edge of cookies). Quickly roll edge in chopped DelightFulls morsels. Wrap each individually in plastic wrap. Place sandwiches in freezer bag(s) and freeze until needed.
Tips:
Refrigerate ice cream for 15 minutes to slightly soften. Place back in freezer while assembling if it becomes too soft.
Variations:
Try any variety of NESTLÉ® TOLL HOUSE® DelightFulls™ Filled Morsels with different ice cream flavors for a frozen treat that will have everyone screaming for ice cream, sandwiches, that is.
In a pinch and can't bake from scratch? Use New NESTLÉ® TOLL HOUSE® Chocolate Chip Frozen Cookie Dough.#PAID #AD
October 16, 2014
Let Them Eat Cake! Coming March 2015
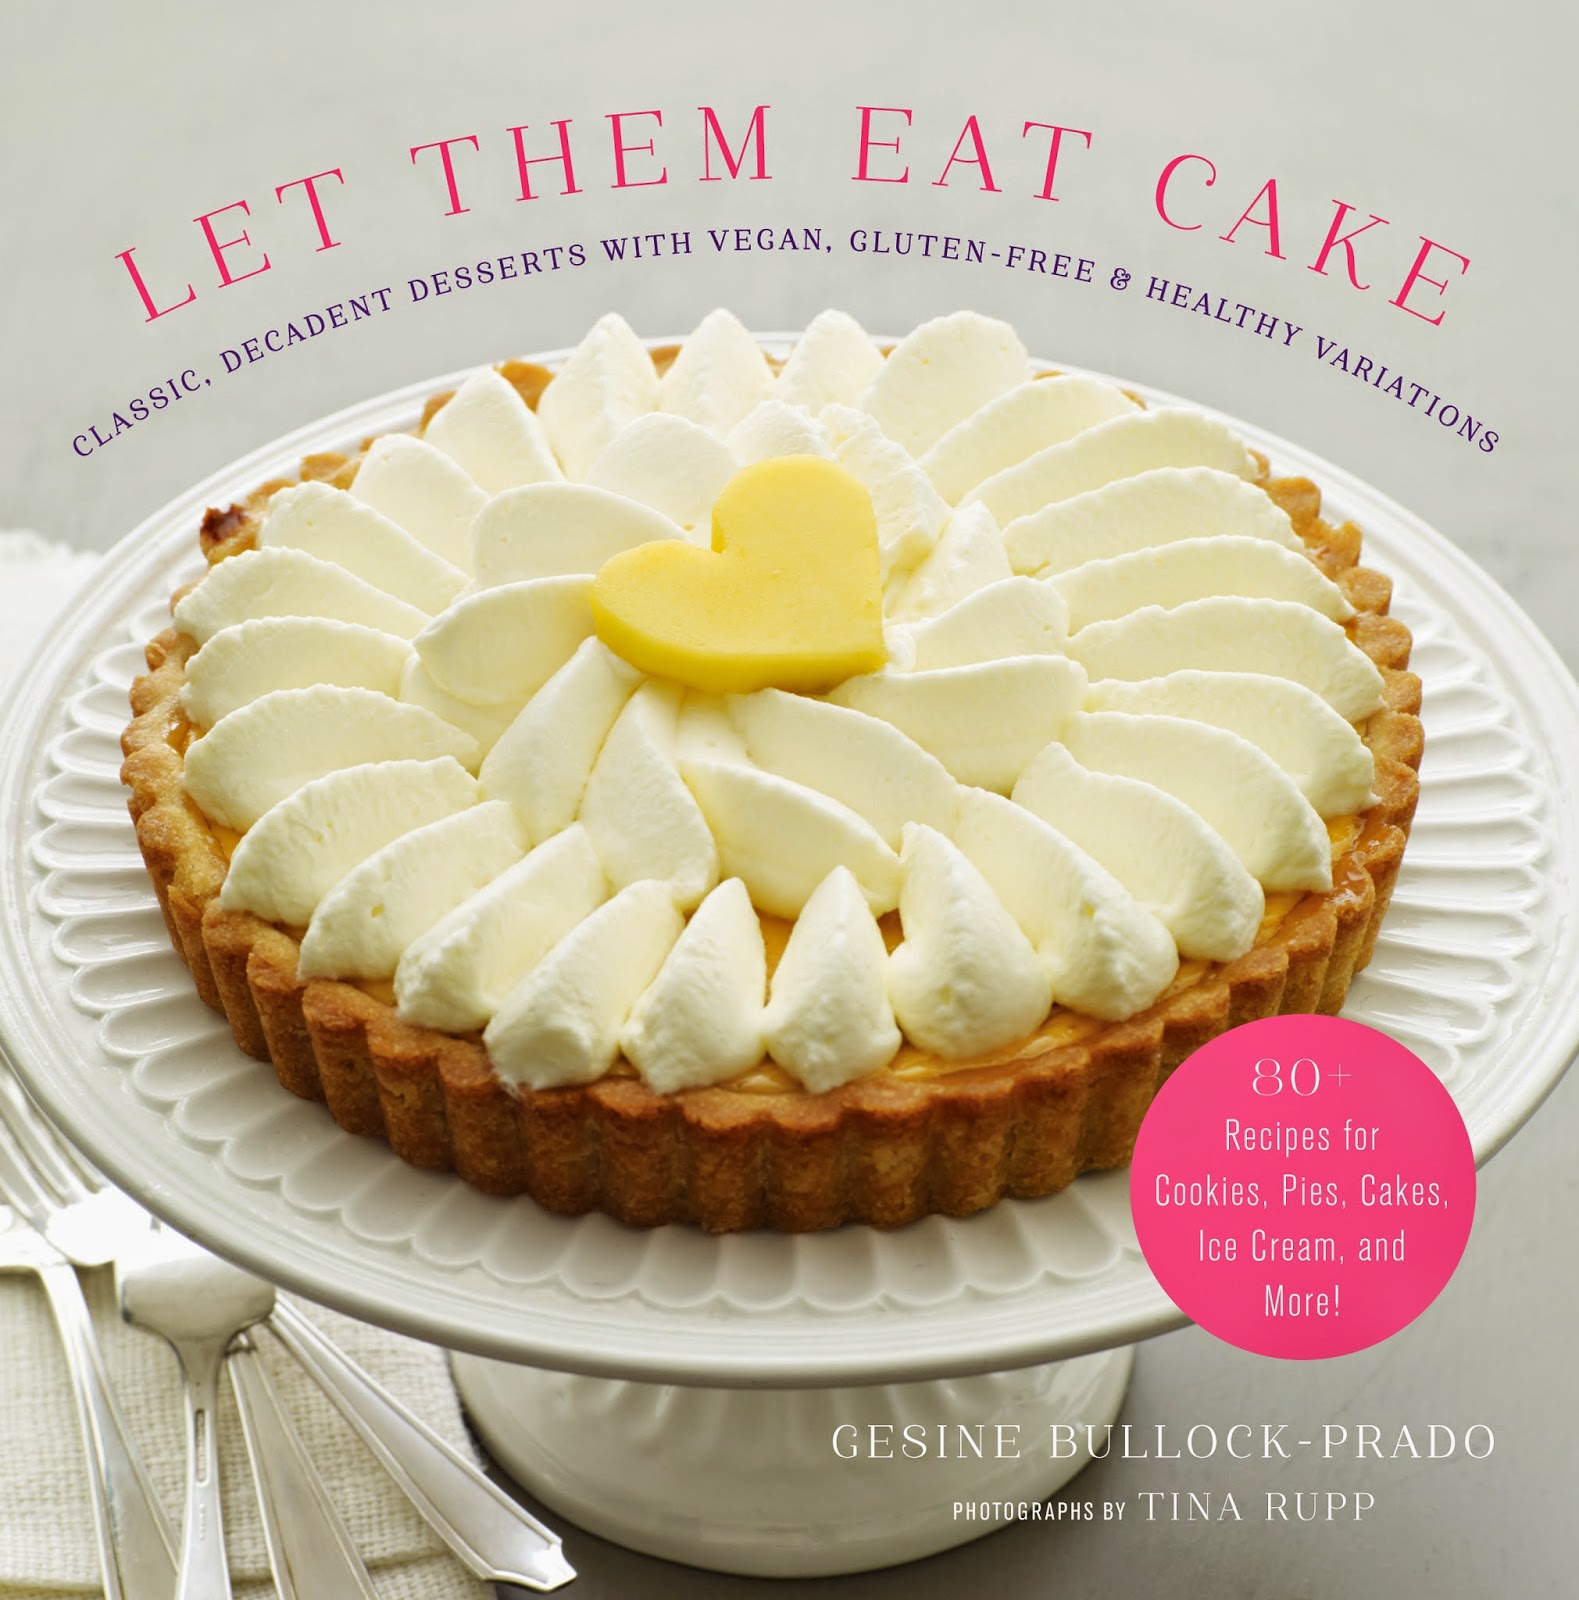
I'm proud to present the cover of my new book, Let Them Eat Cake. It will be available March 2015 but you can feel free to pre-order now! Tina Rupp is responsible for the gorgeous photography. I take responsibility for all the pastry.
Let Them Eat Cake was inspired, first and foremost, by the customers at my pastry shop, Gesine Confectionary. It was there that I came to understand the true nature of food allergy and intolerance. When a kid you've watched grow up can't eat birthday cake at a party due to extreme food allergies, a pastry chef like me will make it a mission to create safe cakes and treats for this fabulous child. But I don't have a pastry shop anymore. And if I did, I wouldn't be able to bake for everyone who finds a dearth of choice in the treats department due to food intolerance. So I wrote this book to fill the void.
This book is also for that enthusiastic baker who jumps at the chance to bake at the drop of a pin, "Of course I'll bake 200 cupcakes for the bake sale!" "Bien sur, I'll crank out 2000 cookies for the elementary school open house!" It's also for you that this book exists because for every time you've jumped in glee at the chance to spend a long weekend playing with flour, butter and sugar, you've been thrown a baking curve ball: "No gluten!" "No dairy!" "No animal products!" No refined sugars!"
If you want to bake with all ingredients in play, this book is for you. Every recipe starts with no holds barred. There's butter, refined sugar and flour all up in your grill. But that recipe also comes with variations for when you need a cake or pie to be gluten-free, vegan (dairy and animal product free) or just plain healthier. In other words, this book is for everyone who enjoys a good pastry.
I want all of you to eat cake...and cookies and pie and candy and ice cream!
September 13, 2014
You're Invited! The Better Homes and Gardens Cooking Experience!
 Better Homes & Gardens is opening the doors of its famed Test Kitchen to host the brand’s first-ever consumer cooking experience. This exclusive, two-day event will kick-off at the Better Homes and Gardensheadquarters in Des Moines, Iowa on October 10, 2014. Guests will enjoy cooking demos from notable chefs and BHG editors, scrumptious meals, tours of the Test Kitchen, a gift bag curated by BHG editors valued at $200 and a limited edition cookbook featuring recipes from the event. Registration is now onlinehere.
“Our 40 million readers look to us each year for advice on fun, fresh ideas to elevate their holiday entertaining, from colorful centerpieces to chic table settings and the star of the table—food,” says Gayle Butler, Editor-in-Chief, Better Homes and Gardens. “This cooking experience gives us a chance to bring our holiday pages to life and invite consumers into our kitchen to engage with editors face to face, meet other entertaining enthusiasts and learn simple and inexpensive ways to make their holiday table shine.”The weekend of events will kick off with a hearty opening reception and welcome dinner for guests that spotlights trend-forward holiday recipes from the pages of Better Homes and Gardens magazine and favorites old and new from the brand’s iconic Red Plaid Cookbook.Consumers are also invited to book a seat at the table for the Tastes of the Season Dinner following Saturday’s cooking festivities. This intimate dinner in the Better Homes and Gardens kitchens will give readers a chance to dine and dish with Editor-in-Chief, Gayle Butler, Senior Deputy Food and Entertaining Editor, Nancy Hopkins, Test Kitchen Director Lynn Blanchard, and Contributing Editors Gesine Bullock-Prado and Scott Peacock. The menu features a four-course meal with wine pairings. This Saturday evening dinner is available as a separate ticket price. Seats are limited. To register click here.Here’s a sample of what BHG has planned for readers during this exclusive, information-packed event:• Eat the Menu & Lunch Instructor: Scott PeacockScott Peacock is a James Beard award-winning chef and cookbook author, is a southern food expert who brings big flavor to his food. Born and raised in rural Alabama, Scott is the former chef to two Georgia governors, founding chef of Atlanta’s Horseradish Grill, and the former executive chef of Watershed Restaurant in Decatur, Georgia. Scott will teach a hands-on class featuring some favorites from his comfort-filled menu, layered with flavors that are perfect to share at the holiday table. Attendees will learn to make every dish, then eat the results for lunch.• Magically Delicious Desserts Instructor: Gesine Bullock PradoGesine Bullock-Prado is a master baker and cookbook author of Bake It Like You Mean It and Sugar Baby, who finds joy in demystifying baking challenges for the home cook. Gesine is a regular contributor to BHG and a frequent guest on NBC’s Today Show and CBS’ The Talk. Gesine will share simple steps to create spectacular centerpiece desserts for the holidays or any special occasion that begs for a sweet finish.• Behind the Scenes at the BHG Test Kitchen with Better Homes and Gardens EditorsGet the scoop on what happens every day in the Better Homes and Gardens Test Kitchen, where all recipes are tested and approved by BHG editors and culinary professionals. The Test Kitchen is not open to the public, so this is a rare opportunity to experience a behind-the-scenes tour of the nations’ most famous test kitchen. Editors will also offer hands-on experience, covering everything from knife skills to pastry tricks.• Everything You Need to Know to Cook SLOW with Better Homes and Gardens EditorsThis hip and happening, fast-paced class will showcase 12 gorgeous go-to recipes for holiday gathering, from surprising appetizers to delicious desserts and the ultimate Christmas morning breakfast. Along the way, BHG editors will share the latest tips and tricks for using the slow cooker as well as the latest advancements in slow-cooker technology. The session will finish with design tips for how to make your slow cooker look great on the buffet table. You will be amazed that something so slow can taste so good!
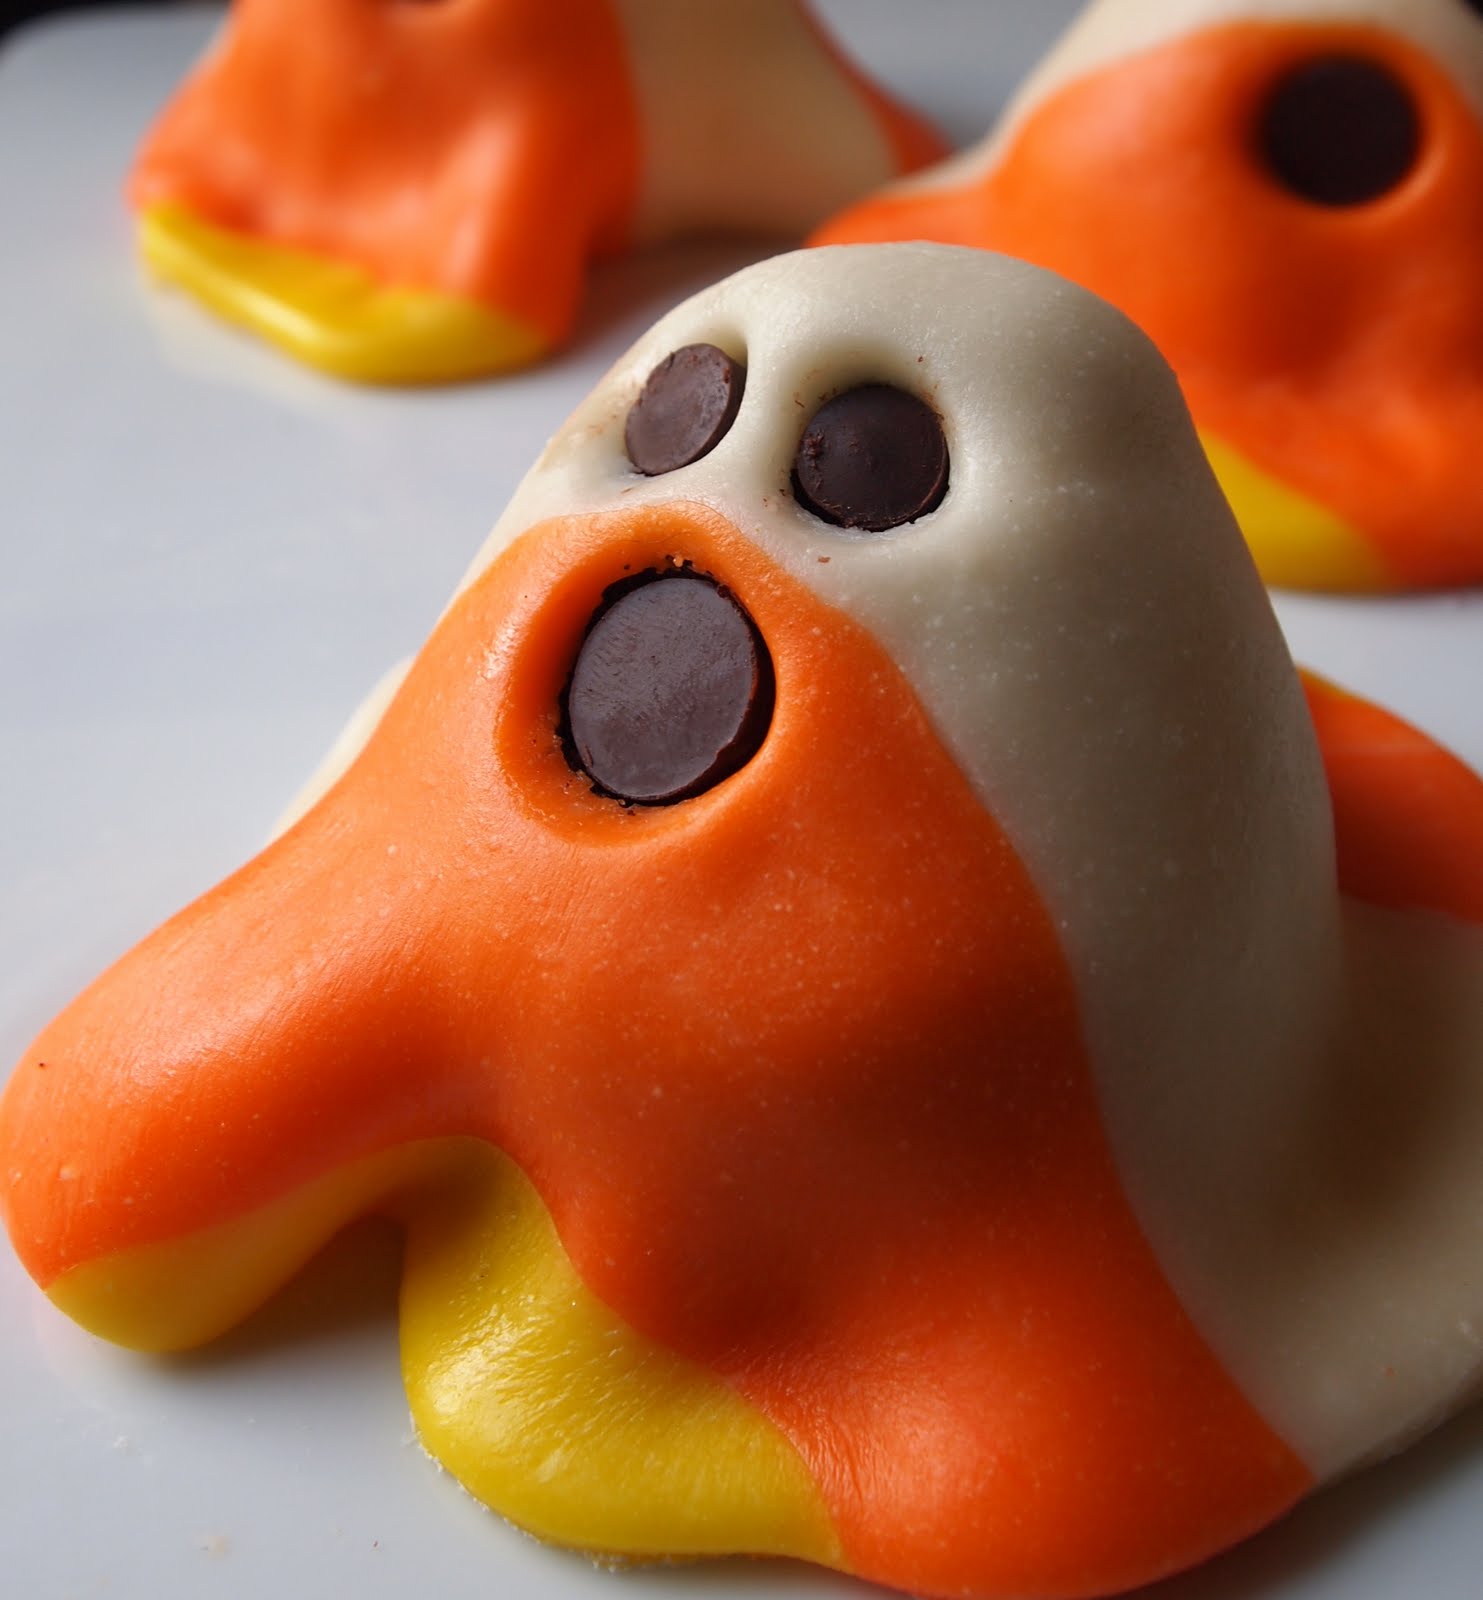
Candy Corn Ghosts! A post worth revisiting for Halloween.
The following is an excerpt from SugarBaby extolling my love of candy corn:
My favorite halloween costume was a death trap: seven feet of chicken wire slathered in papier maché, festooned in flammable white, orange and yellow oil paint, made mobile with four shimmying grocery cart wheels, and equipped with a sticky trap door for candy deposits. I was the envy of every kid at Woodmont Elementary. I was the biggest candy corn on earth.
Sadly, there was no ventilation, it tipped whenever I tried to negotiate a curb, and the built-in mesh window was inches to low for my gangly frame. But I was happy to withstand any discomfort for a giant candy corn, even if it wasn't edible. Luckily, I usually got a few pounds of the real stuff deposited into the bucked attached precariously to the inside of the costume. Today, I bypass trick-or-treating and death-trap costumes and simply make my favorite ghoulish treat at home and in any shape I desire.
I also love chocolate cake and nougat filling.
Put it all together and you better believe you'll be in a sugar coma for a week. But I guarantee you'll be smiling!
Everything in this sweet cake can be found in SugarBaby. The chocolate cake's on page 216.
The innards of my fudgey chocolate cake are filled with vanilla nougat, which you can find on page 120 ofSugarBaby.
The ghostly veil is candy corn (page 66).
Here's how I put it all together.

For the cake insides, I take half the fudgey chocolate cake recipe . I make a dozen cupcakes with the batter (they are baked for 15 to 20 minutes).
I then make half the vanilla nougat recipe while the cupcakes cool.
I level the tops of the cupcakes and put the tops aside.
 level all of the cupcakes
I take a melon or teaspoon cookie scoop and scoop the middle of each cup cake out.
 scoop the innards of the cakes. just enough to make a divet for the filling.
I then scoop nougat filling into the cake cavities!

I put one cupcake atop the other. Smush them together gently.

I then take the small slice we leveled off from one of the cakes and trim it to size to fit on top of our little cake tower and then place it on top and gently smush again. The cake is so moist, you'll find that everything adheres just fine.


 and here's what it looks like sliced in half. Yummy.
Make the candy corn recipe per the instructions in SugarBaby. Divide the candy corn into three even pieces while the candy is still quite warm (this differs from the book instructions because we want to work with the stuff while it's still pliable and easily draped into ghostly shapes).
Keep one piece plain and die one piece orange and the other yellow.
Roll the plain piece into a foot long rope.
Divide the orange and yellow pieces and roll them all into foot long ropes. Put the orange pieces on either side of the plain rope and the yellow pieces on either side of the orange ropes.

Make sure there's a fine layer of either corn starch or confectioner's sugar on your table and lightly dust a rolling pin with the same. Roll the ropes together into a 6" wide x 36" long strip. Stamp out 6, 6" rounds.
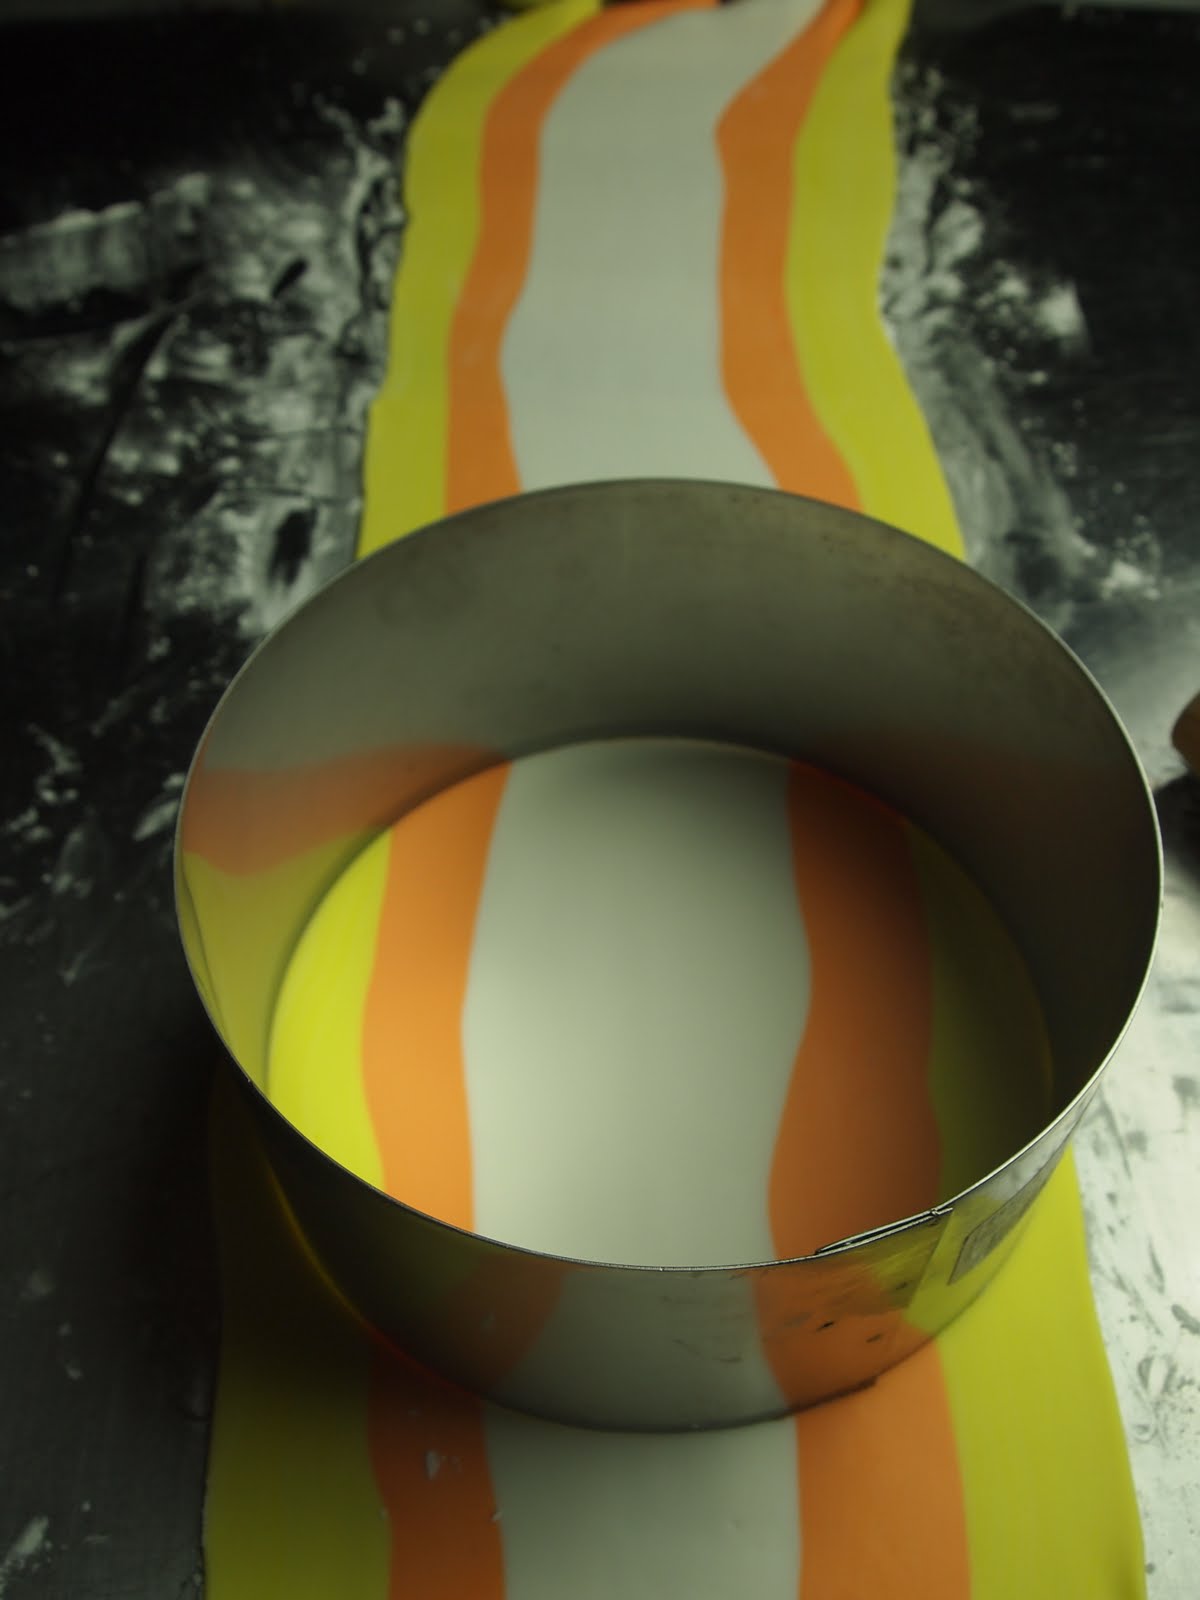
Gently cover each cake with the 6 inch round of candy corn.


Use a medium sized open pastry tip to cut out ghoulish eyes and a large pastry tip for the mouth.

If you like, fill the spooky eye and mouth cavities with melted chocolate or leave them deeply vacant with the promise of the deadly sweetness within.

July 3, 2014
Fresh Cherry and Blueberry New York Cheesecake with Dried Cherry Short Crust
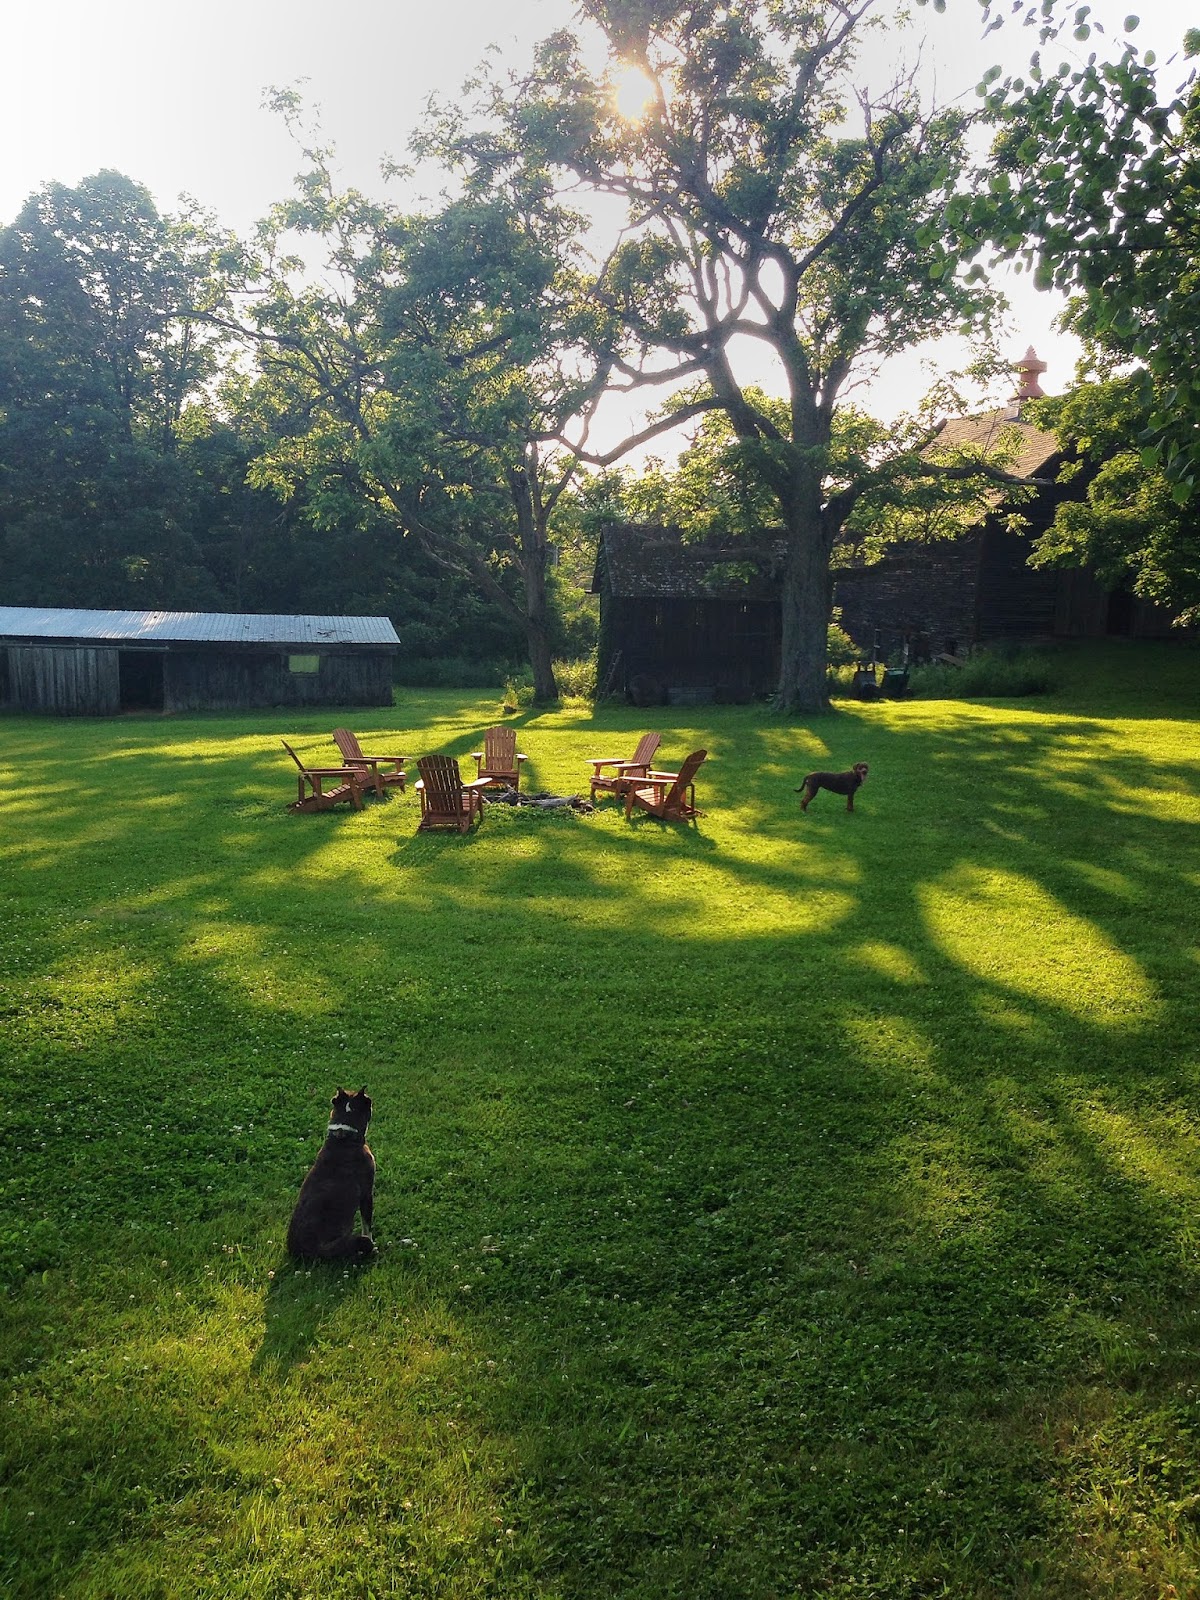 Inu sits and enjoys the sunshine on his smooshy little face.
I'm in the mood to celebrate life in all its infinite beauty and bounty.
This morning we had an appointment at the vet to say goodbye to our old boy Inu, or as we like to call him, "man face eater." He's never cared much for menfolk. He's been utterly blind for a year and has still shown an uncanny discernment for gender.
In an instant, last week, he fell apart. He didn't want to move. He turned his nose at bacon. He refused a bite of cheesecake. He cared not a fig for man flesh. The vet looked at his x-rays and blood work and said, "Bummer."

So we made that horrid decision; today we'd say goodbye.
But as these things go, his meds kicked in. In the last few days he's been eating. He's sprightly. Given the opportunity, he'd show a burly gent a thing or two about fisticuffs (to be fair, he's really a lover. He just has issues). We went to the vet this morning but instead of coming home without him, he's now laying at my feet, tooting up a storm. In other words, all is normal in the Prado household.
We know his diagnosis is grim but it's a future grim, one we can monitor while keeping him happy and fed.
So today we celebrate life and love, for all creatures great and small. We eat bacon and chase after phantom frisbees. We live another day to eat cheesecake.
Hold your family close, those bipedal and four legged. Tomorrow, on Independence Day, pursue some happiness with all the creatures you love.

New York Cheesecake
For the shortcrust
1 cup all purpose flour
1/2 cup cornstarch
3/4 cup unsalted butter, cold and cut into cubes
1/4 cup sugar
1 tablespoon sweetened condensed milk
1 large egg
1 egg yolk
1/2 teaspoon salt
zest of 1/2 a large lemon
1/2 cup dried cherries or Craisins

Shortcrust procedure
In the bowl of a food processor, combine the flour, cornstarch, sugar, salt and zest. Pulse to combine. Add the butter and pulse until the mixture resembles coarse cornmeal.
In a small bowl, whisk together the sweetened condensed milk, whole egg and egg yolk.
Add the cherries or Craisins to the processor and pulse a few times to distribute the dried fruit. Continue pulsing and add the sweetened condensed milk/egg mixture. Continue pulsing until the dough just comes together.
Turn the dough out onto a piece of plastic wrap. Turn the dough over a few times to incorporate any dry patches. Press the dough into a disk and wrap tightly in plastic wrap. Refrigerate for 20 minutes.
Preheat oven to 350º. Spray a 9" round or square springform with non-stick cooking spray. Press the dough into an even layer on the bottom of the pan. Bake for 15 minutes. Remove from the oven and set aside. Turn the oven down to 325º.

For the filling
2 (8 ounce) packages of cream cheese, room temperature
8 ounces heavy cream
3/4 cup sugar
2 eggs
1/4 cup flour
1/4 teaspoon salt
zest and juice of 1 lemon
Filling procedure
In the bowl of a stand mixer fitted with the paddle attachment, combine the cream cheese and sugar and beat on high until smooth. With the mixer on low, add the cream and mix until combined. Add the eggs, lemon juice and zest. Mix until smooth. Add the flour and salt and mix until incorporated. Transfer the filling to the prepared springform and smooth with a small offset spatula. If you find that the mixture is at all lump, run it through a sieve before adding to the springform. Tap the springform gently a few times on the countertop to pop any large air bubbles in the batter.
Bake the cheesecake at 325º for 20 minutes. Turn the oven down to 275º and bake for 30-45 minutes more or until the cheesecake shimmies a bit in the middle. Turn the oven off and open the doors. Allow the cheesecake to cool in the oven slowly. If you find that the sides of the cheesecake are still clinging to the sides of the pan once you turn off the oven, remove the cheesecake from the oven and using a thin paring knife, run the knife along the inside edge to release the cheesecake from the pan but don't remove it from the pan. Return to the cooling oven until the cheesecake comes to room temperature. Refrigerate the cheesecake until cool, 2 hours to overnight.
For the topping
2 (10 ounce) bags of frozen sweet cherries
1/2 cup fresh (frozen) cranberries
2 pints fresh blueberries
1 cup sugar
1 cup orange juice
1 teaspoon vanilla bean paste
pinch salt
3 tablespoons tapioca starch (can substitute with cornstarch)
Procedure for topping
In a large saucepan, combine the sugar, orange juice and salt. Stir over medium heat until the sugar melts. Add the frozen cherries and cranberries and stir to combine.
Remove 1/2 cup of the cooking liquid and transfer to a small bowl. Add the tapioca and cornstarch and stir until smooth. Add the mixture back to the saucepan and stir to combine. Bring the mixture to a simmer and cook just until the mixture starts to thicken. Transfer the topping to a large bowl, leaving about a 1/4 cup of the "sauce" behind in the saucepan. Add the blueberries to the saucepan and stir gently to coat with the "sauce." Transfer the blueberries to a small bowl and cover with plastic wrap. Refrigerate both the cherries mixture and blueberry mixture until cool, about 1 hour.
To finish
Remove the cheesecake from the springform and transfer to a serving platter. Spread the cherry mixture over the entirety of the cheesecake and then arrange the blueberries on top, leaving an 1-2 inch gap at the edge for the cherry mixture to peak through.
Serve immediately or refrigerate for 2 days.
June 17, 2014
A Better Homes and Gardens July

Pick up July's Better Homes and Gardens for one of the zippiest 4th of July dessert features you've ever seen! This Virginia bred girl couldn't be more proud or pleased.
June 9, 2014
Managing a Swarm!
This Saturday, our good friends Caroline and Whit came for a visit at Freegrace. While we were chatting outside, a swarm of bees hightailed it out of my main hive and made camp on a honeysuckle bush just a few yards from their original home.
Gesine and Caroline manage a Swarm at Freegrace from Raymond Prado on Vimeo.
Here's how we caught them and put them into a new home. You'll notice Whit, in the red shirt, keeps a distance. He's deathly allergic but awfully brave. Caroline, you'll also notice, is wearing skorts and flip flops with only a veil and gloves to protect her. I had to force the gloves on her. Who you won't notice is Ray, my husband, who took the footage and cut it together. He got as close to the little buzzers as anyone with no protection at all. Not a sting among us.
I'll write a bit about swarms on Freegrace Friday, for those interested.
May 24, 2014
Memorial Day, Two Ways: Fresh Spring Tart & New England Dogs
What shall I do for our Memorial Day feast? Fancy garden veggie tart or hot dogs?

Do I even have to choose?
Of course not.
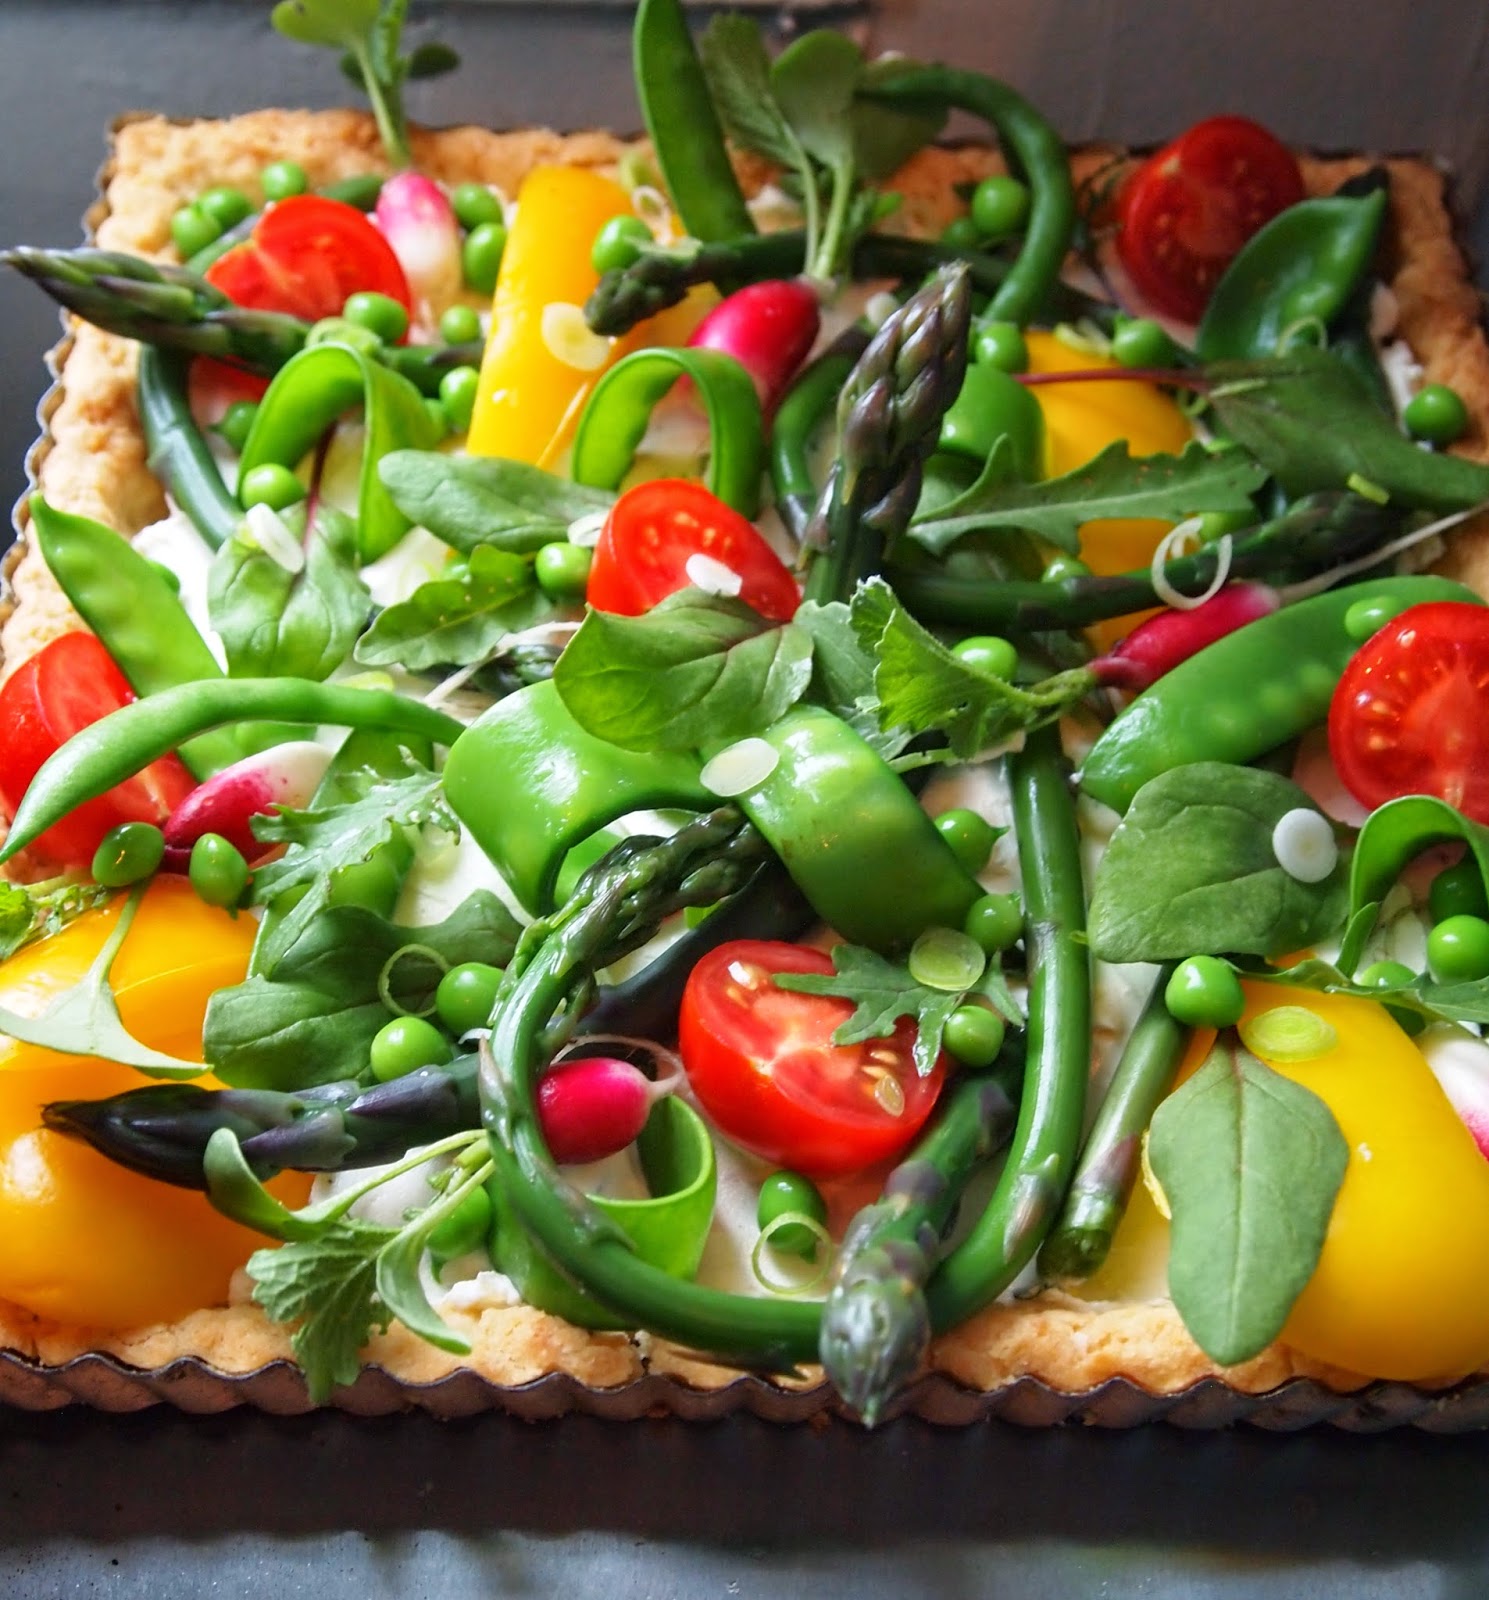
My veggie plots are churning out the good stuff and some if it is so beautiful, it's a shame to bury their sculptural qualities in a salad bowl. A delicious tart shell is far more appropriate display.

And I've got the ingredients to make homemade New England hot dog buns. So I did both and now I don't think I can eat another bite for the rest of the weekend.
For the hot dog buns, I use King Arthur Flour's recipe HERE.
For the tart, follow me!
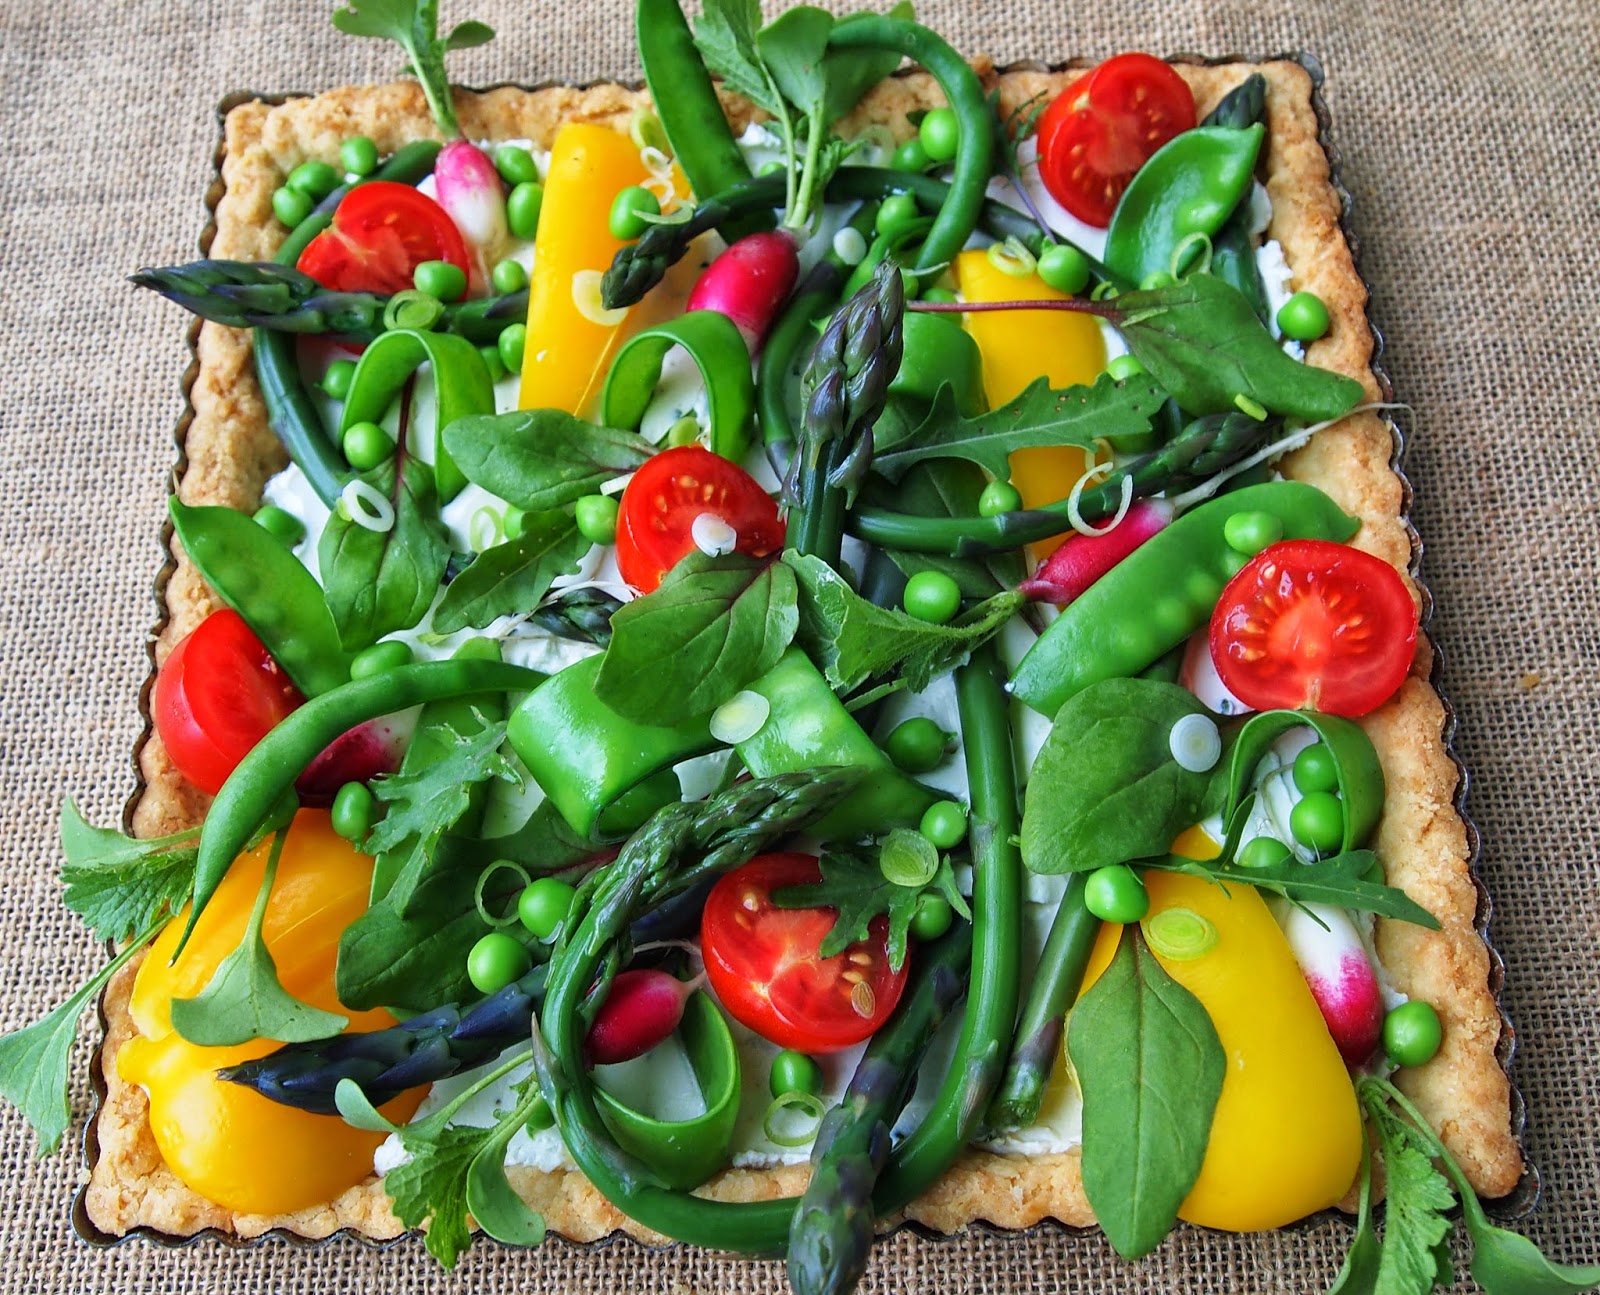
FRESH SPRING TART
For the herbed tart dough
1 cup unsalted butter, ice cold2 cups all purpose flour1 teaspoon salt2 tablespoons sweetened condensed milk1 egg yolk1 teaspoon fresh rosemary, chopped1 teaspoon fresh thyme, choppedPreheat oven to 350º.
Place the flour, salt and herbs in a large bowl and stir. Using a box grater, grate the butter on top of the flour. Toss the butter and flour together until the butter is evenly coated in the flour. Use the tips of your fingers to gently massage the butter into the flour until the mixture resembles coarse cornmeal.
In a small bowl, whisk together the egg yolk and sweetened condensed milk. Add to the flour mixture and using your fingertips, distribute the wet ingredients evenly among the flour mixture. Gently knead the dough until it just comes together. Spray an 8" - 9" square tart pan with non-stick spray and press the dough onto the bottom and sides of the pan. Freeze for 20 minutes. Bake for 20-25 minutes or until the tart dough is baked through and golden brown. Set aside to cool completely.
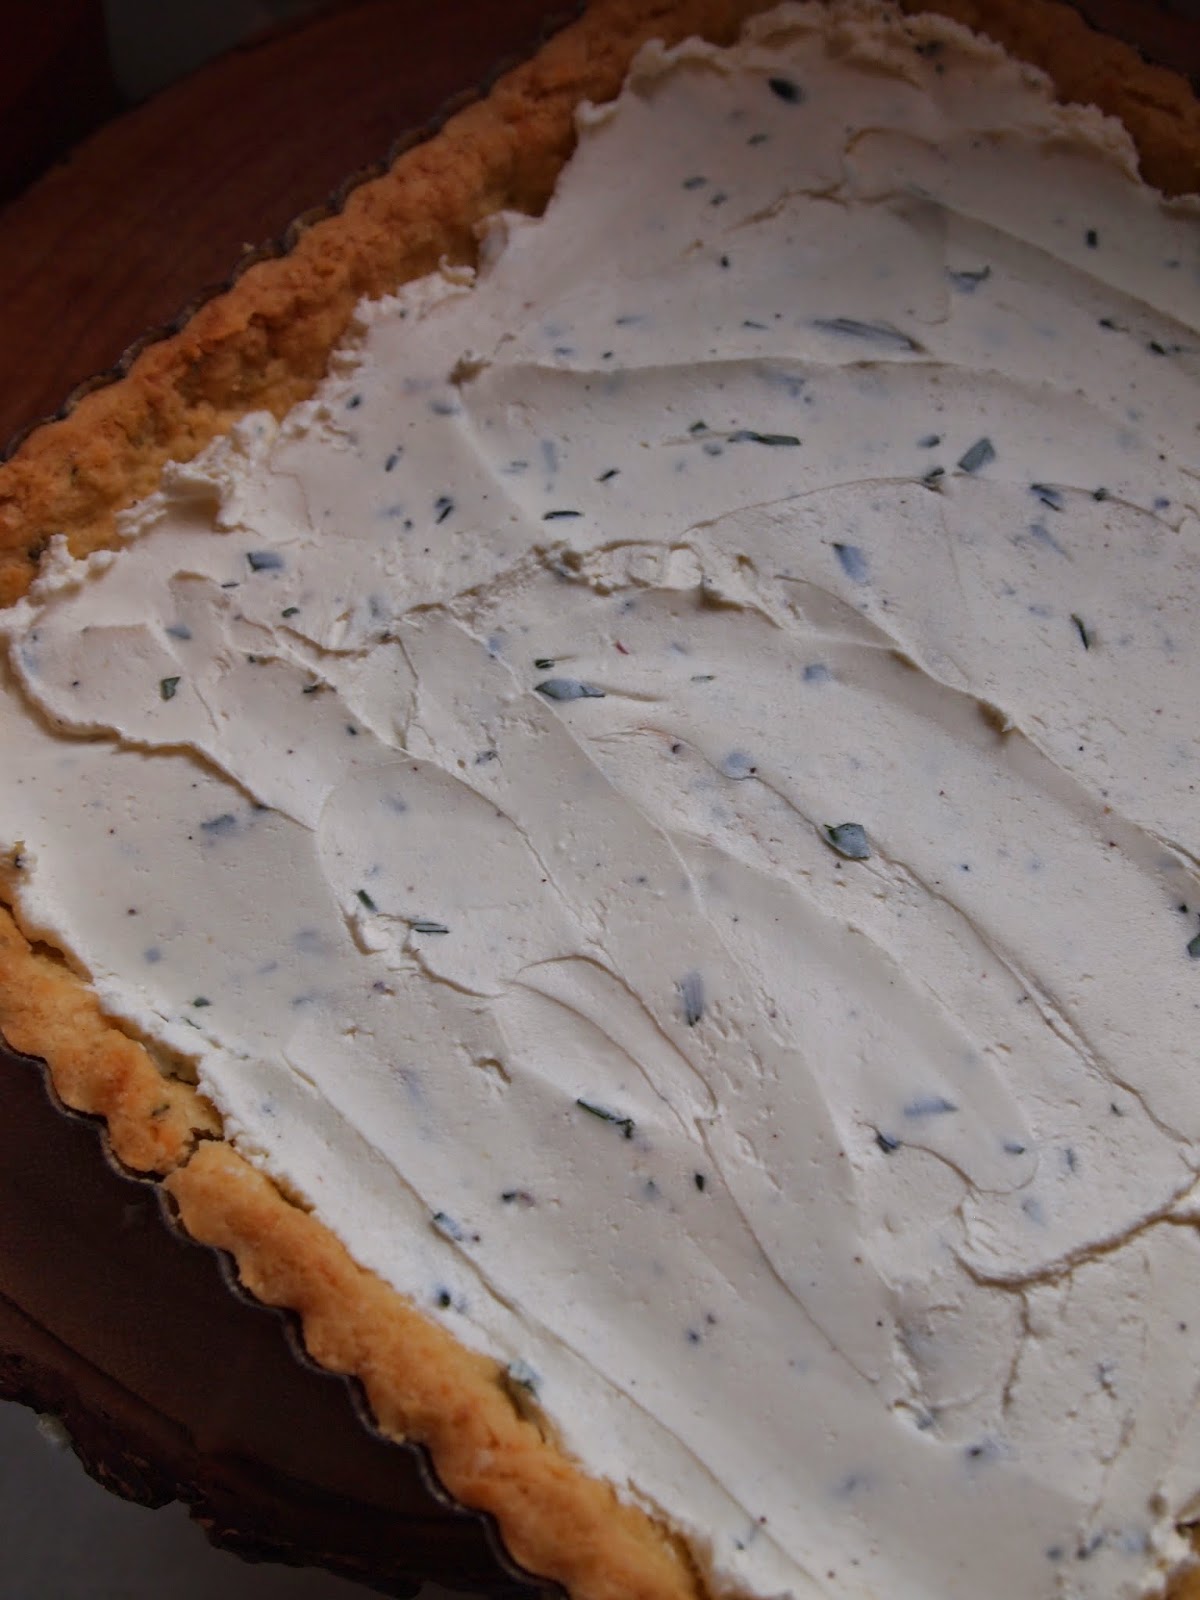
For the filling
1 (8 ounce) package cream cheese, room temperature1 (4 ounce) package soft goat's cheese, room temperature1/2 teaspoon salt1 teaspoon fresh basil, chopped1 teaspoon fresh rosemary, chopped1 teaspoon fresh thyme, choppedsalt and pepper to taste
Combine all filling ingredients in the bowl of a stand mixer fitted with the paddle attachment. Mix until smooth. Using a small offset spatula, spread evenly onto the bottom of the prepared tart pan.

To finish
 My field of arugula
(Any beautiful arrangement of fresh veggies will make for a gorgeous tart. This is what I have coming up in my garden)
 Tender baby spinach
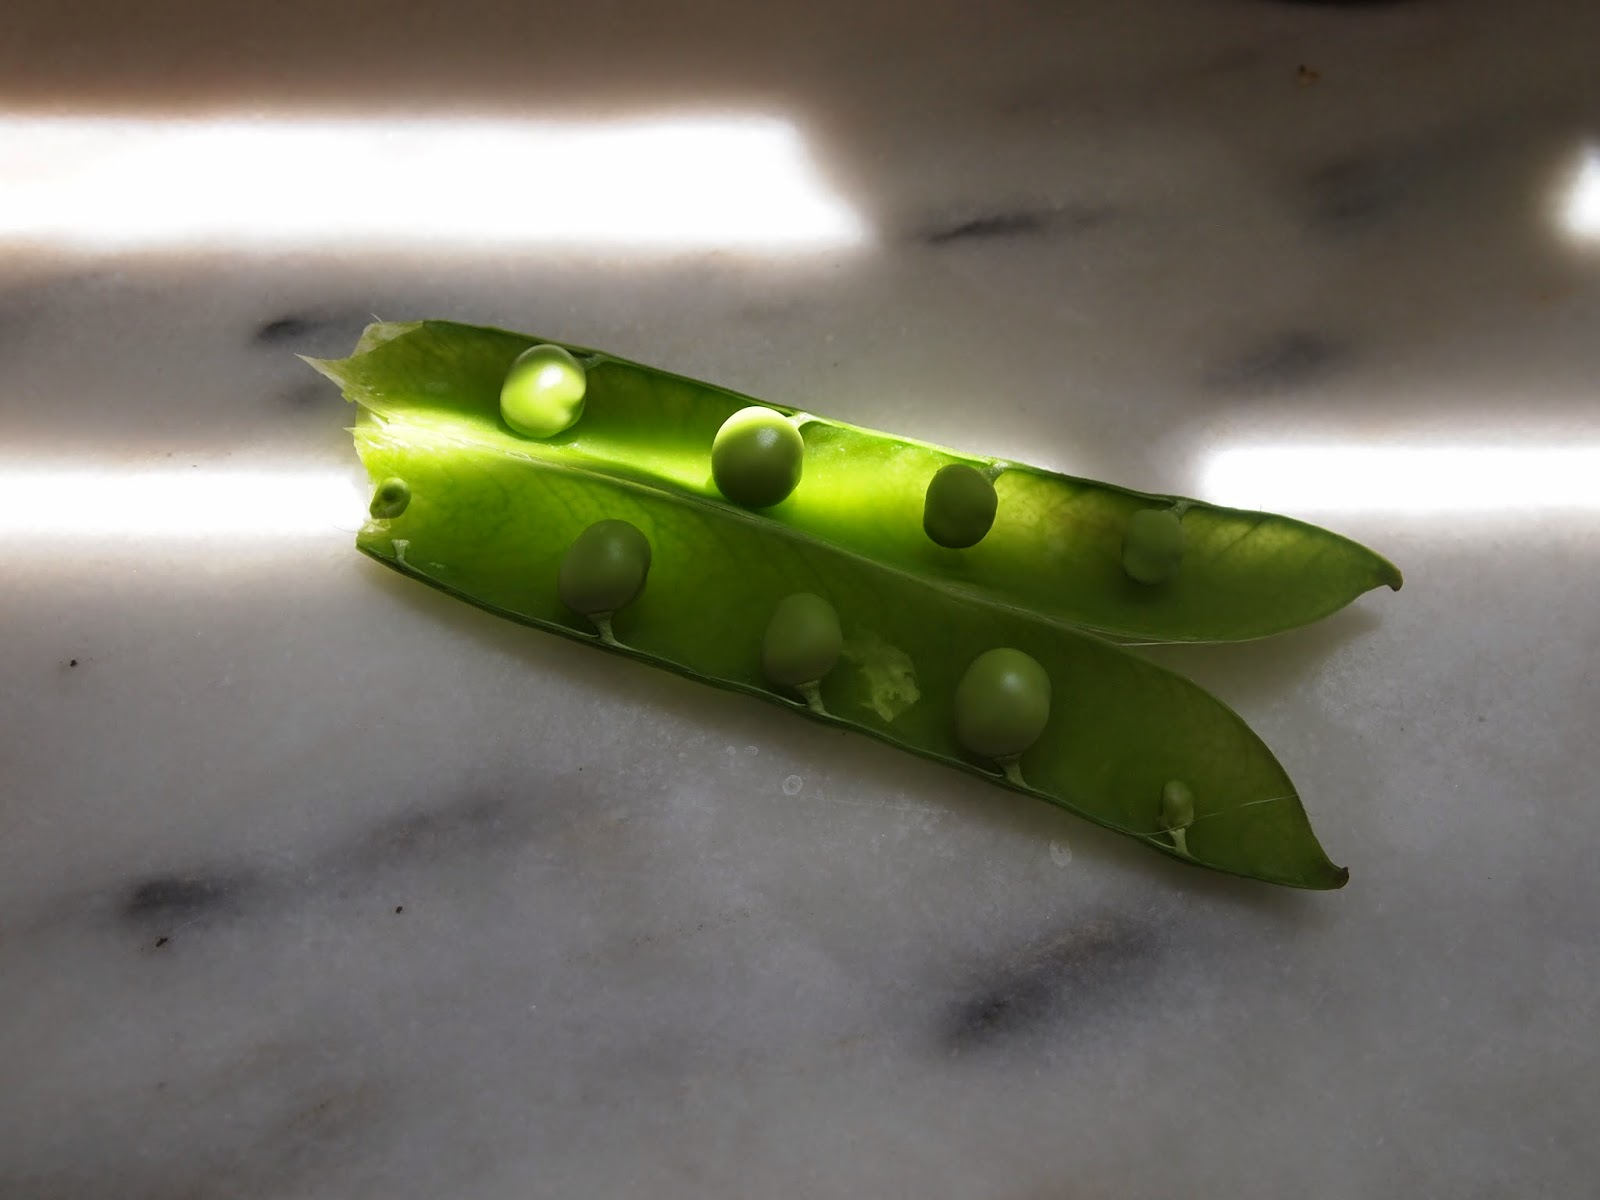
4-5 spears asparagus, quickly blanched and immediately cooledhandful baby spinachhandful baby wild arugulahandful baby kale4-5 small tomatoes1 yellow pepperfresh English peas
French breakfast radishes
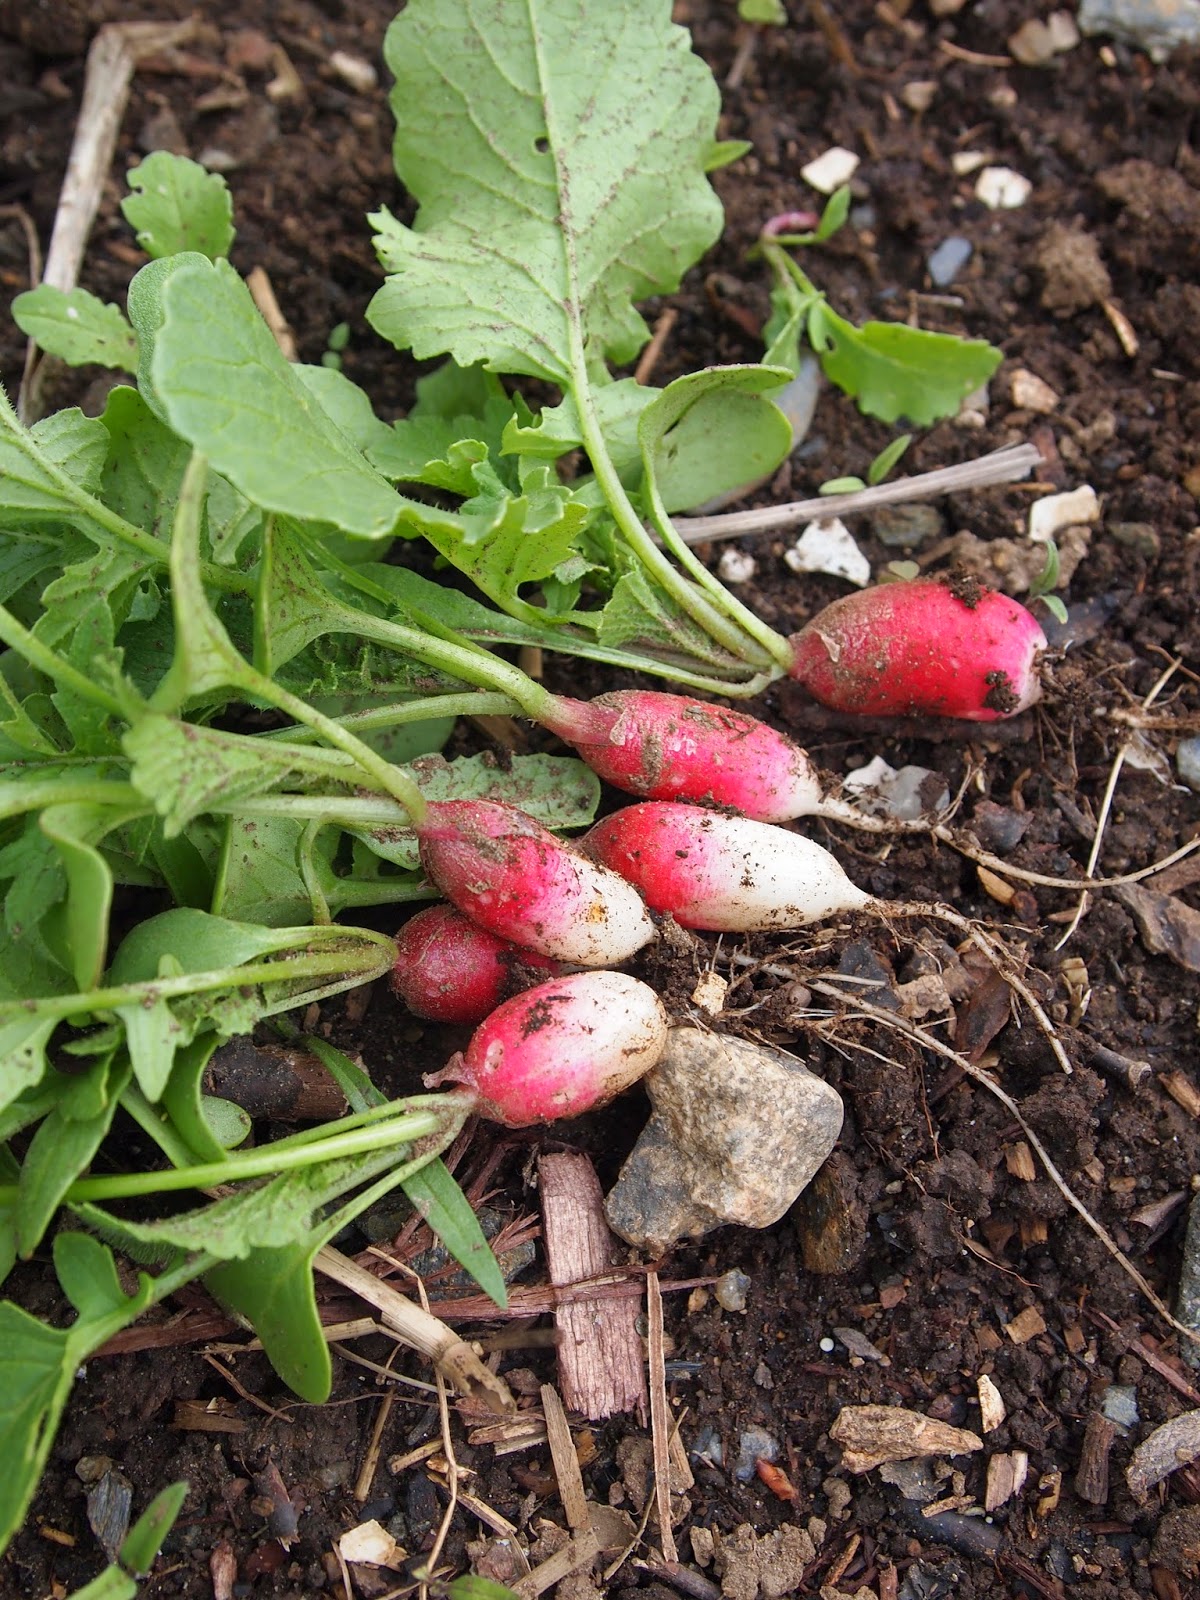 Radishes are one of my all time favorite things to grow. They grow so quickly and the flavor is bright.
Green (wet) garlic, finely chopped
Arrange decoratively over the filling. Serve immediately or refrigerate for up to a day. For added flavor and zip, serve with reduced balsamic vinegar.
May 22, 2014
FREEGRACE FRIDAYS! Tangy Rhubarb Tart

We're in full spring swing here at Freegrace.
 The rhubarb put to some good use: filling my pie hole!
The bees are buzzing. The veggie plots are sprouting. The hop vines are climbing. The currants and gooseberries are getting their berries on. The lilacs are smelling up the joint with their otherworldly perfume.
 Fuzzy little pollinator doing her job.
 Hop vine, shimmying her way up a hemp rope.
 Black currants transforming from tiny clustered blooms to berries.
 The lilac trees cover the barn every spring with lush perfume. No one's complaining.And the rhubarb is READY!
 Her Majesty, the rhubarb.
I'm a wee bit bored of the standard rustic rhubarb recipes; it's either the crumble pie or the lumpy crumble cake. So this year as I was hacking away at the leggy plant, I promised my ever faithful and leafy friend that I would honor her tart goodness in a pastry more elegant than the norm.

I looked to the glorious flavor combination of Pierre Hermé's Celeste pastry, with its lip puckering combination of tart smothered in tart and barely cut with a smidge of luscious sweetness: rhubarb, passion fruit and strawberries. The beauty of this treat is that you can make the fillings ahead of time. I'd even suggest you double the rhubarb/strawberry compote to slather on waffles or pancakes over the weekend.
You'll thank me later.
TANGY RHUBARB TART
INGREDIENTS
For the tart shell dough
6 ounces unsalted butter, frozen
1 cup all purpose flour
1/2 cup cornstarch
1/4 cup sugar
1 egg yolk
2 tablespoons sweetened condensed milk
1/2 teaspoon salt
For the rhubarb/strawberry compote
2 cups fresh rhubarb, cut into 1/2 inch dice
8 ounces fresh strawberries, hulled and diced
1/4 cup sugar
1 tablespoon honey
zest 1 lemon
juice 1/2 a lemon
1 teaspoon vanilla bean paste
pinch salt
For the passionfruit custard
1/2 cup heavy cream
1/2 cup passionfruit puree (can substitute with 1/2 cup Goya passionfruit juice. If you do this substitution, eliminate the 2 tablespoons honey)
1/4 cup sugar
2 tablespoons honey
pinch salt
3 large egg yolks
1 1/2 tablespoons cornstarch
1 tablespoon butter
For the meringue
3 egg whites
3/4 cup sugar
pinch salt
PROCEDURE
For the tart dough
Preheat the oven to 350º.
Add the flour, cornstarch, sugar and salt to a large mixing bowl. Whisk together. Using a box grater, grate the butter on top of the flour mixture and toss the butter and flour together so that the butter is evenly distributed among the flour.
In a small bowl, combine the yolk and sweetened condensed milk and whisk to combine. Add to the flour mixture and gently mix with your fingers to evenly distribute the ingredients. Gently knead the dough until it just holds together. Press into a disk and wrap in plastic wrap. Refrigerate for 20 minutes.
Spray a 12" tart pan with a removable bottom with non-stick cooking spray.
Lightly flour your work space with flour and roll out the dough into a rough 13" circle. Transfer the dough to the tart pan and gently press into the bottom and sides of the pan and trim any excess dough. Dock the dough (prick the bottom with a fork a few times) and freeze for 20 minutes.

Line the tart pan with parchment and fill with pie weights or dry beans. Bake for 15 minutes. Remove the parchment and pie weights and continue baking until fully baked through, about 10 to 15 minutes more. Set aside to cool completely.
For the compote

In a large saucepan, combine the rhubarb, sugar, zest, lemon juice, vanilla and salt. Stir over medium heat until the sugar has melted and the mixture comes to a simmer. Cover and allow to simmer for 5 minutes more or until the rhubarb is very soft.

Add the strawberries and stir to combine. Cover again for 2 minutes to soften the berries and to thicken the mixture. Transfer the compote to a bowl and cover with plastic wrap. Refrigerate until cool, about 1/2 hour.
For the passionfruit custard
Combine all the ingredients in a large saucepan and whisk to combine. Continue whisking over medium/low heat until the mixture thickens to the consistency of ketchup.

Take from the heat and add the butter. Whisk until the butter is completely melted and incorporated into the mixture. Cover with plastic wrap so that it touches any exposed custard but leave on the counter as you'll be immediately assembling the tart.
To assemble
Spoon the rhubarb/strawberry compote into the prepared tart pan and spread in an even layer with a small offset spatula. Immediately pour the warm passionfruit custard over the compote and spread evenly over the compote with a small offset spatula. Immediately place a piece of plastic wrap over the pie, making sure the plastic wrap touches the custard directly so that it doesn't form a skin. Refrigerate until cool and set, about 2 hours to overnight.
For the meringue

Combine the egg whites, sugar and salt in the bowl of a stand mixer. Place the bowl over a saucepan with simmering water. Whisk the mixture constantly until the sugar is completely melted and the mixture is hot to the touch. The mixture must reach160ºF to ensure that all bacteria is safely eradicated.
Transfer the bowl to the stand mixer fitted with the whisk attachment and whisk on high until the meringue reaches stiff peaks and the bowl is cool to the touch.

Transfer the meringue to a piping bag fitted with a decorative tip (I used a St. Honoré tip), remove the plastic wrap and pipe the meringue decoratively over the top of the pie. Serve immediately or refrigerate up to 2 days.
Gesine Bullock-Prado's Blog

- Gesine Bullock-Prado's profile
- 69 followers
Gesine Bullock-Prado isn't a Goodreads Author
(yet),
but they
do have a blog,
so here are some recent posts imported from
their feed.

