
Gesine Bullock-Prado's Blog, page 11
May 10, 2014
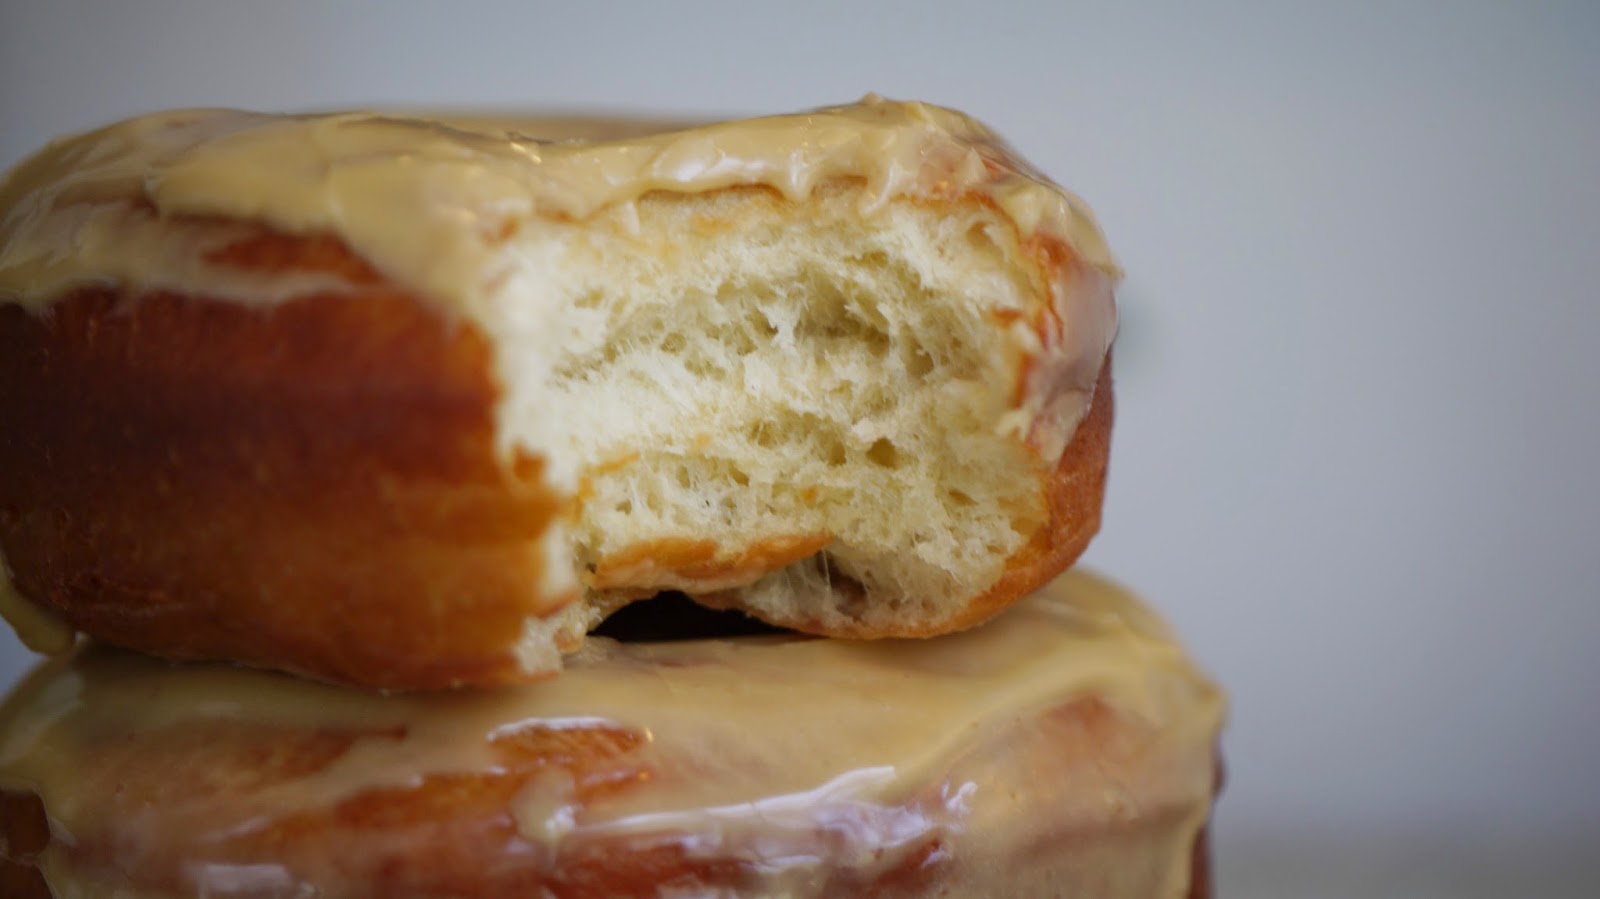
Happy Mother's Day: Maple Donuts
Happy Mother's Day, sweet people!

You are loved, each and every one of you.

My super special maple Mother's Day love goes out to Lisa Bonchek Adams, for whom I created these treats. She loves maple and we all love her.
MOTHER'S DAY MAPLE DONUTS for LISA
Makes a dozen donuts
INGREDIENTS
For the dough
5 cups all-purpose flour (I use King Arthur Flour)14 g or 2 packets instant yeast (I use Red Star's Platinum Yeast)1 1/2 cups whole milk, room temperature1/2 cup maple syrup (B grade is perfect)2 large eggs, room temperature1 teaspoon vanilla bean paste (you can substitute vanilla extract)1 teaspoon salt1/4 cup butter, room temperature
1/2 cup all purpose flour for kneading
4 cups canola oil for frying
For the glaze
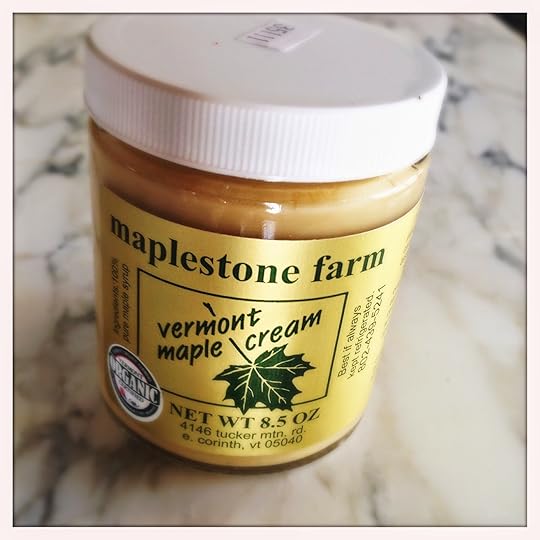
1/2 cup maple cream
PROCEDURE
In the bowl of a stand mixer fitted with the paddle attachment, add the milk, maple syrup, egg and vanilla bean paste. Mix together until well combined and the eggs are completely broken apart.
In a large mixing bowl, stir together the flour, instant yeast and salt for 30 seconds.
With the mixer running on medium/low speed, add the flour mixture to the milk mixture and mix until just combined. Add the butter, a small piece at a time, and continue mixing until all the ingredients are just incorporated. The mixture will look chunky and awful. That's perfectly fine.
Sprinkle the remaining 1/2 cup flour onto your work surface. Transfer the dough to the work surface and knead the dough by hand until smooth, about 10 to 15 minutes. The dough may feel sticky at first but as you knead, the dough will become more and more elastic and less sticky. You can slowly incorporate the flour on your work surface until the dough still feels soft but doesn't stick. Only incorporate enough flour to get to this state and no more.
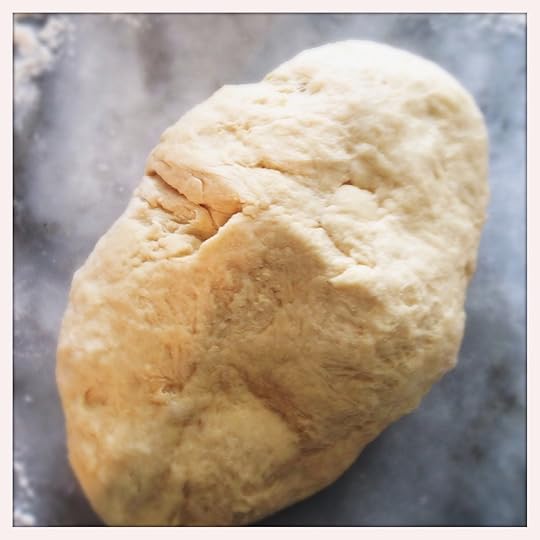 After a few minutes of kneading, the dough will still be knobby. Continue kneading.
 Almost there. A few minutes more.
Once the dough is smooth, spray a large bowl with non-stick spray and transfer the dough ball to the bowl. Spray the dough ball with non-stick spray and turn it over a few times to make sure it's completely coated. Cover with plastic wrap. Allow the dough to rest at room temperature until doubled, about an hour.
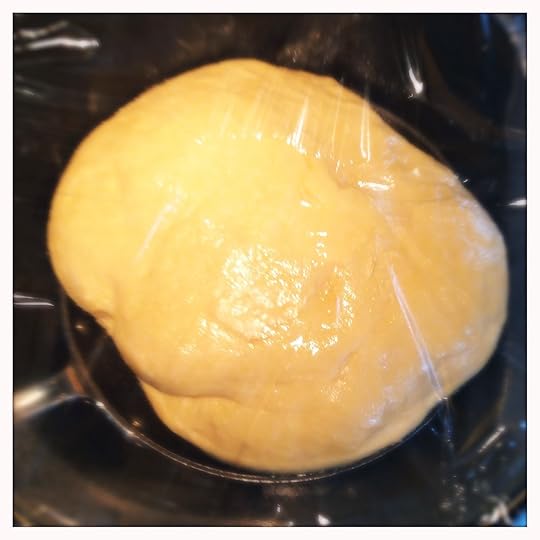 Smooth and rising.
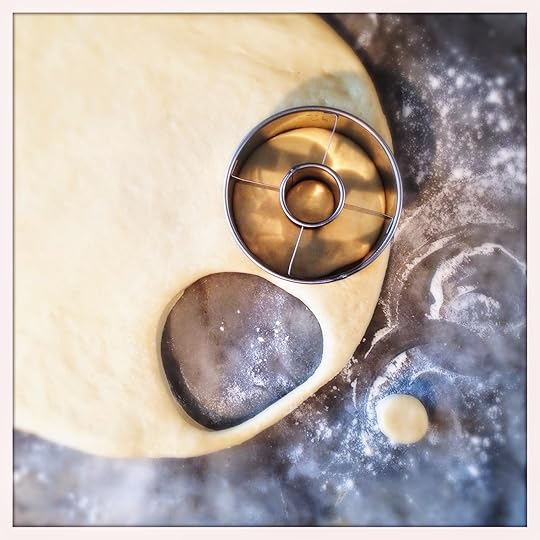
Lightly dust your work surface with flour and roll the dough into a rough rectangle, a little under 1/2" thick. Using a floured donut cutter. Cut the dough and place each round and "hole" onto a parchment lined sheet pan, placing the donuts 1/2" apart.
Cover the donuts with plastic wrap and allow to rest at room temperature until doubled in size, about 45 minutes.
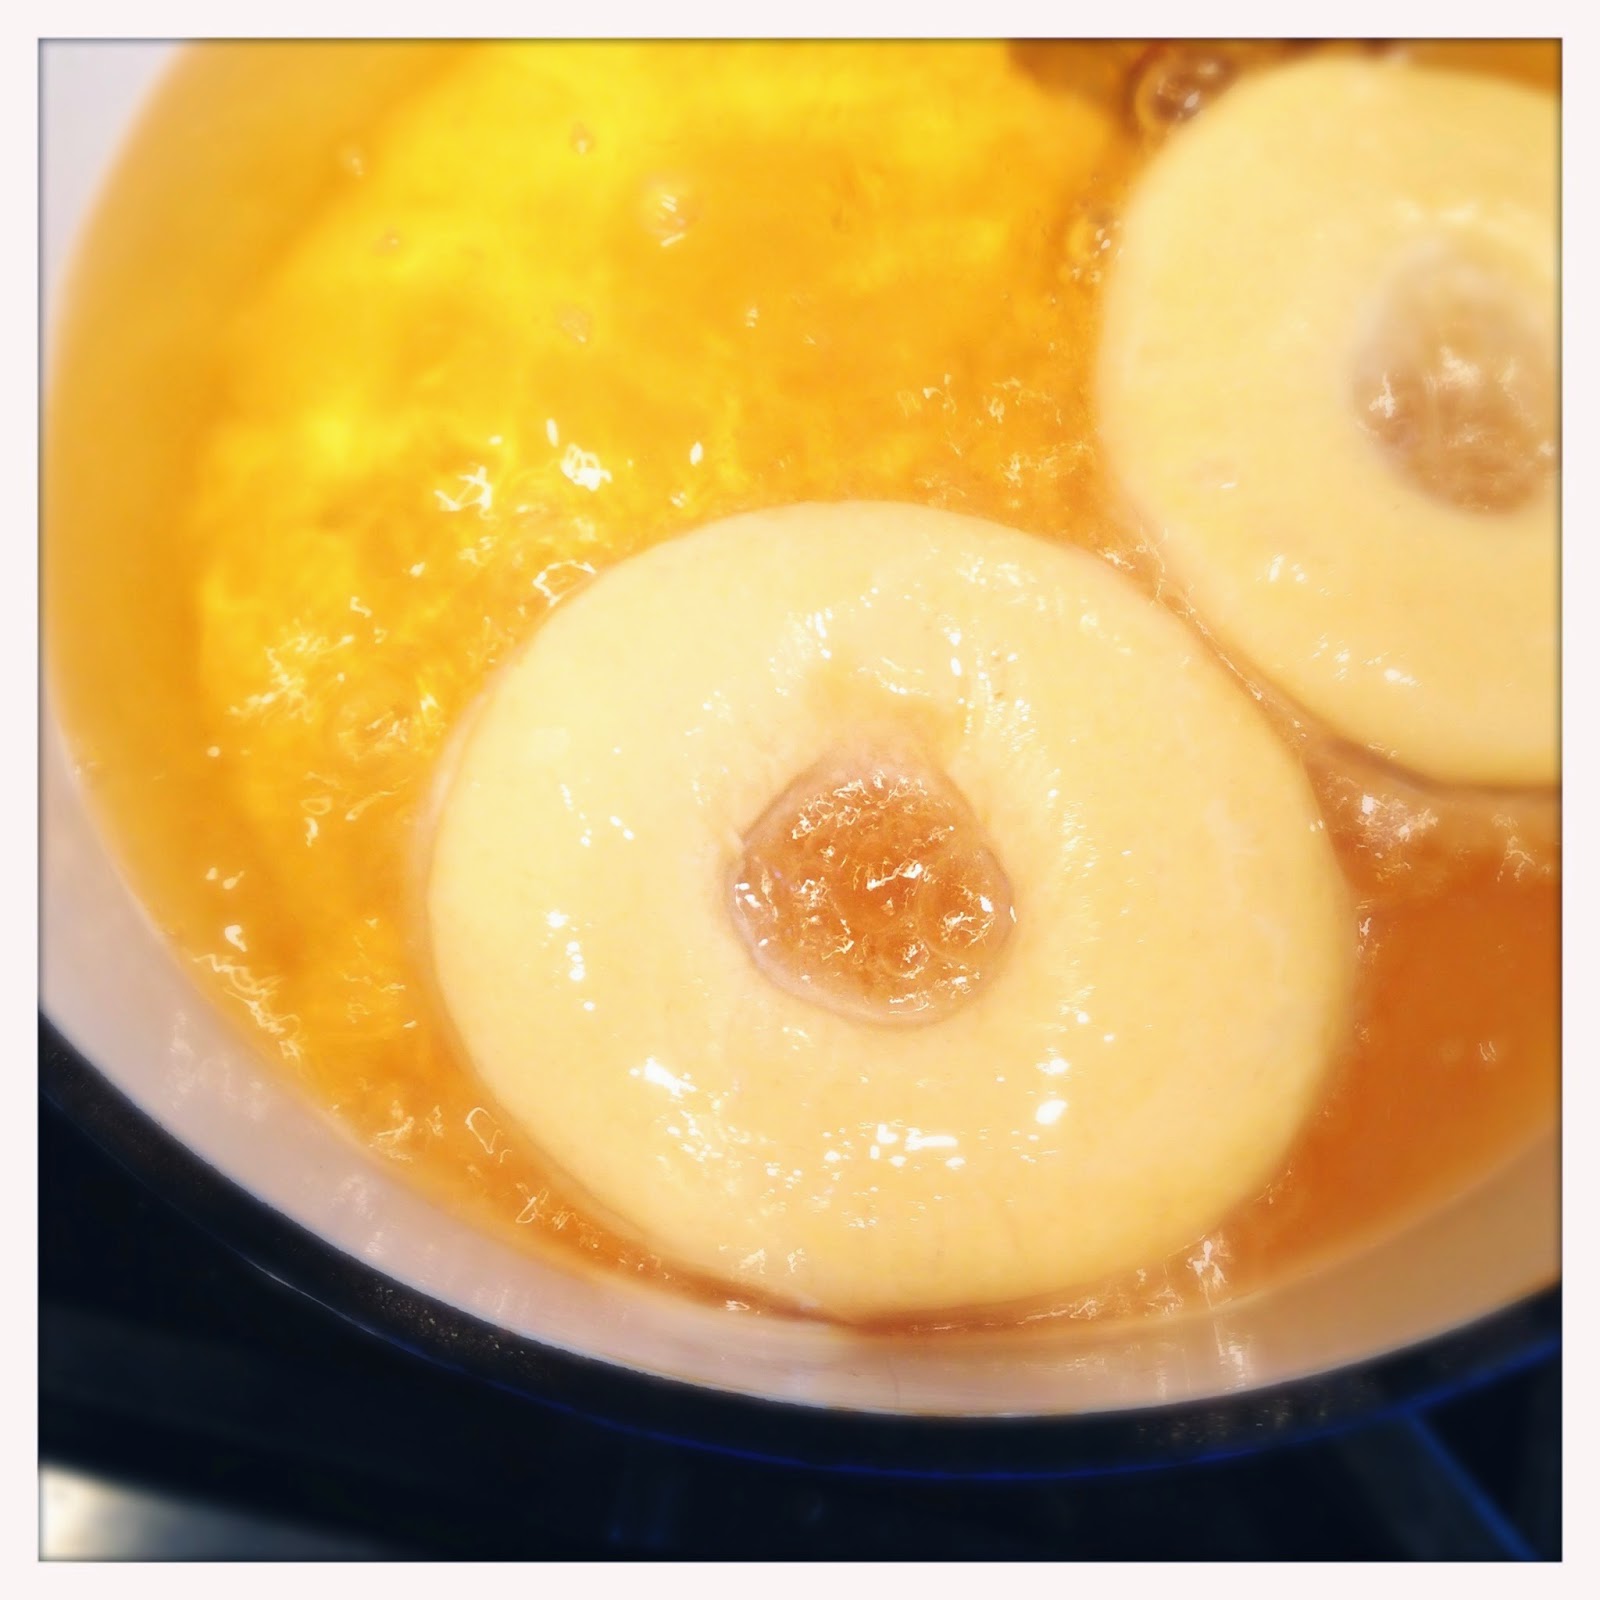
Just as the dough is reaching its full proof, pour the oil in a large pot and attach a thermometer. Bring the oil to 350ºF.
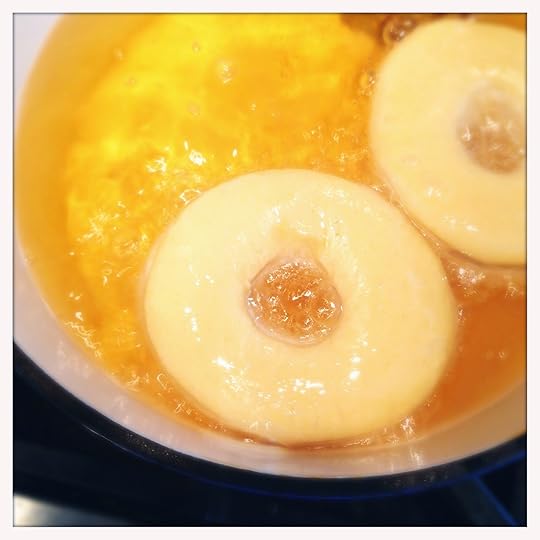
Gently transfer the dough with a large spatula to the hot oil and fry on each side until deeply golden brown, approximately 2-3 minutes on the first side and 1-2 minutes on the second side. The donut holes will only take a few minutes.
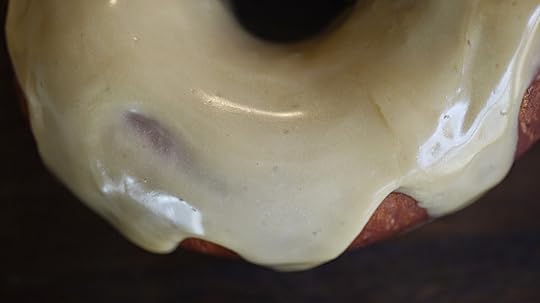
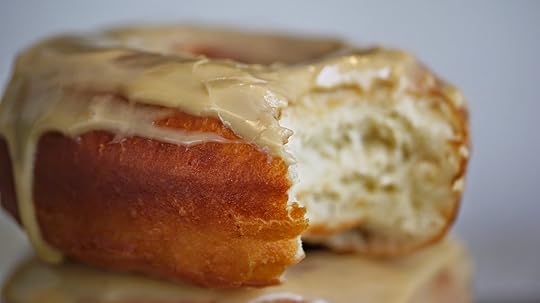
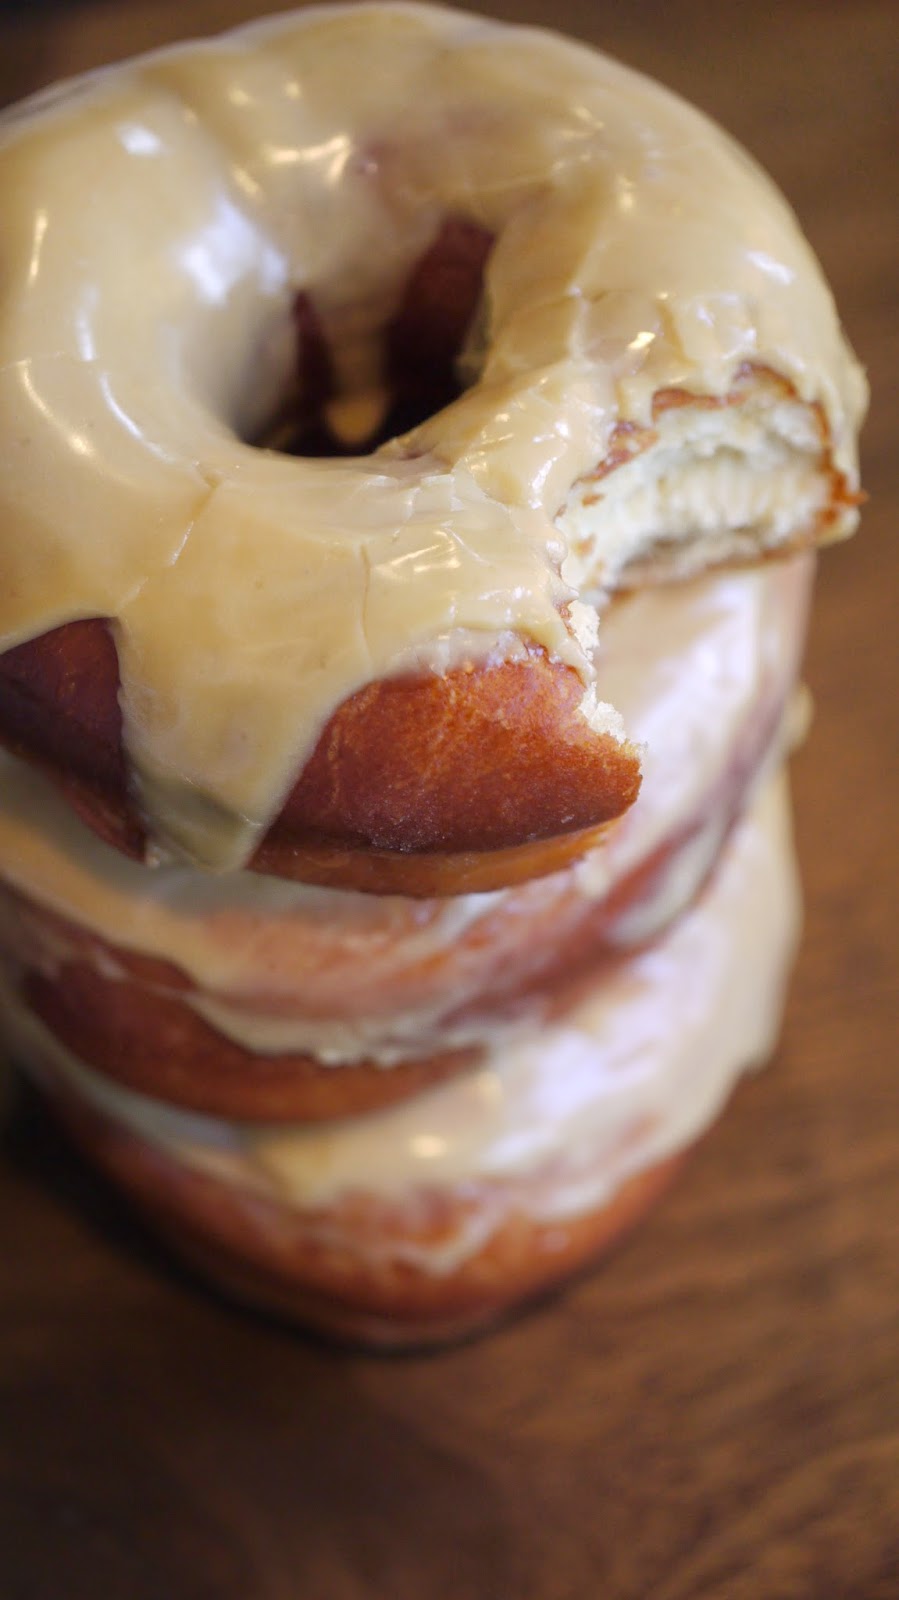
Transfer the donuts to a parchment lined sheet pan and while still warm, drizzle 1 tablespoon of maple cream over each donut.
You are loved, each and every one of you.
My super special maple Mother's Day love goes out to Lisa Bonchek Adams, for whom I created these treats. She loves maple and we all love her.
MOTHER'S DAY MAPLE DONUTS for LISA
Makes a dozen donuts
INGREDIENTS
For the dough
5 cups all-purpose flour (I use King Arthur Flour)14 g or 2 packets instant yeast (I use Red Star's Platinum Yeast)1 1/2 cups whole milk, room temperature1/2 cup maple syrup (B grade is perfect)2 large eggs, room temperature1 teaspoon vanilla bean paste (you can substitute vanilla extract)1 teaspoon salt1/4 cup butter, room temperature
1/2 cup all purpose flour for kneading
4 cups canola oil for frying
For the glaze
1/2 cup maple cream

PROCEDURE
In the bowl of a stand mixer fitted with the paddle attachment, add the milk, maple syrup, egg and vanilla bean paste. Mix together until well combined and the eggs are completely broken apart.
In a large mixing bowl, stir together the flour, instant yeast and salt for 30 seconds.
With the mixer running on medium/low speed, add the flour mixture to the milk mixture and mix until just combined. Add the butter, a small piece at a time, and continue mixing until all the ingredients are just incorporated. The mixture will look chunky and awful. That's perfectly fine.
Sprinkle the remaining 1/2 cup flour onto your work surface. Transfer the dough to the work surface and knead the dough by hand until smooth, about 10 to 15 minutes. The dough may feel sticky at first but as you knead, the dough will become more and more elastic and less sticky. You can slowly incorporate the flour on your work surface until the dough still feels soft but doesn't stick. Only incorporate enough flour to get to this state and no more.
 After a few minutes of kneading, the dough will still be knobby. Continue kneading.
 Almost there. A few minutes more.
Once the dough is smooth, spray a large bowl with non-stick spray and transfer the dough ball to the bowl. Spray the dough ball with non-stick spray and turn it over a few times to make sure it's completely coated. Cover with plastic wrap. Allow the dough to rest at room temperature until doubled, about an hour.
 Smooth and rising.
Lightly dust your work surface with flour and roll the dough into a rough rectangle, a little under 1/2" thick. Using a floured donut cutter. Cut the dough and place each round and "hole" onto a parchment lined sheet pan, placing the donuts 1/2" apart.

Cover the donuts with plastic wrap and allow to rest at room temperature until doubled in size, about 45 minutes.
Just as the dough is reaching its full proof, pour the oil in a large pot and attach a thermometer. Bring the oil to 350ºF.
Gently transfer the dough with a large spatula to the hot oil and fry on each side until deeply golden brown, approximately 2-3 minutes on the first side and 1-2 minutes on the second side. The donut holes will only take a few minutes.

Transfer the donuts to a parchment lined sheet pan and while still warm, drizzle 1 tablespoon of maple cream over each donut.


May 9, 2014
FREEGRACE FRIDAY! A BEEKEEPING JOURNAL: The Buzzers are here.

I drove 2 hours from the Northeast Kingdom to our little farm in the Upper Valley with thousands of bees riding along in the bed of the truck. I'd finished teaching a wonderful class at King Arthur Flour just before I left on my journey and as I bade my lovely students farewell, they wished me luck on my adventure. They all looked terribly worried.
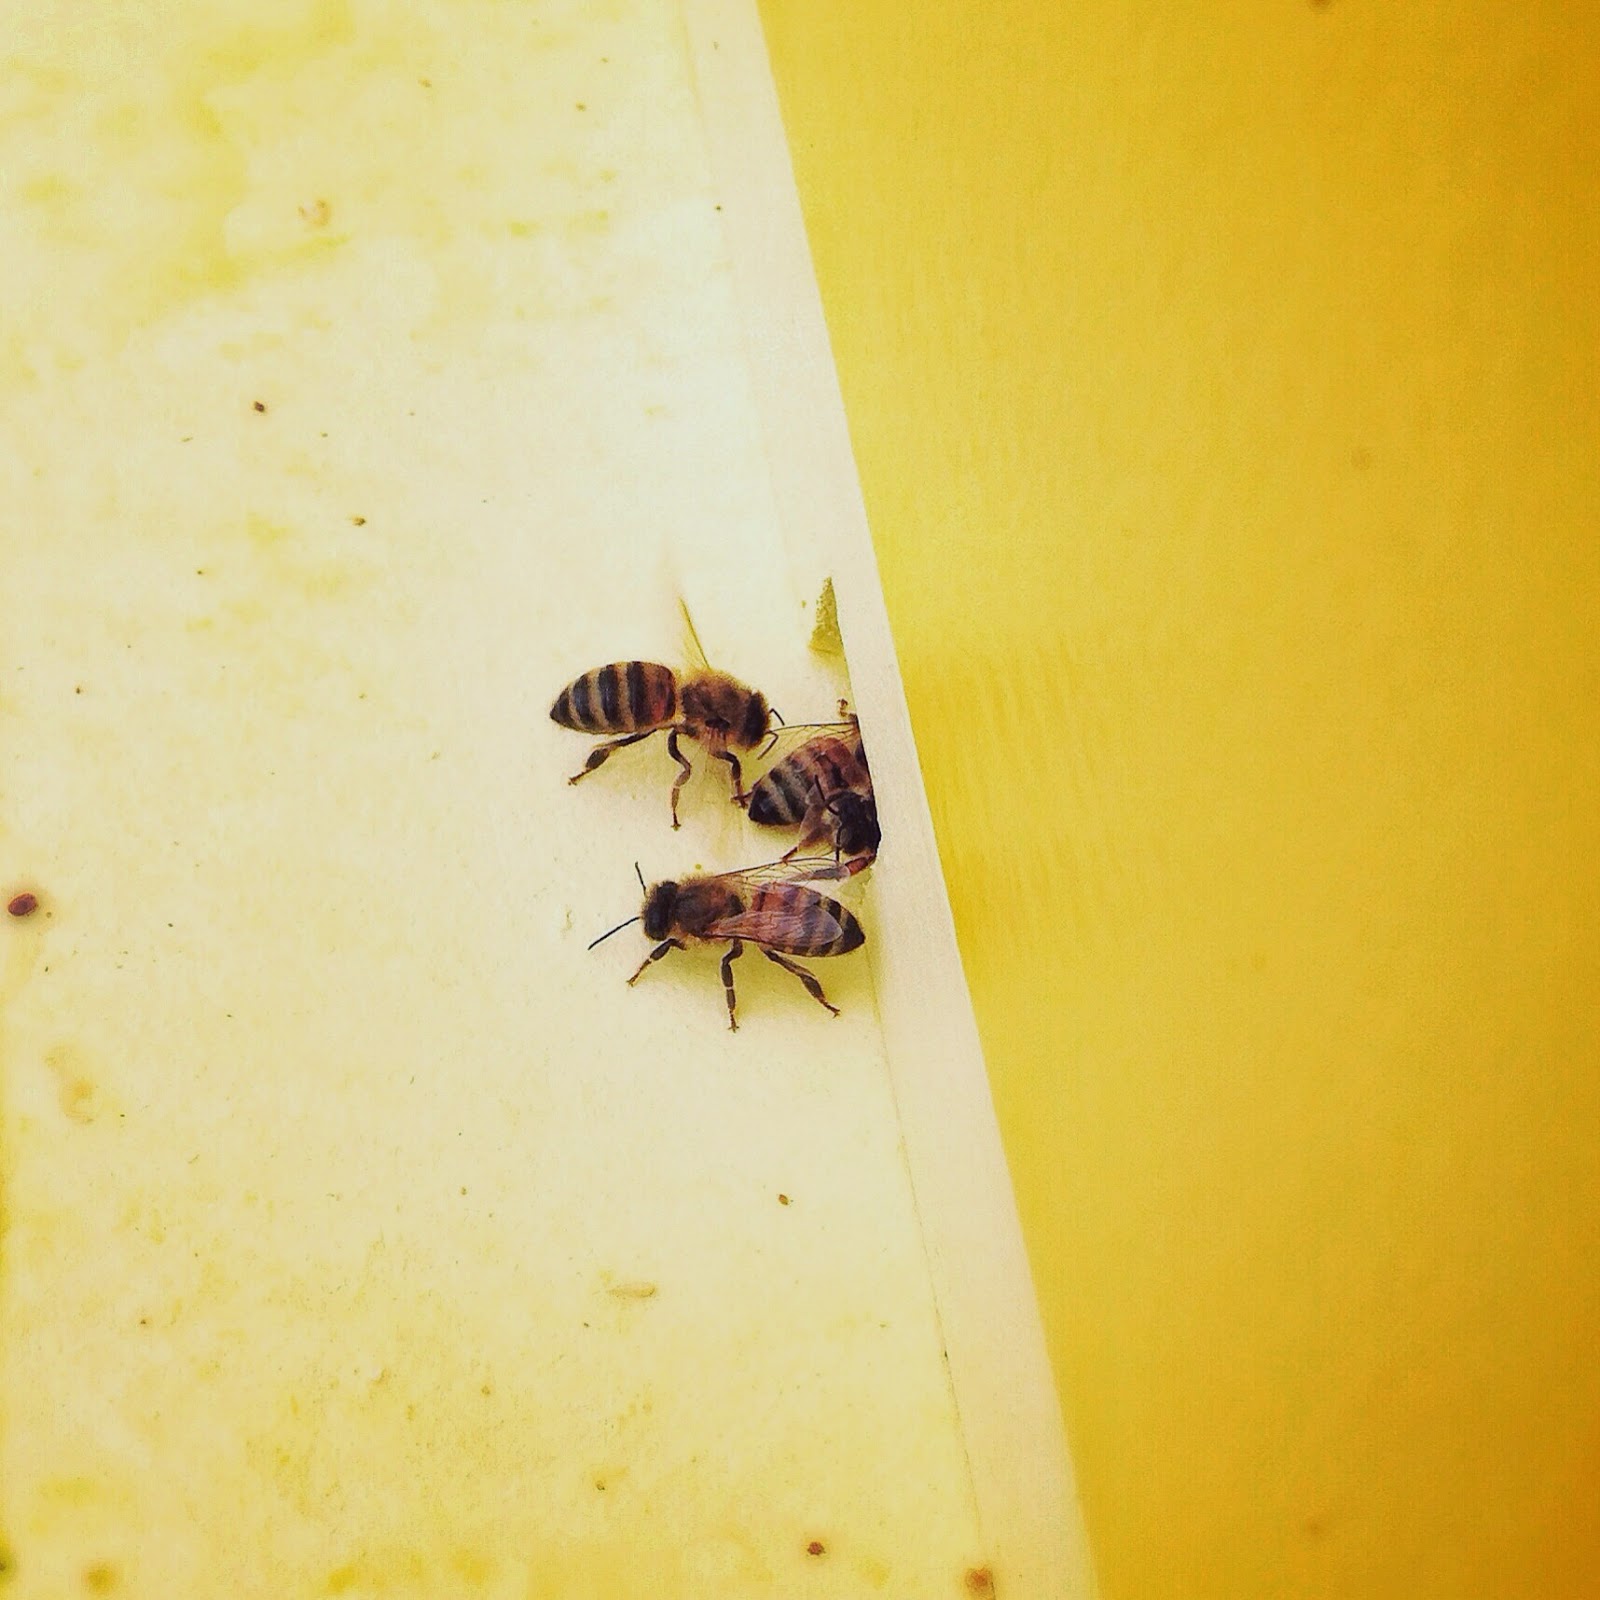
 You can see the nuc box to the right. You leave the box overnight for any stragglers who have a hard time letting go of their cardboard home. On the hive proper, the lighter colored and squat box on top of the dark yellow "deep" is the feeder and contains simple syrup to feed the bees until there's enough nectar flowing outdoors so that they can feed themselves. They have a lot of work to do and they go through 8 cups of simple syrup a day. As the bees continue to fill out the frames in that large dark yellow box with larvae, honey, nectar, etc, I'll add another deep box on top so that they can expand their growing business. Finally, I'll add smaller boxes called "honey supers" that will be for...you guessed it...honey.
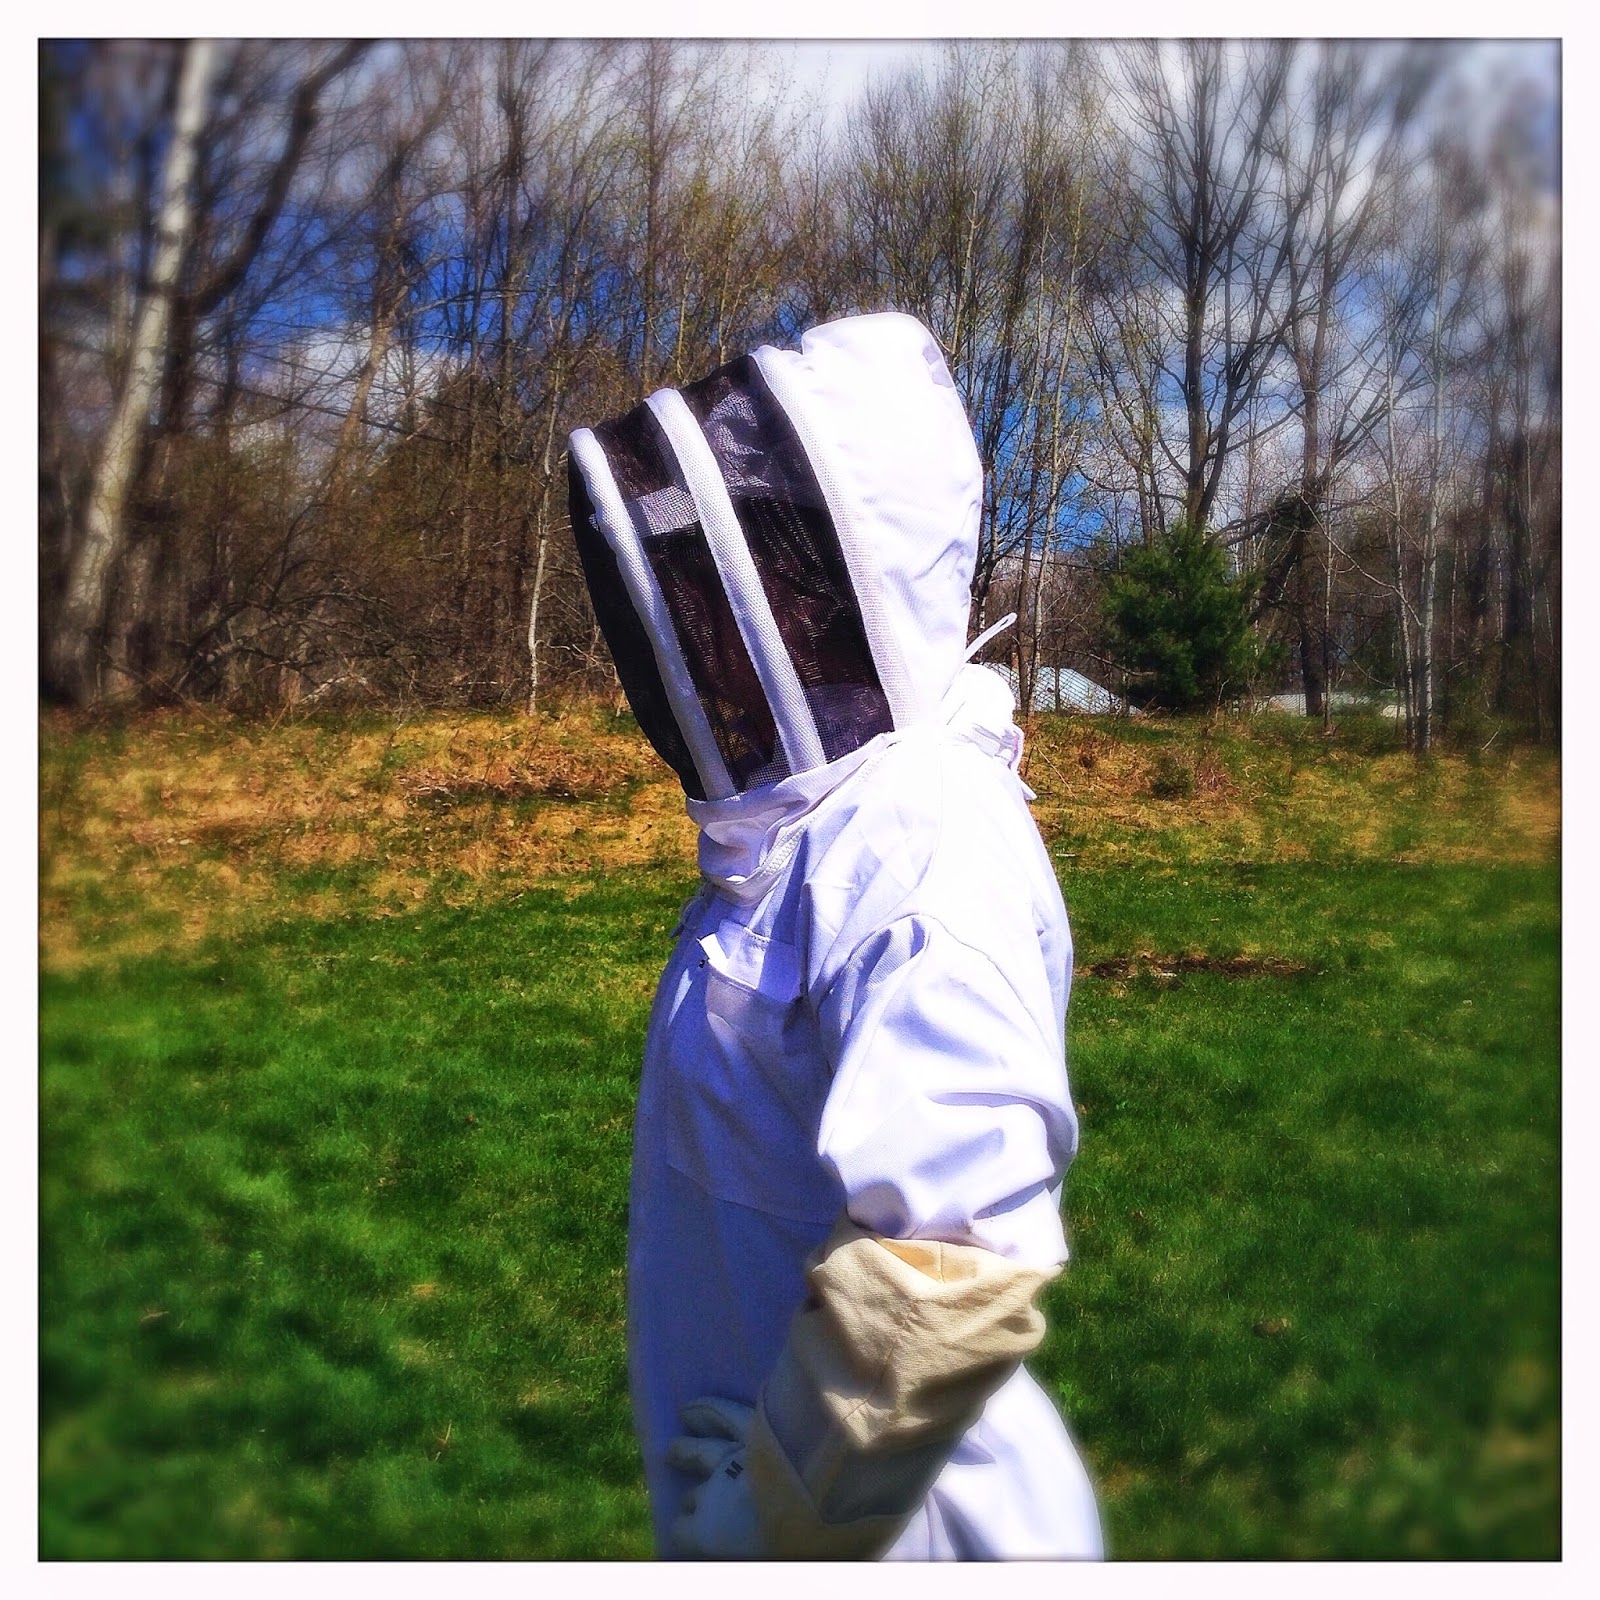 I'm bringing sexy back.The little buzzers were sealed inside a nuc (short for nucleus) box, they couldn't get out. The box had been their home for months, a working hive with a queen already laying the workers already working. To look at it, it appears to be a simple lidded cardboard box with a hole on one end, until you squint and see hundreds of winged critters flying in and out of that hole. Inside the box, 5 "frames" of drawn comb that house larva, nectar, pollen and honey are nestled one after the other. Just before the kindly gents at Northwoods Apiary put the box in my truck, they sealed the hole shut with some mesh, so the little buzzers could breath, and duct tape, because it's duct tape. Duct tape fixes EVERYTHING, even bee holes.
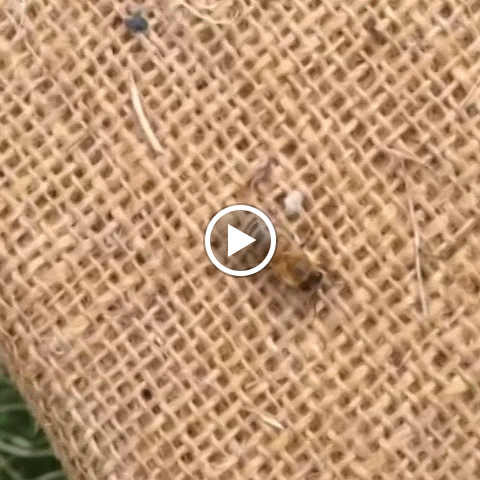
This isn't the only way to buy bees. You can also buy bees in a "package." 3 pounds of bees are packaged into a screened box and sealed. The queen gets her own little condo, a sealed tiny box of her own, and that's attached to the package. The queen and the workers haven't been working together. In fact, they'll first get to know each other on the trip to their new home via USPS. That's right, packages are sent via US mail. Read that again. US MAIL! As this relationship between queen and hive is brand spanking new, when you install the bees into the hive, they have to get down to the work of accepting their new queen, drawing comb, etc. So with a nuc, you get a head start.
 Early morning staff meeting. Bees communicate constantly, about the direction of the best food sources, about whether to swarm (more on that another time), about EVERYTHING. Different bees have different opinions. One may think that a certain orchard is the place to be and another found an mint field in bloom that's totes aweseome-sauce. The bees gather the information and vote on it. I'm not kidding.
 Safely home, I carried the nuc to our corn crib. My bee mentor, Jeffrey Hamelman (those bakers out there will recognize the name. Jeffrey is the head of the King Arthur Flour bakery and one of the very few certified master bakers in the U.S.), offered to help me install my bees on Sunday morning. In the meantime, they needed shelter so I carried the 25 pound box tight against my chest across the property, the low buzzing vibrating through my bones. I imagined that Buddhist monks must feel a similar sensation when they throat sing, a warm soul vibration, just without the anaphylactic shock and honey. I fell in love on that short walk.
 You'll notice that the field bees coming in don't have pollen pantaloons yet, those wonderful sacks of pollen they attach to their legs. It's too early in the season for much pollen activity (in Vermont) but I'd say we'll see some serious yellow slacks on those puppies in a few weeks.
When Jeffrey came in the morning, it took us a while to assemble everything we needed. Smoker. Deep body (The square box), the feeder, the simple syrup to feed, my hive tool. And of course, the bees. I gently pried each frame apart (they get sticky from propolis build up but nothing too alarming) and I gently lifted the frame as Jeffrey had taught me, keeping it over the body of the hive in case the queen decided to make a run for it (unlikely but you can never bee too careful). He helped me identify capped brood, larvae, nectar, pollen, capped honey. I saw a few drones, male bees who don't work in the hive but rather exist to fertilize a queen if they're lucky enough to find a lonely lass flying about (they don't mate with their own queen, who's also their mother, thank goodness). I saw the queen on the 3rd frame, moving slowly and deliberately, going about laying her quota of 2000 eggs A DAY. And then there were the thousands of worker bees, the ladies, taking care of the queen, tending to all the chores from going into the field to collect pollen and nectar to building wax for the combs (they excrete the wax through their abdomens). Busy bee, indeed.
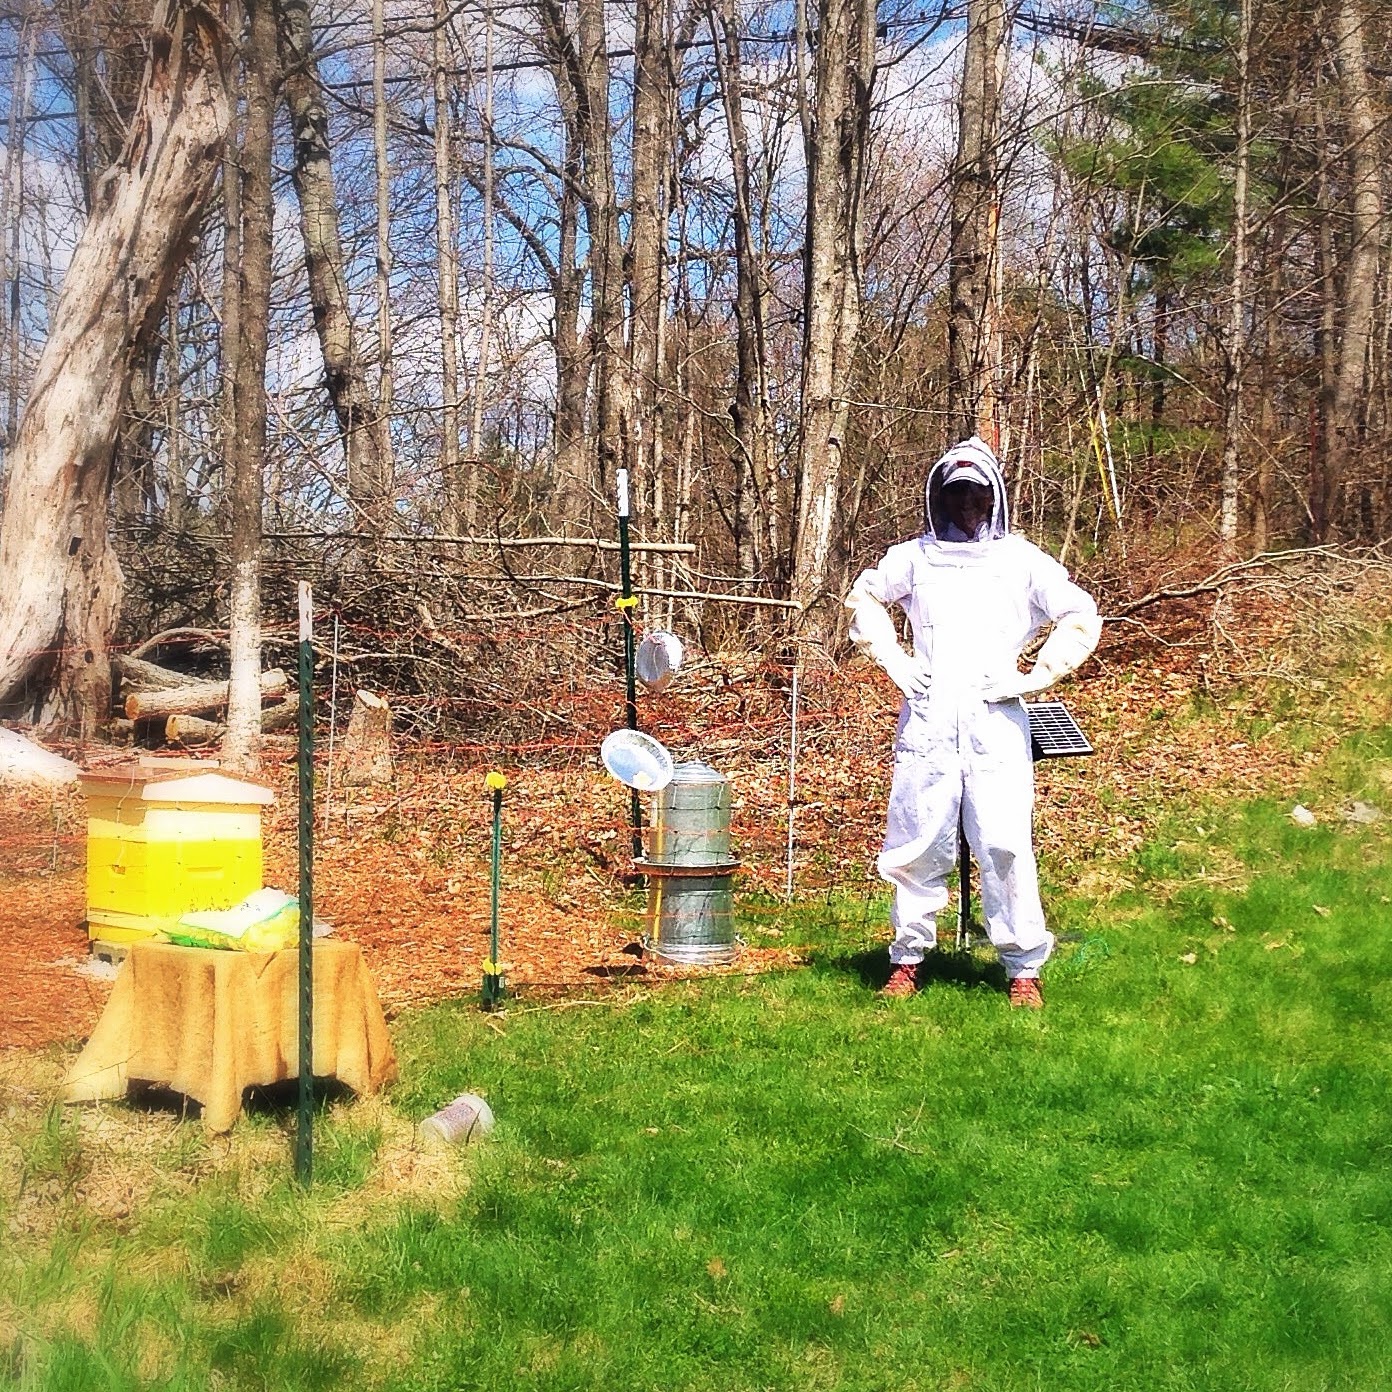 That's a bear fence around my hive. Not attractive but essential. And yes, those are pie plates smeared with peanut butter. A bear isn't going to feel a damn thing barreling through that electrified fence, with all that fur. So if they smell the honey and brood and amble up to your bee garden, any bear will take one look at some yummy peanut butter and say, "Don't mind if I do." And then they get a little zap on the nose, where they'll actually feel it.
 I installed the last frame, put a feeder on top and closed up my hive. I was brimming with the warm and fuzzies. Or is it the warm and buzzies?
There's so much to learn and more to tell. Like how much honey will I get from this hive? Likely none this year as they are building up their stores and will probably need it all to overwinter. However, next year, I might get 20 pounds to 80 pounds, depending on how the nectar is flowing, etc. Do I always wear a suit? No. I only wear it when I actually disturb the hive. Do you wear that suit out in public? HELL YES!
If you have questions that you'd like answered, join my Facebook baker's group HERE and ask away. I'll answer them on the forum and will continue to update on the blog. As a new beekeeper, I may not know the answer. That's why people like Jeffrey and the insanely generous humans at Vermont Beekeepers Association are such a gift to new-bees like me.
Happy Mother's Day!
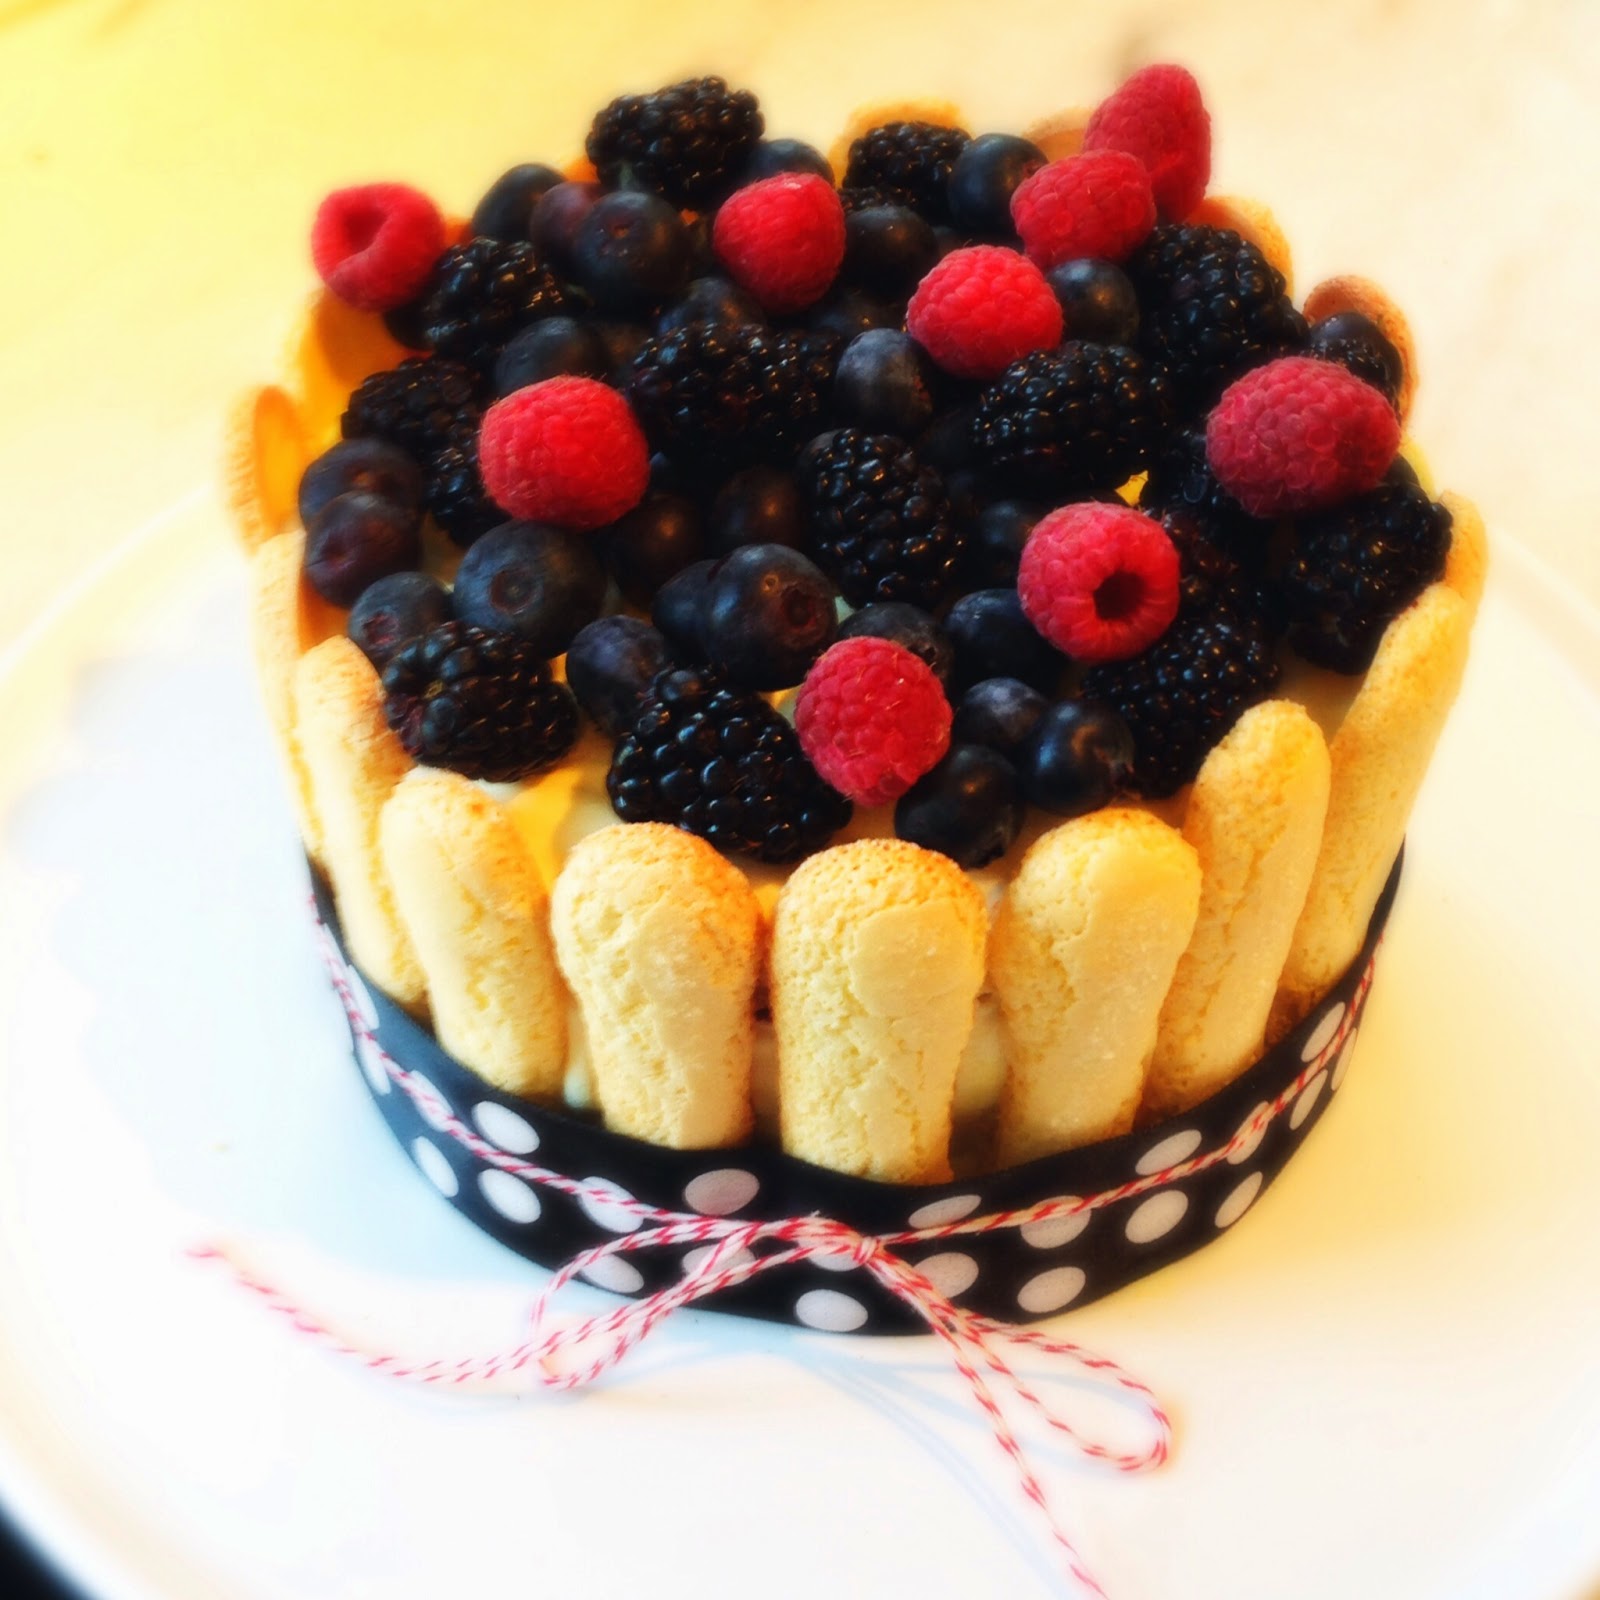 In case you were curious, here's the Berry Charlotte that I taught my class to make.
May 1, 2014
King Arthur Flour Demo, May 2nd
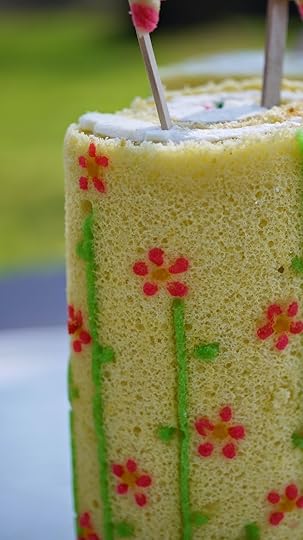
Mother's Day is coming and so is my King Arthur Mother's Day cake class! While Saturday's hands-on is full, there is still time to sign up for my cake demo Friday night, May 2nd.
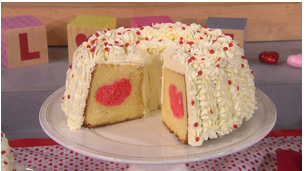
Here's a taste of what I'll be doing!

Click HERE to go to King Arthur's site to sign up.
Here's a taste of what I'll be doing!

Click HERE to go to King Arthur's site to sign up.
April 28, 2014
Not Your Typical Paris-Brest

There was once a bicycle race in France that ran from Paris to the town of Brest and then back to Paris. The cycling tourney was last held in 1951. However, the pastry that was named in honor of the grueling trek, the Paris-Brest, still lives on.
Good choice.
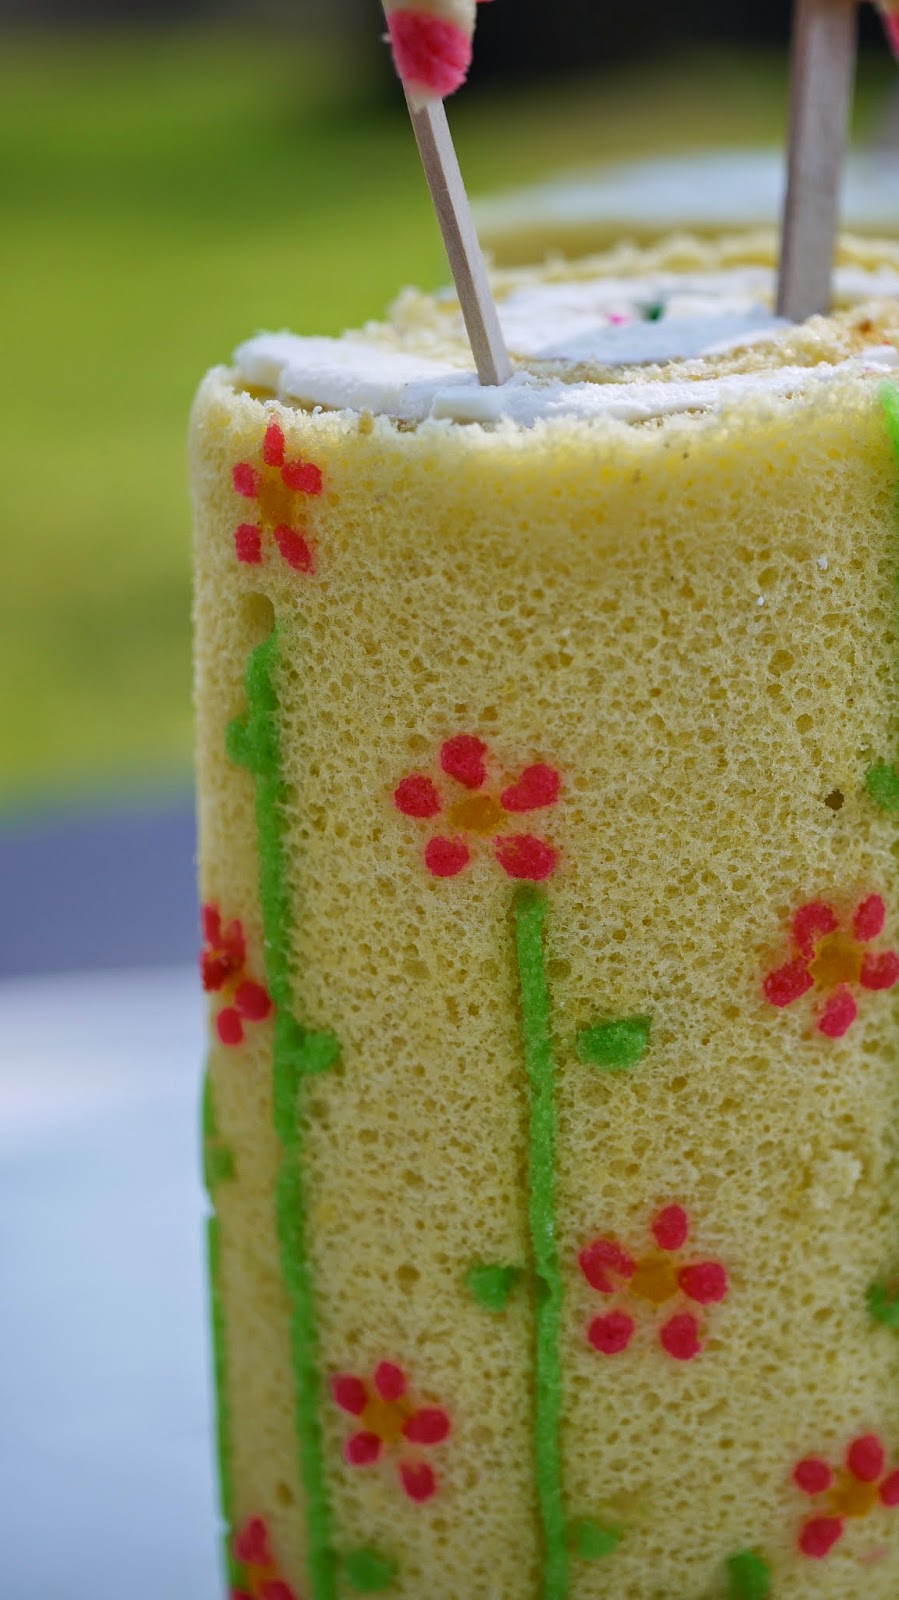
 The backbone of the pastry of comprised of piped choux paste (think cream puff and eclair) in the shape of a wheel. There are a few variations in piping. This is how I choose to present the sweetness.
The filling is a praline cream. The top is often sprinkled with sugared almonds.
But as I'm in Vermont, not France, I take liberties. Instead of praline cream, today I chose to use straight-up Nutella as my filling.

To top the precious pastry baubles, I cut out almond sable rounds and sprinkled those with Swedish sugar, creating a sweet chapeau for each little puff. And as I was left with enough sable dough, I made delicious rounds of pure, buttery and almond cookie goodness to bring to friends.

Of course you can just make individual puffs or you can make your "tire" even larger.

Not Your Typical Paris Brest

For the choux
1/2 cup whole milk1 cup water1 tablespoon maple syrup1/2 teaspoon salt1 teaspoon vanilla bean paste1 1/2 sticks butter1 1/2 cups all purpose flour6 eggs
In a large saucepan, combine the milk, water, maple syrup, salt, vanilla bean paste and the butter over medium heat, stirring until the butter melts and the liquid just begins to simmer. Add the flour, all at once, and stir with a wooden spoon until the mixture becomes a very thick paste and pulls away from the sides of the saucepan. Continue stirring for another minute.
Transfer the paste to the bowl of a stand mixer fitted with the paddle attachment. Mix on medium speed for a few minutes to dissipate some of the heat. Add the eggs, one at a time, beating well between each addition. The final mixture should be a smooth, shiny, easily piped paste.
Transfer the choux paste to a large pastry bag fitted with a large plain pastry tip. Line two sheet pans with parchment paper. Draw 4" circles, upon the parchment and flip the parchment. Make sure you can still see the circles through the parchment. Pipe the choux paste in small dollops, about an inch in size, along the inside perimeter of the circle. Place the piped choux in the freezer, uncovered.
For the almond sable
8 ounces unsalted butter3 ounces almond paste, broken into small pieces.1/2 cup granulated sugar1 large egg1 teaspoon vanilla bean paste1 teaspoon almond extract2 cups flour1 teaspoon salt
1/2 cup Swedish sugar1/2 cup whole milk
Preheat oven to 350º.
In the bowl of a stand mixer fitted with the paddle attachment, add the almond paste and sugar. Mix on medium speed until the mixture is smooth. Add the butter and continue mixing on high speed until light and fluffy.
In a small bowl, whisk together the egg, vanilla bean paste and almond extract. Scrape down the sides of the mixing bowl and add the egg mixture. Mix until combined. Add the flour and salt all at once and mix on low until the dough just comes together.
Transfer the dough to a large piece of plastic wrap and gently turn the dough over a few times to make sure that all of the flour is incorporated. Wrap the dough well and refrigerate, at least 20 minutes.
Roll out the dough 1/8" thick and using a small round cookie cutter, cut inch round circles from the sable dough.
Remove the piped choux from the freezer and brush the tops with milk. Place a round of sable on each round and brush the tops with milk and sprinkle with Swedish sugar.
Bake for 30 -40 minutes, turning the trays in the middle of the bake, or until the choux is puffed and deep golden brown. Allow to cool completely.
To finish
1 1/2 cups Nutella1/2 cup confectioner's sugar
Using a wooden skewer or chopstick, poke holes into each puff along the inside perimeter.
Fill a pastry fitted with a medium sized plain tip with Nutella. Gently place the tip inside the hole in the choux and fill with Nutella.
Dust the tops with confectioner's sugar.
April 26, 2014
Spring Is Berry Close. A Recipe for Key Lime and Berry Sponge Cake
Spring is likely a reality for you, with endless days of temperate weather and trees abloom. Here in Vermont, spring made a pit stop somewhere south of New England, got drunk, passed out and couldn't find his car in the morning to make the rest of the trip up north. Every few days, temperatures threaten to break 60º and we rejoice by baring our chalky limbs and then BAM, it's freezing again.

I'm making the best of it. When the going's good I race around the property, a gardner possessed. Pruning shears in one hand, a shovel in the other and a lunatic gleam in my peepers.

When winter weather creeps back over Freegrace, I shake my fist at the sky and yell "Damn you, spring, you're drunk again!" I then run into the house and I bake to appease my frozen little heart, layering cakes and cream puffs with bright berries. I'm a veritable pastry Smaug with all the bejeweled fruits I've been hoarding in my bakery.
Today it's raining. The temperature is steady at 38º. That means I'm making cake with spring berries, dammit.
 Even if spring is being stingy about sharing her heat, she can't take away the longer days. And longer days are good for the bees.
 With longer days, the hens lay in earnest.
 The frogs are out at night and singing their love songs. An apparent absence of spring can't begin to hinder the raging libido of amphibians.
 And the pond is now officially open again! The girls are swimming fools once again.
KEY LIME BERRY SPONGE CAKE
for the cake:
Ingredients
7 eggs, room temperature and separated1 1/4 cups sugar, divided1 1/4 cups cake flour1/2 teaspoon baking powder1/2 teaspoon salt1/2 teaspoon cream of tartar1/4 cup key lime juice, such as Manhattan1/4 cup canola oil1 teaspoon vanilla bean paste
procedure
Preheat oven to 350ºF. Spray three 9" cake pans with non-stick baker's spray. Line the bottom of the pans with a round of parchment. Set aside.
In a large bowl, combine the egg yolks, 1/2 cup sugar, key lime juice, and canola oil Whisk to combine.
In a small bowl, whisk together the flour and baking powder for 30 seconds to distribute the leavening. Sift the flour mixture over the egg yolk mixture and then stir the two together until smooth. Set aside.
In the bowl of a stand mixer fitted with the whisk attachment, combine the egg whites and salt. Whisk on high until the egg whites just start to get foamy. Sprinkle in the cream of tartar and whisk for 10 seconds. Slowly add the remaining 3/4 cups of sugar, continue whisking on high until stiff peaks form but the egg yolks aren't dry.
Transfer a 1/4 of the egg whites to the egg yolk mixture and whisk to combine and lighten.
Transfer the remaining egg whites to the egg yolk mixture and fold them in with a large rubber spatula until no white streaks remain.
Divide the batter between the three prepared pans and bake until the cake just springs back and a toothpick inserted in the middle of the cake comes out clean, about 20 - 25 minutes.
Allow the cakes to cool in the pan for 10 minutes and then use a paring knife, run the knife along the edge of the pan to release the cakes Turn the cakes out and remove the parchment round. Allow the cakes to cool completely.
For the filling
2 cups heavy whipping cream, cold8 ounces mascarpone cheese, cold1/2 cup confectioner's sugar1 teaspoon gelatin1/4 cup water
12 ounces mixed berries 12 ounces strawberries, medium to small in size1/4 cup sugarjuice 1 lemonzest 1 lemon
Hull all but 5 or 6 strawberries and cut in half. (Reserve the whole strawberries for the top of the cake). Place in a bowl and add the lemon juice, zest and sugar. Stir to coat and allow to macerate until the sugar is melted and the juices run, about 20 minutes. Set aside.
Place the water in a small microwave safe bowl. Sprinkle the gelatin over the water in an even layer and set aside for 5 minutes, until the gelatin looks like wet sand.
Place the bowl with the gelatin in the microwave and nuke at 10 second intervals, swirling the gelatin in between blasts, until the gelatin is completely melted. Set aside for 10 minutes (the gelatin should still be liquid but not hot before adding to the whipped cream)
In the bowl of a stand mixer fitted with the whisk attachment, combine the heavy whipping cream, mascarpone cheese and confectioner's sugar. Whisk until medium peaks form. Add a tablespoon of the cream to the gelatin and stir to combine, this tempers the gelatin so it won't seize when it hits the rest of the cream. Slowly pour in the gelatin mixture into the whipped cream with the mixer on high and continue whisking until stiff peaks form.
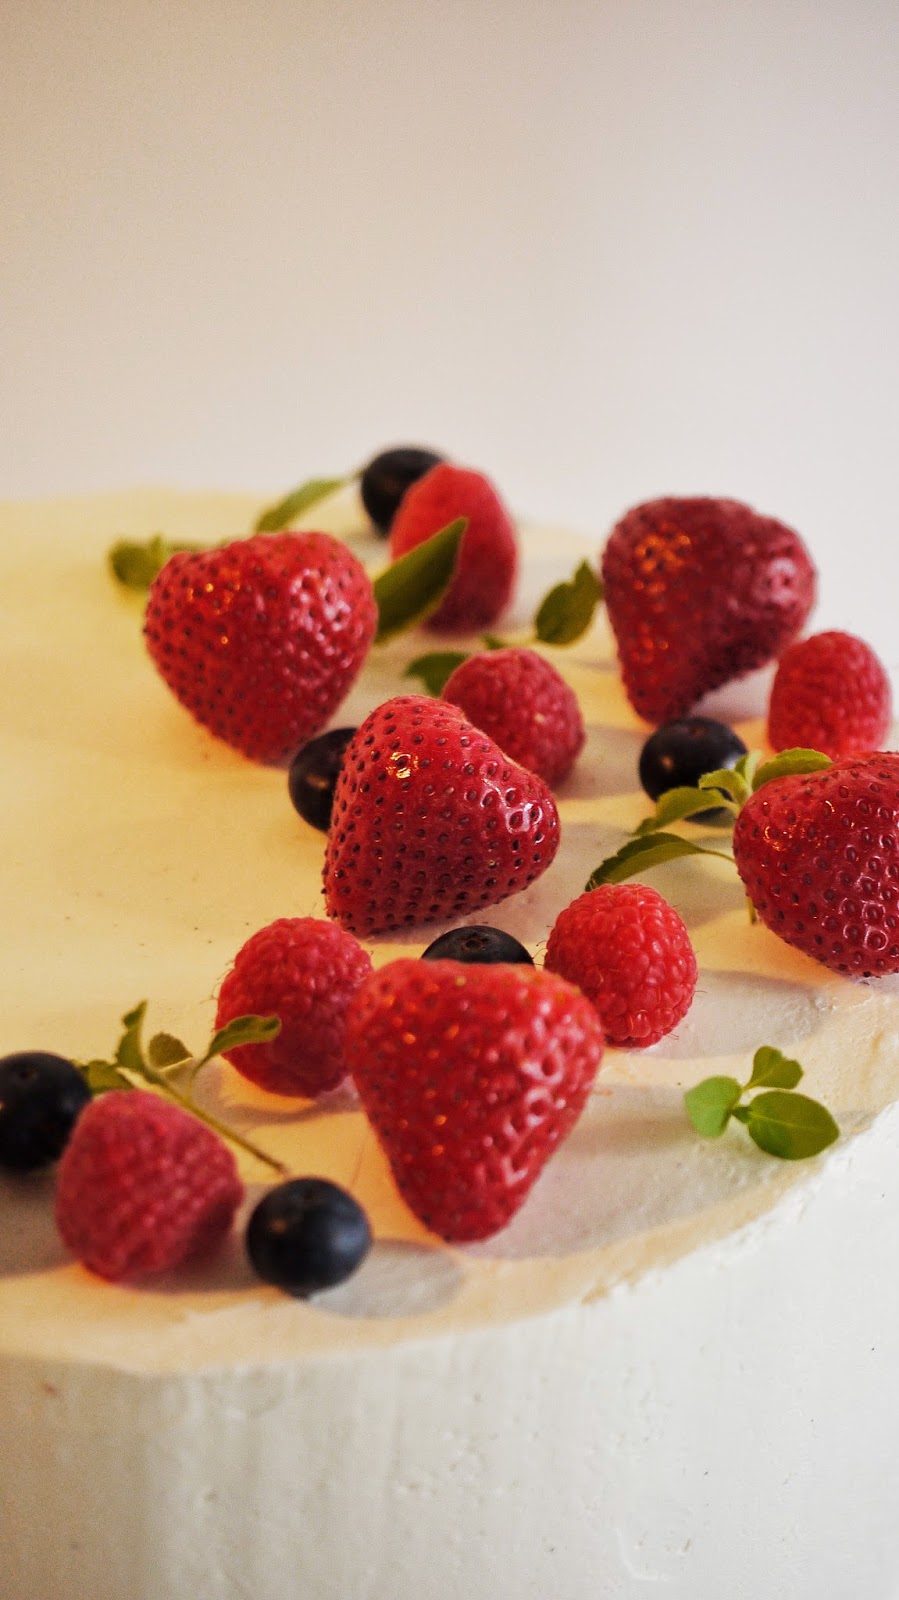
Place a layer of cake on a serving platter. Using a pastry brush, brush half the juice form the macerated strawberries on the cake layer. Place half of the halved strawberries atop the first layer of cake, cut side down, and then, first reserving a few of the best looking mixed berries for the top, scatter half of the mixed berries amongst the strawberries.
Place the whipped cream into a large piping bag fitted with a large plain tip. Pipe half the whipped cream in between and around the berries, making sure not to pipe any cream over the edge of the cake. Use an offset spatula to even out the cream layer. Place a second cake layer atop the cream and berries and gently press to adhere the top layer. Brush with the remaining juice from the strawberries and top with the remaining halved strawberries and the mixed berries. Wrap the cake in plastic wrap and refrigerate for at least 1 hour or until set.
To finish/ vanilla bean buttercream
1 cup sugar5 egg whites12 - 16 ounces unsalted butter, room temperature1 teaspoon vanilla bean pastepinch salt
Place the sugar, egg whites, vanilla bean paste and salt in the bowl of a stand mixer fitted with the whisk attachment. Place the bowl into a simmering saucepan of water set over medium/low heat. Whisk constantly until the sugar is completely melted and the mixture is hot to the touch. The temperature of the egg mixture should reach at least 160º on a candy thermometer.
Transfer the bowl to the stand mixer and whisk on high until you achieve stiff peaks and the bowl is cool to the touch. Add the room temperature butter, a few small pieces at a time, whisking until the buttercream thickens and is smooth. You may not need all of the butter, so be patient between each addition. If the mixture looks as if it's curdling and not smooth, you are very close. Add another tablespoon or two of butter and whisk away.
Spread a smooth, even layer of buttercream over the top and sides of the cake and allow to set in the fridge, about 20 minutes. Top with the remaining berries and a few springs of edible greenery (I used lemon basil).
March 14, 2014
Freegrace Fridays! Happy Pi(e) Day! Blueberry Brown Butter Custard Pie

It's March 14, which means it's Pi(e) Day! Get it? 3.14... And Pie. Every year I bake a pie, or 10, on the big day and enjoy the sweet pun. Except most years, I'm gearing up for spring . I'm doing a little tilling. I'm getting my sugaring equipment together. I'm tending to my seedlings. You get the idea.
This year, I'm shoveling snow. 2 feet, to be exact. I'm crabby.
 Yes. It's beautiful. I still want it to go away.
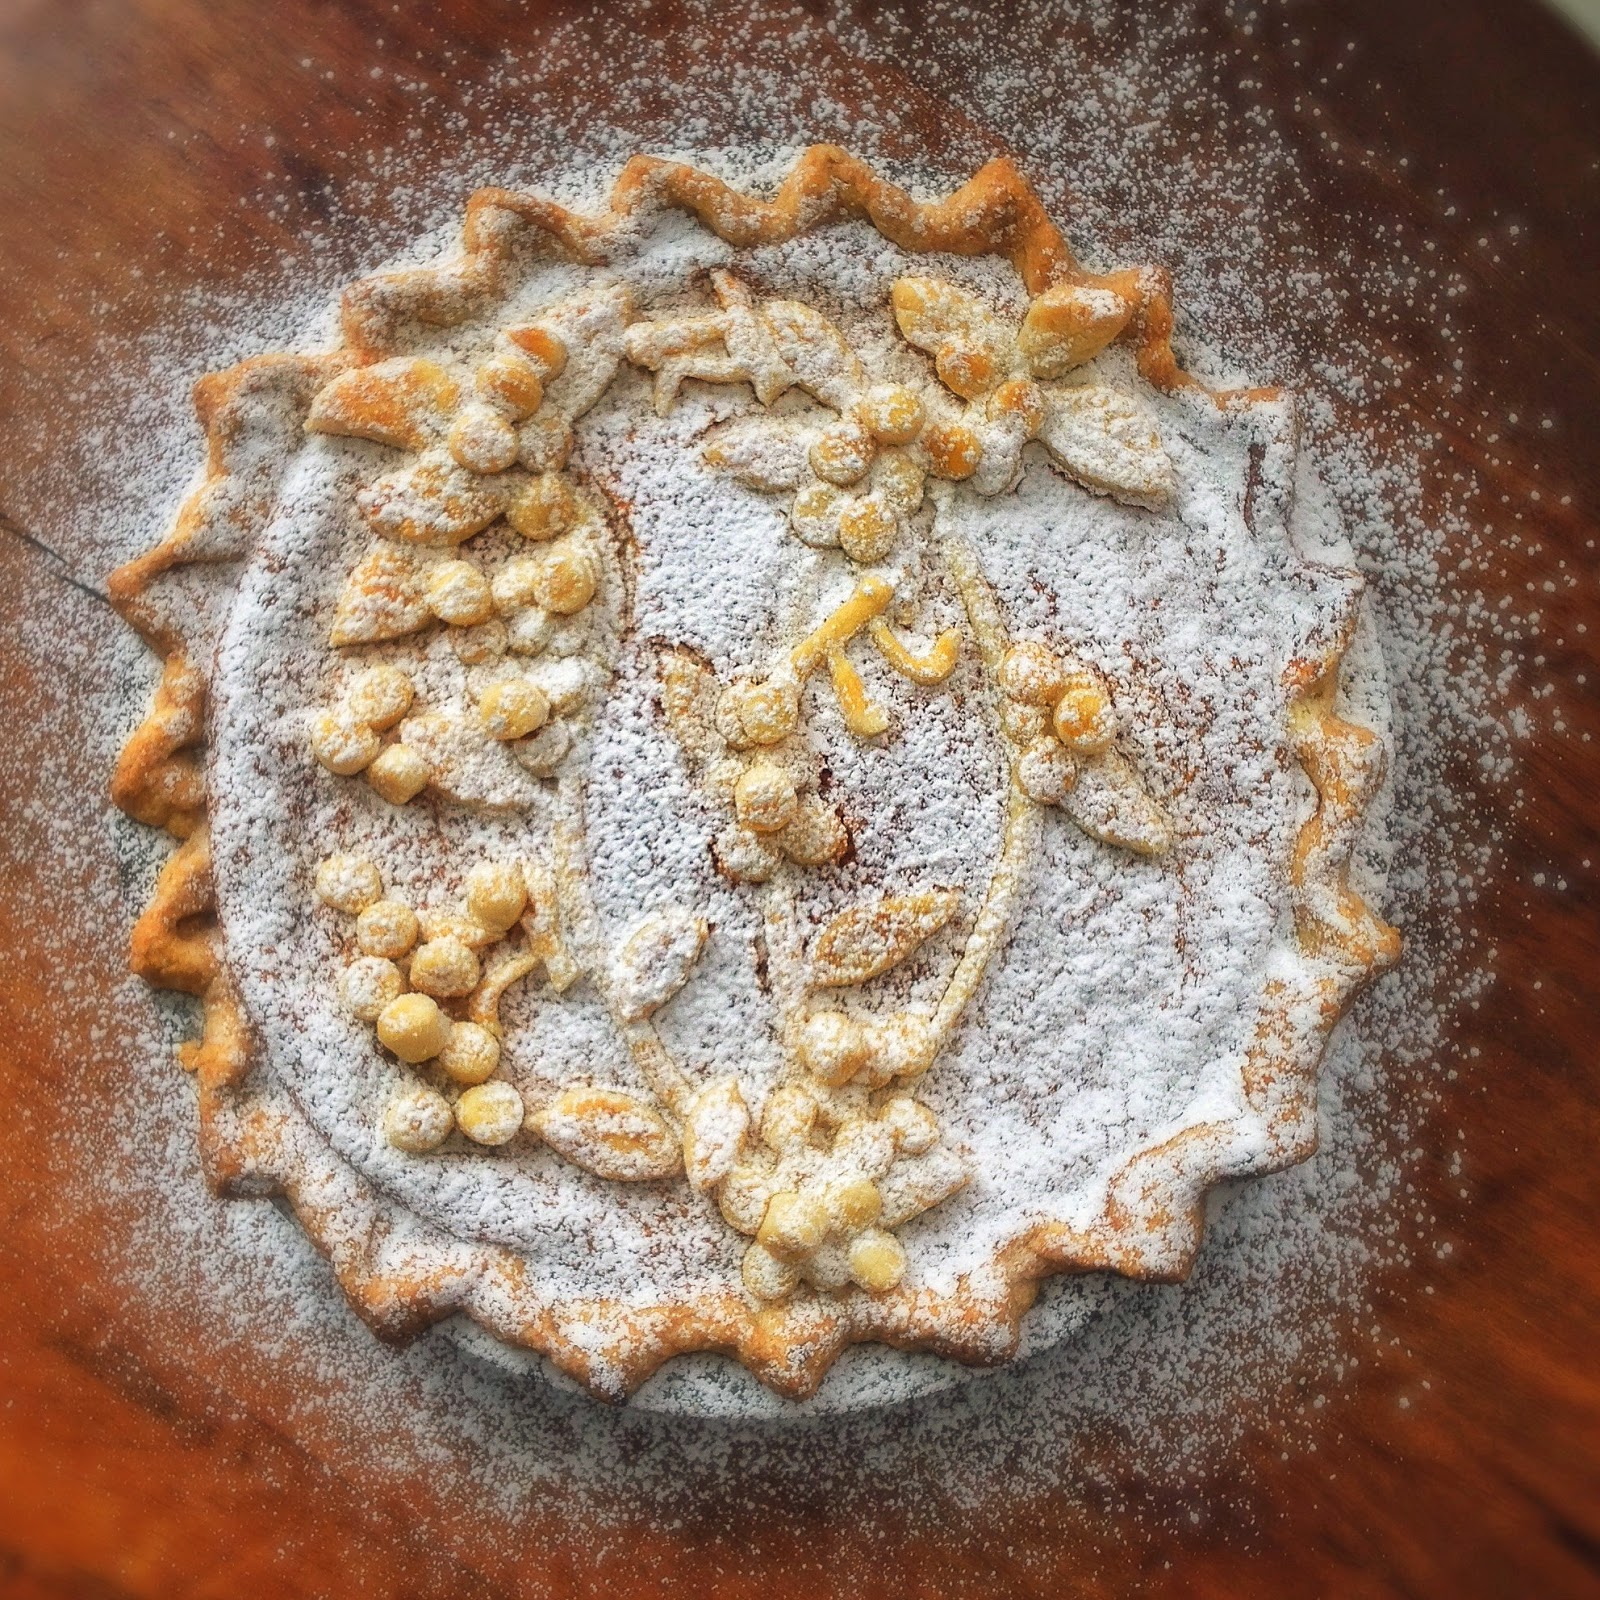
To express my displeasure with this onslaught of the white stuff, I went ahead and baked my pie. I filled it with blueberries I'd tucked in the freezer from last summer, a season that seems foreign right now. I topped the blueberries with custard. I decorated the top with blueberry bush fecundity, all branches, leaves and plump berries. And once it baked and cooled, I dusted the top with a liberal sprinkling of confectioner's sugar, like all that snow covering my garden and shattering my dreams of fresh blueberries entering my life in the near future.
 Freegrace. Will you ever be free of snow?
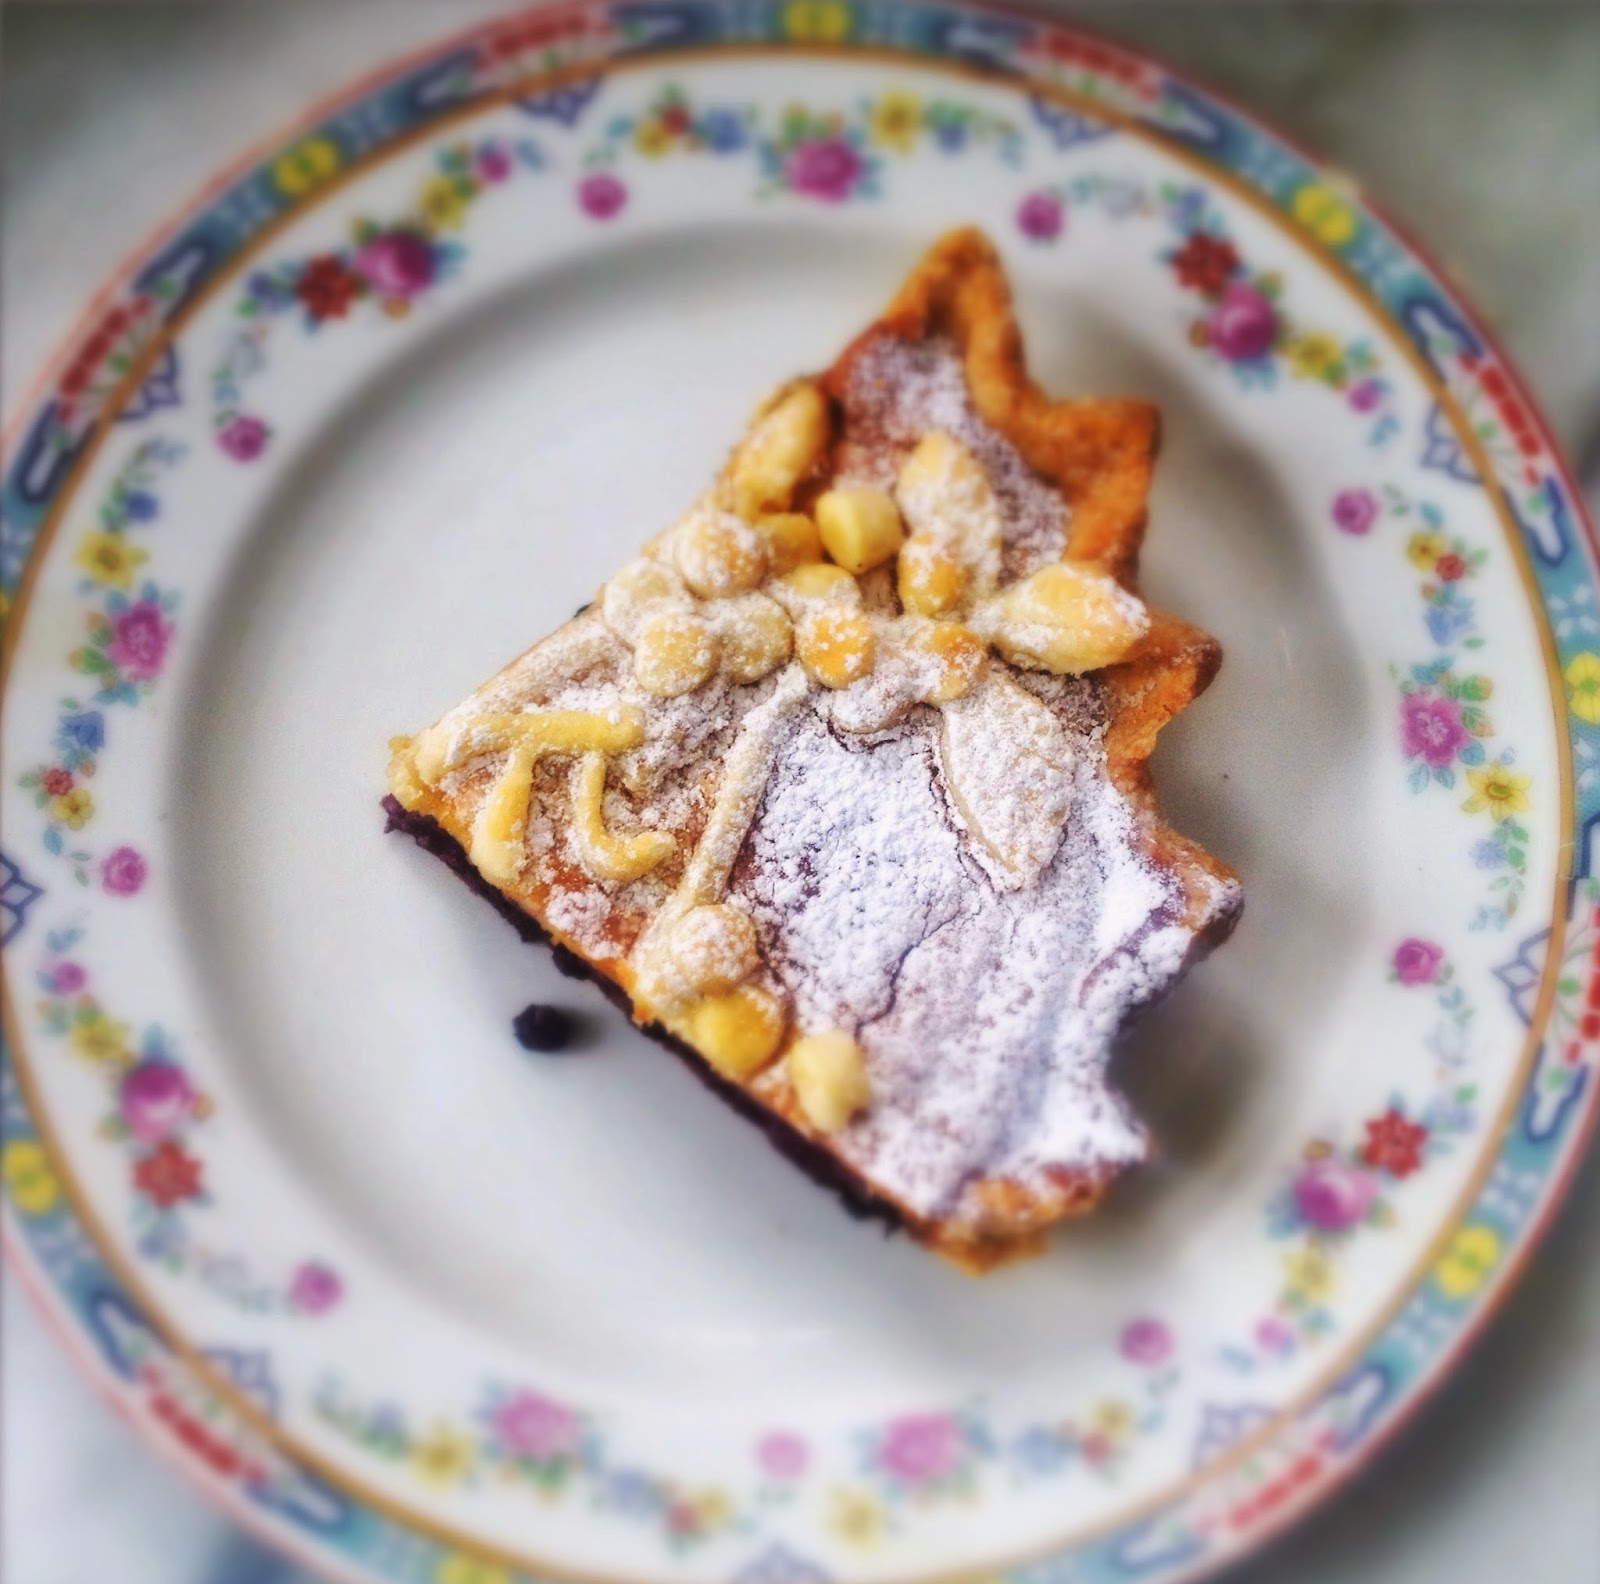
At least I've got pie.
BLUEBERRY BROWN BUTTER CUSTARD PIE

For the crust
2 cups flour, cold
1 tablespoon sugar
1 teaspoon salt
1 cup unsalted butter, chilled and cut into small cubes
1/2 cup ice water
1 teaspoon lemon juice
egg wash (1 egg whisked together with 2 tablespoons water)
Preheat oven to 350º. Spray a 9" pie plate with baker's spray (non-stick spray with flour). Set aside.
In the bowl of a food processor fitted with a blade attachment, pulse together the flour, sugar, salt and butter until the mixture resembles cornmeal.
In a small bowl, stir together the water and lemon. Slowly add the liquid to the flour mixture, pulsing, until the dough just comes together. Squeeze a small piece of dough between your thumb and index finger to make sure it holds its shape.
Turn the dough out onto a lightly floured surface and divide in half. Gently turn each dough a few times, gently kneading, until all the dry bits are incorporated and shape into disks. Wrap each piece in plastic wrap and refrigerate for 10 minutes.
On a lightly floured work surface, roll out one disk into a rough 12" circle. Transfer the dough to the prepared pie plate. Crimp the edges. Freeze for 20 minutes.
Line the pie plate with parchment and fill with pie weights or dry beans. Bake for 15 minutes, remove the weights and parchment and continue baking until the dough has lost its raw dough sheen. Set aside to cool.
Roll out the second piece of dough to about 1/4 inch thick. Using a sharp paring knife, cut out branch shapes, leaves and using a medium sized plain piping tip, cut out small rounds of dough to resemble blueberries. Place on a parchment lined sheet pan, brush with egg wash, cover with plastic wrap and refrigerate.

For the filling
2 cups blueberries, fresh or frozen
4 ounces unsalted butter
one 8 ounces package mascarpone, I use Vermont Creamery
3 eggs
1/2 cup light brown sugar
1 tablespoon vanilla bean paste
1/4 teaspoon salt
In a heavy saucepan, melt the butter and continue simmering over low heat until the butter browns but doesn't burn. The butter will give off a nutty aroma.
In a large bowl, whisk together the mascarpone, eggs, brown sugar, vanilla bean paste and salt. Continue whisking and slowly pour in the butter, leaving any brown bits behind. Continue whisking until the mixture is smooth.
Spread the blueberries in an even layer in the pie pan. Pour the custard over the berries. Lower the oven heat to 325º and bake the pie for 40-45 minutes until the top has formed a skin but the filling is still pretty jiggly.
Take the pie from the oven and quickly arrange the prepared decorations over the top of the pie and bake for 20 to 30 minutes more or until the filling puffs and barely shimmies in the middle.
Allow the pie to cool completely. It will "fall" slightly once out of the oven, this is normal!
To finish
1/4 cup confectioner's sugar
Sift confectioner's sugar evenly over the top of the pie.

February 28, 2014
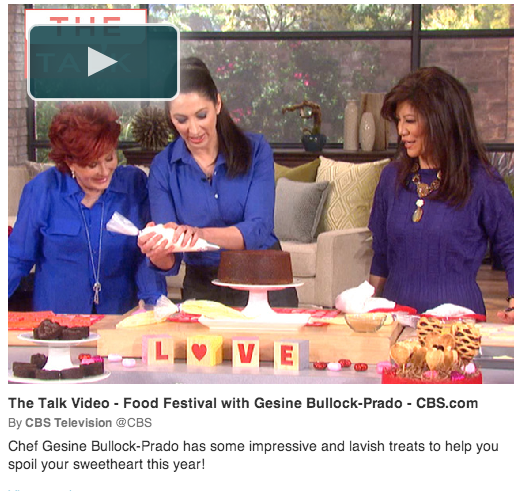
Oscar Treats on The Talk
 Goodness, look how serious I look here. This might have been the only image they could capture from the segment where we weren't busting a gut. To see the hilarity, click HERE.
Whipped up a little bit of trouble, again, with the wonderful ladies of The Talk. This time, we made Oscar Night Sweets. We spent most of our 5 minutes together cracking wise so I've added links to the recipes here as well!
Click HERE for the recipes!

February 14, 2014
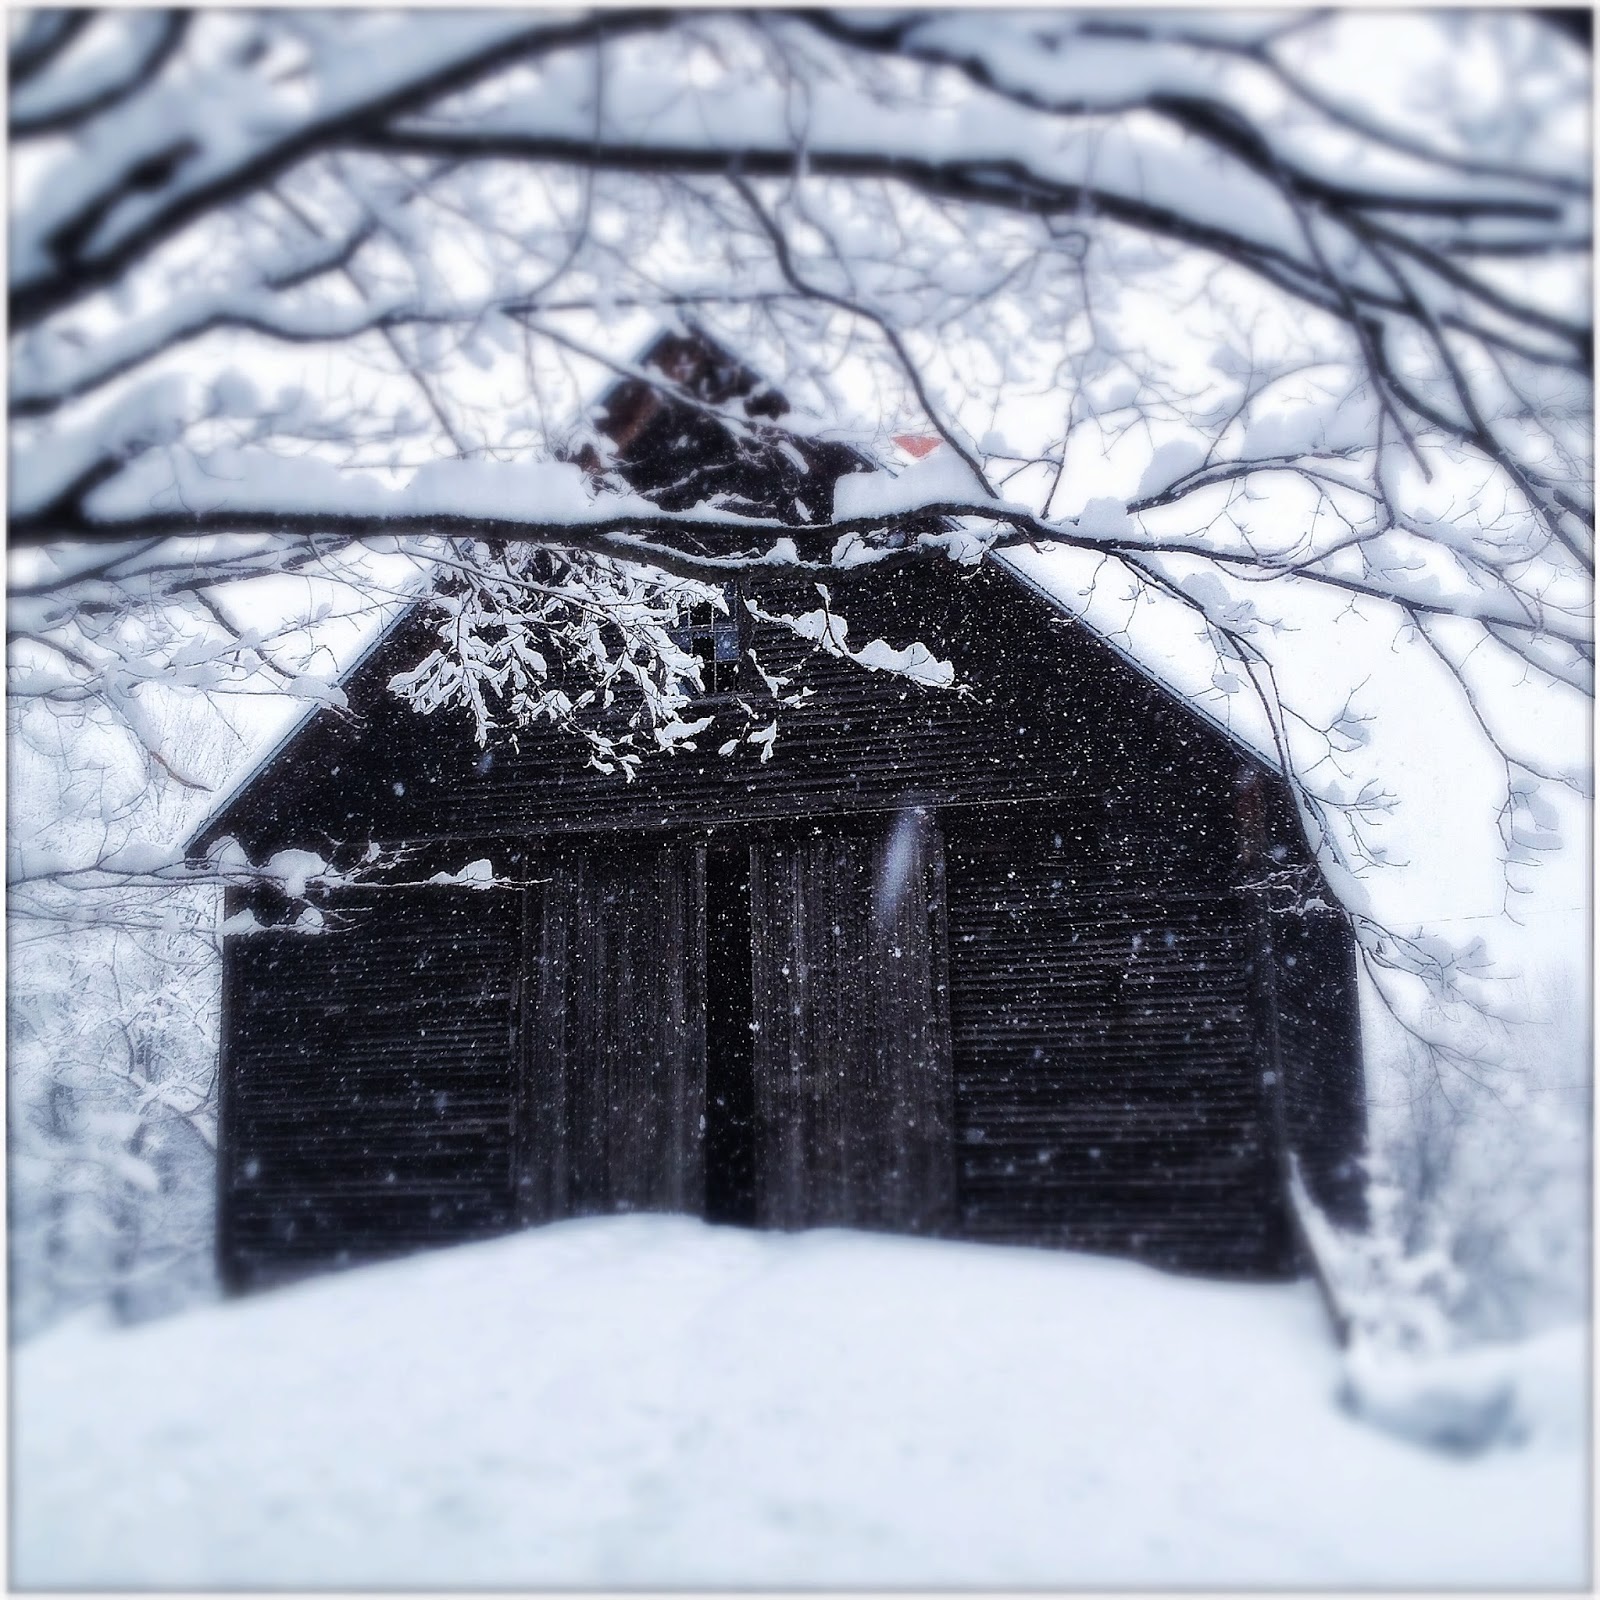
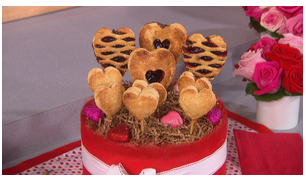
Freegrace Fridays! VALENTINE'S SNOW!

I need say very little about what's going on here at Freegrace because...snow!
I left LA a day early after my appearance on The Talk, all that sunshine and 70º, in time to beat the big one to our front door.
 View of a city in clouds as I leave the warmth of LA.
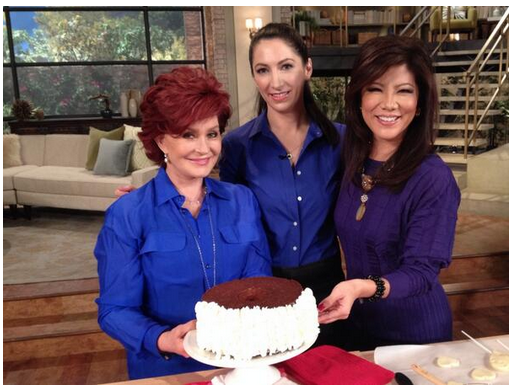 To see the video, click this LINK And boy, did it ever snow. I'll let Ruthie tell you all about it.
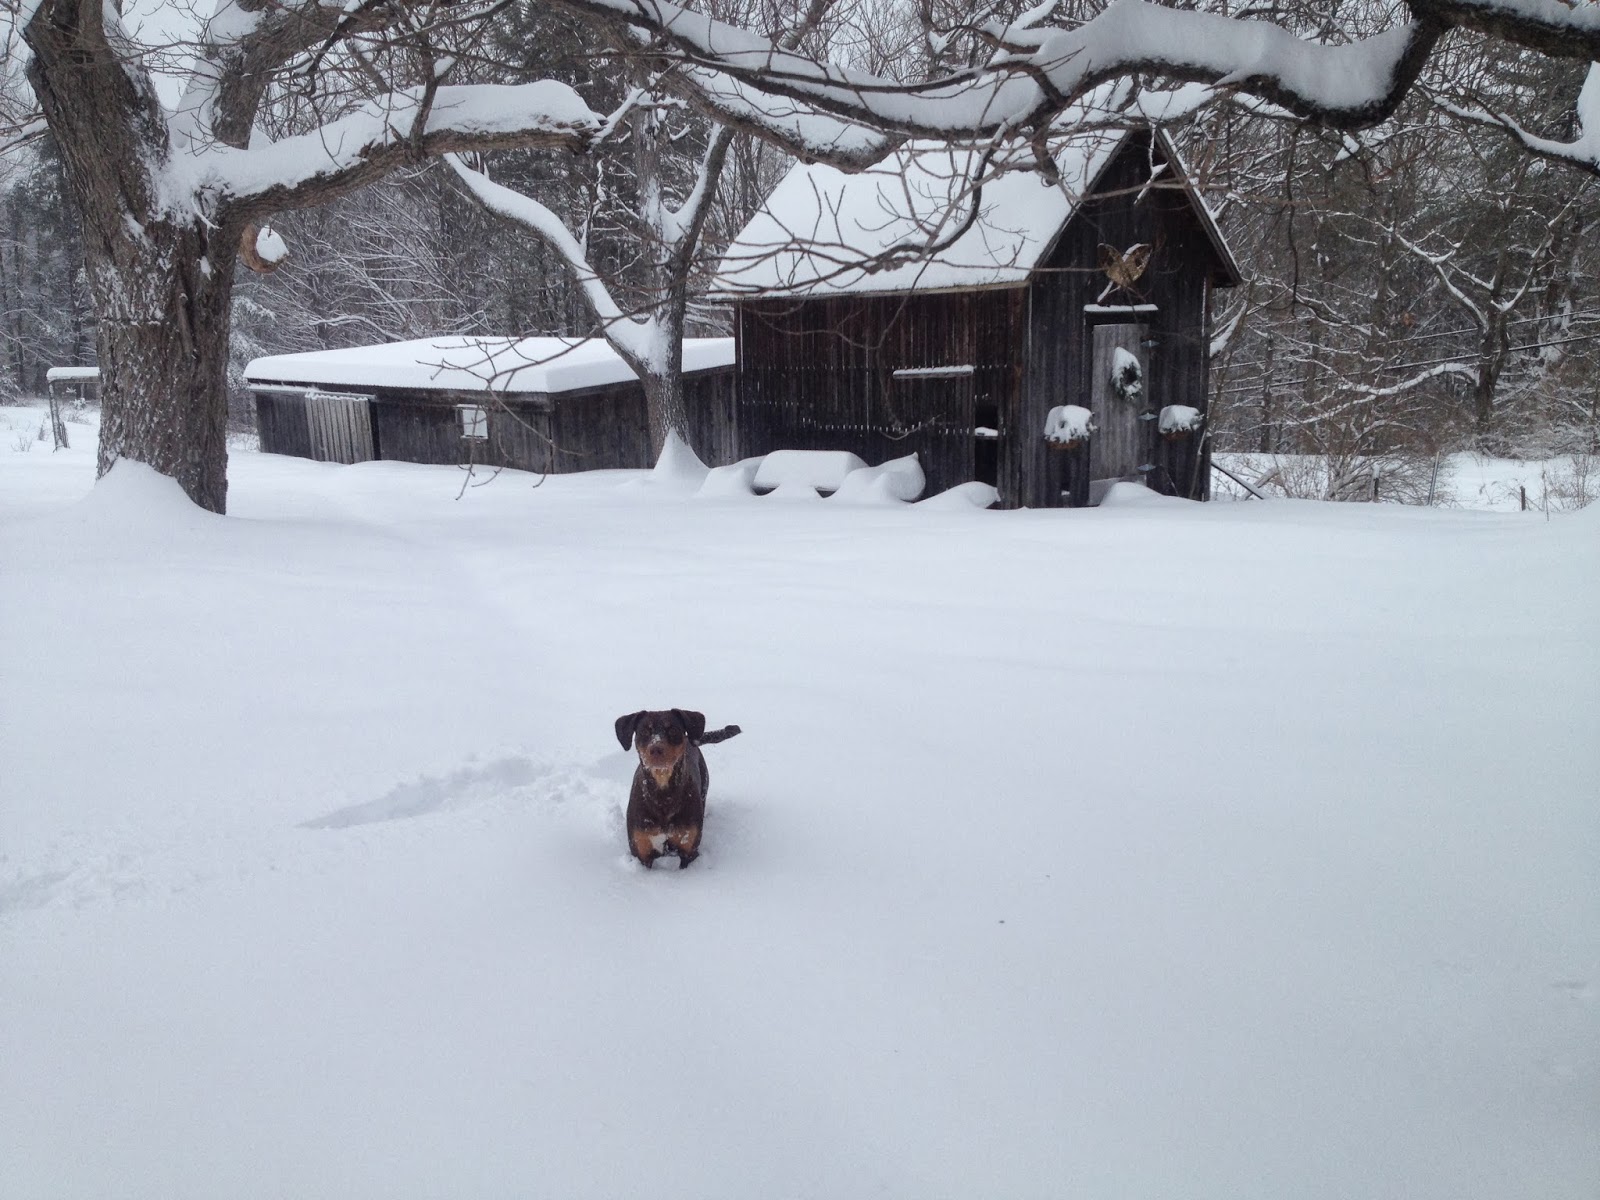
 Chicken Coop.


February 11, 2014
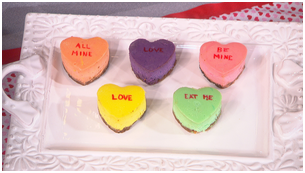
Valentine's Treats on The Talk! And the recipes that go with it!
I had another fun baking extravaganza with the beautiful ladies of The Talk. We made Valentine's Day treats.
Here's the LINK to the video.
Click THIS link to get all the recipes (you'll notice that there's an extra "vegan brownie" recipe that the ladies were nibbling on while we were playing).
P.S. Sharon Osbourne is a dab hand with a pastry bag.

Here's the LINK to the video.
Click THIS link to get all the recipes (you'll notice that there's an extra "vegan brownie" recipe that the ladies were nibbling on while we were playing).
P.S. Sharon Osbourne is a dab hand with a pastry bag.


January 23, 2014
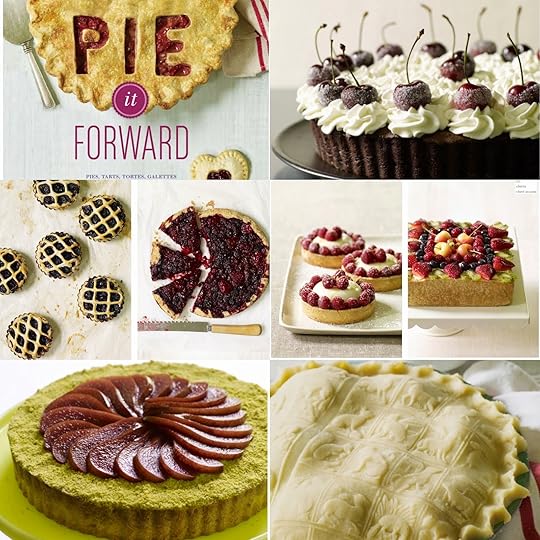
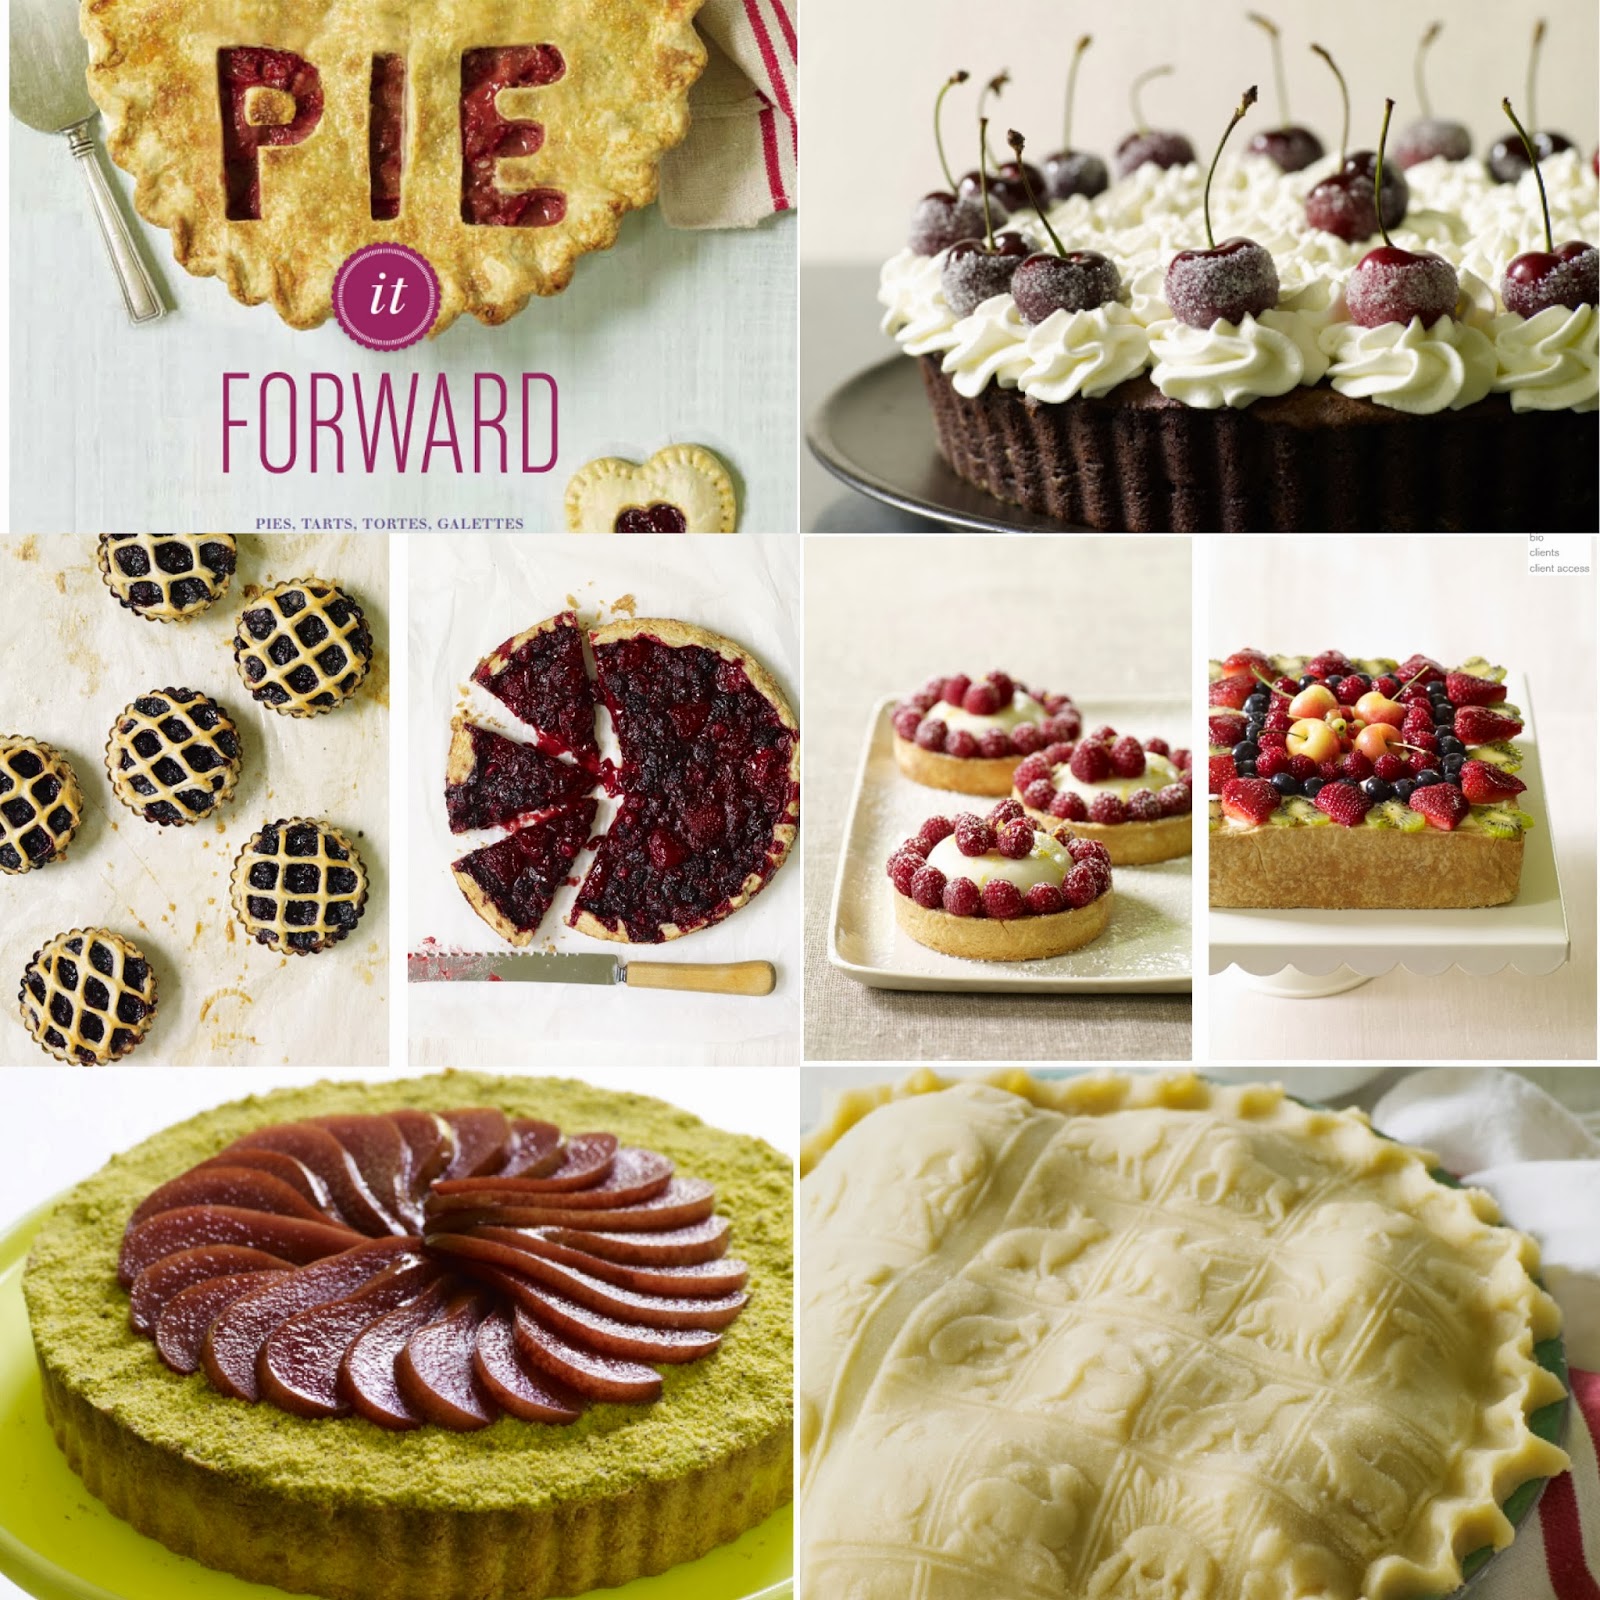
National Pie Day
Happy Pie Day! I actually recognize 3/14 as the official "Pi(e) Day" but who am I complain that there are two in a year? Not me!
And...oh yeah, I wrote a book about that.
Go Pie it Forward!
And...oh yeah, I wrote a book about that.
Go Pie it Forward!
Gesine Bullock-Prado's Blog

- Gesine Bullock-Prado's profile
- 69 followers
Gesine Bullock-Prado isn't a Goodreads Author
(yet),
but they
do have a blog,
so here are some recent posts imported from
their feed.

