
Gesine Bullock-Prado's Blog, page 15
June 17, 2013
Strawberry Lemon Dream Cake

I was picking strawberries from my garden and for every one I added to the basket, another would find its way into my mouth. Glorious. They didn't "suggest" that they may be strawberries, as grocery store berries tend to do. They were unadulterated strawberry, no fruity innuendo from these guys.
 Almost ready but a few days on the vine won't hurt.
Because they are so wonderful they deserve to sing, no matter how they're eaten.

I made a simple cake with just a touch of pizzaz to make it worthy of the ruby jewels. This is my favorite kind of cake, where uncomplicated elements lend themselves to being assembled into a confection that looks as if it was transported from a four-star pastry shop in Paris straight into your kitchen. All the while, the cake itself is scrumptious without trying too hard. It's simple, in every way. But it doesn't have to look that way.
Aside from the lemon and strawberry, there are subtle notes of mint and almond, giving the cake both depth and lingering refreshment. Perfect for a summer day.
STRAWBERRY LEMON DREAM CAKE

INGREDIENTS
For the Lemon Chiffon Cake
1 cup pastry flour
1 cup sugar, divided
4 eggs, separated and brought to room temperature
1/2 cup lemon juice (about 3-4 large lemons)
1/4 cup plus 2 tablespoons grapeseed oil
zest of 2 lemons
1 teaspoon baking powder
1/2 teaspoon of salt
1/2 teaspoon cream of tartar
For the slightly minty, almond infused pastry cream filling
3/4 cup milk
3/4 cup heavy cream
1/3 cup sugar
1/8 cup + 2 tablespoons corn starch
4 egg yolks
pinch of salt
3 large mint leaves, cut into strips (chiffonade)
1 tablespoon unsalted butter
1/2 teaspoon almond extract
3 cups heavy cream for whipping
For the Strawberry Coulis
1/4 cup fresh strawberries, hulled and chopped into small pieces
3 tablespoons sugar
1 tablespoon lemon juice
To finish
1 pound strawberries (or 30 large strawberries for the inside of the cake and a few small perfect berries for garnishing the top
a few leaves of mint for garnish
7 ounces of almond paste
PROCEDURE
For the Lemon Chiffon Cake
•Preheat the oven to 325º.
•In a large mixing bowl, whisk together the 4 egg yolks, lemon juice, lemon zest and grapeseed oil. Sift the flour, 1/2 cup sugar, salt and baking powder over the egg yolk mixture and whisk until very smooth.
•In the bowl of a stand mixer fitted with the whisk attachment, combine the egg whites and cream of tartar. Whisk on high until the egg whites turn white and increase slightly in volume. Slowly add the remaining 1/2 cup of sugar and continue whisking on high until the egg whites create smooth, stiff peaks but don't whisk so much that they dry out and start to chunk.
•Transfer the egg whites to the egg yolk mixture and gently fold together until a smooth batter forms and no white streaks remain.
•Transfer the batter to a sheet pan lined with parchment paper, lightly sprayed with non-stick cooking spray. Gently spread the batter in an even layer over the sheet pan with a large offset spatula.
•Bake for 25 minutes or until the cake gently springs back when gently poked and just begins to pull away from the sides of the pan. Allow to cool completely.
•Run a sharp knife along the edge of the cake to fully release it. Place another piece of parchment on top of the cake and place a second sheetp pan on top of that parchment. Flip the cake and turn the cake out onto the 2nd parchment lined sheet pan. Cut the cake into three even strips, 5 1/3" wide and 12" long.

For the pastry cream
•Combine the milk, 3/4 cup heavy cream and mint in a large saucepan and bring to a simmer.
•In a large bowl, combine the egg yolks, sugar, cornstarch and pinch salt. Whisk until the mixture thickens and ribbons. Slowly add the hot milk mixture, whisking all the while so that the eggs don't curdle. Continue whisking until smooth.
•Transfer the mixture back into the saucepan and whisk over medium heat until the mixture thickens to the consistency of mayo. Take from the heat and add the pat of butter and the almond extract. Whisk the butter and extract into the pastry cream and then pour the pastry cream through a fine sieve into a large bowl. Cover the pastry cream with plastic wrap, making sure to press the plastic wrap over the surface of the cream so that it doesn't form a skin. Refrigerate until completely cool, about 2 hours.
For the coulis
•Combine all the coulis ingredients in a small saucepan and simmer over low heat until the strawberries are very soft and all the sugar has melted.
•Transfer the coulis to a blender and blitz until smooth. Pour through a sieve into a small bowl. Cover with plastic wrap and chill in the fridge until cool, about 1/2 an hour.
To finish
•Hull the 30 large strawberries and set aside.
•Whip the 3 cups of whipped cream until stiff peaks form. Take 1/3 of the whipped cream and whisk into the pastry cream. Gently fold the remaining whipped cream into the pastry cream.
•Place a layer of cake on a cake platter. Place 15 strawberries hulled side down, evenly onto the cake. Pipe half the lightened pastry cream in between the strawberries, using a small offset to smooth out the cream over the strawberries.
•Place a second layer of the cake atop the cream laced strawberries and arrange the remaining 15 strawberries atop the second layer. Pipe the remaining pastry cream among the strawberries and smooth with an offset. Place the final layer of cake atop the strawberries and cream and place in the freezer to set, about 2 hours.
•In the meantime roll out the almond paste to measure slightly larger than 5 1/3" x 12" and using varied sizes of open/plain pastry tips, punch a random pattern of differing sized circles along the almond paste.
•Once the cake has set (test the cream to see if it feels very firm), remove from the freezer and place the almond paste sheet on top.
•Dip a very sharp serrated knife into hot water and wipe dry. Trip the sides of the cake, gently sawing to keep the cream from spurting out the sides of the cake. The more firm the cake is the cleaner the trimmed sides will be. But the cake will be much harder to cut. So take your time in your gentle sawing and keep the knife hot and clean throughout the process.
•Gently spoon coulis into the open almond paste holes. Serve immediately or cover the sides the cake with parchment and then cover again with plastic wrap to keep the cake moist.


June 16, 2013
Sunday Suppers: Low Country Pommes Dauphine for Father's Day

Early supper on a lazy Sunday is a treat. It's lovely to spend the afternoon puttering around the kitchen, taking stock of what's left in the fridge and pantry. I challenge myself to limit ingredients to what needs to be used immediately. No running off to the grocery store. But it has to be something special and thoughtful, especially on Father's Day. It doesn't hurt when I can add an unexpected pastry element to the mix that pulls everything together.
Lately, I've been craving a low country boil, a convivial pile of southern goodness where all the ingredients are shoved into a huge pot to boil and dumped onto a table lined with newspaper. Shrimp, potatoes, sausage, corn, spices. Happiness.
It's best for a large crowd, though. And as I was suffering from a commensurate craving for pommes dauphine, why not scale it down and spiff it up?

LOW COUNTRY POMMES DAUPHINE
(Makes enough to serve 4)
Pommes Dauphine is traditionally a combination of choux paste (think profiterole/eclair/cream puff shell) and potato. Instead of baking, however, it's fried. It's airy. It's crunchy. It's addictive. It's also missing something if I'm going to make it low country. So I add fresh corn kernels and a touch of cayenne. For the "boil" I actually grill the ingredients to keep it simple.
INGREDIENTS
For the pommes dauphine
vegetable oil for frying
1large potato, preferably Yukon gold, cooked until fork tender, peeled and riced
 Potato, cooked until fork tender. Peeled and pushed through a ricer.
1 cob of fresh sweet corn, kernels cut from the cob. Pat dry on a paper towel.
1/4 cup water
1/4 cup milk
1/2 cup flour
3 tablespoons unsalted butter
1/4 teaspoon cayenne pepper
salt and pepper to taste
2 eggs
For the shrimp
24 jumbo shrimp
1 clove garlic, finely minced
juice and zest of 1/2 a lemon
1 teaspoon olive oil
salt and pepper
1/2 teaspoon Pimenton Picante (hot paprika)
For the "boil"
1 large Kielbasa cut into quarters and then each quarter cut in half
3/4 cup grits
4 small pats of unsalted butter
1/4 cup creme fraiche
1 small jar pimento
salt and pepper to taste
To finish
2 cobs of fresh sweet corn, the kernels cut off
1 tablespoon flat leaf parsley, chopped
PROCEDURE
For the pommes dauphine
•In a large pot, pour enough oil into the pot so that it's at least 2" deep. Place over medium heat and attach a candy/frying thermometer. You are aiming for 340º to 350º F.
•In a saucepan, combine the milk, water, butter, a generous pinch of salt and the cayenne pepper. Bring to a simmer, allowing the butter to melt completely.
•Immediately add the flour and stir with a wooden spoon over medium heat until the "paste" comes away from the sides of the saucepan. Continue stirring over the heat for 2 more minutes to allow moisture to evaporate. (Traditionally, the potato for pomme dauphine is added later, during the egg addition. However, I like to add it to the initial mix to insure that I've whisked off as much moisture as humanly possible in order to get a fluffier fritter)
•Add the riced potato and the corn to the saucepan and stir the paste for another minute over medium heat. Test for seasoning, adding salt and pepper before adding the eggs.
•Remove from the stove top and continue stirring. While stirring add the eggs, one at a time, and continue stirring until a smooth paste is formed.
 Dauphine paste, ready for piping.
•Transfer the paste to a large pastry bag fit with a large open star tip.
 Piping and frying
•Once the oil has come to temperature, pipe inch-long dollops of the choux paste into the oil, using a knife to cut the dough off into the oil or use the side of the pan to do the same. Fry until the entire fritter is deeply golden brown. Remove with a slotted spoon and turn out onto a plate lined with paper towels. Continue in this manner with the remaining paste.


For the kielbasa
•Heat a grill pan and coat well with non-stick cooking spray. Once the grill is hot, place the sausage on the grill to heat through completely.
For the shrimp
•In a large bowl, combine the garlic, zest and lemon juice, olive oil, salt, pepper and pimenton in a small bowl. Stir to combine. Add the shrimp and stir to coat evenly
•Spray the grill again and place the shrimp evenly on the grill. Cook on each side until just opaque, about 2 minutes on each side.
For the grits
•In a large pot, bring 3 1/2 cups of water and 1/2 teaspoon of salt to a boil. Stir in the grits. Reduce the heat to low and cover. Cook for 15 - 20 minutes, stirring occasionally, until thick.
To plate
•Divide the grits evenly among 4 plates and place a pat of butter upon the middle of the grits. Arrange the Kielbasa and then the shrimp on top of the grits.
•Drain the jar of sliced pimientos well, if you need to, turn them out onto a paper towel and gently pat to remove excess moisture. Combine them in a small bowl along with the the creme fraiche. Stir to and season with salt and pepper. Dollop the creme fraiche sauce on the plate and add the pommes dauphine. Garnish with the corn kernels and a a bit of flat leaf parsley.
June 15, 2013
Running My Buns Off: Broccoli Salad

Whether you're a marathoner or an "I carried Costco bulk items from the car to the house, that counts as a workout" kind of person, chances are no matter how happy you are with your chosen exercise regimen, there are days when you feel the need to reset your body with a healthy meal. This is especially true for bakers, professional or home enthusiast alike. We play with butter, flour and sugar on a daily basis. We sample the finished product and we dip into the raw batter. We sample and dip some more.
I hate to say this but there comes a time in every baker's life when we crave a vegetable that isn't wrapped in puff pastry. Saturday is my usual day of reckoning, when a week of dipping and sampling weighs heavily on my heart. Literally. Saturday also happens to be the traditional day of "long runs" for those in training for a marathon (or half marathon). It's lovely to cut all that carbo loading with a life affirming vitamin rich, lean protein laced meal and it makes you a little lighter on your feet.
Here's my favorite late spring offering that's a riff off of a broccoli salad my friend and fellow baker Michele Gregroire Joyce made for a baker's gathering. Her salad contained real bacon, raisins (or Craisins, I don't remember anymore) and a dressing that had luscious hints of real mayo. I doctored it as best I could to keep all the fantastic flavors but cut down on some of the illicit stuff. (After further research, I see that Paula Deen has a similar broccoli salad to what Michele made. Now you can see why it was so good...and so bad and why I had to doctor it a skosh).

BROCCOLI SALAD
INGREDIENTS
for the salad
2 large heads of broccoli (preferably organic)
 If you grow your own broccoli as I do, even better!
1/2 a red onion, minced
1 medium sweet potato or Yukon gold potato, peeled and cut into small cubes
2 chicken breasts, skins off
2 cups of low sodium chicken broth (I use Pacific brand organic/free range broth)
6 pieces of prosciutto (or turkey bacon)
for the dressing
(this makes enough to dress this salad and extra to save in a jar for future "dressings")
1 cup olive oil
1/3 cup balsamic vinegar
2 tablespoons stone ground mustard
2 tablespoons maple syrup
1 teaspoon chili paste
1/2 teaspoon salt
1/2 teaspoon black pepper
1 clove garlic, finely minced

PROCEDURE
for the salad
•Preheat your oven to 375ºF.
•Chop the florets from the broccoli and place in a large salad bowl. I save the stalks for juicing or soup.
•Pour the chicken broth into a large saucepan and bring to a simmer. Add the potatoes and cook until fork tender, about 10 to 15 minutes. Remove the potatoes with a slotted spoon and transfer to the salad bowl with the broccoli florets. Keep the broth in the saucepan.
 Potatoes, cubed. I prefer sweet potatoes for their superior health benefits but if you've only got a regular spud on hand, it's still a lovely addition to this salad.
•Place the chicken breasts into the broth, making sure the broth covers both breasts. Continue to simmer. Gently poach until the chicken is cooked through, about 15 minutes or until the internal temperature of the chicken breast reads 165ºF. Remove the chicken to a cutting board and allow to cool enough to handle. When cool enough, cut into small pieces, a little smaller than dime sized pieces. Transfer to the salad bowl.
•Once the oven is preheated, place the prosciutto onto a parchment lined sheet pan and bake for 15 minutes, turning the sheet pan after 7 minutes. Allow to cool. Break the prosciutto into small pieces.
•Add the onion and prosciutto pieces to the salad bowl and gently toss to distribute the ingredients.
for the dressing
•In a small mixing bowl, combine all the ingredients but for the olive oil. Whisk to combine. Continue whisking and slowly add the olive oil. Continue whisking until the dressing emulsifies and thickens.
•Pour a little less than half the dressing over the broccoli mixture, or to taste. Toss gently to evenly coat the ingredients. Can be made a day ahead and kept covered in the fridge.
June 14, 2013
FREEGRACE FRIDAYS! Mad Myrtle and the Fledglings

There are babies popping up all over Freegrace. We've got the ducklings in the brooding room. We've got tadpoles by the thousand in the pond. And we've got Mad Myrtle.
 Mad Myrtle strikes a pose.
I met Mad Myrtle over a week ago while tending to the vegetable garden, pulling out weeds and lopping off stalks of tall grass. Pleased with my tidy plot, I walked away to investigate the hops garden.
 Myrtle, in repose.
Ray noticed Ruthie barking and growling at my garden "chair." When he pulled her away, he discovered a nest full of fluffy, hungry chicks. I hadn't realized that in cleaning up my vegetable garden, I managed to uncover a chickadee nest built into the wood stump I use as a stool. Ma and Pa chickadee had used the tall grasses surrounding the stump as a protective shield from the outside world.
 Hungry Myrtle.
We hid just out of nest range and kept watch to insure that Ma and Pa were still returning to care for their babies. From what we observed, every few minutes someone came to check on the chicks. Phew. So I erected a little chicken wire fence around the stump and tucked a bit of foliage into the wire to provide some camouflage. We kept watching and it appeared that all was well, if not a little remodeled, in chickadee world.
 Supermodel Myrtle.
For the next few days, I kept up my chickadee vigil. I noticed that the chicks were decreasing in number, little lifeless bodies tucked in among fewer and fewer living chicks. The surviving chicks were lethargic and silent. Not a good sign. I noticed that there were no more visits. I was worried that all could be lost.
 Transporting the three remaining babies for some RandR.
I know a few things about wild birds:
(1) Babies are always better off with their mamas.
 Snooty Myrtle.
(2) While it may appear that mama has abandoned her babies, that's usually not the case.
(3) Touching a baby bird will not put a mother bird off of caring for her young. We're not that stinky. That Old Wive's Tale is a great disservice to both winged and biped kind. If you see a baby on the ground and a nest up high, indicating that the little stinker took a fall, you can and should put the bird back into the nest.
 Mad Myrtle.
(4) When chicks fledge, i.e. first leave the nest, they hop around the ground like drunken sorority pledges. It doesn't look good. They clearly can't fly. Quite frankly, it's alarming. But this is normal. The parents are out there watching and taking care. The fledgling will find a safe spot to rest and ma and pa will feed them and protect them until they can feed themselves.
(5) If all bets are off and you're quite sure that the babies have been abandoned, call a wild bird rehab facility. They exist in every state. It's illegal in some states to take in wild birds
 Grumpy Myrtle.
(6) I'm a crazy bird lady. I raised a nest of naked baby Starlings with my mother when I was 12. They all survived into adulthood. Present day, facing a nest that had seen 7 chickadees dwindle to three, I considered that it had become unseasonably cold and it was raining. I knew that if I left the three in the tree stump nest, alone, that none would survive the night.
 Fledglings #1 and #2, ready to take on the world.
I took the babies in and fed them (mashed up soft dog food, some organic apple baby food and a ground paste of nuts and seeds that I blitzed together with a bit of water).
 Reflective Myrtle.
I kept them warm and after a day and 1/2, they were zippy and sprightly. I took their little box outside, near the original nest. Two of the chickadees began calling to their parents in earnest. So I placed them in the nest enclosure and backed off. Lo and behold, a chickadee swooped down into the area in response to the calls. HURRAY!
 From her perch, Myrtle checks out the ducklings.
 The ducklings keep watch over Myrtle.
I got a pair of binoculars and noticed that two of the babies had fluttered onto branches by the stump. Moments later, they bumbled across a small bit of field, into the safety of high brush. They called from their new perches and they were answered by a parental visit. When a nest is disturbed, chicks tend to fledge early. Two of the chicks had feathered more fully than the third. They were bigger and seemed more independent. They were the ones now nestled in the brush.
 #1, tucked away in the brush.
 #2, enjoying a spot of dappled sunshine.
I didn't notice the third. I returned to the nest area and didn't see anything. I assumed that the third had found cover as well. But as the sun set, I worried. I checked again, gingerly lifting up leaves and foliage at the nest site. And there she was. The tiniest of the chicks, hiding in the grass under an enormous maple leaf. Shivering and alone.
Her name is Myrtle. Mad Myrtle. Once you see her, it's clear that she's made for the name.
I feed her every 20-30 minutes during daylight hours. She's now able to sit on a branch without falling over. She practices her flight skills, skittering across the brooding room to find me for a soft landing. She just started to clean her beak after feedings, something I've had to do up until yesterday. We're still working on her learning to feed herself. Until then, she's my charge. Once she can nosh on her own, I'll give her a "soft release." I'll put her cage outside and open it up. I'll keep the cage outside, so she'll have ready access to food and shelter during her transition. And hard as it will be, I have to stay away from her because she's likely imprinted on me and to survive, she needs to imprint on her fellow chickadees. I can't say the same for me. I'll be forever smitten with Mad Myrtle.
June 12, 2013
From Helga's Kitchen: CRONUTS!...and Danish.

I inherited all of my mother's recipes. I have every one of her cookbooks. I have her recipe boxes, crammed with recipes both handwritten and Xeroxed. And I have...me, her bun that popped out of the oven with her genetic pastry map neatly etched into my DNA.
 CRONUT! Or WIENERBRøTNUT! Just out of the fryer.It shouldn't surprise me anymore that whatever project I find engaging, she'd already mastered it in the '80s. I find evidence of my lack of originality on a regular basis. The other day I was cleaning out our brew room at Freegrace. I have a stack of my mother's cookbooks sitting across from our beer siphons and kegs. I grabbed a few to arrange them properly on the shelf and out dropped a manila envelope. It was addressed to her. The return address was from the American Brew Society. You can't make this stuff up. She'd been brewing beer and she never told me.
 I called my dad and he confirmed that she set up a distillery in the basement when I was in college.
Of all the times to hide a beer from me.
 Danish dough. Looks damn pretty baked as well.
It's taken me a while to poke through her recipe boxes since she's passed. The sight of her handwriting brings on a maudlin weep fest. Her handwriting combined with her love of the things that I hold dear, like laminated doughs and brewing, make me apoplectic and whiny. At every turn, she's pointing to what is written in our combined hearts. I am my mother's daughter.
Sadly, cancer took her when she was still so young and vibrant.
But I still want her here with me, making croissant and danish. I want her guiding me as I'm fully engaged in playing with butter and flour, all the while fussing at my disdain for washing the crusty dishes. I want to share a nice coffee with her as we sample our baked experiments. I want to reverse engineer a damn Cronut with her, so we can exclaim together "OURS IS BETTER!" Because we WOULD bake it better and we'd say so. With exclamation points (and with a German accent)!!!
 One of Helga's many overstuffed treasure troves.
For quite some time, I've wanted to share my Danish recipe with you. I've also wanted to dive into Mutti's recipes (that's what a German girl calls her Mama) and share them as well. As it happens, the first thing I grabbed from her treasure trove was Wienerbrød. Translated from the Danish: Viennese Bread. Translated fully into English: Danish. That is, the Danish call Danish, the pastry, Viennese bread. We call Viennese Bread, Danish.

Bottom line, I found my mom's Danish recipe and I wanted to share it. It also occurred to me that everyone's trying to figure out how the hell to make Cronuts, that fried croissant-ish donut hybrid so popular in New York at the moment. From the moment the Cronut squawking started, I hearkened back to the Fry Daddy I was experimenting with in my pastry shop and all the things I threw into it, from croissant dough to brioche. I also threw in Danish dough and it outshone fried croissant by a mile. It's a richer dough, more akin to what we know of as a donut, but it has all the butter and layers that we love about croissant.
I have a sneaking suspicion that this is what everyone is looking for.
Let's all make it together and say, "HELGA'S IS BETTER!" Because it is...and it would make her happy.
CRONUT/ WIENERBRøD /Just plain DANISH
 Cronuts, sitting willy nilly. The layers expand as they want. It's a beautiful thing.
INGREDIENTS
 Close-up of Helga's Recipe
Let me just say that I'm adapting this based on modern advances in baking ingredients (i.e., we don't have "granulated flour" anymore and the yeast, it's so 10 years ago. Helga would approve 100%.
For the dough
1/2 cup water
1/2 cup whole milk
2 eggs
1 tablespoon vanilla bean paste (can substitute with vanilla extract)
4 cups All Purpose Flour plus a cup extra for rolling (I use King Arthur All purpose)
1/2 cup sugar
One 1/4 ounce package instant yeast (I use Red Star Platinum instant yeast)
1 teaspoon salt
1/4 teaspoon cardamom (optional. Don't use if you're only make the Cronuts)
1 tablespoon unsalted butter, room temperature
For the butter block
1 pound plus 2 tablespoons unsalted European butter, slightly cooler than room temperature
1/4 cup all purpose flour
For the Cronuts
2 quarts, grapeseed oil
1 batch pastry cream:
1/2 cup heavy cream1/2 cup milk1/4 cup sugar3 egg yolkspinch salt2 1/2 tablespoons cornstarch
To finish the Cronuts:
1/2 cup granulated sugar
1 cup confectioner's sugar
2 tablespoons whole milk
For the Danish filling:
One 8 ounce tub of Mascarpone (I use Vermont Creamery), room temperature
1 egg yolk
2 tablespoons confectioner's sugar
1 tablespoon flour
zest of 1/2 a lemon
scant pinch salt
jam of choice
To finish the Danish:
Egg wash (1 large egg whisk together with 1 tablespoon of water)
glaze (1 cup of confectioner's sugar whisked with 1 to 2 tablespoons milk)
PROCEDURE
For the Danish dough
*** You'll notice in the original recipe that 2 packets of compressed or active dry yeast are called for. I prefer instant yeast. It doesn't require "blooming" and is very reliable compared to active or compressed yeast. I also recommend only using 1 packet, as that is more than enough yeast for the dough. ***
•In the bowl of a stand mixer, whisk together the water, milk, eggs and vanilla bean paste until smooth, making sure that the egg yolks are completely incorporated into the mixture.
•In another bowl, stir together the flour, sugar, instant yeast and salt (and cardamom, if using). Add to the wet ingredients in the mixing bowl and attach the dough hook.
•On slow speed, mix the dough for 5 minutes until smooth. Add the butter, a few bits at a time. Continue mixing until the dough pulls away from the sides of the bowl and is smooth and shiny, about 5 more minutes. Turn the dough out onto plastic wrap and cover completely. Refrigerate for 20 minutes. In the meantime, make the butter block.
For the butter clock
•Fold a piece of parchment, the size of a half sheet pan, in half. Set aside.
•Cut the butter into small pieces. Combine the butter and flour in the bowl of a stand mixer fit with a paddle attachment. Mix on slow until the butter is smooth.
•Transfer the smooth butter mixture to one half of the parchment. Fold the other half of the parchment over. Roll the butter into a 8" x 12" rectangle between the parchment. Cut the butter in half so you have two pieces of butter, both measuring 6" x 8". Cover both pieces with plastic wrap and refrigerate for 5 minutes.
•Remove the dough from the fridge and turn out onto a lightly floured surface. Roll into a 9" x 18" rectangle. Place one piece of 6" x 8" dough across the center of the dough and lift the left piece of dough up and over the butter, sealing the edges with your fingers. Place the other sheet of butter on top and bring the other half of dough over that, again sealing the butter in. Wrap in plastic wrap and chill for 20 minutes.
 Butter in the middle of a 8" x 18" strip.
 Seal the first block of butter in.
 Place 2nd butter block on top of the first "fold over."
 Fold the remaining flap of dough over the 2nd butter block.
 •Turn the dough out onto a lightly floured surface. Roll the dough into an 8" x 18" strip. Fold both narrow ends in to meet at the center,
 Meeting at the center.then fold, in half, making 4 layers. Wrap in plastic wrap and chill for 20 minutes. Repeat this procedure one more time. Cover and chill for 20 minutes and then roll into an 8" x 18" rectangle and simply fold in half. Wrap in plastic and chill in the fridge for at least 2 hours.
 Last fold.
 For the cronuts
Make the pastry cream:
•Whisk yolks, sugar, salt, and cornstarch in the bowl of an electric mixer until light and fluffy
•Simmer cream and milk in a heavy saucepan and slowly pour the hot cream into whisking sugar/yolk mixture until well combined.
•Transfer back to the saucepan and whisk over medium heat until thickened.
•Place in a bowl and cover the top of the cream with plastic wrap to prevent a skin from forming. Refrigerate until completely cool.
Fry the cronuts:
•Roll out the chilled danish dough to 1/4 inch thick on a floured surface. Allow to rest for 10 minutes . Stamp out "donut" shapes with a very sharp donut cutter (I use an Ateco cutter). Transfer the donuts and "holes" to a parchment lined sheet pan. Cover with plastic wrap and allow to proof for an hour, until doubled in size. Be careful to proof in an area on warmer than 70ºF.


•In a large stock pot, heat the oil to 350º to 360º F. Carefully place the donuts (and the holes) in the oil. Allow the donuts to fry on one side for 45 - 60 seconds, until deeply golden brown. Using chopsticks, flip the donuts and fry for a minute more, until both sides are deeply golden brown and they donuts have expanded considerably. The holes take less than half that time. Place the donuts on a piece of paper towel to drain and cool.
 Can't push these Cronut holes enough. They're dredged in sugar. Just try them. Thank me later.
•Once the donuts are cool, coat the outside of the donuts (and holes) with the granulated sugar. Place the cooled pastry cream in a pastry bag fit with a small open tip. I find open spaces in the center of the donut holes and wiggle the tip inside and squeeze in the cream.
•For the glaze, place the confectioner's sugar in a bowl and stir in 1 tablespoon of milk. If the glaze is too thick, add a drop of milk at a time until the glaze is spreadable. Drizzle on top of the donuts.
For the danish filling
•Combine the mascarpone, yolk, confectioner's sugar, lemon zest and scant pinch salt in the bowl of a stand mixer fit with a paddle attachment. Mix on medium until smooth. Transfer the filling to a small bowl, cover with plastic wrap and refrigerate for at least 30 minutes or until firm.
To finish the Danish:
•Preheat your oven to 375ºF.
•Roll the dough 1/8 inch thick. Cut the dough into 4" x 4" squares. Cut 1" into each corner of the square.
 •Take the left corner of one cut "corner" and press into the center of the square.
 Take the left corner of a "corner" and press into the center.•Continue with the remaining "left corners" to create a pinwheel.
 Pinwheel•Place the pinwheels onto a parchment lined sheet pan and cover with plastic wrap. Proof in a warm corner of the house until doubled in size.
•Place a dollop, about a tablespoon, of mascarpone filling at the center of each pinwheel and then place a teaspoon of your favorite jam or fruit (I used reconstituted dried cranberry by pouring a few tablespoons of hot water over Craisins) in the center of the filling. Brush the edges of the pinwheel with egg wash.
•Bake for 30 minutes or until the pastry is deeply golden brown and the filling is puffed.
•Allow the Danish to cool. Whisk together the confectioner's sugar and milk. Drizzle the glaze over the Danish.
June 10, 2013
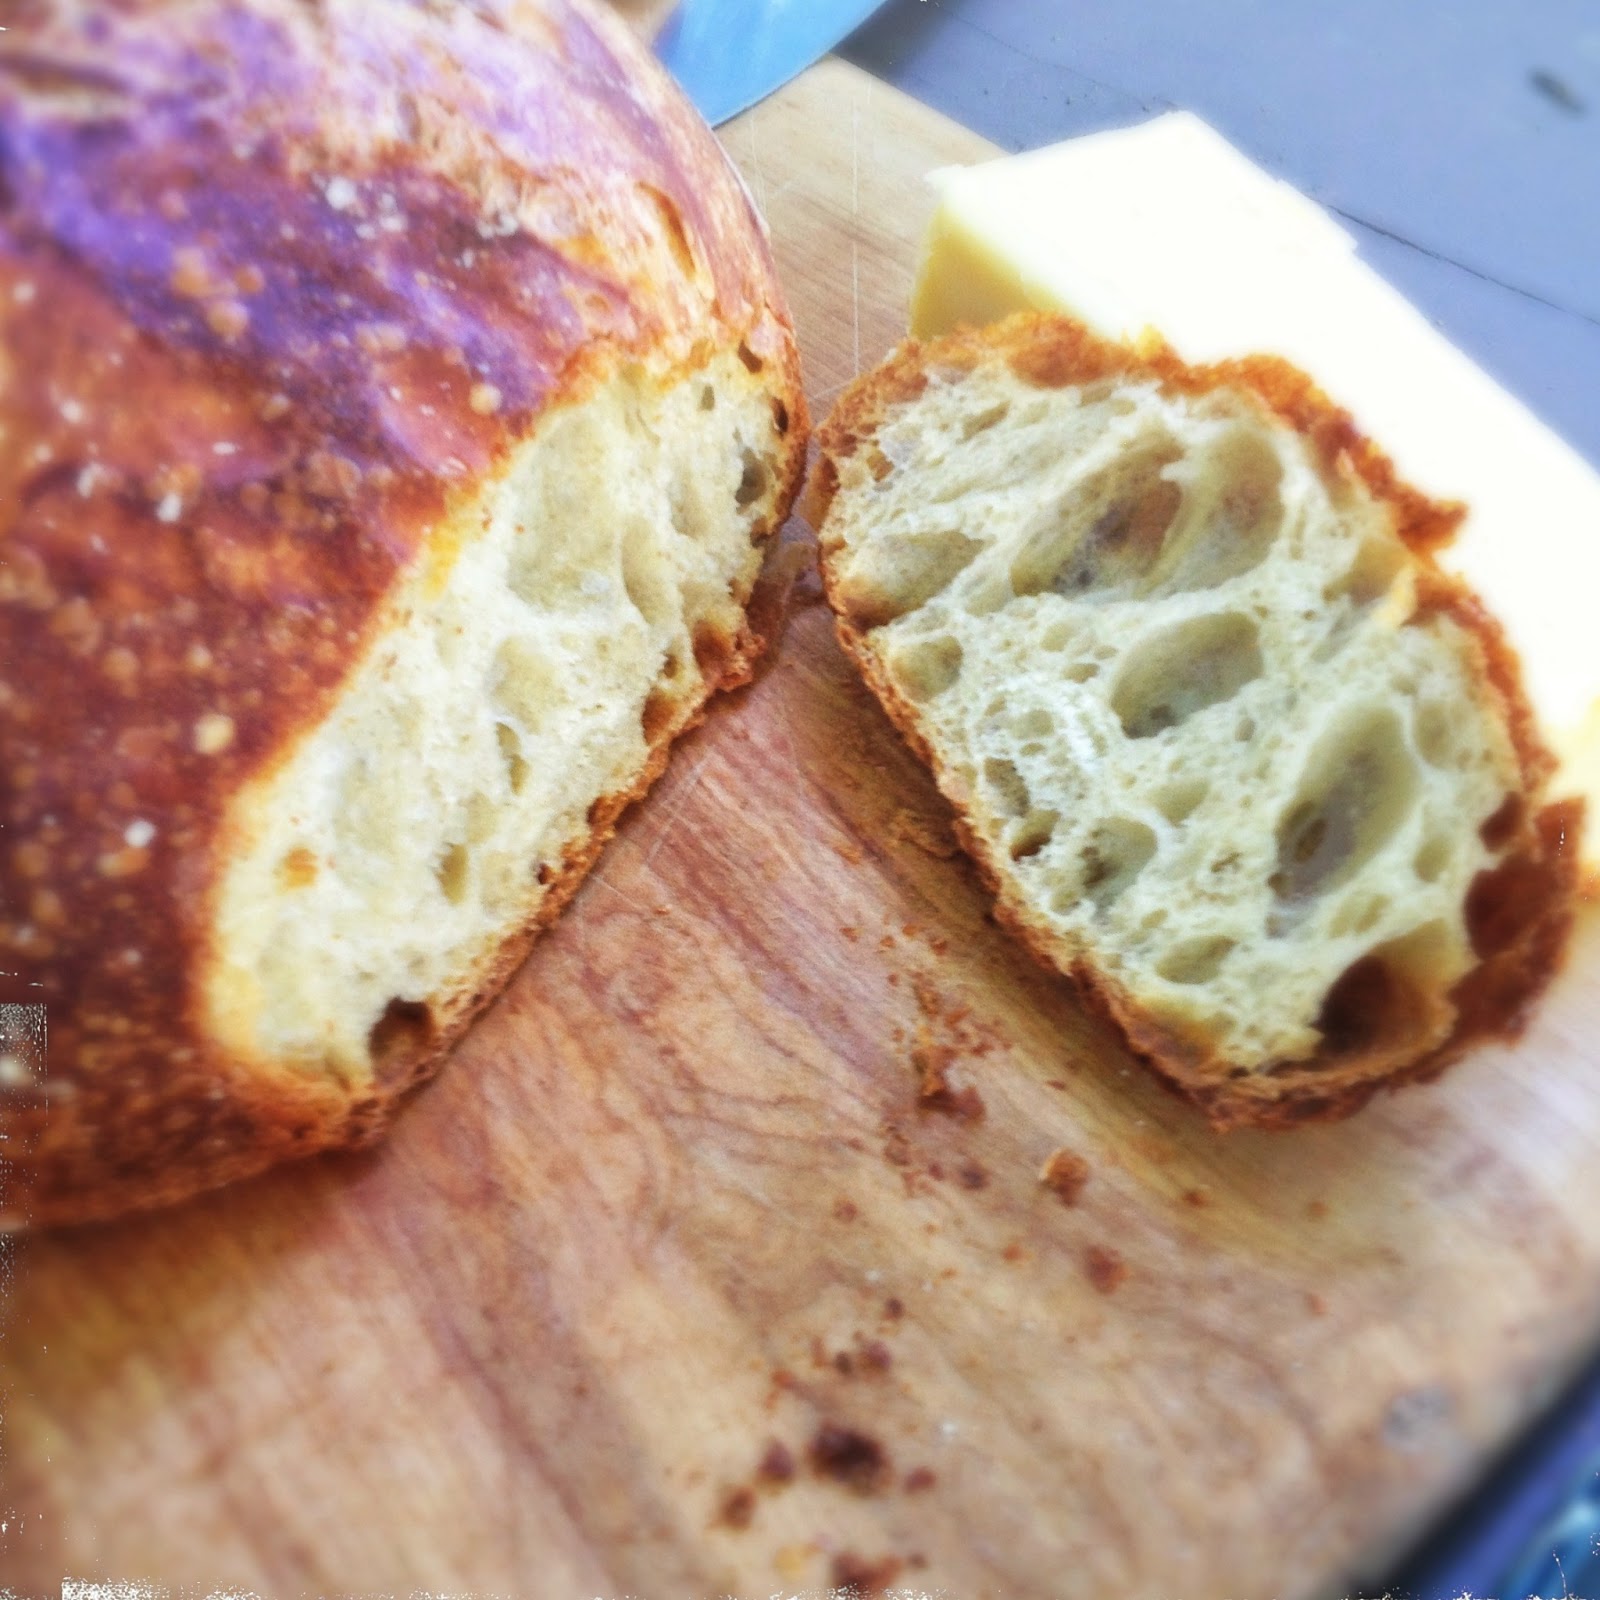
Beer Bread

We brew our own beer here at Freegrace. IPAs, double IPAs, Pilsners, Rye beer, Hefeweizen. You name it, we'll ferment and bottle it. We're even growing hops to contribute to our brew.
You'd think with all this brew-meistering that I'd have made a beer bread by now. And by beer bread, I'm not talking about using the soaker grains or the finished bottled product to aerate the dough. No sir. I'm talking about using trub.
 A birthday beer. Brewed last year.
For those of you not familiar with brewing terminology, trub is the spent yeast sludge left over from the first fermentation. We siphon off the beer-to-be into a big bottle called a "carboy," being careful to leave the trub that's settled to the bottom of our first fermentation tub behind.
 Checking to make sure the beer is ready to be siphoned off into the second fermentation "carboy, " by reading the "gravity" on a hydrometer.
 Siphoning the beer for second fermentation and "dry hopping."
It's that spent yeast filled sediment that's full of hoppy, beery flavor that I've failed to bottle into a starter for bread...until now.
 Trub.A few days ago, I took a deep whiff of the sad yeast slurry left behind, just waiting to be tossed. The aroma was achingly delicious, begging to be harnessed into something more.
 Bubbling Trub.
I saved 200 grams of the trub and started to feed it. For three days, I fed my little trub two 100% hydration meals (equal amounts in weight of flour and water) a day until it bubbled to my satisfaction. I fed it a mixture of both whole wheat and high gluten flours, the whole wheat providing a real kick in the pants for the yeast to thrive. If I'd been a patient baker, I'd have stayed on this feeding schedule, creating a truly viable sourdough starter and waiting a few weeks to use the stuff. But I wondered whether I might lose some of the hoppy undertones I was hoping to cultivate in the bread if I waited that long.
I compromised. In the name of science, of course. I used 200 grams of the trub starter while it still clung to its olfactory beer ancestry to make a few loaves, adding a "spike" of instant yeast to insure a decent rise.
My goodness, I'm so glad I'm impatient sometimes. What a wonderful bread. It's flavorful without being overwhelming. It's clung to the best of the brew while keeping what's so glorious about artisan bread: a thin and crispy crust, a gloriously open and chewy crumb, lovely color and a lingering finish.
I'll continue on a regular feed schedule with the remaining trub and I'll bake another batch without spiking the dough to see whether that wonderful hoppy flavor still lingers. If it doesn't, no big deal. I'll have yet another lovely sourdough starter and an excuse for us to brew another batch of beer.
BEER BREAD
You'll need at least ONE Dutch oven a la Le Creuset for this recipe.
INGREDIENTS
For the starter
200 g trub150 g whole wheat flour350 g high gluten flour (I use Sir Galahad flour from King Arthur Flour)500 g water
-First feed: stir together all the ingredients in a large tub. Cover loosely with plastic wrap and allow to sit at room temperature. -Second feed: discard half of the starter. Weigh the remaining starter. Feed the starter its weight in equal parts flour and water. I.e., if your starter now weights 600g, feed it 300 g of flour (you can continue with the same ratio as above) and 300g water. -Continue feeding twice a day until your starter is nice and bubbly but still holds on to its distinct "brew" aroma. I went through 5 feedings before baking my first batch.
For the bread
200 g trub starter900 g high gluten flour (I used Sir Galahad flour from King Arthur)680 g water20 g fine grain sea salt0.5 g instant yeast (I use Red Star Platinum Yeast)
PROCEDURE
Autolyse
-In a large bowl, combine the trub starter, the flour and the water. Stir until all the flour looks saturated. You aren't "kneading" per se, simply give the mixture a hearty enough stir that the the ingredients are well combined. Allow to sit for at least 20 minutes up to an hour. This is autolyse, a process in which gluten is developed simply by allowing the water to saturate the flour before adding salt or yeast. In this case, I added the starter since it's high in moisture and won't inhibit the gluten formation like a dry yeast would. Autolyse allows you to mix less and helps preserve flavor and color that are lost form over mixing and the resultant oxidation.
Final dough
-Sprinkle the salt and instant yeast evenly over the mixture. Pull one edge of the dough up, as high as you might without it breaking and fold it over the entire mass. Continue around the entire mass of dough, pulling and folding until you've made a full circle. Once you've finished a full "circle" of pulling and folding, use your thumb and index finger as pincers to inch along the body of the dough in a cutting motion. Continue like this, pulling and folding and "pincing" for a minute. Allow the dough to rest for 10 minutes and continue this procedure of pulling, folding and pinching for another 30 seconds. This is a relatively wet dough. Don't worry about it.
-Allow the dough to rest for 20 minutes, covered, and perform 10 more pull/folds. Notice how the dough "stiffens" after just those 10 pull/folds.
 Pull.
Pull.
 Fold.
Fold.-Allow the dough to rest 20 more minutes. Perform 10 more pull/folds. Rest again for 20 minutes and perform 10 more pull/folds. That makes three rounds of 10 pull/folds in total.
-Allow the dough to bulk preferment for 2 hours, covered, on your kitchen countertop.
-After the 2 hours, gently turn the dough out onto a floured work surface. Use a bowl scraper to get all that sticky dough out of the container. Divide the dough in two. Gently pre-form the two pieces of dough into loose rounds, gently degassing the dough. Don't pound it down harshly. You want to keep a decent amount of volume in the bread. Cover the pieces and allow to rest for 20 minutes.
-Shape each dough round into a slightly tighter ball, using the sides of your hands to gently cradle the dough and tighten the mound to create a seam underneath by gently rolling the dough along your floured surface. Click HERE for a beautiful shaping demonstration from King Arthur Flour's Master Baker, Jeffrey Hamelman. The round shaping portion is the first up but it's all worth watching.
-Cover the shaped loves with plastic wrap and allow to proof for an hour.
-While the bread is proofing, preheat your oven to 425º. Place your dutch oven, lid on, in the oven to preheat as well (even better if you have two!).
-Once the bread has proofed, carefully remove the dutch oven from the heat and take off the lid. CAREFULLY place your loaf into the dutch oven, seam side down. I repeat, BE VERY CAREFUL not to touch the sides of the hot Dutch oven.
-Using a razor or terribly sharp knife, score the top of the bread from edge to edge. You can get fancy but it's a tight space in which to score and the more time you take, the more heat you lose and the more likely you'll burn your hands on the Dutch oven. If you only have one Dutch oven, when you shape your final loaves, place them on a lightly floured, parchment lined sheet pan. If your kitchen is on the cool side, leave your second loaf covered on the counter top. If it runs hot, place in the fridge, covered, during the first bake.
-Replace the lid and bake, lid on, for 20 minutes. After 20 minutes, remove the lid and bake for 30 to 40 minutes more, until the bread is deeply brown and sounds hollow when you knock the bottom of the loaf or the internal temperature of the bread reads 190º F to 195º F.
June 8, 2013
Happy Bee Day
 Whether it rains or shines today, we'll celebrate with a special Bee cake and friends.
 I wish you all an equally bee-utiful weekend.


 I have to thank THE Tough Cookie for providing that extra bit of inspiration for my bee and honey themed cake and fest.

June 7, 2013
FREEGRACE FRIDAY! A pantry: He did it for love
Welcome to a new Friday Feature at GBakes: Freegrace Fridays! I'll be sharing stories of our adventures of restoring and working in our 1790s tavern and farm.

We live in an ancient tavern. It was built in 1794. The tavern sits on what was once a working farm, which includes acres of land, an ancient barn, a milk shed, a corn crib and a stable. And whisky barrels. They used to brew whisky here during the war of 1812. We've not found any whisky yet but don't think we aren't looking.
When we bought the house and property, it was pretty much as it appeared 100 years ago, give or take a few layers of wallpaper and internal plumbing.
 Ray dug up this old advertisement for the farm from the late 1800s. But my favorite ad isn't for the farm, it's for Burton's Livery. They hitched your horse. While you were shopping. That's service.
Upon taking possession, we tackled the attached carriage house. The tavern was also a stagecoach stop. The coaches needed a place to trundle through to drop off the passengers and that was where the carriage house came in. We turned it into my commercial bakery. We had the house re-roofed and painted inside and out. During the repaint, our painters found that the porch attached to the el was rotting. We had to rebuild the porch. Then we took on the residential kitchen and other repairs both cosmetic and structurally crucial.
But nothing compares to the pantry/attached bath reno that we just finished. Is it because this was a project we took on all by ourselves, save the plumbing? Is it because it was a project that was begun as a lark on my part ("Hey, Ray Let's tear down some of the ceiling to see if the old beams run through!") only to turn into a pit of despair? Is it because it's the most recently finished, therefore our new favorite? Yes, Yes and YES!
 The "pantry" as it appeared when the original owner's tenant occupied the el. Pictures taken during our inspection. You can't tell but that ceiling's sagging.
Hi kitty!
 More pictures of the bath from our inspection. Don't worry. We moved the washer and dryer the second we moved in. The toilet is hiding next to the washer.
Good times.
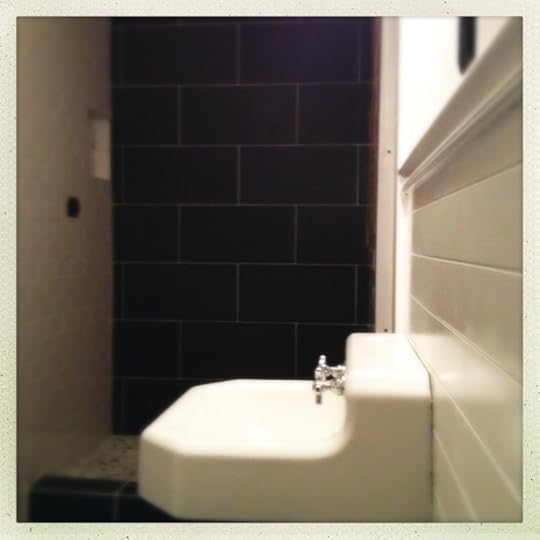
 Plastic shower surround! It's amazing how easy it is to stop noticing how awful something like this is when you don't have the wherewithal to tear it out and start anew.
When we first saw the house, there was a lone woman babysitting the place. The main house was shut down, pipes drained and windows sealed. She lived exclusively in the el which comprises the residential kitchen, an attached sitting room/pantry and bath comprising the downstairs. The sleeping quarters were on the upper level of the el. She had a few cats. She may or may not have had a life size nutcracker soldier in the bedroom.
A few years passed without our having touched either room but for a coat of paint. We parked our gargantuan sleeper sofa in the room, right across from the t.v. I refused to use the attached bathroom. I kept threatening to tear down the sagging ceiling in both rooms.
 A view from the pantry into the bathroom just as we were beginning to tear the whole place apart.I caught Ray in a vulnerable moment. I got him to punch a hole in that forsaken ceiling. I saw beams. I saw an opportunity to press my case for turning the "t.v. room" into a proper pantry that could absorb all the kitchen overflow. When your life and living is centered around baking and cooking, you manage to collect all manner of gadgets and wares.
Ray saw work and trouble ahead.
It took us 6 months to make a move. We just kept staring at the hole.
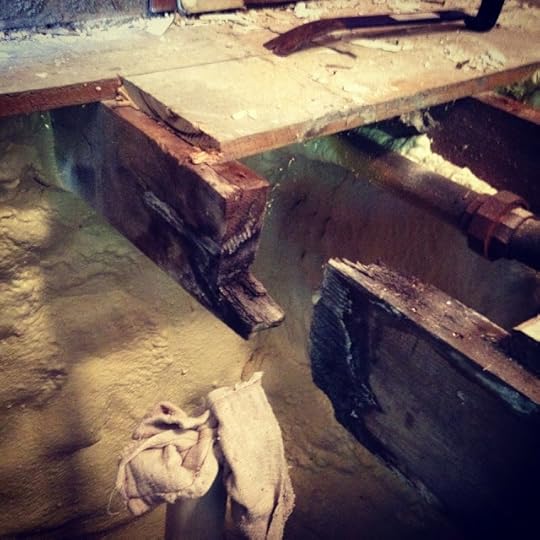 This was the beam underneath the drain of the shower floor. Your eyes do not deceive you. The beam has rotted right in the middle.
As if by magic, one day we both found the motivation to face the hole. Ray's motivation surpassed mine, it extended into the bathroom. Thank goodness it did. It would have taken a few showers more and the floor would have collapsed.
 Rotting beneath the toilet.
A few more flushes and the flushee would have taken a trip to the basement on the porcelain throne.
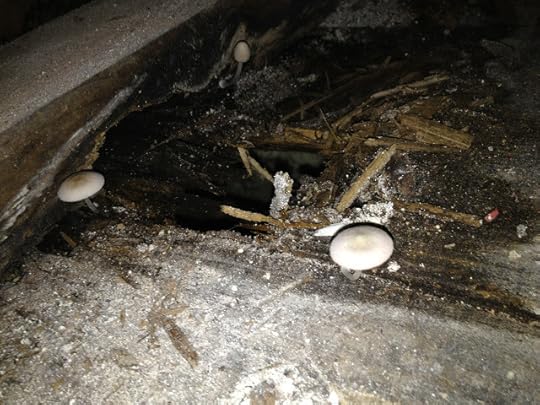 After Ray took out the plastic shower surround but before he took out the subfloor, he noticed that there was quite a bit of moisture. So much so that overnight, mushrooms grew on the floor.
Ray had to replace each supporting beam. By himself. He had a mantra during this stage of the reno. He'd be balancing a 100 lb beam on his back while screwing it into the steel joist hangers and he'd repeat, "Why am I doing this? FOR LOVE?" He muttered and at times he'd yell. But always, "Why am I doing this? FOR LOVE?" I may have reminded him that the bathroom was his idea. This might not have helped matters.
 Just a little bit of trouble Ray found.
He rebuilt the floor over the joists. He rebuilt the shower, the sloping pan and all. As he was putting in the studs, I suggested that while he was at it, he should create a built-in "box" in the shower to hold all the essentials. We (that is he) was going through all the trouble of building a custom shower, "we" really shouldn't skimp on the essentials.
I left him to his work in the shower. Ten minutes later, I swear I heard strains of our new theme song, 'Why am I doing this? For LOVE?" But he did it, he built the shower nook. He did it for love. And for easy access to soap and shampoo.
 Everything's ready for tile, including the nook.In the meantime, I researched tile. I discovered something I already knew. I have expensive taste. If you haven't already guessed, the very reason we (i.e. Ray) were doing this ourselves was to save money. If I indulged my tile whimsy, we'd be screwed.
For the hell of it, I went onto Craig's List. I typed "12-inch x 24-inch black slate tile" into the search box. It certainly wasn't going to hurt to look. And there it was! In Manchester, New Hampshire. Someone had BOXES of my fantasy tile and they were selling it for nothing! That they were probably selling it out of the back of a van didn't concern me. I just wanted my tile.
It did occur to me as we were heading off onto the Manchester exit that buying tile out of the back of a van might not be the worst case scenario. Any worst case scenario always includes a van but it also includes scenes from "Silence of the Lambs" with a gentleman named Buffalo Bill.
I wrote frantic emails to family and friends that if I didn't email them after 1:15, to call the police and tell them we'd been kidnapped by tile impostors.
 You know I'm serious when my hat's backwards.
We drove away from a lovely gentleman's home, tile in the back of the truck. No vans entered into the transaction. I started laying tile that evening. That's right. I did all the tiling. Ray had to mix all of my mortar and grout, though. I always get the fun jobs.
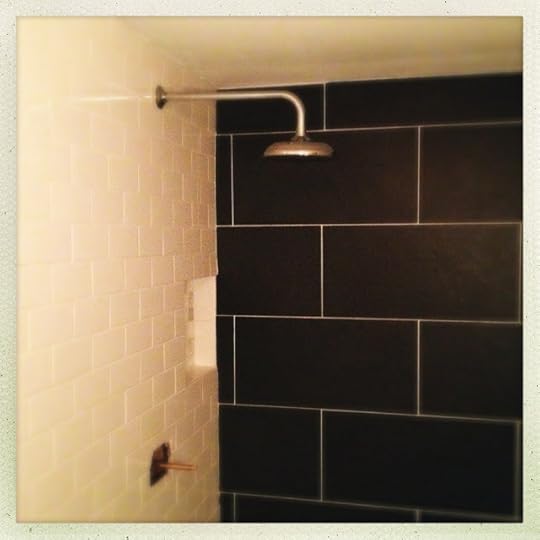 Tile finished on the walls of the shower. Just need a handle to turn on the water but we do have a nook!
 Final touches to what was once the "washer dryer" wall.
 We kept the old sink. I have a soft heart for old fixtures.
 A little starlight for the ceiling.
With the bathroom finished, the pantry was quick work. Ray rebuilt the walls but for the one where we'd discovered ancient barn board. We agreed that we needed to keep it exposed. That decision wasn't based at all on the fact that it would mean less work. Not one bit.
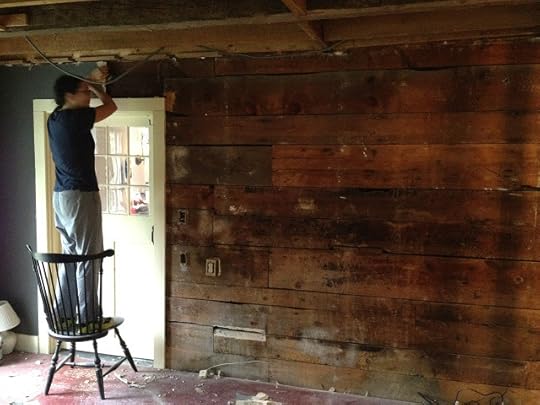 Going through my head at this very moment, "Please tell me that this wood extends all the way to the end of the wall. Pretty please." As well as, "I really hope my saggy assed sweatpants don't fall down while Ray's taking this picture."Ray had the brilliant idea NOT to drywall between the very ceiling beams that started it all. Instead, he suggested we use burlap coffee bean bags from our roaster, Vermont Artisan Coffee, to give the room a wabi sabi feel. We'd cover the insulation, we'd leave the beams exposed AND we'd get a one-of-a-kind look. Win-Win! Again, don't think for a moment that we chose this method based on ease of installation versus drywalling. Or the fact that the materials were free. Nope. Not at all.
We painted the floor.
Ray installed the pantry sink. He kept asking me, "Are you sure you want to use this?" I was hell bent on using a cupboard and a random marble sink that had both been in the barn when we bought the house. I insisted. It was free. No Craig's List needed. Not on the sink, anyway.
 Pantry sink.Did I mention I have expensive taste in countertops? I took to the Craig's List search engine, "4 foot marble countertop." I needed an island for my new pantry. I wanted it marble and I wanted it CHEAP!
You're not going to believe this but we were off to Manchester again!
This time, I wrote my "In the event we don't email you back by 1:30pm, we've been kidnapped via Craigslist.com. Call the police." email to friends and family before we left the house to pick up the marble slab.
Marble base safely in the back of the truck, we left the lovely lady's house in Manchester and I told Ray what I envisioned him building as a base for our newly acquired marble.
Poor Ray. He does it for love.
 Our Craig's List marble top and a Ray made base.
 Our barn wood wall and our new island.
 On our travels to find a countertop for our island, Ray discovered this hutch at Vermont Salvage. He was reticent to show me because he knew I'd fall in love. He broke down and led me to where it sat. It's now in our pantry.
He does it for love.
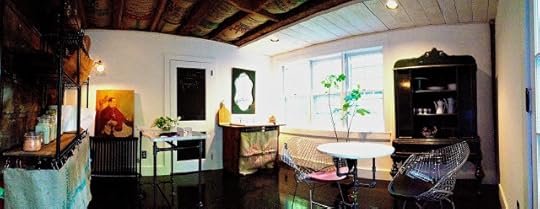 A panorama taken by Ray. I swear the ceiling isn't bowing. It's just an illusion. And yes, Ray built the base for the bistro table too. And that's chalkboard paint on the door leading to the new bathroom. If you're wondering, it says "Gesine Loves Ray."

We live in an ancient tavern. It was built in 1794. The tavern sits on what was once a working farm, which includes acres of land, an ancient barn, a milk shed, a corn crib and a stable. And whisky barrels. They used to brew whisky here during the war of 1812. We've not found any whisky yet but don't think we aren't looking.
When we bought the house and property, it was pretty much as it appeared 100 years ago, give or take a few layers of wallpaper and internal plumbing.
 Ray dug up this old advertisement for the farm from the late 1800s. But my favorite ad isn't for the farm, it's for Burton's Livery. They hitched your horse. While you were shopping. That's service.
Upon taking possession, we tackled the attached carriage house. The tavern was also a stagecoach stop. The coaches needed a place to trundle through to drop off the passengers and that was where the carriage house came in. We turned it into my commercial bakery. We had the house re-roofed and painted inside and out. During the repaint, our painters found that the porch attached to the el was rotting. We had to rebuild the porch. Then we took on the residential kitchen and other repairs both cosmetic and structurally crucial.
But nothing compares to the pantry/attached bath reno that we just finished. Is it because this was a project we took on all by ourselves, save the plumbing? Is it because it was a project that was begun as a lark on my part ("Hey, Ray Let's tear down some of the ceiling to see if the old beams run through!") only to turn into a pit of despair? Is it because it's the most recently finished, therefore our new favorite? Yes, Yes and YES!
 The "pantry" as it appeared when the original owner's tenant occupied the el. Pictures taken during our inspection. You can't tell but that ceiling's sagging.
Hi kitty!
 More pictures of the bath from our inspection. Don't worry. We moved the washer and dryer the second we moved in. The toilet is hiding next to the washer.
 Good times.
 Plastic shower surround! It's amazing how easy it is to stop noticing how awful something like this is when you don't have the wherewithal to tear it out and start anew.
When we first saw the house, there was a lone woman babysitting the place. The main house was shut down, pipes drained and windows sealed. She lived exclusively in the el which comprises the residential kitchen, an attached sitting room/pantry and bath comprising the downstairs. The sleeping quarters were on the upper level of the el. She had a few cats. She may or may not have had a life size nutcracker soldier in the bedroom.
A few years passed without our having touched either room but for a coat of paint. We parked our gargantuan sleeper sofa in the room, right across from the t.v. I refused to use the attached bathroom. I kept threatening to tear down the sagging ceiling in both rooms.
 A view from the pantry into the bathroom just as we were beginning to tear the whole place apart.I caught Ray in a vulnerable moment. I got him to punch a hole in that forsaken ceiling. I saw beams. I saw an opportunity to press my case for turning the "t.v. room" into a proper pantry that could absorb all the kitchen overflow. When your life and living is centered around baking and cooking, you manage to collect all manner of gadgets and wares.
 Ray saw work and trouble ahead.
It took us 6 months to make a move. We just kept staring at the hole.
 This was the beam underneath the drain of the shower floor. Your eyes do not deceive you. The beam has rotted right in the middle.
As if by magic, one day we both found the motivation to face the hole. Ray's motivation surpassed mine, it extended into the bathroom. Thank goodness it did. It would have taken a few showers more and the floor would have collapsed.
 Rotting beneath the toilet.
 A few more flushes and the flushee would have taken a trip to the basement on the porcelain throne.
 After Ray took out the plastic shower surround but before he took out the subfloor, he noticed that there was quite a bit of moisture. So much so that overnight, mushrooms grew on the floor.
Ray had to replace each supporting beam. By himself. He had a mantra during this stage of the reno. He'd be balancing a 100 lb beam on his back while screwing it into the steel joist hangers and he'd repeat, "Why am I doing this? FOR LOVE?" He muttered and at times he'd yell. But always, "Why am I doing this? FOR LOVE?" I may have reminded him that the bathroom was his idea. This might not have helped matters.
 Just a little bit of trouble Ray found.
He rebuilt the floor over the joists. He rebuilt the shower, the sloping pan and all. As he was putting in the studs, I suggested that while he was at it, he should create a built-in "box" in the shower to hold all the essentials. We (that is he) was going through all the trouble of building a custom shower, "we" really shouldn't skimp on the essentials.
I left him to his work in the shower. Ten minutes later, I swear I heard strains of our new theme song, 'Why am I doing this? For LOVE?" But he did it, he built the shower nook. He did it for love. And for easy access to soap and shampoo.
 Everything's ready for tile, including the nook.In the meantime, I researched tile. I discovered something I already knew. I have expensive taste. If you haven't already guessed, the very reason we (i.e. Ray) were doing this ourselves was to save money. If I indulged my tile whimsy, we'd be screwed.
 For the hell of it, I went onto Craig's List. I typed "12-inch x 24-inch black slate tile" into the search box. It certainly wasn't going to hurt to look. And there it was! In Manchester, New Hampshire. Someone had BOXES of my fantasy tile and they were selling it for nothing! That they were probably selling it out of the back of a van didn't concern me. I just wanted my tile.
It did occur to me as we were heading off onto the Manchester exit that buying tile out of the back of a van might not be the worst case scenario. Any worst case scenario always includes a van but it also includes scenes from "Silence of the Lambs" with a gentleman named Buffalo Bill.
I wrote frantic emails to family and friends that if I didn't email them after 1:15, to call the police and tell them we'd been kidnapped by tile impostors.
 You know I'm serious when my hat's backwards.
We drove away from a lovely gentleman's home, tile in the back of the truck. No vans entered into the transaction. I started laying tile that evening. That's right. I did all the tiling. Ray had to mix all of my mortar and grout, though. I always get the fun jobs.
 Tile finished on the walls of the shower. Just need a handle to turn on the water but we do have a nook!
 Final touches to what was once the "washer dryer" wall.
 We kept the old sink. I have a soft heart for old fixtures.

 A little starlight for the ceiling.
With the bathroom finished, the pantry was quick work. Ray rebuilt the walls but for the one where we'd discovered ancient barn board. We agreed that we needed to keep it exposed. That decision wasn't based at all on the fact that it would mean less work. Not one bit.
 Going through my head at this very moment, "Please tell me that this wood extends all the way to the end of the wall. Pretty please." As well as, "I really hope my saggy assed sweatpants don't fall down while Ray's taking this picture."Ray had the brilliant idea NOT to drywall between the very ceiling beams that started it all. Instead, he suggested we use burlap coffee bean bags from our roaster, Vermont Artisan Coffee, to give the room a wabi sabi feel. We'd cover the insulation, we'd leave the beams exposed AND we'd get a one-of-a-kind look. Win-Win! Again, don't think for a moment that we chose this method based on ease of installation versus drywalling. Or the fact that the materials were free. Nope. Not at all.
We painted the floor.
Ray installed the pantry sink. He kept asking me, "Are you sure you want to use this?" I was hell bent on using a cupboard and a random marble sink that had both been in the barn when we bought the house. I insisted. It was free. No Craig's List needed. Not on the sink, anyway.
 Pantry sink.Did I mention I have expensive taste in countertops? I took to the Craig's List search engine, "4 foot marble countertop." I needed an island for my new pantry. I wanted it marble and I wanted it CHEAP!
You're not going to believe this but we were off to Manchester again!
This time, I wrote my "In the event we don't email you back by 1:30pm, we've been kidnapped via Craigslist.com. Call the police." email to friends and family before we left the house to pick up the marble slab.
Marble base safely in the back of the truck, we left the lovely lady's house in Manchester and I told Ray what I envisioned him building as a base for our newly acquired marble.
Poor Ray. He does it for love.
 Our Craig's List marble top and a Ray made base.
 Our barn wood wall and our new island.
 On our travels to find a countertop for our island, Ray discovered this hutch at Vermont Salvage. He was reticent to show me because he knew I'd fall in love. He broke down and led me to where it sat. It's now in our pantry.
 He does it for love.
 A panorama taken by Ray. I swear the ceiling isn't bowing. It's just an illusion. And yes, Ray built the base for the bistro table too. And that's chalkboard paint on the door leading to the new bathroom. If you're wondering, it says "Gesine Loves Ray."
June 6, 2013
Zippy Blueberry Tart

A few weeks ago I was in Burlington, Vermont doing a demo and book signing for a big crowd at the New England Federal Credit Union for the new book Bake it Like You Mean It (for reals! They host a Distinguished Writer's Series IN the bank. I get to fling sugar around willy-nilly in the world of finance!) . After assembling, slicing and dicing my way through my cake demo, I took questions from the crowd, as I am wont to do.

One lovely baker, hearkening back to my second cookbook Pie It Forward, asked why the recipe for Quick Puff yields so much more dough than needed for an individual pie. I explained to her that in reality, I was doing the baking world a favor. Here's why:
While making quick puff is easy, it is a bit of a process. That's my first reason for making a larger batch than necessary for one project. Better to make it behemoth so you don't have to go through the task again for a while.
The second reason is that once you start using puff, you'll discover a thousand applications for it that you want to try RIGHT AWAY! Now aren't you glad you have all that extra dough?
Third, it freezes beautifully. Wrap the dough you aren't using tightly in plastic wrap and shove it in the freezer. It'll last for months.
And lastly, there are moments in a baker's life when your usual zeal for creating heavenly confections in the kitchen is zapped. Lack of sleep, 100º weather, cramps. Any or all of these things can dampen a flour aficionado's affection for the pastry arts, if only for a moment. It's usually in the throws of this disaffection that an urgent request for a baked good comes your way. But what's this? You have extra quick puff in the freezer! You can pump out something gorgeous and unbelievably delicious in no time or effort.
Here's a perfect example of a snappy tart that will come to your rescue on those days when you just don't have the energy to break out your best and brightest inner master baker: a quick blueberry tart.
Zippy (Puff) Blueberry Tart
INGREDIENTS
Quick Puff from the freezer (recipe and amount of dough to use follows)
3 cups frozen blueberries
juice and zest of 1 lemon
pinch nutmeg
scant pinch fine sea salt
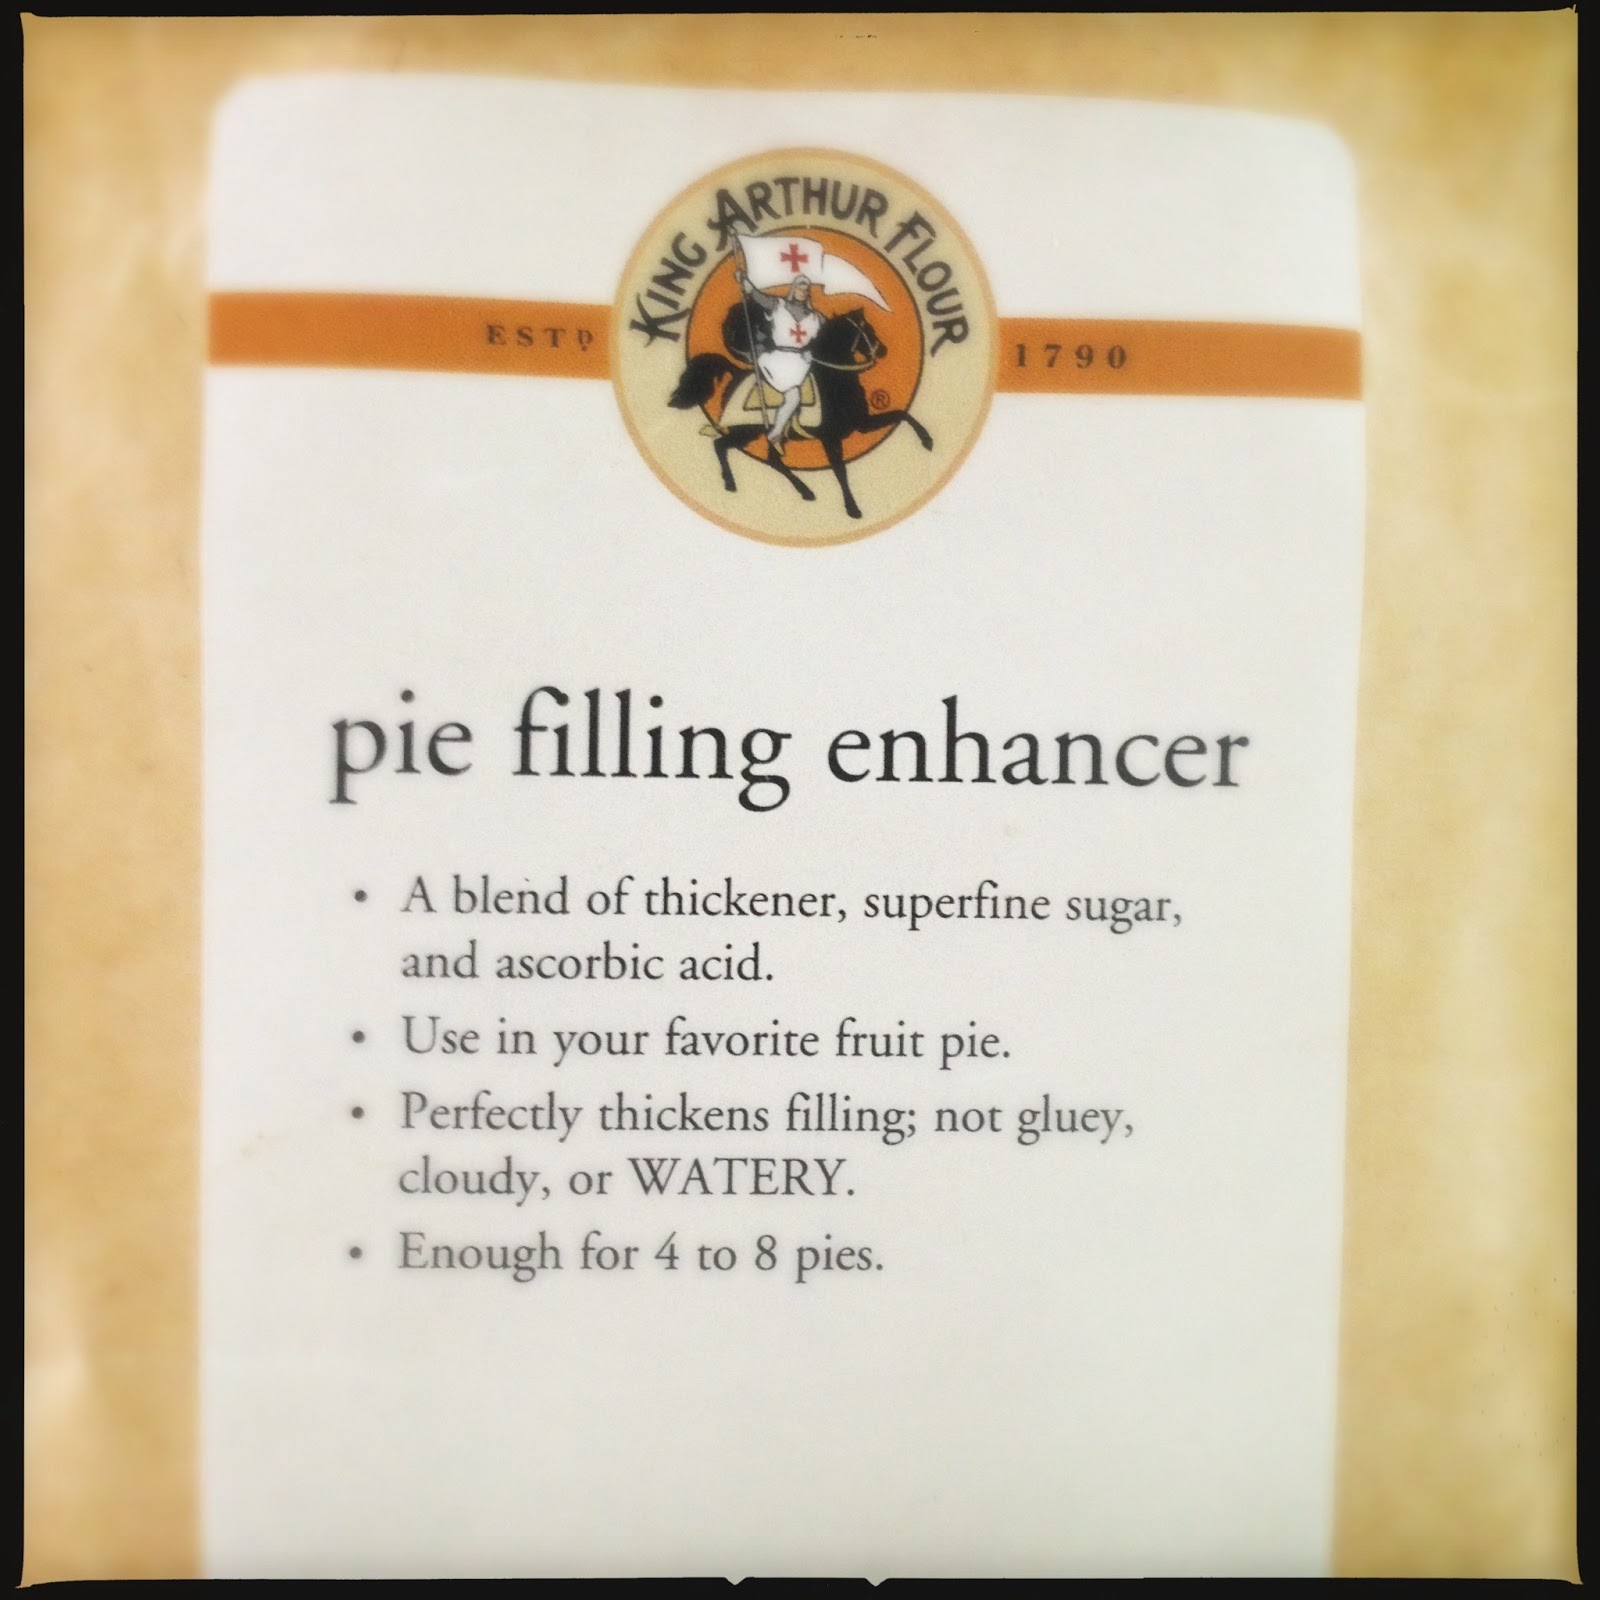
1/3 cup King Arthur Flour Pie Filling Enhancer (this is a mixture of thickener, sugar and ascorbic acid)
If you prefer a sweeter pie, a few extra tablespoons of granulated sugar
1/4 cup Sugar in the Raw to finish
PROCEDURE
•Preheat oven to 375ºF.
• Cut a chunk of dough from your larger quick puff block (I use about 1/8th of the total dough for this tart but you can cut of more for a larger tart, less for a smaller, etc).
• If the block is frozen solid, place it in a microwave and defrost on the 2nd to 3rd lowest power setting and nuke for 4-5 minutes at a time, checking to make sure you're only thawing and not melting. Now, if you have advance warning of an impending dessert, you should put the puff in the fridge overnight to thaw.
• On a lightly floured surface, roll the dough out into a rough 9" circle.

• I place an 8" cake ring gently onto the middle of the rolled dough and, using a very sharp knife, cut a circle around the ring, about 1/2 to 1 inch larger than the cake ring.
• Place the cake ring onto a parchment lined sheet pan (you can use a cake pan instead of a cake ring if you don't have one hanging around). Tuck the dough into the cake ring (or pan), making sure you create an even edge all around.
•Freeze the dough for 20 minutes.
•Dock the dough (using a fork, poke holes along the bottom of the dough) and line with parchment. Place pie weights or dry beans over the parchment and blind bake for 20 minutes. Remove the weights and parchment. Check to see if the dough has lost its "raw dough sheen." If it hasn't, place the dough back into the oven without parchment or weights for 10 more minutes.
•Add the blueberries to a large bowl. In a smaller bowl, combine the Pie Filling Enhancer, lemon zest, nutmeg and scant pinch salt (add extra sugar, if using). Stir to combined.
•Pour the lemon juice over the blueberries and stir with a wooden spoon to distribute and break up the frozen berries. Sprinkle the Pie Enhancer mixture evenly over the berries, stirring as you add. Continue stirring until the berries are evenly coated.
 Ready to go into the oven!
•Spoon the filling into the prepared dough. Sprinkle the Sugar in the Raw over the blueberries and the exposed dough edge. Bake for 30 to 40 minutes or until the dough is dark, golden brown and the filling bubbles slightly.
A Quick Quick Puff Tutorial:
These are images of images from my book Pie It Forward, taken by the wonderful Tina Rupp.
INGREDIENTS
2 pounds AP Flour (I only use King Arthur AP flour)
2 pounds cold, unsalted butter cut into chunks
1 1/4 cups ice cold water
1/2 teaspoon salt
PROCEDURE


•In a large bowl, combine the flour and salt. Stir with your hands to distribute the salt.
•Add the butter and massage the butter into the flour with the tips of your fingers until the butter pieces are a bit smaller, about the size of a dime. Add the water and smoosh everything around with a wooden spoon or with your hands, coating the mixture with water (this gets terribly messy and sticky). Gently knead until the whole mess looks like it's just barely holding together. Dump the dough out onto a lightly flour surface and form it into a loose square. Cover the dough with plastic wrap and let it rest for 10 minutes on the counter, where the flour will continue to absorb moisture from the water and butter.
•Roll the dough into a rough 12 x 20" rectangle.
•Make a single fold by bringing one short edge of the dough to the midline of the rectangle, then fold the other side over on top of the first fold- just like folding a letter (that's why the process is also called a letter fold).
•Turn the dough 90 degrees, roll out the dough again to the same size rectangle, and make another letter fold.
•Do this twice more, to make 4 folds and turns total. Bits are going to plop of will-nilly. Don't worry. Just be patient. Shove the errant blobs of dough back into the whole and persevere! It comes together in the end. Promise.
•Cover the dough with plastic wrap and allow to rest in the fridge for at least 20 minutes or freeze for months!
June 5, 2013
Pop. Tarts. AKA: This is what I do with leftover pate brisee dough.
 Cherry filled pate brisee pops.
If you remember yesterday's post, wherein I made a Strawberry Rhubarb tart, I said you'd have a little dough left over (click here to get the dough recipe). Here's what I do with it:

(1) I roll out the remaining dough into a rough rectangle and cut out as many 1" x 2" pieces as I can muster.

(2) If I'm feeling jaunty and I've got them on hand, I place a lollipop or popsicle stick onto one dough piece.

(3) I put just a skosh of filling. Today I used cherry preserves I'd made last year along with a few blueberry filled, made by combining 1 cup of frozen wild blueberries with a few tablespoons of sugar, a touch of lemon zest and juice and then simmered until it thickened. Make as much filling as you need, remembering you only need a scant teaspoon for each one. Jam works beautifully. As does Nutella. And get this, you can make them savory. I filled some with cheese and sprinkled them with sea salt.

(4) Egg wash the edges and place a second rectangle of dough on top. Press very gently along the edges with your fingertips to adhere and using an extra lollipop stick, press along the edge gently to create a lovely ridge. You can use a fork too, but I love the neat edge that the stick gives you. Use a toothpick to poke little holes all along the the top piece of dough.
(5) Brush the top with egg wash (optional) and bake at 350º for about 15 minutes. The egg wash makes the pop brown more deeply and gives it shine, which is something you could do without if you're covering with glaze.
(6) Allow to cool completely and drizzle glaze on top. I stir together about 1/4 cup confectioner's sugar with a tiny bit of milk. I stir and keep adding drops of milk until I get a thick yet spreadable consistency, adding a little food coloring if the mood strikes.

(7) Gently drizzle the glaze over the top of the pop. This is a deliciously tender dough and if you "spread" the glaze with an offset too aggressively, the dough will flake off. To avoid this, I either pipe or drizzle the glaze as uniformly as I can. If you have sprinkles, apply while the glaze is still tacky.

Gesine Bullock-Prado's Blog

- Gesine Bullock-Prado's profile
- 69 followers
Gesine Bullock-Prado isn't a Goodreads Author
(yet),
but they
do have a blog,
so here are some recent posts imported from
their feed.

