
Gesine Bullock-Prado's Blog, page 6
August 1, 2015
FABA-ulous VEGAN MERINGUES!

Don't you love it when a product is marketed as a "miracle" and it actually is, in its own benign way? That's true for aquafaba or chickpea juice. It's been touted as the vegan egg replacer to replace all egg replacers. Some genius (vegan baker Goose Wohlt) realized that the goo left in the chickpea can is actually good for something other than oozing down your kitchen drain (along with the lone chickpea that accidentally goes for the ride into the Insinkerator). Quite frankly, I believe that garbanzo juice will end up becoming the main reason you end up buying a can of (hopefully BPA free) chickpeas and you'll end up scratching your noggin' for new ways to use all those leftover beans. There's only so much hummus a gal can stomach. But meringues? Can't stop, won't stop.

That's the beauty of the protein packed garbanzo water: it whips up into a stable foam BEAUTIFULLY. We're talking stiff peaks, people. And when baked off, they are light and airy (even more so than a traditional meringue). And, yes, they are stinkin' delicious. You know what that means? Next up: vegan pavlova, vegan macarons that don't require expensive lab generated foaming agents.

Whether you are vegan, allergic or simply faba-curious, this is a gorgeous way to dip your toe into the aquafaba world. Who knows what it will lead to?
FABA-ulous VEGAN MERINGUES
This recipe makes about 90 tiny meringues. The same rule that applies to traditional meringues applies to these: humidity will make them sticky after a while out of the oven. So eat them quickly or store them in an airtight container.
1 cup vegan sugar (if you buy a vegan sugar with large granules, pulse it in a food processor to make it very fine)
1 cup aquafaba/chickpea juice from about 1 can of canned chickpeas (also known as garbanzo beans)
1/4 teaspoon salt
1/2 teaspoon vanilla extract
Preheat oven to 250ºF. Line 3 half sheet pans with parchment paper. Fit a large pastry bag with a large, plain tip. Set aside
In the bowl of a stand mixer fitted with the whisk attachment, whisk the aquafaba until soft peaks form. Add vanilla and salt and whisk to combine. Slowly add the sugar and continue whisking until you achieve very stiff peaks.

Transfer the meringue to the prepared pastry bag and pipe quarter-sized dollops onto the parchment lined sheet pans, leaving about 1/2 inch between meringues.
Bake for 35-45 minutes or until the meringues are firm and baked through. Allow to cool completely.


June 29, 2015
COME JOIN ME ON CRAFTSY! A pâte à choux extravaganza!
I'm so excited, super duper excited in fact, to announce that my pâte à choux Craftsy class is now available! For everyone who isn't able to travel to Vermont for my King Arthur Classes, we're now offering a chance to take a class in your very own home! Stay in your PJs if you want to! I won't judge!
The class will be available to you FOREVER for just $39.99. What a bargain! Take it in your own time. Watch one segment and walk away to do something else. Your class is still waiting for you whenever you have time to get back to it.
So click on THIS link to sign up. I can't wait to see what you sweet people create!
June 19, 2015
ENTER TO WIN MY CRAFTSY CLASS!

I love teaching at King Arthur Flour. It's such an honor to teach lovely and talented students in King Arthur's amazing facility. But it's not easy to get a spot in my classes, they fill up in hours and I realize it's tough to fit a class into busy schedules even it it is in beautiful, but remote, Vermont. Now, I'm thrilled to announce, that I've partnered with King Arthur Flour and Craftsy to bring my class to YOU!
Enter HERE to win a chance to learn all about one of my favorite pastries in all the world. The class start on June 29th. I can't wait to see you there!!!
May 17, 2015
QUICHE: GLUTEN-FREE
.jpg)
My sweet hens were laying so well at the tail end of winter. Every girl came through with a fresh egg come snow or sunshine. Once we entered a thaw, enough that the ladies could take a stroll around the property again, the eggs stopped. Or so I thought.

I was perfectly fine with the interruption. Why shouldn't the girls have a spring break of their own?
We spent our period of eggus interruptus tending to our garden plots. I'd till and the ladies would nibble at critters and weeds alike.

One afternoon, while playing in the dirt, I took a break to peek into the corn crib to see if I had an extra trowel hiding away. Who did I see? Lonely Girl. She was nestled in a hay lined animal carrier. I keep a few crates for any sick farm creatures that need transport to the vet. Here was my most anti-social chicken, trying to enjoy some privacy. As it turns out, she wasn't the only one. I nudged my complaint feathered friend to take a peek and it seems that all the girls had been hopping up to the penthouse nest to get their egg on in peace.

What to do with this unexpected bounty? Quiche, of course.
 Wild chives
And with my asparagus starting to emerge and the wild onion growing, well, wild, I couldn't think of a better way to make a meal of all the glorious largess offered by nature.

A crisp and buttery gluten-free crust keeps the deliciously smooth custard in check.
QUICHE!
This crust is adapted from my new book Let Them Eat Cake: Classic, Decadent Desserts with Vegan, Gluten-Free & Healthy Variations. For a host of recipes that have you covered for ANY dietary situation, check it out!
For the crust
2 cups gluten-free blend, such as King Arthur Flour Gluten-Free Multi Purpose Flour
1 teaspoon Xanthan Gum
1 tablespoon sugar
1 teaspoon salt
1 cup (2 sticks) unsalted butter, cold and cut ito small pieces. Chill in the freezer for 10 minutes before proceeding
1/2 cup ice water
1 teaspoon lemon juice
In the bowl of a food processor, combine the flour GF flour blend, xanthan, sugar and salt. Pulse to combine.
Open the processor and place the butter evenly on top of the flour mixture. Close the processor back up and pulse a few times until the mixture resembles very coarse cornmeal. Stir together the water and lemon juice and slowly pour the water into the processor while pulsing until the dough just comes together when you pinch a bit between your fingers.
Turn the dough out onto a large piece of plastic wrap and turn the dough over a few times to get rid of any dry flour spots. Press the dough into a rough round and cover completely. Refrigerate for 20 minutes.
Preheat the oven to 375ºF. Spray a 9 - 9 1/2 " inch round, 2" tall pie or tart pan with non-stick cooking spray (a deep dish pie plate works well). Break the dough into small pieces and press in an even layer along the bottom and sides of the tart pan. Dock the bottom of the dough and freeze for 20 minutes.
Line the tart pan with parchment paper and fill to the very top edge with pie weights or dried beans (or rice). Place the tart pan on a parchment lined sheet pan and bake for 20 minutes or until the top edge of the crust is golden brown. Remove the weights and parchment and bake until the bottom of the crust just starts to turn golden, about 15-20 minutes. Set aside to make the filling.
For the filling
7 eggs, large and room temperature
8 ounces creme fraiche
1 cup heavy cream
8 ounces grated gruyere cheese
1 cup cubed maple cured ham
1 cup, finely chopped red pepper
2 tablespoons chives, finely chopped
1 cup fresh asparagus, cut into 1" long pieces
1 teaspoon garlic powder
pinch nutmeg
1/2 teaspoon ground white pepper
salt to taste
In a large bowl, whisk together the eggs, creme fraiche, heavy cream, garlic powder, nutmeg and white pepper until smooth. Stir in the gruyere, ham, red pepper, chives and asparagus. Gruyere is a very salty cheese. Add just a bit more salt to season.
Put the parchment lined sheet pan with the tart shell back in the oven. Carefully pour the filling into the tart shell and lower the oven temperature to 350ºF. Bake for 45 minutes to an hour or until the quiche filling puffs up and shimmies only slightly in the middle. Take from the oven and allow to about 20 minutes before serving. The quiche is also wonderful served cold.
April 23, 2015
SCHOKOLADE WINDBEUTELTORTE aka Chocolate Windbag Cake! A recipe that isn't a recipe.

My friend Nancy said her husband had just returned from Germany and brought home with him the memory of a cake and would I happen to have a recipe for this delectable remembrance? This, to my mind, is proof of a successful trip, with cake in your heart.

I was tickled when she told me the name of the cake: Windbeuteltorte. Literally translated: Windbag cake. You see, the word for cream puff in German, Windbeutel, means windbag. And yes, they also use the word to describe humans as windbags.
There are different versions of the cake. The one I know best is vanilla and fruity, with a vanilla cake bottom (and sometimes a top) and a vanilla cream filling that surrounds buried sweet cream filled cream puffs. Sometimes there are berries nestled up next to the cream puffs. Sometimes the berries are the beautiful red crown up top.

But this version that my friend's husband remembered so well was chocolate. He even took a picture. The version he tried didn't have a deckel or a lid, just a mousse covering the cream puffs and drizzled chocolate on top. It didn't have berries either, which is how it's sometimes done, even in the chocolate version. I was down with just straight chocolate, however, I like a lid on the cake proceedings and is how I grew up eating the cake. A cake lid keeps everything neat and acts as the perfect landing strip for a decent layer of more chocolate while also acting as a flat stage for more windbags.
If you're following what I'm saying, there are no rules in making a windbag cake other than you've got to bury windbags in a mousse-like cake. And even then, you can have your way with the filling. Some make a proper mousse, vanilla or chocolate (and hell, why not something fruity?). Some just use sweetened cream. Some folks break open a pudding packet and doctor it with extra whipped cream.
You can make it as simply or as elaborately as you see fit. Just don't forget the windbags!
Following is the list of elements I used to make up my particular version of this wonderful treat.
(1) For the cake: I used the cake recipe I used for my Boston Cream Pie hearts but baked it in a 9" springform, let it cool and cut it in half. The baking time will differ. This took 30-35 minutes to bake through. Find the recipe HERE.
(2) I used the pastry cream recipe from the same recipe for the filling of the cream puffs AND as the base of the mousse. Here's how I doctored both:
(a) For the cream puff filling: I whisked 1 cup of heavy cream to stiff peaks and folded it into the pastry cream. I used HALF of this mixture to fill the choux puffs (here's the link to the recipe again). Once filled (I poked a hole in the bottom of each, fit a large pastry bag with a smallish open tip and filled away).
(b) For the mousse, I kept the remaining half of lightened pastry cream on standby in the fridge. In the meantime, I chopped 8 ounces of bittersweet chocolate and placed in the bowl of a stand mixer fitted with the whisk attachment. I brought 1/2 cup of heavy cream to a light simmer and then poured the cream over the chocolate and allowed to sit for a minute to melt the chocolate. I started the mixer up and added 1/2 cup more heavy cream as the mixture whisked. As the mixture lightened and whipped up, I added the reserve pastry cream and continued whisking until the mixture reached a mousse like consistency.

(3) For the cream puff shells (the choux) I halved the recipe for choux that you can find HERE and piped them a little smaller than 1/2 dollar sized dollops, and baked for about 40 minutes or until they were deeply golden brown. You'll get about 22 puffs for filling.
(4) To assemble the cake, I placed half of the cake on the bottom of the springform.

I layered in half the mousse and then placed about 15 filled cream puffs onto the mousse (just put in as many as you can in a single layer), pushing them into the mousse gently and then I layered the remaining mousse atop the cream puffs.

I put the other half of the cake on top of the mousse and placed everything in the freezer to set for about an hour.

(5) To finish, I made up a batch of ganache by finely chopping 6 ounces of bittersweet chocolate and placing it in a heatproof bowl. I brought 1/2 a cup of heavy cream to a light simmer and poured the cream over the chocolate and added 1 tablespoon of unsalted butter (room temperature) and 1 tablespoon corn syrup (optional). I allowed the mixture to rest, allowing the chocolate to melt, and whisked the mixture until it was smooth. I dipped the tops of my remaining cream puffs into the chocolate and set them aside to set in the fridge. I then spread the rest of the ganache on top of the cake, with the springform (or cake ring) still in place and then refrigerated the cake until the ganache was set. Remove the cake from the form. Place the set, chocolate covered cream puffs on top of the cake and serve to your favorite sweet loving windbags...or cream puffs.
April 21, 2015
Boston Cream Pie Hearts...to welcome the new addition to our family.

Yesterday was Patriot's Day, when thousands of brave folk run the Boston Marathon. Did I run? No. Did I bake Boston Cream Pies? Yes!

Good thing I wasn't signed up for the race because the thing I've been longing for for years, the thing I'd finally received as a birthday gift in March (in part, a gift to myself after saving my ducets and one from my beloveds) had arrived in Vermont.

My Ilve range was sitting in a crate on a giant rig, waiting for me to unload it and get cooking...and baking.

With the help of some friends with patience and muscle, we got my beauty set up and running.

I broke it in from top to bottom. First, I made a bechamel for homemade mac & cheese. Waiting for this puppy had made me damn hungry. After, I moved on to whipping up a vanilla pastry cream. Boy, those burners are dreamy.

I moved on to my little cakes. This is the first time I've worked with an oven, and I've worked on every kind from professional to residential, that baked evenly. No hot spots. Dead-on even browning.
As if I needed another excuse to bake and yet I now have one.
BOSTON CREAM PIE HEARTS
(makes 20 filled hearts)
For the cake
4 ounces unsalted butter (1 stick), room temperature
1 cup sugar
2 eggs
2/3 cup low fat buttermilk
1 tablespoon neutral oil (like canola)
1 teaspoon vanilla
1 1/2 cups all purpose flour
1 1/4 teaspoons baking powder
1/2 teaspoon salt
Preheat oven to 325ºF.
Spray a silicone heart mold with baker's non-stick spray. Place on a parchment lined sheet pan. Set aside.
In a mixing bowl, whisk together the flour, baking powder and salt. Set aside.
Add the oil and vanilla to the buttermilk and stir. Set aside.
In the bowl of a stand mixer fitted with the paddle attachment, cream together the butter and sugar until light, airy and fluffy. Scrape down the sides and bottom of the bowl.
Add eggs, one at a time, mixing well and scraping the bowl between each addition.
Alternate additions of the flour and buttermilk mixtures with the mixer running on low. Mix until incorporated.
Fill each cavity half way. Bake for 15 minutes or until the cake springs back when gently poked. Allow to cool completely.
For the filling
1/2 cup whole milk
1/2 cup heavy cream
3 egg yolks
1/4 cup sugar
2 tablespoons cornstarch
1 teaspoon vanilla
dash salt
1/2 cup heavy cream (to finish)
1 tablespoon unsalted butter, room temperature
In a saucepan, combine the milk and 1/2 cup cream. Allow to barely come to a simmer over low heat.
In the meantime, combine the yolks, sugar, cornstarch, vanilla and salt in the bowl of a stand mixer fitted with the whisk attachment. Whisk until smooth. Slowly add the hot milk mixture into the running mixer to combine. Continue mixing until the mixture is smooth.
Transfer the mixture back into the saucepan, being careful to scrape the bottom of the mixing bowl to capture any stray bits of cornstarch.
Transfer the saucepan back to the stovetop and whisk over low heat until the mixture thickens to the consistency of mayonnaise. Immediately stir in the butter and continue stirring until incorporated. Transfer to a large bowl and cover with plastic wrap, making sure the wrap touches the exposed pastry cream to prevent a skin from forming. Refrigerate until cool, about 1 hour.
Once cool, whip the remaining 1/2 cup cream to stiff peaks. Give the pastry cream a good stir and then gently fold in the whipped cream.
.jpg)
To finish
Cut the cooled hearts in half.
Fill a large pastry bag fitted with a large tip (star or plain) with the pastry cream and pipe the cream onto the bottom half of the cut hearts. Freeze the hearts with the pastry cream for 10 minutes to set and then gently place the heart top onto the piped pastry cream. Place the assembled hearts in the refrigerator while you make the ganache.

For the ganache
4 ounces bittersweet chocolate (70%), finely chopped
1/4 cup heavy cream
1 tablespoon corn syrup (optional. It helps keeps the ganache shiny)
1 tablespoon unsalted butter, room temperature
pinch salt
Place the chocolate in a heatproof bowl. Set aside.
In a small saucepan, bring the heavy cream to a simmer and then immediately pour over the chocolate. Allow to sit, undisturbed, for a minute. Add the butter and salt, then whisk until smooth.
Spoon a hearty tablespoon of ganache on top of each assembled heart. Serve immediately.
March 31, 2015
MAPLE-WALNUT STICKY BUNS a la GESINE CONFECTIONARY (no refined sugar)

Every morning at 4am, I had the distinct pleasure of pouring a quart of grade B maple syrup onto a sheet pan studded with walnuts and healthy knobs of butter. I consider it a point of pride that I didn't take a spoon to the stuff and just call it a very early morning. I'm a martyr to pastry.


I'd flip over the pan and release those gorgeous, fluffy buns and I'd get those sticky gems out of my sight and into the pastry case as fast as possible.
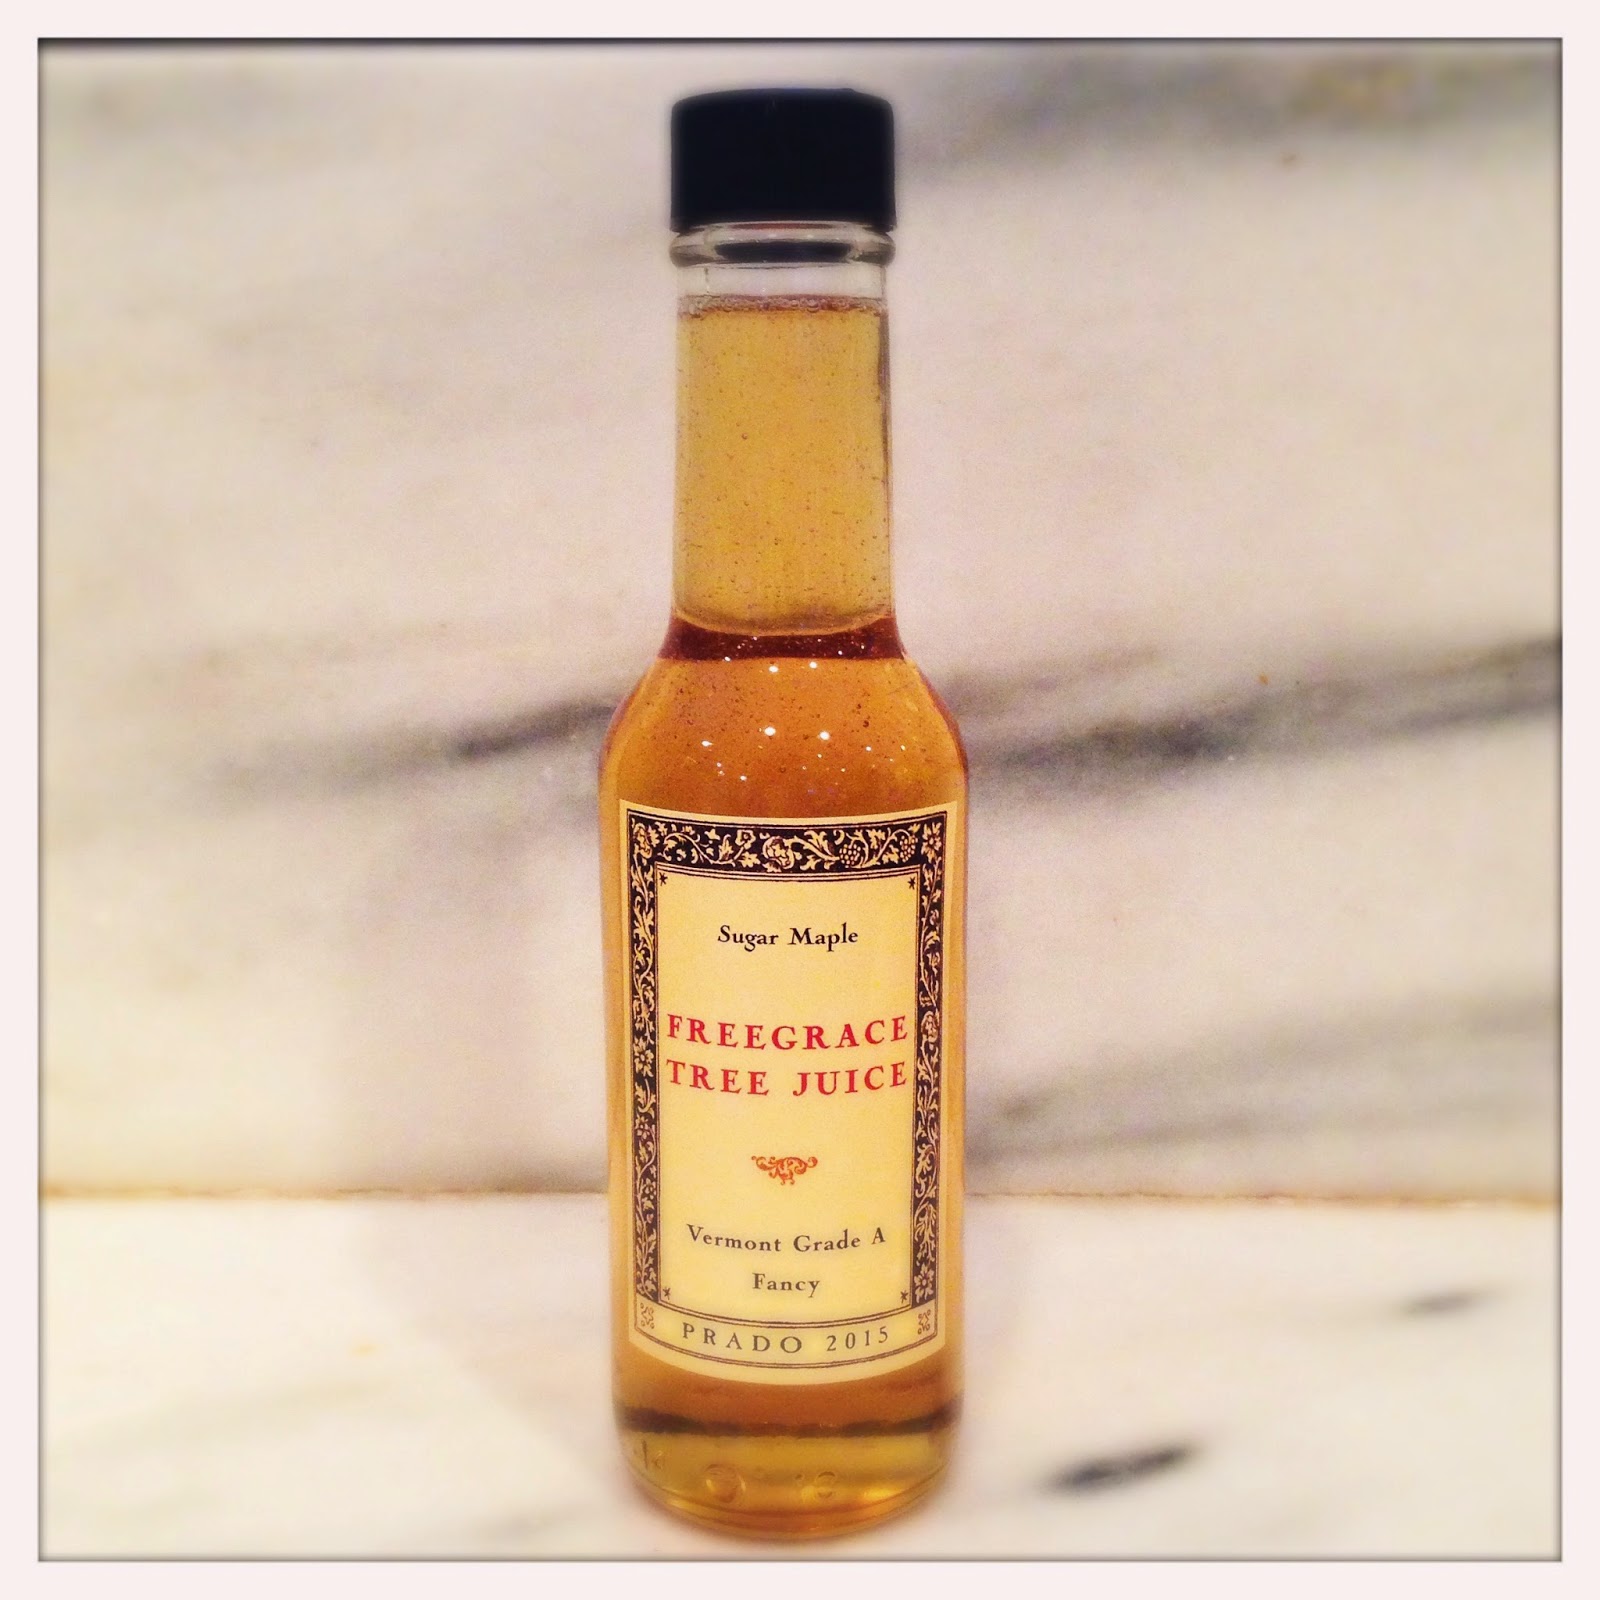 Our first batch of syrup. See how light it is?
 .JPG) Sap. See how clear? It takes 40-45 gallons of sap to make 1 gallon of syrup.
Sap. See how clear? It takes 40-45 gallons of sap to make 1 gallon of syrup.I've not yet shared my recipe for these epic maple sticky buns, a staple at my old pastry shop. But with sugaring season upon us, I find myself surrounded by jars of homemade syrup. I've been digging deep, asking myself what it is that I want...what I'm really made of. It turns out, the answer is maple syrup. Now that the we've entered into the later stages of sugaring, the maple syrup is darker than it was when we first started evaporating sap a few weeks ago. This is how you get grade B syrup, you boil down late season sap. The perfect stuff for making sticky buns.
MAPLE-WALNUT STICKY BUNS a la GESINE CONFECTIONARY
You'll notice I use organic palm sugar. Palm sugar is very flavorful, with an almost nutty/caramel flavor. It also sports some lovely minerals and is pretty low on the glycemic index. It's become more widely available as well. As a matter of fact, I saw it in the baking aisle at our local big box store. If you can't find the stuff, you can substitute an equal amount of turbinado sugar or regular old brown sugar.
For the dough
4 1/2 cups all purpose flour (I use King Arthur Flour's All-Purpose)
1/4 cup plain mashed potato flakes (I use Betty Crocker's "Potato Buds"), finely ground in a food processor or blender
1 envelope instant dry yeast (I use Red Star's Platinum instant yeast)
1 1/2 teaspoons salt
zest of 1 lemon
1 1/4 cups whole milk, room temperature
1/4 cup B-grade maple syrup
1 whole, large egg
1 egg yolk
1 tablespoon vanilla extract
4 tablespoons unsalted butter, room temperature
In a large mixing bowl, stir together the flour, potato flakes, yeast, salt, and lemon zest. Set aside.
In the bowl of a stand mixer fitted with the dough hook, whisk together the milk, maple syrup, egg, egg yolk and vanilla extract. Add the flour mixture and mix low speed until just combined. Slowly add the butter, a small piece at a time and continue mixing until a smooth yet slightly stick dough forms, about 10 - 15 minutes. The dough should pull away from the sides of the bowl but a small bit usually remains on the very bottom of the bowl. The dough should be slightly sticky to the touch.
Transfer the dough to a lightly oiled bowl and turn the dough over a few times in the bowl so that it's evenly coated. Cover the bowl with plastic wrap and allow to proof in a warm area in your kitchen until almost doubled in size, about 1 -1 1/2 hours.
For the filling and assembly
1 cup chopped walnuts
1 cup organic, granulated palm sugar
1/4 teaspoon ground cinnamon
pinch salt
4 tablespoons unsalted butter, very soft
Preheat oven to 350ºF.
Place the walnuts, palm sugar, cinnamon and dash of salt in the bowl of a food processor and pulse until the mixture is fine but be careful not to turn it into a paste.
Roll out the dough into a 20" x 12" rectangle, making sure that the work surface has a very fine layer of flour to prevent the dough from sticking to the surface (alternatively, spray the work surface and rolling pin with non-stick cooking spray).
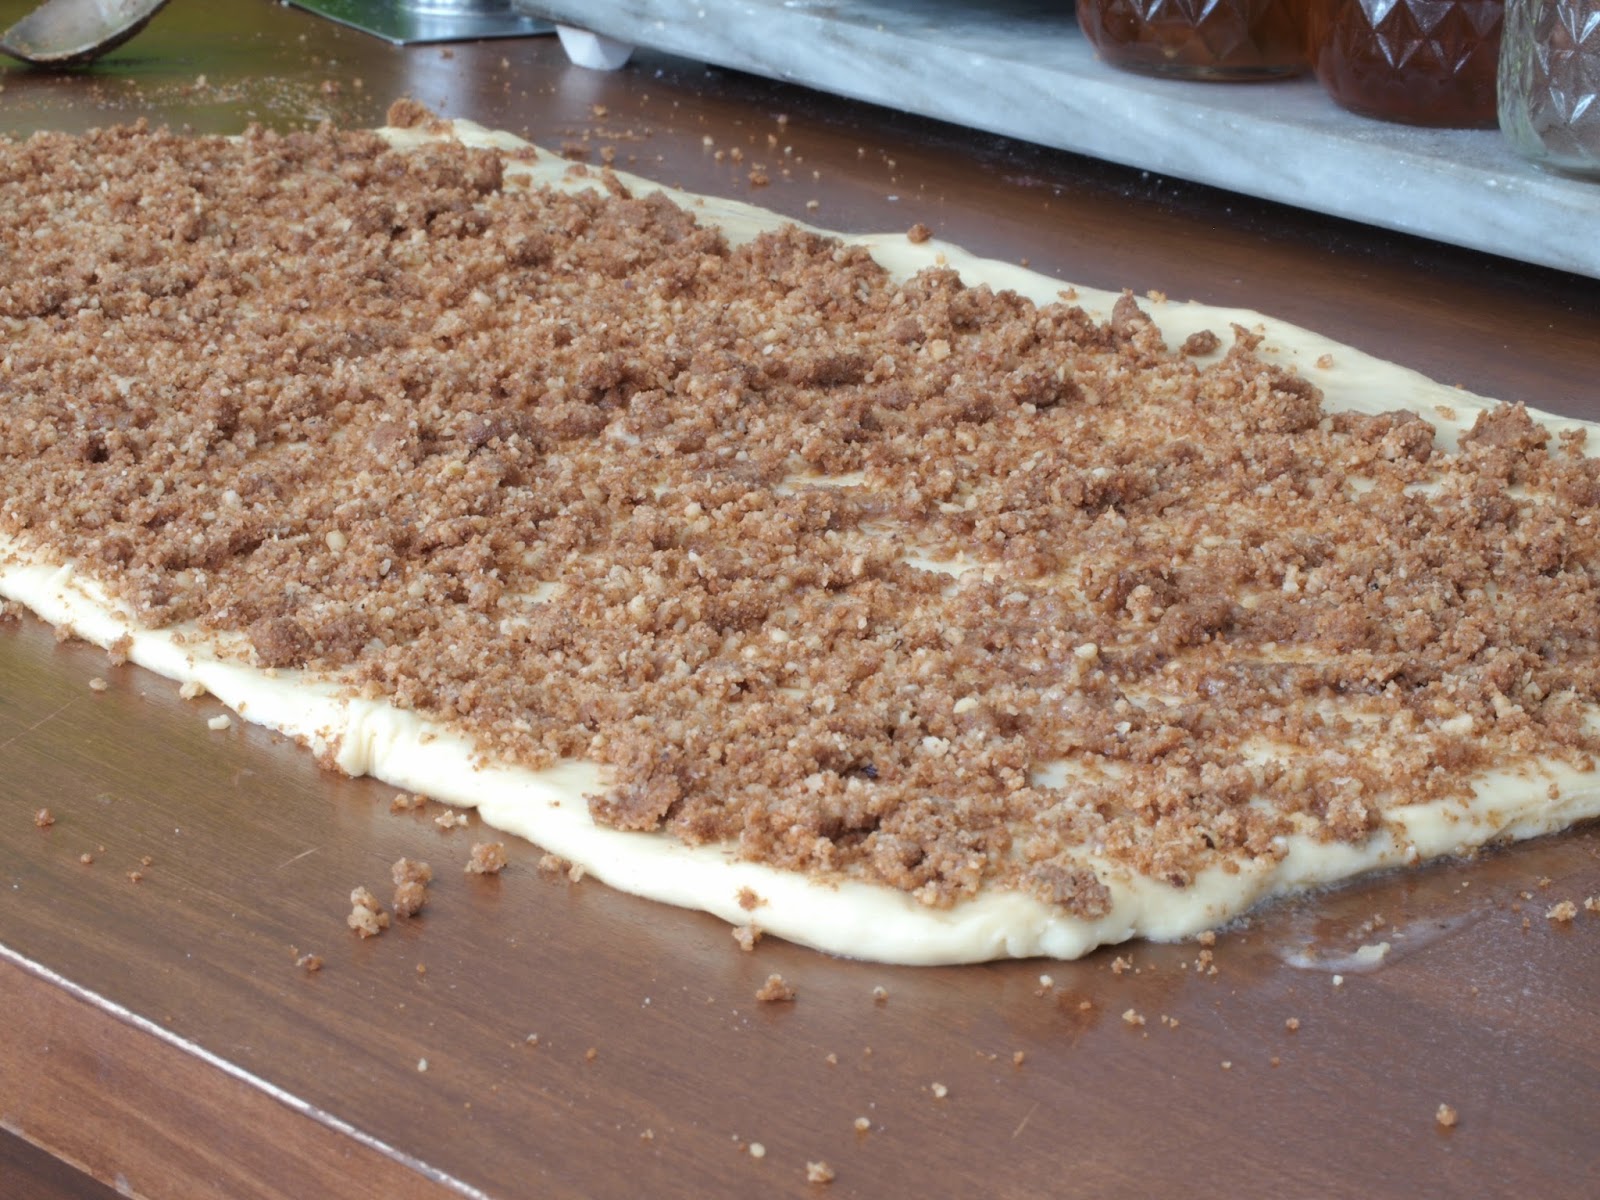
Spread the soft butter over the surface of the dough and sprinkle with the filling, leaving a 1/2 inch naked border, free from filling, on one long end.
Roll the dough into a long log, starting at the long end opposite the naked border, like a jelly roll.
For the syrup
1 cup chopped walnuts
1 cup B-grade maple syrup
1 cup organic, granulated palm sugar
4 ounces (1 stick) unsalted butter
In a 9" x 13" baking pan, pour in the maple syrup. Sprinkle the palm sugar on top of the maple syrup and then sprinkle with the walnuts. Dot the top of the maple/sugar/walnut mixture evenly with small knobs of the butter.
 On the road to the final proof.
Cut the dough log into 12 even pieces. Arrange the slices in rows of three over the the syrup mixture. Cover the pan with plastic wrap and allow to proof at room temperature for 40-50 minutes.
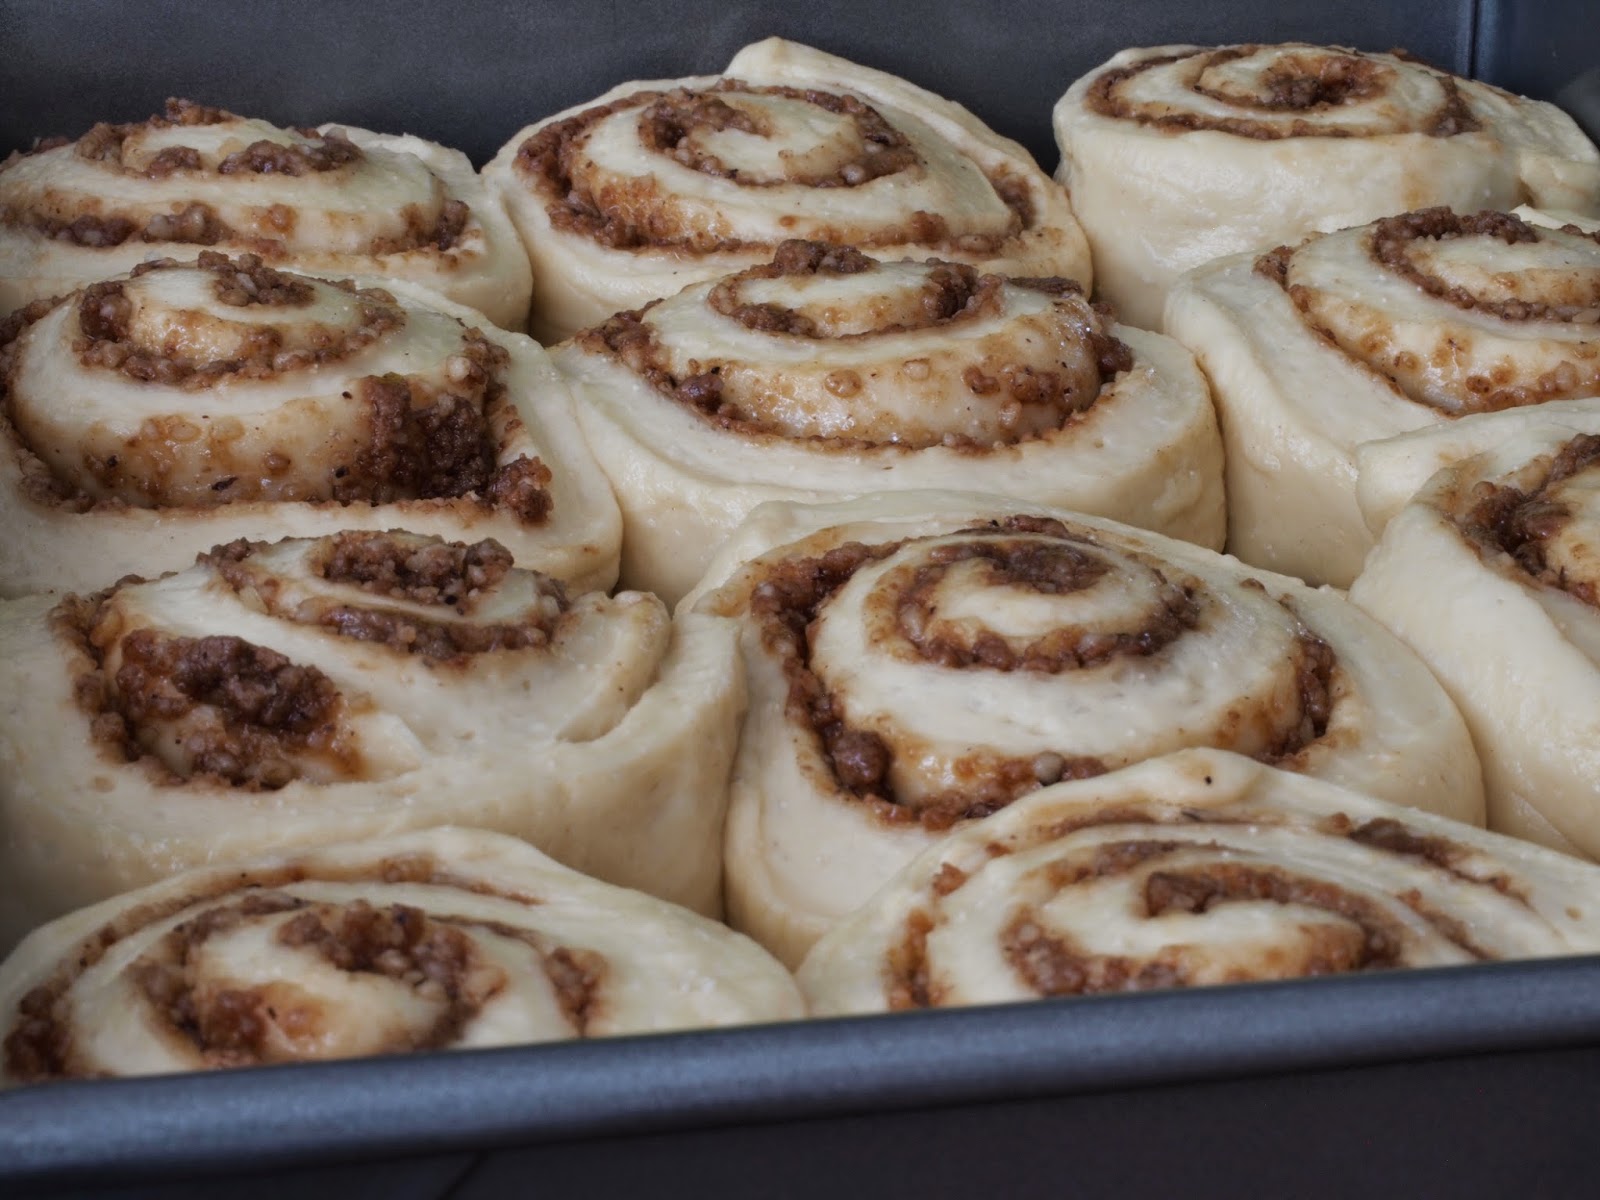 Proofed and ready for the oven.
Take off the plastic wrap and cover the pan with aluminum foil. Place the pan on a parchment lined sheet pan. Bake for 25-30 minutes and take off the foil and bake for 5 minutes more or until the buns are lightly golden brown and baked through. Serve warm.
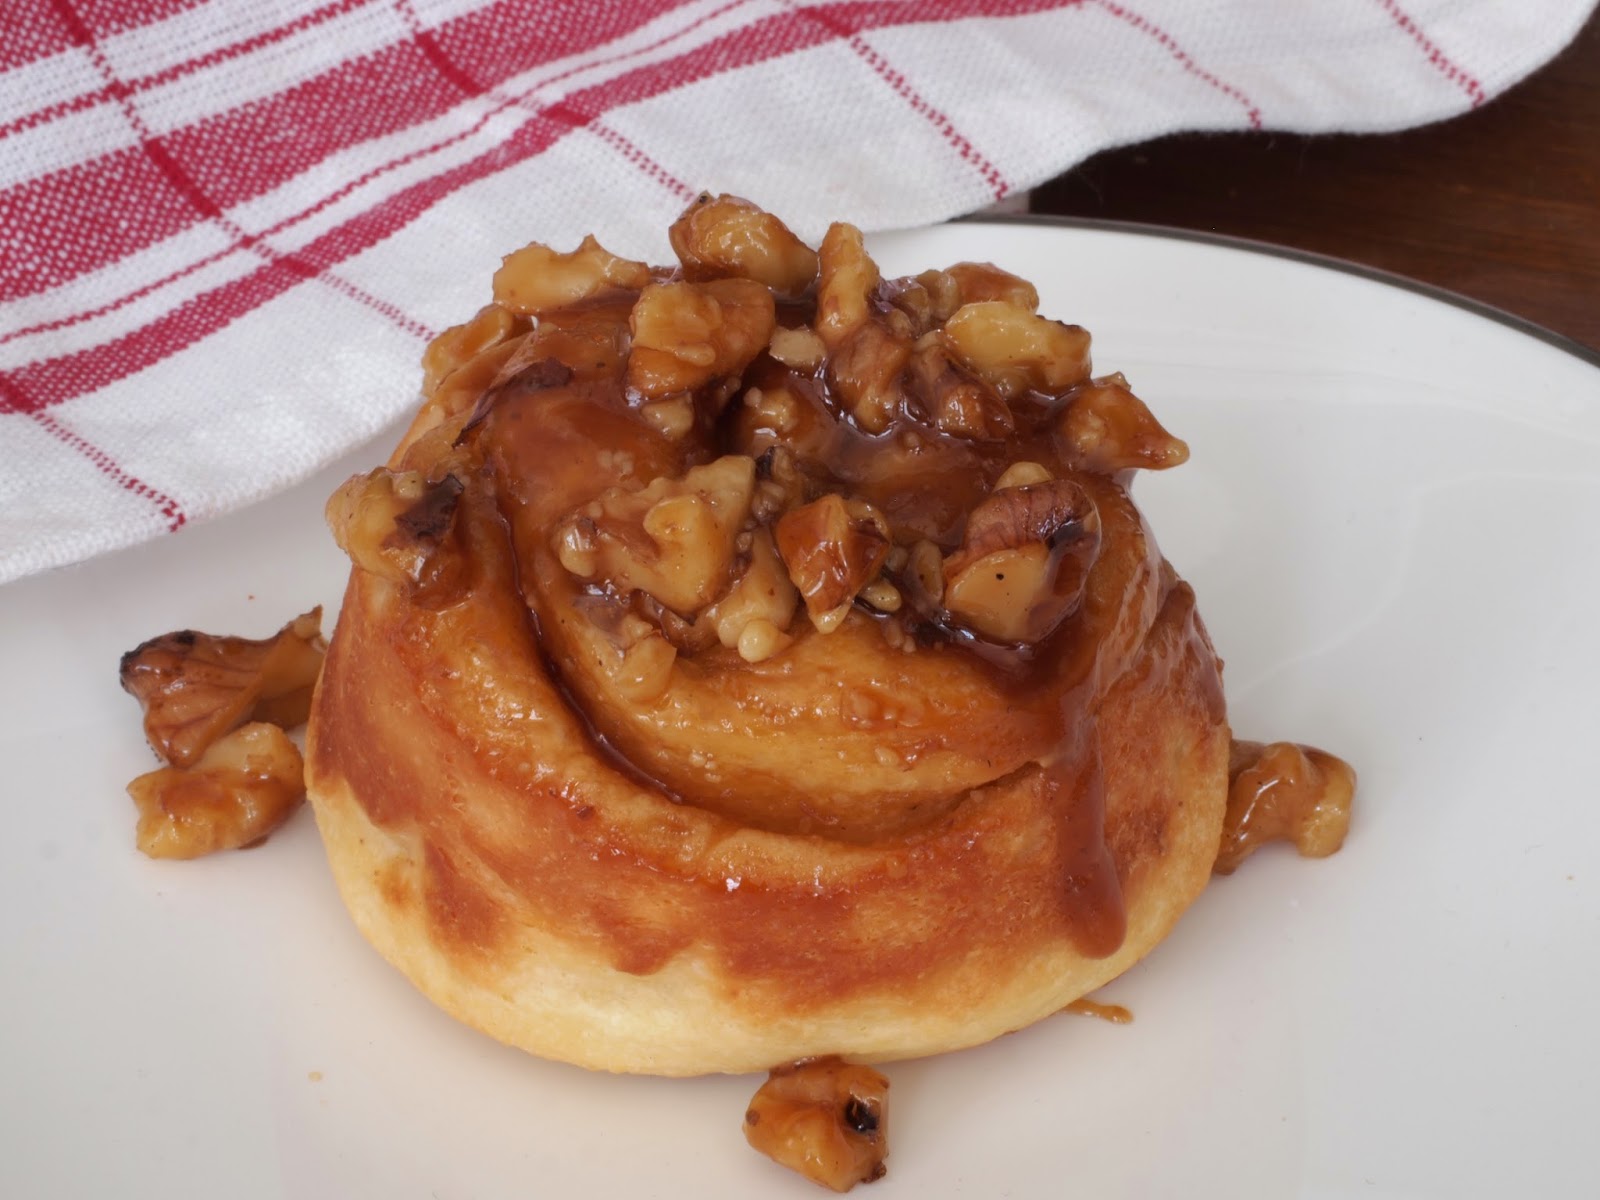 Individual buns baked in a muffin tin.
Alternatively, place the syrup ingredients in a saucepan and stir over low heat until the sugar and butter have melted. Allow to cool slightly. Divide the syrup among the 12 cavities of a large muffin tin. Place a dough slice into each of the cavities and proof and bake as above.
March 5, 2015
LET THEM EAT CAKE on the TODAY SHOW

Once again, I had a fabulous time making a mess on the Today Show baking from my new book Let Them Eat Cake. If you missed the segment, here's the link!
March 4, 2015
LET THEM EAT CAKE: CLASSIC, DECADENT DESSERTS WITH VEGAN, GLUTEN-FREE & HEALTHY VARIATIONS
 Available NOW!
It's here! As of yesterday, my newest book Let Them Eat Cake is out in the world.
I wrote this book with EVERYONE in mind. I wanted to provide a resource for bakers who are often hamstrung when confronted by the need to modify recipes for dietary restrictions. At my shop, I was asked daily if I could make my chocolate cake gluten free or my muffins healthier or my pies with pastry cream vegan. I found the task a wonderful challenge. But my career is baking. I spend my days developing recipes. Most people bake recreationally and don't have the time or background to modify their favorite recipes when they have to bake a batch of gluten-free, nut-free, soy-free cupcakes for little JoJo's kindergarten class. And it also occurred to me that it would be such a lovely thing to have a resource that gave you the recipe with all the bells and whistles (flour, butter, sugar) for those days where all bets are off but gave you options for any manner of dietary restriction. So instead of buying 4 books, here's just one with a boat load of options.
I've included the recipes I think are the most important, from cookies to pies to cakes and ice cream. As a kid who was raised vegan, I can tell you I would have died and gone to heaven if this book had been around when I was in elementary school.
If you want to see me bake from the book, tune into the Today Show tomorrow morning (3/5) and I'll be making a beautiful mess of chocolate treats. I'll be on The Talk March 11th baking with those fabulous ladies. And I'll be teaching and signing across the country in April and May. I'll post those dates and locations soon.
I hope you enjoy it, sweet people!
February 17, 2015
DULCE DE LECHE SANDWICH COOKIES
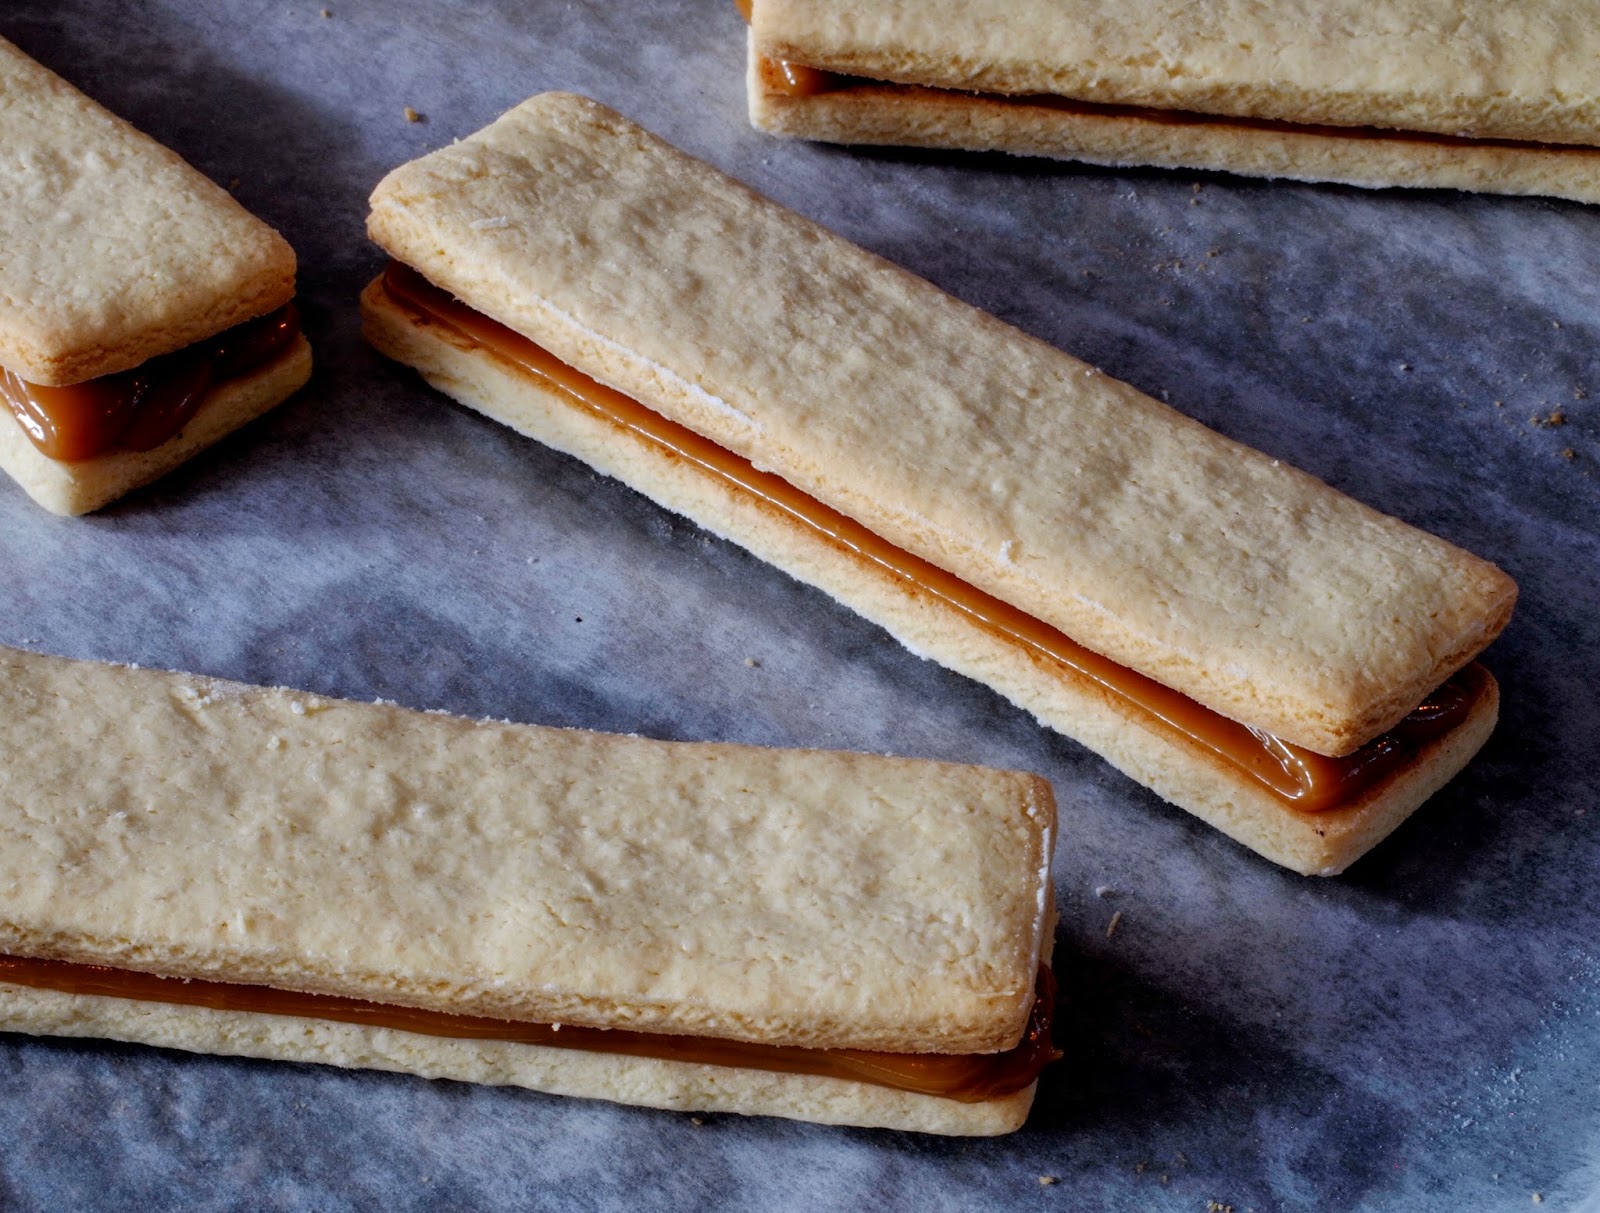
My Tante Christel kept packages of sweet tart shells stocked in her kitchen when I was a kid. Tucked in the cupboard for safe keeping, she would grab a few to top with cream and fresh fruit for Kaffee und Kuchen in the late afternoon. That is, she'd grab them if she could find any. I had a nasty habit of pilfering anything vaguely sweet and leaving very little evidence of their existence behind.

The texture of the pastries, part crispy shortbread/part tender lady finger, has haunted me more than any shame at my delinquency in stealing the things. With a random knob of cream cheese floating freely in the fridge, I took the opportunity of harnessing my acute taste memory of all experiences sweet to reproduce that singular pastry but in cookie form. And with a can of sweetened condensed milk rumbling away in a water bath, well on its way to becoming dulce de leche, I'd have a perfect filling for my culinary flash back.

By the way, if my Tante Christel is reading this: you weren't going crazy. You did, in fact, repeatedly stock up on tart shells and I made it a point to eat every last one of them. The good news is that I can now be counted on to make as many as you need next time I'm in Germany, assuming I can keep from eating them all.
DULCE DE LECHE SANDWICH COOKIES(makes 18 sandwich cookies)

For the dulce de leche
1 can sweetened condensed milk1/2 teaspoon kosher salt
Fill a deep stockpot with water and bring to a tame boil. Take the label from the can and carefully transfer the can to the water bath, making sure the can is completely submerged. "Cook" the can for 2 1/2 hours, making sure that the can is always completely covered with water.
Carefully remove the can from the water and allow to cool until you can safely handle the can. Open the can and stir in the salt. Transfer the dulce de leche to a pastry bag fitted with a flat ribbon tip.
For the cookies
1 1/2 cups all purpose flour1 1/2 cups cornstarch1 teaspoon baking powder1 teaspoon salt1/2 teaspoon lemon zest3/4 cup granulated sugar6 tablespoons softened, unsalted butter6 tablespoons room temperature cream cheese4 egg yolks1 tablespoon sweetened condensed milk1 tablespoon vanilla
Preheat oven to 350ºF. Line 2 sheet pans with parchment. Set aside. Combine the flour, cornstarch, baking powder, salt and lemon zest in a large bowl and whisk for 30 seconds to distributed the ingredients. Set aside.
In the bowl of a stand mixer fitted with the paddle attachment, combine the butter and sugar. Mix until smooth. Add the cream cheese and mix on high until smooth. Add the egg yolks, one at a time, mixing briefly between each addition. Scrape down the bottom and sides of the bowl and add the sweetened condensed milk and vanilla Mix to combine.
Add the dry ingredients all at once and mix on low until the mixture just comes together.
Transfer the dough to a large piece of plastic wrap. Gently knead the dough until it's smooth and no clumps of flour remain. Cover completely in the plastic wrap and refrigerate for 20 minutes.
Roll the dough out onto a lightly floured work surface to between 1/8" and 1/4" thick. Cut the dough into 1" x 4" rectangles and transfer to the prepared sheet pans. Space the cookies about 1/2" apart and place the cookie lined sheet pan in the freezer for 5 minutes.
Bake for 12-15 minutes or until the cookies just start to brown on the edges. Allow to cool completely.
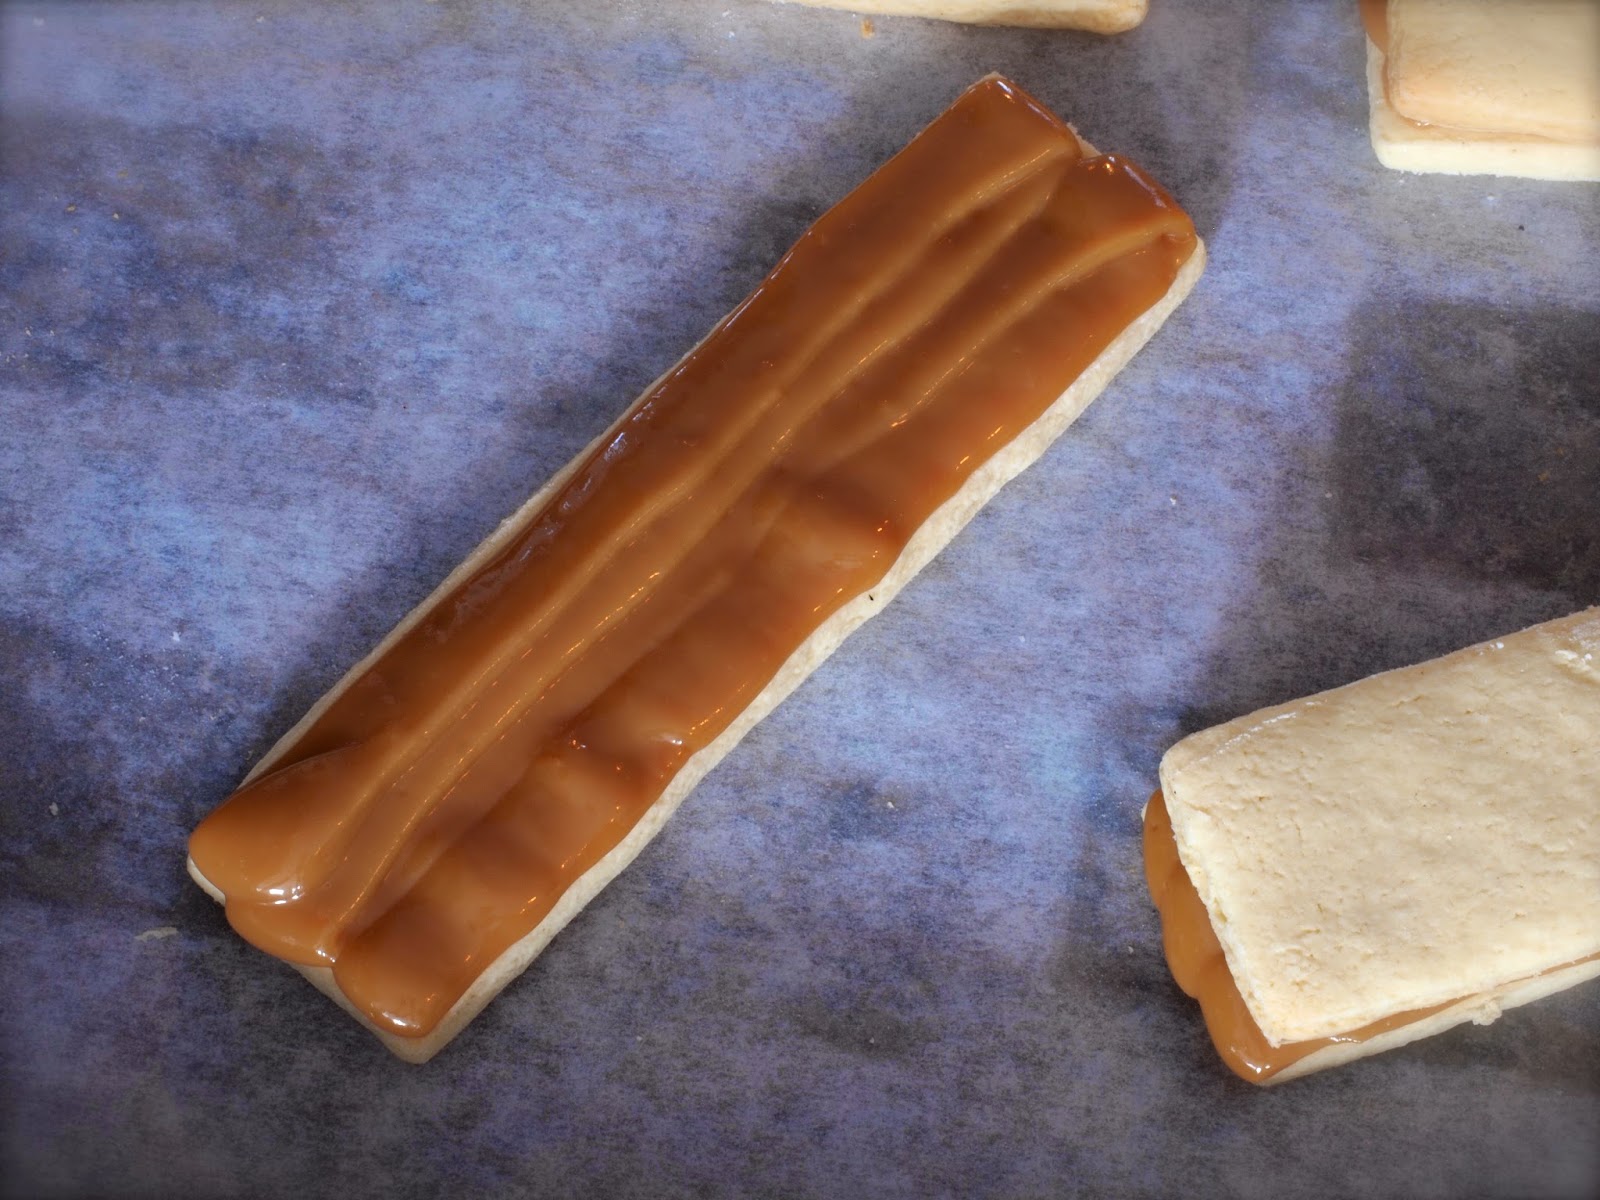
To finish
Pipe the underside of one cookie with the dulce de leche and top with another. The cookies keep for up to 3-4 days when kept in an airtight container. The flavor tends to develop even more after one day.
Gesine Bullock-Prado's Blog

- Gesine Bullock-Prado's profile
- 69 followers
Gesine Bullock-Prado isn't a Goodreads Author
(yet),
but they
do have a blog,
so here are some recent posts imported from
their feed.

