
Gesine Bullock-Prado's Blog, page 5
December 9, 2015
VANILLEKIPFERL with a maple twist

Vanillekipferl are up there among my all time favorite Christmas cookies. Literally translated: Vanilla Crescent. Literally delicious, that is.

They are buttery, of course, because what German Christmas cookie isn't buttery? They're also zippy as all get out. You'll be in and out of the kitchen in under an hour. I had some extra maple sugar lying around so I used it in lieu of granulated for an absolutely glorious flavor. But if all you've got is plain ol' sugar? That's perfectly fine...and delicious.

VANILLEKIPFERL with maple
(Makes 38 cookies)
7 ounces all purpose flour
3 ounces maple sugar (NOT syrup. This is actually granulated maple sugar. You can swap out granulated sugar, one for one)
6 ounces unsalted butter, cold
3.5 ounces almond flour
2 egg yolks
1 teaspoon vanilla bean paste (can swap out vanilla extract)
1/2 teaspoon fine sea salt

1 cup confectioner's sugar for dusting
Preheat oven to 325ºF. Line a sheet pan with parchment or Silpat. Set aside.
In a large bowl, combine the all purpose flour, sugar (maple or traditional granulated), almond flour and salt. Whisk until well combined.
In a small bowl, whisk together the yolks and vanilla bean paste. Set aside.
Using the largest holes on a box grater, grate the butter atop the flour mixture. Using your fingers, massage the butter into the flour until it's evenly distributed. Add the yolk mixture and gently knead the dough until the yolk is evenly distributed and the dough holds together.
Alternatively, combine the flour, sugar, almond flour and salt in the bowl of a food processor. Add the butter in small pieces and pulse to combine. While pulsing, add the yolk/vanilla mixture and continue pulsing until the dough just comes together.
Wrap in plastic wrap and refrigerate for at least 20 minutes.
Divide the dough into 38 small pieces (each will weight just a tiny bit over .5 ounces).

Roll each piece in to a ball and then roll out to about 3 inches, slightly tapering the ends.

Curve into a crescent and place onto the sheet pan. You can place them close together but not touching, as they expand only slightly. Freeze for 5 minutes.
Bake for 12-15 minutes but don't allow the cookies to brown at all. Allow to rest 5 minutes and then dust with confectioner's sugar while still warm.


December 6, 2015
THIS is how you make a truffle: ROCKY ROAD & TOFFEE TRUFFLE

Homemade truffles are the tastiest, most decadent and the EASIEST holiday gift but I've got a problem with them. They usually look like dusty antelope turds. There's a better way. Truffle logs. OK. That doesn't sound any better, does it. But it looks better. Professional, in fact.

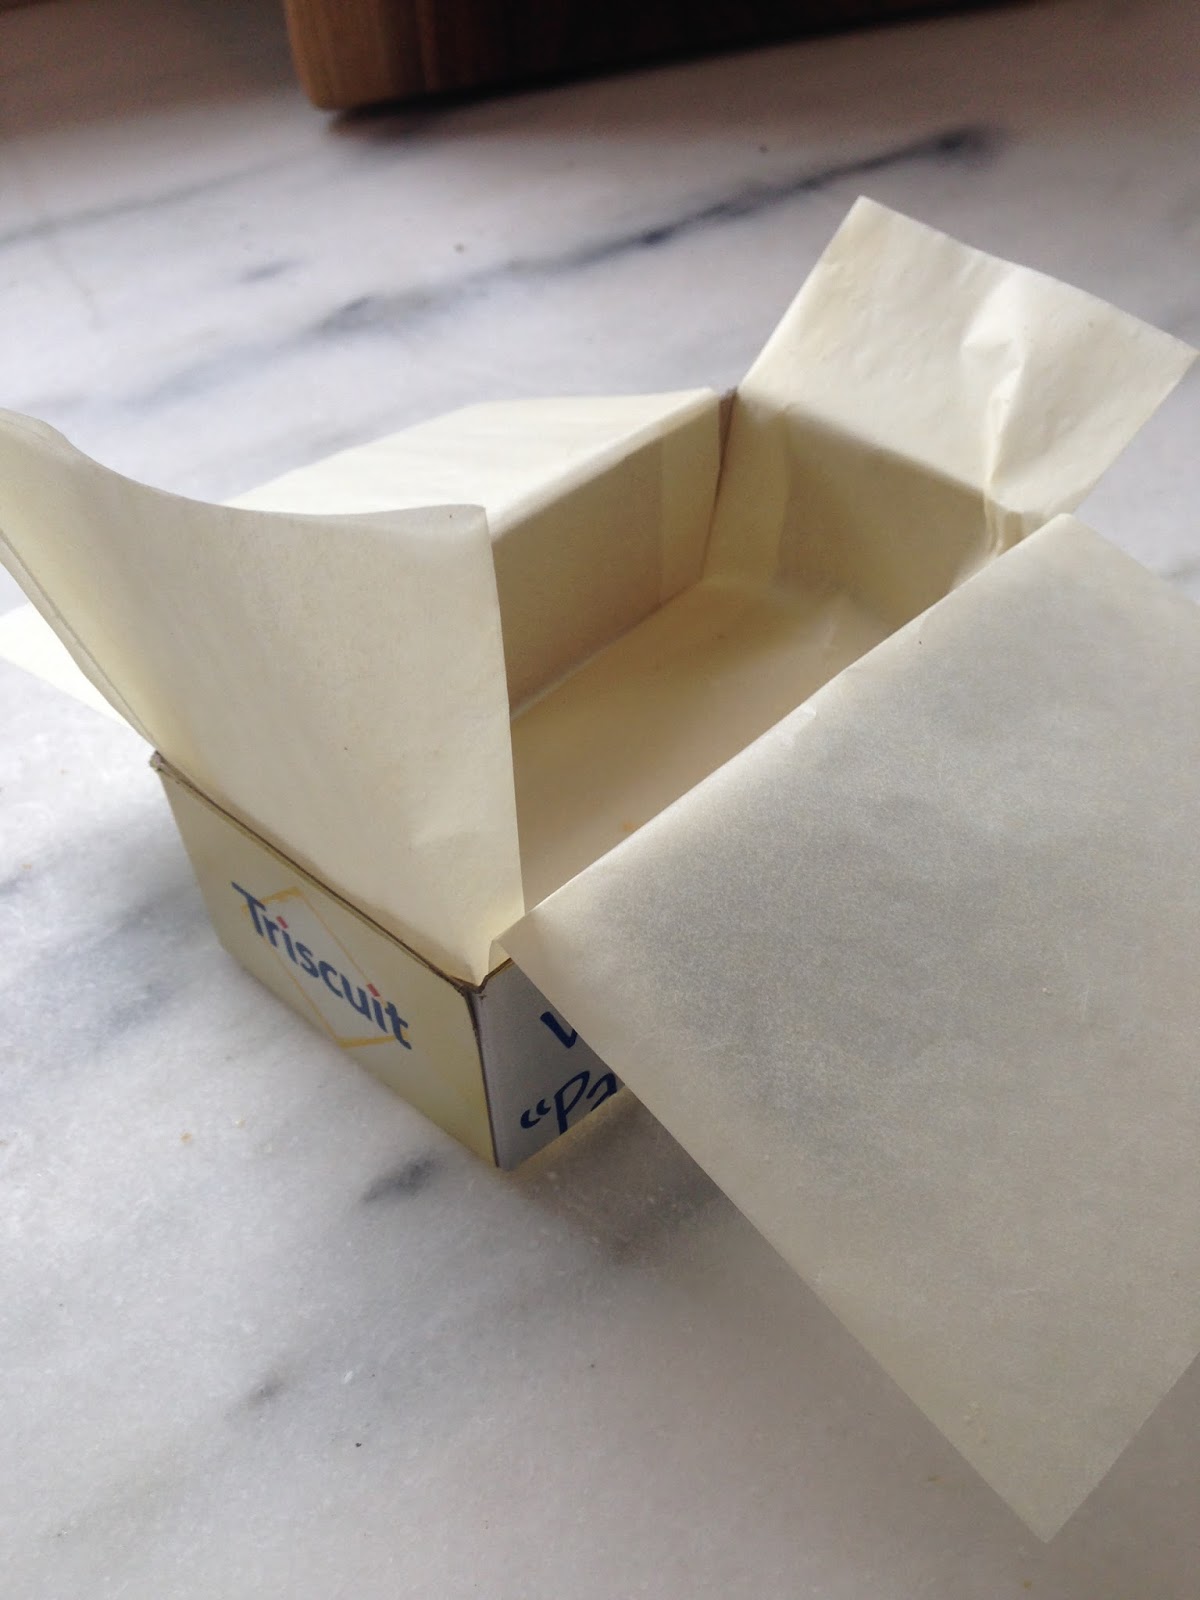
I use a fancy pastry mold but you can find something clever at home. I know you can. You can cut a Triscuit box into mini molds (see pic below). Line them with parchment. Spray with non-stick cooking spray and you just got fancy without spending any money.

And these puppies are so easy to package beautifully without any specialty equipment. You don't have to purchase a 10000000 count box of candy cups and then run around looking for the perfect box in which you can fit all your dusty turds without smooching them. You simply wrap them in parchment like a little package and, voila! Gorgeous truffle treat. This, my friends, is the future.

THE FUTURE OF TRUFFLE TRUFFLES

For the truffle
1 pound best quality bittersweet chocolate (at least 60%), finely chopped
1 cup heavy cream
2 tablespoons butter
pinch salt
For rocky road
1 jar of fluff
1/2 cup of chopped walnuts
For the toffee
2 toffee bars, such as Heath or Skor
2 tablespoons flour
1 tablespoon unsalted butter, cold
Break up the toffee bars and place in the bowl of a food processor. Sprinkle the flour over the toffee and then break the butter into tiny pieces and distribute over the toffee. Process until fine.
To assemble
Place the chocolate in a heat proof bowl.
In a saucepan, combine the heavy cream, butter and salt and bring to a very slight simmer. Make sure the butter has melted. Pour over the finely chopped chocolate, making sure the cream mixture covers the chocolate. Allow to sit a few minutes to allow the chocolate to melt. Whisk until the truffle mixture is smooth.

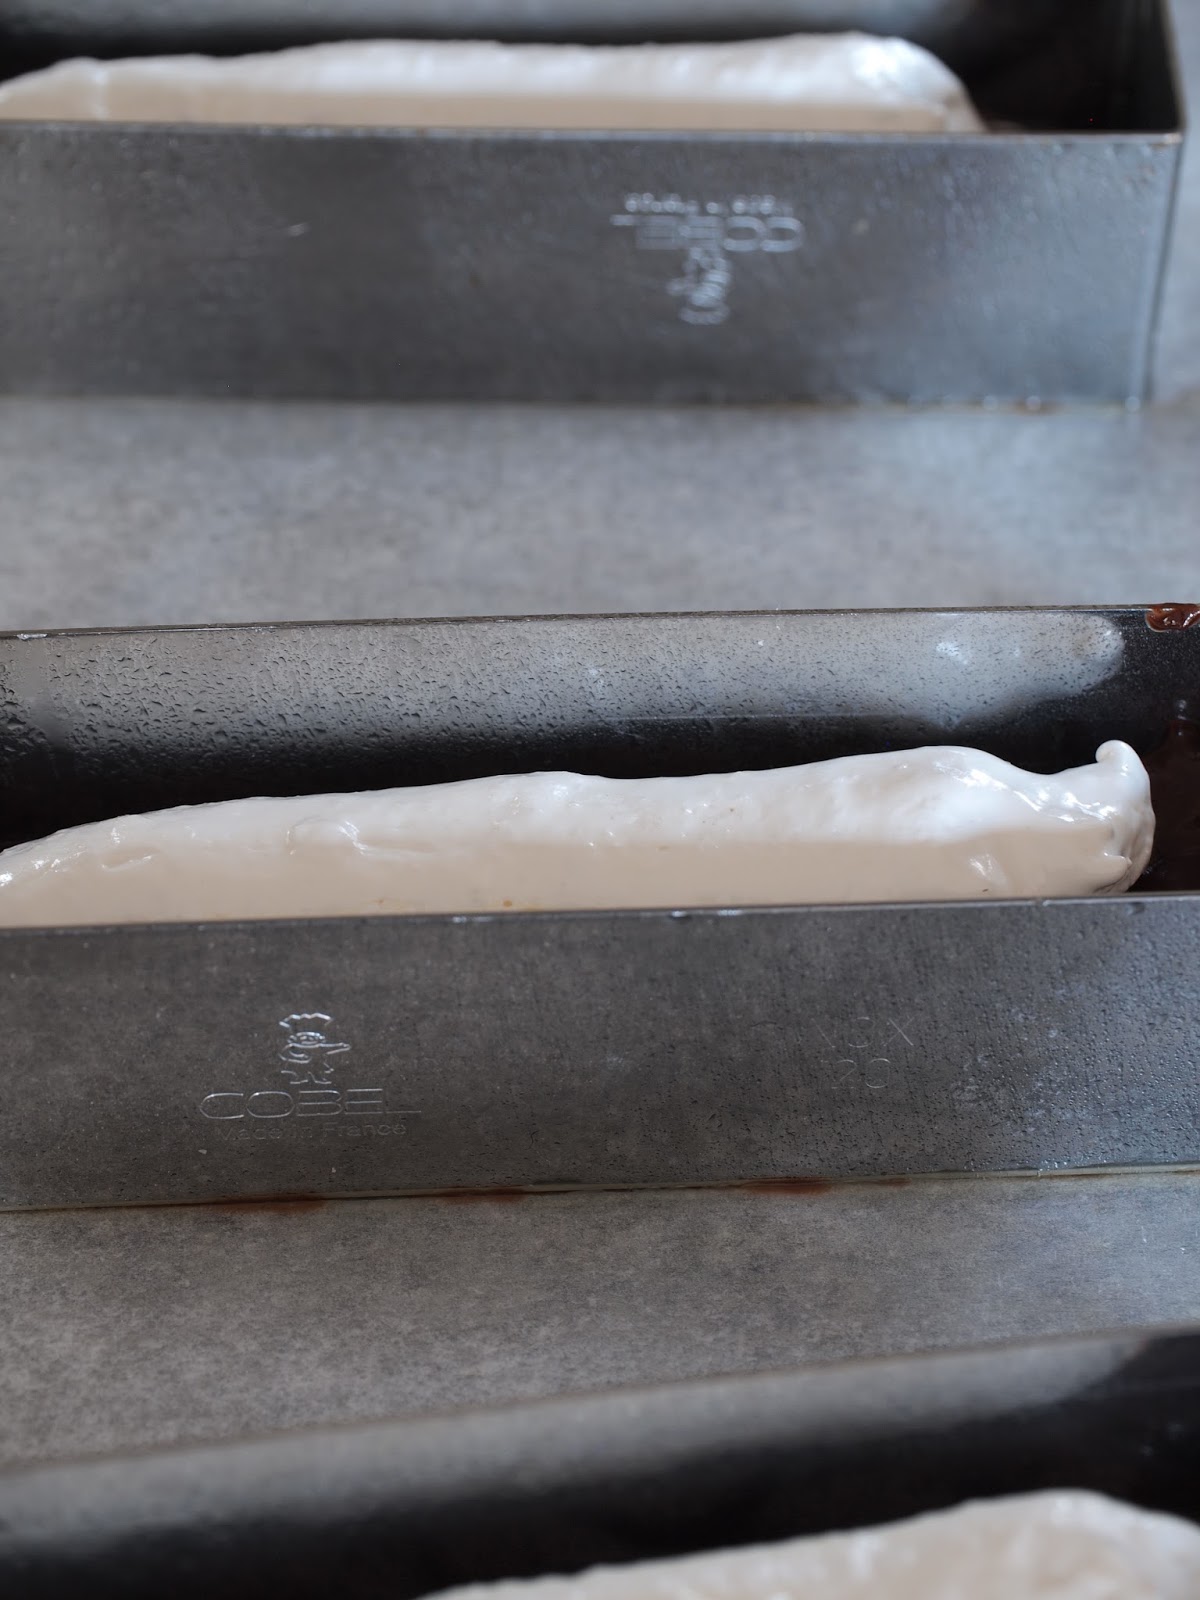
Spray your truffle mold with non-stick spray (a VERY light coating). I used FIVE 1" x 4" rectangular molds. Pipe the truffle about 1/3 of the way up the mold and then pipe a strip of marshmallow fluff down the center of the truffle for rocky road and for the toffee, sprinkle about a tablespoon of toffee down the middle.
 This is twice as wide as the mold I use. To package, I cut the truffle in half, lengthwise, once set to make two LONG truffle logs and then coat with cocoa.
For the homemade mold version, consult the pic above.

Cover with more truffle but not all the way to the top of the mold. Sprinkle the truffle with chopped walnuts for the Rocky Road and more toffee for the ... toffee.


Top with remaining ganache and, using a small offset spatula, smooth out the top.

Refrigerate until solid and then unmold by very gently warming the sides of the mold with a blow dryer (for metal molds) and for homemade molds, just lift out with parchment and unwrap. Coat in cocoa and YOU ARE DONE!
November 25, 2015
PUMPKIN ORANGE CHEESECAKE with a Cranberry Twist: Brooklyn Style

My mother made the best New York cheesecake. It was dense. It was rich. It would explode out of the springform and coat the oven with deliciousness. Granted, this only happened when my best friend Christine and I made it in the mini-bake oven that passed for the real deal in her basement apartment at UVA. We may have been a little tipsy. It was still damn tasty.

Mom's had a sweet crust, one that was crumbly and "hard." Hard in the best way. Like shortbread. But when I caught wind of Junior's famous cheesecake, one where the filling was as rich and dense as Mom's but sitting atop tender sponge cake, I knew I'd found my way to something better (sorry Mom).

Trust me. This stuff is amazing. And flavored with pumpkin, orange and cranberry, this cheesecake reaches celebratory heights that no cheesecake has reached before. In the history of cheesecake.

PUMPKIN ORANGE CHEESECAKE
makes one 8" cheesecake
(adapted from King Arthur Flour's Brooklyn Cheesecake. Find their recipe here.)

For the sponge
1/2 cup cake flour
1/4 cup plus 2 tablespoons sugar
2 egg yolks
2 tablespoons pumpkin puree
4 tablespoons oil (I used Canola)
4 egg whites
3/4 teaspoon baking powder
1/2 teaspoon salt
1/2 teaspoon orange extract
Preheat oven to 325ºF. Line the bottom of an 8" springform with parchment. Spray the parchment with non-stick cooking spray, trying to avoid spraying the sides. (I used an 8" cake ring that I placed in a 9" cake pan that was lined with a parchment covered cake round that I then lined with aluminum foil so I could lift the cake out easily. I chose this cockamamy set up because I have never had much luck with keeping a springform leak-free in a bain marie.)

In the bowl of a stand mixer fitted with the paddle attachment, combine the flour, 2 tablespoons sugar, egg yolks, pumpkin puree, oil, baking powder, and orange extract. Mix on high until a smooth paste forms. Set aside.

In the (clean) bowl of a stand mixer fitted with the whisk attachment, combine the egg whites and the salt. Whisk on high until foamy. Slowly add the remaining 1/4 cup sugar and whisk until stiff peaks form.

Stir in about 1/4 of the egg whites to the egg yolk mixture until smooth.


Add the remaining egg whites and gently fold them into the mixture, making sure to keep the batter well aerated.

Transfer the batter to the prepared springform (or cake ring) and smooth with a small offset spatula. Bake for 20-25 minutes until the cake springs back when gently poked and a toothpick comes out cleanly (leave the oven on).

Using a paring knife, run the knife along the edge of the cake to release it from the ring (leave the ring in place, though). The cake will shrink slightly.
For the filling
3 (8 ounces) packets of cream cheese, room temperature
1 1/4 cups sugar, divided
2 large eggs
1 cup pumpkin puree
1/4 cup cornstarch
1 teaspoon orange extract
1 teaspoon vanilla extract
1/2 teaspoon salt
In the bowl of a stand mixer fitted with the paddle attachment, combine one packet of cream cheese, 1/4 cup sugar and 1/4 cup corn starch. Mix on LOW until smooth and combined. Add the remaining two cream cheese packets and the remaining 1 cup sugar. Mix on LOW until smooth. Add the eggs, pumpkin puree, orange extract, vanilla extract and salt. Mix on LOW until smooth. If for some odd reason your filling has a few lumps, run through a fine sieve.
Spray the exposed sides of the springform/cake ring with nonstick spray. Pour the cheesecake filling into the pan on top of the cake and smooth with a small offset spatula.
Bake for 1 1/2 to 2 hours or until the middle of the cheesecake barely shimmies in the middle. (If you choose to use a bain marie, which helps keep the cake from cracking, cover the springform in aluminum foil to keep the water from seeping into the springform or use my cockamamie cake ring in a cake pan contraption. Place the springform or cake pan in a larger pan with high sides, place in the oven and then pour water in in the larger pan being VERY careful not to keep the water in the larger vessel.)
Allow the cake to cool in the springform while you make the cranberry topping.
For the cranberry topping
1 (12 ounce bag) fresh cranberries
1 cup sugar
1/2 cup orange juice
pinch salt
Combine all ingredients in a saucepan and simmer over medium heat, cook for 10 minutes until the cranberries pop. Run the cranberries and through a sieve back into the saucepan and continue to cook until the sauce has slightly thickened (about 5 minutes). Pour on top of the cheesecake and refrigerate until cool and set, a few hours. Using a paring knife, run the knife along the sides of the cake to release it.
To finish (optional)
I used my recipe from Better Homes and Gardens for the candied cranberries. Find it HERE. In this case, I rolled the cranberries in granulated sugar.
November 23, 2015
PUMPKIN-CRANBERRY DONUTS

My love affair with my pumpkin dough continues and now I've brought cranberry into this delicious sordid business. I don't know when I'll stop playing with this dough. I'm not entirely sure that I can stop. But hell, it just keeps getting better so why worry?

The latest? Pumpkin dough donuts filled with cranberry pastry cream. Thanksgiving never tasted so good.
PUMPKIN-CRANBERRY FILLED DONUTS
(makes 12-13 donuts)
For the dough
The pumpkin dough recipe you can find HERE. To make the donuts, roll the dough about 1/4" thick. Cut 3" rounds from the dough. Place the rounds on a parchment lined sheet pan and cover with plastic wrap and allow to proof until almost double in size, about an hour. Fry for about a minute on either side in 350ºF oil, flipping when one side is golden brown. Transfer to a paper towel lined plate to cool.
For the filling
1/2 cup heavy cream
1/2 cup whole milk
1 (15 ounce) can Ocean Spray jellied cranberry sauce
1/2 cup sugar
1/4 cup corn starch
pinch salt
5 egg yolks
zest and juice one lemon
In a saucepan, combine the heavy cream, milk and jellied cranberry sauce. Stir over low heat until the cranberry sauce has melted (small chunks are ok).
In the bowl of a stand mixer fitted with the whisk attachment, combine the sugar, corn starch, salt, yolks, zest and lemon juice. Whisk on high to combine.
Slowly pour the heavy cream/cranberry mixture down the side of the mixing bowl with the mixer running on medium-low speed. Mix until combined and then transfer the mixture back to the saucepan. Whisk on medium-low heat constantly until the mixture thickens to the consistency of mayonnaise. Transfer to a clean bowl and cover with plastic wrap, making sure the plastic touches the surface of the cream to keep a skin from forming. Refrigerate until cool, about 1-2 hours.
This makes a decent amount of pastry cream. Depending on how much you use to fill the donuts, you'll likely have some left over. It's a wonderful pudding, so transfer the rest to small serving glasses and top with whipped cream for a fun dessert.
To finish

Poke a small hole in the side of each donut with a wooden skewer. Fill a pastry bag fitted with a medium/small piping tip with the pastry cream. Insert the tip into the donut and gently fill each donut with about 2 tablespoons filling (don't go crazy. A little goes a long way).
For the glaze
1/2 cup softened unsalted butter
2 cups powdered sugar
2 tablespoons cranberry juice
2 tablespoons hot water
Stir together until smooth.
Dip the tops of each filled donut in the glaze. Serve immediately.
November 22, 2015
PUMPKIN MAPLE-TOFFEE BUNDT: Revisiting one of my favorite recipes
 It's my friend Lexi's birthday week. I thought it a wonderful opportunity to break out more pumpkin puree to make one of her favorite cakes, my Pumpkin-Maple Toffee Bundt.
This is a fabulous recipe. It's a cake that's truly "bundt worthy" and I revisit it often, no matter the season. I thought it worth reposting here in celebration of Lexi and all things sweet.

You can find the recipe HERE on the blog.
November 20, 2015
ONE PUMPKIN DOUGH. THREE WAYS. As seen on the Today Show

I cannot lie. I'm obsessed with soft, tender bread products. All those things you've heard about me? All true. I like it spongy. The spongier, the better.
I also love when that beautifully tender and spongy dough can be purposed to create many, entirely different yummies. And if it contains pumpkin, so much the better.
So I developed one pumpkin dough that makes three of my favorites things and it makes them GLORIOUSLY.
Cinnamon rolls?
 Check.
 Donuts?
 Check.
 Supple dinner rolls?
 Check.
 To see my Today Show segment, where I made these scrumptious goodies, click HERE. Otherwise, click on to get the recipes!
TENDER PUMPKIN DOUGH
Ingredients
4 ½ - 5 cups all-purpose flour (I use King Arthur’s All-Purpose)¼ cup plain mashed potato flakes (I use Betty Crocker’s ‘Potato Buds’), finely ground in a food processor or blender1 envelope instant dry yeast (I use Red Star’s Platinum instant yeast)1 ½ teaspoons fine sea salt1 teaspoon cinnamon¼ teaspoon nutmegzest 1 lemon1 cup whole milk, room temperature½ cup canned pumpkin puree (I use Libby's)¼ cup maple syrup1 whole, large egg (room temperature)1 egg yolk (room temperature)1 tablespoon vanilla extract (or vanilla bean extract)4 tablespoons unsalted butter, room temperature
NOTE: Instant yeast is combined with the dry ingredients and isn’t bloomed like fast acting yeast in water.
Procedure
In a large mixing bowl, stir together 4 ½ cups flour, potato flakes, yeast, salt, cinnamon, nutmeg and lemon zest. Set aside.
In the bowl of a stand mixer fitted with the dough hook, whisk together the milk, pumpkin puree, maple syrup, egg, egg yolk and vanilla extract. Add the flour mixture and mix on low speed until just combined. The dough will look very "shaggy" but the flour and wet ingredients should all be incorporated.
 shaggySlowly add the butter, a small piece at a time, and continue mixing until a smooth dough forms (about 10 – 15 minutes).
  Butter added. Still not very smooth but it'll get there.After adding the butter and mixing until it's just incorporated, you can take the dough out of the mixer and knead by hand to give your mixer a break and give yourself a workout.
  Transfer the dough from the mixing bowl to a lightly floured surface (take the flour from the reserve 1/2 cup) to knead by hand for about 5 - 10 minutes until smooth.
 Add a little flour, a tablespoon at a time from the reserve 1/2 cup, if the dough sticks to the work surface and your hands. It should still be tacky and soft but not terribly sticky.If finishing in a mixer, the dough should pull away from the sides of the bowl but a small bit usually remains on the very bottom of the bowl (if it’s too sticky in that it literally sticks to your finger when you touch it and isn't just tacky, add a tablespoon of the reserve flour one tablespoon at a time).
 Smooth dough, ready for its first proof.
Transfer the dough to a lightly oiled bowl and turn the dough over a few times in the bowl so that it’s evenly coated. Cover the bowl with plastic wrap and allow to proof and rise about double its size in a warm corner of the kitchen about 1 – 1 ½ hours.
FOR CINNAMON ROLLS (makes 12)
For the filling
6 tablespoons unsalted butter, melted and allowed to cool to room temperature1 cup light brown sugar, packed1 tablespoon cinnamonpinch salt
Mix all the filling ingredients together but the butter in a small bowl.
Preheat oven to 350°F.
Roll out the dough into a 18” x 14” rectangle, making sure that the work surface has a very fine layer of flour to prevent the dough from sticking to the surface of the work station (alternatively, spray the work surface and rolling pin with non-stick cooking spray).

Spread the soft butter over the surface of the dough and sprinkle the filling over the butter-smeared area, leaving a ½ inch naked border free from filling on one long end.

Roll the dough into a long log, starting at the long end opposite the naked border like a jellyroll.
Cut the dough log into 12 even pieces. Arrange the slices in rows, leaving about an inch between them. Cover the pan with plastic wrap and allow to proof at room temperature for 40-50 minutes until slightly puffy.
 PUFFY!
Take off the plastic wrap and cover the pan loosely with aluminum foil. Bake for 25-30 minutes and take off the foil to check how close the middles of the rolls are to done. Bake 5 minutes more or until the buns are lightly golden brown and baked through.
Alternatively, place only 6 rolls per pan (using two parchment lined pans), tucking the loose end under and allow to proof.
 Bun, spaced and loose end tucked under.
For the icing
1 (8 ounce) package cream cheese, room temperature8 tablespoons unsalted butter, room temperature3 cups confectioner’s sugar1 tablespoon whole milk1 teaspoon vanilla extract (or vanilla bean paste)pinch saltNote: this makes a lot of icing. I happen to LOVE a cinnamon bun loaded with the stuff but if you enjoy a less frosted bun, you can half the recipe.
Icing procedure In the bowl of a stand mixer fitted with the paddle attachment, mix all the icing ingredients until smooth. Drizzle over the warm buns.
FOR DINNER ROLLS
(makes 16)
4 tablespoons unsalted butter, melted
1 tablespoon coarse, Kosher salt
Preheat oven to 400ºF.

Roll the dough into an 8" tall x 24" long rectangle. Cut the dough into 16 isosceles triangles and roll into a spiral, starting at the wide end and tucking the narrow tip under.

Place the rolls on a parchment lined sheet pan, spacing a few inches apart. Cover with plastic wrap and allow to proof until puff, about 1 hour.

Brush rolls with melted butter and sprinkle with kosher salt. Bake for 10 minutes or until golden brown. Take from the oven and brush with more butter immediately, while the buns are still hot.

FOR DONUTS
(makes 16 donuts and 16+ donut holes)
Roll once proofed dough to 1/8" thick on a lightly floured work surface. Using a donut cutter, cut out donuts and place on a parchment lined sheet pan lightly sprayed with non-stick cooking spray. Cover with plastic wrap and allow to proof until puffy, about 1 hour.

To fry
Canola oil (enough to fill a heavy stock pot with 2 inches of oil)
Attach a thermometer to the pot and bring the oil to 350ºF. Keep the heat consistent, lowering the flame if need be.
Add the donuts, a few at a time, frying on each side about a minute or until lightly golden brown. Transfer to a paper towel briefly and then coat with glaze while still warm.

For the glaze
6 tablespoons unsalted butter, melted
2 cups confectioner's sugar
1 tablespoon dry, powdered non-fat milk
2 tablespoons pumpkin puree
1 teaspoon vanilla
pinch salt
Mix all ingredients along with 2 tablespoons of water until smooth. If the mixture is too thick, add another tablespoon of water and stir until well combined. Dip the hot donuts into the glaze, coating them completely on one side. If you're crazy like I am, I turn the donut over and coat on the other side as well. Transfer to a parchment lined sheet pan to cool.
November 12, 2015
Pumpkin-Apple Cider Mousse Chocolate Cream Puff Cake: AKA the Fall Windebeuteltorte

My apple trees have been crazy with fruit. My sugar pumpkins are in peak sugariness. Thanksgiving is breathing down my throat and I'm convinced I can use all my extra farm foodstuffs and cram them into one cake for the occassion. And I did! And it's DELICIOUS!

I rounded out the dessert by shoving a few chocolate pastry cream filled cream puffs inside my apple cider/pumpkin Bavarian mousse, sandwiched it all with moist apple cider cake and topped the whole shebang with fluffy whipped cream and MORE caramel coated cream puffs. This is actually a thing in Germany. It's a cake called a Windbeuteltorte (translation: windbag cake). I KNOW!

To learn so much more about making cream puffs, eclairs and all manner of beautiful French choux goodness, you can take my Craftsy class and learn all my tips and tricks in the comfort of your very own home! Here's a super duper link that will get you $20 dollars off the class: LINK!
PUMPKIN-APPLE CIDER WINDBEUTELTORTE
FOR THE CHOUX
1 cup water1/4 cup whole milk4 ounces unsalted butter2 teaspoon sugar1 teaspoon salt1 1/2 cups all purpose flour5 large eggs
Preheat oven to 375ºF.
In a saucepan, combine the water, milk, butter, sugar and salt. Allow the sugar and butter to melt over low heat. Once melted, bring the mixture to a fast simmer, take from the heat, and add the flour all at once and stir until the mixture is smooth and there are no more flour lumps (this mixture is called a panade). Put the mixture back on the stove over medium heat and stir until a starch film coats the bottom of the pan.
Transfer the mixture to the bowl of a stand mixer fitted with the paddle attachment. Allow the panade to cool by mixing for 2-3 minutes. Whisk together 3 of the eggs and add to the mixer while it's running on medium speed. Mix until the eggs are fully incorporated and add the remaining eggs, one at a time, until a smooth shiny paste results. Whisk the eggs before adding.
Pipe small rounds onto a parchment lined sheet pan and bake until the puffs are deeply brown and and puffed, about 25-30 minutes. Allow to cool completely. Once cool, poke a small hole at the bottom of each puff. Fill a small pastry bag fitted with a medium-small open tip with the chocolate pastry cream. Fill the puffs with the chocolate pastry cream and set aside in the refrigerator until ready to assemble.
FOR THE CHOCOLATE PASTRY CREAM
1 cup heavy cream1 cup whole milk1/2 cup sugar1/4 cup cornstarch5 egg yolkspinch salt3 ounces bittersweet chocolate, finely chopped
In a saucepan, bring the heavy cream and milk to a simmer.
In the meantime, combine the sugar, cornstarch, yolks and salt in the bowl of a stand mixer fitted with the whisk attachment. Add the simmering cream/milk in a steady stream with the mixer running. When everything is well combined, return the mixture back to the saucepan and whisk over medium-low heat constantly until the mixture thickens to the consistency of mayo. Take from the heat and add the chocolate. Whisk until the chocolate is completely melted. Transfer to a bowl and cover with plastic wrap, making sure the plastic wrap touches the pastry cream so a skin doesn't form. Refrigerate until cool.
FOR the APPLE SPICE CAKE
1 ½ cups all purpose flour4 ounces unsalted butter, room temperature1 cup brown sugar1 large egg1 cup applesauce1 teaspoon baking powder1 teaspoon vanilla bean paste½ teaspoon salt½ teaspoon cinnamon¼ teaspoon nutmeg¼ teaspoon ground cloves
Preheat oven to 350ºF conventional. Line two 9” cake pans with parchment and spray with non-stick cooking spray. Set aside.
Cream together the butter and brown sugar until light and fluffy. Scrape down the sides of the bowl. Add the egg and mix until combined. Add the vanilla bean paste and mix to just combine.In a bowl, whisk together the flour, baking powder, salt and spices to combine.Add half the flour mixture, mix to just combine. Add the apple sauce, mix and then the remaining flour. Mix until a smooth batter forms.
Divide the batter evenly among the 2 pans and bake for 15 – 20 minutes or until the cake just springs back when gently poked. Allow to cool completely.
PUMPKIN-APPLE CIDER BAVARIAN CREAM
1 cup apple cider2 cups heavy cream, divided5 egg yolks1 (15 ounce) can pumpkin puree, divided1 teaspoon cinnamon½ teaspoon nutmeg½ teaspoon ground clovespinch salt½ cup brown sugar¼ corn starch1 teaspoon vanilla bean paste1 packet gelatin
In a stand mixer, whisk together half of the pumpkin puree and 1 cup heavy cream until stiff peaks form. Set aside in a bowl in the refrigerator.
In the same mixing bowl, combine the remaining pumpkin puree, yolks, brown sugar, cornstarch, cinnamon, nutmegs, cloves, salt and vanilla bean paste. Whisk until smooth.In a small bowl, pour in ¼ cup cool water and sprinkle the gelatin evenly over the water. Allow to sit until it looks like wet sand. Set aside.
In a small saucepan, bring the remaining 1 cup heavy cream and apple cider to a simmer. With the mixer running, slowly add the simmering milk/cream mixture to the beating egg yolk mixture. Continue mixing until combined. Transfer the mixture back to the saucepan and whisk over medium heat until thickened to the consistency of very thick mayonnaise. Immediately stir in the gelatin and continue stirring until the gelatin melts completely.
Allow to cool, about 1 hour and then fold in the reserve pumpkin/whipped cream mixture.
To assemble: Slice an apple into thin "rounds", brushing each with lemon juice. Line a 8" or 9" cake ring with the apples (you can also use a springform). Pour the Bavarian cream into the cake ring, atop the first layer of cake and the carefully place filled cream puffs inside the mousse filling so that they're completely submerged in luscious pumpkin cream, leaving about 6-7 puffs to place on top of the cake. Place the 2nd cake layer atop the mousse and freeze to set. About 2 hours.
TO FINISH
SWEETENED WHIPPED CREAM
2 cups heavy cream1/4 cup confectioner's sugar
Whisk the cream and confectioner's sugar together until stiff peaks form. Pipe atop the cake.
CARAMEL
1 cup sugar1/3 cup water1/2 teaspoon lemon juice
In a saucepan, stir together all the caramel ingredients until the sugar has melted. Take a pastry brush and wipe down the sides of the pan with a moistened pastry brush to knock down any clinging sugar granules. Once all the sugar has melted, stop stirring. When the caramel is light amber, take it from the heat and place the saucepan in a shallow pan of ice. Dip the remaining filled choux puffs in the caramel and set on a parchment lined sheet pan until the caramel sets, about 5 minutes. Top the cake with the caramel coated puffs.
November 10, 2015
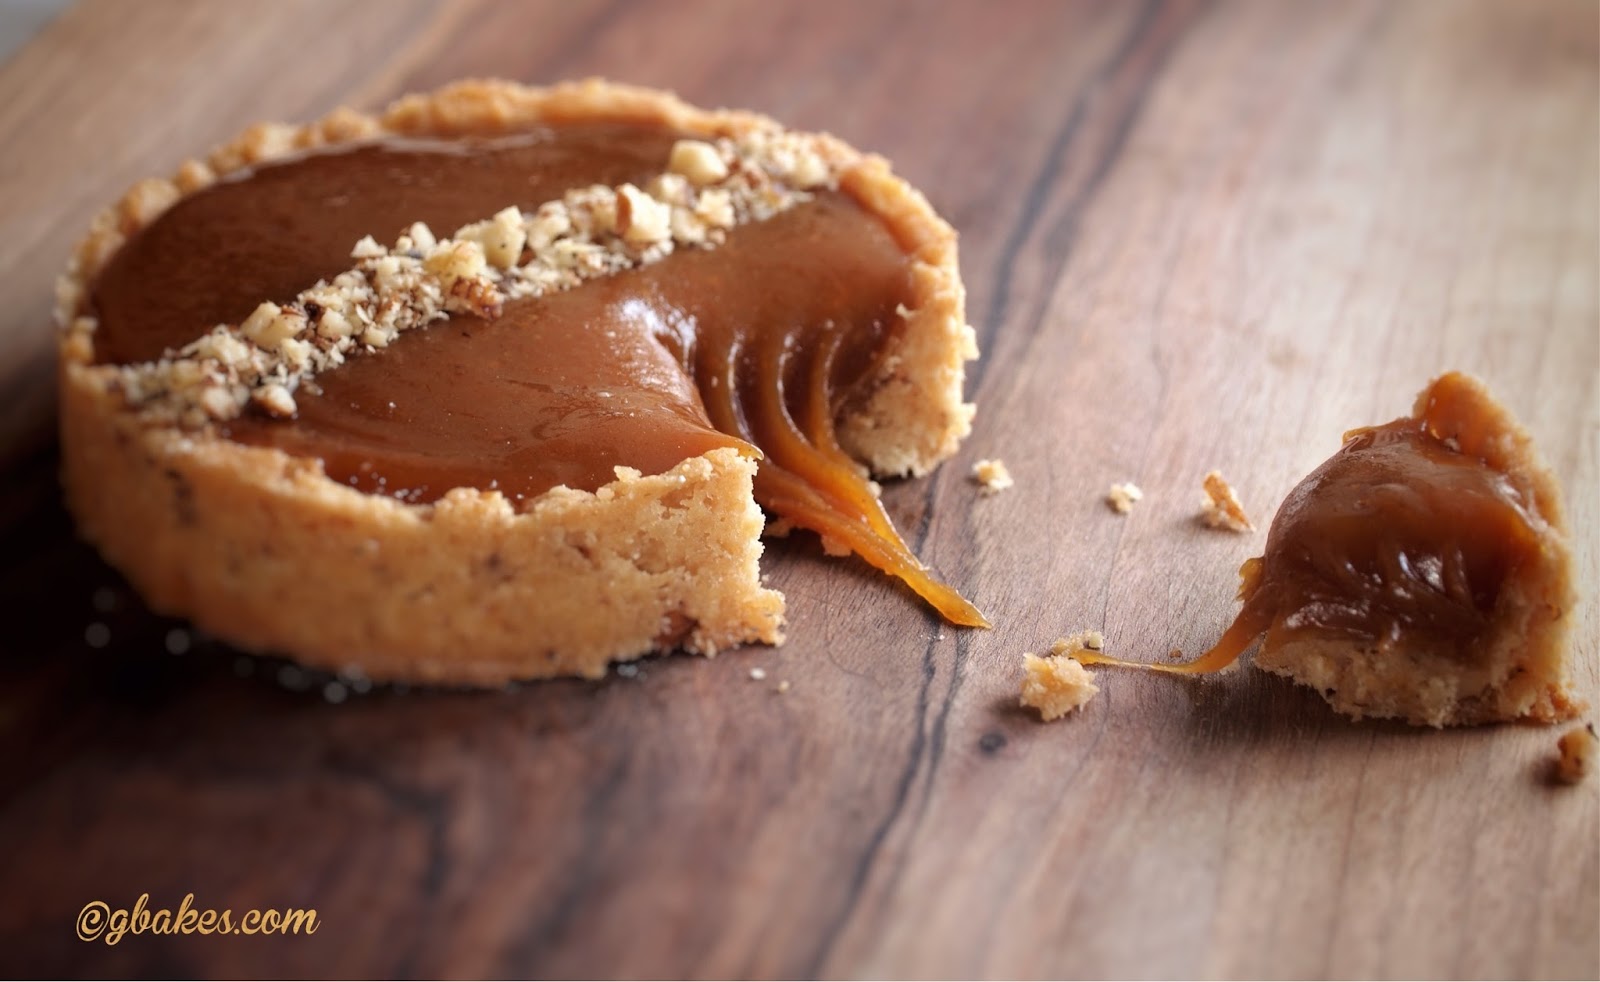
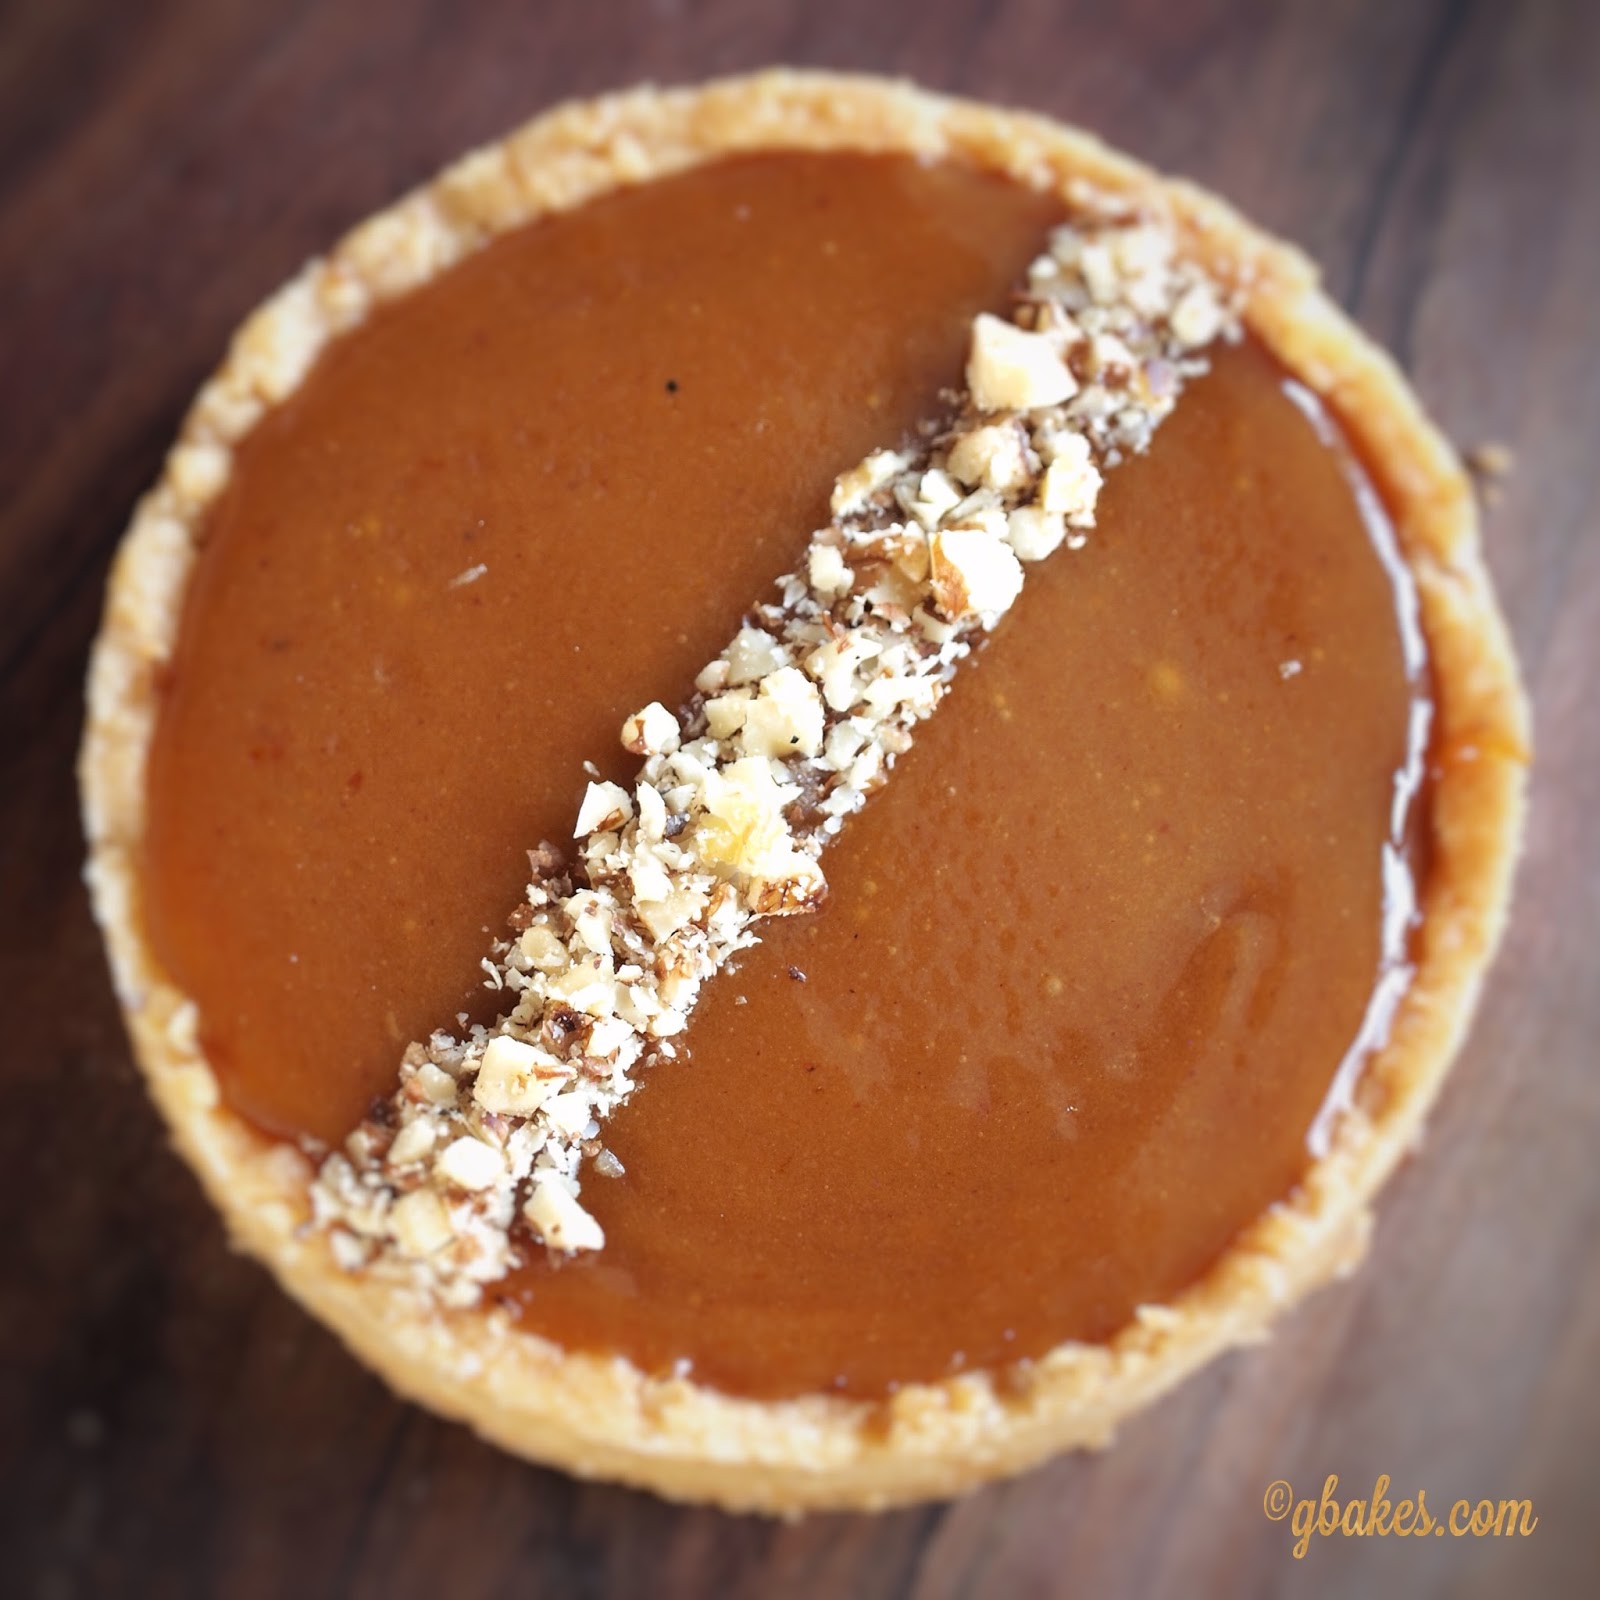
PUMPKIN SPICE CARAMEL TARTS with Walnut Buttery Crusts
I spend weeks during the fall thinking of new ways to use pumpkin. OK. I lied. I spend months and I start obsessing in the summer.
It's during those months that my momentary fixation with all things gourd intersect with my steadfast infatuation with caramel. And butter-y cookies.

This year, my sweet dreaming resulted in in a pumpkin spice caramel tart. I left some naked. Others I topped with pumpkin ganache. You can rock it either way and since this recipe is for individual tarts, you can leave some nekkid and others you can dress up in Thanksgiving finery. Let your guests choose for themselves which they prefer.

PUMPKIN SPICE CARAMEL TARTS

(Makes 8)
For the walnut shortcrust
1 1/2 cups all purpose flour (I use King Arthur)3/4 cup brown sugar6 ounces (1 1/2 sticks) unsalted butter, cold1 teaspoon salt1 cup finely chopped walnuts, divided
Procedure for the crust
Preheat oven to 350ºF. Place eight 4" tart rings on a parchment lined sheet pan and spray with non-stick cooking spray. Set aside.
Using the large holes in the box grater, grate the butter into a bowl. Add the brown sugar and work the sugar into the butter with your fingers. Add the flour and salt and continue massaging the flour into the sugar/butter mixture until you get a crumbly dough that holds together. Stir in HALF the walnuts. When you pinch a small amount of dough between your fingers.
Divide dough among the tart rings. Press the dough along the bottom and sides of the rings and freeze for 10 minutes to set. Line the dough with parchment and fill with rice to weigh down and bake for 10 minutes. Remove the parchment and rice and bake for 5 - 10 minutes more or until baked through. Allow to cool completely.
For the pumpkin spice caramel
1/2 cup maple syrup1/2 cup light brown sugar1/2 cup heavy cream1/4 cup sweetened condensed milk1/4 cup light corn syrup1 teaspoon fine sea salt1/4 teaspoon cinnamon1/8 teaspoon nutmeg1/8 teaspoon ground cloves1/2 cup pumpkin puree2 tablespoons unsalted butter

Procedure for the caramel
Divide the remaining chopped walnuts among the baked tart shells. Set aside.
In a heavy saucepan, combine the maple syrup, brown sugar, heavy cream, sweetened condensed milk, corn syrup, salt and spices. Stir over low heat until the sugar melts. Attach a sugar thermometer and cook until the mixture registered 248ºF on the thermometer.
Take the caramel from the heat and stir in the pumpkin. Stir over low heat and cook until the caramel mixture reads between 238ºF and 240ºF. Take from the heat and stir in the butter.
Divide the hot caramel among the tart shells. Allow to cool. You can serve JUST LIKE THIS or guild the lily, as my dad would say, by swirling some pumpkin ganache on top of all that goodness.

For the pumpkin ganache
5 1/2 ounces white chocolate, finely chopped (I used Callebaut)2 tablespoons unsalted butter1 tablespoon corn syrup1/3 cup heavy cream1/3 cup pumpkin puree1/2 teaspoon fine sea salt

Procedure for the pumpkin ganache
Combine the butter, corn syrup, cream, pumpkin puree and salt in a sauce pan. Stir to combine and allow to come to a simmer. Add the white chocolate and shimmy the pan so that the cream mixture covers the chocolate. Allow to sit 2 minutes to melt the chocolate. Whisk the mixture to combine and refrigerate until cool, about 40 minutes.(Note: when piping, use a light hand. This stuff is sweet. White chocolate tends to bring it on and this ganache is no exception).Transfer the mixture to a stand mixer fitted with the whisk attachment. Mix for a few seconds to thicken the ganache. Transfer the ganache to a piping bag fitted with a medium plain tip. Pipe the ganache over the set caramel. Dust with confectioner's sugar.
November 8, 2015
APPLE CIDER BUNDT: a follow up

I mentioned in my Apple Cider Caramel Layer Cake post that the apple cake is bundt worthy. Many of you asked for the specifics of converting baking time for a bundt versus the layers. I made a few bundts to calculate the time and to get a few pictures. Funny thing, I was never able to get a photo of a whole bundt. They kept getting hacked to bits. So delicious, this thing.
I am able to report back, regardless of the cake disappearing, that it takes 55 minutes at 350ºF to bake off, give or take 5 minutes on either end depending on your oven. It should still be moist and when you poke a toothpick inside, it should come out with a few moist crumbs but otherwise be clean.
I used a 9 1/2 cup Analon bundt. It's non-stick but I still buttered it and then coated with a fine dusting of flour so the cake came out cleanly.
To finish, I brushed the still hot cake with my apple cider cake syrup: 1/2 cup apple cider, 1/2 cup dark brown sugar and 2 tablespoons unsalted butter, melted. Place the cake on a cooling rack over a sheet pan (this does three things: allows the cake to cool evenly, allows any excess drips from the cake syrup to fall onto the sheet pan and keeps the bottom of the cake from being soaked through with the syrup). Using a pastry brush, lightly mop the cake with the syrup, allowing the syrup to soak completely before brushing with the remaining syrup. This takes a few passes but it's worth the time spent if only to enjoy the heavenly aroma of apple cider and warm butter.
The cake keeps for DAYS and stays perfectly moist. Just cover it with plastic wrap and you'll be a happy camper all week. For the recipe, click HERE.
November 1, 2015
Apple Cider Caramel Layer Cake

It's been a spectacular fall in Vermont. I've spent every moment savoring it. Before all the color and sweetness fades, I dove once more into our ancient apple tree, collecting what fruit was left.

The recent frosts have made the the juices sweeter but, at least for this variety, have done nothing to compromise the crispness of the flesh. That means I'm collecting some for cider, some to cellar and a few for a cake that pays homage to a glorious autumn.

APPLE CIDER CARAMEL LAYER CAKE
This cake is unbelievably flavorful and moist. It's gorgeous as a layer cake but equally well suited as a bundt.

Preheat oven to 350ºF, conventional. Line the bottom of three 9" cake pans with parchment paper and spray with non-stick cooking spray (or baker's spray). Set aside.
For the applesauce
4 large, tart apples. Cored and sliced into 1/8 inch thick slices
4 tablespoons unsalted butter
1/2 cup dark brown sugar
1/4 cup apple cider
1 teaspoon apple cider vinegar
1 teaspoon vanilla extract
pinch salt

In a large pan, melt the butter. Add the apples, brown sugar, apple cider, apple cider vinegar, vanilla and salt. Stir over medium heat until the apples are very soft.

Transfer to a food processor and pulse until smooth. Allow to cool. Should make 2 - 2 1/4 cups applesauce.

For the cake
3 cups all purpose flour (I use King Arthur)
2 cups dark brown sugar
2 large eggs, room temperature
2 to 2 1/4 cups applesauce (recipe above)
8 ounces unsalted butter, room temperature
1 teaspoon baking powder
1 teaspoon baking soda
1 teaspoon fine sea salt
1 teaspoon cinnamon
1/2 teaspoon ground ginger
zest 1 lemon
In the bowl of a stand mixer fitted with the paddle attachment, combine the butter and brown sugar. mix on high until light and fluffy. Scrape down the sides of the bowl. Add the eggs, one at a time, beating between additions.
In a small bowl, combine the flour, baking powder, baking soda, salt, cinnamon, ginger and lemon zest. Whisk about 30 seconds to evenly distribute the ingredients.
Add half the flour mixture to the mixer and mix to just combine. Add half the applesauce and mix. Add the remaining flour and applesauce, mixing until a smooth batter forms.

Divide the batter evenly among the three prepared cake pans and bake for 25-30 minutes or until the cake springs back when gently poked. Set aside to cool completely.
For the brown sugar/apple cider buttercream
1 cup brown sugar
1/2 cup apple cider
5 egg whites
1 pound unsalted butter, slightly cooler than room temperature
1/2 teaspoon sea salt
In a saucepan, combine the brown sugar and cider. Stir over low heat until the sugar is melted. Increase heat to medium and cook the sugar mixture until it reaches 234ºF - 240ºF.
In the bowl of a stand mixer fitted with the whisk attachment, combine the egg whites and salt. Whisk until the eggs are just foamy. Slowly pour the brown sugar mixture SLOWLY down the side of the bowl once it has reached temperature with the mixer running on medium speed. Increase the speed to high and continue mixing until the the meringue achieves stiff peaks and the side of the bowl is cool to the touch.
Add 1" butter pieces, on at a time, mixing constantly, until the buttercream thickens and smooths. It may look "broken" or "curdled"
 It looks awful before it transforms into a smooth beauty.after a while but this simply mean you're getting close. Keep mixing add another nob of butter, until it comes together. You may not need all the butter.
  It just took another small nob of butter and a few seconds of beating on high for the buttercream to come together.
To assemble
Make cider cake simple syrup: In a small saucepan, combine 1/2 cup dark brown sugar and 1/2 cup apple cider. Heat over low heat, stirring, until the sugar has completely melted. Transfer to a small bowl.
Place one layer of cake on a cake stand. Using a pastry brush, brush a small amount of the cake syrup evenly over the top of the cake and allow to sit a few seconds to allow the syrup to soak through the cake.
Spread half of the buttercream over the first layer and place and 2 cake layer on top of the buttercream and press gently to adhere the 2nd layer to the buttercream and to insure that buttercream comes to the very edge of the cake and a bit beyond. Brush the 2nd layer of cake with the cake syrup, allowing it to be absorbed and then spread the remaining buttercream evenly over the layer. Place the 3rd layer of cake on the buttercream, pressing gently and then brush the 3rd layer with cake syrup. Use an offset spatula to smooth out the sides of the cake with the overhanging buttercream just to make the sides of the cake completely smooth but don't worry about creating a crumb coat of frosting over the cake sides. This makes it harder for the caramel topping to adhere to the sides of the cake. I gave this cake a crumb coat and while I managed to apply the caramel frosting, it took a bit of doing.
You can also leave the sides naked, and not bother with the caramel and in that case, apply 1/3 of the buttercream to each layer (although, you really should bother....it's delicious), when spreading the buttercream on the layers, coat just to the edge and press only to adhere the layers, being careful that the buttercream isn't pushed out beyond the cake's edge.
Refrigerate the cake until set, about 1/2 hour (you can also freeze for half the time).
For the apple cider caramel frosting
1 (12 ounce) can of whole evaporated milk
1 1/2 cups firmly packed dark brown sugar
1/2 cup apple cider
4 tablespoons unsalted butter
1/2 teaspoon salt
Melt the butter in a large saucepan. Add the evaporated milk, sugar, apple cider and salt. Stir over low heat until the sugar has melted. Continue cooking and stirring constantly over medium heat until the mixture thickens and reads 234ºF on a sugar thermometer. Remember, stir constantly otherwise the mixture will burn. This takes a long while, up to a half hour.
Allow the mixture to cool a bit, for about 10 minutes, and then using a wooden spoon beat the mixture until it is completely cool and spreadable but still shiny. When you take a spoon to it and lift it, the mixture should "pour" thickly and a small dollop on parchment should stay put and not spread on its own.
You can either pour the entire batch of caramel frosting onto the top of the cake and use an offset spatula to wrangle it to cover the entire cake. Or you can spread it on the cake a small dollop at a time. It's time consuming but if you have a steaming hot glass of water, dip your offset into the water, clean off the offset and spread in small increments over the cake.
Refrigerate the cake until you plan to serve it.
Gesine Bullock-Prado's Blog

- Gesine Bullock-Prado's profile
- 69 followers
Gesine Bullock-Prado isn't a Goodreads Author
(yet),
but they
do have a blog,
so here are some recent posts imported from
their feed.

