
Rachael Ray's Blog, page 48
September 25, 2013
11 Adorable Dog Pics From the Rachael Ray Community
We’re big dog fans and we know that our community is too! So when we asked our RachaelRay.com Facebook fans to share their pups, we were delighted to see such adorable dog pics and to learn more about the dogs themselves.
Here are 11 pictures from our community. Be sure to join the conversation on Facebook to tell us more about your pets.
1. Carrie’s Boots (pictured above): “This is my Doxie, Boots! She LOVES to be pushed in a swing! I even bought an infant swing for her to swing in at home!”
2. Stephanie’s Tank and Dodge: “This is Tank and Dodge. Tank is a 7 Year old St. Bernard and Dodge is a 2 year old mix. He was rescued from a kill shelter in TN.”

3. Gladys’s Lou: “This is my baby boy Lou. He’s 8 years old and loves going with me for rides in the car. He’s my little protector. He barks at our other dogs and cats when they get to close too me in the house only. He get upset when I can’t take him with me. But he’s so happy when I get back.”

4. Kim’s Champ & Dixie: “My Babies Champ and Dixie… They can’t do without each other.”

5. Starr’s Max: “This is our rescue Max after his first shopping trip at Petco. LOL.”

6. Lisa’s Drew: “ Our patriotic puppy, Drew, enjoying the sunshine!”

7. Kelly’s Shylah: “This is Shylah, our female Rottweiler. Her 10th birthday is coming up. Do you have a recipe for a doggie cake?” Try these cupcakes: Pet-friendly Penny Cupcakes.

8. Patricia’s Rufus: “This is Rufus.He is a year old and he is the love of our live. He is eating one of your soup bones.”

9. Marisol’s Boston & Jersey: “Boston and Jersey best friends forever!!!

10. Julie’s Austen: “This is Austen, 6yrs old. He is always cold and loves his shirts and sweaters and sun bathing.”

11. Bernadette’s Buster: “This is my Buster. He hates having his picture taken because he doesn’t like the flash. I adopted him in 2009. He had been in shelters and foster homes since 2006. His shelter name was Elton John, and he didn’t like that either. He also doesn’t like to be outdoors…at all. But his most favorite thing is me! He loves to cuddle with me and put his 95 pound self in my lap. We are the best of friends.”


Crunchy Peanut Butter Chocolate Chip Banana Bread
My baking typically falls by the wayside during the summer, and this year was no different. So when I whipped up this moist and delicious banana bread this week, my kids cheered. Ok, they didn’t literally cheer but my daughter did say, “Mom, I’m so glad you’re baking again.”
This banana bread is out of this world, and keeps for days. And who doesn’t love banana bread? It comes together in minutes and nothing says thank you to a teacher, friend or hostess like a loaf of homemade goodness. Just when you thought banana bread couldn’t get any better, add some crunchy peanut butter to really put it over the top. I used natural peanut butter, but any peanut butter will do here, including creamy.
My kids have been scarfing this down after school and for breakfast – I’m sure your family will too.
Crunchy Peanut Butter Chocolate Chip Banana Bread
(adapted from Baked Elements)
Ingredients
1 1/2 cups flour
1 cup sugar
1 teaspoon kosher salt
1 teaspoon baking soda
3 ripe (or over-ripe) bananas, mashed
1/2 cup vegetable oil
2 eggs
1/4 cup milk
1/2 teaspoon vanilla
1 cup crunchy peanut butter (I used natural-style)
2/3 cup chocolate chips
Directions
Preheat the oven to 350 degrees F. Butter and flour (or spray with baking spray) a 9 x 5 inch loaf pan and set aside.
In one large bowl whisk together the flour, sugar, salt and baking soda and set aside. In another large bowl combine bananas, oil, eggs, milk, vanilla and peanut butter. Add chocolate chips and stir briefly to combine. Add the wet ingredient to the dry ingredients and fold with a rubber spatula until just combined. Do not over-mix!
Pour batter into prepared pan and bake 60-75 minutes. If your bread is over-browning while baking (I smelled mine!), tent with foil. Let cool in pan for 15 minutes and turn out onto rack to cool completely.
Check out more delicious banana bread recipes:
Chocolate Chip Banana Bread (our site’s most popular recipe!)
“Light” Peanut Butter Banana Bread
Banana Chocolate Chip Coffee Cake Muffins with Streusel Topping
Plan B Mom is a mostly-stay-at-home mom of 3 who works from home but sees her main job as managing her family. When she is not taking care of her 13-year old and 11-year old girls, 9- year old son, yellow lab, and husband – she is baking, running, carpooling, or helping with homework. She tries to stay organized to keep life running smoothly – or at least catastrophes at bay. Follow her on Twitter at @PlanBMom.
September 24, 2013
Shepherd’s Pie Express: Dinner in Under 30 Minutes
Nature may be winding down but the rest of us are hustling to keep up with a new season of homework, housework and late nights at the office. When it gets really hectic, it always helps to keep one part of the house sane: the dinner table. Last Wednesday I made a shortcut Shepherd’s pie. It was our mid-week meal – a meal to bring my troopers back to the table to find their composure over a comfort dish.
I have many versions of the dish – but truth be told, Shepherd’s Pie Express is my favorite. It delivers its promise of braising with surface-crisped mashed-potatoes in under 30 minutes. Some like their pie filling to be stiffer, but not me. I like to keep it a little wet so that it starts to collapse on my plate when I serve it (and then you can skip making gravy). The mashed potatoes have an edge too, with a dash of mustard and a sprinkle of parmesan adding both depth and character.
Since this rustic dish is a way to use up leftovers, feel free to throw in an assortment of veggies — though for me, carrots are a must. I have also used peas, celery, mushrooms, turnips and pretty much any odd-bod waiting for its calling.
Ingredients:
2 tbsp. olive oil
2 lb. lean minced beef, chicken or lamb
Salt and black pepper
2 medium onions, peeled
1 medium carrot, peeled
2 garlic cloves, peeled and finely chopped
Few thyme sprigs
2 tbsp. tomato purée
5 tbsp. Worcestershire sauce or 2 tbsp. A1 steak sauce
1-1/4 cup chicken stock
4 -6 medium sized russet potatoes
1-3/4 oz. butter
2 tbsp. finely grated parmesan or cheddar, plus extra for grating over the top
1 tsp. Colemans English mustard (if using English mustard powder, use less than 1/4 tsp.)
Method
1. Set oven to broil
2. Add the potatoes to a pan of salted water, bring to a boil and cook until tender. Drain and return to the hot pan for 15 seconds or so to dry out, then take off the heat. Pass the potatoes through a potato ricer back into the pan or mash smoothly. Mix through the butter, cheese and mustard. Taste and adjust the seasoning
3. Heat oil in large frying pan. Season the ground meat with salt and pepper and fry until nicely browned
4. Throw onions, carrots and garlic into a blender and pulse until finely grated. Mix in to meat mixture along with thyme and cook out until they soften. Add tomato puree and cook for a couple of minutes to incorporate
5. Once the mixture starts to dry off, add the Worcester sauce and reduce until it is almost evaporated. Sprinkle to flour and combine well
6. Add chicken stock. Bring to boil and reduce to simmer for 15 minutes to braise. The mixture should be thick and glossy. Remove from the heat. Sauce should coat the back of a spoon
7. Spoon the mince mixture into the bottom of a 2 L pie dish. Spoon the mashed potato on top and rough up the surface with a fork. Grate over some extra cheese and broil until bubbling and golden brown
Enjoy!
Looking for more comfort food? Check out:
Wursts with Apple, Potato and Onion Hash
September 23, 2013
Beer & Chocolate Cupcakes: A Classic with a Grown-Up Twist
Quick, name your three favorite foods. My immediate response (in no particular order): chocolate, beer and coffee.
If your favorite foods are anything like mine, you will feel like you’ve died and gone to heaven when you make these cupcakes.
Yes, beer and chocolate work together. Trust me.
Just like red wine enhances a rich tomato sauce, dark beer really compliments dark chocolate. You won’t even be able to tell at first what that extra something is in this dark, moist chocolaty cupcake. There is beer throughout the recipe – in the batter, in the filling and in the frosting, but not too much. One 12-ounce bottle altogether. Don’t have a Porter-style beer (think dark) on hand? Try a Stout like Guinness.
There are a few extra steps here but they’re well worth your time. Start to finish the recipe took me one hour (I hurried up the cooling time by cheating and putting the cupcakes in the fridge so I could frost them sooner).
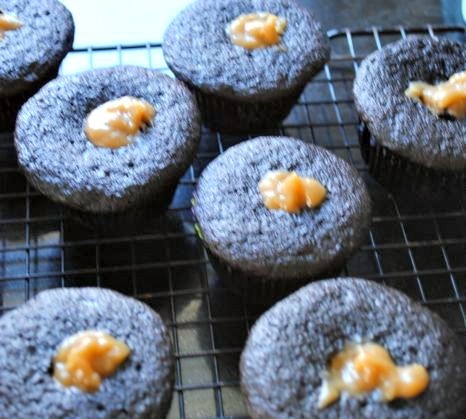
There is the rich, creamy filling…with beer. Think grown-up Hostess Cupcake.
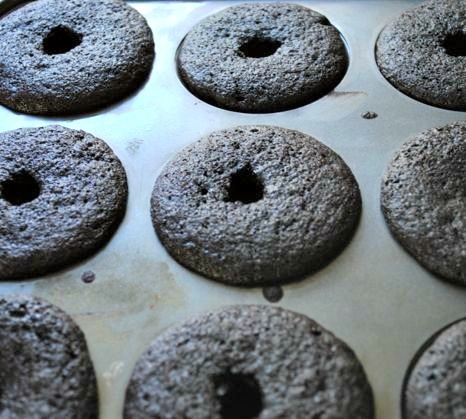
After you take the cupcakes out of the oven, you take the end of a wooden spoon and poke a hole in the center of each cake. Don’t be afraid of making the hole too big or breaking through the bottom. You have the cupcake paper liners to protect you and you want more filling, not less.
And then you fill the cupcakes with the creamy, delicious filling. A little filling can peek out – it’s ok. Your beautiful buttercream frosting will ultimately cover it up.
Make these cupcakes for your boyfriend, he will love you forever. Bring them to a party, you’ll never get dropped from the invite list.

Makes 12 cupcakes
(modified from a recipe from scharffenberger.com)
Ingredients
For the batter:
1 cup Porter-style beer
1 cup flour
1/3 cup unsweetened cocoa powder
1 teaspoon baking powder
1 teaspoon baking soda
1/2 teaspoon kosher salt
1/3 cup softened butter
1 cup brown sugar
1 egg
For the filling:
1/2 cup heavy cream
1/2 cup Porter-style beer
1 egg
1/3 cup brown sugar
2 tablespoons plus 2 teaspoons flour
1/4 teaspoon kosher salt
1/2 tablespoon butter
1/2 teaspoon vanilla
For the Porter Reduction:
1/4 cup Porter-style beer
1/4 cup brown sugar
For the buttercream frosting:
1/2 cup softened butter
3 cups confectioners sugar
1-2 tablespoons heavy cream
1/4 cup Porter reduction
1 teaspoon vanilla
pinch of kosher salt
Directions
Preheat the oven to 350 degrees F. Line the cupcake pan with paper liners and set aside.
Make the cupcakes:
In a small saucepan bring the beer up to a simmer over medium heat, immediately turn off the heat and leave the saucepan on the stove. Sift together the flour, cocoa powder, baking powder, baking soda and salt and set aside. With an electric mixer, cream together the butter and sugar. Add the egg and mix until combined. Set the mixer on low and slowly add 1/2 cup of the hot beer. Add one half of the dry ingredients and one half of the remaining beer, then the remainder of the dry ingredients and the remainder of the beer. Mix until just combined. The batter will be thin.
Pour the batter into the cupcake pan about 2/3 of the way up for each cupcake. Bake for approximately 15 minutes or until a toothpick comes out clean when inserted in the center. Poke a hole in the center of each cupcake with the end of a wooden spoon, remove cupcakes from pan, and transfer cupcakes to a rack to cool.
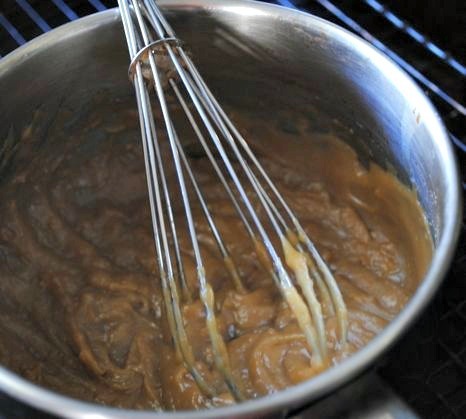
Make the filling:
In a medium saucepan whisk together the cream, beer, egg, sugar, flour and salt. Bring to a slow boil over medium heat – about 8-10 minutes – whisking constantly, until mixture is thick and creamy. Remove the pan from the heat and whisk in the butter and vanilla. Allow the mixture to cool slightly (5 minutes or so) before spooning into the cupcake holes. Let cupcakes cool completely before frosting.
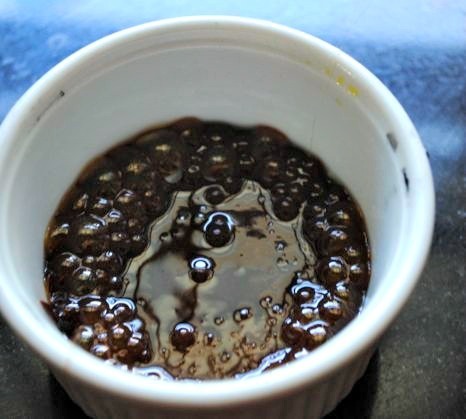
Make the reduction for the frosting:
Combine the sugar and the beer in a small saucepan and bring to a boil. Simmer for 5-8 minutes or until the mixture has reduced by about half and remove from heat.
Make the frosting:
With an electric mixer, cream the butter until light and fluffy. Slowly add the sugar until the butter has absorbed all the sugar. Add vanilla and 1 tablespoon of cream and beat until combined. Slowly add the beer reduction to the frosting (if the reduction has hardened, reheat over low heat, stirring constantly, until it is liquified, and then add it to the frosting) and beat until light and fluffy. If the frosting is too stiff, add another tablespoon of cream. Scoop the frosting into a piping bag and frost the cooled cupcakes.
Some other fabulous cupcake recipes from rachaelray.com:
Chocolate Peanut Butter Cupcakes
Plan B Mom is a mostly-stay-at-home mom of 3 who works from home but sees her main job as managing her family. When she is not taking care of her 13-year old and 11-year old girls, 9- year old son, yellow lab, and husband – she is baking, running, carpooling, or helping with homework. She tries to stay organized to keep life running smoothly – or at least catastrophes at bay. Follow her on Twitter at @PlanBMom.
September 20, 2013
Rice Krispie Crusted French Toast
I’m big on hot breakfasts in my house. Even on the weekdays I like to feed my family something with substance. Cereal is just fine but I find that it really doesn’t keep bellies full as long as it should so I always opt for something heartier. This doesn’t mean that I don’t feel the morning crunch and get overwhelmed with the inevitable chaos of life with kids, but I do my best to come up with recipes that are delicious and fit within my time constraints.
French toast is one of those breakfasts foods that feels luxurious but really takes no time to prepare and has the perfect combination of carbs (from the bread) and protein (from the eggs and milk). It’s the perfect breakfast food for those kiddos who are picky about eating protein in the morning because they really don’t know they are eating eggs.
Rice Krispie Crusted French Toast is a fun spin on a classic that your entire family will love. It’s quick to prepare and so yummy. The cereal coating gives it a slight crunch and actually helps the syrup stick to the french toast —holla!! This recipe was such a hit, I actually served it as a dessert one night to guests topped with a scoop of vanilla ice cream. It was to die for! Rice Krispie Crusted French Toast is perfect for breakfast, brunch or dessert. Bookmark this recipe now and thank me later. : )
Rice Krispie Crusted French Toast
Serves 4-6
Ingredients:
3 large eggs
3/4 cup milk
1 tsp vanilla extract
2 tablespoons sugar
4-6 thick slices of bread
approx 2 cups Rice Krispies, lightly crushed (or other plain cereal)
Instructions:
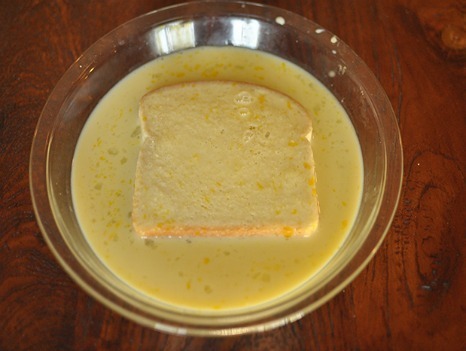
1. In a large bowl, whisk together eggs, milk, vanilla and sugar. Pour into a shallow dish with sides such as a pie plate. Place cereal into another pie plate or shallow, wide bowl.
2. Preheat frying pan or griddle over medium heat. Lightly pan with butter.
3. Soak each slice of bread in the egg mixture, turning once to coat both sides. Transfer slices to cereal plate and press down gently to coat both sides of the bread. Fry french toast in the preheated pan until it is cooked through, about 2-3 minutes on each side. Toast should be lightly browned and no liquid should come out of it when pressed gently with a spatula. Serve warm topped with syrup or powdered sugar.


September 19, 2013
Quick Beef Teriyaki Skewers
You know that feeling when you commit to healthy eating and then it’s 4pm fog time? Yep, the mind drifts to a fantasyland of greasy fast food burgers, fries, yada yada yada. In just as much time you could be eating something equally satisfying and a whole lot healthier. Teriyaki-Glazed Sirloin Skewers with Chili-Lime Romaine. Exotic? Yes. Fancy? A little. Time Consuming? Not at all.
The best part is that you’ll even get to see how easy it is to make teriyaki sauce. I promise you, this sauce will exceed your expectations. Glossy and silky with the perfect hit of sweet and savory and a secret little ingredient – ginger. The sauce calls for a substantial amount of sweetening but, don’t be alarmed, you are only using it to coat the meat and not eating it as a sauce.

While these skewers work really well with rice, I like to pair them with something more hydrating, like, romaine leaves. I don’t even bother to chop my leaves up. I keep them whole and brush them with a lime-chili dipping sauce. Quite literally fresh lime-juice with a squirt of chili sauce. The acidity of the dressing along with the lightly sticky-sweet sirloin come together like the best of buddies.
Beef Teriyaki Skewers
Ingredients:
Teriyaki Sirloin With Chili-Lime Romaine
1 pound sirloin, cut in to classic kebob sized pieces
4 romaine leaves
2 wooden skewers
Teriyaki Sauce
1/2 cup soy sauce (preferably Japanese, such as, kikoman)
½ cup mirin (Japanese rice wine with a syrupy consistency)
1 teaspoon ginger, grated
Chili Lime Dipping Sauce
Juice from 2 fresh limes
Splash of hot sauce (any)
Pinch of salt
Method
Teriyaki
1. Soak wooden skewers in water. Heat oven to 400 degrees
2. Combine all teriyaki sauce ingredients in a saucepan, bring to a boil and reduce to simmer until it coats the back of a spoon (approximately 15 minutes)
3. Coat the beef cubes with the marinade whilst marinade is warm (this penetrates the flesh in a flash). Thread on skewers and pan sear until desired ‘doneness’ (usually 4 minutes per side). Set to broil for some extra browning and crispy bits
Chili-Limey Romaine
4. Combine all dipping sauce ingredients together
5. Lightly brush the sauce over the leaves
The Best Gluten-Free Apple Cake for Apple Picking Season
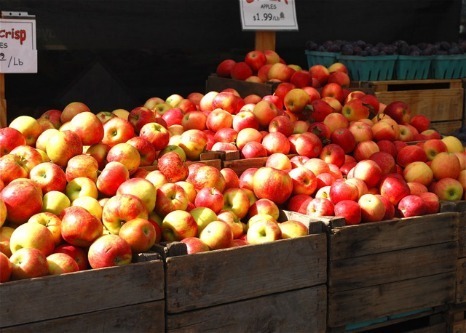
There’s a chill in the air and the leaves are starting to fall, which means it’s time to go apple picking. If you have kids, this is a great way to get them out into nature for a day. In a time when so much of our food is packaged and processed and disguised, a good old-fashioned apple-picking trip is a fun way to give them a sense of where real, fresh food comes from.
Across the country there are “you pick” or “pick your own” farms where you can go and fill up baskets and bags with fruit and pay for them by weight. It’s a good, cheap way to spend a day, and everyone gets to stretch their legs in the fresh air. You can find your local “pick your own” farm at PickYourOwn.org.
Once you’ve gotten all of those beautiful apples back to your kitchen, you’ve got the happy dilemma of how to eat all of them. There are only so many apples you can eat raw—or, my favorite way, sliced and spread with peanut butter—so be prepared with some apple recipes. Apple pancakes and apple pie are two classics, but I’m a big fan of a grated apple cake. It’s so easy and with the small amount of sugar called for in the recipe, this cake is good not only for dessert, but for breakfast, too.
Because so many people are gluten free these days, this recipe uses gluten-free flour mix instead of regular flour. It’s widely available in natural food stores or can be found online.
Depending on what part of the country you live in, you may find several different varieties for sale in all shades of red, pink, yellow and green. What kind of apples should you get for this cake? Any variety will do, but if you choose a tart apple, add an extra quarter cup of sugar to the recipe.
Get picking and have fun!
Grated Apple Cake (gluten-free)
Makes 1 9 x 13 inch square pan, 24 2-inch squares
Ingredients:
2 1/2 cups Bob’s Red Mill Gluten Free All Purpose Baking Flour
1 cup organic cane sugar
2 teaspoons baking powder
2 teaspoons cinnamon
¼ teaspoon salt
3 eggs
1 cup coconut oil, at room temperature
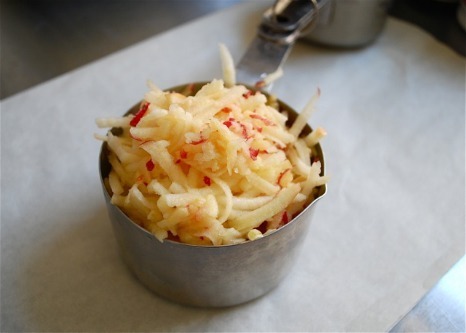
3 cups grated apples (about 3 medium apples)
Zest of one lemon
1 cup ground walnuts, or chopped dried fruit
Confectioner’s sugar, for garnish (optional)
Method:
1. Preheat the oven to 350ºF. Oil and flour a 9 by 13-inch quarter sheet pan.
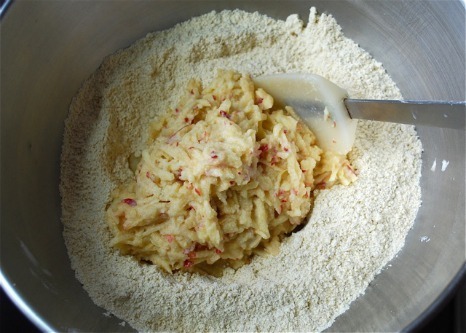
2. In a large bowl, whisk together the flour, sugar, baking powder, cinnamon, and salt. In a separate bowl, whisk the eggs, coconut oil, apples, and lemon zest. Fold the wet ingredients into the dry and mix just until the flour is no longer visible. Gently fold in the walnuts.
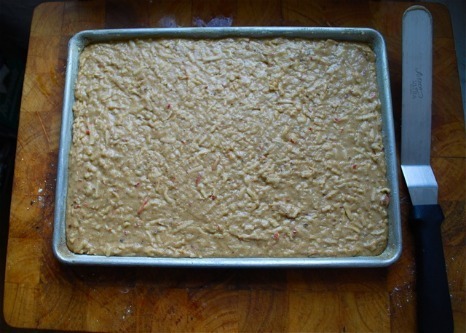 3. Transfer the batter to the prepared baking sheet and smooth with an offset spatula. Bake for 40 minutes, or until a toothpick inserted in the center comes out clean. Cool on a rack, and cut into squares. Sift confectioner’s sugar over the top if desired.
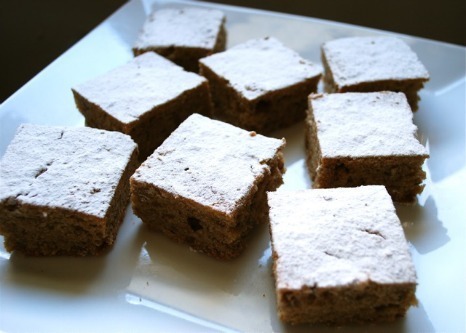
4. Enjoy!
Louisa Shafia is the author, most recently, of The New Persian Kitchen, a book of healthy Mediterranean and Silk Road-inspired recipes. See Louisa’s cooking videos and her schedule of upcoming events at www.lucidfood.com.
September 18, 2013
Celebrate National Cheeseburger Day With These Recipes
Happy National Cheeseburger Day! That’s right — there’s a whole day to celebrate the wonderfully delicious creation that is the cheeseburger and we couldn’t be happier about it. In honor of the holiday, we’re rounding up some of our favorite Rachael Ray cheeseburger recipes. Here are six delicious and simple recipes for the occasion.
1. Smoke and fireworks bacon-wrapped chipotle burgers (pictured above)
A spicy sweet barbecue sauce and flavorful bacon spark up the taste of this cheeseburger.
Beef chili with a cheese sauce served with Easy Oven Fries is a really great freezer meal.
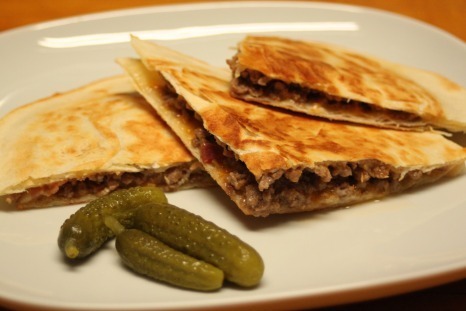
3. Bacon Cheeseburger Quesadillas
An easy and creative way to serve your cheeseburger.
Super simple to make, these hearty hamburger eggrolls make for a great appetizer or game day snack.
5. Cheeseburger mac and cheese
A fan favorite, you’re sure to enjoy this twist on the classic cheeseburger!

Skip the bun and try this out. It’s even got a cheeseburger condiment-inspired dressing!
Looking for more burger ideas? Check out our grill guide.
Images by Lisbeth Axell
Waste Not: Roasted Cherry Tomatoes
I’m a big believer in using up what I have on-hand in the kitchen. I hate wasting food and to be honest, I find it a challenge to come up with a new and exciting way to use up something I might have tossed.
Case in point: cherry tomatoes. My garden is overflowing with juicy tomatoes of every variety right now. It’s insane and we cannot keep up. To add to the insanity, I found some store bought grape tomatoes hiding in the back of my fridge. They were still edible but starting to wrinkle and I just knew if I waited another day or two, they’d totally be spoiled. My 5 year old loves them but definitely would not eat them if the skin wasn’t super perfectly smooth—le sigh! Anyway…I took one look at my kitchen full of tiny tomatoes and decided I would not let them go to waste and instead, take matters into my own hands and roast those babies up.
Roasting tomatoes is a great way to bring out their natural sweetness. The flavor profile of the tomato intensifies and you are left with something so simple yet so elegant, you wont believe your taste buds. The best thing is, it adds 5 more days to tomatoes you might have given up on. I love to roast up a batch of these and keep them in an airtight container in my fridge. Toss them with pasta, mix them into omelets, use them as a sandwich topping or as an elegant appetizer spread on some ricotta topped crunchy baguette. The possibilities are endless and honestly, who would have thought using what you have could be so deliciously rewarding?
So next time you are ready to give up on something in your fridge, be creative and think again. Stretch your culinary muscles, you and your stomach will thank you.
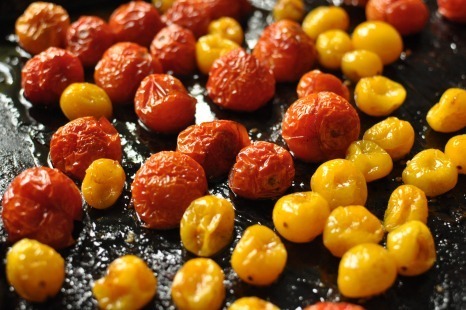
Roasted Cherry Tomatoes
Ingredients:
2-4 cups grape or cherry tomatoes
4 tablespoons olive oil
2 tablespoons balsamic vinegar
1/2 teaspoon kosher salt
1/4 teaspoon black pepper
Instructions:
1. Preheat oven to 425 degrees.

2. Place tomatoes onto baking sheet. Drizzle with oil, vinegar and sprinkle with salt and pepper. Toss with your fingers to coat. Bake until tomatoes burst and begin to caramelize, about 20 minutes. Toss with fresh pasta, use as a sandwich topper or as an appetizer for crusty bread spread with ricotta cheese.
September 16, 2013
3 Tips to Help Kids Beat the Clock at Lunch
So here’s yet another annoying irony of parenting…
We spend years asking-scolding-begging-threatening-demanding in no particular order that our children slow down when they eat.
Because if it was up to them, most kids — especially boys — would face-plant into their food, surfacing 30 seconds later with a bare plate.
Yet when we send them off to school — where lunch periods admittedly tend to be short — suddenly eating… takes… for… ever… And somehow our otherwise Hoover-happy children are entirely unable to eat their lunches in the allotted time.
So when I asked parents for their lunch duty conundrums, this was one of the two that came up most often. (I talked about the other — dealing with children who covet their friends’ lunches — last week in this post.)
Truth is, my son frequently complains about not having enough time to eat his lunch. Except I happen to know his school gives him 20 minutes for lunch. And I happen to know he could eat a side of beef in that time at home.
And we all know that the real reason my kid and yours run out of time is because they are too busy babbling to their friends.
So we have to be honest with ourselves. It’s a lost cause to try to stem the tide of babble.
So if we want our kids to eat their lunches — or at least most of their lunches… — we need to get creative. We need to pack their lunches in ways that make it easier for them to eat them more quickly. Or at least make it easy to talk and eat at the same time.
Tip 1: Pack small items for small hands.
I have found that packing lots of small items makes it easier for Parker to inhale bites in between babbles. So sandwich wraps, for example, are easier to eat when cut up into sushi-style bites (roll it into a log, then cut it into rounds).
Ditto for more conventional sandwiches. I’ll cut larger sandwiches into quarters, or even eighths.
It may not seem like a big deal to adults, but for little ones little bites are easier to hold, easier to eat. And all that adds up to faster to eat.
Tip 2: Do some of the work for them.
As in, if you’re sending a hunk of meat, do the kid a favor and cut it into bite-sized pieces before you pack it. I’ll even pull grapes off the vine so he can just pop them in his mouth. Likewise, I cut apples and plums and any other similar fruit into slices or chunks.
It sounds stupid, but it does make it easier (and faster) for the kids to eat.
I think part of it is psychological. Faced with one large sandwich or one big apple, kids feel daunted and slow down, babble more, etc. But break the food down into bites, and suddenly it’s easy for them to pop the food in their mouths fast.
I even do this with pasta. If I pack him a pasta dish made from spaghetti or some other long form of pasta, I will use kitchen shears to cut it into easy bites before popping it in the thermos. It’s a small thing, but I believe it does make it easier for them to eat it faster.
Tip 3: Save the green bean battles for dinner.
Of course we want our kids to eat healthy lunches. And of course we should pack the best, healthiest lunches we can. But we also shouldn’t draw lines in the sand over lunch.
Think about how your kids act at dinner when an unappealing food lands on their plates. They push it around, avoid it, try to cover it, and basically do anything they can to avoid eating it.
Now think about them doing that at lunch, when you aren’t there to ask-scold-beg-threaten-demand. Before you know it, lunch is over and the food is uneaten.
Which doesn’t mean you should fill their lunch boxes with cookies just because you know they’ll eat them. Rather, work with the healthy foods you know they enjoy and build lunches around those.
Kind of obvious, right? If they like it, they’re more likely to eat it quickly.
J.M. Hirsch is the national food editor for The Associated Press. He blogs about the trials and tribulations of his son’s lunches at LunchBoxBlues.com. His cookbook, Beating the Lunch Box Blues, is the first to be released by Rachael’s new publishing venture, Rachael Ray Books. Hirsch’s previous books include High Flavor, Low Labor: Reinventing Weeknight Cooking and Venturesome Vegan Cooking. He lives in New Hampshire with his son, wife, and too many cats.
Rachael Ray's Blog

- Rachael Ray's profile
- 296 followers

