
Rachael Ray's Blog, page 46
October 15, 2013
6 Pantry Essentials to Make Any Dish Fancier
What makes a dish gourmet? Fancy methods can take some of the credit, but if you are smart, there’s a faster and simpler way to get there: clever pantry items. Yes, I have found those flavors in a jar, bottle or packet that give you that same umami luxury, flavors that wrap around your palate leaving you feeling ‘moreish.’
Shopping List
1. Almonds

This for me is an absolute MUST. My suggestion is to go with the blanched (skinless) and sliced almonds – its growing popularity makes them available at all supermarkets in the nuts and dried fruit aisle.
Where to use:
Almond Breadcrumbs: Give your almonds a whizz in your food processor along with some breadcrumbs and sprinkle on any dish for baking.
Cream replacer? Soak them for 10 minutes and grind to a paste and then add to any sauce. Your sauce will be creamlessly creamy.
Try this: Hot sausage & sweet pepper pizza with almond pesto
2. Anchovies
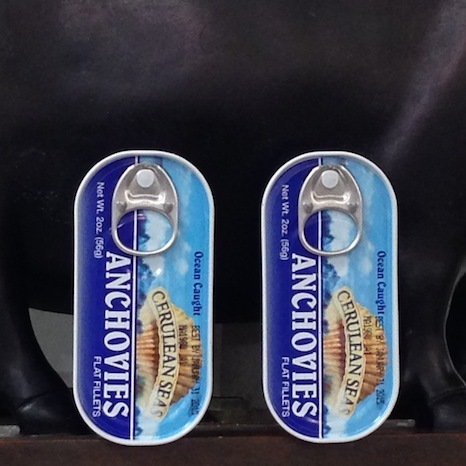
Enjoying them whole in a salad may be an obvious choice (think Caesar), but for me the trick is to cook them down so they disintegrate. Adding a savory-salty kick, your guests won’t even know it’s in the dish.
Where to use:
Italian spicy sauce Puttanesca: Add them as you sauté your garlic and red pepper flakes.
Roast chicken: Mash a couple of filets into butter and rub under the chicken’s skin.
Try this: Spaghetti aglio olio
3. Miso
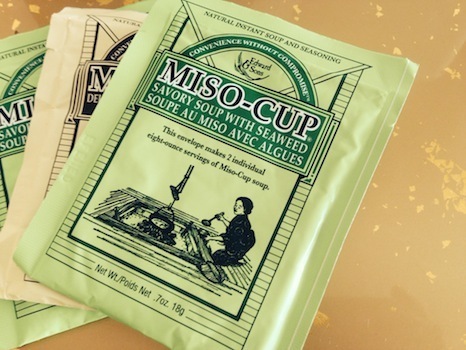
Think global! Yes, this dish can be used outside of Japanese cooking. And the best part: it comes as a paste in tubs or paper sachets in powder form. Either way, that smoky charm gets to work.
Where to use:
Soup and stews: For that added depth in flavor.
Beef burger patties: A great partnership of flavors makes these patties ‘lift-off.’
Try this: Broiled miso steak
4. Demi-Glace

That thing that French Chefs talk about all the time. Demi Glace makes sauces so velvety, complex and luxurious. But to make it from scratch is messy and time consuming. News flash: someone else just did the work for you and it can be stored in your pantry and not refrigerator. Yes, like chicken and beef stock cubes, Demi Glace now also comes in little rectangular Jello-like cubes – just pop and stir.
Where to use:
Chicken pot pie: Swirl some into this comfort classic and the dish will get even more cozy while its flavors intensify.
Bolognese Sauce: Demi Glace totally hooks this dish up while rounding out flavors and texture. Looking for that restaurant quality Bolognese? Now you’ve found it.
Try this: Goat Cheese Stuffed Chicken Breast
5. Sesame Oil
Sesame oil gives you the keys to the kingdom when your goal is to add mystery to a dish. Smoky, nutty and pretty intense, what dish can say no! But be careful to not overpower with too much – remember that just a little goes a long way.
Where to use:
Salad dressing: A few drops will add another dimension of flavor to your salad.
Mayo: Sesame oil will take this ingredient from street to chic.
Try this: Crisp sesame crusted brussels sprouts
6. Capers
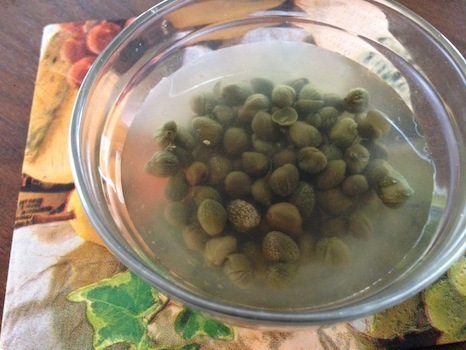
These tangy buds are small in size but big in attitude. Throw a teaspoon full into a sauce or salad and watch that sharp, mustard-like flavor release itself into your dish. To coax its flavor, I like to sauté before adding other wet ingredients to the dish.
Where to use:
Salads: Yes, this may seem like an obvious choice but when was the last time you added them to your salad? Whilst you’re at it, don’t just throw them in. Bruise some up in the vinaigrette to lace the flavor right through.
Sauces: This one will become auto-pilot once you have done it a couple of times. Add to any range of sauces from simple butter-lemon to tomato-based.
Crunchify: Have you ever thrown one in to the deep fryer? Apart from the slightly alarming noise it makes, capers crisp up nicely and impresses the guests when used as a garnish.
Try this: Creamy pasta with spinach & fried capers
Looking for a quick & easy meal to try this out on? Check out our Quick & Easy section!


October 14, 2013
Make Your Own Peanut Butter Cups for Halloween!
Here comes Halloween! It’s time for spooky fun and, yes, lots of junk food. But you can take back some of the control over this candy-fest by making your own unprocessed sweet treats. The peanut butter cups like the ones you buy at the store are easy to make at home, with a fraction of the sugar and all of the satisfying richness.
Peanut butter cups are hard to mess up, because you’re working with peanut butter and chocolate, two flavors that are amongst the best on the planet. All you need to do is make them into an easily edible package.
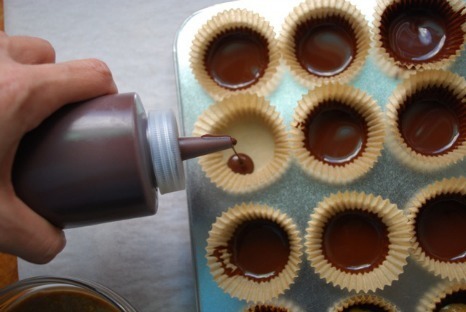
The basic approach with the cups is that you take mini muffin liners, layer the bottom with melted chocolate, plunk a dollop of peanut butter in the middle, then cover with more chocolate and allow them to harden before devouring. Sound simple? Well it is, there are just a few nuances to the process.
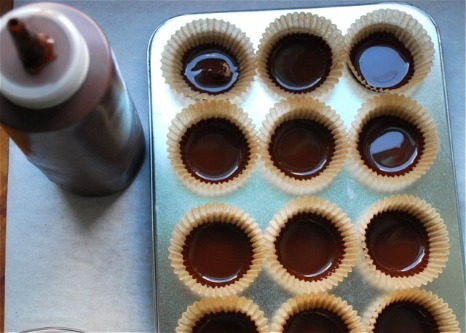
You’ll want to have some special equipment around, namely, the mini muffin liners, as well as two mini muffin pans, to keep the liners steady as they’re filled up with the unwieldy melted chocolate.
You’ll also want to have a squeeze bottle for distributing the chocolate. It’s much easier and neater to squeeze the chocolate from a bottle than to get the right amount into each cup using a spoon. You can either buy a squeeze bottle at a kitchen supply store, or use an old squeeze bottle of mustard or ketchup that’s been well cleaned.
For those who are allergic to nuts, peanut butter cups can easily be made with a different filling, like sunflower butter, tahini, or pumpkin seed butter. You’ll need to adjust the sweetness and flavor, as seeds can have a naturally bitter taste compared to nuts.
Except for the sugar that’s in the bittersweet chocolate, there is no added sugar in this recipe. The taste of the candy hinges on the flavor of the ingredients. To make the peanut butter taste sweet, I add coconut butter, vanilla, and cinnamon. If you like, you can sweeten the peanut butter by adding 1 tablespoon of sugar at a time, and see how it tastes. You could also add a single package of stevia, the sweetener that’s derived from the stevia plant.
Good luck with these elegant, adult-friendly, not-too-sweet treats, and have a happy Halloween!

Peanut Butter Cups
Makes approximately 24 peanut butter cups
Ingredients
3/4 cup peanut butter, almond butter, or seed butter
2 tablespoons unrefined coconut oil, at room temperature
1 teaspoon vanilla extract
1/2 teaspoon cinnamon
1/2 teaspoon sea salt
10 ounces bittersweet chocolate (chips or bars)
Instructions
Line two mini muffin pans with mini muffin liners.
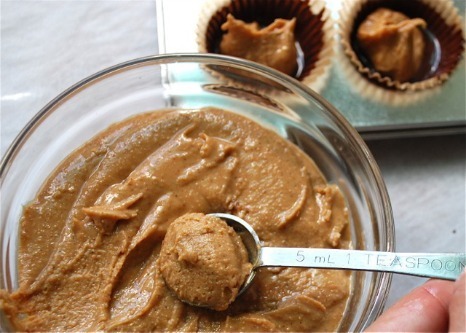
Combine the peanut butter, coconut oil, vanilla, cinnamon, and sea salt in a food processor, and blend until smooth. Taste and adjust the sweetness with sugar or stevia, if desired, and transfer to a small bowl.
Melt the chocolate in a double boiler, and pour it into a clean squeeze bottle. Squeeze about a teaspoon of chocolate into each cup, and tilt the pan so that the chocolate evenly coats the bottom of each cup. Place the pans in the freezer for five minutes, until the chocolate hardens.
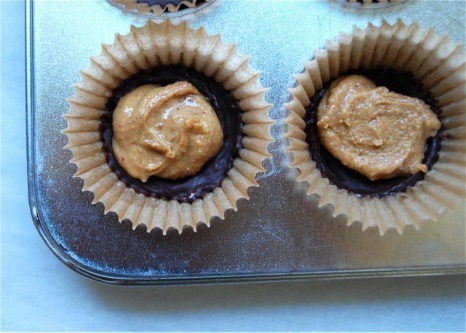
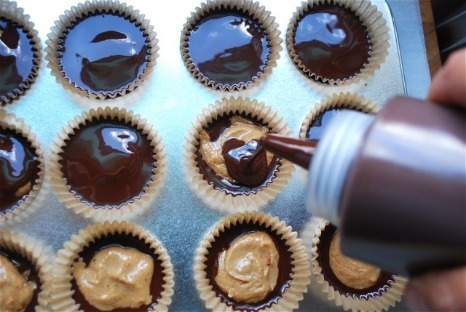
Coat a teaspoon with coconut oil to prevent sticking, then scoop 1 level teaspoon of peanut butter into each cup. Oil your fingertip with coconut oil, then press down gently on the peanut butter to flatten and spread it evenly. Squeeze just enough chocolate on top to cover the peanut butter, between 1 and 2 teaspoons. Refrigerate the cups for two hours, until firm. Store at room temperature or in the refrigerator.
Looking for more Halloween treats? Try these:
Halloween treats: Spook up your soup
Halloween treats: severed hand toast
Louisa Shafia is the author of The New Persian Kitchen, a book of healthy Mediterranean and Silk Road-inspired recipes, and Lucid Food: Cooking for an Eco-Conscious Life, a collection of seasonal recipes and eco-friendly kitchen tips. See Louisa’s cooking videos and her schedule of upcoming events at www.lucidfood.com.
Jumbo Pumpkin Spice Streusel Muffins
I’m so glad it’s early enough in October that I have plenty of time to continue making pumpkin recipes. I hereby declare October the official month of pumpkin.
In honor of pumpkin month, I recently made a crazy-good (and crazy-easy) pumpkin cheesecake. Yesterday I made these jumbo pumpkin muffins for my pumpkin-obsessed daughter. Moist with a crunchy streusel topping – these muffins are addictive and the perfect breakfast or mid-afternoon/after school snack.
My daughter can smell pumpkin baking a mile away and it is scary how much she can put down in a sitting. I am right there with her – there is something about the fragrant spices that are regulars in most pumpkin recipes – cinnamon, nutmeg, allspice, ginger – that just make you want to curl up with a mug of hot something, light a fire, snuggle under a blanket and get cozy. So let’s get cozy, shall we?
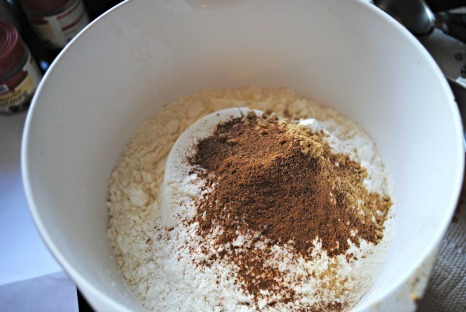
You start with the dry ingredients – lots of cinnamon, nutmeg, ginger and cloves to bring out the best in the pumpkin. No sifting necessary, just a whisk (or fork) will do.
Next up, put your wet ingredients in the bowl of an electric mixer. I love how muffins come together in about two seconds.
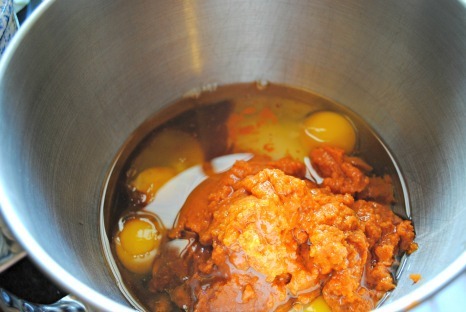
Mix your wet ingredients until they are just starting to combine. I always finish mixing with a rubber spatula – and even then don’t over mix, or you will end up with a tough muffin. Tough muffin = not cozy.

These are jumbo muffins, which are great because you get a real bakery-style (and sized) muffin. This recipe makes 12 jumbo muffins, or 20-24 regular muffins. A good rule of thumb is to fill each muffin cup two-thirds of the way up with batter. I always fill the first muffin cup to the level I want and use that measurement for the rest of the muffins. For these pumpkin muffins I used two heaping large spoonfuls for each. No need to get too technical here – you just want the muffins to be the same size in the end.

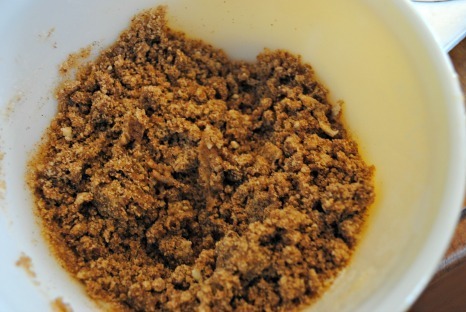
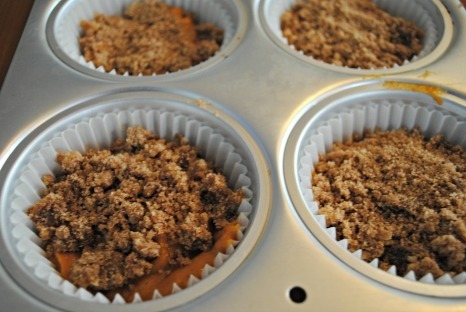
I think some streusel is in order to really put these giant muffins over the top – brown sugar, cinnamon and butter? You can’t go wrong there.
A spoonful of streusel goes on each muffin and into the oven they go.
Should you have any extras (ha – not in my house) – these muffins freeze well. Just pop them in a freezer bag. Happy October – my official month of pumpkin!

Jumbo Pumpkin Spice Streusel Muffins
Makes 12 jumbo muffins or 20-24 regular-sized muffins
Ingredients
For the muffin batter:
3 1/2 cups flour
1 1/2 teaspoons baking powder
1 teaspoon baking soda
1 1/2 teaspoons kosher salt
2 1/2 teaspoons cinnamon
1/2 teaspoon nutmeg
1 teaspoon ground ginger
1/2 teaspoon cloves
2/3 cup vegetable oil
2 cups sugar
4 eggs
1 1/2 teaspoons vanilla
1-15 ounce can pure packed pumpkin
2/3 cup water
For the streusel topping:
1/2 cup brown sugar, packed
1/2 cup flour
2 teaspoons cinnamon
4 tablespoons melted butter
pinch of kosher salt
Directions
Preheat oven to 350 degrees F and place muffin liners in muffin tin(s).
Make the muffin batter: Whisk together in a large bowl the flour, baking powder, baking soda, salt, cinnamon, nutmeg, ginger and cloves and set aside.
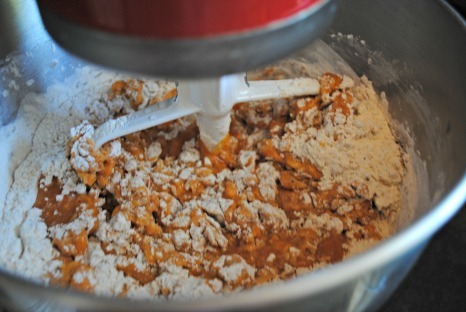
In the bowl of an electric mixer combine the oil, sugar, eggs, vanilla, and pumpkin. Mix until not quite combined. Finish mixing with a rubber spatula. Add the dry ingredients to the wet ingredients and again mix with the electric mixer until not quite combined. Finish mixing with a rubber spatula. There should be lumps but no streaks of flour. Fill each muffin cup 2/3 with the batter.
Make the streusel: In a small bowl combine the brown sugar, flour, cinnamon, butter, and salt. Stir until mixture is combined – there should be some small lumps. Top each batter-filled muffin cup with a spoonful of streusel, spreading so the tops are evenly coated and press down slightly. Bake 25-32 minutes for jumbo muffins (mine took exactly 30 minutes), or 18-24 minutes for regular size muffins, or until a toothpick inserted in the center comes out mostly clean, maybe with a crumb or two.
Can’t get enough pumpkin treats? Check out these recipes:
Pumpkin Pie with Almond-Spiced Whipped Cream
Plan B Mom is a mostly-stay-at-home mom of 3 who works from home but sees her main job as managing her family. When she is not taking care of her 13-year old and 11-year old girls, 9- year old son, yellow lab, and husband – she is baking, running, carpooling, or helping with homework. She tries to stay organized to keep life running smoothly – or at least catastrophes at bay. Follow her on Twitter at @PlanBMom.
7 Unusual Ways to Turn Kitchen Trash Into Real Savings
Sounds crazy, but items we’d normally trash like banana peels, spoiled milk, coffee grinds and egg shells can save you hundreds of dollars on your cleaning supplies, grocery bills, home repairs and a few other expenses. So before you chuck what seems like garbage, see its not so obvious virtues!
1. Banana peels
Who would have thought banana peels could be used to dust and add shine to real plants in your home?
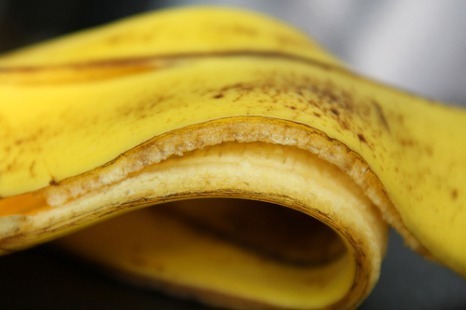
Simply remove the stringy strands from the inside of the peel and thoroughly wipe the top and underside of each leaf. You can also use the peel to shine leather since it contains natural oils and potassium, an ingredient used in store-bought polishes!
2. Condiments
You know there’s another serving in that bottle of ketchup, mustard or BBQ sauce but you can’t squeeze, shake or bang it out! Reach for the white vinegar, which happens to also be an ingredient in each of them and add a teaspoon or two depending on the consistency and amount clinging to the sides. Then shake and squirt!
3. Egg shells
Whether your eggs are good or bad, their shells can be used to sharpen the blades of your garbage disposal! Crack your eggs and push two shells down into the disposal (use a tool, not your fingers!). Flip the switch and let it chop for 15 to 20 seconds. You do not need to run the water while you do this.
4. Milk

Got milk that’s gone bad? Got china with cracks or silver that needs polishing? Well, spoiled milk is your handy dandy fix it!
Tarnished silver: As milk spoils it forms more lactic acid which can remove tarnish from your silver jewelry, silverware and trays. Simply soak the item in the milk for a half hour, wash in warm, sudsy water and dry.
Cracks: Milk contains a protein called casein that when heated forms a natural plastic which can mend minor cracks in your china. Here’s how: Place your cracked china in a pot and cover it with the spoiled milk. Bring it to a boil and then let it simmer for 45-60 minutes. Let cool, remove, rinse and it should be ready to use!
TIP: In case you’re in a pinch and want to shine or fix that crack and your milk hasn’t turned, just add vinegar or lemon, which will curdle it!
5. Coffee grounds
This is where being a two-cup-a-day coffee drinker pays off! Utilize used coffee grounds as:
A fireplace dust stopper: Sprinkle wet grounds on the ashes to keep them from flying everywhere when you clean your fireplace.
A wood furniture scratch filler: Make a paste by mixing 3 tablespoons of used grounds with one teaspoon of water. Gently rub the paste into the scratch with a cloth. The grounds will fill in the scratch and minimize its appearance.
6. Wine and champagne corks

If you’re like me, you have tons of wine corks lying around and a few champagne (though I wish I drank more and had more!!). Here are a few ways to uncork their other uses:
- Organize, stick and store your post earrings.
- Protect your floors: Cut circles in the corks and glue them to the bottoms of your chair legs and end tables to avoid scuffs and scratches.
- Clean high-carbon knives: Use a cork instead of an abrasive pad with cleanser. If you have a champagne cork use that since the top is larger it serves as a ‘built’ in handle to hold on to as you clean your knife. Cheers!
7. Wine
I rarely have any leftover wine but if you do, here’s what to with it:
White wine: Put it in a spray bottle to clean your bathroom and kitchen sinks and showers since it’s a natural bacteria killer. If the smell bothers you, you can wipe with a fabric dryer sheet after you finish cleaning.
Red wine: Pour into ice cube trays ‘n freeze to add to recipes or to a glass of sangria to chill without diluting it! Or pour a glass into your next bath as you run the water. Red wine contains resveratrol, which is an anti-oxidant and will help firm and soften your skin.
Looking for more easy and affordable cleaning tips? Try these:
8 New ways to use lemons around the house
5 Common back to school messes solved
10 New ways to use tennis balls and racquets at home
Egg shell image courtesy of Brett Jordan, Flickr; banana peel courtesy of Claire Knights, Flickr; milk image courtesy of bluewaikiki, Flickr; Wine cork image courtesy of Derek Gavey, Flickr
October 11, 2013
In a Meal-Time Rut? Try Our Weekly Meal Planner for Inspiration!
I don’t know about you, but “what’s for dinner” might be my least favorite question that comes from my kids’ mouths. At the end of a long day, coming up with a home-cooked meal can be daunting. Takeout anyone? Well, drop the phone – we are here to help!
With a little planning, you can shop once a week and have a home-cooked meal – breakfast, lunch, dinner, snack or dessert – on the table any day of the week. Check out our meal planner weekly and let us help you get your game plan together.
Monday
Join the Meatless Monday movement and kick off your week with hearty and satisfying veggie meals. Treat your family to a quick and easy fruit tart for a post-dinner dessert.
Lunch: Roasted Cauliflower Salad or Mayo-less Egg Salad
Dinner: Veggie Mac and Cheese Casserole or Whole Wheat Spaghetti with Brussels Sprouts and Sage Butter
Dessert: 10-Minute Fruit Tart
Tuesday
It’s Taco Tuesday! Treat your family to an easy weekday Mexican dinner. Ole!

Lunch: Quick Homemade Lentil and Sausage Soup Make this soup on Sunday and enjoy for lunch during the week.
Dinner: Sliced Steak Taco Sliders with Guaca-Salsa or Taco Bowls with Guaca-Salsa Salad
Dessert: Chocolate Chip Pumpkin Cookies Celebrate fall with these cookies – a seasonal take on a classic favorite. Store extras in the freezer to enjoy later in the month.
Wednesday
Lunch: Quick Homemade Lentil and Sausage Soup Enjoy yesterday’s leftovers for a nutritious lunch or or try this Greek salad with yogurt dressing.
Dinner: Chicken in a Sack or Teriyaki Chicken with Brown Whole Grain Rice
Snack: Loaded Baked Potato Popcorn Fabulous after school or late night in front of the TV.
Thursday
Thursday is pasta night in our house. Have a lighter lunch so you can indulge at dinner.

Lunch: Lettuce Wrap Gyros with Chicken and Green Tzatziki Use leftover chicken to make these light and tasty lettuce wraps.
Dinner: Unstuffed Florentine Shells or Quick Cherry Tomato Sauce and Spaghetti
Snack: Meat-Free Buffalo wings with Ranch Dipper Crispy roasted cauliflower steps in for chicken wings here for a creative and healthy take on a not-so-healthy classic.
Friday
Lunch: Cold Chicken Curry with Toasted Almonds and Crystallized Ginger
Dinner: Oven Roasted Cod Roasted with Herbs or Fish with Mixed-Herb Gremolata Breadcrumbs
Dessert: Toffee Squares
Saturday
Treat guests to a special steak dinner with shortcut apple pie sundaes for dessert.
Brunch: Quiche Make this yummy egg and sausage dish on Friday afternoon and bake it on Saturday morning to start the weekend off right.
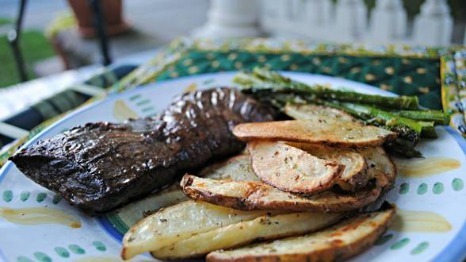
Dinner: Steak au Poivre with Herbs de Provence Oven Fries
Dessert: Apple Pie Sundaes Celebrate apple season with this easy treat.
Sunday
Take advantage of Sunday and spend a little extra time in the kitchen for an old fashioned Sunday supper. Start the day with an easy bunch.
Brunch: Quick and Easy French Toast Casserole A site favorite – you can make this the night before or in the morning.
Dinner: Not-a-Boar Meat Sauce and Pasta or Big Beef Meatballs with Bucatini
Dessert: Chocolate Peanut Butter Cupcakes Your family will love you for these moist and delicious cupcakes with an out-of-this world peanut butter frosting. Short on time? Use a boxed mix for the cupcakes – the frosting is the real star of this recipe.
Looking for more meal ideas? Check out our Quick & Easy section.
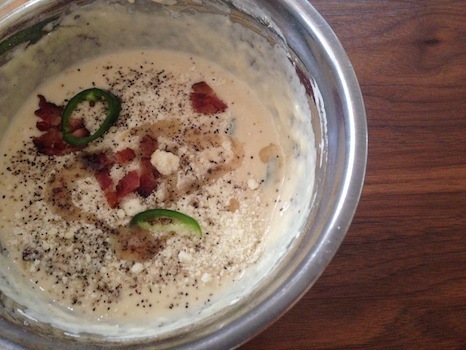
Breakfast With a Pop: Jalapeño-Bacon Pancakes
Sometimes cereals, French toast and syrupy pancakes feel like a sugar overload. On days like that the mouth wants to be woken up with something bolder and brighter, like Jalapeno-Bacon Pancakes.
These pancakes are simple to rustle up even during the week for breakfast. You can use boxed pancake mix (nobody is here to judge you), some bacon bits (fresh or from a packet) and a fired up pan. It is that quick and simple. If it’s Sunday, chop up some scallions and serve with sour cream and shredded cheese for that souped up effect.
Just a couple of quick tips:
1. Browning butter – Adding browned butter lends a nutty flavor. Really, it takes all of 3 minutes of babysitting (avoid the burn baby burn) and your home will smell of baked cookies. Allow the butter to cool for a minute before adding or it will start to cook the batter.
2. Let it rest – Even if only for a couple of minutes. When the batter hits the pan, you’ll be glad that you waited.
3. Hands off! – Yes, it might be common practice for passers by to have a nibble of bacon. Be firm and remind them that good things come to those who wait.
Recipe For Jalapeno-Bacon Pancake
Ingredients
Pancake Mix (make 4-6 serving according to instructions, but don’t add the fat)
3 rashers of bacon, cooked (reserve fat) and broken into bits
1 tbsp. bacon fat
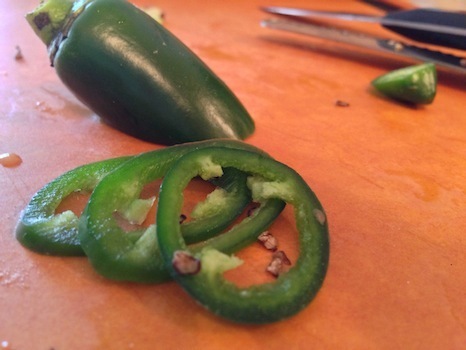
1 Jalapeño, deseeded
2 tbsp. sharp cheddar cheese or Parmesan
Salt and pepper
Directions
1. Make pancake mixture as per instructions. Substitute oil/ butter for the bacon fat.
2. Add the Jalapeños, bacon bits, cheese, salt and pepper. Allow mixture to rest for 10 minutes.
3. Heat up a frying pan and cook pancakes until golden on both sides.
Looking for more breakfast ideas? Try these:
Dark chocolate chip bacon pancakes
Pecan cinnamon and nutmeg pancakes
Saira Malhotra, is of British–Indian descent and is a chef, food writer and cooking instructor based in New York City. Raised in Hounslow, U.K, or rather ‘Little India’, where the air is aromatic with roasted spices, little did Saira know these moments would follow her from being a student in France and Italy to residing in NYC with her husband and kids and parlay themselves unexpectedly in to a culinary career. She is a graduate of the International Culinary Center in New York City. Come visit her at her food blog: www.passportpantry.com where she shares approachable and international recipes.
October 10, 2013
9 New Ways to Use Pumpkin
When it comes to lunch box grub, pumpkin pie is the low-hanging fruit of squash-inspired eats. Because what kid — or adult — would refuse a slice of brown sugar-sweetened pumpkin pie slipped into a lunch box?
Of course, most of us aren’t willing to indulge our kids — or our inner kids — with pie every day. Even if we really want to.
Which actually is too bad. Because pumpkin is one of the easier varieties of produce to get children to embrace. And since pumpkin is packed with all the healthy fiber, vitamins and other goodnesses we strive to feed our kids, it’s worth finding ways to work with it.
Canned pumpkin
So let’s start with the easy stuff — canned pumpkin. Grab a few 15-ounce cans of pumpkin puree (don’t get pumpkin pie filling, which is sweetened and seasoned) and you’re good to go. It’s convenient, available all year and pretty cheap.
1. Smoothies
Spoon 1/4 cup or so into a yogurt- or milk-based smoothie along with some honey, cinnamon and a pinch of salt and you have a seriously delicious — and seriously healthy — pumpkin pie smoothie. Add a banana for even more yum.
2. Pancakes
Substitute an equal amount of canned pumpkin for 2/3 of the liquid (not counting the egg) in your favorite pancake recipe. (Or here is my personal recipe.) Works for waffles, too. Want to make them even healthier? Use white whole-wheat flour.
3. Bread: The Internet is overrun with recipes for pumpkin bread. This is my favorite. But if you have a favorite banana bread recipe, just substitute an equal amount of canned pumpkin for the bananas. And you can usually cut the sugar by half.
Fresh pumpkin
OK… So you’ve maxed out on canned pumpkin. Let’s move on to the real deal. When you’re at the farm stand picking out your pumpkins for carving, grab a small sugar pumpkin (sometimes called baking pumpkins). Peel it, cut it into large chunks and scoop out the seeds and fibers, same as you would a butternut squash. Now cut it into smaller chunks. What next?
4. Mash
At dinner, steam it the same as you would butternut squash, then mash it. Mix in some butter, salt, pepper and — if you are so inclined — a bit of brown sugar and a pinch of cinnamon. In the morning, nuke the leftovers and pop them in a thermos. You could sprinkle on a little extra brown sugar before closing the thermos as an extra enticement.
5. Hash
Instead of cutting the large chunks into smaller ones, cut them into really small ones — as in diced. At breakfast, pop the diced raw pumpkin in a skillet (if you like, you can add a diced potato, too) with some butter and saute until browned and tender. Add any leftover meat you have (sausage, chicken, steak, pork, whatever) and saute until heated through. Season with salt and pepper, and you’re done in about 10 minutes. Now serve some for breakfast and pop the rest in a thermos.
Pumpkin seeds
What about all the glop you scooped out of the pumpkins you carved? Pumpkin seeds are delicious toasted and salted straight up, but also can be used in all sorts of great ways.
6. Granola
OK, let’s get real. Few of us have time to make granola from scratch. But there’s no shame in buying a basic granola and doctoring it with your favorite add-ins. Toasted pumpkin seeds and dried cranberries are fine seasonal choices. Pack your doctored granola in a bag or container and accompany with a container of yogurt or applesauce for sprinkling it on.
7. Bread
Yup, back to the banana/pumpkin bread. If you’re baking up a loaf, add a handful of toasted pumpkin seeds to the mix. It adds a delicious crunch and some great fiber. And if you salt them first, you’ll get that awesome interplay of salty-sweet.
Feeling lazy? Carving a giant gourd just isn’t happening this year? No fear. Grocers these days sell bags of hulled raw pumpkin seeds (sometimes called pepitas) that can be used in so many crazy delicious ways.
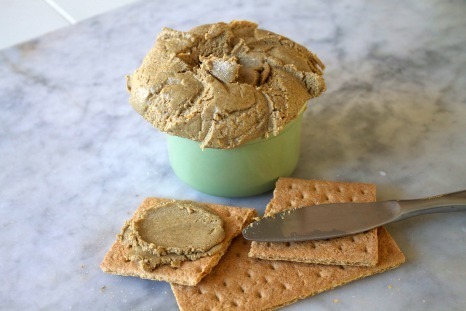
8. Pumpkin seed butter
That’s right — peanut butter, but made entirely from pumpkin seeds. Check your nut allergies at the door! It’s stupidly easy. Get two 7-ounce packages of raw hulled pumpkin seeds (about 3 1/2 cups). Spread them on a rimmed baking sheet at bake at 325 F for 15 minutes, or until very lightly browned. Remove from the oven and let cool. Dump the seeds into a food processor. Process for several minutes, or until they form a dry sand-like mixture. Add 2 tablespoons olive oil and 1 teaspoon kosher salt. Puree until it forms a thick peanut butter-like mixture. Use as you would peanut butter. Tightly covered, it keeps for several weeks in the refrigerator.
9. Pumpkin noodles
Take some of that awesome pumpkin seed butter you made and mix it with a splash each of hot sauce and vinegar (any variety will work). Toss that mixture with warm pasta. Done. Eat it hot (or pack it hot in a thermos) or pack it cold for a cold Asian peanut noodle salad.
J.M. Hirsch is the national food editor for The Associated Press. He blogs about the trials and tribulations of his son’s lunches at LunchBoxBlues.com. His cookbook, Beating the Lunch Box Blues, is the first to be released by Rachael’s new publishing venture, Rachael Ray Books. Hirsch’s previous books include High Flavor, Low Labor: Reinventing Weeknight Cooking and Venturesome Vegan Cooking. He lives in New Hampshire with his son, wife, and too many cats.
October 8, 2013
Fall Fruit Galette: It’s French for “Pie Without The Work”
I think pie is the perfect dessert. I also understand, fellow bakers, that it can be tough to find the time for such culinary delight. As fall sets in, the kids get back to school and spare minutes become all the more valuable, the galette is here to save your sweet tooth.
Galette is a French term that’s widely used to describe flat, freeform tarts or cakes. Most often in America we see them in bakeries as a shortcut to a pie. They’re easier to make as they don’t require much fussing with the dough and bake up more quickly than a traditional pie because they’re thinner.
As fall fruits come into season and go on sale at grocery stores and farmers’ markets, just 2 pounds of fruit and some whipped cream easily stretches into dessert for the whole family. Bonus: the rustic charm of the galette makes it a show-stopper when served whole at a dinner party.
Give it a try with whatever fruit you have on hand and savor the sweet taste of time well saved.
Fall Fruit Galette
1 (9-inch) galette, 8 servings
Ingredients
2 pounds fall fruit (such as plums, pears or apples), peeled and seeded as needed, sliced
1/4 cup sugar
2 tablespoons cornstarch
1/2 teaspoon ground cinnamon
Splash vanilla extract
All-purpose flour, as needed
1 disc pie dough (for a 9-inch pie plate), chilled
Whipped cream or vanilla ice cream, optional, for serving
Directions:
Preaheat an oven to 400 degrees F and line a baking sheet with parchment paper.
In a large mixing bowl toss together the trimmed fruit, sugar, cornstarch, cinnamon and vanilla. Reserve.
Lightly dust a work surface with flour. Roll the pie dough out on the surface as needed to a thickness of about 1/8-inch. Carefully transfer the crust to the lined baking sheet. Spread the prepared fruit into an even layer on the crust, leaving a 1 1/2-inch border around the edge of the crust. Fold the uncovered edge of the crust up over the fruit, crimping or pinching it at several points to preserve the round shape.

Bake the galette until the crust is deep golden brown and fruit is tender and bubbly, 45 to 55 minutes. Let cool before slicing and serving warm or at room temperature with whipped cream or ice cream, if desired.
Looking for more dessert recipes? Try these:
Patrick W. Decker’s life revolves around food. Always has, probably always will. As a graduate of The Culinary Institute of America and past member of the culinary teams for Food Network stars Rachael Ray, Sandra Lee, Marc Forgione, Bobby Deen and Paula Deen, he now works as a food stylist and producer in NYC by day and a food writer and recipe developer at his home in New York’s Hudson Valley by night. You can see what he’s up to by following him on Instagram at @patrickwdecker or visiting his website at patrickwdecker.com.
October 7, 2013
Dinner Deal: Cider Braised Chicken with Peppery Escarole
Weeknight dinners don’t – and shouldn’t – have to break the bank. Using an inexpensive cut of meat like chicken thighs produces a quick-cooking dinner full of flavor.
As we get into autumn, save some scratch by taking advantage of sales on seasonal ingredients like apple cider (or, if you’re like me and looking for new ways to finish off that whole gallon that you bought at the farm stand, try and incorporate new ingredients into your weeknight dinner repertoire).
Cider Braised Chicken Thighs with Peppery Escarole
Makes 4 servings
Ingredients:
For the chicken:
1 tablespoon olive or vegetable oil
4 bone-in, skin-on chicken thighs
Salt and ground black pepper
1 large sweet onion, thinly sliced
2 cloves garlic, finely chopped or grated
1 cup unfiltered apple cider
1 cup chicken stock
For the escarole:
1 tablespoon olive or vegetable oil
Pinch red pepper flakes
1 head escarole, washed and chopped
Salt and ground black pepper
Directions:
To prepare the chicken, place a large high-sided sauté pan over medium-high heat with the oil. Season the chicken thighs with salt and pepper and sear them in the pan, skin-side-down first, until deep golden brown, about 3 minutes per side. Remove the chicken to a plate and reserve.
Pour off any rendered grease to keep about 1 tablespoon of fat in the pan. Return the pan to medium heat and add the onion and garlic. Cook, stirring occasionally, until the onions begin to soften, 3 to 4 minutes. Add the cider and stock to the pan and bring the liquid up to a boil. Add the chicken and any juices that may have accumulated on the plate to the pan. Cover with a tight-fitting lid and simmer until the chicken has cooked through, 6 to 8 minutes.
Remove the chicken from the pan and reserve warm. Increase the heat under the pan to medium-high and boil the liquid until it has reduced by half, 5 to 7 minutes. Adjust the seasoning as necessary with salt and pepper.
While the liquid in the pan is reducing, prepare the escarole. Place a large sauté pan over medium heat with the oil and pepper flakes. Add the escarole to the pan and cook, tossing often, until it has softened, 2 to 3 minutes. Season with salt and pepper.
Serve the escarole with the braised chicken, onions and pan sauce.
Looking for more dinner recipes? Try these:
Creamy chicken and mushroom one-pot with pot pie toppers
Roast chicken dinner with roasted garlic gravy
Chipotle chicken thighs with chunky guacamole
Patrick W. Decker’s life revolves around food. Always has, probably always will. As a graduate of The Culinary Institute of America and past member of the culinary teams for Food Network stars Rachael Ray, Sandra Lee, Marc Forgione, Bobby Deen and Paula Deen, he now works as a food stylist and producer in NYC by day and a food writer and recipe developer at his home in New York’s Hudson Valley by night. You can see what he’s up to by following him on Instagram at @patrickwdecker or visiting his website at patrickwdecker.com.
October 6, 2013
Apple Crisp: The Best Simple & Seasonal Comfort Dessert
I don’t know about you, but come October I have more apples than I know what to do with. I can’t resist the “home grown” signs at the supermarket and the overflowing apple tables at the farmers’ market relentlessly call my name.
When it comes to using up apples, apple crisp is your best friend. You can use just about any kind of apple (crisp and tart work better than sweeter varieties. Try Empire, Granny Smith or Honey Crisp… or mix all three!), and there is no fussy pie crust to deal with. I guarantee you most likely have all the ingredients in your pantry. Plus, a crisp is very forgiving and if your apples have gone a little soft, no worries, overripe apples are just fine.
My favorite apple crisp features lemon zest and juice for a delicious tart flavor, and unlike some crisps, the topping has oats for a great crunch. Plus, there are nearly equal parts apple filling and crisp topping. Isn’t the topping the best part anyway?
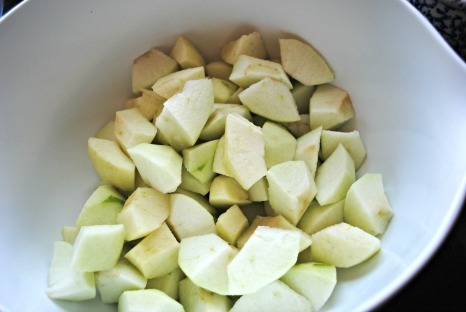
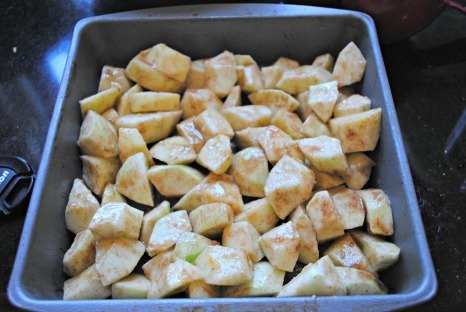
You start by peeling and chopping the apples. A few notes on this step. I am all about shortcuts and I hate peeling apples (and all fruits and vegetables – potatoes, carrots, you name it) but you have to peel the apples for a crisp. I have tried making crisps with the peel left on the apples and you don’t want to go there. Trust me. You also want the apples to be cut in uniform-sized chunks so they bake at the same rate or else you will have some apples that are under-done, some over, etc. I cut my apples in equal fourths after I peel them and then cut each fourth into four chunks.
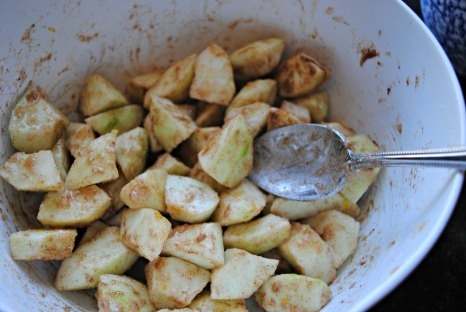
Next you add the rest of the filling ingredients. Notice the aromatic cinnamon and tart lemon zest at center stage.

Mix it up. I could eat this with a spoon. Yum.
Transfer to a pan.
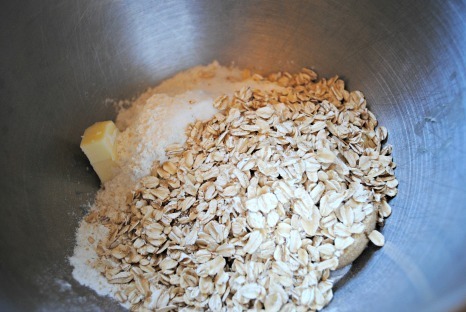
Next is the crust. You mix up the oat-y topping ingredients with a standing mixer with a paddle attachment. Make sure to use cold butter so it’s crumbly, not creamy like oatmeal cookie dough.
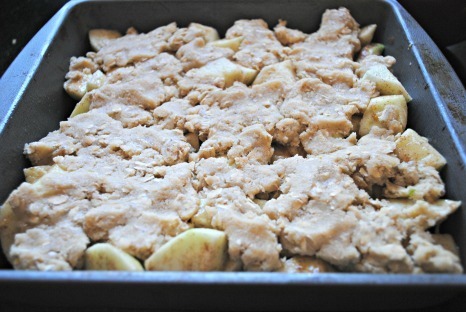
Pat the crisp topping mixture on the apple filling and you’re off to the races.
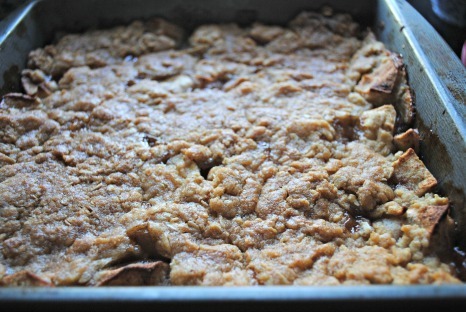
One hour later, your house will smell ridiculously delicious. I dare you not to dig in. My daughter and I were eating this out of the pan.
Apple Crisp
Serves 4 – 6 (Recipe can be doubled for a 9″ x 13″ pan)
Ingredients
For the filling:
5-6 large apples (about 2+ pounds) (Granny Smiths and Empires are my favorite)
zest and juice from one half of a lemon
1/4 cup granulated sugar
2 tablespoons flour
1 teaspoon cinnamon
pinch of kosher salt
For the topping:
3/4 cup flour
1/4 cup granulated sugar
1/4 cup plus 2 tablespoons brown sugar
1/4 teaspoon kosher salt
1/2 cup oats
1 stick cold butter, diced
Directions:
Preheat oven to 350 degrees. Peel and core apples and cut them into large uniform chunks. Place apples in a bowl and toss with lemon zest, lemon juice, granulated sugar, flour, salt and cinnamon. Transfer to either 5 one-cup ramekins or an 8″ square baking dish.
For the topping:
Combine flour, sugars, salt, oats, and cold butter in an electric mixer with a paddle attachment. Mix on low speed for 2 minutes, until mixture is well combined and crumbly.
Spread evenly over fruit mixture and pat down slightly.
Place baking dish on a cookie sheet and bake for one hour, until top is browned and fruit is bubbly. (You can also refrigerate, covered, and bake later for 1 hour – 1 hour and 15 minutes. Serve warm with vanilla ice cream.
Check out these other tasty apple dessert recipes from rachaelray.com:
Easiest Ever Baked Stuffed Apples
Plan B Mom is a mostly-stay-at-home mom of 3 who works from home but sees her main job as managing her family. When she is not taking care of her 13-year old and 11-year old girls, 9- year old son, yellow lab, and husband – she is baking, running, carpooling, or helping with homework. She tries to stay organized to keep life running smoothly – or at least catastrophes at bay. Follow her on Twitter at @PlanBMom.
Rachael Ray's Blog

- Rachael Ray's profile
- 296 followers

