
Rachael Ray's Blog, page 43
November 7, 2013
Quick Ale-Braised Pork Chops
Ah, what a wonderful thing it is to have both meat and time: slow-cooked roast beef, tender short ribs, barbecued brisket… But sadly, not many of us have the time to simply sit back and wait hours for our meat. Sometimes, we don’t even have an hour. Sometimes, we don’t even have the half-hour that most of Rachael’s recipes require.
For those of you who are (like me) forgetful, harried, hurried, or simply impatient, here is a 20-minute recipe that is guaranteed to work every time.
It’s not a no-brainer, though. For those 20 minutes, you really need to stay on top of it. You also need a bottle of brown ale – or something like it. And of course, you need a good pork chop. And by “a good pork chop,” I mean thick, well-marbled, and – ideally – from an all-natural producer. It doesn’t have to be a center cut chop; I personally like end rib chops (They look like rib eye steaks) the best.
This pork chop recipe really is a winner, because it typically takes hours to get the soft texture of braised meat, and this one needs less than 20 minutes.
Brown Ale-Braised Pork Chops
Ingredients
2 center cut pork chops, medium thickness
2 tbsp vegetable oil
1 small onion, chopped very fine
1 bottle brown ale, stout, porter, or other dark beer
1 tsp caraway seeds (*see below for alternatives)
1 apple or pear, thinly sliced
Kosher salt and black pepper, to taste
1 pinch brown sugar
1. Get a large-lidded pan good and hot. While it’s heating up, chop the onion and slice the apple (or pear). Dry the pork chops off, and shower them with salt and a few twists of pepper. Add the oil to the pan. It should start to shimmer; it should be wicked-hot.
2. Put the pork chops in the pan, leaving some space between them. Look at them for three minutes or so. Don’t move them – you need one side to get nice and brown. After the three minutes are up, assuming the oil isn’t burning, lift them and take a peek. Are they brown? If so, flip them over, and push them to one side.
3. While they cook, throw the onions in the hot, porky oil. Drop a pinch of sugar on them, and move them around with a spoon until they get nice and soft. There won’t be time for them to brown, but that doesn’t matter, because they’re about to go swimming anyway.
4. Add the beer; there should be just enough to come halfway up the pork chop. Make sure you lean away when you add it! A big, billowing, beer steam cloud will mushroom up. Then, add the apple or pear slices and the caraway seeds. I know it’s not likely that you have caraway seeds just sitting around. Really, you are adding another flavor so that you aren’t only eating pork, onion, and beer with a few fruit slices floating in there. You need that X-factor, and it should be something that goes with beer, that’s all I’m saying. Allspice or even a little cinnamon will work just as well. Maybe a little paprika, or better still, smoked paprika.
5. Pop the lid on. Turn the heat to medium. Do something else for seven or eight minutes.
6. Get out a plate. Put the pork chops on it. Jack the heat up, and boil away the beer juice for a couple of minutes. Pour it and it and everything in it onto the chops. Serve and eat.
Photo: Courtesy of brown_family_album via Flickr


November 6, 2013
Super Simple Chocolate Peanut Butter Fondue
A few myths about chocolate fondue:
1. You need a special fondue pot.
2. It’s time-consuming and only for fancy occasions.
3. A double boiler is required.
It’s time to dispel these misconceptions and bring this divine treat (that’s actually quick and easy) into your dessert rotation.
For the most basic chocolate fondue, all you need to do is melt together some chocolate and cream over very low heat in a heavy saucepan, whisk until smooth, and transfer to a fondue pot if you have it – or individual ramekins if you don’t.
And let’s be honest, when you’re dipping cake, pretzels, and fruit into warm chocolate, it’s not going to last very long. There’s no need to keep it heated, since you’ll probably finish by the time it cools down. Should you happen to have leftover fondue, you can refrigerate it. To enjoy again, just reheat in the microwave, stirring very frequently until it loosens and, eventually, becomes smooth.
The fondue I whipped up here is chocolate peanut butter. The peanut butter takes a backseat to the chocolate, but it helps to keep the chocolate from being too overpowering. You can also see below for other variations to try.
Here’s how to do it:
Make your life easier by assembling your dippers first so they’re ready to go once your fondue is warm. An assortment of cut fruit (strawberries, pineapple, kiwi, bananas, apples, mangos), salty snacks (pretzel rods, bread sticks), and sweet treats (brownies, short bread, pound cake) works well.

Now, start on the fondue by combining the chocolate chips, cream, peanut butter, vanilla, and a pinch of salt in a heavy-bottomed pan over the lowest heat. Then, whisk your ingredients constantly, or the fondue will scorch (seriously!).

Continue mixing until it’s creamy and smooth.

And while you’d traditionally enjoy your chocolate in a fondue pot…

…it’s perfect in individual ramekins or small bowls for single servings. Then, you don’t have to share!

Super Simple Chocolate Peanut Butter Fondue
Serves 4
Ingredients
2 cups dark, milk, or semisweet chocolate chips
1/2 cup heavy cream
1/2 cup creamy peanut butter (not natural-style)
pinch of salt
1/4 teaspoon vanilla
Dippers of your choice (strawberries, apples, bananas, pound cake, brownies, pretzel rods)
Directions
Combine all ingredients (except dippers) in a heavy-bottomed, medium saucepan. Over low heat, whisk constantly until smooth. Transfer to fondue pot or individual ramekins, and serve immediately with dippers.
For Chocolate Caramel Fondue, replace the peanut butter with store-bought caramel sauce or dip, and proceed with recipe as written.
For White Chocolate Caramel Fondue, replace dark, semisweet, or milk chocolate chips with white chocolate chips, and replace the peanut butter with caramel sauce. Proceed with recipe as written.
Want to try even more creative ways to enjoy fondue? Check out:
German Cheddar and Beer Fondue
Healthier Cheese Fondue with Pretzels and Veggies
—
Plan B Mom is a mostly-stay-at-home mom of 3 who works from home but sees her main job as managing her family. When she is not taking care of her 13-year old and 11-year old girls, 9- year old son, yellow lab, and husband, she is baking, running, carpooling, or helping with homework. She tries to stay organized to keep life running smoothly – or at least catastrophes at bay. Follow her on Twitter at @PlanBMom.
November 5, 2013
Size Matters! 8 Lunchbox Sliders Kids Will Love
When it comes to getting my kid to eat healthy lunches, I’m not above stealing.
Stealing ideas, that is.
For example, let’s take those awful packaged lunch kits they sell at the grocer. I may despise the unhealthy, overprocessed, overpriced foods that go in them, but I’m willing to admit the companies that make them are onto something with the packaging.
Kids love the way those lunch kits offer up lots of kid-sized foods. And they love the assemble-it-yourself ethic. Which is why I use both approaches when packing my son’s lunches in bento-style boxes – lots of little foods and plenty of DIY.
For another source of theft-worthy ideas, I like to keep an eye on hipster food trends. Admittedly, most of these won’t fly with my kid (Garlic scapes? Seriously?), but every now and again, a kid-friendly one comes along.
Some parents have had lots of luck with kale chips, for example (I am not among them, but then again, my son still considers green the color of the devil). But hummus and edamame? All over them.
One restaurant scene trend that is perfect for kids (and adults!) is sliders. For a while, these one- or two-bite burgers were showing up on menus everywhere. The slider trend has cooled a bit by now, but that makes it perfect for us to steal for the lunchbox scene.
Sliders are perfectly suited for lunches. Kids love them because they’re cute and way more manageable than a full-sized sandwich. Parents will like that they’re easy to make – and easy to make healthy – as well as easy to pack.
So here are my top eight ideas for lunchbox sliders. Plan to pack two or three for a complete meal.
1. Waffles and chicken sliders: Head to the grocer’s freezer section and grab a package of whole-grain mini-waffles. Make a sandwich using a bit of cheese and some leftover chicken (any type, including breaded). You can pack them as-is or toast them briefly in a skillet. You don’t even have to thaw the waffles. They’ll be just right by lunch.
2. Bagels and cream cheese sliders: Grab some mini whole-grain bagels and slather a bit of cream cheese on them. Don’t feel guilty about the cream cheese. It has less fat than peanut butter (and there’s always low-fat cream cheese). Top with a dollop of strawberry jam for a sandwich that will taste like dessert. Or, go savory and add ham instead of jam.
3. Chicken salad dinner roll sliders: Toss chopped leftover cooked chicken with vinaigrette (just enough to moisten) or mayo and maybe some chopped celery or cucumber, then slap it between the halves of a sliced dinner roll.
4. Hummus baguette sliders: Cut a few thin rounds off a baguette, then use them to make sandwiches filled with hummus and a slice of plum tomato (Tip: Coat both pieces of baguette with hummus so the tomato doesn’t moisten the bread). Kid won’t eat tomato? Add some sliced or chopped salami instead.
5. PB&J pancake sliders: Making pancakes for breakfast? Make a few silver dollar version while you’re at it, then use them to make peanut butter (or a school-approved alternative) and jelly sandwiches.
6. Apple cheddar stack sliders: This one adds a DIY element to the slider approach. Cut thin slices from the sides of a large apple. These are your pieces of “bread.” To prevent them from browning, mix a teaspoon or two of salt with a cup of water in a box, dunk the apple slices in the salt water, then remove and pat dry. Now, they’ll stay fresh until lunch. Pack the apple slices as-is with slices of cheddar cheese on the side. Kids assemble them into sandwiches at lunch.
7. Cucumber chutney sliders: This one is for adventurous eaters. Cut thin slices from an English cucumber. Then top one slice with a dab of cream cheese, then a dollop of mango chutney (it’s very sweet, not spicy). Finish with another slice of cucumber.
8. Meatloaf quarter sliders: Got leftover meatloaf? Place a cold slab of it between slices of regular ol’ sandwich bread. Now, cut the sandwich into quarters. Done. And delicious. You also could pack a small container of ketchup on the side for dunking.
Want more great lunch ideas? Try these!
Strategic Leftovers? 8 Ways to Stay Sane While Packing Lunch
10 Lunchbox Treats You Can Feel Good (OK, Better) About
Lunch Packing Made Easy, One Grain of Rice at a Time
Nobody Eats Lunch at Lunchtime! 11 Fast and Easy Snack Ideas
J.M. Hirsch is the national food editor for The Associated Press. He blogs about the trials and tribulations of his son’s lunches at LunchBoxBlues.com. His cookbook, Beating the Lunch Box Blues, is the first to be released by Rachael’s new publishing venture, Rachael Ray Books. Hirsch’s previous books include High Flavor, Low Labor: Reinventing Weeknight Cooking and Venturesome Vegan Cooking. He lives in New Hampshire with his son, wife, and too many cats.
November 4, 2013
Dinner Deal: Mixed Mushroom Ragu With Cheesy Polenta
We’ve been trying to eat less meat in my house lately. Save some money, keep our cholesterol down, try some new flavors; there are lots of reasons to work a couple of vegetarian meals into your weeknight repertoire. The trick always seems to be in making a dish that’s just as satisfying as that steak or pork chop that we’d otherwise be having.
While this dish isn’t a true ragù (which is an Italian meat-based sauce) the base of mushrooms makes for a flavor so hearty and satisfying that you won’t even miss the meat. Rounded out with some easy creamy polenta, this satisfying Dinner Deal meal is simple enough to serve to the whole family and special enough to save for just the two of you.
Mixed Mushroom Ragu with Cheesy Polenta
Makes 4 servings
For the ragù
4 tablespoons olive oil
1 pound cremini mushrooms, caps wiped clean, halved
3 portabella mushroom caps, gills scraped out, chopped
1 medium onion, chopped
1 red bell pepper, seeded and chopped
3 cloves garlic, finely chopped or grated
1 tablespoon dried Italian seasoning herbs
Pinch red pepper flakes
1 (28-ounce) can diced tomatoes
Salt and ground black pepper
For the polenta
2 cups milk
1 1/2 cups vegetable, mushroom or chicken stock
1 cup instant polenta
1/3 cup grated Parmigiano-Reggiano cheese
Salt and ground black pepper
To prepare the ragù place a large high-sided pan over medium-high heat with the olive oil. Add the mushrooms to the pan and cook, stirring on occasion, until deep golden brown and beginning to soften, 7 to 8 minutes. Add the onion and bell pepper to the pan and cook until they begin to soften, 3 to 4 minutes. Add the garlic, dried herbs and pepper flakes and cook until aromatic, about 30 seconds. Add the tomatoes to the pan and season with salt and pepper. Simmer the ragù, stirring occasionally, until the liquid is thickened and saucy, 8 to 10 minutes.
While the ragù is simmering prepare the polenta. Place a medium pot over medium-high heat with the milk and stock. Bring the liquid up to a boil. Gradually sprinkle the polenta over the liquid while whisking constantly. Simmer the polenta until thickened, about 1 minute. Remove the pot from the heat, stir in the cheese and season with salt and pepper. Reserve warm (the polenta may thicken more as it sits; adjust the consistency as needed with a few splashes of warm water or milk.)
Serve the ragù over the polenta.
NOTE: When first browning the mushrooms, don’t stir them until one side gets deeply golden brown. It’s this initial browning phase that will help to develop a rich flavor base for the rest of the dish.
Looking for more budget meals? Try these:
One-pot broken florentine lasagna
Cider braised chicken with peppery escarole
Patrick W. Decker’s life revolves around food. Always has, probably always will. As a graduate of The Culinary Institute of America and past member of the culinary teams for Food Network stars like Rachael Ray, Sandra Lee, Marc Forgione, Bobby Deen and Paula Deen, he now works as a food writer in NYC by day and a recipe developer at his home in New York’s Hudson Valley by night. You can see what he’s up to by following him on Instagram & Twitter at @patrickwdecker or visiting his website at patrickwdecker.com.
November 1, 2013
Plan a Week of Meals With This Weekly Meal Planner
Happy November! Welcome to the weekly meal planner, where we give you ideas for dinner every night, weekday lunches and weekend brunches, plus some desserts and snacks.
We will stick to easy meals – lunches and weeknight meals you can make ahead over the weekend, and quick and healthy dinners for night-of serving. Let’s start planning!
Monday
It’s meatless Monday from start to finish today!

Lunch: You’ll never miss the meat with this hearty Minestrone with Tomato and Fennel soup. Make it over the weekend and enjoy throughout the week.
Dinner: Fish in a Sack is super healthy – use the firm white fish of your choice.
Dessert: Monday Night Chocolate Cake is humble – it’s baked in a loaf pan – and delicious. Enjoy as a snack all week long – it’s great toasted and topped with cream cheese or peanut butter.
Tuesday

Lunch: Italian Chef Salad Version 2
Dinner: Spinach and Artichoke Baked Whole Grain Pasta can be made over the weekend and baked for tonight’s dinner for a stress-free meal.
Snack: With watermelon available at most grocery stores year-round, you can make these Watermelon Ice Pops any time of year for a guilt-free snack!
Wednesday

Lunch: Cold tuna pasta salad served in a hollowed-out tomato makes an elegant lunch in this Risso alla Nizzarda recipe.
Dinner: Veal and Pork Meatballs with Mushroom Gravy and Egg Noodles is a tasty riff on spaghetti with meatballs.
Thursday
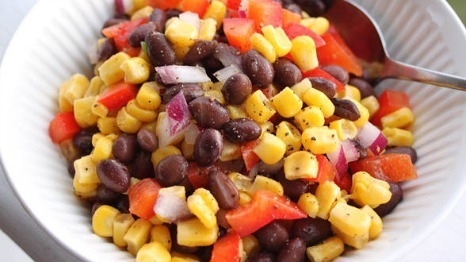
Lunch: Frozen corn and canned beans come together in this zesty Black Bean and Corn Salad.
Dinner: It’s Sandwich Night! BLT Burgers with Sriracha Aioli are burgers with a twist. Simplify the recipe even more and swap out the homemade aoili for prepared mayo. Sriracha too spicy for the kids? Just omit it.
Snack: Ricotta, Garlic and Honey Bruschetta
Friday
Lunch: Rachel Patty Melts You’ll love these grilled turkey burgers with a special sauce.
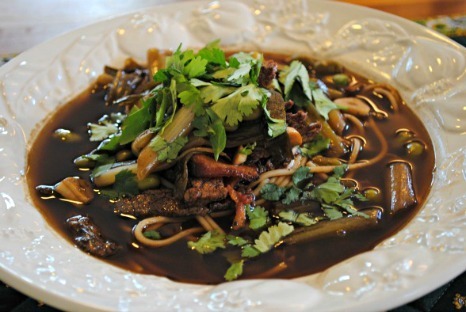
Dinner: Beer, Bacon and Beef Soba Bowl is a fun takeout-style Friday night dinner. Swap out the beer for additional beef stock if you’d like.
Dessert: Sweet and Salty Brownies are a little extra effort but worth it!
Saturday

Brunch: Strawberry Shortcake Waffles are a snap with pound cake cake mix.
Dinner: Garlicky Beef Skewers with Potato Hash and Spiked Ketchup is great for entertaining.
Dessert: Impress your guests! Your friends will swear you stopped by the bakery for dessert with these easy Chocolate Tea Puffs.
Sunday

Brunch: This hearty and versatile Tor-tata can be served hot or room temperature and will hold everyone over until Sunday supper.
Dinner: Mild Green Beef Chili with all your favorite fixings – avocado, cheese, sour cream, chopped onion – is a great Sunday family dinner.
Dessert: Triple Layer Oreo Cake is a sweet and special way to end the weekend.
October 31, 2013
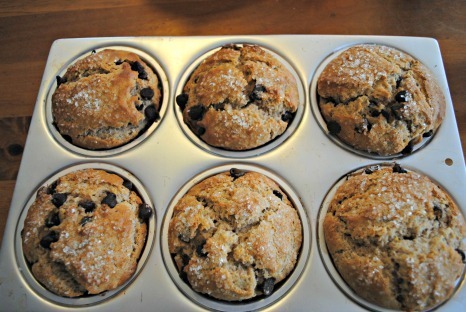
Jumbo Cinnamon Sugar Chocolate Chip Muffins
My kids love muffins from our favorite bakery but were failing to get excited about my traditional homemade muffins. I finally figured out why. My muffins were too small.
I realized most bakeries are selling extra large muffins on steroids. As soon as I got my jumbo muffin tin, my kids’ opinions of my muffins changed. They are so American.
They also like mini muffins (adorable!) – I guess there is something about the regular-sized muffin tin that is well… too regular.
These super-sized beauties are in a word, awesome. Soft with a faint, warm cinnamon flavor, studded with chocolate chips and a sprinkling of sugar on top – and they are delicious with a cup of coffee. Keep in mind that they are huge, so one muffin can serve two people (in some houses, not mine. I do try to stick with a half only. “Try” being the key word here.). If you don’t have the large muffin tin, this recipe makes a dozen regular-sized muffins, just reduce baking time by ten minutes, give or take a few minutes.
You start by whisking together the eggs and sugar with an electric mixer until light yellow.
After you add the rest of the wet ingredients, you mix the wet ingredients into the dry ingredients (you’ve heard this story before) and very gently fold everything together. The batter should look ugly and lumpy, not perfect and smooth.

You hold back about a tablespoon of the dry ingredients to toss with the chocolate chips. This ensures that the chips don’t sink to the bottom of the muffins. Mini chocolate chips would probably be really good in these muffins – but I never seem to have any on hand. Also, a mixture of white and dark chips or butterscotch chips would be interesting.
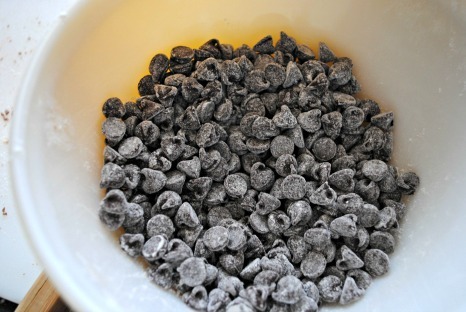
Fold in the floury chocolate chips and any extra flour left on the bottom of the bowl. Next, you fill up the paper-lined muffin tins to the very top. I am breaking my 2/3 full rule here, but that’s ok. All the way up, and if you have it, sprinkle some coarse sugar on top. I had white sugar sprinkles, which were just fine.
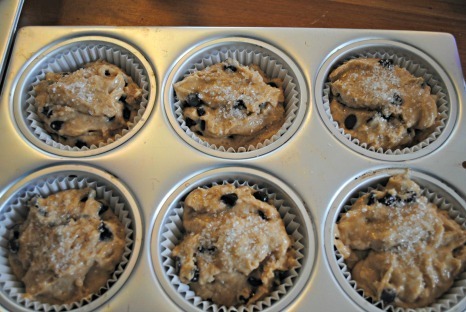
30 minutes later: chocolate chip muffin heaven.
Jumbo Cinnamon Sugar Chocolate Chip Muffins
Makes 6 jumbo muffins or 12-regular sized muffins
Ingredients
3 cups flour
4 teaspoons baking powder
1 teaspoon kosher salt
1 1/2 teaspoons cinnamon
2 eggs
1 cup sugar
1 cup half and half, buttermilk or milk
1/2 cup vegetable oil
1 teaspoon vanilla
1 1/2 cups semi-sweet chocolate chips (or chips of your choice)
coarse sugar for topping
Directions
Preheat oven to 425 degrees F and line a 6- jumbo muffin tin with paper liners. With an electric mixer beat together eggs and sugar until well combined and light yellow in color – about 3-4 minutes. Mix in half and half or milk, oil, and vanilla, and beat until well combined. Whisk together the flour, baking powder, salt, and cinnamon in a medium bowl.
Reserve about one tablespoon of flour mixture in a small bowl, and add the rest of the flour mixture to the to wet ingredients. Mix until just starting to combine with the electric mixer – you will still see clumps of flour – and finish mixing the batter by hand until just combined. It will be lumpy and you will see a few sprays of flour. Add chocolate chips to the reserved flour mixture and toss so the chocolate chips are coated with flour. Add chips to batter and gently fold.
Pour batter into tins, pouring batter all the way to the top of each tin. Sprinkle with sugar and bake for 5 minutes, then reduce temperature to 375 degrees F and bake for 22-28 minutes, or until a toothpick inserted in the center comes out clean. Remember all ovens are different, so check in on your muffins early!
Adapted from a sallysbakingaddiction.com recipe
Want more muffins? More muffin recipes here:
Raspberry Jam Streusel Muffins
Plan B Mom is a mostly-stay-at-home mom of 3 who works from home but sees her main job as managing her family. When she is not taking care of her 13-year old and 11-year old girls, 9- year old son, yellow lab, and husband – she is baking, running, carpooling, or helping with homework. She tries to stay organized to keep life running smoothly – or at least catastrophes at bay. Follow her on Twitter at @PlanBMom.
October 30, 2013
9 Easy Halloween Treats You Can’t Miss
Halloween is almost here! From spooky spaghetti to oh-so-sweet treats, we’re rounding up some of our fave recipes to help you celebrate throughout the day and even after the festivities are over.
Here are 9 super easy Halloween treats you can’t miss!
Spooky dishes

Severed hand toast with Egg eyes: Start the day with a good old piece of toast… severed hand toast, that is, and pair it with some scary egg eyes!
Eyeball pasta: A super easy dinner for the family that also makes for a great kids’ activity.
Spook up your soup: Add pumpkins or ghosts to decorate your favorite soup!
Devilish sloppy chicken mini sammies: A new twist on sloppy Joes perfect for Halloween!
I love mummy hot dogs: Need a last-minute treat? This super simple recipe is worth a try!
Sweet treats
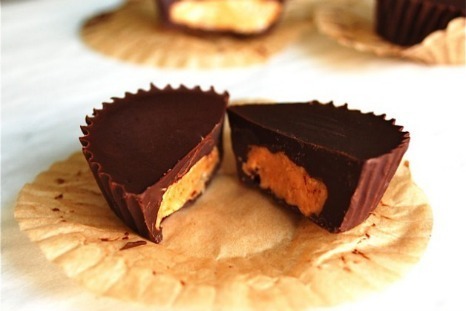
Homemade peanut butter cups: This super-rich treat is a must-try! And if you’ve got a peanut allergy, you can even use sunflower butter or pumpkin seeds instead of peanut butter.
Hot ‘n sweet kettle corn: Can be made sweet or with a bit of spice!
Leftover Halloween cookies: After the trick or treating and parties are done, there’s always at least a little candy that no one wanted. Give it new life with these tasty cookies!
3 Last-Minute Spooktacular Halloween Treats
Halloween is just a few strokes of midnight away, so if you’re like me and ‘accidentally’ didn’t realize it was ‘creepin’ up quickly, here are some of my fave quick and easy treats to make with your little boys and ghouls (big ones too!).
Happy Hallo-almost eve!
1. I Love mummy
Makes 8-10
What You Need:
1 8 oz. can of refrigerated crescent roll, seamless if available
1 small cutting board
Aluminum foil to cover cookie sheet
Cookie sheet
8 1-oz slices of American or cheddar cheese (optional)
Butter or plastic knife
8-10 medium beef or turkey dogs
Cooking spray
Mustard

How to Make Them:
1. Preheat oven to 375 degrees
2. Unroll dough on cutting board (can sprinkle a teaspoon of flour on it to help prevent dough from sticking)
3. Use plastic knife to cut individual crescent triangle into ¼ inch ‘bandages’. (TIP: bandages do not have to be even or the same length)
4. If making with cheese: Place cheese slices on dough before cutting and slice them together
5. Take ‘mummy’ i.e. hot dog and wrap strip over strip (since these are fully cooked there are no food safety issues!) on mummy
6. Spray mummies lightly with cooking spray
7. Bake per dough package instructions or until golden brown: approx. 14-16 minutes
8. Let them cool to touch then use mustard to make the eyes and mouth
2. Trick or Teeth
What You Need:
Apple cored and sliced in ¼ inch slices width-wise
Peanut Butter or Nutella
Mini marshmallows
Candy corn
Raspberries
How to Make Them:
First cover the ‘jaw’ i.e. fruit slice with a thin layer of ‘gum glue’ (peanut butter or Nutella), then place the ‘teeth’ (mini marshmallows) around the edge of the ‘jaw’ (apple). Lastly, place candy corn on the upper and lower teeth to create a vampire look.
Optional: Use raspberries to create ‘bloody’ tooth/teeth and drippings.
3. Frozen Zombie Hand Punch

What you need:
1 (10 ounce) package frozen raspberries, thawed
2 1/2 cups cranberry juice
2 envelopes unflavored gelatin
Small sauce pan
Twine
Punch bowl/food-safe cauldron
2 liters ginger ale
2 liters sparkling apple cider (non-alcoholic)*
*Grown-ups can substitute sparkling wine or champagne. Yum!
Gummy snakes
Optional: Dry Ice
How you make it:
Ghoulish Hand:
1. Clean the outside of a rubber glove and turn it inside out
2. Mix the raspberries and cranberry juice in measuring cup
3. Pour 2 cups of mix into the saucepan and sprinkle the packets of gelatin over it. Let it absorb for 2 minutes.
4. Warm the mix over a low heat until gelatin dissolves: about 2 mins. DO NOT BOIL!!
5. Carefully pour into the glove
6. Leave enough room at the top of the glove to tie/close with twine
7. Freeze for AT LEAST 24 hours
Punch:
1. In a large punch bowl, add ginger ale and sparkling cider (again if adults, add sparkling wine or champagne)
2. Adults: Right before you’re ready to serve it, cut away the glove with a pair of scissors, or you can start the cut and then have your lil ones carefully pull the glove off the frozen hand
3. Place the hand, palm side up against side of large punch bowl
4. Add gummy snakes for fun!
Looking for more Halloween treats? Try these:
Leftover Halloween candy cookies
Halloween horror: Eyeball pasta
Make your own peanut butter cups for Halloween
Hand image courtesy of starphysh, flickr
October 29, 2013
6 Tricks to Packing Cool Lunches Your Kids Will Actually Eat
Whether we like it or not, packing lunch for our kids is a competition.
Not against each other. Though when you look at some of the over-the-top bento box blogs out there, it’s easy to read a little one-upmanship in it.
It’s a competition against the foods the other kids bring. No matter how much love goes into the Brussels sprouts salad you packed for your kid, it’s a lost cause.
That’s because your kid will inevitably compare it – unfavorably – to the cookies and sugary drinks packed by parents who obviously must love their children more than you.
This is true even if your child eagerly devours Brussels spouts salad at home.
It’s the sad truth about the pack mentality that rules the lunchroom. And even if your kid won’t make the comparison, the other kids will. Loudly.
So what do you do? Pack the junk you didn’t want to pack to begin with? Tell your kid to suck it up?
A lot depends on your kid, of course. Some kids have the confidence to say to peers, “Go suck an egg. I like kale chips.”
But for the rest of us, there is a middle ground. And staying in that zone of compromise has allowed me to pack the sorts of foods I want my son eating.
1. Teach that treats aren’t just sugar
I don’t mean trying to persuade your kid that broccoli really is like candy. I mean set the tone at home that there are all sorts of “treats” – including favorite meals. Does a bowl of chili, a platter of sushi or a favorite sandwich spell ultimate comfort food to your kid? Work with that. The gist is to get your kid excited about what you pack, even if it isn’t junk food.
2. Garnish with bait
Keep in mind that kids are simple creatures who are easily impressed. A bit of chocolate – no matter how miniscule – transforms anything into a treat for my son. So I top his yogurt and fruit parfaits with a sprinkle of mini chocolate chips. Ditto for fruit salad. Nutritionally speaking, the teaspoon of chips is meaningless. But they make me a lunch packing hero to my kid. A dollop of whipped cream on fruit has a similar effect.
3. Imitate the junk
What is your kid coveting? Find it at the store and get a good look at it. Now figure out a way to make it work on your terms. Sugary juice bags? There are plenty of lookalike flavored water bags. DIY pizza lunch kits? Assemble your own, but with better ingredients.
4. Involve the eater
I’m not a big fan of giving my kid tons of choices in what I pack for his lunches. If I did, he’d hem and haw over it all morning. But at the grocer, it’s a different story. This is when you set some ground rules, then send the kids off in search of things they think are cool enough for school.
5. Go whacky
Kids love crazy themes, so embrace them. It’s an easy way to make your kid’s lunch more appealing than his buddy’s. How about an all-round lunch (pack foods that are all round)? Or all blue (think blueberries, blue tortilla chips, baked blue potato, etc.)? Or breakfast-for-lunch (pancakes, yogurt, juice, bacon, etc.)? You get the idea.
6. Communicate
Just talk it out. As adults we tend to forget what a pressure cooker the lunchroom can be. Between being pressed for time and harassed by peers, lunch can be stressful for kids. Start by asking what the issue is. Then set your rules and find a compromise somewhere in there.
J.M. Hirsch is the national food editor for The Associated Press. He blogs about the trials and tribulations of his son’s lunches at LunchBoxBlues.com. His cookbook, Beating the Lunch Box Blues, is the first to be released by Rachael’s new publishing venture, Rachael Ray Books. Hirsch’s previous books include High Flavor, Low Labor: Reinventing Weeknight Cooking and Venturesome Vegan Cooking. He lives in New Hampshire with his son, wife, and too many cats.
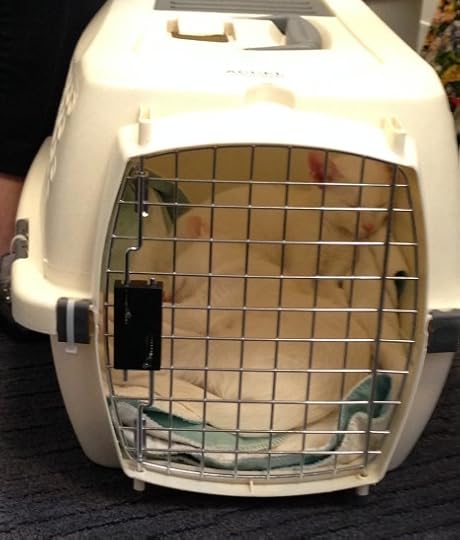
Happy National Cat Day!
Happy National Cat Day! To celebrate, the cat lovers at Cheezburger (well known for its site I Can Has Cheezburger) are promoting cat adoption by delivering adoptable kittens for reservable 15-minute play times around New York, San Francisco and Seattle.
The cats, which come from the ASPCA, San Francisco SPCA and Seattle Humane Society, are being chaperoned by shelter volunteers and are available on-demand via Uber for $20 a visit, with all funds benefiting their shelters.
We’ve rounded up some cute kitten pics from today’s events!

Talk about striking a pose!

Offices show their kitten love!
This kittens nap before the next office visit

Better than a coffee break!
Rachael Ray's Blog

- Rachael Ray's profile
- 296 followers

