
Emily Henderson's Blog, page 135
March 15, 2022
Caitlin NEEDS To Externally Process Her Feelings About Chartreuse (Is It A New Neutral?)
There’s this quote from The Office that’s been rattling around a bit in the back of my brain for a few weeks now. Michael’s mocking Jim (sorry for the 13-year-old spoiler, folks) and offers up this little nugget: “I can see it in your crusty little eyes that you are going to make everything perfect. If I can just think this through, if I could just think it exactly right, I can make this perfect.”
Because honestly, that’s kinda sorta what I’ve been on the hunt for recently – a perfect design process. A checklist so I can avoid mistakes. I’ve joked about it a bit on Zooms with the team – “please write down every thought you had while you were designing and installing” is my go-to line, but I’m not really joking. 11 days ago, I presented you with a dilemma: I’d procured my dream dresser but was struggling with finding a real jumping-off point. I presented three beds to the crowd, offered three possible corresponding color schemes, and we were off to the races. Then, TWO OF YOU BLEW MY MIND.


“I have a brass canopy bed. Chartreuse walls look beautiful with it,” said Patricia. “You could add lilac/mauve/violet/chartreuse/cerulean/cognac/yellow curtains, accessories or wall color, bedding or rugs,” said Mouseface (and while I wish I had created this highly-descriptive portmanteau, the credit belongs to the commenter in question). Chartreuse, huh? I started poking around the internet and landed on one image in particular that really made my heart skip a beat…
 design by luke edward hall | via stitched
Here’s the thing: this isn’t my first chartreuse rodeo. (Click through at your own risk to see a photo of my childhood bedroom. You’ve been warned.) And while my style has changed a bit since that original introduction post – more deco, less postmodern – my love of color hasn’t really shifted.
So when I stumbled upon this shot from Luke Edward Hall’s home, I knew I wanted to make a cognac bed work with chartreuse walls and other pops of bright, saturated color. Is it going to be a lot for a bedroom? Sure. Is it possible to create a space that’s more jarring than the neon nightmare cave I created in 2004? NO. It’s all up from here, baby!!!
To that end, I started looking for more and more inspiration – you know, how to do chartreuse the right way, so you don’t feel like you’re living inside a container of sherbet – and realized that it’s a lot more flexible than I ever imagined (when chosen by adults with actual brains and thought processes beyond “NEON,” at least). Can I show you a few of my favorites? I pulled inspiration from all kinds of styles, so I can be extra sure that I’m thinking EXACTLY RIGHT. Let’s kick it off with a total stunner, yeah?
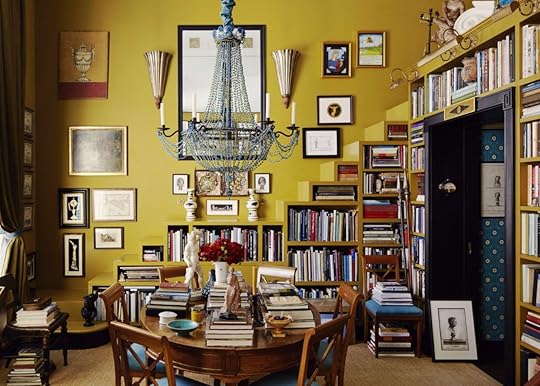
 design by pierre letan | photo by shade degges | via bibliostyle
OKAY. Try this scenario on for size: I show up at your house, unannounced. “I am going to redesign your living room,” I declare. “Everything will be some variation of cherry red, navy blue, lime green, or wood.” (Wow, what a presumptuous and arrogant move from hypothetical Caitlin! So audacious! Did I even say “hello” first? Where are my manners???)
You know what you – a normal and/or rational person who has probably seen a color wheel once or twice – would say in response? It’d probably be a little something like this: “Are you insane? What are you talking about?” Or maybe even a, “NOT TODAY, HILDI. Hard pass. Please leave.” (The latter option is for those who consumed a lot of Trading Spaces in the early aughts. I would fall into this bucket, I think.)
BUT WAIT. Against all odds, the aforementioned hypothetical, manner-less, weirdly-imposing Caitlin is actually on to something here (palette-wise, at least). Peek at the above space – this bold chartreuse is elevating the room way more than a soft, cool gray or clean, bright white EVER could.
Chartreuse: 1. Other Neutrals: 0.
 design by paloma contreras
It’s not just paint, though. Chartreuse can add something a little fresh, unexpected, and modern to a space. Are these four chairs super loud or out-there? Not really. But does this bright, happy velvet add WAY more personality and joy than a similar piece upholstered in camel leather or jade green velvet? HECK YEAH.
Bringing this not-quite-neon, not-quite-pea-soup shade into your decor is such an easy way to add a little edge without feeling like you’re living inside an avocado, you know? (If you are interested in feeling like you’re living inside an avocado, stay tuned. I have inspiration for you, too.)

 left: design by bells + whistles, photo by madeline tolle, via design milk| right: design by india mahdavi, photo by luis ridao
BIG SWOON. I’ve always been a fan of this color palette – some aqua, some coral, some hits of chartreuse. (Now that I’m thinking about it, this is kind of the tropical version of the earlier “cherry red, navy blue, lime green.” There’s something here, guys. Stick with me!!!) A traditional pearly-toned zellige fireplace tile would have fallen SO flat on the left; the trim on the right ups the “weird” quotient just enough to make things super cohesive on the right. MASTERFUL.
 design by brad walsh | photo by alec hemer | via elle decor
I know this technically leans a little more green than the rest of my examples, but I just had to tell you three things:
This reminds me SO much of Erik’s home, where paint makes all the difference. (Scroll to the bottom for an incredible side-by-side of Erik’s in white and in chartreuse – it’s what I’d present as my closing argument if I was a lawyer and not a woman screaming about colors on the internet.) OVERSIZED LIGHT FIXTURES ARE SO, SO, SO CHIC. I dream of mixing and matching like this. A Bergere chair, rattan table, regency demilune console, AND pop art? Inspired.
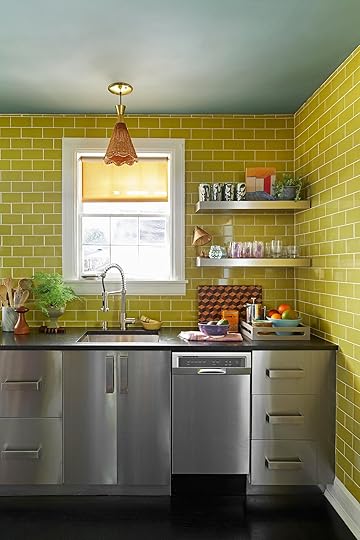 left: via marie claire france | right: photo by brian anderson, via better homes & gardens
When in doubt, go tonal. I love how much the chartreuse warms up these spaces (like, check out that atrium in the back of the photo on the left – this front sitting room is so much warmer!).
I also cannot believe how AWESOME those stainless steel cabinets look in the kitchen on the right. A more traditional subway tile in white would have left this space feeling like a hospital (read: morgue), but these brightly-colored walls bring such a great balance – do you agree???
 design by todd alexander | photo by william abranowicz | via elle decor
When I really distill it, I think my favorite thing about this shade is that it allows for a lot of experimentation – it’s so bold that every choice in your space will, in turn, feel a bit more thoughtful and considered and ~designed~. Would this art configuration and dining nook look fine against a beige wall? Probably! But does the whole space really sing against a neon background? YES.
 left: design by miles redd, photo by roland bello, via house beautiful | right: via maria killam
Same chairs, same color palette, VERY different vibe. We’re having a dinner party in the room on the left. We’re having a very productive team brainstorm in the room on the right. Which one is your favorite?? (I think I’m leaning towards the Miles Redd-designed room on the left – I’m a huge sucker for a good chinoiserie credenza – but man, that fireplace surround on the right is DREAMY.)
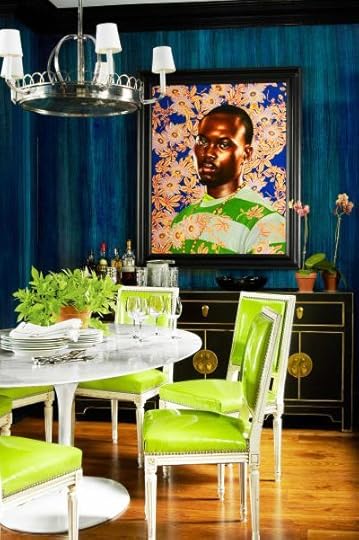
 design by jean-philippe demeyer| photo by kasia gatkowska | via vogue australia
Confession: This is another shot where we’re leaning a little more green than chartreuse, but check out how much depth this lone wall brings to the space. I don’t think most people stumble upon luxe, warm portraits of mastiffs and think, “oh my gosh, GOTTA HANG THIS THIS SMACK DAB IN THE MIDDLE OF MY LIME GREEN WALL,” but like…maybe they should start thinking that way, you know?

 left: design by sam allen, via architectural digest | right: design by matthew carter
These two lean a little muddier – more split-pea than neon – which makes them great candidates for layering in warmer reds and oranges.
And pals, it’s pretty unbelievable how color elevates each of these rooms. The space on the left could have read as clean, simple, and preppy – now it’s statement-making and design-forward without looking like it’s trying too hard. And the room on the right? It’s a pattern lover’s dream set against an incredible, flexible backdrop that’ll stand the test of time even as the homeowner’s decor changes. (Em’s classic wisdom that “pretty looks good next to pretty” holds up here. Also…that super high art placement above that shelving unit with just a hint of overlap? So, so, so good.)
 design by brockschmidt and coleman | photo by jean allsopp | via better home and gardens
Last year, I wrote a dissertation about my obsession with antiques. This photo was included. I’m making you look at it again because it’s an all-time favorite of mine. The old! The new! The mix! SUBLIME. The wallpaper is a perfect backdrop, right? EVERYTHING GOES. (PS. If anyone ever sees a marquetry cabinet like this in LA that won’t cost several months’ rent…well, send up a bat signal for me, please.)

 left: design by emily eerdmans, photo by kelly marshall, via veranda | right: design by sam allen, via house beautiful
Oh, hey, fans of classic design! I think my original biggest misconception about chartreuse was that it was only for use in modern spaces – discovering it in such formal, traditional rooms has been pretty liberating.
Here, the wall color really lets some of the tinier details shine – the window treatments and skirted table on the left would have been lost in a sea of tan or cream; there’s such a dynamic and fun balance in the room on the right. I guess it’s nice to know that vintage and antique things can still feel new and fresh when presented in a fun way, you know?
 photo by jess isaac for ehd and monica wang | from a floral glam nursery reveal + get the look
So, like, maaaaybe you’re convinced that chartreuse can be a neutral…but you’re not totally ready to commit to painting a room. I GET IT. It’s a great accent color, too. Case in point: This sweet nursery was designed by THE BIG BOSS. That’s right – Em revealed this space over 6 years ago (!!!) but it still feels cheery, inviting, and modern. And sure, she could have stuck with white draperies…but isn’t this just better? (Side note: In her original mood board, Em actually had planned for pink curtains. The hit of color was just too good to resist, I guess :))
 left: design by 2lg studio | right: design by paloma contreras
STICK A FORK IN THESE ROOMS BECAUSE THEY ARE DONE. It’s so easy to keep your styling and furniture simple when you’re playing with color in such a creative, special way. I’m especially drawn to these spaces because, at their core, they’re super neutral – white walls, beige floors – but they’re totally amped up by the interaction between the curtains and the main furniture pieces.
 design by mendelson group
Here’s one for my most risk-averse folks – one big hit (the upholstered stripe) and 3 little supplementing color infusions (the chair, the blanket, and the art – a true chartreuse-meets-neutral piece!). I’m doubly attracted to this because of the use of brass in the lighting and in the coffee table (since, uh, “whining about how brass goes with everything” was kind of the impetus for this whole exploration).

 left: design by jeffrey bilhuber, via frederic | right: source unknown
Nothing says “I’m refined, but I also like to party” quite like filling your home with drop-dead gorgeous antiques and then lacquering your ceiling in a punchy highlighter tone. It’s playful and approachable – you can tell that someone warm and fun lives here, you know?
I’ve had this bathroom pinned forever, too. The lucite legs on this console sink! This strip of chartreuse above the picture moulding! That marble flooring! I’m 99% sure this was pulled from a book (image searches just take me back to Pinterest, which feels criminal) so if anyone recognizes this shot, please help a girl out – I GOTTA buy this book.

 design by erik kenneth staalberg, photo by esteban cortez, via apartment therapy | from grab a drink and come explore this ehd stylist’s treasure filled living room
Last but not least – as promised!!! – is a real-life before and after. You may be familiar with the image on the right from Erik’s living room reveal, but this may be the first time you’ve ever seen the image on the left – it’s from his 2017 Apartment Therapy House Tour.
The chartreuse paint adds so much depth and character and life, right? The room on the left is stunning (and it’s still incredibly light and bright inspiration, if you’re looking for that in your home!) but MAN. That simple switch to green just makes it feel finished and polished – it’s so freakin’ beautiful. ERIK, YOU’RE MY INSPIRATION IN ALL THINGS.
 so…let’s try this again (we’ll do it better this time)
So, sweet pals – HAVE I SWAYED YOU? (It’s okay if you say no – my mom’s response to my color decision was a simple “That’s crazy.”) I’m a firm believer in painting last, so we’ll see how my paint swatches play with all of my furniture once it’s delivered.
In any case, I hope that documenting this overwrought, unnecessarily painstaking process helps someone else – we’re going to finish this bedroom project together and you’re going to know every single thought that’s racing in my smooth, egg-like brain while it all goes down. I mean…it can’t get worse than my neon monstrosity, right? (And if it does, at least you’ll have an interesting, slow-motion train wreck to watch.) LET’S CHAT. xx
Opening Image Credits: Design by Brockschmidt and Coleman | Photo by Simon Watson | via Chairish
The post Caitlin NEEDS To Externally Process Her Feelings About Chartreuse (Is It A New Neutral?) appeared first on Emily Henderson.


March 14, 2022
The “Mosaic Tile” Journey And How It Took Me 11 Months Of “Designing” To Land On Something Totally Classic

If I were charging myself my hourly rate I would have billed/spent around $12,500 in design time for sunroom mosaic floor, followed by quickly firing. That’s 50 hours at $250 and is easily how many hours I put into this endeavor. You see copying or applying something you’ve seen before, even if it’s just classic, is just too easy at times especially when, say, if you are in lockdown in early 2021 dreaming of your future home. Even if I were in a hurry I like to use my own home as an experimental lab, and doing something too classic feels like a missed opportunity to challenge myself (and show my skills to the world). And I’m not alone, many designers obsess about how to reinvent a classic in all art forms. Sometimes it’s worth it (that stained glass from Fig House is a great example) but sometimes it’s not. Maybe sometimes “the classic” was actually the best route anyway and maybe you don’t need to customize everything just to prove that you can do something more special. And while what I landed on won’t have been seen before (because they’re custom colors) I think we can all agree that I spent far more time on this mosaic floor than was probably needed. And that’s ok because it was honestly so much fun and I got to deep dive and learn something new. Remember “the obstacles are part of the journey” and the creative process is super messy if you are doing it right. So today’s post is “the case of the mosaic tile – the one where I spent so much time to actually design something you’ve kinda seen before”.
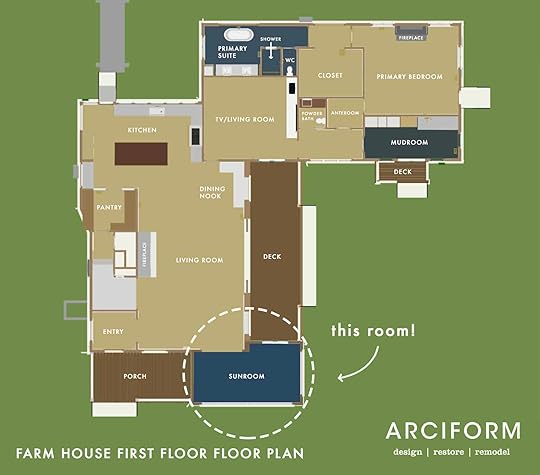
The Inspiration – My Old Patio photo by tessa neustadt | from: the finished patio (with the tile!)
Before we get started – I’m not sure if this is healthy or not but there are certain past rooms of mine that I have loved so much that I find myself wanting to recreate a new version in this home (think Elliot’s first two rooms – this one and this one). Maybe it’s “homage”, maybe nostalgia for that period of time, or maybe they were so “successful” that I want to bring that success into my new home. The tile of our patio in LA is one of them. I LOVE THAT TILE, I love that courtyard. I loved being out there every single second we lived there. So when we bought this farm I was like, “Where is my patio here?? Where is that magical space that feels old-world and eccentric? Most importantly where do I put my 7′ bird????”

Thus the “sunroom/writing studio” was born and at times I fear that we added this room onto the house for the sole purpose of me getting that tile moment that my heart and eyes wanted so badly. Sure, I could have put it in a bathroom but it wouldn’t have gotten the public attention it deserved. I knew that I didn’t want the kitchen to have this busyness and the dogs didn’t deserve this splurge in the mudroom. This room, since it’s an addition, can be its own style/moment, like a conservatory/sunroom styled with plants, for summertime dinners, meetings, photoshoots, and it’s where I’ll write/design/blog during the day. There is nothing about this room that is “shaker” but it honestly feels separate from the house (different window pattern, different exterior material and it even steps down). I CAN’T WAIT.
So with that patio inspiration in mind, I wanted to come up with this house’s version of my favorite outdoor space. I knew I wanted a larger pattern and I know this is shocking but I was leaning towards the oft-overlooked color combination of, are you sitting down? Blue and white. It’s my “Anna Wintour black dress and big sunglasses” uniform and I’m comfortable with it.
So I obviously asked myself “what is the farmhouse/Victorian version of that tile pattern?’ And knowing that I was working with Pratt and Larsen the challenge became what new pattern could I make with all of their classic tile shapes? Like an evil mad designer from a marvel movie I thought, hands wringing, I will create a new pattern the world has never seen before!! (said every designer, ever before realizing that, spoiler, most things have been done).
So I did what all internet famous designers do, I googled “Victorian patterned tile floor” and my screen was once again flooded with intricate old-world patterns. Most of them are on the busier side which I love but don’t want. I wanted a fresh take on it, and something that (at the time) felt more appropriate for a farm.
Wanted: A “Farm-Inspired” Mosaic Tile Floor…But, like, one that isn’t dorky. And that, my friends, can be very tricky and risky. Of course, there are farm motifs that make sense – plaids, stripes, and florals, but I didn’t want it to be lame! Then I had another aha moment… Quilts!!! I love quilts!
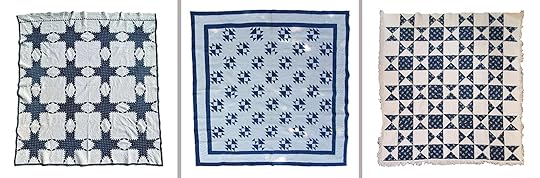
19thc Fine Blue & White Feathered Star Quilt | 19Thc Teal Calico & White Shoe Fly Quilt | Antique Quilt, Mid-19th Century Blue Resist Eight Point Stars
Instantly I was like ooh, that’s so appropriate and could it be done? Of course! The below are “star quilt-inspired Victorian floor patterns” and they are indeed awesome.
 Wait… How Expensive Could This Risk/Mistake Be?
Glad you asked because we aren’t shopping for scrunchies if you know what I mean. Installing a mosaic tile will be extremely expensive. We don’t have a quote yet but we are talking between $5-10k just for this room. It was always a tile install I had planned to splurge on (and since it’s my writing/design studio I can write off a large percentage of it) but even so, it’s expensive and it makes a normal pattern decision even weightier. FURTHERMORE, how much is it to potentially replace the tile if it looks bad? Answer: EXTREMELY expensive. Like a year of gut punches. I’d have to change my profile pic on every platform to the hand-to-face emoji. Tile is the most expensive “hard finish” to replace if you get it wrong. It’s not “switching out a faucet” or a sconce. It requires a very messy demo process that is full of waste. I applaud all of you who take tile risks, but in an older home, I’m just VERY nervous to do something risky. I’m not proud of this cowardice, and I do think there are other places I’m willing to take tile risks… but not in a 12’x17′ room that I’ll be spending 6 hours a day in.
Meanwhile, I had gotten all the tile shapes from Pratt and Larson and it was time to “play puzzle” on the floor of my office/loft at the mountain house. This first photo documentation of this is dated April 7th, 2021. Almost 1 year ago.
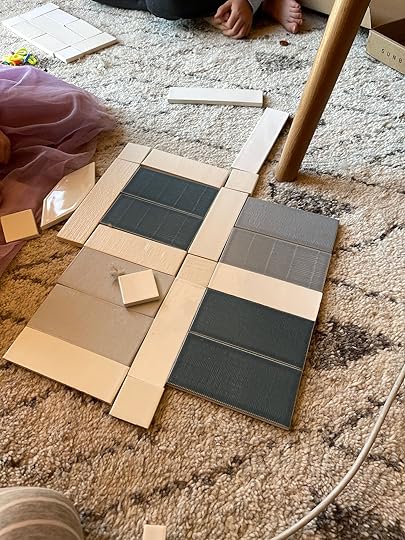


I experimented with a “plaid”, a broken stripe, and a mixed checkered pattern. None felt right. Ultimately I gravitated to most was the picket shape and forming flowers with it, with a contrasting color as the spacers between.

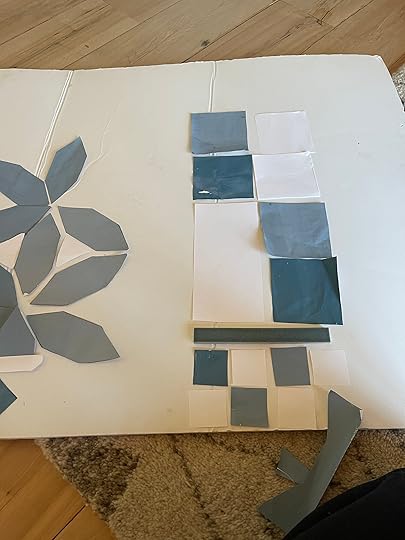

I tried it in white with blue squares and blue with white squares, both with a Victorian border. This became VERY exciting to me and I thought I had absolutely nailed it. I love flowers so much so that I named the blog originally “The Brass Petal” (and fun fact, I actually wish I never had changed it to my name – word of warning). So a flower-shaped mosaic tile? YES!!!! EUREKA!!!!!!
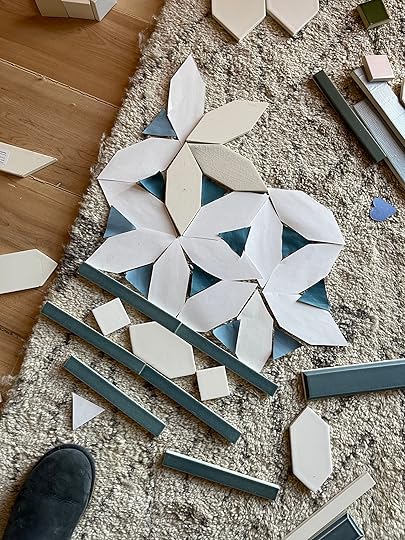
So I did what any professional designer does in 2021, I had my kids paint different blue tones on paper and cut out the “tile” so that I could play with the repeat on a larger scale. If only there were a way via technology that I could have gotten a visual …
TBH it was still lockdown and it’s not that I was bored per se, but with the kids not in school it was a super fun way to get them involved in the design and do “arts and crafts with mama”. And it was super helpful to see it repeated over and over. Until …..
So, confident as a cucumber (?) in my never been seen before mosaic floor pattern, I sent the specs of the tile to a magical person (Stephyn) who knows “computer programs” (chief architect) to render it out in the space, mostly to calculate tile take-offs (square footage per tile) because we were that sure.

HUH. Our first reaction was not a “hell yes”.
HMM…. still nervous.

We all had the exact same reaction. Uh, no. And listen, Stephyn didn’t finish rendering it out because I think they had a sense that this wasn’t going to be a “yes”. Looking back, I think that renderings are very very hard to get a sense of how it will be in IRL, especially when it comes to texture. How could I love something so much in person, feel so confident in person but then have an immediate negative reaction once rendered out? IDK. It’s frustrating. Sometimes I feel like I should have just gone with it and it would have been beautiful. But this render made it look like polka dots, not flowers and too much white. But this render doesn’t show grout or texture of the tile. That’s all to say that maybe it would have still been awesome, but none of us felt confident to take the risk. I do want to take more risks going forward, but for our permanent residence, I would hate to be confronted daily by a mistake (thinking I’ll take more risks in the Victorian house on our property once we tackle that).
So we went back to the drawing board, wanting a larger scale pattern because we think that that was what we loved so much about the patio. But most companies, Pratt and Larson, included don’t make ceramic tiles larger than 8″ because of waste and fragility. So we created a “square” pattern that is bigger with 2×6 + 2×4 + 2×2 (all separate tiles). This is a classic tile that I did not invent.
We saw it rendered out to mixed reactions. I really liked it but thought it was too, like, regal or something for this house. Too much, too fancy, too formal, not the right vibe. Brian and Anne totally disagreed with me. And needing the actually pull the trigger soon (it’s a 4 month lead time and we were past our deadline) I said OK, thinking that I was wrong.

Then Brian and I went into Pratt and Larson to finalize our kitchen tile and show Suzanne (the wonderful head of marketing who I’ve worked with for years). After going through the rest of the tile choices that were already chosen, we showed her this mosaic flooring and all three of us at the same time had the same reaction – this is a different house. Now we always knew that this room was going to feel different than the rest, but I still wanted an element of simplicity in here – and the ornamental/intricate pattern really made it feel fancy, not classic.
So that day at Pratt and Larson, Brian and I pulled the trigger on the classic diamond shape pattern, in our custom blue that is so happy without being too bold, with a Victorian-style border.

How do I feel about it? GOOD. What you can’t see here is that the border is about 8″ wide so it’s thicker than the renderings, and it includes a light blue/gray accent in it. So it’s more substantial than seen here and it has another tone which we love. Do I wish that I had created something that no one has ever seen? YAH. But I KNOW that this will not date, that this is classic and by keeping the pattern pulled back into just a diamond it still feels restrained and easy for your eye to understand (which is always important to me these days). I find that things that are busy make me mentally slightly more exhausted I think because my brain is trying to understand what is going on. I’m not sure if this is an age thing, a personality type, or a design philosophy that is rooted in truth, but I feel better, more settled in spaces that are less busy. Don’t get me wrong – this floor pattern is BUSY but the experience we want to have in this room is more fun – for dinner parties, creative business meetings, or where I write/design so that added dose of energy is welcomed. I’m just glad we didn’t go overboard. Plus, this install will be probably 30% less than the previous design since it’s just 2 tiles back and forth versus a more intricate pattern.
So that’s the mosaic tile journey. I’m finding myself doing this more and more – going further just to pull it back. And I’m fine with it. It’s like exercising my creativity but being secure in the fact that it may not be what I actually want in life right now for this house anyway. It also aligns with my ethos of designing something once, and for the long term. I just want to make sure that I’m not always being too safe or boring. So my goal (as it has been) is to keep the permanent hard finishes (flooring, tile, lighting, and plumbing) on the safer side, with furniture/decor, art, and textiles with more risks – but only if they make sense for comfort and function. IT’S HARD Y’ALL.  Thanks for indulging me in my tile journey. I’m having a SERIOUS blast and thanks to Anne and Stephyn for trying out all these different renders to land where we did.
Opening Image Credits: Design by Alessandro Agrati | Photo by Elena Rosignoli | via Vogue Italia
The post The “Mosaic Tile” Journey And How It Took Me 11 Months Of “Designing” To Land On Something Totally Classic appeared first on Emily Henderson.
March 13, 2022
The Link Up: Mallory’s Comfy Clogs, Jess’ Favorite New Pants, And What’s Hopefully The Future Of The Restaurant Industry

Like a dear friend you can always depend on, we are here with The Link Up. We hope you had as good of a week as possible and did something just for you. If you didn’t… then let’s get on that this next week, ya? Even just a walk with some music playing can do wonders. Ok, now let’s link!
This week’s home tour has our names written all of it. We clearly didn’t design it, Meghan Eisenberg and Jeff Troyer were the creative geniuses, but boy does it have everything we love – floral sofas, vintage chairs, cool art, the perfect dose of eclectic English granny, the green bathroom of our dreams, etc, etc. Just go take a look. We promise it’s stunning.
From Emily: Portland’s new best restaurant (Cafe Ollie) is also co-founded by one of my closest friends (talking about you Dirks) and is employee-owned. But most importantly it’s INCREDIBLY DELICIOUS. Ryan co-founded a restaurant with a few other highly respected Portland restaurant folks during the Pandemic with the super optimistic goal of having it be the first employee owned restaurant in Portland (and maybe even in America). Having worked myself in restaurants/bars from 15 – 25 years old, I was so curious and impressed by this business model. Basically, ALL employees will receive 50% of the profits, allocated by how much they work and how long they’ve been there. And yes this of course extends to the back of the house – line cooks, dishwashers, bussers – EVERYONE. Obviously, the goal is to democratize the restaurant industry more and pay all restaurant workers a living wage (they have a generous hourly, not tips – just a 20% service fee to all tables). So yes, I feel very good supporting it. In fact, last week I supported it TWICE because it was so good. My recommendations are the beef tartare (crazy, crazy good), the Rotini pasta (rolled up like a cinnamon roll), the spring greens/fennel salad (Sara said it was the best salad she’s ever had), and oh my lord the chocolate cake was INSANE. I’ve never really freaked out over a cake before, but we all couldn’t believe how good it was. Also, the meatballs were divine. We have yet to try the pizza, but it’s what they are known for. Basically, it was so good that I brought Brian back 3 nights later and we tried everything else. It was all delicious, great wine and cocktails and of course wonderful service. Y’all, head to Cafe Ollie if you are in Portland. Good people making straight-up DELICIOUS food. xx
Former EHD alum, Ariel Fulmer designed The Try Guy’s studio and we love it!! It’s full of color, pattern, but very cool and professional. Congrats, Ariel!
From Mallory: I strained my calf this week (booo) and basically can’t straighten my leg if my foot is flat on the ground so that means I literally have to wear heels when I go anywhere because it’s the only type of shoe that doesn’t make it hurt when I walk (it’s cool to get injured and have to wear heels lol). I’ve been resorting to my comfy clogs and I realized I missed wearing them SO much. They have a rubber sole so they don’t slip around when you walk (like a lot of clogs do) and they have a foamy lining so walking is actually comfortable. PLUS they have an ankle strap, so if you’re klutzy (or just injured) like me, this is an AWESOME shoe…I’ve had them for years and have worn them every day this week without being uncomfortable!!
From Ryann: When I work out, I want to sweat A LOT. I want to feel like I am getting all the toxins out of my body, but I don’t sweat that easily (I just turn bright red :)). For weeks, I was seeing waist trimmers all over my Tik Tok feed and since I started going to the gym for the first time ever a month ago, I decided to try one out. I love this one so much and wear it every time I work out and sometimes just around the house while I am doing chores. As soon as you put it on you can feel it heating up and when you take it off, you are soaking wet. It also acts as a back support and helps with my posture while running.
From Jess: I did a little bit of shopping last weekend and wanted to share with you what I got because I am PUMPED about them. This mesh patterned turtleneck top is exactly what I’ve been looking for. I’m a real simple, neutral top kinda gal, and while that’s great, I want to mix in some more fun. I will warn you that it’s a little more see-through than it looks on the model (which makes it a fun secret sexy top) and I have the “RED” one. It doesn’t have any red in it so not sure why that’s the name. Actually, if you read my design inspo post this week, the fact that I bought this top is real on the nose. Then I got these wide-leg cognac-colored pants and I don’t want to take them off. They are chic, super lightweight, and soft. I did need to get them hemmed but I couldn’t love them more. Oh, and when you go to the site they are less shiny in person.
From Caitlin: Airbnb waived all their fees in Ukraine, so people have been booking AirBnbs in Kyiv (and around the country) with a little note that they’re not coming and just wanted to support and those funds have been going straight into the pockets of Ukrainian folks! Pretty easy way to help.
That’s it for today. Have a great rest of your day and see you tomorrow with a fun farmhouse update!
Opening Image Credits: Design by Meghan Eisenberg and Jeff Troyer | Photo by Haris Kenjar | via Architectural Digest
The post The Link Up: Mallory’s Comfy Clogs, Jess’ Favorite New Pants, And What’s Hopefully The Future Of The Restaurant Industry appeared first on Emily Henderson.
March 12, 2022
4 Easy To Wear (Read: Comfortable) Dress Trends + Great Shoppable Picks


Here’s a hot debate: Are all dresses easy to wear? The whole single garment thing should point to yes, but it’s not that simple. I think for a dress to be easy to wear it needs to be at least two of the following: 1. Non constricting so you can move around, eat, and live your life unencumbered. 2. Patterned, colorful, OR structural so on its own it feels like a cute pulled-together outfit. 3. Bra-friendly or easy to wear without a bra. (At least for me, as a larger chested woman, I tend to want some shelf support whether it’s built into the dress or not). 4. Bonus points if it’s a fabric that doesn’t wrinkle easily (i.e. stay far away from linen unless you like the wrinkle look – which I actually DO but I think I am in the minority here). Is that too much to ask for?? Maybe. SO that is why the EHD team worked together to find these easy to wear, on trend dresses for Spring.
Trend #1: The Puff Sleeve
1. Women’s Plus Size Balloon Long Sleeve Dress | 2. Women’s Short Sleeve A-Line Dress | 3. The Meadow Dress | 4. The Pleated Ravine Dress | 5. Black V Neck Dress | 6. Linen-Blend Sophia Midi Dress | 7. Floral Puff Sleeve Dress | 8. Amber Cover-Up Midi Dress | 9. Flannel Lucie V-Neck Smocked Mini Dress
Emily Henderson is the queen of easy-to-wear dresses as you may know, and is no stranger to the puff sleeve. From Emily: “Remember last year when I bought that blue/white striped dress from The Great then proceeded to wear it (and continue to) 30-40 times in one summer/fall? Well, this (#4) is this year’s version. Delicate buttons show off that decolletage, while the puff sleeves distract from my “Covid 10″ if you know what I mean. And that floral is so pretty but not tooooo floral – just spring and summer enough to make me happy without making me feel like a little girl.”
Well, I am sold. I am also very drawn to #2 and #3 of course because I am still a fan of the prairie trend. I just want a dress that will make me feel like frolicking through a meadow. You know, normal stuff.
Trend #2: The Roomy Denim Dress
1. Voluminous Denim Mini Dress | 2. Tie-Belt Denim Dress | 3. Denim Babydoll Shirtdress | 4. Tie-Waist Shirtdress | 5. Time After Time Denim Dress | 6. Tie-Sleeve Button-Front Dress | 7. Ecru Denim Button-Up Dress| 8. Denim Dress | 9. Hannah Denim Mini Dress
You might not think denim and comfort are synonymous but these dresses might just change your mind. They are all roomy or have good amount of stretch so you won’t feel like you are wearing a denim straight jacket. I love the structured sleeve denim trend so I particularly love #1 and #6. #5 is also really catching my eye. Which one is your favorite?
Trend #3: The Maxi Floral
1. Floral-Print 3/4-Sleeve Tie-Neck Maxi Swing Dress | 2. Floral Puff-Sleeved Dress | 3. Cactus Flower Embroidered Cotton Dress | 4. Mixed Pineapple Garden Wrap Dress | 5. Ultraviolet Dress | 6. Elbow Length Sleeve Print Tiered Maxi Dress | 7. Embroidered V-Neck Maxi Dress | 8. Long-Sleeve Tiered Floral Midi Swing Dress | 9. White Spring Bananas Maxi Dress
(Miranda Priestly voice) Florals for spring? Groundbreaking. But seriously, if you are looking for a VERY easy-to-throw on-and-go dress that still looks cute and stylish, any of these picks will hit that mark. If you love pattern and bold color, #4 and #9 are great picks from one of our favorite brands Farm Rio (Caitlin is basically their spokesperson). #1, #5 and #8 are great examples of the micro floral trend and I am a fan.
Trend #4: The Transitional
1. Suelita Dress | 2. Women’s Balloon 3/4 Sleeve Eyelet Dress | 3. Eshal Plunge Neck Dress | 4. The Sage Dress | 5. Sadie Solid Maxi Dress | 6. All Day Long Midi T-Shirt Dress | 7. Jacquard-Weave Shirt Dress | 8. That’s Your Stripe Belted Dress | 9. Sundry Pull Sleeve Dress
A transitional dress is one you could wear in winter with layers or in spring with a light sweater if needed. They are simple but cute and the key with all of these picks is they are flowy and not restricting. I love #5 that has a button-front silhouette with pleating at top and a very cute pin stripe detail. I still love the shirt dress trend so #7 and #8 are great, too. Which is your favorite?
That is all from team EHD. Happy Saturday and happy shopping!
Opener Image Credit: Photo by Veronica Crawford | From: 51 Affordable Spring Dresses (& 1 Awesome Jumper I Couldn’t Resist)
The post 4 Easy To Wear (Read: Comfortable) Dress Trends + Great Shoppable Picks appeared first on Emily Henderson.
March 11, 2022
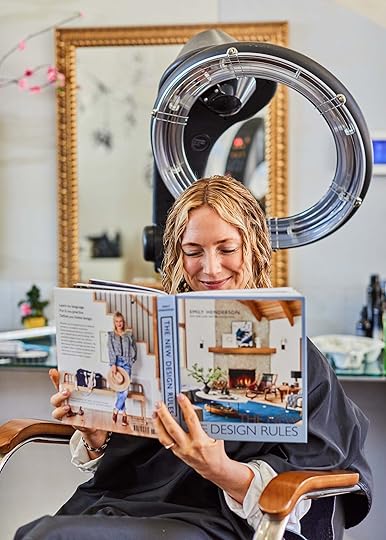
How To Make Your Curly Hair Look Cool (+ Learning How To Embrace My Very Naturally Curly Hair)

I have very, very, very curly hair – I had no idea. Sure I’ve let it air dry before but it always just looked so bad that I almost didn’t see it as curly, but more big and frizzy. Obviously, I now know that this is because I wasn’t using the right product or process to let these golden ringlets shine. But curly hair is special and when done right I think looks far cooler than a blowout – no matter what society tells me. So yes I had to be re-programmed from thinking that blown out smooth/ wavy hair is how I look “good”, and likely I would have gone on forever blowing it out once or twice a week except for these TWO facts:
It rains a lot in the winter in Portland and even when it’s not raining it’s humid, so there is no point in blowing your hair out if you are going to say, walk the dogs 2 hours a day (which has become my winter anti-depressant). I’m desperate for my hair to be long and healthy, and heat styling it is so damaging and causes breakage.So my options are to A. never leave the house or B. figure out how to style my curls to look good.
 My Curly Hair Fears:
 I’m just going to say it because it’s my truth: I was scared that shoulder-length curly blonde hair would read as “middle-aged MOM”. Which I am. I’m in that phase of life where 1/2 the time I have the mature perspective to not consciously chase “youth” or care if I look “cool” but y’all, but the other 1/2? I still do. I want to look as young as I feel (27 years old) and like I have a sense of style because I do. But I am not Keri Russel in year one of Felicity. I’m a 42-year-old mom who mostly wears athleisure, a baseball hat, and has a super messy car. So when I do my hair, a wavy blowout is what society has deemed is “pretty” and I know that it makes me feel/look good. We all know that what is actually “cool” is not only embracing who you are, but feeling confident in that. And I was neither embracing nor feeling confident with my curls 2 weeks ago – thus the blowout. We all have a lot of deprogramming to do. I don’t want Elliot to have the same thoughts feelings about her hair/skin as I have and I don’t want her to look at herself naked in the mirror with the same thoughts that I do. It’s part of a larger conversation that most people in their 30s, 40s, and 50s find themselves in – this “how do I look on the outside the way I feel on the inside (young, cool, fun) without giving in to societies dubious expectation of women, shoved upon us via marketing, celebrity culture, and the patriarchy??” I still get lashes extended, skin self-tanned, and gray hair covered (amongst other things tbh) but maybe this is step #1 to self-acceptance? Learning how to style my curly hair to look cool, thus getting closer to embracing myself how I naturally am. I mean, it’s worth a shot.
Janine Jarmon is a friend of mine who owns a salon in LA (and fun fact came in second on Bravo’s Sheer Genius around the same time I was on DesignStar). She has been working for years on behalf of curly-headed folks (of all ethnicities) to create a great product and method. It’s called Curl Cult and I’m an official member now. So with my humid atmosphere and with her new product, it was time for her to teach me how to make my curly hair look cool two different ways.
THE EASY, EVERYDAY ROUTINEThe wash and let air dry thing always mystified me as mine was more “wash and prepare yourself to look like a lion for the rest of the day”. But Janine knew that it was a matter of product and method. So here is what I do most days when I have time to let it air dry.
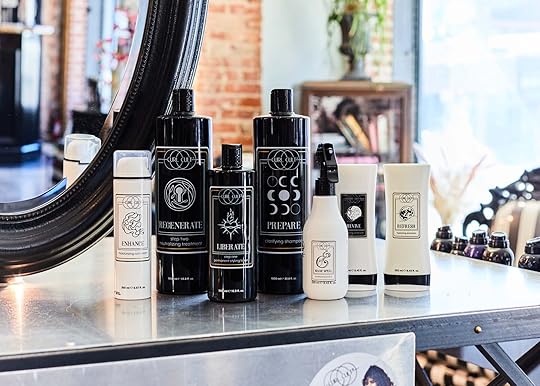
STEP 1: WASH/CONDITION WITH REFRESH SHAMPOO & REVIVE CONDITIONER
Refresh – Hydrating Shampoo| Revive – Hydrating Conditioner
First, wash your hair start with a quarter size of the Refresh shampoo (if you have curly hair you need curly hair shampoo). You may need to rinse and repeat up to 2 times. This is a sulfate-free shampoo so don’t look for suds (that’s what sulfates help produce) instead look for the hair to feel clean. Follow with a silver dollar amount of the conditioner and apply to the middle of your hair to the ends and rinse.
This is pretty standard procedure – just with good product that is paraben & sulfate surfactant-free. Janine told us that a lot of shampoos can actually be overly hydrating, meaning that it is not water-soluble. With straight hair that can be okay and really helpful to keep it straight, but with curly hair, you need water-soluble stuff so that it reactivates the curls and doesn’t just build up on your hair. FYI, Curly hair is naturally dryer than most, so Janine recommends that you don’t wash your hair as much (she washes hers once a week). I work out every day so I was washing my hair almost every day but now I just rinse and condition and then wash with shampoo once or twice a week per Janine’s advice. Basically, frequent washing with curly hair agitates the cuticle layer and makes your hair frizzier. Whoops.
STEP 2: PAT DRY WITH 100% COTTON TOWEL
Whatever you do, do NOT use a terrycloth towel to dry your hair. Janine used a flour sack type towel which is delicate, lightweight, and absorbent. You can also use a microfiber towel or a cotton T-shirt, so don’t think you need to go out and buy new towels.
 STEP 3: SPRAY WITH MAGIC SPELL
Magic Spell is their leave-in conditioner spray that you can use every day to refresh your curls. If you are spraying it after a shower, it’s best when you spray it on soaking wet hair but you can also spray it on dry hair throughout the day (I do). This leave-in conditioner is not just for curly hair folks. You can use it on any type of hair because it’s a natural heat protectant and helps prime your hair for any other product you put on top of it. It is vegan and paraben-free so it’s safe to use on all hair and on kid’s hair too (Birdie uses it too!). This stuff is AWESOME. I have used it even on the days that I do blow my hair out and it detangles and conditions like no other.
STEP 4: COMB WITH WIDE TOOTH COMB

For my kind of curls, without some detangling it will get VERY frizzy so Janine taught me to use a wide-tooth comb like so. You can also use a wet brush but not a regular brush as that will amplify the frizz. I know that most of you curly hair’d ladies know how specific the process is but I’m just now learning it and boy is it specific.
STEP 5: APPLY CURL CREAM

Enhance – Moisturizing Curl Cream
To help support the curls, use Curl Cream which enhances and controls natural curls. Use 2-4 pumps, rub on your hands like lotion and then with a clawing motion apply throughout your hair to the ends. With a curl-enhancing product like this, you don’t need it on your roots, just where your curls start. This product you shouldn’t use every day but more so every other day and ONLY on very wet hair.
STEP 6: LET AIR DRY
That’s it? I just let it dry? So I sat there for 3 hours while Ryann got a perm (coming at you soon) and waited to see what would happen.
STEP 7: ONCE DRY, SHAKE IT OUT AND USE FINGERS TO MASSAGE ROOTS TO GIVE MORE VOLUME
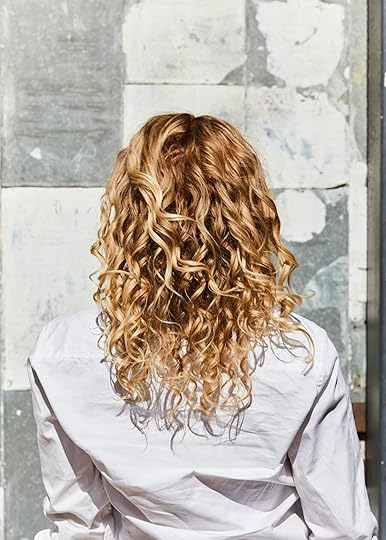
CHECK OUT THOSE CURLS!!! GAH! Can you believe it?


I mean, the difference is actually wild. Clearly, the right products and technique does wonders.
THE ELEVATED SCULPTED LOOKNow before I left Janine wanted to teach me how to do the “sculpted look” which is basically just bigger curls by using a brush to control the ringlets. This is higher maintenance but boy did I love the look.
REPEAT STEPS 1-5


Steps 1-5 are the same, remember the product and process is just so important.
STEP 6: SEPARATE INTO SECTIONS
Here’s where it gets more complicated, but it’s still very doable. You have to put it into sections and just work with one strand at a time.
STEP 7: APPLY THE SCULPTING TECHNIQUE

The sculpting technique is huge on TikTok, guys. What you do is feed strands of hair through the brush so it twirls and also perfectly detangles it. (This is step is probably better explained on camera, so definitely check out the video below (just wait for the ad to play).


Here’s me trying it out which took me a second to figure out. SO fun. It is a very involved process as you have to go strand by strand but the result is so pretty (as you’ll see ;)).

It’s like training your curls to create this unbelievable shape – which curly hair can do easily (whereas straight hair can’t).

Now Janine helped me in the back, where it is harder to do, but just takes some practice. At the front, I sculpted it away from my face (parted in the middle) because I love that look.
STEP 7: LET AIR DRY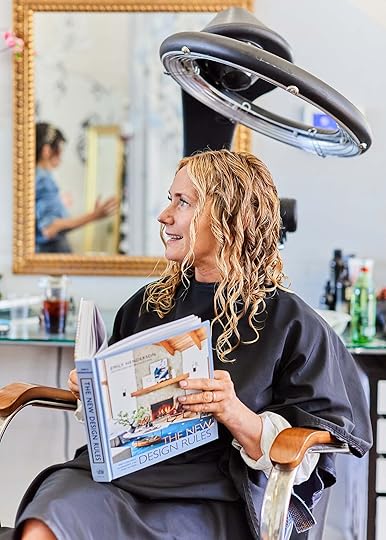
The key is to not touch the sculpted curls AT ALL. This part was killing me. You must just sit and wait for them to air dry so I picked up a gripping new thriller.

My hair takes a long time to dry (especially underneath) so I think this was an hour under the heat lamp or 2 hours normal.
STEP 8: SHAKE OUT THE CURLS


I was excited and nervous to see how it would look (we did this look first, with the everyday look after).


I LOVED IT and more importantly, I couldn’t believe this was mine and ZERO styling beyond the sculpting and then using my fingers to comb it out (i.e. no product after, no curling irons – nothing). And the best part is that both hairdos get better every day – just like a blowout day 2 is better than day 1.


Day 2, 3, and 4 I just used the conditioning spritz and it controlled the frizz and it didn’t make it curlier – just less frizzy which I was happy about. I actually loved the sculpted look more but it was more work.

 SO, WHICH ONE DO I LIKE MORE?
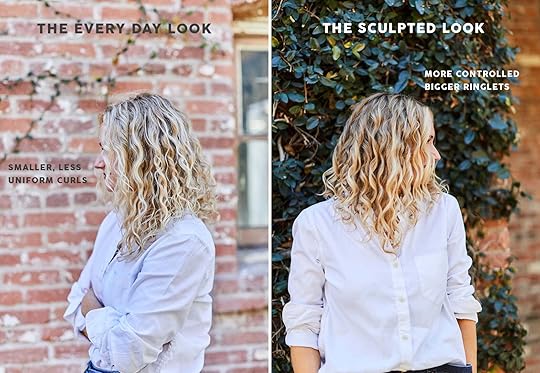
I honestly love both – I think technically the sculpted is my preference but it’s not that much better to sacrifice the time. This does make me want to go blonder though Since I learned this, I wore it curly for the first 10 days but we were in Palm Springs and it was dry out there so it looked AWESOME. My main/only issue with it is that it takes a while for my hair to air dry so that if I have a 9 am Zoom I have to shower at 6:30 am for it to dry and loosened up by then. By 2 pm it looks awesome if I’ve done it right. So much respect for Janine for spending the years and likely a lot of money in research and development on this project.
Thank you, Janine!!!! All of us naturally curly-haired ladies are better because of you. Janine is giving us 10% off if you purchase the products through any of the links in this post (the price is already marked down). I seriously love every product and use the leave-in conditioner almost every day.
Photos by Sara Ligorria-Tramp
The post How To Make Your Curly Hair Look Cool (+ Learning How To Embrace My Very Naturally Curly Hair) appeared first on Emily Henderson.
March 10, 2022
Sara’s Galley Kitchen “Update” Turned Into A Full Renovation (And The Result Is Well Worth The Wait)

This reveal wouldn’t be possible without the support of a handful of amazing brands, who partnered with us. Thanks to KitchenAid, Caesarstone, Kokeena, and Rejuvenation for helping this kitchen come to life.
I’d like to open this blog post with a quote…
“And it makes more sense to hustle and get it all done. It’s a really small kitchen, and he [my dad] thinks it will only be a 5-week project.” – Sara Ligorria-Tramp, blog post dated 5.26.20
Well. Here we are folks. The end of the line. Wrap it up. We’re sending Bilbo off to the Undying Lands. It’s time to reveal my kitchen renovation that started exactly 1 year, 9 months, and 15 days ago. I am 105% ready to let your eyeballs scroll all over this kitchen. But first, a little trip down memory lane.

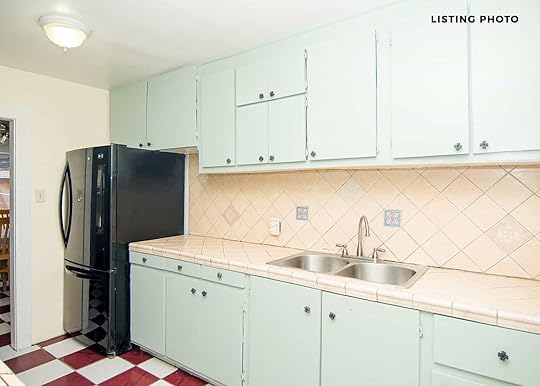
It was a kitchen that was literally crumbling apart at the grout lines. There were holes in the walls, at least three different paint colors between the cabinets, walls, and trim, and more than a few shelves and drawers that were falling apart. I have a hard time remembering the kitchen this way. It honestly feels like a lifetime ago. Time’s gotten weird in the last few years… gooey almost.
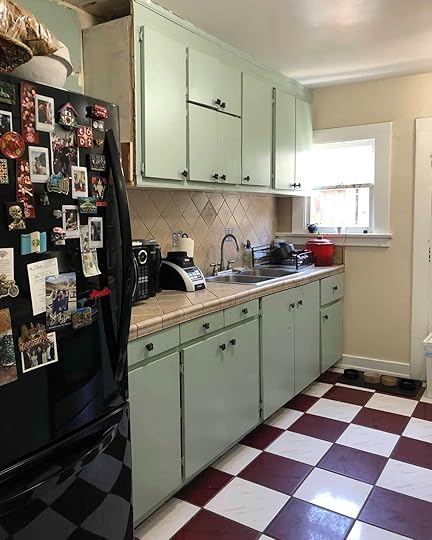
So, back in May of 2020 I thought “hey, let’s make this a challenge and update our kitchen, and let’s set a budget of $3k to do it, and, you know… see how far we get.” Oh, young me. Still so self-unaware. That idea snowballed fast (as most of my home projects do) into “hey, let’s renovate this whole kitchen, while we’re home all the time, and as every supply chain comes to a grading halt. How about that?” Here’s why – My dad was home too (a rare occurrence) since all film and TV production was on hold, and he was ready for a project.

Once we’d made the leap from well-intentioned and naive update, to fully unhinged renovation, I went down a design rabbit hole. I still love all of those above design directions. What we ended up going with was a modified version of Option #3, but with a lighter, less saturated green. And honestly, I can’t imagine my kitchen any other way. Green it was, is, and will be forever.
Forgetting all the emotional breakdowns, doubt, existential dread, and work over the past two years, I’m so happy we ripped off the bandaid and just went for it with the full renovation. Because now we have THIS…
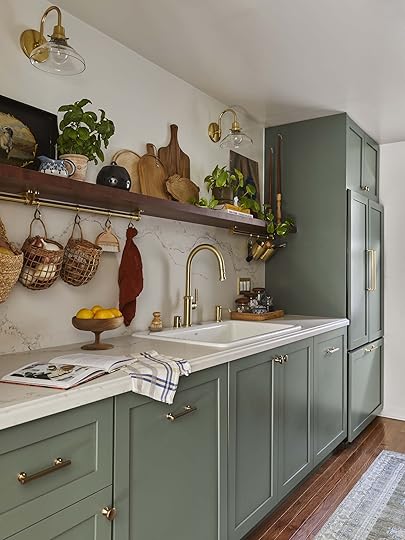
A kitchen of my dreams, that I can’t believe I get to cook in. I’ll level with you – is this what our kitchen looks like all day, every day? Yes. It is the most beautiful kitchen in the world, a dirty dish has never touched that sink, my produce is always ripe, and my counters are always clear and clean. I am the most aesthetic person in the world. Thank you for reading today’s post.
“Oh, she thinks she’s a comic…”
In fact, our kitchen does not look like this every day. Think of a shoot day like school picture day, but for interiors. You clean the space up, curate it, zhuzh it. You bring in the stylist, and the hand towel you’ve never used because it’s too beautiful, but makes you look cool. You kinda live out this fantasy of what the space could be. Seeing it at its full potential. So for today, this is the version of my kitchen I’m sharing. But because I am benevolent, I will be sharing some photos of how our kitchen actually looks (…on a clean day). Including the insides of all the cabinets and drawers. But that’s content for a different post (coming soon).
Ok. We’ve got a lot of ground to cover, so start reading faster…and check out this video we made showing the whole space (just wait for the ad to play):
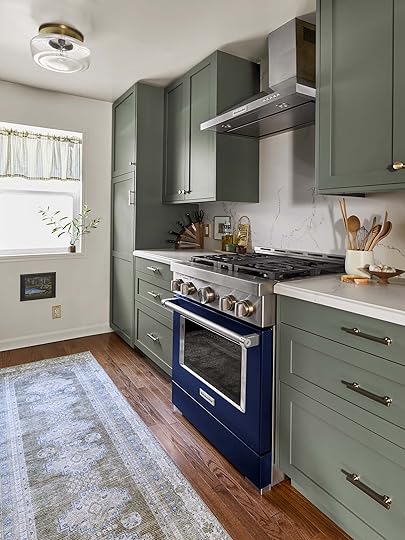
Going in alphabetical order, let’s start with the appliances. All of our major appliances (fridge, dishwasher, and range + hood) were provided by KitchenAid, and all three are a pleasure to have in our home. Emily Bowser has a KitchenAid fridge in her home, and I have always really liked the functionality of it. Plus, I already loved my KitchenAid Stand Mixer. So when it came time to choose appliances for the kitchen, they were my first choice. The range is my favorite, and is a KitchenAid 30” Commercial-Style Range. This line of ranges comes in several different colors – I have the ink blue model, which allows me to add an extra hint of color in my kitchen. After all, I am a “more is more” kinda person. It’s also just a really great range – it’s got smart capabilities so I can preheat the oven from my phone without leaving the couch, powerful burners, and an endless array of cooking capabilities. I cook at least two meals a day, so the Commercial-Style Range is a huge part of my life.
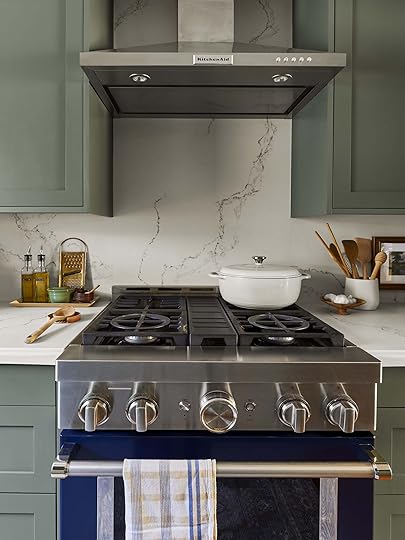

Next up is our KitchenAid, counter depth panel-ready fridge with interior dispense French doors. The freezer drawer has been the biggest upgrade in terms of food storage, and I love how spacious it is, as it lets me organize my food better.
Lastly, our KitchenAid dishwasher with panel-ready design (which blends seamlessly into our cabinets) has a third-level rack for things like spatulas, serving utensils, and measuring cups, freeing up space in the lower two racks, which helps keep our counter clear and our sink empty. And when you have a narrow kitchen, things can start feeling claustrophobic fast. Every inch of clear, clean space counts. If you’re in the market for some dreamy new appliances, check out more from KitchenAid(R) Suite Collections.

Cabinet Fronts | Brass Hardware
Next up – They are beauty, they are grace, they are our cabinet fronts by Kokeena in collaboration with Townsend Interiors in “Moss Green.” Solid wood, smoothly lacquered, and ready to pop right onto our self-installed Ikea cabinets. We went with their “Modern English” style cabinet fronts – essentially a shaker style cabinet to vibe with our more traditional style home. What drew me to these fine pieces of lacquered craftsmanship? Well, first of all they were green. The most lovely, perfect shade of warm, dark olive, cozy cottage green. They are also very nice people who run this small business out in Portland, and made the whole custom cabinetry front process very lovely.


And I can tell you that after about a year, they’re still holding up great. Yes. It took that long to get in all the finishing touches. But that also means that we’ve lived with our kitchen, and almost everything in it, for about a year. So I really do know how everything is holding up. And our beautiful cabinet fronts are checking all the boxes: gorgeous (duh), easily cleanable, and durable. We also used Kokeena’s brass hardware on all of the fronts, minus the fridge.
I really feel like the cabinet colors and the hardware shape keep this kitchen from feeling too modern, and really grounds the space in some vintage *emotions*.

Speaking of emotions, this photo gives me lots of them. Mostly because this kitchen was such a labor of love, and I can remember the installation of each and every piece, down to Bowser tying that kitchen towel into the most elegant knot on that tiny brass hook. But also because I feel like this kitchen really is me. Obviously the green cabinets, and brass hardware. But also the random, slightly chaotic, but cozy and lived-in feeling that I get from being in the space.


Each of those cutting boards has a personal story – The round one is a hand-me-down from Bowser, the arched one was a wedding gift from a friend, the tall one was the first nice cutting board I ever bought for myself, and the little pig was my grandmas. Does that shelf have a lot going on? Yes, but it feels warm and inviting and used. Do the brass rails and hanging baskets add a lot, visually? Definitely, but they also offer me the option of a lot more counter space by hanging items that I otherwise wouldn’t have room for. And sure, there are a lot of little things in my kitchen that probably don’t make practical sense, but they make me happy.

Window Valance | Curtain Rod | Brass Outlet Cover
Like hanging this tiny little piece of art below my kitchen window, so my cats can also enjoy my vintage oil painting obsession while they eat – which is normally right under the window (painting gifted to me by the lovely Rosa Beltran after I photographed the CLAD Home storefront).


Brass Switchplate | Rattan Tray | Honey Jar | Countertop
Our countertops and backsplash are from Caesarstone, in the color Statuario Nuvo with a honed finish. These counters were probably the smartest choice we made in our kitchen – they have never chipped, cracked, stained, or warped in any which way. They feel oh so velvety smooth, and I love rolling out dough on them. And they look so good. The veining throughout is delicate, the color is just slightly creamy. We went with natural stone in our bathroom, and I’m kinda wishing we had used Caesarstone again. I dunno how much more I can recommend it.
I thought the counters were going to be a really scary part of the reno, but they were actually super easy because they were the one thing we didn’t install ourselves. I connected with a fabricator in my area that Caesarstone recommended, showed them my kitchen layout, they sent someone out to measure, they told me how much stone I would need, and Caesarstone shipped the stone directly to the fabricators. The fabricators then cut the stone, and came to install it. Considering everything else that went into this kitchen (I’m looking at you floating wood shelf), it was a gentle breeze.
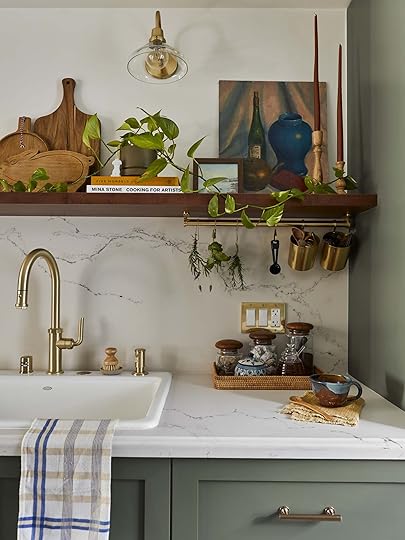
All that glitters isn’t gold, it’s brass. And it all comes from Rejuvenation. We’re talking the Eastmoreland arched wall sconce, the Foster flush mount ceiling fixtures, the Fenton outlet covers, the Brookside brass rail systems, the Descanso pull down faucet, and the matching dish soap dispenser that makes me feel very fancy. Even the window curtain rod that you can’t see in any photos, but I know is there. Beautiful, timeless, well crafted, and made right up in Portland. I like the outlet and switch plates so much, I didn’t even photoshop them out of the photos (I usually refer to outlets as the zits of walls). Also please, enjoy Emily Bowser’s aspirational herb drying station. We laughed about this, but she’s also serious about drying her own herbs and I’m a supportive friend.

Faucet | Soap Dispenser | Sink | Arched Cutting Board
This faucet and sink combo has proven wildly successful in our home – I nabbed that deeeeeep, Kholer, drop-in sink on Craigslist knowing I would need a kitchen bathtub for produce cleaning, washing out big pots, and maybe a kitty or future baby bath. Paired with our brass faucet that has a suuuuuuper long hose neck that can reach every nook and lustery enamel corner of that sink with either a gentle flow or powerful spray, there’s no contest.

Brass Bookends | KitchenAid Stand Mixer | Seagrass Woven Hanging Baskets | Rattan Hanging Baskets | Black Garlic Keeper
Ahh, we’re reaching the end. Have I talked enough about my love for chaos? Have I even mentioned that hilarious vintage painted dog tray I bought in Atlanta and drove across the country with me?? Do you understand my love for my KitchenAid Stand Mixer which I use at least once a week?! I brought that tiny blue and white pitcher (and the matching sugar bowl) back from Guatemala in my carry-on because I was scared I was going to break it. And I found that wood pedestal bowl at a thrift store in Oregon on the road trip where Macauley proposed to me. THIS KITCHEN HAS EMOTIONS & MEMORIES. Unhinged ones, clearly. But they run deep.
That basil will probably die pretty soon though, so I’m trying to actually use it.
Now it’s time for everyone’s favorite section of the post – before and afters:


Are you not entertained???

WOW. WE DID IT. I revealed this kitchen (that’s me, up there), and you scrolled through this whole blog post. I think we’ve both achieved something. But now it’s time for the applause round – Thank you to my brother and dad who literally installed this kitchen with their own four hands. Thank you to Julie Rose, who took my iPad drawings and measurements and turned them into something that I could actually use. Thank you to Velinda Hellen who answered 1 billion questions, and held my hand as we measured for the floating shelf because I was terrified to get it wrong (literally came over and did it with me, and by the way V, it fit perfectly). Thank you to all the brands who believed in my vision and helped it become a reality by gifting us beautiful kitchen items – KitchenAid for the appliances, Caesarstone for the counters, Kokeena & Townsend Interiors for the cabinet fronts, and Rejuvenation for so many shiny brass things. Thank you to Emily Bowser for knotting that hand towel so perfectly (and styling everything else). Thank you to the EHD team for tolerating me, and my brand of editorial chaos. And my husband Macauley for doing this whole home renovation thing with me.

So now you’ve seen the kitchen and you feel the feelings. This post was really about how I made this kitchen feel like us. But stay tuned, because in my next kitchen post I’m gonna share how I made this kitchen work for us. AND, I’m gonna be sharing photos of what it looks like on a more normal day. Because yea, we live with a rice cooker on the counter at all times. It’s a Zojirushi. It does not live in a cabinet.
*Design and Photos by Sara Ligorria-Tramp
**Styled by Emily Bowser
The post Sara’s Galley Kitchen “Update” Turned Into A Full Renovation (And The Result Is Well Worth The Wait) appeared first on Emily Henderson.
Sara’s Kitchen “Update” Turned Into A Full Renovation (And The Result Is Well Worth The Wait)
This reveal wouldn’t be possible without the support of a handful of amazing brands, who partnered with us. Thanks to KitchenAid, Caesarstone, Kokeena, and Rejuvenation for helping this kitchen come to life.
I’d like to open this blog post with a quote…
“And it makes more sense to hustle and get it all done. It’s a really small kitchen, and he [my dad] thinks it will only be a 5 week project.” – Sara Ligorria-Tramp, blog post dated 5.26.20
Well. Here we are folks. The end of the line. Wrap it up. We’re sending Bilbo off to the Undying Lands. It’s time to reveal my kitchen renovation that started exactly 1 year, 9 months, and 15 days ago. I am 105% ready to let your eyeballs scroll all over this kitchen. But first, a little trip down memory lane.
It was a kitchen that was literally crumbling apart at the grout lines. There were holes in the walls, at least three different paint colors between the cabinets, walls, and trim, and more than a few shelves and drawers that were falling apart. I have a hard time remembering the kitchen this way. It honestly feels like a lifetime ago. Time’s gotten weird in the last few years… gooey almost.
So, back in May of 2020 I thought “hey, let’s make this a challenge and update our kitchen, and let’s set a budget of $3k to do it, and, you know… see how far we get.” Oh, young me. Still so self-unaware. That idea snowballed fast (as most of my home projects do) into “hey, lets renovate this whole kitchen, while we’re home all the time, and as every supply chain comes to a grading halt. How about that?” Here’s why – My dad was home too (a rare occurrence) since all film and TV production was on hold, and he was ready for a project.
Once we’d made the leap from well-intentioned and naive update, to fully unhinged renovation, I went down a design rabbit hole. I still love all of those above design directions. What we ended up going with was a modified version of Option #3, but with a lighter, less saturated green. And honestly, I can’t imagine my kitchen any other way. Green it was, is, and will be forever.
Forgetting all the emotional breakdowns, doubt, existential dread, and work over the past two years, I’m so happy we ripped off the bandaid and just went for it with the full renovation. Because now we have THIS…
A kitchen of my dreams, that I can’t believe I get to cook in. I’ll level with you – is this what our kitchen looks like all day, every day? Yes. It is the most beautiful kitchen in the world, a dirty dish has never touched that sink, my produce is always ripe, and my counters are always clear and clean. I am the most aesthetic person in the world. Thank you for reading today’s post.
“Oh she thinks she’s a comic…”
In fact our kitchen does not look like this every day. Think of a shoot day like school picture day, but for interiors. You clean the space up, curate it, zhuzh it. You bring in the stylist, and the hand towel you’ve never used because it’s too beautiful, but makes you look cool. You kinda live out this fantasy of what the space could be. Seeing it at its full potential. So for today, this is the version of my kitchen I’m sharing. But because I am benevolent, I will be sharing some photos of how our kitchen actually looks (…on a clean day). Including the insides of all the cabinets and drawers. But that’s content for a different post (coming soon).
Ok. We’ve got a lot of ground to cover, so start reading faster…and check out this video we made showing the whole space (just wait for the ad to play):
Going in alphabetical order, let’s start with the appliances. All of our major appliances (fridge, dishwasher, and range + hood) were provided by KitchenAid, and all three are a pleasure to have in our home. Emily Bowser has a KitchenAid fridge in her home, and I have always really liked the functionality of it. Plus, I already loved my KitchenAid Stand Mixer. So when it came time to choose appliances for the kitchen, they were my first choice. The range is my favorite, and is a KitchenAid 30” Commercial-Style Range. This line of ranges comes in several different colors – I have the ink blue model, which allows me to add an extra hint of color in my kitchen. After all, I am a “more is more” kinda person. It’s also just a really great range – it’s got smart capabilities so I can preheat the oven from my phone without leaving the couch, powerful burners, and an endless array of cooking capabilities. I cook at least two meals a day, so the Commercial-Style Range is a huge part of my life.
Next up is our KitchenAid, counter depth panel-ready fridge with interior dispense French doors. The freezer drawer has been the biggest upgrade in terms of food storage, and I love how spacious it is, as it lets me organize my food better.
Lastly, our KitchenAid dishwasher with panel-ready design (which blends seamlessly into our cabinets) has a third level rack for things like spatulas, serving utensils and measuring cups, freeing up space in the lower two racks, which helps keep our counter clear and our sink empty. And when you have a narrow kitchen, things can start feeling claustrophobic fast. Every inch of clear, clean space counts. If you’re in the market for some dreamy new appliances, check out more from KitchenAid(R) Suite Collections.
Next up – They are beauty, they are grace, they are our cabinet fronts by Kokeena in collaboration with Townsend Interiors in “Moss Green.” Solid wood, smoothly lacquered, and ready to pop right onto our self-installed Ikea cabinets. We went with their “Modern English” style cabinet fronts – essentially a shaker style cabinet to vibe with our more traditional style home. What drew me to these fine pieces of lacquered craftsmanship? Well, first of all they were green. The most lovely, perfect shade of warm, dark olive, cozy cottage green. They are also very nice people who run this small business out in Portland, and made the whole custom cabinetry front process very lovely.
And I can tell you that after about a year, they’re still holding up great. Yes. It took that long to get in all the finishing touches. But that also means that we’ve lived with our kitchen, and almost everything in it, for about a year. So I really do know how everything is holding up. And our beautiful cabinet fronts are checking all the boxes: gorgeous (duh), easily cleanable, and durable. We also used Kokeena’s brass hardware on all of the fronts, minus the fridge.
I really feel like the cabinet colors and the hardware shape keep this kitchen from feeling too modern, and really grounds the space in some vintage *emotions*.
Speaking of emotions, this photo gives me lots of them. Mostly because this kitchen was such a labor of love, and I can remember the installation of each and every piece, down to Bowser tying that kitchen towel into the most elegant knot on that tiny brass hook. But also because I feel like this kitchen really is me. Obviously the green cabinets, and brass hardware. But also the random, slightly chaotic, but cozy and lived-in feeling that I get from being in the space.
Each of those cutting boards has a personal story – The round one is a hand-me-down from Bowser, the arched one was a wedding gift from a friend, the tall one was the first nice cutting board I ever bought for myself, and the little pig was my grandmas. Does that shelf have a lot going on? Yes, but it feels warm and inviting and used. Do the brass rails and hanging baskets add a lot, visually? Definitely, but they also offer me the option of a lot more counter space by hanging items that I otherwise wouldn’t have room for. And sure, there are a lot of little things in my kitchen that probably don’t make practical sense, but they make me happy.
Like hanging this tiny little piece of art below my kitchen window, so my cats can also enjoy my vintage oil painting obsession while they eat – which is normally right under the window (painting gifted to me by the lovely Rosa Beltran after I photographed the CLAD Home storefront).
Our countertops and backsplash are from Caesarstone, in the color Statuario Nuvo with a honed finish. These counters were probably the smartest choice we made in our kitchen – they have never chipped, cracked, stained, or warped in any which way. They feel oh so velvety smooth, and I love rolling out dough on them. And they look so good. The veining throughout is delicate, the color is just slightly creamy. We went with natural stone in our bathroom, and I’m kinda wishing we had used Caesarstone again. I dunno how much more I can recommend it.
I thought the counters were going to be a really scary part of the reno, but they were actually super easy because they were the one thing we didn’t install ourselves. I connected with a fabricator in my area that Caesarstone recommended, showed them my kitchen layout, they sent someone out to measure, they told me how much stone I would need, and Caesarstone shipped the stone directly to the fabricators. The fabricators then cut the stone, and came to install it. Considering everything else that went into this kitchen (I’m looking at you floating wood shelf), it was a gentle breeze.
All that glitters isn’t gold, it’s brass. And it all comes from Rejuvenation. We’re talking the Eastmoreland arched wall sconce, the Foster flush mount ceiling fixtures, the Fenton outlet covers, the Brookside brass rail systems, the Descanso pull down faucet, and the matching dish soap dispenser that makes me feel very fancy. Even the window curtain rod that you can’t see in any photos, but I know is there. Beautiful, timeless, well crafted, and made right up in Portland. I like the outlet and switch plates so much, I didn’t even photoshop them out of the photos (I usually refer to outlets as the zits of walls). Also please, enjoy Emily Bowser’s aspirational herb drying station. We laughed about this, but she’s also serious about drying her own herbs and I’m a supportive friend.
This faucet and sink combo has proven wildly successful in our home – I nabbed that deeeeeep, Kholer, drop-in sink on Craigslist knowing I would need a kitchen bathtub for produce cleaning, washing out big pots, and maybe a kitty or future baby bath. Paired with our brass faucet that has a suuuuuuper long hose neck that can reach every nook and lustery enamel corner of that sink with either a gentle flow or powerful spray, there’s no contest.
Ahh, we’re reaching the end. Have I talked enough about my love for chaos? Have I even mentioned that hilarious vintage painted dog tray I bought in Atlanta and drove across the country with me?? Do you understand my love for my KitchenAid Stand Mixer which I use at least once a week?! I brought that tiny blue and white pitcher (and the matching sugar bowl) back from Guatemala in my carryon because I was scared I was going to break it. And I found that wood pedestal bowl at a thrift store in Oregon on the road trip where Macauley proposed to me. THIS KITCHEN HAS EMOTIONS & MEMORIES. Unhinged ones, clearly. But they run deep.
That basil will probably die pretty soon though, so I’m trying to actually use it.
Now it’s time for everyone’s favorite section of the post – before and afters:
Are you not entertained???
WOW. WE DID IT. I revealed this kitchen (that’s me, up there), and you scrolled through this whole blog post. I think we’ve both achieved something. But now it’s time for the applause round – Thank you to my brother and dad who literally installed this kitchen with their own four hands. Thank you to Julie Rose, who took my iPad drawings and measurements and turned them into something that I could actually use. Thank you to Velinda Hellen who answered 1 billion questions, and held my hand as we measured for the floating shelf because I was terrified to get it wrong (literally came over and did it with me, and by the way V, it fit perfectly). Thank you to all the brands who believed in my vision and helped it become a reality by gifting us beautiful kitchen items – KitchenAid for the appliances, Caesarstone for the counters, Kokeena & Townsend Interiors for the cabinet fronts, and Rejuvenation for so many shiny brass things. Thank you to Emily Bowser for knotting that hand towel so perfectly (and styling everything else). Thank you to the EHD team for tolerating me, and my brand of editorial chaos. And my husband Macauley for doing this whole home renovation thing with me.
So now you’ve seen the kitchen and you feel the feelings. This post was really about how I made this kitchen feel like us. But stay tuned, because in my next kitchen post I’m gonna share how I made this kitchen work for us. AND, I’m gonna be sharing photos of what it looks like on a more normal day. Because yea, we live with a rice cooker on the counter at all times. It’s a Zojirushi. It does not live in a cabinet.
The post Sara’s Kitchen “Update” Turned Into A Full Renovation (And The Result Is Well Worth The Wait) appeared first on Emily Henderson.
March 9, 2022
Design Funk Cure: 26 Rooms/ Design Details That WILL Wake Up And Inspire Your Eyeballs

We talk a lot about how easy it is to get into a design funk. No designer or person is exempt. If there’s someone out there that never had this issue please show yourself and tell us your ways! So when this happens to me, I hit the internet hard. I try and find those spaces, new furniture pieces, design details that make my heart sing (and hope it will translate into physical design progress). But I am also constantly saving and pinning images on the internet so that I have a backlog to peek at for a boost. As I assume most of you are, I am a design super fan. I can’t get enough of it. Is it a sickness? That’s still out for debate. So I thought I would do a show & tell of what I’ve recently saved (that I haven’t already shown you) in hopes it will A. brighten your day, B. give you some inspo to translate into your homes or C. get you out of any potential design funk. Let’s dive in, shall we?
 design by shapeless studio | photo by hagan hinshaw
I love Shapeless Studio’s work. This kitchen beautifully mixes modern style with the perfect dose of warmth. The seamless vertical paneled fronts help to marry the modernness of the stone and organic look and warmth of the dining table and chairs. I would never call this kitchen “farmhouse” but those lower cabinets slightly give off that vibe which is why all the elements blend so nicely together, IMHO.
 design by shapeless studio | photo by hagan hinshaw
And then those modern uppers that go down to the counter (a very popular detail right now) are awesome. I might just be forgetting but I feel like that look is done more in traditional style kitchens and have a hutch look(?) So this is a nice option for modern design lovers. Lastly, the two-toned cabinets with colors are in that stone is a real “chef’s kiss” as Caitlin would say:)
 design by margriet de hollander
This photo caught my eye for a couple of reasons. First, that HUGE skylight and how it makes this kitchen feel like it’s on a cloud. If I ever own a house, I (like Emily) will have many skylights. Then that candelabra just does something to my insides. As an owner of 3 candelabras in her 1 bedroom apartment, this shouldn’t be shocking to me. But those curves, the delicate metal, the short candlesticks…all perfect. But I think what actually brings this whole photo to life is that reclaimed wood island and baskets. Texture brings everything to life. When in doubt… add some texture.
 design by diario design | photo by maarten willemstein | via diario design
When I first saw this photo I COULD NOT take my eyes off of those ball feet. It’s so simple it’s almost stupid (I say that in the fangirl way) but that’s why designers exist. They can make something “simple” that will change the entire space, give it character, and uniqueness. 10/10. But let’s look a little deeper. Did you notice the two-toned seat cushions? The sweet curtain on the window and between the booths? The neutral stripes on the walls? That incredible sconce??? I could stare at this photo forever.
 design by stéphanie lizée of lizée-hugot | photo by benoit linero | via yellowtrace
 I have two words. Bistro table. Also, I realllllly want one if anyone has a hookup:) But aside from those tables that made my eyes pop out of my head, take a look at that little wall nook on the right. The little spotlight is so chic and that art is perfect. Inspiration can come from small “non-focal point” moments too.
 design by lucy sear-barlow of barlow and barlow | photo by jonathan bond
Inject this design sunshine into my veins! This color palette is what my heart wants to look at. The patterns aren’t necessarily my style but my god are they happy and the scale contrast is perfect. I also love the simple detail of putting in that pink border tile above the mustard subway tile. You don’t notice it until you do and it shows how easy it is to make a design uniquely yours. But what really makes this room come together for me is this mirror and mini scones. The mirror is SO COOL and adds the perfect amount of organic texture (the stool is a great accent too). This mirror is a great reminder that unless you want a very modern, nonorganic bathroom (or kitchen) that you need natural pieces like these. It could about be a frame or wall hook or something along those lines.
 home of ben mooney | editorial styling by annie portelli | photo by amelia stanwix | via the design files
I would move into this apartment immediately. I sat and looked at this photo for a while when it popped up on my feed. First, there’s that arch. I wish we could all add this kind of authentic soul into our homes. It’s perfect. But then there’s that incredible shelf, mirror, and bust that the owner found on Facebook Marketplace (!). It’s the effortless mixing of the old and new that does it for me. Also, the green stool completes the space and proves that taking a style risk will pay off… so have some fun!
 home of ben mooney | editorial styling by annie portelli | photo by amelia stanwix | via the design files
I actually didn’t even see the other rooms until I was putting together this post. But then I saw this shot and thought, “He did it. He has an incredibly chic, modern home that you feel like you could and would want to actually live in!” That is not always the case. Even in a lot of the photos I’m showing you today, there are things I love about each one and am inspired by. However, actually thinking that all of these spaces are comfortable enough to live in (both aesthetically and functionally) is a different story.
 home of and photo by chris mottalini
I mean. This might be another space I could really live in. Even if it’s just in this nook. It’s playful, whimsical, and yet so chic AND functional. Y’all those “tubes” are WOOD. Heart, be still. Then the patchwork cushion is welcoming, colorful, and a little chaotic in the best way. I also love those mushrooms which *cough* are a trend we called out for 2022. I’m also so happy that they chose a boldly patterned rug. I’ve been on a real solid rug kick lately but again, this rug adds to the welcoming feeling of the room and while extremely well designed, doesn’t feel so serious.
 design by petronio studio | photo by lance gerber | via shout out la
From a reading nook to a reading chair. This is the epitome of a “special” piece of furniture. I’m not sure how comfortable it is to actually sit in but it makes my eyes SO happy to look at. I love neutral spaces but they need to have pieces like this for them to really feel special and exciting to me. That kinda sounds obnoxious but you know what I mean.
 design by lucy williams
I love these colors. I love the softness of this space. I love that the walls and accent table match. I love that red sconce. But most of all I LOVE the contrast piping on this sofa. It’s perfect.
 home of paul roche | via tumblr
Not a new home but this fireplace and art on the mantle make me want to bring a lot more color into mine (and I’m planning on it). I’ve also fallen in love with the idea of mini murals and freehand drawings on walls. There’s something that’s so freeing and risky about it. That’s kinda how I want to feel in my home with a good dose of “cozy” also.
 design by sarah reilly of studio rozu | photo by read mckendree | via dwell
I can’t imagine how fun it must be to lay in this bed (reading nook?). The variety in vertical paneling scales, mixing in with the solid non-paneled bed looks so intentional and cool. I also love love how modern and delicate those scones are and that the black ties in with the window frame.

 image via leibal
We still have more rooms to look at but let’s take a break and look at some pieces of furniture like this sofa above (and in a minute below). Emily has shown me the light when it comes to noticing and appreciating joinery. This sofa is taking a more modern approach but I just love the open back, the thick dowel that runs across the back. It’s simple, neutral, and yet you can’t look away… or at least I can’t.
 image via morentz gallery
Vintage and perfect. That frame is ridiculously good and I am swooning over that striped fabric. As much as I love a patterned sofa, I have always been a little nervous about owning one. But this one is neutral enough, while still being fun, that I would HAPPILY own it. But also THAT FRAME!
 design by ann edgerton and jessica manning
Another example of simple design details making a piece of furniture/room. This credenza would still be pretty without the cutouts at the bottom. But with them? With them, it makes a quiet statement and adds so much visual interest.
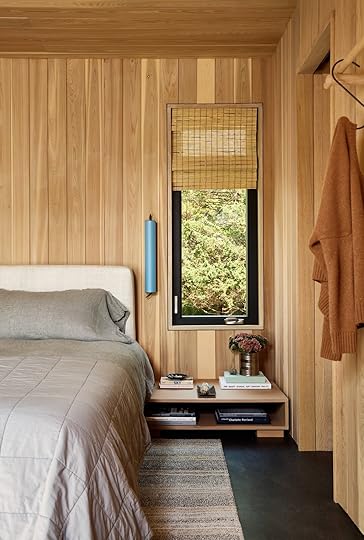 design by sarah reilly of studio rozu | photo by read mckendree | via dwell
I originally stopped and saved this photo because of that blue scone. It’s incredible and unexpected in this wood-clad home. But then I noticed that extra low and wide nightstand (stunning) and how awesome that bamboo shade looked with the wood paneling. Both are the same tone but because of the totally different materials, textures, and patterns it adds that extra layer of “special”, making your eyes bounce around the space.
 design by agathe convert | photo by bcdf studio
I am pretty obsessed with that enormous tapestry paired with that super modern table lamp on the floor (of which I am also obsessed with). Then peeking out of the right corner is that pink and mustard bedding which is just a fun and unexpected color palette choice for this room. I love that there’s isn’t a ton of “stuff” in this space and yet it’s still so fun and interesting to look at. This is definitely giving me ideas for my bedroom:)

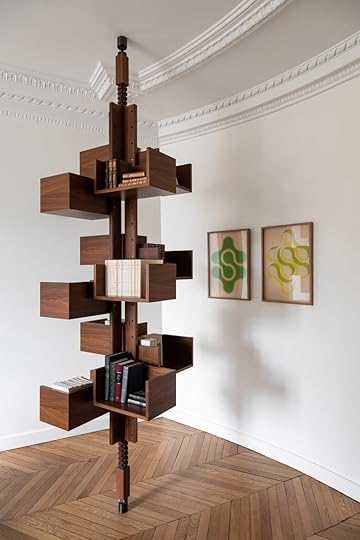 design by agathe convert | photo by bcdf studio
Like what?! There are few wall-to-wall bookshelves I haven’t loved, but this stroke of design genius is almost too much for my eyeballs. The details are incredible and it’s just such a cool take on how to display books.
 design by jessica helgerson interior design | photo by aaron leitz | via vogue living
This room isn’t new but I hadn’t seen this tight shot in a while. These inset cabinets are so pretty. I love that there are open nooks mixed in. I love the tiny brass hardware. I love the whitewashed wood about the sofa and how the drawers under are painted so it doesn’t look too uniform. And I always love a Serge Mouille wall sconce.
 design by atelier steve | photo by bcdf studio
Talk about creative storage. I think it’s those moveable “cabinets” are super cool. I love all of the open storage options (think of all the styling possibilities!). That “pegboard” especially is really awesome. Also, notice the balance of curves and straight lines. The chair, corner shelves, and cabinet knobs all help to contrast the bacinets, pegboard, and floating desk. Everything is beautiful and neutral but exciting to look at.
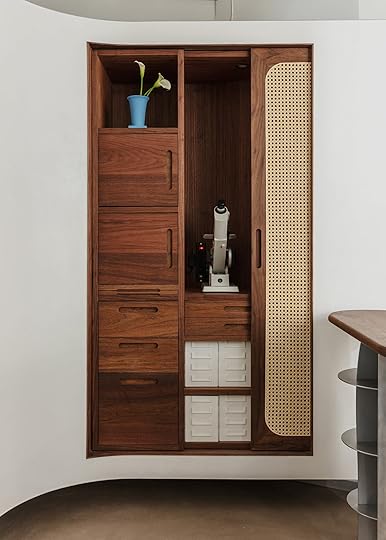 design by shapeless studio architecture & interiors | photo by hagan hinshaw | via design milk
 This is technically an eyewear shop but that rattan pocket door is SO GOOD. I would like one immediately. I also really love the tone of that dark wood.
 design by louis denavaut | photo by christophe coenon | via yellowtrace
Look at this built-in! It may not make a ton of sense of a bedroom since I personally think you’d want bigger drawers for your clothes. But hey, maybe you have A TON of underwear, socks, and bathing suits. If that’s the case this would be the dream. Regardless I think it’s beautiful, looks so special and different.
 design by fig interior design and jam architecture | photo by gieves anderson | via dwell
Staircases are a secret love of mine. There are so many different ways you can make them ridiculously cool. Example A: Paint it navy blue. It’s bold but it reallllly paid off here.

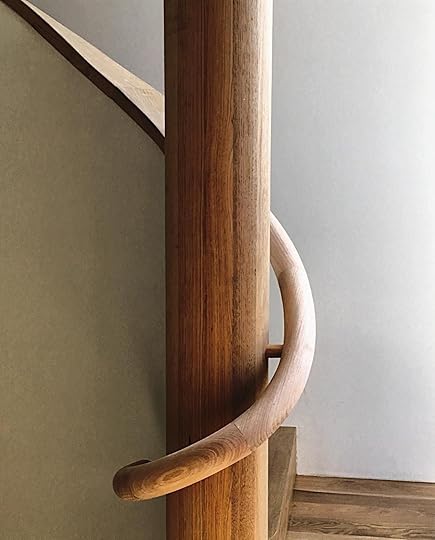 left image via tumblr | right image via tumblr
 But newels and railings are where I really geek out. HOW GOOD ARE THESE?! I love love those wooden ball accents and that wraparound wooden railing makes me feel emotional. I know that custom stairs are not cheap but if you can please do because how happy would you be seeing one of these every day??
 design by manuelle gautrand | photo by gaelle le boulicaut | via yellowtrace
I leave you with what is clearly one of my favorite color combos – pink and yellow. This staircase is a pure jolt to the senses in the best way and I hope it leads to a great rest of your day.
So now, do you have a favorite? Are there any rooms you have been drooling over lately? Has this sparked any creative juices? Let’s chat!
Love you, mean it.
Opening Image Credits: Home of Ben Mooney | Styled by Annie Portelli | Photo by Amelia Stanwix | via The Design Files
The post Design Funk Cure: 26 Rooms/ Design Details That WILL Wake Up And Inspire Your Eyeballs appeared first on Emily Henderson.
March 8, 2022
Kids Organization Hacks – Inspirational Ways To Get Them To Do More By Themselves And Make Our Lives Easier

Here’s a true mom anecdote for you: during quarantine, our kids asked for a glass of water 19 times a day, but the filtered water from inside the fridge was too high for them to do it on their own. It became a constant interruption and annoyance (I empathized because they got the “need cold water” gene from me). Fed up, we bought one of those filtered water systems on a stand – at a 5-year-old level, and BOOM – problem solved. It was a good lesson – that if we set them up properly to do things on their own, to meet their own needs, they can and will, AND it makes our lives easier. So when we were brainstorming with Target about their new organizational products as it pertained to my kid pain points we came up with some ideas, hacks, and areas to set them up for doing things for themselves, empowering them to be self-reliant, while hopefully keeping the house more organized for us.
 A Utility Closet Turned Family Zone
Large Black Wire with Natural Wood Handle 2 in 1 Milk Crate | Make-A-Size Paper Towels| Toliet Paper | 3 Wire Drawer Organizer | Rustic Rivet J Decorative Hook Black | Red Backpack | Flower Backpack | Black Square Backpack | Navy Pencil Case | Active Noise Cancelling Over-Ear Headphones
Depending on your space, you might have the problem that I did – a hall closet that needed to house both the vacuum and the crafts. So considering the product that we wanted to feature, Emily Bowser came up with three different ideas that you can steal – A homework station, A craft cart, AND a chore cart (in addition to the hanging vacuum). Now in a perfect world for me, these would all three-match (I’d choose the white cart) because I like things to look streamlined, but they sent us different samples and we decked them out differently to feature more colors and ideas.
The Homework Station
Black and Tan Charing Cable | Green Charging Cable | Brown Charging Cable | Cosmetic Pouch | Blue Kids’ Bluetooth Headphones | Tan Pencil Pouch | Pink Kids’ Bluetooth Headphones
When Emily B. presented me this homework station I thought what a dream – could this really happen? It’s one drawer per kid (three in this case). It includes textbooks, noise-canceling headphones, pouches full of pens/tools, and yes, even a charging station on top for them to put down their devices to charge while doing homework (!!!). Part of me was like no kid would ever do this, and the other part of me thought hold up woman, kids will do anything if you train them properly. It’s likely an “if you build it they will come” situation. Maybe for you it’s not this curated or designated, but the idea of an organized homework drawer/cart in a closet near the family room feels pretty attainable.

Small Natural Wood Handles Crate | Tall Kitchen Trash Bags | Spray Bottle | Soft White Light Bulbs (set of 6) | 5 Pocket Open Top Expandable Folder | 1″ Fashion Flex Ring Binder | Square Dry Erase Calendar Board | Magnetic Dry Erase Weekly Calendar Board | Magnets (set of 8) | Adjustable Face Mask (set of 2) | Broom | Refillable Spray Mop | Cordless Stick Vacuum | Broom Gripper
The Craft Cart
White Metal Utility Cart | Plastic Kids Tall Tumblers | Gel Pens | 91pc Go Go Studio Mixed Media Art Set | Crayola 4ct Big Paint Brushes | Long Cart Divider Cups (set of 2) | Washable Markers | Watercolor Paint Set | Pink Lined Notebook | Elmer’s Washable School Glue | Washable Glue Sticks Disappearing Purple ( set of 3)
I’m so excited about this – crafting is Birdie’s and my love language. Target has had this cart for a while, but now they added accessories that you can add onto it, including that pegboard with containers that easily mount and move for all your accessories (including clips to hang work). There are larger ones on the side for markers, tools, and custom-sized containers for the top. If you wanted you could even have this be your homework cart so you have three that match.

Pegboard Set | Kids’ Scissors | Jumbo Paper Clips | Fuzzy Sticks | Lined Composition Notebook (set of 4)


Magnetic Paper Clip Holder | Paper Clips | Binder Clips | Green Small Storage Trays (set of 4) | Quarter Circle Divider Cups (set of 2) | Stapler | Ruler | Pink Erasers (set of 3) | Pencils | Pencil Sharpener | Agua Spiral Notebook
The Chore Cart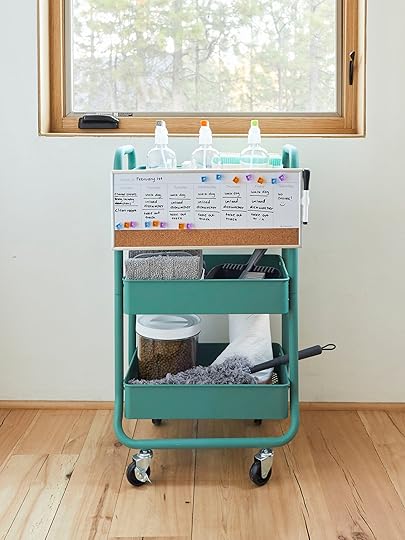
Magnetic Dry Erase Weekly Calendar Board | Magnets (set of 8) | Green Cart | Gray Reusable Cleaning Glass Spray Bottle | Orange Reusable Cleaning Glass Spray Bottle | Green Reusable Cleaning Glass Spray Bottle | Spray Mop Microfiber Refill | Mini Hand Broom and Dust Pan Set | Round Airtight Canister (set of 3) | Premium Dry Dog Food | Tall Kitchen Trash Bag | Handheld Dust Wand
If you are a mom, you are either laughing or nodding in approval. Pre-quarantine I would have laughed because our kids were so bad at doing chores. But during lockdown, we had more time to really teach them and suffer through them doing their own chores. I bought them each little cleaning carriers of their own, stocked with their own gloves/sprayers/sponges and while Sunday chores were still a struggle, they felt ownership over the tools and it made them feel like big kids (and they were awarded sundaes on Sundays). For older kids, this chore chart is GREAT and having everything in one area I think is genius. Also, I want my kids to spend the summer at Auntie Emily (Bowser, our stylist who came up with this chore cart). And fun fact, Target has a ton of green and eco cleaning supplies, including bio-degradable and recycled sponges.
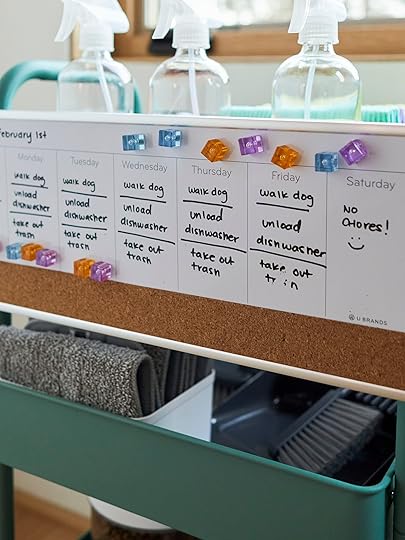


Digital Multi-Purpose Timer | Orange & Rosemary Multi-Purpose Cleaner Concentrate (set of 2) | Orange & Rosemary Glass Cleaner Concentrates (set of 2) | Citron & White Rose Tub & Tile Cleaner Concentrates (set of 2) | Magic Sponge Cloth (set of 3) | Medium Storage Trays (set of 3) | Cart Divider Cups (set of 2)
The Family Calendar Station
While I did push back and say that I was unsure putting a calendar in a closet would work for convenience reasons, for the sake of our shoot I loved including it here to help show all the ways you can organize your life, whether it’s in a hall closet or even better, a large pantry. I really liked how this was just for the week – we have most of the events on our shared google calendar, but not the little stuff (like repeating soccer practice or library books due back) so I ordered this after this shoot.
The Snack And Kids Drawer/Cupboard
All Purpose Storage 1/2 Storage Bin | White Top Airtight Canisters (set of 5) | Light Blue Lunch Bag | Stainless Steel Colby Kids’ Water Bottles | Green Long Storage Trays (set of 3) | Green Medium Storage Trays (set of 3) | Creamy Peanut Butter | Strawberry Rhubarb Fruit Spread
If you are designing your kitchen now and have kids or might want kids, think about “the snack drawer” or cupboard. It needs to be low and easy to access. We styled this below the microwave and decanted all their snacks (something I for the most part kept up within the pantry).


YumEarth Organic Cummy Fruits | Apple Butternut Squash Organic Applesauce Pouches | Apple Spinach Organic Applesauce Pouches | Organic Chocolate Chip Whole Grain Baked Bars | Dark Blue Lunch Bag | Plastic Kids Tumblers | Tumbler Lids | Reusable Silicone Sandwich Food Storage Bag | Reusable Silicone Snack Food Storage Bag | Bamboo Melamine Kids Dinner Plate
The new Bright Room line has these wonderful stackable acrylic containers perfectly sized for cereal and snack boxes. Then on the bottom, we gave the kids a full drawer for their lunches – everything from lunch boxes, water bottles, snack bags, sandwich bags, and bread/PB & J for them to make their own sandwiches (which we would do except that we have to leave for school at 7:45 am which is CRAZY EARLY).


White Cheddar Cheese Slices | Oven Roasted Turkey Breast Ultra-Thin Deli Slices | Organic Yellow Mustard | Mayonnaise | Clementines | Mini Babybel Original Semisoft Cheeses
The idea is that they have ownership over that drawer and can make themselves lunch or a snack when they need it. Our rule in our family is that if they make their own lunch they can choose what they eat (they have to at least have a couple of carrots or apple slices to ensure we don’t feel like the worst parents). We give up control over this in exchange for them feeling autonomy and competence (and yes at times it’s more work but we are playing the long game).
Cheddar Penguins | Organic White Cheddar Popcorn
In the same line, they have fridge containers – that hold everything else for lunches that need to be refrigerated – condiments and fruit. We have fridge drawers for this exact reason – so they can reach, but if you have french fridge drawers or a fridge column it helps give them access to this stuff. The whole Bright Room collection is super versatile with the goal of making our lives easier and to control the chaos.


Like the wise Kevin Costner once said, “If you build it they will come” and in a world where I’m seeing competence and self-reliance become increasingly important (and less normal), setting them up to do things for themselves in a way that is both pleasing to the eye and helps calm the family clutter is a really good thing. For those of you interested, here is what we used, and please go check out the whole new Bright Room collection on Target.com.
*Art Direction by Me
**Photos by Sara Ligorria-Tramp
***Styled by Emily Bowser
The post Kids Organization Hacks – Inspirational Ways To Get Them To Do More By Themselves And Make Our Lives Easier appeared first on Emily Henderson.
March 7, 2022
The Design Trend That Has The Entire EHD Team Seeing The Light…Literally (We’re Talking The Glory Of Interior Windows)

My first apartment in New York was my first peek into “interior windows.” As you can see in the photo below, my room was likely “invented” in the main common space so that the landlord could charge more for the space. Wanna guess how much this room was in 2010?? $740. The craziest part is that it was a STEAL given the prime East Village location. But I digress. So yes, I can’t say “entirely windowless” because up in that crawl space were two rows of chunky glass cubes that let in a tiiiiny bit of light from the front room where the actual light lived. Long story short, it was in that apartment I truly realized the importance of natural light. It not only makes a space beautiful but it helps your mood and prevents you from not sleeping until 1 pm because your body thinks it’s always nighttime.
 nyc, 2010 (hence the fishbowl lense), before i made it kinda cute
Are interior windows a new idea? No, not at all. But I have been seeing them way more and honestly I can’t get enough. Let that light in! We need to feel joy again! (kidding…or am I?) They also invite the perfect balance between an open concept home and a traditional closed floorplan.
 photo by sara ligorria-tramp | from: mountain house dining nook reveal
But Jess, where and/why is an interior window a good idea? Thanks for asking, Jess. One fun/solution-based way is to put one between a load-bearing post and a wall like Emily did in the mountain house dining nook. Since they couldn’t move that post and weren’t in love with the original pony wall, Em and the design team decided not to close up the wall and instead install a window that matched the windows in the nook. This kept things looking and feeling airy.
 from: how we are repurposing the original living room windows at the farmhouse (in the pantry??)
Emily is actually keeping the good interior window times rolling in the farmhouse. She’s repurposing some of the original exterior windows and using them for the pantry as shown above. It’s going to add just a sweet architectural moment that is also special to this house specifically. Actually adding a vintage interior window (depending on the style you are going for) is SUCH a great way to bring in some soul to a home without having to worry if it’s sealed perfectly like it would need to be if it were being used as an exterior window.
 design and styling by michelle mele | photo by rafael solid | via rue mag
Now, let’s get into all of the examples I found (well, not all but some of my favorites:)). This one above by Michelle Mele is perfect. Had that wall been solid it still would have looked nice but now the whole space feels more open and larger. It feels modern yet classic while also being decorative but ultimately functional (because it lets in light).
 design and styling by michelle mele | photo by rafael solid | via rue mag
I also wanted you to see it from a more pulled-back angle. It really adds so much to this whole space. Let an interior window be a functional piece of art!

 design and photos by julie de pinieux
Ok so technically this is more than “just a window” but it has the same function on a larger scale. This window wall gives the feeling of the living and dining rooms being two separate spaces while still letting the light bounce around in both rooms. It’s almost too pretty. Ok, it’s definitely too pretty.
P.S. This was also one of the rooms that inspired me to get my shag rug. I need mine to look like that!
 design by blanc marine intérieurs | photo by sylvie li
What I also love about interior windows is the style variety. This isn’t something that’s exclusively modern, traditional, farmhouse chic, etc. It’s for everyone and every home.
Something else to note is that they don’t just have to be picture windows (ones that don’t open). As shown in this beautiful living room by Blanc Marine Intérieurs with those awesome functional vintage windows. Let that air circulate if it makes sense with the flow of the house and design.

 design by the residency bureau | photos by miranda estes | via rue mag
I’m not sure if this entry and interior window were original to this house but regardless it’s so smart. This home is in Seattle so it’s wet and the need for an entry with storage is a must. This example design by The Residency Bureau shows us how to get that needed entry without losing all of that precious light in the living room.

 design by jean stoffer design | photos by stoffer photography interiors
Big, bold interior windows at their finest. When I saw these photos I gasped. They perfectly separate these spaces, add architectural interest, AND make the space feel simultaneously cozy and grand.
 design by chip and joanna gaines | via scene therapy
But if you just want cozy, feast your eyes on this home from HGTV’s Fixer Upper by the one and only Joanna and Chip Gaines. It’s the same idea as the space above but on a much smaller and vintage-inspired scale. This is what I mean by adding some soul.

 design by chip and joanna gaines | via scene therapy
I love that they doubled down (literally) by adding in these functional windows to this home office. It makes everything brighter and if you are a parent this is a great hack to be able to work and still be able to keep an eye on the kids (or animals for that matter).
 design by nicola manganello | photo by jeff roberts
Or maybe you have a dark laundry room and want to let in some light… how sweet is THIS WINDOW?!

 design and photos by molly of heyfeatherstone
As a simple gal like myself, this window has my whole heart. Molly of HeyFeatherstone installed this one herself and I can’t stop looking at this. Why have a wall when you could have a window?
 styled by mari strenghielm | photo by lina ostling
Think how great this window wall is for a party? The host can be prepping while there are people around the island and then some can go into the dining room while still feeling like there are all together. But mostly I just think it’s beautiful.

 design by hecker guthrie | photos by shannon mcgrath | via yellowtrace
Did y’all think there wouldn’t be an arch?? No way. And not just one, we’ve got a double arch. I feel like whoever lives here doesn’t walk but actually floats from room to room, it looks so airy.
 design by marianne evennou | photo by grégory timsit photographie | via remodelista
We featured this space by Marianne Evennou in a Link Up a few weeks ago because we all LOVED IT. Not only is this whole space so well designed but that window enclosing the kitchen from the hallway is a knockout. I would assume it also helps with lowering the noise level from the kitchen to the bedroom at the end of the hall. It keeps the kitchen bright but the zones in this small apartment (shared by a brother and sister) clear.
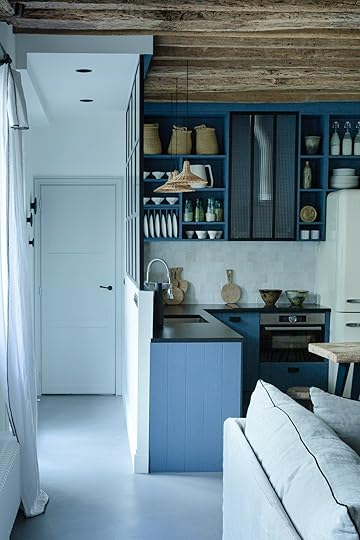
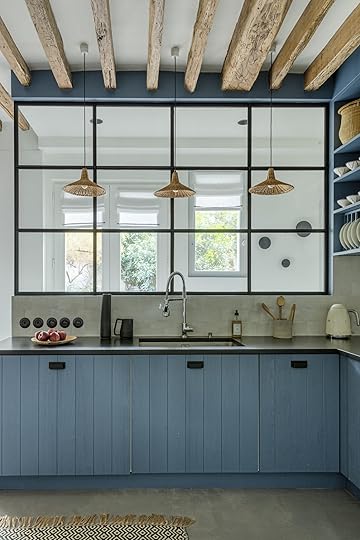 design by marianne evennou | photos by grégory timsit photographie | via remodelista
Here are some more photos because I couldn’t not.
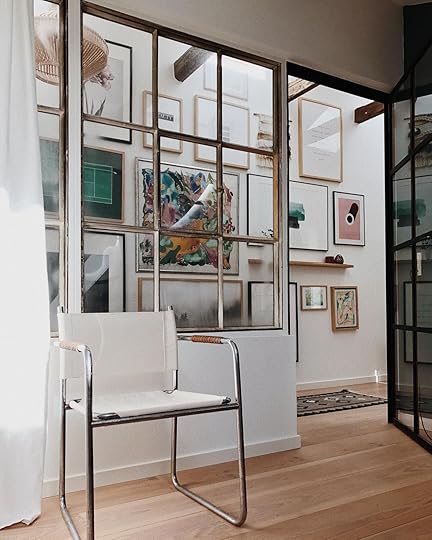 design and photo by johanne landbo | via my scandinavian home
Do you have a room in a hallway (like an office or playroom) that doesn’t need all the privacy? Put in an interior hallway window. I can guarantee this helps to make this space feel bigger. Plus who doesn’t want to look at all that cool art as much as possible? Oh and remember that you can always add a curtain in situations like this one for a little bit of privacy when needed.
 design by arkstudio | photo by rodrigo cardoso
Modern, organic, and bright. See? Style versatility, people.
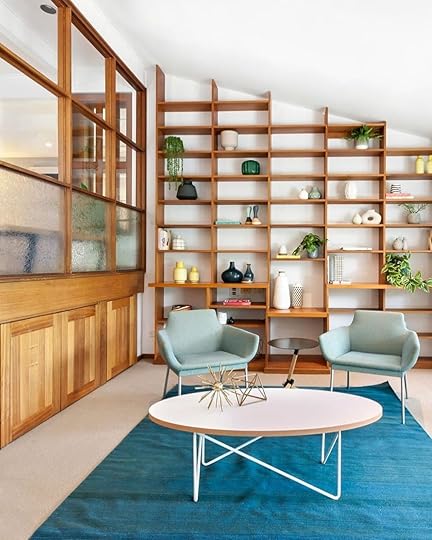 photo by steph bond-hutkin | via atomic ranch
They are even perfect in a mid-century modern home. Again, I know this is an entire wall but you should know that it’s an option (and a very good one at that).
 design by louis denavaut | photo by christophe coenon | via yellowtrace
From mid-century modern to modern, modern. When you live in a loft and your bathroom is in the center, why not put in privacy glass windows to brighten things up? I’m really into this kind of glass right now (it’s also been trending) because it’s the same idea as those silly glass blocks but waaaay cooler.
 design steven ehrlich | photo and via dwell
Do you have very high ceilings spanning to your second floor and don’t know what to do with ALL of that wall space? Well, why not add a functional (or picture) window to the room on the other side of that tall wall? It can add airflow and light and a lot of beauty.
 design steven ehrlich | photo and via dwell
Here’s that window from inside the room:)
 design by elizabeth roberts architects
Ok so I know I’ve already had some favorites but LOOK AT THIS PERFECT WINDOW. Elizabeth Roberts and her team are one of my absolute favorite firms and this home only confirms that.
 design by elizabeth roberts architects
The way this window (and matching interior shutters) help to gently break up this wood wall is genius. Warm and modern and I want to go there so bad. This is an example of the many ways windows are simply not just for your exterior facing walls. Have some fun!
So what do you think? Do you also love this idea? Or do you want to keeps walls, walls and not have to involuntary look at anyone in your house? Have you already taken a sledgehammer to your nearest wall and are searching Etsy for vintage windows? Let’s talk about it!
Love you, mean it.
Opening Image Credits: Design by Lauren Liess and Beau Clowney | Styled by Kendra Surface | Photo by Robbie Caponetto | via Southern Living Magazine
The post The Design Trend That Has The Entire EHD Team Seeing The Light…Literally (We’re Talking The Glory Of Interior Windows) appeared first on Emily Henderson.
Emily Henderson's Blog

- Emily Henderson's profile
- 10 followers

