
David Allen Wizardgold's Blog: Good and Geeky
December 14, 2023
Setting Up a Django Project: A Step-by-Step Guide
Are you ready to dive into the world of Django and set up a project from scratch? Join me on this step-by-step journey as I walk you through the process of creating a Django project, from setting up the environment to integrating authentication via Django All Auth.
If you’re venturing into Django development or looking for a structured approach to set up a project, this guide will be your go-to resource. Let’s break it down into manageable steps.
Setting Up the Development EnvironmentFirst things first, creating a folder structure and setting up a virtual environment is crucial for a clean development workflow. Dave, a seasoned Django developer, shares his preferred way to do this using terminal applications like Warp and VS Code.
 Installing Django and Essential Packages
Dave starts by creating a virtual environment and installing Django 5. Additionally, he introduces Django-environ for handling environment variables and Pillow for image handling. The step-by-step installation of these packages is detailed to ensure a comprehensive setup.
Initializing Django and Creating the CoreWith Django installed, Dave initiates the Django project, focusing on the core structure. He explains the reasoning behind using specific naming conventions and avoiding unnecessary subfolders to maintain project clarity.
Creating a Django AppMoving forward, Dave demonstrates how to create a Django app, named “Sponditious,” within the project. He uses terminal commands and showcases the folder structure created by Django for the app.
Configuring URLs and ViewsThe configuration of URLs and views within the Django app is critical for routing and rendering content. Dave meticulously guides you through creating URL patterns and corresponding views for the app’s functionality.
Implementing Templates and HTML FilesA critical aspect of web development involves creating templates (HTML files) to render content. Dave explains the process of setting up the template directories and creating basic HTML files for the Django app.
Securing Secrets with .env FilesProtecting sensitive information like secret keys is paramount. Dave demonstrates how to use .env files to store confidential data securely, utilizing Django-environ to access these variables within the Django settings.
Integrating Django All Auth for AuthenticationDave goes above and beyond by introducing Django All Auth, enabling users to log in using Facebook or other social accounts. He outlines the installation process, configuration in settings.py, and the necessary steps to integrate social login features.
Version Control and Deployment PreparationFinally, Dave illustrates version controlling with Git, setting up a repository on GitHub, and explains the process of pushing the local Django project to the remote repository.
ConclusionBy following this comprehensive guide, you’ll have a fully functional Django project set up, complete with authentication features using Django All Auth. You’ll be equipped to expand and customize this base to suit your specific web development needs.
Dave’s detailed walkthrough provides a solid foundation for starting your Django journey. With this guide, you’re primed to explore Django further, customize your projects, and embark on creating robust web applications!
The post Setting Up a Django Project: A Step-by-Step Guide appeared first on Good and Geeky.


August 6, 2023
Obsidian or DayOne for Journalling?
Introduction: A Journey through 10 Years
For over a decade, I’ve been faithfully chronicling my life with Day One, cherishing the “On This Day” feature that lets me revisit my past memories. However, with the need to save money, I am considering a shift to Obsidian, enticed by its remarkable linking capabilities and comprehensive personal knowledge management system.

Weighing Pros and Cons
Day One’s “On This Day” feature has been a highlight of my journaling experience, allowing me to look back on significant events spanning 10 or 11 years. On the other hand, Obsidian’s flexibility and customisable note-taking environment offer an appealing alternative, granting me complete control over the structure and organisation of my journal.
The Allure of Obsidian
What draws me towards Obsidian is its ability to seamlessly interlink information, creating a web of connections between my notes and ideas. This linking functionality goes beyond Day One’s capabilities, making Obsidian a powerful tool for personal knowledge management.
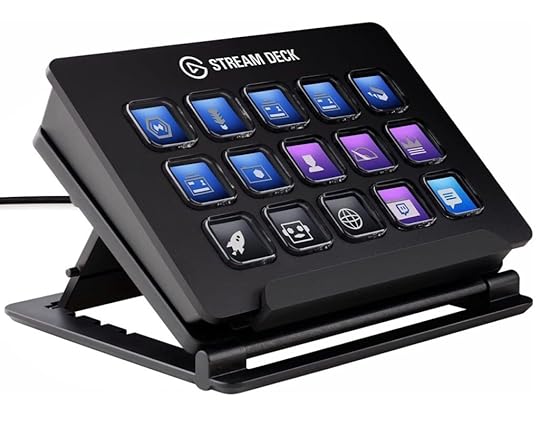 The StreamDeck is Amazing !!
I use a StreamDeck to help me be more productive.
Buy OneBalancing Costs and Features
Although Obsidian’s synchronization service comes at a higher cost than Day One’s subscription, I recognize the value it brings. With Obsidian, I can use the app for more than just journaling, making the investment worthwhile for me.
Embracing Obsidian for Journaling
Having already started journaling with Obsidian, I am impressed with its user-friendly features. The automatic daily page with a customizable template allows me to effortlessly record my thoughts and experiences, regardless of the device I’m using.

Expanding Beyond Journaling
Obsidian extends its versatility beyond journaling, catering to my passion for reading books and watching television shows. With its template-based system, I can easily add new entries for books and create a database of my literary journey.
The Power of Personal Knowledge Management
Obsidian’s true strength lies in its focus on personal knowledge management. The application encourages me to consolidate all my data and establish meaningful links between various notes. Its intuitive link creation process simplifies navigation and enhances my understanding of interconnected concepts.
Visualising Knowledge with the Graph View
The graph view in Obsidian serves as the cherry on top, presenting a visually compelling representation of all the connections between my documents. I can effortlessly explore the relationships between different topics and gain a broader perspective on my areas of focus.

Conclusion: Embracing the Future with Obsidian
Although saying goodbye to Day One feels nostalgic, embracing Obsidian opens up new avenues for personal growth and knowledge exploration. The transition may present challenges, but Obsidian’s remarkable flexibility, ease of use, and interconnectedness assure me that I’m making a positive and empowering choice for my journaling and learning journey ahead.
Pros of using Obsidian for journaling:
Flexibility and Customization: Obsidian offers a highly flexible and customizable note-taking environment. You can structure your journal in any way that suits your needs, creating links between notes and organizing entries in a way that makes sense to you.Markdown Support: Obsidian uses Markdown, a lightweight markup language, which allows for easy formatting and quick styling. This makes it simple to emphasize important points, add headings, and create lists in your journal entries.Interlinking and Backlinks: Obsidian’s unique feature of bidirectional linking and backlinks allows you to connect ideas and thoughts across different journal entries. This fosters a deeper understanding of your experiences and enhances the ability to reflect on past events.Offline Access and Data Ownership: Obsidian stores your journal entries as plain text files on your local device, granting you complete control and ownership over your data. You can access and edit your journal offline without relying on cloud services.Community and Plugins: Obsidian has an active community of users, offering various plugins and extensions to enhance your journaling experience. You can customize the app with themes, additional features, and integrations to make it truly your own.Cons of using Obsidian for journaling:
Steep Learning Curve: Obsidian might have a steeper learning curve compared to more user-friendly journaling apps like DayOne. It requires some familiarity with Markdown and its unique features to fully utilize the app’s potential.Limited Mobile App Experience: While Obsidian offers mobile apps for iOS and Android, the mobile experience might not be as polished or feature-rich as specialized journaling apps like DayOne.No Automatic Backup or Syncing: Unlike cloud-based journaling apps, Obsidian relies on you to manage backups and syncing across devices. This can be a potential downside for users who prefer automatic backups and seamless synchronization.Less Focus on Media-Rich Entries: DayOne excels in supporting media-rich journal entries with features like location tagging, weather integration, and multiple photo attachments. Obsidian, being primarily a text-based app, may not offer the same level of multimedia integration.Less Streamlined User Interface: While Obsidian offers a lot of customization options, some users might find its user interface less streamlined compared to dedicated journaling apps like DayOne, which are specifically designed for a smooth journaling experience.In summary, using Obsidian for journaling can be a powerful and versatile option, especially for those who prefer flexibility, customisation, and want complete control over their data. However, it might not be as beginner-friendly or media-focused as dedicated journaling apps like DayOne. The choice ultimately depends on individual preferences and journaling requirements.
The post Obsidian or DayOne for Journalling? appeared first on Good and Geeky.
August 5, 2023
Review – LG 4K Monitor connected to my Macbook
I love having a lot of screen space on my computer desk. I have the Macbook screen but I’m used to having more with the old iMac and a 1920 x 1080 monitor connected to it. So when I got the MacBook I went for the LG 4K monitor and it’s working really well.
I have a couple of apps to choose from to adjust the screen resolution. Mostly I use the default largest available and occasionally swap to a lower resolution so I can see things bigger. It depends on if I can change the size of the text in the app I’m using.
[image error] [image error]The post Review – LG 4K Monitor connected to my Macbook appeared first on Good and Geeky.
June 6, 2023
I Didn’t Think I Want Apple Vision Pro
I finally managed to watch the Apple presentation for WWDC 23 and the Apple Vision Pro does look kind of stunning. The price is huge, but what you get from it means the value is also huge. I can’t wait to actually try one out in person and see if it’s as good in augmented reality and virtual reality as it is in the hyped up presentation from WWDC. My imagination has been stimulated and I can picture myself wearing these and interacting with the computer on my head.

I suspect it could be kind of weird going into a room and seeing someone wearing these goggles on their face. Even with the projected picture of the users eyes on the front of the device it’s going to take quite a bit of getting used to. If you use them out in public I expect the general public will think you’re a weirdo. I suppose in time when they get more prevalent it might seem normal. In the same way that people are looking like they’re talking to themselves when using AirPods seems normal to us now. I remember many years ago talking to someone while wearing wired headphones while walking along the street getting a weird look and someone thinking I was talking to them. People do it all the time now and nobody takes any notice.
It seems like we’ll be able to control the device using small hand gestures. We won’t have to be waving our arms around like lunatics or like Tom Cruise using those computers in the movie Minority Report. I’m wondering how accurate this system will be. Is it going to be like Voice Control where sometimes you have to actually use the keyboard to get what you want, now and then. Unless these hand gestures work 100% of the time it could get slightly annoying. Any niggles like this we’ll have to be massively out balanced by the usability, efficiency and enjoyment you get from using Apple Vision Pro.
Apple claim a two hour use time with the attached battery. You could use it all day long if you have it plugged in as well. I’m wondering how it’s going to feel after an hour or two of total immersion into your computer. Is it going to make your eyes feel really tired, will it give you headaches. Other virtual reality headsets have been known to even make people want to vomit due to the excessive movement. I suppose it’s going to depend on each person and I suspect there will be some people who will not be able to use this device at all.
In the presentation they show you could take the screen from your Mac and work with it inside augmented reality. Maybe it also does that for the iPhone or iPad. It works with a keyboard so if you really do need to things then that’s another possibility. Could the Apple Vision Pro take the place of, or even be better than a huge monitor screen. I have two monitors connected to my MacBook Pro and by the looks of it I could get rid of both of those. When you take into account not needing extra monitors might be the price of the device it’s not that excessive. Perhaps all you would need is the Apple Vision Pro and an iPhone and you’d have everything taken care of. I would still need my Mac as some of my applications I like to use often are Mac only.
In the WWDC 23 presentation they showed the Device being used in the home and the office. There weren’t any clips of it being used in the street. The most public usage they showed was someone using it on an aeroplane. That could be absolutely fantastic to use the totally immersive experience and basically time travel your way through a long flight. I expect they’ll be the possibility of extra batteries that you can swap in or add to with MagSafe.
Like I said in the title, I didn’t expect I would want Apple Vision Pro, but after seeing it in action and weighing up at the value you could get from using such a device – I want one! I’d go into the shop and buy one tomorrow. However, it’s going to be a long time before it is available to me. Apple says they’re coming out in early 2024, but it looks like it’s going to be just in the US to start with. It could be more than a year before we see them here in Europe. We’ll have to be patient and that gives me time to save up some money. I can’t wait until I can look like a complete dork wearing Apple Vision Pro.
The post I Didn’t Think I Want Apple Vision Pro appeared first on Good and Geeky.
June 4, 2023
Remind Me App – Which One?
I have a number of tasks I have to complete while at work which I need to be reminded about. In previous years I used the application Due. I was happy using it and it worked really well for what I needed to do. The best thing about it is that it has this persistent reminder thing. It will tell you you’ve got to do something and then five minutes later tell you again. It’s not an unlimited number of reminders but it is often enough for the message to get through. It also works well on the Apple Watch.
I’m not quite sure why I stopped using it, but I looked at the possibility of using Reminders app by Apple instead. Also I was using the application Sorted which had some nice features. I put it on all of my devices, but the only thing I didn’t like was that the synchronisation between devices was slow. When I had checked something off as done on the phone it would still be persistent on other Devices. It just took too long to synchronise.
Apple Reminders
Using Reminders has been pretty good, but sometimes I don’t get the message from the app. Also it doesn’t have that persistent way of reminding I have with Due. Other good things about Apple Reminders is that it has a good interface which is easy to use and you have extra things like tags and location. You can also give the reminder a flag and a priority rating. You can even have subtasks, although I prefer not to use them because you have to open up the reminder and look inside to see what those sub tasks are. So you don’t know what you’re supposed to do until you actually go looking inside. Unless of course you can just remember what those subtasks are.
Other Options For A Reminders AppI’ve been looking at one called Ticktick which looks pretty good. Has a good looking interface as well as the bells and whistles you would expect from a modern reminders app. I had this running at the same time as Due for a whiole. Fairly pleased with the application although I’m thinking it’s too expensive to use. I have too many Subscriptions running already. The subscription for Due is only €5 per year which would only cover two months with ticktick. I don’t think the free option is going to give me enough.
Another one I have looked at in the past it is Omnifocus just too expensive. I did pay for it once and it has all the best features, but it’s too complicated and too expensive for my usage. It’s a sledgehammer for cracking a nut as far as my needs are concerned.
Back to Due AgainThe other useful thing with Due is that you get timers. The auto snooze you can set how many times you want it to repeat up to 10 times for repeat in definitely when possible. I have mine set for three times. When you need to change the time on the time picker you have buttons when you want to change it quickly. There is a thing called Critical Alert and these will always play a sound and appear on the lock screen even if your phone is muted or do not disturb is on.

Another option is to create an event. This allows you to move the reminder from the Due application into your calendar application. It’s easy to create Reminders in the Due application, but you can also create them in the Apple reminders app and import them. This is very easy to do and it works seamlessly. Only works on the iPhone app though and not in the iPad app, which is a little bit strange.
I normally like to have my applications everywhere so also available on my Mac. I’m not going to be doing this with Due because it’s too expensive on the Mac. For a start you have to pay €18 to buy the application and then there is another €9 per year they expect off you to get the upgrade.
To Do App by MicrosoftI look to briefly at this one as it is the application which used to be called Wunderlist List. I used this one in the past also and thought it was okay. When I looked at this a couple of days ago I wasn’t really impressed with the design of the application or the usability. The good thing about it is that it’s free and it is available on all the platforms.
Another Possibility is GoodTaskThis is an add to Reminders essentially. There is a free version and it 10 Euro upgrade to unlock everything. It really likes to nag you into buying the upgrade. I’ve been looking at it briefly and not loving it so far. The buttons for making it a recurring task and It seems you need the upgrade to get back into a task to change it. Or you tell it to open in Apple Reminders and make changes there. Possible to change the due date, clear date, followup. There are also bulk actions. It is not a bad option to use GoodTasks and the price is not excessive either. Still think I’ll be sticking with Due for my daily reminders for the moment.

The post Remind Me App – Which One? appeared first on Good and Geeky.
March 15, 2023
2FA with Hardware Keys or Authenticator Apps
There are different levels of two factor authentication. There are some places you can sign in and the website will push out a time-limited code. It’ll come out either as an email or it’ll come out through a message to your phone. It could even go to another device with which you were also logged in to the same account.
It does offer some security extra on top of just having a username and password. The only thing is, if somebody steals your phone that also gives them access to that second factor of authentication. It’s not going to be enough, it’s a little bit too easy with regard the a man in the middle attack. Or a thief
 https://youtu.be/RGn95l7ekF0
The next level of two factor authentication protection will be to use a separate authentication app. You can put a password or a pin code which is different from your device login password to keep people out of that app.
Or you could have it Open up only with face recognition or other biometric locking mechanism like your fingerprint.
So if someone steals your phone they would need to know the password to your authenticator app which you have different to your log in pincode to the phone. If someone was shoulder surfing and saw you enter the password to the phone – Your important accounts still have another level of protection.
Have a look at the other video I made about using ScreenTime to add protection of your iCloud \ Apple ID. Another password to remember because it is different to the log in code for the phone.
But you know your iCloud account holds the keys to the kingdom. So you have to Keep it secure.
There are a number of these authentication applications like the Google authenticator, but I prefer to use the one called Authy.
You can also use 1Password the password manager to give you the TOTP codes. So long as you have that properly protected with a password different from what you used to login to your iPhone or whatever device.
If this is set up properly then this is going to be a good solution for most people.
The next level of two factor authentication is to use a hardware key like Yubico key. Trust Keys and Thetis are other options.
There is the Yubico authenticator which will give you the time based keys – only if you also plug-in or use NFC to unlock the application. I would highly recommend using one of these keys for your keys to the Kingdom accounts.
These are accounts such as your email accounts, bank accounts and something as important as your Apple ID. This will make it more difficult for people to lock you out of your accounts.
This is why you protect email accounts —
Often you will get an email asking if it was you who wanted to change the password on your email account. If someone has broken into your email account they might be able to say “Yes it’s me” to one of those emails – and do more damage. Locking you out of important accounts like banks.
What I like about using Authy or 1Password for the two factor authentication codes is that they are synchronised across devices. Also there is no limit to the number of two factor authentication codes you set up in the application.
This is in contrast to the Yubico authenticator which only allows you to have up to 32 accounts on one key.
Also you have to setup these per Yubico key. So it’s going to take more work to set up the two factor authentication.
I’ve also found that some accounts only allow one authentication key. It’s necessary and not just highly desirable to have duplicates of your Yubico keys. Just in case you lose one.
If the site only allows one hardware key. Make sure you have another method of getting in as a back up. This could be a list of one time keys you have printed and kept safe somewhere. You get these when you set up the 2FA.
I have three Yubico keys now. One key is kept in a safe place and is the back up key. Two of my keys work on USB A / NFC and the newest one I have bought works on USB C and lightning.
I have covered all the bases. Although I’m tempted to get another which is USB C / NFC.
When you set up a new account with your Yubico keys you have to do all the keys at the same time. So go get the back up key from the safe place and do that one too.
Apple will not let you set up hardware 2FA keys unless you have 2 keys. So bear that in mind when you are buying your first key. You have to buy two.
So decide what your level of risk is. Use the protection you think is necessary.
Some people who like going to bars where people can easily look over your shoulder as you put in the pin code to the phone could even consider using a burner phone which only used for these nights out.
Purely for phone calls and without any connections to online accounts.
The post 2FA with Hardware Keys or Authenticator Apps appeared first on Good and Geeky.
December 30, 2022
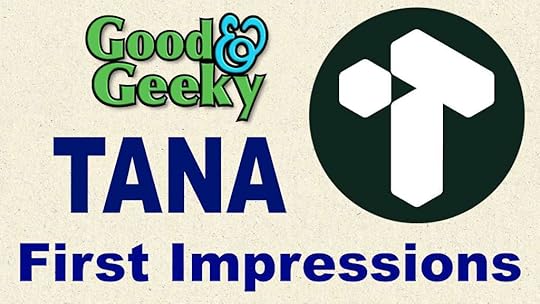
Tana vs Other PKM Applications
I put in my application to get the access to the beta version of Tana, waited for quite a long time and forgot about it. Then the invitation arrived and I couldn’t wait to give it a try. Here are my first impressions of Tana.
You have to login to the software using a Google email address. I have to wonder if there’s too much of a Google connection there. There isn’t an application specifically for Tana and you need to run it in a Google based browser. I use the Brave browser and so it was no problem to get started using Tana. It’s soon gave me a prompt to add the Brave browser application which allows Tana to open like a proper application. Even before you have done that you can use the application within a normal browser tab. I prefer proper applications and I’m not even that keen on the electron applications like Obsidian and Logseq. This is because I do a lot of dictation and Voice control dictation doesn’t work too well if it’s not a proper mac application.
 Good Help To Get You Started Though
I was quite impressed with the on-boarding efforts by the software developers. They do their best to make it easy to get started. There are helpful little prompts to help you understand how Tana works.
They explain how the basic starting point for the application is in the calendar. It’s kind of the same way that Obsidian and Logseq work. You throw your data into these places and work outwards from there.
It’s like if you go into using tags in a big way on your Mac and throw all files into one big bucket. You rely on the tags to be able to find, classify and use all of your data.
On account of the fact I already have Obsidian I have to wonder if I’m in need of another personal knowledge management application. I really got into Logseq and enjoyed the application hugely.
It’s a great piece of software and I’d have been happy to stick with it. Except I gave Obsidian another try and found that I liked it also. Obsidian had the added advantage of being the one, at the time which offered synchronisation. It’s only good and geeky curiosity making me have a look at Tana. I have seen quite a few people raving about how good it is. Another of my first impressions about Tana is that it’s still very much a work in progress. Mind you, that can be said of just about every software application on whatever platform out there.
The other application in this personal knowledge management arena is Craft. On the cons side of Craft is the fact that it doesn’t have tags. A big plus for Craft, is that it’s a proper Mac application with corresponding iOS applications. This can’t be said of Tana and to use it on a mobile device it’s not ideal at all. You have to use it from within a browser and I just don’t like that. Craft does give you synchronisation and has just introduced a connection to AI artificial intelligence. There are other ways to get directly into GPT 3, but it is cool to have it built into the application. It was for that reason I updated Craft or continued with the subscription for the application. It is also cheaper than the subscription to the synchronisation in Obsidian. By the way, looks like Logseq might also now have synchronisation as a paid for option.
Obsidian is further along the road than Tana as regards development. It has a vibrant and passionate community around it. So does Tana. Many of these people are adding to the functionality of Obsidian with excellent plug-ins. The same can also be said of Logseq and both of those are really useful applications. I find the query language used in Obsidian a little bit easier to use and understand than the one in Logseq. Tana still has a long way to go in its development journey. It could though be a really useful application.
After using these other applications for personal knowledge management and getting used to the way they work, it’s difficult to get my head around Tana. Many of the concepts are quite similar with the linking from one document or nodes to other documents or nodes. Wiki style linking isn’t anything new. You just have to get used to the different language being used to describe how it works and fits together.
You don’t just get tags in Tana, but you get Super Tags. I quite like the way that you get different ways to view your data. The standard way to view the data is with a list, but you can set it up to view as a table or as cards.
At the moment the two formats you can use to bring in from other applications are with Roam and with Workflowy. You can bring other information in but you have to use a specialised format called Tana Intermediate Format. I’d be tempted to bring in some or all of my data from Obsidian just to see how it looks in Tana. I expect someone has made a plug-in or something which allows this to happen. One of the nice things about obsidian and Logseq is the fact that it uses markdown format. What do you can do to import documents is to put them into the correct folders and they are automatically part of the Obsidian Vault or Logseq Graph. Markdown is easy to use and you can set up titles and headers with a minimum of effort. In Tana it seems you only have minimal formatting options for the text. I expect that to change because you have to have formatting. Visual learners need it.
The Tana WorkspaceIt’s a basic three panel set up. On the left you have your workspaces and various lists within the workspace and the lists contained within those. The centre panel is the document panel. This is where you put your data. As I mentioned, the calendar is your starting point for adding data. This gets a super tag of day. A super tag is like a template, I think. Add lists and whatever you want to appear each time you use the Supertag. So a book supertag can be configured with a title, author, status, number of pages, date finished – For example
There are options at the top to go to the previous, next day and to go to a specific date.
Clicking on these will take you to the specific date or there could be a button there for today.
The post Tana vs Other PKM Applications appeared first on Good and Geeky.
November 28, 2022
Getting Into Warp Speed With The Terminal
I’ve recently come across a new terminal called Warp and it looks a lot better than using iTerm. The only thing it doesn’t do is to allow me to use Power Level 10K to configure the command line prompt. It doesn’t look like it’s going to do that any time soon. I could change the command line prompt to starship which it does allow at the moment.
The command line area is better for working with the text. You can select whatever you want and change things easily. You don’t have to do things just by text you can also select things with the mouse cursor. There are keyboard shortcuts if I want to select something like a word or to the end of the line.
Each of the commands of youse are considered to be a block. Can you can do more things with these blocks such as either copying the command or copying the output. This is an interesting piece of functionality which could be useful. For example it would be a quick and easy way to get a list of files within a folder.
Although I’ve lost the Git information I had with Powerlevel10k, it is replaced with other git functionality which is included within Warp. Changes I’ve made in the ZSH configuration file the honoured within my Warp window. Things such as the default text editor I want to use. I have recently changed from using nano to using Neovim, it’s a little bit more geeky and I like it. I also still have the aliases I set up within the config file.
It’s possible to divide the app warp app into panes as well as tabs. This gives us some of the functionality we get from using TMUX, but not all. So TMUX will still be needed, but for some use cases you won’t have to use it.
I do like the command palette which gives you access to extra tools you can use. It also shows you the keyboard shortcut for the commands do you have available within that palette.
The post Getting Into Warp Speed With The Terminal appeared first on Good and Geeky.
November 20, 2022
Affinity Designer Version 2 Tutorials
Serif have made available the new versions with a 40% discount from what the price is going to be as standard. If you buy the whole kit and caboodle it’s costing €119 and that covers all three applications across three platforms. I use these applications across the Mac and iOS platforms and that makes it a no-brainer to buy the full set of applications. At least we don’t have to think about how much it’s going to cost with a subscription. Of course there have been some people complaining about the cost. Maybe they’ve only recently bought version one, and that would be justified if they only did it last month. I suspect if they talked to the company they might get some sort of deal in a special circumstance. It’s possible just to buy whatever you need and the cost could be fairly low.

Since this new version of Affinity Designer arrived I’ve been busy making videos to put onto YouTube. Affinity Designer tutorials 2022 showing users how to do things with the software. Most days I’ve been able to create a YouTube shorts video and also a longer video. The longer video going into more detail and highlighting certain aspects of the app with the shorts. If you haven’t already subscribe to the Good and Geeky channel then go and subscribe now. You’ll be able to keep up-to-date with the new tutorials I make as they become available.
 First Impressions Of Affinity Designer Version 2
On the surface it doesn’t look too different from the previous version. However, there are additions which are especially welcome, such as the vector warp tool. This is something designers have been waiting for for a long time, the ability to warp vectors without them being turned into bitmaps during the process. It’s surprising it’s taken them so long to add this, because I remember when I used to use CorelDraw it had that ability. That was over 20 years ago. When you’re working on design it’s quite often you want to warp text to fit into a specific shape. When you tried to do it before it would send you over to the Affinity Photo Application and do the warp. The problem with that was, when it came back it was a bitmap. This might not be a problem, if you was doing it at the end of a design process and no more changes were going to be made. That’s not really the way the world works. When you give the design to someone or it’s a design you’re working on over a longer period, it’s highly likely you’re going to make changes to the design a number of times. It’s definitely necessary to keep your design as a vector to make it easy to make changes when you go back to it later.
Affinity Designer Warp ToolThe Affinity Designer warp tool works fairly well. You have a number of different types of warps available. There are simple ones such as quad and perspective. These are fine to use if you’re just using the four corner nodes to distort your design. I found when I put a quad warp onto anything and then changed any of the sides of it to a curve, it turned into a mesh type warp. A simple mesh with just the four corners which is different from the mesh you get from the Affinity Designer warp choices. The Mesh Warp has more nodes in it in the centre of the rectangle.
Subscribe to the YouTube ChannelCan’t Warp Bitmaps in Affinity DesignerIt isn’t possible to warp a bitmap file such as a PNG file or a JPEG file from within Affinity Designer. What you have to do is to send it off to Affinity Photo to get that picture warped to fit a perspective or whatever other shape you need it. When doing this on my new MacBook Pro M1 Max it takes no time at all to swap to the other application and apply the shape needed. Bringing it back into Affinity Designer happens in a split second. I found it best to create the shape I wanted to have a bitmap fit into, in Affinity Designer first. This made everything ready to go when I got to Affinity Photo. Watch the video to see how I did it.

There are two warps which will put a curve in a text to either vertically or horizontally. It kind of curves in on itself rather than making a curve of the text similar to when you put the text on a curve / ellipse. There is a Fish-Eye Warp and a Twist Warp which have the ability to really mess up the shapes you are working on. It’s a good job these tools are easy to recover from. Click on the Reset Button to get it back to the starting point, or hit the Mute Warp button. It’s fun to play with these warp tools and get all sorts of weird shapes happening. I found that if you rotate the object the warp doesn’t rotate with it. So you get unexpected weird changes happening when you do that. Something to watch out for as you work
The Affinity Designer Shape Builder ToolIt was always possible to put shapes together, cut them up or dissect them with the simple compound shape building tools available before. You could take two objects and put one over the top of the other, use the add tool and make one object out of the two. Or you could use one object as a cookie cutter to cut a shape out of the other object. There is the intersect tool and the XOR options which remove various parts and leaves other parts of your objects. These tools are still available in Affinity Designer Version 2. What they have added is another tool which extends what those older tools could do. The new Shape Builder tool is more interactive and in some ways is easier to work with. So if you have a couple of shapes overlapping and selected you can choose how you want to deal with them. The first choice would be to use the add tool. Then you would choose how you want to select which bits to keep. You use a line, a freehand line or a marquee selection. I prefer using the freehand line which works best when I’m working with the Magic Touch Pad. I can easily draw over the areas I want to keep or delete by moving my finger around on the track pad. Have a look at the video to see how this works. If you have two objects, perhaps two circles which are overlapping that gives you three areas. You need to run your selection line across all three areas you want to join together.
Using The Symbols ToolI don’t think this is a new tool for version two of Affinity Designer, but I have made a video using it within this new version. It’s a really good productivity tool. You may have a design where you have the same shape repeated in numerous places. Using the symbol tool you can create extra instances of objects or group of objects. Whenever you change one of these you will change all of them. It’s also possible to go in and make changes just to one of the shapes that has to be different for whatever design reason. Change everything about the object from the colour, shape, stroke size and effects and still keep all of the other instances of the object in sync.
Have a look at the video and see how it works. I found that it can be a little bit fiddly sometimes. You have to make sure you select the correct object in the layers panel to make sure that you change everything within that shape and have it synchronised across all of the other linked objects. It isn’t too difficult to get the hang of it if you give it some practice and spend time using it. While I was testing it I did find a couple of times I messed up I had to go back to the start with one of my objects. I found it difficult to detach the synchronisation and then reattach it afterwards. I think it’s just a case of practice though.
Subscribe to the YouTube ChannelThe post Affinity Designer Version 2 Tutorials appeared first on Good and Geeky.
October 19, 2022
Database for Movies or Books in Obsidian

I’ve heard many people get excited over Obsidian and say how wonderful it is. A couple of years ago I gave it a try and I didn’t really like it very much. I gravitated towards Craft, because it’s a proper Mac application and looks good while doing it’s stuff. I’ve paid for a subscription for the year for Craft because I enjoyed the synchronisation abilities it has. It’s always good to have all of your information everywhere, on the iPhone, on the iPad on the iMac and even in a browser on whatever. I gave Logseq a good try and I liked it. I did the synchronisation using Git and Github alongside using Working Copy on the iOS devices. Generally, I was pretty happy with the way it was working. Now and then it would be annoying with the synchronisation not working exactly right. Something triggered me to give Obsidian another try. And now I am glad that I did.
Why Do I Like Obsidian So Much Now?I’m getting all the good stuff I had in Craft plus a huge amount of customisation and in particular, tags. There are weird workarounds to give you something like tags in Craft. I have no idea on earth why Craft hasn’t included tags right from the start. It costs more for the synchronisation you get with Obsidian, but overall the application has a huge amount of extra functionality. It’s the bees knees in terms of personal knowledge management applications, the crème de la crème of PKM. I’m now running Obsidian on my Raspberry Pi’s as well as all of my Apple devices. The synchronisation is fast and secure with encryption covering my data end to end. The big thing with Obsidian is the huge variety of plug-ins available to really customise the application. This is what it needs to make your own database for things like books, television series and movies. Dataview is one of these plug-ins and the other is Database Folder.
Using Dataview And Database FolderIt’s easy to install plug-ins into Obsidian, and this was certainly the case with Dataview and Database Folder. I followed a few tutorials showing me how to get data into the Dataview plug-in applied into a document. It is something similar to a MySQL query with it’s language and I found it easier to work with than the queries in Logseq. Another reason to move towards Obsidian rather than Logseq. So I did a video showing how to set up these databases, one using just Dataview and the other one using Database Folder. Check the video out below.
The very next day after making the video I found another tutorial showing me how to bring in data from a movies database. This will make it much easier for putting the data into Obsidian when I’m sitting on the sofa with my iPad or iPhone. All I need to do is to add my own rating and review to complete the task. This second way to set up the movies database in Obsidian took more setting up and required other plug-ins and even a JavaScript file to make it work. Following the instructions step-by-step was pretty easy. Here is the video showing how I set it up for myself.
I’ve also found something similar to show me how to bring in data for book information. It’s always good to be a lazy, geeky person because we’re always looking for a quicker, easier and more efficient way of using technology. I have all my information of the books I’ve read in Goodreads. Goodreads is a useful tool because they put you in contact with other book readers and makes recommendations for your next book. I think it’s a better idea though, to have your own database because you never know what changes might happen to the external service. It could stop working completely or they could leak your data from it or whatever. If you keep all of your data in house, then it’s much safer and you only have to make sure you have a good backups.
So It’s Obsidian For The WinThis morning I found out I could do the callouts in Obsidian I’ve been able to use in Logseq. I also found a plug-in which allowed me to do snippets to do quick replacement of text. Same sort of thing I’ve been using on my Mac using either the built in text replacement by using Text Expander or Keyboard Maestro. The good thing about it is that I can do this on my Raspberry Pi within the Linux system. So I’ve got similar functionality whatever device I might be using.
Getting Good And Geeky On YoutubeIf you haven’t done so already, please subscribe to the Good And Geeky Youtube channel. This will ensure that you get the updates when I upload new videos, new tutorials to show you how to be your best, geekiest self. My idea for the channel to show ordinary folk how to make the best use of technology, hardware and software. I try to be concise to give you the information as efficiently as possible. Step-by-step guides you can easily follow to help you achieve proper geekiness. If you’re a subscriber to the channel I’m happy to answer to your questions and even do one off tutorials to show you how things are done. I’m an old bloke who loves technology and passing on the information to you whether you’re young or old. Good quality, straightforward tutorials without the distractions of people or cats doing silly things.
The post Database for Movies or Books in Obsidian appeared first on Good and Geeky.
Good and Geeky

- David Allen Wizardgold's profile
- 3 followers

