
David Allen Wizardgold's Blog: Good and Geeky, page 2
October 2, 2022
Kasm Cloud Computing on Linode
Getting properly good and geeky using Kasm. This is a service which lets you have total anonymity online. If you need to do any hacking and you don’t want to let anyone know you are there, then this is the tool to use. The Ultimate Hacking Tool. I followed the tutorial from Network Chuck (See the tutorial below) and it was fairly easy to setup. Of course I did run into some small problems on the way, but I managed to get around them. Surprisingly I found I was able to use the Kasm workspaces easier on the raspberry Pi than on my Mac. I should have been able to get to the Kasm instances through Google Chrome or Firefox on my Mac but it didn’t work well. I was able to get past that problem by going with Safari. Then I ran into another problem where the keystrokes were not being recorded into the browser and I couldn’t really do much.
 So I Went To The Raspberry Pi
On the Raspberry Pi in the standard browser I put in the IP address for Kasm. It was easy to get through to web addresses like a proper hacker. It got even cooler when I installed another operating system on top of that. Kali is the operating system you want to use if you’re going to do any proper hacking. If you want to do penetration testing of online systems and websites Kali is the one to use, as the tools built in are ready to do that sorts of thing. You can use other operating systems and add the tools you find in Kali but it’s easier just to use the tool made for the job. To get Kali started I went into the Kasm interface and into Workspaces. From there I could choose from a number of browsers, specific Internet apps such as Discord, Postman and even Only Office then there were other Linux operating systems like Kali and CentOS. You can even play Doom from within Kasm. How cool is that?
It All Started off with Using Linode Cloud Computing
I’m not going to do step-by-step instructions to install Kasm on Linode because that’s all in the video by Network Chuck. I took advantage of the link which gave me $100 credit for 60 days which means I can try this out for free. The cost of using the new node instance is $20 a month which means I can use Kasm and also try out other things on Linode within the time period for free. I have other projects planned to use with the Linode cloud computing service. There are other cheaper nodes you can use for only five dollars a month, Kasm has some minimum requirements. It’s all good clean good and geeky fun.
I left Kasm running overnight, why not, because it’s free. At least until I’ve used up say $100 of credit I have because of being a new user.
Ubuntu running on top of Raspberry Pi operating system
So this morning I’ve tried another work space where I’m running Ubuntu. On the desk top of this virtual machine I have access to a couple of different web browsers, Visual Studio Code, Zoom, gimp, Nextcloud. It’s all quite impressive. What I need is a way to connect to some sort of document sharing space to get documents in and out. The point of running a computer like this is the anonymity from the computer being hosted in the cloud and not on my IP address. If you need to do something nefarious or just secretively, then this is the way to do it. Obviously it all works a little bit slower because of the layers we are having to work through. When I log into Reddit, it thinks I’m in Germany because that’s where the server is located. It seems a little weird to be running a computer inside a browser. Quite impressive though!
Network Chuck TutorialA good thing to remember is that running on Linode the Kasam is totally sand-boxed. If you need to try out a link to a web site and you’re not sure if it could be dodgy, use this. It is totally sand-boxed and you can’t mess up your own computer if you tried.
The post Kasm Cloud Computing on Linode appeared first on Good and Geeky.


September 23, 2022
Raspberry Pi Fun and Games
I’ve had the Raspberry Pi 4 for about a month now and I’m really pleased with it. It is really ticking all the boxes for my good and geekiness. I’m learning a lot about the Linux command line while I am setting up a whole lot of different things. Using the command line application Nano to edit set up files is pretty easy once you get used to it. Moving around the file system is no problem when you learn a few of the essential commands. I have added extras to customise and personalise the experience.
I have added Zoxide which allows me to change directories using the letter z instead of cd. It also has a fuzzy finding thing going on. If I have already navigated to a folder such as Documents, I can get back to it again by just typing in the first two or three letters. This is a bit of a timesaver.
I installed an extra program called Exa. This gives me a tree view of whatever is in the folder I’m looking at. It also gives me another view which uses colours to show different types of files and data. There is GIT support in the standard view so you can see which files are staged. It shows extra information that you wouldn’t normally see with using the LS command.

I’ve also installed a small utility called Starship. This gives information about the directory you’re in and puts your command line below. It also gives you GIT information. It doesn’t do much, but it’s useful for what it does.
Started Again From ScratchI was following a tutorial on YouTube to set up Docker and Portainer, and I got to a point where I could not go forward. For some reason or other I could not use localhost to see the configuration pages for Docker or for Portainer. I tried all sorts of things to work it out. Deleting things and reinstalling and looking in various configuration files for the Raspberry Pi. In the end I decided it would be quicker to take one of the SD cards and completely reinstall from scratch the operating system for Raspberry Pi. Obviously, it was annoying having to set everything up again. It’s a good idea to take notes as you go to remind you what do you have set up on what you haven’t. I had a few notes, but I did have to rely upon my memory to a certain extent. It took me quite a few hours to get everything back to working again.

I started again with the same tutorial for Docker and Portainer. Everything was going great and when I tried to install a container for Homer I had a similar problem crop up again. This time I looked through the comments for the YouTube video and I found something that helped me get past this problem. I noticed that even though following the tutorial exactly, it was not publishing the ports I needed to get access to the config webpage. I tried a couple of things and in the end I went with using an option for auto set up of a part of the setup. Hey presto, it worked and I’m in business.
What’s The Best Mac or Linux?I have to admit I’m loving using Linux on the Raspberry Pi. You can do an awful lot with it. Using the Raspberry Pi 4 the operating system is quick, and it doesn’t feel like I’m using a tiny credit card sized computer. Obviously, when you’re using the command line things get done quicker because you don’t have extra layers of gui on top to slow things down. On the other hand, I couldn’t give up using the Mac completely because after using it for so many years I have things set up just the way I like it. There are loads of applications on the Mac I would definitely miss. All the customisations and personalisation I have on the Mac such as using Raycast and Alfred, make the Mac my favourite computing platform. The Apple computer platform, which includes the iPad, the iPhone and my Apple Watch, all work together to give me access to my data and files.
SyncthingOne thing I’ve done is to set up Syncthing, this allows me to share files across platforms. I have it set up so that files from my 2 Raspberry Pi’s are also shared to my iMac. I only have to drop files into the correct folder and they get shared wherever I have set up Syncthing. I tried using iCloud to make a bridge so the files could also be shared to my iPad and iPhone. It’s really didn’t work very well. iCloud is slow. When you drop things into the Syncthing folder you only have to wait a maximum of five seconds and the files move themselves across the systems. With iCloud you could wait forever. So instead I used an app called Resilio Sync to synchronise from the iMac to my iOS devices. This seems to work well enough so far. I can share files into the sync folder on the iPad and iPhone and they will end up on the iMac in the folder which shares out to the Linux computers.
Useful tutorial for SyncthingOne More Thing – Cloud ComputingI also have dipped a toe in the water with cloud computing. I have set up an account with AWS, Amazon Web Services. With this I’ve been able to set up Linux computers in the cloud which I can SSH into from any of my computers. This includes the iPad and the iPhone where I’m using an application called Secure Shellfish. I also use this application to SSH into the Raspberry Pi computers. It’s all pretty cool good and geeky stuff. I’ve even got into the Raspberry Pi computers using VNC. It seems kind of weird having the the Linux operating system inside my iPad. It’s a little bit useful even though it doesn’t work perfectly with regards moving around and pointing and clicking on stuff. Something else to play with!
Another One More ThingSomehow or other I managed to break the ability to SSH into the Raspberry Pi 4. It would not let me login using the password. It said I had to use an SSH key. I tried sending the SSH key to the device by copying it across. Nothing seemed to work. In the end, I decided I would copy an SSH connection which was working. So made a duplicate of the connection to Wally the Raspberry Pi 3. I then twiddled with some settings within that and I’ve been able to login from my iPad using the application Secure Shellfish. Delighted I am (as Yoda would say).
There seems to be quite a few of these little gotcha moments. Often it can be quite annoying, but at least I’m learning stuff when I find out how to get around the problem. Frequently I need to go to the Internet and find the information on the huge number of websites with information about Raspberry Pi and Linux. Sometimes I can work it out with just a bit of twiddling and fiddling. It’s all part of the fun!
The post Raspberry Pi Fun and Games appeared first on Good and Geeky.
September 13, 2022
Craft App Versus Logseq
In the world of personal knowledge management applications Craft and Logseq are two really good options. Each with their strengths and weaknesses. The main thing to note is that Logseq is an Electron application like Obsidian and for some people this might be a big red flag. There are things you can do with a proper Mac app which you can’t do with an electron application.
For example, I like to dictate and I can’t properly do that with Logseq. I also usually find that Mac applications are prettier and generally a joy to use. The electron app is another level of code running on top of the Mac system and works differently. The good thing about Electron apps is that they are multi platform. You will have versions that will work on Windows and Android and maybe even Linux. This means you can learn one set of Keyboard shortcuts for the application which are not dependent upon the platform you’re running the app on.
So let’s make a detailed comparison between Craft and Logseq.
When you compare Craft and Logseq, upon initial opening of the applications, Craft is so much prettier. The pages for the documents have nicer formatting options and it’s button click easy to add titles, subtitles, headings and so on. You have a panel on the right-hand side giving you a good number of formatting options. You can style whole blocks as titles, subheadings or as body. Then you can also make groups of blocks into pages or cards. It’s a piece of cake to make your documents visually appealing and for us visual learners that’s really important.
You can also make the right panel disappear and have that good stuff appear as fly in menus. Have the whole of the screen available by hiding the left panel too.
Craft gives you synchronisation of your data across devices built into the application. You can use the application on your iPhone, your iPad and in the web application in the browser and anything you put into it will be immediately available on your other devices. It synchronises automatically and you don’t have to think about it.

The synchronisation you get with Craft is phenomenal. When you want your data everywhere then Craft is the way to go.
With Logseq – You can do it with a tricky set up with Git and using Working Copy app on iOS. It works but takes time and geekiness to set up.
Logseq doesn’t have synchronisation built into it yet. It’s coming at some point in time and will be a paid for upgrade. Which is fair enough, because the makers of the application have to monetise at some point in time. If it’s always going to be free it is not going to survive for very long. Talking about money, Craft is a paid for application although it has a free version. The free version is good for trying it out and you get plenty of time and space so you can work out if you like the application in terms of its utility for you. Having to pay a subscription will be a red flag for some. Only you’ll know if there is value in paying $5 a month (paid annually).

We all have multiple devices these days and it really is nice to be able to put things into one device and to see them magically appear on the other devices. The synchronisation I get with the Drafts application is one reason I have kept using it for so long. It’s an incredibly useful app and is my go to application for adding text into any device. For many people looking for a good personal knowledge management application if they get 90% of what they want from Craft and have the synchronisation then they will stick with Craft. This will be the case even though Logseq has impressive flexibility and personalisation options.
The Nitty-Gritty of using Logseq or CraftBoth of these applications give you a journal or calendar as a starting point for your writing. Logseq actively encourages you to start by entering whatever into the journal and spreading out from there.
You can work with Markdown syntax just the same in either application. Both use the forward slash to make things happen to your text if you are a keyboard expert and use it in preference to using the mouse or trackpad.
The precise way it works in each application is different and you can use the arrow keys or letters to get what you need. The big difference with Logseq is that you can add a huge number of plug-ins into your options available from the forward slash.
While Logseq being mostly keyboard-based is great, the usage on iOS is poor and the app looks half baked. Weird choices for icons. They don’t match up with the icons on the Mac app. Craft on the other hand looks magnificent out of the box and just works just as brilliantly on whatever platform.
 Working with other apps like Drafts
I can send things from Drafts much easier, compared to the way it works with Logseq or Obsidian. Drafts is my text input application of choice. When I want to capture an idea I’ll do it in Drafts and then decide after where I want to put it. Might not be important for you but certainly affects my decision.
Logseq feels more geeky because of the configurability. Seems like it does more and it has the visual graph thing. So many more ways to link between documents and blocks.
The post Craft App Versus Logseq appeared first on Good and Geeky Books.
June 2, 2022
The Good & Geeky Way to Learn Coding Skills
Over the last few months I’ve been learning to code. I started with the lessons available from Mosh Hamedani. I started with learning JavaScript and SQL followed by Git and GitHub. Git is not a coding language but it’s something you need to know about if you’re going to learn to code. It’s a version control system which code is also used to collaborate with each other. Git is also useful for writers of any sort. Having all of your versions of whatever you have written is the ultimate backup strategy. It is very geeky but we like that sort of thing.
100 Days of Code with Angela WuAngelo Wu is a medical doctor and also a coder. She is excellent in how she teaches code. She explains everything as if we are 10-year-old children. She’s not like some teachers who start off very basic but quickly get to a stage where they expect the learner to know nearly as much as they do about the code they are teaching. Sometimes I find it a little slow but I’m prepared to put up with that because overall I am learning what I need to learn.
Why Am I Learning to Code?I still don’t really know how going to be up to use the code skills on learning. I doubt if it would be possible for me to get a job although I could do freelancing work. Self-employed to do coding to solve problems. There must be something I could do to make money with this new skill set.
Practice and More PracticeIt’s all about turning up and getting your bum into the seat. If you turn up each day and practice your coding skills then eventually it makes sense. What I learned previously in other courses have made a difference with this course by Angela Wu. She is big on teaching via challenges. So far, with most of the challenges I’ve been successful in completing the challenge without assistance. In the hangman challenge I needed a bit of help, but that was because I had to take a couple of days off because of other things I needed to do. A couple of times I tried to sit down and do some learning, but my head was just not working due to tiredness.
Typescript on Top of JavaScriptMosh has recently brought out another course. This new course is about Typescript which is a superset of JavaScript. I really need to get my head around JavaScript more before I jump into this course. I think I still need to go back to JavaScript even though I’m enjoying Python more. Sometimes I think it would be nice if someone could invent something more visual and block orientated. Something like Shortcuts with its ease of use. But within that it would give you all the complexity you find in a full programming language. So if you want to do a while loop, a for loop or an if statement you just drop in the block required her and fill in the blanks. Sometimes I think the programmers like to keep it as arcane as possible with the language syntax. It kind of gives programmers special powers, superpowers.
Learning to Use LogseqLogseq is a little bit like Obsidian, but for some reason that I have taken to it much easier. Logseq is list based as in each block is a list. You can organise things by indenting and out denting the data. In fact it’s really important to do this because it has an effect upon how the data is retrieved when your making queries.
I’ve also been comparing Logseq with Craft. Craft is prettier and is a proper application. One of the best things about Craft is the synchronisation across platforms. Whatever data I put into whichever version of the app, so either on iOS or on the Mac is available everywhere. It’s been more difficult to set this up on Logseq. With Logseq you need to use a synchronisation service like Git and GitHub. It works but sometimes it doesn’t work perfectly. You have to be really careful about not working in the same document within Logseq on more than one platform at the same time. I’ve already hit upon some conflicts which needed to be sorted out. On iOS you need to use an automation to bring the data in from GitHub. This activates actions in the application Working Copy. The trouble is, the shortcuts don’t always work. Sometimes it’s better to open up working copy first and do the pull to bring the data in from GitHub manually. Just to make sure the synchronisation has actually taken place.
In a lot of ways I prefer using Logseq to using Craft. First of all Logseq is free. It seems to do the wiki style linking a lot quicker and easier than is with Craft. There is much more configurability and personalisation available within Logseq. It is definitely more geeky to get it to do these things, but that’s half of the fun.
New Capabilities in Craft
One thing that’s better in Logseq is how it displays code. I can get it to display an entire block of code and it also puts in the line numbers for the code. I’ve found Logseq to be invaluable in my learning process.
The post The Good & Geeky Way to Learn Coding Skills appeared first on Good and Geeky Books.
January 28, 2022
Old Man Learning to Code
If you’ve been following Good and Geeky for a while you’ll know that I am keen to use Shortcuts, Keyboard Maestro and other tools to automate whatever can be automated. It’s all part of the plan to be as good and geeky as possible. With shortcuts you have a simple linear coding process. You can throw in information at the beginning of a shortcut and use that information later in that shortcut. So if you are new to any sort of programming this is the basics of having a variable. It was inevitable that I’d feel the need to take it a step further and learn some actual coding. I have tried in the past to learn aspects of coding with Python and I think I might have looked at JavaScript before. I’ve checked out AppleScript and even thought that Swift looked interesting. Before Swift came along I did look at how you could do coding for iPhone apps but I really couldn’t find my way through learning the code being used then. It was Objective C and quite difficult. So I decided this winter to really dive in and push on learning JavaScript. I’ve also had some fun with Swift Playgrounds.
 Good book to learn Javascript.Where to Start Learning Code
YouTube is the obvious answer and especially so for me because I learn in a visual way. I like to see examples, diagrams and lots of things with pretty colours. I want to be educated with visual representations to show what the words mean. More than half the time when you’re listening to a code expert, a programmer talking about code. it sounds like they could be speaking Russian or Japanese or a mixture of the two. It doesn’t take long for my eyes to glaze over. They always seem to assume a level of understanding of the programming terms without ever explaining the basics. It’s because of what I’ve encountered before when trying to learn programming I’ve always got to a plateau point which could also be described as a big brick wall. I need to get past that some how.
So on YouTube you have to pick and choose your teachers carefully. If you find someone on there who is explaining things well with diagrams and good metaphors then you should make a note and see what other content they have. I found a few that I like and sometimes it’s good to have more than one explanation of the same concept. What one of them might miss or not explain quite so well, another will describe perfectly.
Mosh the Iranian GuyI found Mosh on YouTube with his excellent course on SQL. The content of the course was explained efficiently, clearly and concisely. He didn’t jump from absolute beginner mode to almost an expert, so I didn’t get put off. I started with learning about SQL and moved on to JavaScript. It soon became clear it would be a good idea to get the full courses and they seemed to be fairly reasonably priced. In the end I went for the season pass for the year which gives me access to all of his courses. This is because the has courses on a wide range of coding topics. I also have interest in how to use Git and GitHub so I dived in with both feet and spend some money.
So far I’m happy with the courses and I made it all the way through the first JavaScript course. I did get a little bit bogged down with the next course which covered object oriented programming. I really need to go back over some of the elements of the first JavaScript course. There are exercises to get you more involved in the subject. Mostly I follow these through step-by-step and use them as an extra learning experience. I have to go back over them again and work it out for myself. I’ve struggled a bit with the thinking process needed to be a coder or programmer. By making myself solve the problems presented helps me get past this blockage.
While these courses are good, you do need extra information coming in. I thought there were not quite enough exercises and small tests of the subject matter. For this I went to other places where they had bite -sized tests and one of these I used was called Codecademy and W3 schools. I liked the way they have the ‘try this yourself’ sections in their lessons. You get to a page where the code is already on the page and you can play with it, adjust it and see what happens. They also have an iOS application which does bite-size lessons with exercises to test your learning.
I still like the content from Mosh because his explanations are so good. I need to work on my own learning abilities. I try to be as interactive as possible. So as I’m getting the information I’m typing the code in VS Code. Naturally I made a few mistakes as I do this and I have to solve the problem. Matching up what I’ve put into the code editor with the lesson information helps me to learn. Sometimes I think it’s a good idea to watch the lesson without doing anything with it. Then watching it again and being interactive.
Programming with PaxPax is a young chap and I like the way he explains the code. He doesn’t have as much content as Mosh, but it takes time to build up this sort of stuff. He also has information on CodePen.IO which is another place you can go to try things out if you haven’t got yourself sorted out with a code editor you like. Pax, Just like Mosh recommends the use of the VS Code editor. I’ve tried this and I like it and there are all sorts of extensions you can use to make it work just the way you want it to. I’d recommend following this YouTube guy as one of the starting points if you want to learn how to code.
Swift PlaygroundsThis application from Apple has been around for a while. Just recently had an update which allows you to create applications to the point of being able to submit them to the Apple App Store. It’s also been updated to use the latest Swift code and it has excellent teaching materials. When you first look at this you might think it is more for children to learn coding. There are the Learn to Code Playgrounds which have some very simple coding problems to solve. You get a bouncing cartoon figure in a small environment and you have to make it move around and complete certain tasks. These coding problems start simple and gradually get more complex. Because there is such a high level of interactivity and an extremely visual learning experience I have found them to be excellent to learn the basics of thinking like a programmer. I really got the concepts of for and while loops by solving the game like programming challenges. It was fun too and it always helps to have some fun while learning new things.

My grandson came to visit and is seven years old and I showed him the Swift Playgrounds and he took to it like a fish to water. He easily got the idea of functions to get a set of steps into one command that could be called later more than once. No problem for him with for loops either. Hopefully he will be able to get back into it back at home. I’d consider buying him an iPad so he could do more. Although, with kids it is too easy for them to get distracted and use it just for playing games. That would be a waste.
The post Old Man Learning to Code appeared first on Good and Geeky Books.
December 1, 2021
Apps For Learning – Mac and iOS
Yesterday I learned of an application called Anki and I installed it on my Mac, my iPhone and my iPad. On the Mac I installed a couple of different versions. I found applications which were not the ones I was looking for because they didn’t have all the tools and possibilities of the original. I couldn’t work out why the menus were not there I was looking for. It was extremely annoying. I was expecting one thing but getting something else. The name of the application was exactly the same and it might even be from the same developer or business. It was a mess, really. I want the one which is fully configurable and with all the options.
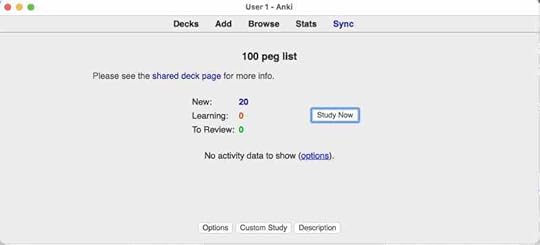
Anki is a flashcard system and you can get sets of flashcards to cover a variety of topics. It’s particularly popular with medical students because they have to learn vast amounts of information. What the system does is to work with an algorithm so the information is effectively pushed into your memory. It’s not just about memory though. I set it up in such a way as to try to make me understand the information and not just memorise it. The information is pretty pointless if you only memorise it and you don’t understand what it means and how it connects to other information. I found Anki because of a connection with Obsidian for which there is a plug-in to help you make flashcards ready to use in Anki. I’ve installed this plug-in but I haven’t worked out how to make it function yet. I will get to that bottom of that problem in time.
 Memory and the Struggles of Being Old
 My mom is only 20 years older than me and she complains of forgetting things all the time. Lately I’ve noticed I’ve been having the same problem myself. There are words I know, both in English and in Spanish and I just forget them. I try to think what these words are and my head is completely empty. Nothing comes to me and it might be a couple of days before I remember or can find a way to remember. It’s a bit of a worry because I’ve read that this could be a precursor to Alzheimer’s and I don’t like the idea of that. I like my marbles and I want to keep them. So I’m trying to keep my brain working with training. Anki is perfect for this. When I was studying to pass the test for my Spanish exam I used a website which provided flashcards. It worked excellently. When it came to do the test I was able to fly through the answers easily and get, I think, all of them correct. I just kept repeating these flashcard questions until I kept getting the right answers. I was a little bit surprised at how well it worked. The woman sat next to me in the test was struggling and still scratching her head long after I had finished the test, She definitely gave me a funny look as I sat there with my arms folded with the job done.
There is another Anki App - Not as configurable!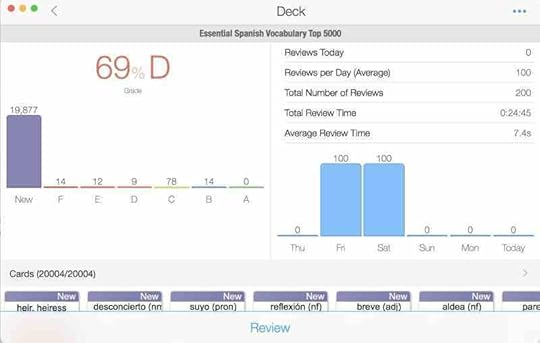 Learning Spanish and Other Things
 I downloaded a deck of flashcards with 5000 cards contained within. The idea is to use this to build up my Spanish vocabulary. It won’t be a lot of use on its own. The thing about learning a language is you need to learn how the verbs work and I specifically have problems with the past tense in Spanish. There are at least three different types of past tense I need to know about. I struggle even with just one of them. I need to spend some time to really study and learn this part of the language. For speaking the language I tend to learn mostly by osmosis listening to what people say. Using the same words and intonation often seems to work for me. When I’m chatting people tend to understand me, or at least I think they do.
The other thing I’m learning is the number peg system. This is where you use words to remember numbers. Letters are assigned to the first 10 numbers and then you can use these numbers to create words up to 100. The D or the T is used to signify number one. The N because it has two down strokes is for the number two and so with the number three you have the letter M. And so on. Vowels are not used except to make up words within the larger numbers. So the number 11 will be tit and so this makes the number 11 an easy number to remember. By using the words to create pictures in my head I can remember long numbers by imagining connections between the words. If I need to remember the number 1177 I could imagine a tit shaped cake.
When I was in the police I needed to know the international phonetic alphabet. Alpha, Bravo, Charlie, Delta and so on. I have forgotten the names of some of the letters now and so I have been relearning those. Just as a brain exercise, although people here in Spain tend to use a different system. They will use the names of towns and cities to provide the sounds for the letters. Such as S which is Sevilla, B for Barcelona and M for Madrid.
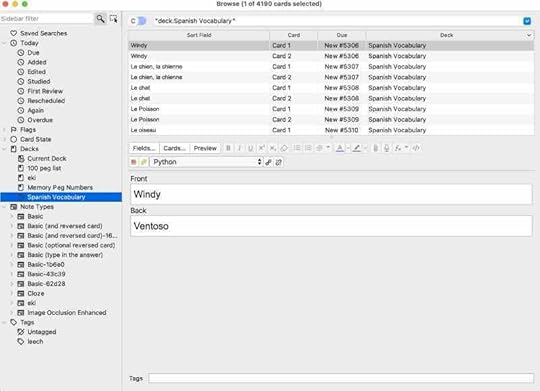
In the application Anki I have added decks of flashcards for those memory/mnemonic systems as well as the Spanish vocabulary and also a vocabulary for Estonian. Estonian is not a useful language to work with worldwide, but my two grandchildren are half Estonian. I’d like to know one or two words of the language to use with them and also with my daughter-in-law.
 How Anki Works
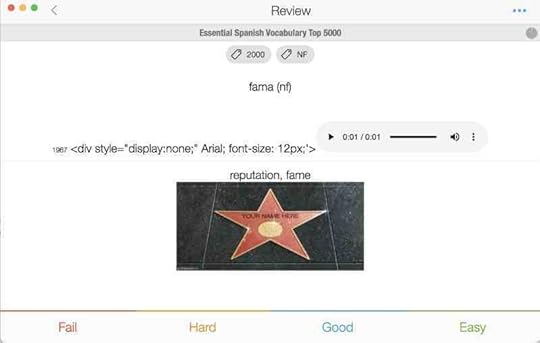
 You start by reviewing the flashcards. You see one side of the flashcard and you have to say what’s on the other side. Then you use the buttons or the keyboard shortcuts to indicate whether you failed, found the question hard, it was good, or it was easy. The application uses a timing system to bring up the failed questions more often than the ones you found hard, which show up more often than the ones you found were good or easy. It’s this systematic, spaced repetition which pushes the information into your head. You can change the algorithm, but most people find it’s easier just to leave it as it is. If you failed the question, it will show you the same card pretty soon after. The easy ones don’t need to be repeated, if at all. The ones where you have replied good, come up less often than the ones where you said it was hard.
You can create your own decks of cards. It’s also possible to edit the cards you already have. For example, with the number peg system I had learned a set of words previously and I wanted to get those same words onto this new set of flashcards. In the correct app from Anki there are lots of ways to customise the decks of flash cards.
Anki and ObsidianIf you have a subject you need to learn then a combination of Anki and Obsidian is amazing. Use Obsidian to make pages which link to other pages and back again with automatically created back links. You can even add another stage at the beginning of this by using mind maps. Embed the mind map into Obsidian and use it to create an outline for your study. It’s possible to send data from Obsidian to create flashcards in Anki. It’s also possible to fold text away in Obsidian so you get something like a flashcard, but without the algorithmic spaced repetition.
The post Apps For Learning – Mac and iOS appeared first on Good and Geeky Books.
November 17, 2021
Obsidian – iCloud or GitHub Sync?
I saw on a few places online where people had been synchronising their Obsidian documents over git. I can say that the advantage would be you would have a backup on steroids due to the versioning. This is what git is all about and I decided it would be a good idea to give it a try. I have the paid for version of Working Copy and I wanted to get into it and use it. I learned the basics of git and GitHub and I was off to the races. I found a tutorial in the Obsidian Community Forum and I followed that to set up pulling in a clone from GitHub of my Obsidian files onto my iOS devices. I should have guessed that it wasn’t going to be totally straightforward when following the tutorial exactly I still had a few problems.
Git Software Not Ready for Prime TimeIt seems that most of the problems came from the software, Working Copy. Partly because I didn’t know how to use it properly, the interface is quite different from what I was using on the Mac. Sometimes I would do the exact same commands, press the exact same buttons in the software but get different results. Software is kind of like automation and you expect the same thing to happen each time you do a process. I was ending up with error messages to annoy me by leading me down a rabbit hole to try and fix the problem. As I was doing this I was learning more about git commands. It’s important to know that when you do a “Pull” it’s the same as doing a “fetch” followed by a “merge”. So I was using the pull, to pull in the information from GitHub onto the iPad. There were times I could give myself a high five and be happy that everything worked just as it was supposed to. Then I would go back into Obsidian, make a few changes and either commit or push the data back to GitHub. Then I would jump onto the Mac to pull the data in and something wouldn’t be right. “Hell’s teeth, what’s going on here it worked last time?”
The problem with using GitHub is there are too many variables in how it works. I learned on the Mac it was necessary to ‘stage’ files for upload and then use ‘commit’. In my mind it seemed that was all I needed to do. Then there were times when I would look at what was in GitHub and there was stuff missing. So I went back into the terminal or into GitKraken and tried to find out what went wrong. I sometimes saw error messages and problems and didn’t understand the message. I was always able to sort it out one way or another and get back to equilibrium, but it was a complete mess and a time suck.
 Not as bad as I Thought
Then again – After spending more time with Git and using a couple of shortcuts to aide the process I’m starting to think it is workable. The shortcut does the Pull command and then opens up Obsidian. You then do all the work you want for the session in Obsidian.
Then you use the second of the shortcuts to push the changes you made back to GitHub. It’s important not to forget this part. Don’t work on other devices in the same files at the same time. Working this way I found it to be manageable and reliable. The human in the process has to be trained to work in a specific way.
A Better Way to Use ObsidianWhile trying to use Obsidian using iCloud on one occasion I found the changes did not synchronise across from the iPhone in a timely manner. This is one of the reasons I was looking at using GitHub as my synchronisation method. I certainly don’t want to pay nearly hundred dollars per year to synchronise Obsidian. For some people this could be worth it. Those people who use Obsidian for all of their computer text needs. It’s an excellent notetaking application and the wiki linking is phenomenal. It’s an interesting and novel way to help your studies because you can link any note to any other note. When you are working on a very long notes, you can do internal links within the same note. So if you’re reading something and you see a link you can hover over the top of it and get a preview. Or you can tap on the link and jump to more information which might just be the vital piece of information you are looking for at that time. Then you have the graph view which is an automatic mind mapping style of view. This gives you an overview of all of your notetaking and you can directly see where links are going from and to. This could help you see connections between information you hadn’t spotted before.
 Journalling with Obsidian?
I could also use Obsidian as my journalling software. At the moment I use Day One which is made for the purpose and I really like using. If I could get just as good a job done with Obsidian I would consider changing. I can put images and audio into notes just the same as with Day One. I might even be able to put videos within notes, I haven’t tried yet. One of the things I would miss from Day One is the reminders you get to look at ‘On This Day’. I really like to look back and see what happened over the years. Within Day One I have nine years worth of journal entries and it’s pretty cool to see that far back and know what I was thinking and doing on that day. Then there are the Day One widgets I have on my iOS devices I can go to directly. This helps me be reminded that I should create a journal entry for the day because I’m always looking at my iPhone and iPad screens. I don’t think I’ll get that with Obsidian. Maybe the €38 for Day One will still be the right choice. In Obsidian there is a Daily Note and also a community plugin called Periodic Notes. The idea is to have one note per day and put it all in one document. I like to split my journalling into sections. I have journals in Day One for family,motorcycle stuff, Culture and more. I can assign colours and it all looks great.
Still running into Issues With ObsidianThis morning I opened up the iPhone to have a look at Obsidian and I’m getting a notice to say is waiting for iCloud to synchronise Obsidian synchronisation files. It says there is one file left and I’ve got a button to skip if I want to. It was taking so long I decided to skip it and to go directly into Obsidian. I was just making some changes in the application on the iPad and even though I skipped the file which hadn’t been updated through iCloud everything was still okay within the files. The changes I had made had propagated through to the iPhone version of the application.
Another problem I run into with images is sometimes they come in upside down in Obsidian. This leads me to thing journalling is not going to work with Obsidian. I reckon I’ll stick with Day One.
iCloud Sync and GitWhat I think I’m going to do is to use iCloud synchronisation as the main way to keep everything up-to-date across my Apple system. Then what I will do as a backup and as a separate thing is to use get locally on my Mac. I’ll just use the Mac to create a Git folder which looks at what’s going on in Obsidian. I can either use the terminal to do this or I’ll use GitKraken. this way I’ll get the ease-of-use of the synchronisation through iCloud and I’ll get the versioning available from Git. I will probably still use Drafts as my way to input text into any of the devices. I’ll just have to create an action which puts the text into Obsidian in the correct place.
The post Obsidian – iCloud or GitHub Sync? appeared first on Good and Geeky Books.
November 6, 2021
Privacy and Security for Activists- Tails OS
If you’ve been following this channel for a while you’ll know that I am keen to promote privacy, encryption and security. One of the easiest ways to protect your data when you’re sending emails is to use the webmail available with Vivaldi browser. An easy to use PGP service. Or you can set up encryption using email clients like MailMate or Thunderbird. If you don’t want to get into encrypted emails you could also use end-to-end encryption with messaging services like Signal, Session, Threema, Dust, Wire and perhaps Telegram. Don’t send an email when you can send an encrypted message.
 .wp-duotone-filter-61876496dc3ee img { filter: url( #wp-duotone-filter-61876496dc3ee ); } Sending Email Through a Web Browser.
I do not recommend this if you’re using one of the more open web browser applications like Chrome or Safari or Internet Explorer. Safer browsers like Brave, Vivaldi and Firefox are better. Only then is it better when you are completely sure your computer is not compromised with a key logger or other malware. What about if you need to use a computer which is not your own? What can you do to ensure your privacy and security then? Now most of us carry a computer in our pocket is not so necessary to use somebody else’s computer. There are still some edge case scenarios where you’d have to use computer equipment that wasn’t your own. What about if we could carry our computer/personalised operating system with us? This is how we take our security to the next level by using a computer which we carry around on a USB drive or an SD card.
Tails – The Portable Secure Computer AnywhereTails stands for – The Amnesiac Incognito Live System. What you do is to install the computer on a USB drive or an SD card which you can plug into most computers and run directly. It’s not connected to the operating system on the host computer. So theoretically even if the host computer has viruses or things like keyloggers you’ll be able to use Tails completely safely. You will be able to avoid censorship, advertising and viruses, benefiting from a digital security toolbox which is ready to use with the safest defaults. This is free software and it’s based on a Debian Linux and I have tested it to find out how easy it is to install and use.
 .wp-duotone-filter-61876496dc475 img { filter: url( #wp-duotone-filter-61876496dc475 ); } My Experience with Tails
To get Tails you go to this webpage for Tails and download the image file to install on your portable storage. It’s about 1.2 GB in size and doesn’t take too long with a reasonable speed Internet. It’s possible to install this software image onto the USB stick using the command line interface, but it’s easier if you grab the software called Etcher. Make sure you get the latest version of this software. The reason I say this is because I was using an older version and it didn’t work. I didn’t know why it wasn’t working and I thought the problem was with the SD card. As soon as I used the latest version of Balena Etcher the process was as smooth as butter. The minimum size of your USB stick is 8 GB and I used an SD card with 16 GB and I also installed onto a micro USB with 32 GB without any problems.
 .wp-duotone-filter-61876496dc4cf img { filter: url( #wp-duotone-filter-61876496dc4cf ); }
 Tails will run on most computers. I first tried it on my own 2018 iMac and it didn’t run. I might try again on that computer, but instead what I did was to try it on my older iMac and it ran straightaway. It has to be said that this computer system isn’t really meant for everyday working. It takes a long time for it to load and boot up. You are going to need some patience waiting for it start up and be ready to use. It was only a couple of minutes, but it’s much slower than the operating system I normally use. I would recommend using a faster rated storage device to enhance the load up time.
When you are working on the Tails system you won’t notice much difference with most of your working. The operating system is fast enough and when you work on your documents it will be just like using any computer. It will be slower with the browsing of the internet through the browser. This is because by default Tails is setup to use a Tor connection. This makes your browsing safer and more private, but will always be slower to load pages. It’s not that bad. We are using Tails more for the security than for general computer usage though. We can put up with a slower download of web pages when no one knows what you are looking at.
Setting up Persistent StorageThe amnesiac part of Tails is the way it deletes and forgets everything when you shut it down. The idea is that your SD card or USB stick can’t keep anything which could incriminate you or be used to grab data you want to keep secure. However there will be some things you want to keep. This can be files and it can be settings. This secure space is protected by a password and is not unprotected out in the open. When you log in next time you will have to give the password to get access to the persistent storage. In this area I keep the PGP keys I use. The key pair I have for sending and receiving encrypted mail and also the public keys for me to send encrypted messages to my contacts. This works well for my threat level. Someone with a higher threat level like a whistle-blower, journalist or activist might prefer not to keep anything from a session. That scenario would need a fresh operating system each time, and that’s what you get with Tails. You will have to setup a new key pair each time, but that’s quick and easy and not a problem. If you don’t keep the previously used key pair you won’t be able to read encrypted data sent to you on the last session. You will have to work around that. Anything not in the persistent storage is completely erased when you log out. Nothing is written to a hard disk.
What Do You Get With TailsThe Libre Office suite of office software in on there, along with Audacity audio recording software. The PGP works through the text editor. You can also encrypt files using PGP. There is the Tor browser which is fine, if a little slow. There is a password manager KeePassCX, which you protect with a password like I do with 1Password on Mac and iOS. Put that into persistent storage also if you wish. You get Thunderbird mail client with which you can send encrypted emails. OnionShare for sharing files over Tor. There is an app called mat2 which will remove metadata from a wide range of file formats. A digital photo could betray you by having metadata showing the location where the photo was taken. So you have a tool to clean files so they can’t be connected to you. There are all the basics you need for general computer usage. It’s also possible to add other apps as you need them, either for temporary usage or you can make them persistent.
Protect your identity when using TailsTails is kind of marvellous, but it’s not magic. You should use Tails sessions for only one purpose each time. This is so an adversary can’t link your activities like you logging in to a website with two different accounts. You should restart Tails if you are checking work emails and then want to check whistle blowing emails. You should still follow good security and privacy practices when using Tails.
Tails is Recommended By –The Electronic Frontier Foundation (EFF) recommend Tails. Founders of the Tor Project recommend Tails, saying it’s a favourite companion Tool of Tor. Edward Snowden, whistle blower extra-ordinaire says Tor and Tails help you to maintain anonymity. He should know..
 .wp-duotone-filter-61876496dc569 img { filter: url( #wp-duotone-filter-61876496dc569 ); } Who Should use Tails?ActivistsJournalistsDomestic violence survivorsAnyone who needs to avoid censorship and needs to communicate securelyYou – For the extra privacy sometimes needed in todays digital world.Not for Everyday Use- More for the Special Occasions
It was fun to set up and use a different and specialised operating system. I couldn’t use it everyday because many of the applications I like to use are not available. I am so ingrained into using the Mac and the applications that come with it. However, Tails is definitely something I will add to my arsenal of privacy and security protection tools. It has a reasonable and very easy-to-use implementation of PGP encryption. It’s easy to encrypt text and files manually and to add them to an application for sending to the recipient. On top of that there is the addition of Thunderbird in which you could use their implementation of PGP. It’s easier and a little bit more automatic to send and receive encrypted emails using this email client.
I can already use PGP and end to end encrypted messaging services to communicate safely using my Mac and iOS devices. For me the use of Tails would be for those specific situations when it was necessary to bring out the big guns. Everything within Tails is set up from the get go to be private and secure. You have to work hard to make mistakes and send something or receive something which could come back and bite you. Due to this inherent built-in safety I think it’s good for beginner users in the realm of privacy and security as well as for more savvy users. A beginner user doesn’t have to think about it too much. Set up the system on your portable storage and have it available wherever you are. This is particularly good for any user when it’s necessary to use a computer which is not yours. You don’t know how well the owner of the computer takes care of security and privacy and you can get around this by using Tails. I recommend making a Tails USB drive or SD card and always keeping it with you. Attach the USB drive to your keys or put the SD card in your wallet.
The post Privacy and Security for Activists- Tails OS appeared first on Good and Geeky Books.
October 22, 2021
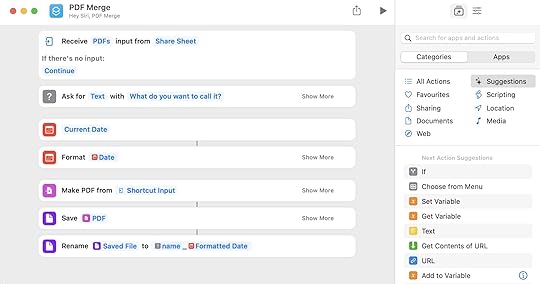
Tutorial – Merge PDF Docs Using Shortcuts iOS 15
Shortcuts keeps getting better and better and with iOS 15 you can do even more automation. In this tutorial I show you how easy it is to put together a shortcut which merges multiple PDF documents. To use it you select the PDF documents in the Files application and use the Share Sheet to activate the shortcut. I’ve set this up so that all you have to do is to add a name for the file. It’s also possible to use a default name and for you to choose where you want the file to be saved.
Making shortcuts, for the most part, is very simple indeed. You drag and drop actions into the shortcut. In this shortcut we need an ‘ask for data’ action which pops up a window asking for us to give a name for the file. In the shortcut we can then get the date and format it. Later in the shortcut we can grab these as magic variables in order to name the file. It’s a simple case of choosing the merge PDF action and then following that up with an action to save the file. We end the shortcut with a cherry on the top when we rename the saved file. Job done, quick and efficient.
Tutorial on YouTube Why Automate with Shortcuts or Other Automation ToolThe main idea with shortcuts is that if there’s something you do regularly, you can save time by automating the process. It might be you only save four or five seconds each time you use it. If you’re using the shortcut frequently though, those seconds will soon add up to productivity benefits. Sometimes using automation is not about speed and saving time. Many times the deciding factor in using a shortcut automation to get things done is to provide repeatability. As a user you don’t have to think about what you need to do and how to do it. You just have to select your shortcut from the share menu and the job gets done just the same as the last time you asked it to do it and the time before that.
Using Shortcuts on the MacAt the time of writing this blog and of creating the video this shortcut does not work on the Mac. It is still early days with the application Shortcuts for Mac and I expect we will have to wait until it matures into a proper automation beast. For the moment if you want to append pages from one PDF to another it’s possible to do this using the application Preview. I haven’t looked yet, but I suspect it also may be possible to create an automation using AppleScript, Automator or Keyboard Maestro to merge PDF documents.
The post Tutorial – Merge PDF Docs Using Shortcuts iOS 15 appeared first on Good and Geeky Books.
September 21, 2021
Shortcuts in MacOS Monterey and iOS15
Shortcuts is a very useful application and is now available on Mac OS Monterey. We’ve been enjoying the benefits of iOS automation using Shortcuts for quite some time now. So I made a video showing how to put together a shortcut in the Shortcuts app on my Mac in the beta version of Mac OS Monterey. There were a couple of actions I wanted a use from Drafts which didn’t work. Drafts had recently just been updated to give us these actions but Monterey is not quite ready for them.
I was still able to create a useful shortcut allowing me to collect information from whatever application by accessing the share sheet. I can take text from a browser or from a PDF document, or from whatever document I like and send it to a collection document. I’m in particular looking for ideas for new videos. I might see something interesting in the web and all I have to do is to select the text and choose share. From there I can get the information into Craft, and when it is working Drafts all with one shortcut. On the Mac I can access shortcuts from the menu bar or from the Services Menu.
Don't Forget to Like and Subscribe on YouTube to Get More TutorialsThere are some improvements in the Shortcuts application in this new round of operating system upgrades. When you add the action to make it work from the share sheet you also get an option to have it do something else if there’s nothing coming in. This means I can have a brilliant idea for making a video and run the shortcut even when I don’t have text selected. There will be a text dialogue pop up and asked me what my idea is and send it to my YouTube video ideas document in Craft and Drafts.
The post Shortcuts in MacOS Monterey and iOS15 appeared first on Good and Geeky Books.
Good and Geeky

- David Allen Wizardgold's profile
- 3 followers

