
Kristina Seleshanko's Blog, page 31
June 2, 2017
Weekend Links
In which I share my favorite posts from this blog's Facebook page.
This post contains affiliate links. All opinions are my own. Please see FCC disclosure for full information. Thank you for supporting this site!
"Count it all joy, my brothers, when you meet trials of various kinds, for you know that the testing of your faith produces steadfastness. And let steadfastness have its full effect, that you may be perfect and complete, lacking in nothing."
James 1:2-4
________________________________________
 * To paraphrase a blog title, fats make your pants fall off...and turn your shirts into tents, too! When I started the keto lifestyle just before Christmas, I couldn't button up this shirt. I'm a little bummed that certain weird foods are spiking my blood sugar; I'm a lot sicker than even I realized. But I'm SO happy with the keto lifestyle. My blood sugar is still a thousand times better, and I feel a thousand times more energetic, too. Plus...shirt tents. (Check out a recent newspaper article on why eating fat helps you lose weight.)
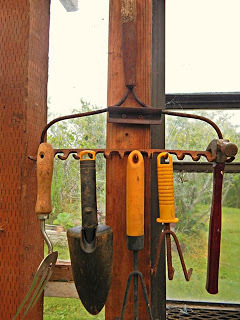
* The previous owners of our homestead left behind all kinds of junk. Piles, and piles, and PILES of it. We are using what we can, sorting out scrap metal, and will spend thousands hauling the rest to the landfill. One of the things they seem to have collected were broken tools, including rakes with broken or missing handles. Last week, I had hubby turn some of them into the BEST garden tool organizers. They are totally practical but also look like they've been there a 100 years. (Hubby wants me to tell you that normally he'd have everything lined up perfectly like the type A he is, but he knew I wanted the old, imperfect look...so he gave it to m.)
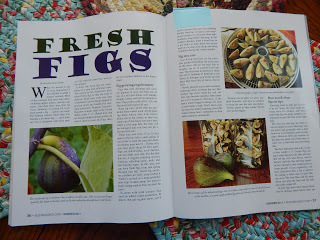
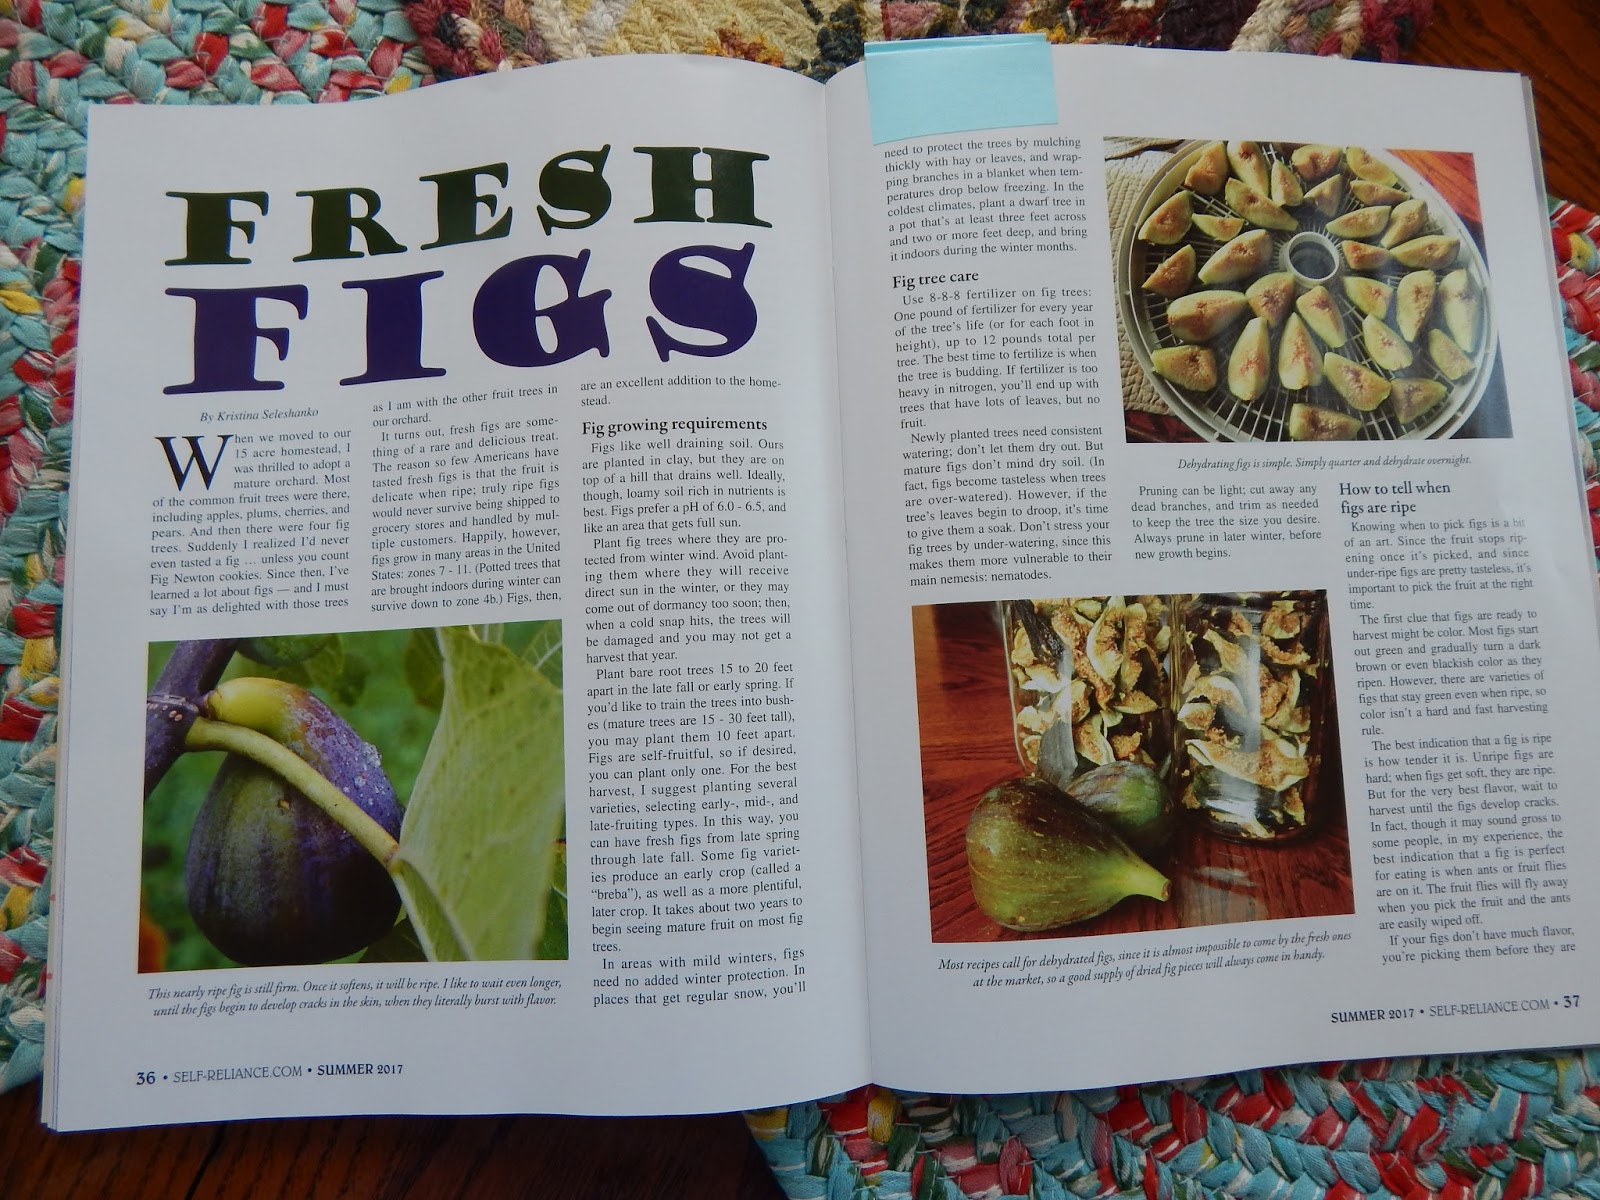
* I have an article on growing and using figs in the summer issue of Self-Reliance magazine. It includes my super yummy homemade "fig newton" recipe! Grab a copy of the issue - or better yet get a subscription of this terrific homesteading magazine - right here.
* Graco car seat recall.
* Tuna recall due to hepatitis.
* Recall on Kroger's macadamia nuts, due to listeria.
* Hot dog recall due to metal shards.
* How 36 million pounds of soybeans treated with pesticides became "organic."
* Make your own organic, liquid fertilizer with compost or manure: A video from my YouTube channel.
* Chicken coop mistakes that will cost you.
* Tips from Christian author Tricia Goyer on teaching kids to give generously.
* Think you know what drowning looks like? Then you better read this.
* Lots of free homesteading ebooks!
* How to homestead even if you live in an apartment.
* Lacto-fermented garlic scape pickles.
Oldies But Goodies:
* Activities to go along with the Little House on the Prairie books.
* Canning Strawberry Rhubarb pie filling.
* How to Make Brownies FROM SCRATCH.
This post contains affiliate links. All opinions are my own. Please see FCC disclosure for full information. Thank you for supporting this site!
"Count it all joy, my brothers, when you meet trials of various kinds, for you know that the testing of your faith produces steadfastness. And let steadfastness have its full effect, that you may be perfect and complete, lacking in nothing."
James 1:2-4
________________________________________
 * To paraphrase a blog title, fats make your pants fall off...and turn your shirts into tents, too! When I started the keto lifestyle just before Christmas, I couldn't button up this shirt. I'm a little bummed that certain weird foods are spiking my blood sugar; I'm a lot sicker than even I realized. But I'm SO happy with the keto lifestyle. My blood sugar is still a thousand times better, and I feel a thousand times more energetic, too. Plus...shirt tents. (Check out a recent newspaper article on why eating fat helps you lose weight.)
* The previous owners of our homestead left behind all kinds of junk. Piles, and piles, and PILES of it. We are using what we can, sorting out scrap metal, and will spend thousands hauling the rest to the landfill. One of the things they seem to have collected were broken tools, including rakes with broken or missing handles. Last week, I had hubby turn some of them into the BEST garden tool organizers. They are totally practical but also look like they've been there a 100 years. (Hubby wants me to tell you that normally he'd have everything lined up perfectly like the type A he is, but he knew I wanted the old, imperfect look...so he gave it to m.)

* I have an article on growing and using figs in the summer issue of Self-Reliance magazine. It includes my super yummy homemade "fig newton" recipe! Grab a copy of the issue - or better yet get a subscription of this terrific homesteading magazine - right here.
* Graco car seat recall.
* Tuna recall due to hepatitis.
* Recall on Kroger's macadamia nuts, due to listeria.
* Hot dog recall due to metal shards.
* How 36 million pounds of soybeans treated with pesticides became "organic."
* Make your own organic, liquid fertilizer with compost or manure: A video from my YouTube channel.
* Chicken coop mistakes that will cost you.
* Tips from Christian author Tricia Goyer on teaching kids to give generously.
* Think you know what drowning looks like? Then you better read this.
* Lots of free homesteading ebooks!
* How to homestead even if you live in an apartment.
* Lacto-fermented garlic scape pickles.
Oldies But Goodies:
* Activities to go along with the Little House on the Prairie books.
* Canning Strawberry Rhubarb pie filling.
* How to Make Brownies FROM SCRATCH.


May 30, 2017
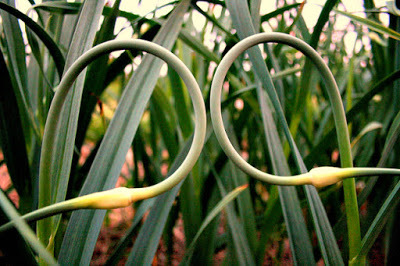
How to Grow BIGGER Garlic
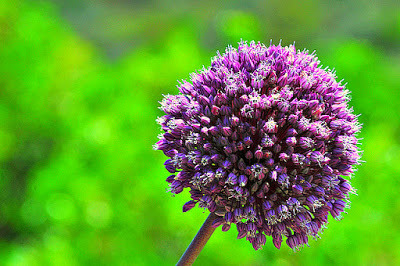
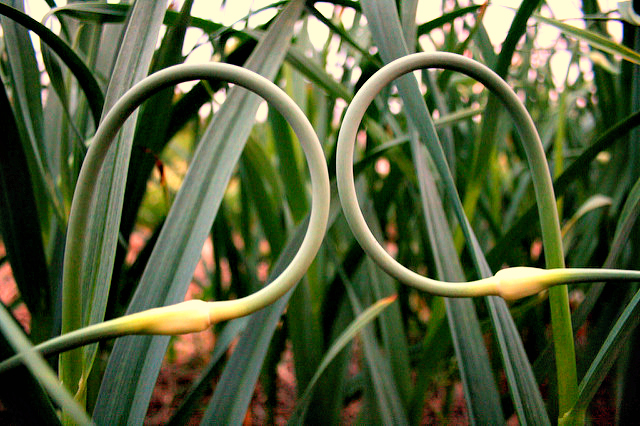
If you grow garlic, eventually it will send up "scapes" - long stalks with bulbs, and eventually, flower heads. You can leave them entirely alone. In fact, flowering garlic is really pretty in the garden.
 Courtesy of Panegyrics of Granovetter
But if your main goal is to grow food, you'll want to cut them off. That's because scapes provide additional food - and removing them creates bigger garlic! Learn more in this short video:
And check out my posts on How to Cook with Scapes and Great Garlic Scape Recipes.
 Courtesy
Eli Duke
 Courtesy of Panegyrics of Granovetter
 But if your main goal is to grow food, you'll want to cut them off. That's because scapes provide additional food - and removing them creates bigger garlic! Learn more in this short video:
And check out my posts on How to Cook with Scapes and Great Garlic Scape Recipes.
 Courtesy
 Eli Duke
May 26, 2017
How to Make Your Own Garden Soil
 This post contains affiliate links. All opinions are my own. Please see FCC disclosure for full information. Thank you for supporting this site!
I continue to struggle with setting up our garden. A lot of things have delayed creating vegetable beds on our homestead: particularly, a hurricane-force wind storm that blew the roof off my greenhouse and lead to the loss of every single plant marker (oy!); my husband's limited spare time and projects that I simply needed his help with; weather that seems to make everything bolt (go to seed); and too many holes for our income. So I've decided to do what homesteaders should: Make do with what I have. The problem is, good soil is something we have almost nothing of. And though I don't have the ability to bring truckloads of soil home, I'm doing my best to find creative ways to produce the soil I need.
Building Your Own Soil
I began by considering lasagna gardening (also called, much more boringly, "sheet mulching"). This is not only easy, but it's ideal for people who have terrible garden soil. The idea is simple: Lay cardboard or many layers of newspaper on top of the soil (no need to remove weeds or grass) and get them thoroughly wet. Then put layers of organic matter on top. That's it!
To help the materials break down more quickly into soil, it helps to alternate "brown" and "green" materials, just like you would when composting. (Not sure what that means? Click here for an explanation.) But it's not absolutely necessary. Any organic matter you use will eventually break down and create great soil.
So what kinds of things can you use for lasagna gardening? Almost any organic matter you can get your hands on, including compost, animal manure that's not "hot;" a thin layer of grass clippings, fall leaves, clippings from the garden (but none that have gone to seed), straw (that hasn't been treated with weed killer), coffee grounds, a thin layer of wood ashes, dryer lint, shredded newspaper...
Ideally, you start layering lasagna gardens in the fall and the beds will be mostly decomposed and ready for planting by spring, but Patricia Lanza, author of Lasagna Gardening , says you can plant seedlings directly into a just-created lasagna bed. Just remember that as the bed decomposes, it will shrink in height.
How I Did It
You can make a large, proper garden with the lasagna gardening method, but I'm having to scramble more than that since my garden area currently has our motor home parked on it. (If you're reading this honey, "Ahem.") For example, recently I drug an old bathtub (which the previous owners left behind) and put it in a sunny spot. (It's 1950s pink. It's got retro charm, dontcha know.)
To prep it, I took a broken piece of terracotta pot (also left behind by the previous owners) and placed it over the tub's drain hole. This will keep the soil in the tub while still allowing water to drain from the hole. Next, I added a layer of bad soil. This happened to be super dry, dead potting soil left in buckets by the previous owners. (Noticing a trend here?) For you, it could be soil from your yard. I broke up the clumps, but I allowed the small roots in the soil to stay there. They will decompose eventually.
 My stylin' retro pink bathtub garden bed.
Next, the rabbit cage needed cleaning, so I put a thick layer of rabbit manure and straw (which we use as bedding) in the tub. The wonderful thing about herbivore manure is it doesn't need to sit and compost before you can use it in the garden; it can go directly into the soil without danger of burning plants. (For more info on using manure in the garden, click here.) Finally, I added a bucket or two of decent soil that I'd bought in bags and had previously used for seed starting. I watered this all down well, and voila! I had a garden bed. (But who knows what's planted in it, since all my seed markers went missing...)
A Few Other Tips
* If you're using a deep container for planting, you can prevent the need for quite so much soil by placing small nursery pots, broken terracotta pots, or even packing peanuts in the bottom of the container. This is not, however, recommended for veggies with long roots, like tomatoes.
* If you have woods nearby (that you own, or that a friend or neighbor has given you permission to use), you could remove topsoil from the forest and use it in your beds. You'll probably bring some weeds with you, but they should be easy to distinguish from desirable plants. Obviously, you'd want to do this gently and not remove too much soil from the natural landscape.
* It might pay to check with your local city. Some offer free compost to people residing in the area. Technically, if the compost is completely "finished," you can use it in place of soil. But I find it's almost never finished when you rely on someone else to determine that for you, so it's best to use compost only as an amendment. Nevertheless, it can add bulk to your garden beds, reducing your need for quality garden soil.
* Use kitchen scraps to bulk up your beds. Yes, scraps that aren't composted! Just put fruit and vegetable scraps in the bottom of the garden bed, and cover them with other organic materials. They will decompose there and help create fantastic soil.
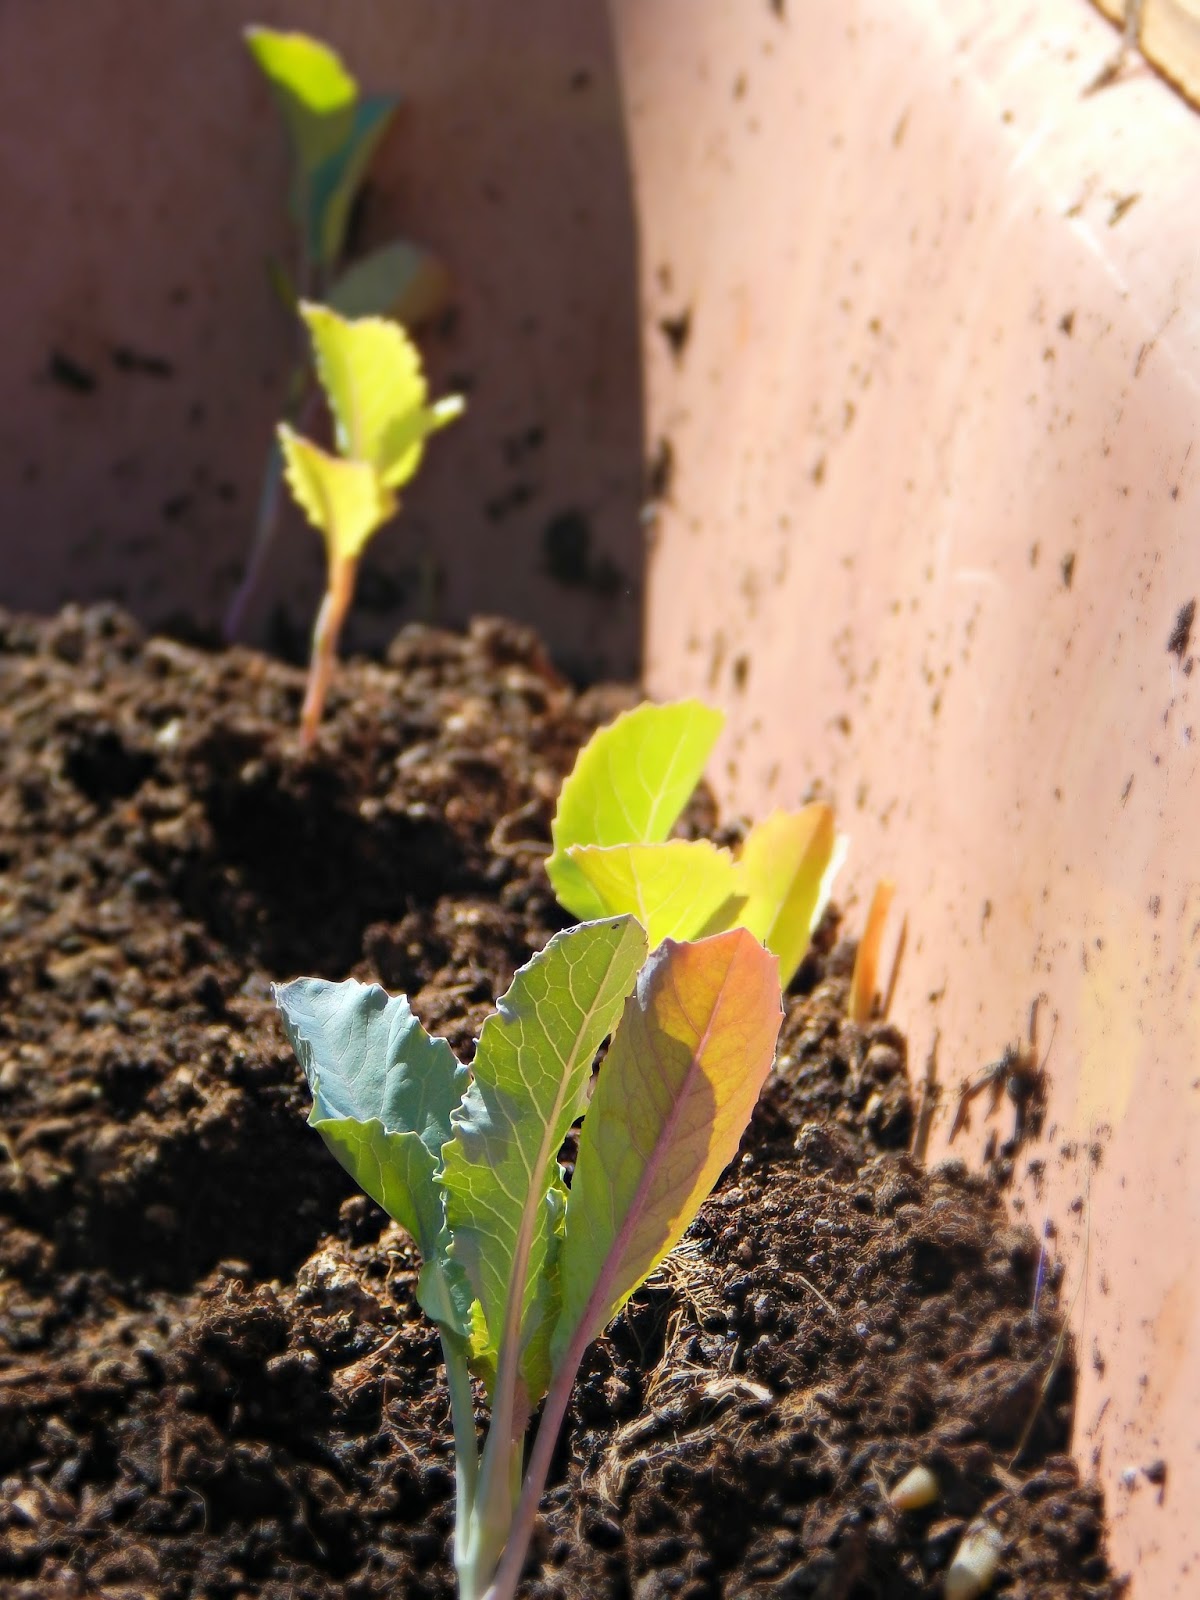 Mystery seedlings.
May 23, 2017
Does Dehydrated Food Lose Its Nutritional Value?
 This post contains affiliate links. All opinions are my own. Please see FCC disclosure for full information. Thank you for supporting this site!
Years ago, when my children were toddlers and I first dipped my toe into the world of home dehydrating, I remember a friend saying, "But why? Food loses all it's nutritional value once you dehydrate it!" In years since, I've heard similar thoughts from friends and readers - but the question is, are they right?
First, let me be clear that today I'm only addressing home dehydrated food. Store bought dehydrated food usually has sugar and preservatives added - which is definitely not something I want for my family. Home dehydrated food, however, has no preservatives and no added sugar (unless you chose to add it). In addition, I'm discussing food that's dried either by the sun or by a conventional electric food dehydrator, not food that's preserved in a home freeze drier, which is something else entirely.
Does Dehydrating Remove Fiber Content? What About Sugar?
A common belief is that dehydrated fruit and vegetables do not contain fiber. This is untrue. The fiber does not dry up and float away - in fact, compared to fresh fruit, there's more fiber in proportion to weight. This is why dried fruit is often used as a remedy for constipation; there's simply more fiber per bite than fresh food can offer.
I also think it's important to note that the carbohydrates or sugar in food do not diminish when that food is dehydrated. Just like fiber, sugar stays put - which means dehydrated food has a higher sugar content than the same food in fresh form.
 Plums prepared for dehydrating.Does Dehydrating Remove Minerals?
Some sources claim dehydrated food loses no minerals, while others claim food "generally retains its mineral content well during the drying process." However, if you blanch food before dehydrating - a practice sometimes used to help retain the food's color and vitamin content - it will lose more minerals than if you don't. Still, the mineral loss is scant.
Does Dehydrating Remove Vitamins?
The quick answer is: To a certain extent. The amount, and which vitamins, depends upon the methods used to dry the food.
According to Harvest Right, the makers of a home freeze drying (not dehydrating) machine, canned food loses 40% of its nutritional value, while dehydrated food loses only 60% of its nutrients. (Home freeze dried food, they claim, loses just 97% of its nutrients.)
This jibes with what I've read elsewhere; a nutritionist in The New York Times states that a cup of fresh, halved apricots "is 86 percent water, with 74 calories, and a cup of dried fruit is 76 percent water, with 212 calories. Fresh apricots have 3.1 grams of fiber versus 6.5 for dried; 0.6 milligrams of iron versus 2.35 milligrams; 15.5 milligrams of vitamin C versus 0.8 milligrams; and 149 retinol activity equivalents of vitamin A versus 160." In fact, the consensus is that dehydrating, the oldest known food preservation method, actually does the best job of preserving nutrients, compared to canning or freezing.
According to the University of Missouri Extension Office website, Vitamins A and C are most likely to see a reduction through dehydrating because they "are destroyed by heat and air." In fact, if you cut a piece of fruit, it will begin losing those nutrients right away, just from air exposure. In addition, heat - including heat used in cooking or dehydrating - reduces the amount of vitamin C in any given food.
What About Enzymes?
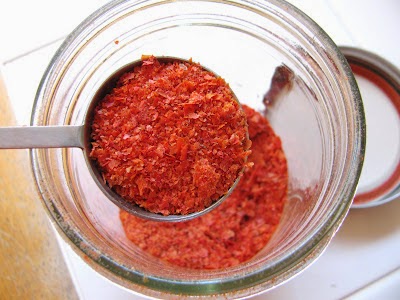 Dehydrated tomato paste (made from tomato skins).
Whenever you heat food, some enzymes are lost. However, the low temperatures used in home dehydration are less likely to kill enzymes than cooking that same food.
How to Prevent Vitamin Loss in Home Dehydrated Food
The single best way to preserve as much of the nutrients in home dehydrated food is simply to dry it at the right temperature. This is one area where an electric food dehydrator trumps using the oven or a solar dehydrator to dry food: Controlling temperature and keeping it low equals more nutrients in the finished food. This easy guideline ensures that almost all the food's original nutrients remain in place. So it pays to follow the standard heat recommendations for home dehydrating:
Herbs - 95 degrees F.
Nuts and seeds - 105 degrees F.
Fruit and vegetables - 135 degrees F.
Pasta - 135 degrees F.
Meat - 160 degrees F.
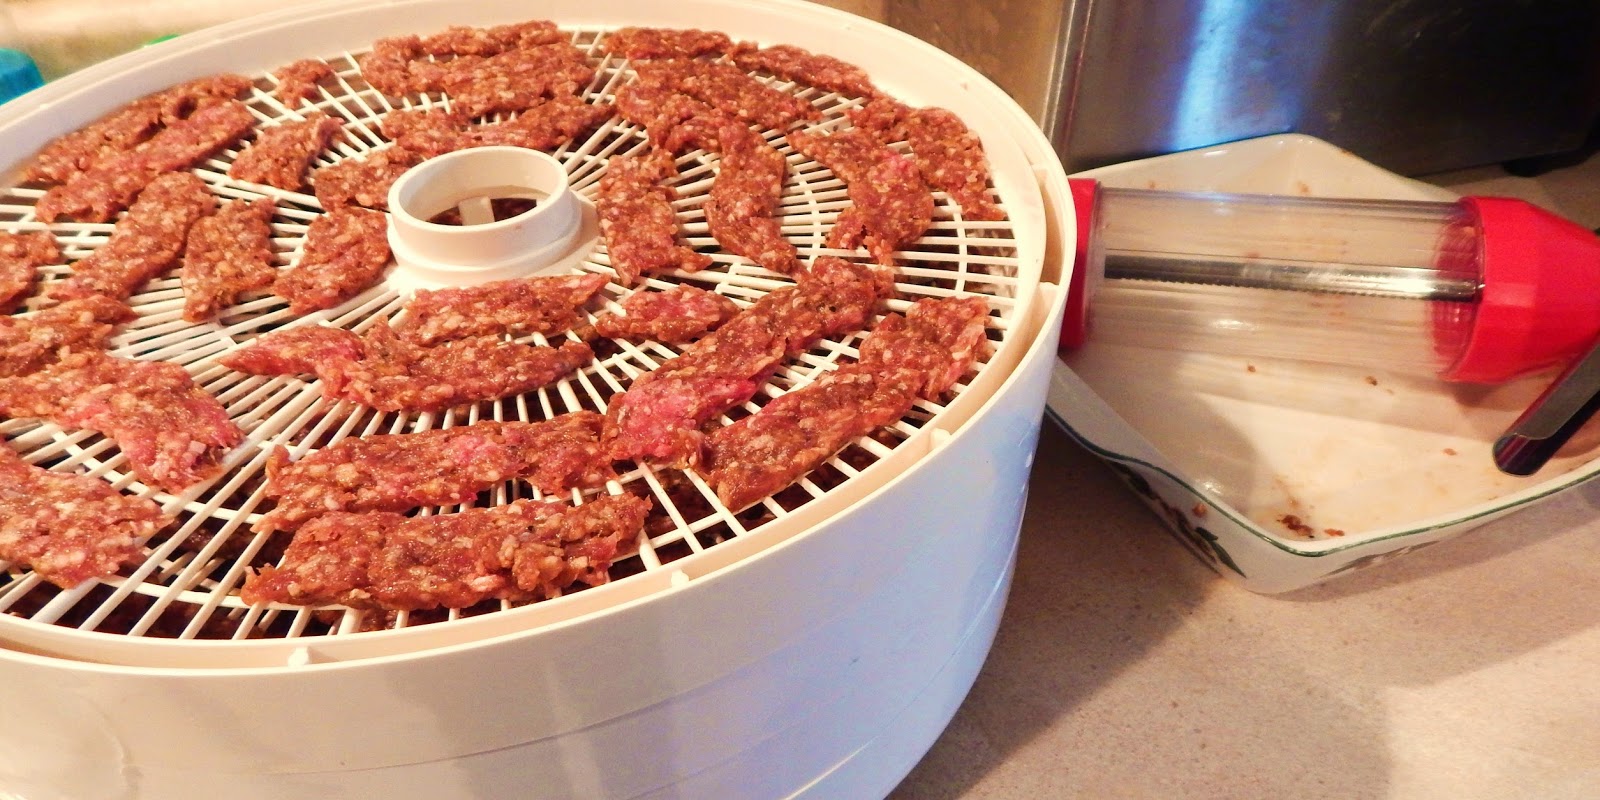 Dehydrating jerky.Other things that can help retain nutrients in home dried food include:
* Pre-treating by dipping vegetables and fruit in lemon juice or citric acid. This not only helps prevent browning, but it helps preserve vitamin A and C in the food. Unfortunately, this treatment can also reduce thiamine in dried food.
* Blanching vegetables before dehydrating helps preserve their carotene...but it also lowers a food's vitamin C content and may cause a small amount of mineral loss. Steam blanching is less likely to reduce nutrients in food than blanching in boiling water.
* Not letting the food sit in direct sunlight. This is why dehydrated food should be stored in a dark location - and also why solar dehydrators should have a shading cover (like this one).
* Slicing food evenly, to ensure you don't over-heat and over-dry smaller pieces. Using a mandoline to slice makes this much easier. (This is mandoline I use.)
* Rotating dehydrator trays to prevent over-heating and over-drying of some portions.
* Planning ahead. If a food is likely to only take a couple of hours to dry, for example, don't put it in the dehydrator at bedtime, or by morning it will be over-dried.
Related Posts:
* Making Dried Apples in an Oven
* Drying Tomato Skins to Make Easy Tomato Paste
* Why I Love My Dehydrator
* How to Make Jerky in a Dehydrator
X
May 20, 2017
Weekend Links
 Berry picking led to some excitement this past week.In which I share my favorite posts from this blog's Facebook page.
This post contains affiliate links. All opinions are my own. Please see FCC disclosure for full information. Thank you for supporting this site!
"For you created my inmost being; you knit me together in my mother’s womb. I praise you because I am fearfully and wonderfully made; your works are wonderful, I know that full well."
Psalm 139:13-14
________________________________________
* Friends, I have sad news. For a while now, I've been vomiting "randomly" and having nausea. I finally learned why. I. Am. Egg. Intolerant. How completely sad is that??? I've been eating eggs all my life, but I admit I sometimes felt just a wee bit icky afterward. But when I started the keto lifestyle to reverse my diabetes, I began eating more eggs per week, and...well, my body rebelled. Incredibly, I also learned eggs were raising my blood sugar! They were consequently preventing me from losing more weight. Now that I eat no eggs (except in baked things) I feel SO much more energetic, all the tummy troubles are gone, and I'm losing weight again. So while I'm glad I figured out my problem, I'm sad to say bye-bye to eggs. Maybe one of these days, when I'm willing to risk feeling sick all day, I'll try just the yolks (statistically, you're far more likely to be allergic to the whites) or maybe even duck eggs. Who knows? We might add ducks to the homestead!
* Took the kids wild berry picking this afternoon, when suddenly the dog started growling and barking, then began pulling me firmly the opposite direction (I was holding his leash). Yep, that's why we got ourselves a guardian dog! I'm sure he kept us from bumping into something we wouldn't have wanted to bump into. My first thought was a bear bed - but he's passed by fresh bear beds before without freaking out. Then I thought a bear itself - but it should have been sent crashing through the woods by the dog's barking, and we didn't hear that. Hubby thinks it was a cougar...which gives me the shivers. Whatever it was, the dog didn't like it. He spent the rest of the day very jumpy, and he kept staring in the direction of whatever it was, growling very low. I've never seen him like that before.
 I'm thrilled to have my first-ever homegrown artichoke!
* Have you ever heard of tick paralysis? Sometimes when ticks latch on to children (and Learn more from the CDC.
occasionally adults) they can literally cause the child to lose the use of her limbs!
* A few simple ideas to help prevent ticks in your yard.
* How to dehydrate celery AND how to make celery salt , on my YouTube channel.
* How to grow great sunflowers - and some great ideas on what to do with all parts of the plant.
* Cauliflower can be expensive to purchase. Why not try growing it? You can even grow cauliflower in a pot!
* Copycat recipe for Claussen Kosher Dill Pickles.

* Making canned rhubarb butter.
* How to make freezer jam without a recipe - also from my YouTube channel.
* Cute crafts for kids to make with toilet paper tubes.
Oldies But Goodies:
* If you're not use Fels-Naptha for laundry stain removal, you need to go grab yourself some now!
* The truth about salt.
* Banana Peanut Butter Cookies Recipe
* Harvesting and Making Your Own Chamomile Tea
* Now is the PERFECT time to make use of the dandelions growing in your yard! Every part of the dandelion is edible. Learn how to use this common plant to make super food! Check out my book The Ultimate Dandelion Cookbook!

Berry picking led to some excitement this past week.In wh...
Berry picking led to some excitement this past week.In which I share my favorite posts from this blog's Facebook page.This post contains affiliate links. All opinions are my own. Please see FCC disclosure for full information. Thank you for supporting this site!
"For you created my inmost being; you knit me together in my mother’s womb. I praise you because I am fearfully and wonderfully made; your works are wonderful, I know that full well."
Psalm 139:13-14
________________________________________
* Friends, I have sad news. For a while now, I've been vomiting "randomly" and having nausea. I finally learned why. I. Am. Egg. Intolerant. How completely sad is that??? I've been eating eggs all my life, but I admit I sometimes felt just a wee bit icky afterward. But when I started the keto lifestyle to reverse my diabetes, I began eating more eggs per week, and...well, my body rebelled. Incredibly, I also learned eggs were raising my blood sugar! They were consequently preventing me from losing more weight. Now that I eat no eggs (except in baked things) I feel SO much more energetic, all the tummy troubles are gone, and I'm losing weight again. So while I'm glad I figured out my problem, I'm sad to say bye-bye to eggs. Maybe one of these days, when I'm willing to risk feeling sick all day, I'll try just the yolks (statistically, you're far more likely to be allergic to the whites) or maybe even duck eggs. Who knows? We might add ducks to the homestead!
* Took the kids wild berry picking this afternoon, when suddenly the dog started growling and barking, then began pulling me firmly the opposite direction (I was holding his leash). Yep, that's why we got ourselves a guardian dog! I'm sure he kept us from bumping into something we wouldn't have wanted to bump into. My first thought was a bear bed - but he's passed by fresh bear beds before without freaking out. Then I thought a bear itself - but it should have been sent crashing through the woods by the dog's barking, and we didn't hear that. Hubby thinks it was a cougar...which gives me the shivers. Whatever it was, the dog didn't like it. He spent the rest of the day very jumpy, and he kept staring in the direction of whatever it was, growling very low. I've never seen him like that before.
I'm thrilled to have my first-ever homegrown artichoke!* Have you ever heard of tick paralysis? Sometimes when ticks latch on to children (and Learn more from the CDC.
occasionally adults) they can literally cause the child to lose the use of her limbs!
* A few simple ideas to help prevent ticks in your yard.
* How to dehydrate celery AND how to make celery salt , on my YouTube channel.
* How to grow great sunflowers - and some great ideas on what to do with all parts of the plant.
* Cauliflower can be expensive to purchase. Why not try growing it? You can even grow cauliflower in a pot!
* Copycat recipe for Claussen Kosher Dill Pickles.
* Making canned rhubarb butter.
* How to make freezer jam without a recipe - also from my YouTube channel.
* Cute crafts for kids to make with toilet paper tubes.
Oldies But Goodies:
* If you're not use Fels-Naptha for laundry stain removal, you need to go grab yourself some now!
* The truth about salt.
* Banana Peanut Butter Cookies Recipe
* Harvesting and Making Your Own Chamomile Tea
* Now is the PERFECT time to make use of the dandelions growing in your yard! Every part of the dandelion is edible. Learn how to use this common plant to make super food! Check out my book The Ultimate Dandelion Cookbook!
May 18, 2017
Realistic First Year Homesteading Expectations
 This post contains affiliate links. All opinions are my own. Please see FCC disclosure for full information. Thank you for supporting this site!
I know so many people who've been waiting and hoping and praying to homestead for years. And when they finally get the opportunity to live on some land, they want to do everything all at once. They want chickens, goats, pigs, a milk cow, a huge vegetable garden, an orchard, an herb garden...RIGHT NOW. Unfortunately, they're setting themselves up for disappointment and discouragement because what they want is impossible. So let's talk about what is realistic when you first start homesteading - whether that's in the suburbs or in the sticks.
Hard Truths About Homesteading
Hard Truth #1: Money is probably the number one thing that prevents most people from homesteading on the scale they wish they could. Unless you're quite wealthy, it's just not feasible to buy land, build a house, obtain animals, house animals, and so on in a year's time.
This is not to say that you shouldn't do as much as you can with as little as you have. In fact, making do is really at the heart of homesteading. But you simply can't fudge on, say, animal housing. You can build it from scraps, yes. But chances are, you'll have to buy at least some materials in order to make the housing truly safe for your animals. (If it weren't for the cost of animal housing, our homestead would already be a menagerie!)
Hard Truth #2: It takes time to acquire the skills you need to run a homestead. Unless you grew up on a farm, you probably don't have all the skills and knowledge you need to run a full fledged homestead. That's okay! Give yourself time to learn. Want chickens? Read multiple books on the topic - not just one! This will save time, money, and heartache. Then give yourself time to implement the skills you've read about (because reading about it and doing it are very different things) before you move on to another skill.
Hard Truth #3: It takes time to run a homestead. We all wish we could quit our jobs and homestead full time. Very few people are blessed to achieve this. So, for now at least, assume you'll have to continue working away from home. That means you'll have limited homesteading hours. Don't over-estimate what you can accomplish during those hours.
Realistic First Year Goals
So what is a realistic view of what you can accomplish your first year homesteading? Honestly, that's hard to say because it depends upon your financial resources and how many hours you work at your job. But assuming you work ordinary hours, and you have a middle class income - as well as a strong desire to set up your homestead - I think the following goals are completely achievable:
1. Start Composting. This is a homesteading basic that reduces your garbage considerably and benefits your garden and orchard...and you can do this virtually anywhere - even if you live in the city! Composting can be as simple as burying organic matter in the soil, or as expensive as buying several enclosed, rotating compost bins. More Info: Learn how to compost.
 Composting is an important first step when homesteading.2. Start a vegetable garden. It doesn't have to be huge - in fact, it probably shouldn't be. As your skills grow, so can your garden. And don't get hung up on pretty. Yes, raised beds made of rock are beautiful, but you can grow just as much food in berms that cost next to nothing. The important thing is to start growing food! More Info: Learn how to start a garden.
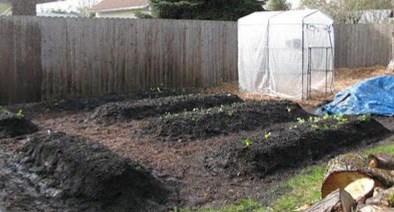 My very first productive garden beds.3. Plant some fruit trees. Plant them soon, because they take a few years to begin producing fruit. However, it's better to plant trees in the fall...so take spring and summer to look for sunny locations and the least boggy land for your trees. Learn more: Fruit trees for small spaces.
 Our first fruit trees were these columnar apples in pots.4. Start learning to cook from scratch. I don't recommend trying to making everything from scratch when you're first starting out; that can be really overwhelming! Instead, start by making your own spice blends and baking mixes, then learn to make bread. And so on. More info: See more from scratch recipes.
 Homemade bread isn't as hard as you think!5. Get chickens. If you eat eggs, chickens are a homesteading essential, and - once you're set up with a hen house and run - are not expensive to maintain. More info: Learn the basics of chicken keeping in my Chickens 101 posts.
 A portion of our first flock of chickens.6. Plant a few herbs. You don't have to create a large herb garden right away. Instead, just choose 3 - 6 herbs you'll use for cooking and medicine and put them in pots. There! Done. More info: Learning to grow kitchen herbs.
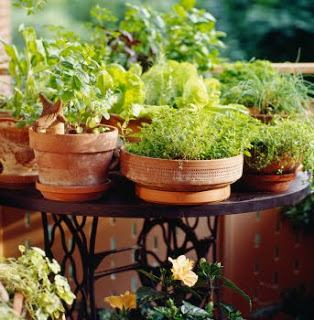 Herbs in pots are easy.7. Learn to dehydrate. Drying fruits, vegetables, and herbs is one of the easiest ways to preserve. You don't have to spend much on a dehydrator (I love my Nesco American Harvest dehydrator better than the expensive Excalibur some friends have. You can add as many trays to the Nesco as you want.) Learn more: See my dehydrating posts.
 Dehydrators preserve fruit and veggies you grow, forage, or buy.8. Learn to water bath can. This type of canning is less intimidating than pressure canning, and allows you to put up jam and jellies, pickles, and fruit. It's the perfect way to start building up your food supply. More info: Learn how to use a water bath canner.
 Canning makes self-sufficiency easier.Related Posts:
 * Homesteading Skills to Learn NOW - before you head to the farm
* How to Save Up for Your Very Own Homestead
* Prioritizing Your Homestead: Where to Start & Where to Go From There
* How Do I Quit My Job & Start a Homestead
May 15, 2017
The Busy's Mom's Guide to Reading The Bible
 This post was originally published in 2009.
I admit it. Some days the only Bible I read is a children's picture Bible. As the mother of two small children, it's a real challenge to find adult reading time. Yet the Bible admonishes us to nurture ourselves with God's Word (Deut. 11:18, 1 Pet. 2:1-3), to equip ourselves to serve God with it (2 Tim. 3:17, Eph. 6:17), to help us steer clear of sin by reading it (Ps. 119:11)...and who can forget the lesson of how Jesus beat back Satan by quoting Scripture (Matt. 4)?
If you're having trouble finding time for the Word, here are some tips that may help:
* Get up early. If you can get out of bed before anyone else (or at least before the children), spend time with the Bible. If this will not negatively impact your parenting and spousal skills (sleep deprivation can turn me into a totally different woman!), this may be the best solution for you.
* Use nap time. I always find it tempting to use the rare times my children nap to catch up on household chores. But it's better to use these precious minutes for something more important: When your little ones are snoozing, read the Bible and spend time with the Lord.
* Listen to the Bible. If you can block out the noise of your little ones (Earbuds, anyone?) and focus on an audio version of the Bible, this is an excellent way to get some time with the Word.
* Use movie time. Once my little ones are at least two years old, I find it acceptable to plop them down in front of an educational DVD. An excellent use of this time for me is to sit nearby, reading my Bible.
* Read to your child. I began doing this when my daughter was about 3. In the mornings, after I get the baby fed and changed and give my daughter a cup of juice, I sit down with some tea and open my Bible. Sometimes I read silently, but usually my daughter wants me to read out loud to her. She plays quietly nearby and listens - which not only means I get some Bible time in, but she's benefiting from the Word, too.
* Settle for less. Pre-kid, you may have read chapters of the Bible in one sitting. But now that you have little ones, it's okay to lower your expectations. Even reading and meditating on a single verse is an excellent thing.
* Pray about it. God wants you to have time for the Bible, so pray, asking him to help you find or make the time.
May 11, 2017
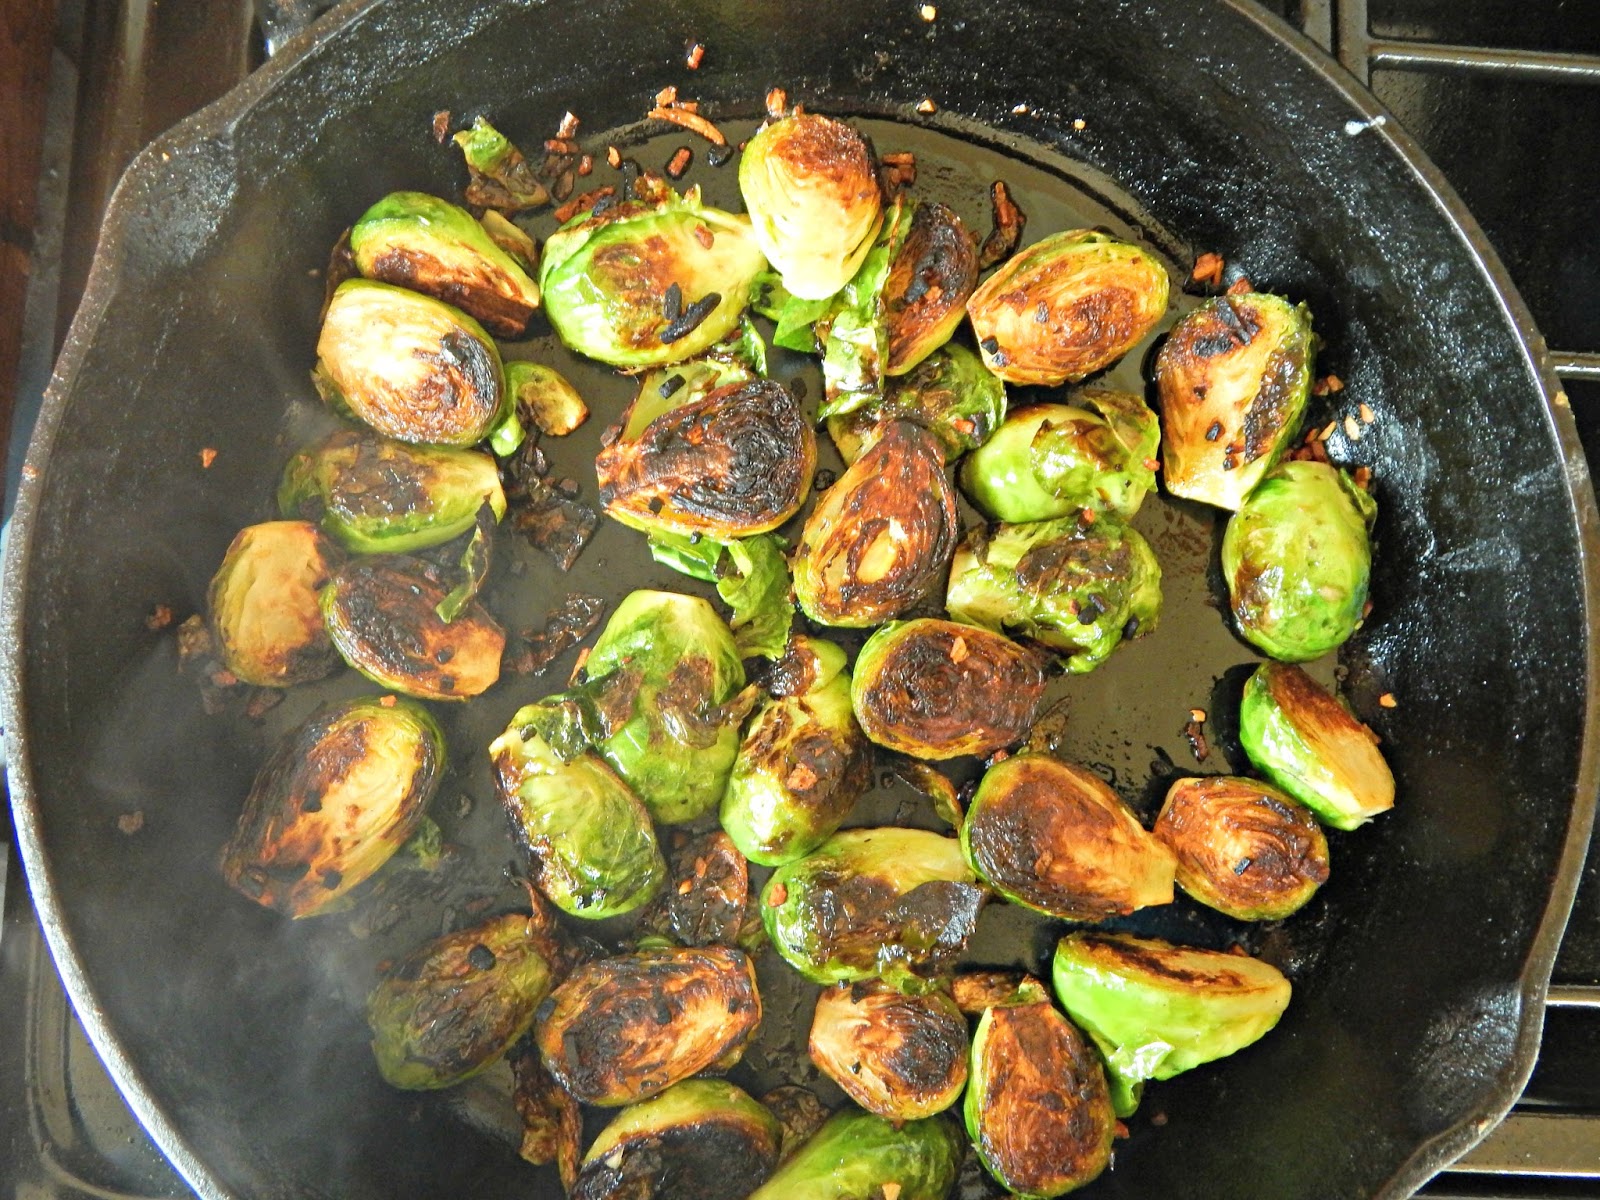
Skillet Brussels Sprouts with Parmesan Sauce Recipe
 I'm not afraid to shout to the world that I LOVE BRUSSELS SPROUTS! In fact, my whole family does - even my picky eaters. Because they are in season right now, I've been experimenting with new ways to eat them. That experimentation has resulted in this recipe (based on one found at PeaceLowAndLowCarb) - which has turned into one of our absolute favorites. It's packed with delicious flavors. Yum!
Incidentally, if you're afraid of the sauce - which you shouldn't be - but if you are, feel free to omit it, and simply cook the Brussels sprouts in the pan, as directed. Of course, I would at least add butter on top afterward. Enjoy!
 Skillet Brussels Sprouts with Parmesan Sauce Recipe
 1 1/2 lbs. Brussels sprouts
6 bacon slices, cooked, drippings reserved (bacon is optional; if desired, substitute drippings with butter) 2 tablespoons butter 1 tablespoon dried onion flakes1/2 cup heavy cream1/2 cup grated Parmesan cheese3 garlic cloves, mincedSaltPepper 1. Prepare the Brussels sprouts by trimming the ends. Cut each sprout in half.
2. Place a large skillet over medium high heat and add the bacon drippings. Add the butter. Once the butter is melted, add the Brussels sprouts and onion flakes.

3. Saute, stirring occasionally until the spouts are well browned and can easily be pierced with a fork. (Parts of the sprouts will look black; that's good!) Remove from the heat.
4. In the meantime, create the sauce in a small saucepan: Pour the heavy cream, Parmesan, and garlic into the pan and place over medium heat. Season with salt and plenty of pepper.
6. Bring mixture to a boil, then reduce the heat to low. Allow to simmer and thicken, stirring occasionally. Pour sauce over Brussels sprouts and serve.

Makes about 4 servings.
Estimated Nutrition, according to SuperTracker; Carbs 10 g.; fiber 3 g.; fat 25 g.; protein 12 g.; calories 303 g.
May 8, 2017
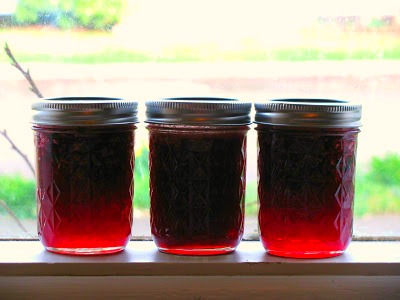
Bumbleberry (Mixed Berry) Jam - with no pectin, lower sugar options!
 I originally posted this recipe in 2011, and it has remained a family favorite. (My sis says, "This is the BEST jam I've ever tasted!")
Recently, however, I wanted to make a batch for the freezer (instead of canning it and making it shelf stable) and realized that if I wasn't going to can it, it didn't need nearly as much sugar - and no pectin, either.
So today I'm re-posting this delish jam, with notes on both canning it and making it as a lower sugar, no pectin freezer jam.
From 2011: This weekend I opened the freezer and was once again confronted with a bag of frozen strawberries and another of raspberries. When my son was tested for food allergies, we bought these bags and the nurse removed a single berry from each to use in the testing process. Since then the bags have sat, undisturbed, in our freezer. What to do with them? Especially since they'd been in there nearly a year.
We don't eat much jam in our household, but I do occasionally give it to the kids. And jam always makes a great gift. So I wondered if I could find a jam recipe that included both strawberries and raspberries. My Ball Complete Book of Home Preserving had the solution: Bumbleberry Jam. All I had to do was add a few of the frozen blueberries I also had on hand.
Incidentally, some people hesitate to use frozen goods for canning, but in most instances, it's fine. These days, frozen foods are flash frozen at their peak, so they are often more fresh than the "fresh" produce you buy at the grocery store. For this recipe, since the berries must be crushed with a potato masher, (EDIT: This is optional when making freezer jam) I recommend removing the berries from the freezer long enough for them to partially thaw.
The jam came out terrific. In fact, my 2 year old just threw a temper tantrum because I wouldn't give him more than one serving.
For Shelf Stable, Water Bath Canned Bumble Berry Jam:
1 cup crushed blueberries
1 cup crushed raspberries
1 cup crushed strawberries
6 cups granulated sugar
6 tablespoons powdered pectin
1. Review the guidelines for using a boiling water canner, if necessary.
2. Prepare jars and lids.
3. In the large pot, combine the crushed blueberries, raspberries, strawberries, and sugar. (EDIT: Please note that you cannot reduce the amount of sugar required in the canned version of this recipe, or it will not set.) Cook and stir over high heat until the mixture reaches a full boil that can't be stirred away. Add the pectin. Boil and stir constantly for 1 minute. Remove the pot from the heat. Skim off any foam.
4. One jar at a time, fill hot jars with jam, leaving 1/4 in. headspace. A funnel makes this job tidier. Use the handle of a plastic or wooden spoon to remove any air bubbles. Wipe the rim of the jar clean with a towel. Place a lid on top of the jar, followed by a screw band. Secure until the band is finger tip tight.
5. Using the jar lifter, place the filled jar in the canner. Repeat step 4 until the canner is full or all the jam is used up. Make sure the jars are completely covered by water.
6. Cover the canner and bring the water to a boil. Boil the jars for 10 minutes*, then turn off the heat. Wait 5 minutes and remove the jars from the canner and place on a wire rack or a thick towel to completely cool.
* NOTE: If you live at a high altitude, read this important information about adjusting canning times.
For No Pectin, Lower Sugar Freezer Bumbleberry Jam:
1 cup crushed blueberries
1 cup crushed raspberries
1 cup crushed strawberries
1 cup+ granulated sugar (to taste)
1. Place a small plate in the freezer.
2. Pour the berries into a heavy, medium-sized saucepan. Add 1 cup granulated sugar. If desired, use a potato masher to mash up the berries.
3. Place the pan over medium heat and stir the ingredients until the fruit juices begin flowing. Turn the heat up to medium high, stir often, and bring mixture to a boil.
4. Stir constantly while jam thickens. Add more sugar, to taste, if desired. Boil jam while stirring, until the mixture reaches 121 degrees F. (Click here for more tips on testing jam for doneness.)
5. Pour hot jam into hot canning jars. Put on lids and allow jars to come to room temperature. Transfer to the freezer.
|


