
Kristina Seleshanko's Blog, page 27
November 3, 2017
Saving Money While Eating Keto (or Whole Foods)
 This post may contain affiliate links. All opinions are my own. Please see FCC disclosure for full information. Thank you for supporting this site!
Last December, when my doctor informed me I had type II diabetes and that if I didn't want to take insulin I needed to go on a keto diet, I was worried this new way of eating would blow our grocery budget sky high. Maybe you're trying to switch to a whole foods diet but are afraid it will cost a fortune. Or maybe you're still eating lots of processed, carb-laden food but need to trim your grocery costs. Whatever the case, the following tips will help keep your grocery budget under control, just as they have mine.
(An important point: Many people find their grocery budget goes down when they switch to a keto diet, even without implementing these money-saving tips. It helps that keto keeps you more full than the more popular high carb, low fat diet, but it also really depends upon how much processed food you're used to buying. Our budget remained about the same; previously we ate a lower carb whole foods diet.)
 Courtesy of
 Michael Johnson
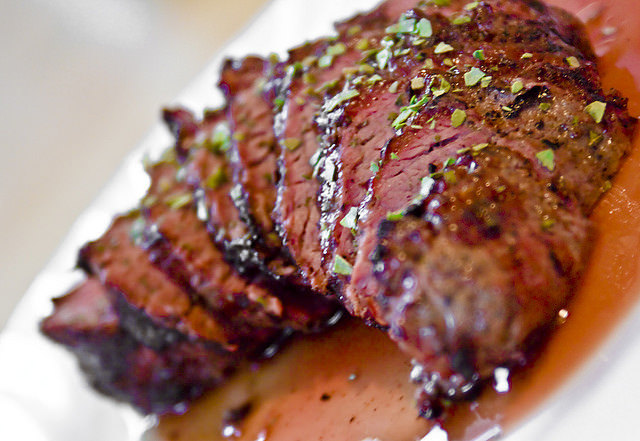
Meat
* Keto is a moderate protein diet; it doesn't require huge amounts of meat. That should help your budget, right there!
* Learn which grocery stores in your area have a meat clearance section and what day of the week they mark down their meat. Plan to use that meat the same day, or freeze it for later use.
* Watch for meat sales, via newspaper inserts, store websites, or store loyalty programs. Plan your meals around these sale items.
* But cheaper cuts of meat, and learn to cook them so they taste great. Most cheaper cuts are either less tender (so you'll need to learn to cook them low and slow in a crock pot or Instant Pot).
* Considered canned meat. If you're not used to it, canned meat may seem weird or even yucky. But I assure you that minimally processed canned meat, like chicken breasts, salmon, and tuna, is healthy and delicious! Sometimes it's cheaper than fresh, too - especially if you buy it on sale.
* Prepare your own meat. For example, instead of buying chicken tenders, buy chicken breasts and cut them down to size yourself. Or buy a whole chicken and use the meat for several meals.
Produce
 Courtesy of Jules
 * Buy what's in season; it's almost always cheaper. For example, asparagus is least expensive in spring, when it's naturally abundant. (Not sure what's in season when? Check out the USDA's website.)
* Consider farmer's markets. Sometimes they are less expensive than grocery stores. (But not always!)
* Compare the cost of frozen vegetables with fresh vegetables. Often, frozen is less expensive, yet still quite nutritional.
* Grow as many of your own veggies as possible. Even having a few pots on your porch or balcony can save a lot of money, especially if you choose greens, which grow and grow and grow until killed by frost. (Some greens, like kale and collards will even stay alive in the snow.)
In General
* Shop around. Familiarize yourself with all the grocery stores in your area, so you know for sure which ones are least expensive for the foods you most purchase.
 Courtesy of Clyde Robinson
 * Keep a price book. Don't rely on your memory to know the best price for the foods you regularly purchase or you may end up buying something on sale without actually saving any money. Click here to learn how to make a simple price book.
* Avoid processed food, even if you think it's keto. This will save you a ton of money - and processed food is frankly never as healthy as whole food. The Internet has a wealth of made-from-scratch keto foods. (Check out my Pinterest boards, for a start.)
* Eat simple meals most days. Few ingredients usually means spending less money to make a meal. Focus on one meat and one veggie for most meals.
* Although organic produce and grassfed meat and dairy are ideal for any healthy diet, don't feel you must buy them in order to eat keto. Sure Kerrygold butter and grassfed steaks are awesome, but you can be very successful at keto while eating conventional meat, dairy, and produce.
* Consider buying in bulk. Find local farmers from whom you can buy half a cow or a pig. When you find a good deal at the grocery store, especially on a staple, buy a lot to save yourself money in the future. For fresh foods, freeze what you won't use right away.
* Meal plan. This will save your sanity, as well as your pocket book, and it doesn't have to be complicated. I usually just determine how many days I'm buying for (typically 14 or so - because the less often I'm at the grocery store, the less I'm likely to buy!), pick that many dinners, and choose basics for lunch and breakfast. Make sure you plan around what's on sale and in season.
* Meal prep. Some people find that if they have pre-made, homemade meals at home in the freezer or fridge, they are less likely to grab unhealthy food elsewhere. If grabbing food-to-go is a temptation to you, commit to spending a few hours every weekend to prep the week's meals.
 Courtesy of
 Didriks
* Make your own spice blends. Spice mixes can not only have hidden, unhealthy ingredients (including MSG, soy, and flours), but they are more expensive than homemade mixes.
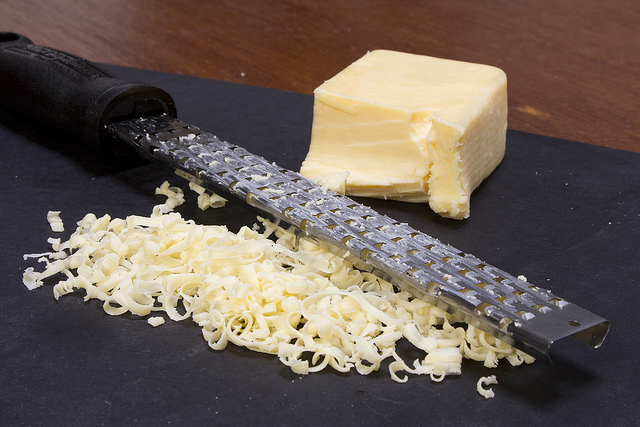
* Grate your own cheese. Do this first because pre-grated cheese has additives that are high in carbs. Do it second because it's almost always less expensive to do it yourself. Hate grating cheese? Buy a food processor! You can also save a lot of money by buying blocks of cheese on sale, grating it, and freezing it.
* Use leftovers. Either freeze them for a future meal or eat them the next day.
* Avoid eating out. Eating at restaurants or grabbing food on the go is expensive! Bring snacks and drinks with you, and eat out only as a special treat.
* Eat eggs. They are a cheap source of protein. (Even cheaper if you raise the hens yourself!)
* Eat enough fat. Natural fats are healthy and make you feel much more full. (Don't overdo it, though, or you may stall your weight loss or begin gaining weight.)
* Fast. Intermittent fasting has health benefits - and it saves your bank account some cash. Don't starve yourself, though. Just skip a meal; you'll probably find that easy to do after a couple of weeks of eating keto. (Diabetics should only fast if they are unmedicated and have their blood sugar under good control.)
* Avoid snacking. Not only do snacks burn your cash, but they slow weight loss, too. Eat enough at your regular meals that you feel comfortably full.
 Courtesy of
 Matthew Hurst
* Avoid recipes that contain expensive ingredients. This may seem like a big duh, but a lot of low carb or keto recipes for sweets - something every newbie craves - are costly. Keto-friendly, natural sweeteners, for example, and alternative flours like almond and coconut, hike up your budget very quickly. Keep these treats occasional, and you'll save a ton of money while truly taming the sugar dragon.
* Start doing Swagbucks. This is a site that let's you earn points toward gift cards by doing Internet searches, surveys, and other things. Depending upon where you buy groceries, you can earn gift cards to your grocery store. I mostly shop at Walmart, and find I can easily get $25 - $50 off my monthly grocery bill by using Swagbucks.
* Consider a Costco or Sam's Club membership - or find a friend who has a membership and go shopping with her! But be sure to compare their prices to those in your price book! Not everything at these stores is a good deal.


October 31, 2017
Why I Withdrew My Kids from Connections Academy (After Only a Week)
 If you've ever homeschooled, you know that sometimes you need to shake things up a bit; in my experience, trying something new, school-wise, leads to unexpected learning opportunities. This reality, combined with the fact that my son was seriously struggling with reading and math facts, prompted me to enroll my children into an online school called Connections Academy this fall.
Enrolling in Connections Academy
For years, I'd heard about Connections Academy - a national virtual school, advertised on tv, radio, and the internet. Before enrolling, I read all the information on their website, as well as in their physical brochure, and thought, "Why not?" I enrolled them just a few weeks before school was supposed to start.
The enrollment process was mostly painless. I did it all online, but you can call and have a representative help you. The biggest pain was getting my children's immunization records and birth certificates. What can I say? As a homeschooler, I'm just not used to that. Still, it wasn't a real problem.
I also got us set up to use Connections Academy's online system - which is basically a hub page for each child and parent. The parent's site shows the progress and grades of each child, plus any important notices from the teacher or school. Parents also have access to a (barely used) online forum, and lots of online materials about schooling at home. The children's sites allows kids to receive and send information to their teachers, see their day's assignments, and do online school work.
There was a dull, mostly common sense video I was required to watch before school began, plus orientation videos for each child to watch. I realized later that these videos weren't up to date, and covered some issues incorrectly. For example, the school had recently changed the way they mark attendance, and that information hadn't been updated in the videos or anywhere on the website.It caused a lot of confusion among the parents.
The Connections Academy Curriculum
Shortly before school started, I received an informative and friendly phone call from my son's teacher. It was immediately apparent she'd been a teacher for a long time and understood children well. She wanted to know all about his learning disability, what he loved to learn, what he was good at learning, and so on. I was excited for my son to work with this lady, who did an excellent job of keeping in touch with me - and with my son, too.
I also received a phone call from one of my daughter's teachers. (She's in middle school, so you'd expect her to have multiple teachers. She was assigned two - one of which neither she nor I ever had contact with.) I was completely unimpressed with this teacher's phone call. He seemed disorganized and we felt we were just another thing to cross off his to-do list. He also forgot to tell us an awful lot of information.
We ended up starting school without any of the materials Connections Academy promised to provide. That was because I signed my kids up rather late in the game - and as it turned out, it wasn't a huge deal because books aren't very important at Connections Academy. When we did receive our supplies, I was disappointed.
First, we received one laptop. But, as I learned in our first week, Connections Academy is almost 100 percent online. There was no way for my children to share a computer. I ended up letting my daughter use the laptop supplied by Connections Academy, while my son used my personal work laptop. The children also received some art, P.E., and science supplies - but they were almost laughable. For P.E. both kids got a jump rope and a yoga DVD. Fortunately, there were options outside of yoga (which is religion based, so why was it offered by Connections Academy, which is publicly funded?). For science, there were cheap supplies, like tiny plastic magnifying glasses. On the other hand, there was a very long list of supplies I was supposed to provide, and as it turned out, many of them weren't even necessary.
The textbooks were disappointing, too. Oddly, my son (the youngest of my children) had far more books than my daughter. I quickly realized everything was Common Core. The social studies seemed accurate, but it was terribly dumbed down. (For example, there was an extremely simplified story of the pilgrims.) The same thing with the science book. (We're talking "tadpoles turn into frogs.") Both books were something I might have used when my kids were in preschool, and were way too babyish for my son now.
The reading was mostly done online and we could never get the reading website to function correctly. And the math. Ugh. It was all the bad things you've heard about Common Core. In lieu of teaching math facts, it taught strategies for figuring out math facts when you don't have them memorized. Worse, the methods were overly complicated. Instead of making math easier for my son, they made it so much harder. He was incredibly frustrated. I asked his teacher if we could choose a different curriculum. She said we could not.
My daughter was having a tough time, too. All her work was online, and often it was repetitive...in a way that made me think nobody had read the entire curriculum. Although she's a good student, she wasn't doing well. For example, she got a very poor grade in science - a subject she loves - so I wanted her to go back and re-read the lesson. We couldn't find a way for her to do that.
So I called her teacher. His line had been disconnected. So I emailed him. The following day (because, in our experience, Connections Academy teachers are never available until the next day), he emailed back and said there was no way for my daughter to re-read the material. There was no science book available to her; the material was only online, and once it was accessed, it wasn't available again. I was shocked. How does a student master a subject if she can't re-read and study it?
Connections Academy pounds into parents' brains that they are "learning coaches," not teachers. And yet the "real" teachers were mostly absent. I was never able to talk to a teacher the same day I called him or her. My son's teacher called once every other week to touch bases, but my daughter's teacher first forgot to set up our bi-weekly phone call, then never called on the day he was supposed to. Supposedly, there were a few times when the teacher and all his or her students would go online to a sort of chat room with the teacher Skyping, but that didn't happen often, according to the schedules I was given.
Leaving Connections Academy
I'd started Connections Academy hoping it would help my son. But the reading wasn't any different from what we'd done before, the math was totally confusing and convoluted, and science and history were far below him. I knew it was time to withdraw the children.
I emailed my son's teacher as a courtesy, then tried to call Connections Academy. No real person was available, so I left a message, explaining we were withdrawing immediately.
The same day, I received a phone call from my son's teacher. She was understanding and tried her best to be helpful, even saying I could call her if I needed help with my son's education. I was sad to say goodbye to this lady, even if the system she was working in really wasn't utilizing her talents effectively.
I also revived a phone call from my daughter's teacher - the quickest reply I'd ever received from him. He tried to talk me out of withdrawing and even backtracked on what he'd said about not being able to re-read lessons - but I'd had enough.
And then I waited for Connections Academy to contact me and tell me how to return their materials.
In the meantime, we returned to good old fashioned homeschool. And I kid you not, my children both learned more in one day of homechool than they did in a week and a half at Connections Academy.
Then I waited some more for Connections Academy to contact me.
Then, suddenly, I received a message that my children had been absent from school and I needed to remedy that immediately. I called Connections Academy again. No real person answered the phone. I left another message; this time, I was more firm.
Weeks later, I could finally no longer log into the parents' site. But I still had all the materials the school sent me. I was anxious to return them, too, because Connections Academy made a big deal out of the fact that parents are responsible for any damage to the laptops. That piece of equipment was a liability; I wanted to send it back!
Finally, a month and a half later, Connections Academy contacted me via email and explained how to return their materials.
Some Good Can Come From Bad
The good news is, we learned a lot from our bad Connections Academy experience. My children learned they like homeschooling a lot better than public school (even virtual public school) and that books are way, way better than computers. I was reminded what I love about homeschool, and I also gathered something I should have realized sooner: These online schools are all federally funded; therefore they are all Common Core. (There are some virtual and charter schools that, while Common Core, are based on sound learning techniques. Connections Academy, however, isn't one of them.)
In the end, we felt re-invigorated to homeschool, and discovered renewed interest in our subjects. And my son? He's suddenly making leaps and bounds in both reading and math.
October 24, 2017
What Fills Your Day? An Easy Experiment for Kids
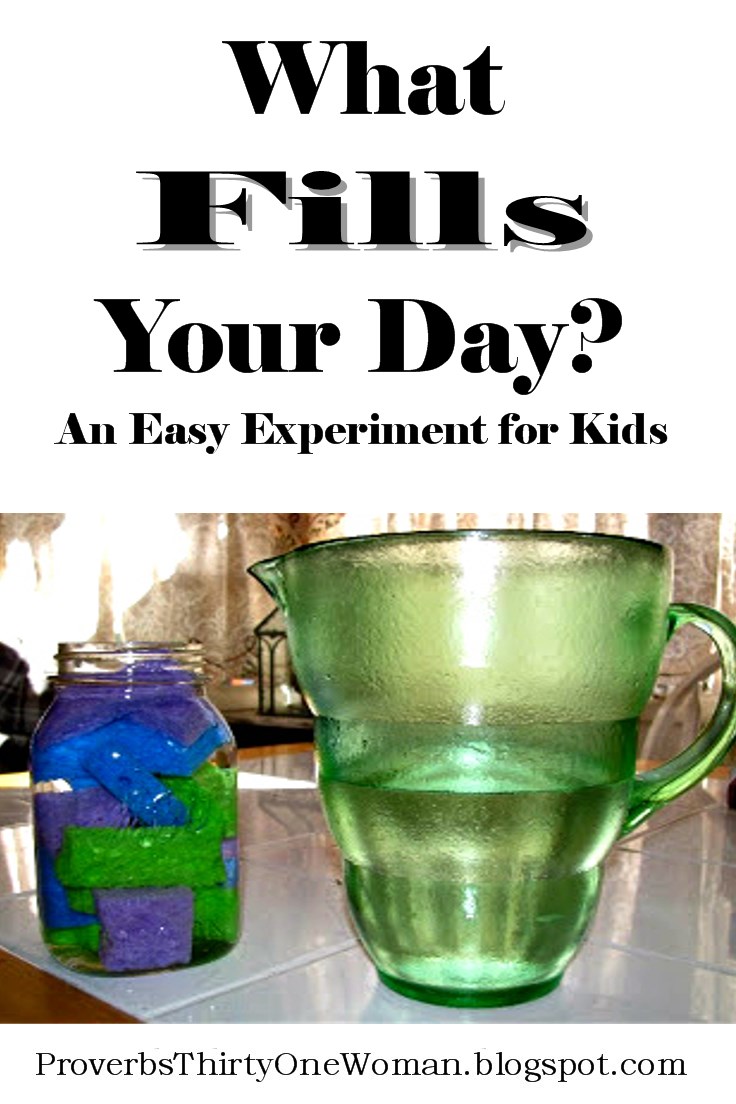 Years ago, my firstborn and I conducted a preschool experiment that, given the culture we live in, ought to be required for people of all ages. Not only does it illustrate how easy it is to fill our lives with less important things, it also shows there's always room for Jesus, every single day.
To prepare, I cut up some inexpensive sponges, dug out an empty glass jar (see-through plastic works, too), and filled a pitcher with water.
I laid the sponges and the jar on the table and asked my daughter to name some things that fill her day. She came up with many things, from brushing her teeth and hair to doing school work and playing with her toys. For each thing she named, I asked her to place one piece of sponge in the jar.
Soon I said, "It doesn't seem like there's room for anything else, does there?" We then took a few minutes to discuss whether she had filled her jar with time wasters, less important things, or truly important things. "If we remove some of the less important sponges - like maybe watching cartoons - will you have room for more important things, like visiting with friends?" I asked. She readily agreed.
Then I touched the pitcher of water. "Jesus is like this water," I said, as I slowly poured the liquid into the jar. She wasn't sure she understood, so I explained: "It seemed there was room for nothing else in the jar, didn't it? But there was plenty of room left for this water. Sometimes our lives seem so busy - much too full for us to spend time with God. But there is always time for Him. And what do you notice about the sponges now?"
She said they were bigger. "Yes, the sponges grew, didn't they?" I said. "That's what Jesus does to us. When we make time for him, he fills us up with lots of good things."
It's a lesson she never forgot.
This post was originally published in a slightly different form on 10/9/09.
October 21, 2017
Weekend Links
 I've been busy.In which I share my favorite posts from this blog's Facebook page.
This post contains affiliate links. All opinions are my own. Please see FCC disclosure for full information. Thank you for supporting this site!
"Do not be conformed to this world, but be transformed by the renewal of your mind, that by testing you may discern what is the will of God, what is good and acceptable and perfect."
Romans 12:2
_______________________________* If you've noticed that I'm blogging less, please bear with me. I'm trying to find a blogging schedule that works well with my crazy homeschooling, working from home, homesteading life. Now that the rush and bustle of preserving season is mostly over, I hope to have more time and energy for blogging!
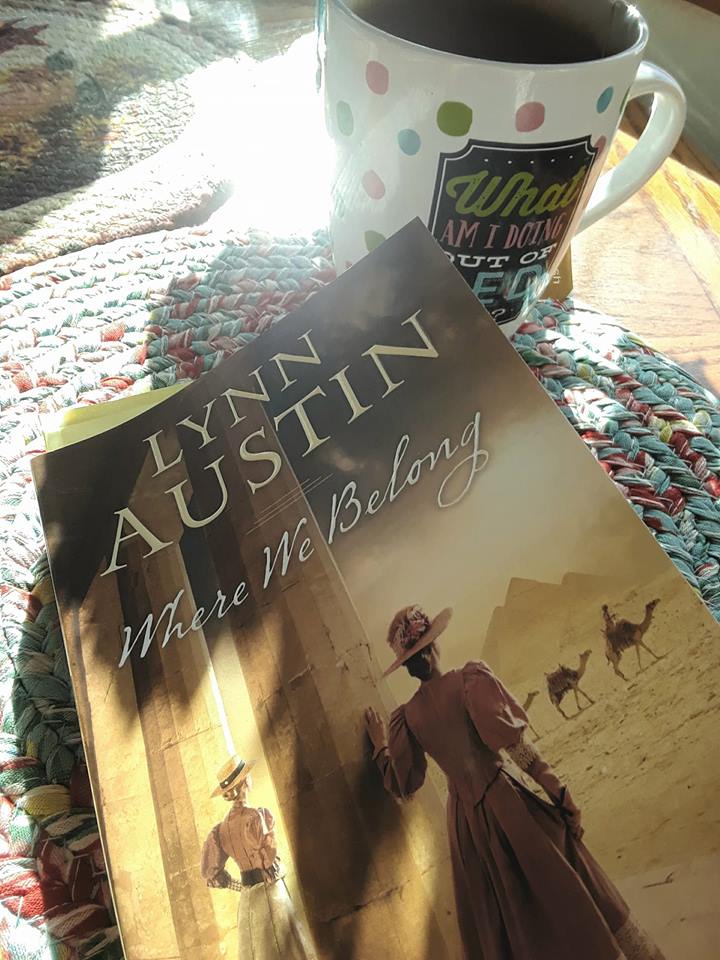 Non-guilty pleasures.* I work hard, so when I have the opportunity to get my hands on a great novel, I can be kind of naughty and stay up too late reading it. Such is the case with
Where We Belong
, by one of my favorite Christian authors, Lynn Austin. I'm about halfway through and I recommend it!
Non-guilty pleasures.* I work hard, so when I have the opportunity to get my hands on a great novel, I can be kind of naughty and stay up too late reading it. Such is the case with
Where We Belong
, by one of my favorite Christian authors, Lynn Austin. I'm about halfway through and I recommend it! * Free homestead management printables. They look helpful!
* Why orange yolks aren't always an indicator of free range chickens or a higher quality egg.
* 50 Ways to Inspire Your Husband
* It's so healthy to have kids give gifts they've made. Even very young children can give these simple sachets as gifts, for example.
 * Take your homemade or store bought apple cider and spice it up (mull it) for the holidays!
* How to Trust God with Your Older Children.
* Recall on all I.M. Healthy Soy Nut Butter products, due to E. coli.
* Why you should NOT slow cook beans. I checked, and the USDA says it's true. Can't believe I never knew this!
* Little House on the Prairie told from Ma's point of view?? I totally need to read this!
Oldies But Goodies:
* The BEST Cinnamon Rolls Ever - a from scratch recipe
* How to Can Ham
* AMAZING Molasses Spice Cookie Recipe
* How to Roast Pumpking & Squash Seeds
* What to Do With Green (Unripe) Tomatoes
October 18, 2017
Protecting Canning Jars in an Earthquake
 This post contains affiliate links. All opinions are my own. Please see FCC disclosure for full information. Thank you for supporting this site!
I live in an area where the government keeps warning us to expect an earthquake. A really big earthquake. Having lived through the 6.9 Loma Prieta earthquake in 1989 (the one that interrupted the World Series), I take this pretty seriously. And one of my concerns is how to keep my home canned goods safe. After all, if the earthquake is big enough, those jars might contain the only food we could obtain for a while.
Let's face it; canning jars are far from earthquake proof. So what can we do to minimize the risk of loosing them during an earthquake? Here are some ideas I've come up with or seen implemented online.
* Secure shelves or cupboards to wall studs. This should keep them from toppling over during an earthquake.
* Line shelves with no-slip (or "grip") shelf liner to help prevent jars from sliding around during a quake.
* Secure cupboard doors with child locks. This will at least keep jars from flying out of them during an earthquake.
* Place boards across the front of open shelves. Don't just give shelves a lip, or place wood at the bottom of each shelf. In a bigger earthquake, that won't help at all. Instead, place the wood jut below the middle of the jars. (Make it look like
* Place jars in boxes with foam or bubble wrap dividers. Sort the content so like items are grouped together, clearly label all sides of the boxes, and label the tops of jars, too. If this seems like a pain for everyday use, separate a percentage of your jars into boxes and keep the rest on the shelf.
How do you protect your canning jars from natural disasters?
October 11, 2017
How to Make Apple Cider With an Electric Juicer
 This post contains affiliate links. All opinions are my own. Please see FCC disclosure for full information. Thank you for supporting this site!
Many people saw my photos on Facebook and Instagram and wanted to know more about how I make apple cider (and apple juice) using an electric juicer. It really couldn't be easier! And I highly recommend the method. (But first: Let's clarify the apple juice vs. apple cider. Cider is just like apple juice, except it isn't strained - so bits of pulp remain in the liquid. Traditionally, apple cider is also left unpasteurized.)
Unfortunately, cider presses generally cost hundreds, and building one may take time, ingenuity, and money you don't have. It's possible to make apple juice by cooking the apples on the stove, as described by Ball, but it's pretty time consuming and heats up the house. But if you have an electric juicer? Quick and easy!
Now, juicers aren't always much cheaper than cider presses. I inherited mine from my brother, and it's a really nice piece of equipment. (It would cost about $350 to try to replace it.) But less expensive juicers work just fine, too - and there are plenty of them on the market. I'm sure you could even use a KitchenAid Mixer attachment. Also, juicers are a lot easier to find (used or new) than cider presses. And you're more likely to be able to borrow one.
How to Make Apple Cider with an Electric Juicer
1. Read the juicer manual thoroughly, since they don't all work the same. Mine has a handy dandy container for the apple pulp to go into, plus a pitcher for the juice. (Which is still packed somewhere, so this year, I used my batter bowl.) You basically plug the machine in, insert an apple or two, and turn it on.
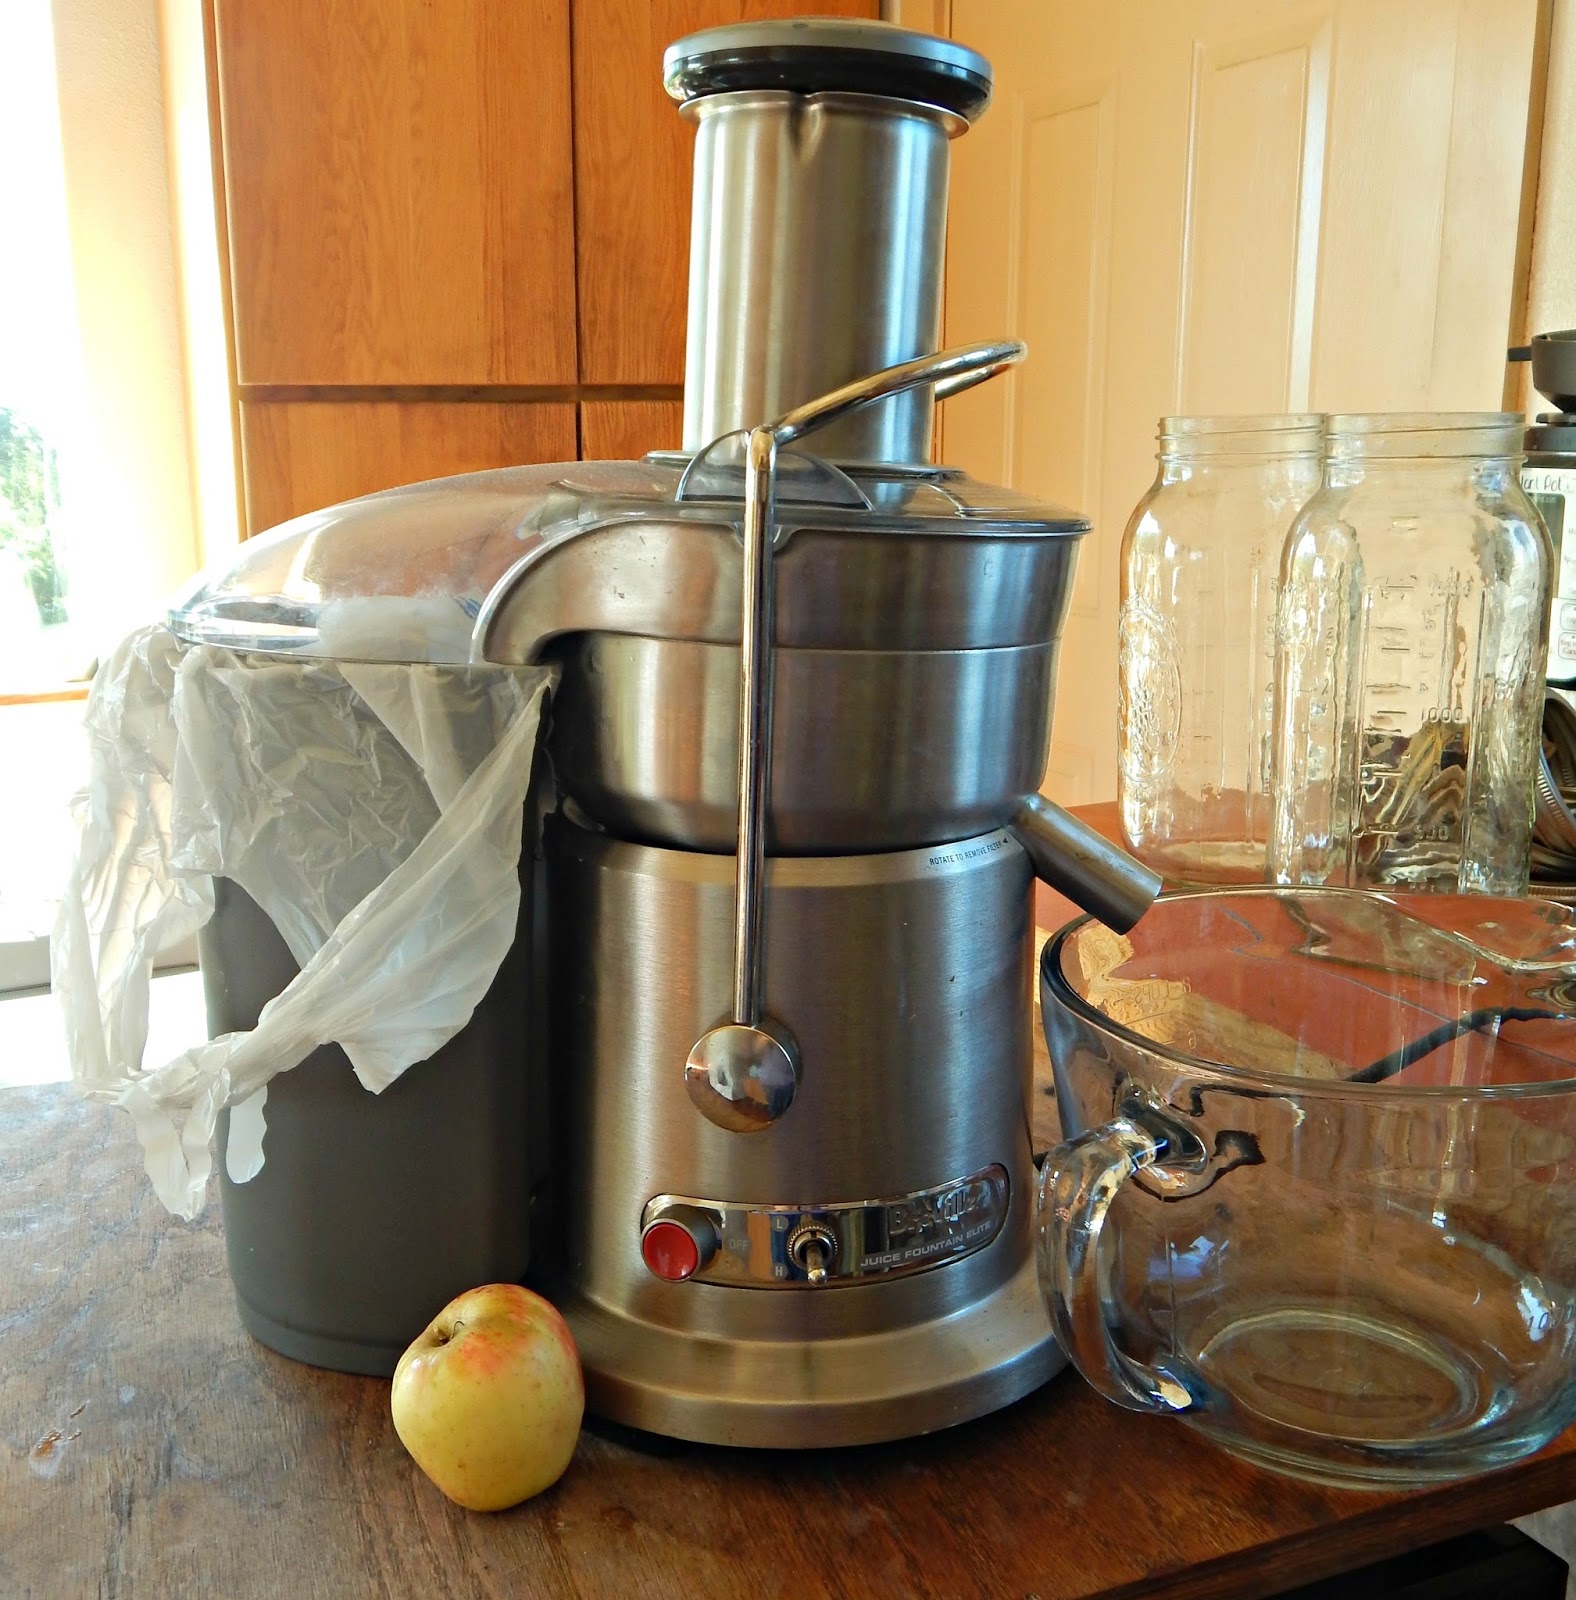 My juicer set up.2. In most cases, you do not need to prep the apples. I find making cider or juice is an excellent use for very small apples that are time consuming to cut up for other methods of preservation. Plus, small apples don't need chopping up in order to go into the juicer. My juicer manual recommends removing the apple's stems, which I do - but I don't fret if a little bit of the stem adheres to the apple. Also, you should never use bruised apples or apples that are beginning to go bad. Doing so will increase the risk of dangerous bacteria in the finished product. If you run across apples that are bruised, just cut the bruises away before juicing the rest of the fruit.
3. Insert one or two apples (depending upon your juicer), and use the presser to slowly press the apple through the juicer. Slower is better because the machine will get more juice from the fruit than if you push the apples through quickly. Repeat until you have as much juice as you desire.
 Extracting apple juice.4. If you're pressing a lot of apples, you may need to empty the pulp holder more than once. You might also want to clean the screen now and then, to make the machine more efficient.
5. When you're done, you will probably see a lot of gunk in the juice. My creates a stiff foam that sits on top of the liquid. I spoon off this foam and dump it into my compost bins. (It does not blend into the juice, even after stirring or shaking.)
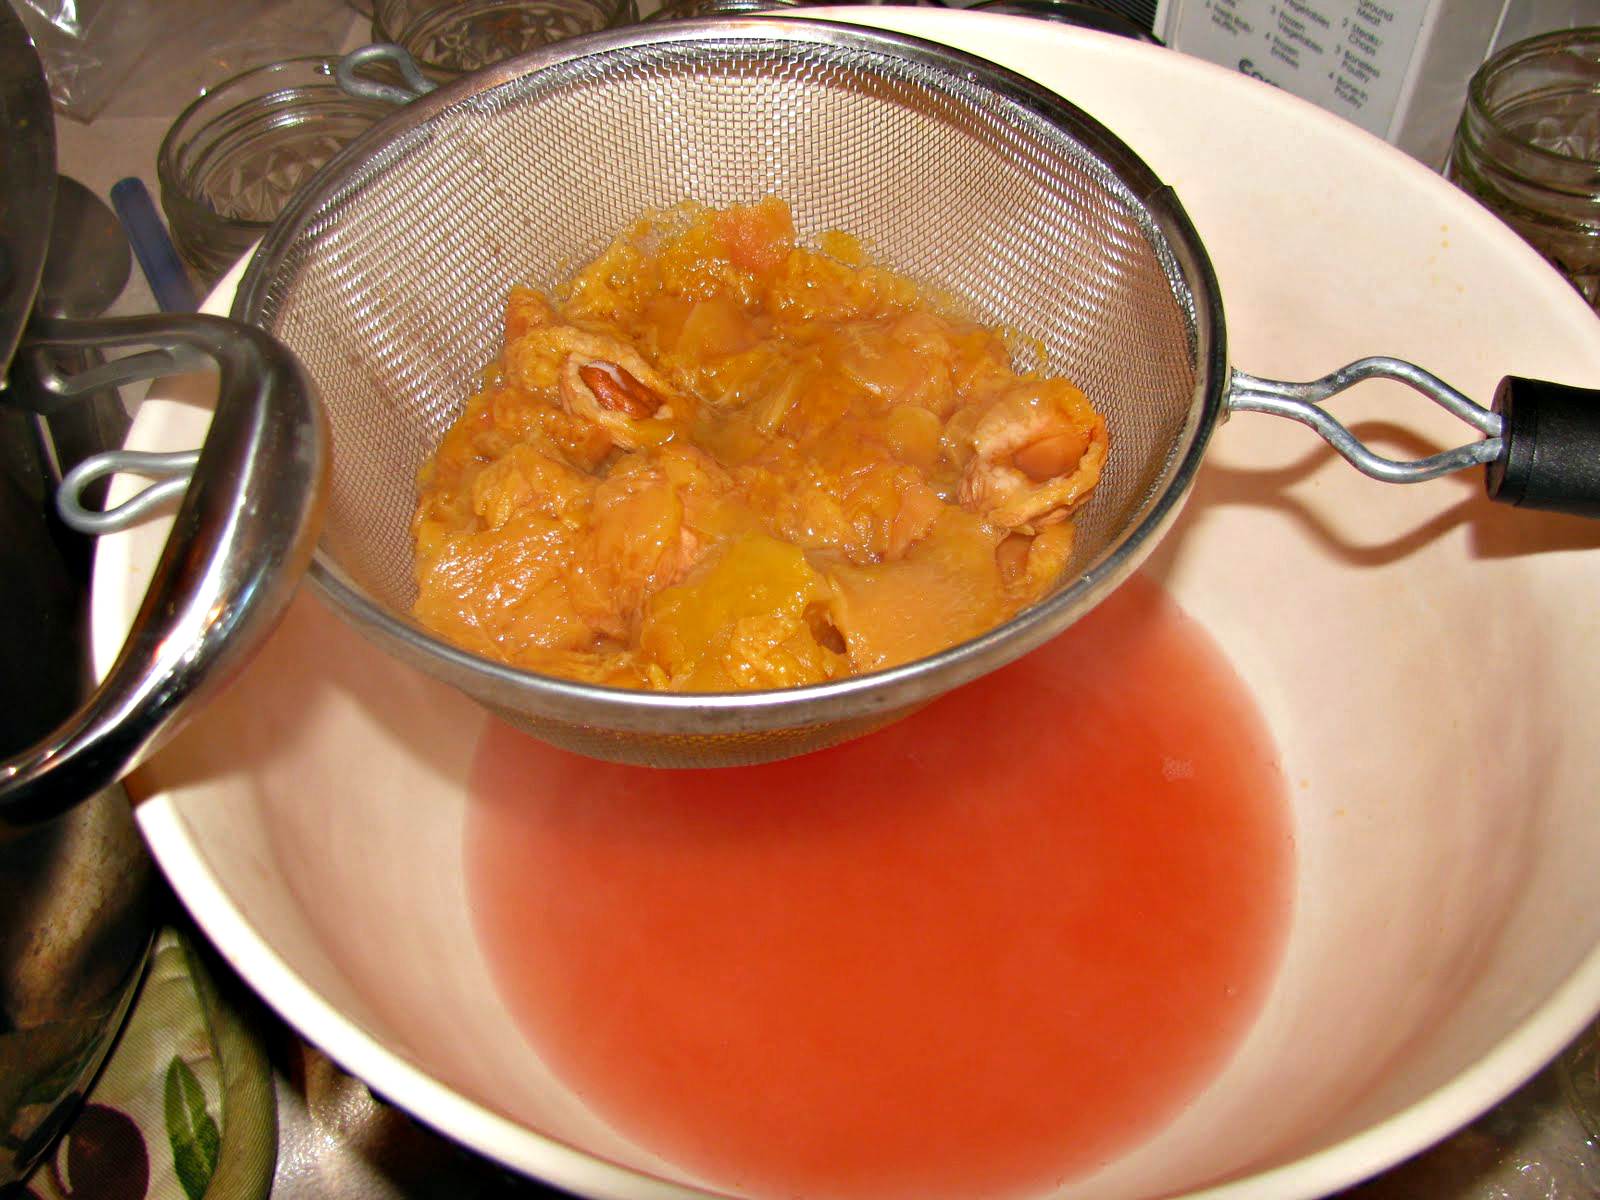
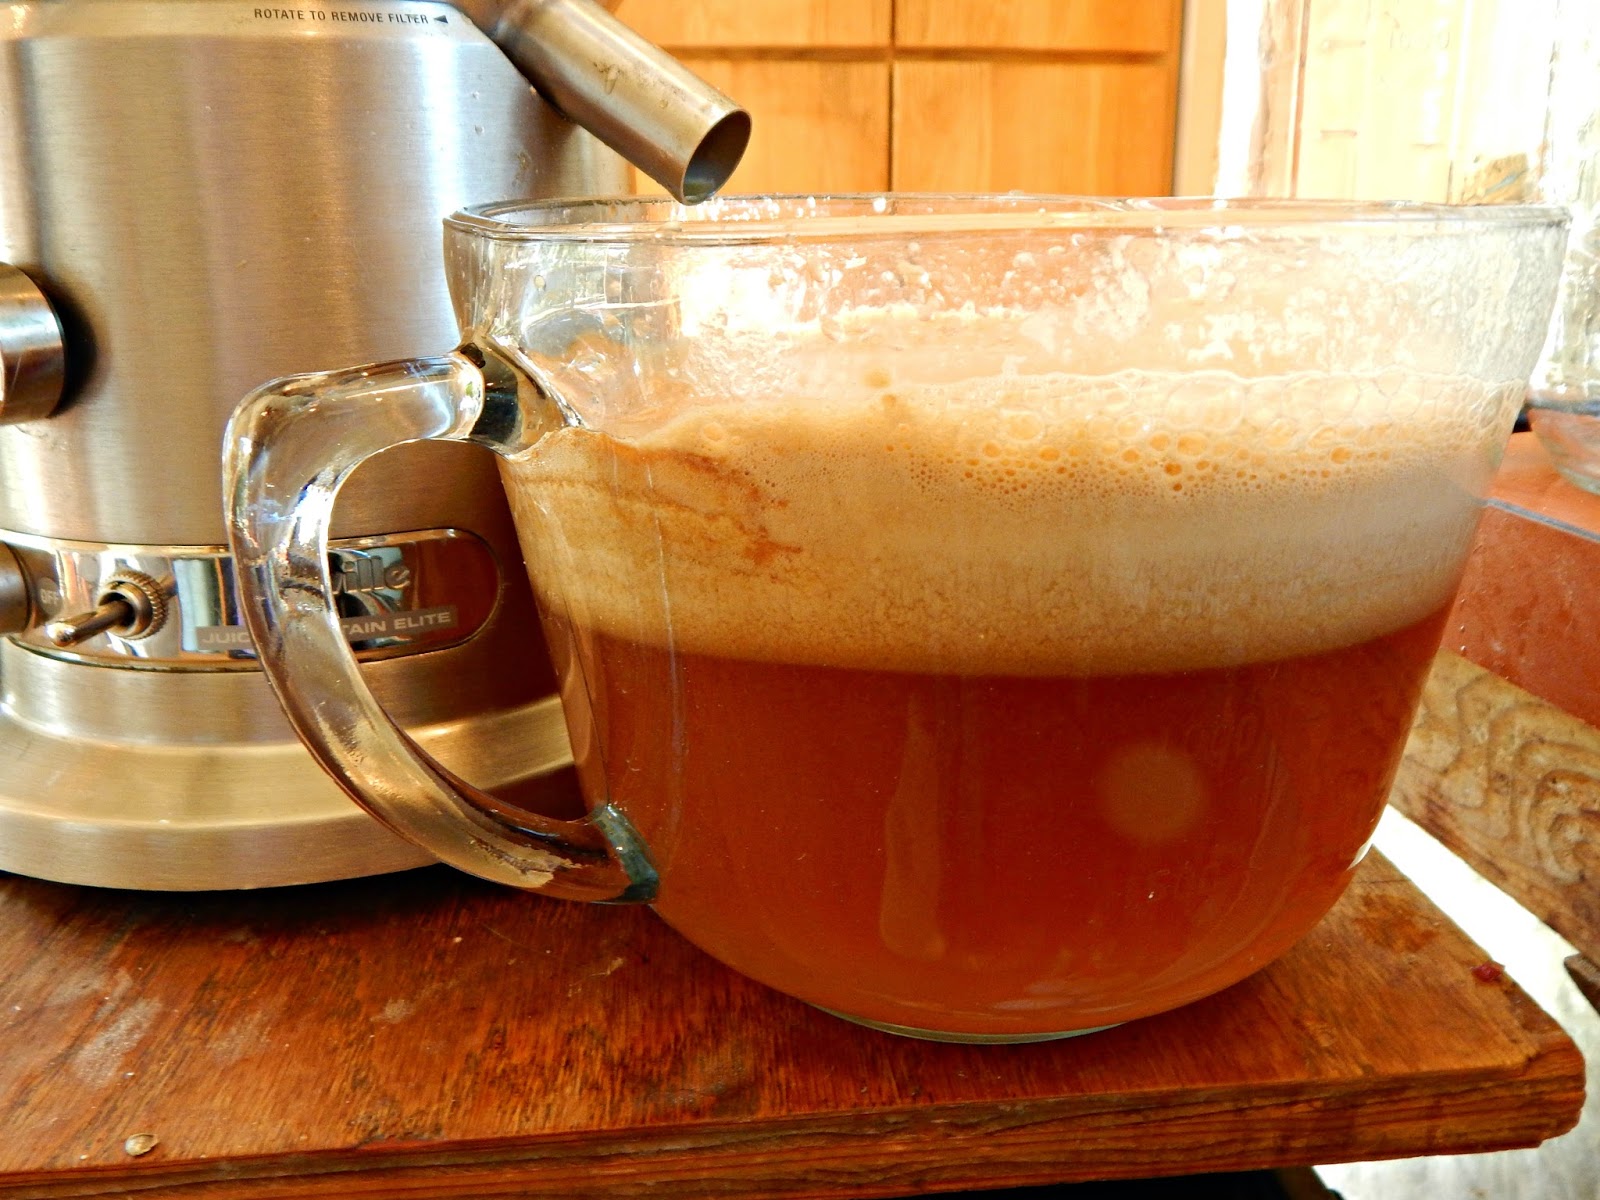 When done juicing, there is a lot of stiff foam on top.6. Cider, by definition, has bits of apple pulp in it. But my machine leaves a lot of pulp in, and my kids (who are the primary drinkers of the liquid) don't love it. So I strain my apple cider through a fine mesh sieve. The end product still has pulp in it - just not so much.
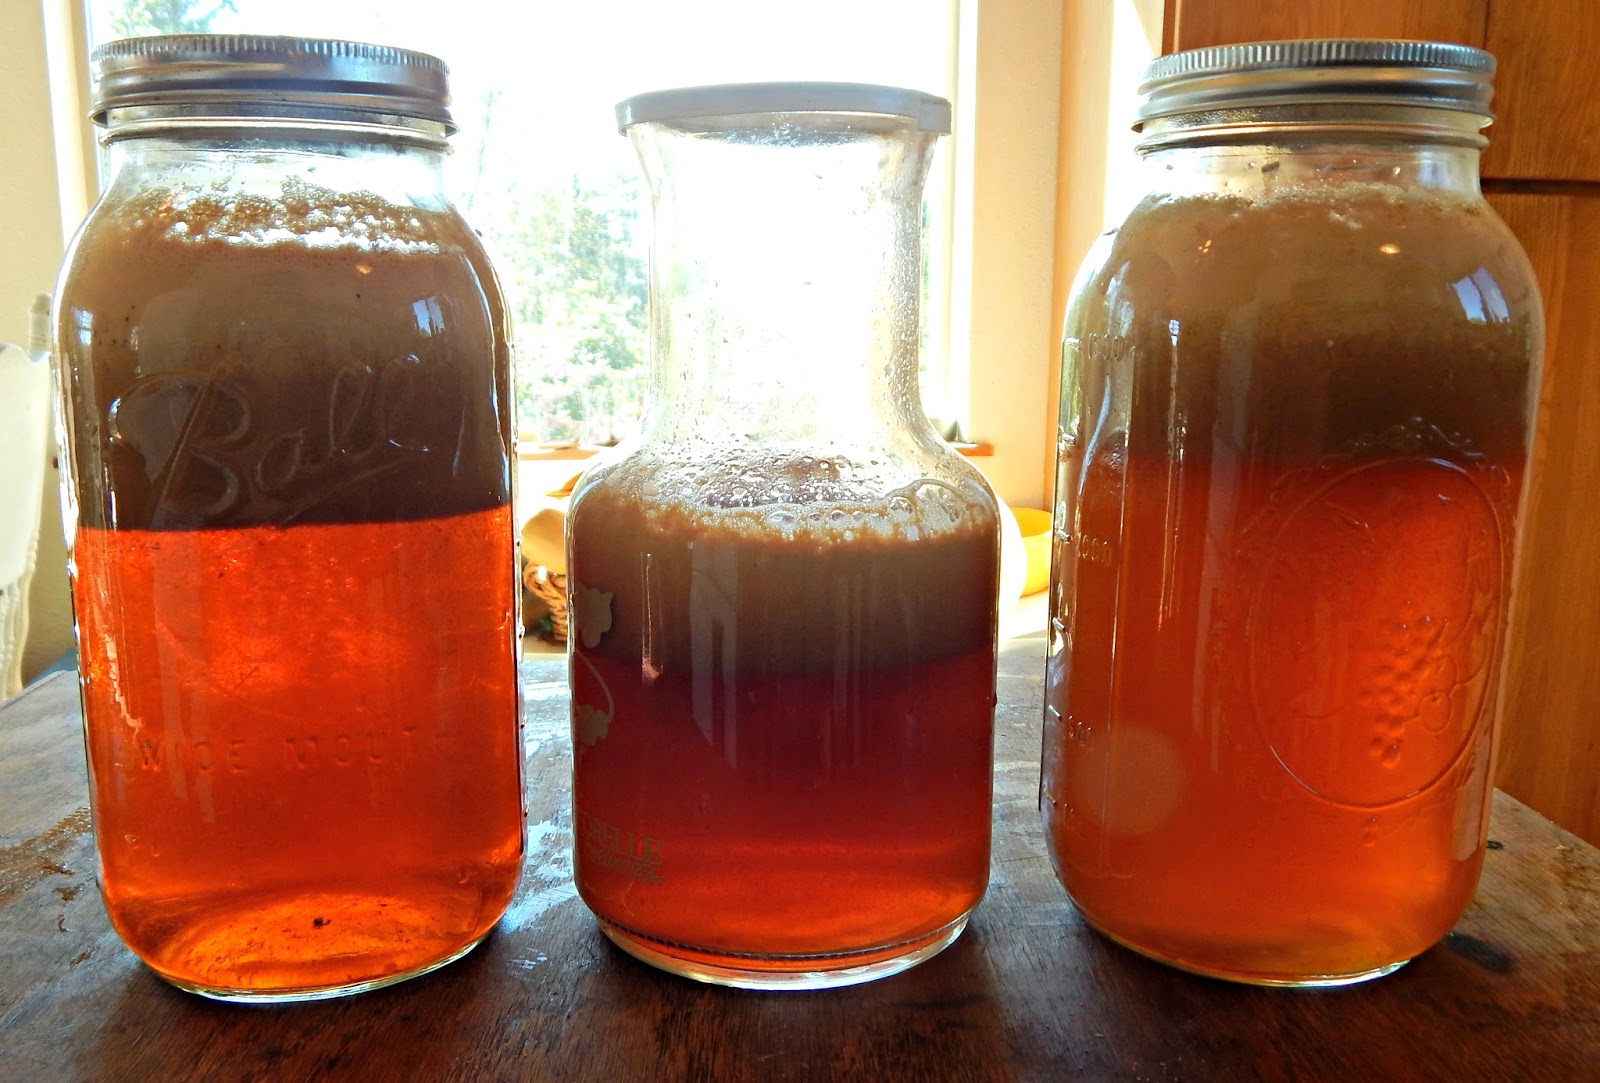 My juicer leaves a lot of pulp in the jars.
How to Make Apple Juice with an Electric Juicer
1. Follow steps 1 - 5.
2. Line a fine sieve with coffee filters or a double layer of cheesecloth. Strain the juice through it.
 Straining the pulp away to make apple juice.
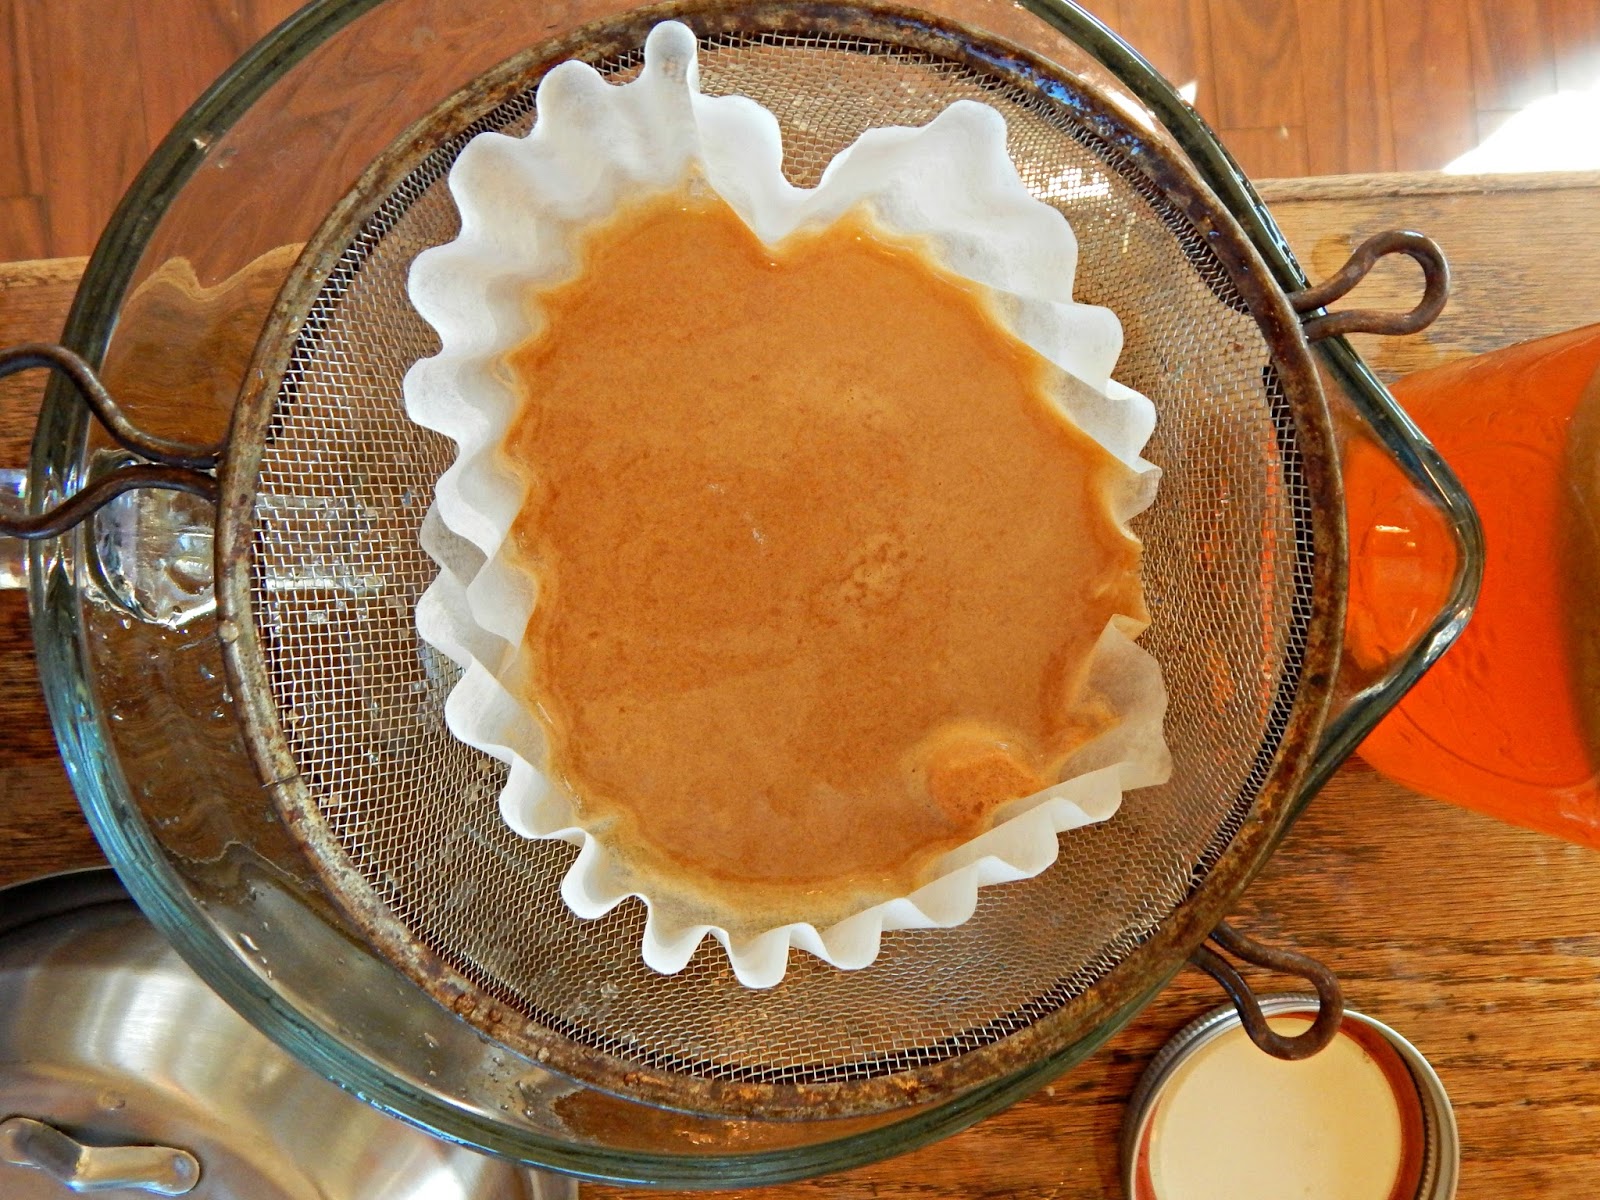 2 or 3 coffee filters (or a double layer of cheesecloth), combined with a fine sieve, do the trick.
How to Can Apple Cider or Apple Juice
I follow Ball's directions.
1. Pour the cider or juice into a large pot placed over high heat. Bring the liquid to 190 degrees F., or just a bit hotter. Do not allow the liquid to come to a boil. Keep the liquid at 190 degrees F. or hotter for 5 complete minutes, adjusting the stove temp as necessary. This kills off any bacteria in the liquid.
 Pasteurize the juice or cider at 190 degrees F. for 5 minutes.2. Ladle cider or juice into hot canning jars, leaving 1/4 inch headspace. Process in a water bath canner for 10 minutes. Any size canning jar may be used.
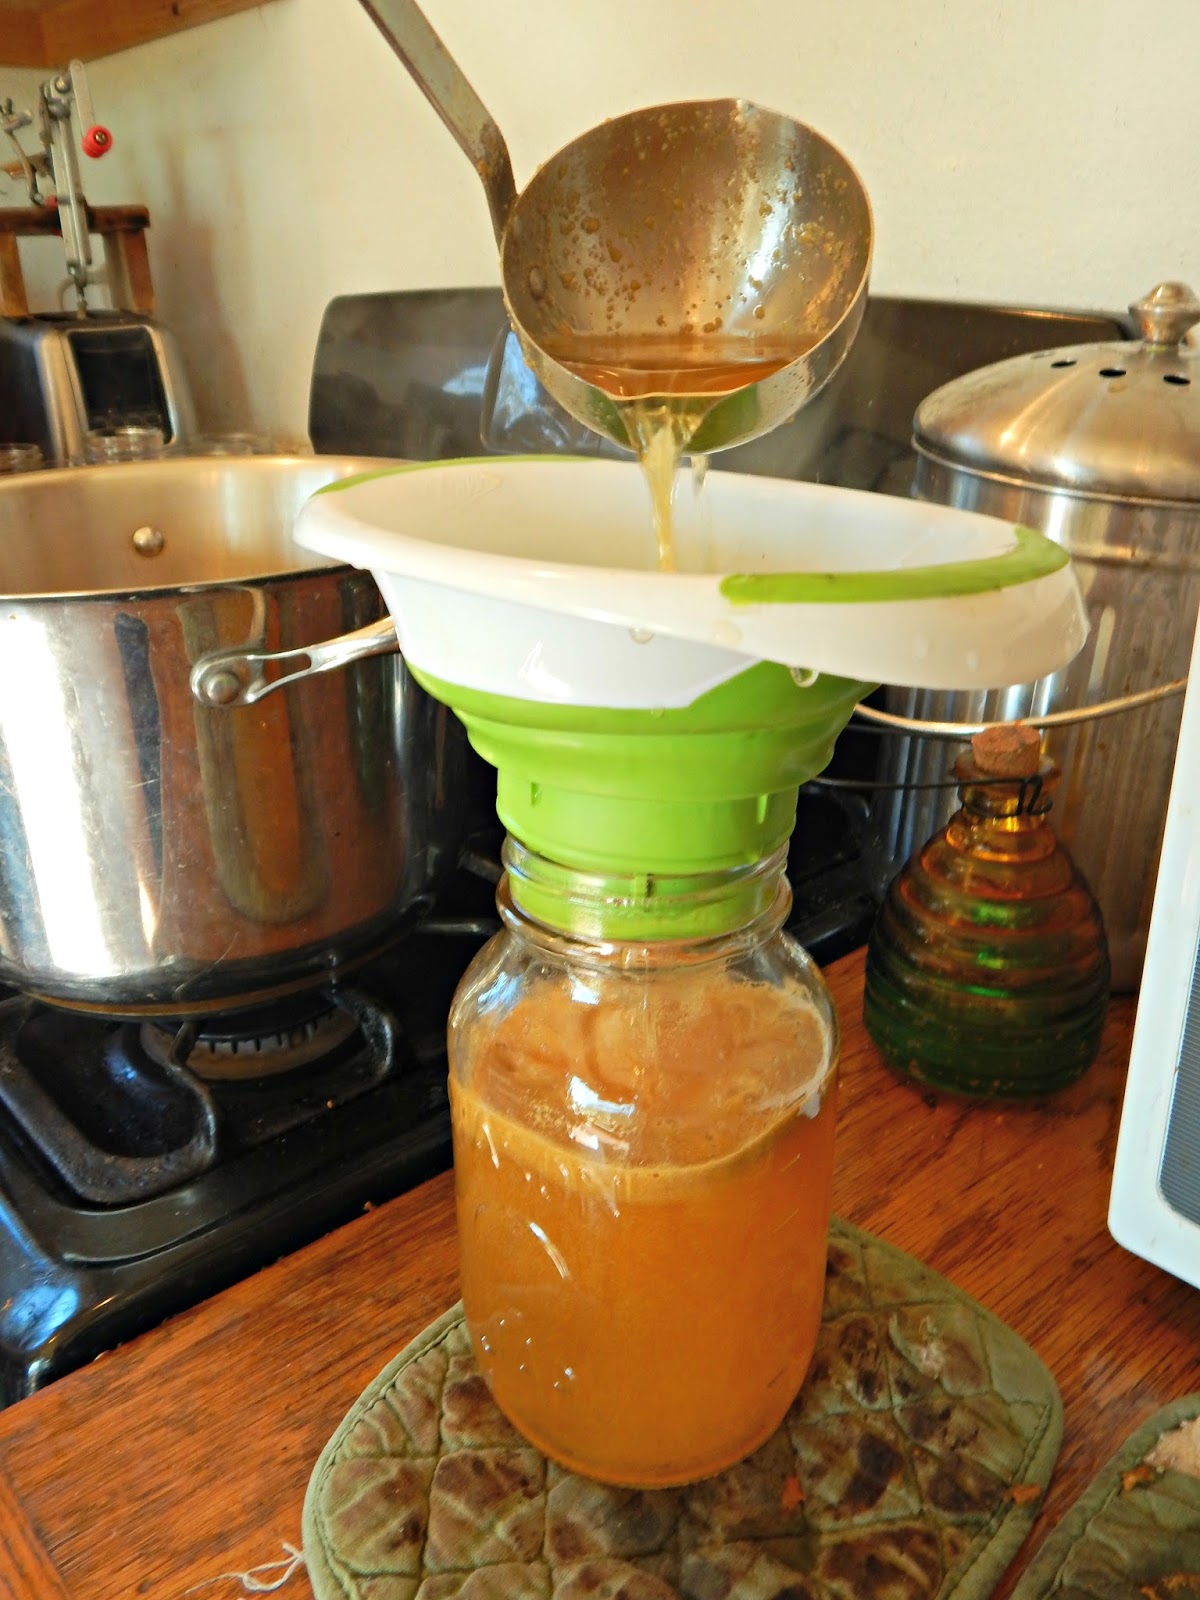 Jarring the cider.
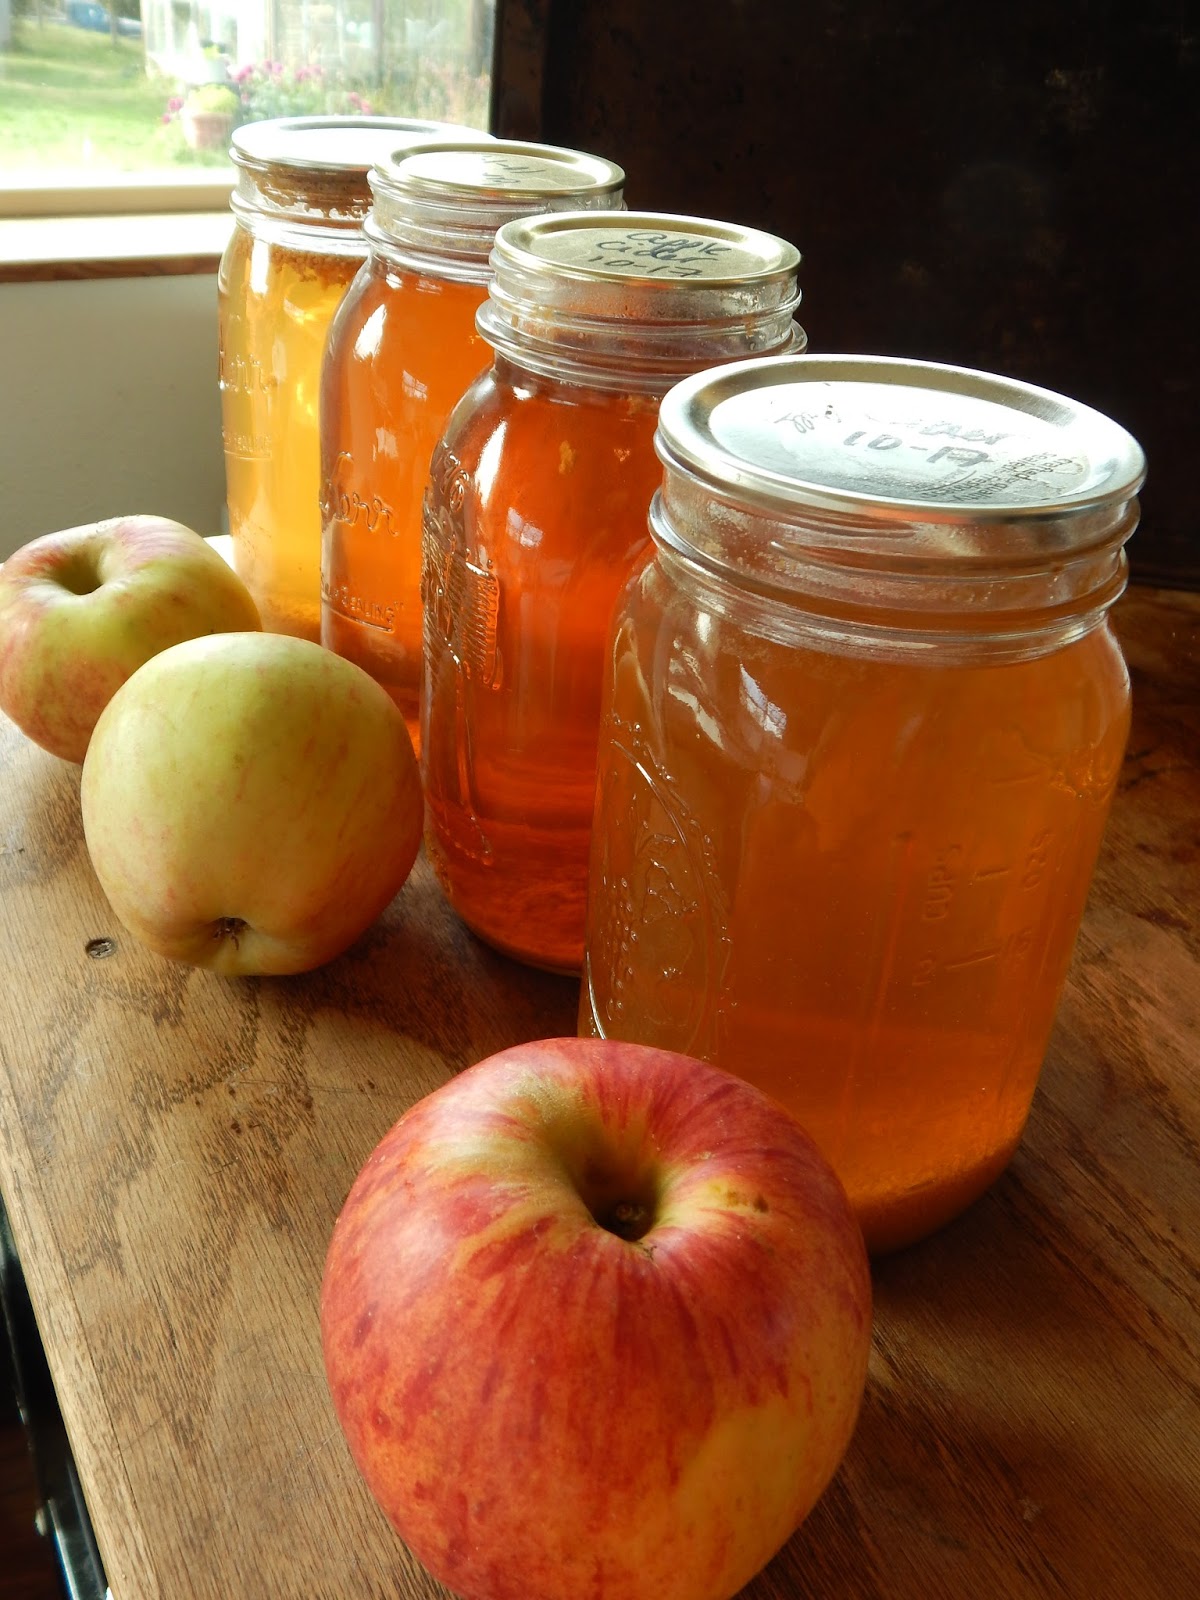 The finished product!Related Posts:
How to Preserve Apples: Canning, Freezing, Dehydrating, Root Cellaring
What to do with Crab Apples
Low Sugar, No Pectin Apple Peel and Core Jelly
Picking Unripe Apples for Making Apple Pectin
Apple Skillet Cake Recipe
Apple Spice Bread Recipe
Apple Butter Oatmeal Crumb Bars Recipe
Canning Apple Pie Jam
Freezing Apple Pie Filling
The Best Tasting, Easiest Applesauce Ever
Making Dried Apple Rings in the Warmer Drawer
October 4, 2017
Introducing...Pickles!
 Pickles, wearing her leash.
This post contains affiliate links. All opinions are my own. Please see FCC disclosure for full information. Thank you for supporting this site!
Pickles, wearing her leash.
This post contains affiliate links. All opinions are my own. Please see FCC disclosure for full information. Thank you for supporting this site!
We have a new critter on the homestead: Pickles, a Polish rabbit doe.
Let me be clear that Pickles is a pet. My daughter's, really. But we are hoping Pickles will lead us up to rabbit as livestock. Here's how.
My daughter adores her buck, Buddy. He's really an excellent pet, and our daughter has long had aspirations to breed him and sell the offspring as pets. Not only do we love her entrepreneurial spirit, we love encouraging our girl to work with animals. (Actually, I feel she has a special way when it comes to critters. Give her an animal that's ornery with everybody, and she'll soon have it well behaved...at least around her. Buddy himself had a rough start on our homestead, back in July of 2016. He bit me repeatedly, several times drawing quite a lot of blood. He bit my husband, too. But he would never dream of biting our daughter.)
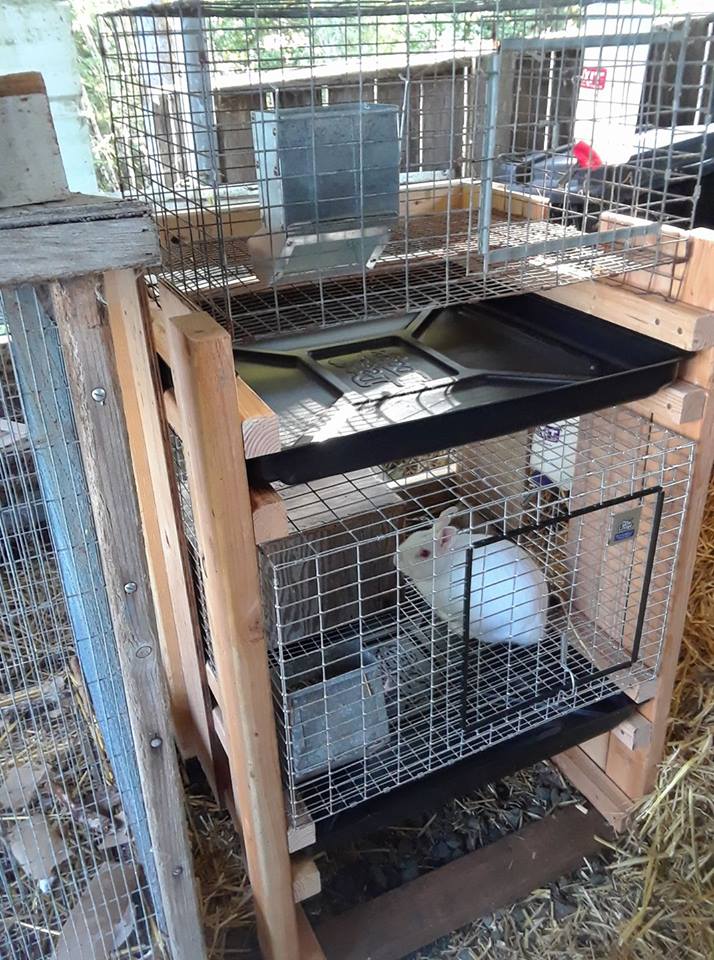 Buddy in one of the rabbit hutches.Our girl saved her birthday money to buy the cages and equipment to house a doe and kits, and we finally found a doe we thought she could breed with Buddy. (Bonus points if you get the reference to Buddy and his wife Pickles!) She's already something of an expert caring for rabbits. Now we want her to become an expert at breeding them. And then, when we can afford the housing for them, we hope to add meat rabbits to the homestead.
(Please don't worry about Buddy and Pickles safety. Polish rabbits are really tiny - 3.5 lbs, tops. They would not be worth butchering! Besides, pets are pets, not livestock.)
Buddy and Pickles haven't met yet. We're first letting Pickles get acclimated to her new surroundings and new caregiver. It should be pretty amusing to see Buddy's reaction to his "wife." I will keep you updated.
By the way, if you're interested in having a rabbit as a pet, we highly recommend the Polish breed. Not only are they small and therefore easy to hold and carry, but they tend to be more laid back than some breeds. Their small size also means they can easily live in smaller cages (though it's always good to let them have access to the outside; we use a ferret leash for this purpose, which you can see in the photo of Pickles at the top of this post.) Plus, their oddly proportioned bodies are just plain cute!
Related Post: An Introduction to Raising Rabbits for Meat
September 30, 2017
Weekend Links
 We have grapes!In which I share my favorite posts from this blog's Facebook page.
This post contains affiliate links. All opinions are my own. Please see FCC disclosure for full information. Thank you for supporting this site!
"He who gathers crops in summer is a prudent son,
but he who sleeps during harvest is a disgraceful son."
Proverbs 10:5
_______________________________
* I'm a pretty tired lady, lately. I'm homeschooling two kids, writing as a job, homekeeping (including cooking healthy meals from scratch), and preserving the harvest. It. Is. A. Lot. Of. Work. I have ZERO time to relax. Still, I'm thankful we can homeschool. I'm thankful I can help bring in some money to make ends meet. I'm thankful we are eating healthy. And I'm thankful we have a harvest to put by for the winter. Perspective is everything!
* Recall of Death Wish Coffee Company’s Cold Brew Coffee, due to botulism.
 THIS is a knock-your-socks-off pie!
* Recall on papayas, due to salmonella.
* THIS is an amazing pie that will knock everyone's socks off! And it's in my book "Easy As Pie" - so you can be the star of Thanksgiving dinner :)
* 25 powerful ways for a wife to tell her husband "I love you."
* Tackling mom worry with God's word.
* Growing a family on a next-to-nothing budget.
* 5 Reasons Your Children Aren't Obeying.
* Did you know there are Halloween books for kids that speak biblical truth? There are! Check them out here.
* I think every family needs to have a copy of Squanto for Thanksgiving. Hint: It's got details you've probably never heard before about God's hand in American history.
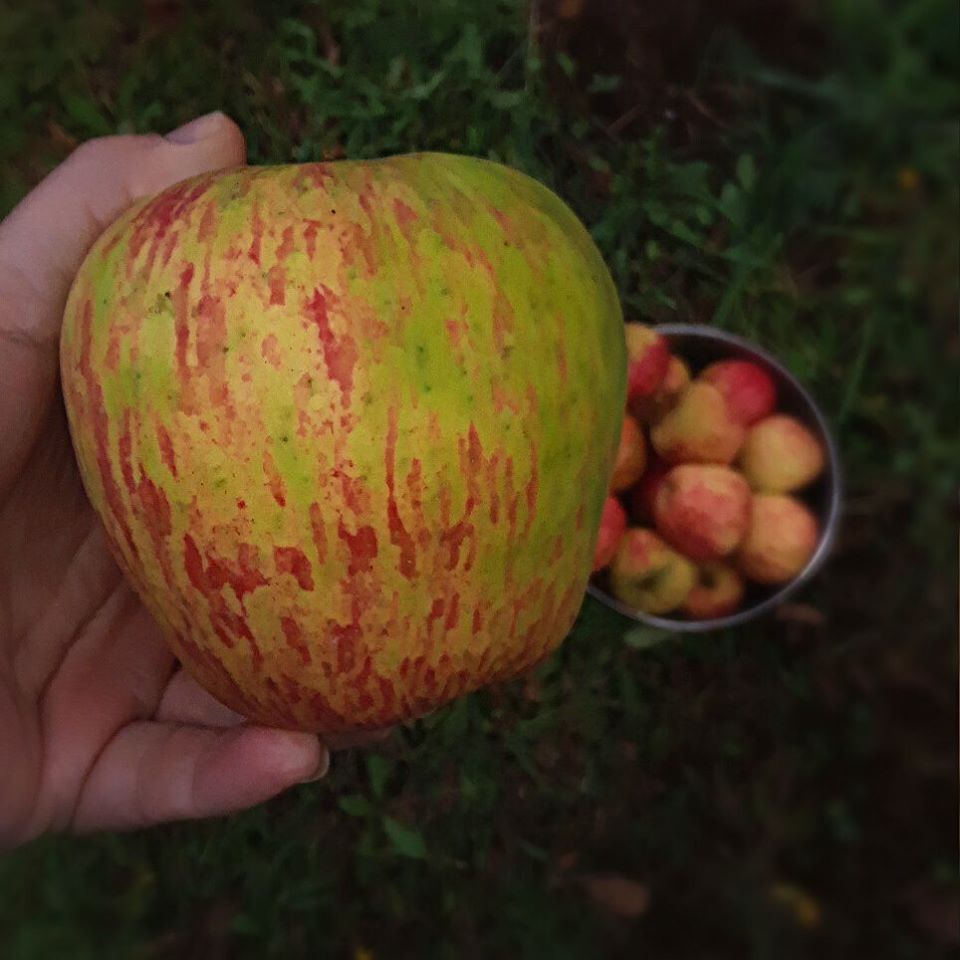 We're still harvesting apples.* A MUST READ. 2 million children are being trafficked worldwide. 250,000 of those children live here in the United States. Here are 3 of ways these children are pulled into trafficking.
 * Conventional marshmallows contain horribly unhealthy ingredients. But that doesn't mean you have to do without. Try these healthy, homemade marshmallows.
* If you're about to have a hard frost and you still have green pumpkins, learn how to ripen them indoors. (Or just make mock apple pie with them!)
* Growing up, chili meant lots of beans. Now that I follow a keto diet to control my diabetes, I don't eat beans. Happily, this was the first no-bean chili I tried. Everyone loved it and nobody missed the beans!
Oldies But Goodies:
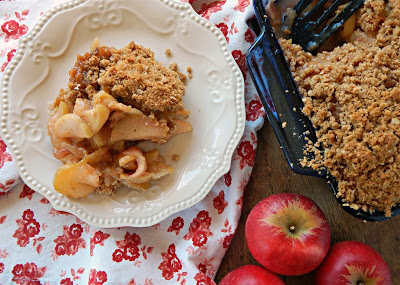 Apple crisp.
* Herbal remedies for winter illnesses
* 7 make-ahead Thanksgiving food ideas
* Apple Skillet Cake Recipe
* Cauliflower Chowder Recipe (with an Instant Pot option)
* Freezing apple pie filling
* Easy Apple Crisp Recipe
September 26, 2017
Waste Not, Want Not...Making the Most of Orchard Fruit
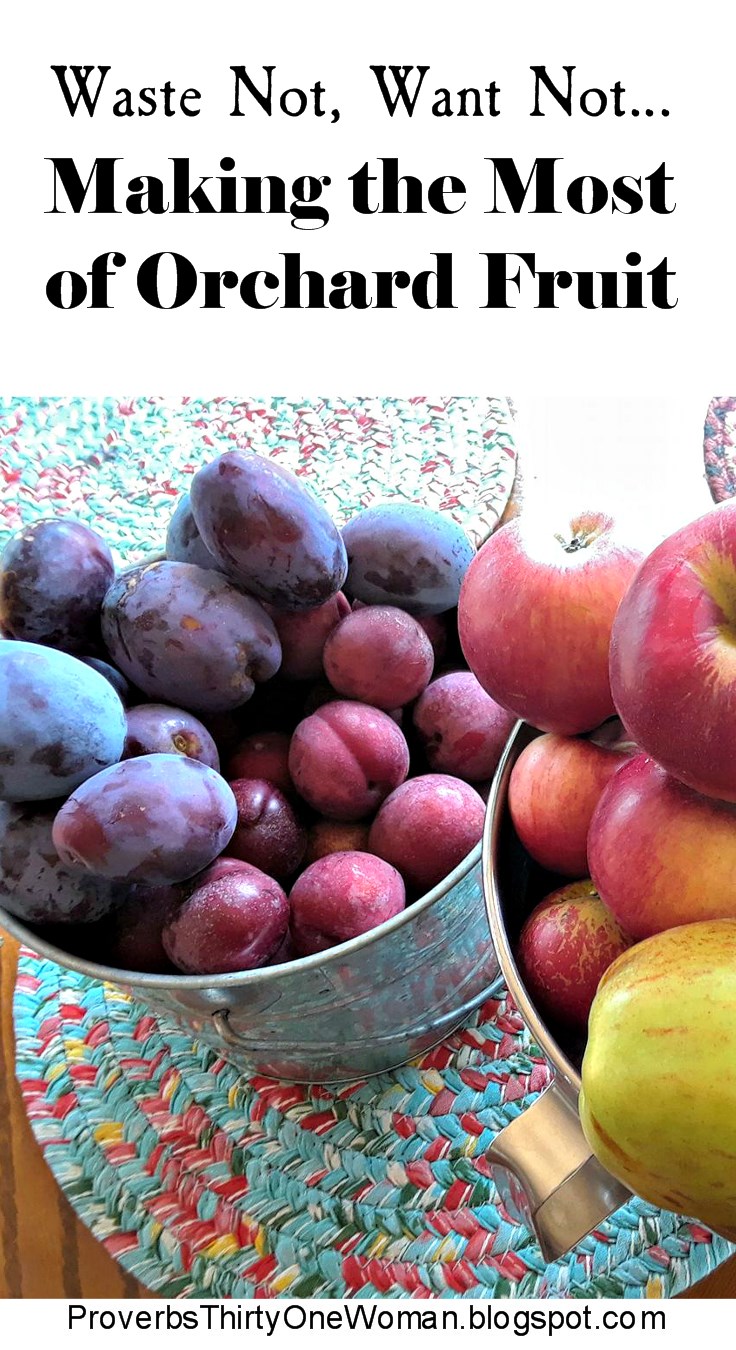 The black and white photo caught my eye because it featured two women standing next to a tall pyramid of canned food. Though I spotted the photo on the Internet*, it originally appeared in an early 1900s newspaper, and the caption said the mother and daughter team had canned hundreds of jars of fruit that year. The mother bragged, "We didn't waste a thing."
That photo was pretty awe-inspiring, and made me think about how previous generations prided themselves on their lack of waste, whereas all too often the current generation doesn't even realize how much it is wasting. Especially when it comes to food.
As a general rule, homesteaders are thrifty and resourceful, but amid the hot, seemingly-never-ending work of the harvest season, how often do we let food go to waste? On our homestead, my goal is to avoid food waste as much as possible, and to preserve as much of the harvest as I can for human consumption.
When we moved to our current homestead, there was already a small orchard in place. I quickly learned that while this was a true blessing, it could also be overwhelming. Today, I have a solid system in place to help me preserve the orchard's harvest each year.
Unripe Fruit
The first batch of fruit homesteaders usually deal with is unripe. Maybe they've taken the time to thin their fruit trees (which typically results in larger single fruits); maybe the trees have naturally thinned themselves by dropping unripe fruit on the ground; or perhaps a storm has knocked young fruit off the trees.
If you're like me, you grew up being told unripe fruit was unfit to eat. My mother promised me tummy aches and digestive complaints if I broke this rule...but as it turns out, a lot of cultures eat unripe fruit. We can, too.
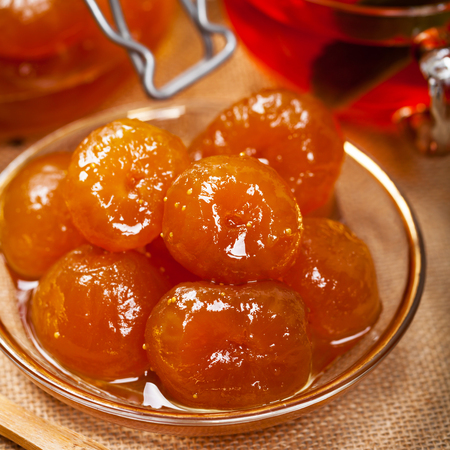 Preserved immature figs.Unripe Figs: In the Greek and Turkish cultures, unripe figs are commonly eaten in a sugar syrup.
1. Cut off the stems of the figs and make a slit at the bottom of each fruit.
2. Place the fruit in a large pot and cover with water. Bring to a boil. Cover and gently boil for 15 minutes. Remove the figs with a slotted spoon.
3. Wash the pot. Place the figs back in the pot and cover with water. Boil and strain them again. If the figs are soft but still keeping their shape, they are ready. If they aren't yet soft, boil and strain one more time.
4. Place the figs back in the pot and add water and granulated sugar to make a syrup. Traditionally, equal parts water and sugar are used, but you can make a lighter syrup, if you wish. Also add about 2 tablespoons of freshly squeezed lemon juice for every 1 1/2 lbs. of uncooked figs. If desired, add some strips of lemon peel, and about 6 whole cloves. Cover and bring to a boil, cooking until the liquid turns into a thin syrup. During this process, if some of the figs start to lose shape, remove them with a slotted spoon and set aside.
5. Cool the syrup and the figs. 6. Thoroughly wash some glass jars and fill them with the prepared figs, leaving about 1 inch headspace. Cover with the syrup. Place lids on the jars, refrigerate, and begin eating after a week's time.
 Immature apple pectin.
Unripe Apples: Use immature apples to make your own pectin for jam-making or health. Click here for complete instructions.
Immature Plums, Peaches, or Nectarines: Unripe plums are regularly eaten throughout Asia and the Middle East. How do they make them edible? By pickling them. In the Mediterranean, baby peaches, no bigger than olives, are also pickled and eaten. But peaches and nectarines don't need to be so small to make great pickles.
Basic Fruit Pickle Brine: Into a medium saucepan, pour 1/2 cup white vinegar, 1/4 cup granulated sugar, 2 teaspoons of kosher or canning salt, and 1 cup of water. Place over high heat and stir until the sugar and salt are completely dissolved and the liquid is clear. Cool completely, stirring once in a while. Place fruit in freshly washed glass jars, cover with brine, and refrigerate. Allow the pickles to sit a week or two before eating.
Other Unripe Fruits: Poaching makes unripe fruit more tender and enhances any sweetness while helping to remove bitterness. Poaching is best used on fruit that is fairly close to ripeness.
1. Cut the fruit in half and, if possible, remove the core or stone.
2. In a saucepan, add enough liquid to cover the fruit. You may use water, beer, wine, or a sugar syrup. If desired, add spices like cloves, cinnamon sticks, or ginger. Bring to a boil. Reduce the heat, bring the liquid to a simmer, and add the prepared fruit. Simmer until fruit is soft.
3. For particularly green fruit, allow the food to sit in the poaching liquid in the refrigerate overnight. In addition, fruit that is nearly ripe is salvageable by using it in baked goods. For example, chop not-quite-ripe peaches and add them to your favorite muffin or quick bread recipe.
 Windfall applesauce.Windfall Fruit
 When our fruit is ripe (or nearly so), but the wind or over-ripeness has made it fall to the ground, I don't leave it for the birds. (Letting fruit rot around trees encourages pests.) Every day, I look for windfall fruit; that way, very little of it ends up so mushy its only use is the compost pile. Don't be concerned if windfall fruit is bruised or has holes from birds or other critters.
To use windfall fruit, I cut away any bad parts and use the rest for pie, cobbler or crisp, jam, jelly, or (if you have apples or pears) applesauce or pearsauce. Sometimes I also put better quality windfall fruit into a bowl designated for food that should be eaten that same day.
Handling a Bumper Crop
If you have large amounts of ripe fruit, it pays to start preserving it right away. Set aside some for fresh eating, but then get right to work dehydrating, canning, or freezing the rest. Putting some fruit in freezer bags to turn into canned food later is a life saver. For this reason, I try to ensure the freezer has plenty of empty space before the orchard season begins. Most fruits freeze just fine whole; place them on a rimmed baking tray and pop them in the freezer. When they are hard, put them in freezer bags. But when I'm really pressed for time and I know I'm going to make jam with the fruit, I often just throw the fruit in a freezer bag and call it good.
Not sure how to preserve your fruit? The National Center for Home Food Preservation is a gold mine of information on how to can and freeze just about anything. And to learn how to dehydrate your fruit (or other foods), click here.
And, of course, it's always nice to share with friends and family. My husband's co-workers love the bags of apples my hubby brings them! You might even look into sharing your fruit with a local charity that feeds the hungry. Sadly, not all of them allow home grown food, and you'll want to be sure the organization has a good reputation for not letting produce spoil, too.
Waste Not, Want Not
 Making fruit scrap syrup.
It used to be that when I cored or peeled any fruit, I just dumped those trimmings in the compost bin. There's nothing terrible about that. And there's nothing awful about feeding those trimmings to livestock, either. (Be careful feeding too much fruit peelings to chickens, however; it will make their eggs taste "off.") But I really try to use those peelings for human food, when I'm able.
One way to do that is to make fruit peel syrup. It's an easy process and makes a thin syrup perfect for pancakes, or even to use with savory dishes. (For example, peach syrup is a nice marinade for pork.) Here is complete information on how to do it.
You can also turn fruit skins, cores, and pits into jelly. Easiest of all is apple peel and core jelly, which requires no pectin and can be made low or no-sugar. See the recipe here. The process is very similar with other fruits, except you'll typically need to use pectin for them. For example, when I recently made pear jelly, I boiled the trimmings just like I do for apples, strained to make juice, but then followed the directions on a box of commercial pectin to make the jelly itself.
Peach Peeling and Pit Jelly This recipe works for any fruit.
1. Place peach peels and pits in a large pot. Just barely cover with water. Simmer for 30 minutes. Allow the mixture to sit overnight.
2. Strain the mixture; compost the peels or feed them to your animals.
3. In a clean, large pot, mix together the resulting liquid and 1 box of powdered pectin. Bring to a full boil. Add 3 cups of granulated sugar. Stir and return to a full boil until the jelly reaches 221 degrees F.
4. Ladle into hot jelly jars, leaving 1/4 inch headspace. Process in a water bath canner for 10 minutes.
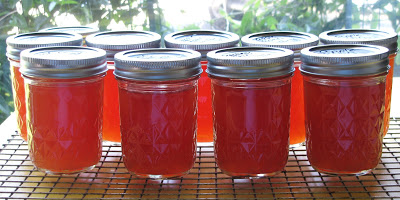
 Apple vinegar in the works.Fruit Scrap Vinegar I also sometimes make vinegar from fruit scraps. It's very easy and results in some really tasty vinegar. Homemade vinegar should not be used for preserving, because there's no accurate way for you to ensure it has the correct acidity to safely preserve food. But you can use it in salad dressing, as a marinade, or in cooking.
1. Warm 1 quart of filtered, non-chlorinated water. Stir in 1/4 cup of granulated sugar or honey, stirring until completely dissolved.
2. Wash some glass jars and fill them about half full with coarsely chopped fruit scraps (peels, cores, bits of fruit - but not rotten or bruised parts). Pour the sugar water over them, leaving about 1/4 inch headspace. Cover with cheesecloth held in place with a rubber band and allow to sit at room temperature. Stir once a day with a freshly washed spoon.
3. After about a week, the liquid will appear dark. Strain, composting the fruit scraps or feeding them to animals. Pour the liquid into freshly washed jars, cover with cheesecloth, and allow to ferment 2 or 3 more weeks, or until you like the flavor. (When tasting the vinegar, use a freshly washed spoon and don't double dip.)
4. To store, place a plastic lid on the jar and keep in a cool, dark location, like the refrigerator. Is it
Is it Safe to Use Fruit Pits and Seeds? Most people believe apple seeds and fruit pits contain cyanide (or, depending upon who you're talking to, arsenic). But according to Rodale's Organic Life, the Guardian newspaper, and other sources, there's nothing to worry about when using pits or cores to create food for your loved ones. The truth is, apples, apricots, plums, pears, peaches, and cherries do contain amygdalin, which breaks down into hydrogen cyanide when chewed. (There's no natural arsenic in any fruit.) However, according to Nordic Food Lab and other expert sources, cyanide isn't heat-stable. So when you cook pits and cores to make syrup or jelly, their toxicity disappears. In other words, there's no need to worry about making anyone sick. Furthermore, according to experts, even enthusiastic fruit eaters would have a hard time ingesting enough seeds/pits that their body could not naturally detoxify the fruit's toxicity.
* I have literally spent hours trying to find this photo again so I could share it with you. No luck!
September 20, 2017
50 Low Carb and Keto Thanksgiving Recipes
 I discovered I was diabetic last year, right around the holidays - so I guess it's no wonder I've been planning a keto-friendly Thanksgiving since then. I confess, the thought of not having all my favorite Thanksgiving and Christmas foods was really depressing. But then I realized, I don't have to feel deprived! Thanks to the Internet, it's so easy to come up with low carb (or keto or LCHF) alternatives that taste fantastic!
 Now, if Thanksgiving isn't at your house, or you have carbavores who insist on the old standbys, admittedly things will be more difficult. There is hope, though! Focus on the turkey, ham, or whatever meat you traditionally have. (Hopefully not ham covered in sugar - but if that is what's served, just cut off the "crust" of the ham.) Then bring a side and a dessert you can eat.
I've included single or small serve desserts, if you feel you're the only one who will be eating them - but honestly, if you don't tell anyone food is low carb, they'll probably never know! In fact, in my experience, non-low carbers tend to prefer my keto dishes over versions they are used to. (Because fat adds flavor, friends.)
Enjoy!
Gravy:
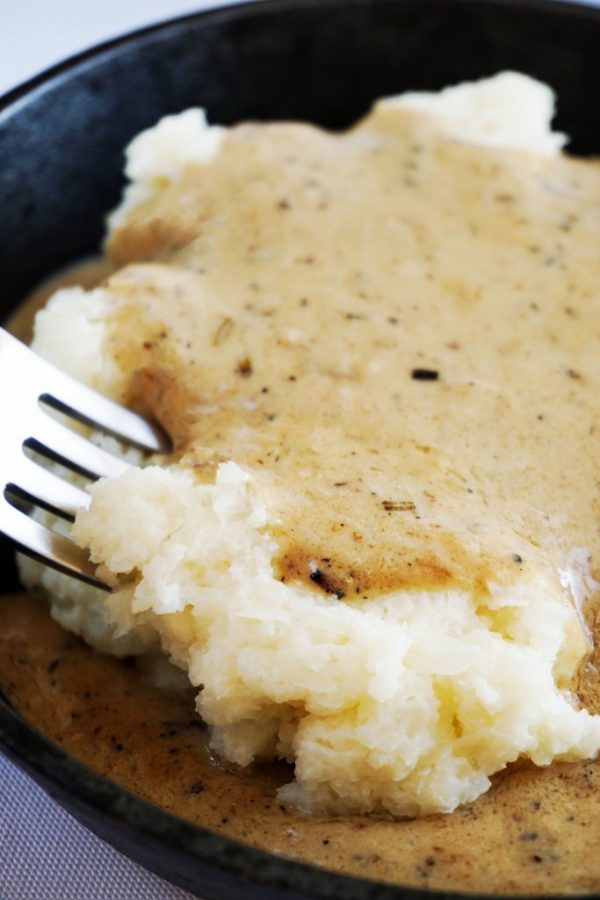 Creamy cauliflower mash with gravy, via Keto Connect.The Ultimate Keto Gravy
 Keto Giblet Gravy
Low Carb Chicken (or Turkey) Gravy
Paleo (and Low Carb) Gravy
Stuffing:
Low Carb Sausage and Cheddar Stuffing
Cauliflower Stuffing
Cauliflower Rice Stuffing
Mushroom, Bacon, and Cauliflower Stuffing
Pork Rind Stuffing
Low Carb "Cornbread" Stuffing
(Hint: Have you tried low carb cauliflower replacements before and hated them because of a strong cauliflower flavor? Try using frozen cauliflower! In my experience, it's far more mild-tasting.)
Bread:
Low Carb Garlic Parmesan Knots
Low Carb Cheddar Biscuits
Low Carb Cranberry "Cornbread" Muffins
Low Carb Dinner Rolls
Almond Flour Low Carb "Cornbread"
Coconut Flour Low Carb "Cornbread"
 Low carb, crustless pumpkin pie, via Low Carb So Simple.Mashed Potatoes:
Slow Cooker Mashed Cauliflower
Instant Pot Mashed Cauliflower
Keto Mashed Cauliflower and Gravy
(Hint: Remember, frozen cauliflower has a more mild flavor.)
Sides & Other:
Sugar-Free, Low Carb Cranberry Sauce
3 Cheese Ham and Broccoli Casserole
Low Carb Green Bean Supreme Casserole
Skillet Green Beans
Creamy Garlic Parmesan Mushrooms
Keto Creamed Spinach
Low Carb Broccoli Salad
Skillet Brussels Sprouts with Parmesan Sauce
Low Carb Egg Nog
Keto Pumpkin Spice Latte
Low Carb Gingerbread Men
Pies and Desserts:
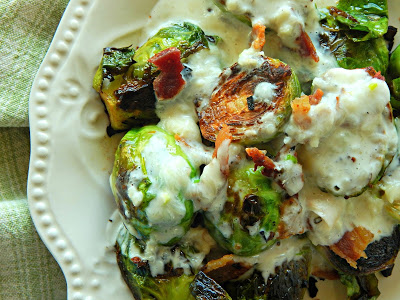 Keto Brussels Sprouts with Parmesan Sauce.Crustless Low Carb Pumpkin Pie
 Crustless Pumpkin Pie II
Keto Pumpkin Cheesecake Mousse
Pumpkin Pie in a Bowl
Low Carb Pumpkin Cheesecake
Mini Low Carb Pumpkin Cheesecakes
Low Carb Pumpkin Cake Roll
LCHF Cheesecake
Keto Brownie Cheesecake
Boston Cream Cheesecake
Low Carb Chocolate Silk Pie
Low Carb Chocolate Pie
Keto Brownie Cheesecake
Low Carb Mock Apple Pie Filling
Low Carb Pecan Pie
Low Carb Pecan Pie Bars
Almond Pie Crust
Coconut Flour Pie Crust
Keto "Graham Cracker" Crust
Low Carb Chocolate Pie Crust
(Hint: Anytime you can omit the pie crust, do! It will save a ton of carbs. Cheesecake and pumpkin pie are easy - and delicious - without a crust.)


