
Kristina Seleshanko's Blog, page 28
September 15, 2017
The Little Chicken Who Couldn't
This post may contain affiliate links. All opinions are my own. Please see FCC disclosure for full information. Thank you for supporting this site!
Our Internet line was down for five days, so I'm playing a lot of catch up! (Not only do I work exclusively online, but my children were doing online school, too. Oy.) And while I was disconnected from the world, a lot of things happened at the homestead - including the hatching of our hens' eggs.
 X marks the incubating eggs.Mama hen had been sitting on 10 eggs for 21 days. When she first started sitting, I carefully marked each egg with a penciled X, so I'd know exactly which eggs were being incubated. Then I left Mama to it.
I knew the general advice is to separate the mama hen from the rest of the flock, but I had no way to do this, and I wanted to see what happened if I did things the old fashioned way - letting Mama do all the work.
Well, Mama was an excellent broody hen. She sat diligently every day, only getting up rarely to drink, relieve herself, and eat a wee bit of food. She growled at us when we checked on her (yes, hens can growl!), though she never pecked when I peeked under her. (I'm telling you, Australorps are the sweetest chickens ever!)
One day when I went to collect the other hens' eggs, I laughed because I found two eggs immediately in front of Mama's nest. I assumed (ahem) the other hens wanted to lay in her nest - because hens are like that; you can give them each a nesting box, but they'll all lay in the same one. Then, I thought, they couldn't hold their eggs any longer and out they popped in front of Mama's nest.
 Mama, sitting diligently.Well, a few days later when I went to cook with those eggs, I got a surprise. I was making a huge batch of pancakes to freeze for my children's breakfasts, and when I cracked one egg, the contents were bloody. Upon closer inspection, there was an embryo in that egg. Gross. That huge batch of pancake batter had to go in the trash, but the kids were fascinated to see a real embryo up close and personal.
I knew then that the egg had originally been under Mama, and somehow got booted from the nest. And over the course of the next several days, I found a few other partially incubated eggs with embryos in them. (Needless to say, I started cracking eggs in a separate bowl before adding them to whatever I was cooking.) Embryos only develop in fertilized eggs if those eggs have been incubated (i.e. warmed up by a sitting hen or an electric incubator). So either Mama booted those eggs accidentally, or other hens snuck into her nest when she got up for a quick break and they booted them, or Mama rejected the eggs, thinking they were bad.
None of those embryo-filled eggs had pencil marks on them, by the way. Note to self: Use a pen next time.
In the end, though she had six eggs under her at the end of 21 days, only one egg hatched. In other words, only one egg had been under her for a full 21 days.
Some people asked why I removed all the unhatched eggs after that time. Why not just leave them under Mama and let them hatch when they were ready? I had two good reasons not to do that. The first is that most hens will abandon their chick before they abandon the eggs in their nest - which means the chick has pretty much zero chance of survival. In fact, this scenario played out on our homestead.
I heard peeping on a Monday afternoon. By Tuesday afternoon, I could still hear peeping, but couldn't see any chicks. I didn't want to disturb Mama too much, so I didn't peek under her. I assumed (see how my assumptions lead to bad things?) she had chicks still hatching.
That night, however, when my husband locked up the chickens in the hen house, he looked inside with a flashlight. There, in a spot underneath the slightly raised nesting box, was the chick, peeping for Mama to help him. Somehow, he or she had fallen out of the nest. But Mama would not abandon her eggs. (Hubby says broody hens are a lot like Daleks from Doctor Who, but instead of having a one-track mind that says "Exterminate!", they have a one track mind that says "Incubate!") Fortunately, this happened during a heat wave, so the chick didn't die of cold, and my husband tucked the chick back under Mama, who seemed grateful.
 Mama and her chick.The second reason I needed to dispose of the additional eggs is that in 21 days, Mama had hardly eaten or had anything to drink. By the time chicks hatch, the hen is much thinner and really requires a break from sitting in order to be healthy.
So, the other eggs were gone and Mama was focused on her single, cute little fluff butt. The chick seemed bright and alert and curious, and Mama had her work cut out for her.
By the third day, she took the chick out of the nesting box and let it wander around the hen house. She showed it the water and the chick feed and taught it to eat, and she remained highly protective, even fiercely pecking my husband once. (Normal for the average hen, but really aggressive for this one.)
 Mama love!Then she must have taken the chick outside to teach it to scratch. That evening, my husband found the chick dead in the chicken run, its eyes pecked out.
We'll never know exactly what happened. Maybe the chick took a turn for the worse, it died suddenly, and the rest of the flock did what chickens do to dead things. Maybe the chick showed signs of illness, which chickens greet with cannibalistic fervor. Maybe the chick fell of the ramp to the hen house and was injured or died. Or maybe Mama simply didn't do a good job protecting the chick from the rest of the flock, who, not knowing what it was, assumed it was food.
Sigh.
It's never easy when animals die on the homestead, but at least I know we gave the chick every chance and that nature took its natural course.
My husband says he wants to use an electric incubator next time. Personally, I'd like to give Mama another chance, but this time put her (and her chicks) in a smaller run of her own, safe from the rest of the flock. We'll see.
Our Internet line was down for five days, so I'm playing a lot of catch up! (Not only do I work exclusively online, but my children were doing online school, too. Oy.) And while I was disconnected from the world, a lot of things happened at the homestead - including the hatching of our hens' eggs.
 X marks the incubating eggs.Mama hen had been sitting on 10 eggs for 21 days. When she first started sitting, I carefully marked each egg with a penciled X, so I'd know exactly which eggs were being incubated. Then I left Mama to it.
I knew the general advice is to separate the mama hen from the rest of the flock, but I had no way to do this, and I wanted to see what happened if I did things the old fashioned way - letting Mama do all the work.
Well, Mama was an excellent broody hen. She sat diligently every day, only getting up rarely to drink, relieve herself, and eat a wee bit of food. She growled at us when we checked on her (yes, hens can growl!), though she never pecked when I peeked under her. (I'm telling you, Australorps are the sweetest chickens ever!)
One day when I went to collect the other hens' eggs, I laughed because I found two eggs immediately in front of Mama's nest. I assumed (ahem) the other hens wanted to lay in her nest - because hens are like that; you can give them each a nesting box, but they'll all lay in the same one. Then, I thought, they couldn't hold their eggs any longer and out they popped in front of Mama's nest.
 Mama, sitting diligently.Well, a few days later when I went to cook with those eggs, I got a surprise. I was making a huge batch of pancakes to freeze for my children's breakfasts, and when I cracked one egg, the contents were bloody. Upon closer inspection, there was an embryo in that egg. Gross. That huge batch of pancake batter had to go in the trash, but the kids were fascinated to see a real embryo up close and personal.
I knew then that the egg had originally been under Mama, and somehow got booted from the nest. And over the course of the next several days, I found a few other partially incubated eggs with embryos in them. (Needless to say, I started cracking eggs in a separate bowl before adding them to whatever I was cooking.) Embryos only develop in fertilized eggs if those eggs have been incubated (i.e. warmed up by a sitting hen or an electric incubator). So either Mama booted those eggs accidentally, or other hens snuck into her nest when she got up for a quick break and they booted them, or Mama rejected the eggs, thinking they were bad.
None of those embryo-filled eggs had pencil marks on them, by the way. Note to self: Use a pen next time.
In the end, though she had six eggs under her at the end of 21 days, only one egg hatched. In other words, only one egg had been under her for a full 21 days.
Some people asked why I removed all the unhatched eggs after that time. Why not just leave them under Mama and let them hatch when they were ready? I had two good reasons not to do that. The first is that most hens will abandon their chick before they abandon the eggs in their nest - which means the chick has pretty much zero chance of survival. In fact, this scenario played out on our homestead.
I heard peeping on a Monday afternoon. By Tuesday afternoon, I could still hear peeping, but couldn't see any chicks. I didn't want to disturb Mama too much, so I didn't peek under her. I assumed (see how my assumptions lead to bad things?) she had chicks still hatching.
That night, however, when my husband locked up the chickens in the hen house, he looked inside with a flashlight. There, in a spot underneath the slightly raised nesting box, was the chick, peeping for Mama to help him. Somehow, he or she had fallen out of the nest. But Mama would not abandon her eggs. (Hubby says broody hens are a lot like Daleks from Doctor Who, but instead of having a one-track mind that says "Exterminate!", they have a one track mind that says "Incubate!") Fortunately, this happened during a heat wave, so the chick didn't die of cold, and my husband tucked the chick back under Mama, who seemed grateful.
 Mama and her chick.The second reason I needed to dispose of the additional eggs is that in 21 days, Mama had hardly eaten or had anything to drink. By the time chicks hatch, the hen is much thinner and really requires a break from sitting in order to be healthy.
 So, the other eggs were gone and Mama was focused on her single, cute little fluff butt. The chick seemed bright and alert and curious, and Mama had her work cut out for her.
By the third day, she took the chick out of the nesting box and let it wander around the hen house. She showed it the water and the chick feed and taught it to eat, and she remained highly protective, even fiercely pecking my husband once. (Normal for the average hen, but really aggressive for this one.)
 Mama love!Then she must have taken the chick outside to teach it to scratch. That evening, my husband found the chick dead in the chicken run, its eyes pecked out.
We'll never know exactly what happened. Maybe the chick took a turn for the worse, it died suddenly, and the rest of the flock did what chickens do to dead things. Maybe the chick showed signs of illness, which chickens greet with cannibalistic fervor. Maybe the chick fell of the ramp to the hen house and was injured or died. Or maybe Mama simply didn't do a good job protecting the chick from the rest of the flock, who, not knowing what it was, assumed it was food.
Sigh.
It's never easy when animals die on the homestead, but at least I know we gave the chick every chance and that nature took its natural course.
My husband says he wants to use an electric incubator next time. Personally, I'd like to give Mama another chance, but this time put her (and her chicks) in a smaller run of her own, safe from the rest of the flock. We'll see.


September 5, 2017
Low Sugar, No Pectin Apple Peel and Core Jelly Recipe
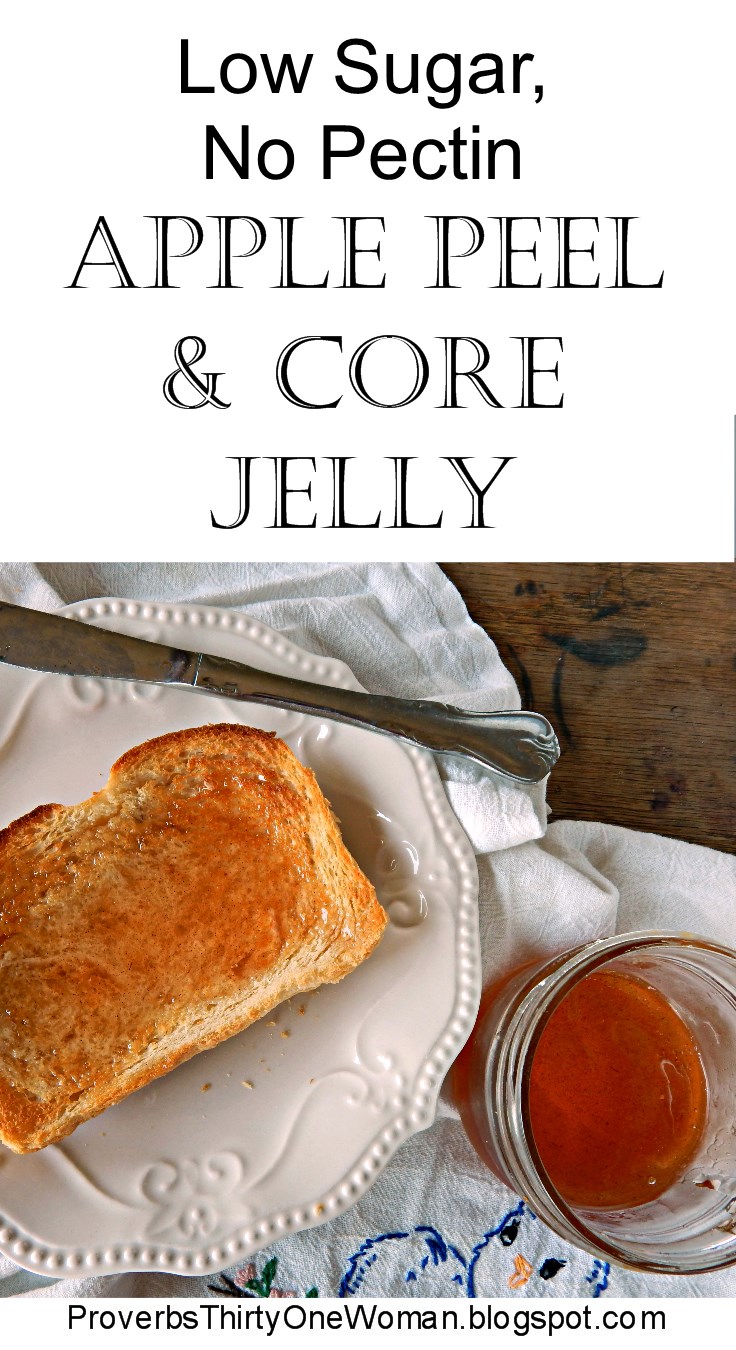 There are few things I hate more than food waste. So when I realized I could make delicious human food from fruit scraps that, years ago, I would have thrown in the garbage, I was thrilled.
Years ago, I typed about turning fruit peels into yummy syrup, but I recently learned you can also use fruit peels and pits (or cores) to make jelly.
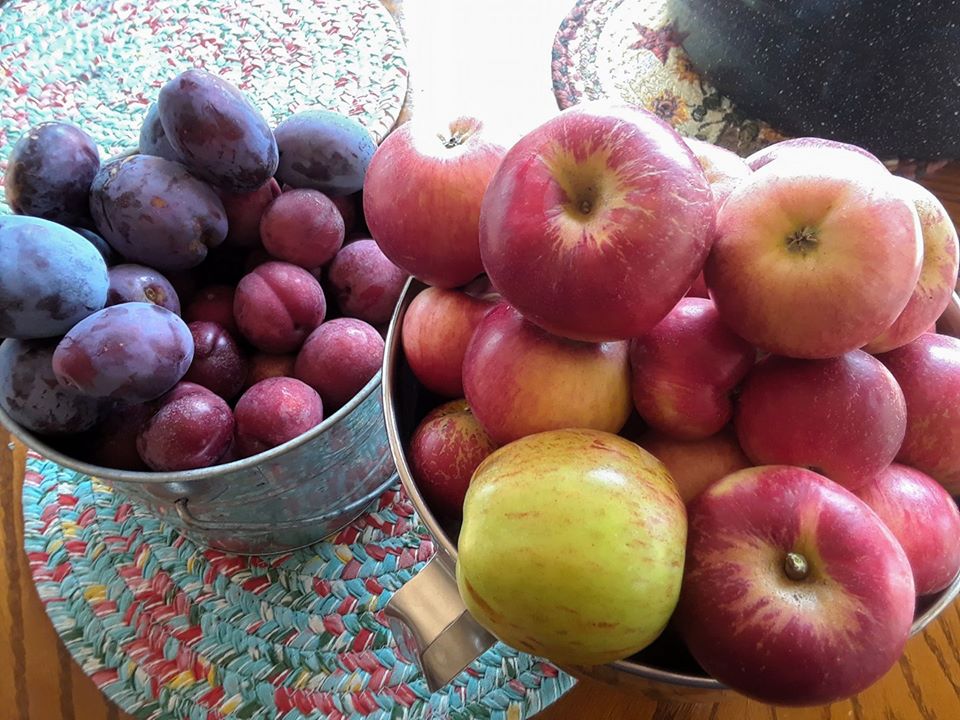
Since I've been making a lot of applesauce lately (see my super easy method here), I've been saving up apple cores in the fridge. Generally speaking, I don't peel our apples, but if you do, you can save up the peels, too. And with those cores and peels, you can make scrumptious jelly.
Even more good news? The recipe doesn't require pectin, so you can use as little sugar as you like!
If you are new to canning, please review basic canning procedure, here.
Low Sugar, No Pectin Apple Peel and Core Jelly
1. Place a bunch of apple peels and cores in a large pot. Cover, just barely, with water. Bring to a boil.
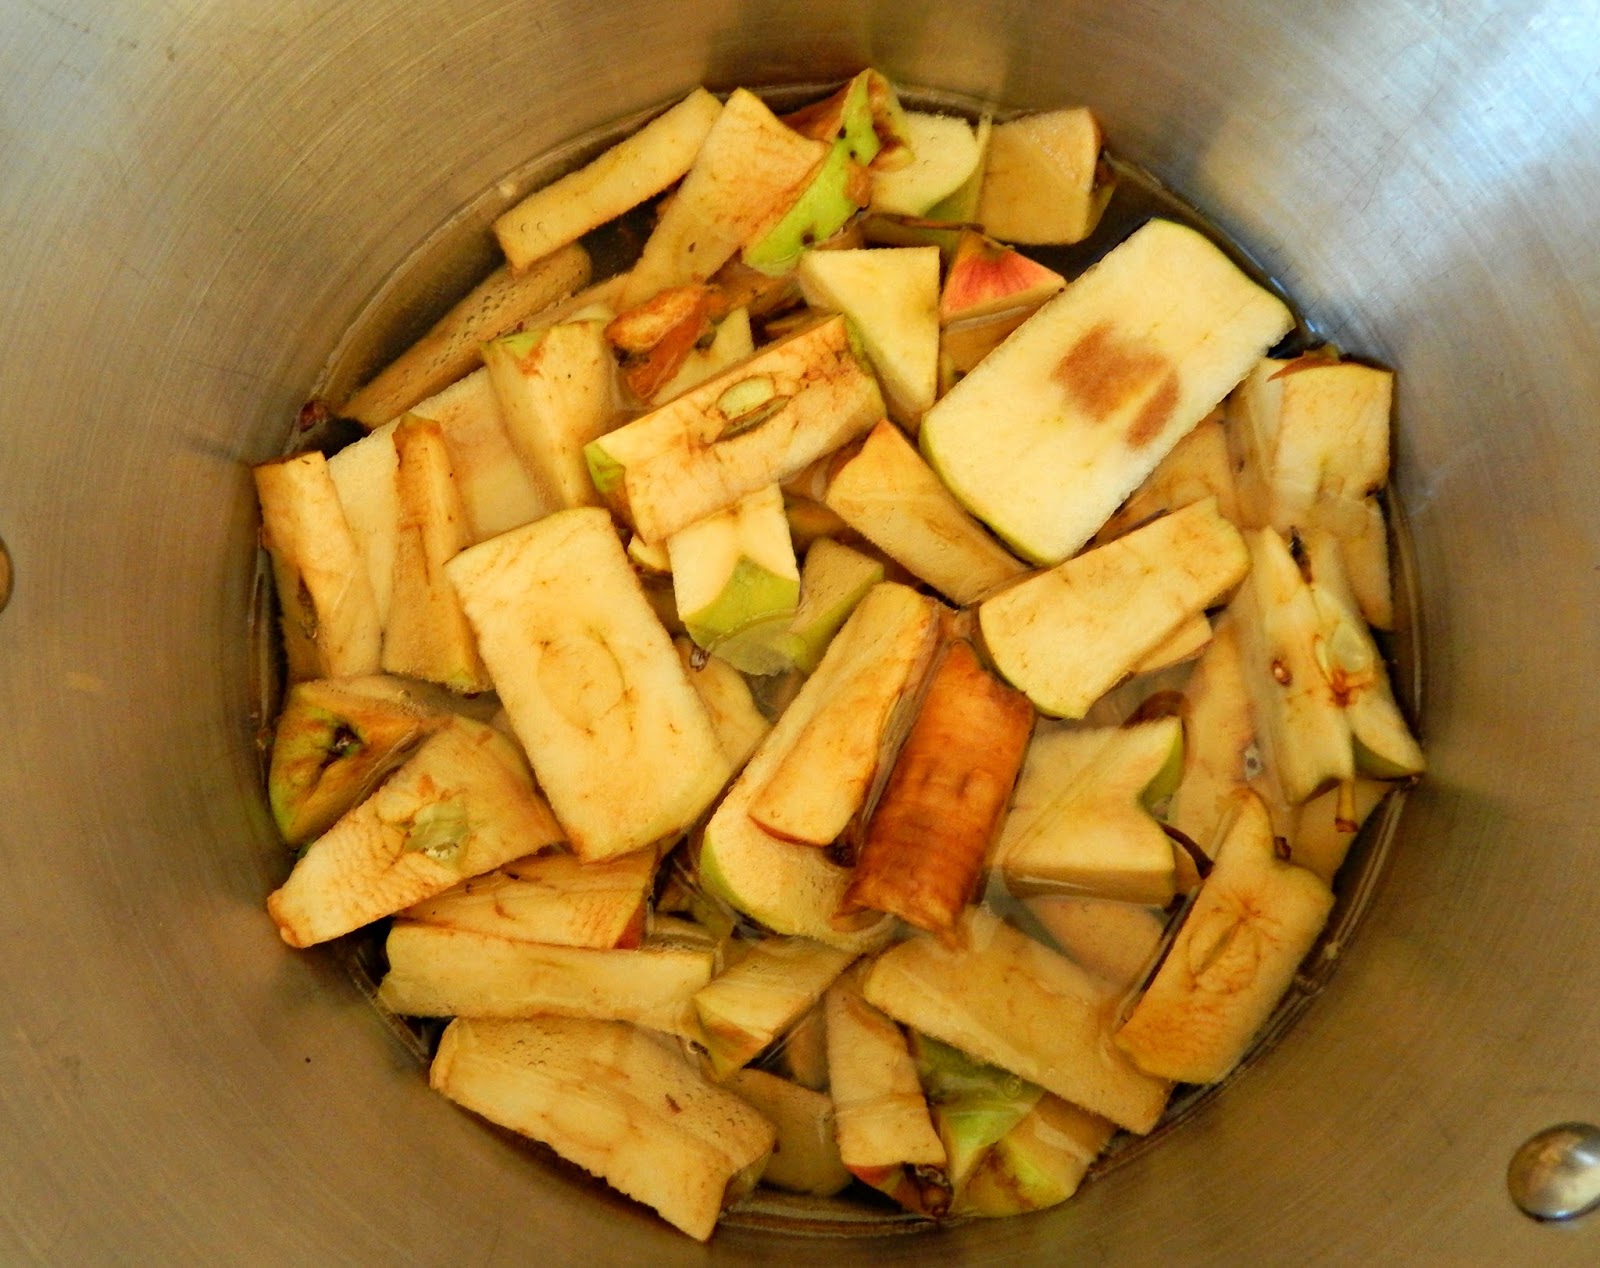 Cooking down the apple cores.2. Reduce the heat to medium and cook, stirring frequently, until the cores and peels are mushy and the liquid is reduced by about half.
3. Strain through a fine sieve, reserving the liquid. (Use a stainless steel bowl to catch the liquid; ceramic or glass may break when the hot fluid touches them.) Toss the peels and cores to your livestock or throw them in the compost. Measure the liquid.
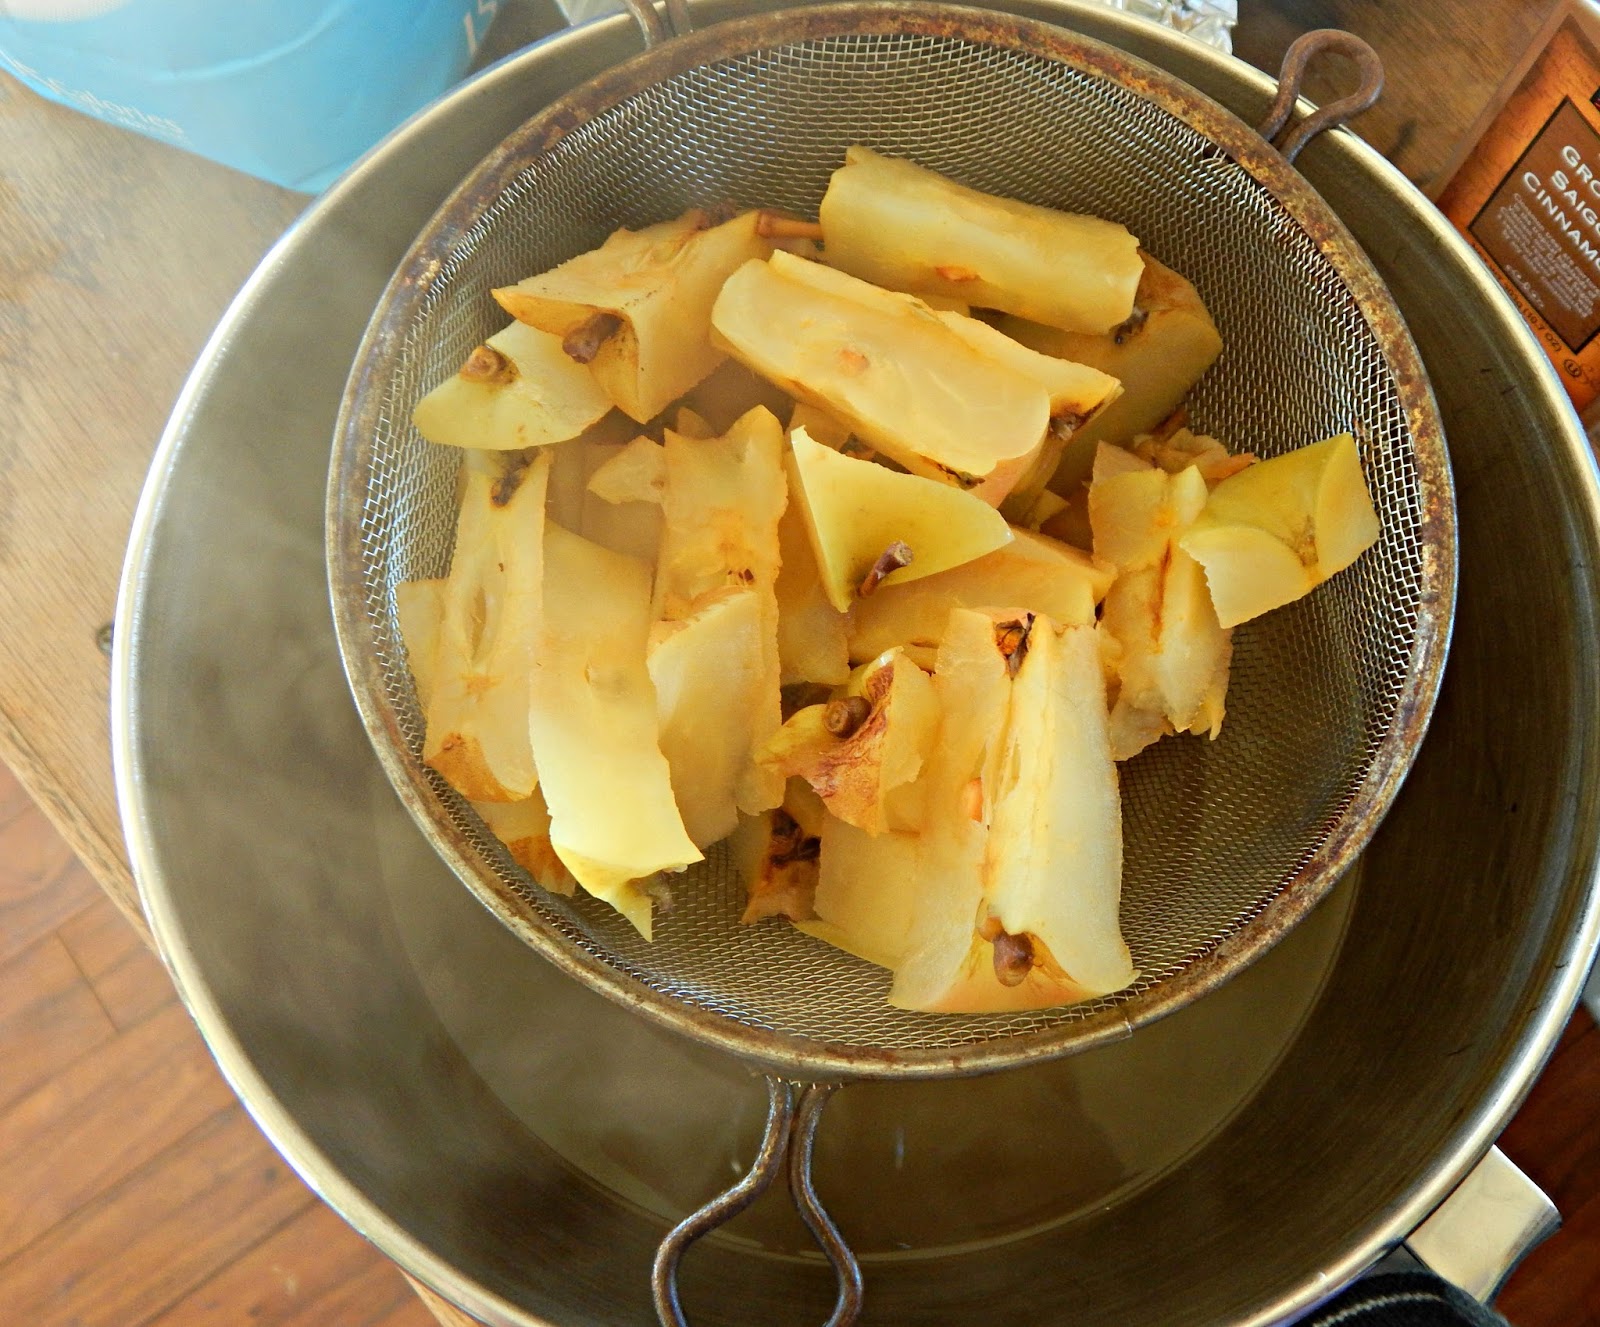 Straining the jelly.4. Wash the pot. (You don't want any bits of apple debris in your jelly.) Pour the liquid into the pot.
5. Add granulated sugar. You can use as little or as much as you desire. My original, old-time recipe called for 1/2 cup granulated sugar for every cup of liquid, but I think that's quite a lot. I used about 3 1/2 cups of sugar for every 5 1/2 cups of liquid, and even that might have been more than was needed. So I recommend adding perhaps a half cup of sugar at a time, letting it dissolve, and tasting the mixture until you like the flavor.
6. If desired, you can also season the jelly. I used a little ground cinnamon and ground cloves. You could use cinnamon sticks and whole cloves, too, and just fish them out before jarring the jelly. Or try a little apple pie spice.
7. Add 1 tablespoon of bottled lemon juice for every cup of liquid. This keeps the jelly acidic enough to safely can. (If you want to freeze the jelly, you may omit the lemon juice or use freshly squeezed lemon juice.)
8. Bring to a boil over high heat, stirring frequently. When the jelly reaches 221 degrees F., it's done. Remove it from the heat.
9. Ladle into hot jelly jars, leaving 1/4 inch headspace. Process in a water bath canner for 10 minutes. Or, allow the jelly to completely cool, ladle into freezer safe containers, and freeze.
 Oh so yummy! P.S. Worried about the poison in apple seeds? It is true apple seeds contain amygdalin, which breaks down into hydrogen cyanide when chewed. But according to Nordic Food Lab (and many other expert sources), when exposed to even a little bit of heat, cyanide is no longer toxic. In other words, his recipe won't harm anyone!
September 2, 2017
Weekend Links
In which I share my favorite posts from this blog's Facebook page. Mama hen.
This post contains affiliate links. All opinions are my own. Please see FCC disclosure for full information. Thank you for supporting this site!
"Be patient, then, brothers and sisters, until the Lord’s coming. See how the farmer waits for the land to yield its valuable crop, patiently waiting for the autumn and spring rains. You too, be patient and stand firm, because the Lord’s coming is near. Don’t grumble against one another, brothers and sisters, or you will be judged. The Judge is standing at the door!"
James 5:7
_______________________________
* Have I mentioned how much I continue to love my Instant Pot electric pressure cooker??? When I purchased it, I imagined it making my life a heck of a lot easier, come harvest season. And I was right! I love that I don't have to plan ahead to use this thing; I can even wait until the last minute to remove meat from the freezer! (Frozen meat can go right into the pot.) And I don't have to get dinner going during a busy morning. Plus, it doesn't heat up my house, and once I put food in the Pot, I can walk away and do other things. Cause I'm a busy lady ;) Here's a very simple Instant Pot recipe I recently tried for crustless pizza casserole. It was quick to get into the Pot and everyone loved it! (I do recommend doubling the recipe for a family of four.) Not sure what an Instant Pot is or what to do with it? Click here.
* Mama hen is doing a splendid job. She has about 4 days to go, I think, so we may see baby chicks the first day of school! She only has 7 eggs under her now. I already knew she'd lost 2: One afternoon, I found two eggs just outside her nesting box, and I thought some of the other hens were trying to lay in her nesting box (chickens are funny that way) and couldn't hold their eggs any longer and dropped them in front of the box. I gathered those eggs...and a few days later, used them. They were bloody on the inside...and, yes, had partially developed embryos in them! Well, at least I had confirmation that our young rooter was doing his job! (And since then, I've taken to breaking eggs in a separate bowl before adding them as an ingredient to what I'm cooking.) Neither of the eggs was marked as one of the original 10 I put under Mama...so I assume that when she briefly goes to get a drink of water and a bite to eat, other hens and getting into her nest. It's all good, though, and we'll be delighted if we get even one live chick.
 Some things I've been harvesting.* The harvest season is the season for crisps (sometimes called crumbles) at the Seleshanko residence. I use the same basic recipe, no matter the fruit I'm using. Check out my simple recipe here.
* It's tomato season! If you preserve tomatoes and remove their skins, I hope you don't just compost or throw away those skins! You can dry them and turn them into a powder that's perfect for adding flavor to your cooking and can easily be turned into homemade tomato paste! I've been doing it for years
* Thoughts about homesteading with young children. (I wrote on the same topic, but quite a different article, years ago.)
* Of all things, I'm having a horrible time growing zucchini...you know, that veggie that is so easy to grow! The plant in the greenhouse is doing best, but two of the baby zucchini I had started turning yellow. A little research proved this happens when flowers don't get fully pollinated, so the plant "miscarries." That's a new one on me!
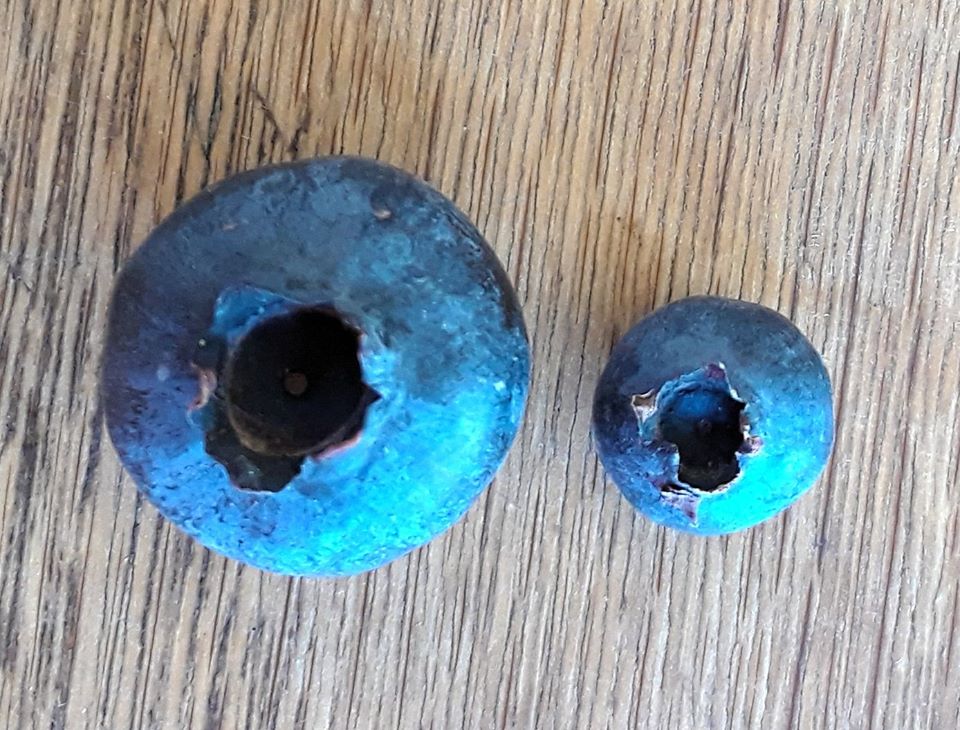
 The biggest blueberry I've ever seen (next to a normal sized one).
* Do your dishes have dark scratches on them from utensils? Try this!
* It's become almost impossible to have a conversation with anyone - including people who consider themselves Christians - without hearing this phrase. Here's the problem...
* There are some great tips in this article on stopping the fussing in your home. I personally used the peace making couch with my 8 and 12 year olds...and it worked great! Why didn't I think of that before??
* Money is tight on the homestead these days, so I've been using my Swagbuck points to earn gift cards to Walmart, where I do most of our grocery shopping. It's an easy way to earn cash in your spare time!
Oldies But Goodies
* Pierced ears closed up or irritated? This simple trick works for me.
* How to clean up soap scrum easily and naturally
 Mama hen.
This post contains affiliate links. All opinions are my own. Please see FCC disclosure for full information. Thank you for supporting this site!
"Be patient, then, brothers and sisters, until the Lord’s coming. See how the farmer waits for the land to yield its valuable crop, patiently waiting for the autumn and spring rains. You too, be patient and stand firm, because the Lord’s coming is near. Don’t grumble against one another, brothers and sisters, or you will be judged. The Judge is standing at the door!"
James 5:7
_______________________________
* Have I mentioned how much I continue to love my Instant Pot electric pressure cooker??? When I purchased it, I imagined it making my life a heck of a lot easier, come harvest season. And I was right! I love that I don't have to plan ahead to use this thing; I can even wait until the last minute to remove meat from the freezer! (Frozen meat can go right into the pot.) And I don't have to get dinner going during a busy morning. Plus, it doesn't heat up my house, and once I put food in the Pot, I can walk away and do other things. Cause I'm a busy lady ;) Here's a very simple Instant Pot recipe I recently tried for crustless pizza casserole. It was quick to get into the Pot and everyone loved it! (I do recommend doubling the recipe for a family of four.) Not sure what an Instant Pot is or what to do with it? Click here.
* Mama hen is doing a splendid job. She has about 4 days to go, I think, so we may see baby chicks the first day of school! She only has 7 eggs under her now. I already knew she'd lost 2: One afternoon, I found two eggs just outside her nesting box, and I thought some of the other hens were trying to lay in her nesting box (chickens are funny that way) and couldn't hold their eggs any longer and dropped them in front of the box. I gathered those eggs...and a few days later, used them. They were bloody on the inside...and, yes, had partially developed embryos in them! Well, at least I had confirmation that our young rooter was doing his job! (And since then, I've taken to breaking eggs in a separate bowl before adding them as an ingredient to what I'm cooking.) Neither of the eggs was marked as one of the original 10 I put under Mama...so I assume that when she briefly goes to get a drink of water and a bite to eat, other hens and getting into her nest. It's all good, though, and we'll be delighted if we get even one live chick.
 Some things I've been harvesting.* The harvest season is the season for crisps (sometimes called crumbles) at the Seleshanko residence. I use the same basic recipe, no matter the fruit I'm using. Check out my simple recipe here.
* It's tomato season! If you preserve tomatoes and remove their skins, I hope you don't just compost or throw away those skins! You can dry them and turn them into a powder that's perfect for adding flavor to your cooking and can easily be turned into homemade tomato paste! I've been doing it for years
* Thoughts about homesteading with young children. (I wrote on the same topic, but quite a different article, years ago.)
* Of all things, I'm having a horrible time growing zucchini...you know, that veggie that is so easy to grow! The plant in the greenhouse is doing best, but two of the baby zucchini I had started turning yellow. A little research proved this happens when flowers don't get fully pollinated, so the plant "miscarries." That's a new one on me!
 The biggest blueberry I've ever seen (next to a normal sized one).
* Do your dishes have dark scratches on them from utensils? Try this!
* It's become almost impossible to have a conversation with anyone - including people who consider themselves Christians - without hearing this phrase. Here's the problem...
* There are some great tips in this article on stopping the fussing in your home. I personally used the peace making couch with my 8 and 12 year olds...and it worked great! Why didn't I think of that before??
* Money is tight on the homestead these days, so I've been using my Swagbuck points to earn gift cards to Walmart, where I do most of our grocery shopping. It's an easy way to earn cash in your spare time!
Oldies But Goodies
* Pierced ears closed up or irritated? This simple trick works for me.
* How to clean up soap scrum easily and naturally
August 31, 2017
How to Grow Figs
 When we moved to our homestead, I was pleased as punch there were fig trees. Of course, I'd never eaten figs before (unless you include Fig Newton cookies), but I was eager to try a new fruit.
Soon, I learned why you never see fresh figs in the grocery store: Truly ripe figs are delicate things that handling and transportation would turn to mush. That makes them quite a precious home grown food, then.
A lot of people are surprised to learn that figs grow in most areas of the United States. And they are easy to care for, too. To learn how you can grow figs, please click here to read my article over at Self-Reliance magazine's website.
August 29, 2017
Tips for Successful Devotions with Young Kids {How to Do Children's Devotions}
 My most important job is to teach my children about God. There are many ways to go about this: praying with and in front of my children; talking with my kids about how God affects our every day lives; having theological discussions with my children; reading kids' devotionals and other Christian books for children; listening to and watching Christian media for kids; among other things. But reading the Bible with my children is a top priority.
The only trouble with Bible reading with young children is...it can be very, very difficult to get them to listen. Many mothers complain their little ones wiggle too much, or argue during Bible reading, or or touch each other, or kick each other, or breathe on each other, or otherwise cause disruptions that make Bible reading impossible. If you have this trouble in your home, read on. Here's what works for us:
* Choose your time wisely. You and your children are probably at your freshest in the morning. Evening devotions are okay, too, but I find I'm more likely to feel impatient when it's nearly bedtime - and my children are less likely to remember what we read.
* Make sure your children's needs are met. If they are hungry or thirsty or need to use the restroom, it will be impossible for them to pay attention to the Bible. So get those basic needs out of the way before you begin.
* Try singing first. Sing a hymn or a Bible verse (for example, something from Hide 'Em in Your Heart ) with your kids. Encourage them to stand up, make hand motions, and even dance. This gets the wiggles out.
* Try mealtime. Typically, I read the Bible to my children while they eat breakfast. I find they listen very well while they are eating a meal (not just a snack), and that breakfast becomes a mostly laid back time, where we can easily discuss the Bible.
* Try quiet activities. If for some reason I can't read the Bible while my children eat breakfast, I usually sit on the couch in the morning and have the children gather around while I read. But they don't just sit; they have quiet activities to do. Usually this is coloring or drawing, but anything works as long as it isn't noisy and leaves them free to listen. Truly, most children seem to listen better if their hands are busy.
* Pick the right Bible. There's nothing wrong with reading a regular, adult Bible to your children. (Although you'll probably want to skip certain, more mature sections.) However, I believe it's invaluable to have Bibles your children can more readily understand. Not only should each child have his or her own Bible (which should be geared toward their age group), I recommend having a children's Bible storybook that appeals to all your children - except perhaps the babies and toddlers in your family. In addition, I like having several children's Bible storybooks around, so we can finish one and - instead of repeating everything we just read - pick up another. Invariably, the stories are a bit different and the author's approach lends a freshness to the stories. Click here for my Bible recommendations.
How do you make devotions with young children work in your family?
Originally published 4/30/14.
August 24, 2017
Myths about the Keto Diet
 This post may contain affiliate links. All opinions are my own. Please see FCC disclosure for full information. Thank you for supporting this site!
It's amazing how many people can stare at the positive effects of the whole-food ketogenic diet and still not open their minds to it. As many of you know, I began a keto lifestyle in December, on the recommendation of my doctor who'd just diagnosed me with type II diabetes. (Read about my journey and the incredible success I had in just three months right here.) Eight months later, I can say my health has become even better. My blood sugar is still normal; I've lost 42 lbs.; my cholesterol is normal; my blood pressure is normal; the hidradenitis supporativa I suffered from is almost entirely gone; the C-section pain I suffered from (eight years after my last C-section) is mostly gone; and I have more energy.
And yet...I keep bumping into people who tell me I'm on a dangerous, fad diet.
Is the Keto diet a fad?
Did you know that the ketogenic diet (though it was not called that at the time) was the first diet ever developed to truly combat diabetes? Yep, way back in the 1860s, Dr. William Banting popularized the idea that "starchy" foods made us fat. By the early 1900s, doctors realized that by cutting those same carbs from the diet, diabetics who otherwise were dying, could live for years. Take a peak at this old diabetic cookbook, and you'll see it's not much different from the keto recipes you see today.
In addition, many experts argue that the keto diet is the way most people used to eat. In The Art and Science of Low Carbohydrate Living , Doctors Jeff Volek and Stephen Finney explain how eating habits from thousands of years ago are largely misinterpreted by archeologists, primarily because looking at the remains of food waste "does not allow us to know which parts of the food were treasured, which discarded, and what parts were fed to dogs." Think about it: Meat has usually been abundant, whereas vegetables were seasonal, and fruit rarer still.
Coming closer to our time period in history, fruit was treated as a dessert, and meals consisted mostly of natural fats, meats, and vegetables. Many of our modern epidemic diseases (including heart disease and diabetes) were far more rare in those days.
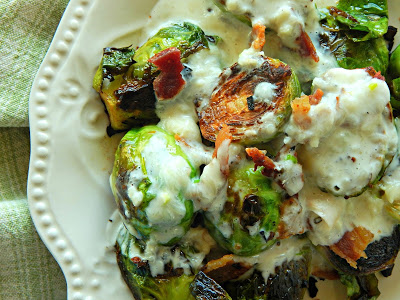
 A classic keto meal. Recipe here.Is the Keto Diet Dangerous?
Interestingly, when people bring up how "dangerous" the ketogenic diet is, they tend to be vague. I'll ask, "How is this diet dangerous?" and typically they can't answer. Sometimes I meet a healthcare professional who touts this line, and the "dangerous" aspect of this lifestyle always boils down to two things:
1. They think keto is a high protein diet.
2. They confuse ketoacidosis with ketosis.
A high protein diet does, indeed, have the potential to cause kidney damage - that's the "dangerous" part people frequently mention. But keto is not a high protein diet. It's a moderate protein diet.
I'll also note that I'm in contact with people who've been eating keto for a decade or longer, and none of them have ever had kidney issues. In fact, they've never been so healthy in all their lives. So kidney damage due to eating too much protein is definitely not a concern with this lifestyle.
An awful lot of people who should know better (nurses, dieticians, etc.) also confuse ketoacidosis with ketosis. I've addressed this concern before, but let me just say briefly: Ketosis means your body is burning fat instead of carbohydrates. That's what you're after in a keto diet. It's called ketosis because the process puts ketone bodies (chemicals the body produces when breaking down fatty acids) into the blood stream. The amount of ketones in the blood stream is, however, very low.
Ketoacidosis, on the other hand, is a dangerous condition found almost exclusively in type I diabetics. It occurs when there are very high amounts of ketones in the blood stream, caused by a lack of insulin in the body. (Insulin metabolizes ketones.) This condition requires emergency treatment because it can seriously damage organs and cause death. Learn more about ketoacidosis here.
Another item that comes up is something that was featured on a recent blog post over at The Paleo Mom. I've previously recommended this blog to people, because it has great articles about the AIP (autoimmune protocol) diet, which is useful for people suffering from a variety of ailments. But I must say I was disappointed with this piece.
 Low carb veggies are a major part of the keto diet. Recipe here.
The first red flag in the post is the assertion that keto is a "starvation diet." This tells me the author doesn't understand even the basics of keto. I assure you, no one ever starved on keto. No one need even feel hungry. Keto is a very filling diet, and if you're hungry, you eat. Period.
Perhaps the author is being unclear and saying keto starves the body of carbohydrates, which (she fails to mention) are not a nutrient anyone requires.
Then the author goes on to list the serious reactions some people have had while on a keto diet...Every single one of them apply to every diet that's ever existed, including the high carb, low fat diet that's currently so popular.
The post also claims keto hasn't been well studied, except among epileptic children. This simply isn't the case. Perhaps the author's confusion is that she's not looking at the studies of LCHF diets (another name for keto, and stands for "low carb, high fat, moderate protein") - the real studies, that is. As Volek and Phinney point out, rarely do studies that claim to look at LCHF really do the job. Usually, they look at high protein diets, or diets filled with processed (not natural) fats, or diets that aren't truly low carb.
Another thing I sometimes hear is that keto is bad for your gut and colon because it doesn't include enough vegetables. Again this shows a lack of knowledge about the diet, because keto is a whole foods diet that encourages vegetable consumption at every meal. In fact, a lot of people who switch to keto end up eating more veggies than they did previously.
A few other concerns are sometimes mentioned, like "Your body needs carbs!", "Fruit is good for you!", and "Fat causes heart disease!" Each of these assertions is false; you can read what I've already written about them here.
 I suffer a lot eating delicious, wholesome food like this chowder. (Not!) Recipe here.It's Not Maintainable
This is the most laughable argument against the keto diet, and the one that most reveals how our culture is addicted to carbs. In truth, thousands of people stick to a keto lifestyle without cheating...and do it for decades.
In fact, keto the easiest diet I've ever been on. Weight Watchers? Now there's a diet that's not maintainable. Even Atkins, which has some parallels with keto - is not maintainable for me and many others. But keto keeps me full and satisfied and the food is delicious. I have no desire to go back to the carb-laden diet the American diabetes Association and most medical professionals suggest.
My honest opinion? The standard American diet is what's not maintainable. At least, not if we want to be healthy.
To learn more about the specifics of the ketogenic diet, click here.
August 21, 2017
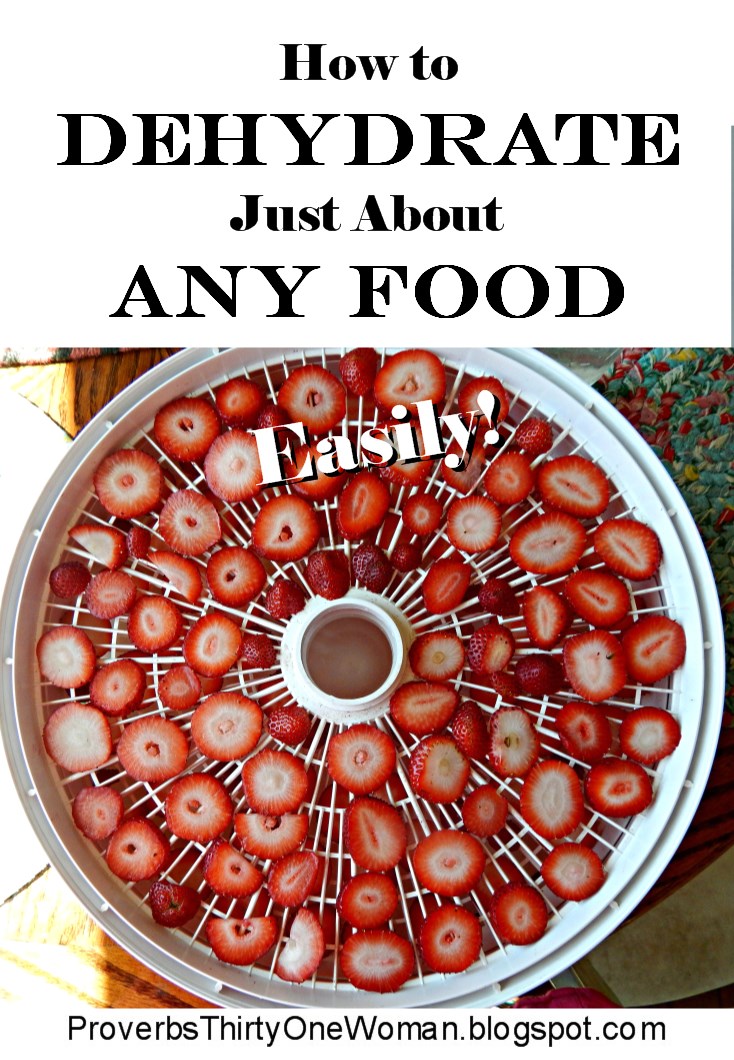
How to Dehydrate Just About Any Food - Easily!
 This post contains affiliate links. All opinions are my own. Please see FCC disclosure for full information. Thank you for supporting this site!
Recently, I've received a few questions about dehydrating food: "How do you dehydrate such-and-such?" and "What dehydrating books do you recommend?" I was all set to send these reply with the easy way to dehydrate just about anything when I realized...I've never written such a post! How can that be?
I've been dehydrating since my children were toddlers and I experimented with using my oven's warming drawer to dehydrate apple slices. It's an invaluable way to preserve food, whether I'm squirreling away orchard fruit for the winter or I'm trying not to waste store bought food that will soon spoil. In fact, dehydrating is just about the easiest method of preservation, with very little hands-on time required and little monetary investment necessary.
And here's the deal: Dehydrating is so simple, there's really no need for a book on how to do it. Once you know the basic rules about dehydrating, there's not even any need to hop online to check how to dehydrate a specific food.
So let this post be your dehydrating "bible," if you will. Dehydrating with an electric dehydrator is really simple. And dehydrating other ways isn't hard, either.
What Foods Can Be Safely Dehydrated?
Fruits, vegetables, herbs, jerky, and seeds can all be safely dehydrated. Some people dehydrate meals (like soups) or non-jerky meats, but this is considered risky. In fact, when it comes to home dehydrating, it's easier to discuss what you shouldn't dry:
Fatty meats and dairy - All these tend to go rancid quickly because of their high fat content. A neat trick some people like to use is to dehydrate small drops of yogurt to use as snacks. This is fine - but those yogurt drops need refrigerating afterward. And yes, you can dehydrate lean meats without making them into jerky, but they aren't considered safe to store at room temperature.
Eggs - Considered by most experts unsafe to dehydrate due to salmonella (which is not killed during the dehydration process). I have dehydrated backyard fresh eggs before, but I can't recommend them from either a safety or a quality standpoint.
Nuts - You can dry these, but because they are fatty, their shelf life still isn't long. It's best to preserve nuts by freezing them.
Fish - You can dehydrate fish but it will only last 1-2 months.
 Dehydrating plums.
How Long Does Dehydrated Food Last?
It depends upon the food, how dry you get it, and how well you store it, but generally speaking, home dehydrated foods last about a year.
What Kind of Dehydrator Should I Use?
Everyone raves about Excalibur dehydrators, but man are they expensive. And honestly, I don't think they are any better than my Nesco American Harvest Dehydrator, which is much more affordable (about $65). I purchased additional trays to make it more productive, and it's been going strong for years. (Actually, I love it so much, last year I bought an additional Nesco dehydrator!)
What every worthwhile home food dehydrator needs is:
* An adjustable thermostat, from 85 to 160 degrees F.
* Double wall construction.
* An enclosed heating element and a fan/blower. The heating element should not be at the base of the unit, because foods could drip onto it.
* UL seal of approval.
* The ability to add trays.
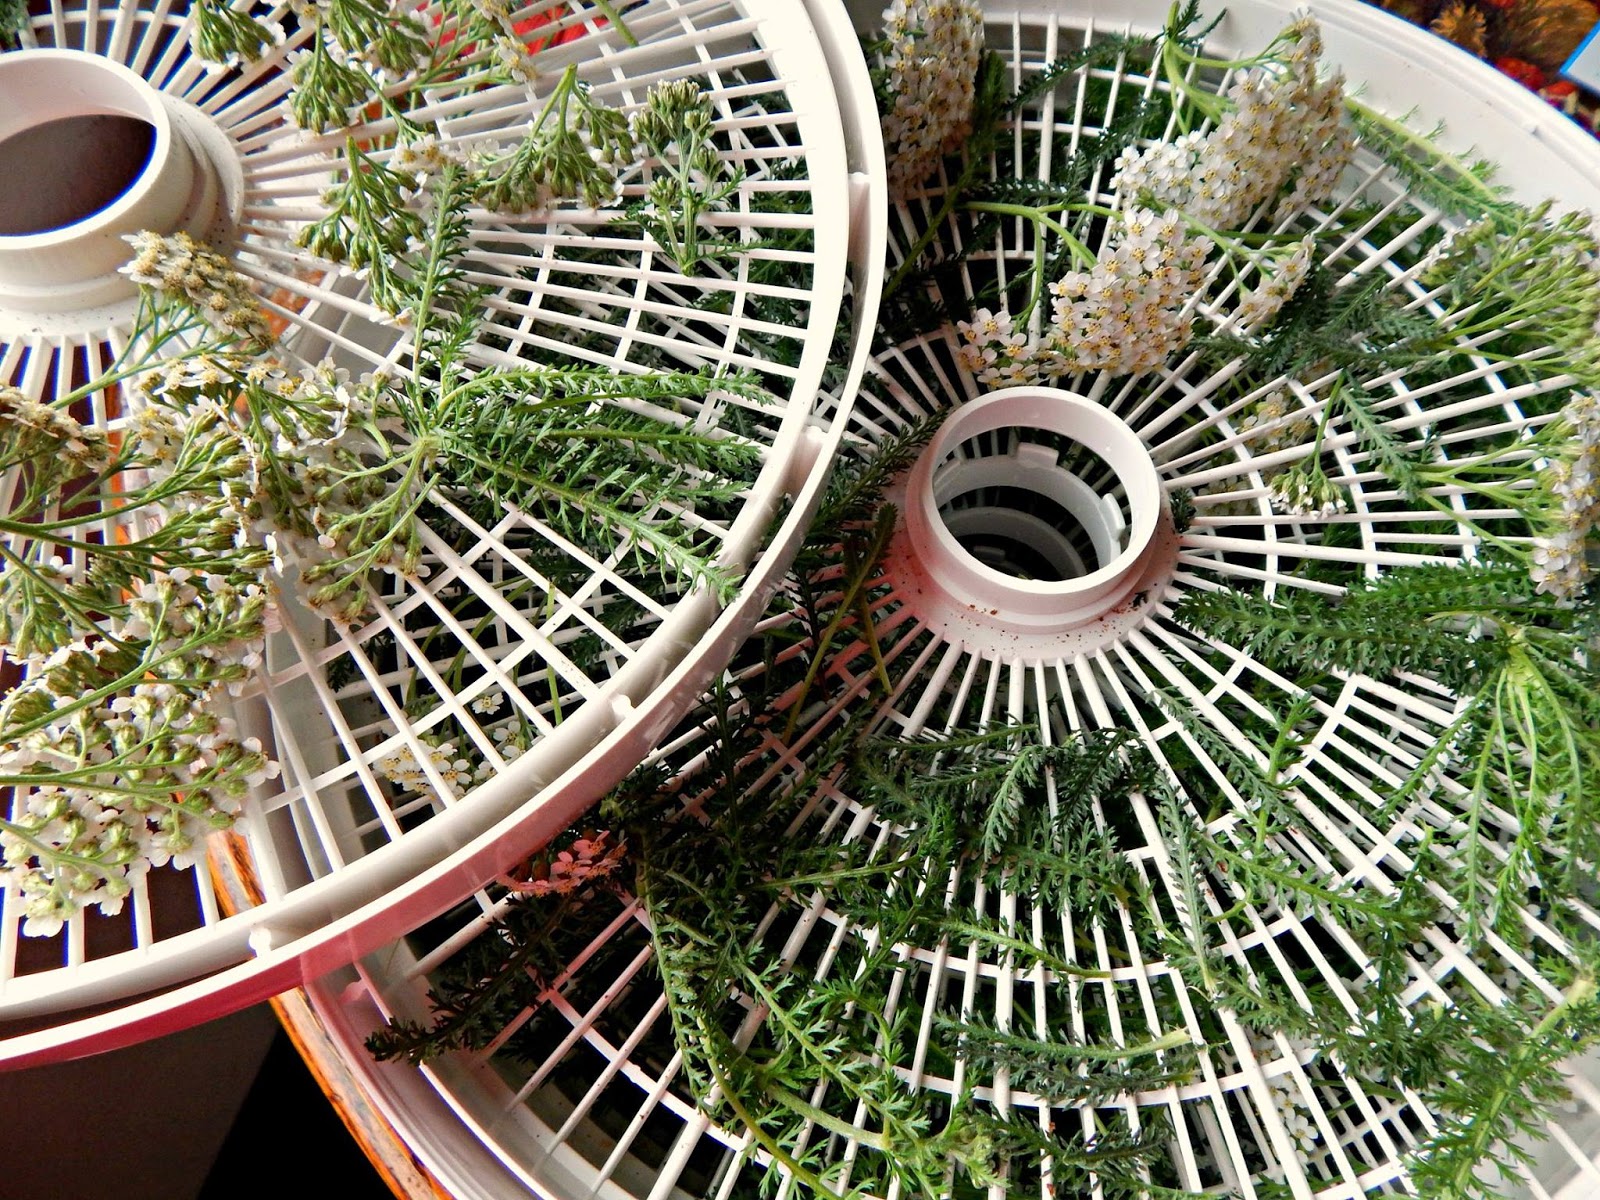 Dehydrating yarrow.
You may also use a solar dehydrator, but these really only work in arid locations, or where you'll have low humidity and high temperatures for several days running. (If you want to try it without any upfront investment, try it the old school way: Lay a clean white sheet in a sunny area and lay the prepared food on top. Turn the food several times to speed the drying process.)
Other options include using a standard oven or using the warming drawer in an oven. Neither are ideal because very low temperatures cannot be achieved, which results in quality loss. Of the two, warming drawers are preferable.
For more on choosing a dehydrator, click here.
What Temperature to Use When Dehydrating
Herbs - 95 degrees F.
Seeds and Nuts - 105 degrees F.
Fruits - 135 degrees F.
Fruit leather - 140 degrees F.
Vegetables - 135 degrees F.
Jerky - 160 degrees F.
 Dehydrating rose hips.How to Dehydrate Just About Any Food
Herbs - For small-leaved herbs, place stems with leaves still on them onto dehydrator trays. For herbs with large leaves, remove the leaves from the stems and place in a single layer on dehydrator trays. Dry until crisp. Leaves dried on the stem are easily removed by running your fingers down the length of the stem, with a bowl beneath to catch the leaves as they fall.
Fruits - Most fruits should be sliced before dehydrating. The thinner the slice, the less time the food will take to dry. If desired, you may prevent discoloring by dipping the fruit in lemon water as you cut it up. (Use about 1 tablespoon of lemon juice to 1 cup of water.) Place juicy fruits, like plums, peaches, and apricots, skin side down on the dehydrator trays. (This will keep them from sticking to the trays - which can make them very difficult to remove.)
Dehydrate until you can tear a piece of fruit and no fluid seeps out. Fruit should still be pliable after being dehydrated. To prevent over-drying, test a thinner or smaller piece of fruit before you think it's dry. Allow it to cool and test for doneness.
A few fruits require an extra step; for example, berries with tough skins (like blueberries and cranberries), as well as grapes, need their skins broken before being dehydrated. An easy way to accomplish this is to freeze them in a single layer on a rimmed baking sheet. Once hard, transfer the fruit to the trays of a food dehydrator. Another method is to plunge the berries into boiling water for about 15-30 seconds, until their skins crack, then plunge into cold water to stop the cooking process. You may also prick berry skins with a needle or similar implement.
Fruits with a rind, like watermelon or cantaloupe, should have their rinds removed before dehydrating.
Fruit Leathers - Fruit leathers are homemade fruit rolls. Puree fruit and, to prevent discoloration, stir in 1 teaspoons of lemon juice for each cup of puree. Pour into a fruit leather dehydrator tray and dehydrate. Leather is done when you can touch the center and see no indentation is left behind. Remove the leather while still warm, roll into a scroll, allow to cool, and wrap in plastic wrap. Freeze, if not using immediately.
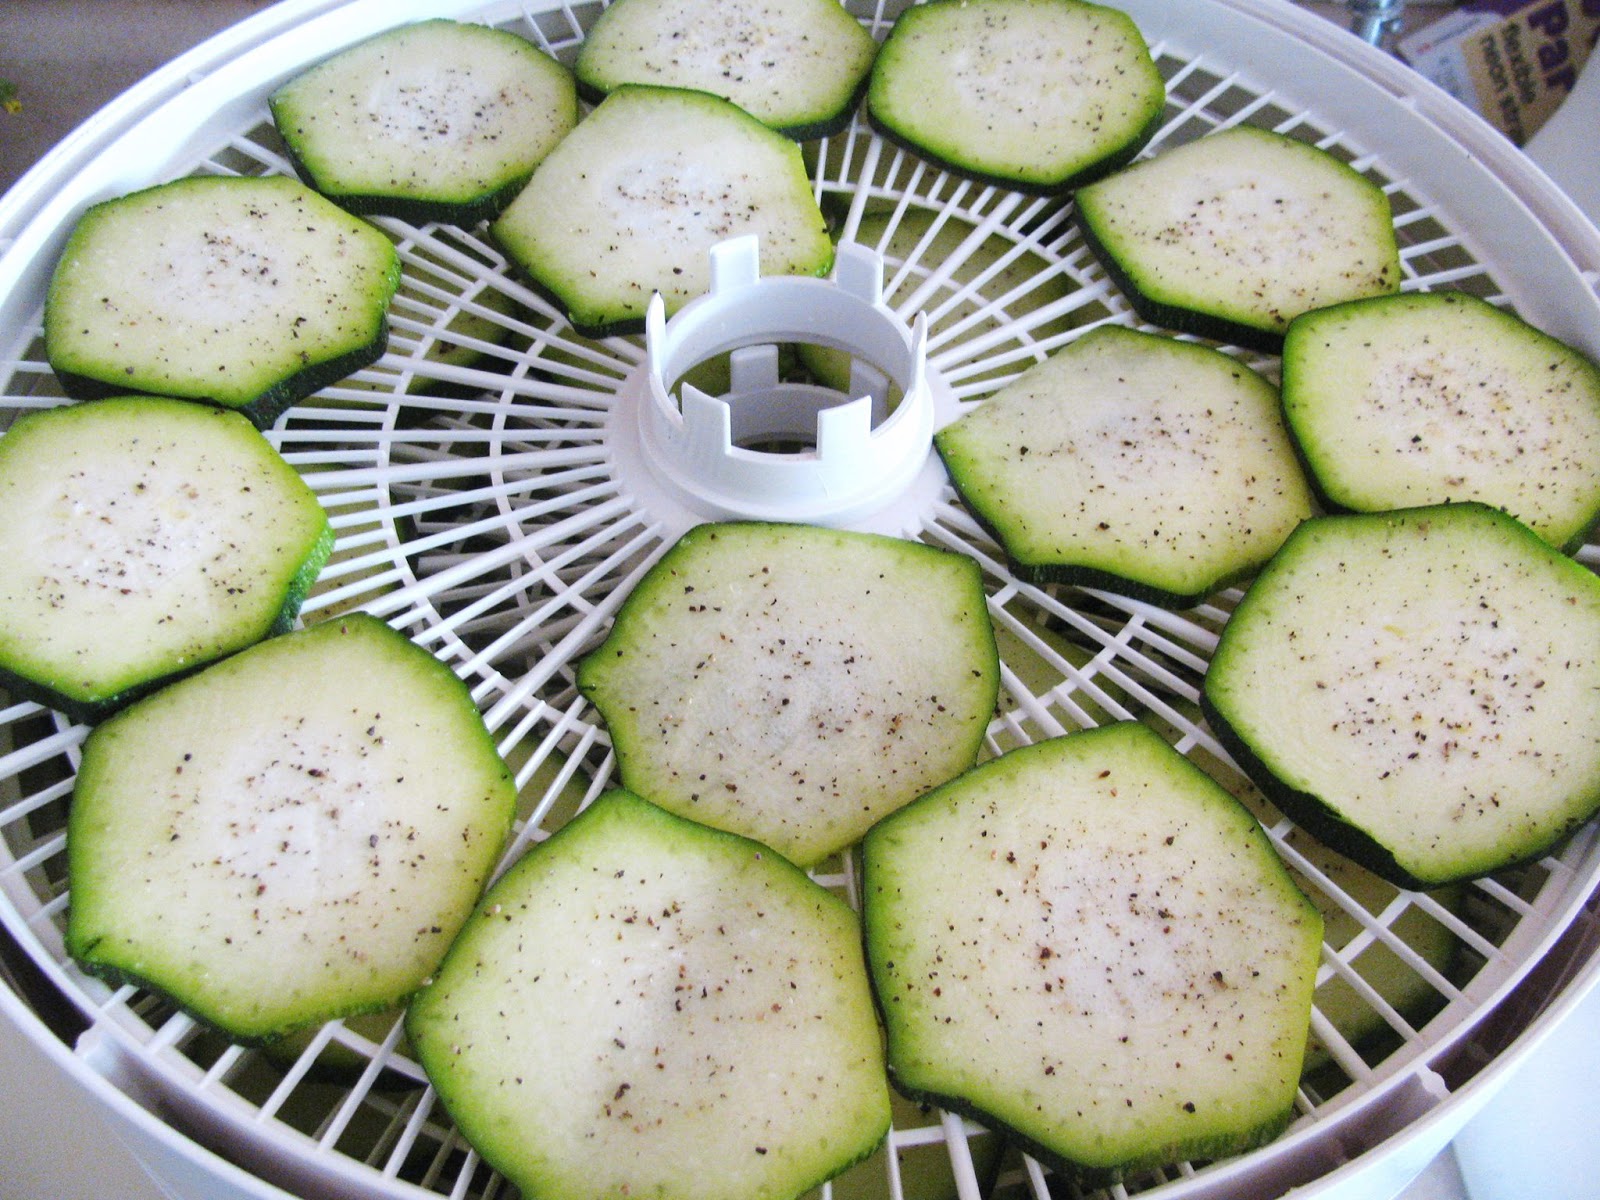 Dehydrating zucchini.
Vegetables - Cut, if desired, and dehydrate until you can tear a piece and no liquid seeps out. Veggies should be brittle when dehydrated.
Most vegetables require blanching (drop into boiling water for 2 - 3 minutes, then dunk into ice water to stop the cooking process) to help preserve color, flavor, and nutrients. Many times, I leave off the blanching and just pop the veggie into the dehydrator; it's a matter of personal preference. The following veggies should never be blanched before drying: cucumber, eggplant, garlic, horseradish, mushrooms, onions, peppers, and winter and summer squash (including zucchini).
Jerky - Cut all fat off the meat and season as desired. Lay in a single layer on the dehydrator tray and dry until the meat cracks when you bend it. Homemade jerky should be stored in the refrigerator or freezer.
For information on using a jerky gun, click here. For info on making smoked jerky, click here.
IMPORTANT: Food should not touch on the dehydrator trays, or the pieces may stick together. Always check the food every few hours during the dehydration process. This ensures you don't over-dry anything. (Yes, you can over dry dehydrated food, making it tasteless and too tough.) Remove finished pieces as they are done, consolidating pieces that still need drying time. In addition, be sure to rotate dehydrator trays periodically.
How to Condition Dehydrated Food
Experts suggest "conditioning" your home dehydrated food before storing it long term. I honestly never do this and have never had a problem - but it does allow you to spot food that still has moisture in it.
 Dehydrating pineapple.To condition dehydrated food:
1. Allow the food to cool completely.
2. Place the dried food in a plastic or glass container with a loose-fitting cover.
3. Shake or stir the food every day for one or two weeks, looking for any signs of moisture.
4. If you find moisture, put the food back in the dehydrator, dry and allow to cool.
5. Once you're sure the food is dry, store in a glass jar with an air tight lid, a Ziplock bag with the air pushed out of it, or in a vacuum sealed bag. Store the container in a cool, dark environment. Be sure to label the food, including the date of preservation.
 Dehydrating strawberries.
August 19, 2017
Weekend Links
 Berries!In which I share my favorite posts from this blog's Facebook page.
This post contains affiliate links. All opinions are my own. Please see FCC disclosure for full information. Thank you for supporting this site!
"...make it your ambition to lead a quiet life: You should mind your own business and work with your hands, just as we told you, so that your daily life may win the respect of outsiders and so that you will not be dependent on anybody."
1 Thes. 4: 11-12
_______________________________
* Life is good on the homestead. I'm picking copious amounts of wild berries. (The photo to the right explains why I rarely have my kids help. Guess which bucket is mine and which bucket is one of the kids'.) We got a few coveted yellow plums, and there are still some red plums, prunes, and apples on the trees, despite hurricane force winds last spring. I'm growing broccoli and cauliflower, which I've never successfully grow before. Our little broody hen is sitting on ten hopefully fertilized eggs. The dog is finally coming out of his puppy phase. Hubby set up two additional rabbit cages, so my daughter can soon get a mate for her buck. And, in answer to many prayers, my hubby finally got a job close to home! No more four hours of commuting each day. No more concern about what fatigue and driving were doing to his health. What an AMAZING gift time is. We're thrilled for both him and us. He's taking a steep pay cut, but we are trusting God on this. And I'll be working even harder to try to bring in some income for our family. So...if you want to help support this blog (my labor of love) and my family, would you take a moment and consider purchasing one of my books? Most are very affordable. You can see them all here.
 From a photo shoot I recently did for Self-Reliance magazine.* I've blogged quite a bit about dehydrating food as an alternative to canning or freezing it. But another great reason to have a dehydrator is that it helps prevent food waste. Case in point: I bought some strawberries to make my daughter strawberry ice cream for her birthday, and had quite a few berries left over. But because we have an abundance of fruit on the homestead just now, they weren't getting eaten. So a few days ago, I popped them into the dehydrator. (Here's the one I use.) Quick and easy, and it will make a really yummy treat that will last on the shelf for at least a year!
 Dehydrating strawberries.* I have an article in the new issue of Backwoods Home magazine. Check it out; it's a fantastic resource for homesteaders.
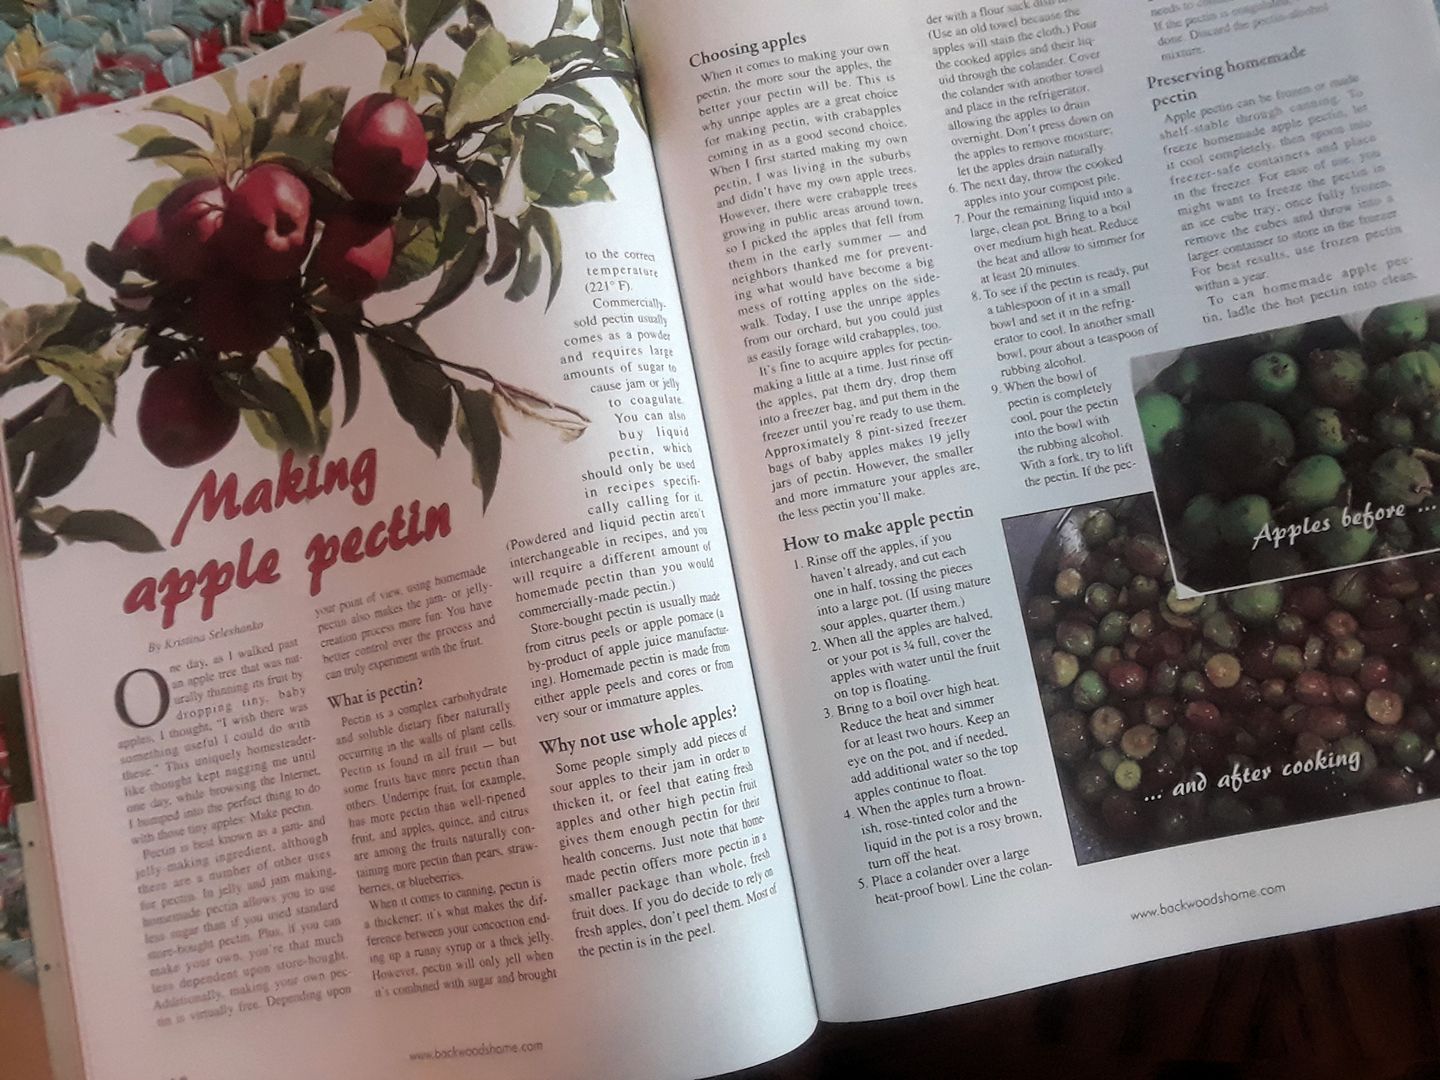 Learn to make your own pectin in Backwoods Home magazine.*
Graco car seat recall.
Learn to make your own pectin in Backwoods Home magazine.*
Graco car seat recall.
* Blue Wilderness dog food recall.
* Comfy Cow ice cream recall due to E.Coli.
* AMPT Coffee recall.
* Papaya recall due to salmonella.
* Ground beef recall due to contamination with Styrofoam.
* I have new videos on YouTube. Be sure to check them out - and subscribe and like! Thank you.
* There's been a ton of news about the safety of viewing the solar eclipse. I thought I'd done the right thing by purchasing eclipse-safe glasses for everyone in the family. Then NASA came out and said they only recommended a handful of brands, saying other brands may not be tested safe. I know some people pooh-pooh the idea that viewing the eclipse without special glasses is unsafe. I do not, because I've researched the history of solar viewing and can see that thousands of people have damaged their eyesight looking at the sun. Anyway, I was relieved to find this comprehensive list of manufacturers who've had their eclipse glasses tested for safety . Our glasses are on the list! Are yours?
* How Smartphones are Destroying a Generation - an interesting read.
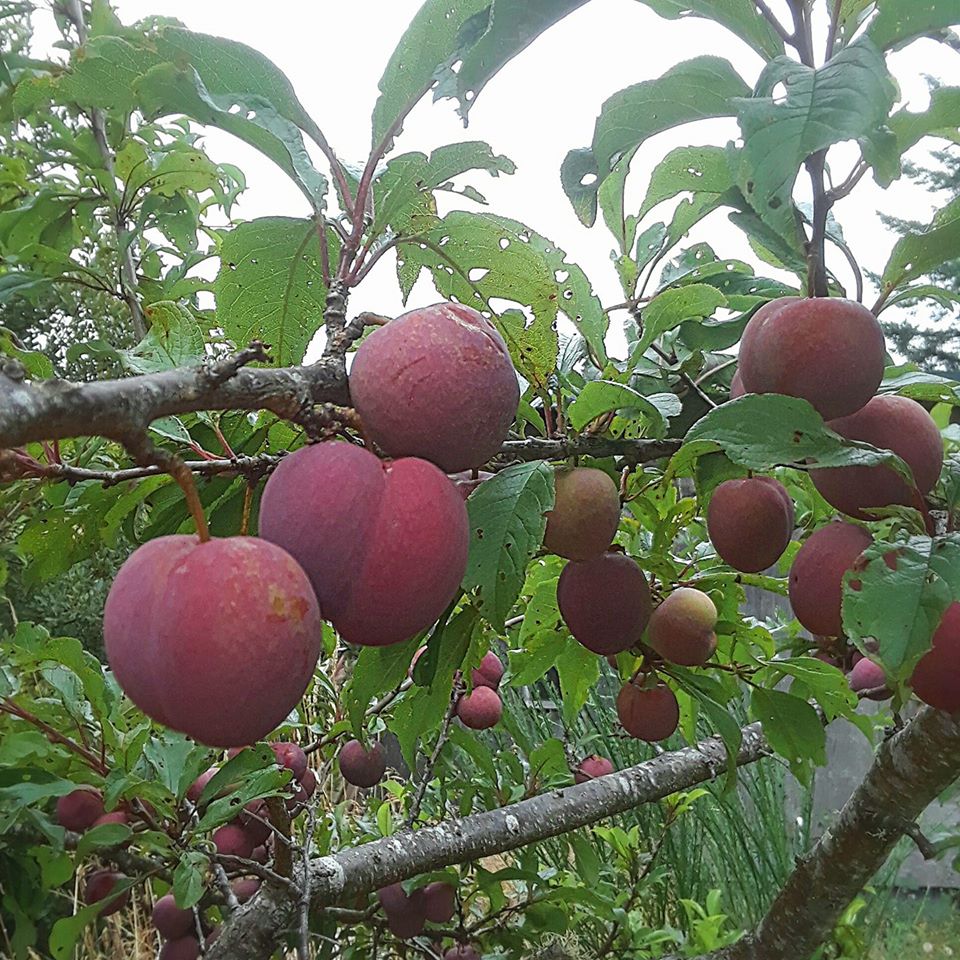 Eagerly awaiting the red plums!
* What you probably don't know about child grooming and abduction. A must read for every parent.
* The weird thing about Ball's new canning lids. A lot of experienced canners are reporting false seals with them too.
* Here's a helpful aid for teaching children to pray: Prayer prompt printables.
* 10 Ways to Preserve Cucumbers.
* Why aren't we telling diabetics the truth about diet?
Oldies But Goodies:
* 10 Ways to Save on Back to School Supplies
* How to Forage for and Eat Lobster Mushrooms
* Why Homeschool Preschool?
* DIY Spice Blends - Healthier, Cheaper, and Easy!
* How We Homeschool on a Shoestring Budget.
 Our broody hen sitting on 10 lovely eggs.
August 15, 2017
Blackberry Recipes (Recipes for Canning, Freezing, Drying, Fermenting, and Eating Right Now!)
 We are having a bumper crop of blackberries this year! I've never seen either the thornless, domestic blackberries or the wild, invasive blackberries produce with such abundance. And while I already have enough berries in the freezer for one year, you can bet I'm taking advantage of this crazy good crop to preserve berries for years when the crop is meager. So...what can we do with all these blackberries? Oh, have I got ideas for you!
Freezing Blackberries
Freezing is the easiest preservation method to preserve blackberries for future use. The "right" way to do it is to lay the berries in a single layer on a rimmed baking sheet, pop them in the freezer, and when they are good and hard, pour them into freezer safe containers. The way I actually do it, however, is to pour berries into freezer safe containers of the size that contain the amount of berries I want for particular jobs, like making a cobbler or pie. Yes, the berries stick together. But no, it doesn't matter because of the way I am using them.
Canning Blackberries
* Whole Blackberries in Syrup
* Blackberry Lemonade Concentrate
* Backberry Jelly (without added pectin)
* Blackberry Jam (with added pectin)
* Blackberry Jalapeno Pepper Jelly
* Blackberry Jam (with Pomona's Pectin)
* Razzleberry (blackberry and raspberry) Jam
* Lower Sugar Blackberry Jam
* Blackberry Apple Jam
* Blackberry Rhubarb Lime Jam
* Bumbleberry (blackberry, strawberry, and blueberry) Jam
* Blackberry Pie or Cobbler Filling (another version here)
* Blackberry Syrup
* Blackberry Applesauce
Fermenting Blackberries
* Blackberry Fermented Soda
* Fermented Whole Blackberries
* Blackberry wine

Baking with Blackberries
* Blackberry Crumble Muffins
* Blackberry Apple pie
* Iron Skillet Blackberry Pie
* Blackberry Custard Pie
* Blackberry Trifle
* Blackberry Turnovers
* Blackberry Cobbler
* Blackberry Cheesecake Squares
* Blackberry Oatmeal Cookies
* Blackberry Cream Cheese Frosting
* Blackberry Crumb Bars
* Blackberry Bread
* Blackberry Pound Cake
* Blackberry Coffee Cake
* Blackberry Banana Bread
* Blackberry Cheesecake Brownies
* Blackberry Crisp
* Blackberry Oat Bars
Other Blackberry Recipes

* Blackberry Iced Tea
* Blackberry Cream Cheese Spread
* Blackberry, Basil, and Ricotta Pizza
* Blackberry Ice Cream (no churn)
* Blackberry Sorbet
* Blackberry Frozen Yogurt
* Cream Cheese Blackberry Crepes
* Blackberry Tarragon Salad Dressing
* Balsamic Blackberry Vinaigrette
* Thai Blackberry Basil Chicken
* Blackberry Glazed Salmon
* Blackberry and Rosemary Pork Tenderloin
* Blackberry BBQ Sauce (another version here)
Low Carb/Keto/Diabetic Blackberry Recipes
* Low Carb Blackberry Cobbler
* Low Carb Blackberry Gelato
* Low Carb Blackberry Ice Cream (no churn)
* Low Carb Blueberry Cream Cheese Crumble (substitute blackberries)
* Low Carb Blackberry Coffee Cake
* Keto Mixed Berry Cake Bars
* Keto Blackberry Fat Bombs
* No Sugar Added Blackberry Jam
* Low Carb Berry Sauce
* Low Carb/Keto Blackberry Cheesecakes
* Low Carb Blackberry Custard Pie
What About Dehydrating Blackberries?
I don't recommend it, because I believe it makes the seeds more pronounced. But if you'd like to try it, here are some directions.
You can also make blackberry leather (fruit roll ups).
A Word About Washing and Bugs
If the Internet is believable, a lot of people wash their berries before preserving or eating them. The trouble with this, though, is the flavor of the berries is greatly diminished after washing. If you're worried about surface bugs, just leave the berries in a container outside for an hour or so. Spiders and such will flee during that time. Hand pick any leaves or other debris off the berries. I don't get very picky about this. A few tiny pieces of leaves aren't going to hurt anyone!
August 10, 2017
A Proverb 31 Woman's Priorities
 There is a lot of pressure in the Christian community for everyone to "have a ministry." What are you doing for the church? What are you, specifically, doing for God? However, if you're the mother of young children, this is problematic.
Every mom learns pretty quickly that if she wants her family to have a great home life, she has to juggle many things. She needs to not only care for her children's physical needs, but also spend time with them so their emotional and spiritual needs are met. She wants to keep a reasonably clean house and serve healthy meals. She needs to keep the laundry pile under control. To increase her family's health and self sufficiency, she might also want to do things like garden, preserve, and sew. She might also home school. And then there is her husband: She needs to maintain a good relationship with him, which also requires times and effort. That's a lot for one person to do! And then a Christian friend actually asks "What is your ministry?"
The Proverbs 31 Woman did many things, but she kept them in some semblance of balance. She didn't teach a women's Bible study but let her house turn into a scene from Hoarders. She didn't donate time to the local shelter but neglect to spend time with her husband. She didn't keep a blog to encourage other women but leave her children feeling like they never got much time from mom.
Balance is only possible if you have priorities. So, biblically speaking, what are the right priorities for a mother?
1. A relationship with God. Matthew 6:33 says "But seek first his kingdom and his righteousness, and all these things will be given to you as well." And in Mark 12:30, Jesus says the most important commandment is to "love the Lord your God with all your heart and with all your soul and with all your mind and with all your strength." Remember, too, how Jesus told the ever-busy-housekeeping Martha that her sister Mary had "chosen what is better" by seeking God first. For the modern Proverbs 31 Woman, this means seeking God's will, and reading the Bible daily and praying continuously throughout the day.
 2. Husband. It's not politically correct, but yes, our husbands are next in line. 1 Corinthians 7:34 hints at this by saying one of a married woman's top concerns is pleasing her husband. The reason for this is pretty simple: First, God created woman to be her husband's (not her childrens') helpmeet. Second, husbands and wives should set an example for their children - an example of how to live godly lives, which certainly doesn't include neglecting our spouse. (1 Thes. 2:11-12; Prov. 22:6) Finally, once the children are grown and out of the house, you'll want and need a solid relationship with your husband; that won't happen if you neglect your husband now.
 3. Children. God tells us to create "godly offspring" (Mal. 2:15) and in Timothy, we learn that a woman's ministry is "bringing up children." In Deuteronomy, God says parents (not teachers) must teach children the ways of the Lord. God gave you children to to care for. They grow so quickly; don't busy yourself with other things and neglect the important ministry - your children - that God has put squarely before you. Remember, when they are older, you'll have more time for other ministries - but why would God entrust you with those if you neglect the ministry of your children?
4. Home. Like it or not, the Bible says one of the signs of a godly woman is that she cares for her home. This doesn't mean she should be Martha Stewart-esque or that she is a slave to housework. It's simply a recognition that if we live in sloth and ugliness, our attitudes and personalities will be affected negatively. If our homes are reasonably clean and comfortable, however, the entire family benefits. Husband, children, and wife can take refuge at home, feeling less stress and more peace. Proverbs 31:27 says a godly woman "watches over the affairs of her household and does not eat the bread of idleness." 1 Timothy 5:14 says young unmarried women do well to marry and "to manage their homes..." And in Titus, we are told it's good for women to "love their husbands and children, to be self-controlled and pure, to be busy at home, to be kind, and to be subject to their husbands..."
Those four priorities are huge. Honestly, it's the rare woman who can successfully add more and keep a decent balance in her life. In fact, it's interesting to note the Bible never mentions mothers with young children doing anything else - no other job, no other ministry. Nowhere does Jesus or anyone else in the early church ask moms, "What is your ministry?" Because their ministry is being a wife and mother. And that is a full time job.
This post originally appeared in 2012.


