
Kristina Seleshanko's Blog, page 29
August 8, 2017
4 Ingredient No Sugar, Low Carb, Soft Serve Ice Cream
 This post contains affiliate links. All opinions are my own. Please see FCC disclosure for full information. Thank you for supporting this site!
Is there anyone who doesn't love ice cream? Probably not. And on these hot summer days, it sure is nice to have a cool, sugar free treat to enjoy. Lately, I've been on an ice cream binge - mostly because my daughter wants an ice cream social birthday party, and most of our family is now eating keto. I wanted to be sure I had ice cream they could enjoy, too, so I've been testing recipes. (Poor me!) Here's what I've learned:
* There is no such thing as a truly low carb, store bought ice cream. And even if there were, the ingredients lists are truly disgusting.
* Low carb ice cream is really easy to make...but once frozen, it loses its creaminess unless you add glycerine or vodka, or you make an egg-based ice cream. Most of the time, that's too fussy for me.
* Homemade soft serve, low carb, no sugar ice cream is the bomb! Seriously, I have this stuff as a meal replacement and feel like I'm cheating when I'm totally not.
Here's my favorite go-to recipe.
Easy 4 Ingredient Low Carb, No Sugar, Soft Serve Ice Cream

To make this ice cream, I use my Cuisinart ice cream maker, but you could use the bag method, or the mason jar method, instead.
1 1/4 cups heavy cream or heavy whipping cream1/4 cup sweetener (I use Sukrin1)1/4 cup ice cold water
1 tablespoon real vanilla extract
1. Mix all the ingredients together in one tub of the ice cream maker. Turn the machine on and let it churn for about 25 minutes. Eat right away.
 Churning mint chocolate chip keto ice cream.
This is just a simple vanilla recipe, but it's easy to jazz things up:
For coffee ice cream, omit vanilla extract and add1 level tablespoon of instant coffee.
For mint chocolate chip, omit vanilla extract and add 2 drops mint extract. In the last 5 minutes of churning, add 5-10 squares Lily's chocolate, chopped. (Or use the low carb, no sugar chocolate of your choice.)
For strawberry, omit vanilla extract and add 2 drops strawberry extract. In the last 5 minutes of churning, add 4 or more strawberries (chopped up).
For more easy flavors, browse your grocery store's extracts (found in the baking aisle) and add a drop or two in place of the vanilla extract in the original recipe.
Serves 4. Estimated Nutrition, according to SuperTracker, per serving for the vanilla ice cream: 266 calories, 2 g. protein; 2 g. carbohydrate; 28 g. fat


August 3, 2017
15 Useful Things to Do With Lavender (Plus Growing and Drying Tips)
 This spring and summer, I've been having fun seeing what plants the previous owner placed in our garden. I'm especially excited by all the herbs, including quite a bit of oregano and thyme - and a few lavender plants. I've grown all these herbs before, but I've treated lavender mostly as an ornamental. That is, I've never done much with the blooms, except make a few sachets, and (one year) lavender soap.
Lavender makes a gorgeous and prettily scented addition to any garden, and can be either formal (think lavender hedges) or informal (a.k.a. scattered throughout a cottage garden). And the truth is, when you snip off those pretty lavender flowers, you encourage the plant thrive, and urge it to bloom again. Sure, you could just plop the cuttings into a vase and call it good, but why not find some more valuable things to do with them?
With that in mind, here are some ideas I came up with:
1. Cook with it. I admit, I've not tried this, and I do know that cooking with lavender requires a delicate hand. But this lavender cookie recipe looks like a simple place to start. (Here are some expert tips on using lavender as a culinary herb.)
2. Make bath salts. What a terrific gift this would be!
3. Make lavender linen spray. Lavender is such a soothing scent; this would be dreamy.
4. Whip up some lavender mineral water.
5. Stir together some lavender sugar scrub. This would be soothing after a hard day!
 It's trendy to cook with lavender. Courtesy
 Elizabeth Weller.
6. Throw it, instead of rice, at a wedding.
7. Create some lavender bath bombs. Hmmm...I see a few Christmas gift ideas here.
8. Make lavender skin oil.
9. Brew some lavender extract, for cooking.
10. Like scented laundry, but not the chemicals that come with it? Try making lavender dryer balls or sachets.
11. Weave some lavender wands...a very traditional craft.
12. Stir together some lavender sugar. This would be tasty with tea...especially Earl Grey!
13. Stir together some lavender body lotion. This could be really relaxing after a long day.
14. Create some lavender vinegar.
15. Craft an old fashioned lavender pomander to keep insects out of closets.
 Bees love lavender. Courtesy of Wikimedia Commons and Maja Dumat
BONUS: Tips for Growing Lavender
* Buy a variety that likes your gardening zone.
* Add a bit of bone meal to the soil while planting your lavender.
* Water newly planted lavender well, then let it dry between waterings.
* Lavender grows well in containers, and it likes being a bit root bound - so use a pot that's just a little larger than the plant.
* Cut off blooms just above a double leaf. This encourages new growth and more blooms!
How to Dry Lavender
1. Cut off blooms just above a double leaf.
2. Use a rubber band to hold a bunch of lavender together. The bunch should be no bigger than, say 1 - 1 1/2 inches fat.
 To retain more of lavender's scent and medicinal properties, it's better to hand it to dry in a dark location. Courtesy
 Jessica Lucia.
3. Hang in a cool, dark location (like a closet...It will make your clothes smell amazing!) until completely dried.
4. Unless using dried lavender as a flower arrangement, remove the flowers from the stems, place in a glass jar with a tight lid, and store in a cool, dark, location until ready to use.
Did You Know?
* Lavender is scientifically recognized as a pest repellent, a sleep aid, and a relaxer.
* Some herbalists promote lavender as a treatment for head lice.
* Lavender is antiseptic.
15 Useful Things to Do With Lavendar (Plus Growing and Drying Tips)
 This spring and summer, I've been having fun seeing what plants the previous owner placed in our garden. I'm especially excited by all the herbs, including quite a bit of oregano and thyme - and a few lavender plants. I've grown all these herbs before, but I've treated lavender mostly as an ornamental. That is, I've never done much with the blooms, except make a few sachets, and (one year) lavender soap.
Lavender makes a gorgeous and prettily scented addition to any garden, and can be either formal (think lavender hedges) or informal (a.k.a. scattered throughout a cottage garden). And the truth is, when you snip off those pretty lavender flowers, you encourage the plant thrive, and urge it to bloom again. Sure, you could just plop the cuttings into a vase and call it good, but why not find some more valuable things to do with them?
With that in mind, here are some ideas I came up with:
1. Cook with it. I admit, I've not tried this, and I do know that cooking with lavender requires a delicate hand. But this lavender cookie recipe looks like a simple place to start. (Here are some expert tips on using lavender as a culinary herb.)
2. Make bath salts. What a terrific gift this would be!
3. Make lavender linen spray. Lavender is such a soothing scent; this would be dreamy.
4. Whip up some lavender mineral water.
5. Stir together some lavender sugar scrub. This would be soothing after a hard day!
It's trendy to cook with lavender. Courtesy Elizabeth Weller.
6. Throw it, instead of rice, at a wedding.
7. Create some lavender bath bombs. Hmmm...I see a few Christmas gift ideas here.
8. Make lavender skin oil.
9. Brew some lavender extract, for cooking.
10. Like scented laundry, but not the chemicals that come with it? Try making lavender dryer balls or sachets.
11. Weave some lavender wands...a very traditional craft.
12. Stir together some lavender sugar. This would be tasty with tea...especially Earl Grey!
13. Stir together some lavender body lotion. This could be really relaxing after a long day.
14. Create some lavender vinegar.
15. Craft an old fashioned lavender pomander to keep insects out of closets.
Bees love lavender. Courtesy of Wikimedia Commons and Maja DumatBONUS: Tips for Growing Lavender
* Buy a variety that likes your gardening zone.
* Add a bit of bone meal to the soil while planting your lavender.
* Water newly planted lavender well, then let it dry between waterings.
* Lavender grows well in containers, and it likes being a bit root bound - so use a pot that's just a little larger than the plant.
* Cut off blooms just above a double leaf. This encourages new growth and more blooms!
How to Dry Lavender
1. Cut off blooms just above a double leaf.
2. Use a rubber band to hold a bunch of lavender together. The bunch should be no bigger than, say 1 - 1 1/2 inches fat.
To retain more of lavender's scent and medicinal properties, it's better to hand it to dry in a dark location. Courtesy Jessica Lucia.
3. Hang in a cool, dark location (like a closet...It will make your clothes smell amazing!) until completely dried.
4. Unless using dried lavender as a flower arrangement, remove the flowers from the stems, place in a glass jar with a tight lid, and store in a cool, dark, location until ready to use.
Did You Know?
* Lavender is scientifically recognized as a pest repellent, a sleep aid, and a relaxer.
* Some herbalists promote lavender as a treatment for head lice.
* Lavender is antiseptic.
August 1, 2017
How Long Do Home Canned Foods Last?
 Recently, I've had a slew of questions about how long home canned foods last. Typically, the reader says something like: "I just found these peaches at the back of my pantry. I canned them in 1999. Are they still safe to eat? Or should I throw them away?"
Canning books and websites generally say that canned foods should be consumed within a year. But it's important to remember this is a "best by" date, not an expiration date. That is to say, after a year's time, the food will very gradually begin to lose nutrients and flavor, but it's still quite safe to eat. In fact, I've eaten home canned food that was more than a decade old and it didn't taste any different than food canned the day before I ate it. (A fun bit of trivia: The oldest known canned food that was opened and eaten was a 118 year old can of veal. No one died or go sick. Here's another fun story about very old canned food that was still safe to eat.)
Tips for Making Home Canned Food Last a Long Time
Of course, your canning methods make a huge difference in how safe your home canned food is, and how long it lasts on the shelf. Older methods (for example, putting hot jam into a jar, putting the lid on, then flipping it upside down in order to get the jar to seal) often lead to food that not only isn't as safe to eat, but also doesn't last nearly as long on the shelf. There are plenty of people who will deny this. ("But Grandma always did it this way...") Yet over and over again these same people complain they find spoiled jelly in their cupboard or that they have a "stomach bug" after eating their home canned food. (For the most up-to-date and safe canning methods, visit the National Center for Home Food Preservation website.)
How you store your home canned food also goes a long way toward making it last virtually forever. Keep jars in a relatively cool, dark location. Storing jars where they get hot (for example, near a furnace or in the attic), where they will be exposed to sunlight, or where they will get damp (like a basement), all contribute to a shorter shelf life.
Looking for Signs of Spoilage in Canned Food
Whether your canned food is decades old or just a day old, always inspect jars for signs of spoilage:
* Inspect the lid before opening. If it's bulging up at all, the food has spoiled and should be carefully disposed of. (Canning jar lids should always be concave, if properly sealed.) Another sign that the food has gone bad is if food is leaking from the lid.
* Pay attention as you open the lid. If it comes off with no effort, don't eat the food, because it did not have a strong seal and could be spoiled. Likewise, if the food explodes out of the can when you open it, it's gone bad.
* Toss out any food that is bubbly, scummy or moldy, or has an unnatural or bad smell.
If canned food displays these signs of spoilage, do not taste the food! Throw it out. Because deadly botulism could be present, experts recommend putting the unopened jar in a plastic bag, sealing it off, and disposing of it in the garbage. If the jar is leaking, do the same, but be sure to clean any surfaces that have touched the jar (like a shelf or countertop) by wearing rubber gloves (botulism can get into your body through the skin) and sanitizing the area with 1 part unscented chlorine bleach to 5 parts water. Let the mixture stand on the surface for 30 minutes before rinsing. Dispose of the gloves and towels or sponge you used by putting them in a plastic bag, taping it closed, and putting it in the trash. Apply the bleach mixture again, let sit 30 minutes, and rinse. Again dispose of all cleaning materials, like gloves.
Related Posts:

10 Common Canning Myths - Debunked!

July 29, 2017
Weekend Links
 In which I share my favorite posts from this blog's Facebook page.
This post contains affiliate links. All opinions are my own. Please see FCC disclosure for full information. Thank you for supporting this site!
"We know that we are children of God, and that the whole world is under the control of the evil one."
1 John 5:19
_______________________________
* I am now over 40 lbs. lighter than I was in December, when I was diagnosed with type II diabetes and went on a keto diet. I can't even tell you how amazing that is, because I was at the point where I felt I'd tried everything (including low carb diets) to lose weight, and NOTHING worked. I'd really given up. I'm so thankful to my doctor for suggesting keto! Anyway, lots of people were asking me for an updated photo, so I had my 11 year old take some a few days ago. I've updated all my bio pics (I think). To see it, look in the left hand column.
* You know the old saying "God works in mysterious ways?" It's so true. This spring, I was not happy I didn't have a big garden ready to go, but it was really a blessing in disguise. I've had a lot of trouble growing anything here, the climate is so different from what I'm used to. And everything I read about the region, and was told by other gardeners in these parts hasn't been true for me, either. For example, I thought cold weather crops would be no problem at all - things like kale, broccoli, and lettuce. But almost every single cool season plant bolted (went to seed) before I got a crop from it. Even growing an easy plant like zucchini is a bit of a challenge. I have two plants: One inside the greenhouse and one outside. The outside zucchini is still tiny. The inside zucchini is much bigger, but struggling already with powdery mildew. (I'm treating it with milk; see how that's done by clicking here.)


 * QUICK TIP: If you have fresh, aromatic herbs on hand, you have an automatic room freshener. Just scatter torn leaves or blooms on the floor and vacuum them up!
 * Every parent needs to read this...right now. How pedophiles and sex traffickers "groom" children to trust them...even more than they trust their parents.
* Salmon tested positive for cocaine, anti-depressants, and more.
* And another reason I'm avoiding seafood. (Radioactive material.)
* Stuff everyone should know about Lyme disease...but doesn't. You might even have to educate your doctor.
* Old school "fidget spinners." More fun because you make them yourself.
* Got a lot of zucchini already? Try fermenting some zucchini pickles!
* Planning on watching the solar eclipse? NASA says to be very careful what eclipse-safe glasses you purchase. Some are fakes and may permanently damage eyes.
Oldies But Goodies:
* How to Tell When Figs are Ripe (video)
* The Ins and Outs of Homesteading with Kids
* Canning Dilly Beans (Pickled Green Beans)
July 27, 2017
Sleep Deprivation is Not a Virtue
 "It is in vain that you rise up early
and go late to rest,
eating the bread of anxious toil;
for he gives to his beloved sleep."
Psalm 127:2
In 2009, when my youngest was a year old and I was still in a sleep-deprived daze, I blogged about the importance of sleep. Since that time, however, it seems more and more Christian books and blogs are turning sleep into the enemy. Don't give into "the flesh," many say. Instead, get up early and you'll be more holy, many imply. Only moms who rise before the rest of the household keep the house - and themselves - orderly. Somehow the idea of getting less sleep has been confused with being more godly.* Um...really?
While it's true the Bible speaks against laziness and sleeping late all the time, the idea that sleep deprivation is virtuous is not from the Bible - it's from the world. All around our nation, we see moms (and dads and children) who are sleep deprived. This has lead to a host of problems in the U.S., including obesity, depression, grumpiness, inability to respond well to life's difficulties, poor decision making, car crashes, and much more. This isn't a good way to care for the bodily temples God gave us. Even from a purely spiritual point of view, sleep deprivation has its consequences. When we haven't had enough rest, it's harder to behave in a loving, giving, Christ-like fashion. And getting even just an hour and a half less sleep each night reduces our alertness and ability to think clearly by 32%. How can we make right choices for the Lord when our thinking is so impaired? Even our joy can be sucked away when we're sleep deprived. This is not what God wants. Quite the opposite, in fact.
But, some moms say, how can I have time alone with the Lord if I don't rise early every morning? First, know this: The problem isn't necessarily rising early. The Proverbs 31 Woman gets "up while it is still dark," after all. The problem is rising early even though your body calls requires more sleep. The problem is making yourself sleep deprived because of the mistaken notion that doing so will make you more worthy. So if you can rise early, spend time with the Lord, and still get all the sleep you need, fantastic! But if rising early makes you feel dizzy, nauseated, wiped out, and/or impatient and grumpy, then you'll be a wiser woman if you sleep a little longer. There are lots of ways to spend time with the Lord, even when you're home with little children all day. (For a few ideas, go here; and think of Susanna Wesley - mother of John and Charles Wesley, the founder of the Methodist movement - who, with 10 young children underfoot, maintained her prayer life by flipping her apron over her head to create a certain "calm" while she spoke with God.)
But, some moms say, how I can keep the house tidy, homeschool the kids, make myself look presentable, be active in the church, socialize with my friends, run the kids to their activities, do the shopping, have hobbies, and so on, if I don't get up early? There aren't enough hours in the day! You're right; there aren't enough hours to do all that. As Jesus told Martha, there are many good things to do, but a wise woman carefully chooses the most important activities.
We live in a society that worships busy-ness. Moms buzz around the house and to various activities, always busy, busy, busy. But this isn't the life the Bible recommends. Jesus, though he had an active ministry, found time to spend with his Father, to spend with his family and friends, and to rest.
Busy-ness has a way of putting a barrier between us and what's important. Moms (especially those with young children) have some tough choices to make. They can run around busily doing good things (perhaps fairly well, perhaps not), or they can focus on what's most important in their lives right now: God, husband, and children (in that order). It's no coincidence that in Titus Paul says, "...urge the younger women to love their husbands and children, to be self-controlled and pure, to be busy at home, to be kind, and to be subject to their husbands, so that no one will malign the word of God." (2: 4-5; emphasis mine)
Being a wife and mother is a full time job. And because of the society in which we live, it's easy for mothers to get distracted from this job. That distraction costs families a great deal. And it costs many moms sleep - one of the things they most require in order to fulfill their Godly purpose.
So while some moms may wear their sleep deprivation as a badge of honor - and some may even look down their noses at moms who don't rise before dawn - a wise woman smiles and knows that busy-ness and sleep deprivation aren't what makes a Proverbs 31 woman.
* This post assumes you are a reasonably mature person and aren't staying up all hours of the night working or playing. This post also assumes you don't have an infant in the house - because sleep deprivation is a natural part of caring for an infant; however, moms of babies should do everything possible to take naps.
This post was originally published in 2012.
July 24, 2017
Foraging for Wild Berries
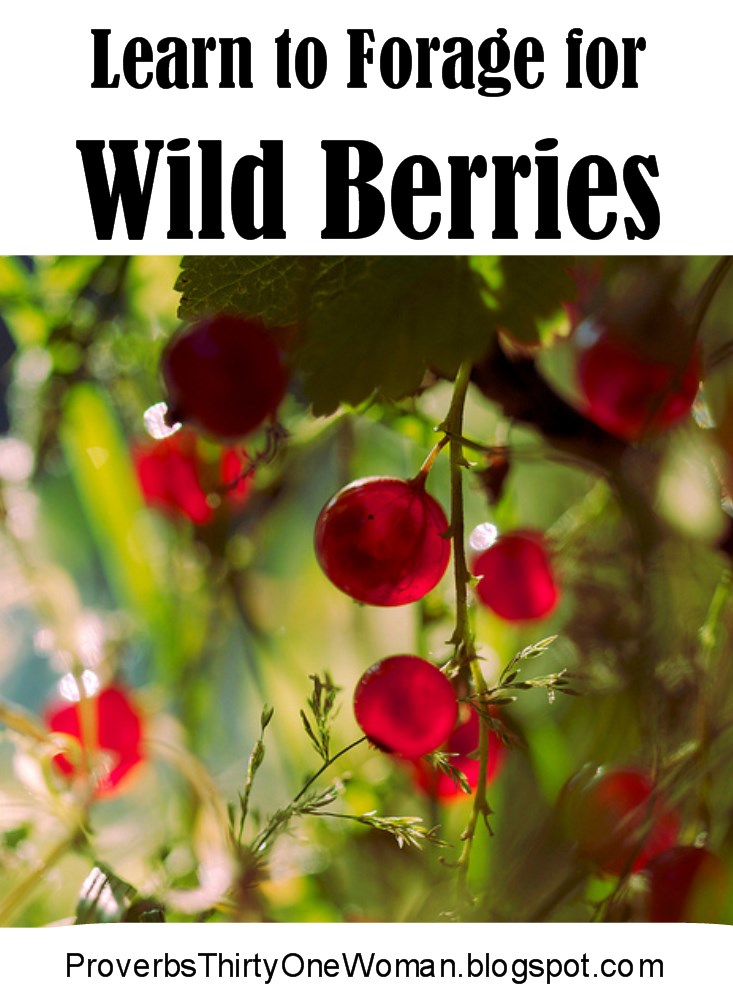 A bucket of wild berries. That's what started it. On my personal Facebook page, I posted a photo of a bucket of wild berries I'd picked, and suddenly I was getting all kinds of messages: "Are those really safe to eat????" "We've had those for years, and I never knew I could eat them!" "Will you teach me about eating wild berries?"
Even though we - like most Americans - live in a wild berry-rich environment, most people have no idea so many of them are edible.
But here's the thing: Wild foods are generally more nutritious than what you buy in the store. (Years of selective breeding - which has nothing to do with GMOs, by the way - have given us standard garden and grocery store varieties that might look pretty and hold up well to handling, but are less nutritious than they once were.) And who can argue with the idea that free food is good food? Not me! And while I don't advocate harvesting all the wild berries you find - animals need some, too, and left-behind berries lead to more berry bushes or briars - it's a shame more people don't take advantage of the free food around them. (When we lived in the suburbs, a lot of local people needed food - especially healthy food - and we had tons of wild berries and public fruit trees around that very few people took advantage of. So sad!)
How to Learn Which Berries Are Safe
Most people are smart enough to know that if you can't positively identify a wild plant, you should never eat from it. But very few bother to learn which plants are safe to eat. Maybe they aren't sure how to go about it. Here are some ways I've learned these things:
* Talk to old timers. They grew up in an era when harvesting from the wild was more common and they can often teach you which berries they grew up eating.
* Get some great guide books. To be truly useful, they should focus on foraging in your region and have plenty of color photos to help you identify plants. I recommend using the Internet in conjunction with such books. For example, if you think you've identified a certain type of berry using you foraging guide book, hop online and search for more information. I like to do an image search to make sure the plant I think I have corresponds with the images; then I'll read a bit more about the plant online.
* Consult your local extension office. Many extension offices will help you identify local, edible berries - and they may even supply recipes for eating and preserving them, too. To find your local extension office, click here.
 Salal berries.Where to Look for Wild Berries
The next hurdle is teaching people to open their eyes to the food growing all around them. It's truly a matter of practice.
If you live in a city or the suburbs, try scouting for berries at parks, on the edges of parking lots, rest stops, around athletic fields...in short, anyplace nature has been allowed to take over. State parks are often an excellent place to begin your wild berry quest, too. (It's perfectly legal to pick berries at state parks, as long as it's for your own personal use.) I recommend finding a ranger at the park, and telling him or her your mission. Often the ranger can give you tips for where to find good patches of berries.
In rural areas, seek out the edges of forests, or openings within the forest, which offer enough sun for berries to grow and thrive.
Do be careful not to wander onto private land. If you pick berries on someone else's property, that's called stealing. On the other hand, it's fine to knock on someone's door and ask if you may pick berries on their land. The kind thing to do is to offer to give some of the berries you pick to the landowner.
Also, you'll want to avoid picking berries near the roadside or railroads (where they may be contaminated with vehicle pollution) or anywhere that might have been sprayed with an herbicide (like along roadsides).
Good Beginner Berries
 Bunchberries. Courtesy of Jason Hollinger.
 For the novice wild berry forager, it's usually best to stick to berries that resemble garden variety types. This includes:
* Blackberries
* Raspberries
* Strawberries
* Salmonberries (which look a lot like raspberries, but may be salmon-colored)
* Cranberries
* Blueberries
Later you can move on to learning about some of the less known berries, including:
* * Thimbleberries
* Huckleberries
* Gooseberries
* Currents
* Chokeberries
* Bunchberries
* Elderberries
* Hawthorne
* Juneberries/Serviceberries
and many others.
Added Resource: A list of common poisonous berries. Remember, there may be others in your area! Never eat any berry you cannot positively identify.
 Black elderberries. Courtesy of R. A. Nonenmacher and Wikimedia Commons.
* Title image (wild currants) courtesy of Emilie Barbier.
July 20, 2017
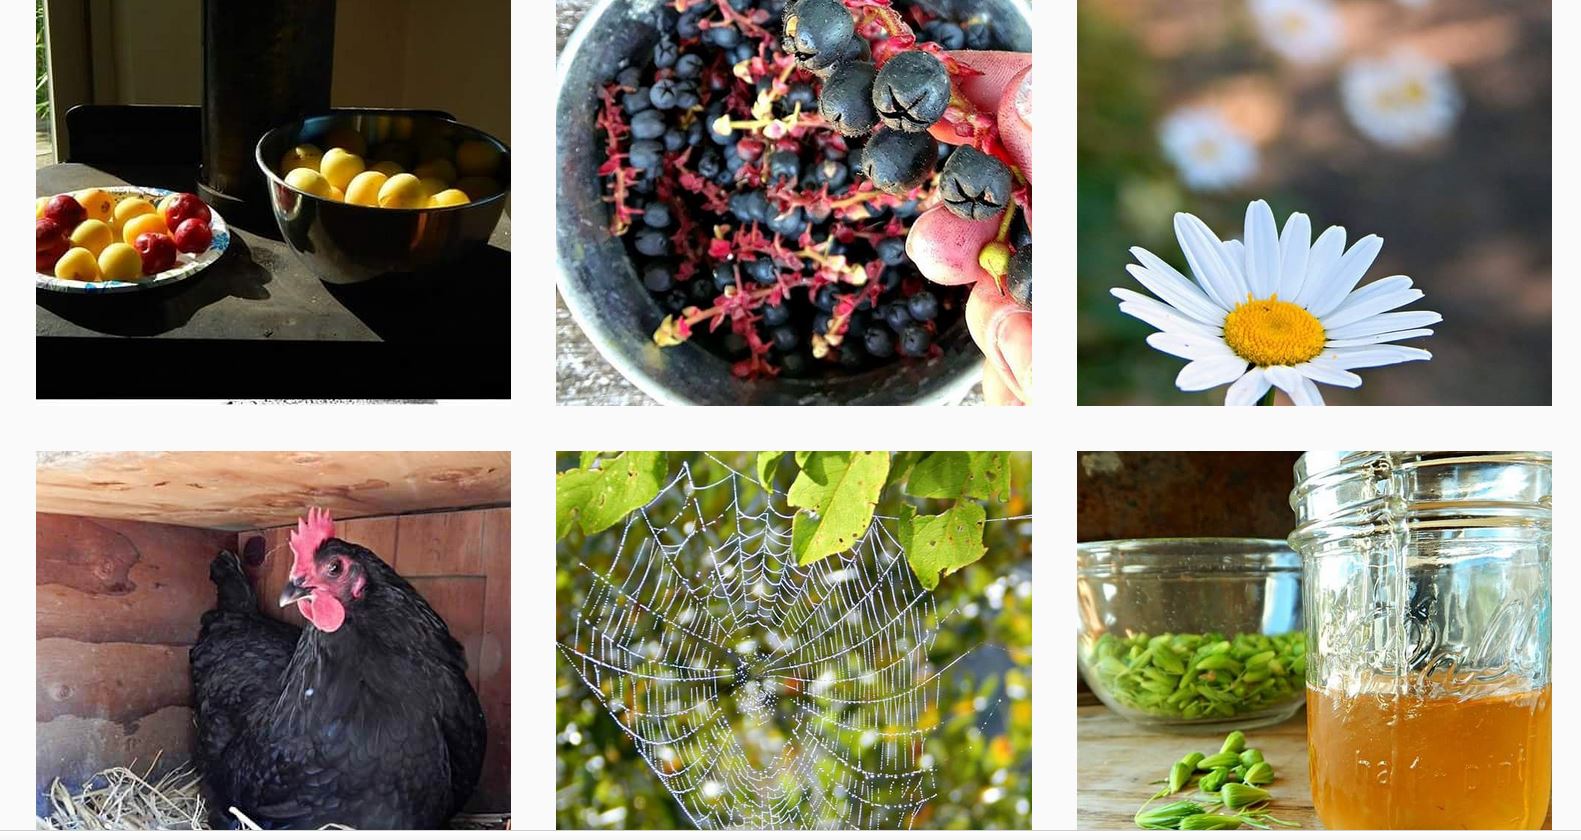
Join Me!
So I've finally entered the modern age: Hubby got me a smart phone. That means I can now share more homesteady goodness with you...via Instagram :) Check it out, and come follow me!
July 18, 2017
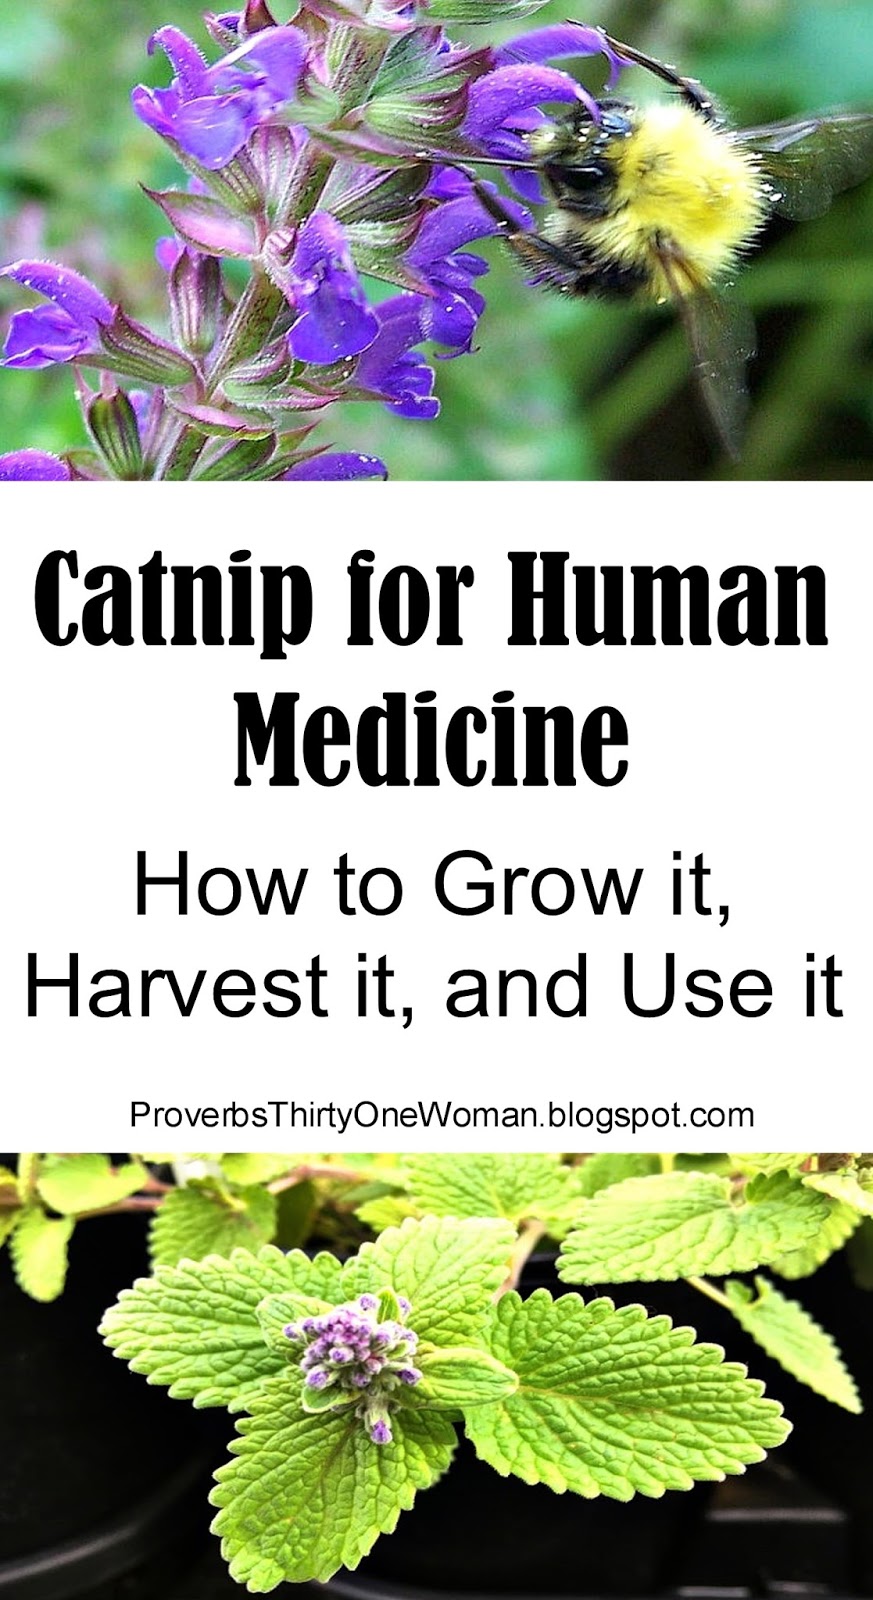
Catnip for Human Medicine
 This post contains affiliate links. All opinions are my own. Please see FCC disclosure for full information. Thank you for supporting this site!
My interest in medicinal herbs began when I was in my 20s. That was also when I had my first unfortunate incident with catnip (also called "catmint"). I'd bought a tiny nursery seedling, thinking it would be fun to grow catnip and give my cat a little now and then...but my cat ate the entire seedling before I ever got it planted...and then proceeded to suffer from hallucinations which lead to years of flashbacks. So let's just say I'm not a fan of giving catnip to cats. (It is, most vets will admit if you press them, rather like giving heroine to a human.)
So when we moved to our new homestead and I found a large patch of catnip, I was ready to pull it out. Yet with our homestead, came the previous owners' cat, Loki. He's a great little guy - a wonderful mouser, and sweet to boot. He's not young, however...and he's very fond of catnip. The family joke is that Loki is the old hippie on our homestead; in the summer, when the catnip is growing, we always know where to find him: laying in the middle of the catnip. All. Day. Long.
Despite some misgivings, I finally decided the cat was set in his ways, happy, showing no ill effects from the catnip (other than growing a little thin in the summer because he's too busy in the catnip to eat as usual), and I hated to upset his world. So the catnip remains, though I keep it under pretty tight control.
That decision made, I also came to the conclusion that I may as well use the catnip for the humans who live here, too. Because, yes! Catnip has a long tradition of medicinal use in humans.
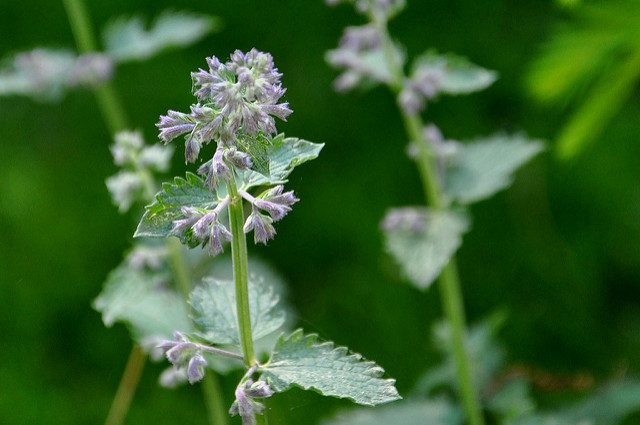
 Catnip blooms can be lovely and attract plenty of garden pollinators. (Courtesy of
 Sharyn Morrow.)
Catnip as Human Medicine
Catnip (Nepeta cataria) is part of the mint family (hence the other common name for the plant: catmint). In humans, the herb is a mild relaxant, mostly used as a soothing tea to de-stress and prepare for sleep. Catnip contains nepetalactone, which is known to repel mosquitoes better than DEET and may repel flies and cockroaches, too. Herbalists say catnip is anti-inflammatory, antimicrobial, antiviral, antispasmodic, anti-fungal, and a bactericide. It's traditionally used for treating colic, nausea, digestive distress, fevers, arthritis, headaches, anxiety, insomnia, hemorrhoids, to put menstrual cramps at bay, as a treatment for minor cuts and abrasions, and to help relieve the symptoms of the cold or flu.
How to Grow and Harvest Catnip
Like many perennial herbs, catnip is incredibly easy to grow. In fact, usually the only problem with growing it is keeping it from spreading everywhere. Therefore, I suggest either growing catnip in a container, or keeping it in a small bed surrounded by concrete.
Catnip wants full sun, and I find it doesn't mind being a bit dry (though that's contrary to most growing guides I've read, which claim catnip needs evenly moist soil). Like all herbs, catnip loves a good trim, so don't be afraid to harvest it regularly. To harvest, simply snip off a stem, just above a double set of leaves.
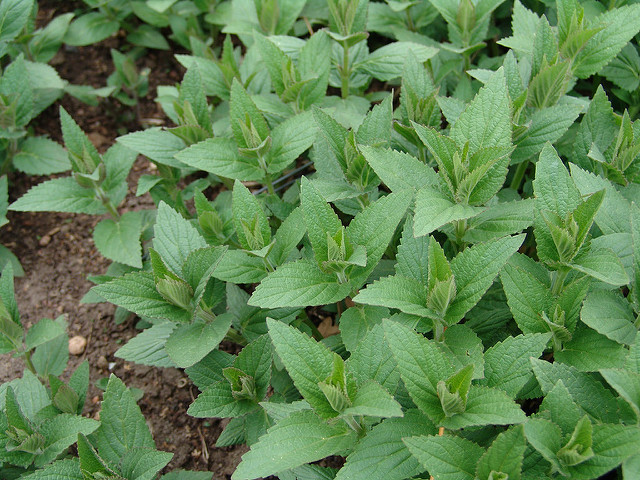 Catnip is in the mint family. (Courtesy of
 Drew Avery.)
How to Preserve Catnip
There are some uses for fresh catnip leaves, but catnip is primarily used dried. Pick leaves off stems and place them on the trays of a dehydrator. Dry at 95 degrees F. until crisp. Alternatively, hang stems of catnip upside down in a dark location until the leaves are completely dry.
Place dry, cool leaves in an air tight container stored in a dark, cool location.
Using Catnip for Humans
Tea: This is the most common way to consume catnip and is perfect as a relaxer, sleep aid, digestive aid, menstrual cramp reducer, and headache reliever. Strong teas may also relieve anxiety attacks. Simply fill a tea ball with dried catnip leaves, crushing them as you go; place the ball in a cup, cover with boiling water, then cover the cup with a saucer. When the tea stops steaming, you may remove the saucer. (Herbalists say covering steeping tea helps retain the herbs' medicinal qualities.) For a stronger tea, use fresh, coarsely chopped leaves. It's fine to add honey or lemon juice to flavor the tea.
Poultice: When catnip is actively growing, crush fresh leaves and place directly onto minor cuts and abrasions to help prevent infection and promote healing. Fresh leaves may also be chewed to help relieve a toothache, and a simple poultice of crushed catnip leaves and warm water or oil may be applied to arthritic parts of the body.
For colic: Brew catnip tea and have the child consume it. Most children do not like the flavor of catnip, so adding sweetener helps. (Do not use honey as a sweetener for children under the age of 12 months.) You may also add the tea to a bottle of milk or formula or other drink - just 2 or 3 tablespoons will do the trick.
 Catnip is also called catmint. (Courtesy of
 Claudia Daggett.)
Baths: Adding catnip to warm bath water may help relieve sore muscles, achey bodies with the flu, and relax the body and mind. If desired, place a handful of fresh or dried catnip in a square piece of cotton, pull up the corners, tie off, and hang the resulting bag so the warm water runs through it as you fill the tub. Alternatively, make a strong catnip tea and add it to the bath water.
WARNINGS:
Disclaimer I am not a doctor, nor should anything on this website (www.ProverbsThirtyOneWoman.blogspot.com) be considered medical advice. The FDA requires me to say that products mentioned, linked to, or displayed on this website are not intended to diagnose, treat, cure, or prevent any disease. The information on this web site is designed for general informational purposes only. It is not intended to be a substitute for qualified medical advice or care. There are no assurances of the information being fit or suited to your medical needs, and to the maximum extent allow by law disclaim any and all warranties and liabilities related to your use of any of the information obtained from the website. Your use of this website does not constitute a doctor-patient relationship. No information on this website should be considered complete, nor should it be used as a substitute for a visit to, consultation with, or the advice of a physician or other qualified health care provider.
* Title images courtesy of Megan Hansen and mwms1916.
July 12, 2017
Mexican Skillet Cauli-Rice (Low Carb, Keto, LCHF Recipe)
 The first time I served this dish to my family, nobody had any idea I was sneaking them veggies. In fact, my husband was perplexed, thinking I was eating rice (a definite no-no because of my diabetes). I giggled like a little girl. "Nope!" I said. "There's no rice in this dinner. That, my dear, is cauliflower."
Now, I've tried quite a few cauliflower-masquerading-as-something-else recipes, and most of the time, I haven't been impressed. But cauliflower as a rice substitute? Perfect!
I make my own cauli-rice from fresh cauliflower, but if you prefer, you can now buy riced cauliflower in the freezer section of most grocery stores. (Just be sure to read the label for questionable, added ingredients.) One thing I haven't tried is using frozen cauliflower to make cauli-rice. I'm learning frozen is usually less expensive than fresh, and often has a more mild flavor suitable for cauliflower substitute recipes; but I'm not sure how well it will rice. If you try it (or already do it), please leave a comment, and I will update the post with opinions on how well it works!
To make your own cauli-rice: Quarter a fresh cauliflower and cut away the core and the bigger parts of the stems. Pop chunks of the cauliflower florets into the food processor (with the grater attachment in place), or simply chop the cauliflower florets finely with a knife until it has the appearance of rice. I usually rice several heads at one time and pop the results in the freezer for later use.

 Mexican Skillet Cauli-Rice Recipe
1lb. ground beef
1/2 small onion, chopped
1/2 large green bell pepper, chopped
1 batch taco seasoning (see below)
1 cup no-sugar-added tomato paste
Cauli-rice from 1 cauliflower head (or about 24 oz. of pre-riced cauliflower)
1/2 cup beef broth
2 cups shredded Cheddar and mozzarella cheese
1. In a large skillet placed over medium high heat, cook the ground beef until no longer pink. Add the onion and green pepper and cook until tender. Add the taco seasoning, mixing well.
2. Add the tomato paste, cauli-rice, and broth, stirring well to mix. Bring to a simmer. Reduce the heat to medium and cook until cauli-rice softens (about 5 minutes for fresh cauli-rice, or about 9 for frozen).
3. Sprinkle cheese over the mixture and serve. Add sour cream, green onions, and other toppings, if desired, but add them to the carb count.
Makes about 5 servings. Estimated nutrition, according to SuperTracker: 227 calories; 18 g. protein; 10.2 g. carbs; 3 g. fiber;13 g. fat.

DIY Taco Seasoning
Not only is it cheaper to mix your own taco seasoning, but it makes all the dubious ingredients in ready-made spice mixes (like flours and preservatives) something you can easily avoid.
2 teaspoons chili powder
1 teaspoon cumin
1/2 teaspoon onion powder
1/2 teaspoon garlic powder
1/2 teaspoon sea salt
1/2 teaspoon red pepper flakes
1/4 teaspoon oregano


