
Kristina Seleshanko's Blog, page 30
July 5, 2017
Why Did the Rooster Cross the Road? Because Our Hens Were on the Other Side!
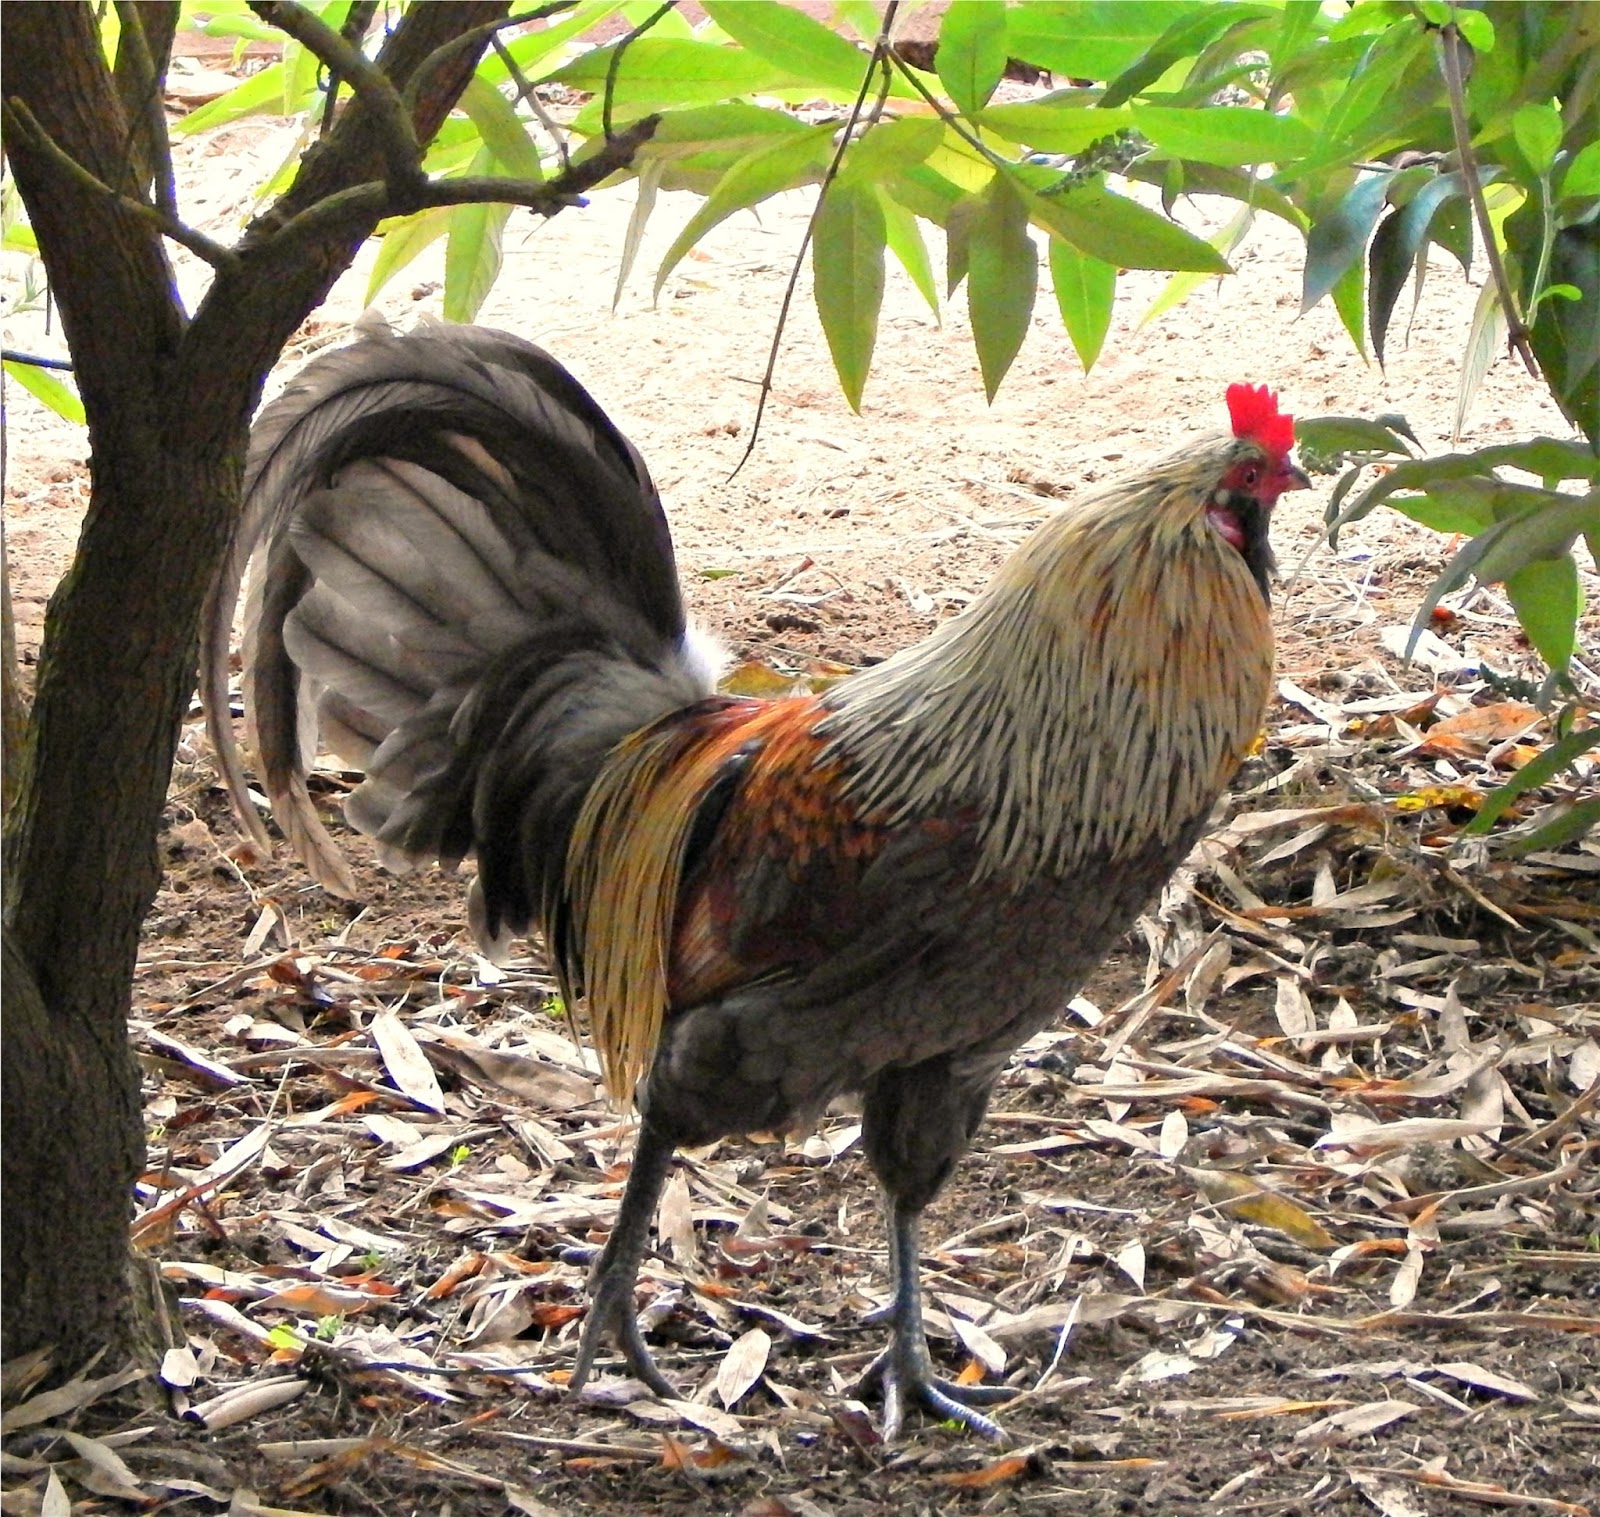 Late Sunday afternoon, my hubby spotted a beautiful rooster wandering around the outside of our chicken run, trying to find a way in. We've been wanting to add a rooster to the homestead, but every time we see one advertised, someone else has already snatched it up. So light bulbs went on above our heads. My husband called our neighbor, knowing it must be his bird. "Your rooster is over here romancing our hens. Do you mind if we keep him for a few days?" Our neighbor readily agreed.
So we opened the gate to our chicken run - there was little danger of our hens wandering off; they are so content in that run, they show little interest in leaving it. And within minutes, the rooster had found his way inside.
First, he crowed. Repeatedly. "I proclaim these ladies are mine!" I imagine him saying. Then he spread his wings wide as if to impress our girls with his splendor. Soon, he started scratching around, found some food, and called to the girls. "Ladies! I found something tasty! Come and get it!"
They eyed him suspiciously and didn't take him up on his offer.
Finally, he began following them around, cooing bewitchingly. At least, I guess he was bewitching, because within 30 minutes, he was making whoopie with one of our hens. He then wasted no time getting friendly with all of them.

We are thankful he's a gentleman about it all. He never once pecked, scratched, or got violent with the hens. And when dusk came and I locked the hen house...he was nestled away in there like he'd never had any other home.
His second day here, I walked by the run to see how things were going...and discovered the gate was unlatched. That morning, my daughter hadn't closed it properly. All but our two broody hens were missing. (Broody hens are in a hormonal state that prepares them to hatch eggs.Among other things, they sit on the nest and do not leave it. It doesn't matter that our eggs were not fertilized. ) I was a little panicky, since the rooster was not ours to lose.
(adsbygoogle = window.adsbygoogle || []).push({});
My first thought was that Mr. Rooster had lead our hens to his old property, wanting to integrate his new lady friends with his old ones. But before we could call the neighbor, my son spotted the partial flock in the woods, busily scratching away on the forest floor, finding bugs. The rooster hadn't been trying to get back home. He was merely looking out for his new hens, finding them a good foraging location.
To complicate things, our 90 lb. puppy, Ed, got loose. He's good around "his" animals, but I was worried he'd go after the rooster, thinking it didn't belong on our property. So I spent 15 minutes trying to catch him, wrestle with him, and lock him up before I could proceed with the chicken rescue mission.
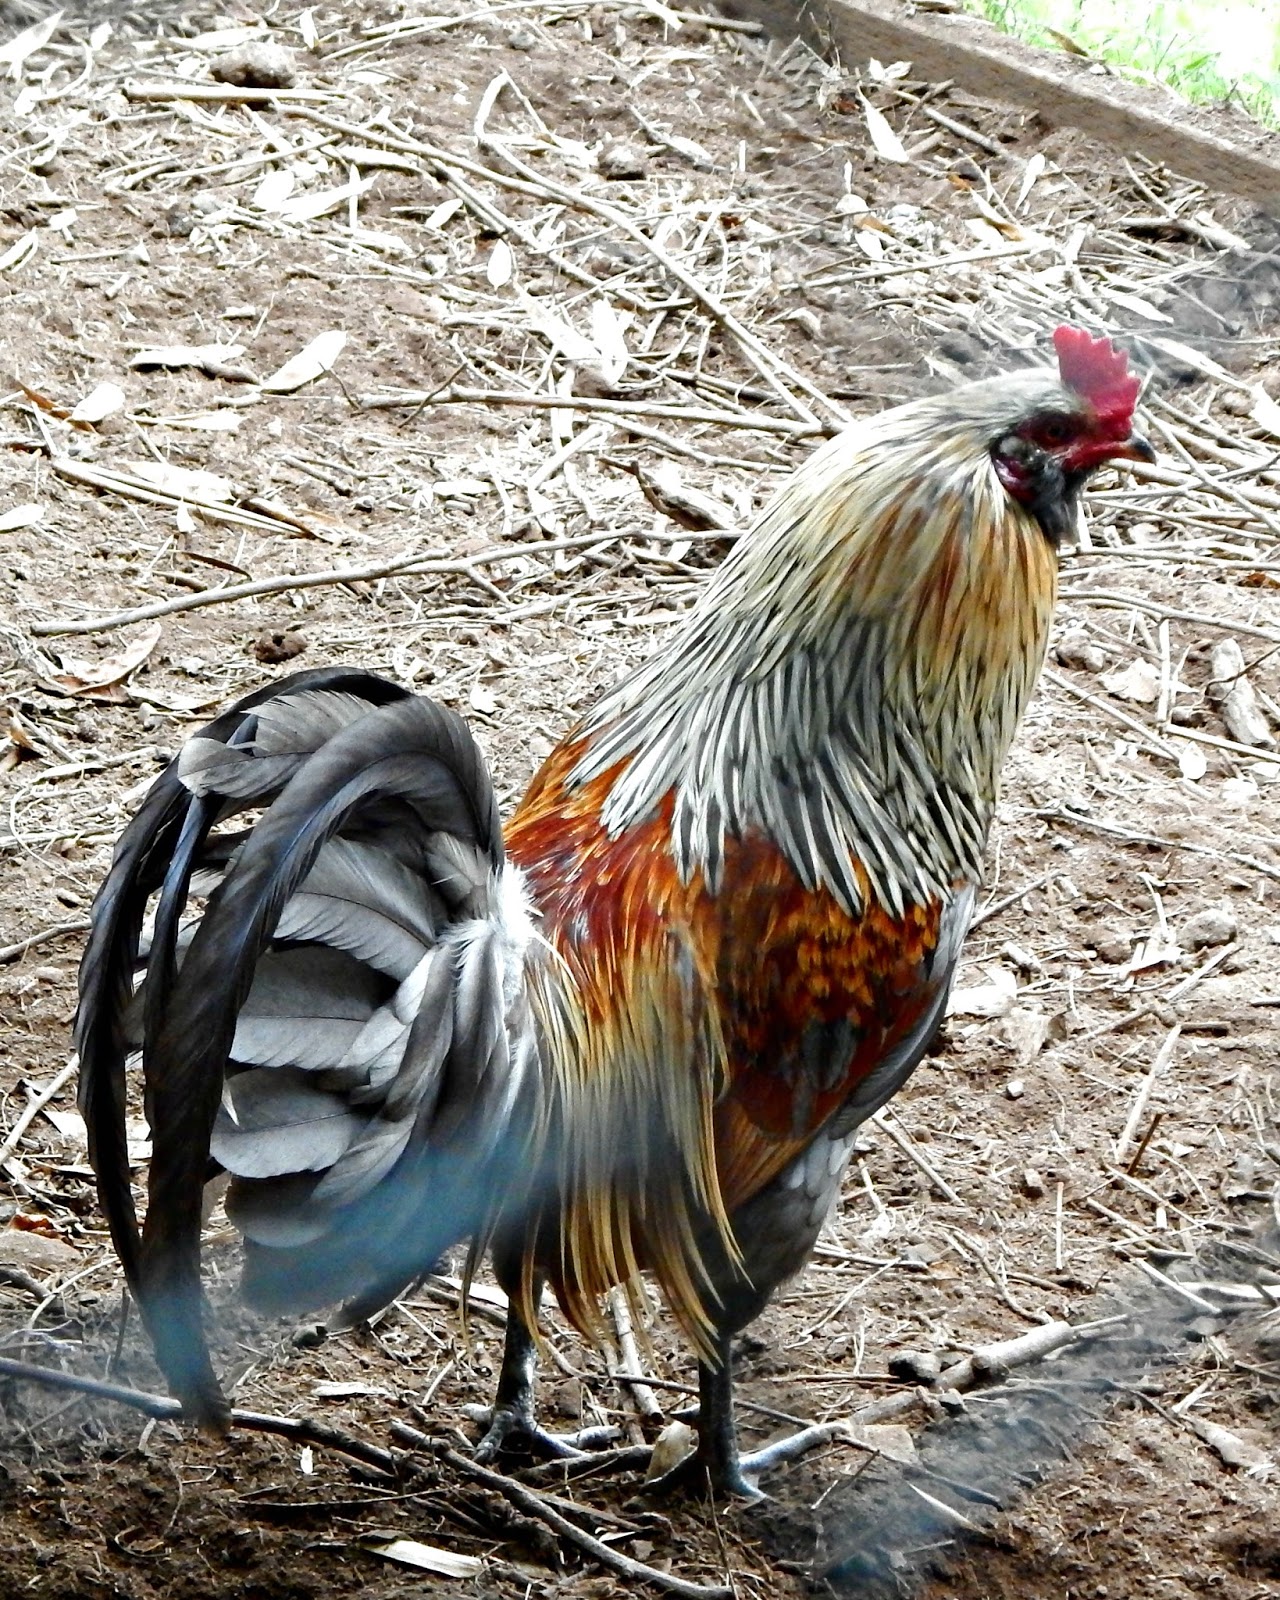
By the time this was accomplished, Mr. Rooster had lead the hens to a prime foraging spot under some trees on a steep embankment. And, naturally, he did his best to protect them from me. Still, one by one I grabbed squawking hens, handed them to the children, and had them put the girls back in the chicken run.
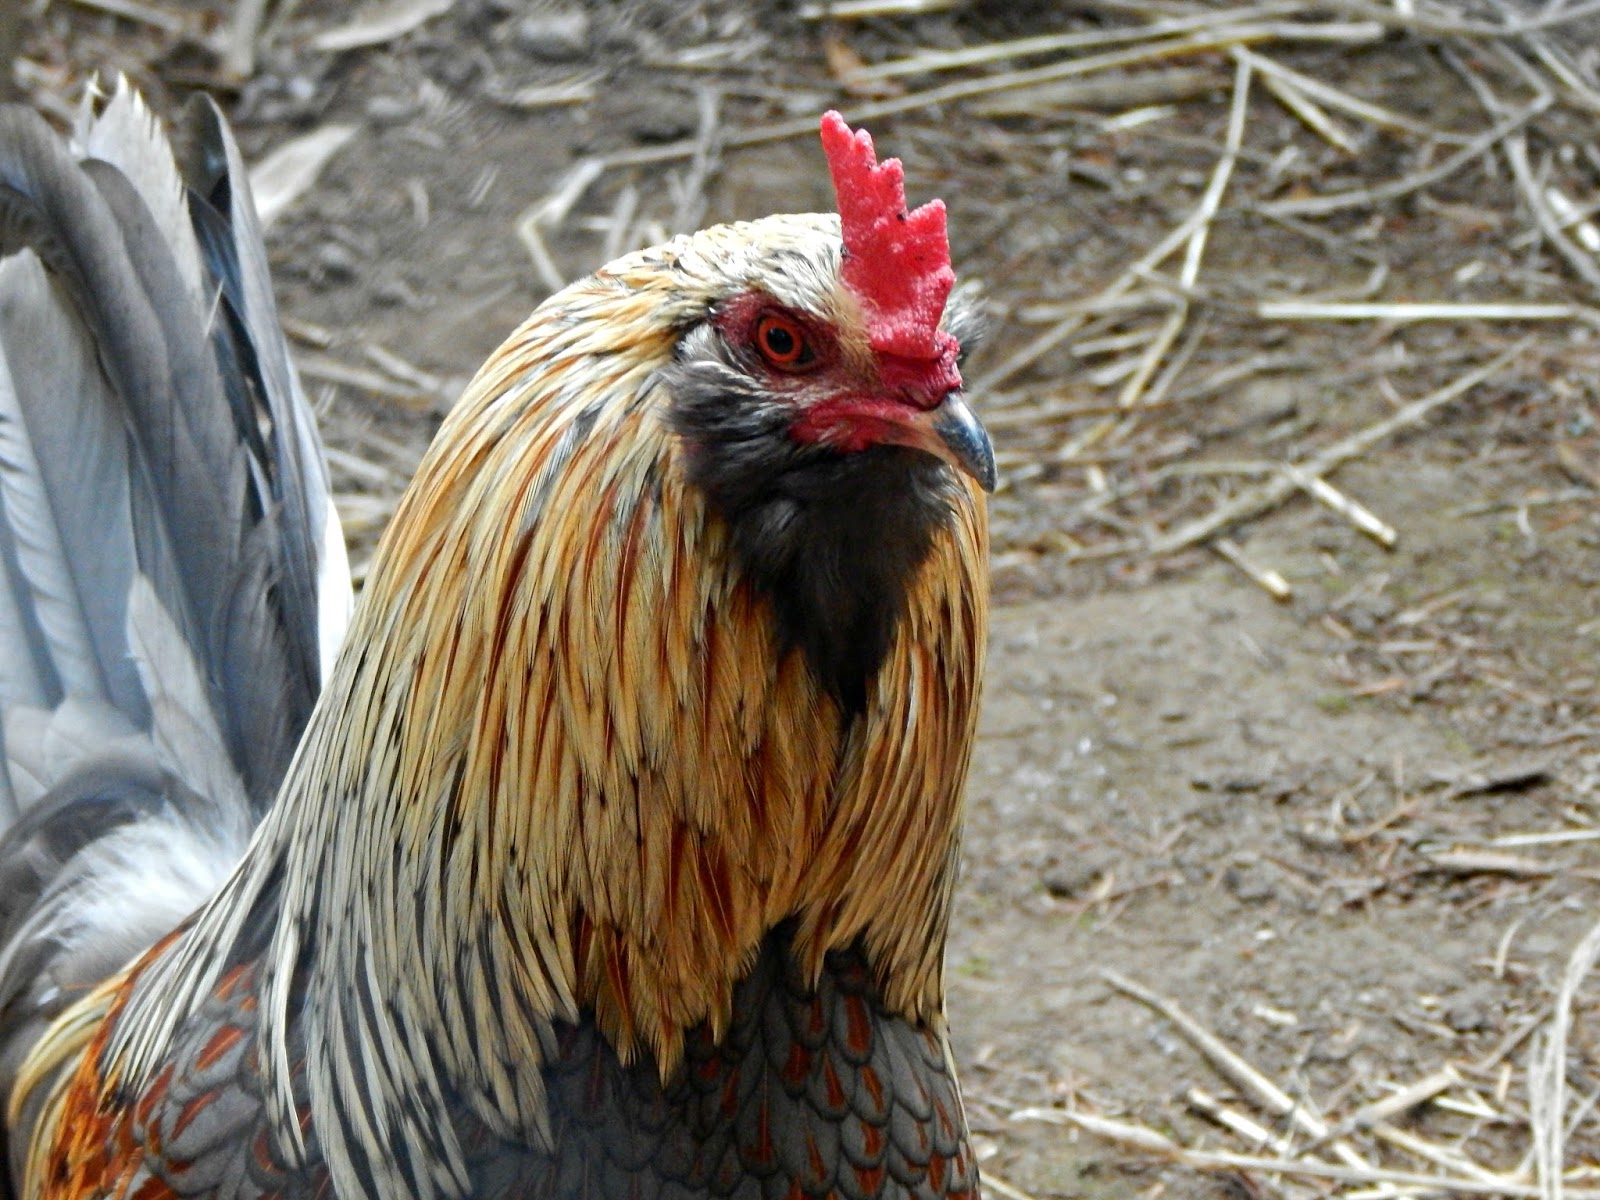
I was not looking forward to picking up the rooster. Roosters have spurs...need I say more? (I didn't realize at the time that Mr. Rooster is young enough he doesn't have spurs yet.) But I walked back to the woods to do my best and...he had disappeared. Completely vanished. I hoped he was headed back to "his" ladies. I was right! I don't know how he moved so fast, but he was already pacing outside the run, with the hens ruffled and upset he wasn't inside with them. (Amazing how quickly those hens adopted him!) I opened the gate and chased him until he ran into the run to flee me. Whew!
Later that day, amazed by how the rooster seemed to complete our flock - how the hens already adored him and obeyed his gentle commands - and entranced by his lovely crowing that just made the homestead more homesteady - my hubby asked the neighbor if we could buy his rooster.
 "Tell you what," our neighbor said. "Give me half the chicks from your first two clutches, and he's all yours."*
Happy dance!
Of course, hatching chicks the natural way is a little bit iffy. There's a reason chickens mate constantly; not all clutches of eggs hatch, and all newborn chicks are incredibly fragile.
But, best case scenario, sometime within the next 3 weeks, our hens will lay some fertilized eggs, and one of our hens will be patient enough to sit on them for 21 days, then mother the resulting chicks.
Hens often get fed up before 21 days of sitting have passed. But we have one particularly broody hen who seems very patient. Twice now, she's plucked her chest feathers and sat on unfertilized eggs. She's felt hot and gives that gentle clucking sound only broody hens make. When we remove eggs from under her, she scolds us - and even, once, pecked. (Which is a huge deal for Australorps. They are not much into pecking, especially at their humans.) In fact, when Mr. Rooster originally crossed the road, we had her separated from the flock, trying to get her to come out of the broodiness she'd had for several days. Now she's in with the rest of the flock and we hope her broody dreams come true!
I'm ridiculously happy to have this rooster. He is so nice - which is a huge bonus. Many roosters are just plain mean. He is gorgeous. (I think he might be an Americauna.) The hens love him. And now my hubby has an excuse to get around to expanding the hen house. (Wink.)
Only one questions remains: What should we name him?
* In case you're wondering, Mr. Rooster shows zero interest in crossing the road again. For whatever reason, he has chosen our hens as his.


July 1, 2017
Weekend Links
 Still waiting for the contractor to start re-roofing my canning kitchen!
In which I share my favorite posts from this blog's Facebook page.
This post contains affiliate links. All opinions are my own. Please see FCC disclosure for full information. Thank you for supporting this site!
"Do you not know? Have you not heard? The Lord is the everlasting God, the Creator of the ends of the earth. He will not grow tired or weary, and his understanding no one can fathom. He gives strength to the weary and increases the power of the weak. Even youths grow tired and weary, and young men stumble and fall; but those who hope in the Lord will renew their strength. They will soar on wings like eagles; they will run and not grow weary, they will walk and not be faint."
Isaiah 40:28-31
________________________________________
* I just returned from an out of state trip to visit my Dad, and am busy trying to catch up on homesteading, home keeping, and blogging chores. Forgive me if I take a little time to catch up!
* It's official! Duck eggs do NOT raise my blood sugar the way chicken eggs do...and they don't seem to upset my tummy, either. So now my 11 year old daughter is saying: "Does that mean I can get some pet ducks now???"
* Once, you could walk onto our front porch, easily look into the bathroom window, and see a person sitting on the toilet! Bad layout. But this inexpensive window cling easily took care of the problem...and it looks pretty, too! I recommend it.
* No one likes to look like a city slicker when they live in a rural area. But for months, the kids and I have been looking for tadpoles to scoop into fish tanks so we can watch them turn into frogs. A couple of weeks ago, we were excited when we saw some in the greenhouse water tank. I'm glad we didn't put them in tanks in the house, though, because my hubby later informed me they aren't tadpoles...they are mosquito larvae. He thought it was cute that I didn't know this...
* Recall on dog raw hides.
* Recall of almond butter due to possible listeria.
* Respecting Your Husband the Proverbs 31 Way.
* Some interesting insights into what makes teens rebel.
* Lately I've noticed Netflix has some questionable titles readily available to anyone browsing their offerings. Even just the "covers" for the shows are not something I want my kids to see. If you're concerned about this, too, Our Good Life has instructions on how to block Netflix shows so your kids can't find them.
 * Here's a fun, free summer activity for kids: Playing Bible detectives!
 * Did you know I have a free children's chapter book all about time traveling to the days of the dinosaurs in order to learn about creationism? It's action-packed and fun, and perfect for summer reading!
* More fun ideas for summer fun.
* With wild berries beginning to come on, now is a great time to start foraging! Even city dwellers can forage.
* Tick bites can lead to meat allergies. It's true!
* These look good! Crispy Green Bean Chips.
* I recently joined a Facebook canning group...and oh my goodness! People get tossed out for mentioning botulism or suggesting a certain canning practice isn't safe. The things these people are doing are shocking. There's a lot of "My granny did it and she didn't die." Um, yeah, that's like saying "I drive home drunk every night and I've never gotten into an accident." There are many reasons Granny didn't die - mainly because she boiled the heck out of her canned food before she ate it. She also stored it in a fridge-like setting (a cellar or something similar). And she took for granted that spring time (as the last of the canned food was consumed) was a time of sickness, not realizing her home canned foods were making her ill. Please. No food you want to home can is worth making someone ill or killing them. Period. Learn more here.
* In my day, I've used a lot of manure. In the garden, that is. But by far my favorite is rabbit manure. I love it because you don't have to wait for it to age before using it, and because it makes plants grow abundantly! Don't have your own rabbits? Sometimes you can find rabbit owners who are willing to give away or sell their bunnies' pellets. Here's more on using rabbit manure in the garden.
Oldies But Goodies:
* Preserving Herbs with Salt
* Tips for Keeping the House Cool in Summer
* An EASY Way to Make Your Own Butter
* Crock Pot Sloppy Joes
* Easy Refrigerator Pickled Beets
June 29, 2017
"Unbreaded" Parmesan Chicken Tenders Recipe - ZERO Carb!
 Whenever I find a chicken recipe my family loves, I'm pretty proud of myself. And whenever my family says they like the low carb, keto version of a recipe better than the high carb version, I'm even more happy. Such is the case with my "Unbreaded" Parmesan Chicken Tenders.
These babies are not only tender, but so flavorful! Who needs breadcrumbs or flour?? Not us! I also love that this meal comes together without much work; all it needs is a simple vegetable on the side and viola! you've got a truly healthy meal.
Money Saving Tip: Yes, this recipe calls for chicken tenders, but I recommend you buy frozen chicken breasts instead. Let them thaw, then cut them into smaller, chicken tender-sized pieces. It's easy, doesn't take much time, and saves money.
Another Note: Although the cheese I used to calculate nutritional information on this chicken dish claimed to be ZERO CARBS (yay!), all dairy has a small amount of carbohydrates. Food manufacturers are allowed to indicate the carbohydrates in any given food are zero if the serving size has less than 1 carb. So do bear this in mind if you're diabetic or carefully counting carbohydrates.

"Unbreaded" Parmesan Chicken Tenders Recipe

2 lbs. chicken tenders
1 cup grated Parmesan cheese
1 tablespoon dried oregano
1 tablespoon paprika
1 teaspoon garlic powder
1 teaspoon fine sea salt
1/2 teaspoon pepper
pinch of cayenne pepper (optional, but recommended)
1/2 cup butter
1. Preheat the oven to 350 degrees F. Line two baking trays with parchment paper and set aside.
2. In a pie plate or shallow casserole dish, stir together the cheese, oregano, paprika, garlic powder, salt, pepper, and cayenne. Set aside.
3. In another pie plate or shallow casserole dish, melt the butter in the microwave. (Or, if you prefer, melt in a small saucepan on the stove, then transfer to the pie plate.)
4. Dip each piece of chicken in the butter, coating both sides, then dip t in the cheese mixture, well covering all sides of the chicken. Place chicken pieces on the prepared baking tray.
5. Bake for 20-30 minutes, or until the chicken reaches an internal temperature of 165 degrees F.
Estimated Nutrition, according to SuperTracker; per piece of chicken: Carbs 0 g.; protein 17 g.; fiber 0 g.; fat 10 g.; calories 160.

June 26, 2017
Our Favorite Chicken Breed: Australorps
June 22, 2017
Can I Use My Instant Pot Pressure Cooker for Canning?
 This post contains affiliate links. All opinions are my own. Please see FCC disclosure for full information. Thank you for supporting this site!
Q: Can I use my Instant Pot or other pressure cooker for canning?
A: I see this question so often! The answer is absolutely, positively no. Oh yes, I do know there are pressure cooker manufacturers who claim otherwise, but they are putting your life at risk.
First, let's talk about the Instant Pot, which is a popular electric pressure cooker (I love mine! You can learn more about it here.). The manufacture has this to say about canning in the Instant Pot, emphasis mine:
"Instant Pot can be used for boiling-water canning. However, Instant Pot has not been tested for food safety in pressure canning by USDA. Due to the fact that programs in Instant Pot IP-CSG, IP-LUX and IP-DUO series are regulated by a pressure sensor instead of a thermometer, the elevation of your location may affect the actual cooking temperature. For now, we wouldn’t recommend using Instant Pot for pressure canning purpose. Please note this correction to our early inaccurate information."They kind of talk around themselves, don't they? But basically they are saying you should not use the Instant Pot for canning because the temperature may not be high enough to kill dangerous bacteria in the food. I would add that with water bath canning the jars must be well under water and cannot touch the bottom of the pan. That means there simply isn't enough space in the Instant Pot for safely canning anything.
What about other types of pressure cookers? Quite simply, they are not designed for canning, and they cannot safely can food and make it shelf stable. The National Center for Home Food Preservation makes it clear that pressure cookers cannot hold enough water to safely bring the contents of canning jars to a temperature that kills harmful and deadly bacteria.
In addition to holding too little water, pressure cookers have less metal, which means the time it takes them to come to pressure is shorter than that of a pressure canner. The time it takes them to cool down is also shorter. That might seem like a good thing, but it actually means the food in the jars is heated for less time - and that means bacteria won't be fully killed during processing. "The food," The NCHFP says, "may end up underprocessed. Underprocessed..foods are unsafe and can result in foodborne illness, including botulism poisoning, if consumed."
My personal recommendations:
I love my Instant Pot (here's the model I have) for making dinner when I need my hands and focus free for other things. I also use it to hard boil eggs, cook dried beans, and so much more.
But I use my Presto pressure canner (here's the model I use and recommend) for pressure canning; I also use it as a water bath canner by simply not locking down the lid. (Learn more about that here.) I have also used it as a pressure cooker, but I don't anymore, for two main reasons: 1. It's really big, and therefore difficult to clean in the sink. This isn't an issue when it comes to canning, because the canner stays clean. But when I cook in it, I usually have to scrub it out. 2. Unlike an electric pressure cooker, like the Instant Pot, I have to monitor the Presto as it cooks food. That means it simply uses up more of my time.
For more information, see:
* What You Need to Know About Home Canning and Botulism
* Pressure Canning vs. Pressure Cookers
* Canning 101: Using a Boiling Water Bath Canner
* Canning 101: Using a Pressure Canner
June 19, 2017
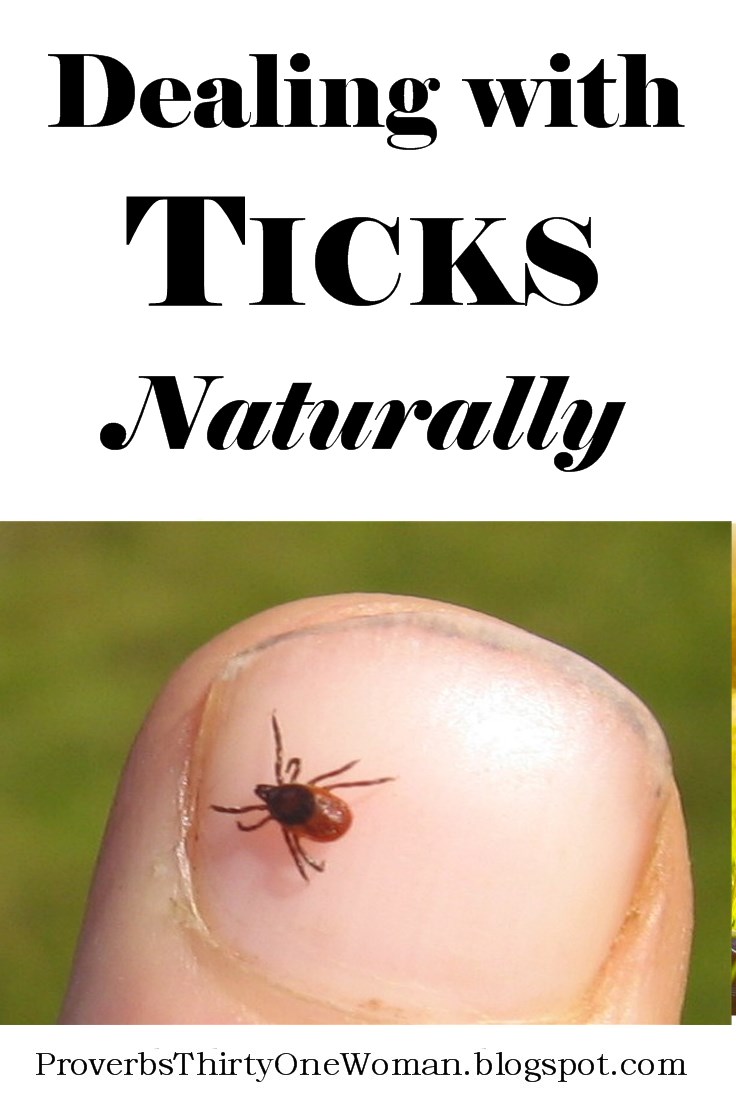
Dealing with Ticks, Naturally
 This post contains affiliate links. All opinions are my own. Please see FCC disclosure for full information. Thank you for supporting this site!
Country living isn't new to me; I grew up in a rural area. But ticks? Yep, definitely a new-to-me experience. And this year, ticks are already much, much worse than they were last year - a trend throughout the nation, I read. And while the little buggers completely gross me out (just writing this post makes me feel like ticks are crawling all over me), I don't relish the thought of spraying my family with DEET day in and day out. So here are a few things that have helped us keep the ticks at bay naturally.
(Please bear in mind that I don't live in an area where Lyme disease is currently a factor. If I did, I might be more inclined to use DEET as the lesser of two evils.)
1. Yard Maintenance. Keeping the grass mowed goes a long way toward keeping ticks out of the yard. Yes, some ticks hang out on bushes and trees, but a many more seem to lurk in tall grass. Keeping that grass short obliterates a tick's favorite hang out. In addition, having gravel or bark borders surrounding common human hang outs (like the deck) may help keep ticks at bay.
2. Dress Right. When you're in tick-infested areas, wear boots with long pants, or tuck your pants into your socks. It may look dorky, but it keeps ticks from climbing up your legs. Long sleeves help, too.
3. Cloak Your Scent. Many types of ticks know what to jump on by that creature's smell, so anything you do to mask your smell will help deter ticks. We've been using tea tree oil - apparently successfully. (That is to say, we've never found a tick on us after applying it.) I just dab it onto our ankles (or the ankles of our boots), our wrists (at the pulse points, just like you'd do with perfume), and our necks. Since mosquitoes are also a problem for us, I also want to experiment with using Thieves' Vinegar. I've made a batch (you can read about that here), and it stinks a lot, but we haven't had a chance to use it yet.
4. Check Right Away. As soon as you're out of the tick-infested area, check for ticks. Remove all your clothes and check every nook and cranny. It's best to put those clothes directly into a sealed, plastic garbage bag, or directly into the washing machine (which should then be turned on), so any ticks on your clothes won't be loose in the house.
 5. Remove Ticks CORRECTLY. If you find a tick, remove it carefully. So many of the tick-removing ticks neighbors and family told us about - or that we read about on the internet - are not recommended because they allow the tick a chance to regurgitate into your blood stream, increasing the likelihood it will pass on some disease to you. Methods to avoid include using a match or heat source, using manual rubbing, or using bag balm, petroleum jelly, or some other oil. The CDC recommends using tweezers, but I find this usually results in the tick's head being left behind - definitely not what we're after! Then I discovered the Tick Twister. When I first bought this device, I was highly skeptical. It seemed too simple and too much like tweezers. But trust me, this baby works! You just insert the tick between the tongs of the device, then turn, like a screw driver. Out comes the tick, head and all!
6. Dealing with the Dog. One area where we still struggle is with the dog, who is basically a 90 lb. tick magnets. Tea tree oil is toxic to dogs. (According to Pet MD, uou could could safely use .1% to 1% tea tree oil, but I doubt it would be strong enough to keep ticks at bay.) Our neighbors use garlic powder, sprinkled into their dog's food. When they told me this, I was surprised; I thought garlic was toxic to dogs. But further research online and in books indicates that it's a matter of proper dosage. The book All You Ever Wanted to Know About Herbs for Pets claims dogs can have 1/8 teaspoon of garlic powder per pound of food, 3-4 times a week. (If your dog is anemic or has other health issues, talk to your vet before giving the dog garlic.) I plan to start feeding our dog this tiny amount of garlic powder to see if it really does keep ticks at bay.
How do you deal with ticks? Leave a comment and share your wisdom!
June 15, 2017
Spring Cleaning Roundup
Some time ago, my sis-in-law remarked that she loved the cleaning posts on this blog. I literally laughed out loud - because I am a true messy at heart. But maybe that's the appeal. As much as I appreciate the need for good housekeeping (and homekeepers), I usually try to find the easiest, fastest way to clean things so I can move on to other stuff. So with that in mind, I present to you my most popular cleaning posts. Just in time for the procrastinating spring cleaner - like me.
Throughout the House:

How to Clean a Popcorn or Textured Ceiling
How to Easily Clean Ceilings and Walls - Even in a Greasy Kitchen
How to Easily Remove Stains from Carpet - without Chemicals
Why Every Housewife Needs Safety Goggles
In the Kitchen:
How to Clean a Really Dirty Stove Top
How to Clean Really Dirty Stainless Steel Pots and Pans
How to Easily Clean a Super Duper Dirty Cup
 In the Bathroom:
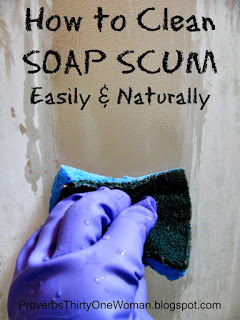
How to Clean Soap Scum Easily & Naturally
The Easy Way to Get Mold Off Grout
In the Laundry Room:
Cheap, Effective Fabric Stain Removal
The Easy Way to Remove Grease from Fabric
Homemade Laundry Detergent: Why I Don't Use It
Natural Alternative to Dryer Sheets
Why You're Using Too Much Laundry Detergent
Throughout the House:
How to Clean a Popcorn or Textured Ceiling
How to Easily Clean Ceilings and Walls - Even in a Greasy Kitchen
How to Easily Remove Stains from Carpet - without Chemicals
Why Every Housewife Needs Safety Goggles
In the Kitchen:
How to Clean a Really Dirty Stove Top
How to Clean Really Dirty Stainless Steel Pots and Pans
How to Easily Clean a Super Duper Dirty Cup
In the Bathroom: How to Clean Soap Scum Easily & Naturally
The Easy Way to Get Mold Off Grout
In the Laundry Room:
Cheap, Effective Fabric Stain Removal
The Easy Way to Remove Grease from Fabric
Homemade Laundry Detergent: Why I Don't Use It
Natural Alternative to Dryer Sheets
Why You're Using Too Much Laundry Detergent
June 12, 2017
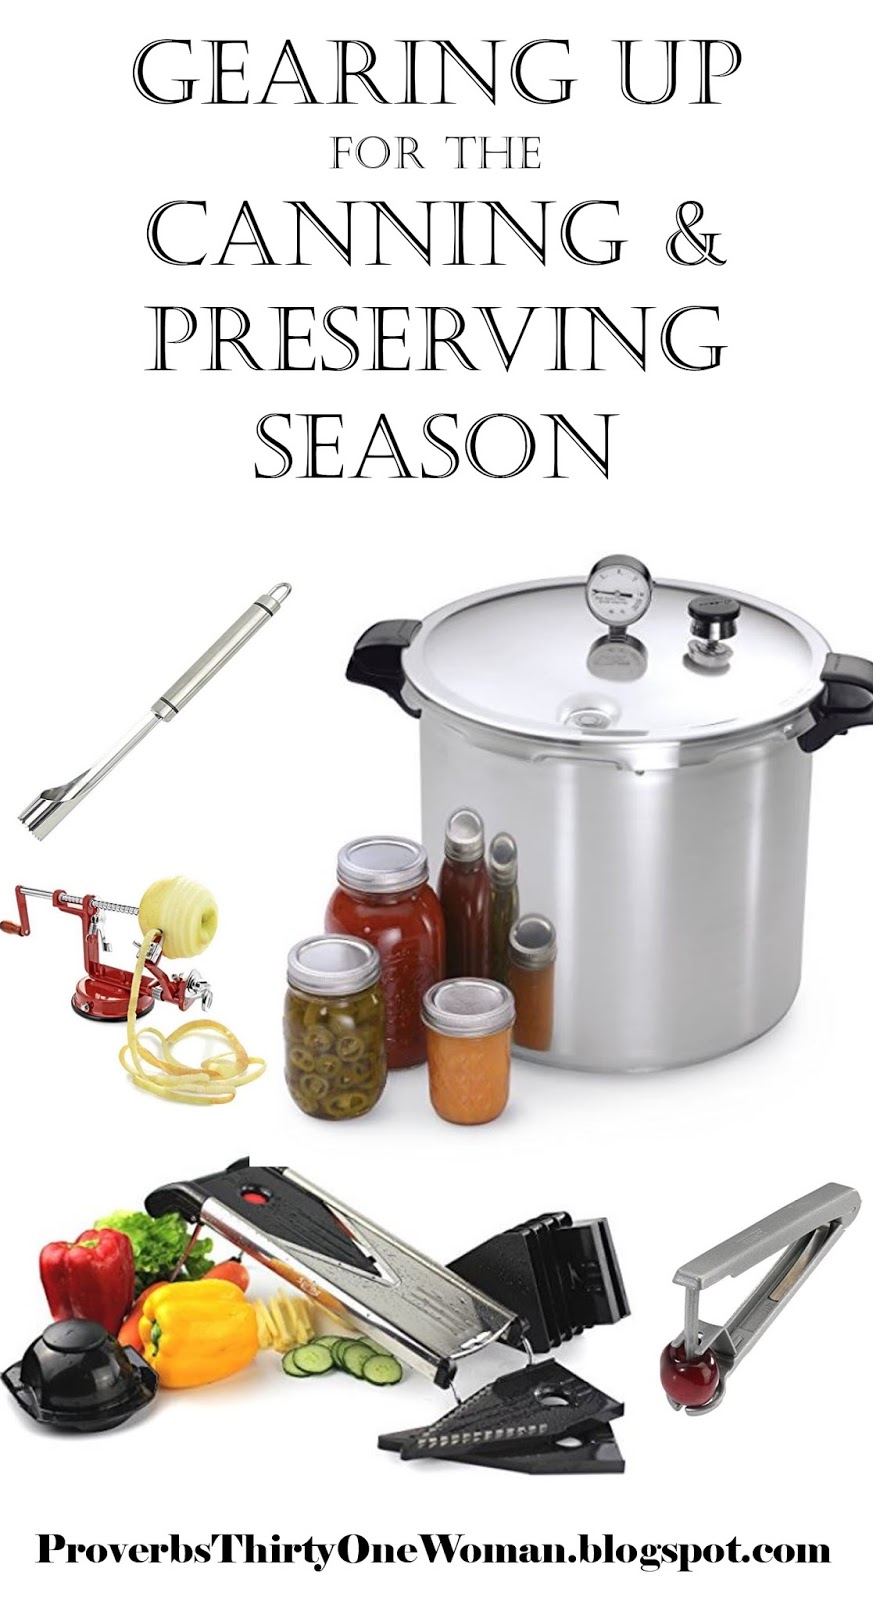
Gearing Up for the Canning & Preserving Season
 This post contains affiliate links. All opinions are my own. Please see FCC disclosure for full information. Thank you for supporting this site!
I think I'm almost set for the bustle of canning and preserving season. I can't wait to preserve the food growing on our homestead; the still-green blueberries taunt me, and the tiny baby apples are calling my name! And this year, I purchased a few inexpensive tools to help make preserving easier.
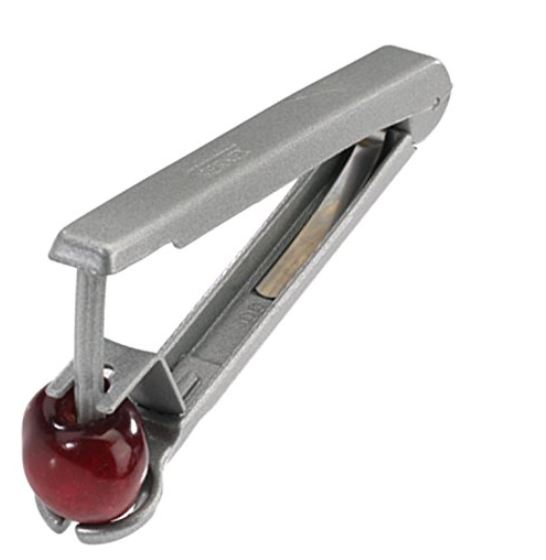
 Use it for plums, not apples!
Apple Corer...For Plum Pits
A time saving addition to my canning and preserving tools is this apple corer. I won't be using it for apples; I tried that with a similar model last year, and it broke. Instead, I'll use this tool to quickly pit plums and prunes. Last year, my dad-in-law introduced me to this idea and loaned me a corer from his kitchen. It made pitting those plums so much faster! This winter, I carefully researched the sturdiest model I could find, and came up with this. (By the way, for actually coring and cutting apples, as well as peeling them if desired, I use something similar to this.)
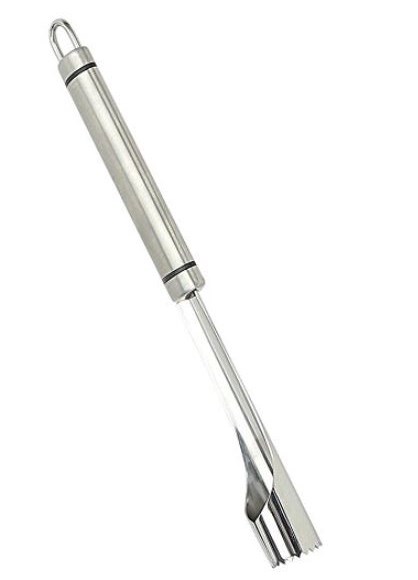
 A good cherry pitter is a must.Sturdy Cherry Pitter
Another good addition to my arsenal is this cherry pitter. I have a plastic one in my utensil drawer, but this stainless steel version will hold up much better to the large amounts of cherries I hope to have on our trees this year.
 A decent mandoline makes things much easier.Mandoline Slicer
Last year, I also purchased a new mandoline. I had a plastic one for years and rarely used it; eventually, I gave it away. But now that I'm a dehydrating fiend, this baby comes in very handy. I like this model because it's affordable, but not flimsy, like so many mode sold today. But I'm prone to cutting myself if I'm using any sharp tool, so an important accessory are these cut resistant gloves.
One Time Use Canning Supplies
Naturally, I'm also gathering one time use canning supplies. I like to do this now, before I'm in the middle of canning, for a couple of reasons. One, canning lids and similar items often go on sale in the spring. Two, having everything I need on hand reduces stress and the need to go into town at the last minute because I have pounds of produce that need immediate canning. I've bought some lids, and also a few seasoning packets. I don't typically use those - homemade seasonings are better. But I do like to have a few on hand for making pickles.
The Heavy Hitters
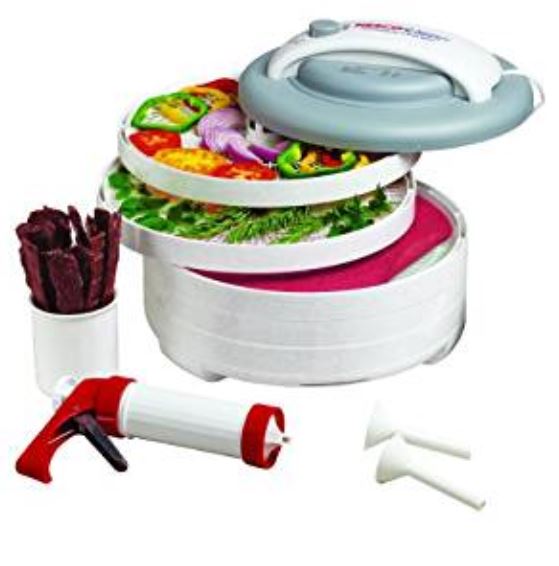 I've loved my Nesco dehydrator for years.
And of course, I couldn't do any preserving without my heavy hitters on hand - my Nesco American Harvest dehydrators (I now have two, with added trays) and my Presto pressure canner, which I also use as a water bath canner. I still need to pick up an extra sealing ring for the canner; having a new one on hand is a must, because if I'm in the middle of canning and the ring stops working, the last thing I want to do is abandon everything and run to the store. Incidentally, years ago, I bought a rocker gauge for this canner so I wouldn't have to go to the Extension office every year and have the pressure regulator checked. (More on that here.)
 My Presto pressure canner is high capacity.And...The Preserving Kitchen
My other - rather large, ahem! - preserving investment comes in the form of beginning work on my preserving kitchen. Why would I want a separate kitchen just for preserving? Well, for one thing, my kitchen stove runs on a propane tank. I can't imagine how many times I'd have to refill that tank if I canned on it. For another, it's hard to boil water on my stove; I don't know if I could get a canner up to temperature. And finally, in the summer, canning inside makes the house so hot. Since our house has a lot of thermal windows in the combined kitchen and living area, and since the house is well insulated, this is a much bigger problem here than it was when we lived in a leaky 1950s house in the suburbs.
I could definitely just create an outdoor canning set up with propane burners, but...we have the original homestead building sitting near the house and it's already wired and plumbed. Right now, we use it for the washer and dryer - and we use the old tub inside it for washing the dog. But there's also an old farm sink with a drainboard in there...so all we really need is an electric stovetop. We plan to buy one used.
 The original, old building on our homestead...and my future canning kitchen.
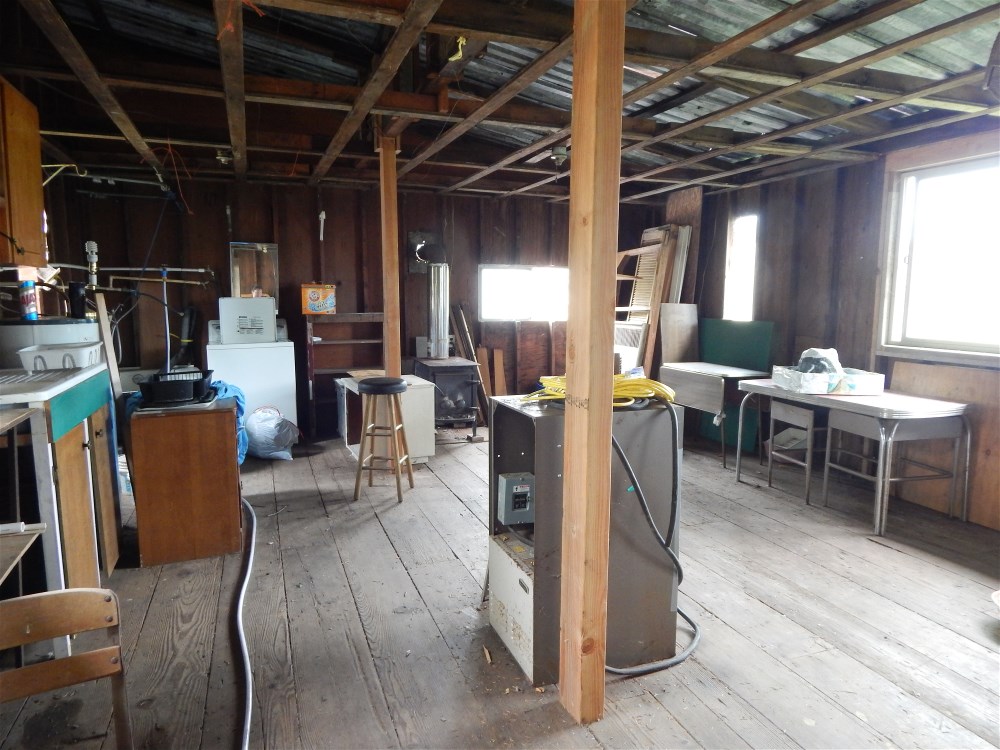 You can't see it here, but the old metal roof currently leaks like crazy.
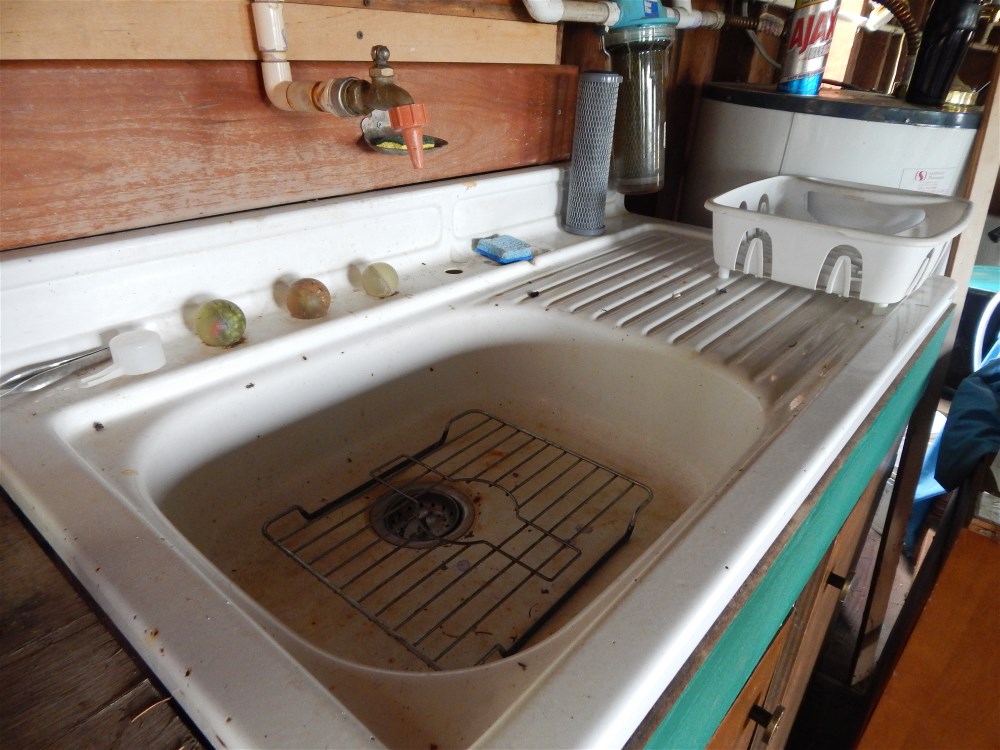 A lovely vintage farm sink. It just needs a little cleaning!
And then there's just the tiny task of filling in all the holes and cracks in the un-insulated, wood plank walls. And putting a new roof on. And adjusting the foundation. But, the contractor who's putting on a new metal roof is supposed to come today, so maybe I'll be using the canning kitchen sometime this year. How exciting would that be?!
June 8, 2017
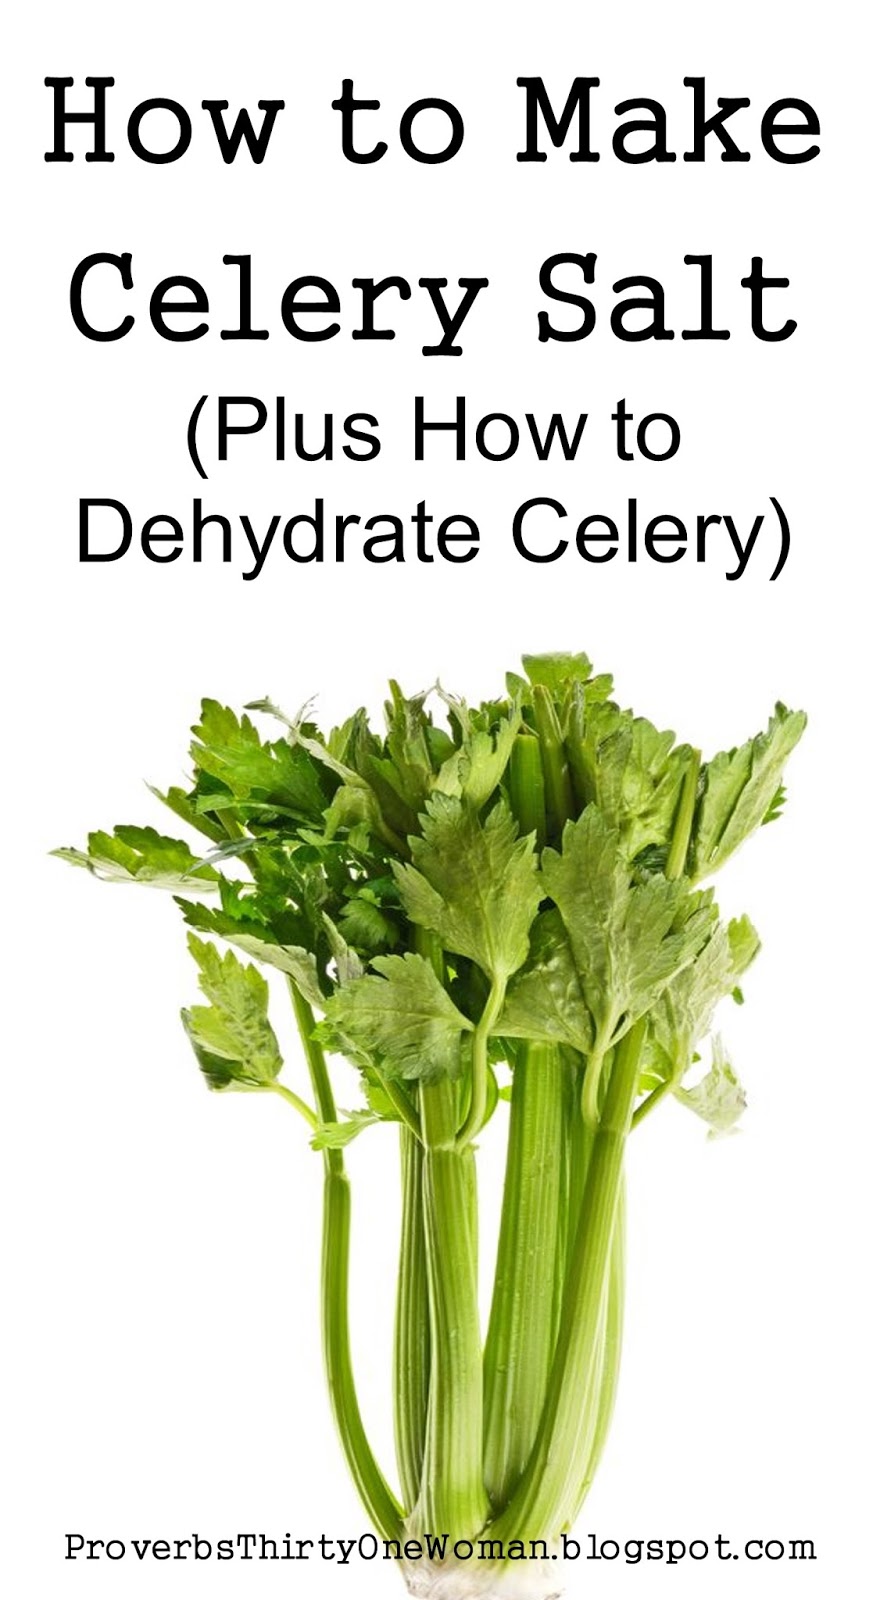
How to Make Celery Salt (Plus: How to Dehydrate Celery)
 This post contains affiliate links. All opinions are my own. Please see FCC disclosure for full information. Thank you for supporting this site!
We have but one celery plant in our garden, yet it's enough to supply all our celery needs. That's because celery is a "cut and come again" plant, meaning you can cut off the stalks and new ones will grow in their place. Given that our plant is prolific, and given that it's getting huge now that it's spring, I recently cut all the larger stems off and decided to preserve them as celery salt (SO delish on meat and eggs!). I also made some plain dried celery.
Dehydrating the celery was easy: I cut up the stalks, laid them on dehydrator trays (covered with fruit roll sheets that prevent small pieces from falling through the trays' holes), set the dehydrator to 135 degrees F., and waited for the pieces to dry. It only took about 5 hours. These chopped, dried, stalk pieces are perfect for adding to soups and stews, come cool weather.
But I also had a ton of celery leaves I wanted to do something with. When I cook with fresh celery, I normally chop up the leaves and add them to whatever I'm cooking. They add celery flavor, but not crunch. So I dehydrated the leaves, too - and could have left them as is, to also add to soups and stews. But instead, I made really yummy celery salt.
How to Make Celery Salt
You can make celery salt with dried celery leaves, dried celery stalks, or even with celery seeds (but not seeds designed for planting in the ground; they may be treated with chemicals). For salt, I recommend sea salt, since table salt or iodized salt will impart a less pure flavor. You may use either coarse or fine salt.
1. Powder dried leaves, stalks, or seeds. I used a food processor, but you could use a blender. If you're using leaves, a mortar and pestle, or even your fingers, will also do the trick.
2. Combine the salt and celery powder. The ratio you use is a matter of personal preference. I used half and half (equal parts), but some people prefer a 1:2 ratio, using more of whichever flavor, salt or celery, they want to emphasize.
3. Pour the celery salt into an air tight container, like a glass jar with a lid.
Watch this video to see just how easy it is!
June 3, 2017
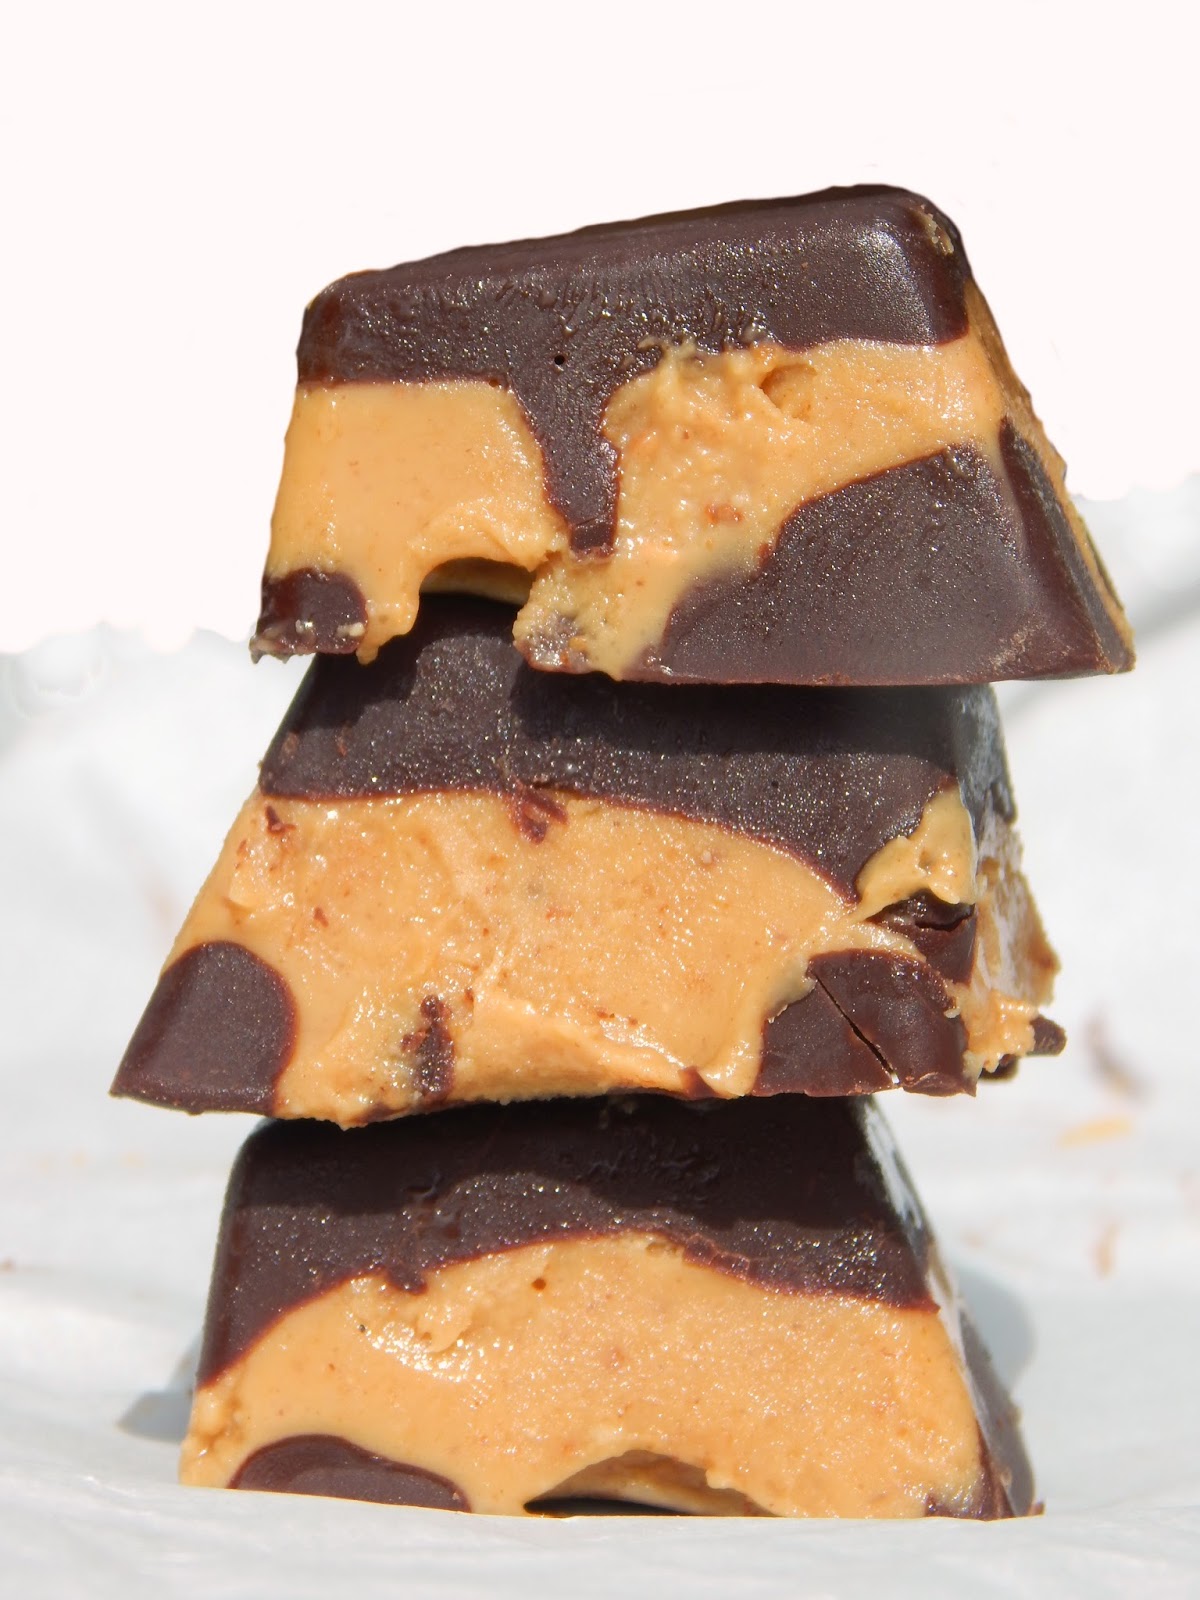
Crazy Easy No Sugar Chocolate Peanut Butter Bites
 Here's a recipe I think everyone can agree is healthier than that certain famous peanut butter candy - and delicious, too. There are tons of copycat recipes for that famous brand, and even many no-sugar and keto-friendly adaptations. But I wanted to make something simple. I wanted to make something without any added sweetener. And I wanted a treat - a fat bomb - that would satisfy me. Here's what I whipped together. And now my only problem is they are so yummy, I'm tempted to sit down and eat them all!
Those of you eating carby foods will, I hope, appreciate this as a good alternative to sugar-laden candy. Each piece is only about 9 calories. But those of you in the low carb or keto world will also enjoy this treat as a dose of fat that will keep you filled up and satisfied until your next meal. In fact, if you want to make this recipe even fattier, you can easily do so by simply adding more coconut oil.
Do we miss the sugar from that famous brand? Nope. Even my sugar loving kids beg for these babies.
And by the way, this recipe also proves you don't need to buy special fat bomb making molds. My sis-in-law actually recommended an ice cube tray, which most of us still have laying around somewhere or can buy for a buck at Walmart. It works perfectly for this recipe.

Crazy Easy Chocolate Peanut Butter Fat Bombs
Note: I used Lilly's dark chocolate chips, which are lightly sweetened with Stevia. You could also use a chopped up Lilly's chocolate bar, or any other no sugar, low carb candy bar you prefer. Many health food stores carry Lilly's; if not, Vitacost has the best online price I've seen. And hey, place your first order with them, though this link, and you'll get $5 off your order!)
6 oz. Lilly's dark chocolate chips
2 teaspoons coconut oil
Natural, no sugar added peanut butter (I used Adam's; you could also use other no sugar added nut butters.)
1. In a small saucepan placed over very low heat, melt the chocolate chips and coconut oil, stirring often until smooth.
2. Spoon about 1 teaspoon of melted chocolate into the bottom of one cube in an ice cube tray. It should make a rather thin layer of chocolate.
3. Put about 1 teaspoon of peanut butter on top of the chocolate.
4. Drizzle about 1 teaspoon of melted chocolate over the peanut butter.
5. Repeat until the chocolate is all used up. Freeze.
Makes about 17 cubes.
Approximate Nutrition per cube: 1.17 g. carbohydrates; 2.74 g. fat; 1.3 g. protein; .33 g. fiber; 9.15 calories. (I recommend you do your own calculations based on your ingredients and the size of your ice cube tray.)


