
Becca Hillburn's Blog, page 44
April 13, 2016
How To Approach that Artist You Admire At Conventions
You are absolutely, definitely 100% encouraged to approach artists you admire at conventions. As someone who has been on both sides of the table- the busy artist AND the nervous fan, I can appreciate both situations. And as someone who's been in both positions, I can offer some advice that should help ease anxieties about what's ok and what isn't.
1. If you can, message them ahead of time! Let them know you'll be there, and ask when a good time to swing by and chat would be. Most artists are beyond delighted to meet up, and can recommend a time where they won't be swamped with other customers.
2. If you want an artist to look at your portfolio, doing the above will definitely help, but if you meet an artist for the first time at a show, and would like them to look at your portfolio or sketchbook, please consider limiting how many images you show them. Up to 10 should be fine, but any more than that gets overwhelming for the artist. You should also wait for a time when the con is slower, or arrive early (Fridays are usually good, early Sat is usually ok, but Saturday afternoons and Sundays can be very hectic for commission artists). Please be respectful of the artist's time- they're tabling to make money, so if you can afford to do so, please purchase something. It doesn't have to be expensive, but if you like an artist enough to ask for their opinion on your art, you should like them enough to want to support their endeavors too! Time spent looking at your portfolio is time not spent working on commissions or engaging customers.
3. Please don't take photos of the artist's booth without permission. It's become very common for artists to rip off other artists' designs and ideas this way. If you'd like to take a photo so you can remember to visit the booth again, or to show a friend who might be interested, please ask first- and let the artist know that's why! Otherwise, just take a business card.
4. Please DON'T hit on artists while they're working. Conventions are a work environment for many of us, and we are there to make money.
5. Please don't critique or insult the artist's work. If you don't like it, don't buy it and move on. Tabling at a convention is not an invitation for critique, and this is seen as rude.
6. Don't be a booth barnacle. Spending more than 10 minutes at a table (especially one where you don't yet know the artist, and don't intend to buy) just because you are bored is a huge distraction to the artist, and it deters other customers from buying.
7. Don't invite yourself behind the table. That's the artist's personal space- they keep their supplies and money back there.
8. If you don't know the artist well, please don't be offended if we can't accept your home made baked good. If you really want to bring a treat for your favorite artists, something that's prepackaged is usually welcome.
9. Some of us are great at remember names, some of us are good at faces. I personally remember commission customers best. Some of us do so many conventions that everything's a blur. Please don't be hurt if we don't remember you immediately.
10. If you've arrived early, and we're still setting up, please be respectful of that. Some of us will encourage you to go ahead and look, some of us would rather focus on setting up, and may ask you to return later. Saying 'no, that's ok' and continuing to hang around is distracting and rude.
11. Don't worry about coming across as shy or awkward- many of us are the same way. You're perfectly fine.
12. Don't worry about coming across as over eager either- your energy energizes some of us!
13. If an artist seems busy, or doesn't notice you at first, please don't bang your hand on the table, snap, or whistle at us like we're dogs. Just say 'excuse me' in a voice that's loud enough to carry over the noise of a convention. I promise, we're not ignoring you (unless you've broken a couple of the above mentioned suggestions), we're probably getting organized, promoting our con appearance on social media, making sure our finance apps are working for the show, sorting money, or working on a commission.
14. If you are an artist who has benefitted from the knowledge, advice, or experience of another artist, it is considered a professional courtesy that you go over to the front of the table, check out their work, and say hi. Anything less, unless the con is just ridiculously busy and you don't even have time to pee, is rude and dismissive of the work they've shared with you. There is no requirement to buy (although that's a fantastic way to say 'thank you for the hard work you shared so freely'), but you should at least respect them enough to be interested in their work, even if this work doesn't directly benefit you as a convention artist. We do not exist as individuals, we do not table in a vacuum, and no artist is so well off that they wouldn't appreciate A: your thanks and B: your support. If you can't make time at some point to go over and say hi at their tablefront, you could always make it a point to check out their shop, their website, and shoot them an email. Artists who have freely shared their experiences are trying to contribute to a better artist alley community, and deserve your recognition.
Please consider donating to this blog or purchasing from Natto-shop (http://nattosoup.com/shop) if you want me to continue publishing quality content. All materials tested were purchased from my own pocket. Keep on Truckin' Nattosoup is not under any sponsorship.


April 10, 2016
1000 YouTube Subscriber Giveaway!
My YouTube has just reached an exciting milestone- 1k subscribers! To celebrate, I'm hosting a giveaway- I'm giving away a carefully curated set of Blick Studio Brush markers to one lucky winner! The rules are simple- pick one of the below prompts to answer in the comments of my 1k Subscriber Giveaway Video, and you're entered to win.
Prompt 1. What's the first thing you plan on illustrating with your new alcohol markers? Please be specific.
Prompt 2. What first inspired you to pick up a pencil/paintbrush/wire and start creating art?
Prompt 3. Who is your favorite artist, and what is one enduring lesson you've taken from their work and applied to your own?
Prompt 4. What is one thing you'd like to share with other artists that you've learned during your artistic journey?
The Prize
A carefully curated set of Dick Blick Studio Brush marker alcohol markers, handpicked by me. This set includes the 6 piece primaries set (black, canary yellow, dark green, red, ultramarine, violet) as well as 23 hand selected markers (including a blender). Colors include:
Camel
Sienna
Beach
Butter Cream
Warm Gray 10%
Gray Lavendar
Sepia
Warm Gray 90%
Dark Umber
Stone
Sand
Light Umber
Warm Gray 70%
Walnut
Warm Black
Coral Pink
Spice
Peach Blush
Dark Brown
Latte
Shell
Tan
Colorless Blender
These markers were purchased out of my own pocket, with no donated items.
The Rules:
This giveaway is not affiliated with, or sponsored by YouTube or DickBlick, it is sponsored by Nattosoup Studio Art and Process Blog, and Nattosoup Studio's Patreon. Contestants must be 18 of age or older to win, or must have a parent's written consent emailed to me at becca.hillburn at gmail dot com. Failure to procure this consent unfortunately results in forfeiture of the prize.Winner will not be determined until May 1st or after- please do not inquire prior to then. Prize will be shipped out after winner is announced, at the cost of Nattosoup Studio.Multiple entries by same contestant will be deleted- if you would like to change your answer, please edit or delete your initial comment by April 28th.Winner must post reply to the comments section of my 1k Giveaway video, not to the comments on this post or through email.Winner is chosen at my discretion- based on my opinion of 'best answer'.Winner will be contacted by me after announcement is made.All responses must be civil and safe for work. Any responses that are rude, disrespectful, inflammatory, or overly graphic will be deleted and will not be up for consideration.
I plan on picking a winner (based on best response) by May 1st, and the winner announcement should be up on both the YouTube and this blog by May 2nd. You do not need to be a subscriber to enter, nor do you need to be a regular reader of this blog. This giveaway is just a way to show my appreciation and excitement for hitting 1k subscribers, and to share an under appreciated alcohol marker brand with people who might enjoy it.
If you haven't checked my YouTube channel out yet, and you enjoy this blog, I highly recommend you make it a priority to give it a glance. Just like with this blog, I share reviews, tutorials, demonstrations, and sketchbook tours, but in living, breathing movement. If you're having difficultly getting the knack of a technique, seeing it in motion may be just what you need.
Please consider donating to this blog or purchasing from Natto-shop (http://nattosoup.com/shop) if you want me to continue publishing quality content. All materials tested were purchased from my own pocket. Keep on Truckin' Nattosoup is not under any sponsorship.

April 8, 2016
Patreon Backer Bonus: Watercolor Tutorial- Negative Painting
My Patrons unlocked two bonus tutorials for February and March through their contributions on Patreon, and one of my lovely backers requested a tutorial through the blog. Happy to oblige, I began working on a tutorial on Negative Watercolor Painting, a technique that's gaining some popularity. I tried a couple new things that didn't work out so well in this post, so if you're interested in negative painting, please learn from my mistakes.

Materials I Used:Fluid 100 Watercolor PaperSailor Mitsuo Aida Brush Pen (inks)Molotow Grafx masking fluid penAssorted watercolor palettesPlastic watercolor paletteAssorted brushes, including syntheticsCopic Opaque WhiteCaran d'Ache Supracolor II watercolor pencil (white)
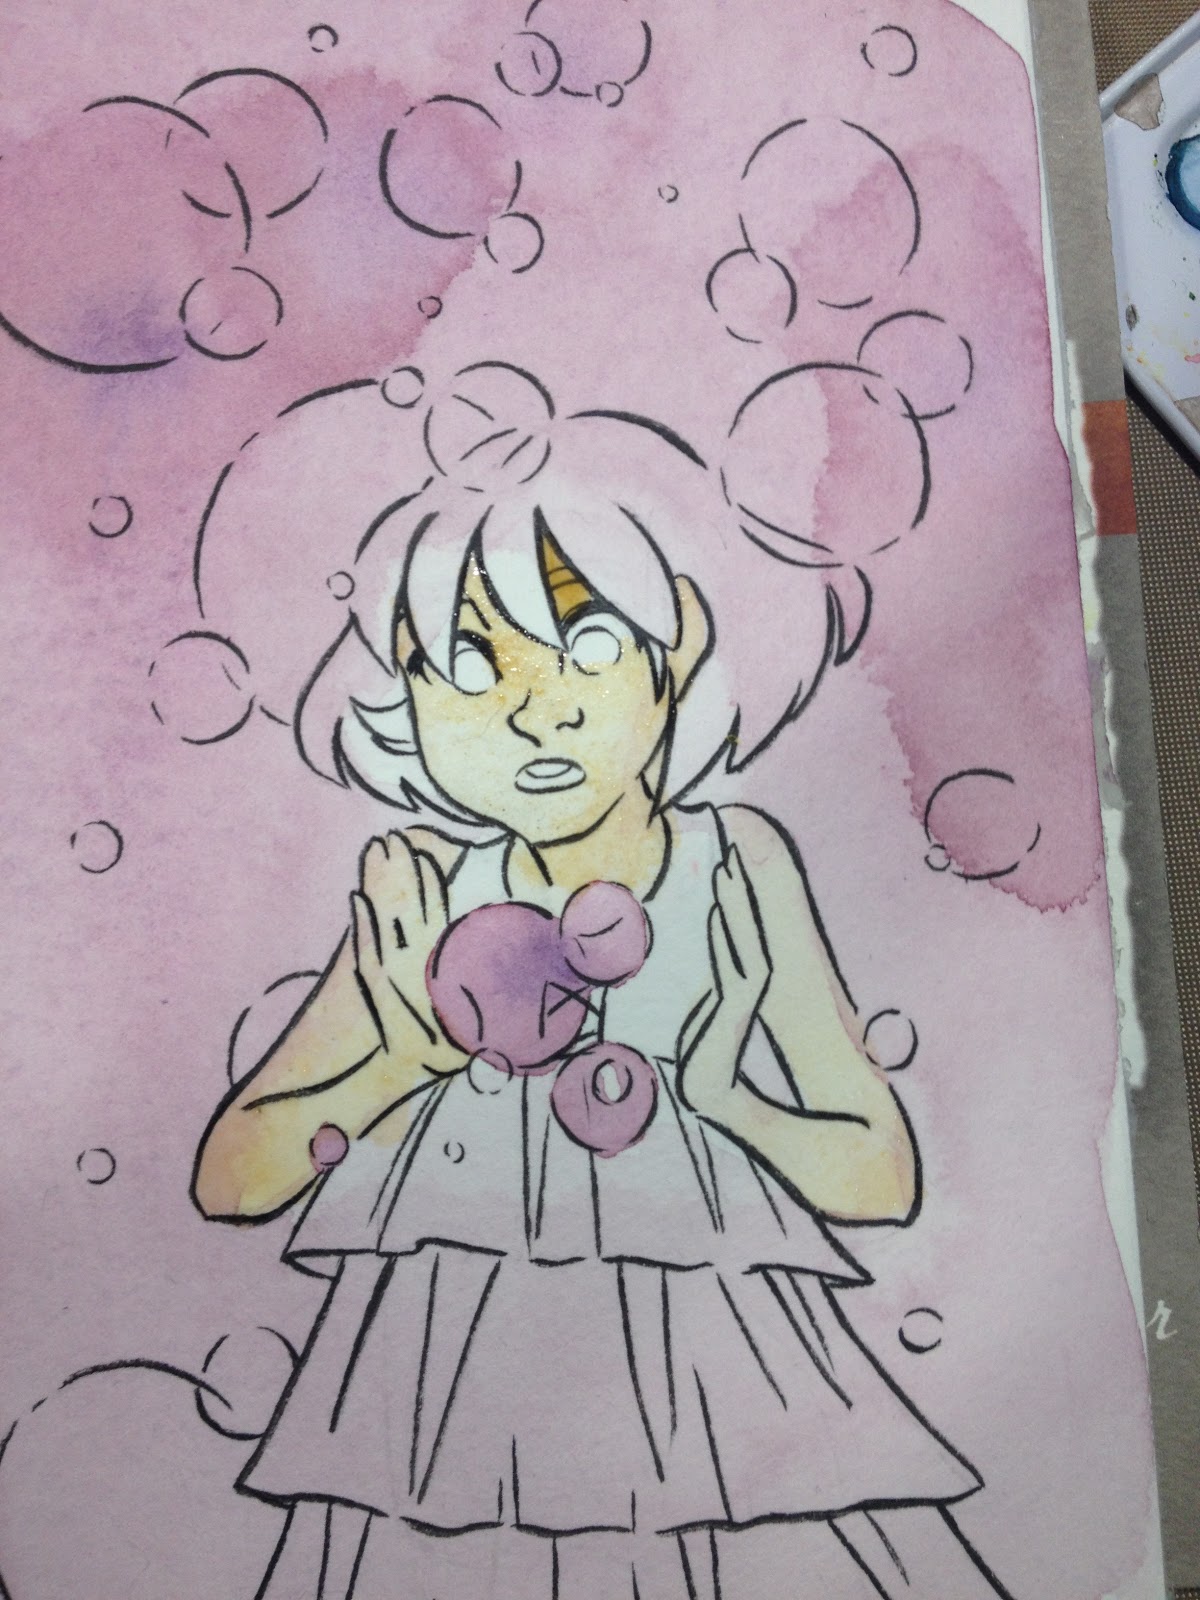
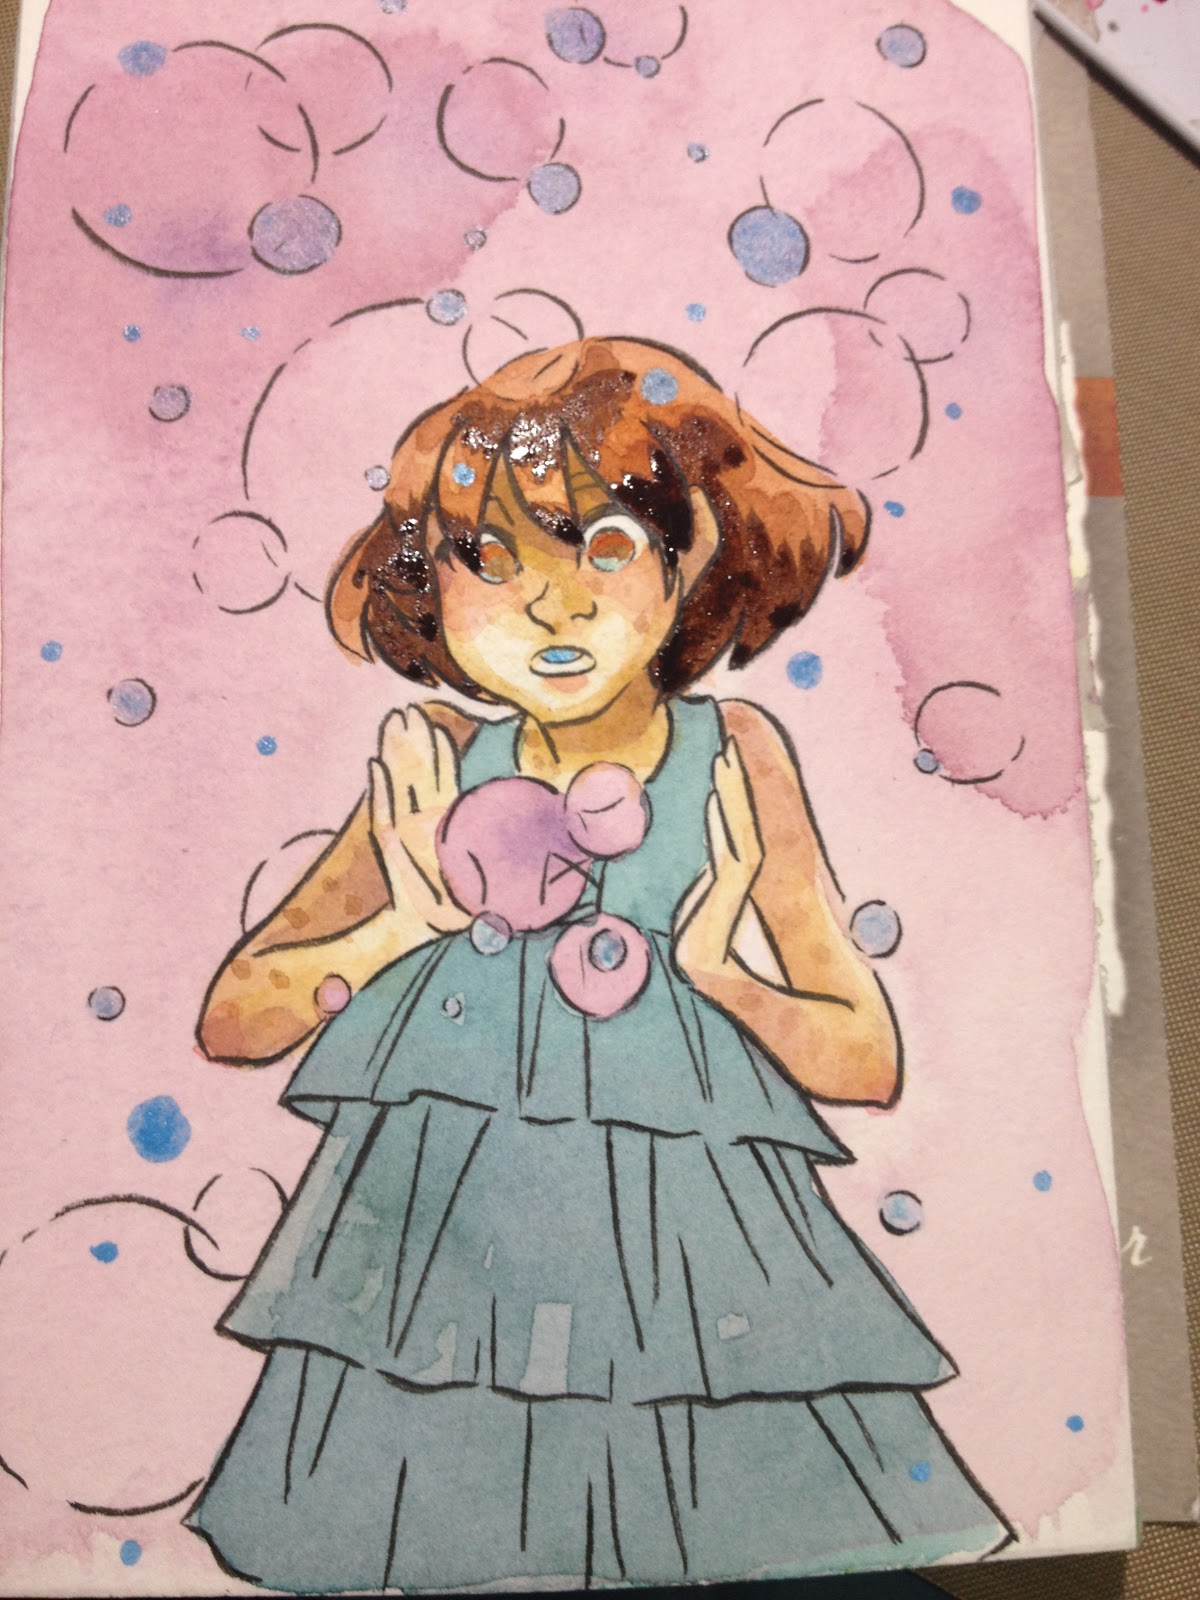
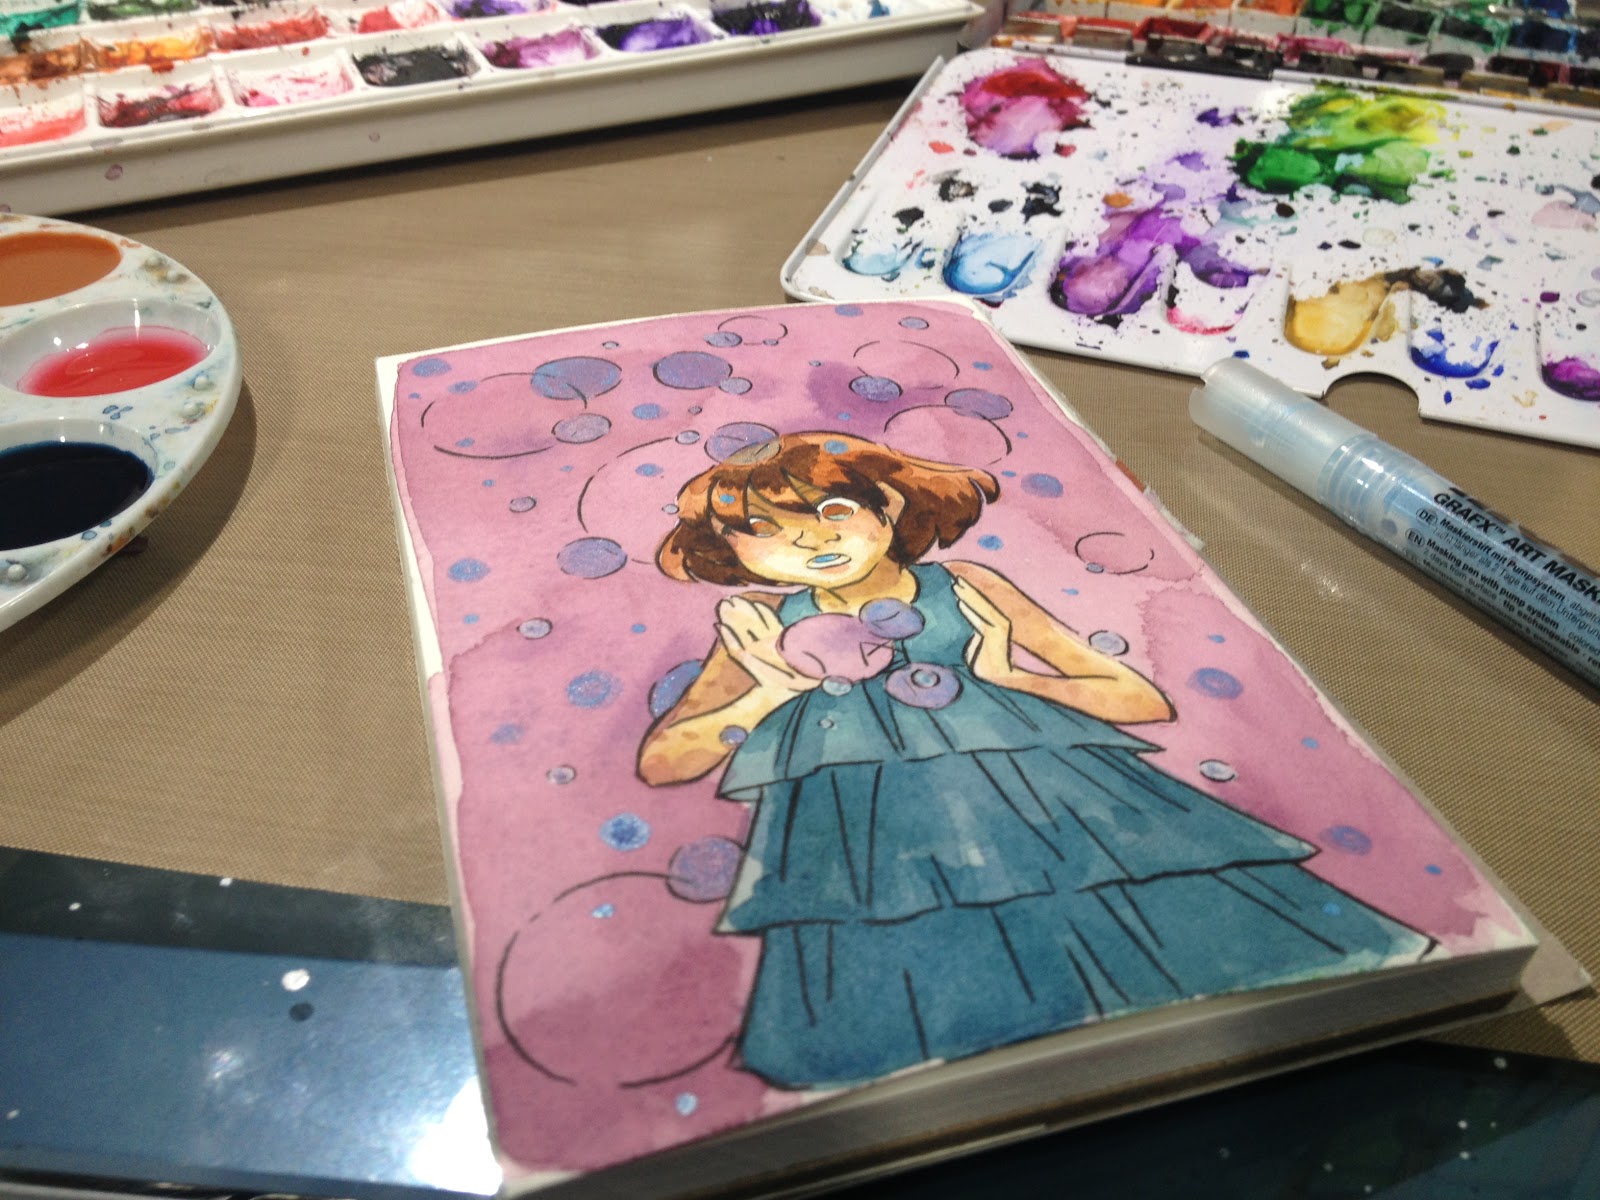
I begin this tutorial with an inked piece on Fluid 100 watercolor paper. Fluid 100 watercolor paper is the cotton rag option recently released by Fluid. I sketched and inked (with a waterproof Sailor Mitsuo Aida brushpen) a design of Kara surrounded by fireflies a few weeks before I got around to painting it, but as long as you allow your ink to dry for at least 24 hours, it should be good to go.

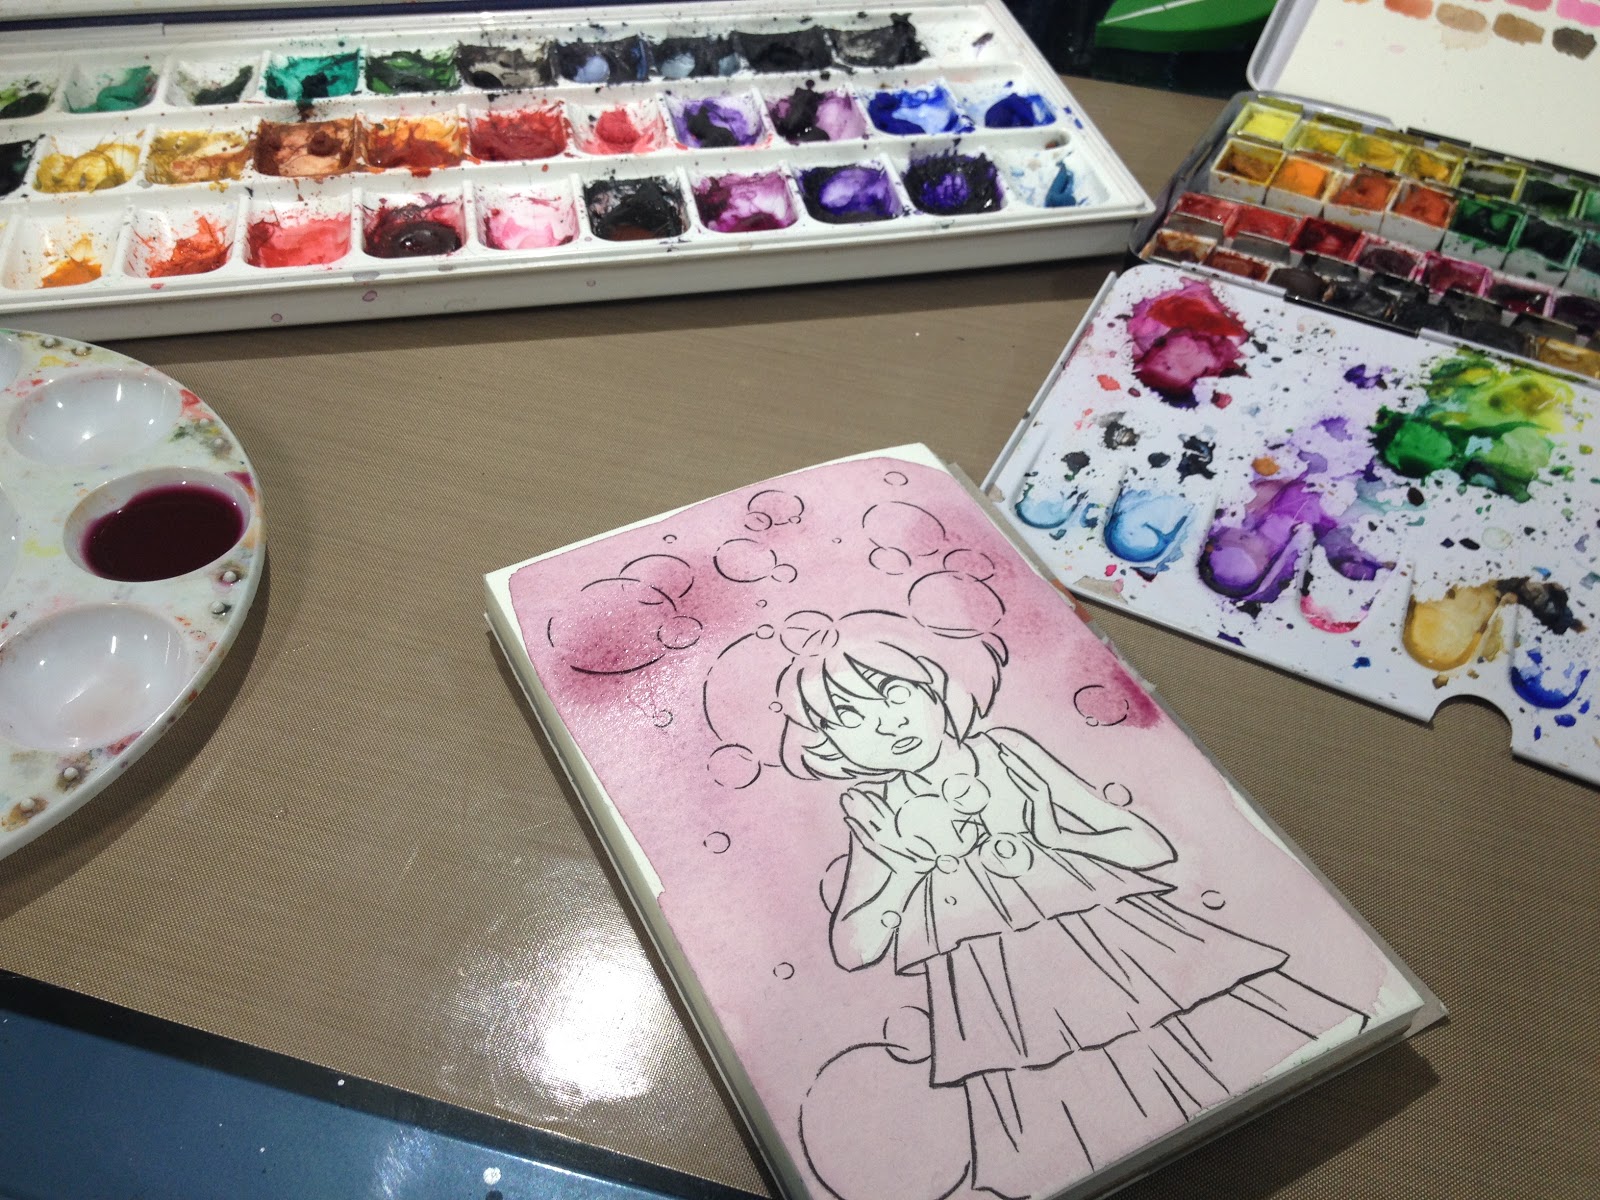
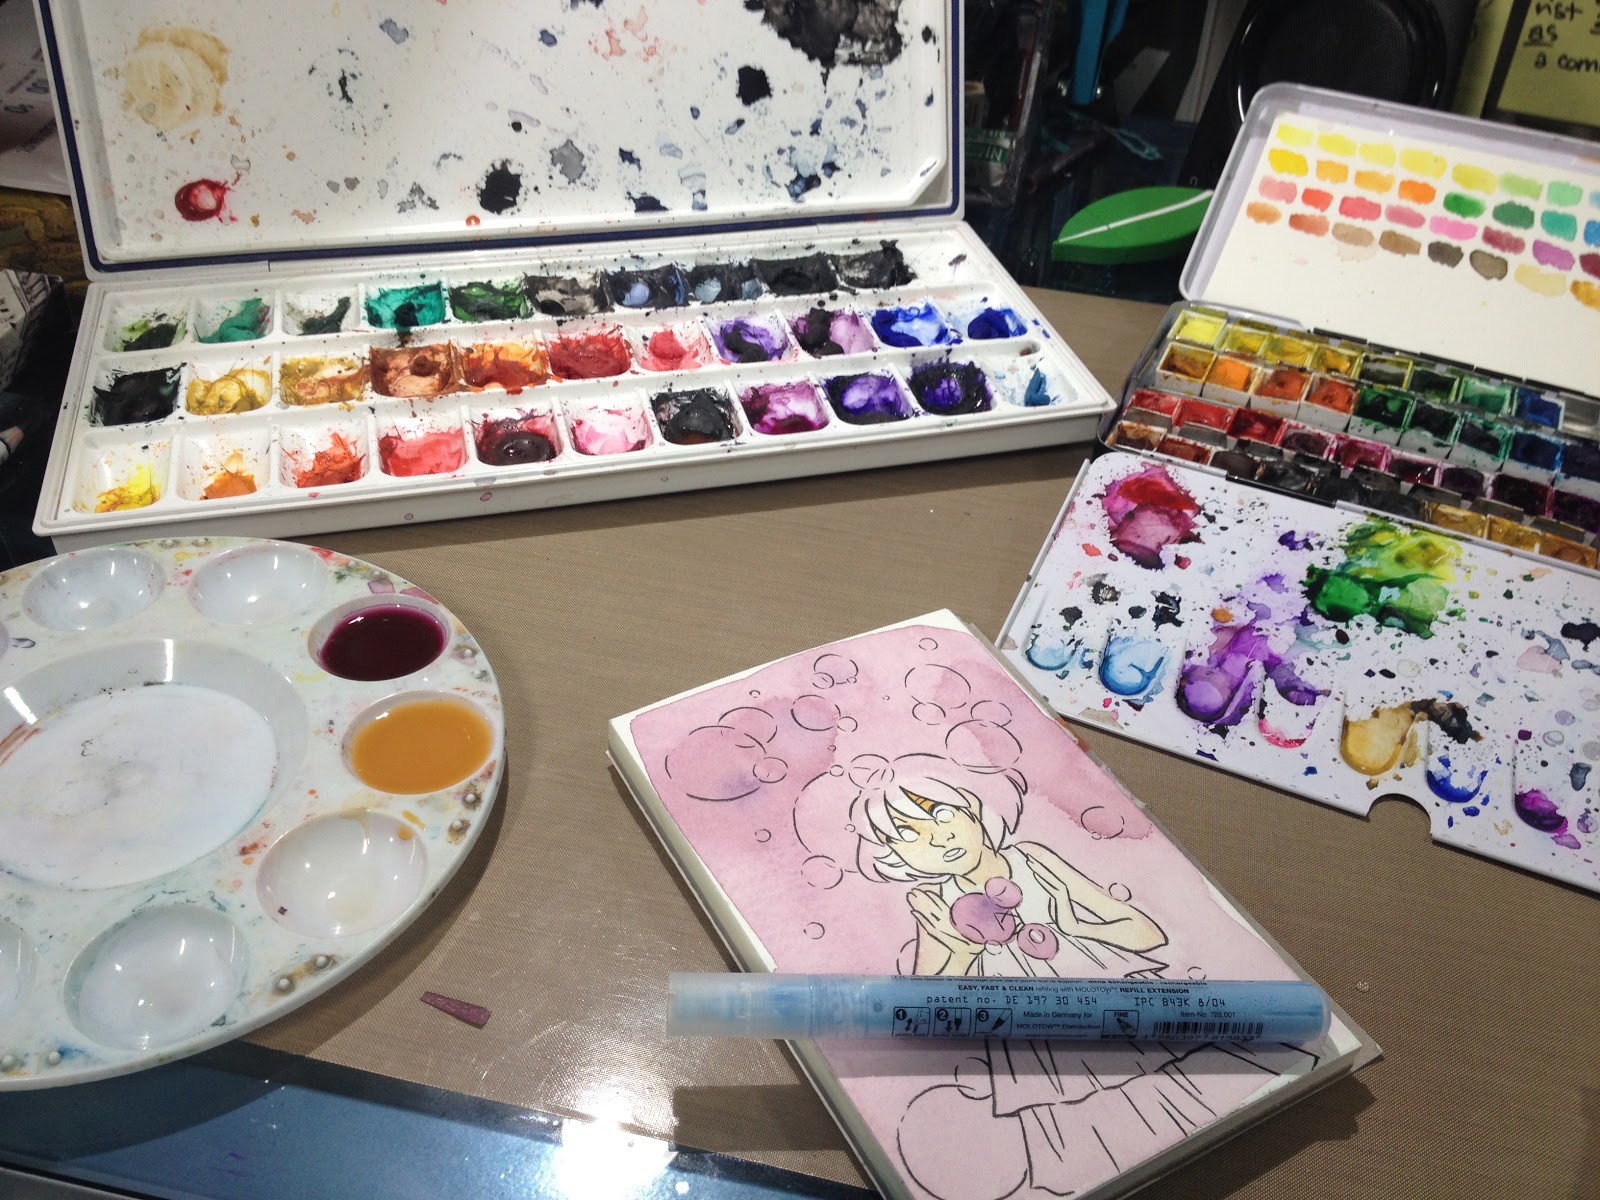
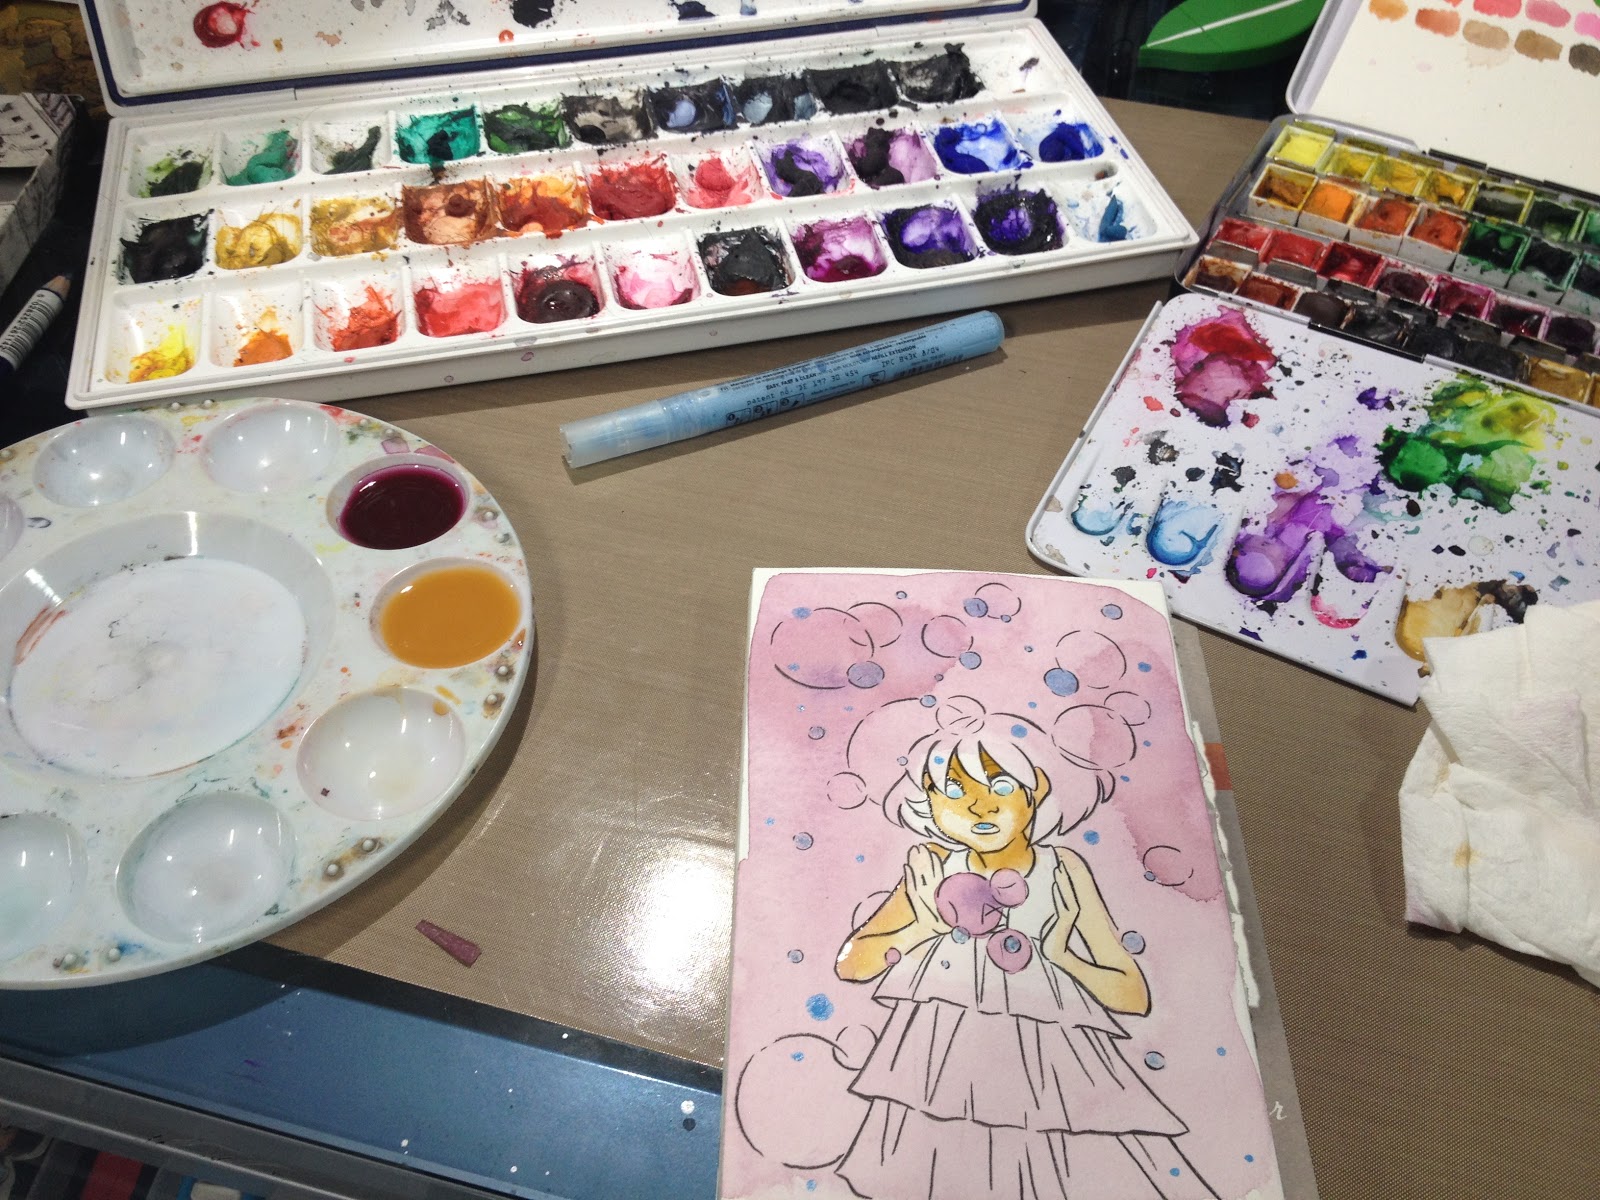
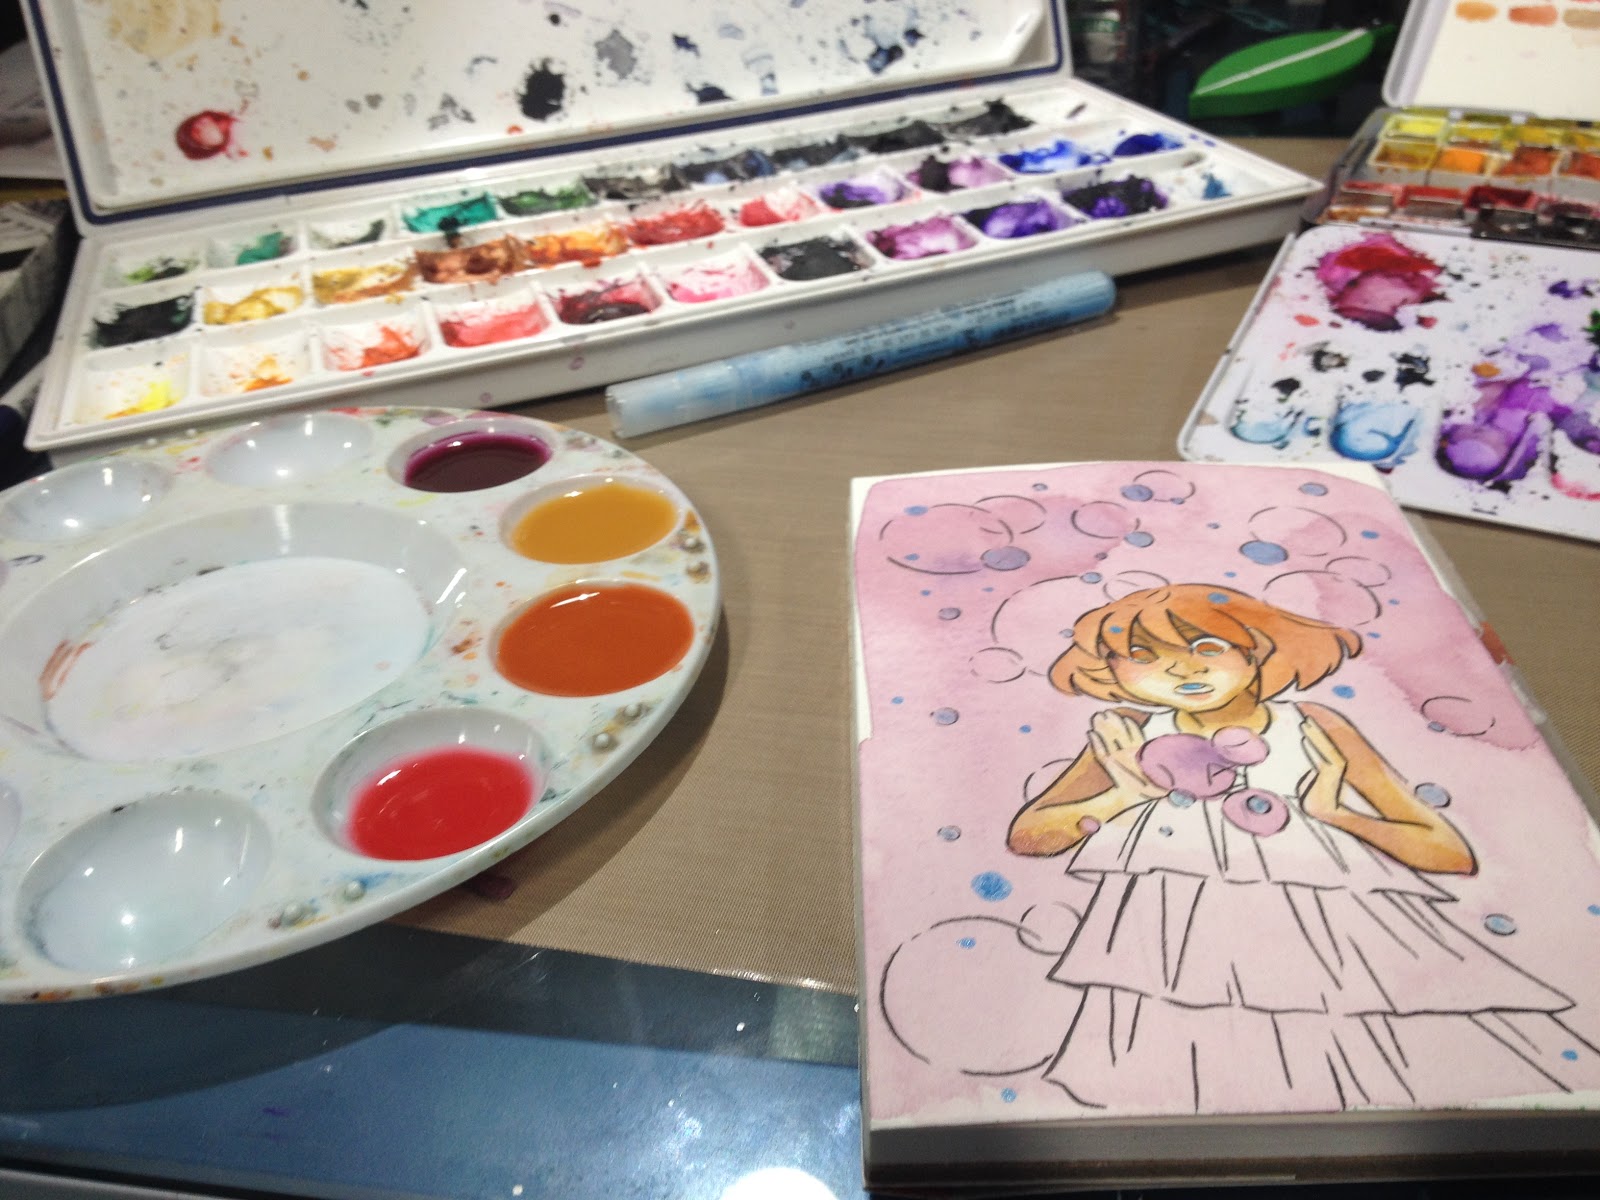
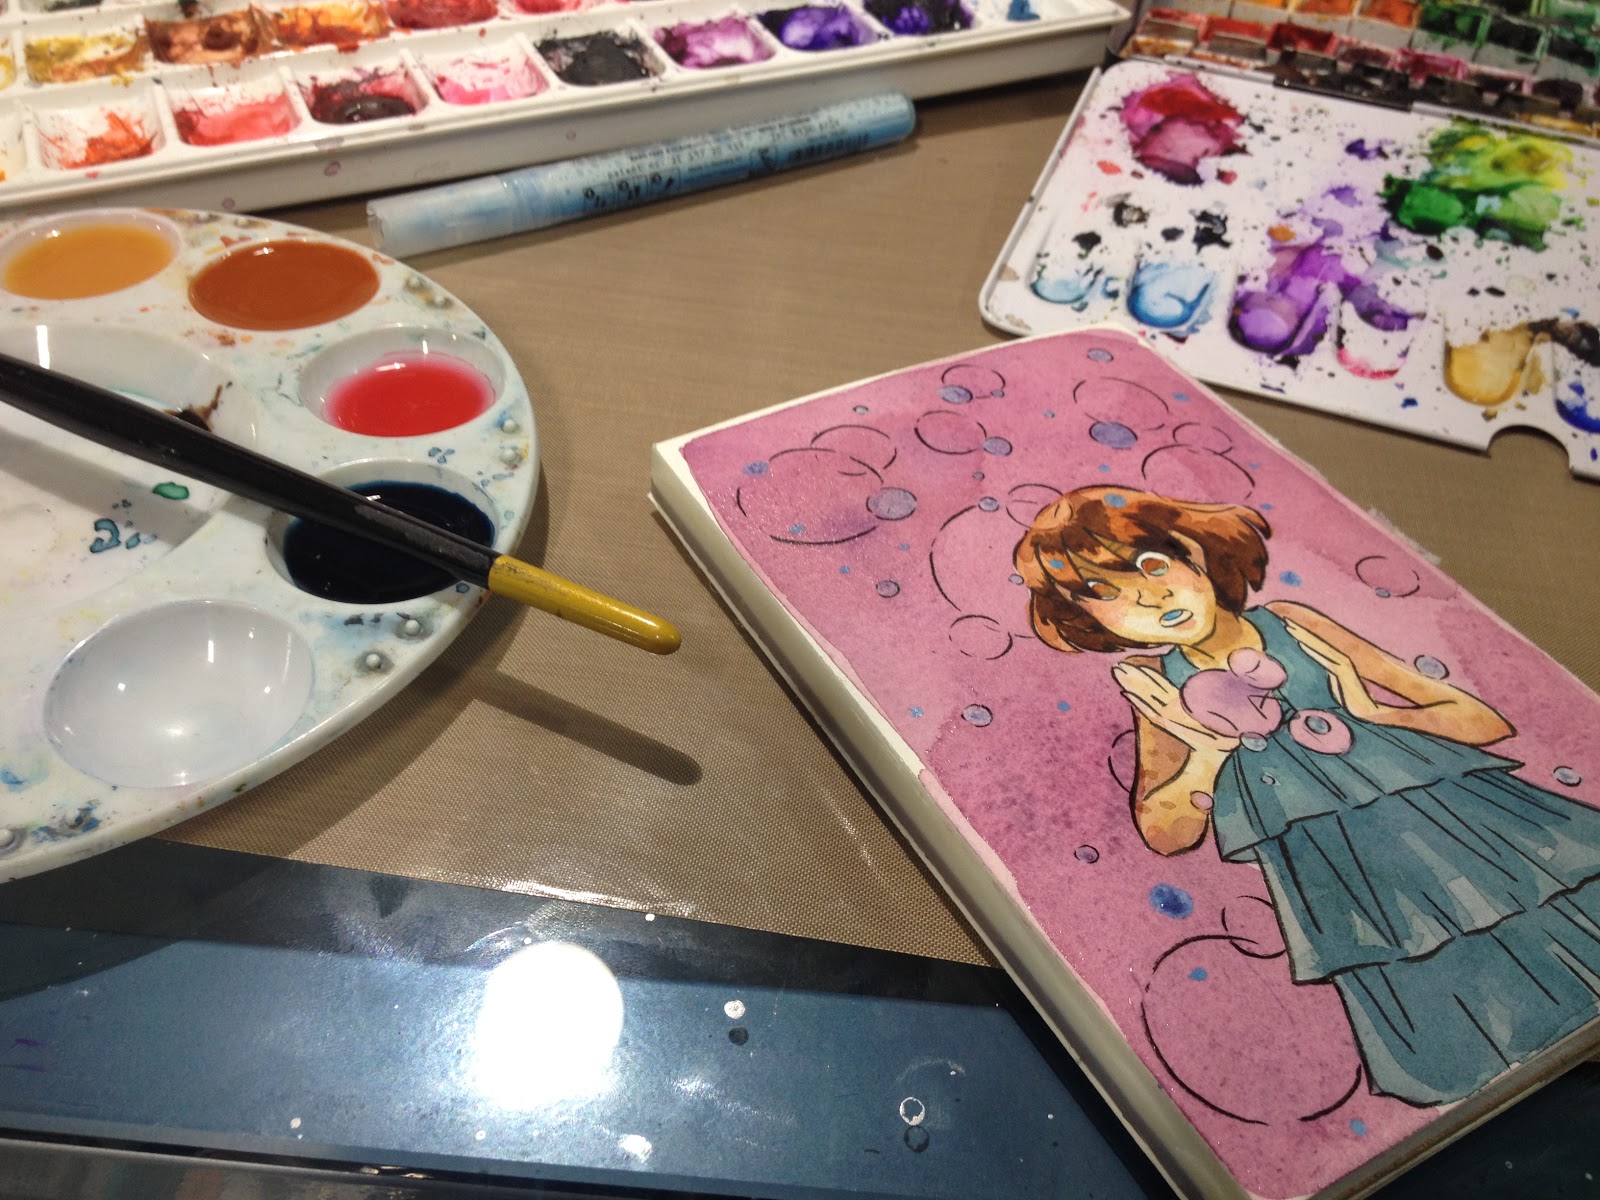
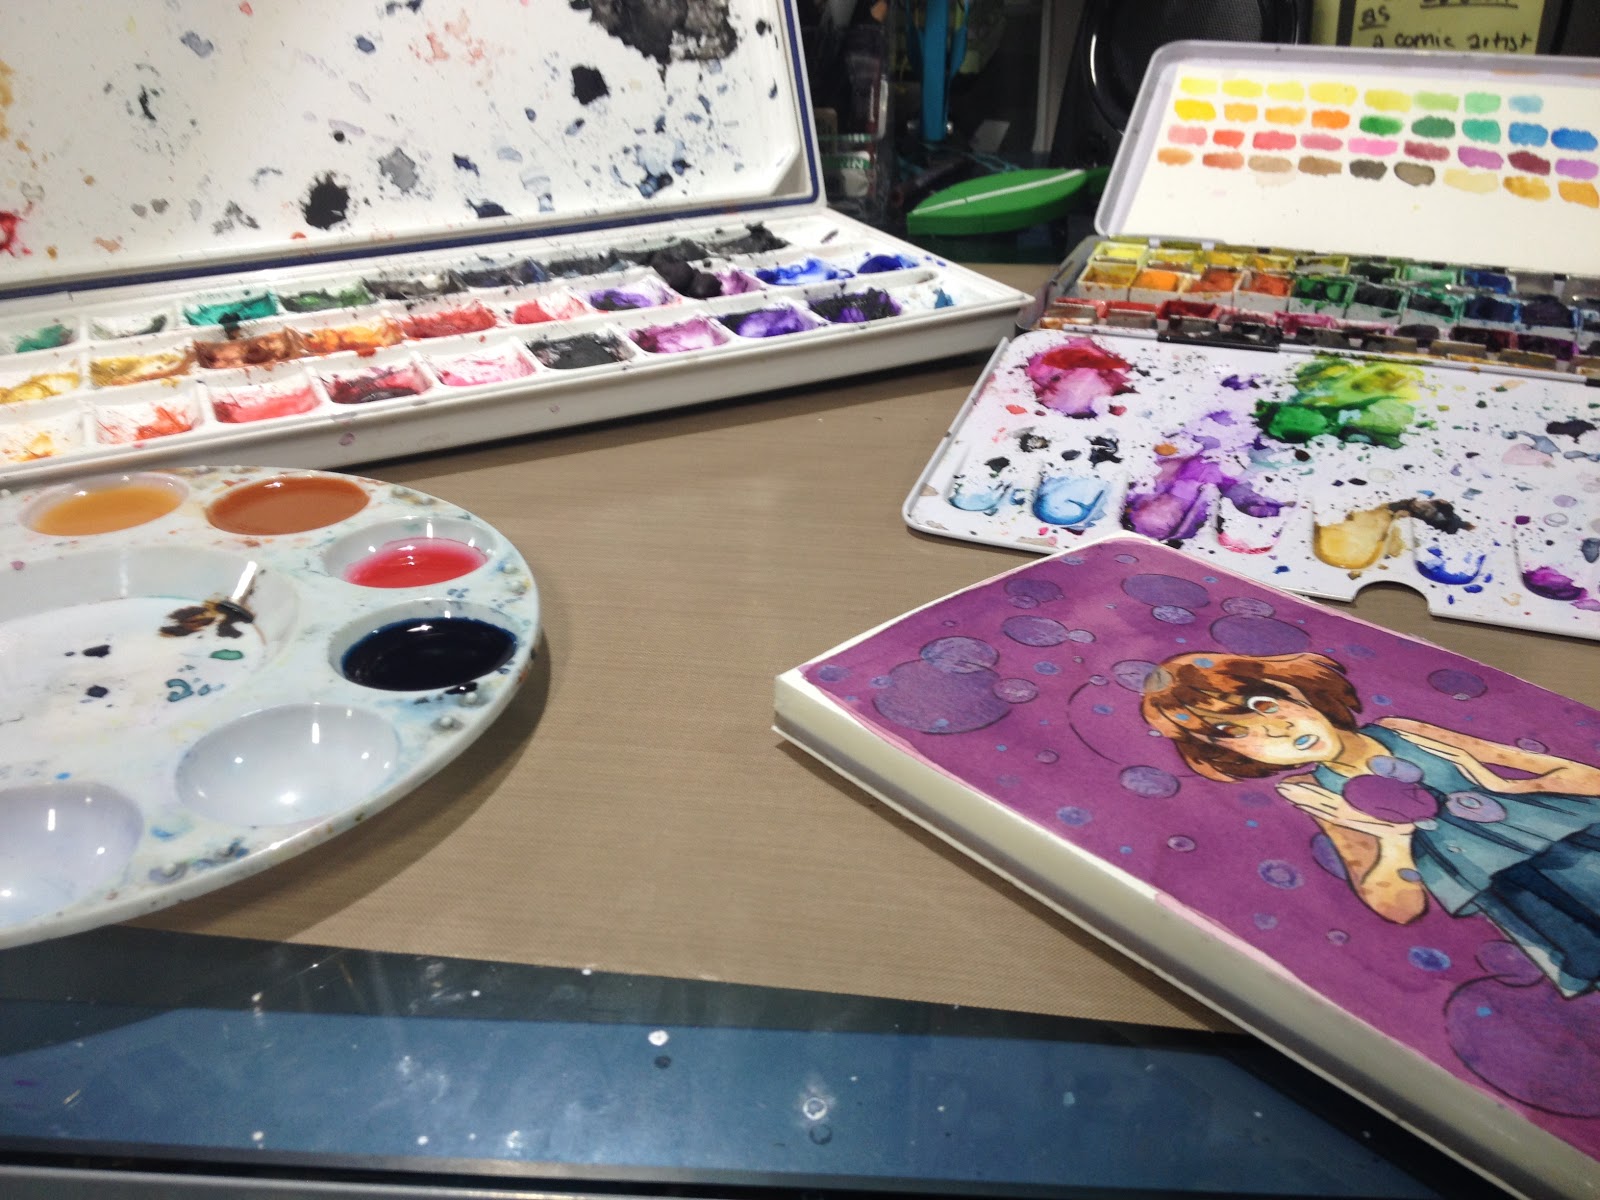
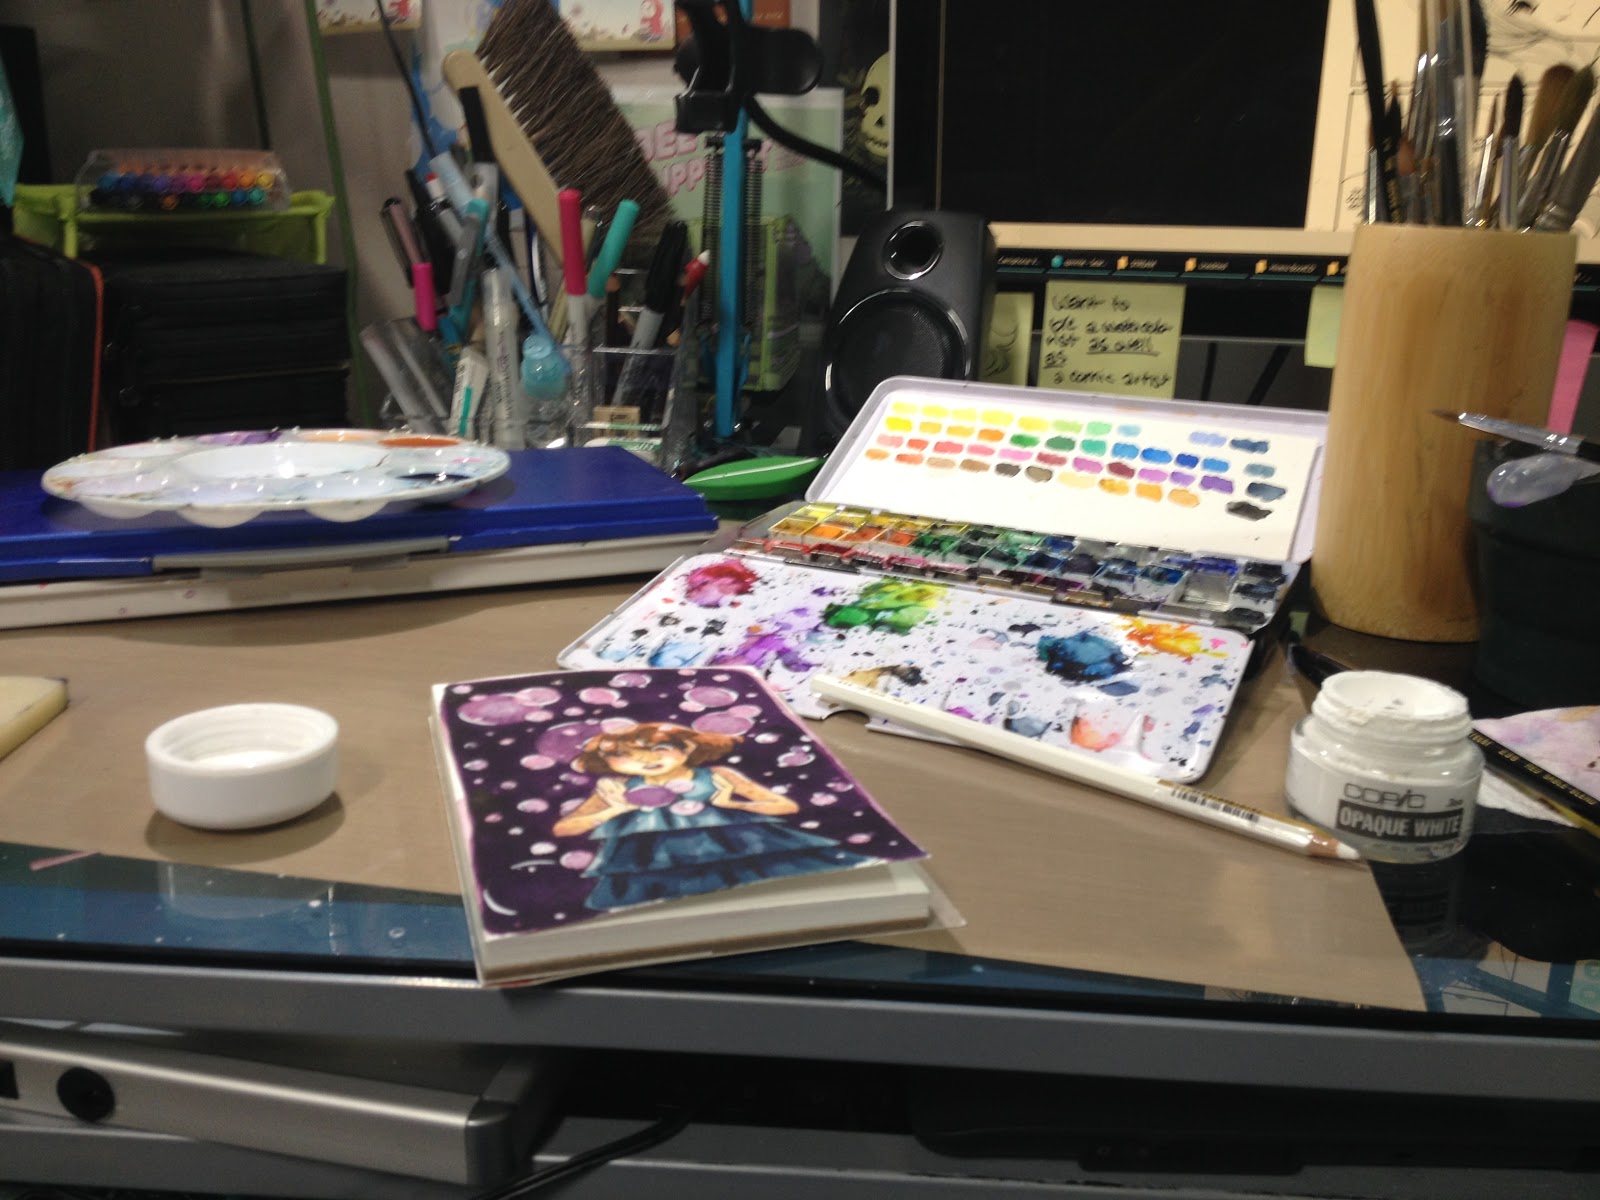
Here's my whole desktop setup. It includes a couple self-assembled watercolor sets- tube colors (left) and half pans (right), a round plastic palette, my illustration. My brushes are just off camera. You can read more about setting up your own palette of dried tube watercolors here.

I mixed my first layer of wash, to help establish the tone for everything, and to tint areas of Kara that wouldn't be lit by the fireflies.

And I used a Viva papertowel to dab up some of the excess wash- if you catch it while it's still wet, it's an easy way to do a glow effect.

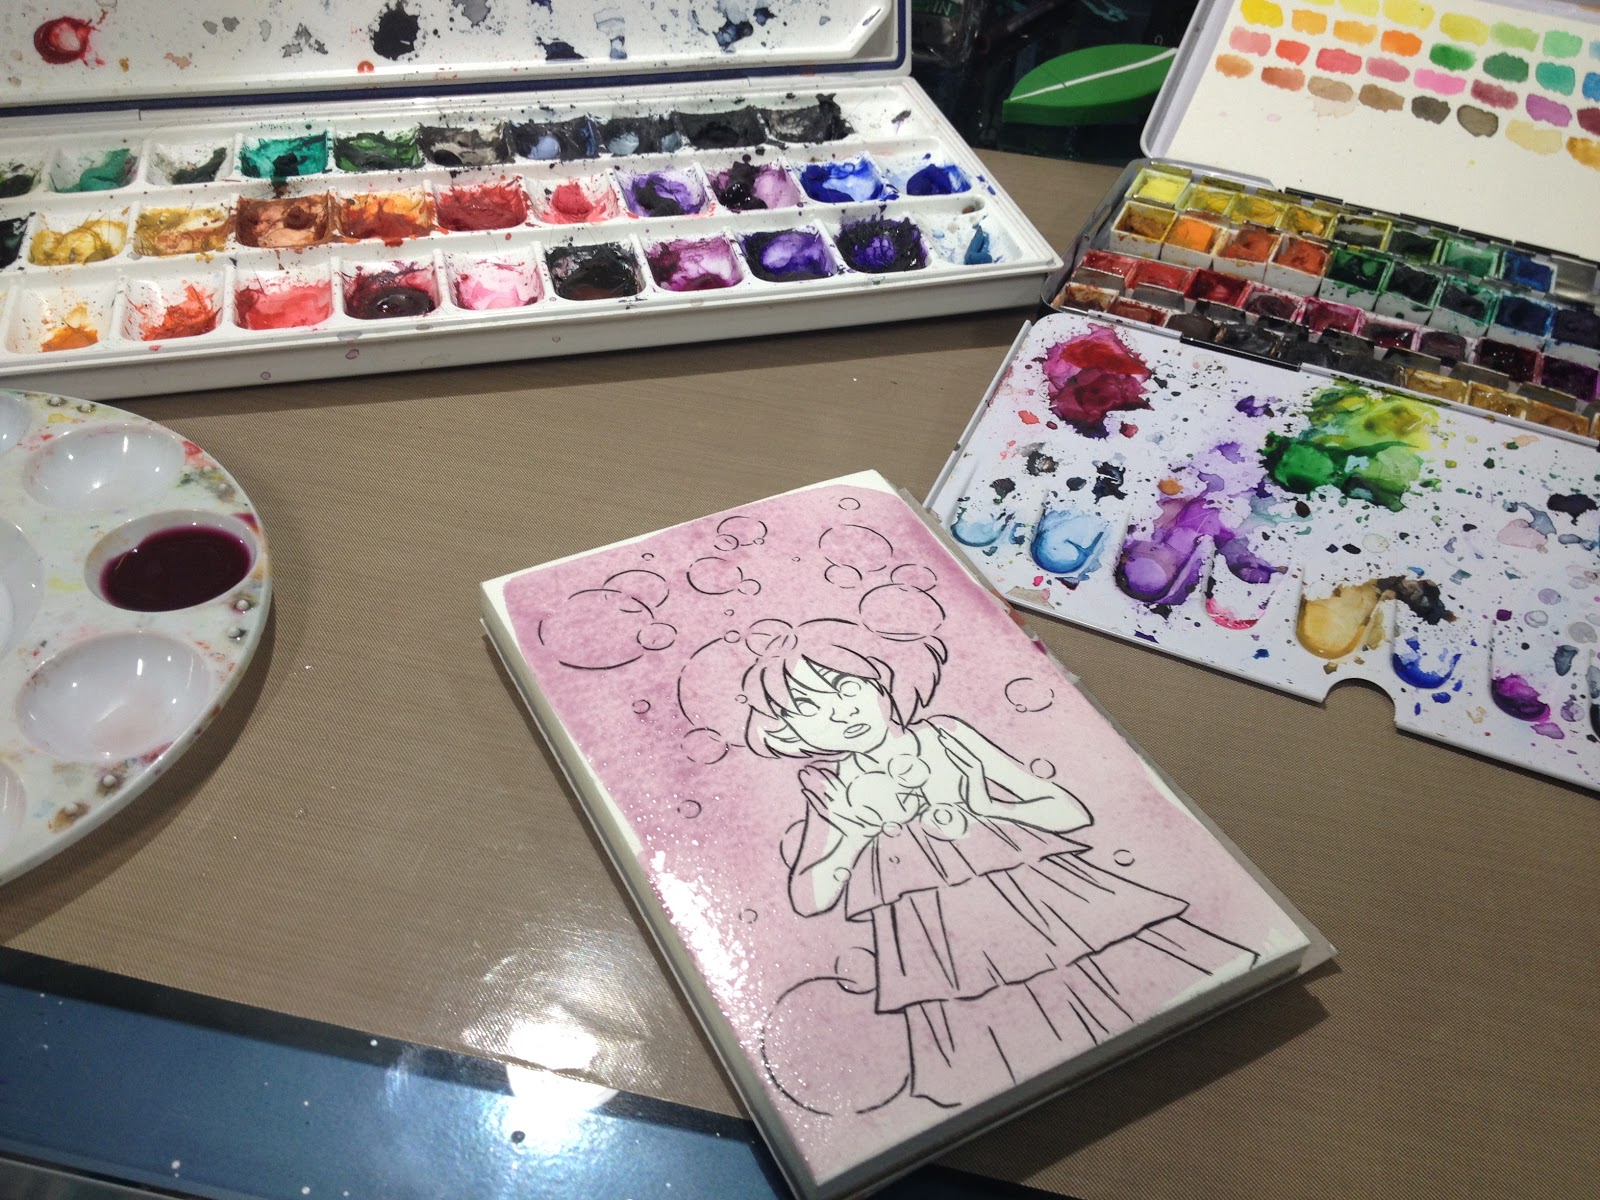
I also opted to darken a few areas selectively, to add a little visual interest.


And colored in the fireflies that cross Kara's skin. Retrospectively, I think I would have left them light.

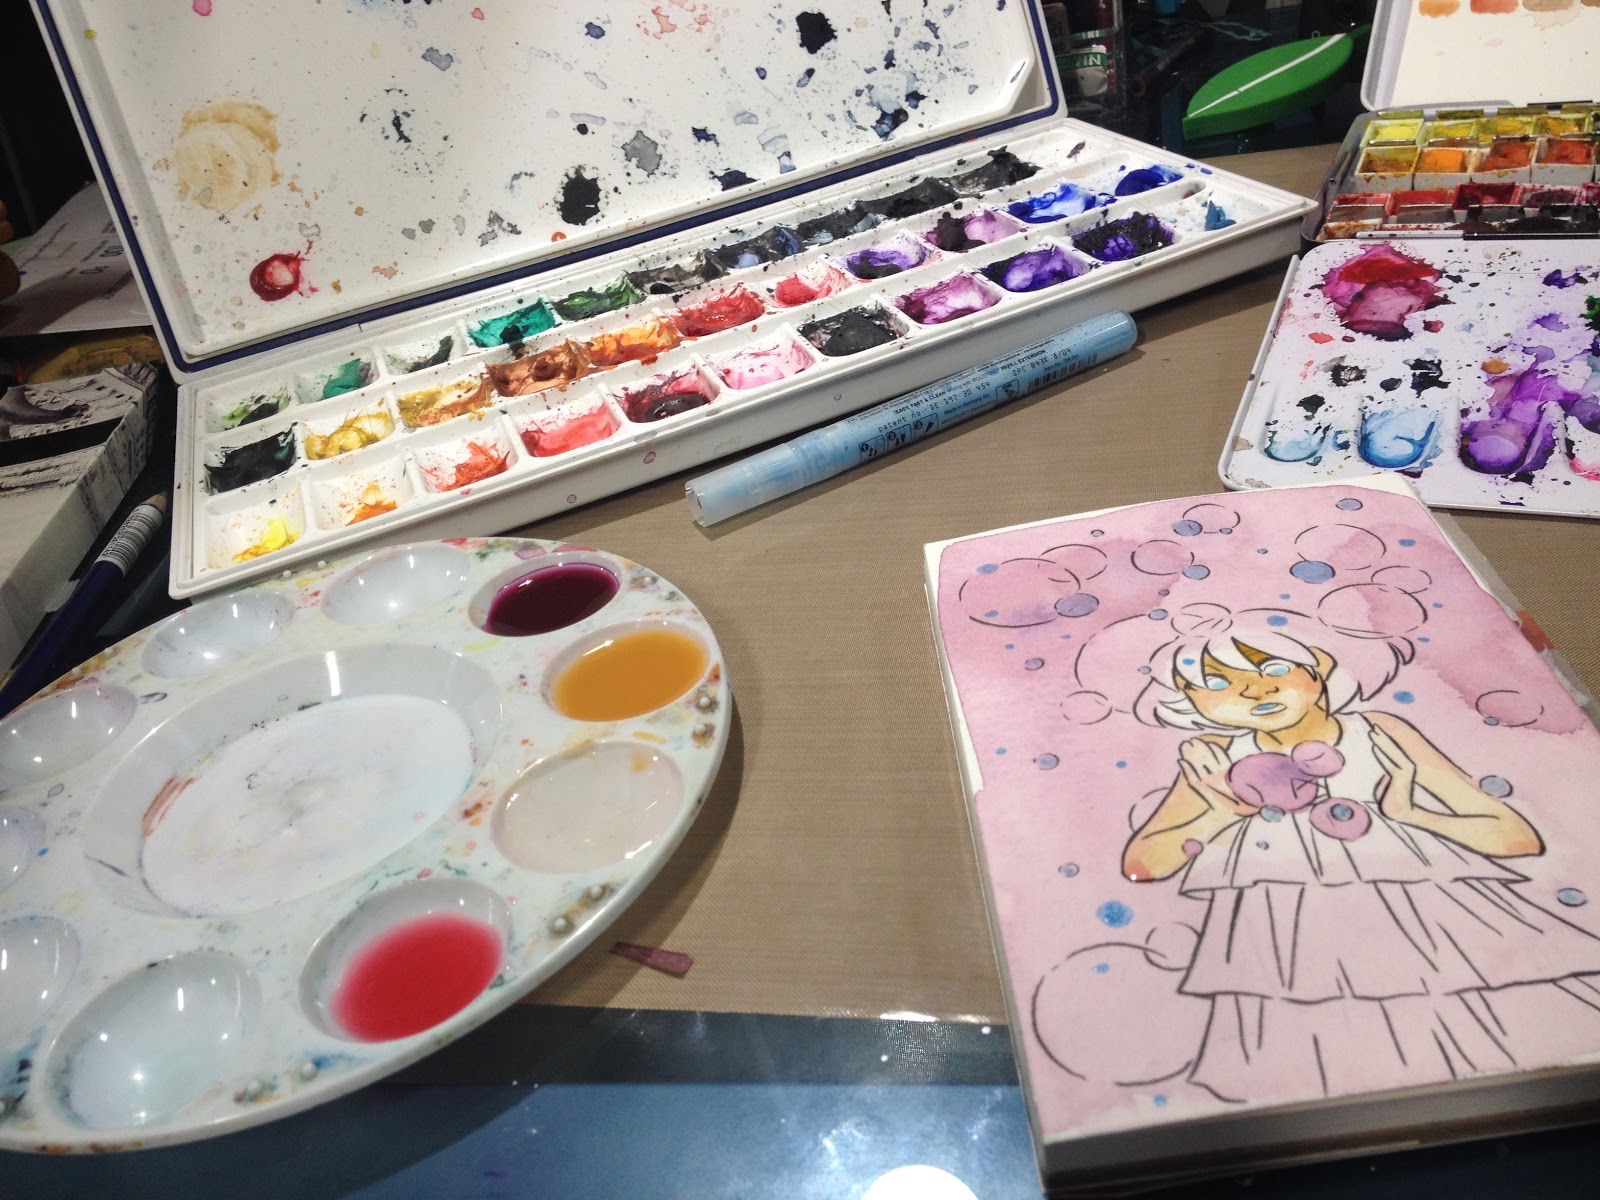
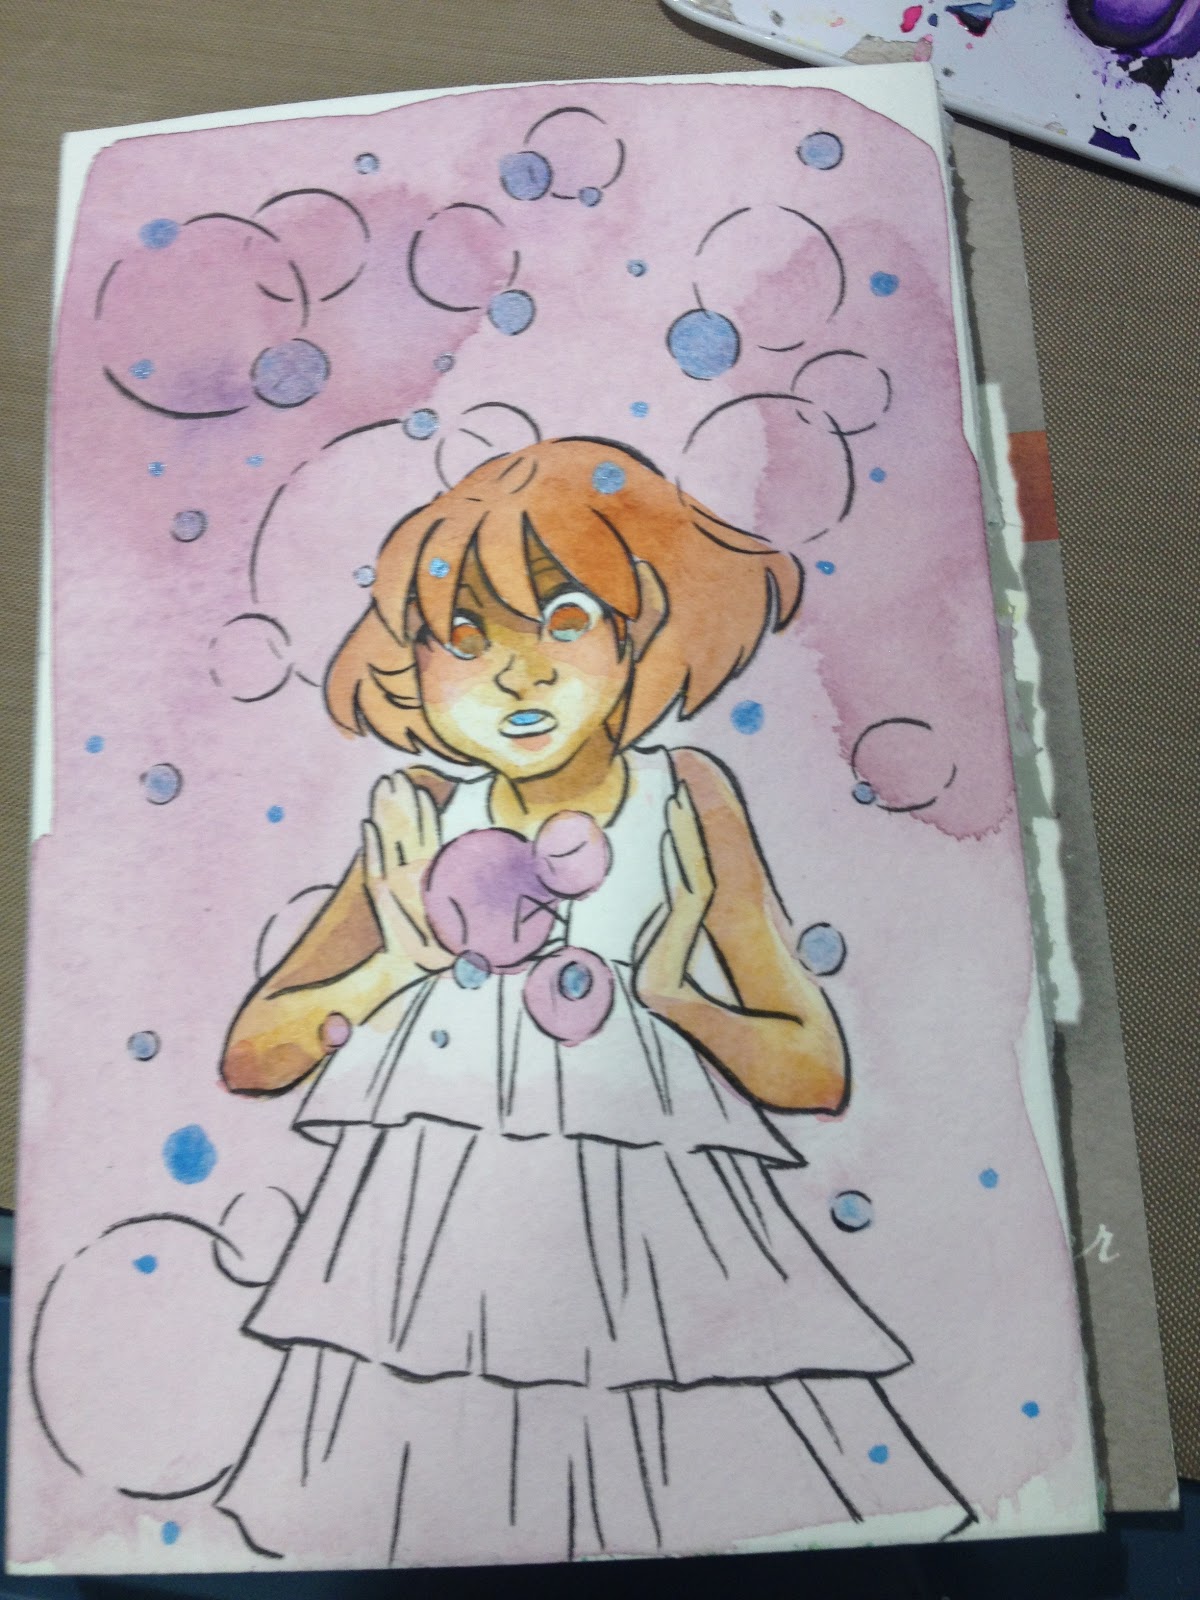
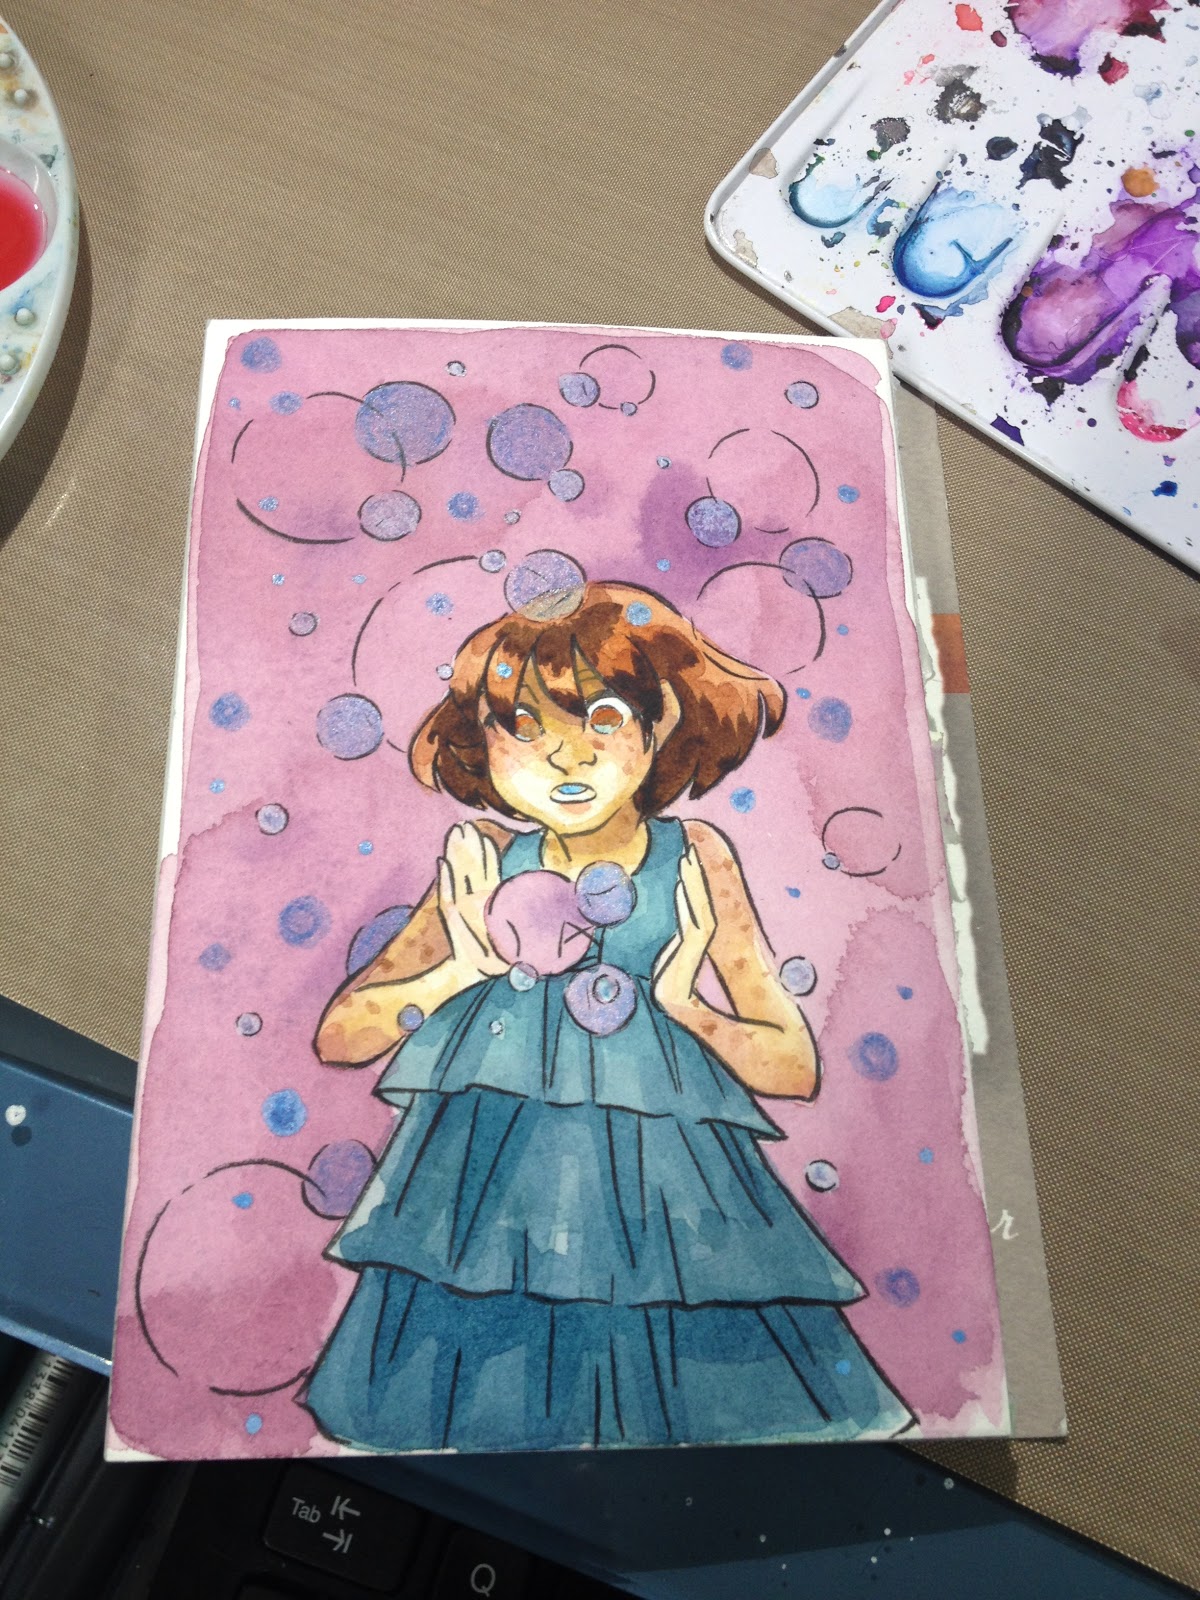
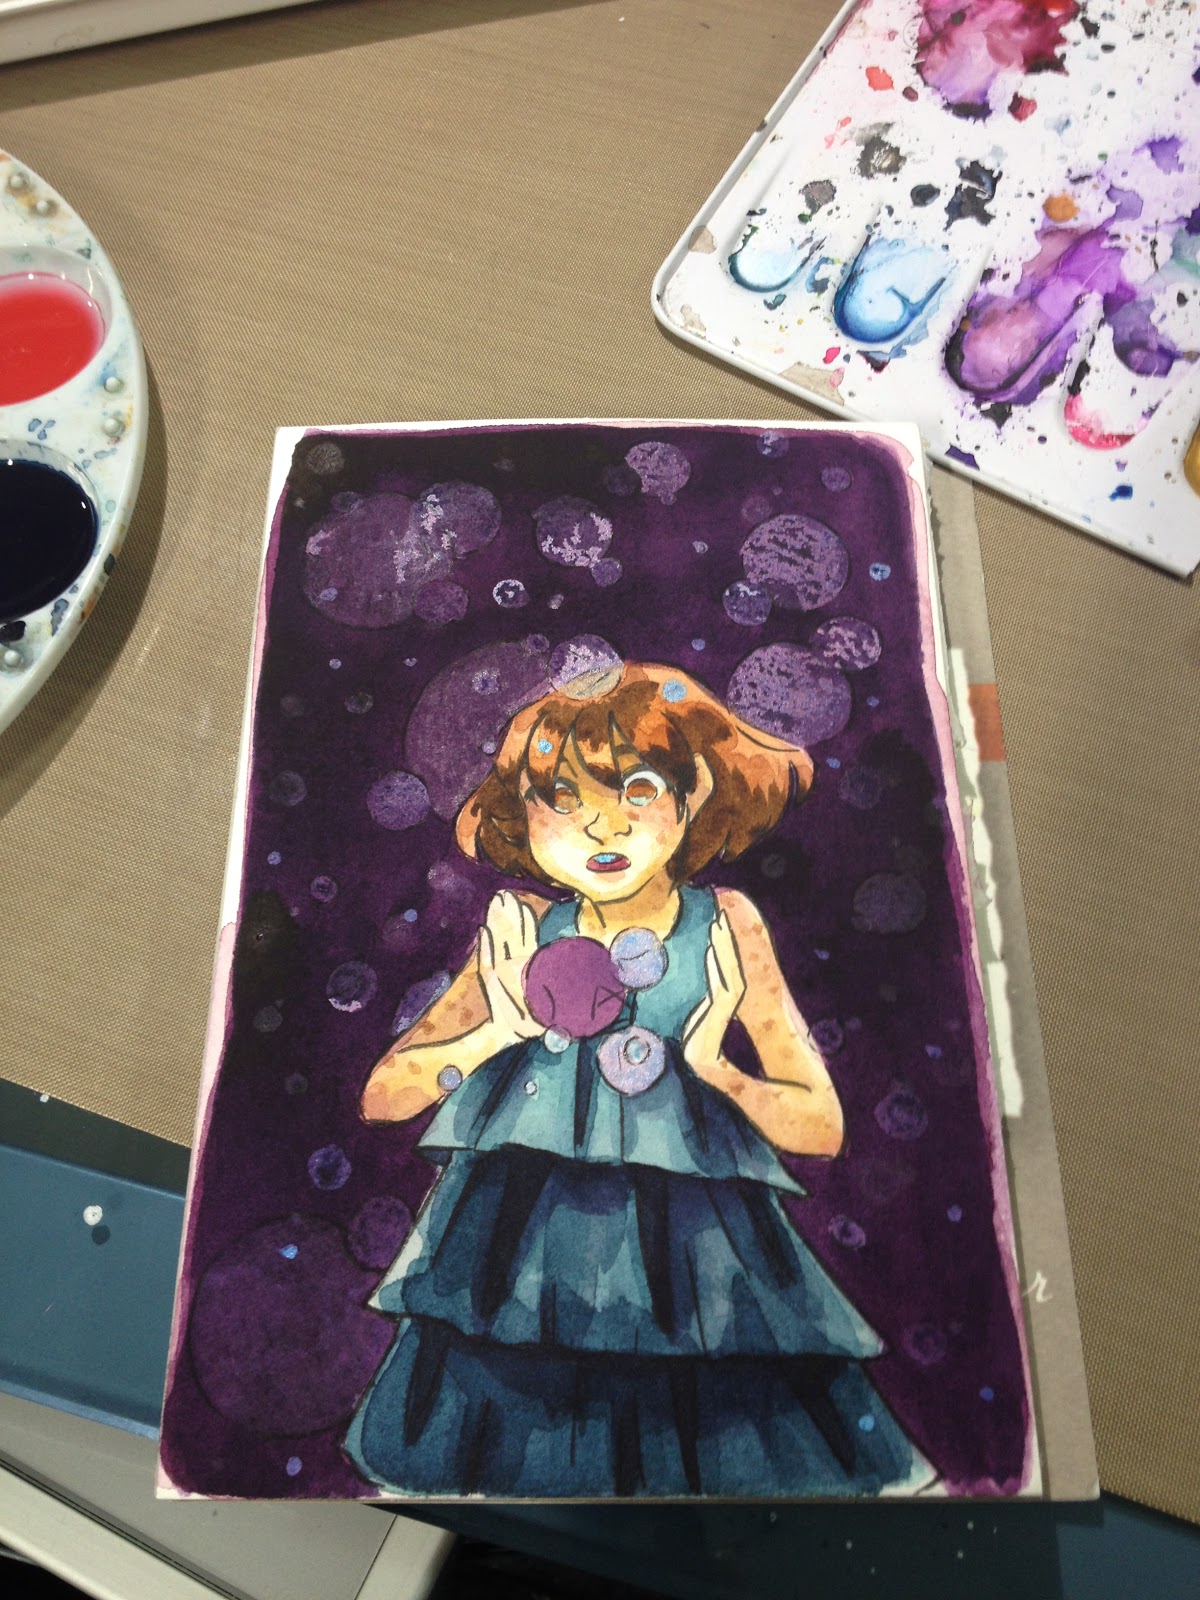
Now that my wash is established, I start laying in tones for Kara's skin.


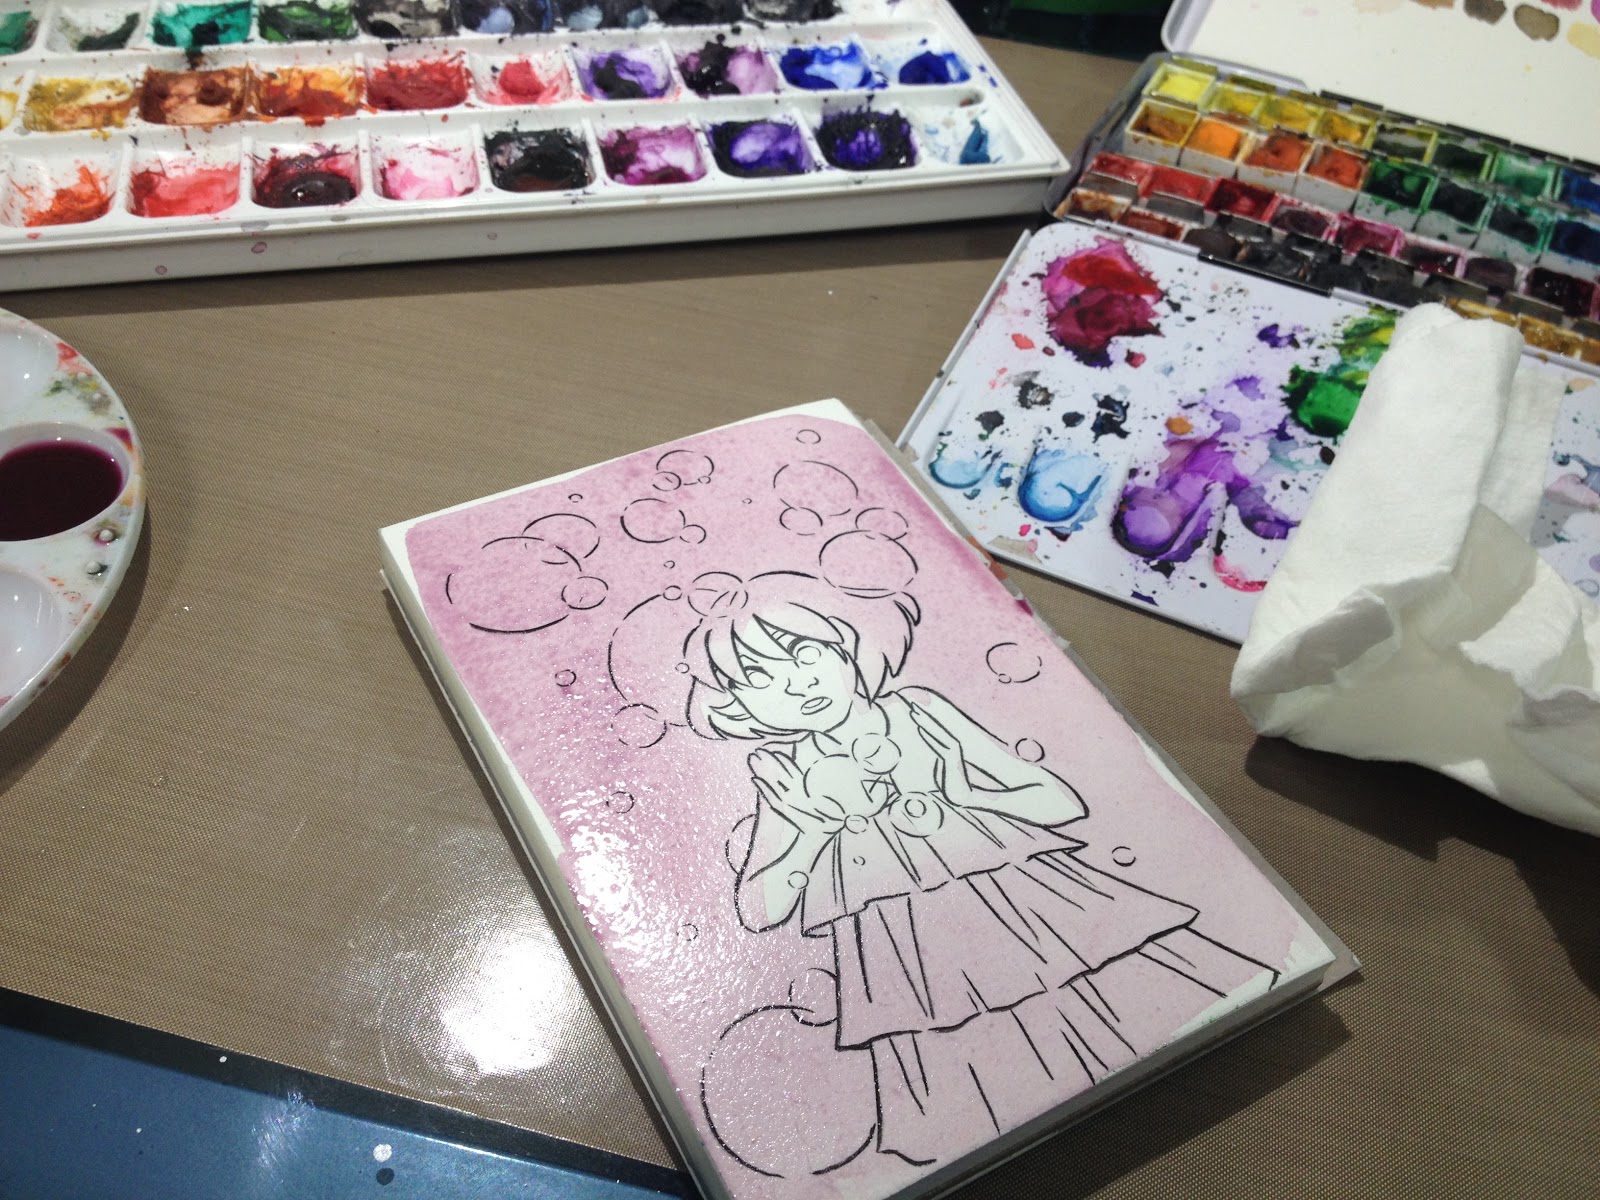
Here's where I really fell off the boat- I figured it would be faster and easier for me if I went ahead and masked bubbles that I didn't want colored by subsequent washes. I used Molotow's Grafx masking fluid pen, which has given me a lot of issus in the past. Next time, I may skip the masking fluid entirely, or I may opt for a higher quality masking fluid, as Grafx continues to give me issues.


While my masking fluid dried, I added another layer to Kara's skin.


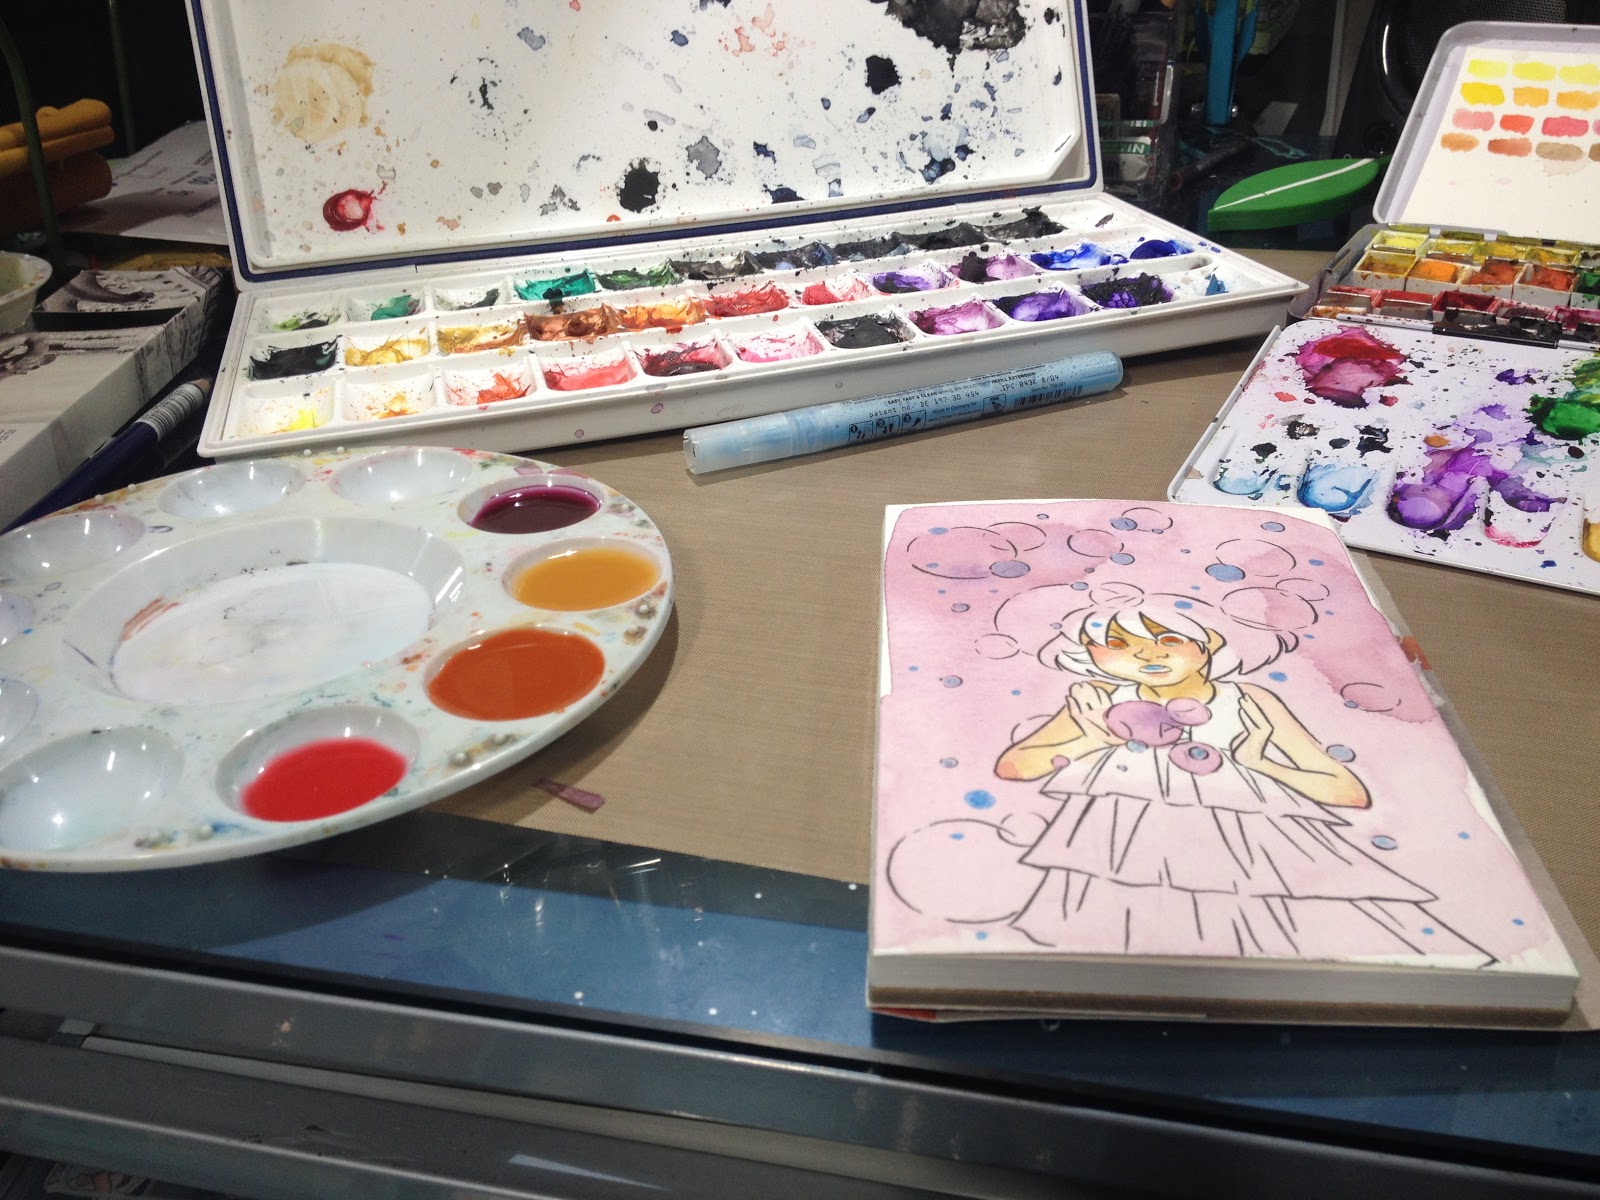
And began mixing some of the other colors I knew I'd need.


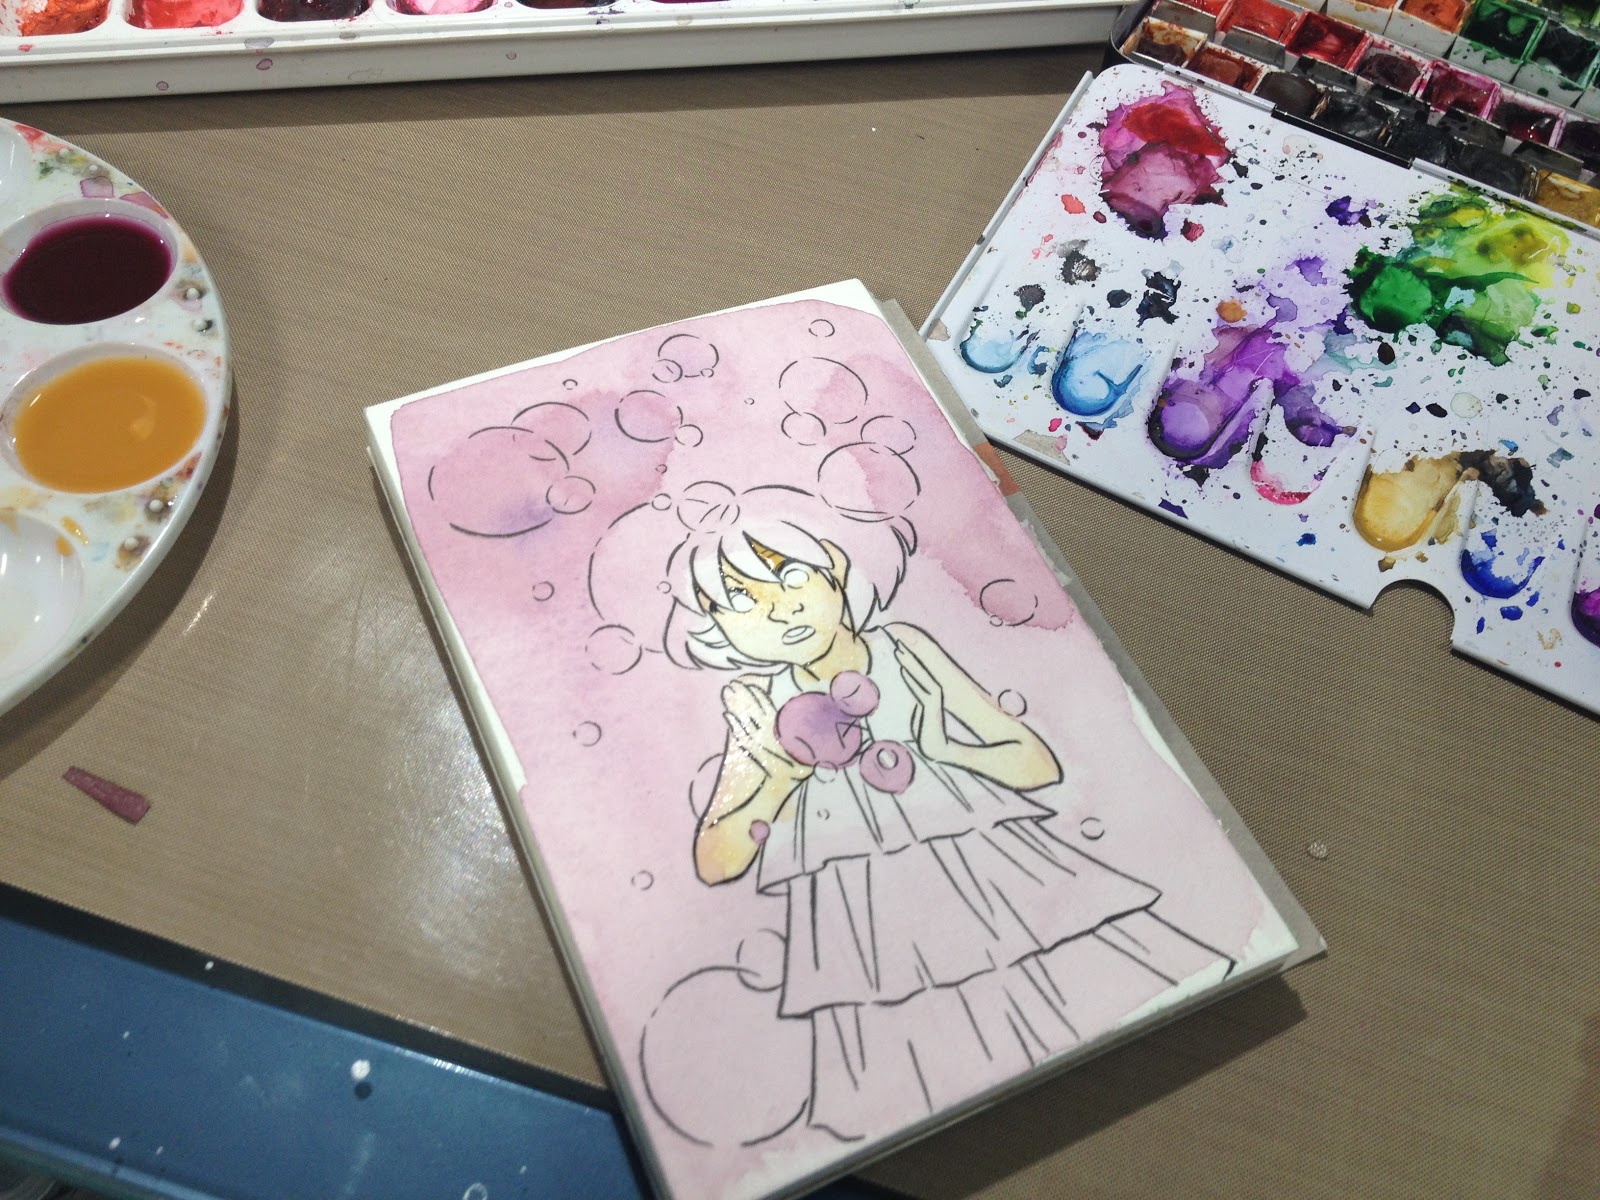
And I start laying those colors in to give me a feel for what's going to need to be darker, what should be left light to account for glow, ect.


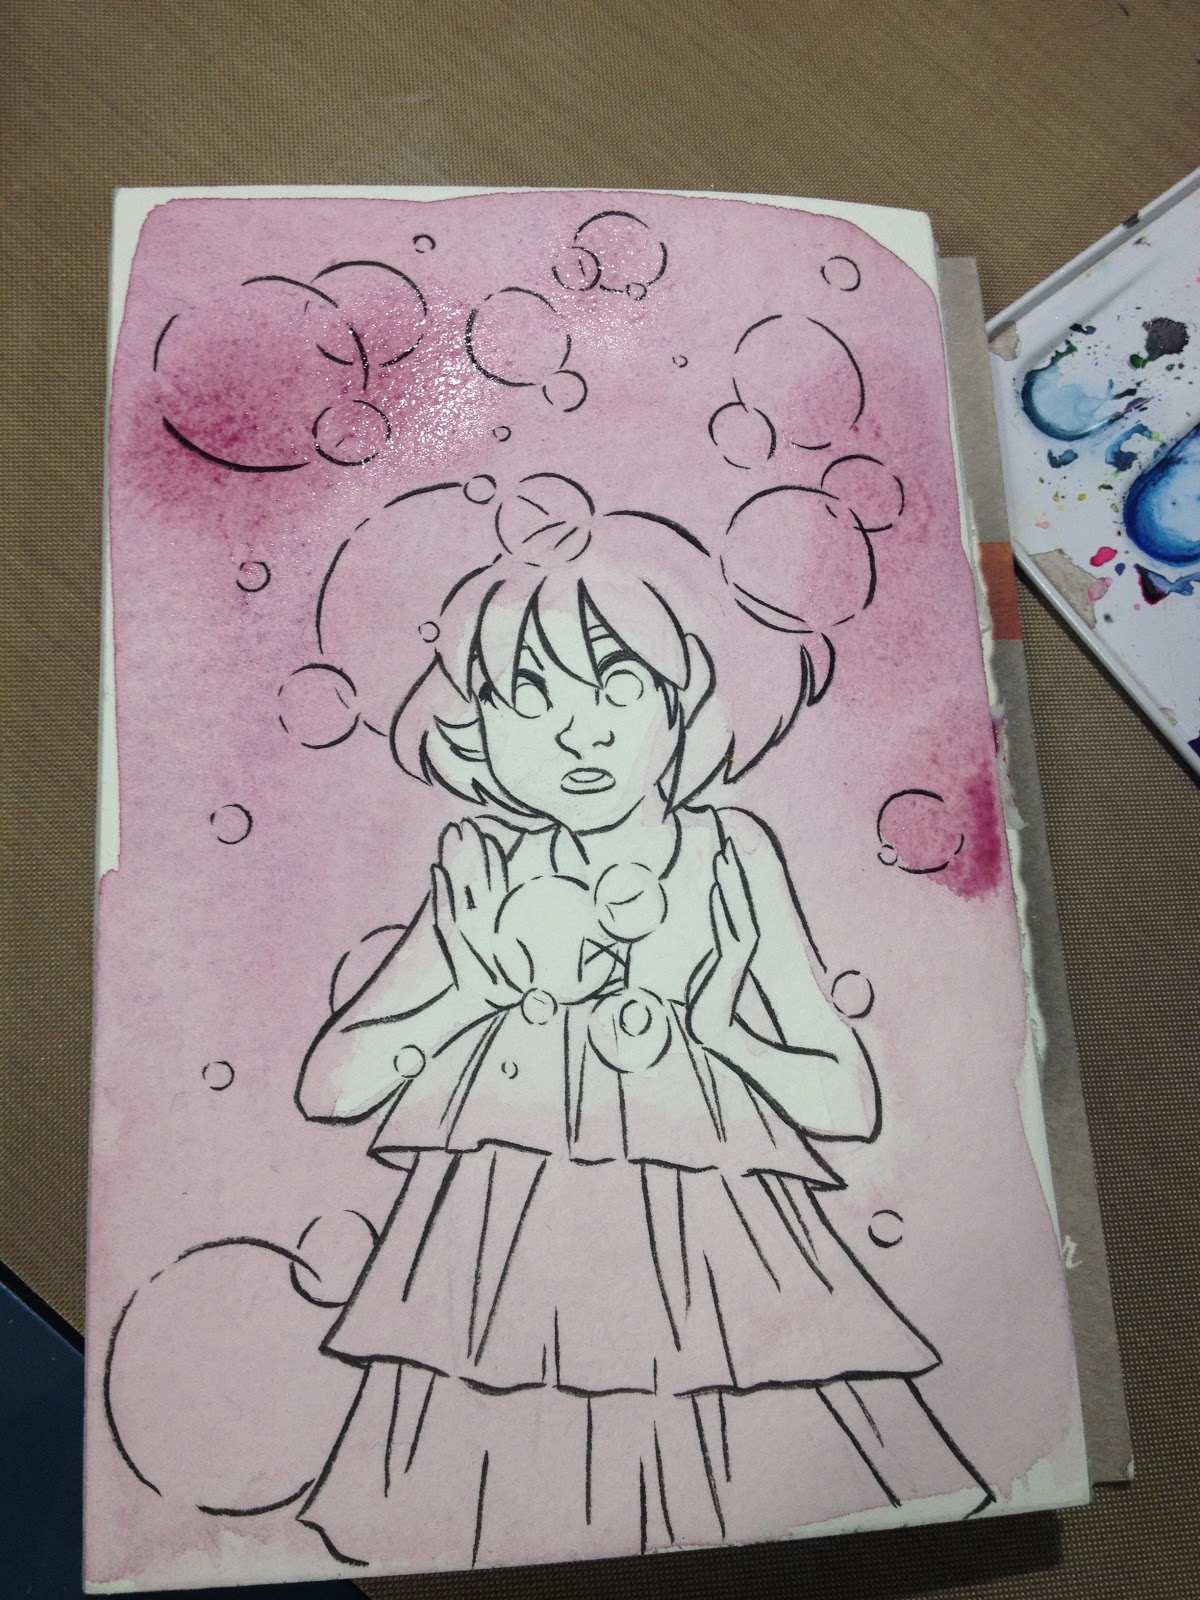
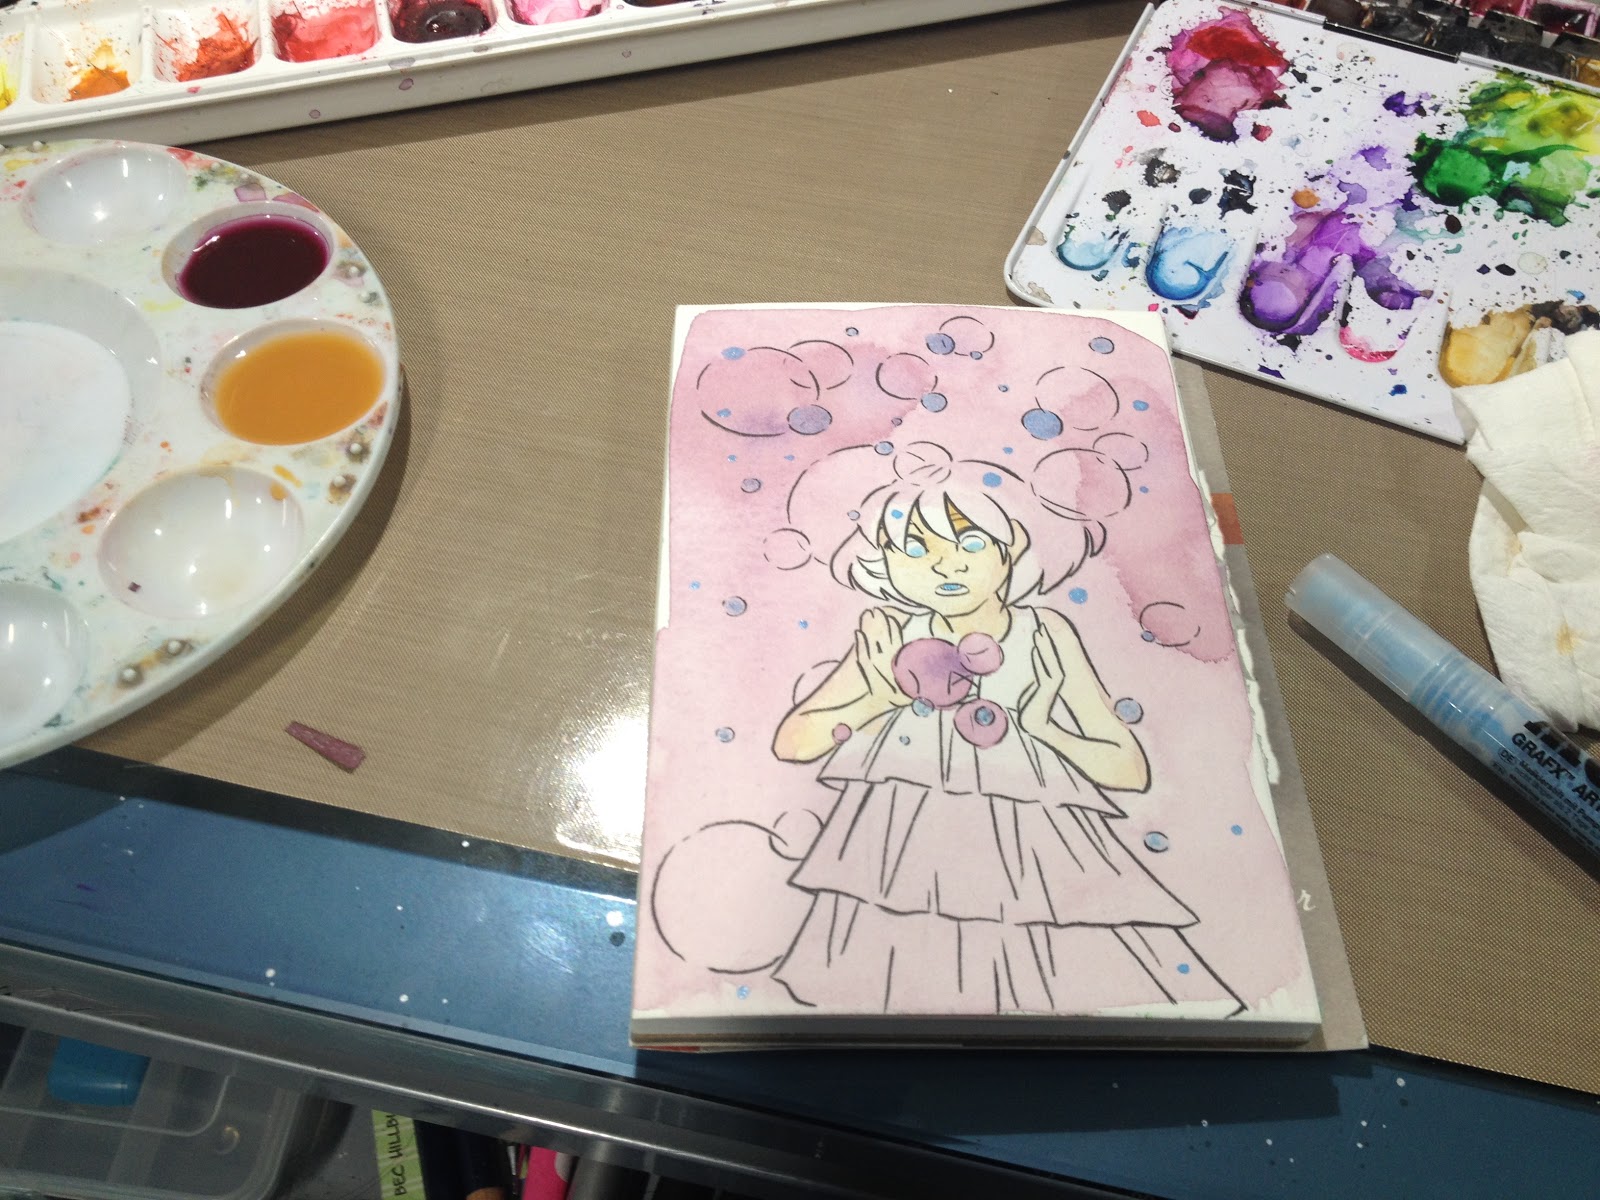
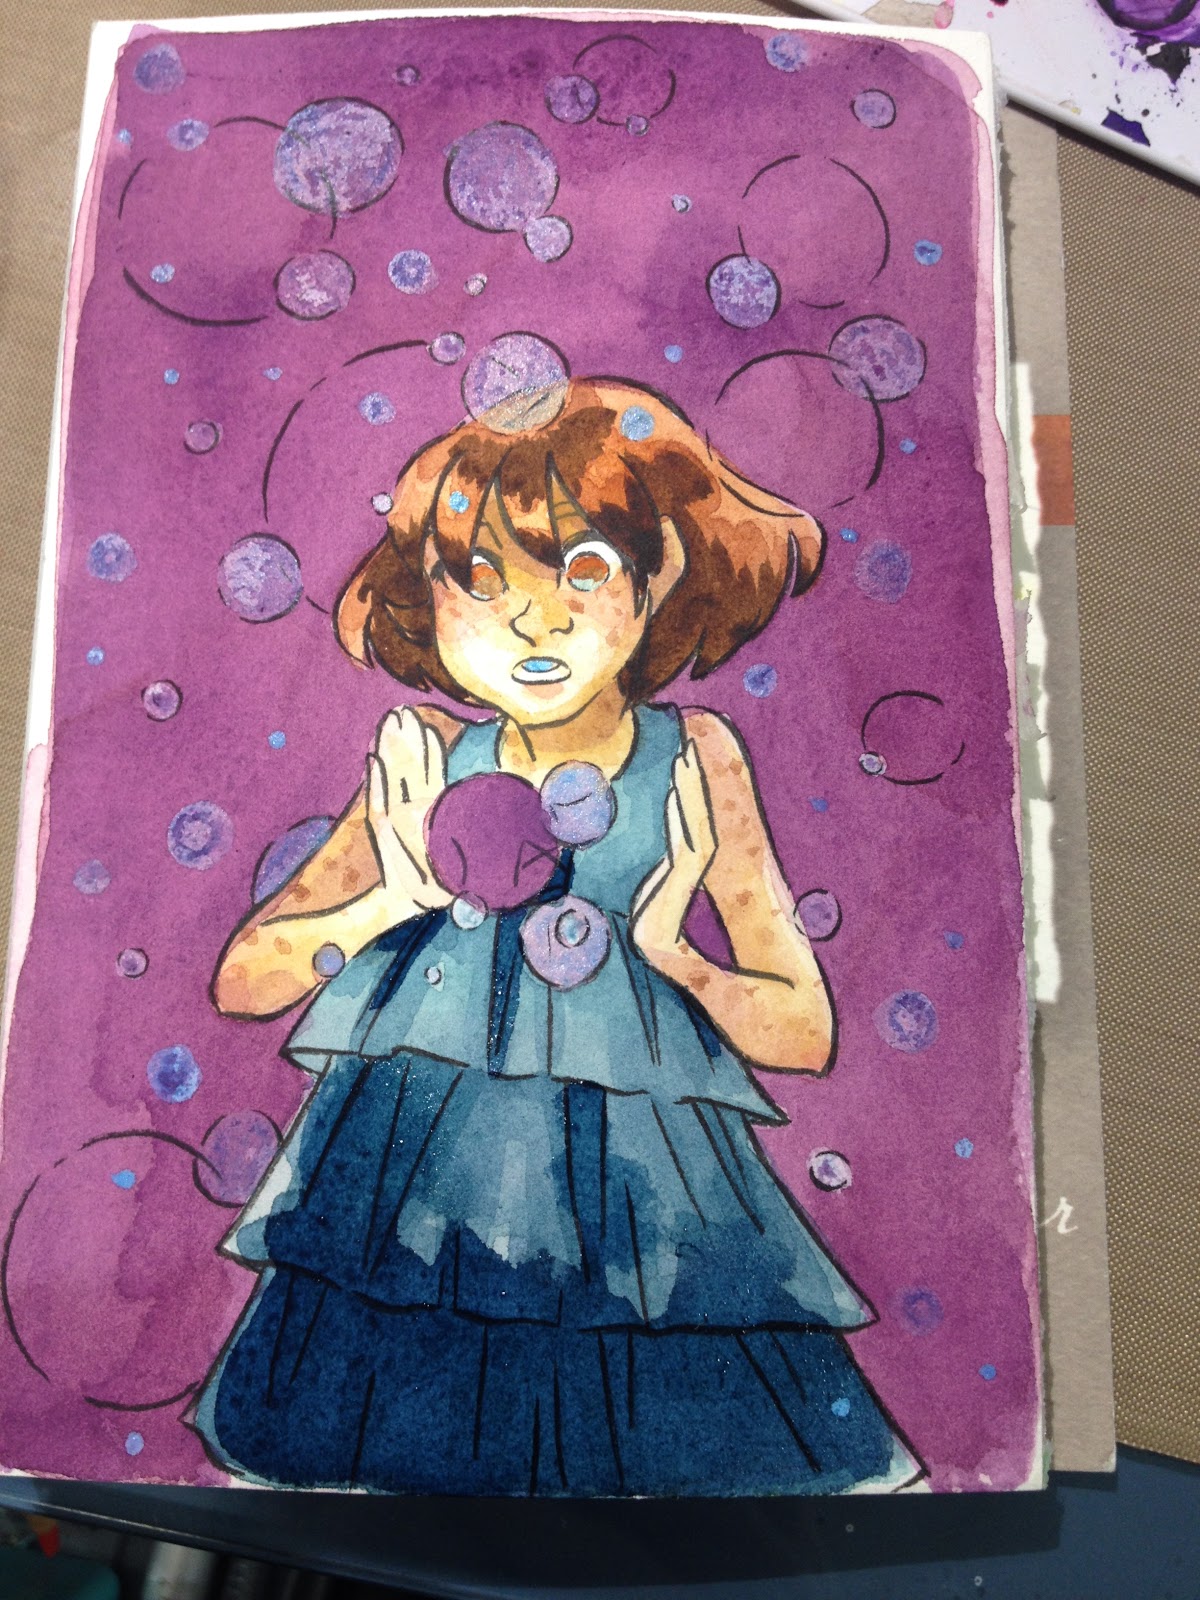
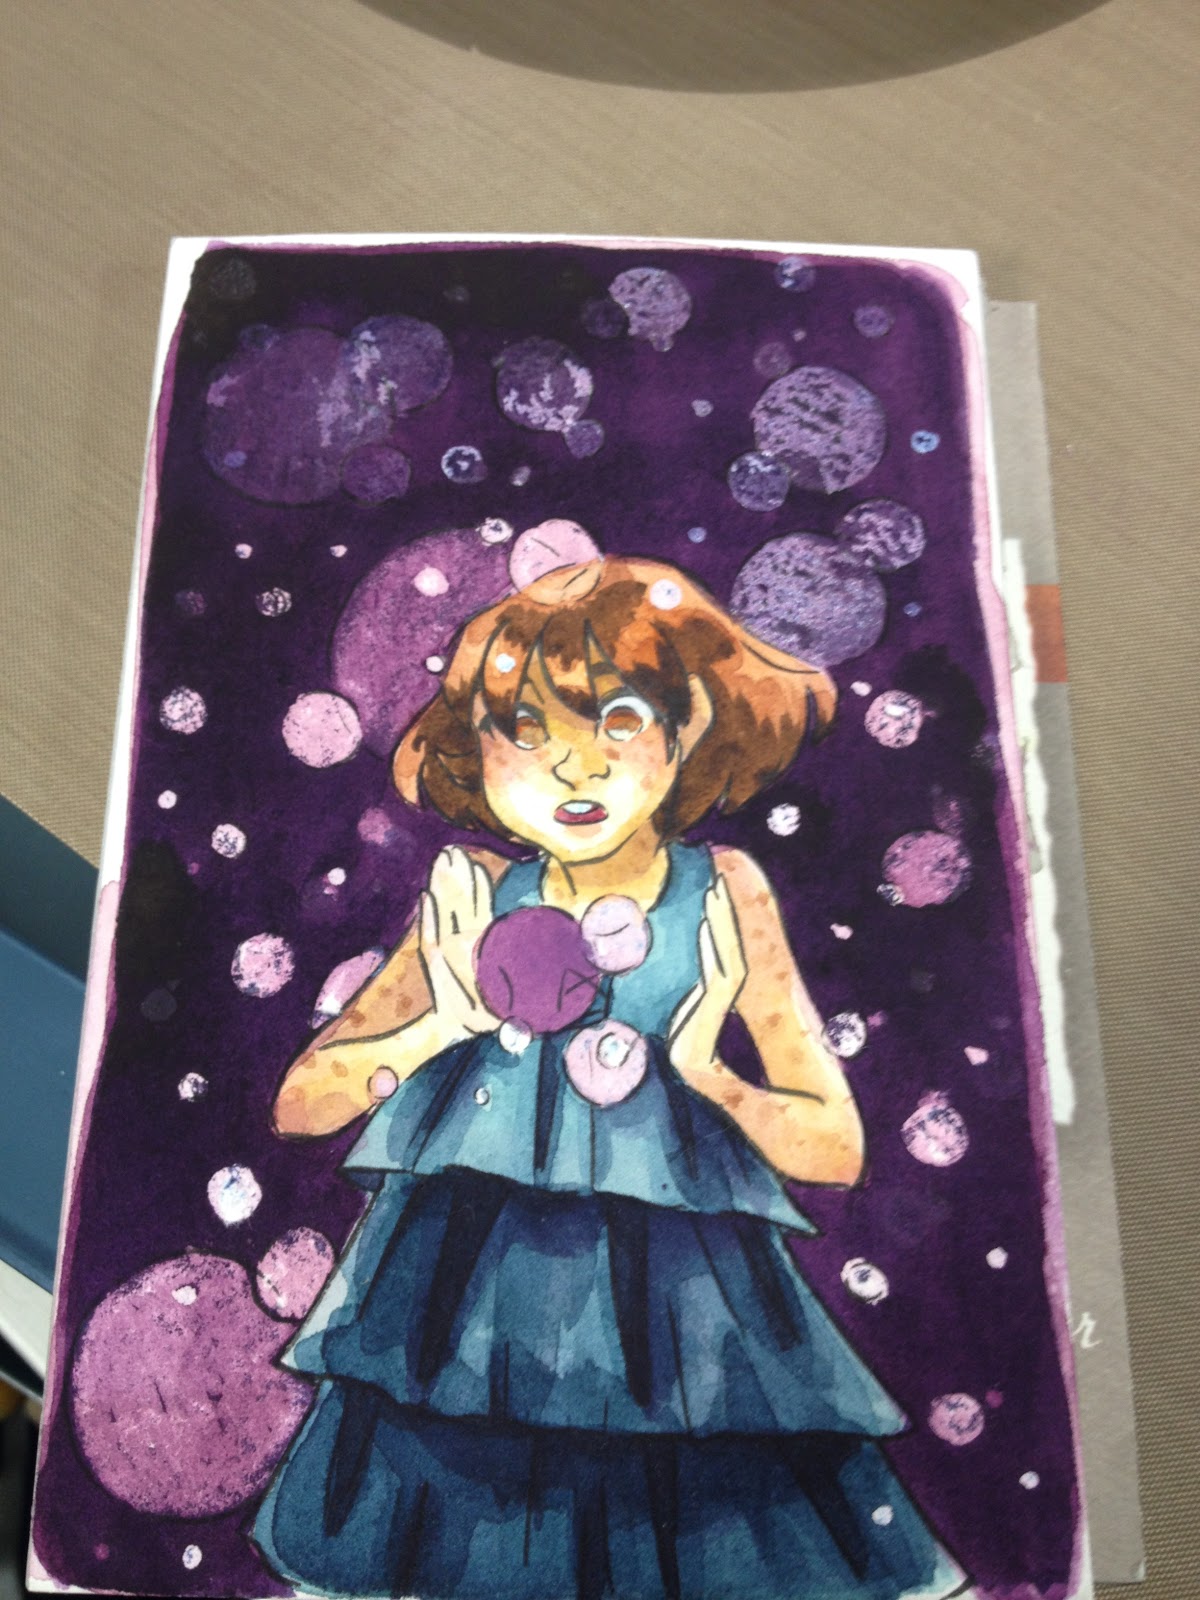
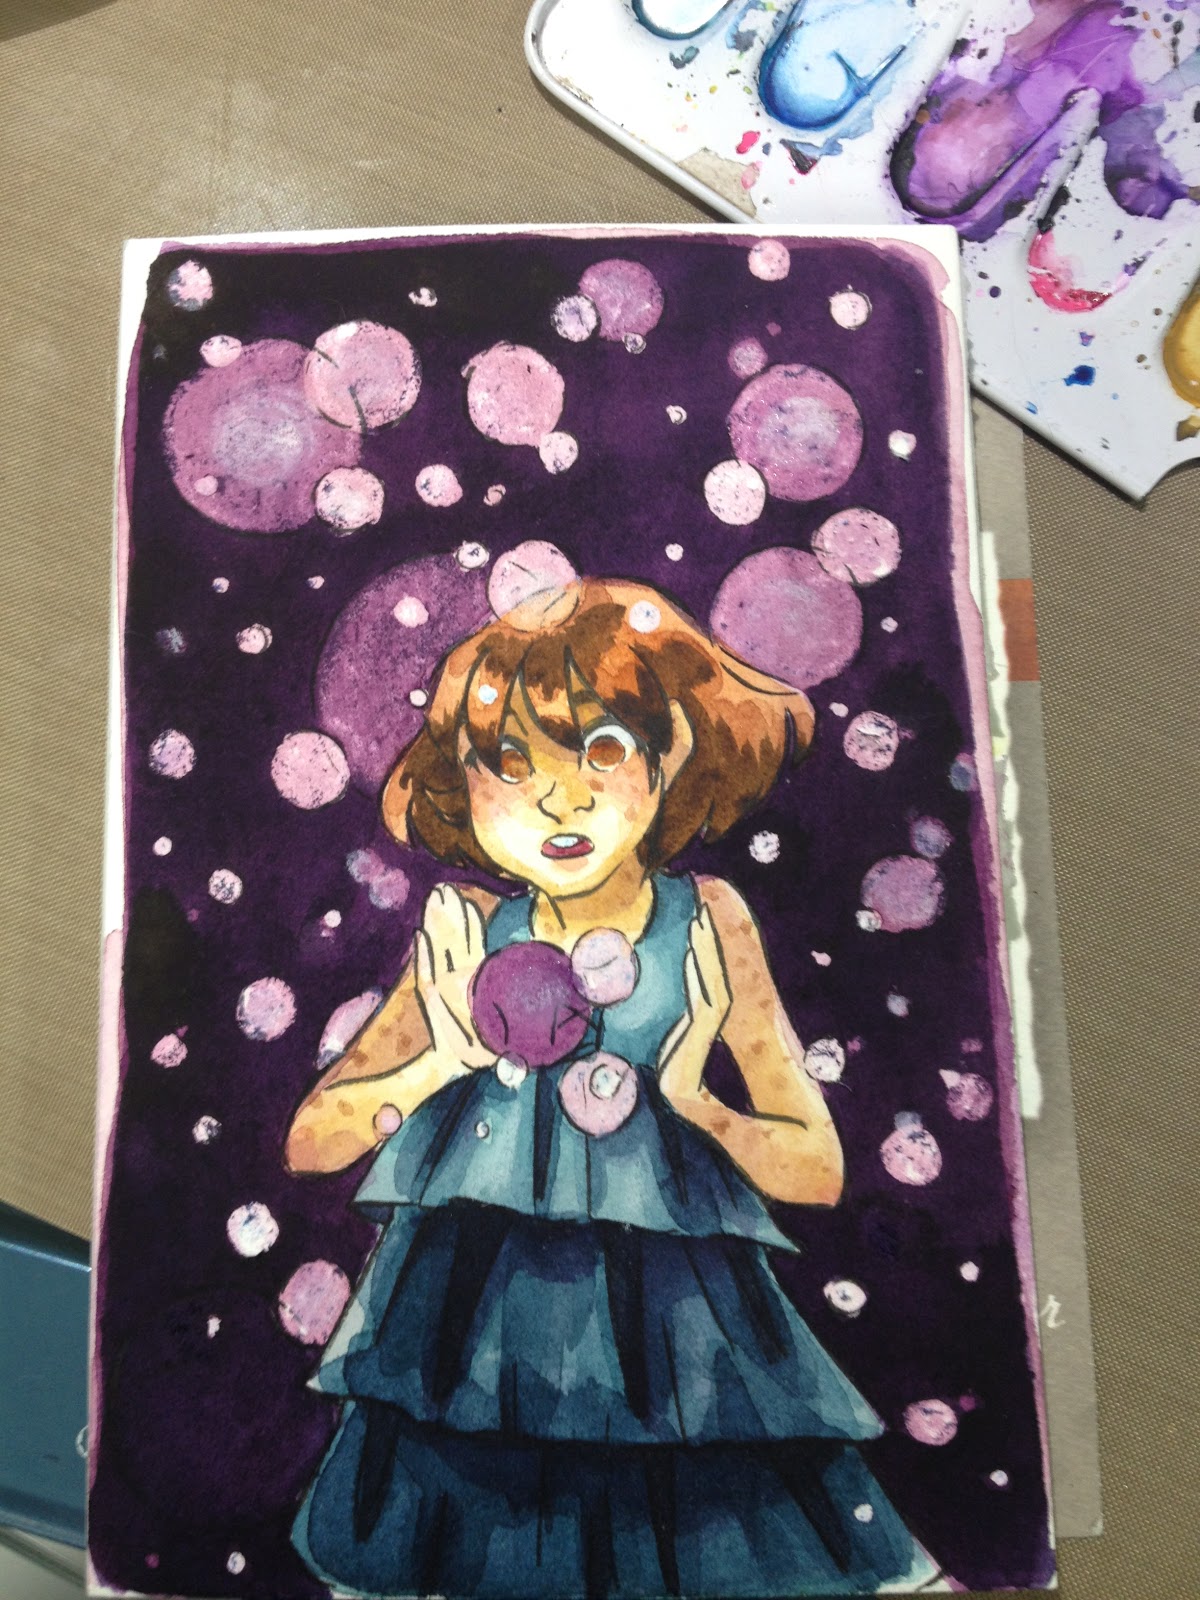
After my base colors were applied, I can start focusing on the background. So the whole point of negative painting is what you leave unpainted- I.E. negative space. I cheated a bit using the masking fluid to reserve areas of negative color, because I wanted to focus on just laying in washes.


And as the washes dry, I apply more layers of masking fluid, so I don't have to worry about remembering what I want to reserve. In the future, if I don't plan on adding details or colors to my reserved negative spaces, I may just go over them with a clear wax crayon. Masking Frisket (the plastic masking paper I've used in some videos) may also make this a bit easier, without causing surface damage.
And while I wait on the masking fluid to dry, I continue to work on building up shape, shade, and form on Kara.


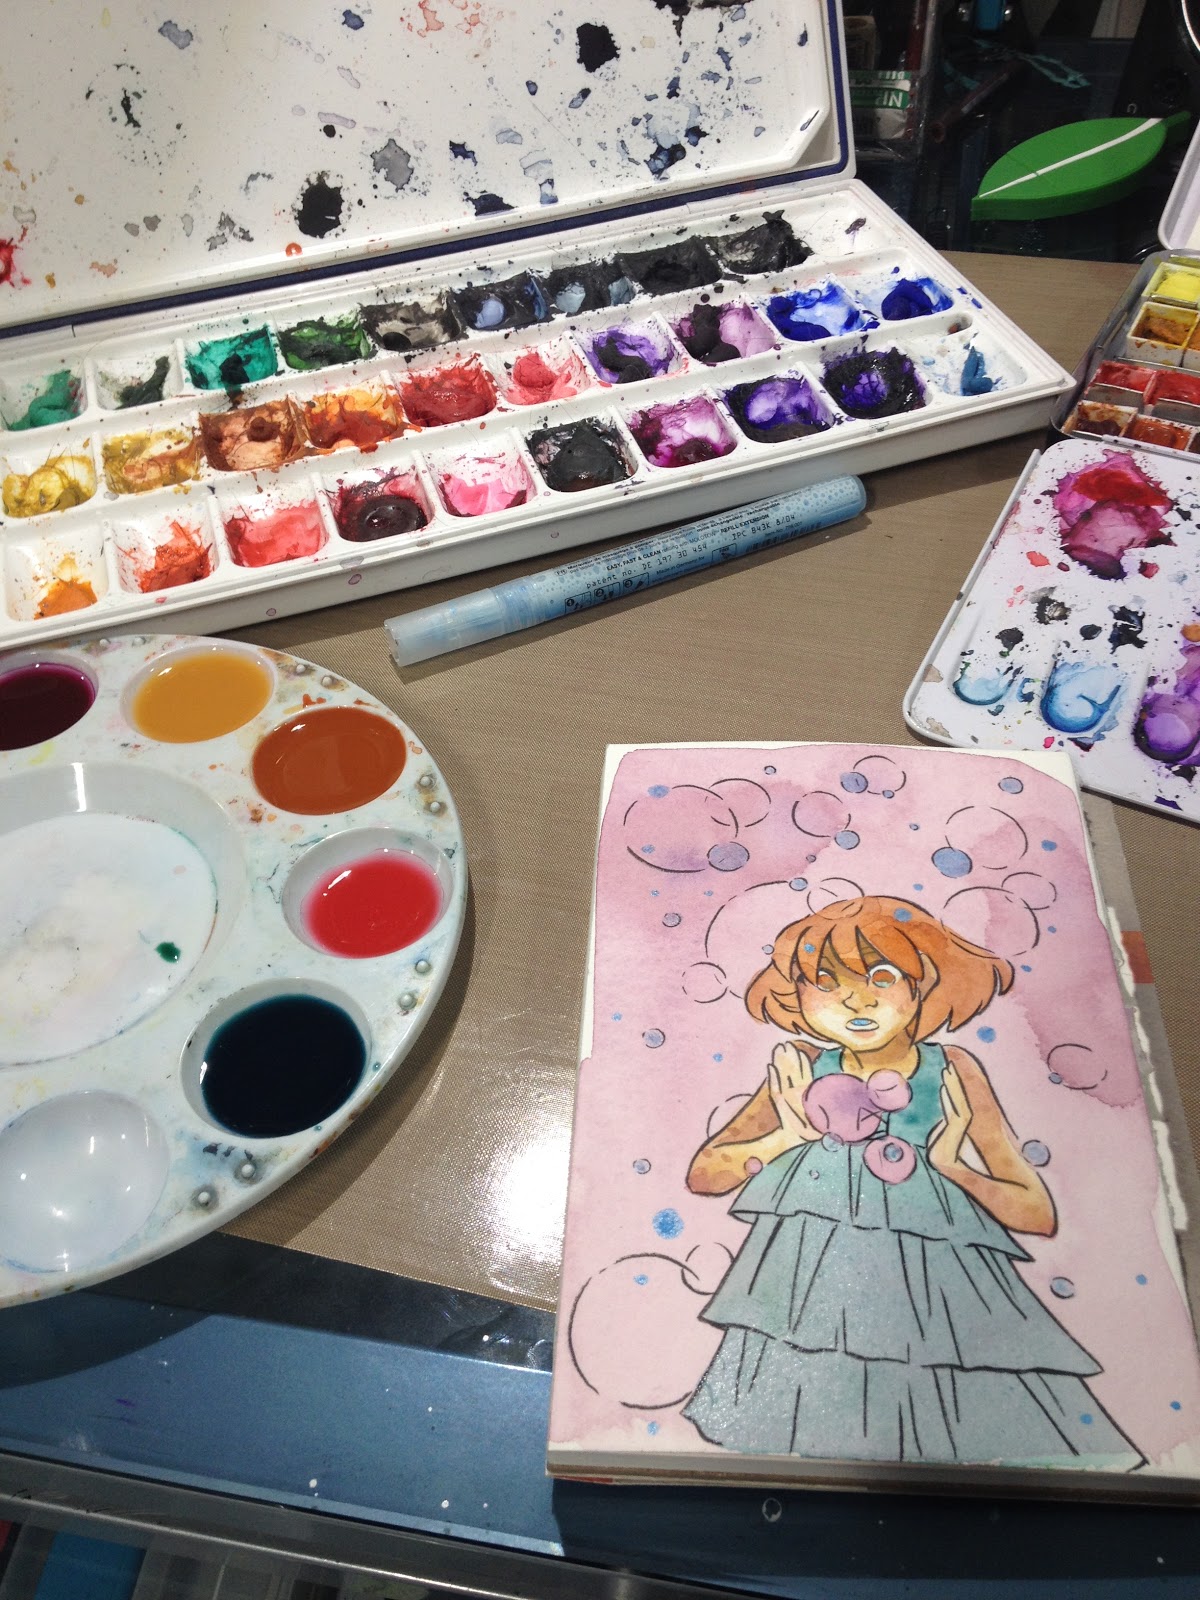
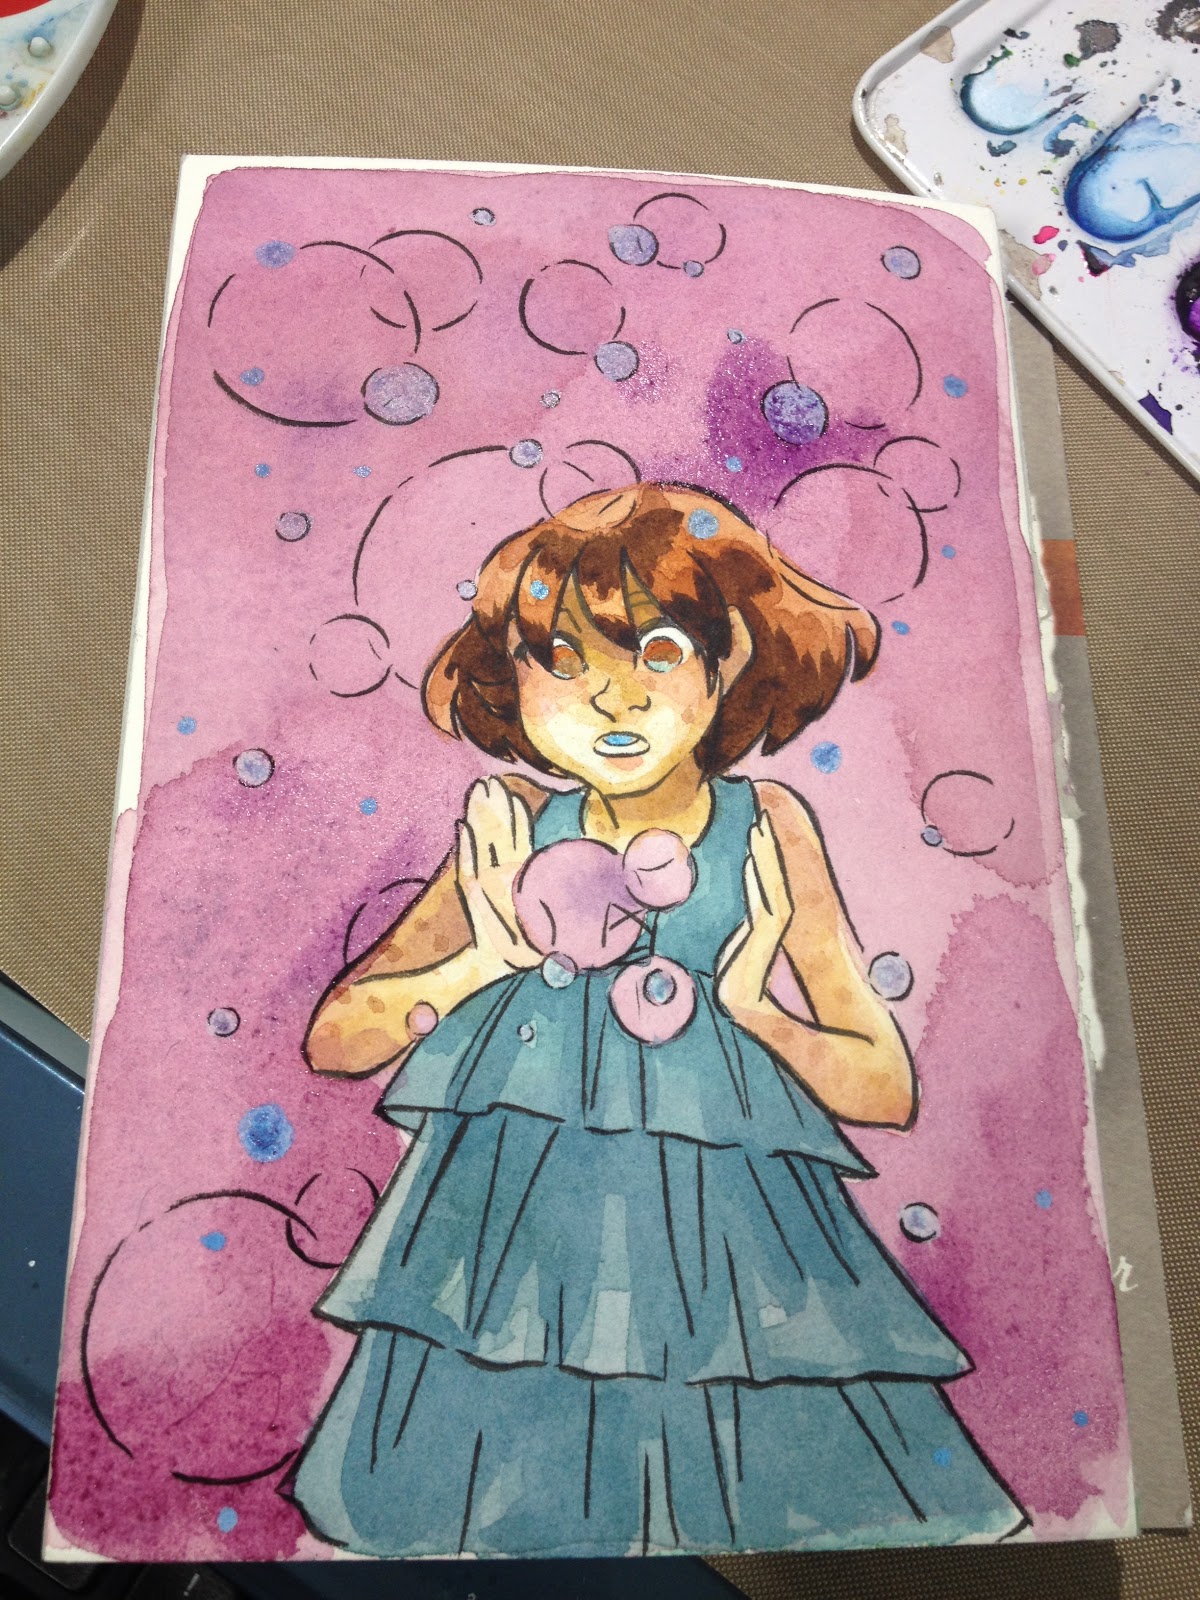
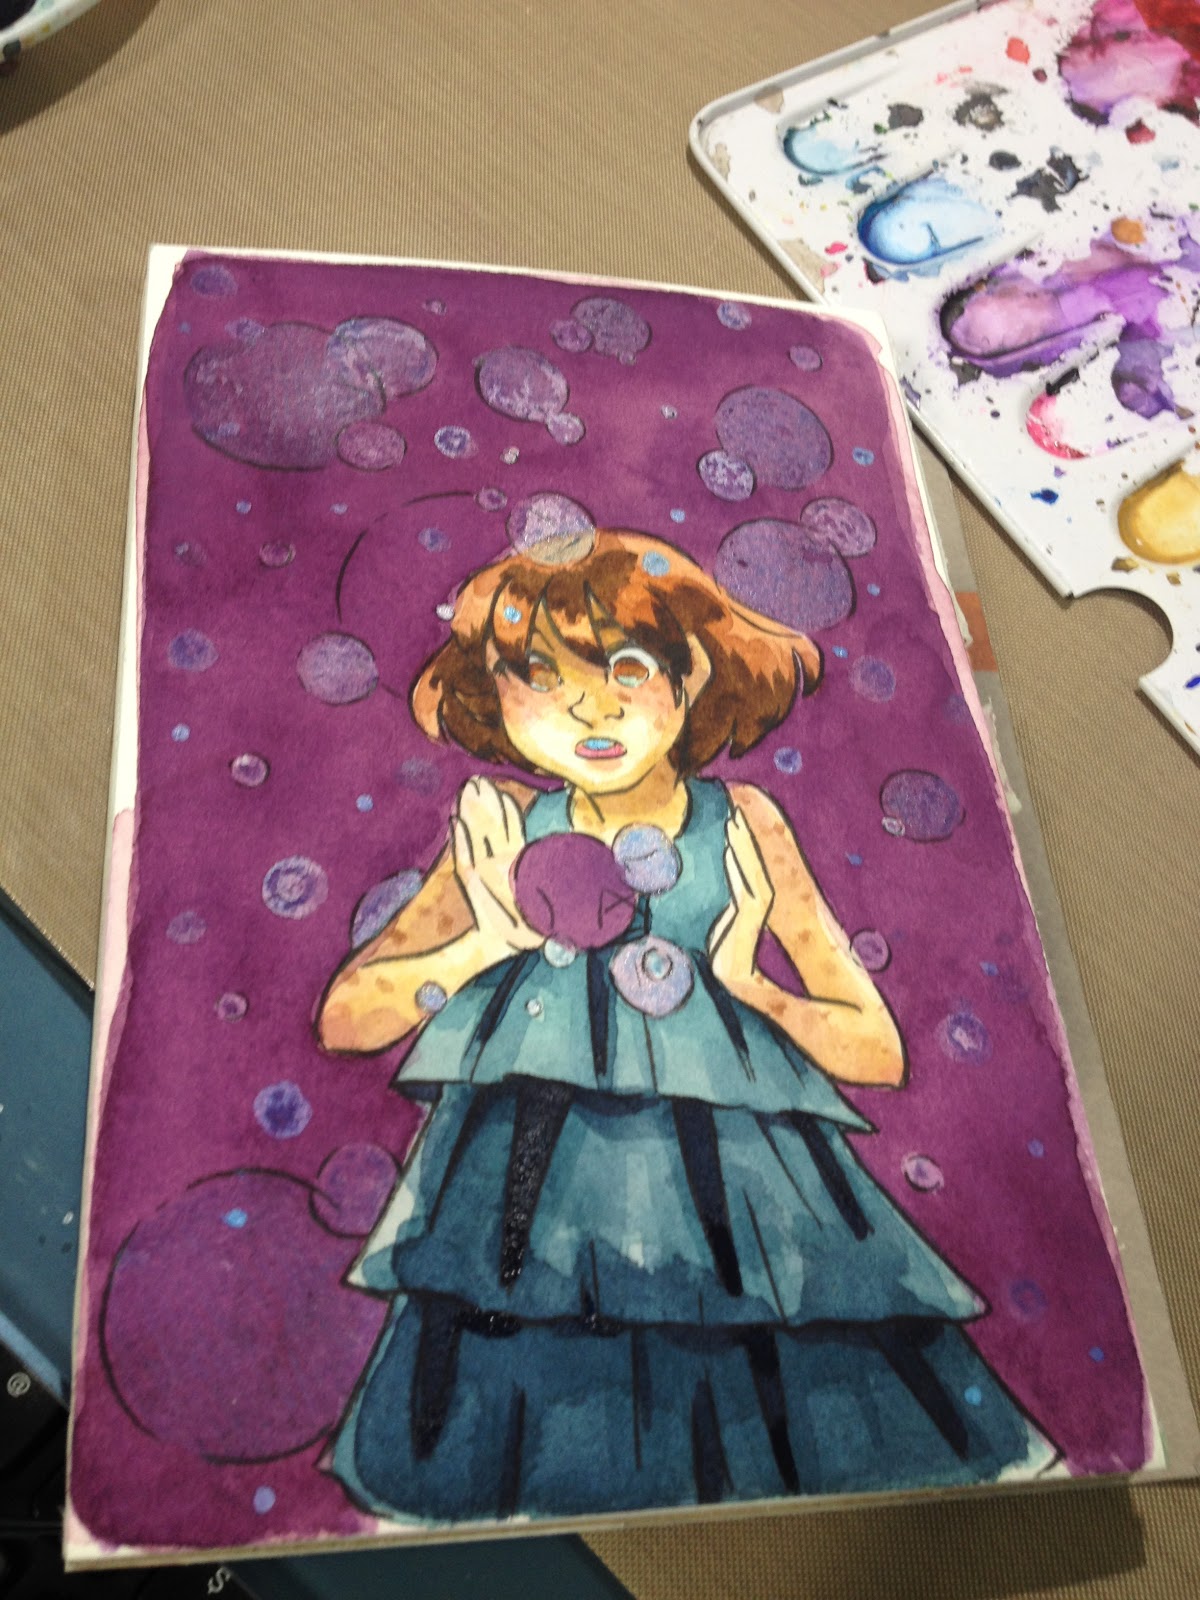
And once those layers had dried, I applied another layer of purple wash to the background. Throughout my washes, I tried to move from red violet to dark blue violet as the layers built up.


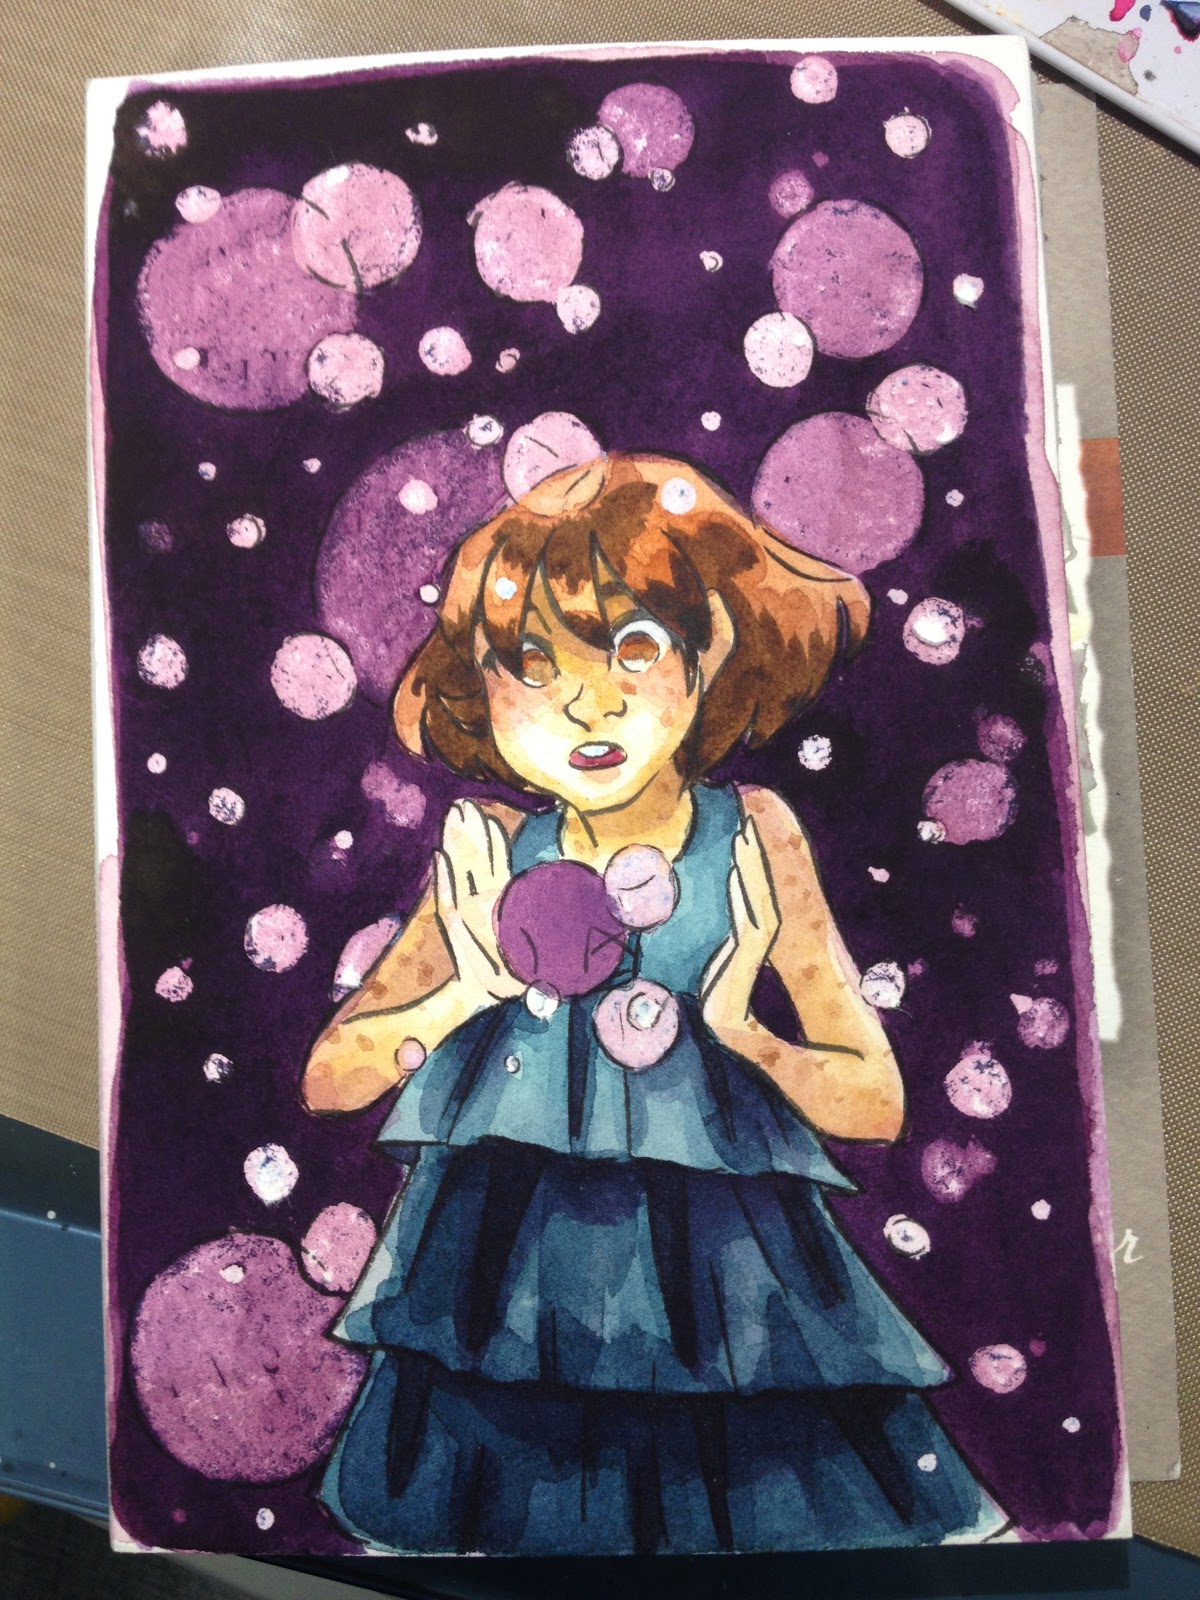
And when that layer dried, I added more masking fluid.


And once that was dry, I continued adding washes to the background.


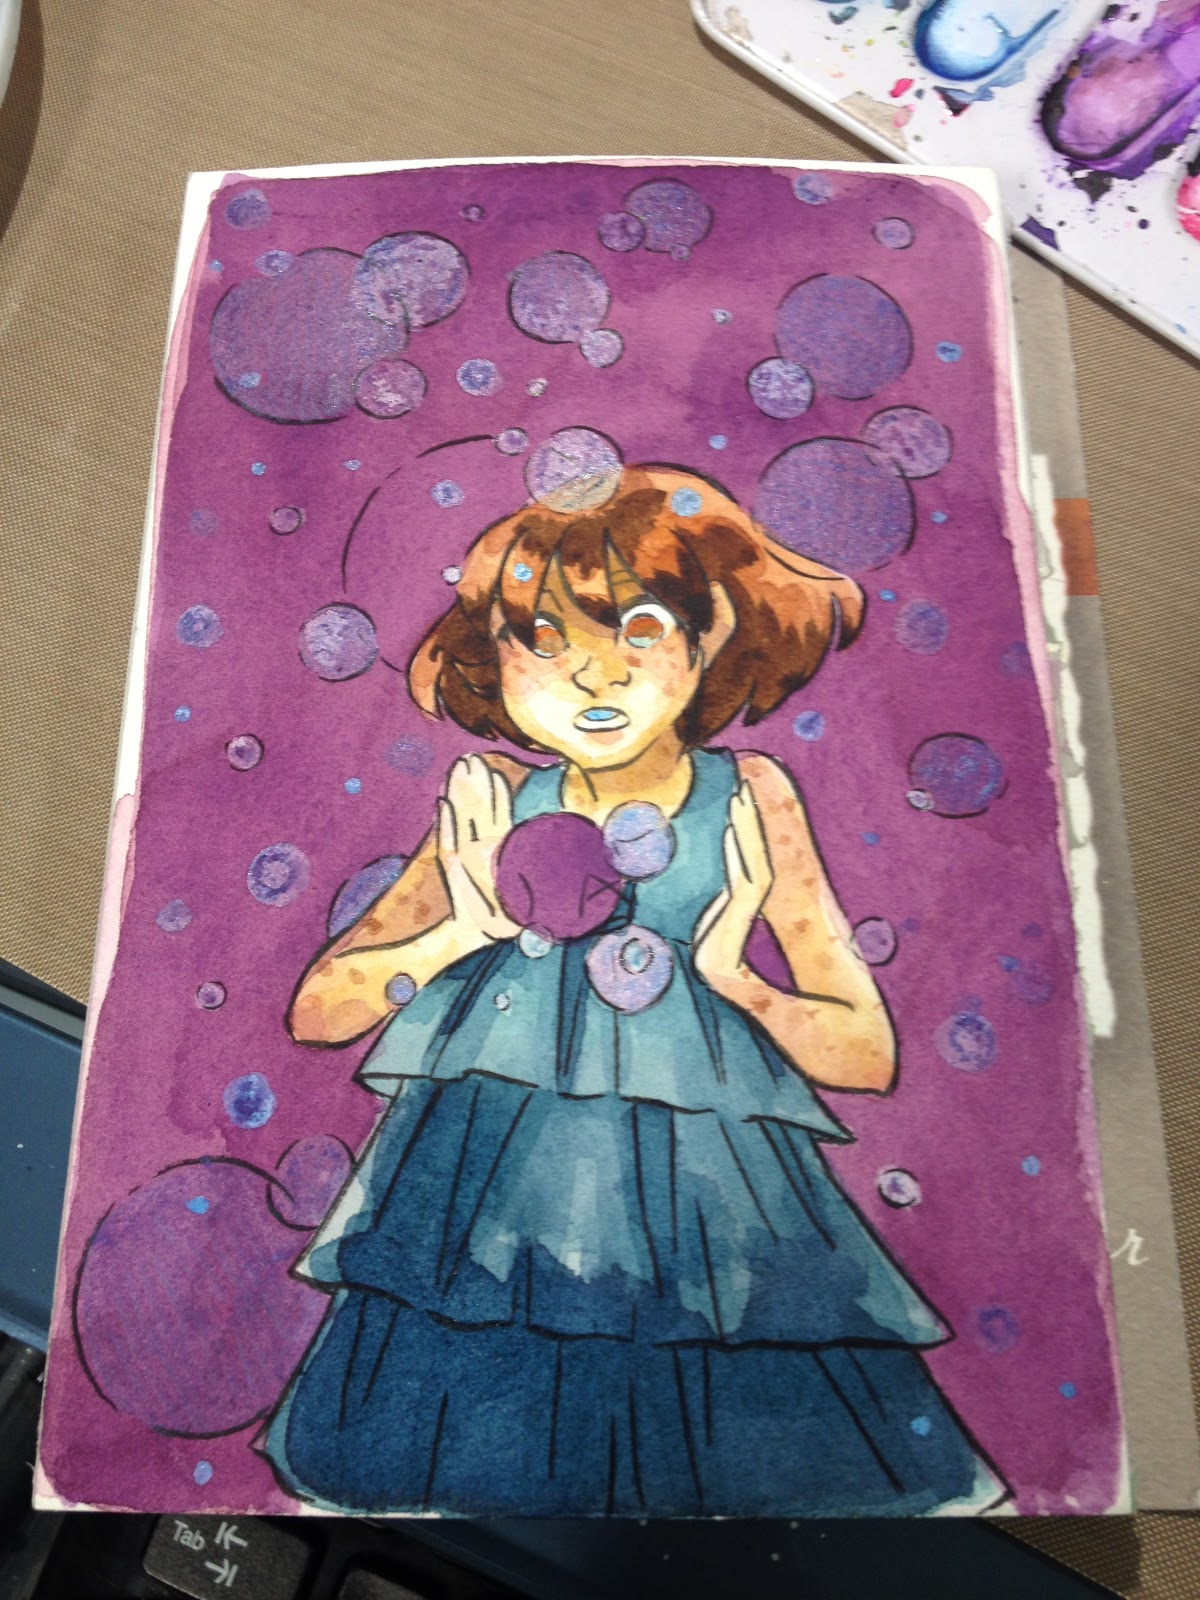
Perhaps one of the issues is that my paper may not have been entirely dry when I added the masking fluid- it was dry to the touch, but cotton based papers often take a bit longer to dry than woodpulp papers (as the water actually soaks in), or perhaps the cotton fibers were more fragile. Either way, I added another layer of masking fluid.

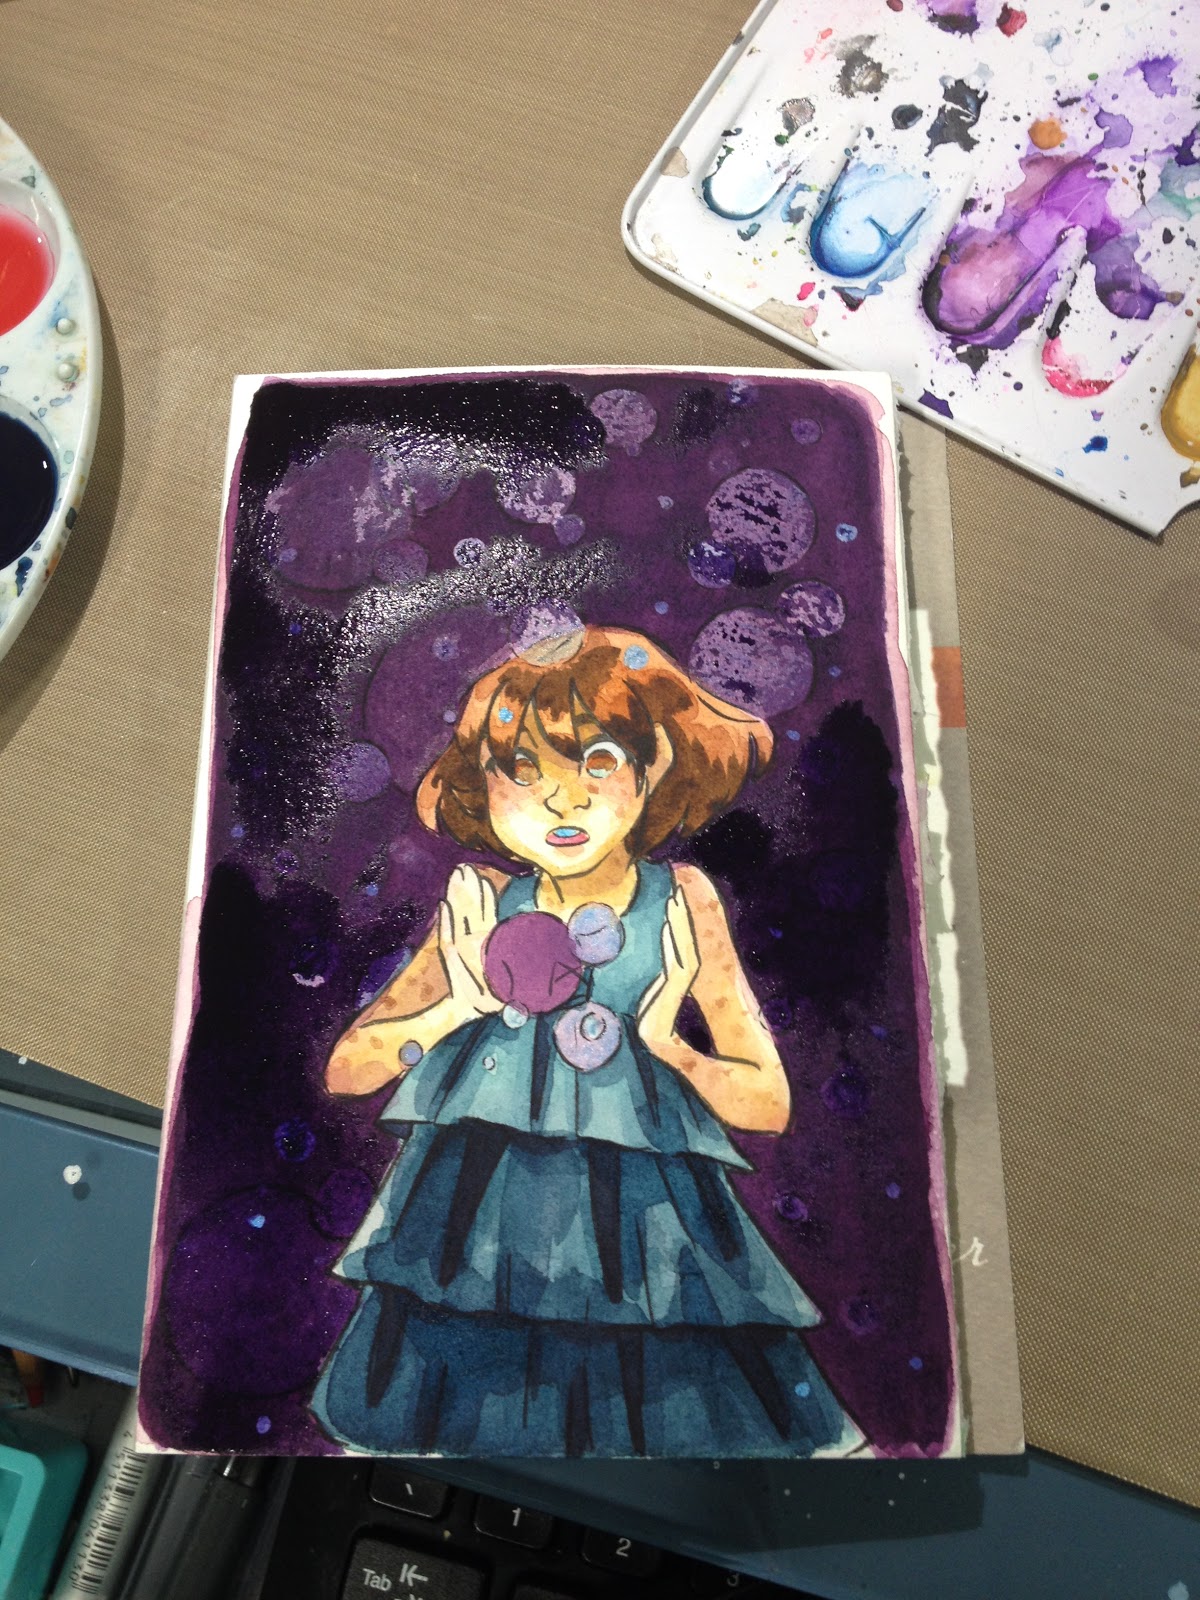
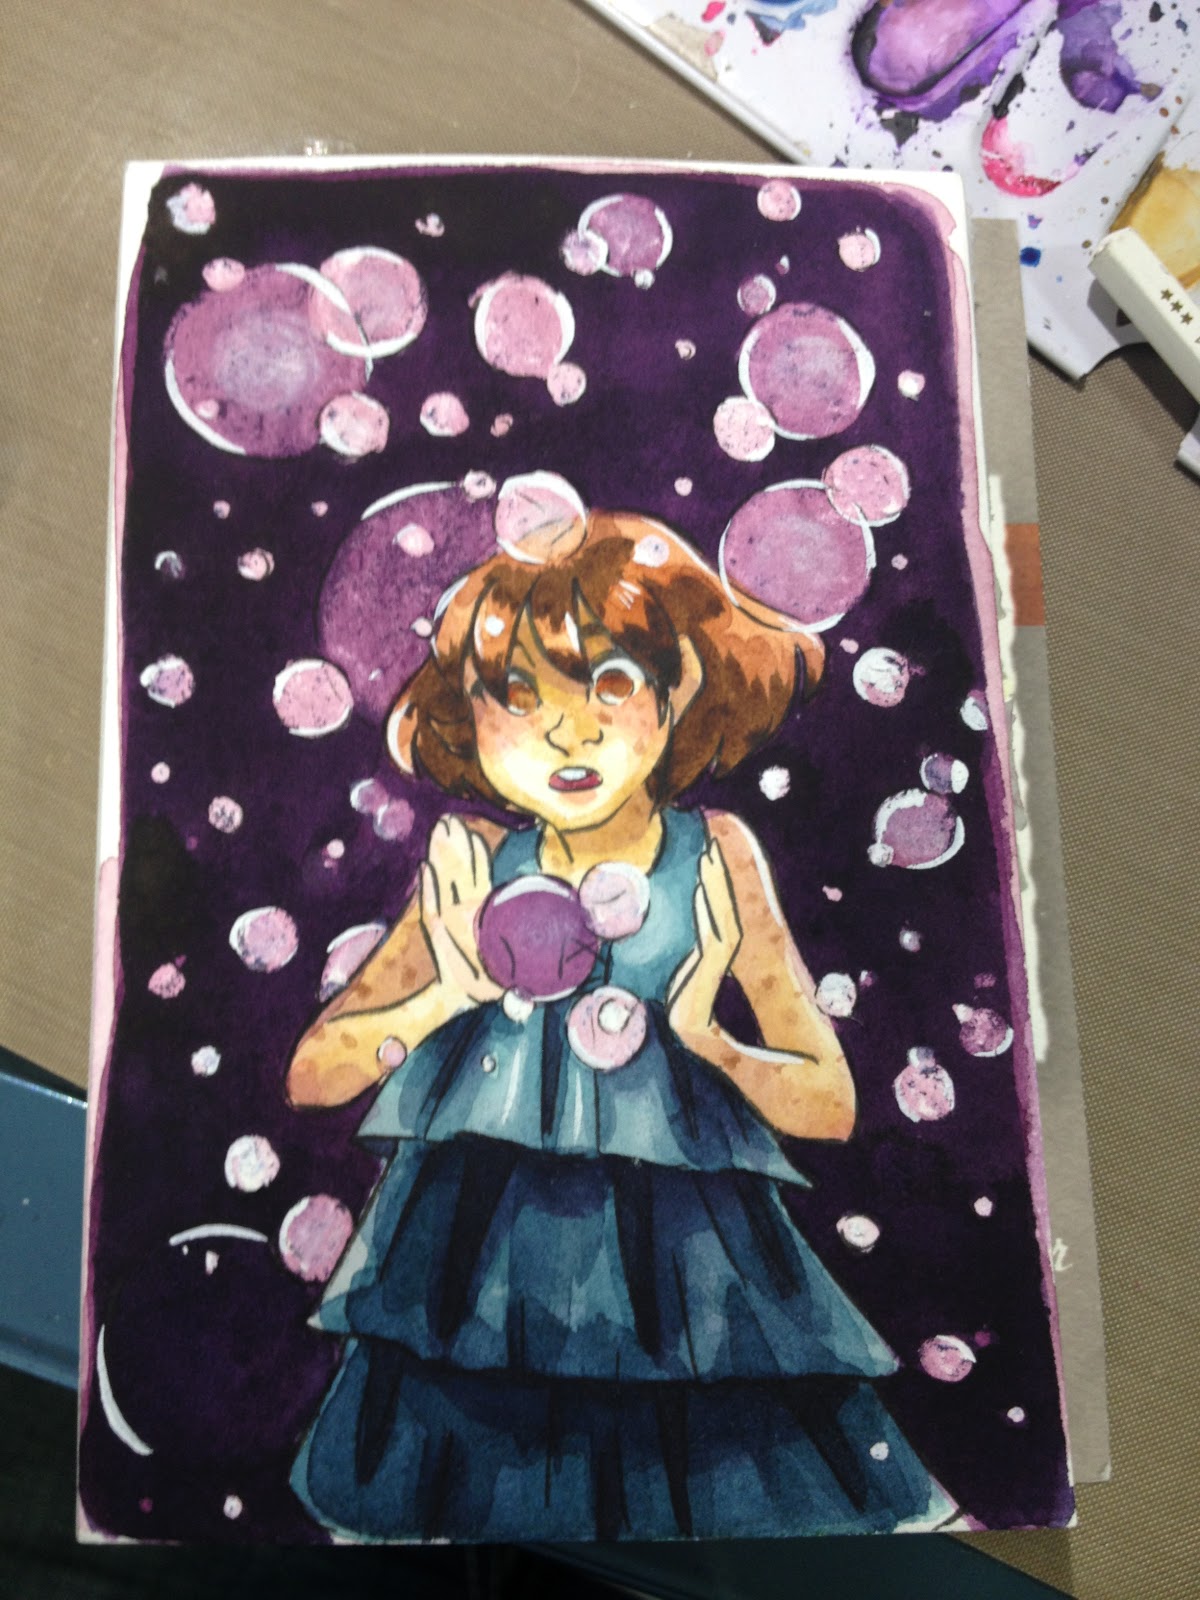
I applied one last layer of wash, and allowed it to dry.


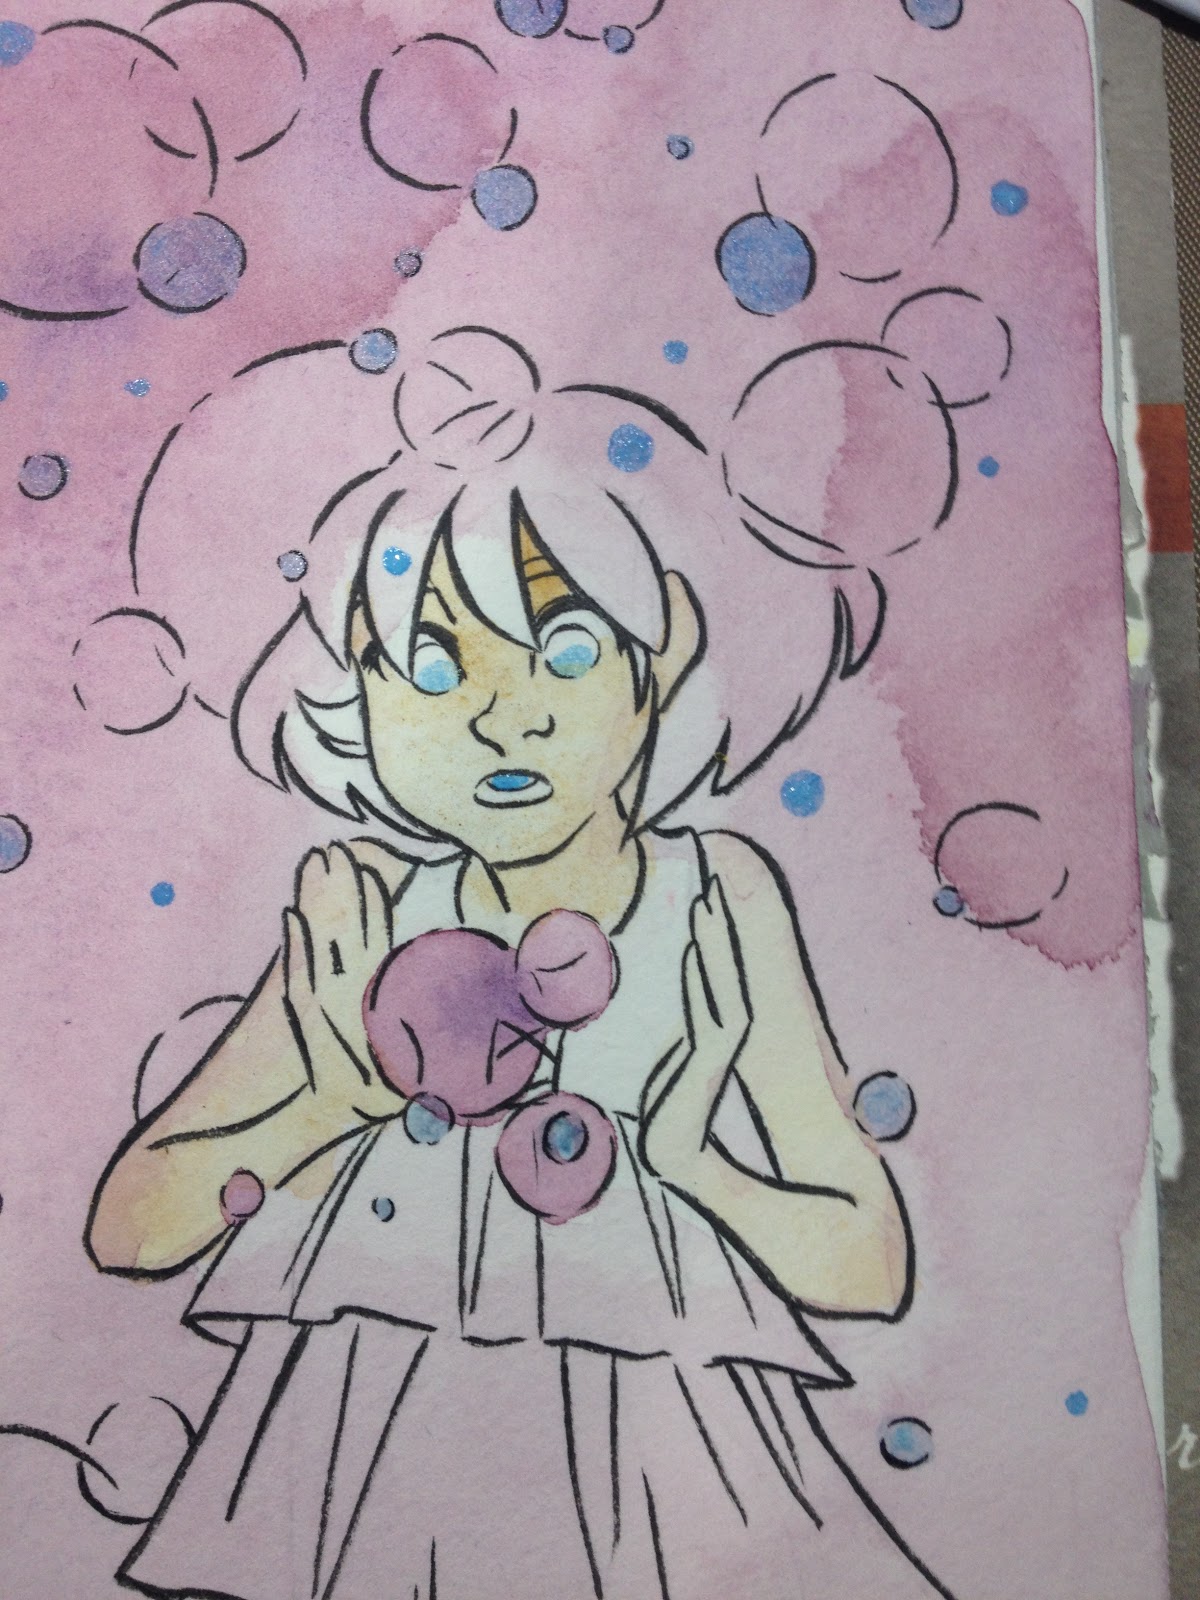
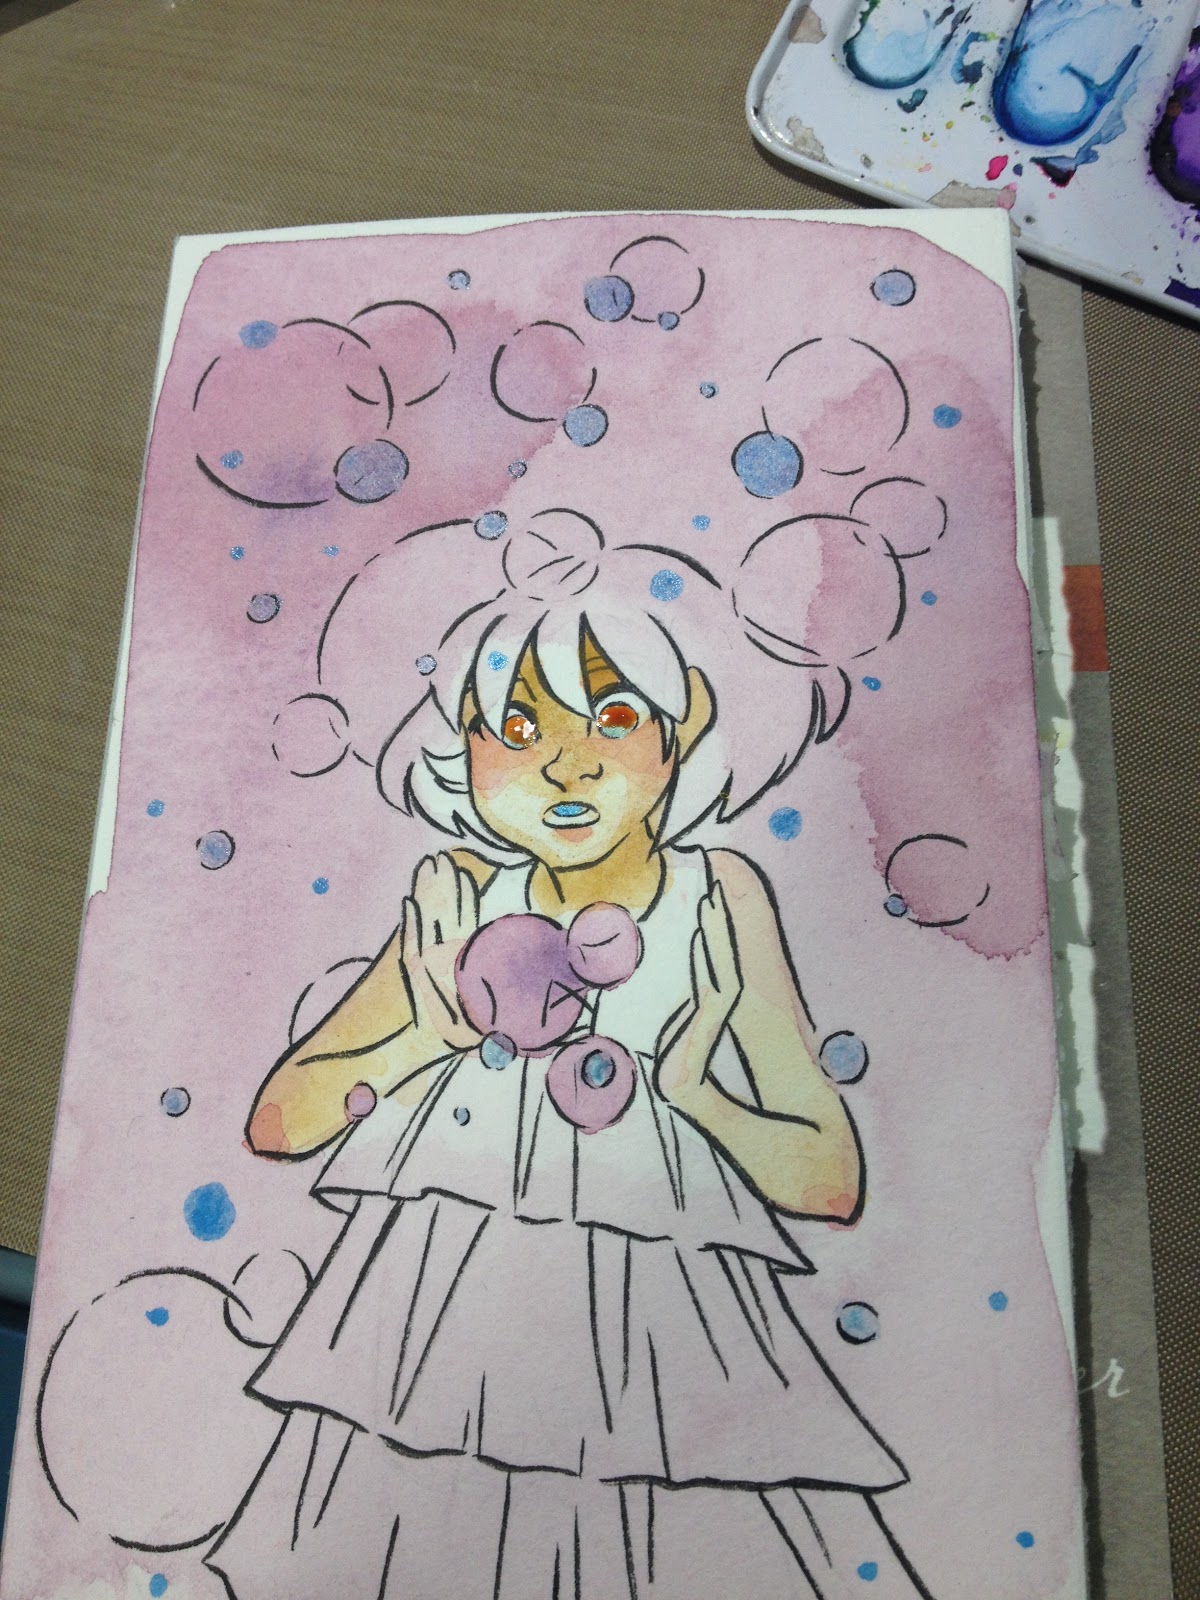
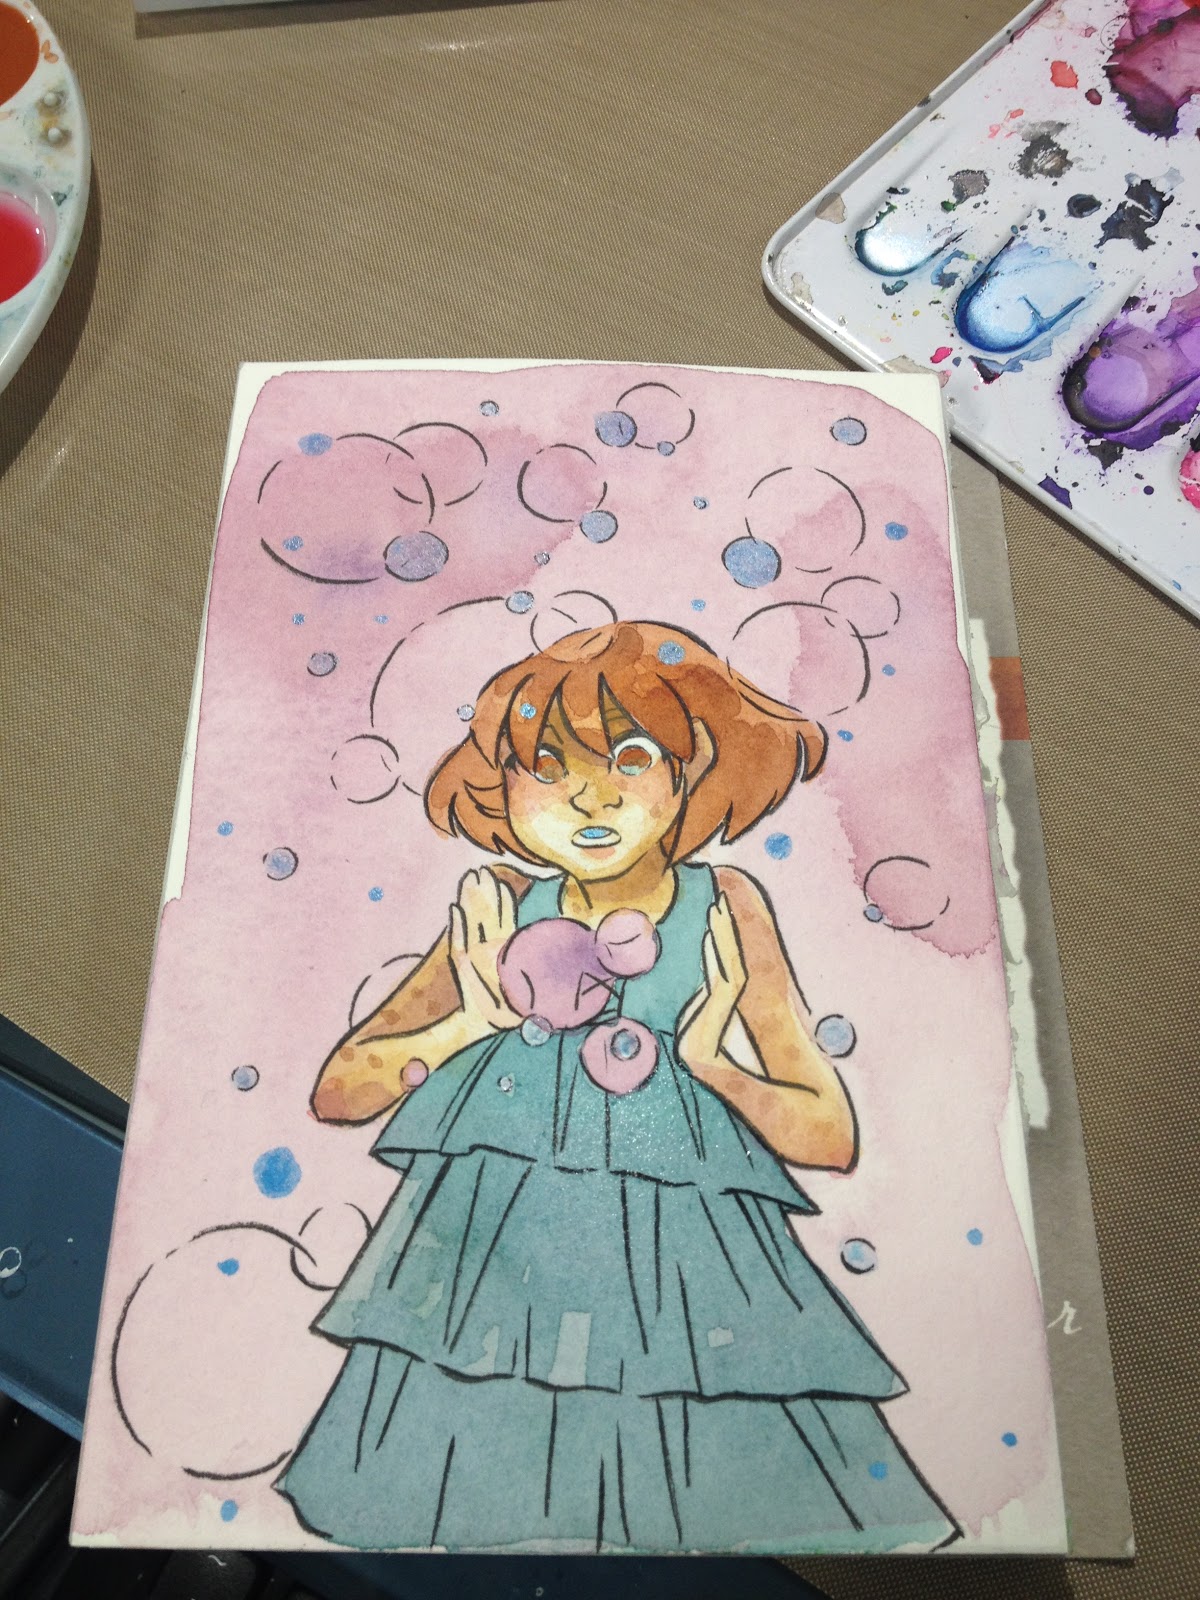
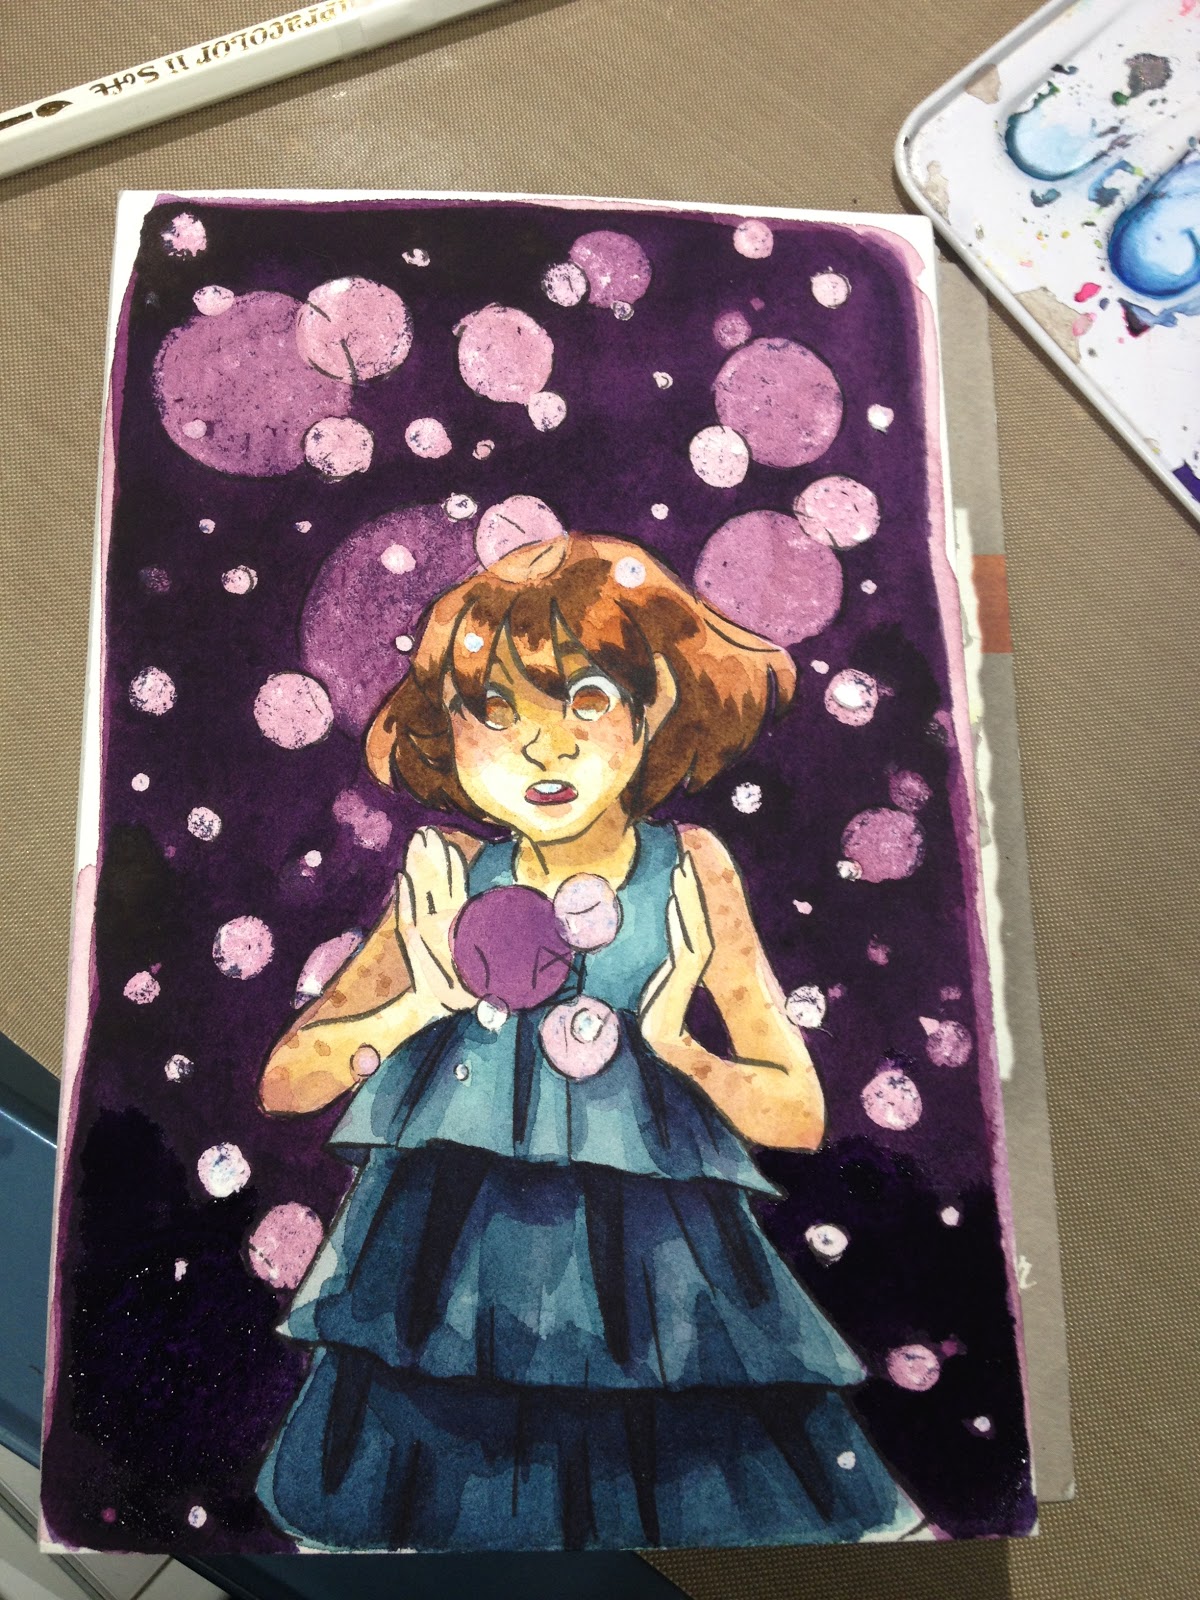
Once everything was dry, I attempted to pick up my masking fluid using a rubber cement eraser. This should be a fairly easy task- the latex in the frisket should want to adhere to your rubber cement eraser, but my Grafx proved more stubborn than I was- discoloring the paper and tearing when I tried to pick it up.


Because I had so many areas of discoloration, I tried to even things out with a light application of white watercolor pencil.

Unfortunately, the white watercolor pencil didn't blend out as hoped when water was added, so it didn't do much to even the tone.

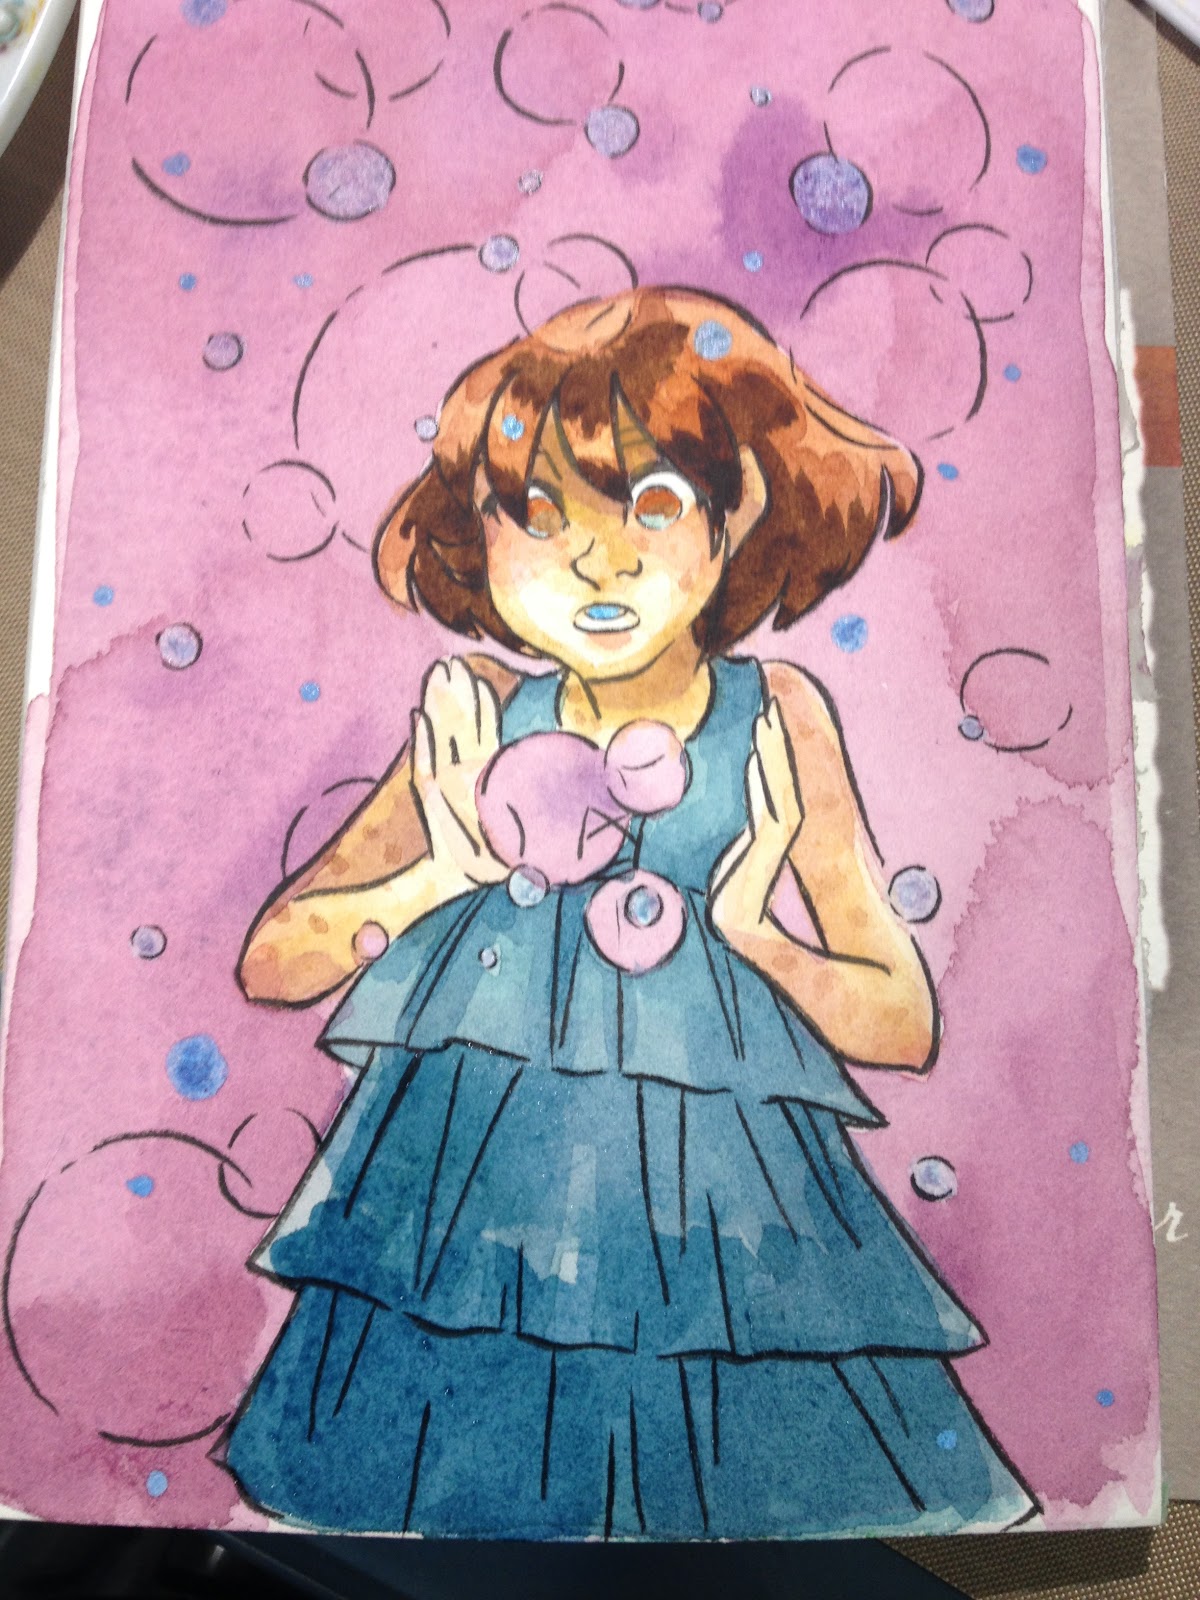
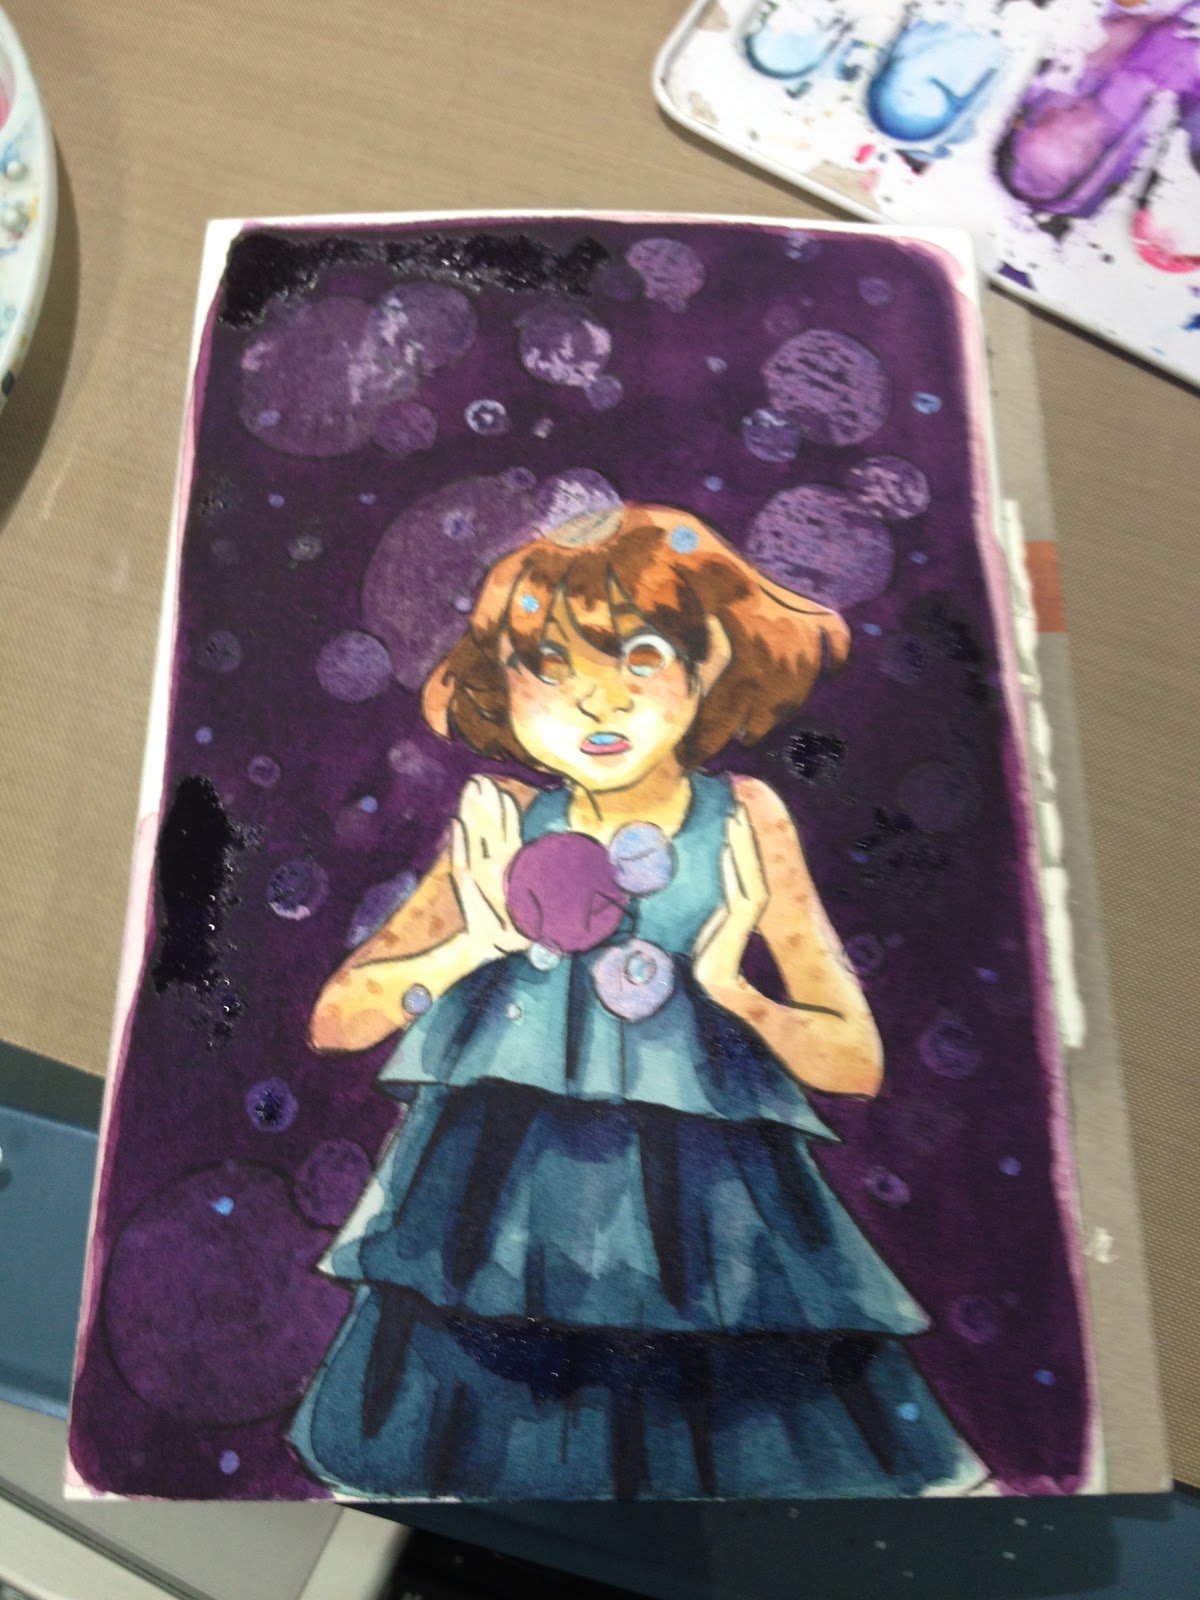
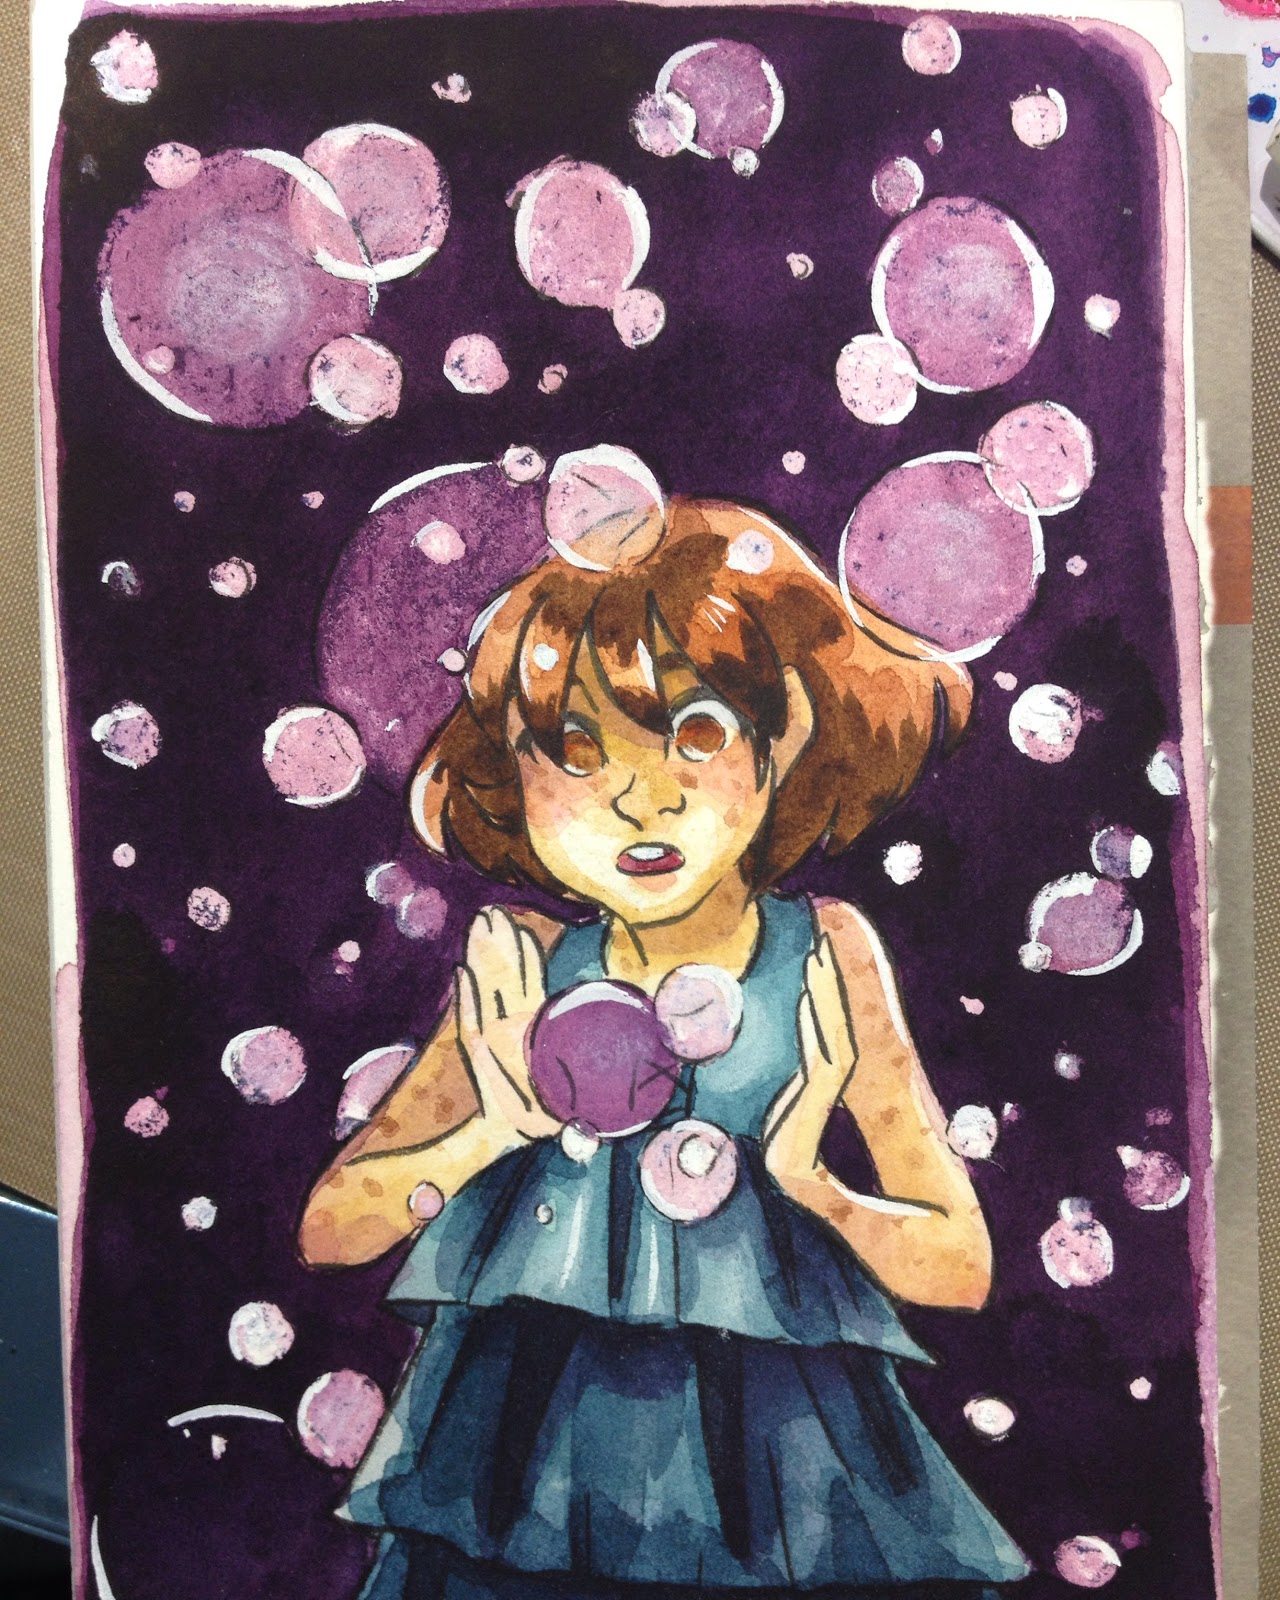
So I upped the size of my guns, and pulled out my jar of Copic Opaque white. Copic also makes a little jar that comes with a pathetic, flimsy, overly thin little brush, but I recommend you get the jar and use a synthetic brush for application.


At this point, I decided to call it done, and just try this technique again, without the masking fluid. Negative painting is an interesting technique that can liven up your watercolor repertoire, but Grafx masking pens are not recommended for projects like this, where you want your reserved areas to remain unscathed.
I'm excited to revisit Negative watercolor painting at a later date, with some revisions to my approach, and I hope I've inspired you guys to give it a shot as well!
If you enjoy content like this, please take a moment to share it on your social media sites! Your social support helps me build up a larger audience, which attracts sponsors. If you'd like to help fund future content like this, please consider backing this blog on Patreon.
Please consider donating to this blog or purchasing from Natto-shop (http://nattosoup.com/shop) if you want me to continue publishing quality content. All materials tested were purchased from my own pocket. Keep on Truckin' Nattosoup is not under any sponsorship.

Materials I Used:Fluid 100 Watercolor PaperSailor Mitsuo Aida Brush Pen (inks)Molotow Grafx masking fluid penAssorted watercolor palettesPlastic watercolor paletteAssorted brushes, including syntheticsCopic Opaque WhiteCaran d'Ache Supracolor II watercolor pencil (white)
I begin this tutorial with an inked piece on Fluid 100 watercolor paper. Fluid 100 watercolor paper is the cotton rag option recently released by Fluid. I sketched and inked (with a waterproof Sailor Mitsuo Aida brushpen) a design of Kara surrounded by fireflies a few weeks before I got around to painting it, but as long as you allow your ink to dry for at least 24 hours, it should be good to go.
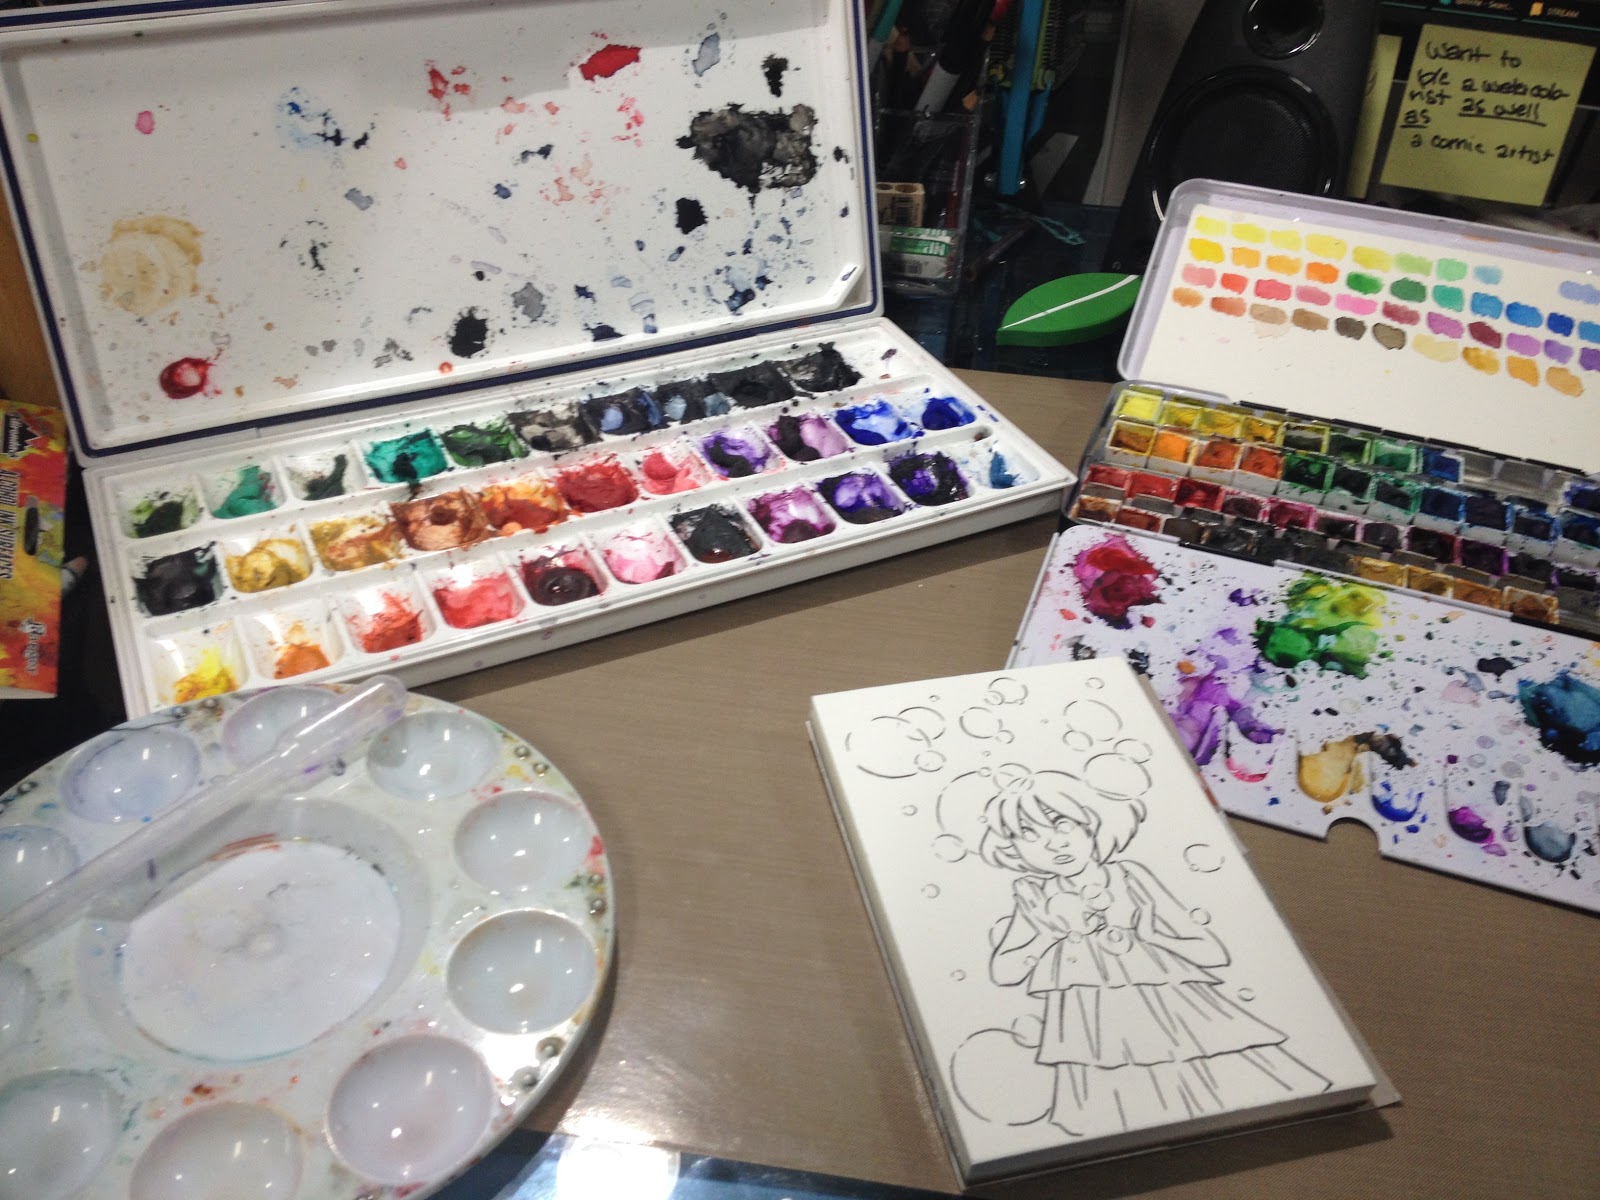
Here's my whole desktop setup. It includes a couple self-assembled watercolor sets- tube colors (left) and half pans (right), a round plastic palette, my illustration. My brushes are just off camera. You can read more about setting up your own palette of dried tube watercolors here.
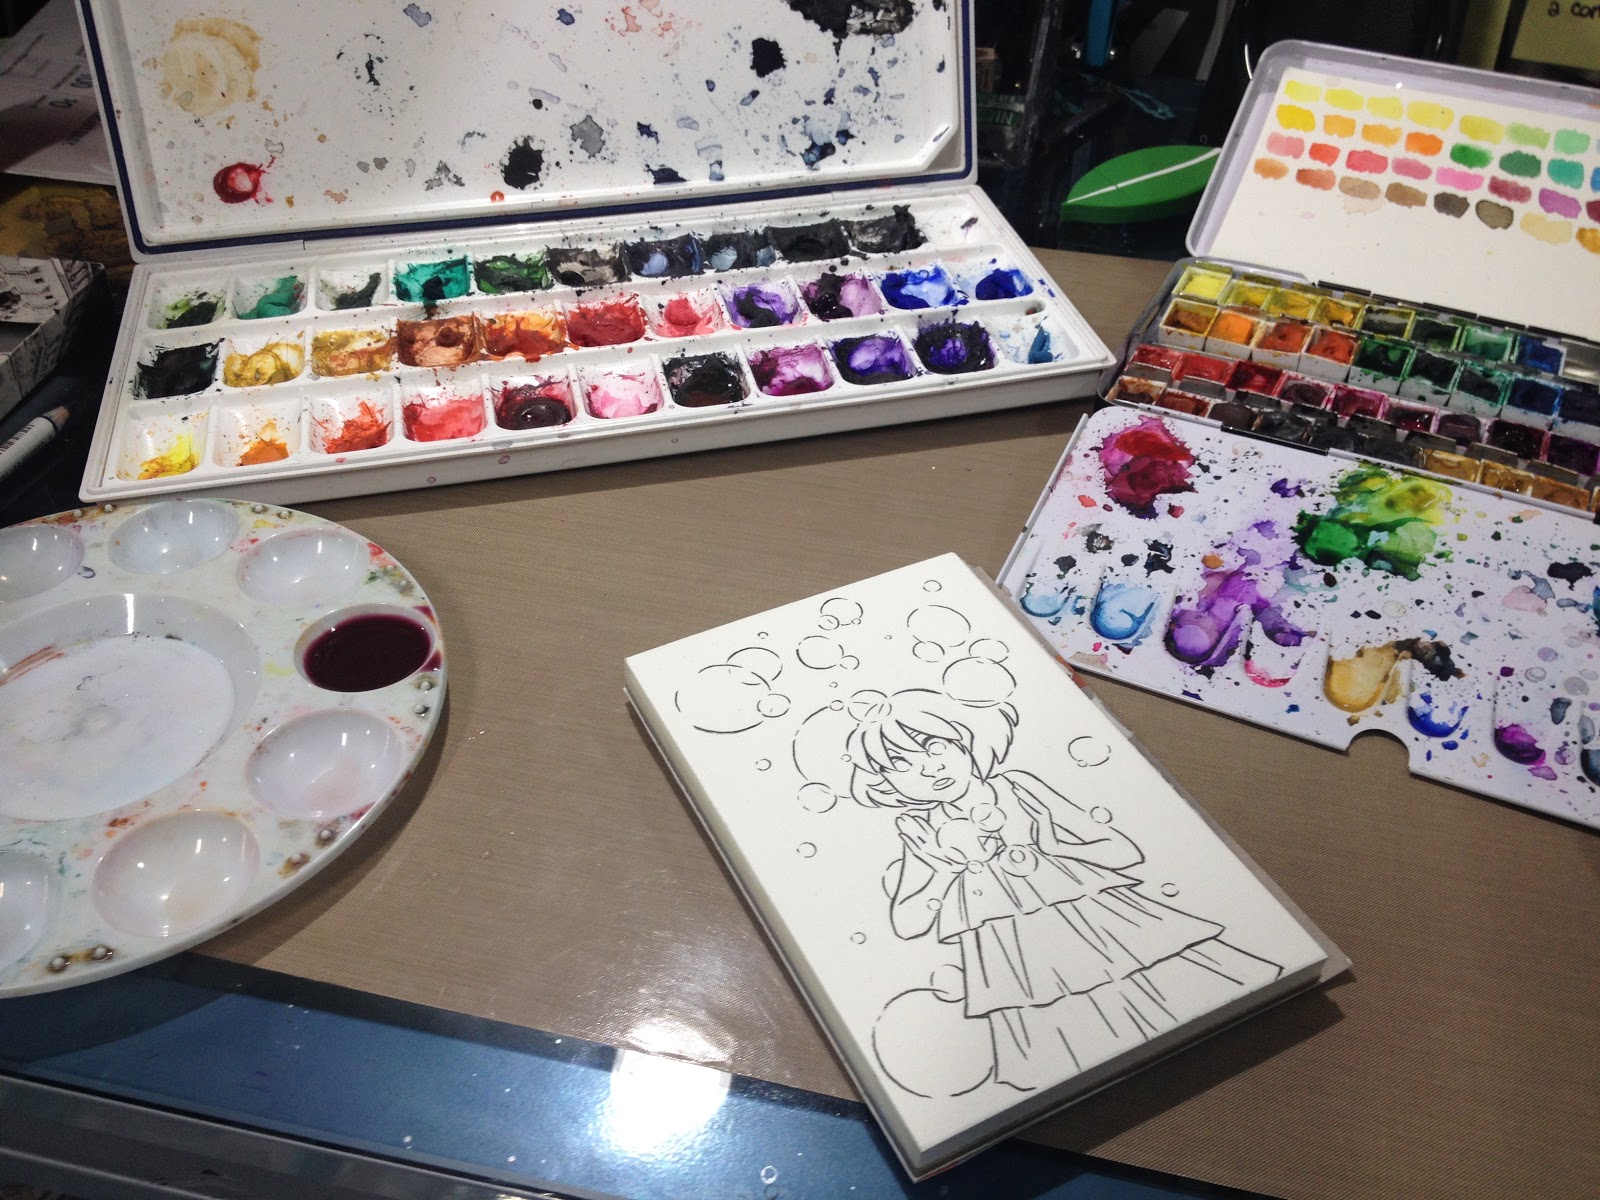
I mixed my first layer of wash, to help establish the tone for everything, and to tint areas of Kara that wouldn't be lit by the fireflies.
And I used a Viva papertowel to dab up some of the excess wash- if you catch it while it's still wet, it's an easy way to do a glow effect.
I also opted to darken a few areas selectively, to add a little visual interest.
And colored in the fireflies that cross Kara's skin. Retrospectively, I think I would have left them light.
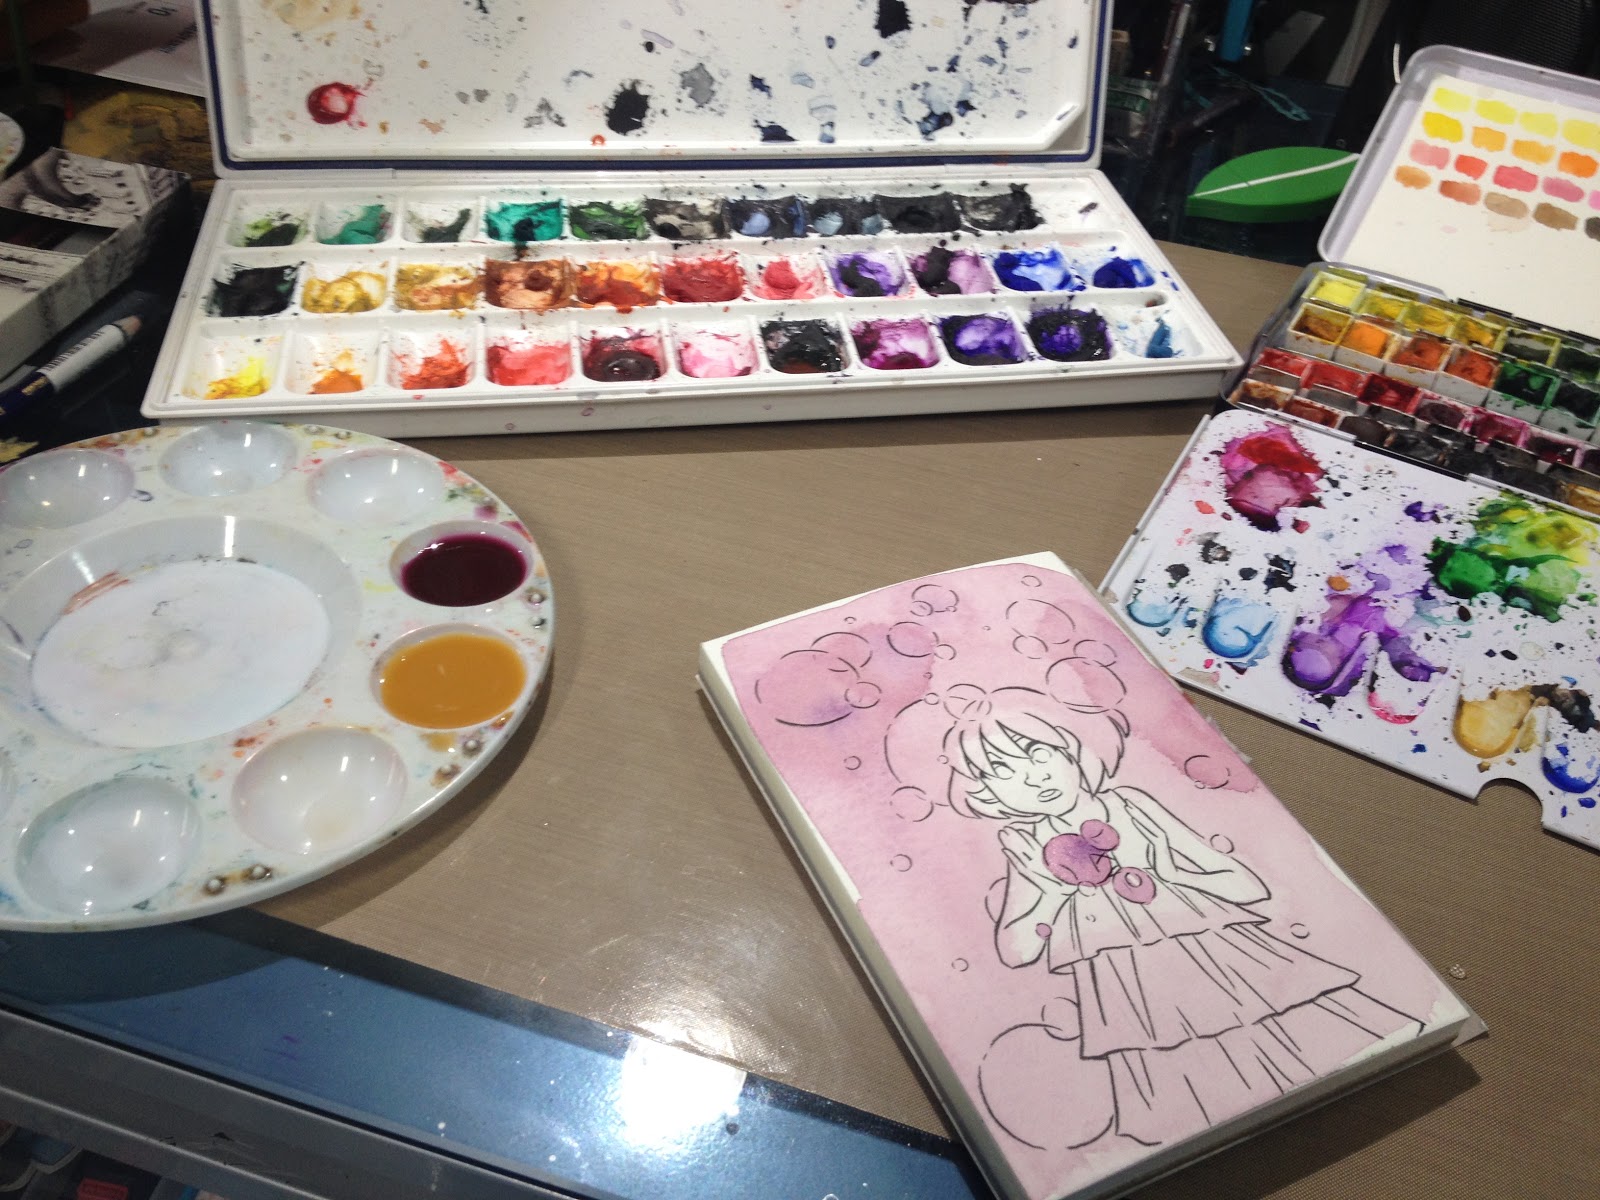
Now that my wash is established, I start laying in tones for Kara's skin.
Here's where I really fell off the boat- I figured it would be faster and easier for me if I went ahead and masked bubbles that I didn't want colored by subsequent washes. I used Molotow's Grafx masking fluid pen, which has given me a lot of issus in the past. Next time, I may skip the masking fluid entirely, or I may opt for a higher quality masking fluid, as Grafx continues to give me issues.
While my masking fluid dried, I added another layer to Kara's skin.

And began mixing some of the other colors I knew I'd need.

And I start laying those colors in to give me a feel for what's going to need to be darker, what should be left light to account for glow, ect.

After my base colors were applied, I can start focusing on the background. So the whole point of negative painting is what you leave unpainted- I.E. negative space. I cheated a bit using the masking fluid to reserve areas of negative color, because I wanted to focus on just laying in washes.
And as the washes dry, I apply more layers of masking fluid, so I don't have to worry about remembering what I want to reserve. In the future, if I don't plan on adding details or colors to my reserved negative spaces, I may just go over them with a clear wax crayon. Masking Frisket (the plastic masking paper I've used in some videos) may also make this a bit easier, without causing surface damage.
And while I wait on the masking fluid to dry, I continue to work on building up shape, shade, and form on Kara.
And once those layers had dried, I applied another layer of purple wash to the background. Throughout my washes, I tried to move from red violet to dark blue violet as the layers built up.

And when that layer dried, I added more masking fluid.
And once that was dry, I continued adding washes to the background.

Perhaps one of the issues is that my paper may not have been entirely dry when I added the masking fluid- it was dry to the touch, but cotton based papers often take a bit longer to dry than woodpulp papers (as the water actually soaks in), or perhaps the cotton fibers were more fragile. Either way, I added another layer of masking fluid.

I applied one last layer of wash, and allowed it to dry.
Once everything was dry, I attempted to pick up my masking fluid using a rubber cement eraser. This should be a fairly easy task- the latex in the frisket should want to adhere to your rubber cement eraser, but my Grafx proved more stubborn than I was- discoloring the paper and tearing when I tried to pick it up.

Because I had so many areas of discoloration, I tried to even things out with a light application of white watercolor pencil.
Unfortunately, the white watercolor pencil didn't blend out as hoped when water was added, so it didn't do much to even the tone.
So I upped the size of my guns, and pulled out my jar of Copic Opaque white. Copic also makes a little jar that comes with a pathetic, flimsy, overly thin little brush, but I recommend you get the jar and use a synthetic brush for application.
At this point, I decided to call it done, and just try this technique again, without the masking fluid. Negative painting is an interesting technique that can liven up your watercolor repertoire, but Grafx masking pens are not recommended for projects like this, where you want your reserved areas to remain unscathed.
I'm excited to revisit Negative watercolor painting at a later date, with some revisions to my approach, and I hope I've inspired you guys to give it a shot as well!
If you enjoy content like this, please take a moment to share it on your social media sites! Your social support helps me build up a larger audience, which attracts sponsors. If you'd like to help fund future content like this, please consider backing this blog on Patreon.
Please consider donating to this blog or purchasing from Natto-shop (http://nattosoup.com/shop) if you want me to continue publishing quality content. All materials tested were purchased from my own pocket. Keep on Truckin' Nattosoup is not under any sponsorship.
Alcohol Marker Review: Conda Markers
This post was sponsored by Nattosoup Studio's
Patreon
. If you enjoy content like this, and you want to help out, please consider pledging. You can read more about my goals for this blog, the YouTube, and why I launched a Patreon
here
. Without your support, I can no longer afford to fund reviews as this blog has no outside sponsorship.
The Brand
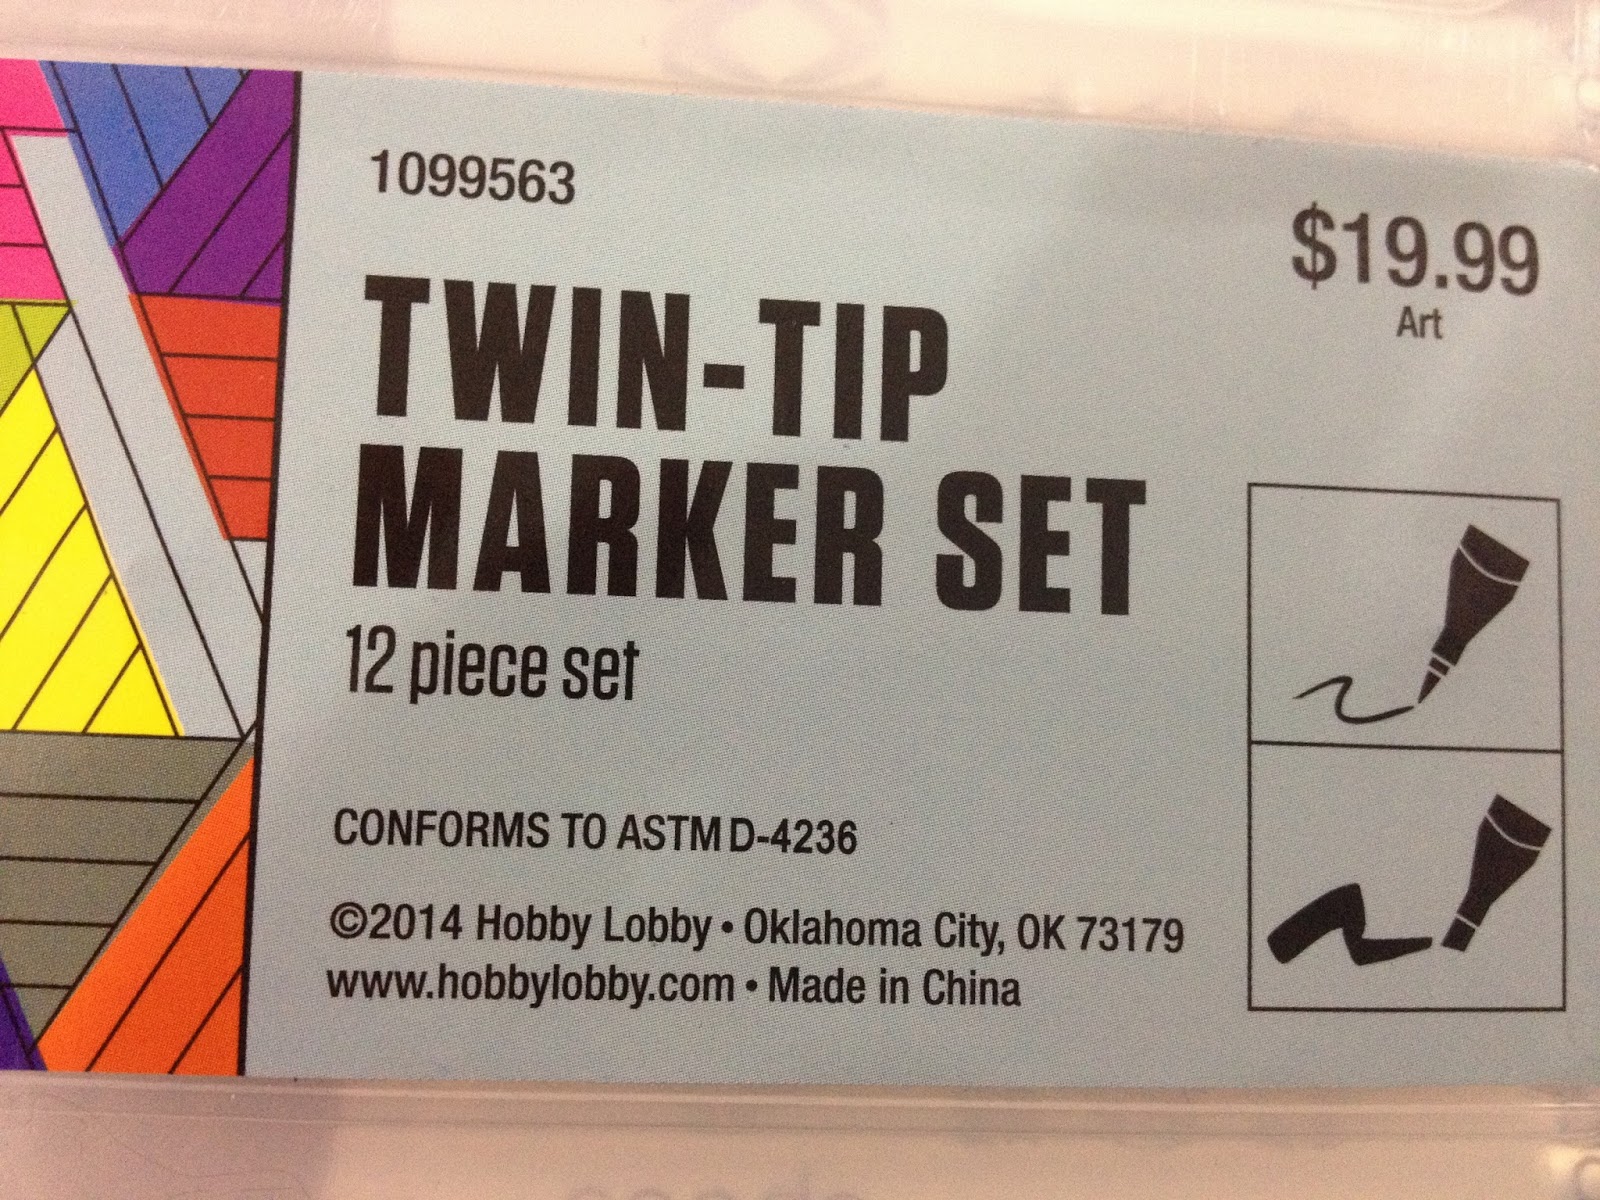
Conda is a Chinese art supply brand that produce everything from easels to paints to markers. Conda's marker offerings are fairly varied- there are marker bodies that look like Jerry's Artarama's Concept markers, bodies that look like Finecolour Sketch markers, and markers I can't comment on as they're hidden by an opaque box. I couldn't find markers similar to those I purchased at Hobby Lobby in Fall 2015, but it seems like others were able to find this body type at their stores in the fall as well.
I purchased the 12 piece set for $19.99- I was tempted to splurge and get the 24 piece set (which was $34.99, I believe), but I didn't want to invest a lot of money in markers I'm only purchasing for review purposes.
If you're interested in trying Conda markers, the Hobby Lobby website still has the 24 piece set available. These markers seem to have replaced the Art Markers I reviewed last year.
If you can't find Conda Markers, they're very similar to Prismacolor's original alcohol markers, which you can purchase through Amazon. Your purchase through affiliate links helps support this blog, so if you're interested in alcohol or art markers, please make sure you check this blog first!

The Stats
Not available openstock$19.99 for 12 markersTwin Tipped- bullet nib and chisel nibAvailable in sets- 12, 24, 36Available through Hobby LobbyBlender marker available in larger sets
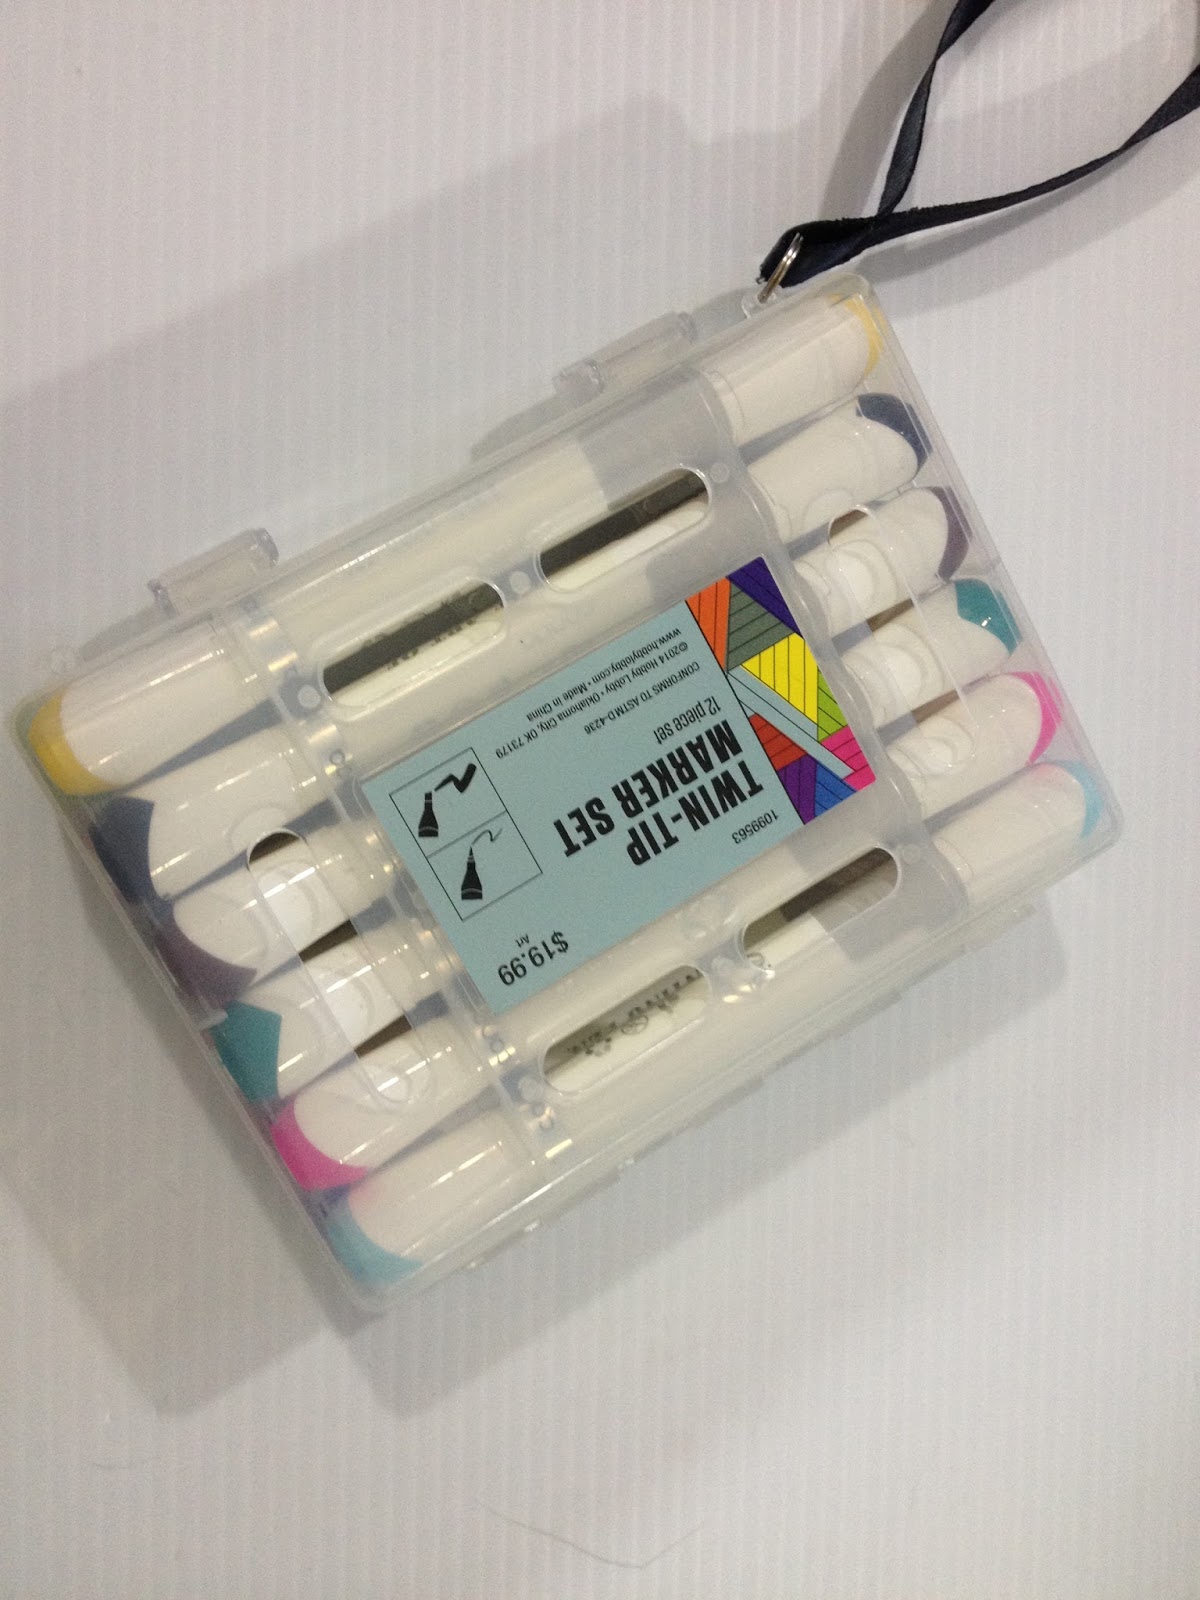
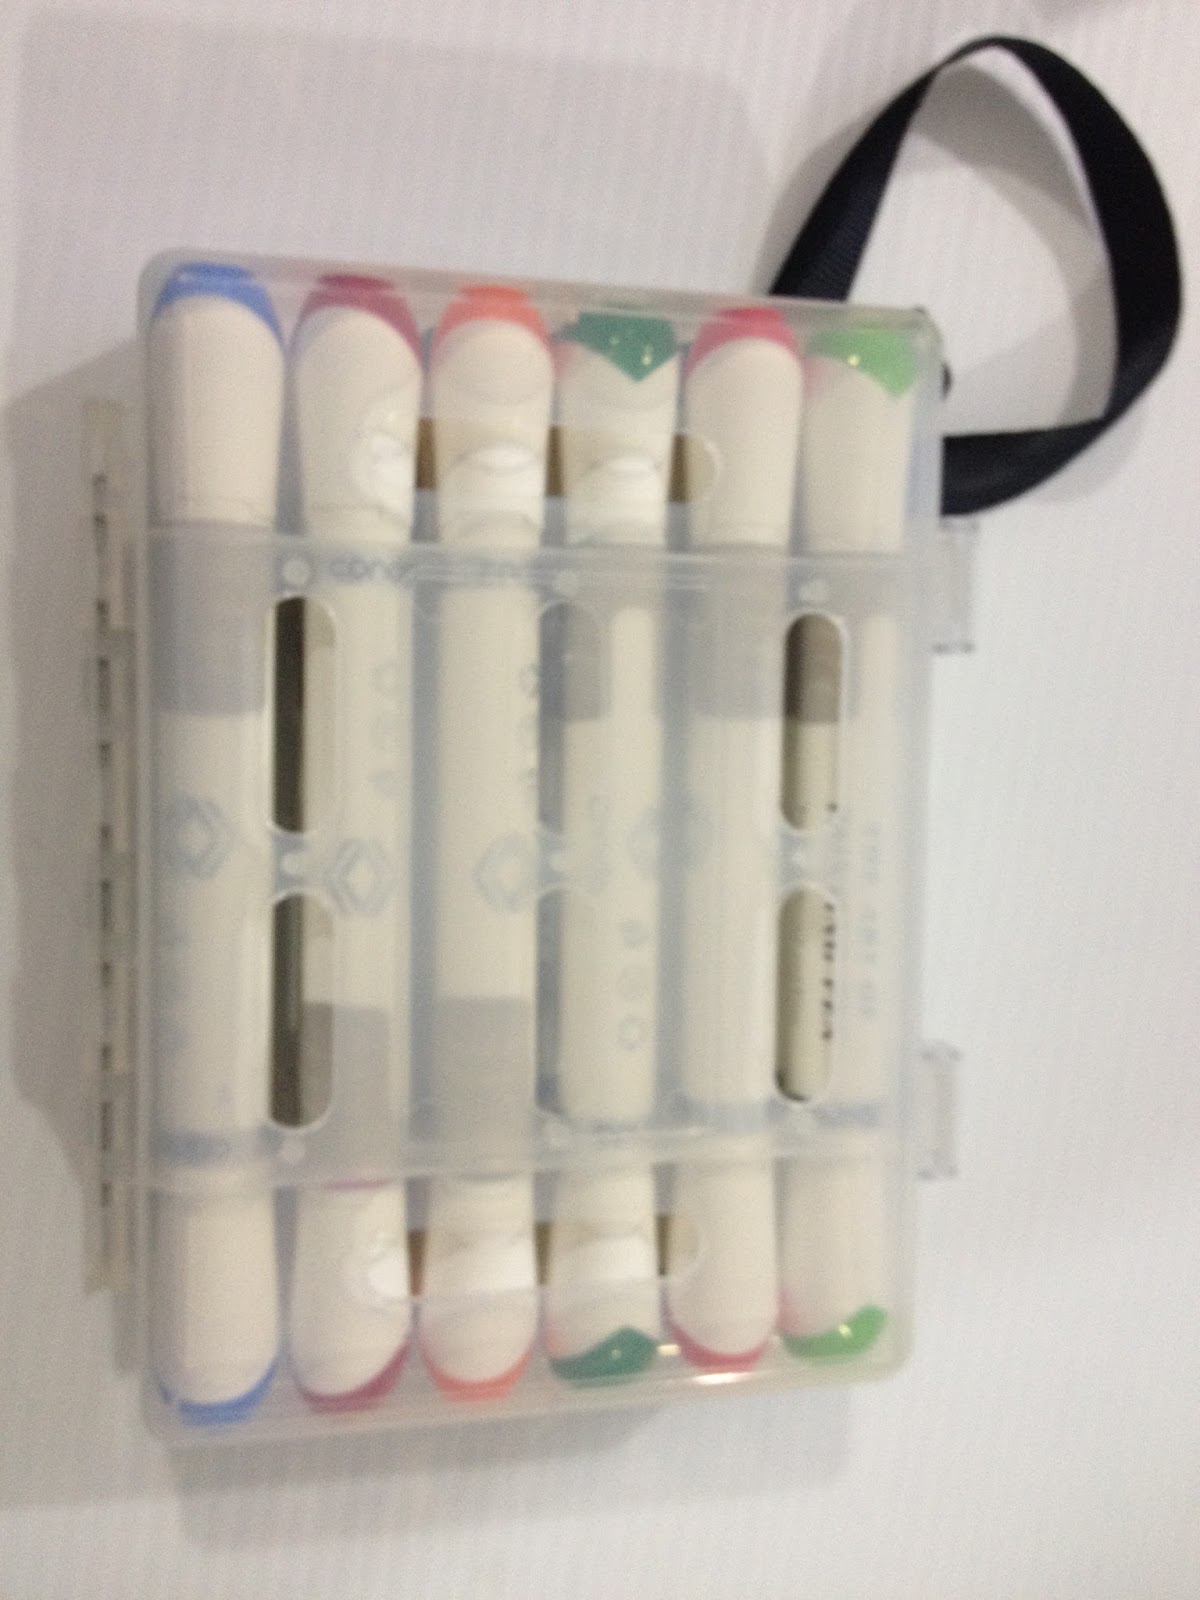
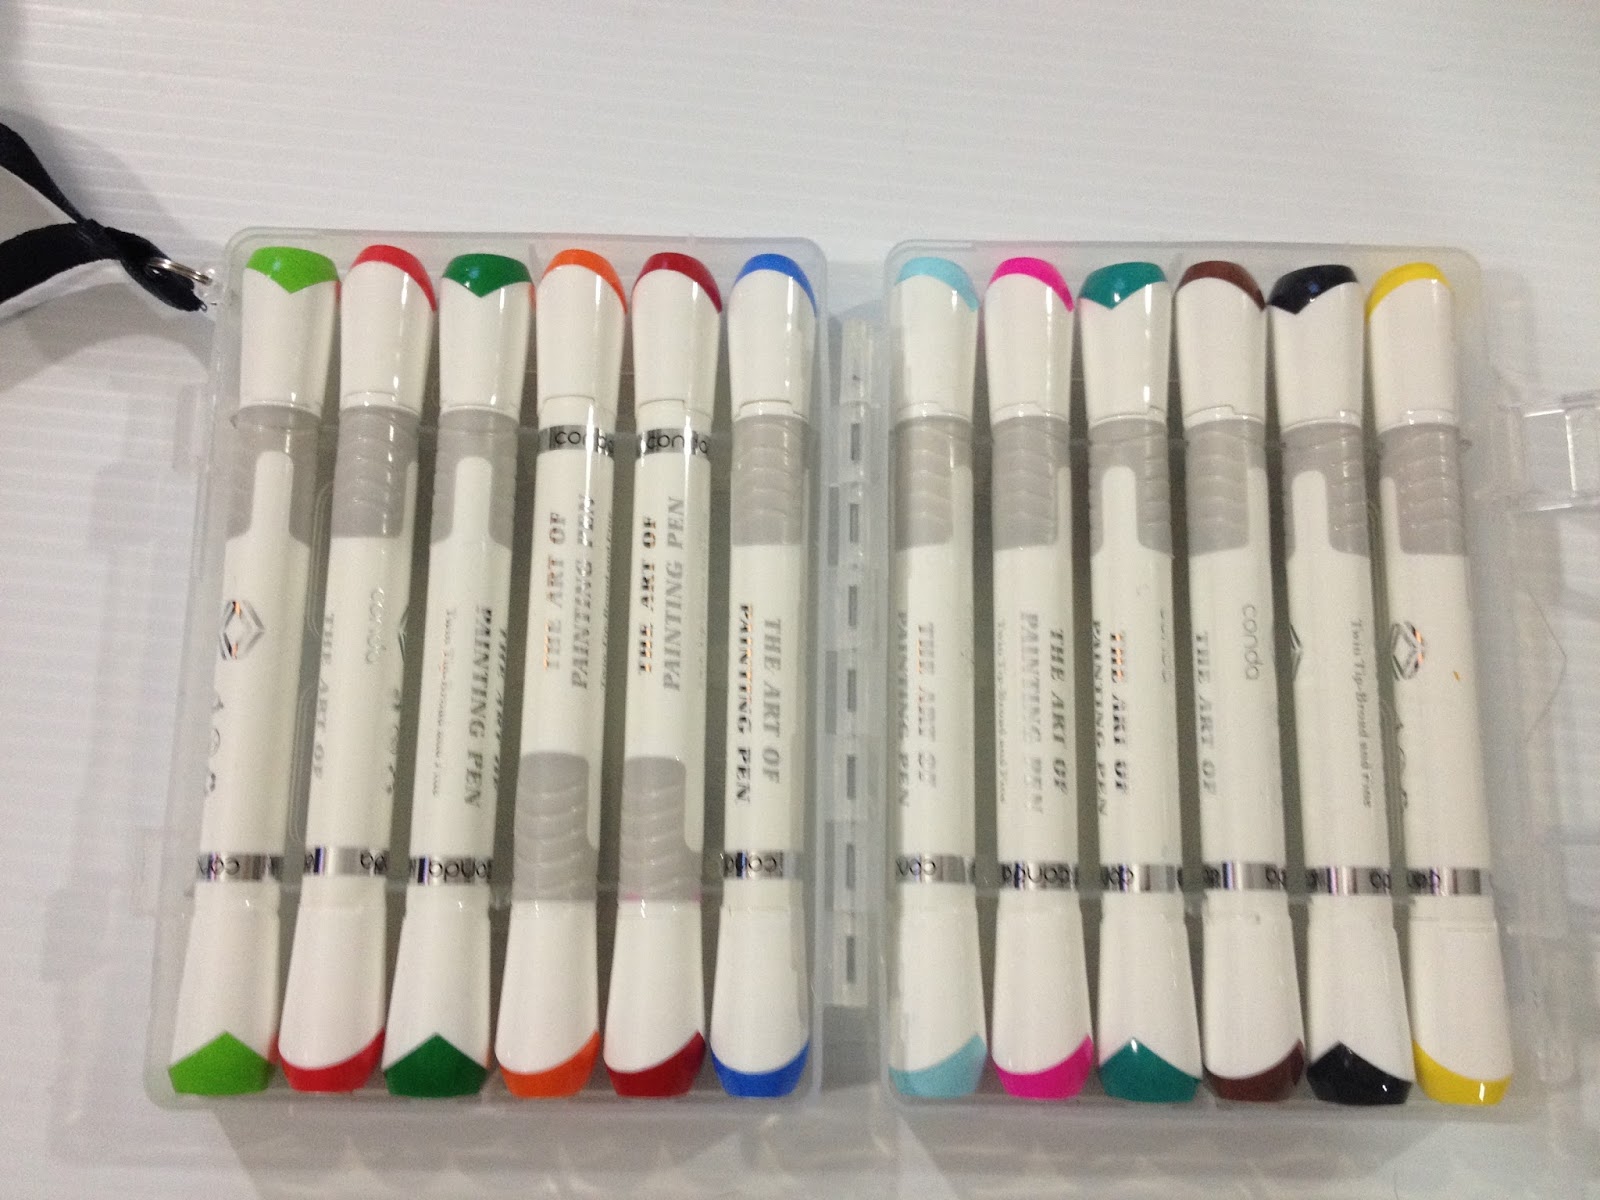
The Packaging
Conda markers have some of the most interesting marker packaging I've ever seen. All sets available through Hobby Lobby come in a reusable, sturdy plastic case that clicks shut. My 12 piece set came with a wrist loop.


The clips are very secure, and this set could very easily travel to conventions for at-show work.

The markers are securely held in place- so securely that if all markers are in their spots, it's difficult to remove markers.
The Markers

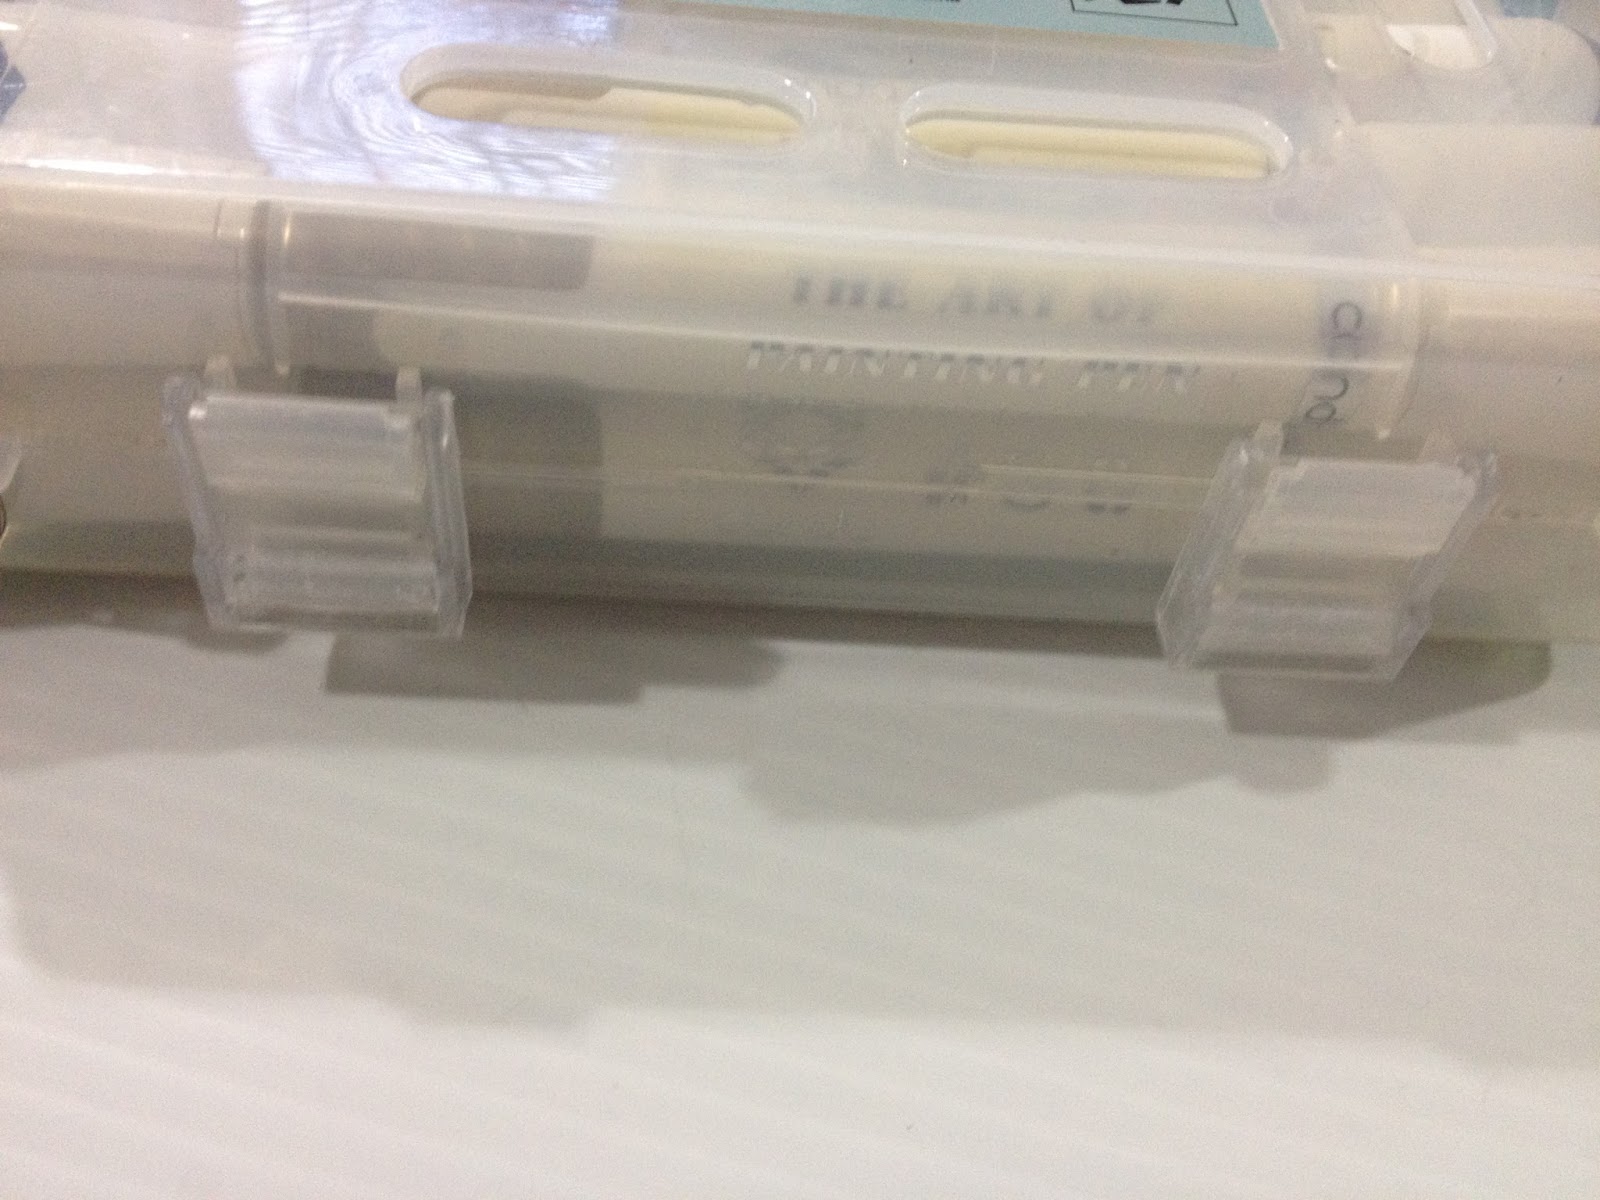
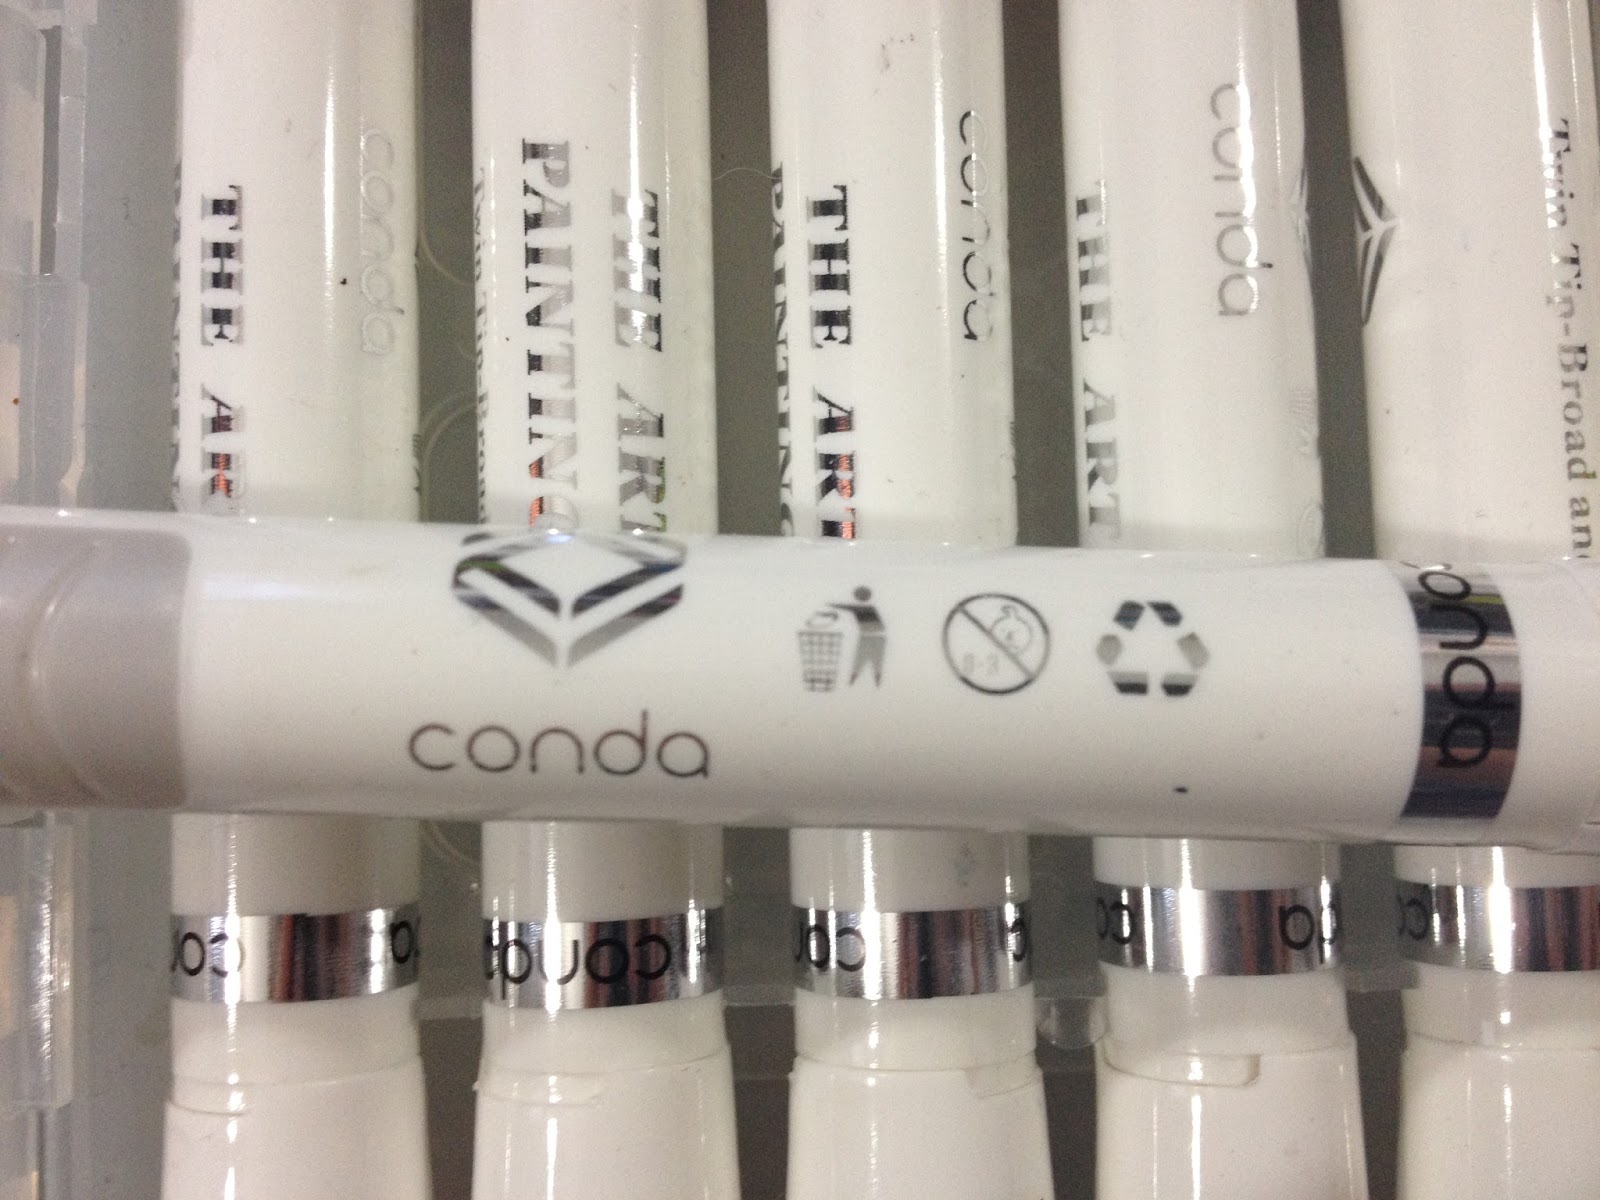
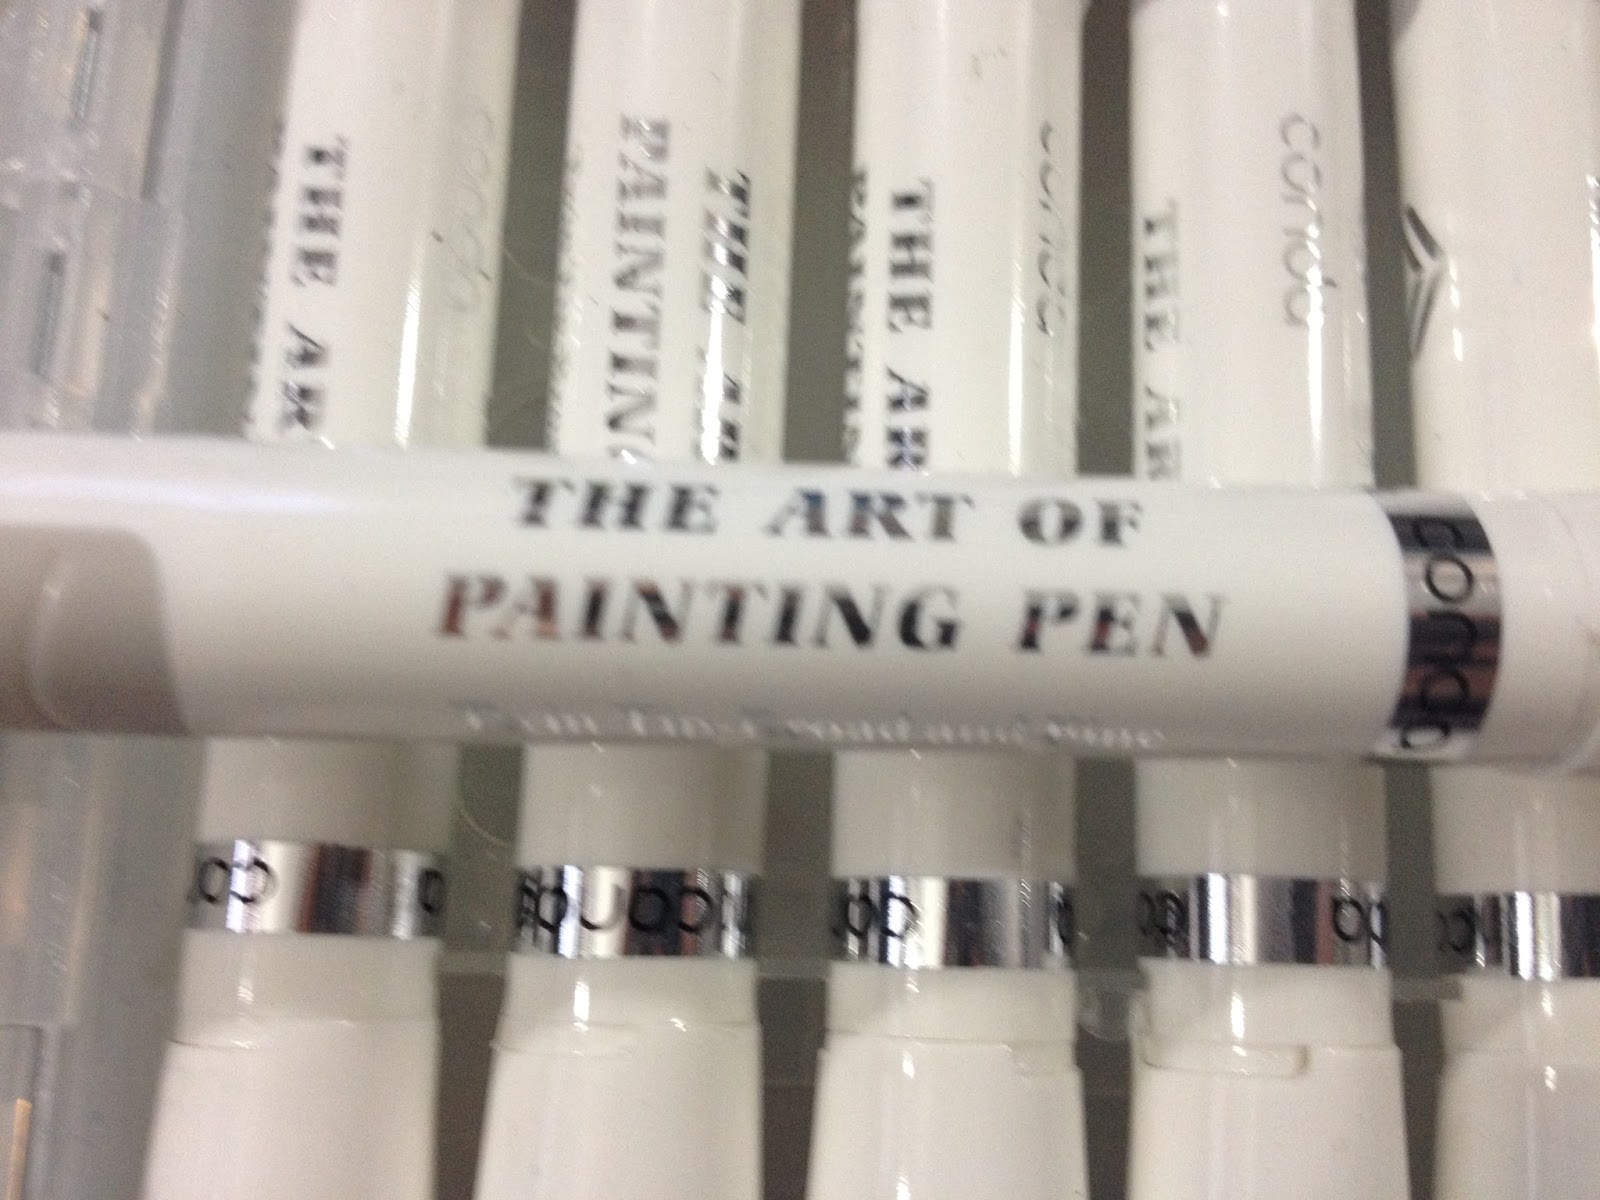
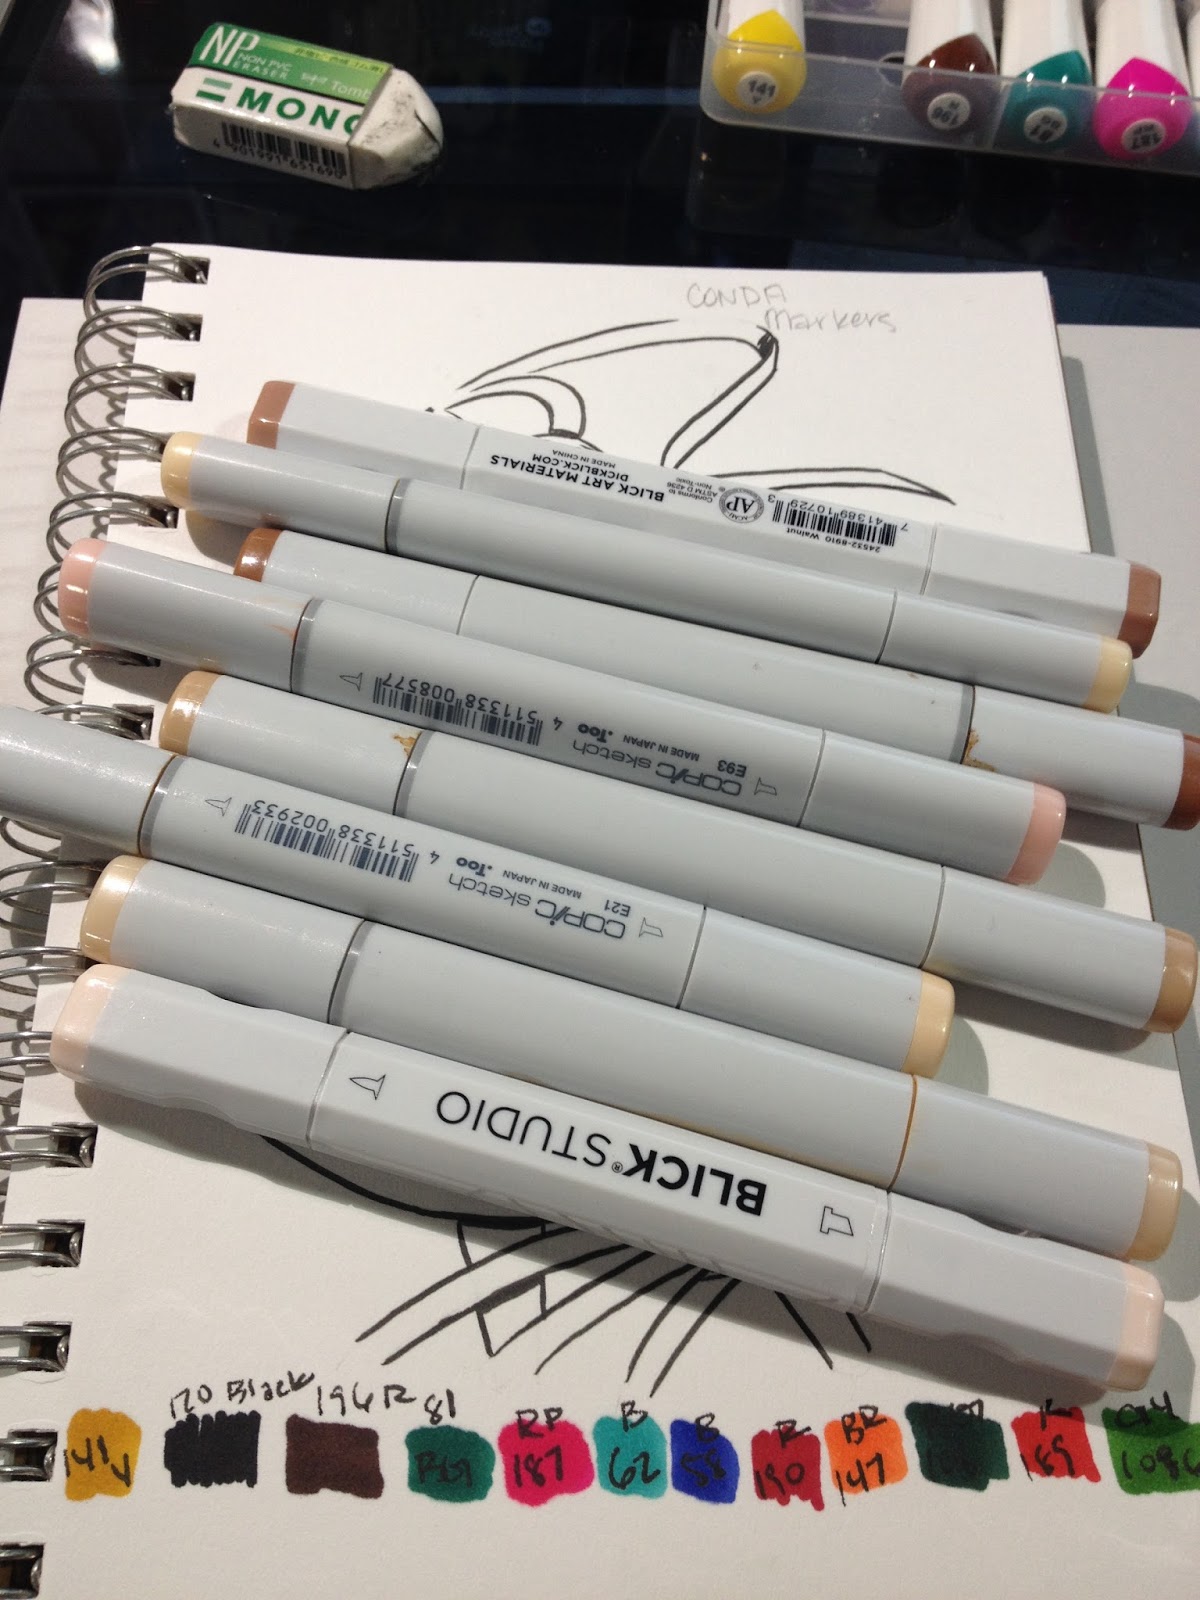
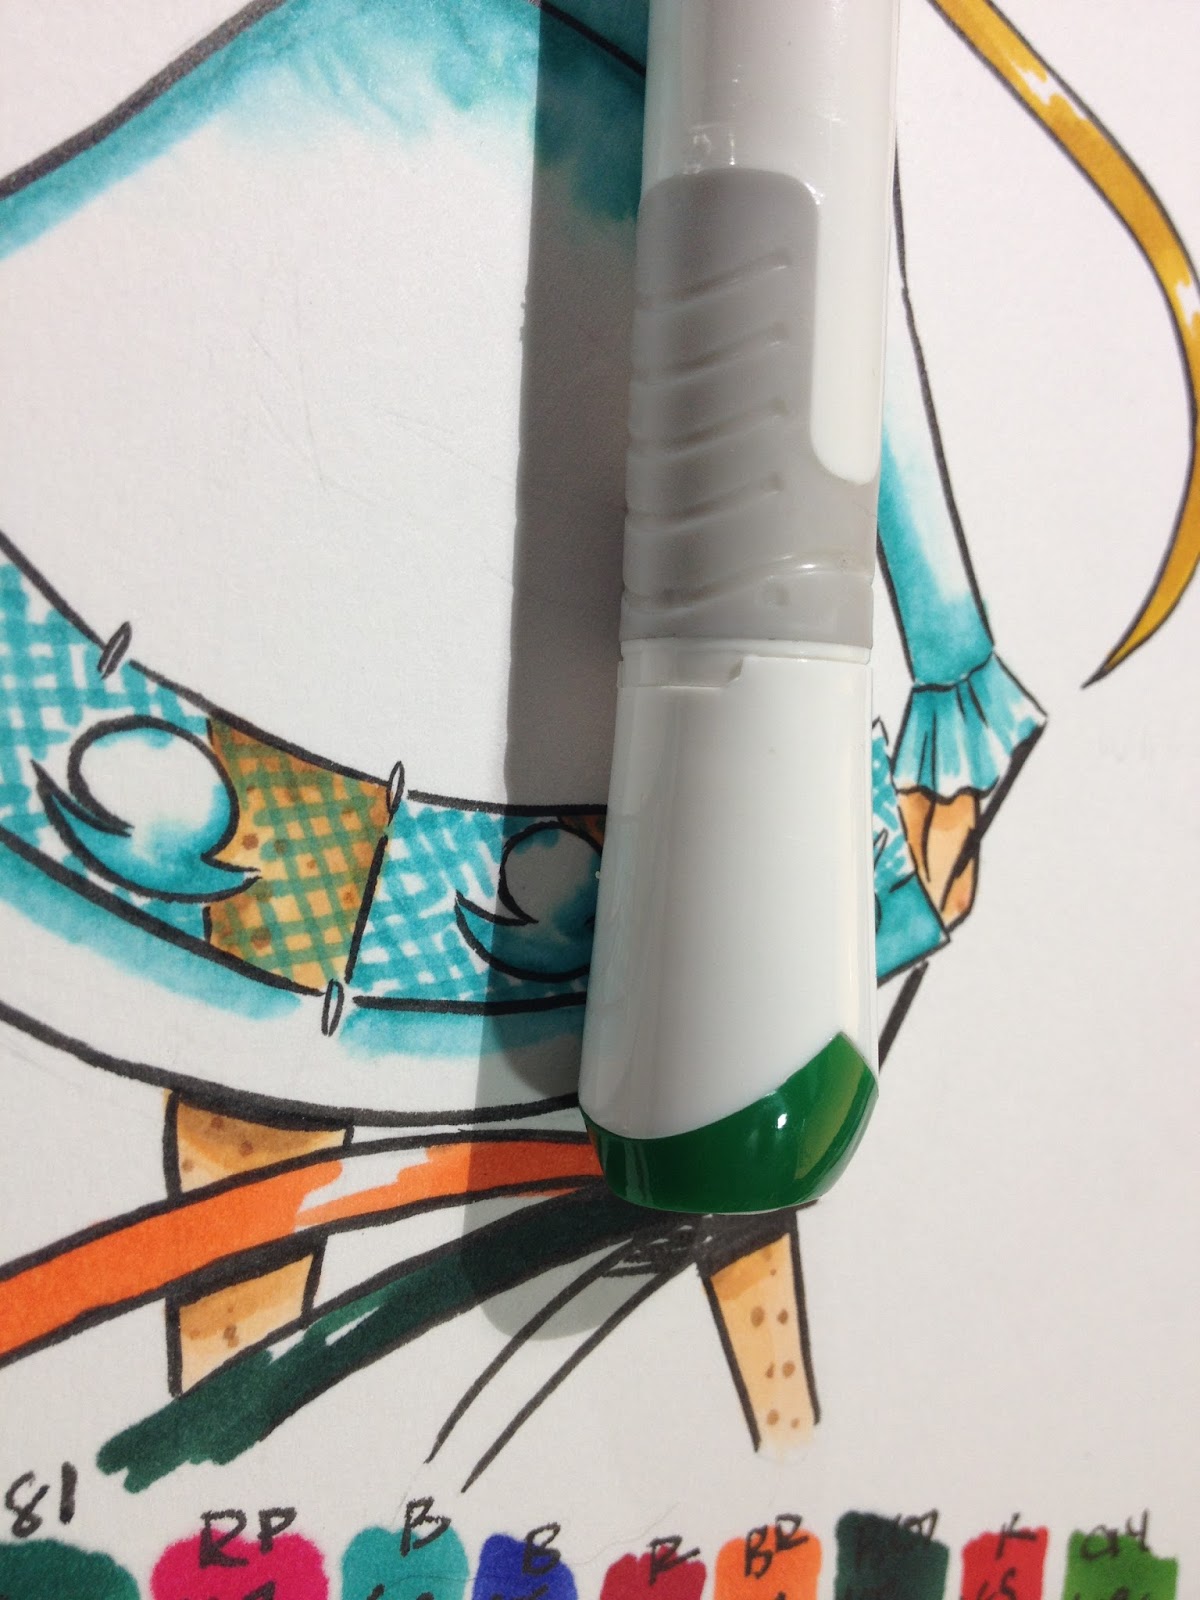
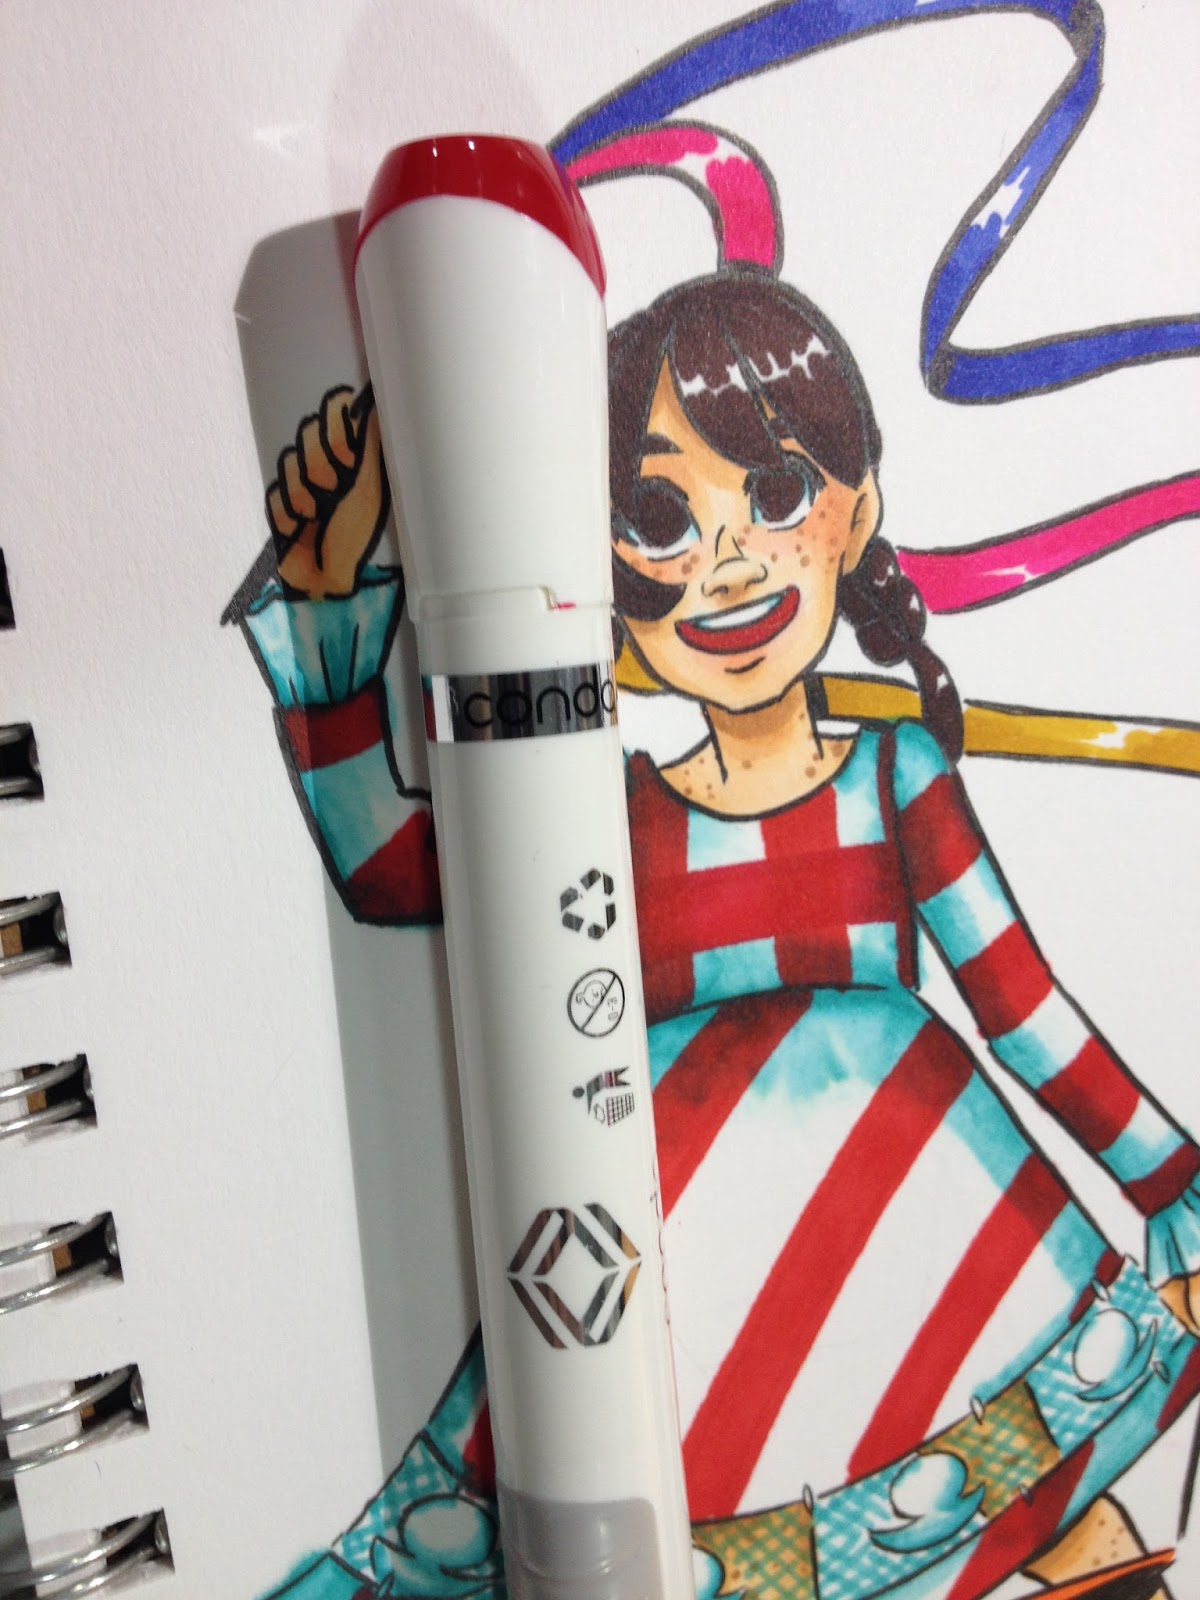
Conda markers are white with silver screening and gray grips.

The body reads The Art of Painting Pen, can anyone give me any clues as to where that comes from? Perhaps a literal translation from the Chinese name? On AliExpress, I've seen alcohol markers referred to as 'oil pens' and 'oil markers' before- any insight on that?

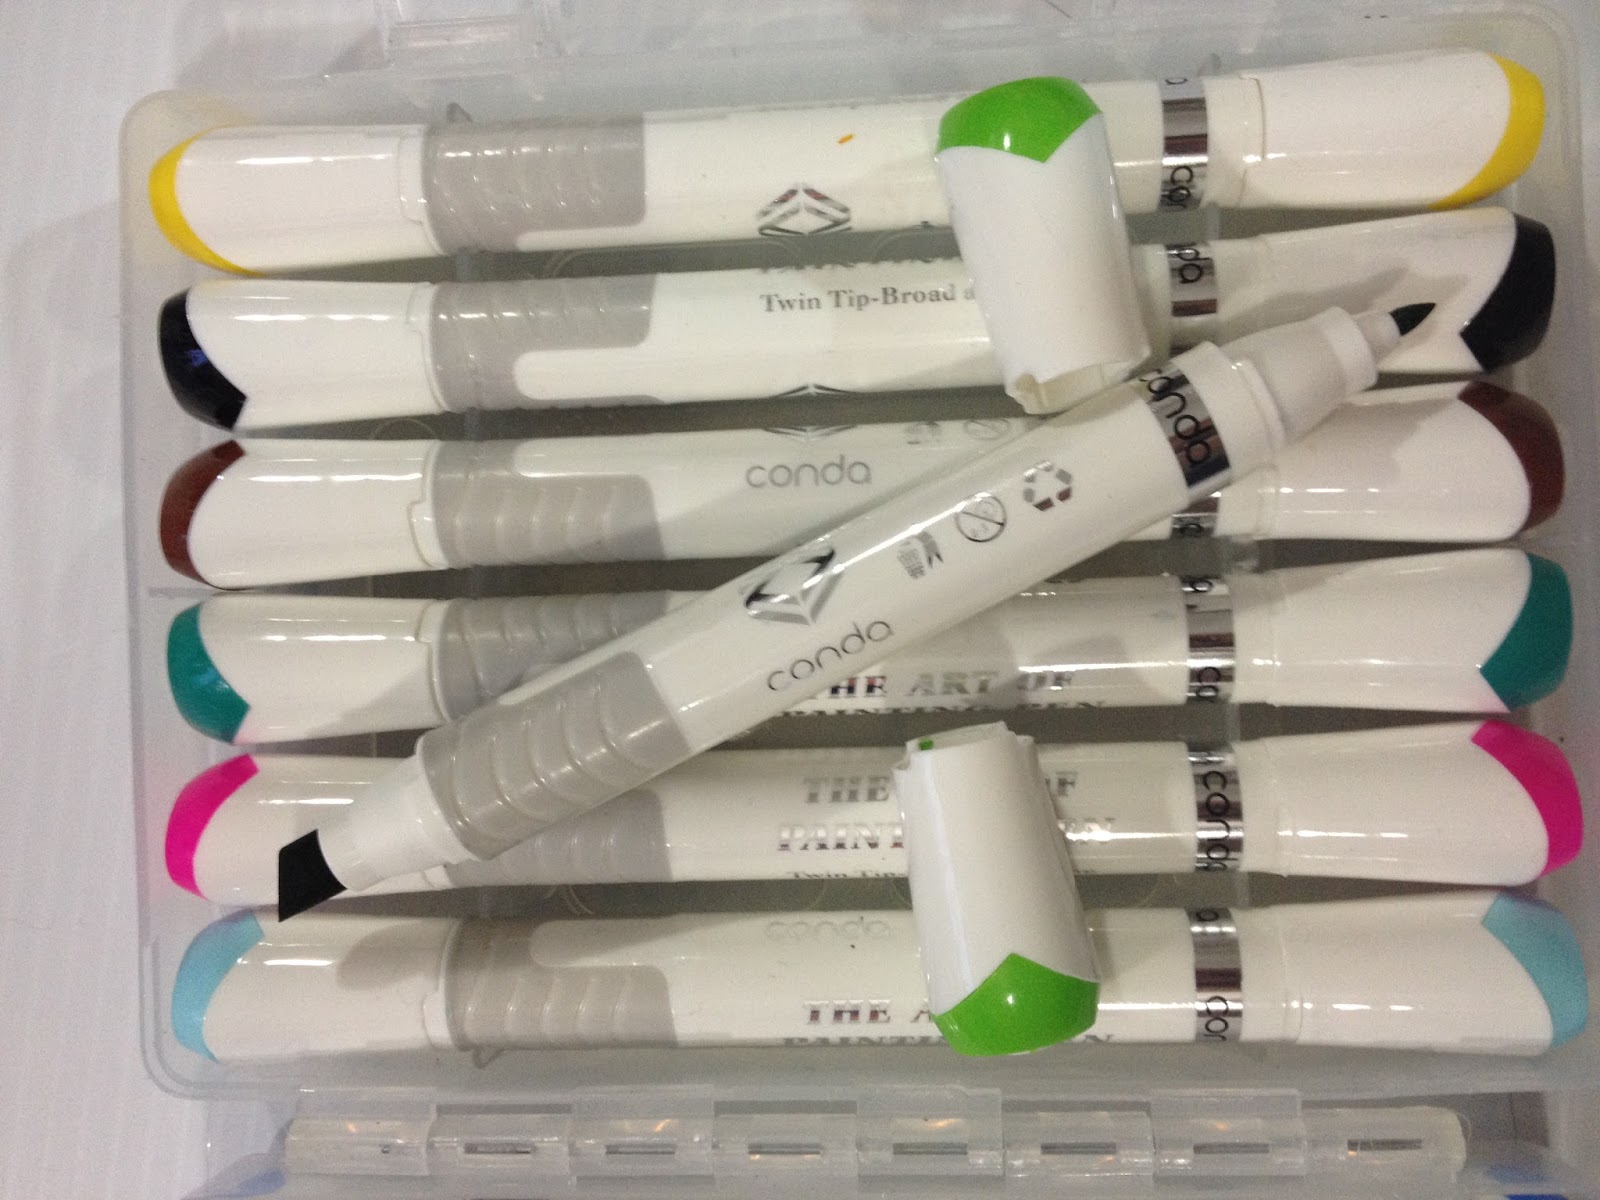
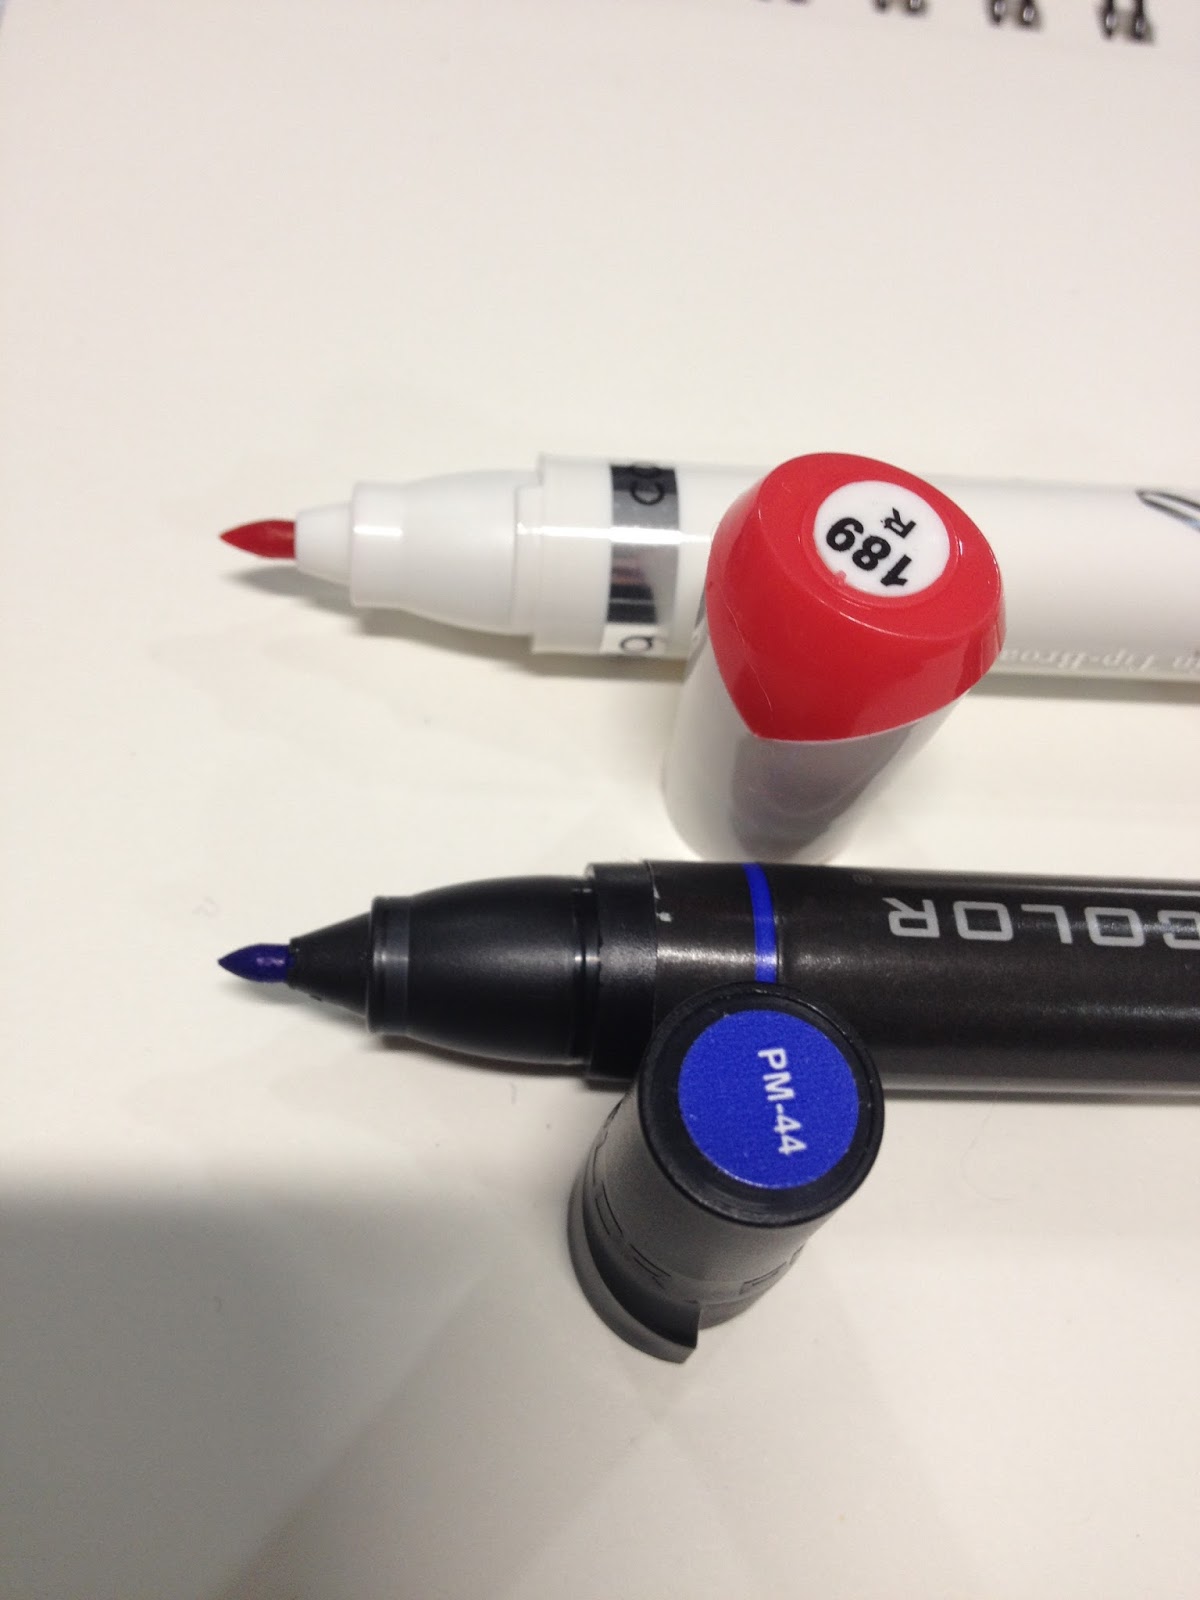
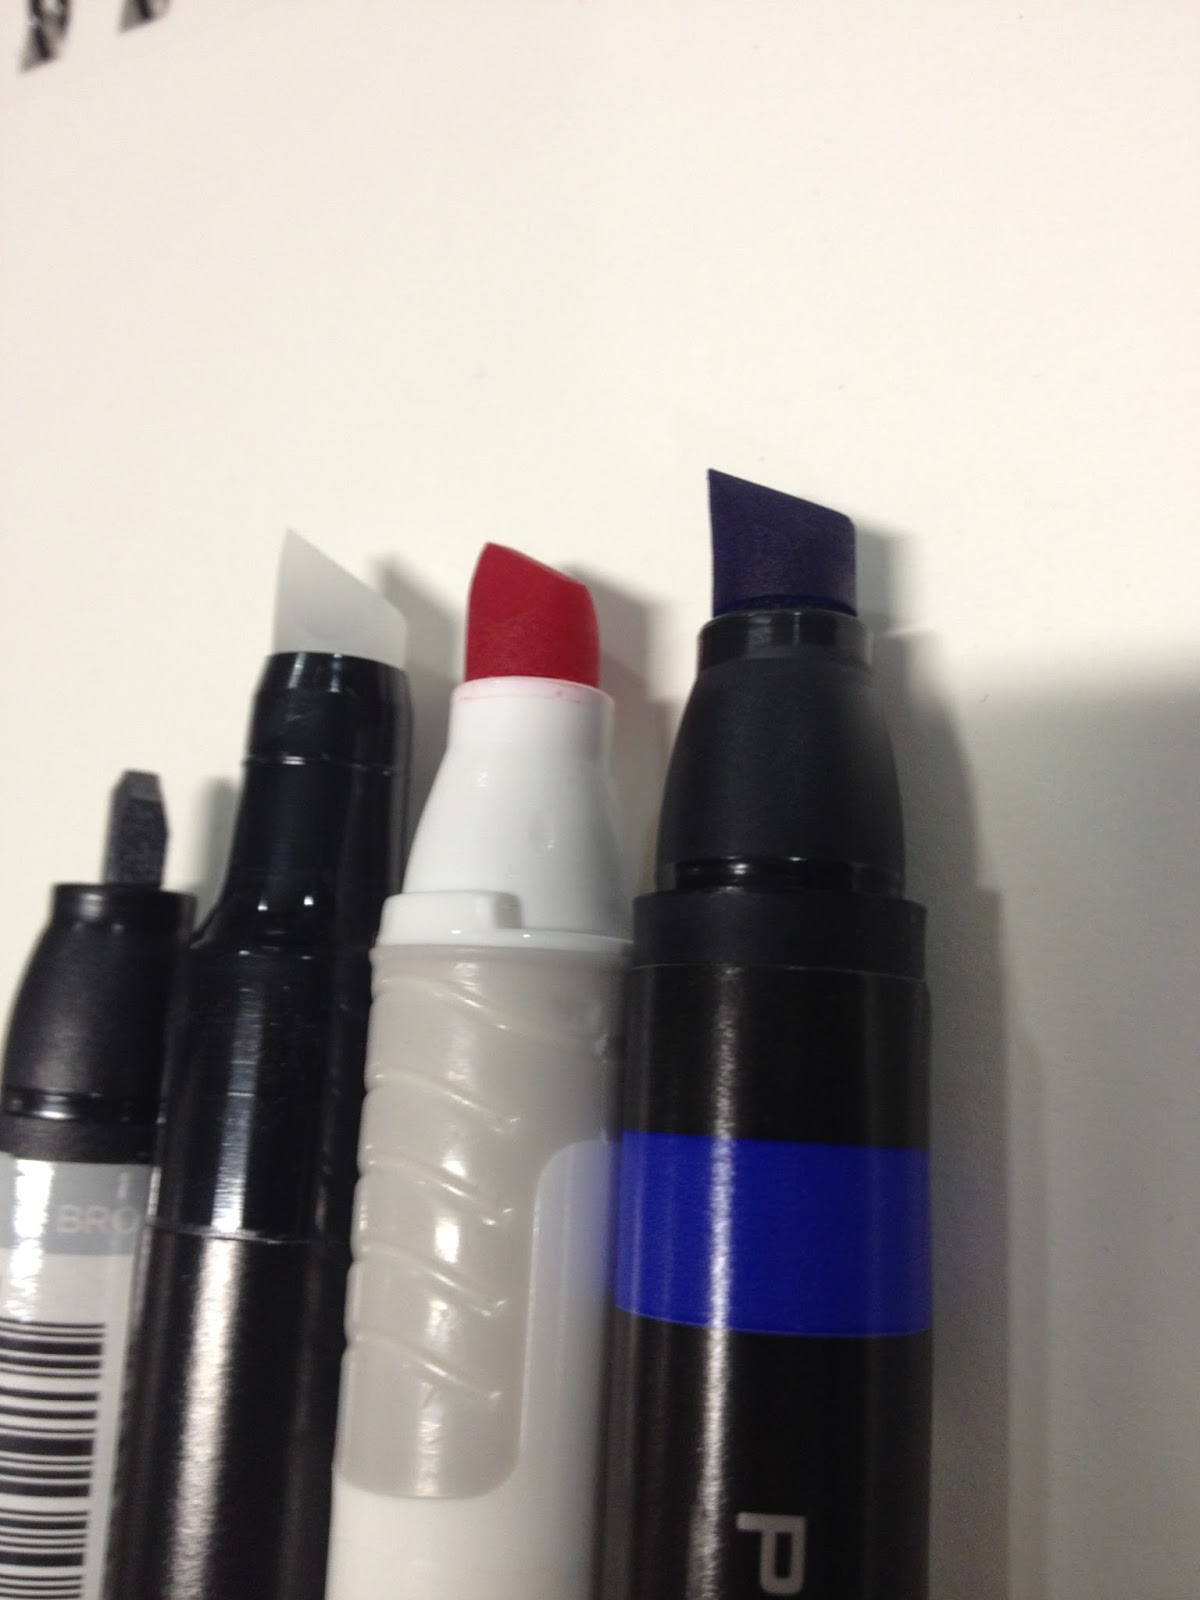
Conda markers are twin tipped- a bullet nib and a large chisel nib that closely resembles Prismacolor's Art Markers.
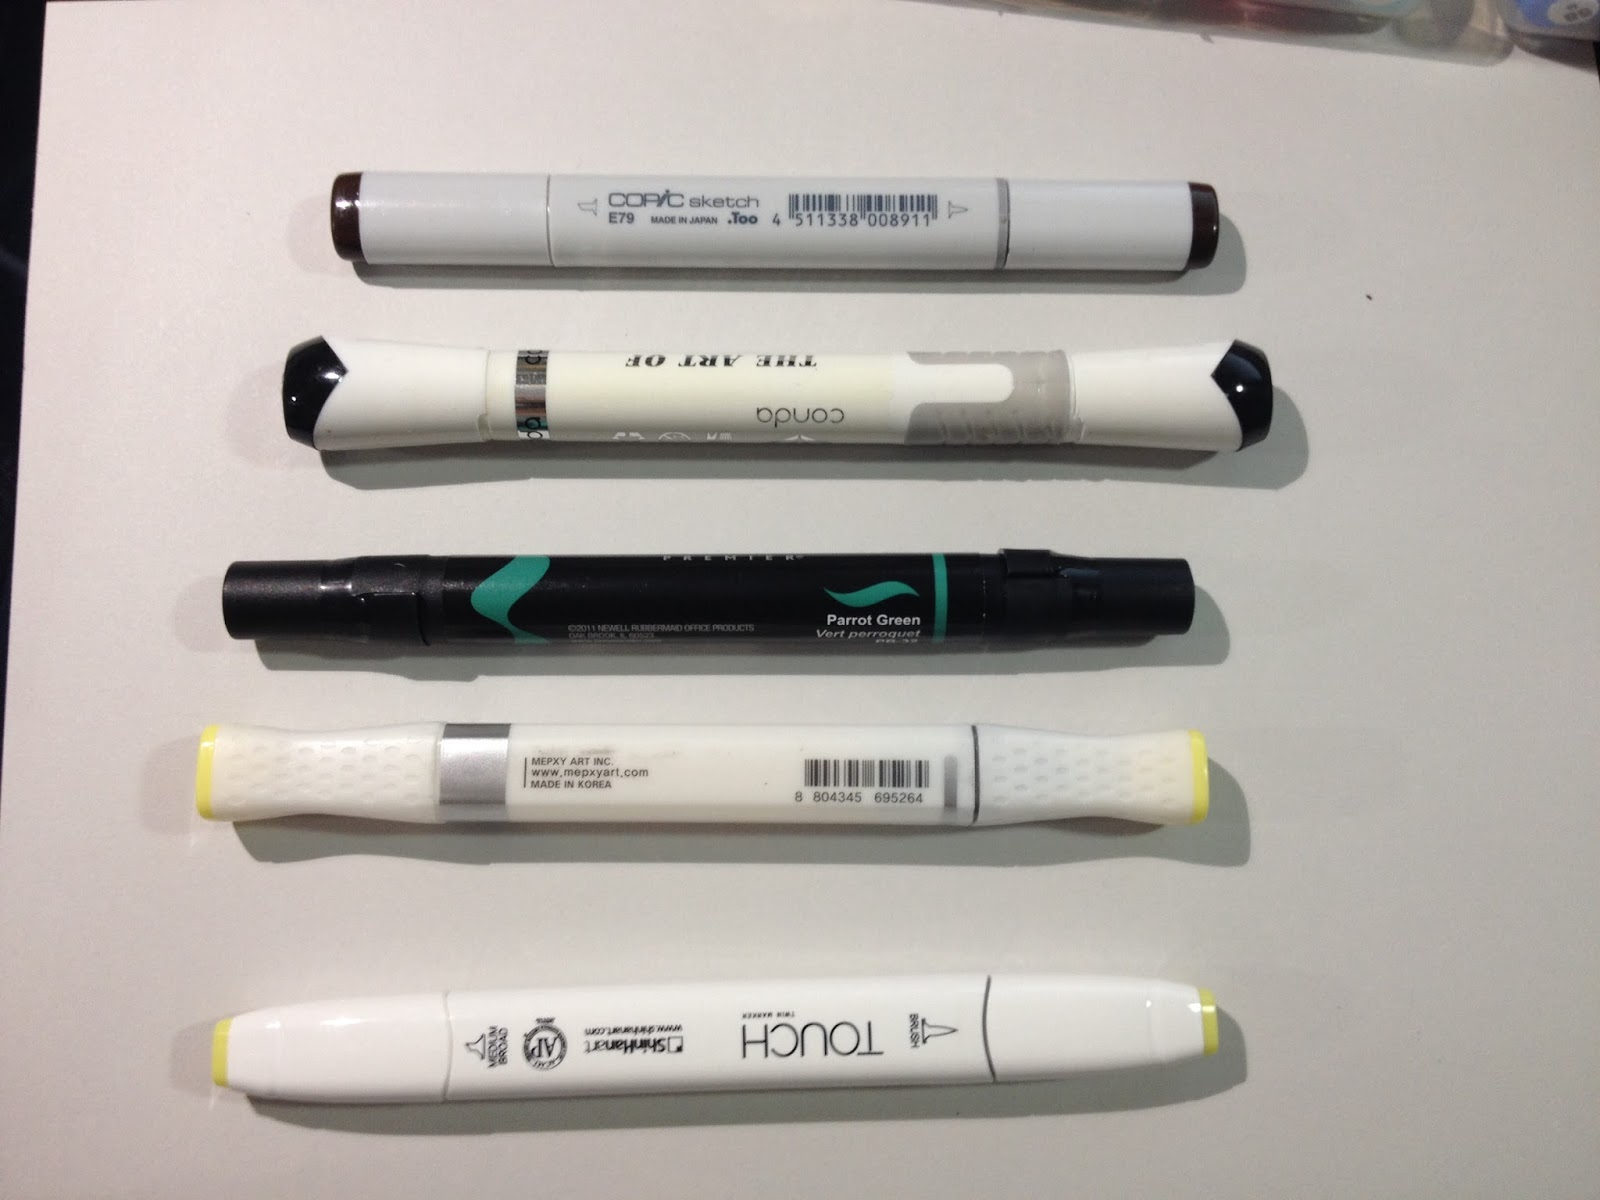
 From top to bottom: Copic Sketch, Conda marker, Prismacolor marker, MEXPY marker, Shin Han Twin Touch (all alcohol markers)Conda markers are baton shaped, which makes removing the cap a bit easier as your hand is less prone to slipping. They're some of the longest alcohol markers I own, tying with MEXPY and Shin Han Twin Touch.

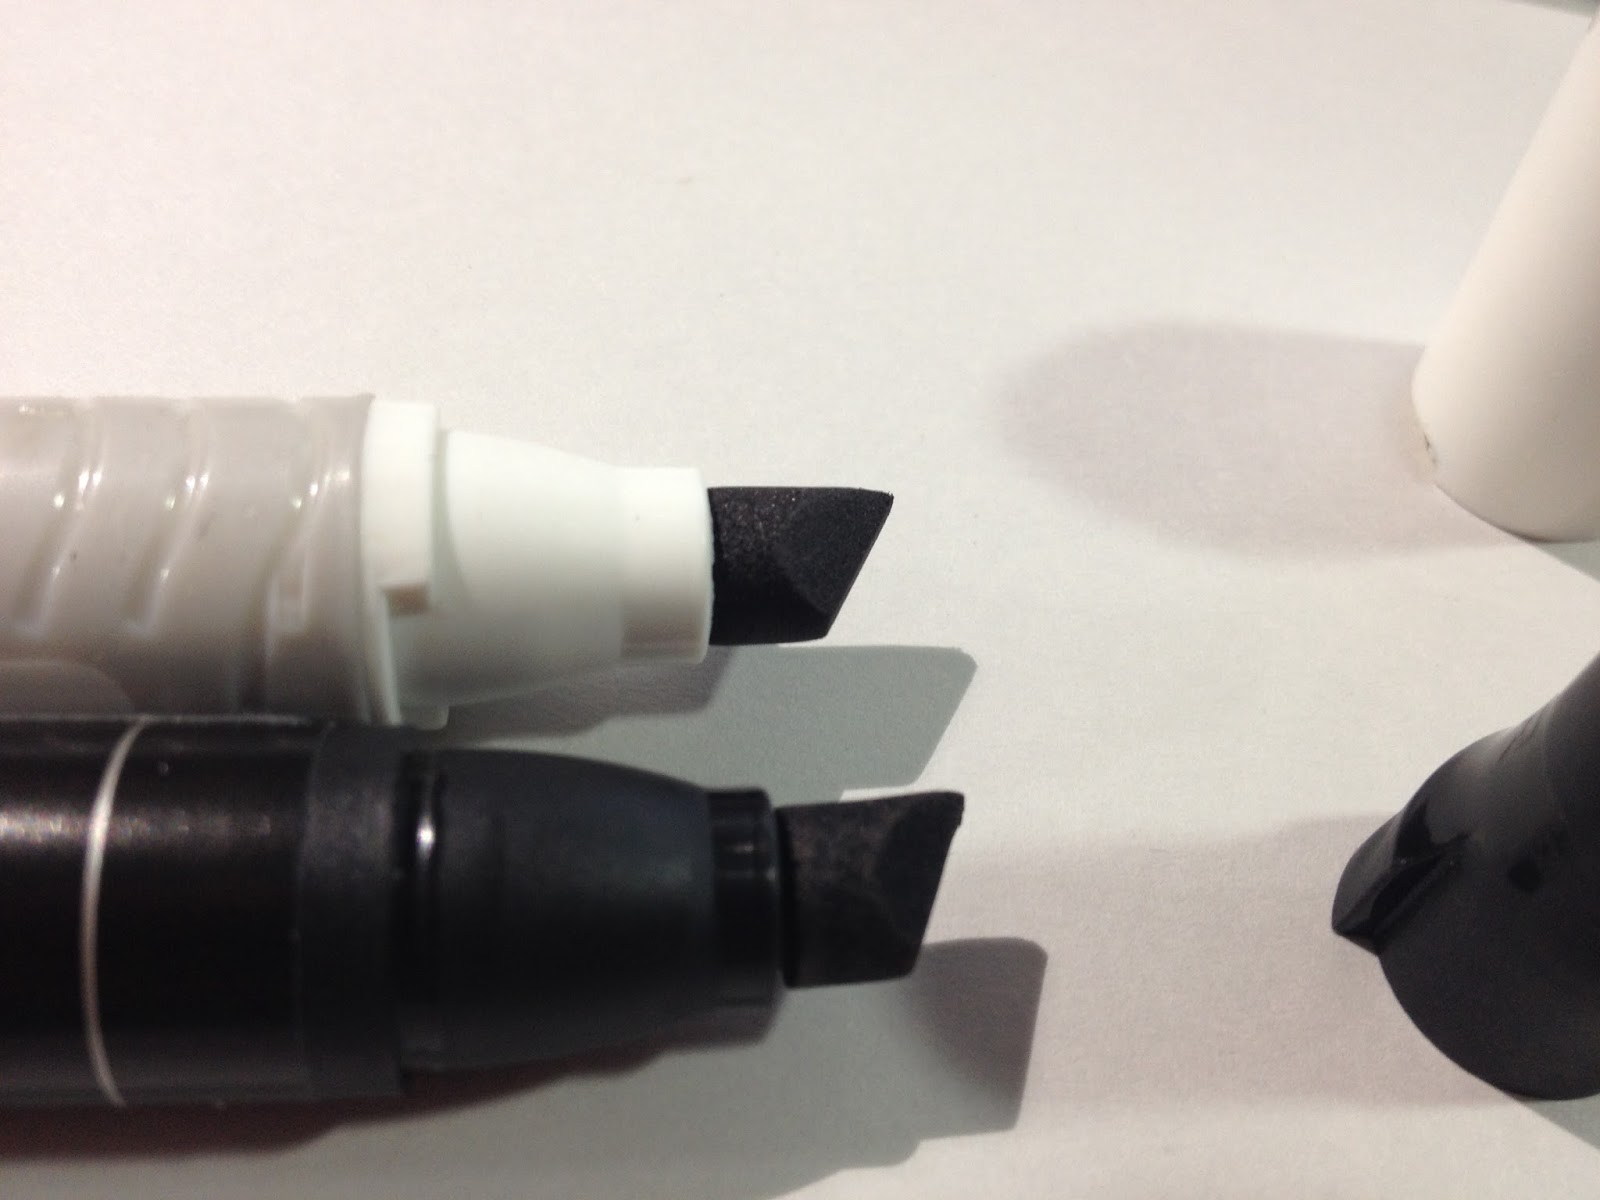
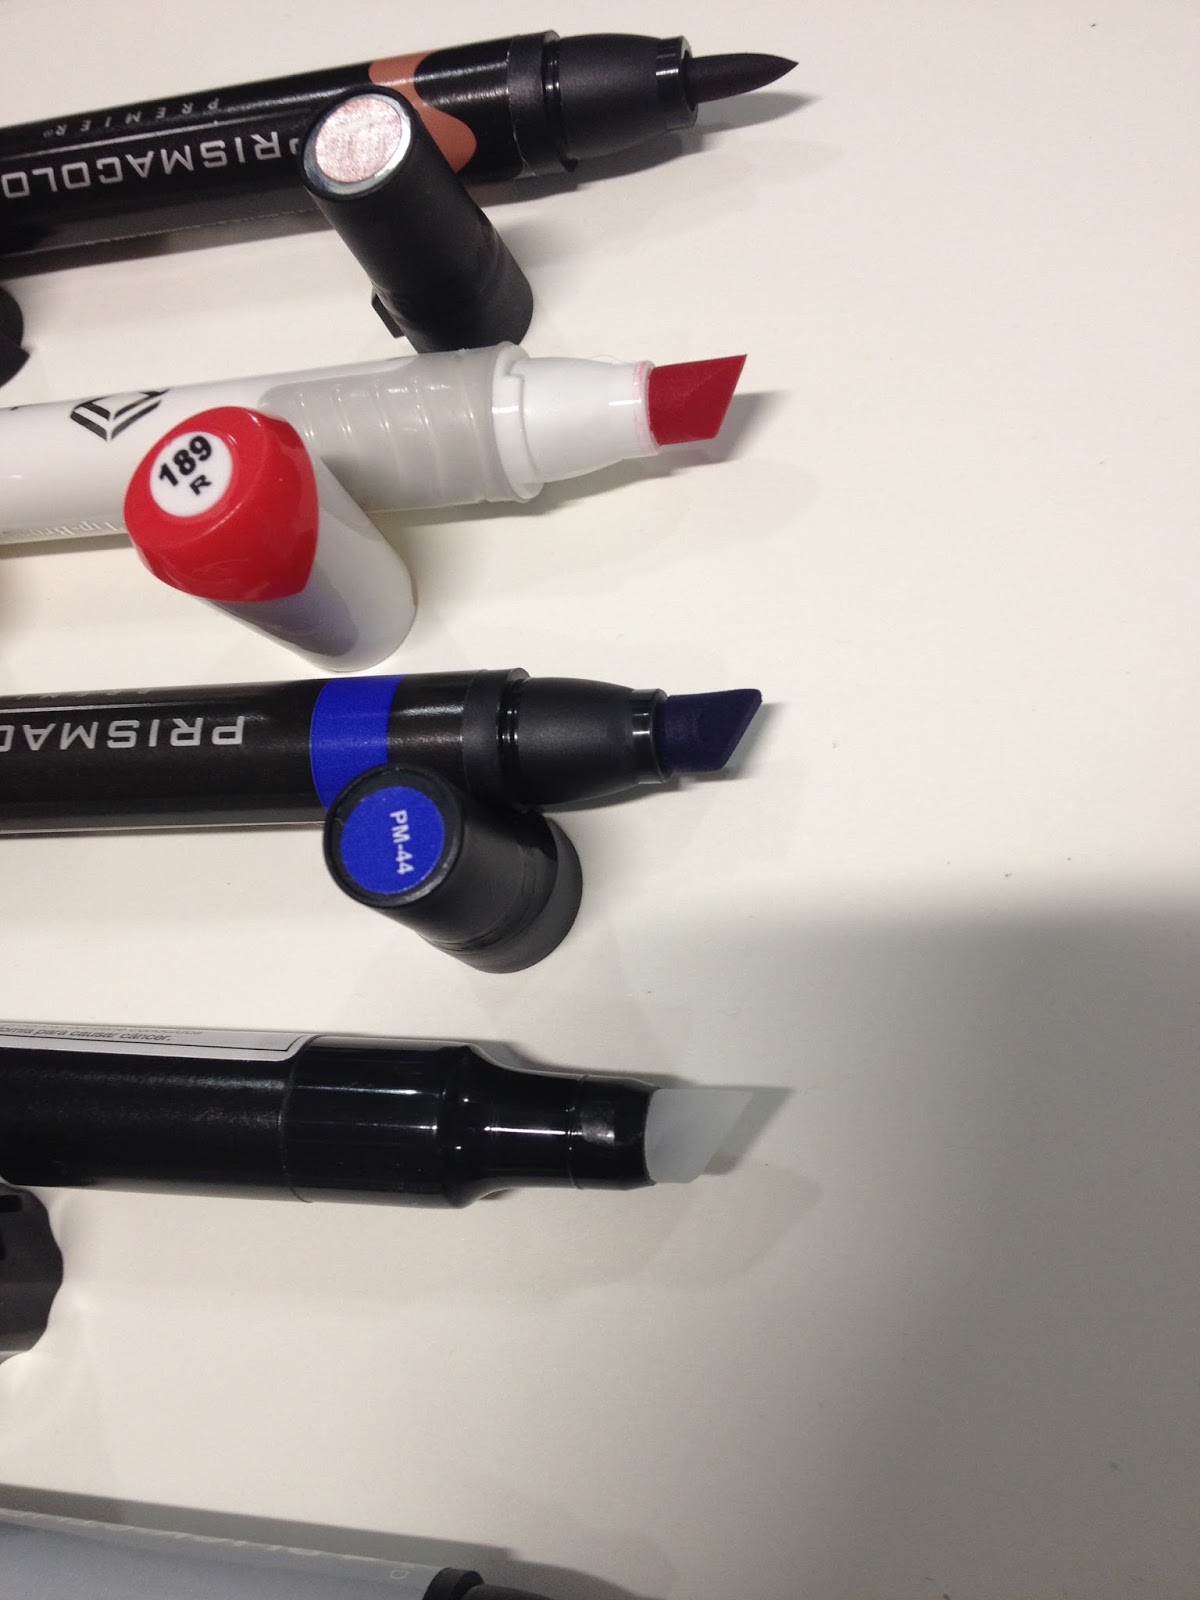
When the caps are removed, it becomes readily apparent how similar Prismacolor markers and Conda markers are, both in body mould and in chisel nib design.
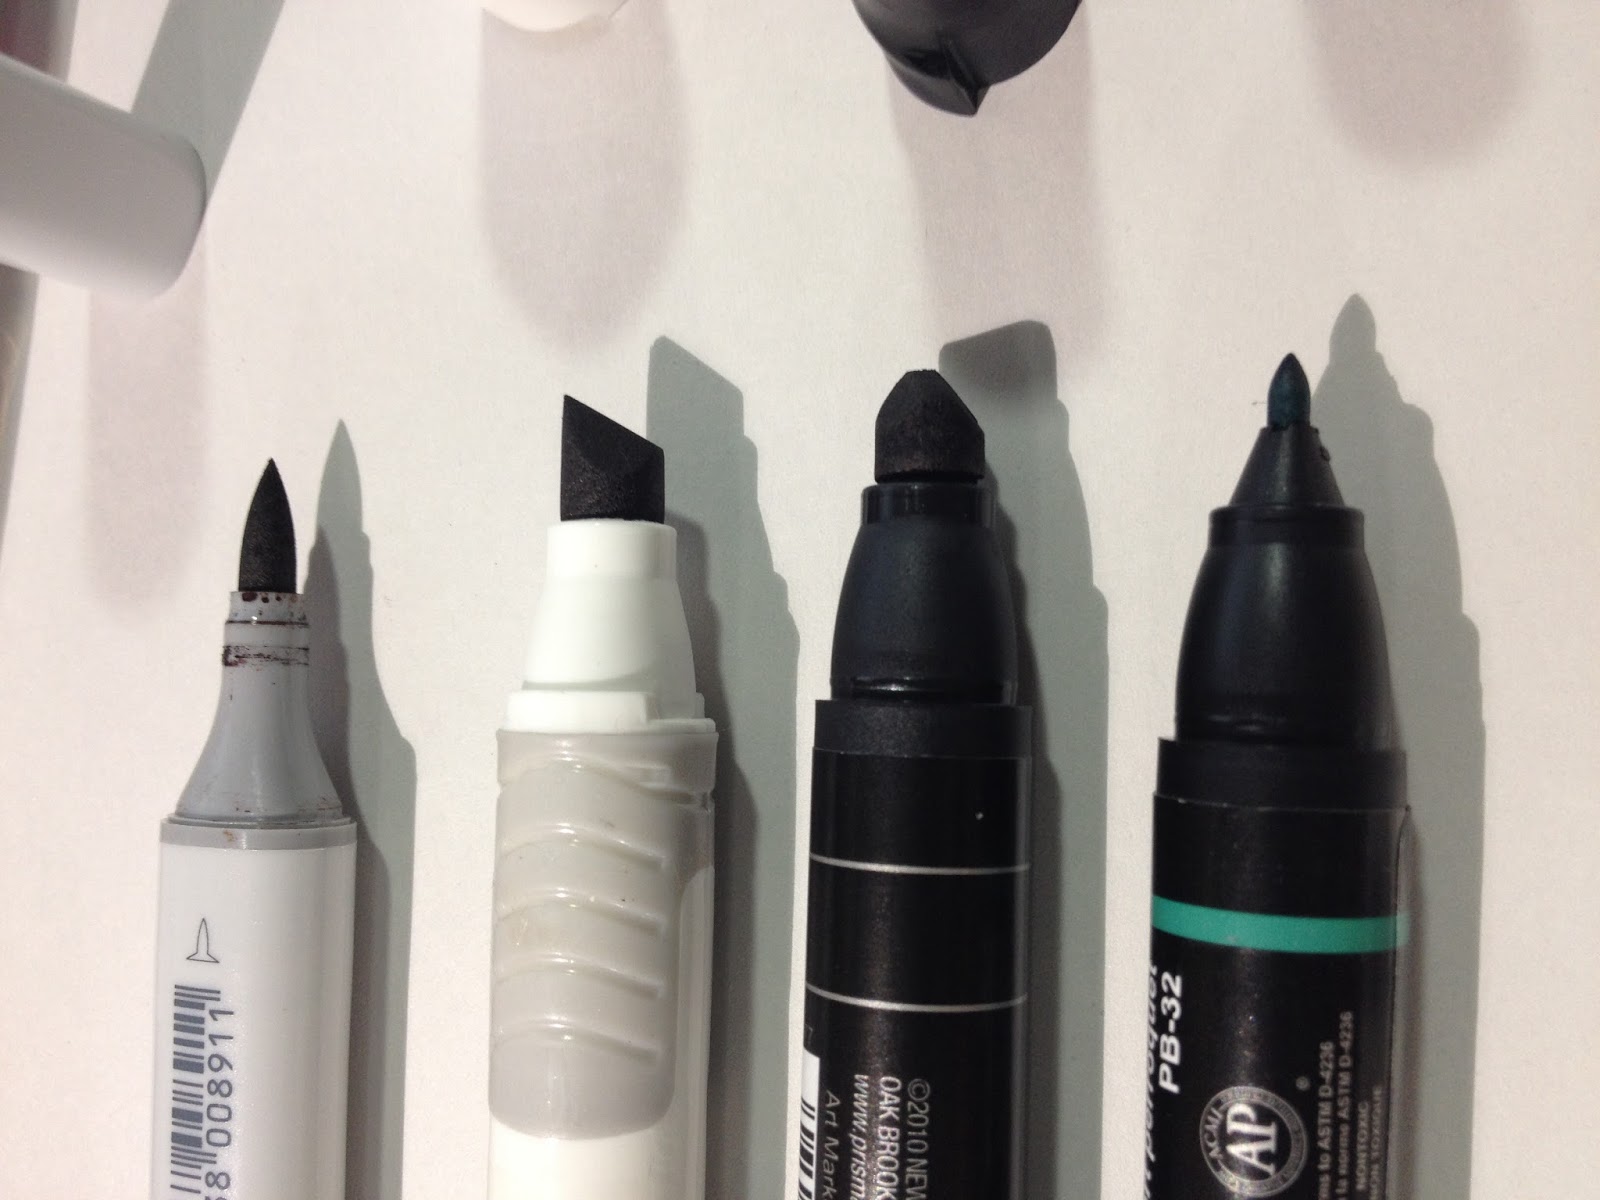
 From left to right: Copic Sketch, Conda marker, Prismacolor Art Marker, Prismacolor Brush Marker (Bullet nib)


Conda markers have pretty much the same chisel nib as Prismacolor Art markers, and it's one of my favorite chisel nibs available- juicy, well built with lots of angles for a variety of lines.
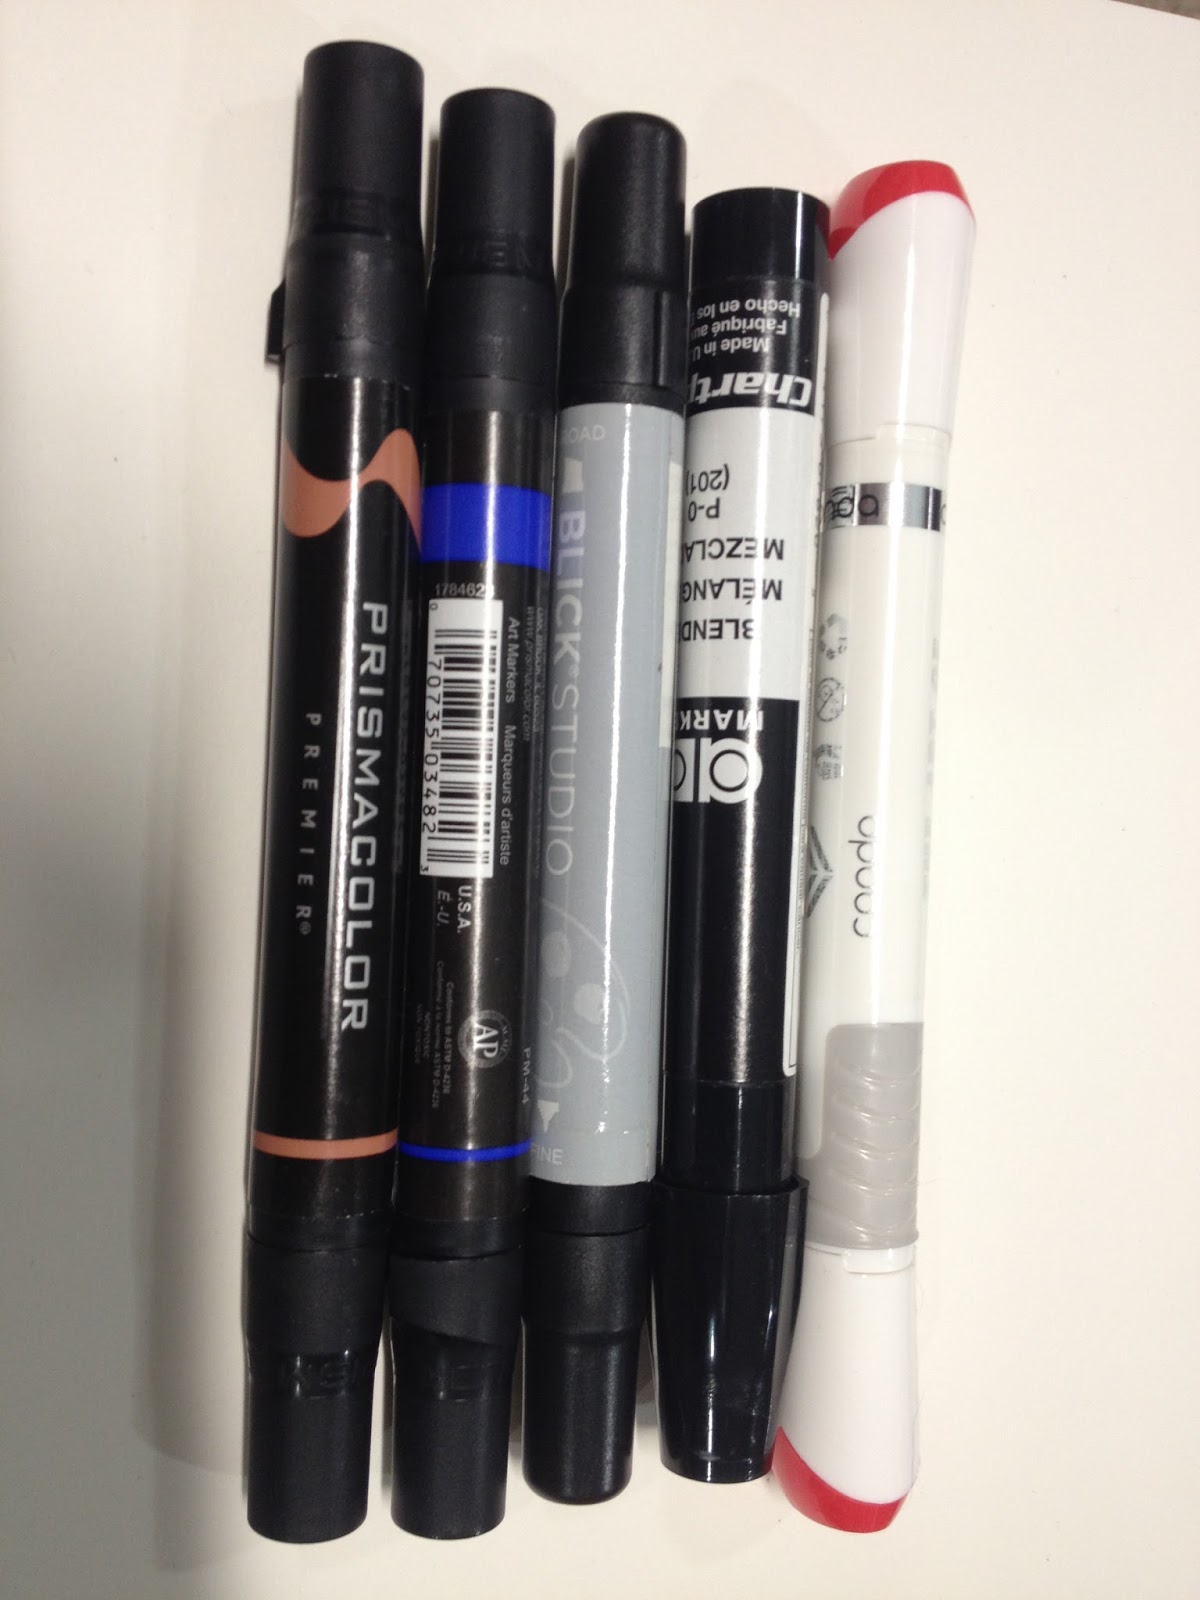
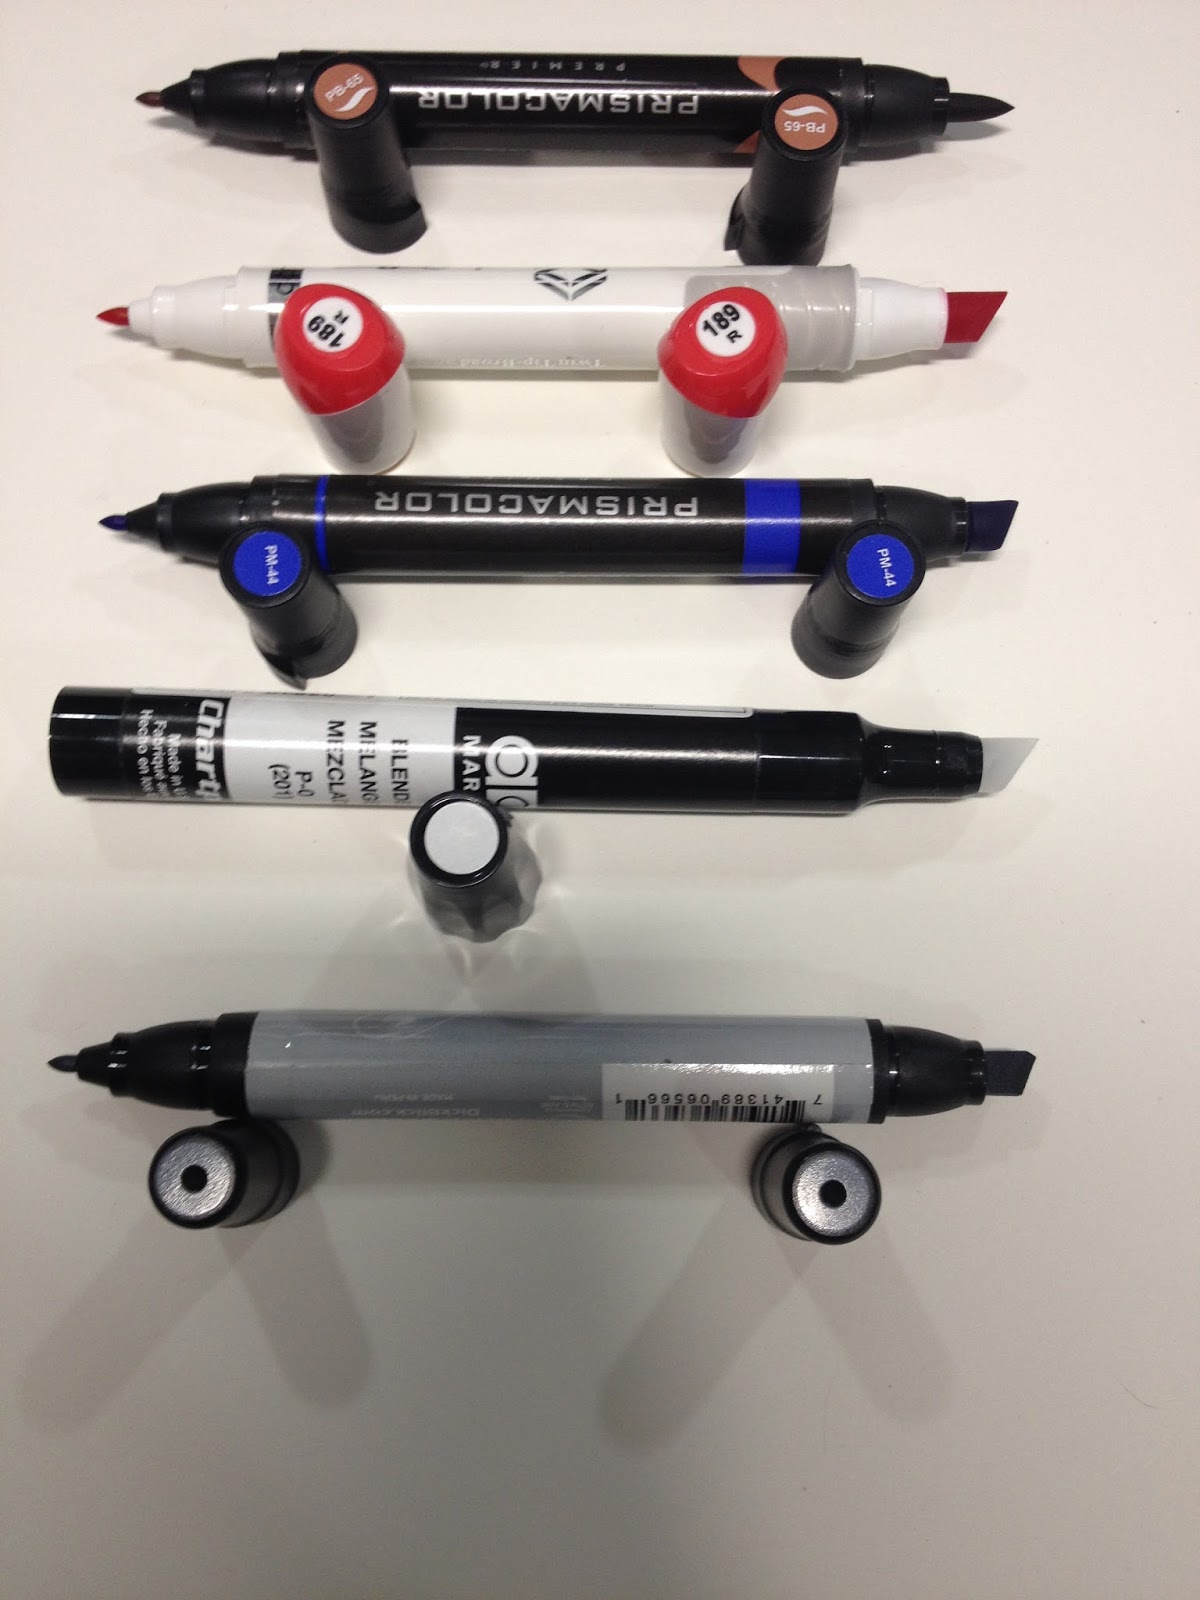
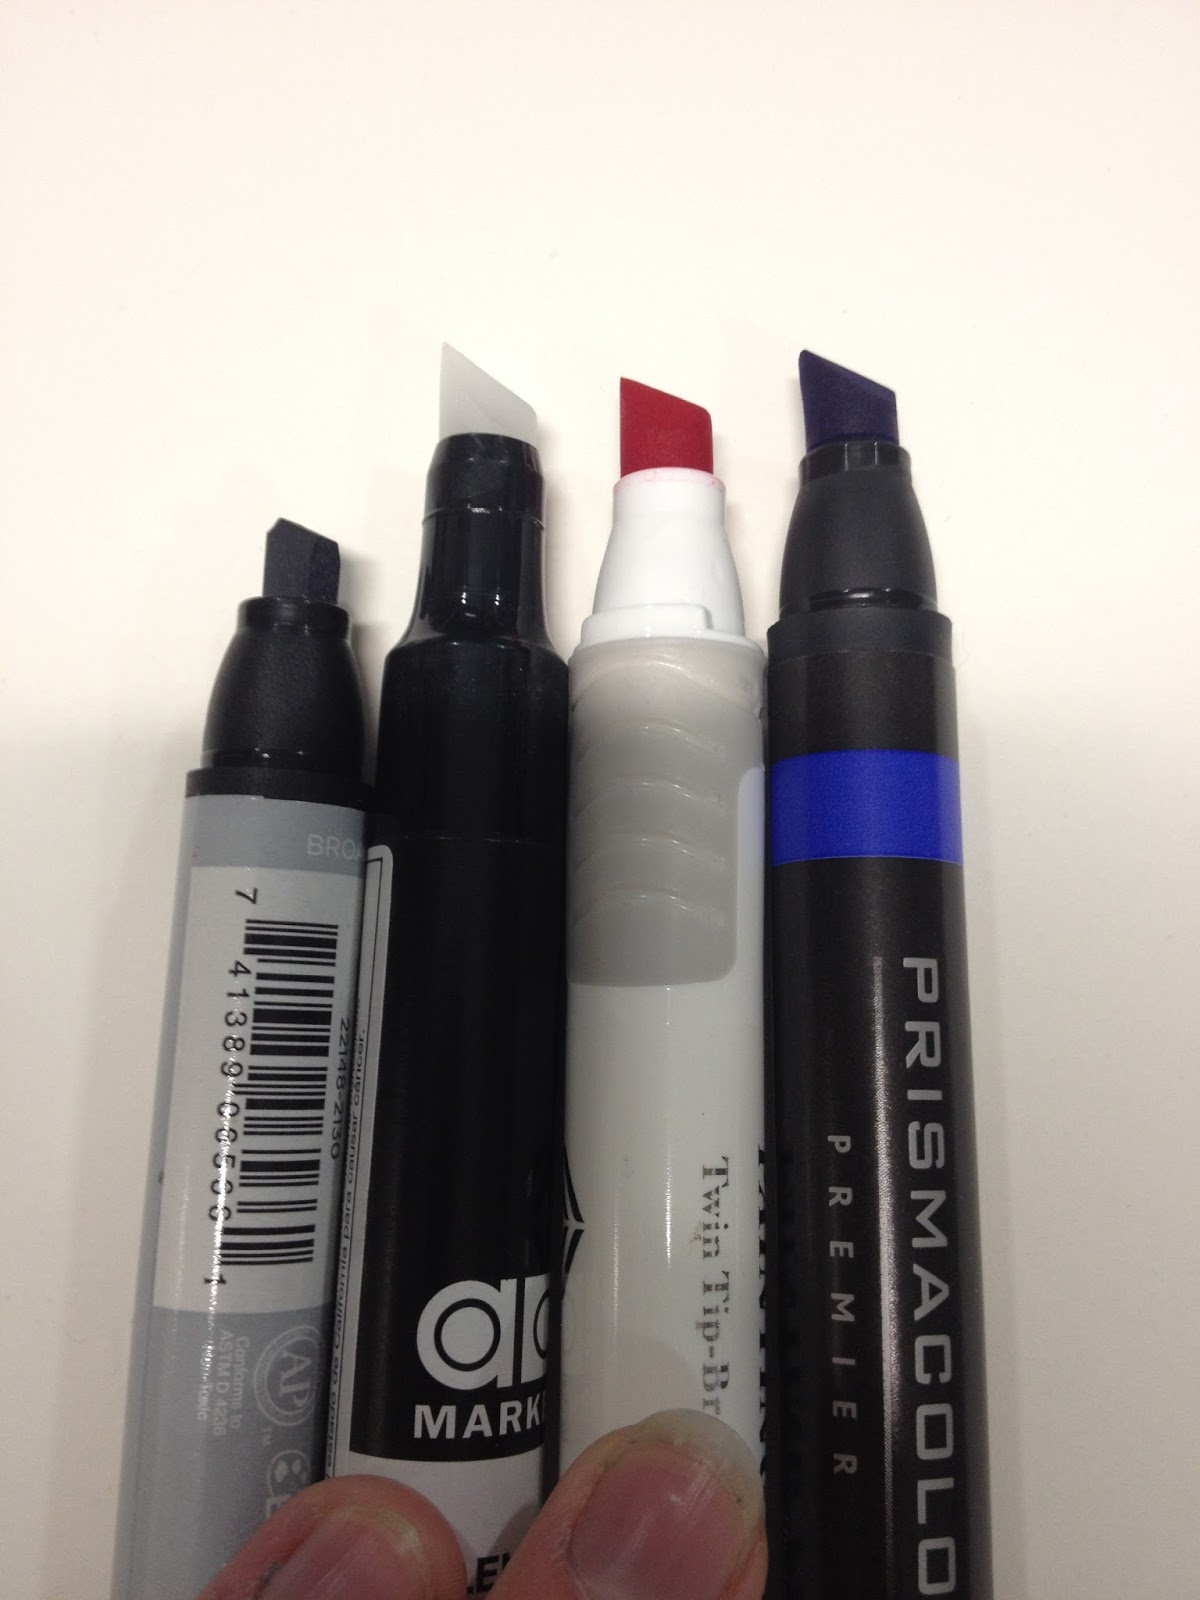
 From left to right: Prismacolor Brush Marker, Prismacolor Chisel Tip Marker, Blick Studio Marker (original) Chartpak marker, Conda Marker

The Conda marker body has a gray rubber grip like the Concept Markers I reviewed awhile back, but is otherwise the same body as the Prismacolor marker.


The Chartpak Adpro marker has a very similar chisel nib to the Prismacolor and Conda marker nibs. The Blick Studio marker has a nib made cut fiber- my least favorite type of chisel nib and sadly the most common.


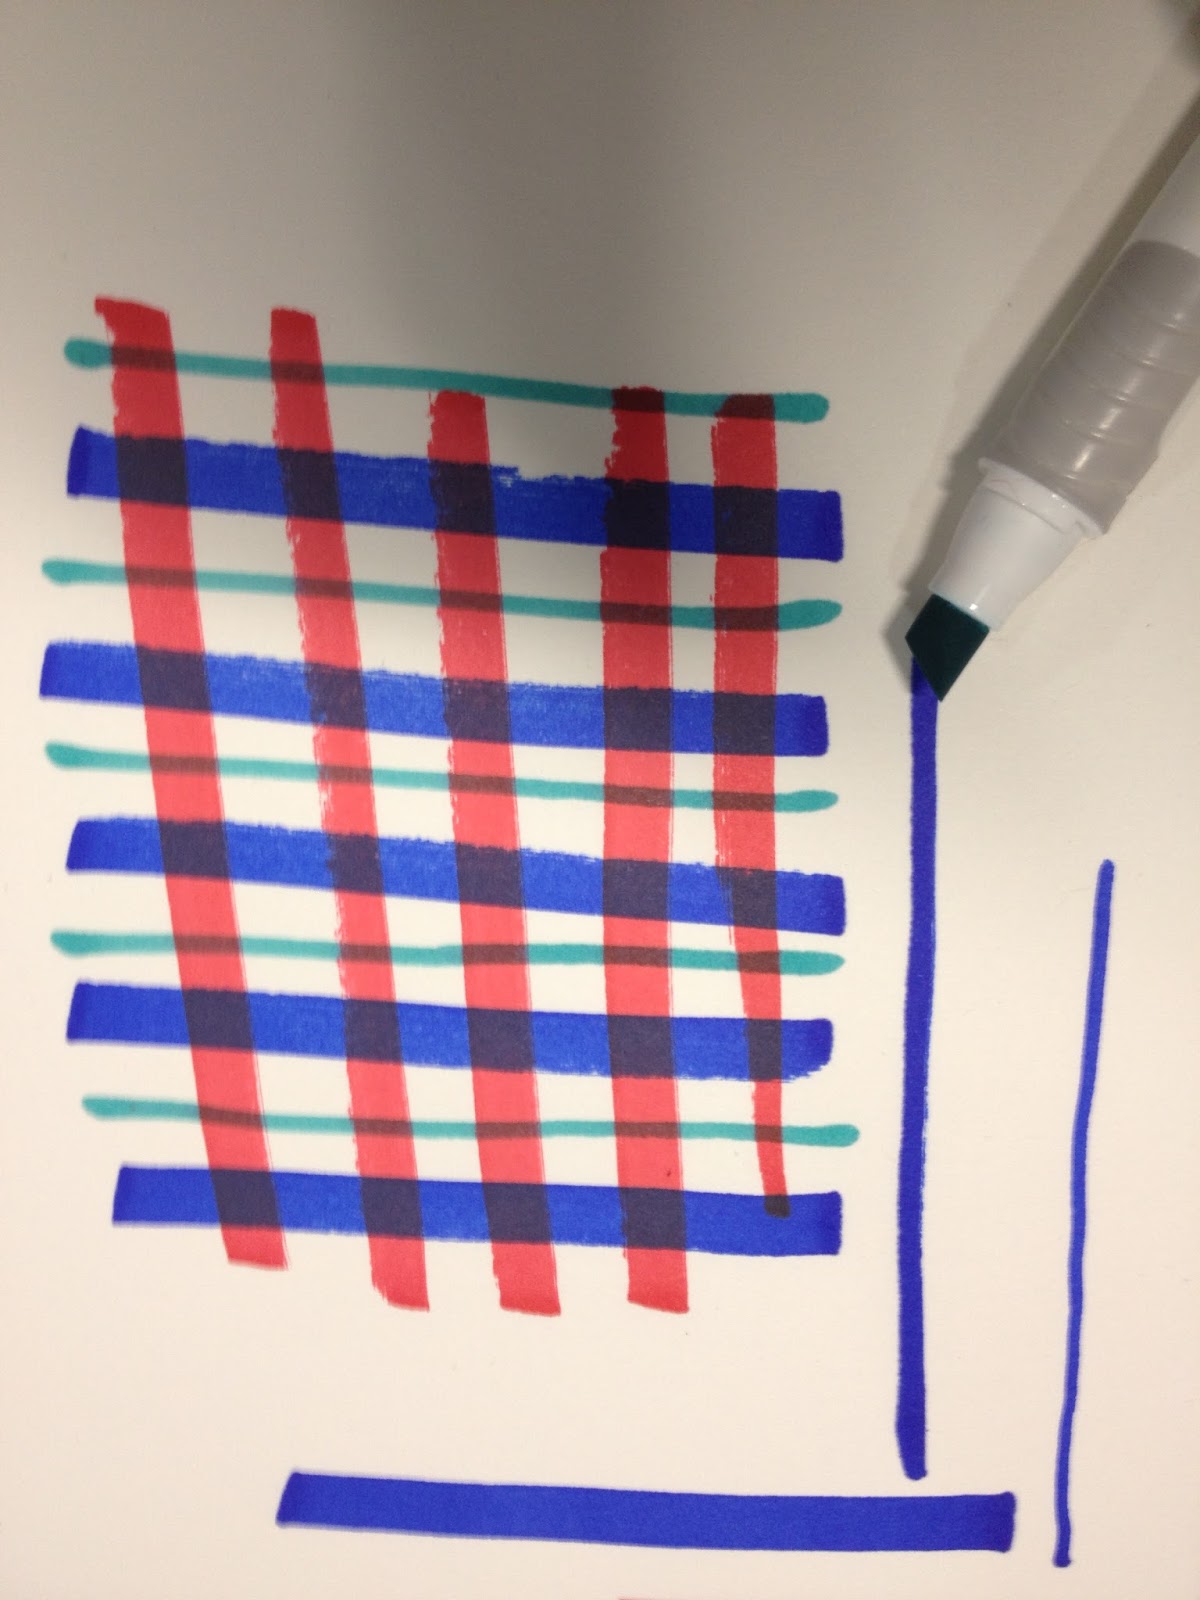
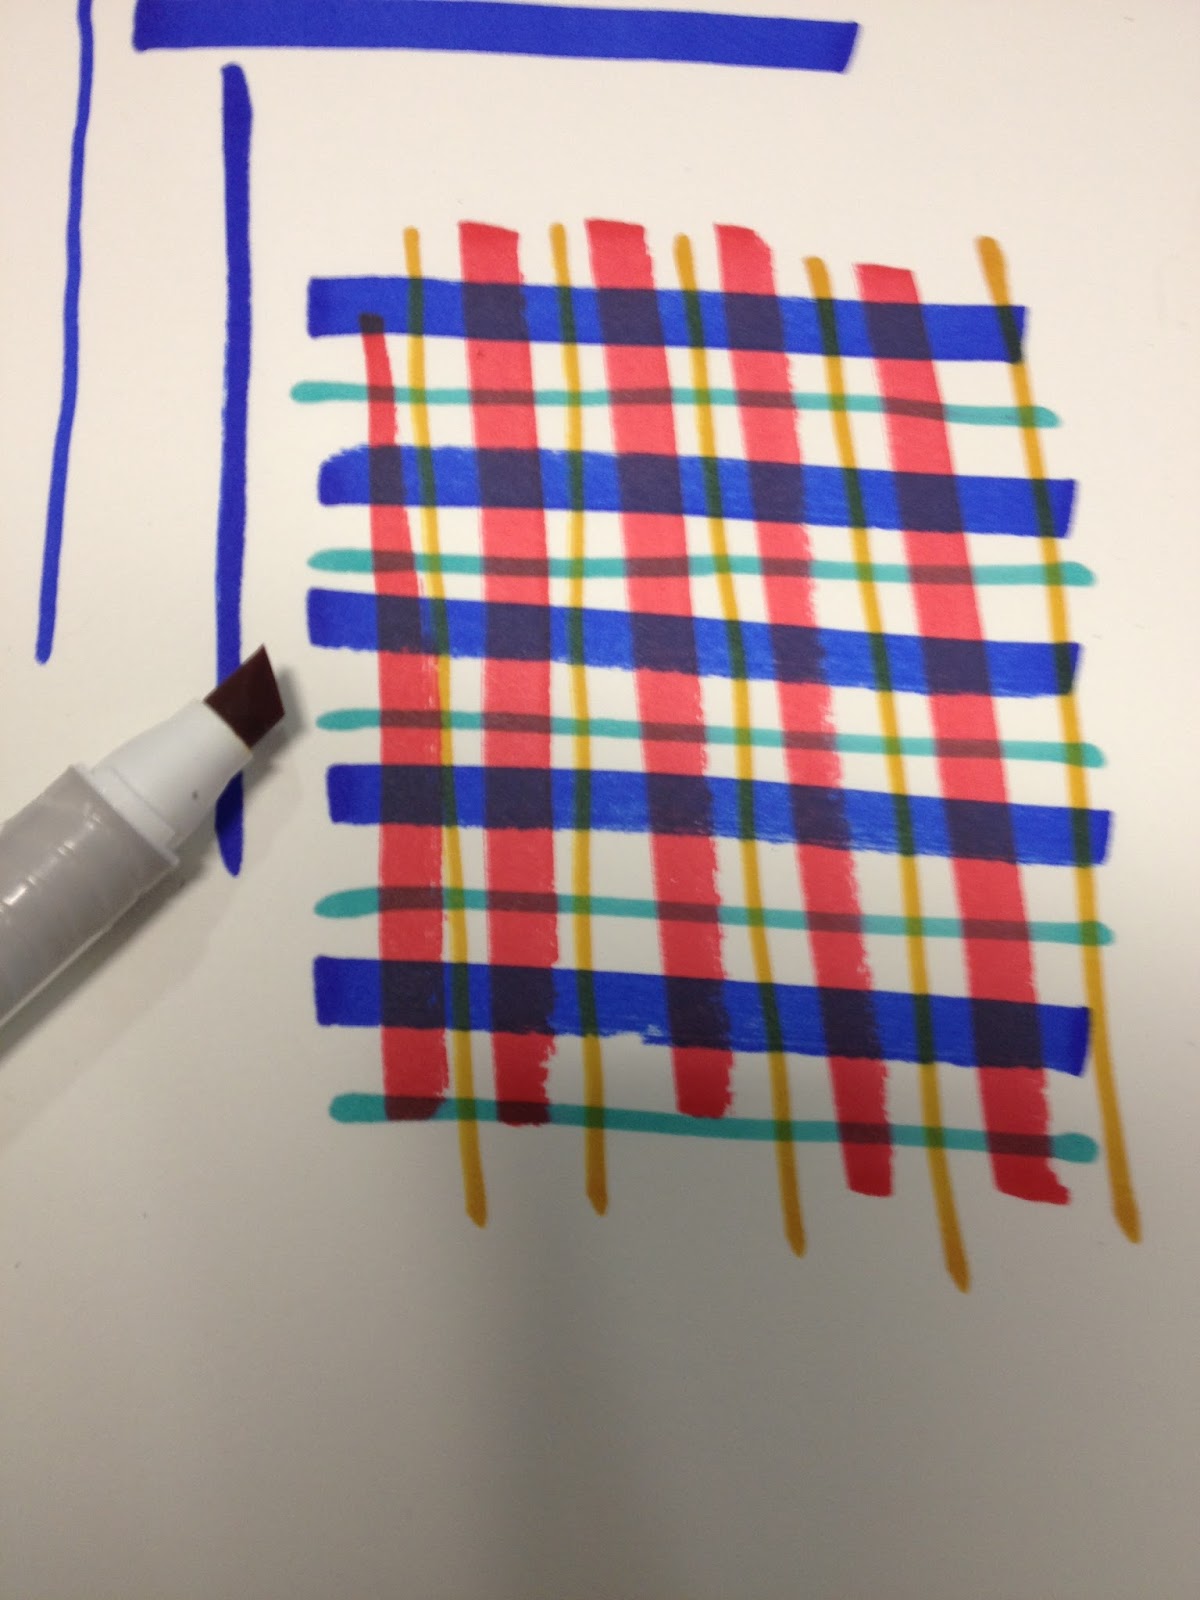
Alcohol Ink Compatibility Tests
A common concern for marker artists is 'will these markers work together'. Some brands have more alcohol in their dye solution than others, and may react strongly to colorless blender or layer poorly. Conda markers appear to include lots of dye in their alcohol solution, as the colors are saturated and don't come off as dull.


I found it difficult to draw a consistent wide line with these markers, despite their similarities to the Prismacolor chisel nib.


I alternated between using Prismacolor and Conda markers for this test, and found that the markers handled well together. It would be difficult to tell at a glance which color belong to which brand.
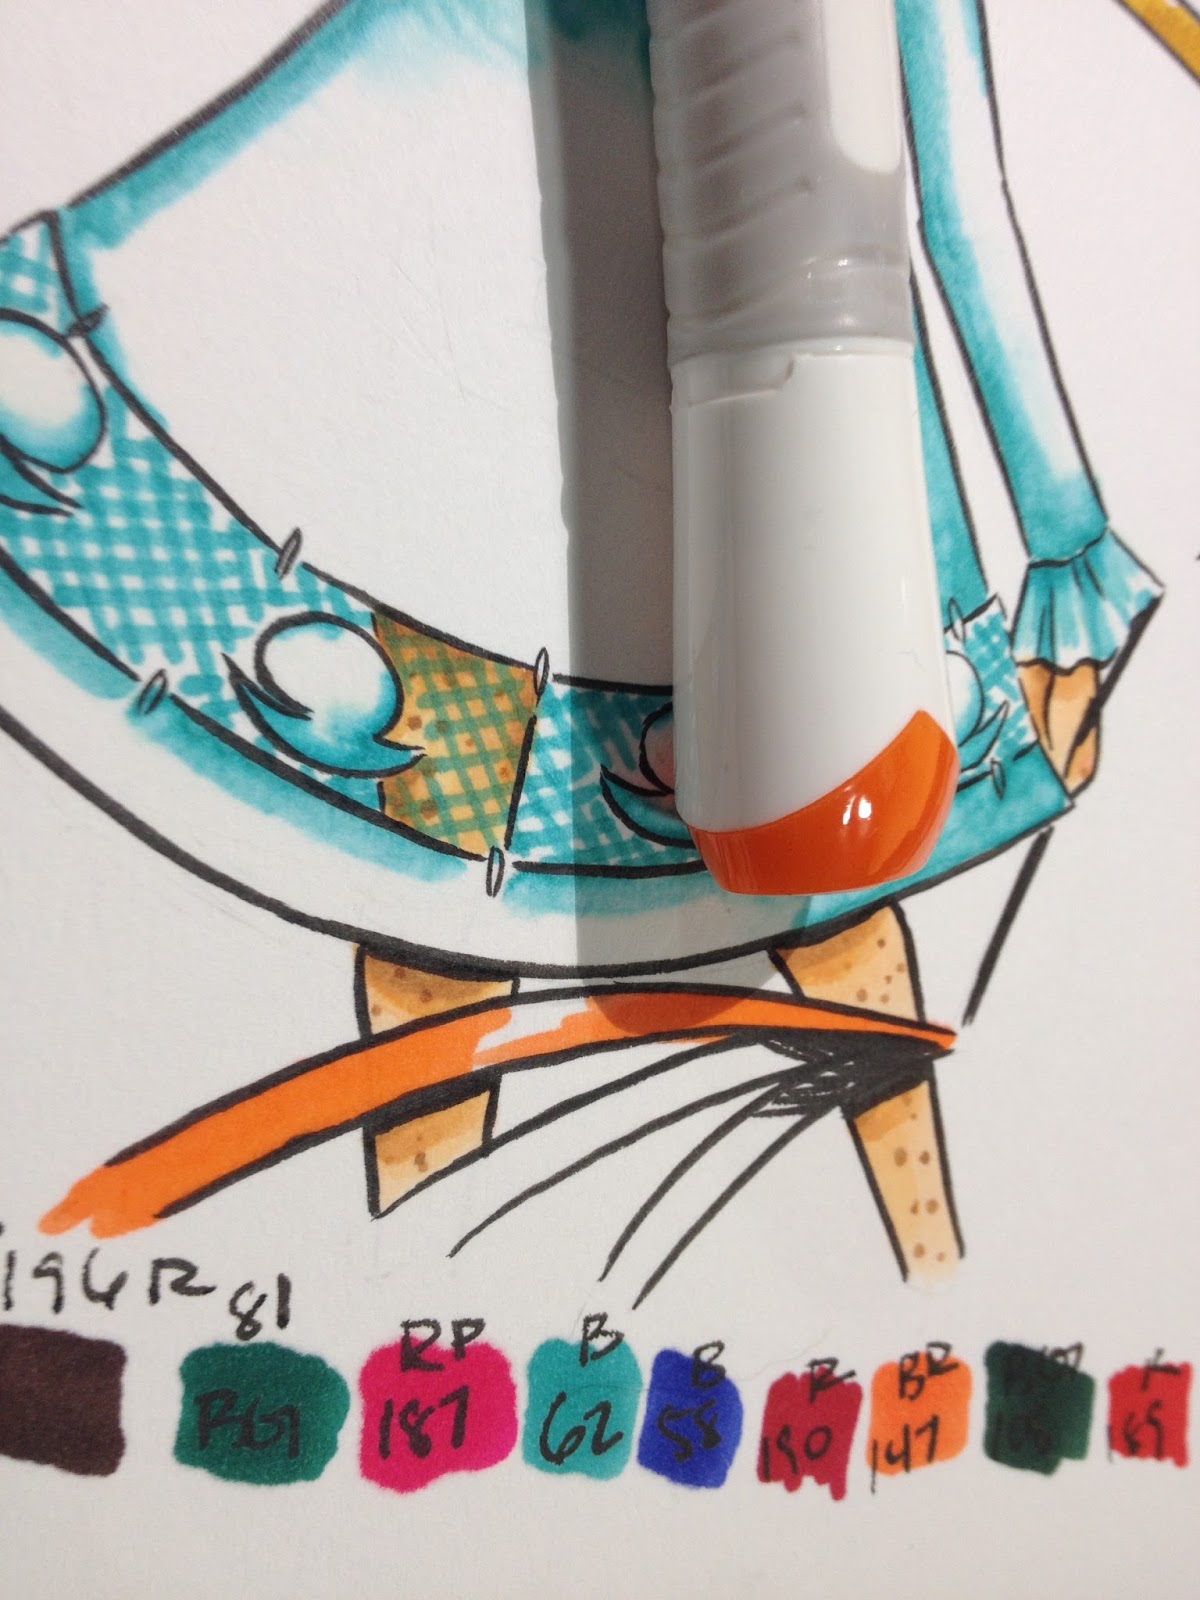
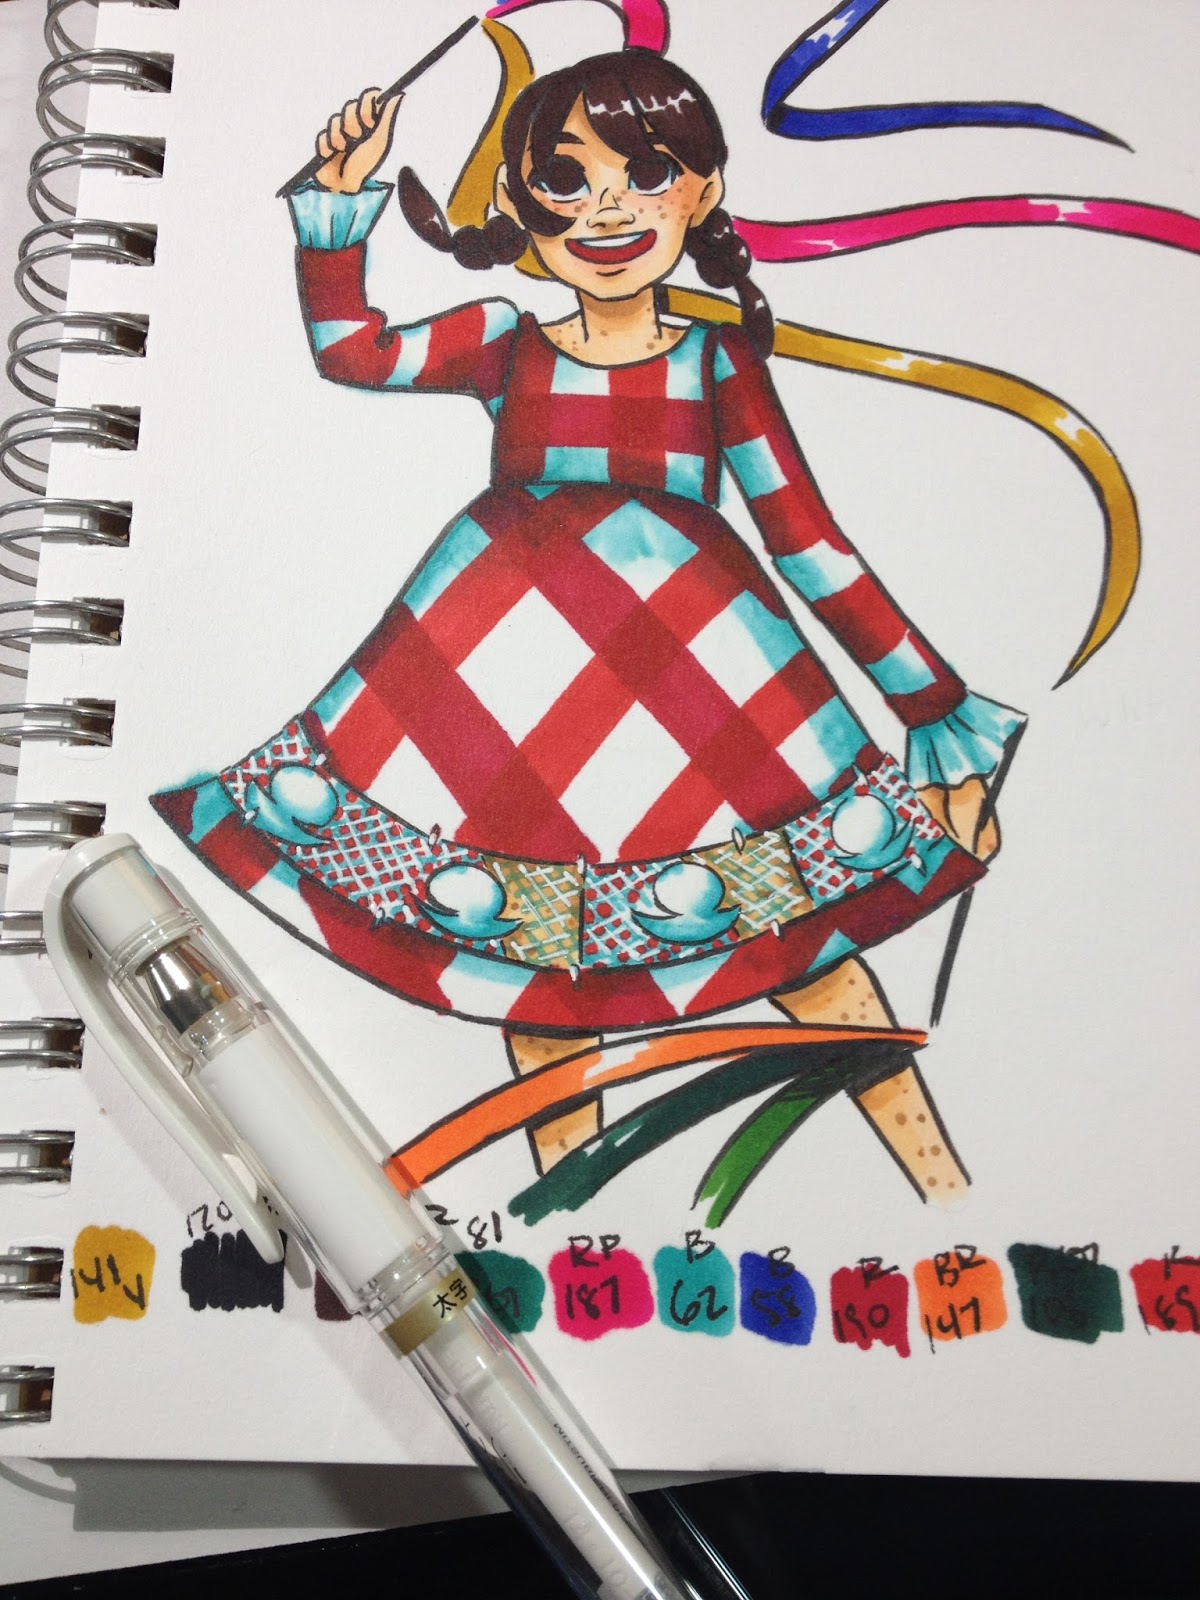
The Swatch Test

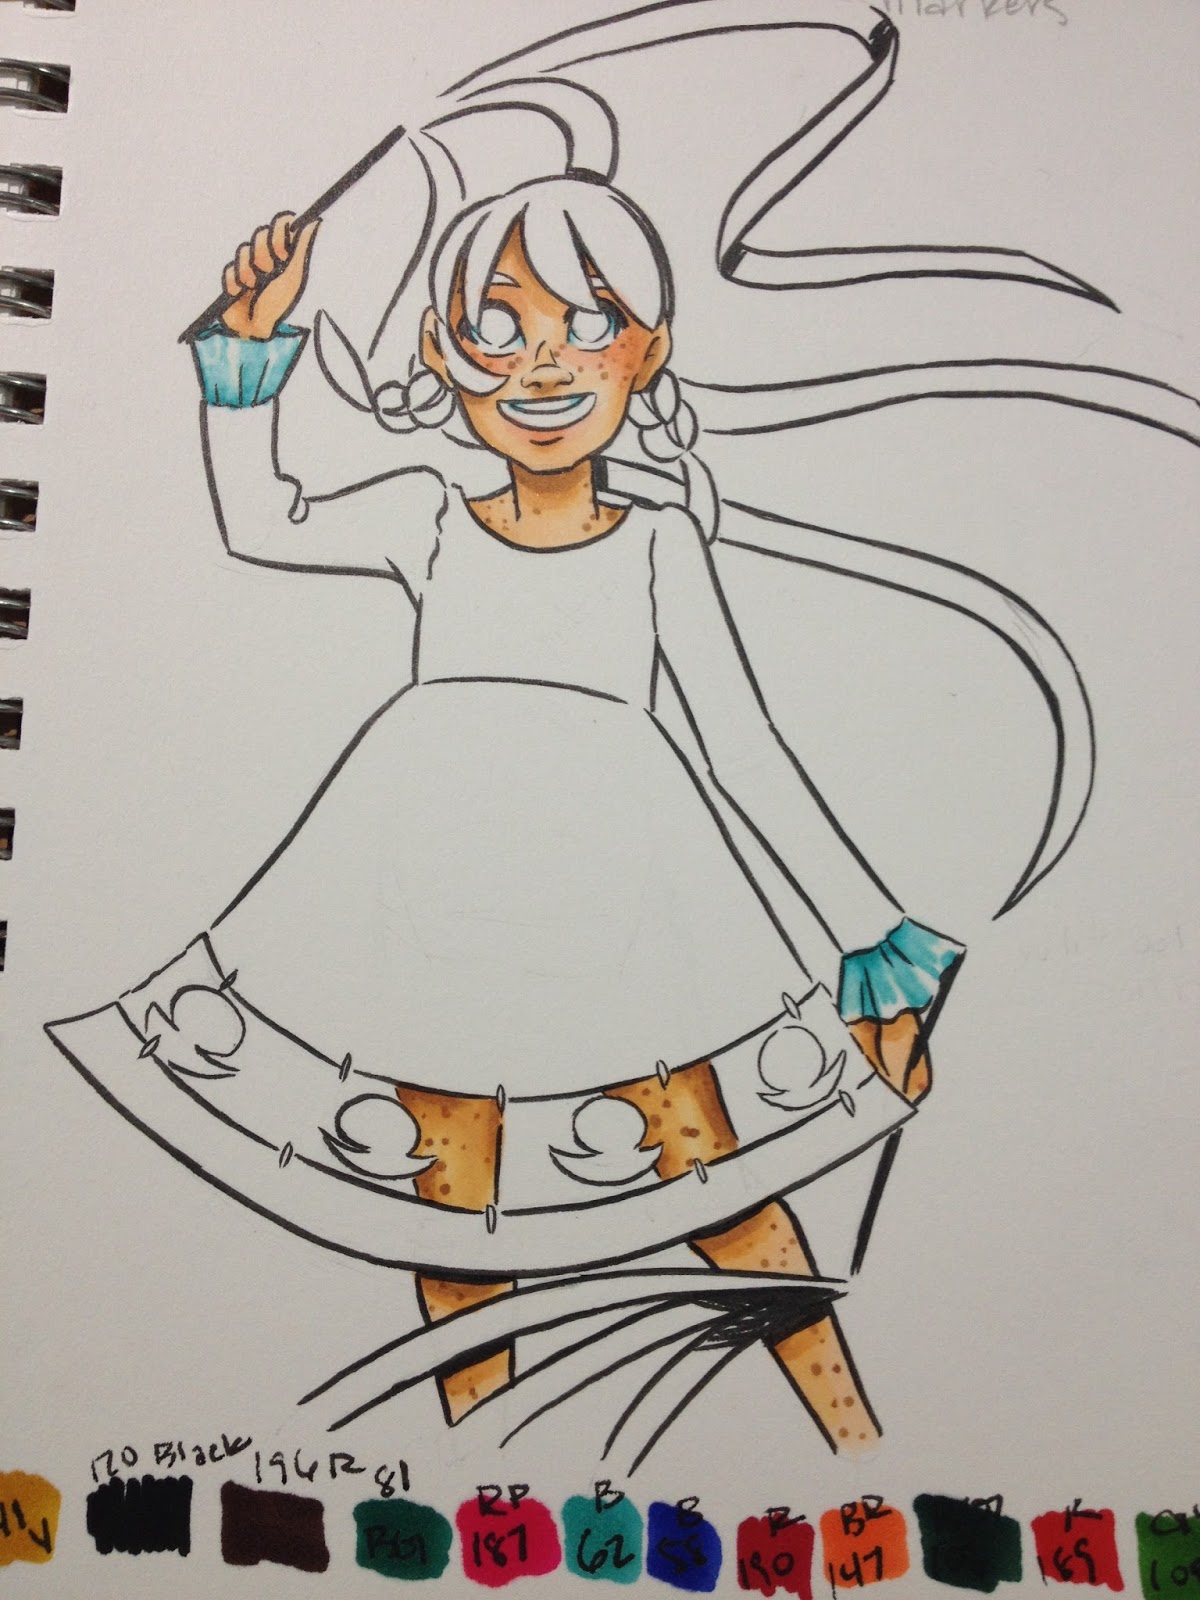
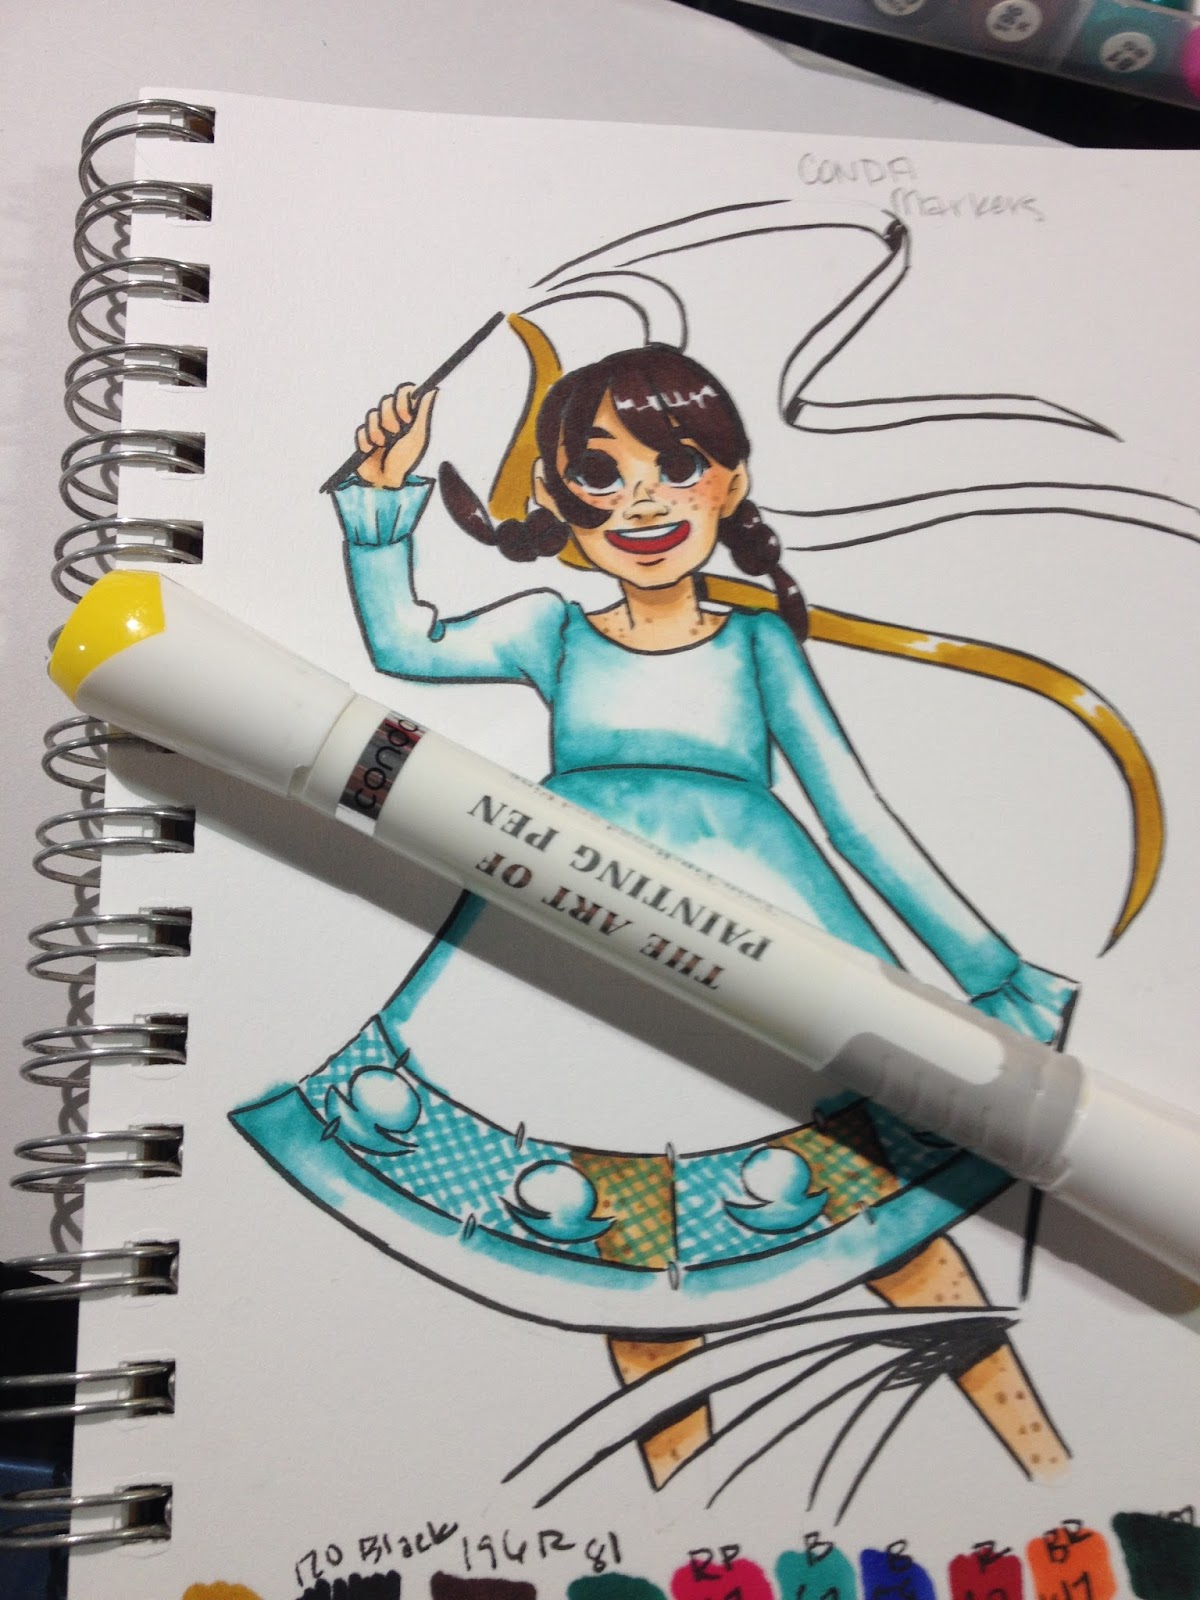
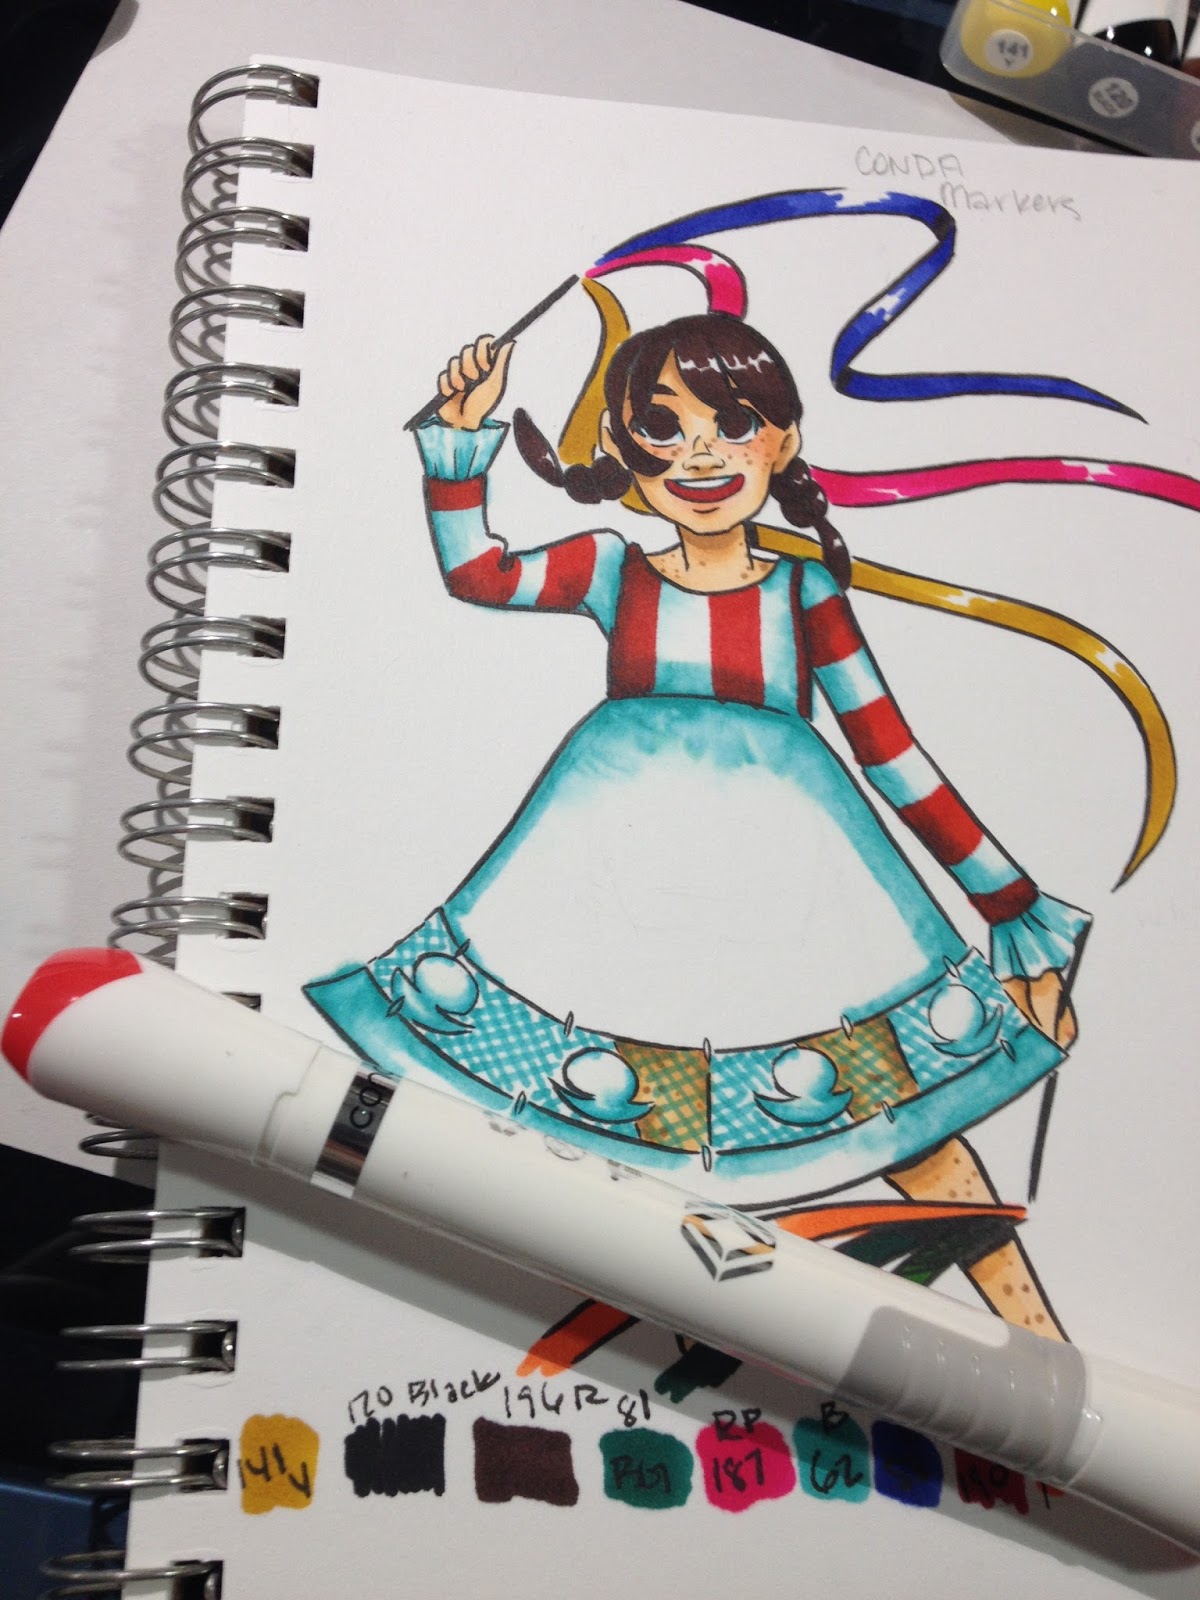
My field test was inked with a Sailor Mitsuo Aida brushpen, and allowed to dry overnight before color was applied.
All of the markers in my 12 piece Conda marker set swatched well- vibrant, saturated colors. My only complaint is the lack of skintones ALL marker brands seem to have with small sets- there's never anything usable in a set smaller than 24, making these sets difficult for beginners to utilize.
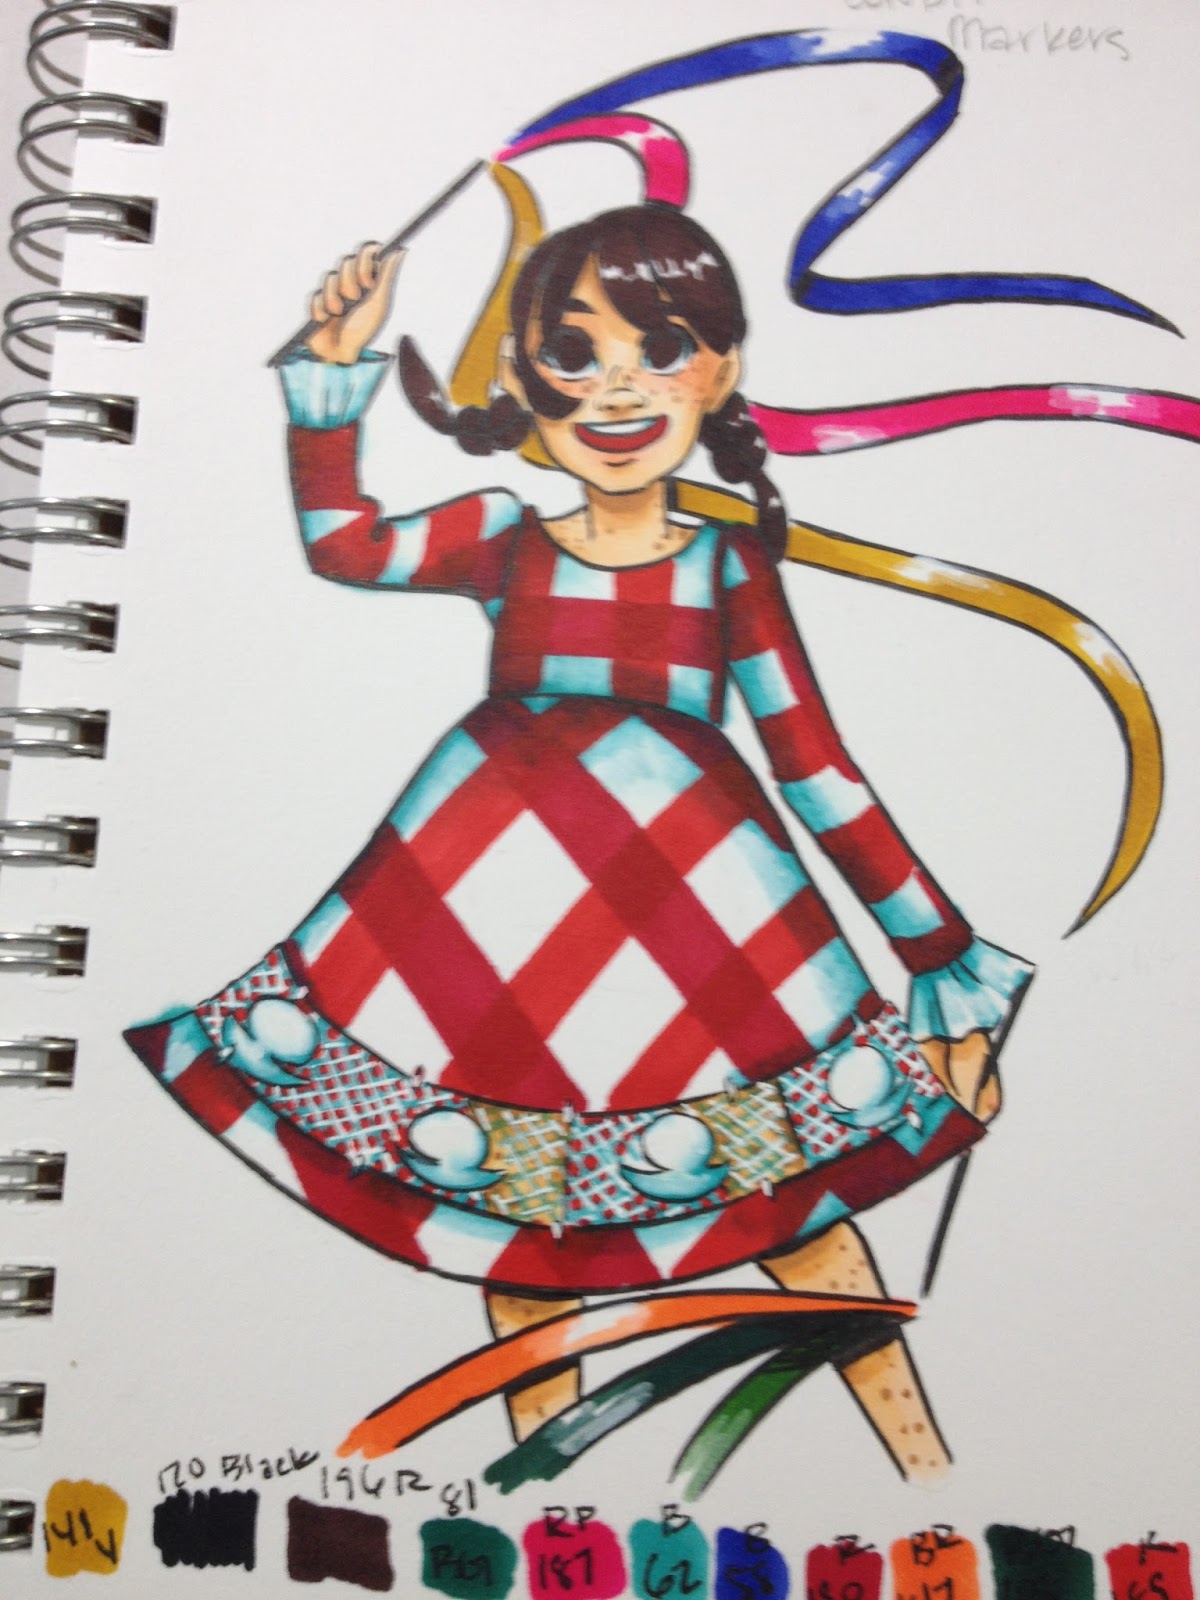
The Field Test

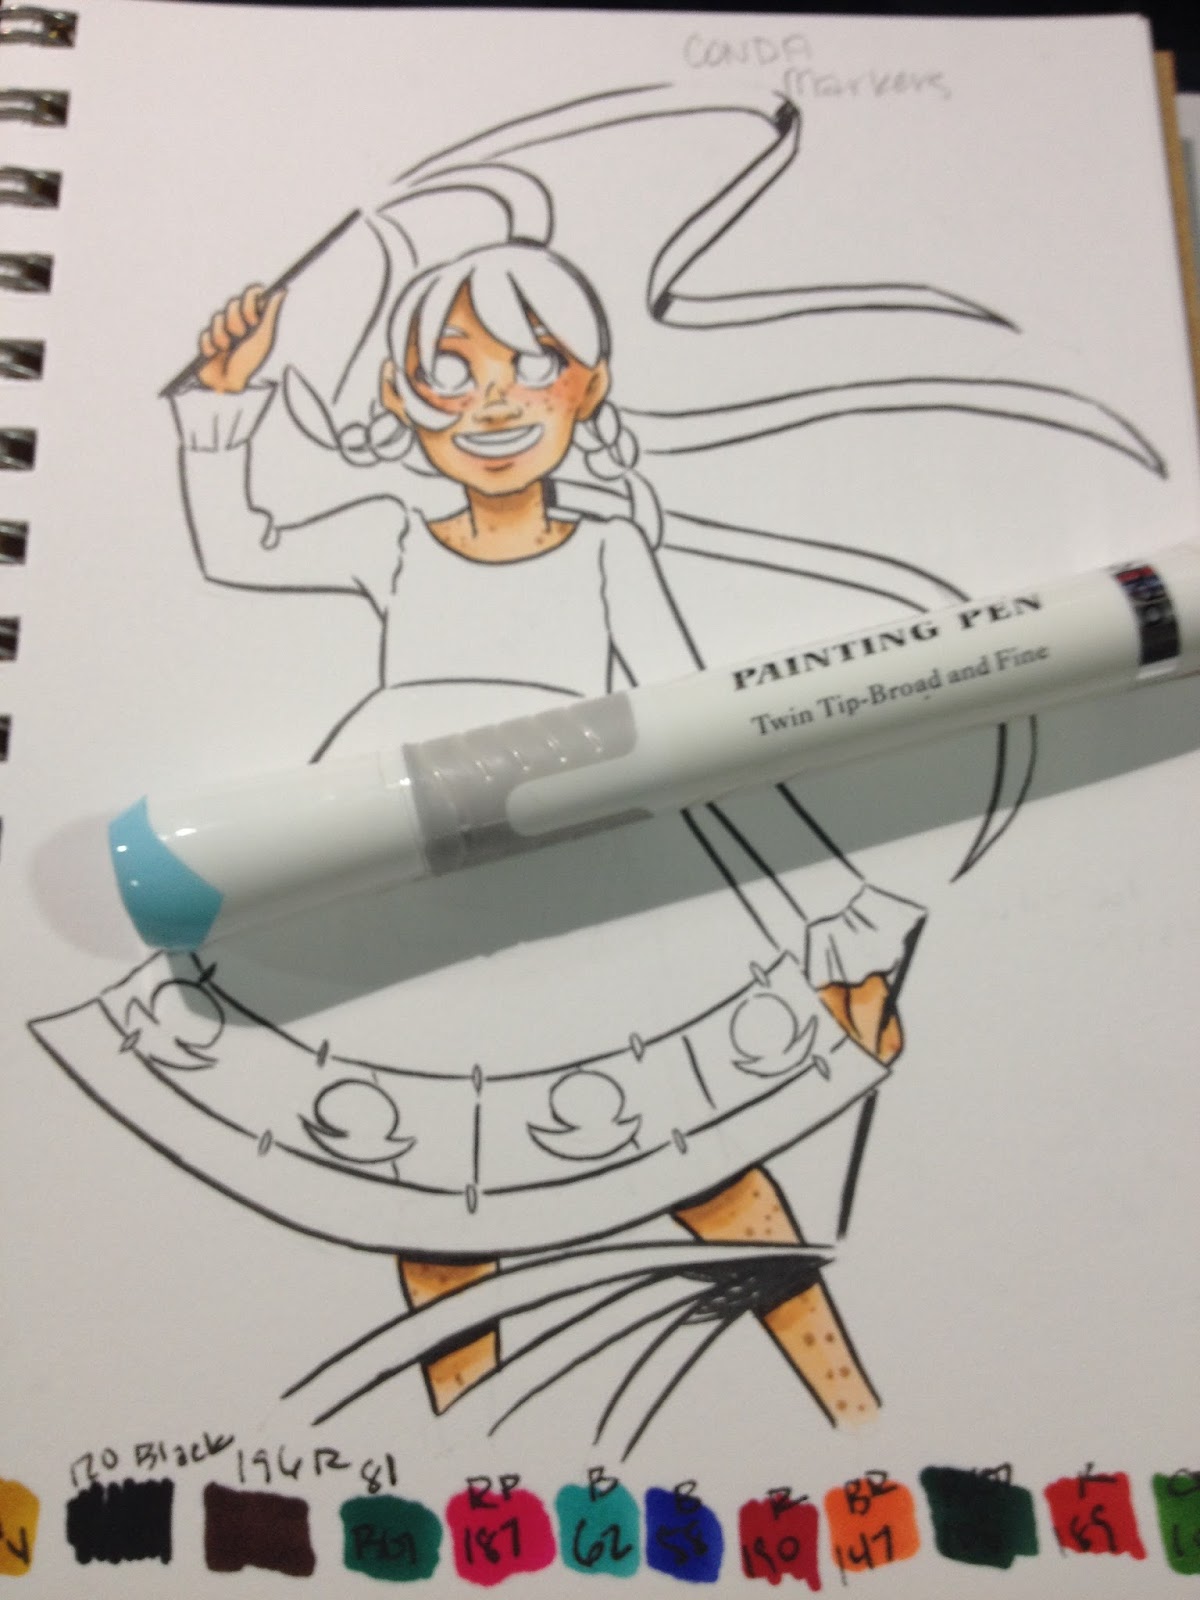
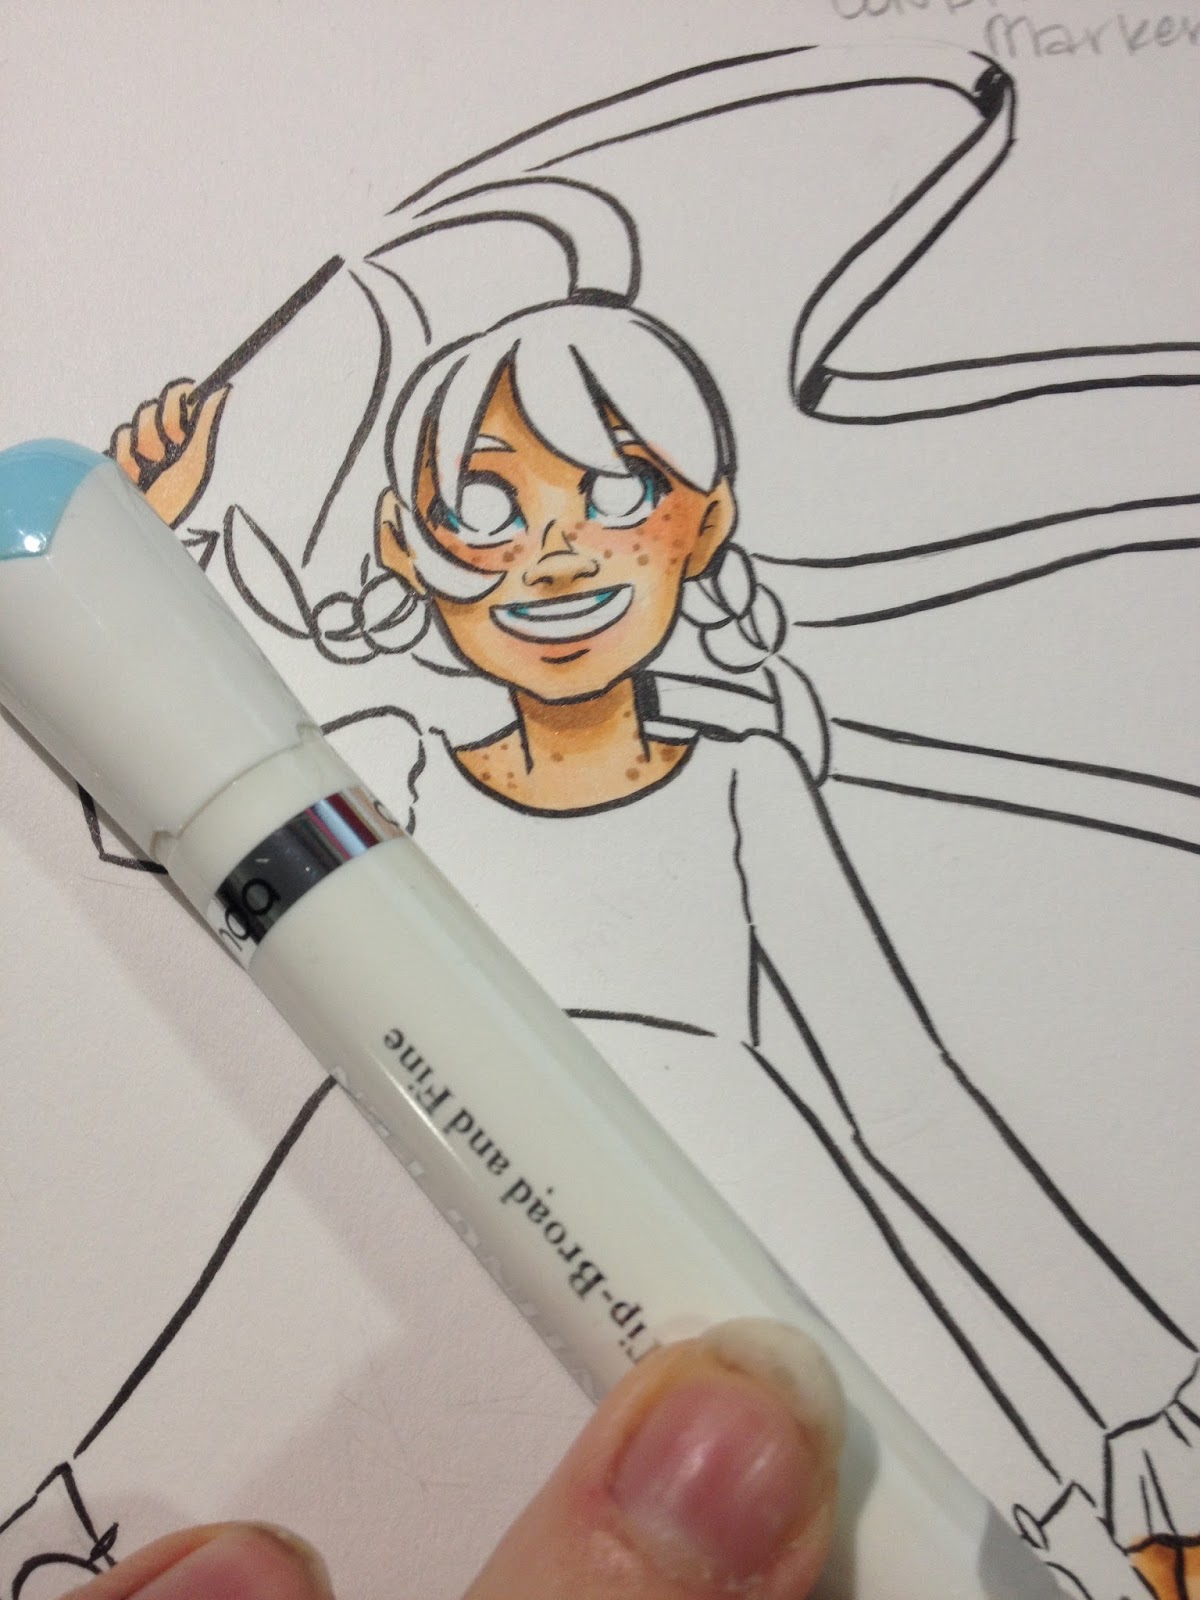
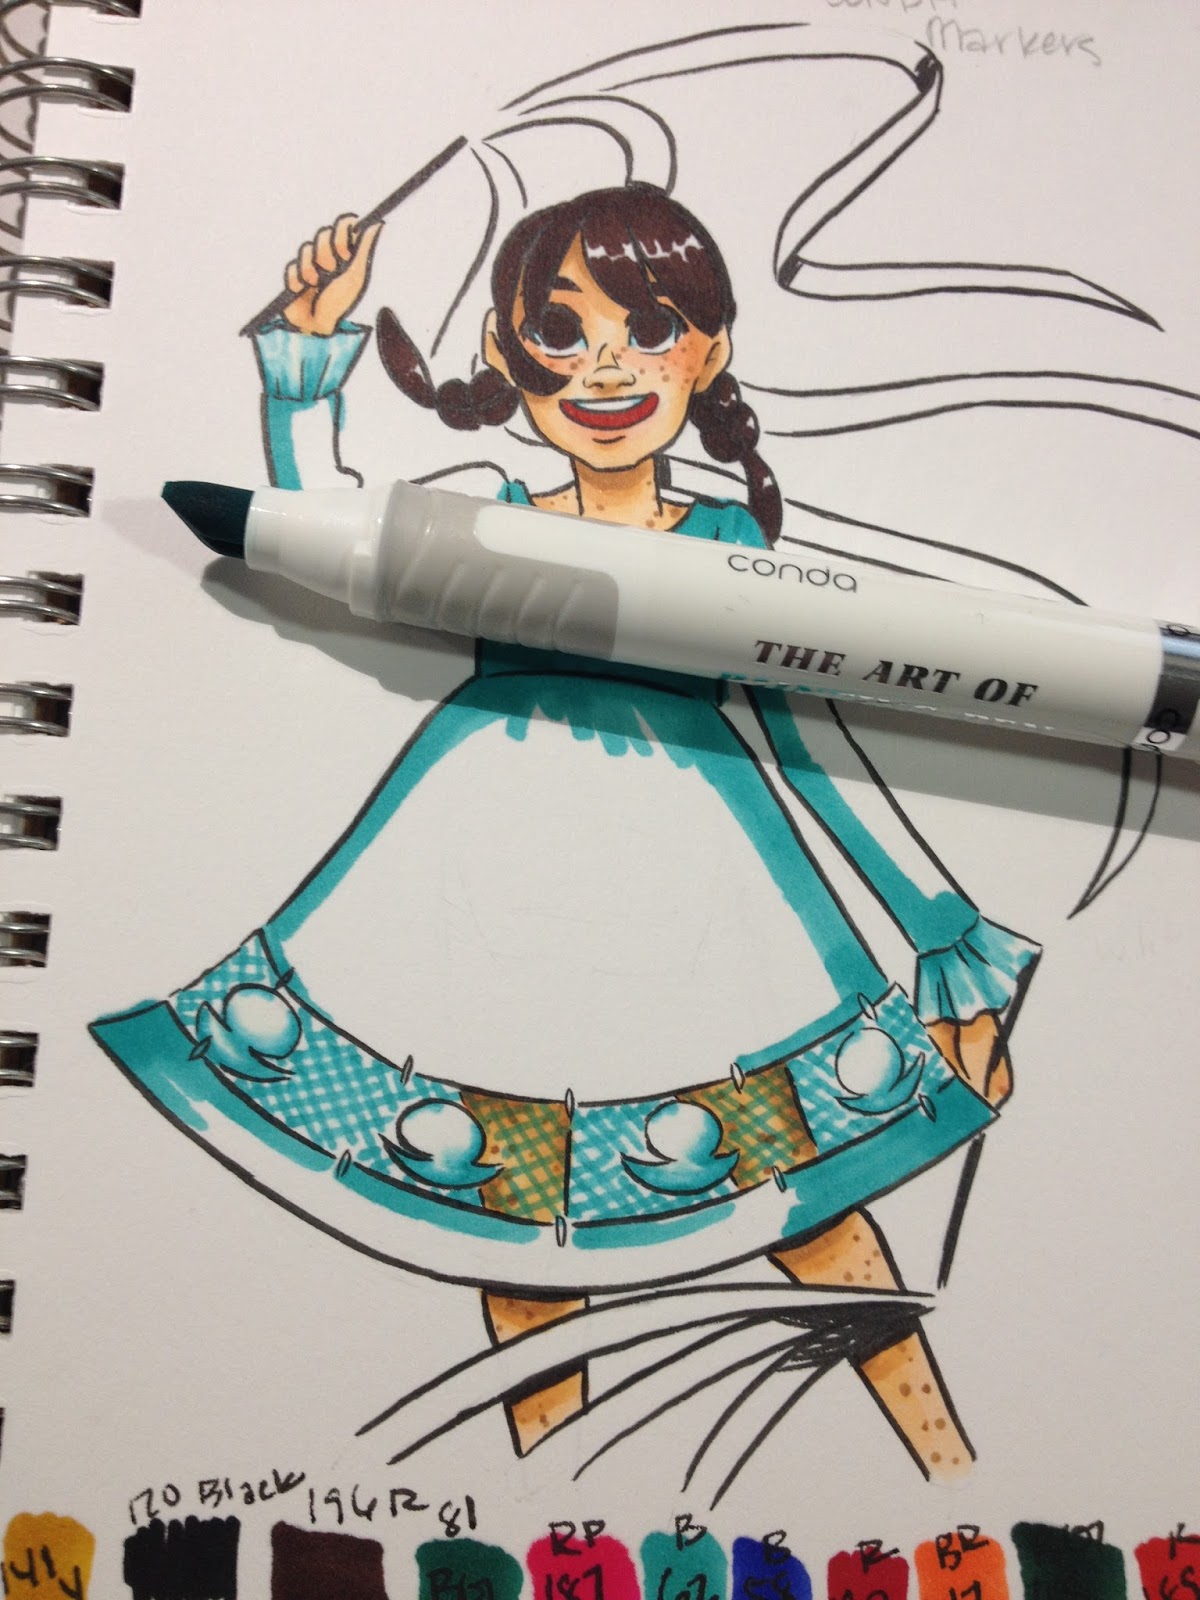
For my field test, I had to pull out some backup for Kara's skin- a mix of Copic Sketch markers and Blick Studio Brush Markers, one of my favorite Copic competitors.


I was finally able to use the Conda markers for a light blue- this light blue is actually B62, which is a darker blue green than I had wanted.

So I used a Copic colorless blender to knock the intensity back, as my 12 piece set did not include a blender marker, and they were not offered openstock.


It takes a lot of Copic colorless blender to knock Conda's B62 back into a useable light blue.


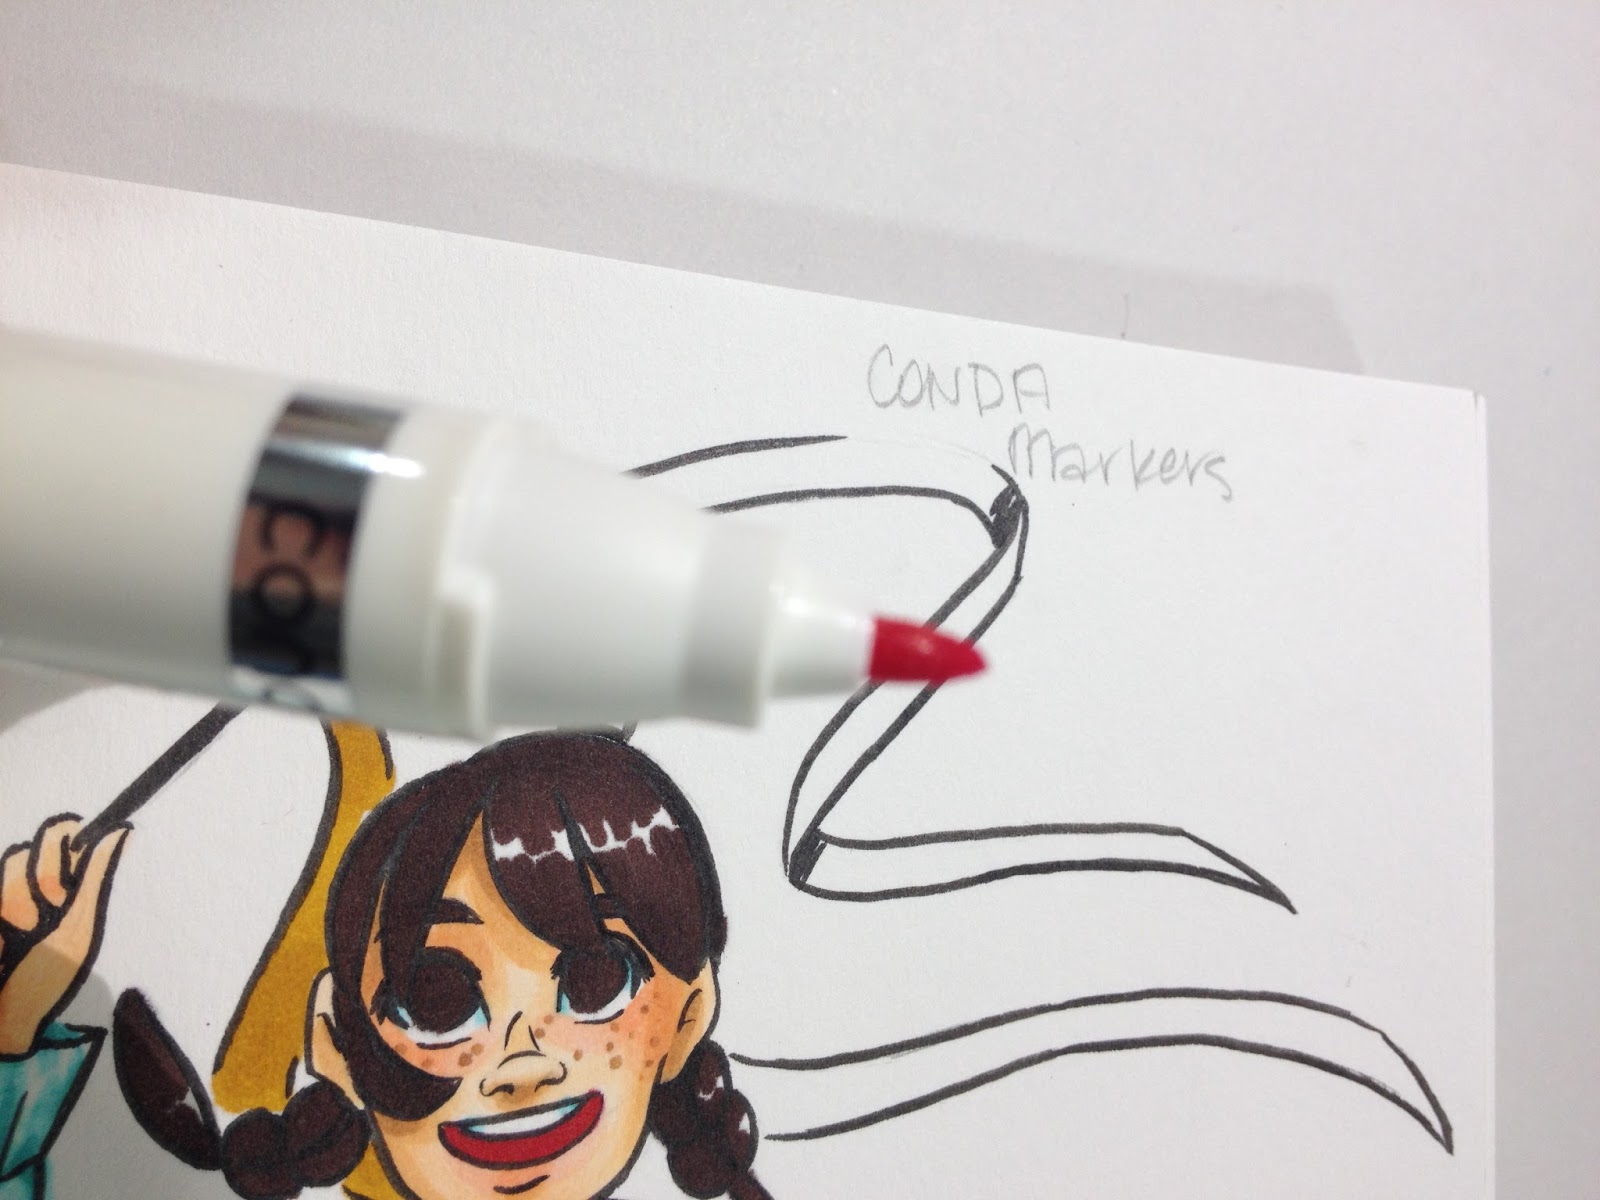
The included brown was too dark to really be the right color for Kara's hair and eyes, but I used it anyway.


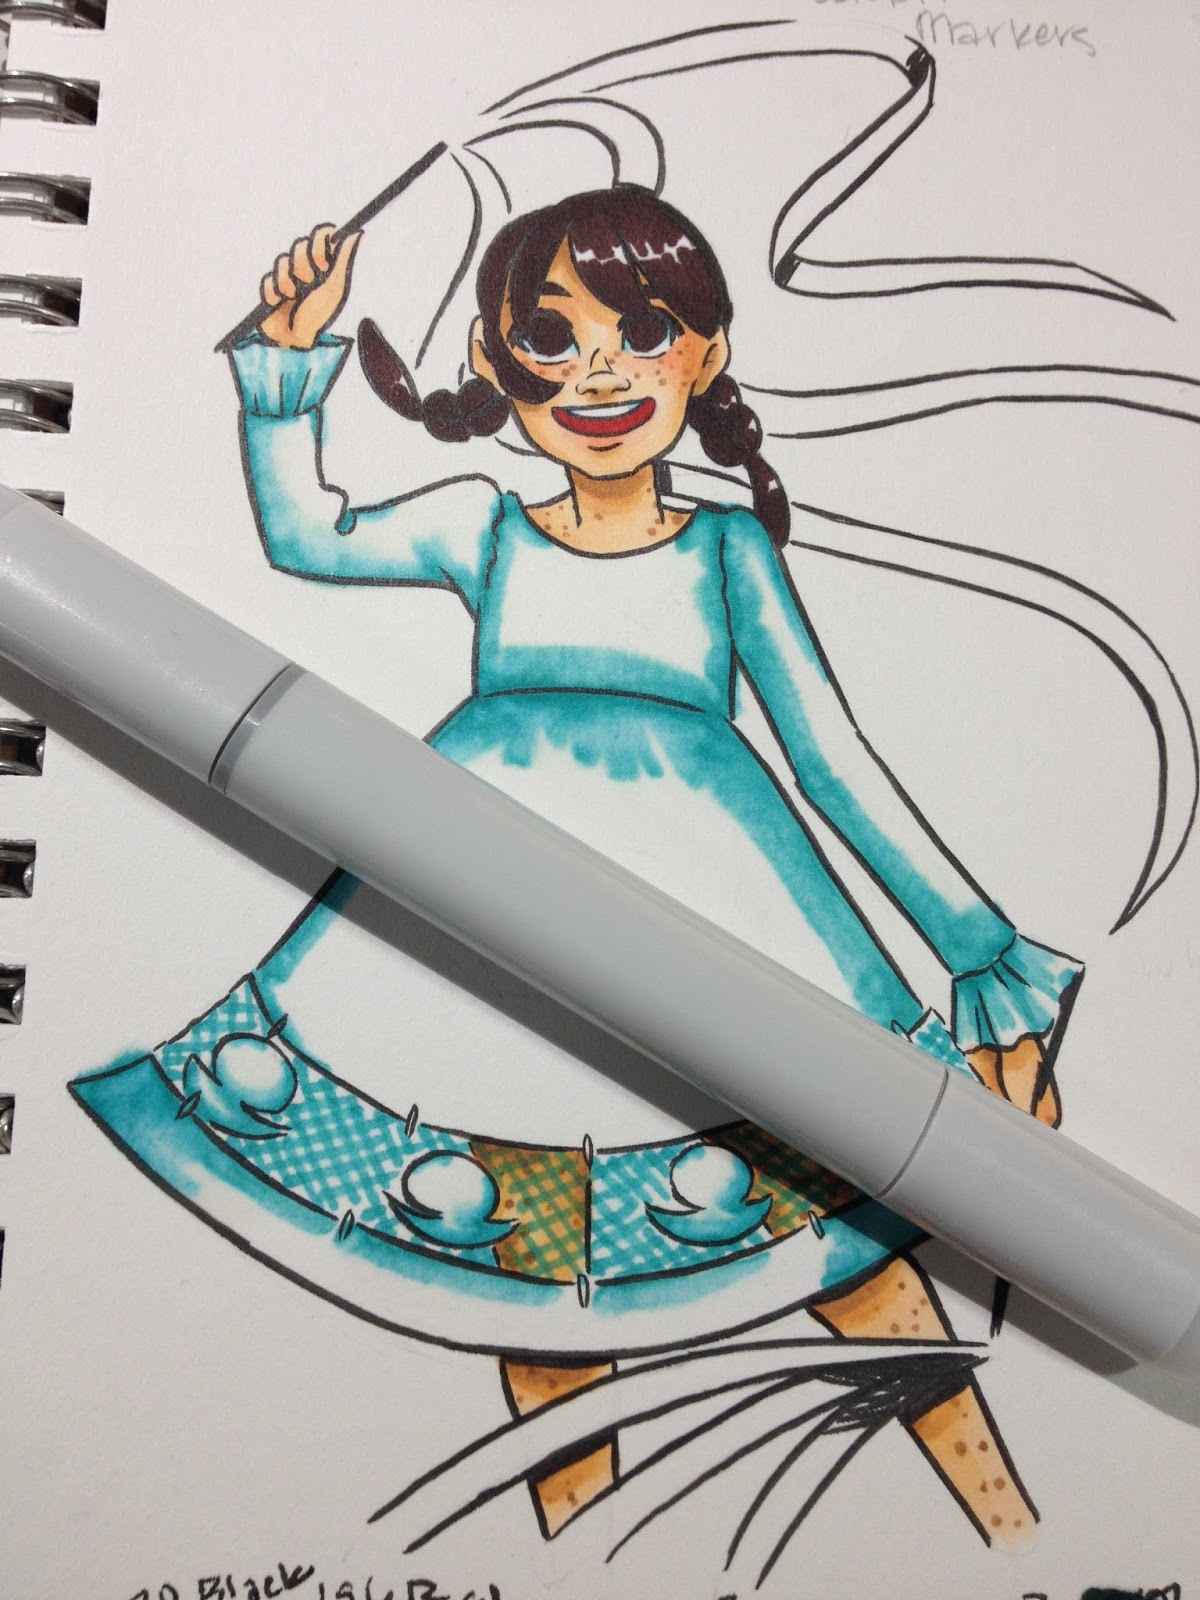
I wanted to do a white and red check dress for Kara, so I needed to establish my ground color. It's harder to shade and knock back whites once other colors have been layered on top, so I applied B62 first, in hopes that I could knock it back with the Colorless Blender.


Unfortunately it was difficult to smoothly knock back Conda's B62, so I needed to try another blending method.

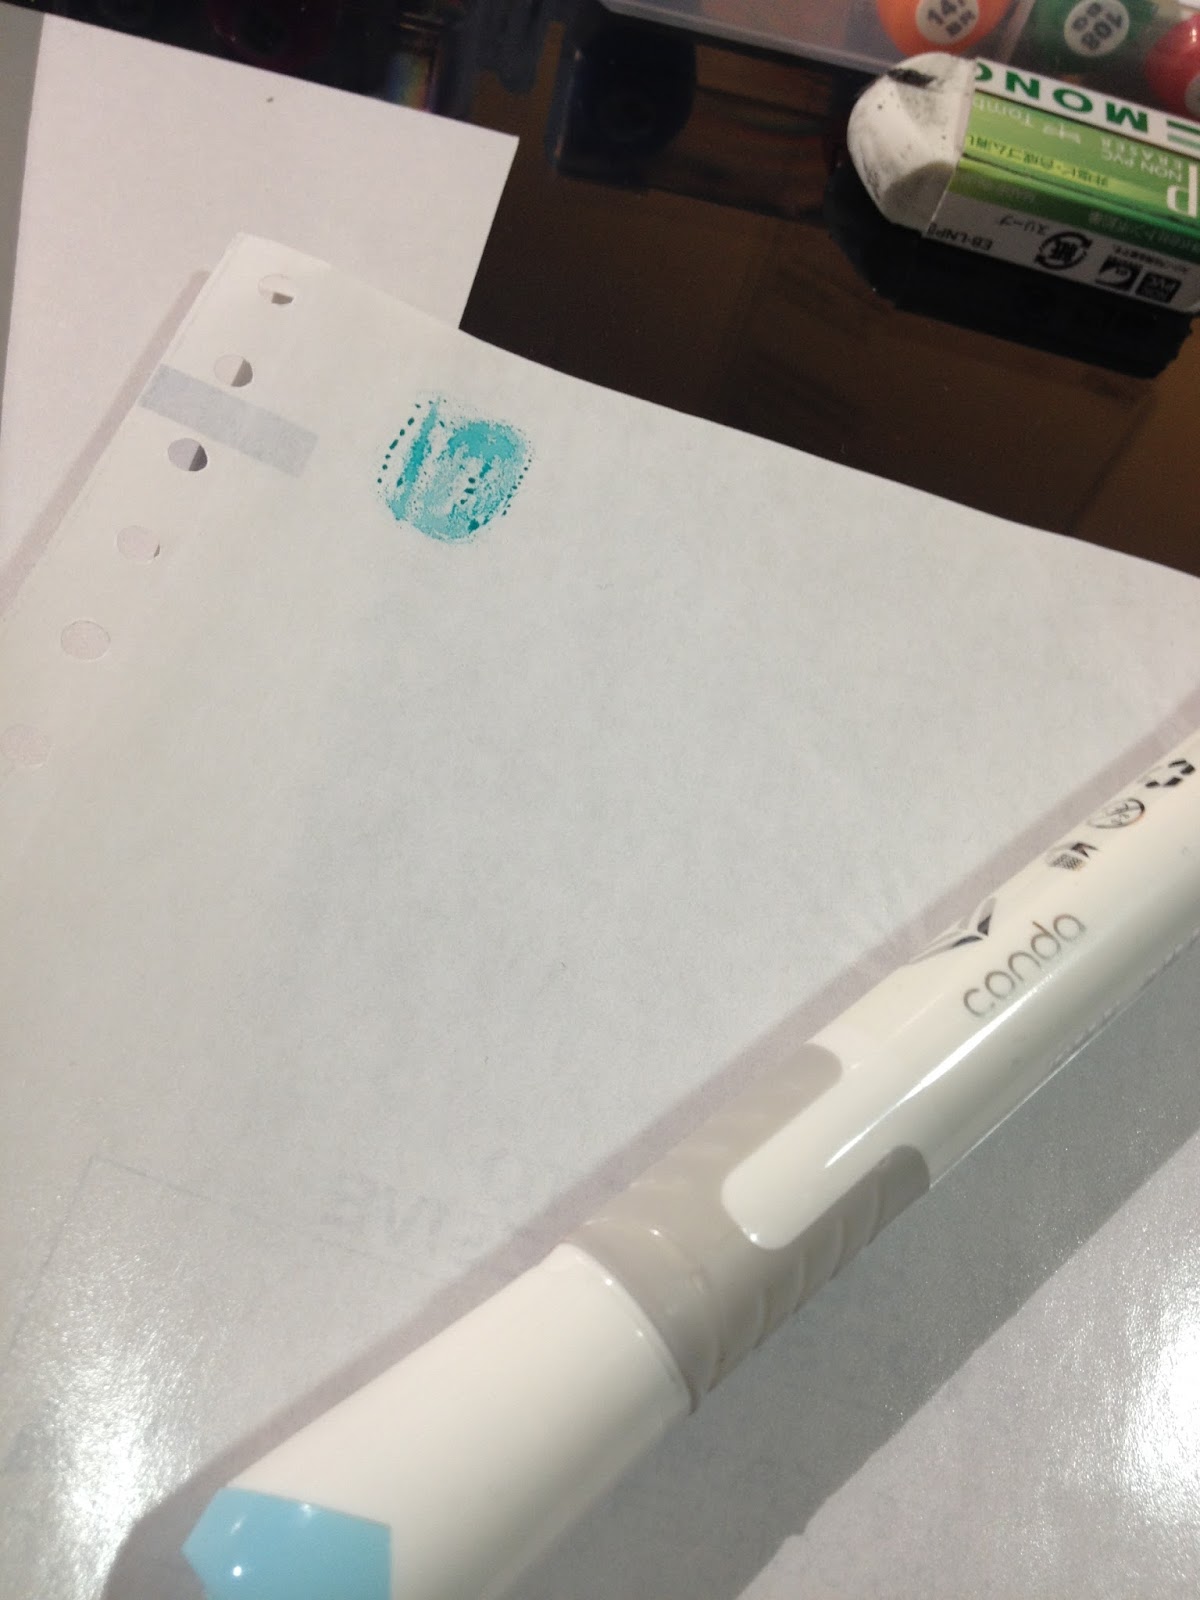
So I tried applying my alcohol ink to waxed paper, and using the colorless blender to pick it up and apply it.

This method might have worked better if I had utilized a scrap of plastic instead.


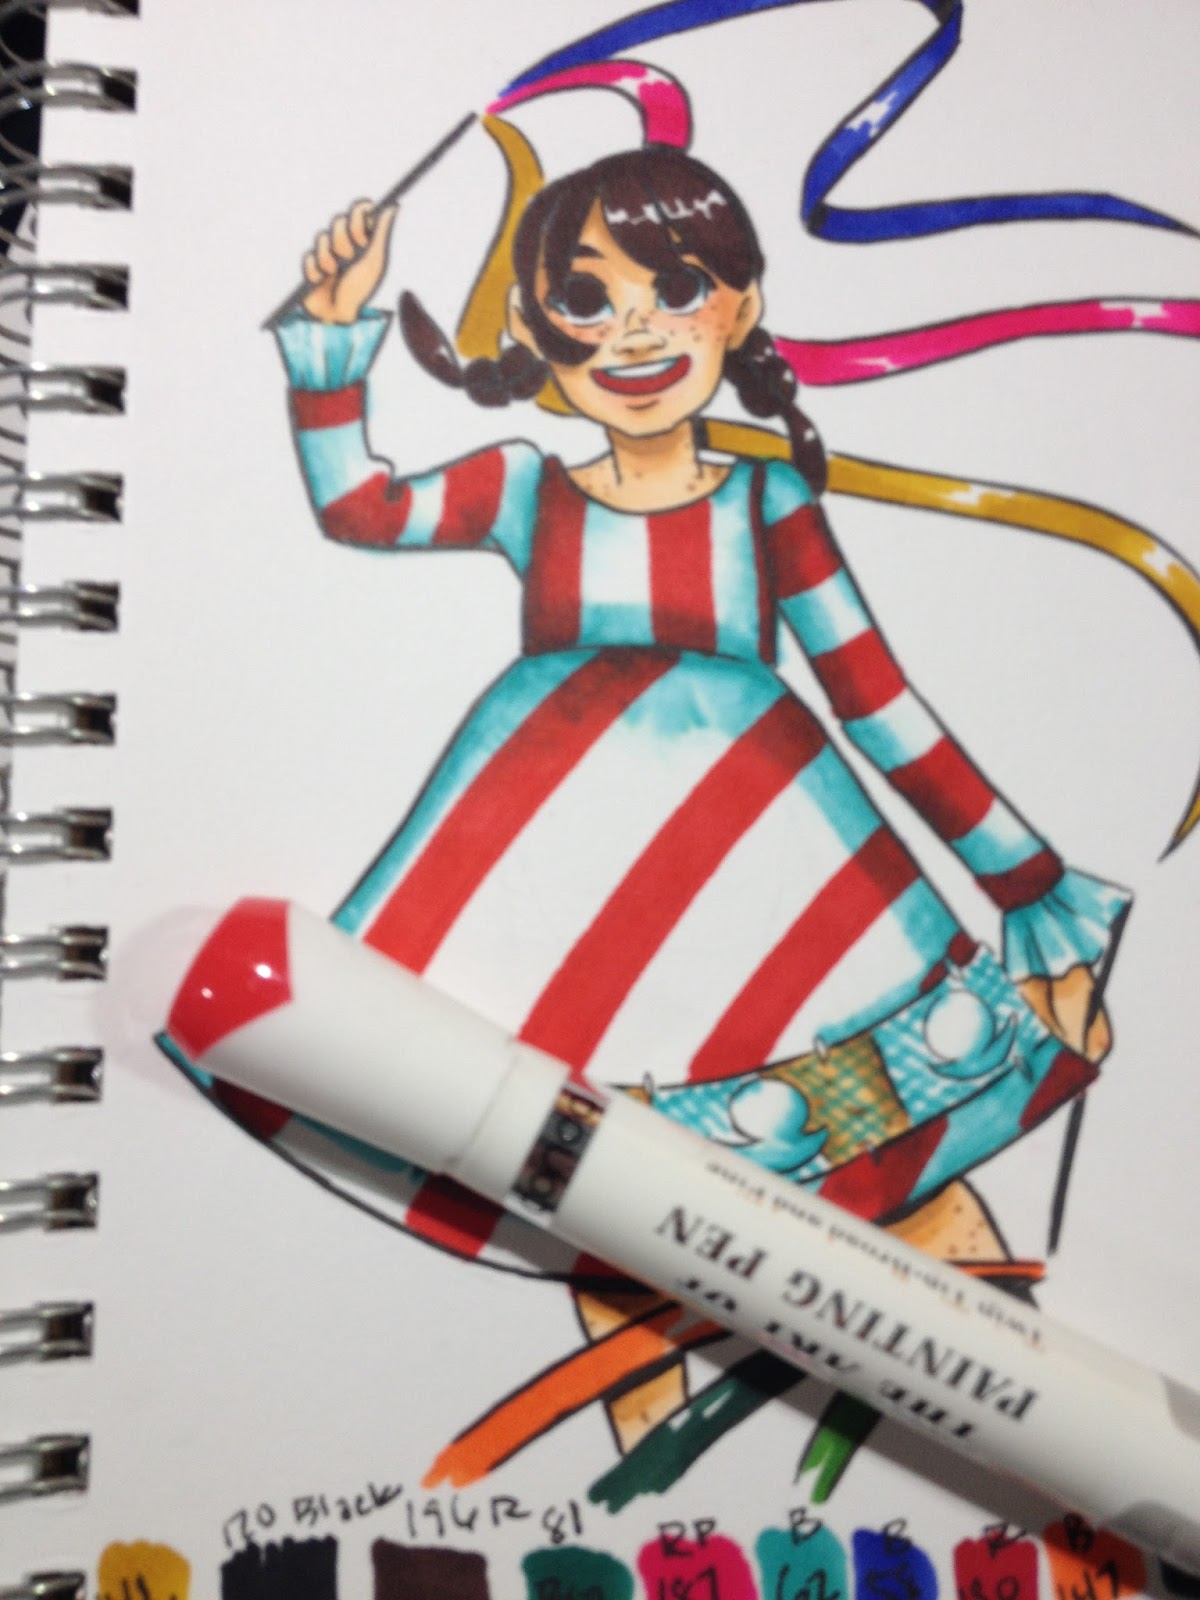
Although these colors are very saturated, many layered decently well, allowing me to build up color.


Once I'd finished applying color, it was time to add white details with a white Signo pen.


The Verdict
In my years of reviewing alcohol markers, these aren't the worst I've reviewed by far, and perform quite well given the price. If you use the original style of Prismacolor Markers, you'll find the Conda markers are almost identical once you get past the weird baton caps. Like the chisel nib Prismacolor, these Conda alcohol markers have a fantastic chisel nib that is juicier and holds up better than the compressed fiber nibs commonly included on alcohol markers, including Copic Sketch markers.
I wish I had splurged for the larger set so I could have fieldtested some skintones- the downside of Conda alcohol markers is that they aren't sold open stock, and may be difficult to find, as Hobby Lobby seems to regularly rotate out their alcohol marker options (besides Copic and Prismacolor). I you're looking to start an alcohol marker collection, or are curious as to whether alcohol markers are for you, the $19.99 Conda set isn't a bad way to start.
Please consider donating to this blog or purchasing from Natto-shop (http://nattosoup.com/shop) if you want me to continue publishing quality content. All materials tested were purchased from my own pocket. Keep on Truckin' Nattosoup is not under any sponsorship.
The Brand
Conda is a Chinese art supply brand that produce everything from easels to paints to markers. Conda's marker offerings are fairly varied- there are marker bodies that look like Jerry's Artarama's Concept markers, bodies that look like Finecolour Sketch markers, and markers I can't comment on as they're hidden by an opaque box. I couldn't find markers similar to those I purchased at Hobby Lobby in Fall 2015, but it seems like others were able to find this body type at their stores in the fall as well.
I purchased the 12 piece set for $19.99- I was tempted to splurge and get the 24 piece set (which was $34.99, I believe), but I didn't want to invest a lot of money in markers I'm only purchasing for review purposes.
If you're interested in trying Conda markers, the Hobby Lobby website still has the 24 piece set available. These markers seem to have replaced the Art Markers I reviewed last year.
If you can't find Conda Markers, they're very similar to Prismacolor's original alcohol markers, which you can purchase through Amazon. Your purchase through affiliate links helps support this blog, so if you're interested in alcohol or art markers, please make sure you check this blog first!
The Stats
Not available openstock$19.99 for 12 markersTwin Tipped- bullet nib and chisel nibAvailable in sets- 12, 24, 36Available through Hobby LobbyBlender marker available in larger sets
The Packaging
Conda markers have some of the most interesting marker packaging I've ever seen. All sets available through Hobby Lobby come in a reusable, sturdy plastic case that clicks shut. My 12 piece set came with a wrist loop.
The clips are very secure, and this set could very easily travel to conventions for at-show work.
The markers are securely held in place- so securely that if all markers are in their spots, it's difficult to remove markers.
The Markers
Conda markers are white with silver screening and gray grips.
The body reads The Art of Painting Pen, can anyone give me any clues as to where that comes from? Perhaps a literal translation from the Chinese name? On AliExpress, I've seen alcohol markers referred to as 'oil pens' and 'oil markers' before- any insight on that?
Conda markers are twin tipped- a bullet nib and a large chisel nib that closely resembles Prismacolor's Art Markers.
 From top to bottom: Copic Sketch, Conda marker, Prismacolor marker, MEXPY marker, Shin Han Twin Touch (all alcohol markers)Conda markers are baton shaped, which makes removing the cap a bit easier as your hand is less prone to slipping. They're some of the longest alcohol markers I own, tying with MEXPY and Shin Han Twin Touch.
When the caps are removed, it becomes readily apparent how similar Prismacolor markers and Conda markers are, both in body mould and in chisel nib design.
 From left to right: Copic Sketch, Conda marker, Prismacolor Art Marker, Prismacolor Brush Marker (Bullet nib)
Conda markers have pretty much the same chisel nib as Prismacolor Art markers, and it's one of my favorite chisel nibs available- juicy, well built with lots of angles for a variety of lines.
 From left to right: Prismacolor Brush Marker, Prismacolor Chisel Tip Marker, Blick Studio Marker (original) Chartpak marker, Conda Marker
The Conda marker body has a gray rubber grip like the Concept Markers I reviewed awhile back, but is otherwise the same body as the Prismacolor marker.

The Chartpak Adpro marker has a very similar chisel nib to the Prismacolor and Conda marker nibs. The Blick Studio marker has a nib made cut fiber- my least favorite type of chisel nib and sadly the most common.

Alcohol Ink Compatibility Tests
A common concern for marker artists is 'will these markers work together'. Some brands have more alcohol in their dye solution than others, and may react strongly to colorless blender or layer poorly. Conda markers appear to include lots of dye in their alcohol solution, as the colors are saturated and don't come off as dull.

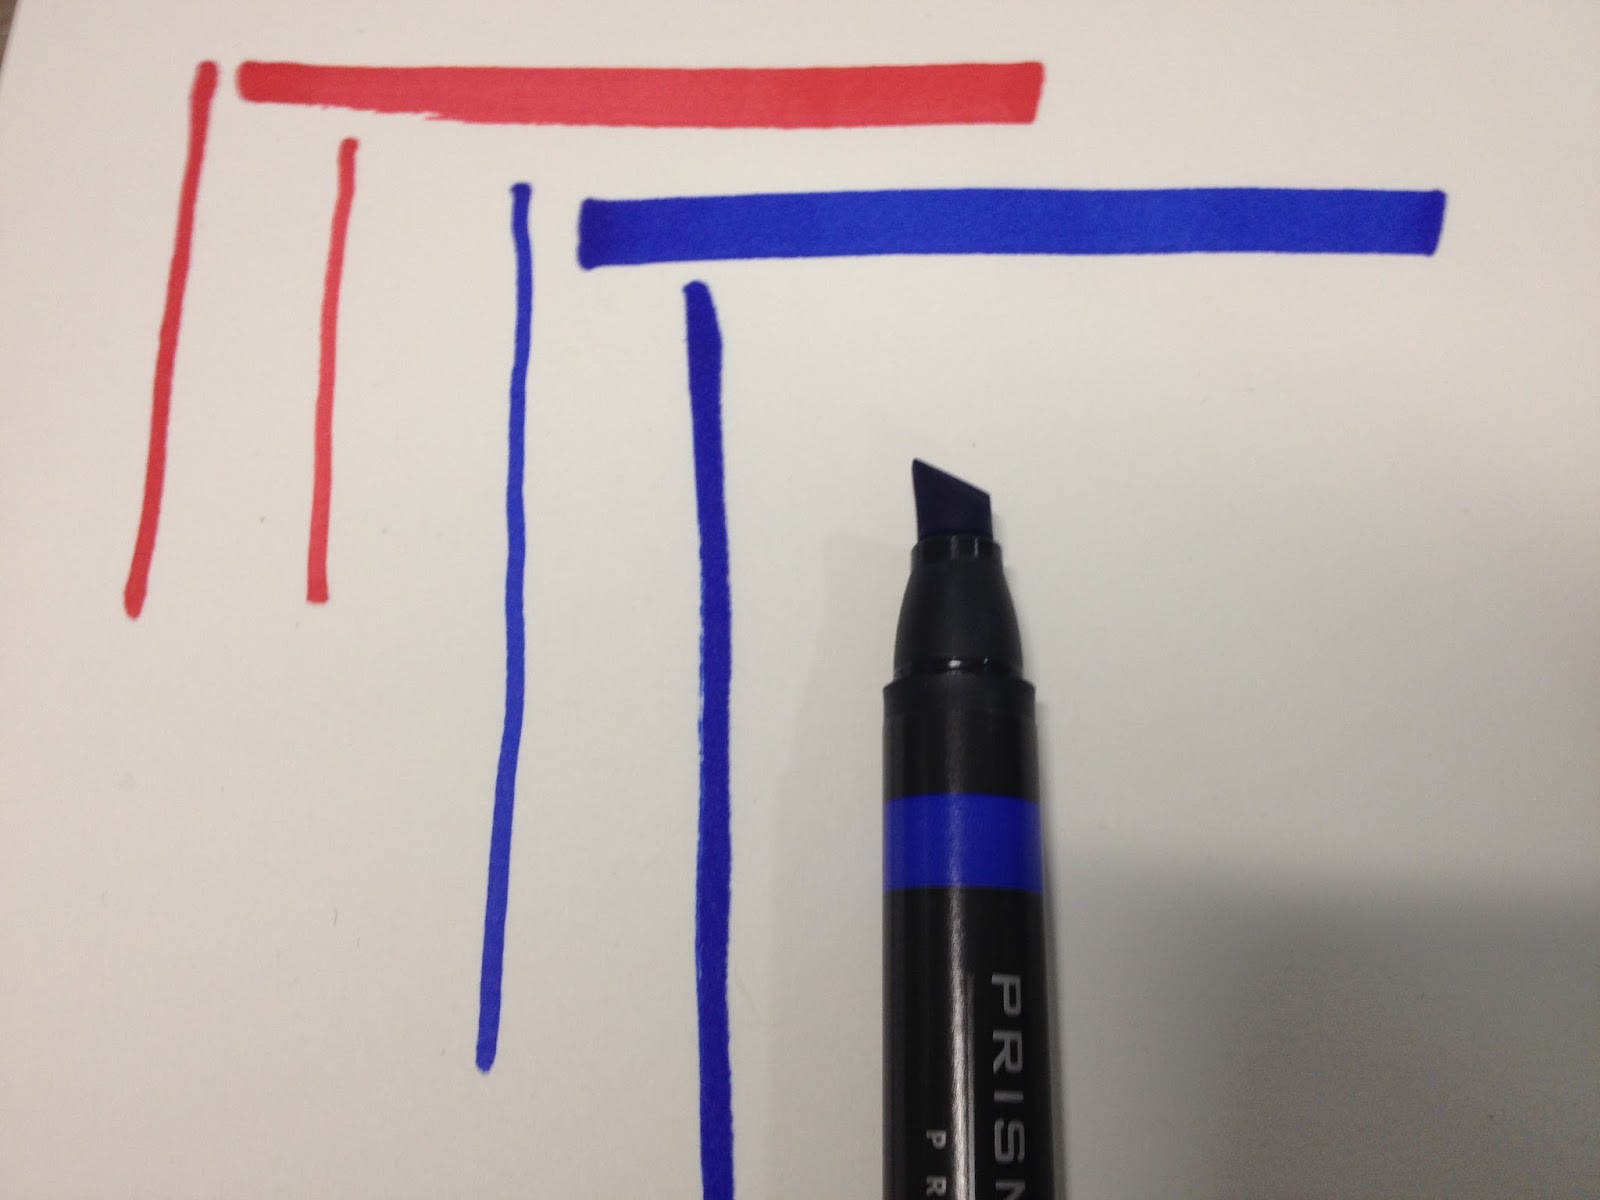
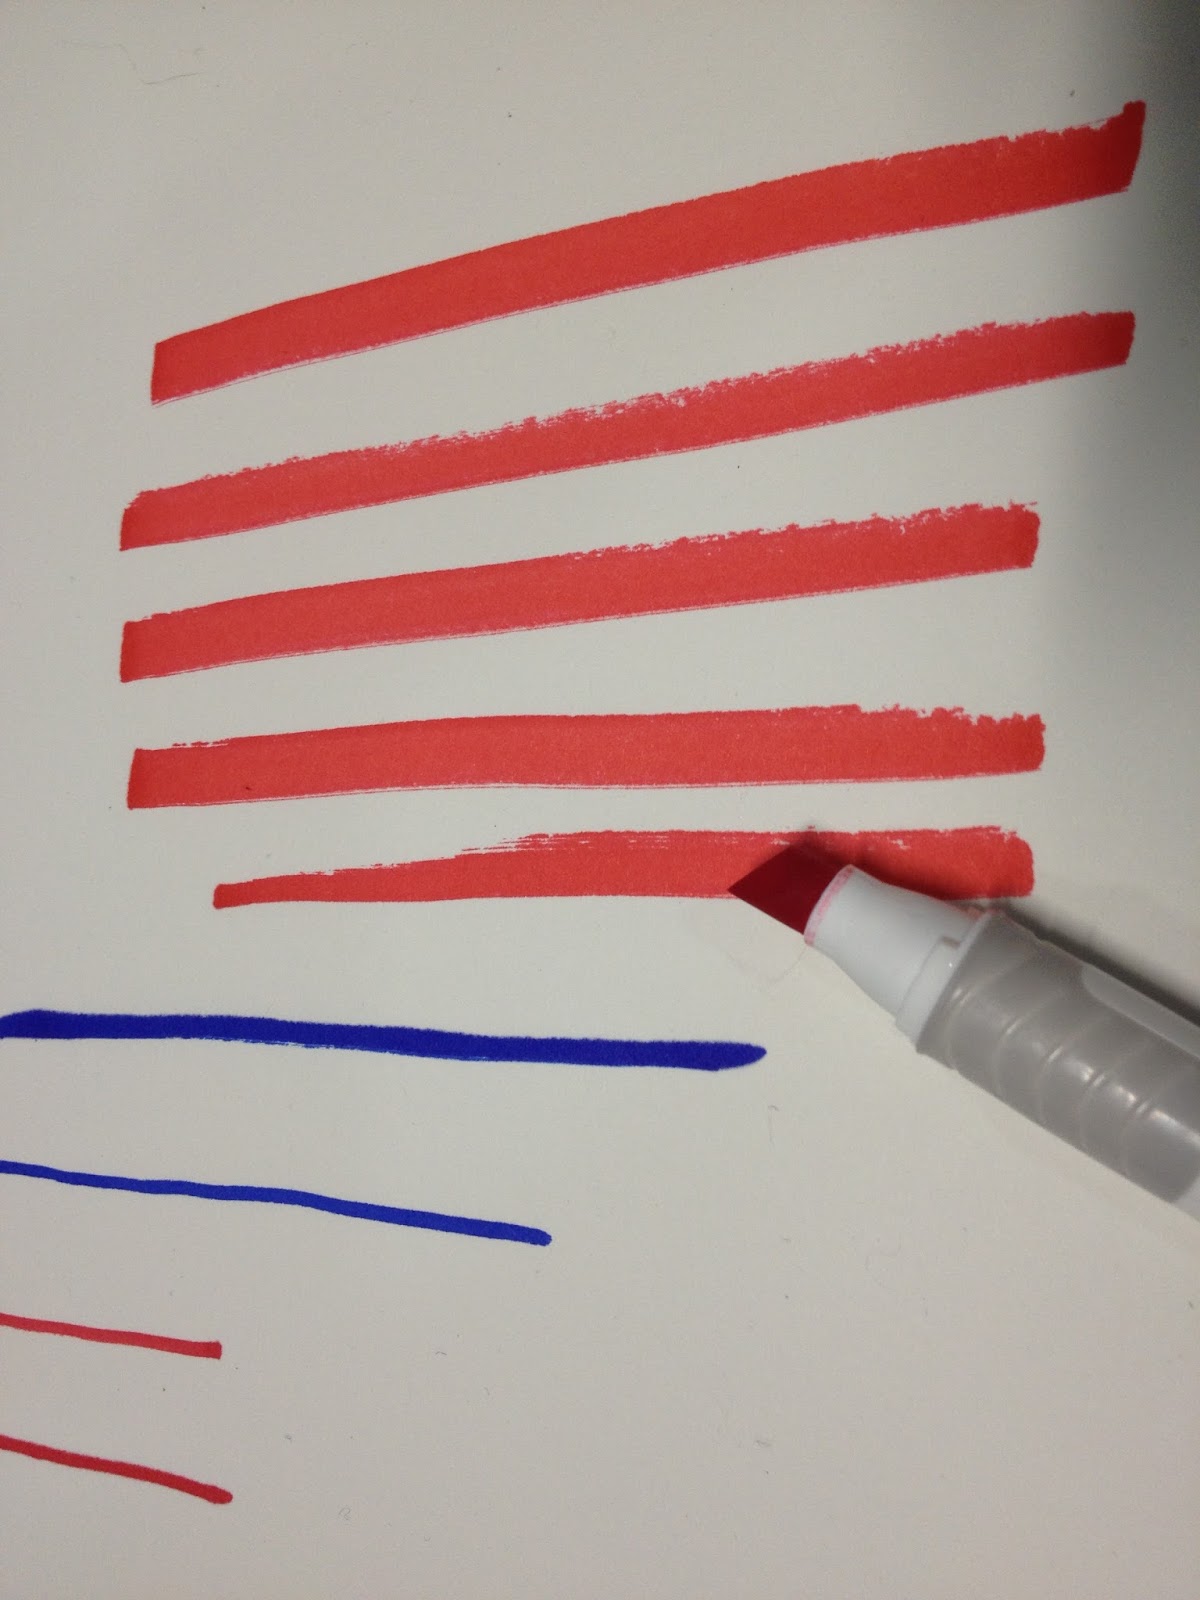
I found it difficult to draw a consistent wide line with these markers, despite their similarities to the Prismacolor chisel nib.
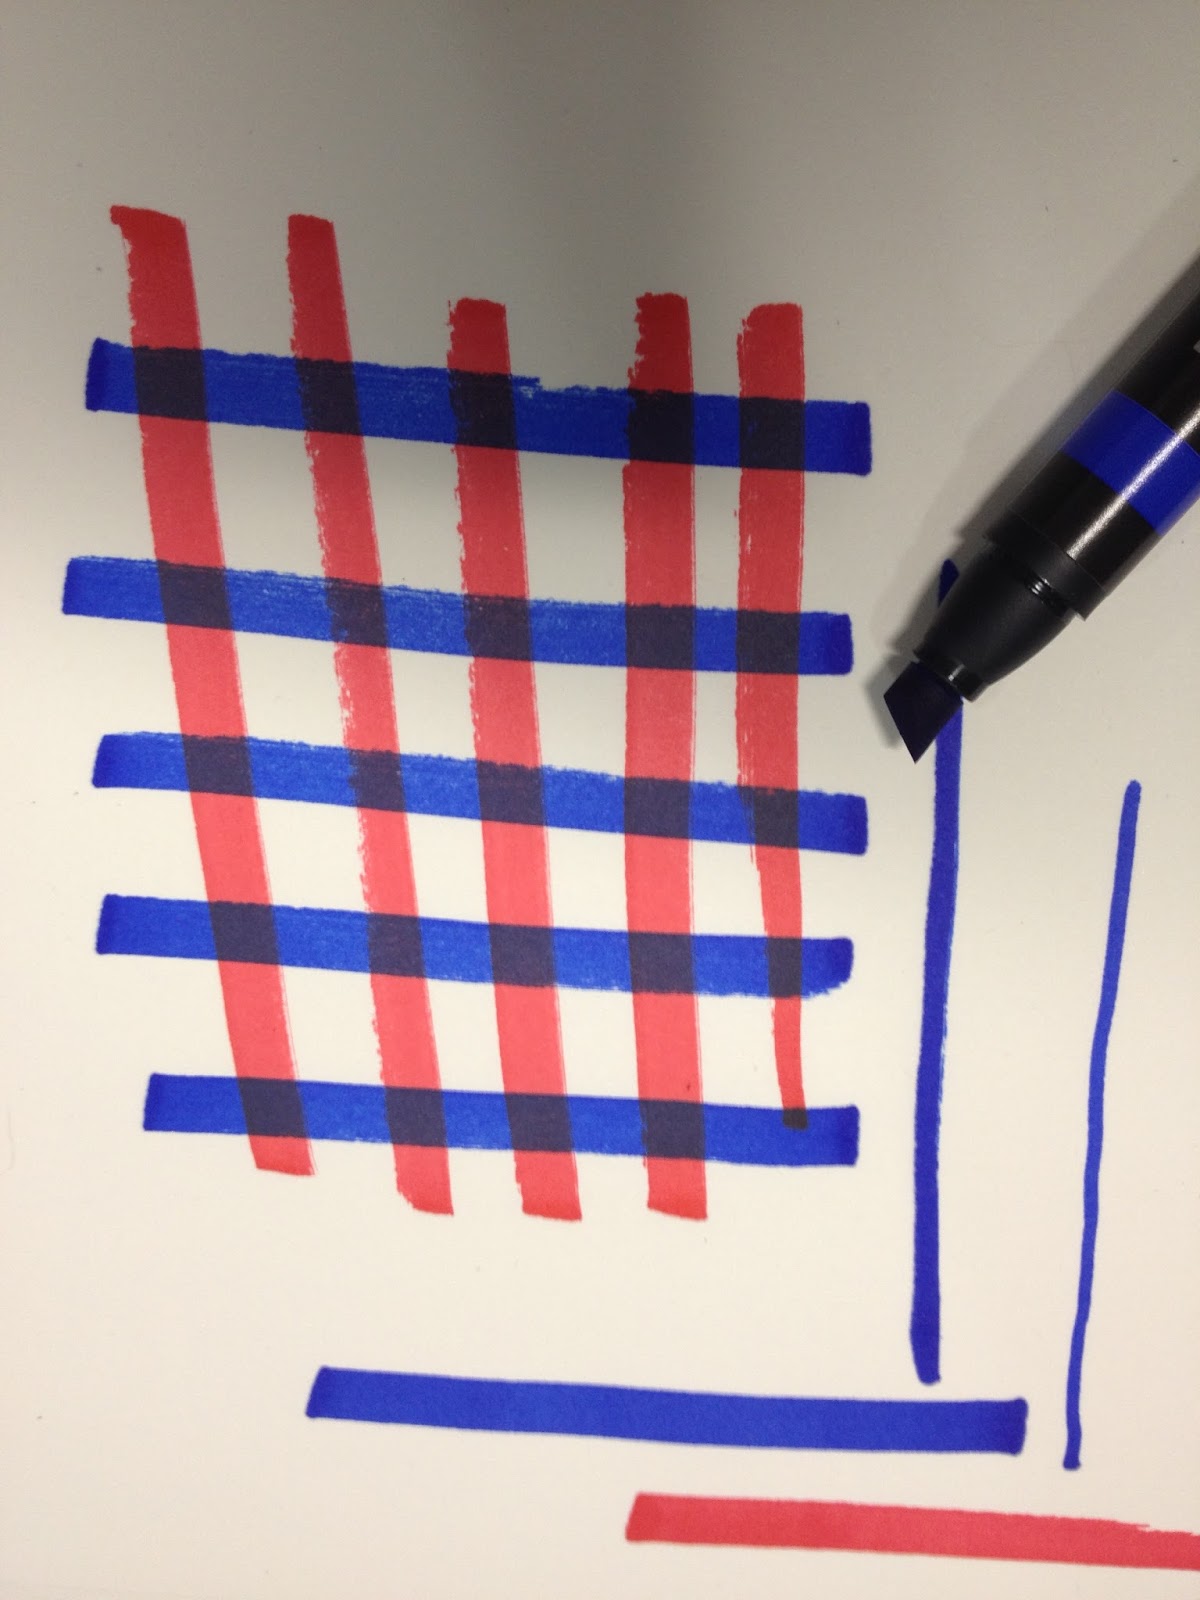
I alternated between using Prismacolor and Conda markers for this test, and found that the markers handled well together. It would be difficult to tell at a glance which color belong to which brand.
The Swatch Test

My field test was inked with a Sailor Mitsuo Aida brushpen, and allowed to dry overnight before color was applied.
All of the markers in my 12 piece Conda marker set swatched well- vibrant, saturated colors. My only complaint is the lack of skintones ALL marker brands seem to have with small sets- there's never anything usable in a set smaller than 24, making these sets difficult for beginners to utilize.
The Field Test

For my field test, I had to pull out some backup for Kara's skin- a mix of Copic Sketch markers and Blick Studio Brush Markers, one of my favorite Copic competitors.

I was finally able to use the Conda markers for a light blue- this light blue is actually B62, which is a darker blue green than I had wanted.
So I used a Copic colorless blender to knock the intensity back, as my 12 piece set did not include a blender marker, and they were not offered openstock.


It takes a lot of Copic colorless blender to knock Conda's B62 back into a useable light blue.
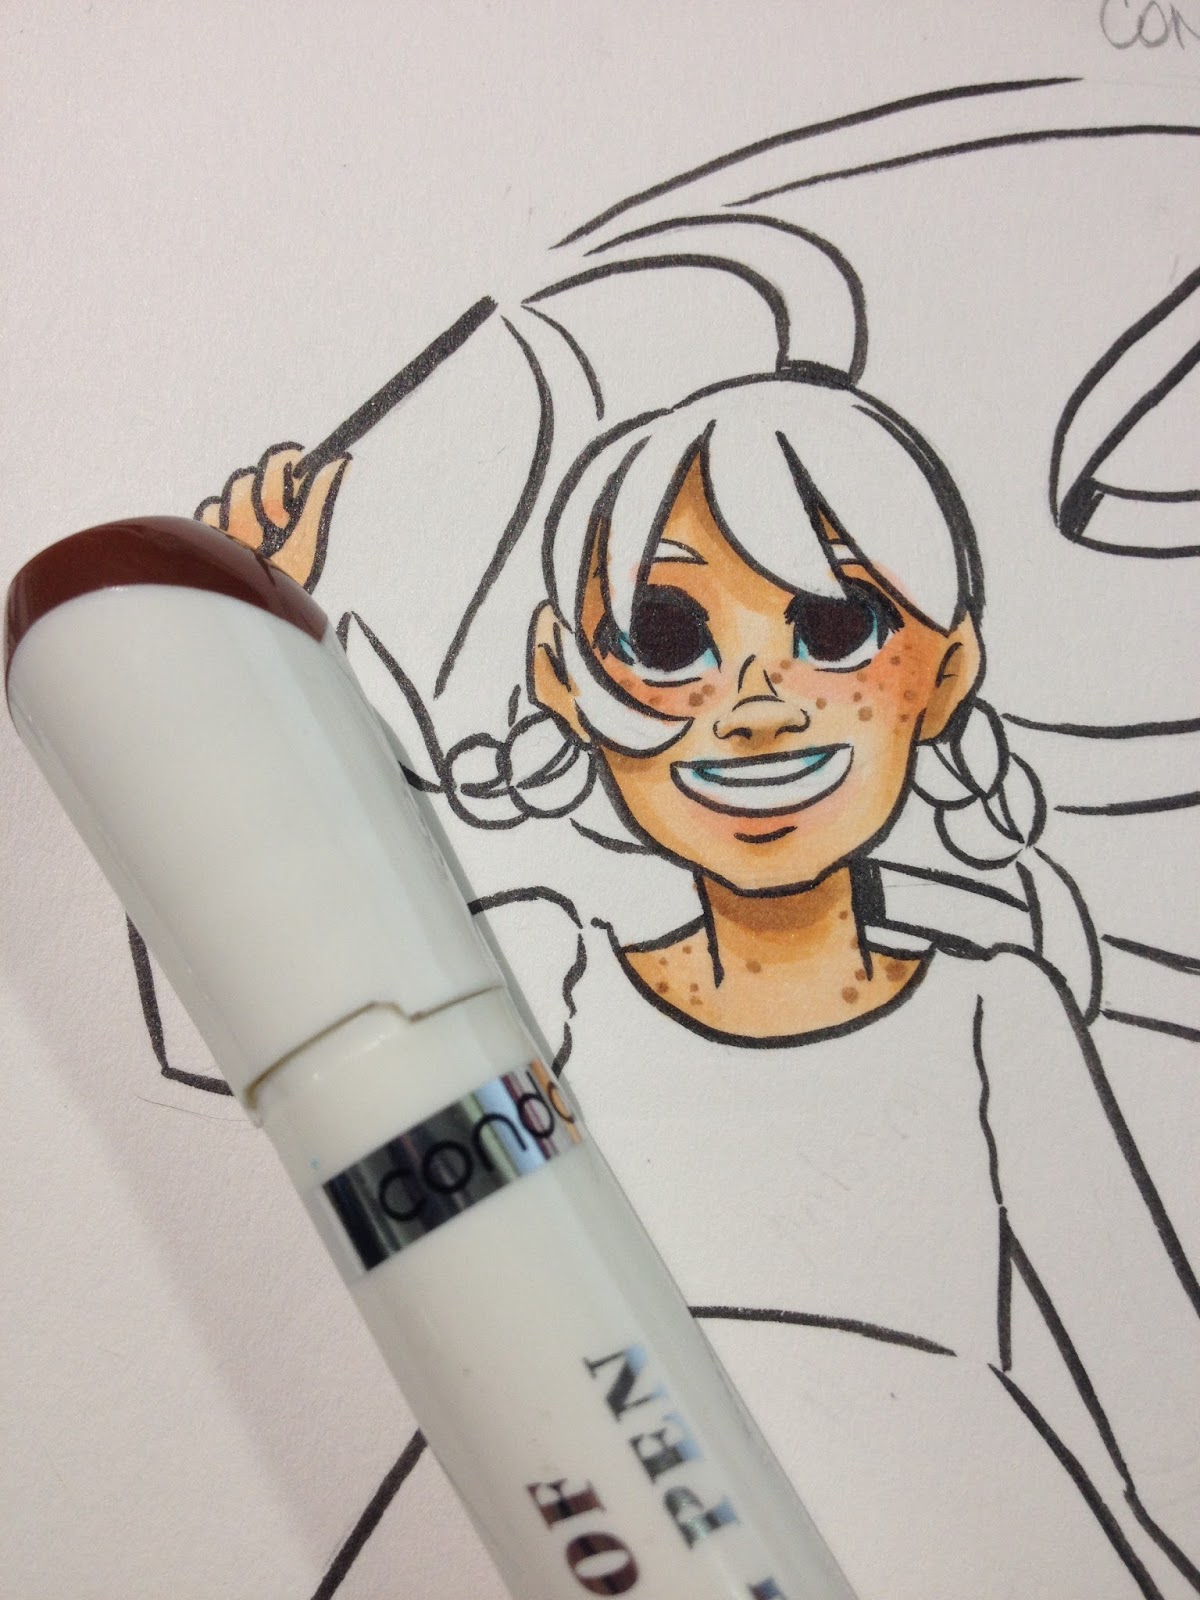
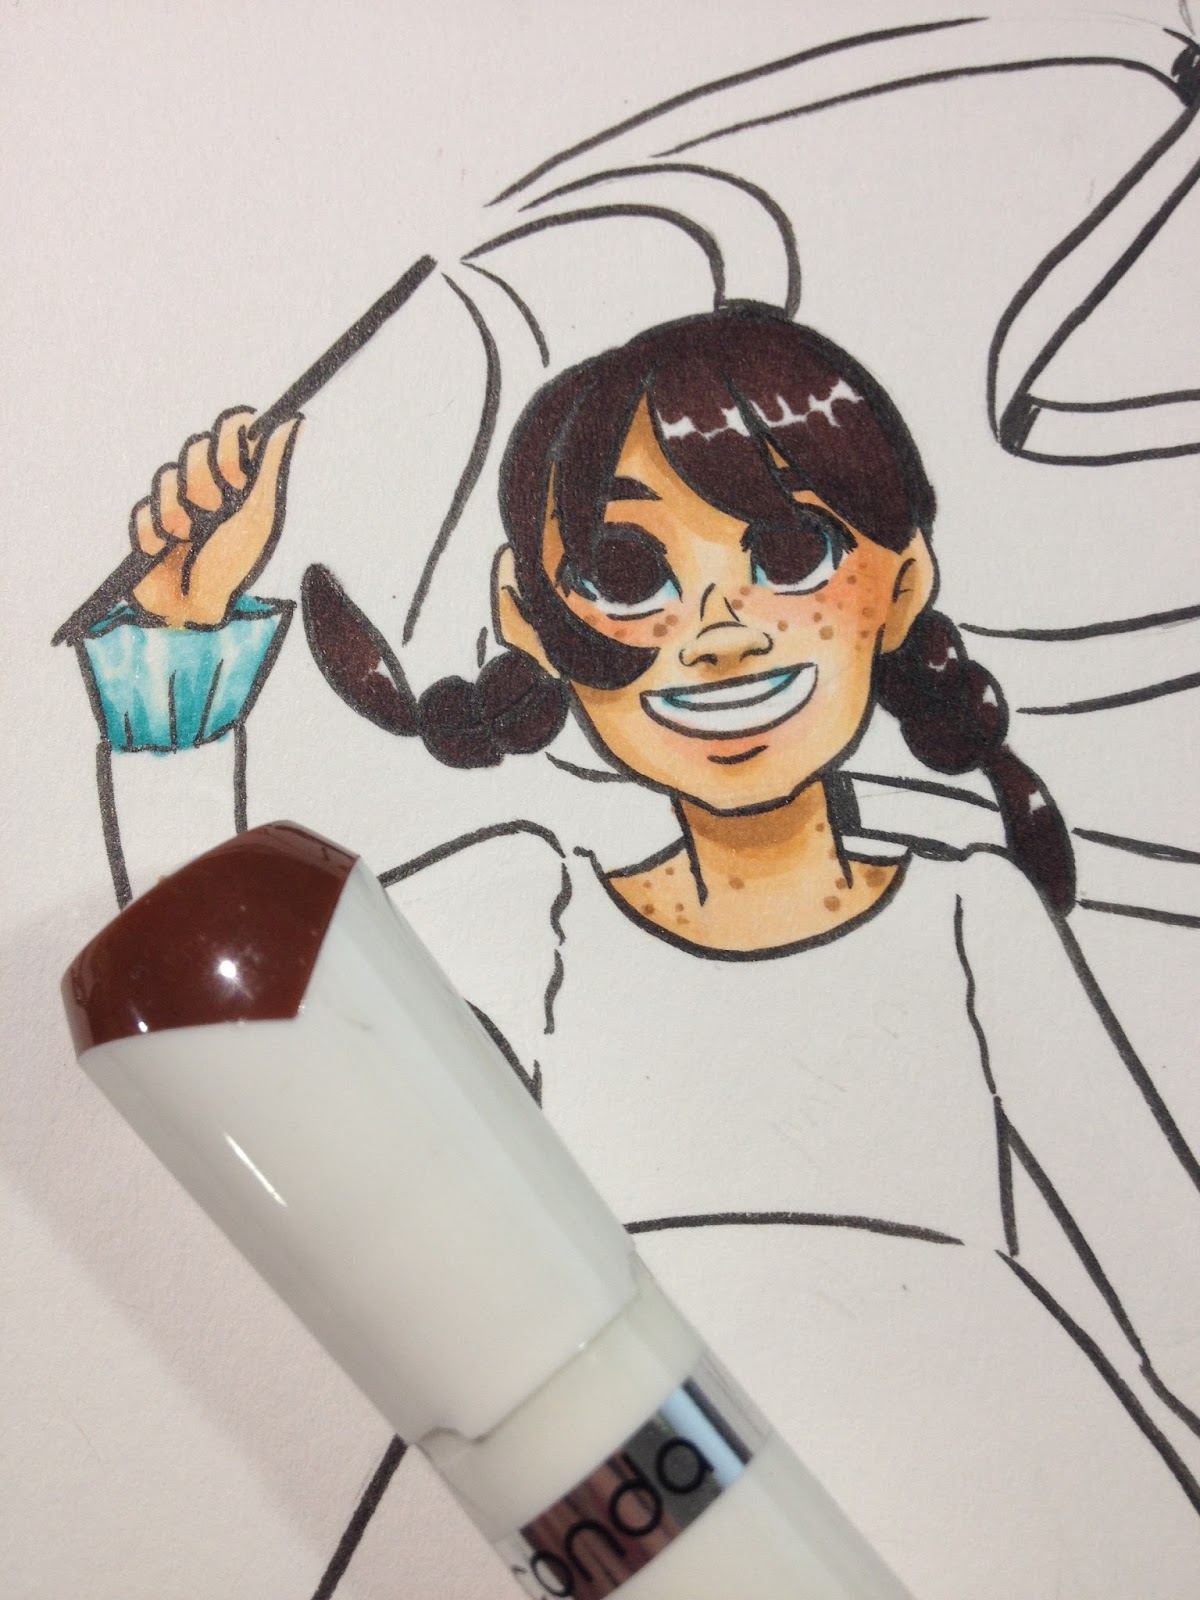
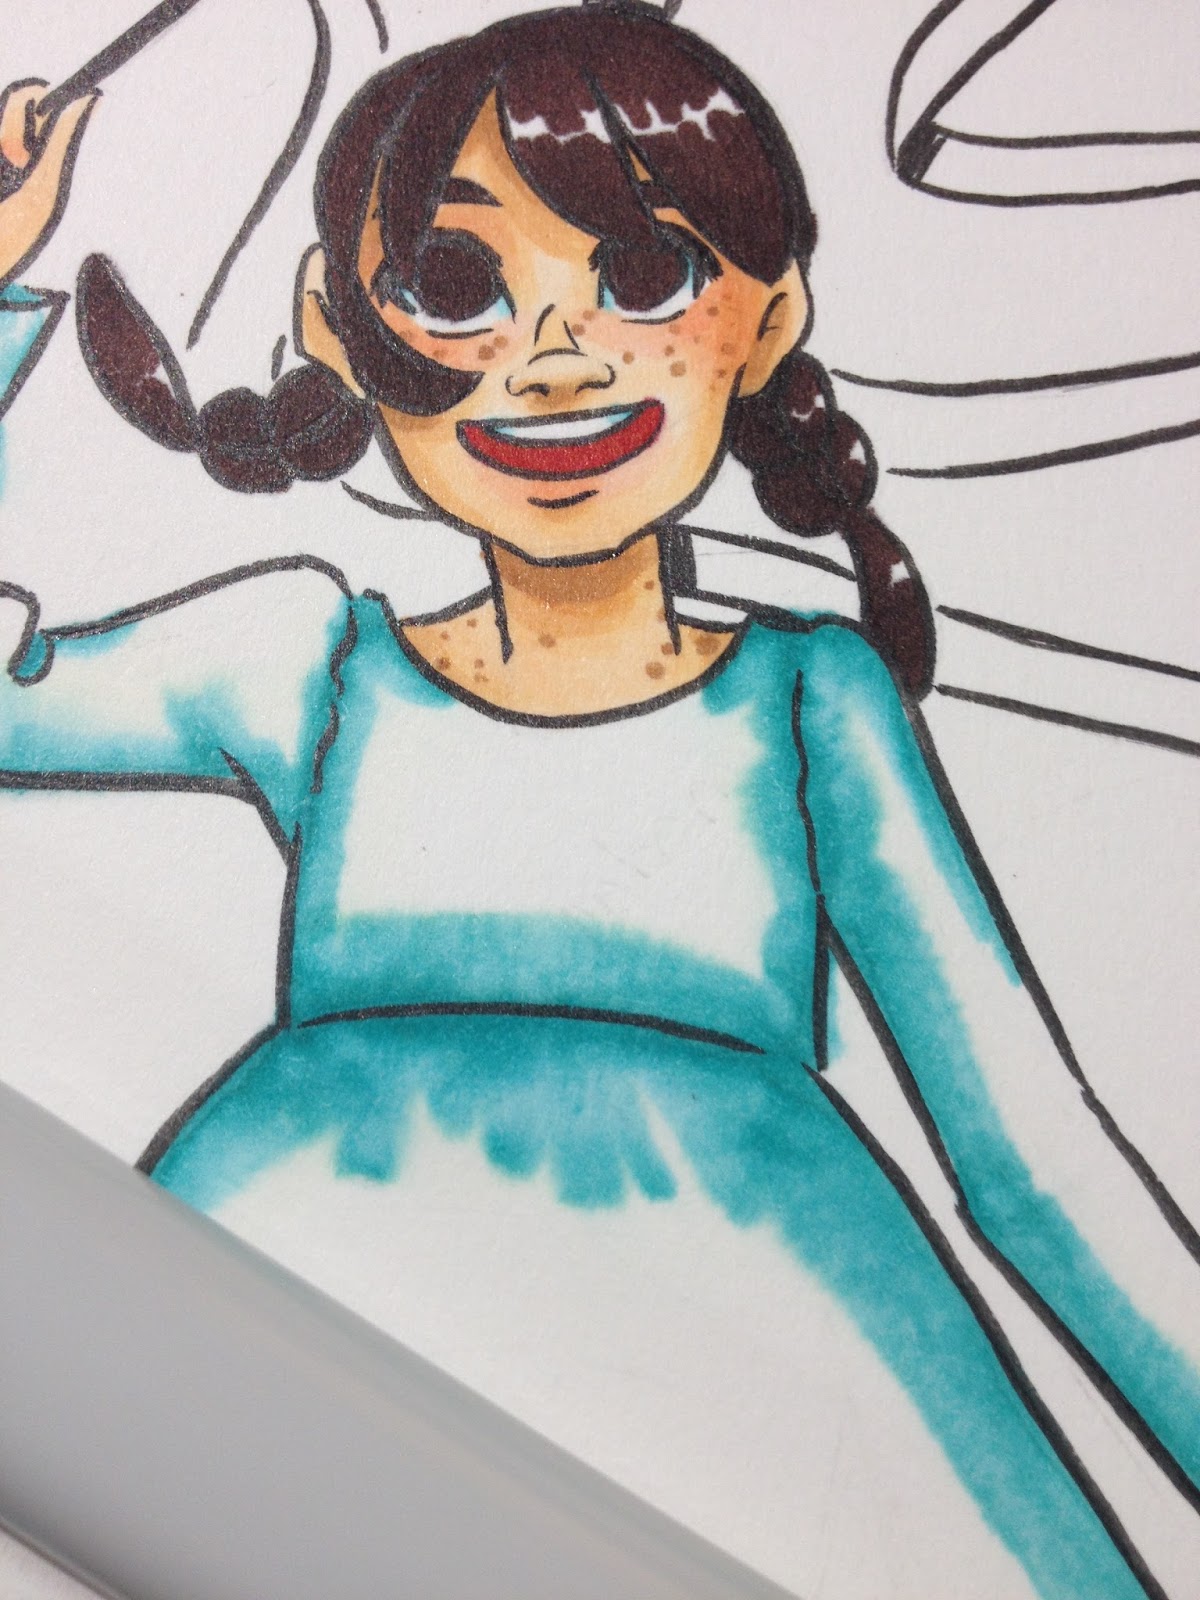
The included brown was too dark to really be the right color for Kara's hair and eyes, but I used it anyway.

I wanted to do a white and red check dress for Kara, so I needed to establish my ground color. It's harder to shade and knock back whites once other colors have been layered on top, so I applied B62 first, in hopes that I could knock it back with the Colorless Blender.
Unfortunately it was difficult to smoothly knock back Conda's B62, so I needed to try another blending method.
So I tried applying my alcohol ink to waxed paper, and using the colorless blender to pick it up and apply it.

This method might have worked better if I had utilized a scrap of plastic instead.

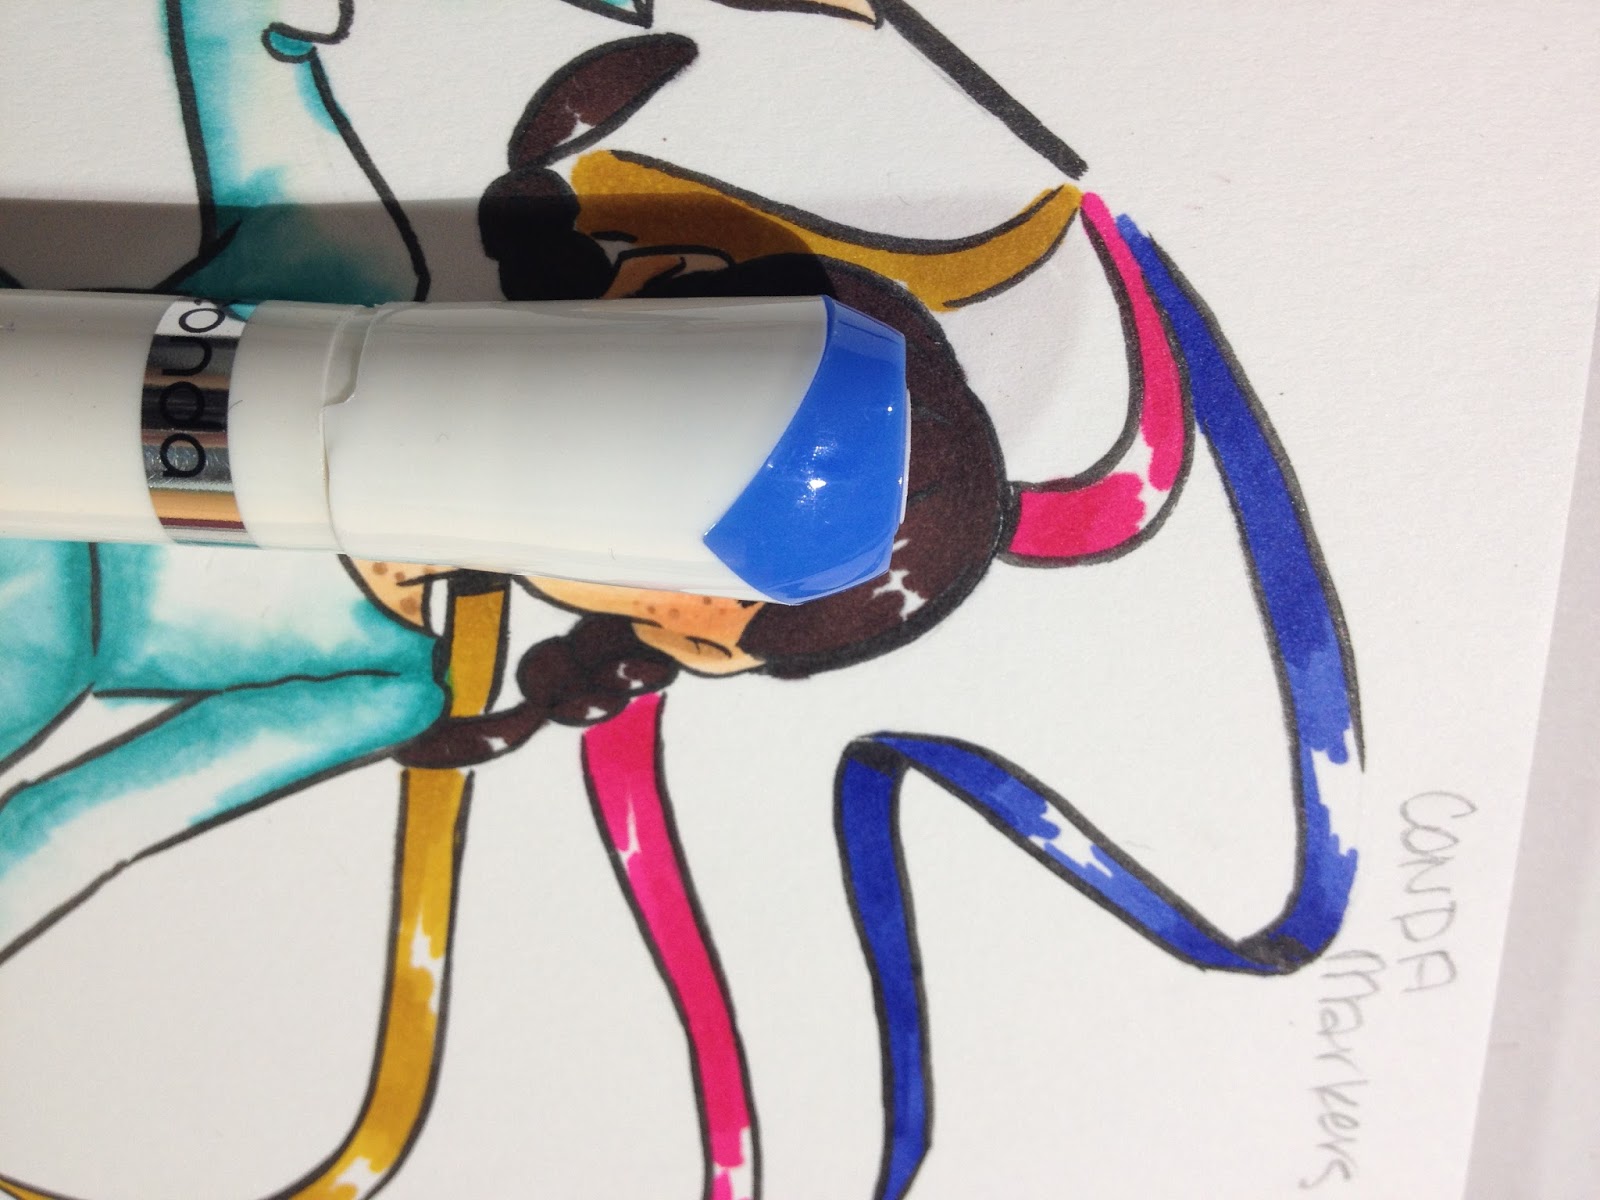
Although these colors are very saturated, many layered decently well, allowing me to build up color.

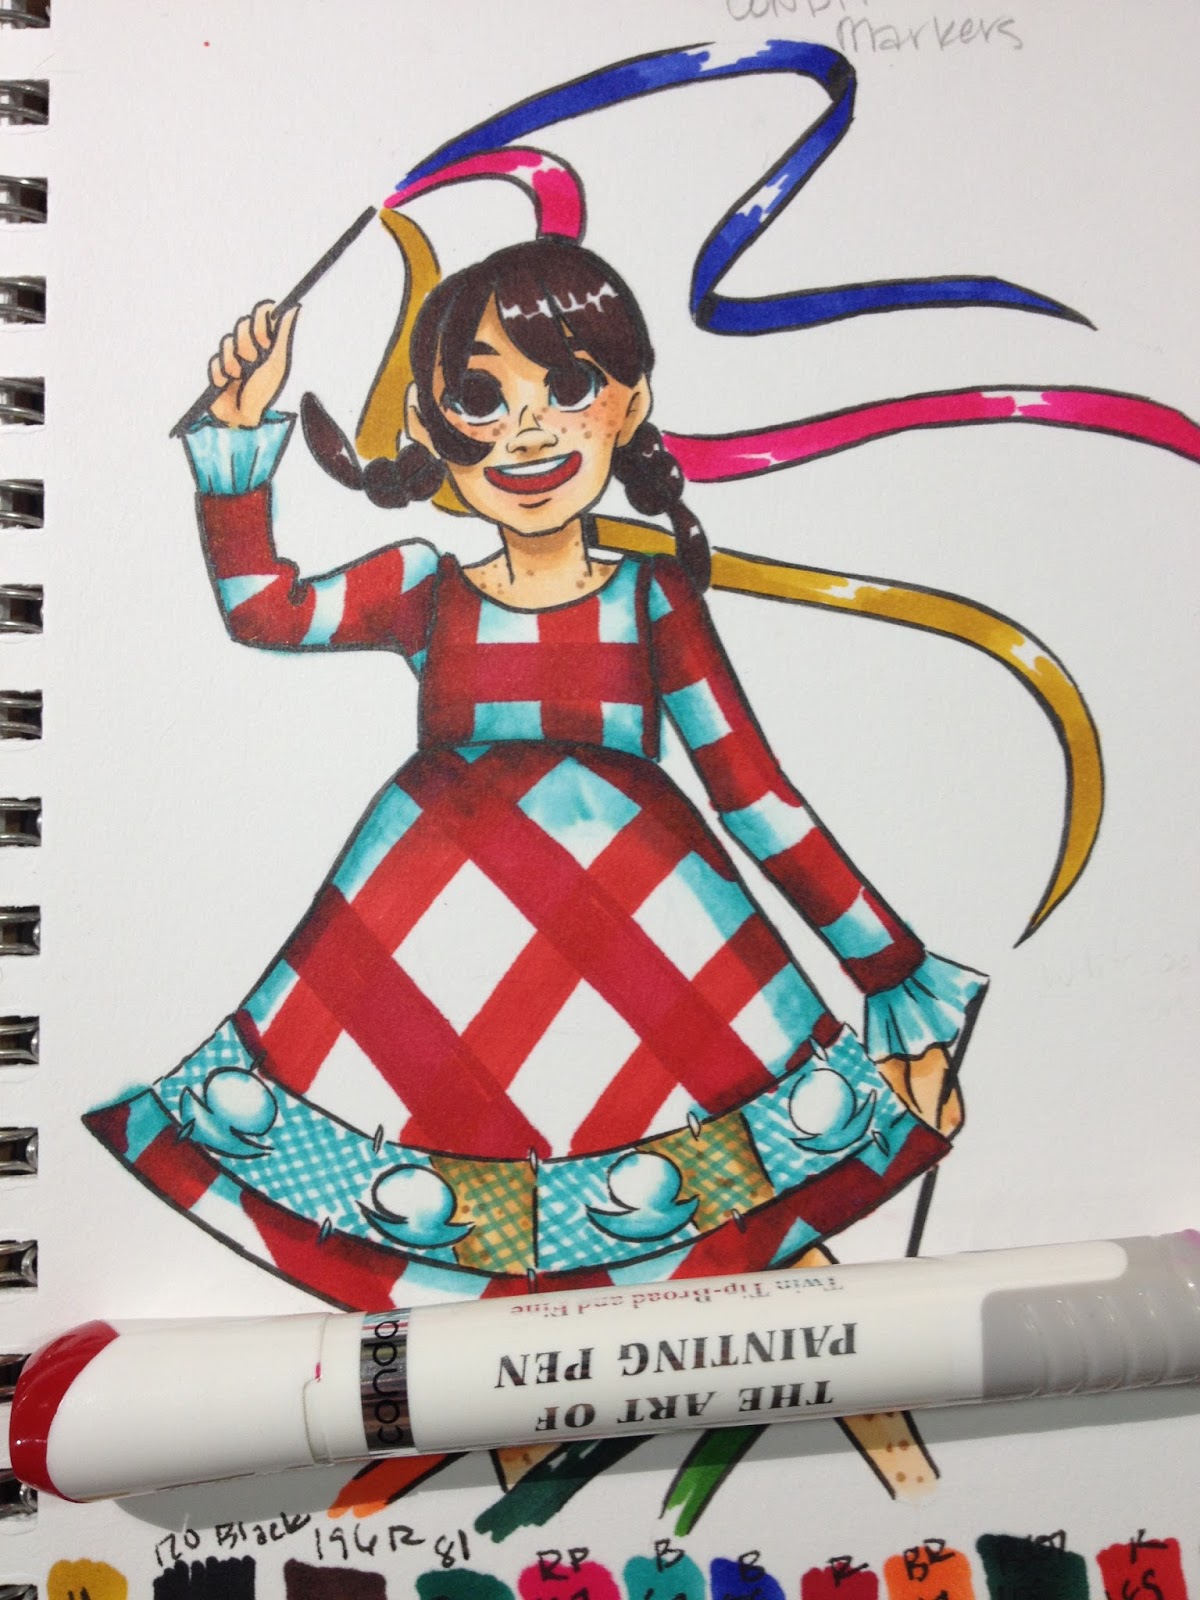

Once I'd finished applying color, it was time to add white details with a white Signo pen.

The Verdict
In my years of reviewing alcohol markers, these aren't the worst I've reviewed by far, and perform quite well given the price. If you use the original style of Prismacolor Markers, you'll find the Conda markers are almost identical once you get past the weird baton caps. Like the chisel nib Prismacolor, these Conda alcohol markers have a fantastic chisel nib that is juicier and holds up better than the compressed fiber nibs commonly included on alcohol markers, including Copic Sketch markers.
I wish I had splurged for the larger set so I could have fieldtested some skintones- the downside of Conda alcohol markers is that they aren't sold open stock, and may be difficult to find, as Hobby Lobby seems to regularly rotate out their alcohol marker options (besides Copic and Prismacolor). I you're looking to start an alcohol marker collection, or are curious as to whether alcohol markers are for you, the $19.99 Conda set isn't a bad way to start.
Please consider donating to this blog or purchasing from Natto-shop (http://nattosoup.com/shop) if you want me to continue publishing quality content. All materials tested were purchased from my own pocket. Keep on Truckin' Nattosoup is not under any sponsorship.
April 6, 2016
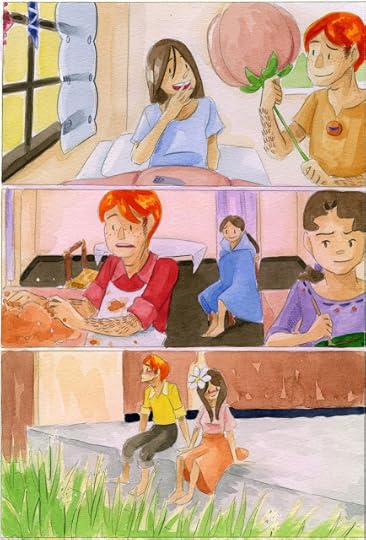
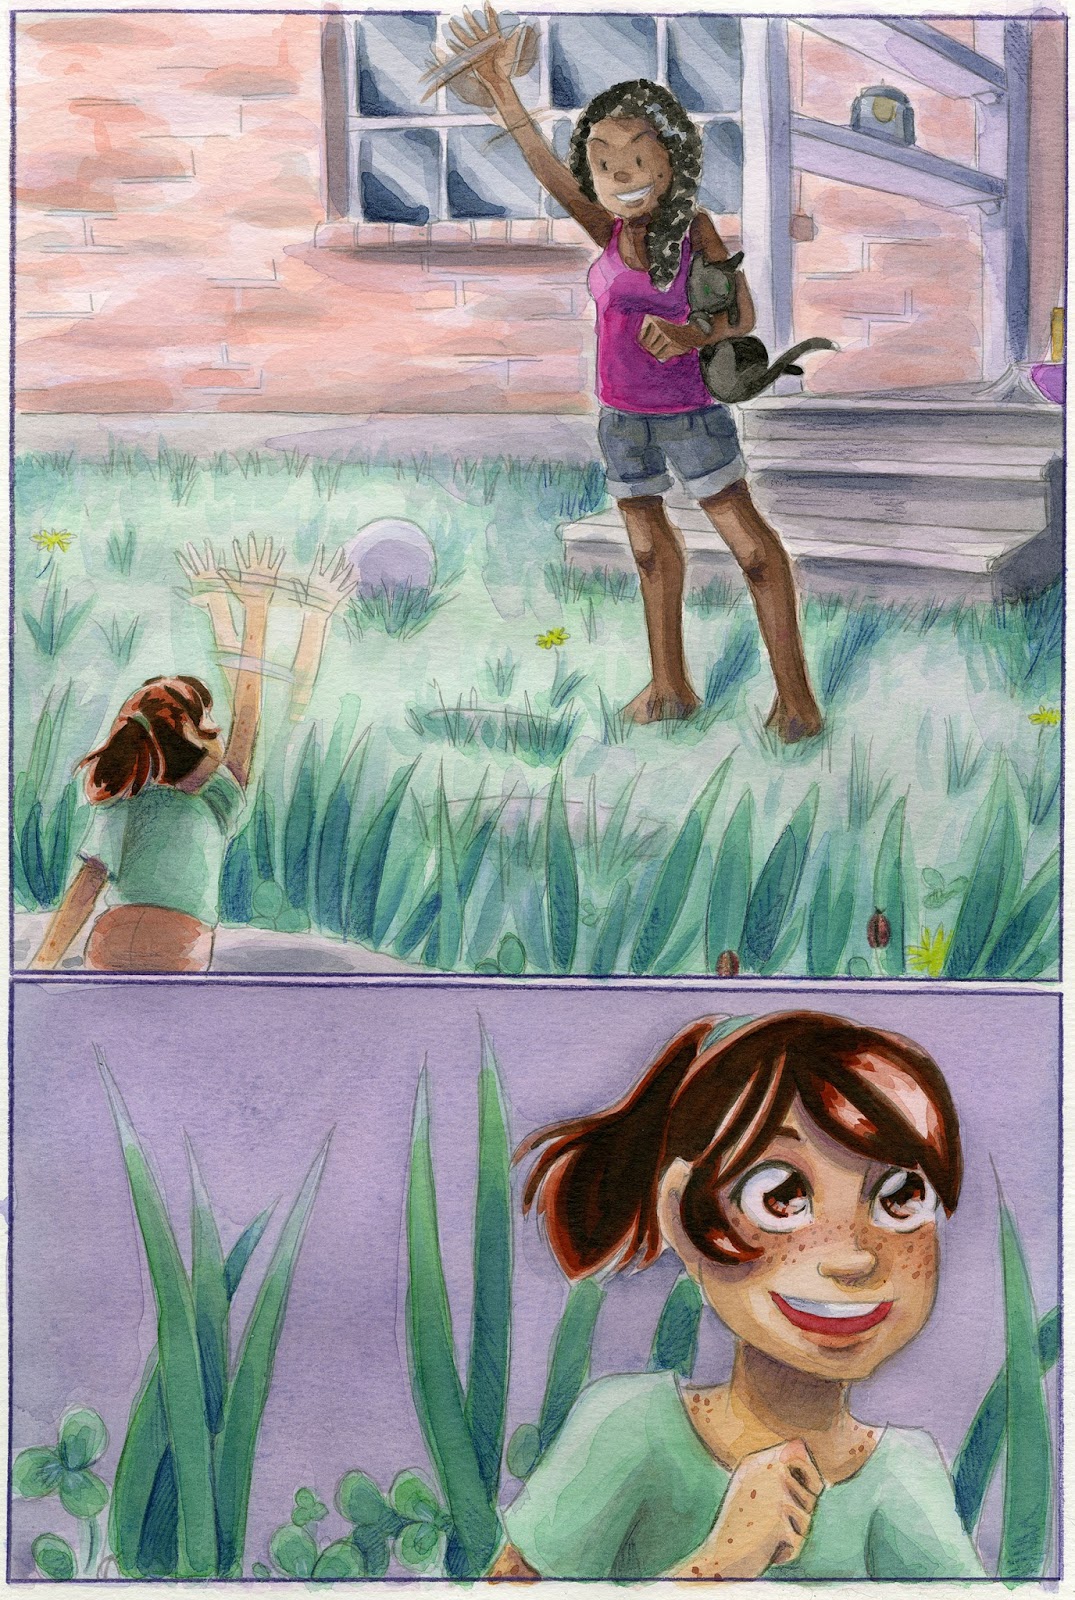
My Pain is Your Gain- 7 Inch Kara Chapter 5 Preview
I had a horrible realization today- Chapter 5, which had been color corrected, lettered, and in the can for months had actually not survived the transfer from old Surface Pro to OneDrive to Google Drive. All that remains of the finished pages is the cover, meaning I have to rescan, re color calibrate, and re letter all of Chapter 5.
While juggling painting Chapter 6.
While attending conventions.
I am at peace with it now.
That's not to say I didn't have a few moments of howling grief. I may have screamed (a lot). This seems to happen to me more often than other artists- perhaps because I have so many balls in the air. Redo Chapter 5? That's ridiculous, I already have so much to do in March. I'm already struggling to keep my head above water. I'm already horribly overwhelmed.
But once I'd cried myself out, and felt only numbness, I started scanning. Sure, there are times I'd really like to walk away from all of this- the blog, the YouTube channel, even comics. There are times where I feel like nothing I do matters, when people do read what I've created, they take away the wrong impression, and that all this is futile. But I also know you can't fight futility by giving up.
You apparently can't rely on One Drive and Google Drive to sync when they're supposed to. So take a lesson from me, and check that in triplicate, and if you have it, store important stuff on physical hard drives. That's what I thought I had done, but apparently I hadn't. And believe me, I frantically checked it all- Google Drive's trash, One Drive's backup of deleted files, all my flash and hard drives. Nada. It was like I'd never scanned those pages in the first place. I've never had anything disappear so cleanly without a complete hard drive failure back in the dark ages.
And since I went to all the trouble of rescanning and color correcting Chapter 5, I figured I should make you guys look at it. Force you to consume parts of it. If I'm going to go to all the trouble of redoing the chapter, I might as well show it off to people.
So here's a few unlettered but otherwised finished pages from Chapter 5 of my ongoing comic, 7" Kara. If you like what you see and you haven't yet, please check out Volume 1, which is Chapter 1-4, on my online shop.


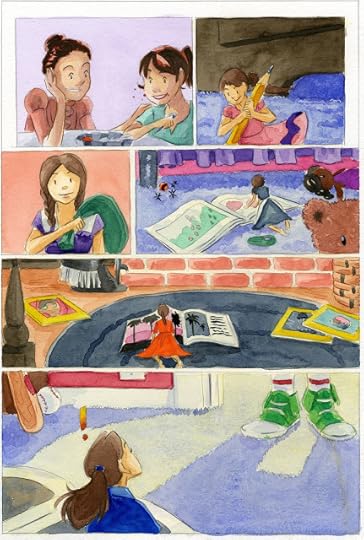

If you enjoyed this sample, please be on the looking for Volume 2 of 7" Kara in the next two years. Currently, I'm painting Chapter 6 (and working on a How I Make Comic series-- it's a lot of work!), which will put me 50 pages deep into Volume 2 when it's finished. You can find Volume 1, which is currently out, in my online shop. When my Patreon hits $75, all backers, regardless of pledge level, will have PDF access to 7" Kara Volume 1, and I have plans for instant-access to Volume 2 pages for backers in the works.
Please consider donating to this blog or purchasing from Natto-shop (http://nattosoup.com/shop) if you want me to continue publishing quality content. All materials tested were purchased from my own pocket. Keep on Truckin' Nattosoup is not under any sponsorship.
While juggling painting Chapter 6.
While attending conventions.
I am at peace with it now.
That's not to say I didn't have a few moments of howling grief. I may have screamed (a lot). This seems to happen to me more often than other artists- perhaps because I have so many balls in the air. Redo Chapter 5? That's ridiculous, I already have so much to do in March. I'm already struggling to keep my head above water. I'm already horribly overwhelmed.
But once I'd cried myself out, and felt only numbness, I started scanning. Sure, there are times I'd really like to walk away from all of this- the blog, the YouTube channel, even comics. There are times where I feel like nothing I do matters, when people do read what I've created, they take away the wrong impression, and that all this is futile. But I also know you can't fight futility by giving up.
You apparently can't rely on One Drive and Google Drive to sync when they're supposed to. So take a lesson from me, and check that in triplicate, and if you have it, store important stuff on physical hard drives. That's what I thought I had done, but apparently I hadn't. And believe me, I frantically checked it all- Google Drive's trash, One Drive's backup of deleted files, all my flash and hard drives. Nada. It was like I'd never scanned those pages in the first place. I've never had anything disappear so cleanly without a complete hard drive failure back in the dark ages.
And since I went to all the trouble of rescanning and color correcting Chapter 5, I figured I should make you guys look at it. Force you to consume parts of it. If I'm going to go to all the trouble of redoing the chapter, I might as well show it off to people.
So here's a few unlettered but otherwised finished pages from Chapter 5 of my ongoing comic, 7" Kara. If you like what you see and you haven't yet, please check out Volume 1, which is Chapter 1-4, on my online shop.


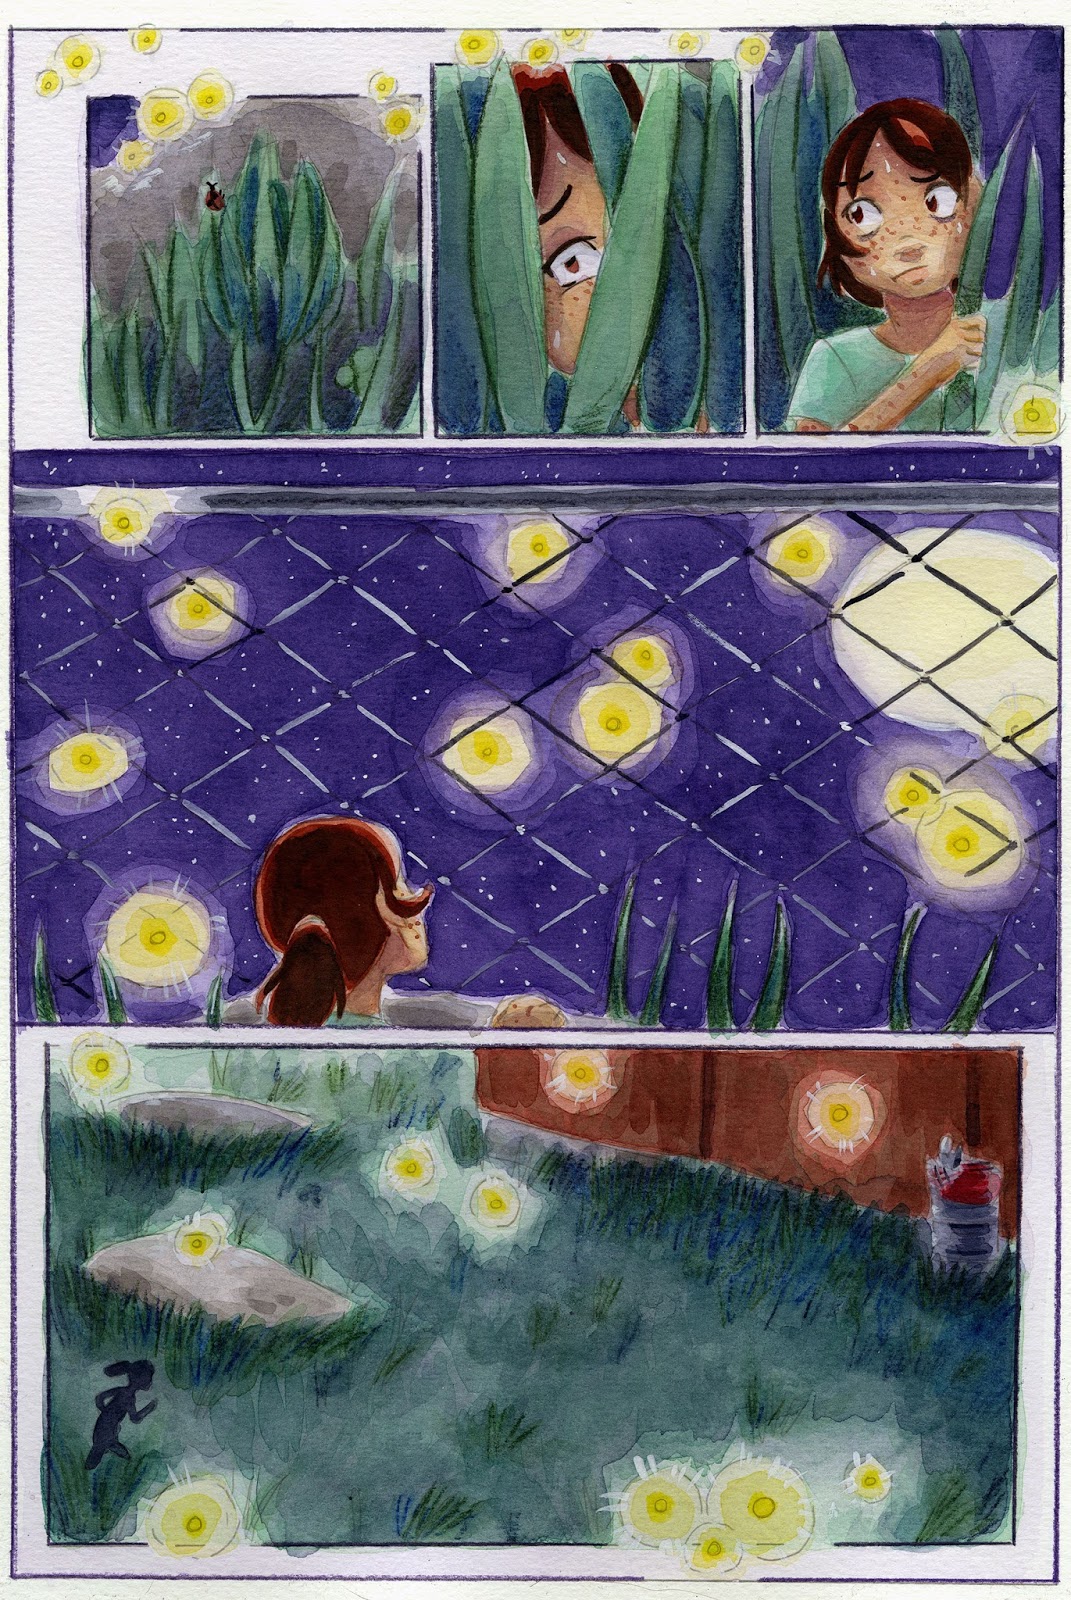


If you enjoyed this sample, please be on the looking for Volume 2 of 7" Kara in the next two years. Currently, I'm painting Chapter 6 (and working on a How I Make Comic series-- it's a lot of work!), which will put me 50 pages deep into Volume 2 when it's finished. You can find Volume 1, which is currently out, in my online shop. When my Patreon hits $75, all backers, regardless of pledge level, will have PDF access to 7" Kara Volume 1, and I have plans for instant-access to Volume 2 pages for backers in the works.
Please consider donating to this blog or purchasing from Natto-shop (http://nattosoup.com/shop) if you want me to continue publishing quality content. All materials tested were purchased from my own pocket. Keep on Truckin' Nattosoup is not under any sponsorship.
April 3, 2016
Target Art Supply Review Final Verdict
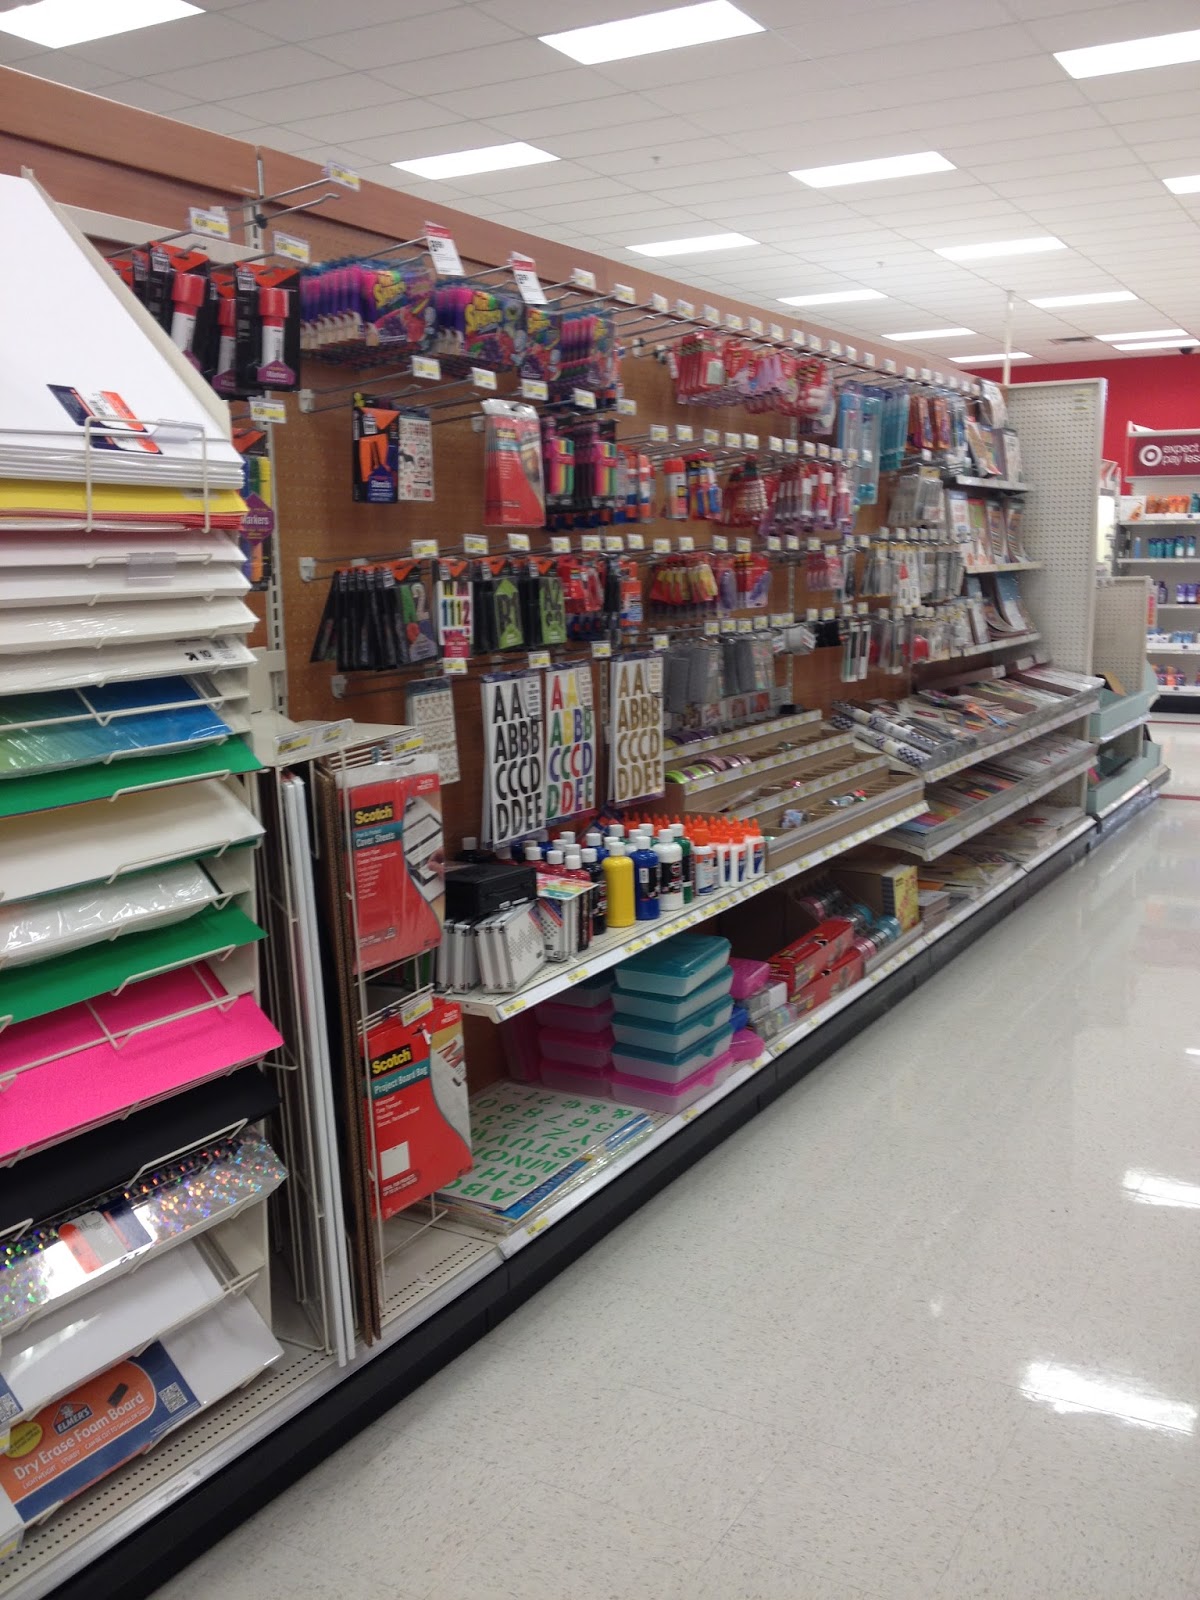
I've finally reached the end (for now) to my Target Art Supply Review series. We've looked at markers and paints, pencils and erasers, products from well known crafting brands like ek tools, to fun stationary and supply brands like Yoobi, and even checked out items from Target's storebrand, Up and Up. As with the Walmart Art Supply Review series, I was often surprised by how some supplies surpassed expectations. Target's Up and Up Supertips, which are now unfortunately difficult to find, handle amazingly well on a variety of papers, and can be blended with a Tombow ABT blender. The Journaling and Calligraphy pens from ek tools are alcohol marker proof, and can be used with Copics for colorful lineart. Sharpie Pens are a handy fineliner to have around the studio and do not share the yellowing properties of their more permanent cousins.
My Top Recommendations

Target Up and Up Supertips (these are HIGHLY recommended if you can find them, regardless of skill level)- $4.29Sharpie Pens- $2.97ek tools Journaling Pens $12.79
Next up is the Dollar Tree Art Supply Review Series, which is the biggest challenge of all. I've found lots of goodies (or maybe baddies) that I can't wait to share with you guys in the upcoming weeks. These affordable art supply reviews are a lot of fun to purchase and write, and if you'd like to see more content like this in the future, please take a moment to check out my Patreon. Your monthly pledge enables me to not only continue purchasing the materials needed for large scale reviews like the Walmart Art Supply Review Series and the Target Art Supply Review Series, as well as compensation for the manhours spent gathering, photographing, researching, recording, editing, and writing content. If you're uncomfortable or unable to make a monthly pledge, a one time donation to the Paypal linked in my sidebar is also much appreciated.
Please consider donating to this blog or purchasing from Natto-shop (http://nattosoup.com/shop) if you want me to continue publishing quality content. All materials tested were purchased from my own pocket. Keep on Truckin' Nattosoup is not under any sponsorship.

April 1, 2016
February 2016 Sketchbook Tour
Please consider donating to this blog or purchasing from Natto-shop (http://nattosoup.com/shop) if you want me to continue publishing quality content. All materials tested were purchased from my own pocket. Keep on Truckin' Nattosoup is not under any sponsorship.

March 30, 2016
Paint Marker Review: POSCA Marker Review and Tutorial
This post includes several videos that I highly recommend you watch. If you can't watch the video while reading this post, you can save the video to watch for later by clicking the little clock in the corner. Two of the videos are mine- a tutorial on using POSCA markers, and a timelapse video demonstrating a few techniques, and three are supplementary videos by other creators to help cement those techniques. You can check out more of my art supply review/art tutorial videos over on my YouTube channel, which I update at least once weekly with a variety of art related new content.
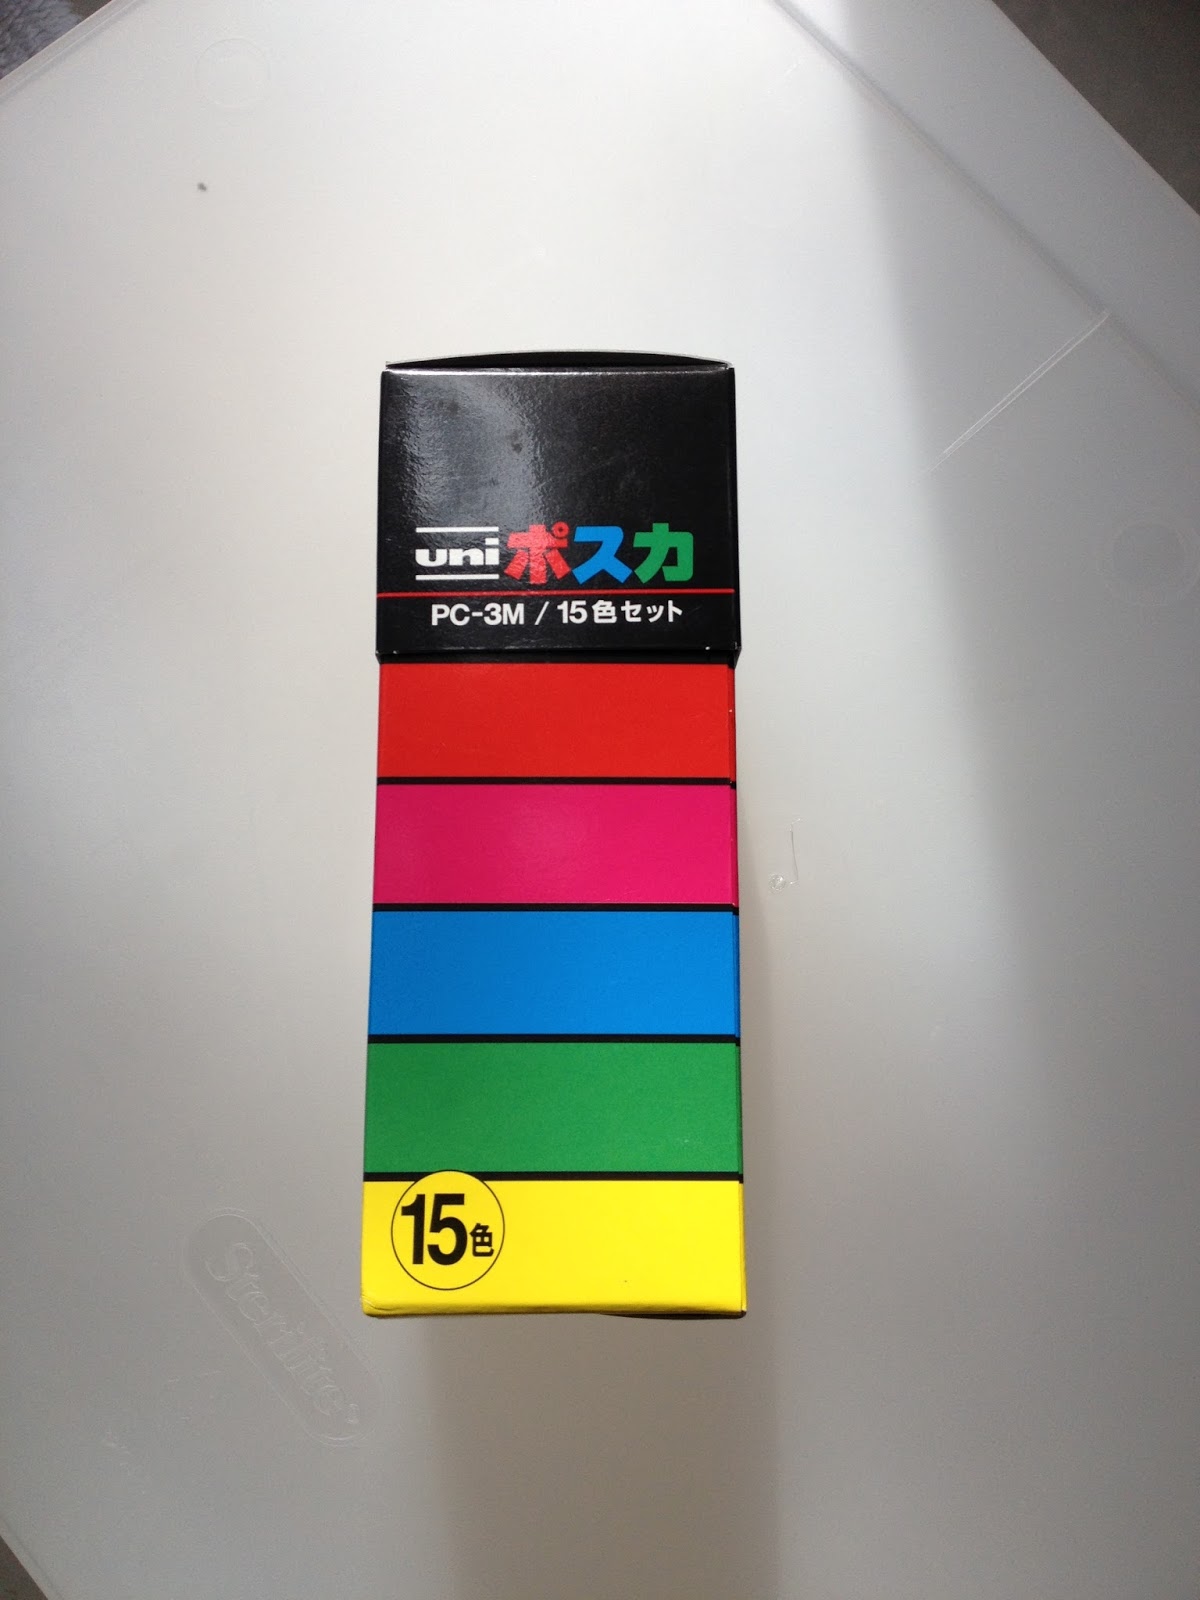
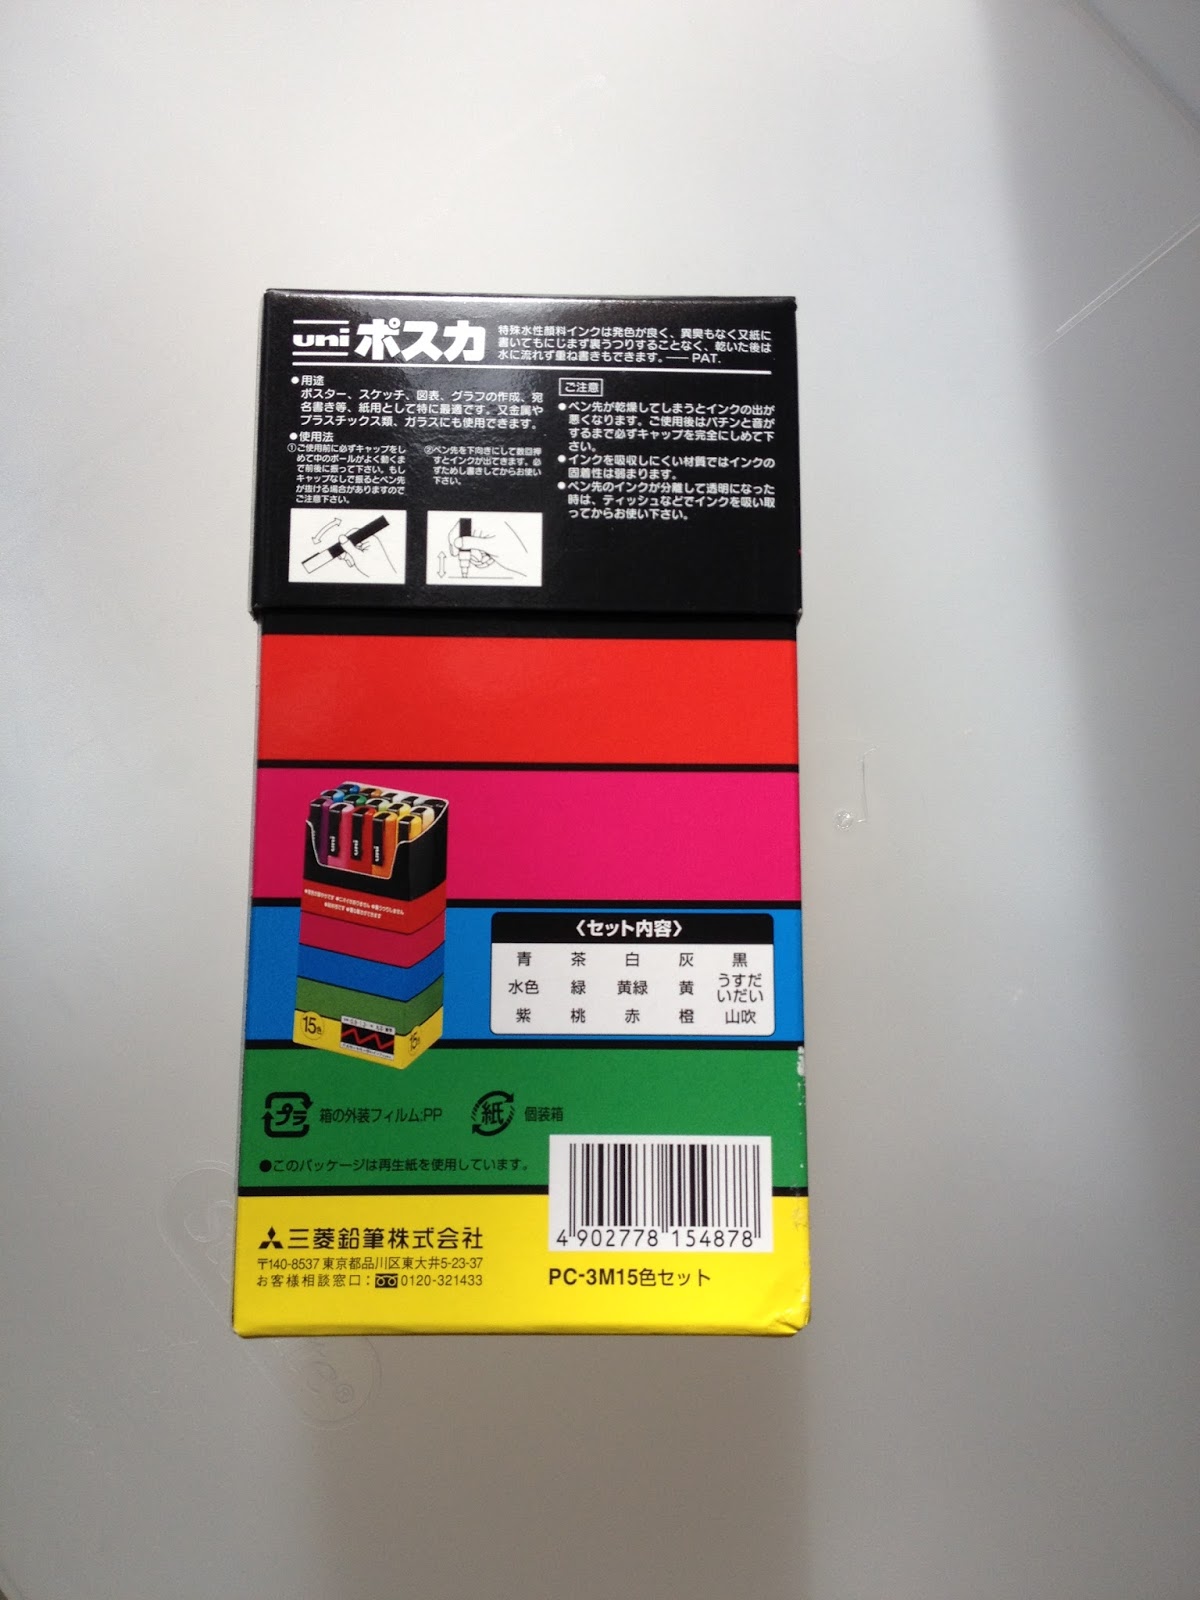
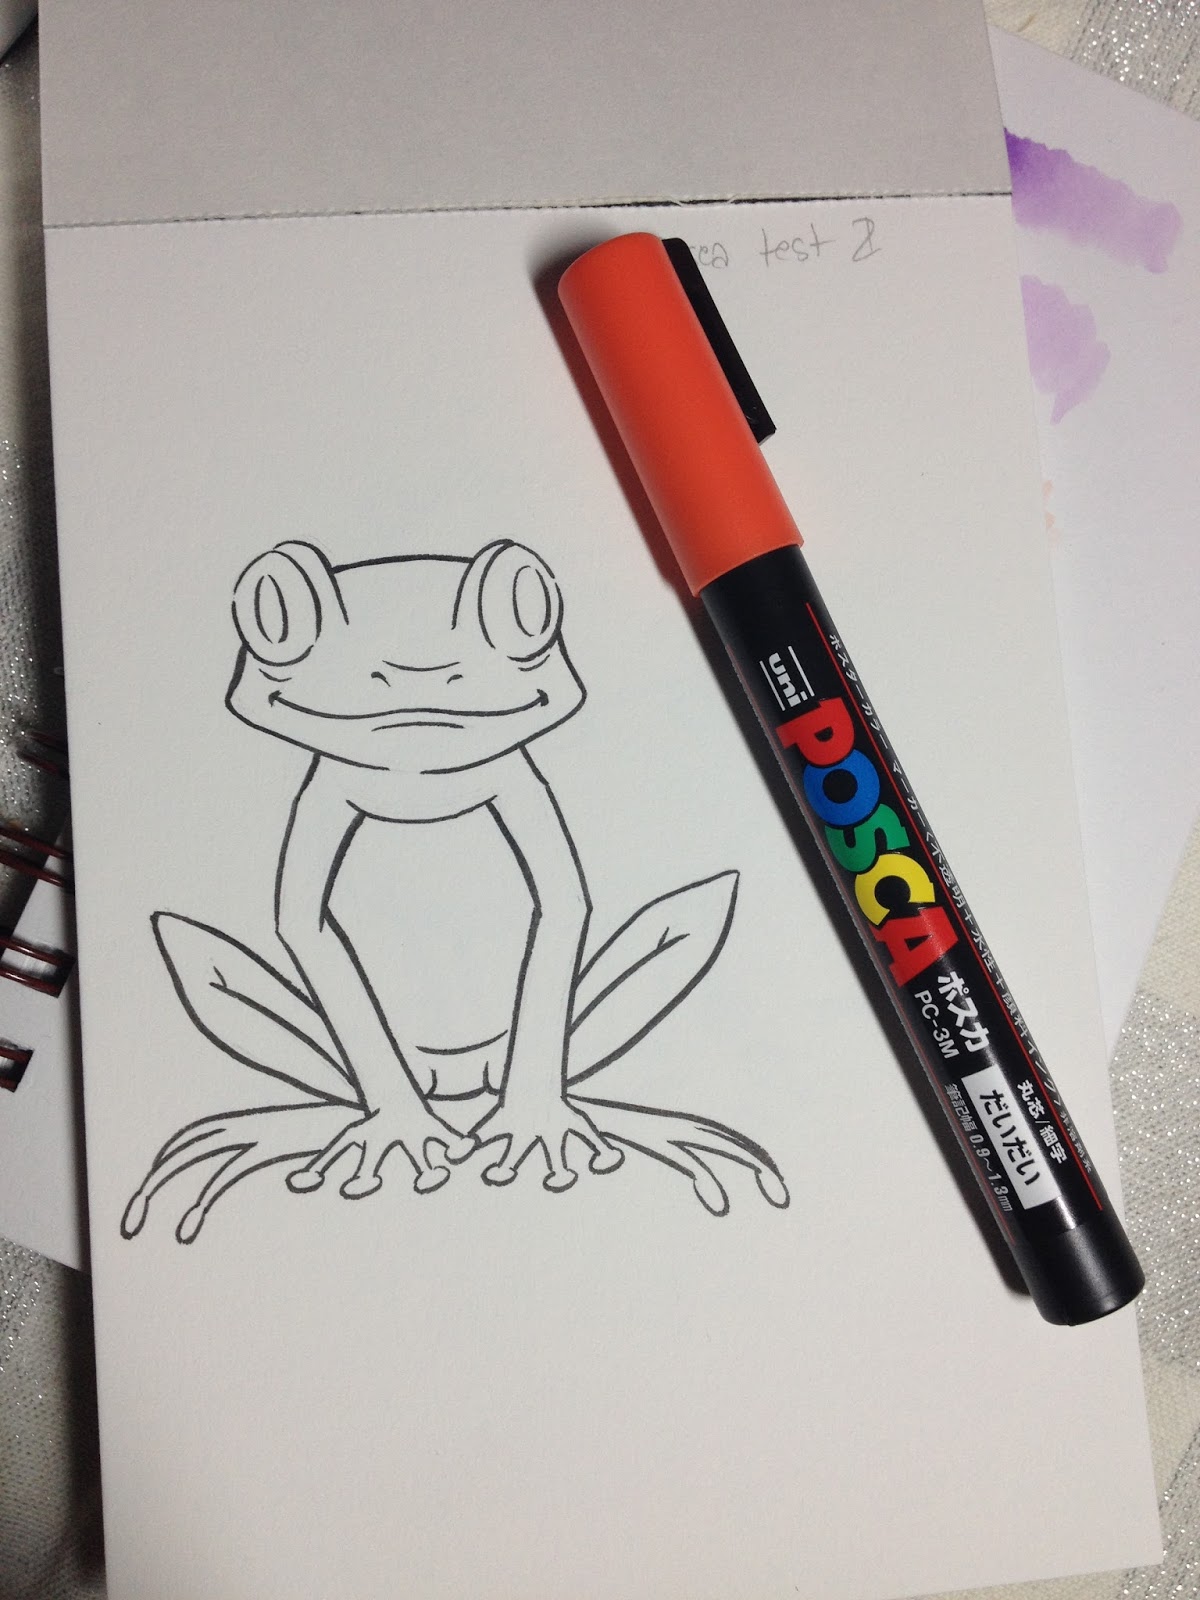
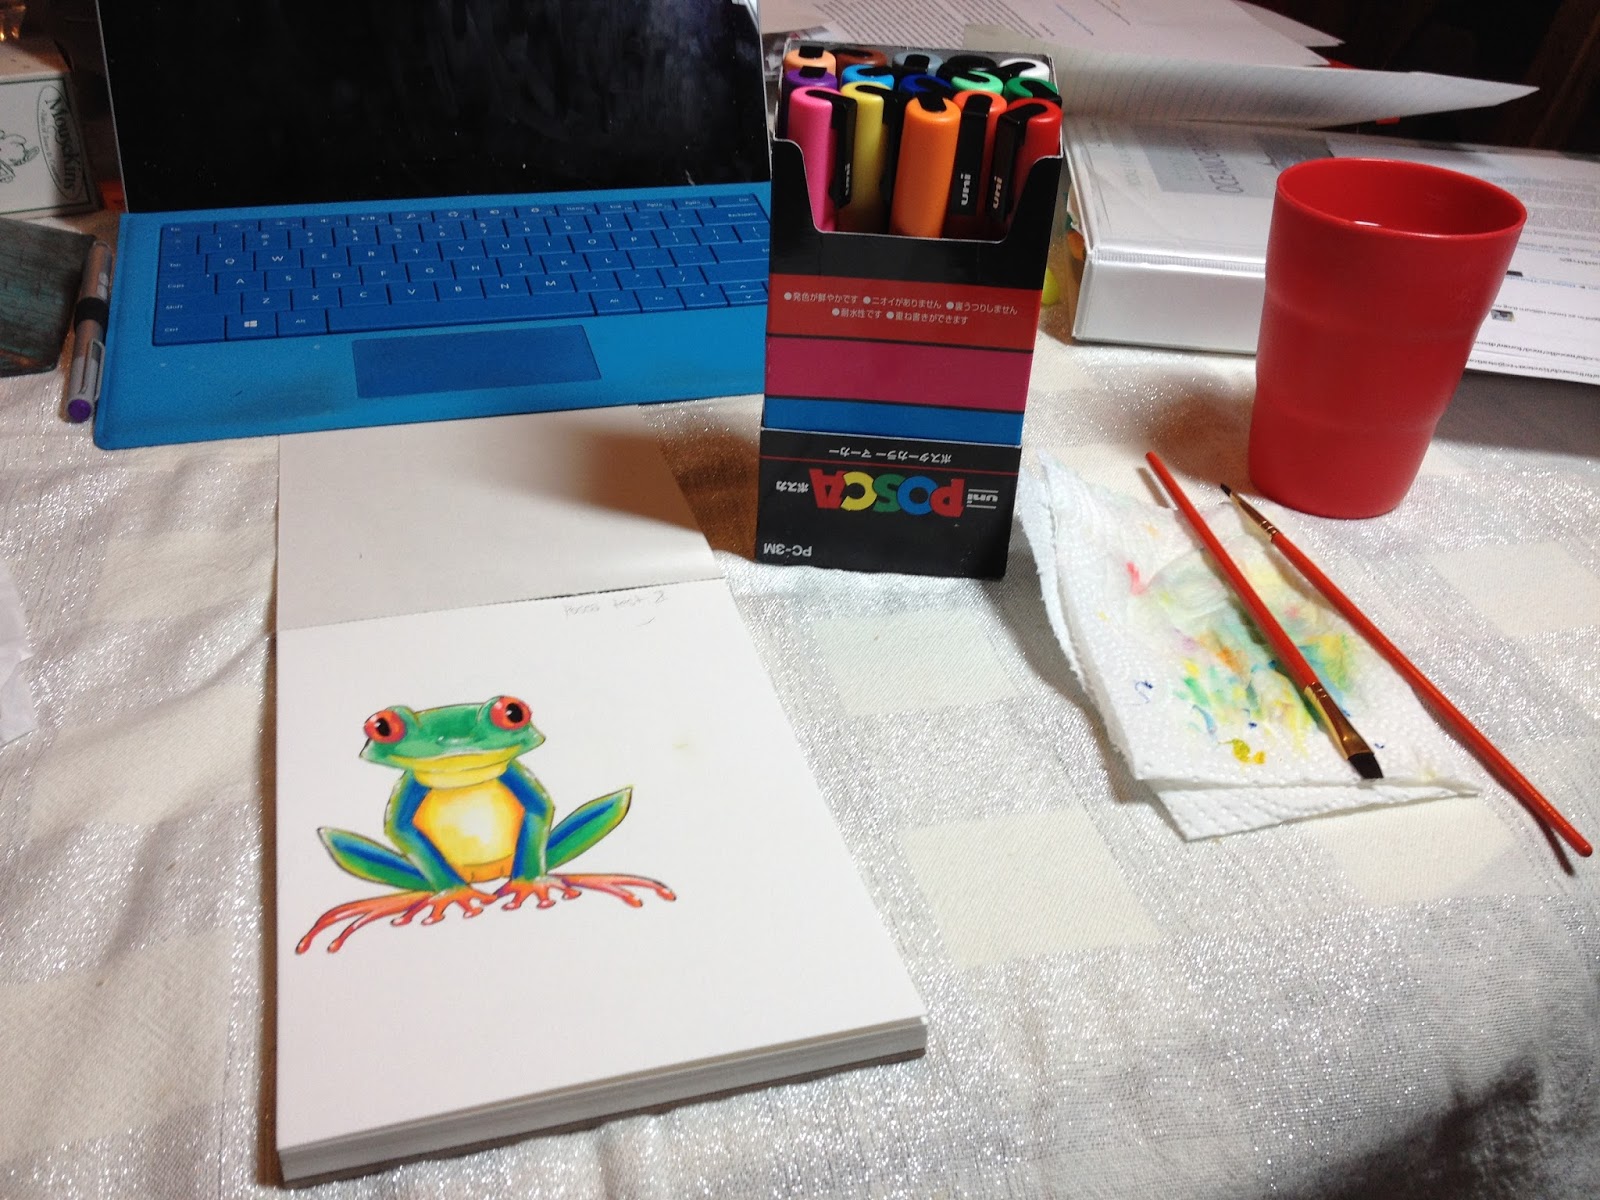
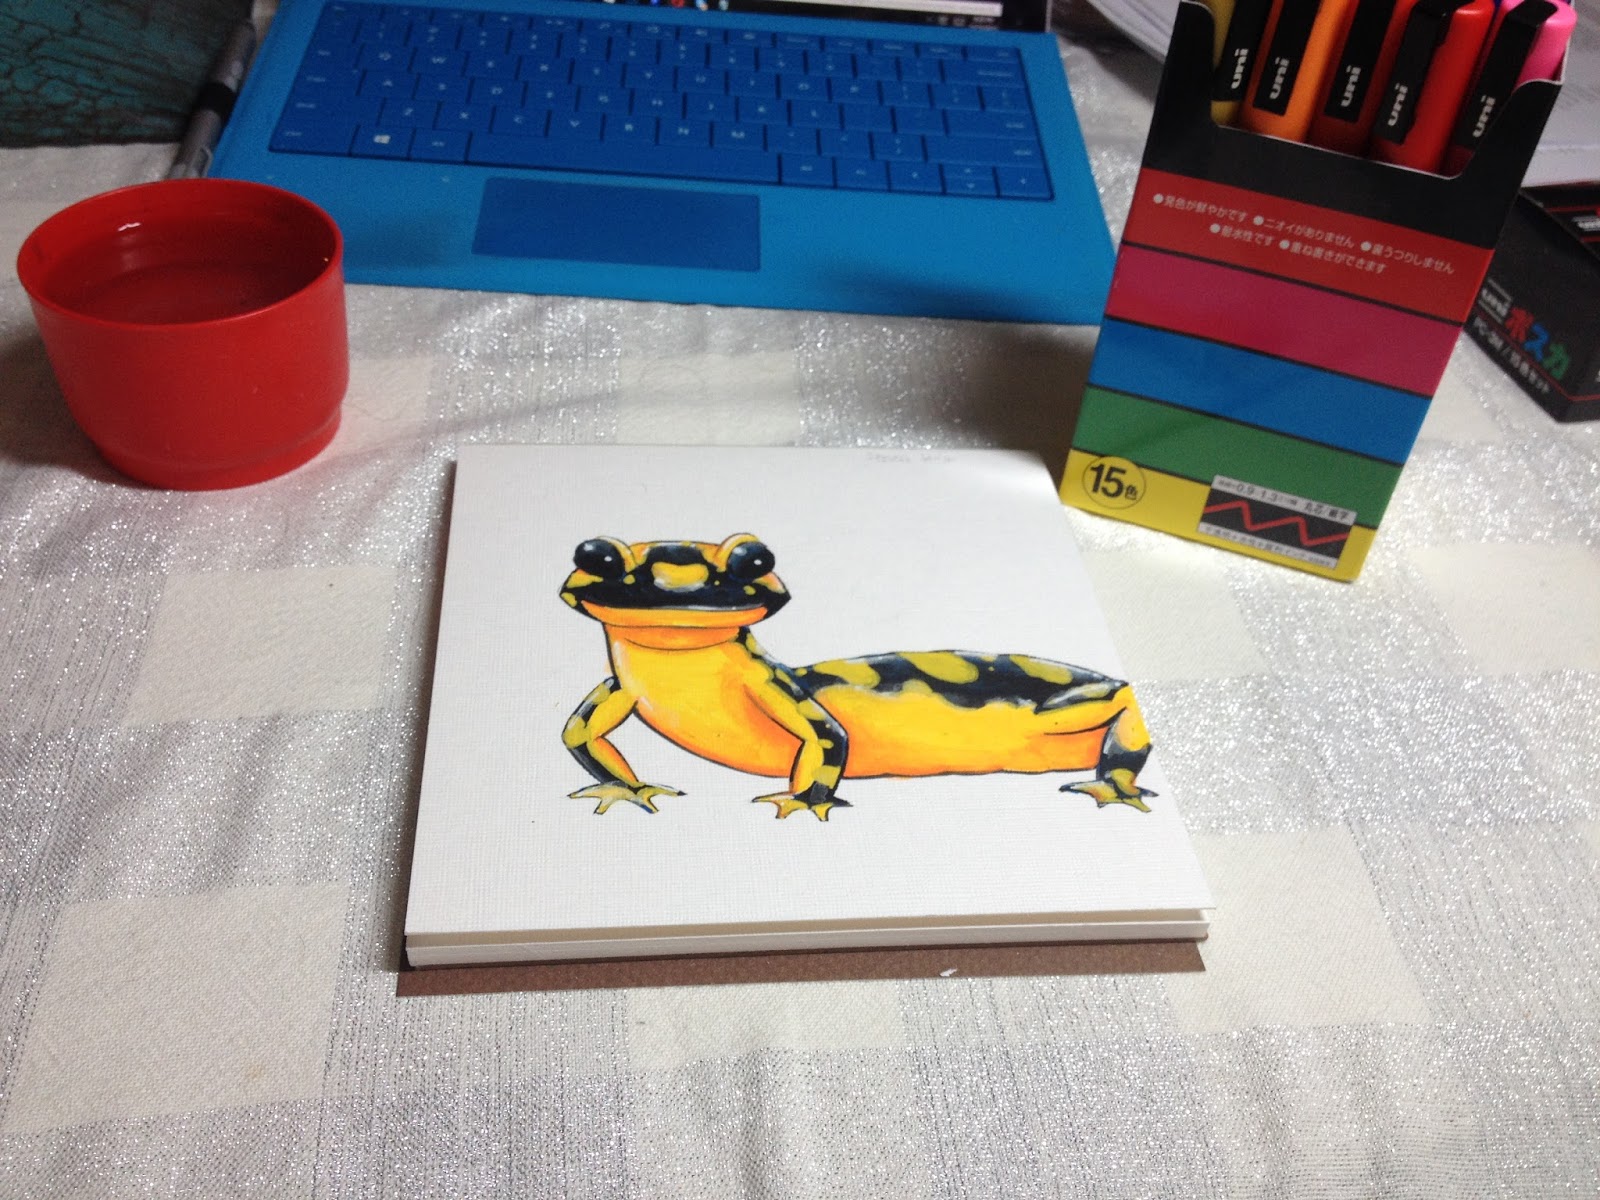
Awhile back, one of my Twitter friends asked if I had any experience with POSCA markers. At the time, I'd only used a POSCA white brush marker for corrections, but I was neck deep in researching and reviewing waterbased markers, so I quickly ordered a set of 15 from Amazon so I could begin investigating POSCA markers first hand.
Above are the set I actually purchased- a 15 marker fine tipped set of bullet nibbed POSCA markers, but Amazon has a selection of POSCA pens to suit your needs. You could even get this omega set if your heart really desired.
But I recommend you play it safe, order a smaller set, and see if POSCA markers light up your life before investing in the whole shebang.
The Brand
Mitsubishi Uni, better known as Uni-Ball in the US, is a Japanese stationary brand. Their US offerings are lackluster compared to the wide array of pens, pencils, markers, and brushpens sold by Uni Mitsubishi in Japan, and American enthusiasts may have difficulty finding favorites stateside. If you're interested in the gamut of Mitsubishi Uno's products, JetPens carries a few that are difficult to find here, but you may have better luck on Cultpens, EBay and Amazon. I purchased my POSCA markers through Amazon, and received an all Japanese package.
The Stats
NonrefillableVariety of nib types and sizesUp to 35 colors, check marker type for color availabilityPermanent on porous surfacesCan be varnished These markers have replacable nibs: POSCA PC-1M, PC-3M, PC-5M, PC-8K and PC-17K.
Seven different types of POSCA markers available:
PC1-M (1mm)- Extra Fine, 14 total Colors availablePC1-MR (.7mm)- Extra Fine, like a fineliner or lining pen, 17 colors availablePCF-350 (brush tip)- 11 colors availablePC3-M (1.5mm) 27 colors availablePC5-M (2.5mm) 33 colors availablePC8-K (8mm) Broad chisel tip, 35 colors available, widest color rangePC17-K (15mm) Extra broad, 8 colors available
Places to Purchase
Amazon
DickBlick
Marker Supply
Durable Supply Company
EBay
Jetpens
Similar Markers (Acrylic):
Montana
Krink
Liquitex
Similar Markers (Waterbased)
Zig Posterman
Krink Water-Based Paint Markers
Similar Markers (Oil-Based)
Sharpie Paint Pens
Zig Painty
DecoColor
The Packaging
I ordered my POSCA markers from Amazon and set them to ship to my mom's place in Louisiana, as I was going to be in town for Mechacon and wanted something to noodle around with in my downtime. My markers arrived in a sturdy Amazon mailing box, and nestled inside the inflated plastic pillows were my POSCA markers in a cardboard box.
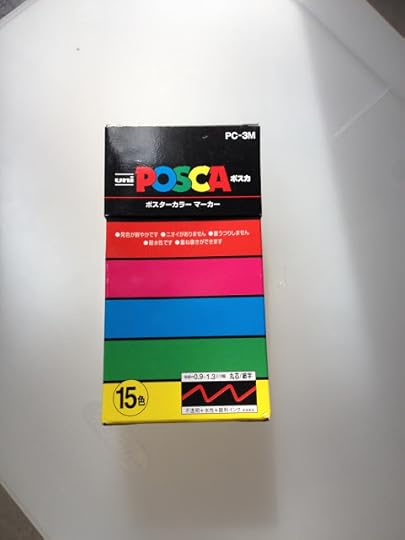
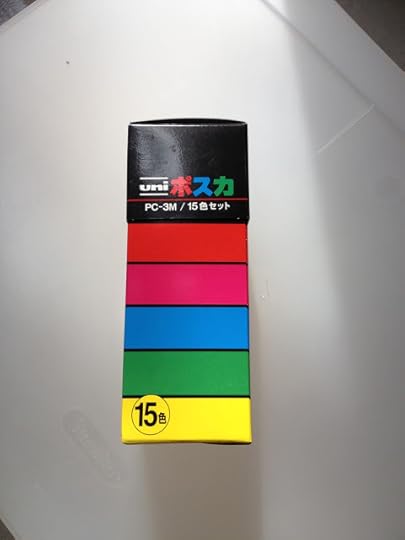

The box, while cardboard, isn't sturdy enough to have been shipped as was, but it's plenty sturdy enough to hold my POSCA markers.


The box is designed to be reusable with a removable cap and a slanted front designed to show off the markers.
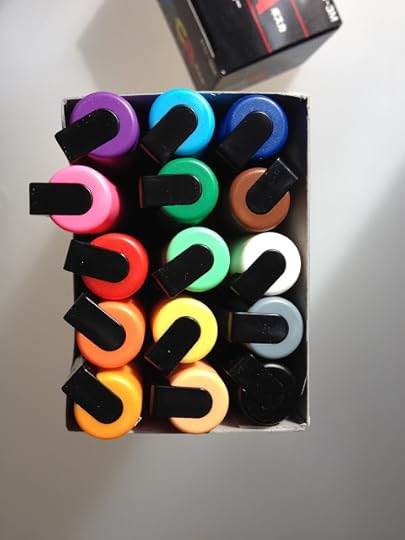
The Markers
The markers are a little chunkier than your average waterbased marker and they're a little wider around than Liquitex acrylic markers.
Although POSCA markers may LOOK like chalk markers, these markers are permanent once fully dry. Until they dry, they can be blended with a little water and a nylon brush.

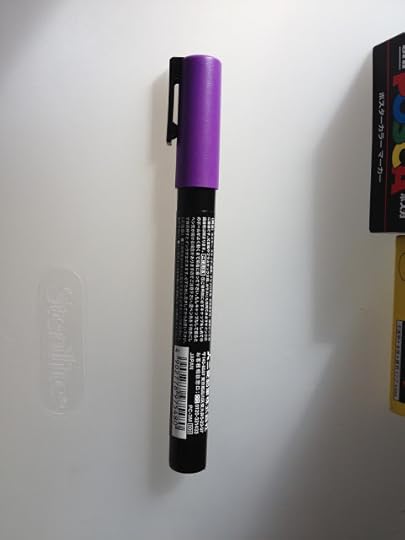
My POSCA markers are Japanese, so almost all the text is written in Japanese. Unfortunately, I can't transcribe that for you guys.

The bodies are identical with POSCA written in primary colors across the front, with the caps indicating the paint color inside.

Before the ink moves to the tips, the nibs are white.

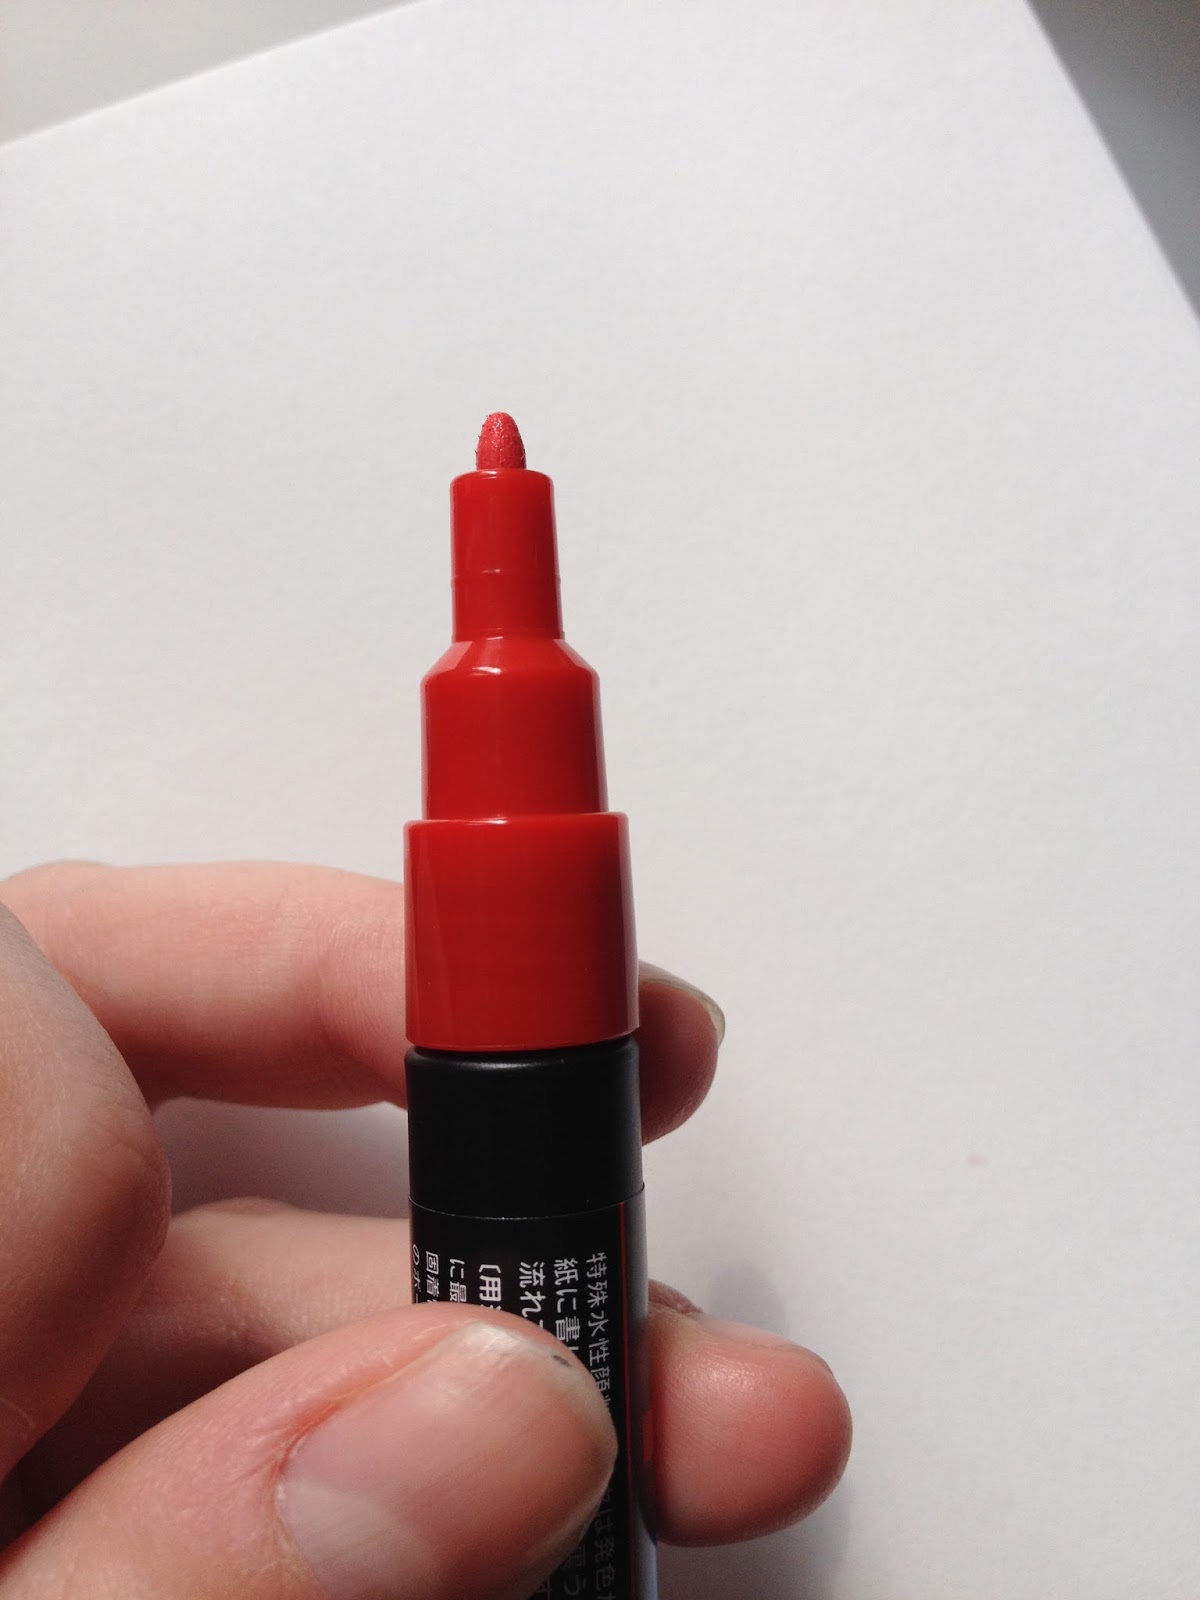
It only takes a few pumps (and storing your POSCAS upside down for a little while) to get the paint going.

Since the paper started to pill and tear when I tried to layer or add water, I decided to find something a little sturdier to do my field tests on. I found POSCA markers to be scratchy on Vellum Bristol.
You can check out Uni POSCA's official features, with neat animated graphics on their site. POSCA markers have liquid paint inside barrel with a metal ball to help keep paint mixed. You shake the pen to ensure an even mix. A pump action inside the pen allows you to extract more ink.
Tips can be removed and cleaned out with water, in case of cross contamination, and some can be flipped or replaced, extending the life of the pen. Some are reversable, and even replacable, prolonguing the lives of your markers.
If you're interested in using POSCA markers, I recommend you read their Instructions for Use first before committing.
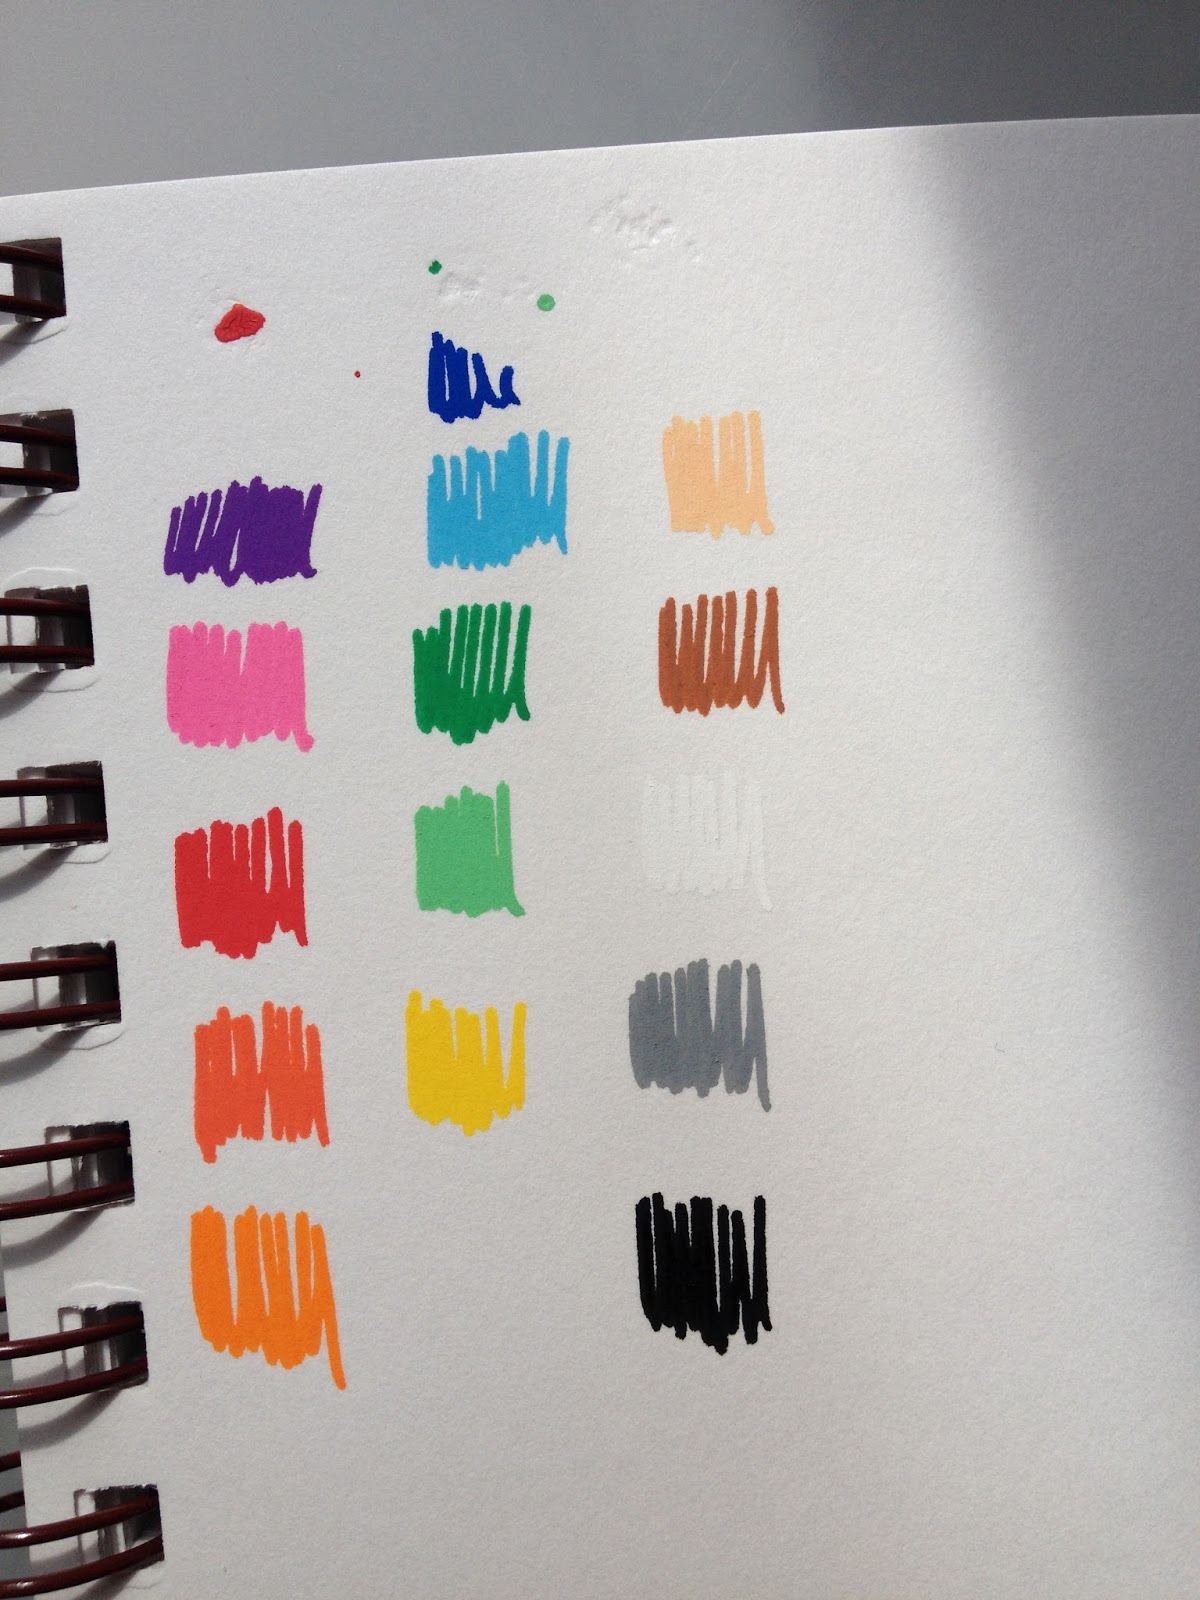
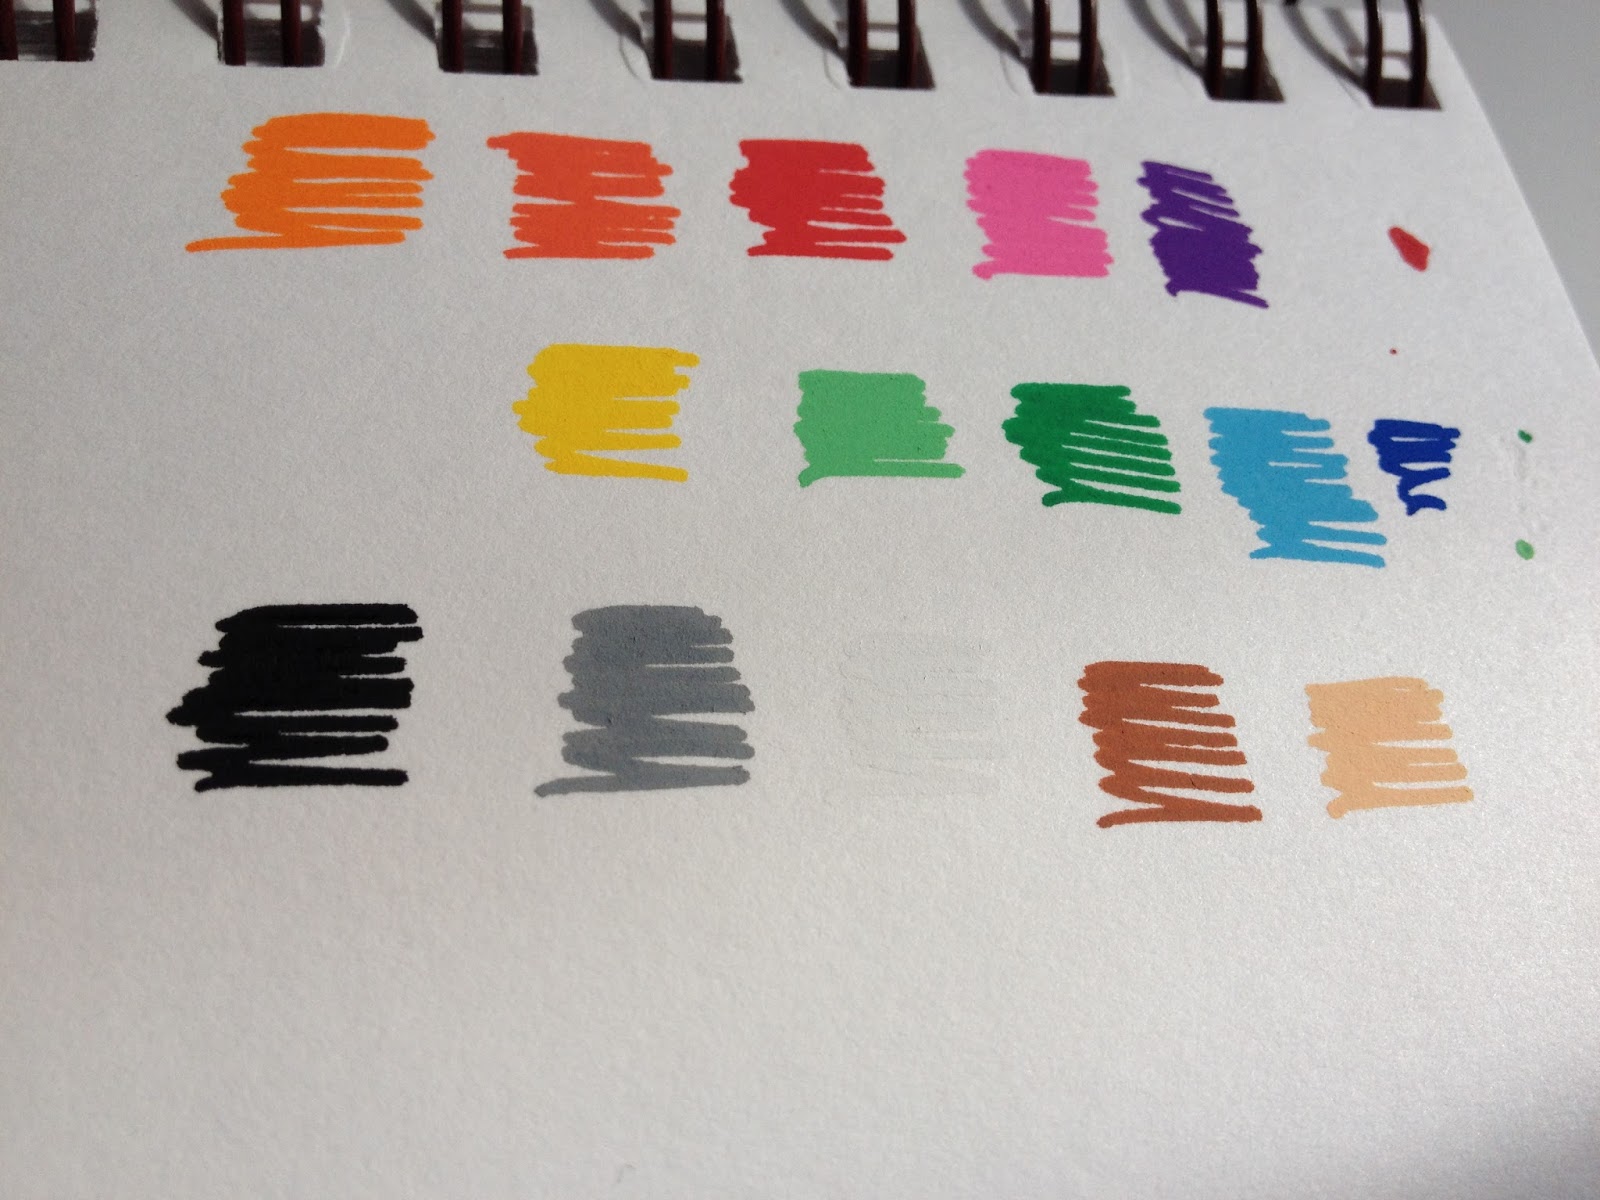
The Swatch Test (On Strathmore Visual Journal Bristol Paper)

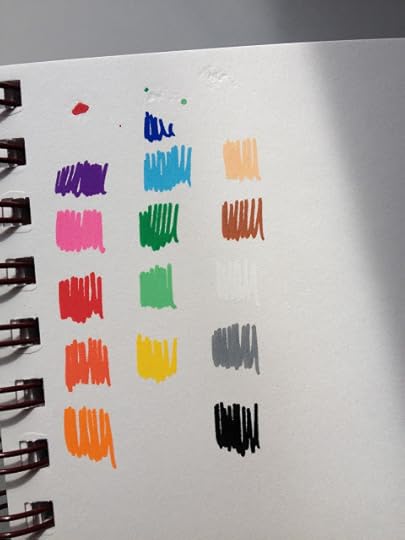

Although the site says these are waterbased markers, I'm still not entirely sure what the paint inside is. These might be acrylic markers, but the website doesn't say clearly what the markers utilize as a paint. These could also be similar to Sharpie's Paint pens, which are oil based. The closest hint I've gotten as to what's used in these markers is that the site says it's 'similar to acrylic', which leads me to believe it's a proprietary formula. The site also says these are pigment markers, but these are nothing like Winsor and Newton's Pigment Markers in performance or formula. Those are ethanol alcohol based and many are translucent, whereas these are waterbased and entirely opaque.
The nibs on the POSCA markers are fairly scratchy and have no give, and tended to tear up the Vellum Bristol paper upon repeated application while still wet (blending, or instance), so I needed to find something sturdier.
The Field Test- On Stonehenge Paper
My first thought was Stonehenge paper- I'd used this and BFK Reeves back when I was a printmaker during undergrad. Stongehenge paper is fairly thick, and able to handle water applications, so I figured it could not only handle the waterbased markers, but the water I planned on using to blend these markers.
Many artists use their finger to blend POSCA markers, and while that's a valid technique, I was worried that it might further abrade the paper surface, so I opted to use a cup of clean water and some inexpensive white nylon brushes. I found that flats worked the best for this technique, so skip the rounds.
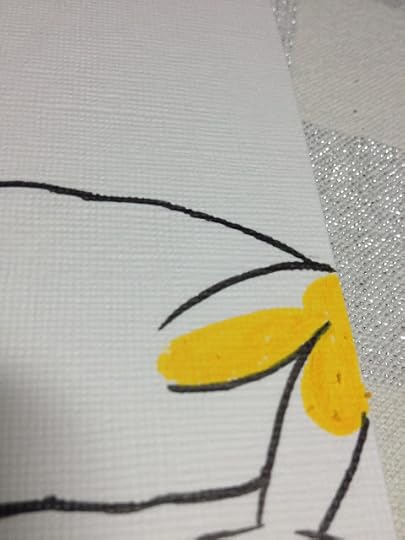
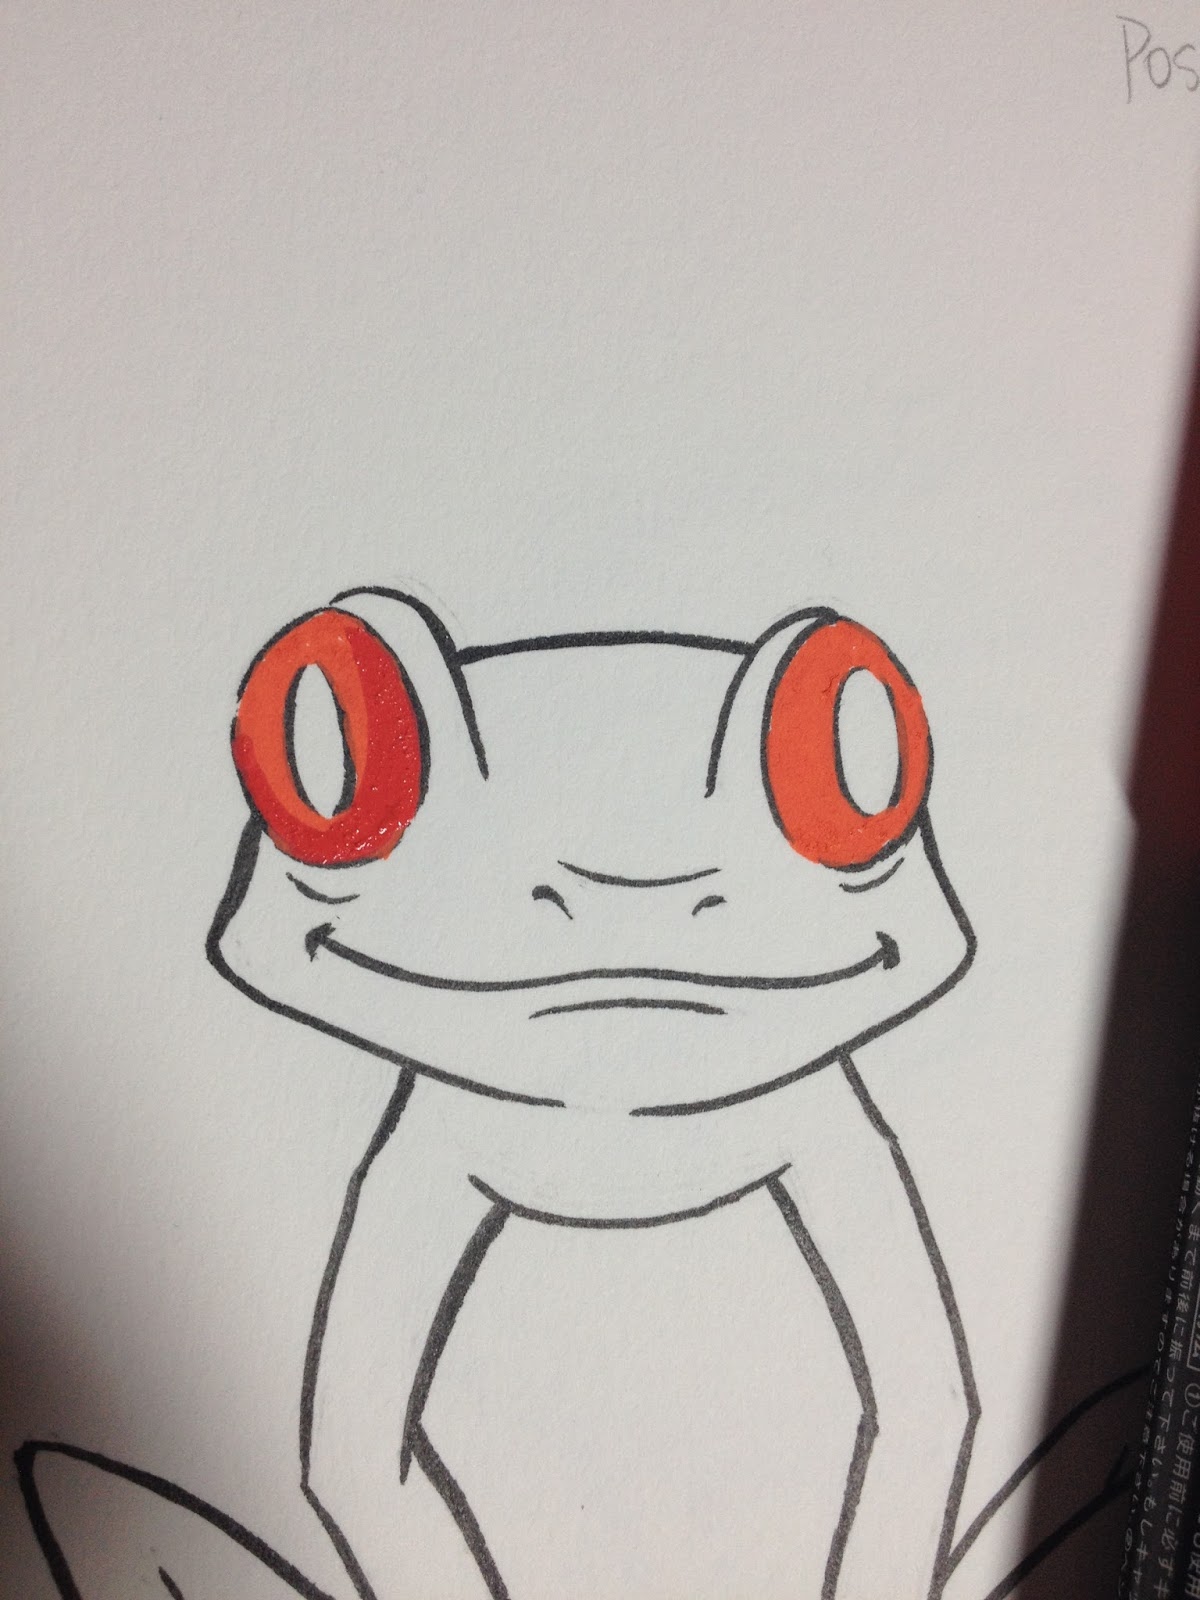
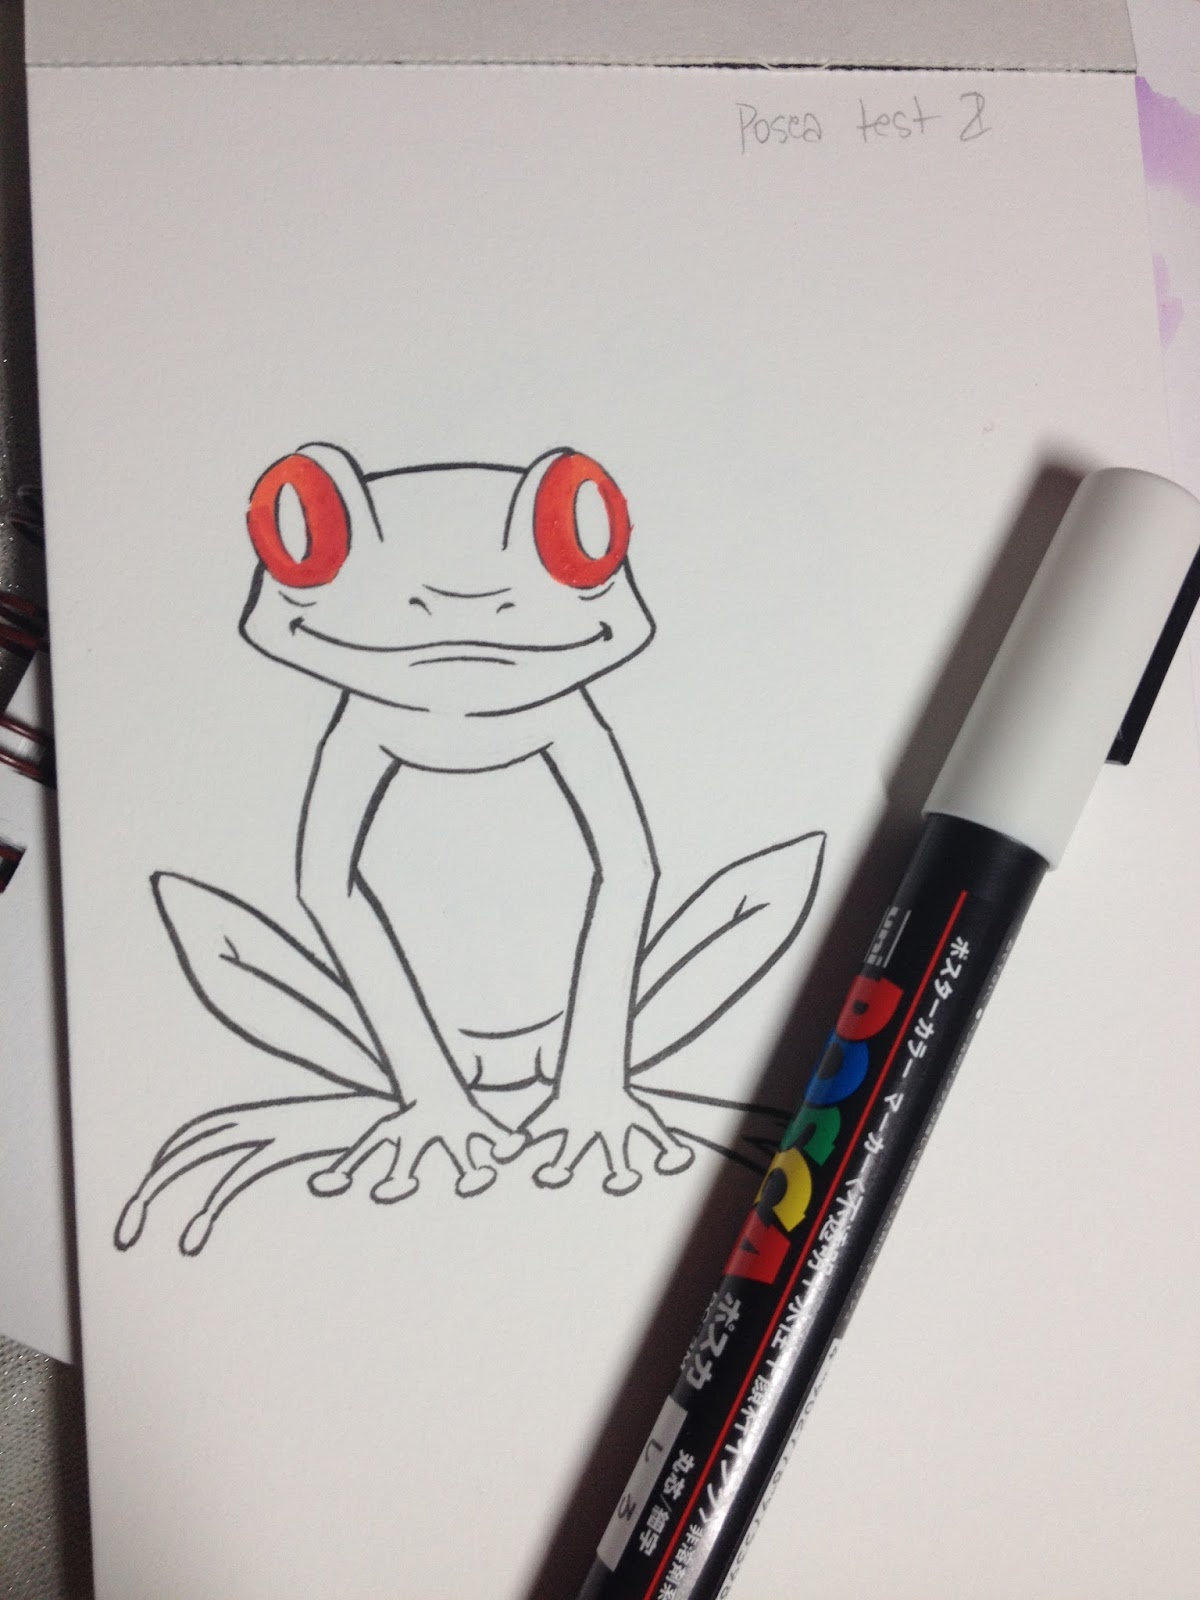
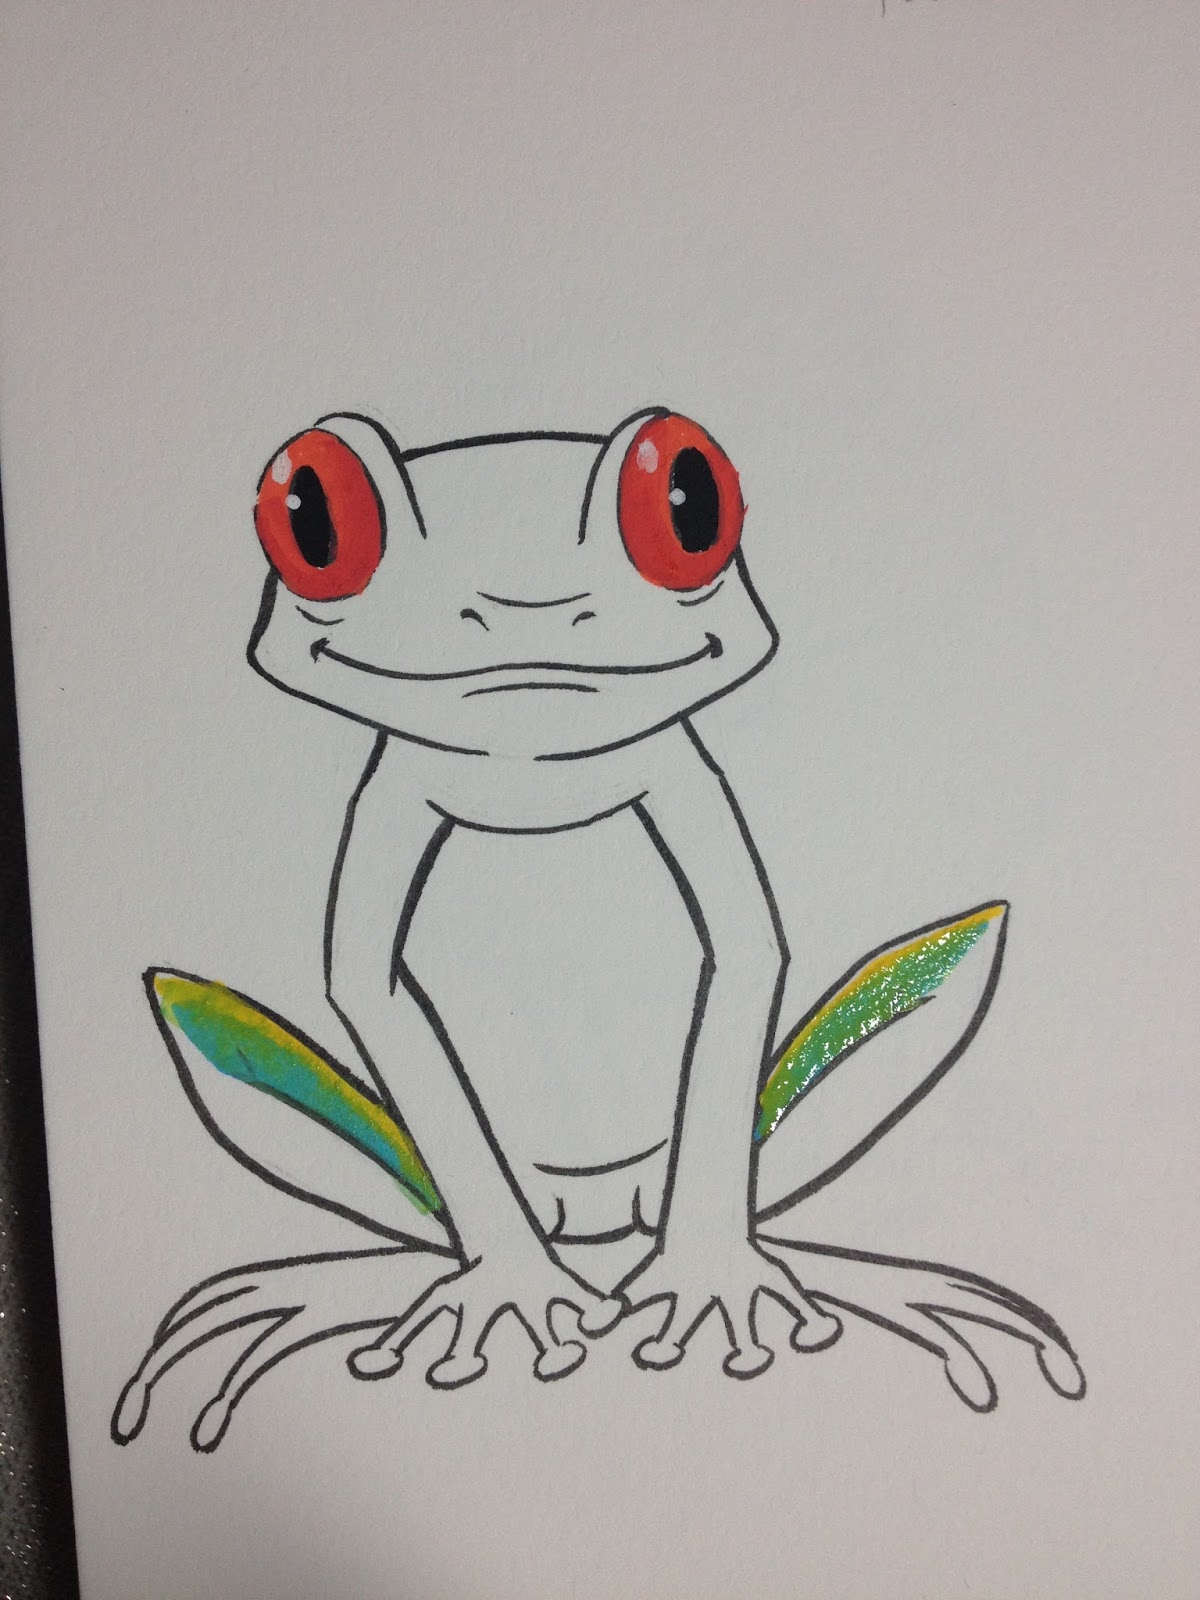
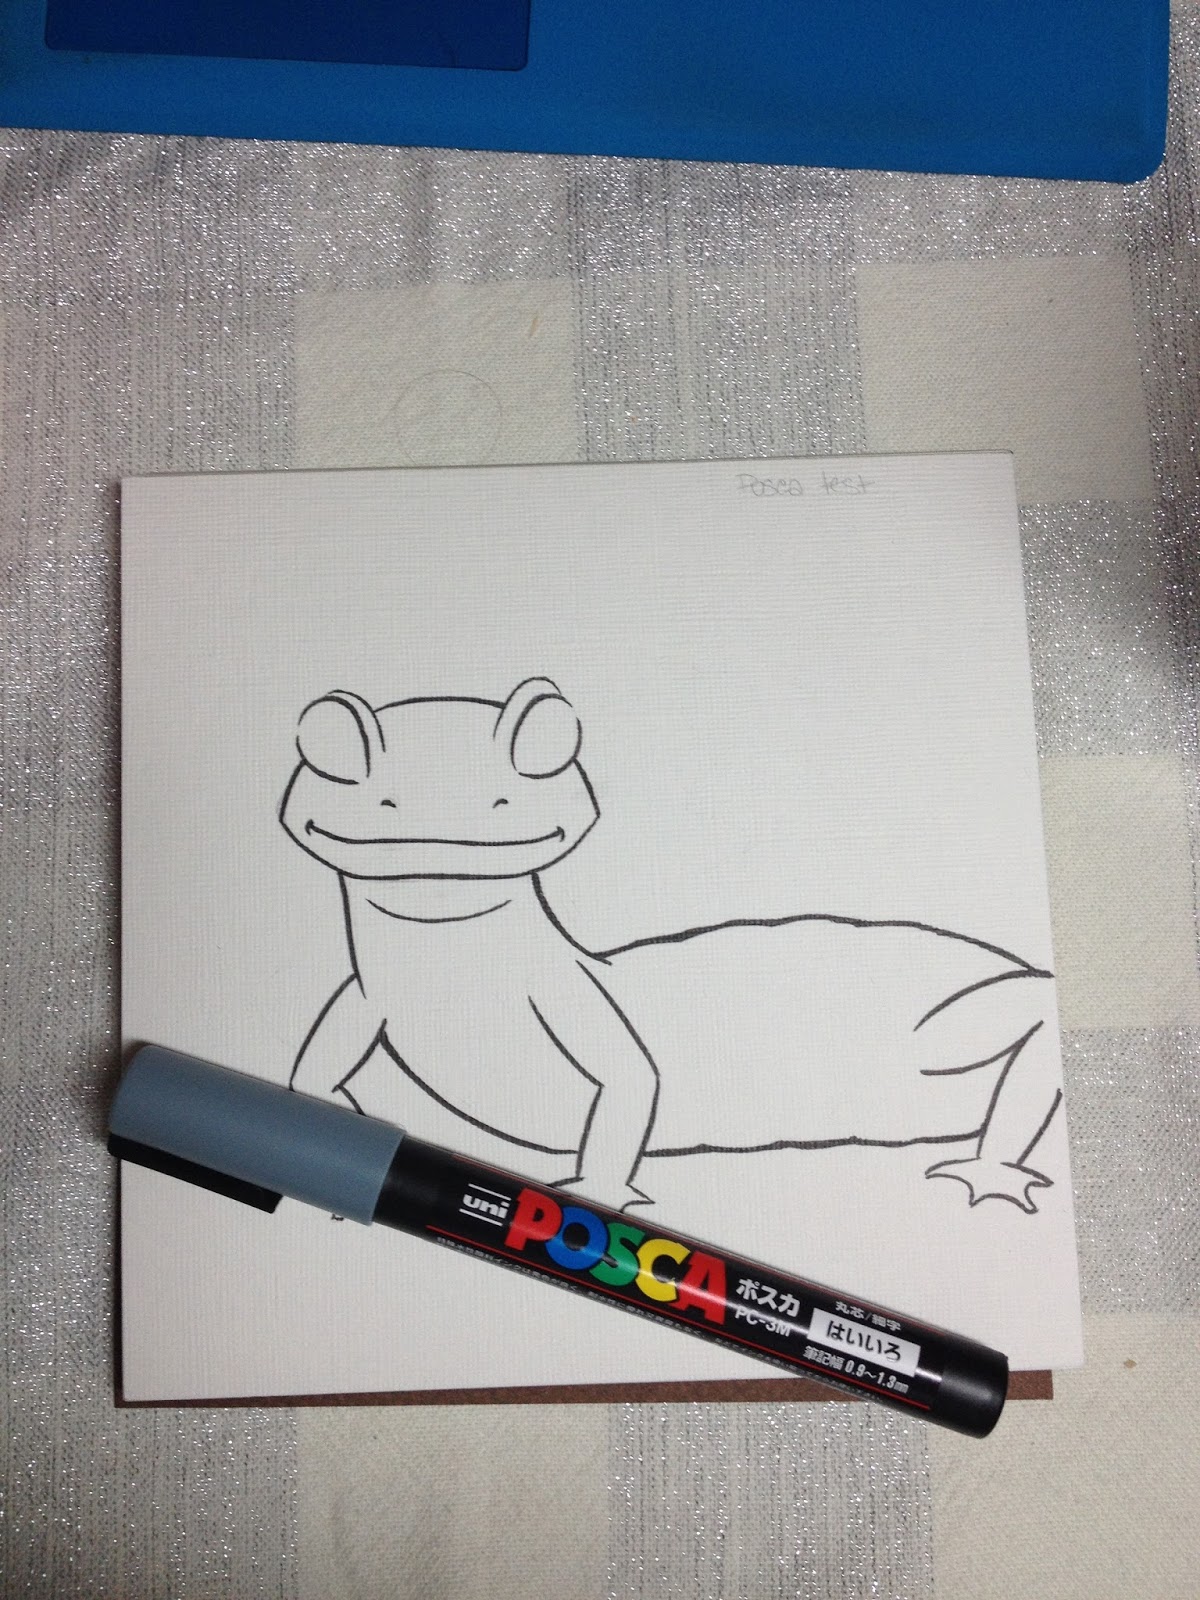
I inked this little tree frog with a Sailor Mitsuo Aida fude pen, as it's waterproof and alcohol proof.
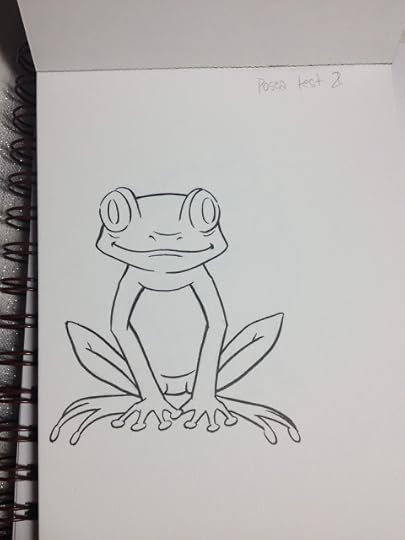


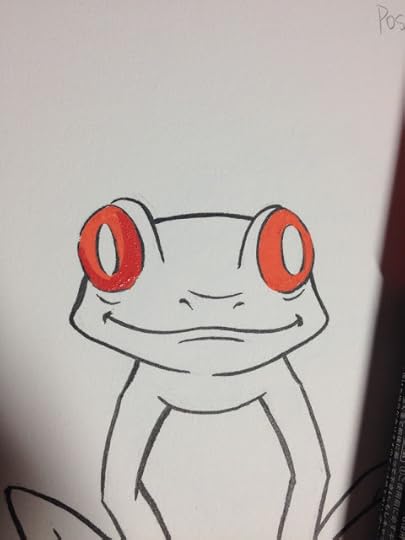
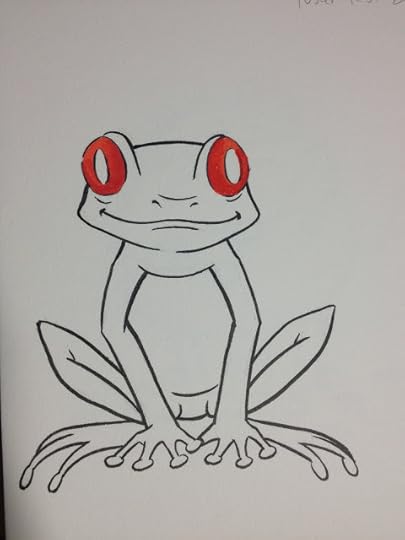

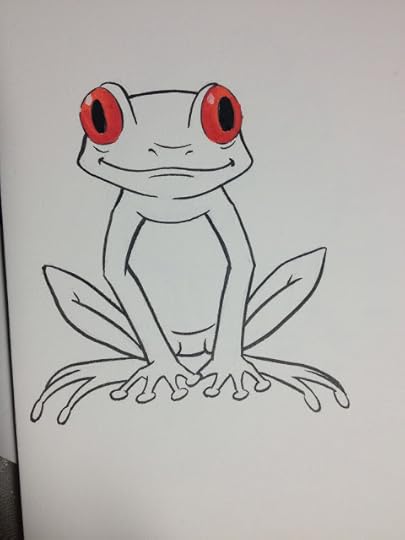

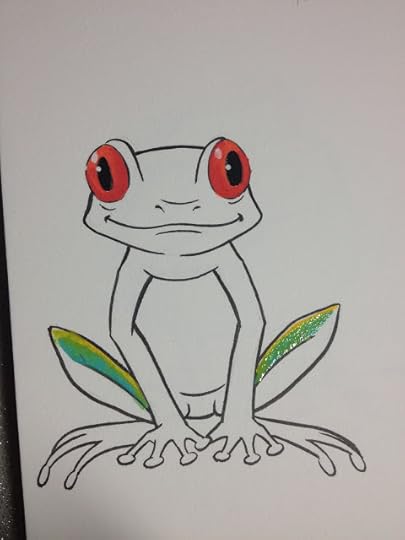
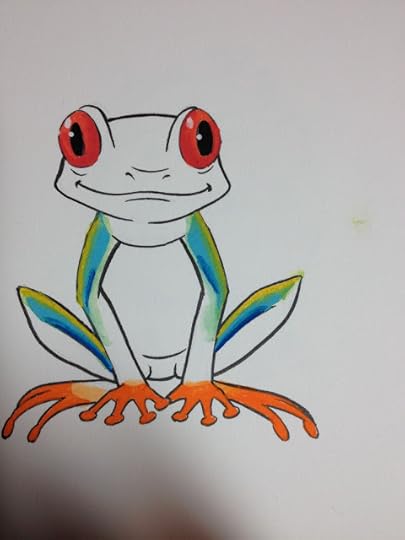
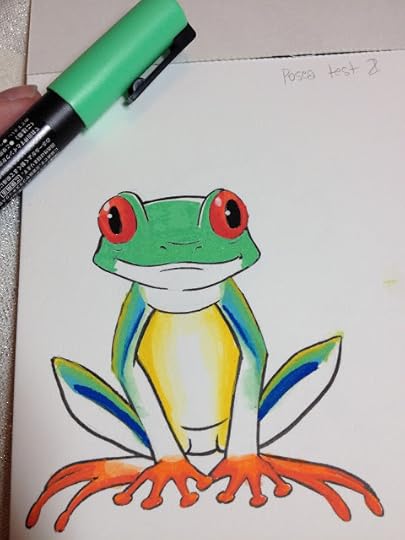
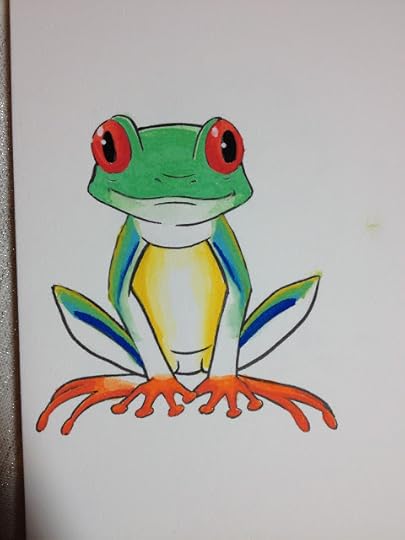


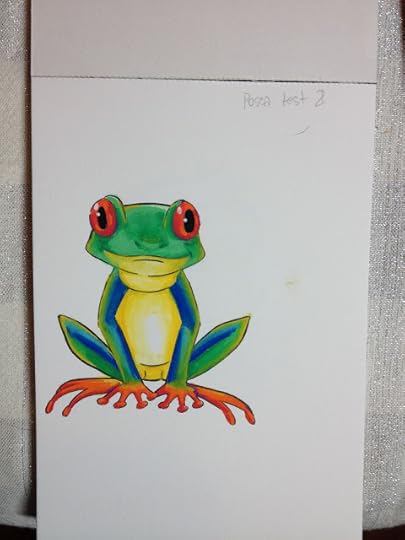

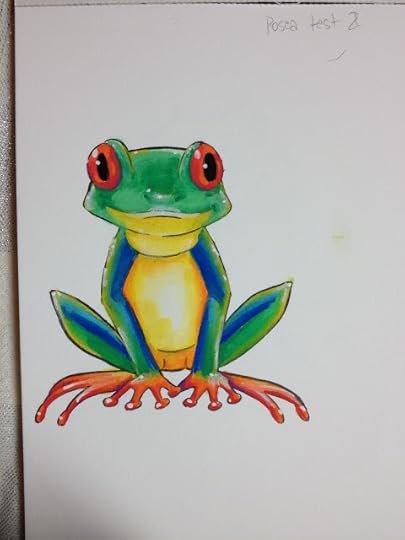
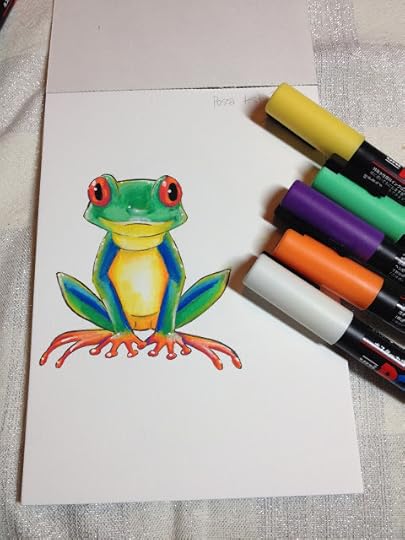

Although Stongehenge is tough, and could handle the water, it did start to pill with repeated applications, which slowed my working time. I had to stop and wait for the paper to dry before applying new layers of POSCA, lest the stiff nib scrub the paper into pills.
If you're interested in seeing how I I handle these markers, keep reading because I have a couple great videos towards the bottom of the post. One is a timelapse, for those of you who can learn quickly, and another is a step by step tutorial where I explain everything!
The Field Test- Strathmore Acrylic Paper
Since the Stonehenge paper pilled, I knew I'd need something even tougher- so I picked up some Strathmore Canvas paper while at David Art Supply in New Orleans. This canvas paper does not have an actual canvas surface, but a synthetic, plasticized surface, which seemed ideal.
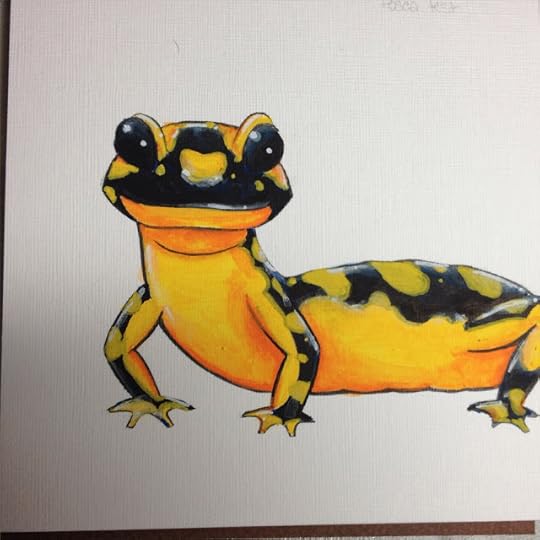
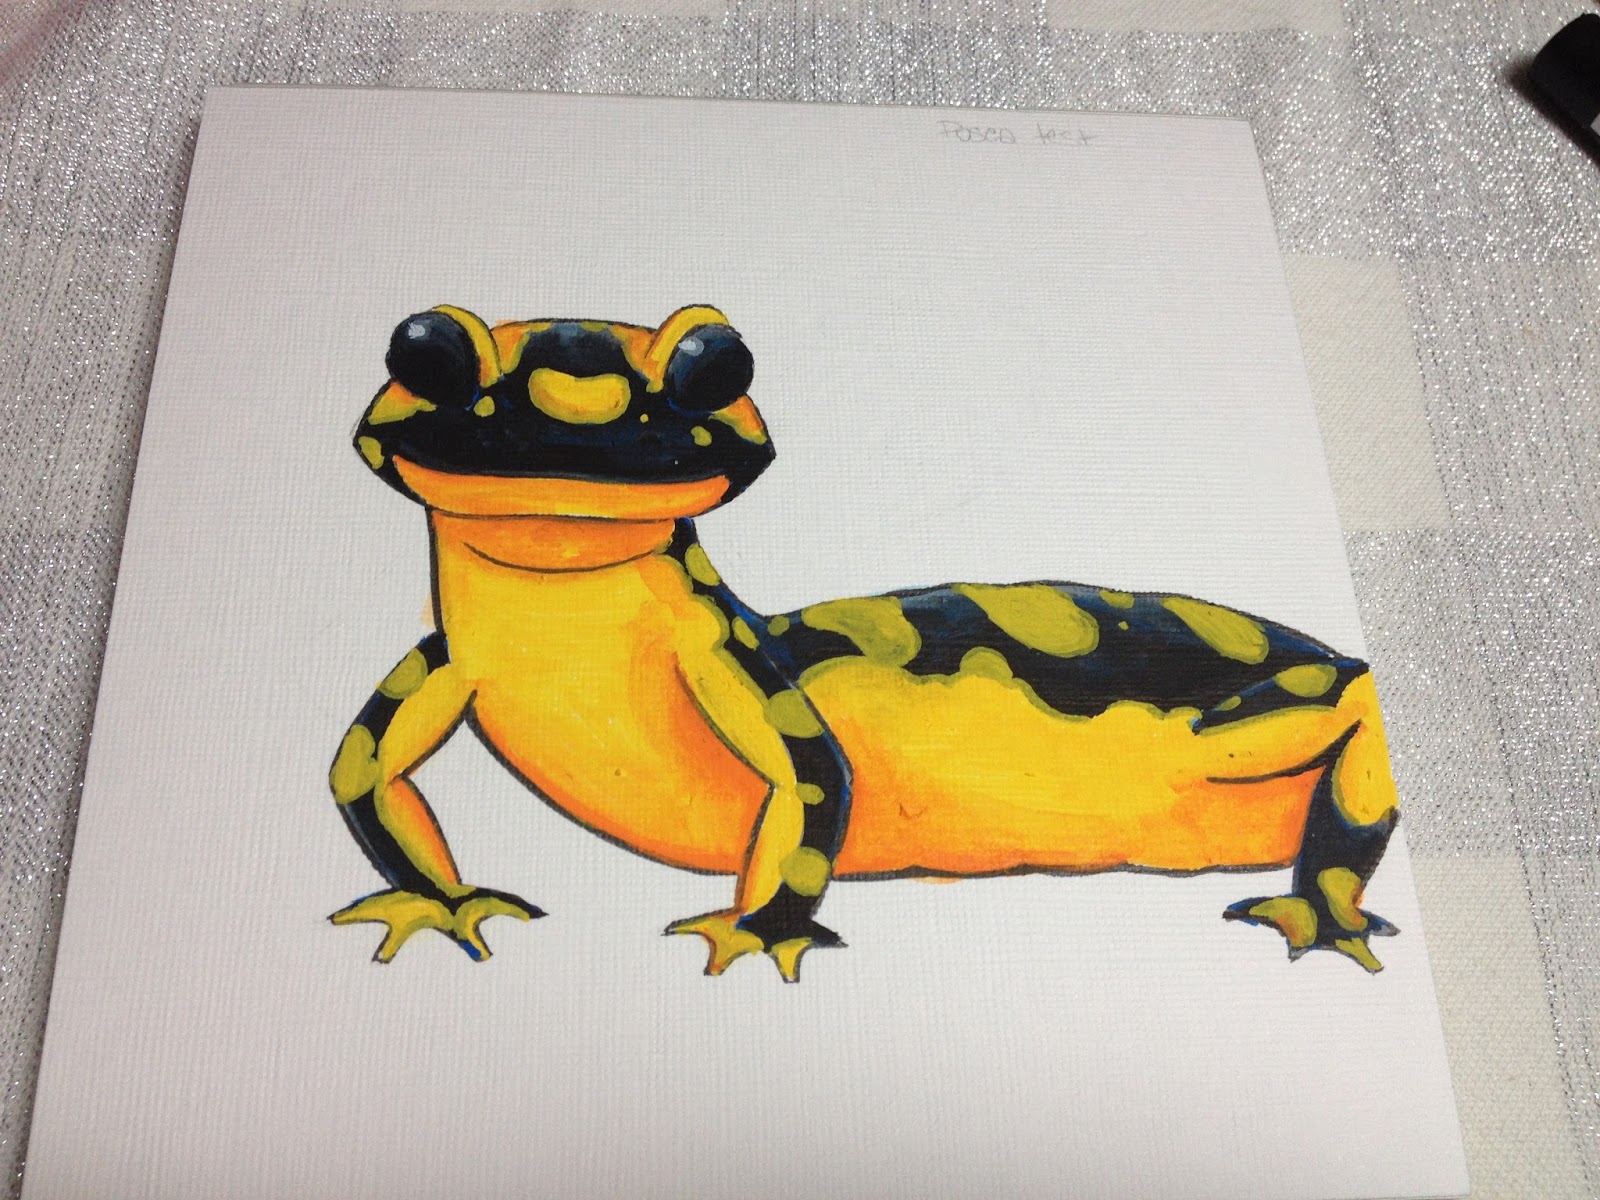
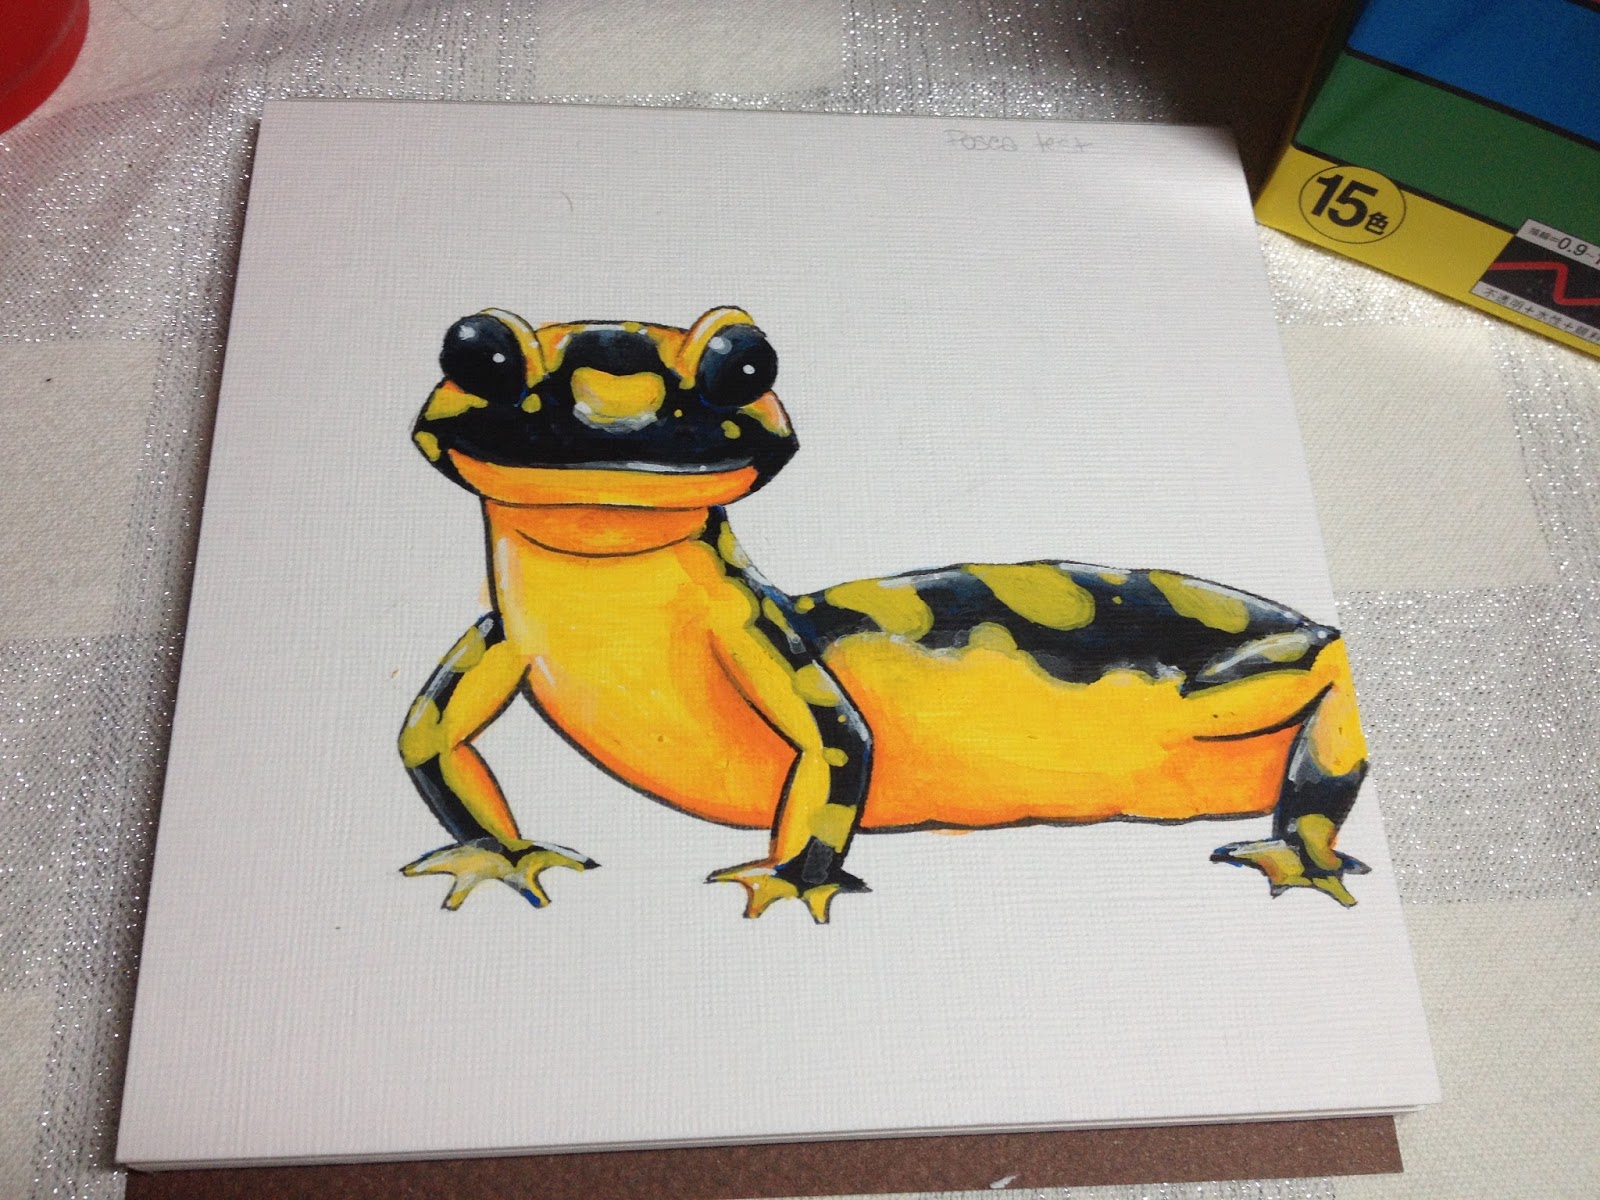
I inked this salamander with a Sailor Mitsuo Aida brushpen. I thought it might run on the plastic-coated paper, but it seemed to do fine.


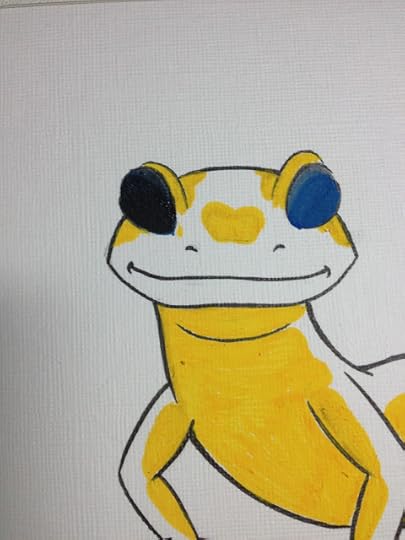


In retrospect, I should have left the yellow on the salamander's back open until I was ready to fill it in with yellow, but handling it this way also allowed me to build up color and gave the salamander a glossy appearance.


POSCA Tutorial Video- POSCA on Canvas, Amaterasu
Materials Used
Sailor Mitsuo AidaMono eraserDaler Rowney Nylon BrushesBlick mini canvas
POSCA Timelapse- POSCA on Black Canvas, Cat
The Verdict
These are a lot of fun to use, but don't make the mistake of thinking these are a replacement for waterbased or alcohol based markers, as they're very different.
POSCA markers are paint markers, and they work best on sturdy surfaces like gesso'd board, canvas, or canvas board. The stiff nibs of the bullet and chisel nib are prone to tearing up papers, so if you want to use POSCA markers, I recommend you skip the paper and go for sturdier scaffolding
POSCA markers
Permanent when dryWaterbasedCan be blended with water while wetOpaque
Alcohol Based Markers
TransparentCan be blended with alcohol solutions- isoproply alcohol, blender solutionsCan always be reworked with blender, alcohol, or other markersRelated Videos
Getting Started with Posca Paint Pens - Part 1 - Joseph Tubb
Getting Started With Posca Paint Pens - Part 3 - Blending- Joseph Tubb
Posca x Miss Wah - Kawaii Graffiti Canvas (Vol 1) - Miss Wah
Outside Resources
POSCA FAQ
More Inspiration: http://www.posca.com/uk/customisation
Workshops/Tutorials: http://www.posca.com/uk/creative-work...
POSCA Blog: http://www.posca.com/uk/news
If you enjoyed this post, or found it useful, inspiring, or informative, please consider backing my Patreon to help fund future posts like the one above. Posts like this take a lot of time, energy, resources, and research to write, photograph, record, and illustrate, and your pledge can go a long way towards ensuring there's a future for them. This blog is currently sponsor-free, meaning everything is paid for out of my pocket- the materials reviewed, the materials tested on, the equipment used to photograph, the equipment used to record, and a show of support from readers who enjoy my content, especially financial support lets me know that you guys are invested in my content. If a monthly pledge is outside your budget or comfort-zone, a one time donation can be made via the Paypal link in my sidebar. You can learn more about the community goals of my Patreon here.
If both of these are not an option for you, please consider pledging your time- clicking affiliate links when interested in the product, watching at least 30 seconds of the ads before videos, occasionally clicking ads on the blog that may be of interest to you. Every click ads up, and the money earned goes towards paying the bills, keeping the lights on, and funding more posts.
Please consider donating to this blog or purchasing from Natto-shop (http://nattosoup.com/shop) if you want me to continue publishing quality content. All materials tested were purchased from my own pocket. Keep on Truckin' Nattosoup is not under any sponsorship.
Awhile back, one of my Twitter friends asked if I had any experience with POSCA markers. At the time, I'd only used a POSCA white brush marker for corrections, but I was neck deep in researching and reviewing waterbased markers, so I quickly ordered a set of 15 from Amazon so I could begin investigating POSCA markers first hand.
Above are the set I actually purchased- a 15 marker fine tipped set of bullet nibbed POSCA markers, but Amazon has a selection of POSCA pens to suit your needs. You could even get this omega set if your heart really desired.
But I recommend you play it safe, order a smaller set, and see if POSCA markers light up your life before investing in the whole shebang.
The Brand
Mitsubishi Uni, better known as Uni-Ball in the US, is a Japanese stationary brand. Their US offerings are lackluster compared to the wide array of pens, pencils, markers, and brushpens sold by Uni Mitsubishi in Japan, and American enthusiasts may have difficulty finding favorites stateside. If you're interested in the gamut of Mitsubishi Uno's products, JetPens carries a few that are difficult to find here, but you may have better luck on Cultpens, EBay and Amazon. I purchased my POSCA markers through Amazon, and received an all Japanese package.
The Stats
NonrefillableVariety of nib types and sizesUp to 35 colors, check marker type for color availabilityPermanent on porous surfacesCan be varnished These markers have replacable nibs: POSCA PC-1M, PC-3M, PC-5M, PC-8K and PC-17K.
Seven different types of POSCA markers available:
PC1-M (1mm)- Extra Fine, 14 total Colors availablePC1-MR (.7mm)- Extra Fine, like a fineliner or lining pen, 17 colors availablePCF-350 (brush tip)- 11 colors availablePC3-M (1.5mm) 27 colors availablePC5-M (2.5mm) 33 colors availablePC8-K (8mm) Broad chisel tip, 35 colors available, widest color rangePC17-K (15mm) Extra broad, 8 colors available
Places to Purchase
Amazon
DickBlick
Marker Supply
Durable Supply Company
EBay
Jetpens
Similar Markers (Acrylic):
Montana
Krink
Liquitex
Similar Markers (Waterbased)
Zig Posterman
Krink Water-Based Paint Markers
Similar Markers (Oil-Based)
Sharpie Paint Pens
Zig Painty
DecoColor
The Packaging
I ordered my POSCA markers from Amazon and set them to ship to my mom's place in Louisiana, as I was going to be in town for Mechacon and wanted something to noodle around with in my downtime. My markers arrived in a sturdy Amazon mailing box, and nestled inside the inflated plastic pillows were my POSCA markers in a cardboard box.

The box, while cardboard, isn't sturdy enough to have been shipped as was, but it's plenty sturdy enough to hold my POSCA markers.


The box is designed to be reusable with a removable cap and a slanted front designed to show off the markers.

The Markers
The markers are a little chunkier than your average waterbased marker and they're a little wider around than Liquitex acrylic markers.
Although POSCA markers may LOOK like chalk markers, these markers are permanent once fully dry. Until they dry, they can be blended with a little water and a nylon brush.

My POSCA markers are Japanese, so almost all the text is written in Japanese. Unfortunately, I can't transcribe that for you guys.

The bodies are identical with POSCA written in primary colors across the front, with the caps indicating the paint color inside.
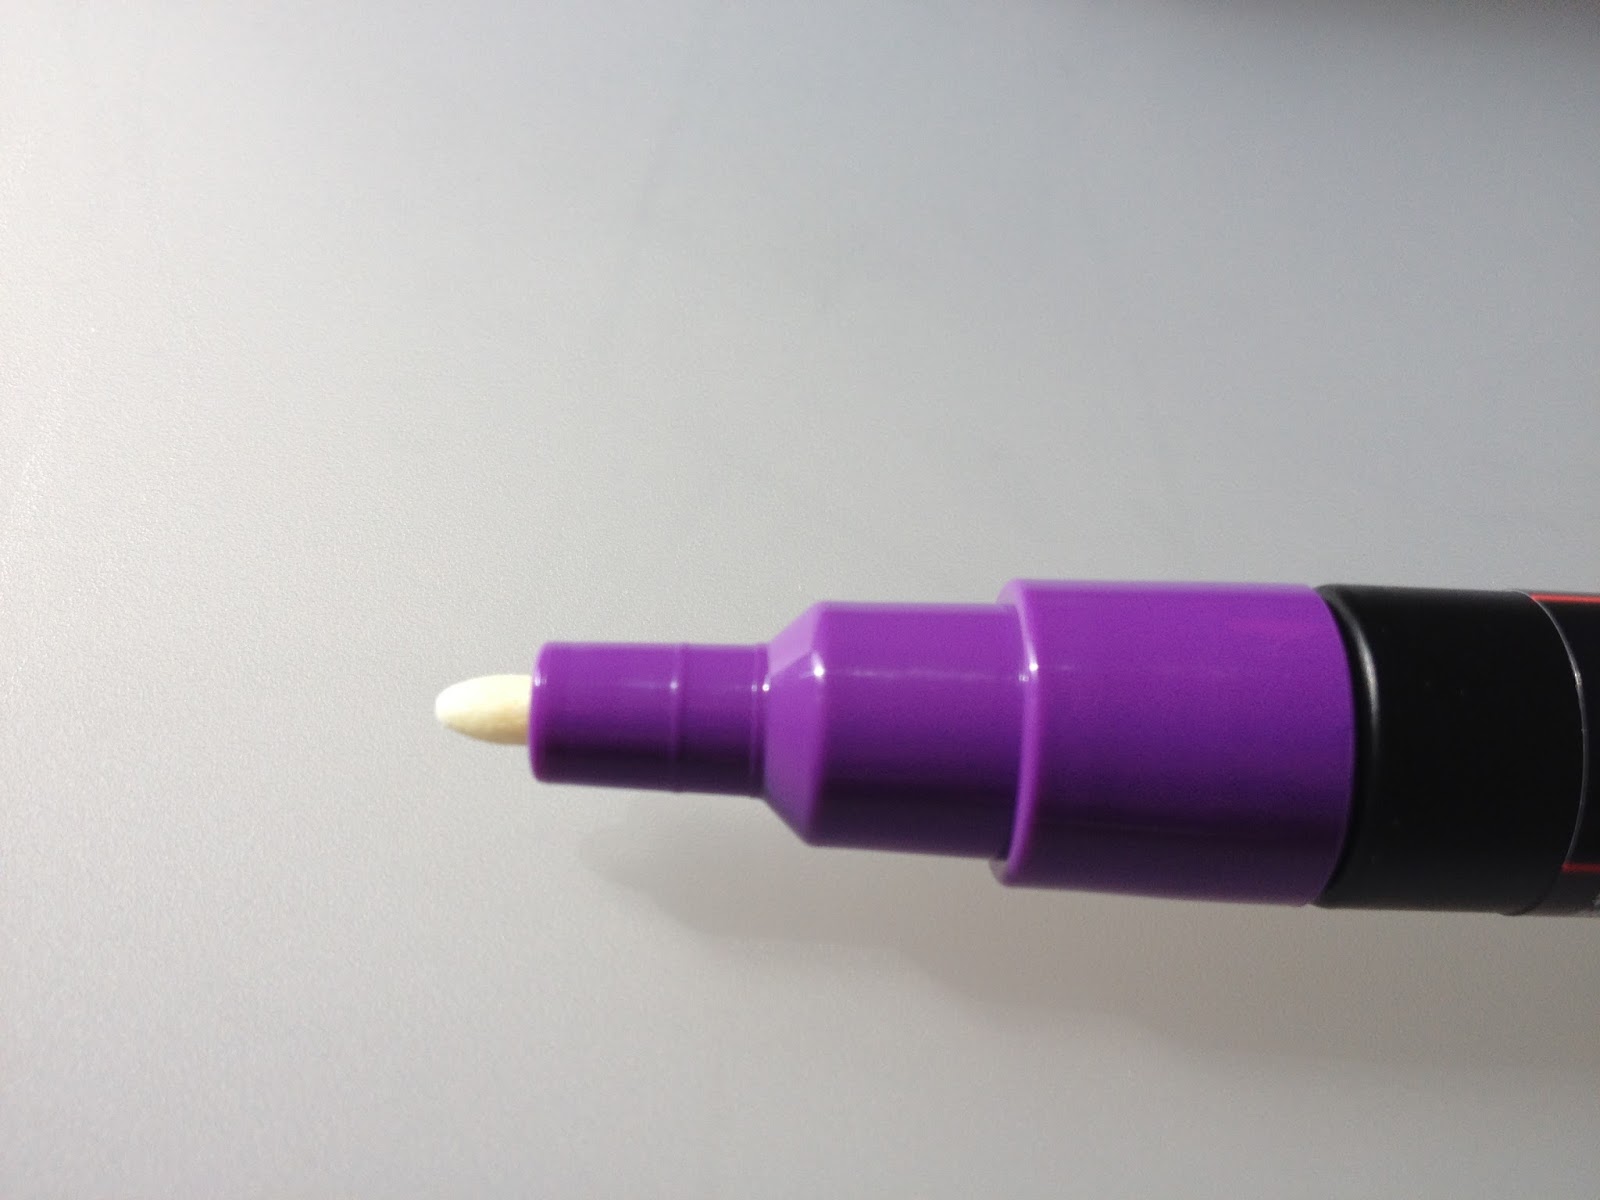
Before the ink moves to the tips, the nibs are white.
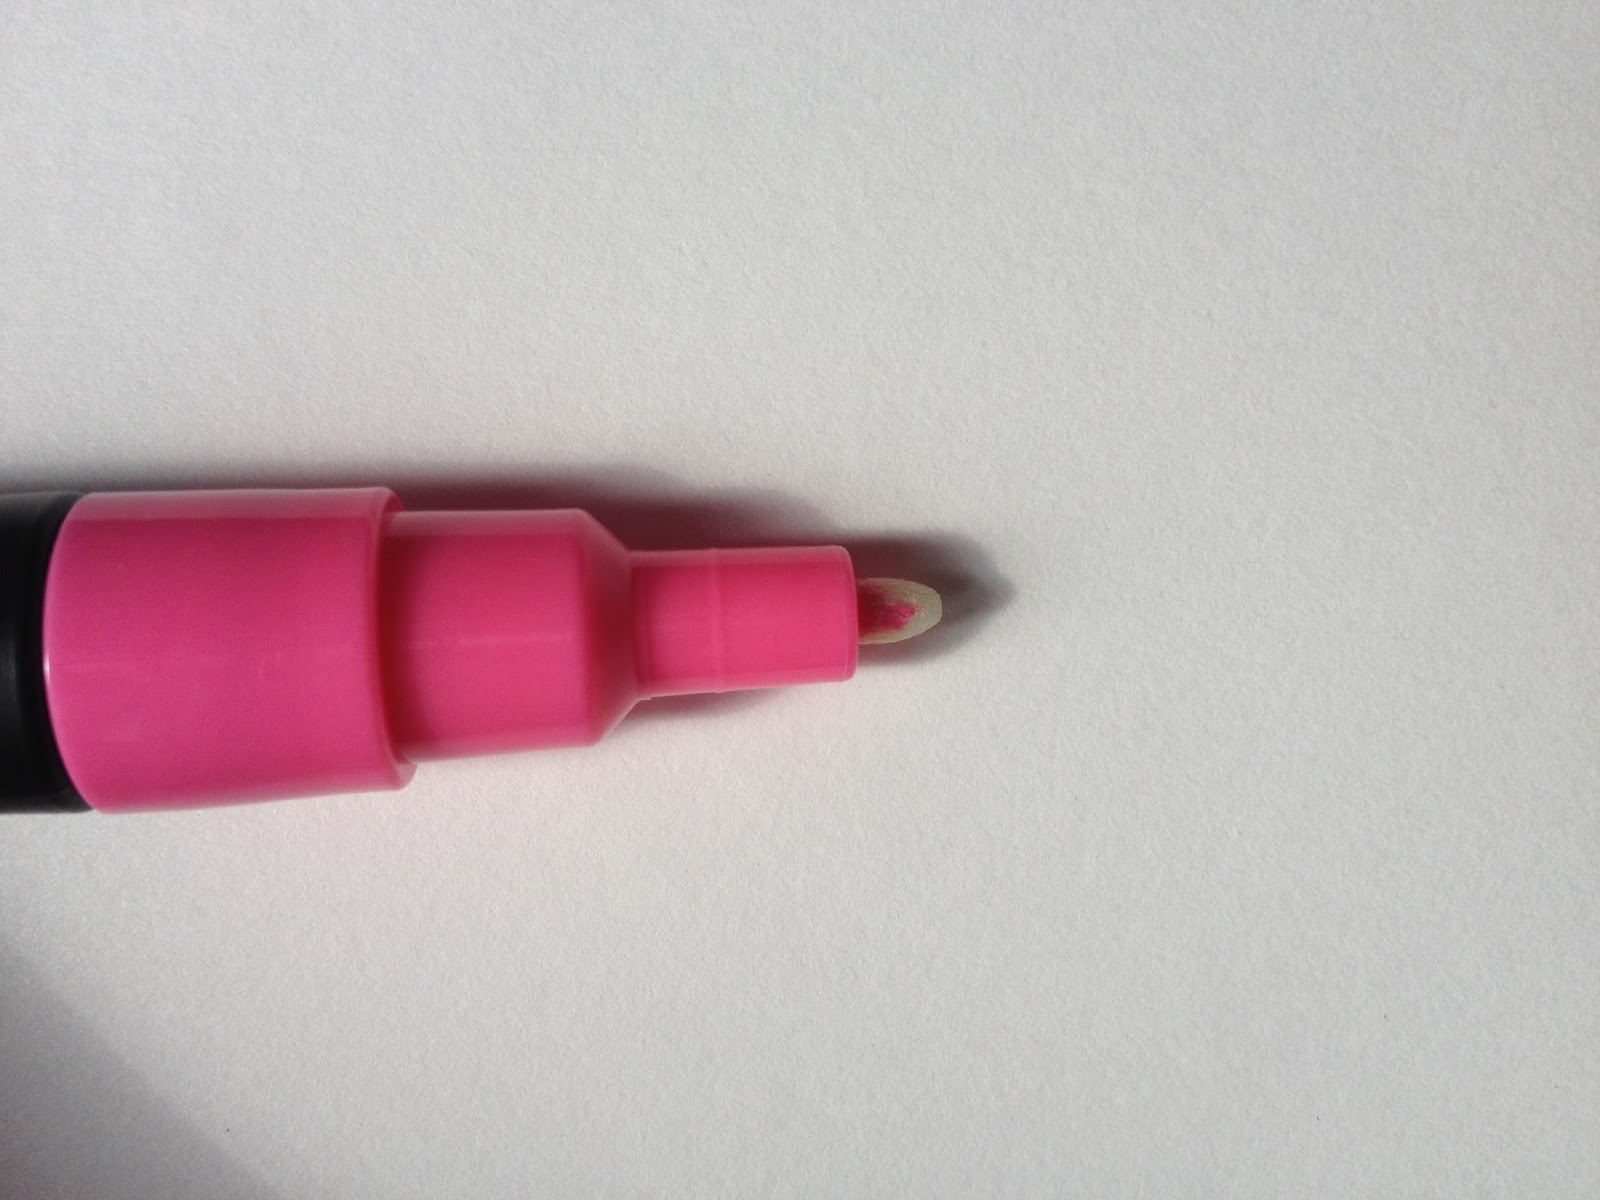
It only takes a few pumps (and storing your POSCAS upside down for a little while) to get the paint going.
Since the paper started to pill and tear when I tried to layer or add water, I decided to find something a little sturdier to do my field tests on. I found POSCA markers to be scratchy on Vellum Bristol.
You can check out Uni POSCA's official features, with neat animated graphics on their site. POSCA markers have liquid paint inside barrel with a metal ball to help keep paint mixed. You shake the pen to ensure an even mix. A pump action inside the pen allows you to extract more ink.
Tips can be removed and cleaned out with water, in case of cross contamination, and some can be flipped or replaced, extending the life of the pen. Some are reversable, and even replacable, prolonguing the lives of your markers.
If you're interested in using POSCA markers, I recommend you read their Instructions for Use first before committing.
The Swatch Test (On Strathmore Visual Journal Bristol Paper)

Although the site says these are waterbased markers, I'm still not entirely sure what the paint inside is. These might be acrylic markers, but the website doesn't say clearly what the markers utilize as a paint. These could also be similar to Sharpie's Paint pens, which are oil based. The closest hint I've gotten as to what's used in these markers is that the site says it's 'similar to acrylic', which leads me to believe it's a proprietary formula. The site also says these are pigment markers, but these are nothing like Winsor and Newton's Pigment Markers in performance or formula. Those are ethanol alcohol based and many are translucent, whereas these are waterbased and entirely opaque.
The nibs on the POSCA markers are fairly scratchy and have no give, and tended to tear up the Vellum Bristol paper upon repeated application while still wet (blending, or instance), so I needed to find something sturdier.
The Field Test- On Stonehenge Paper
My first thought was Stonehenge paper- I'd used this and BFK Reeves back when I was a printmaker during undergrad. Stongehenge paper is fairly thick, and able to handle water applications, so I figured it could not only handle the waterbased markers, but the water I planned on using to blend these markers.
Many artists use their finger to blend POSCA markers, and while that's a valid technique, I was worried that it might further abrade the paper surface, so I opted to use a cup of clean water and some inexpensive white nylon brushes. I found that flats worked the best for this technique, so skip the rounds.
I inked this little tree frog with a Sailor Mitsuo Aida fude pen, as it's waterproof and alcohol proof.
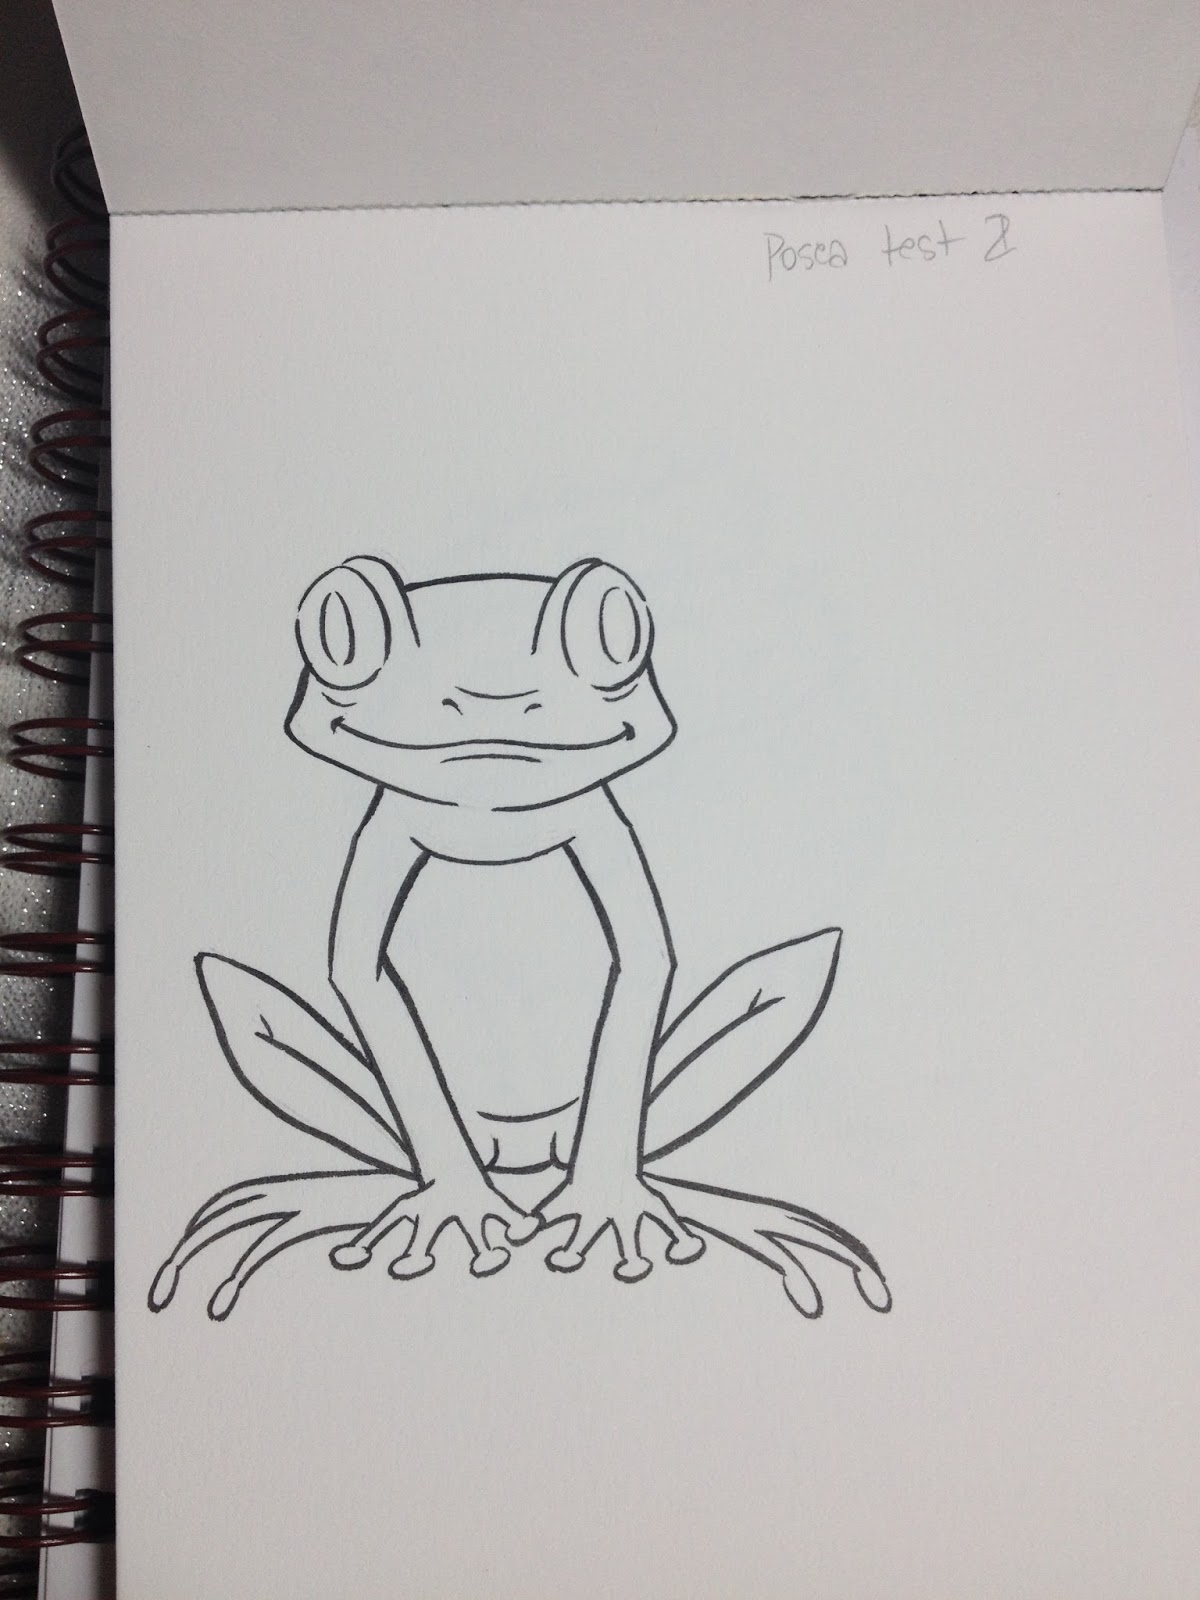
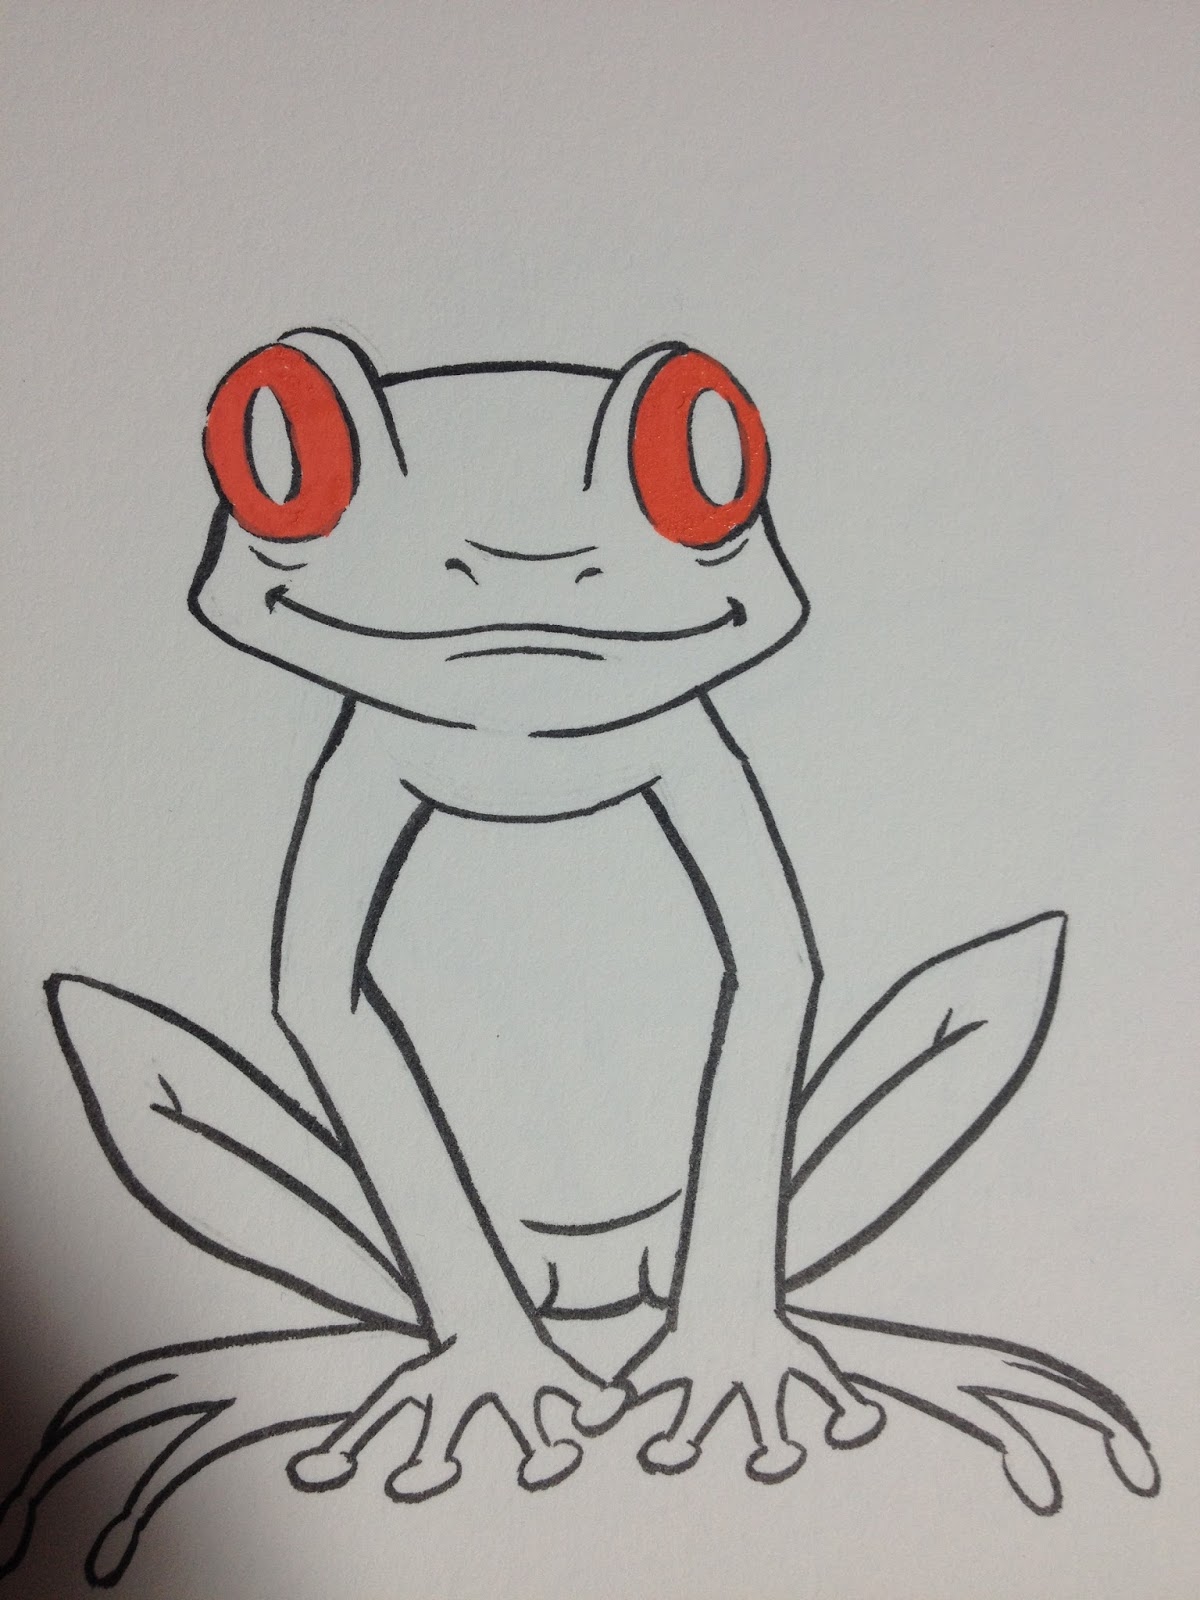

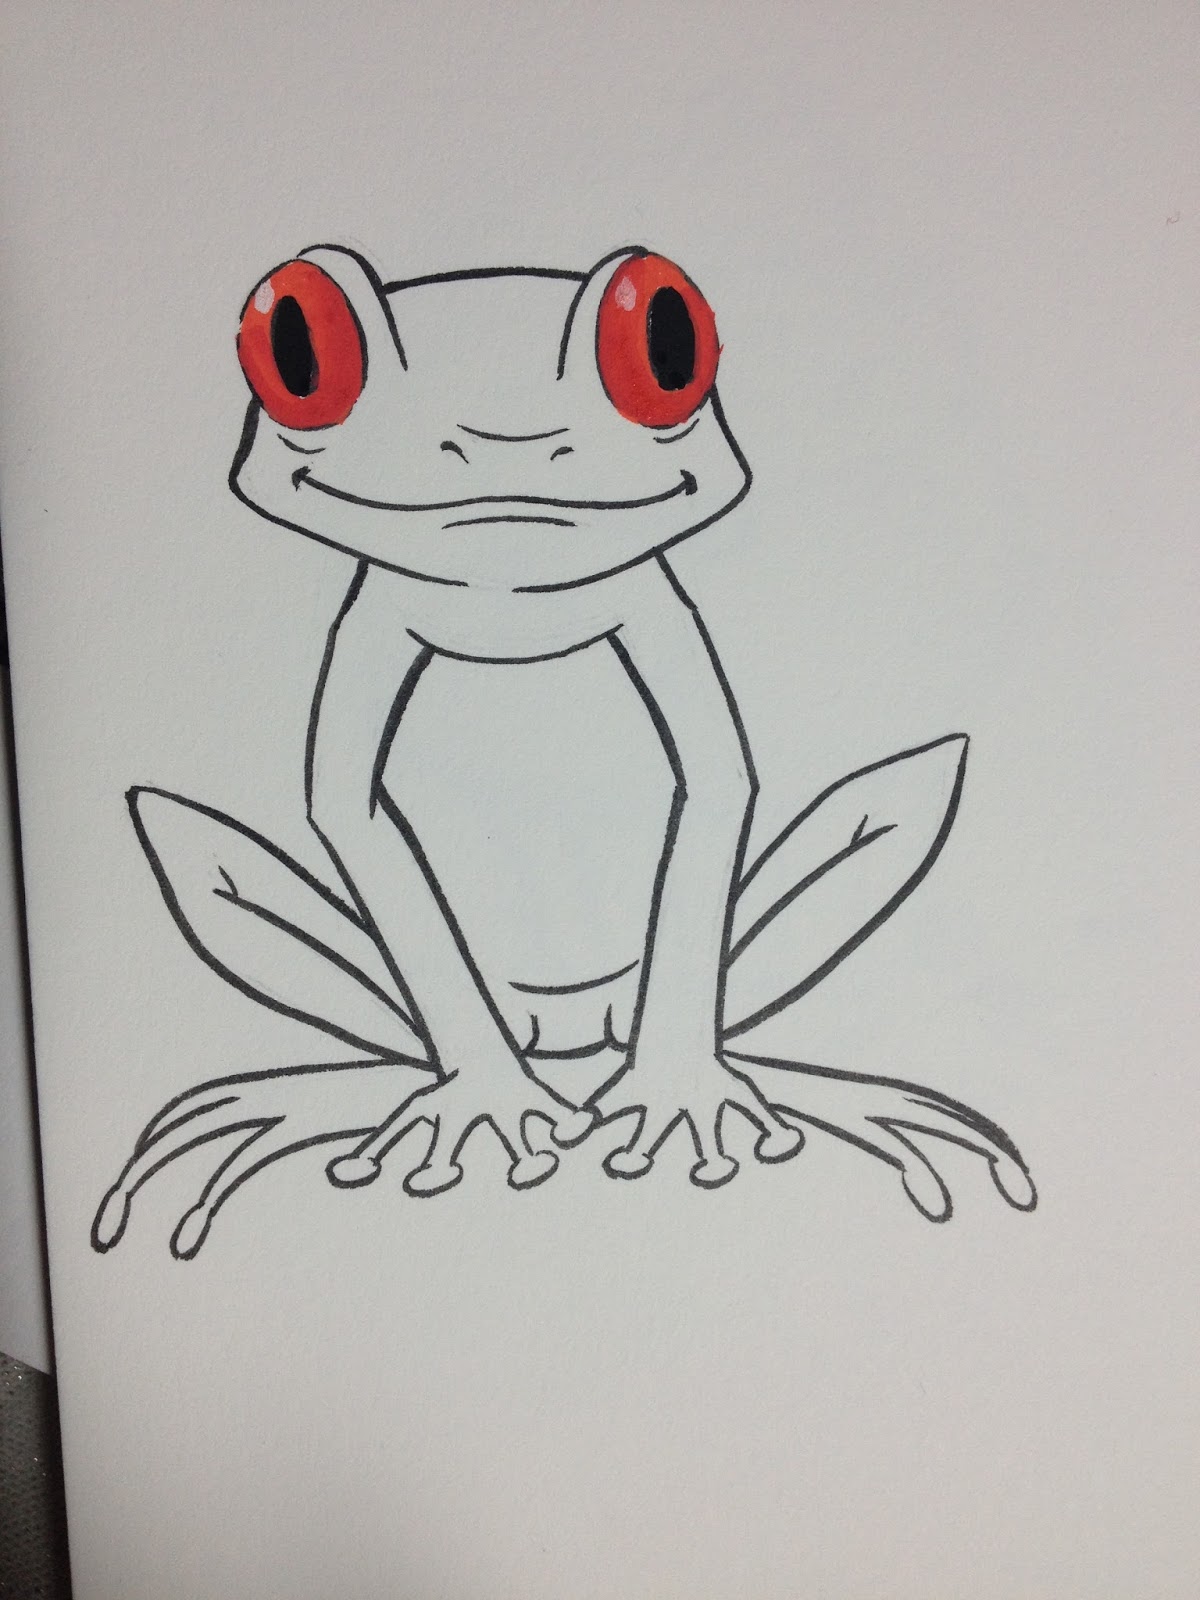


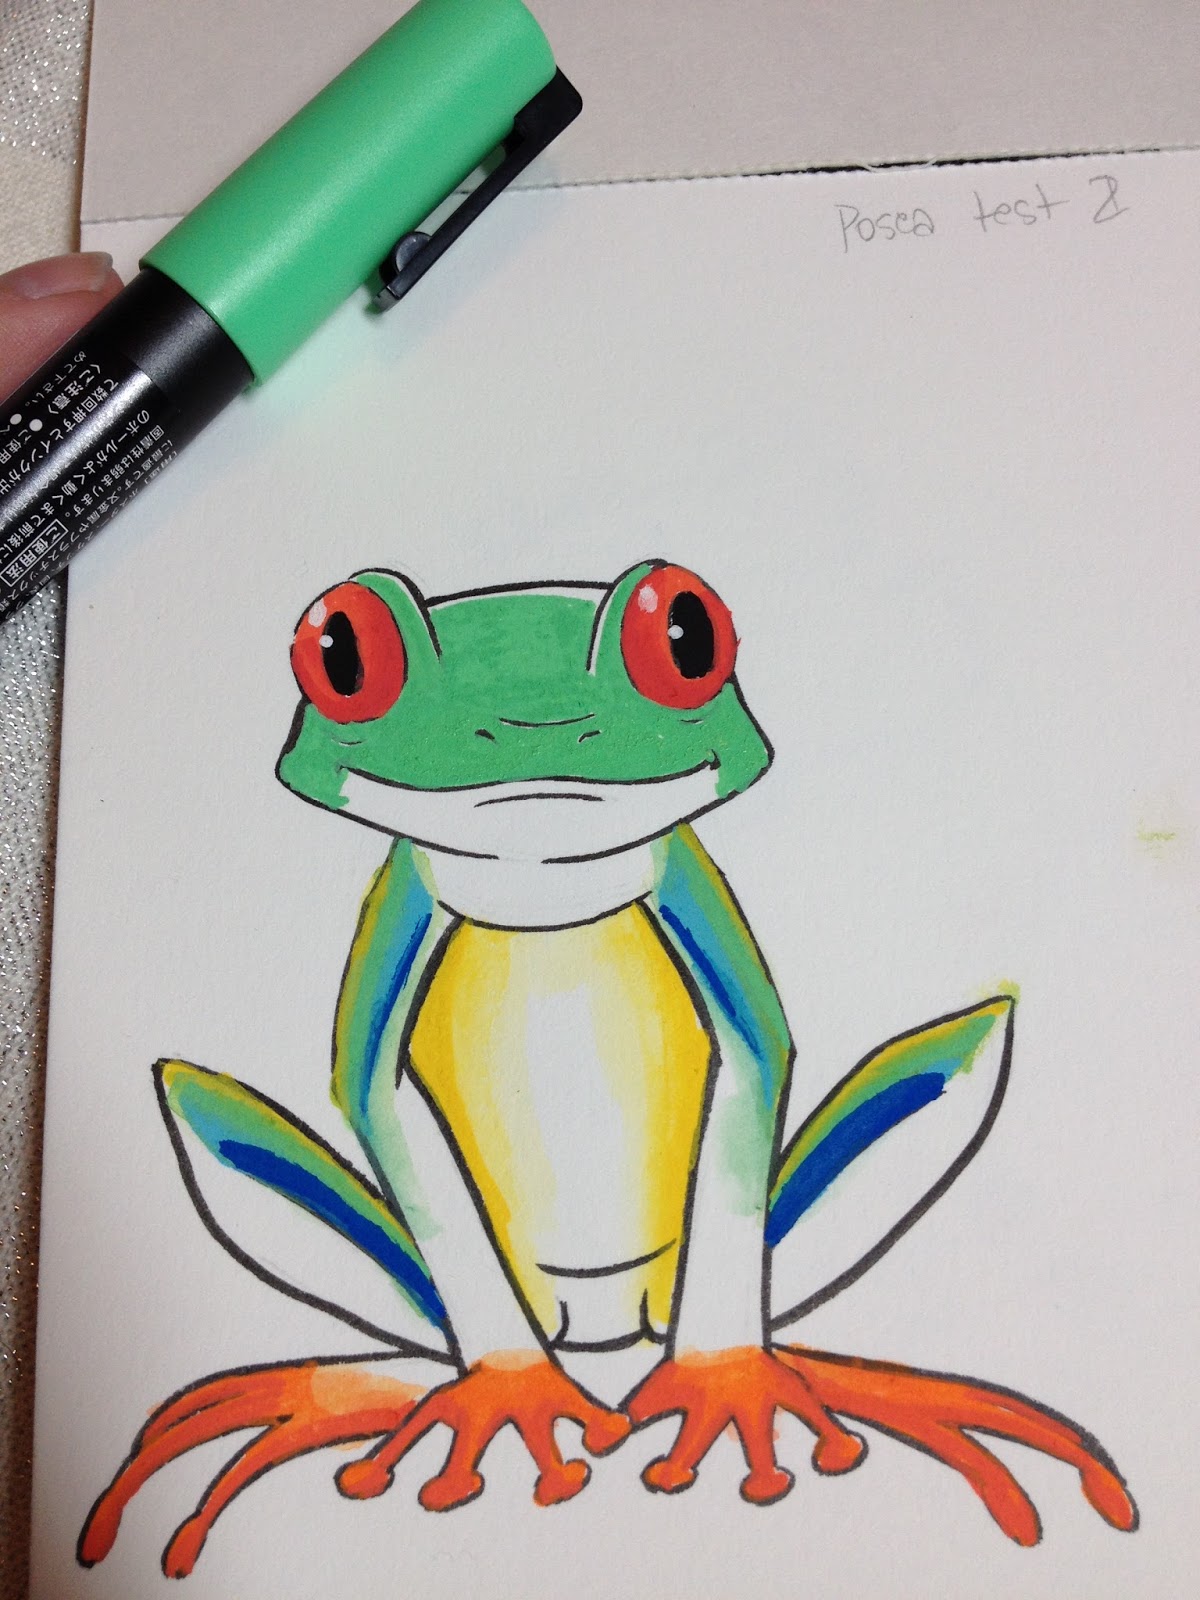
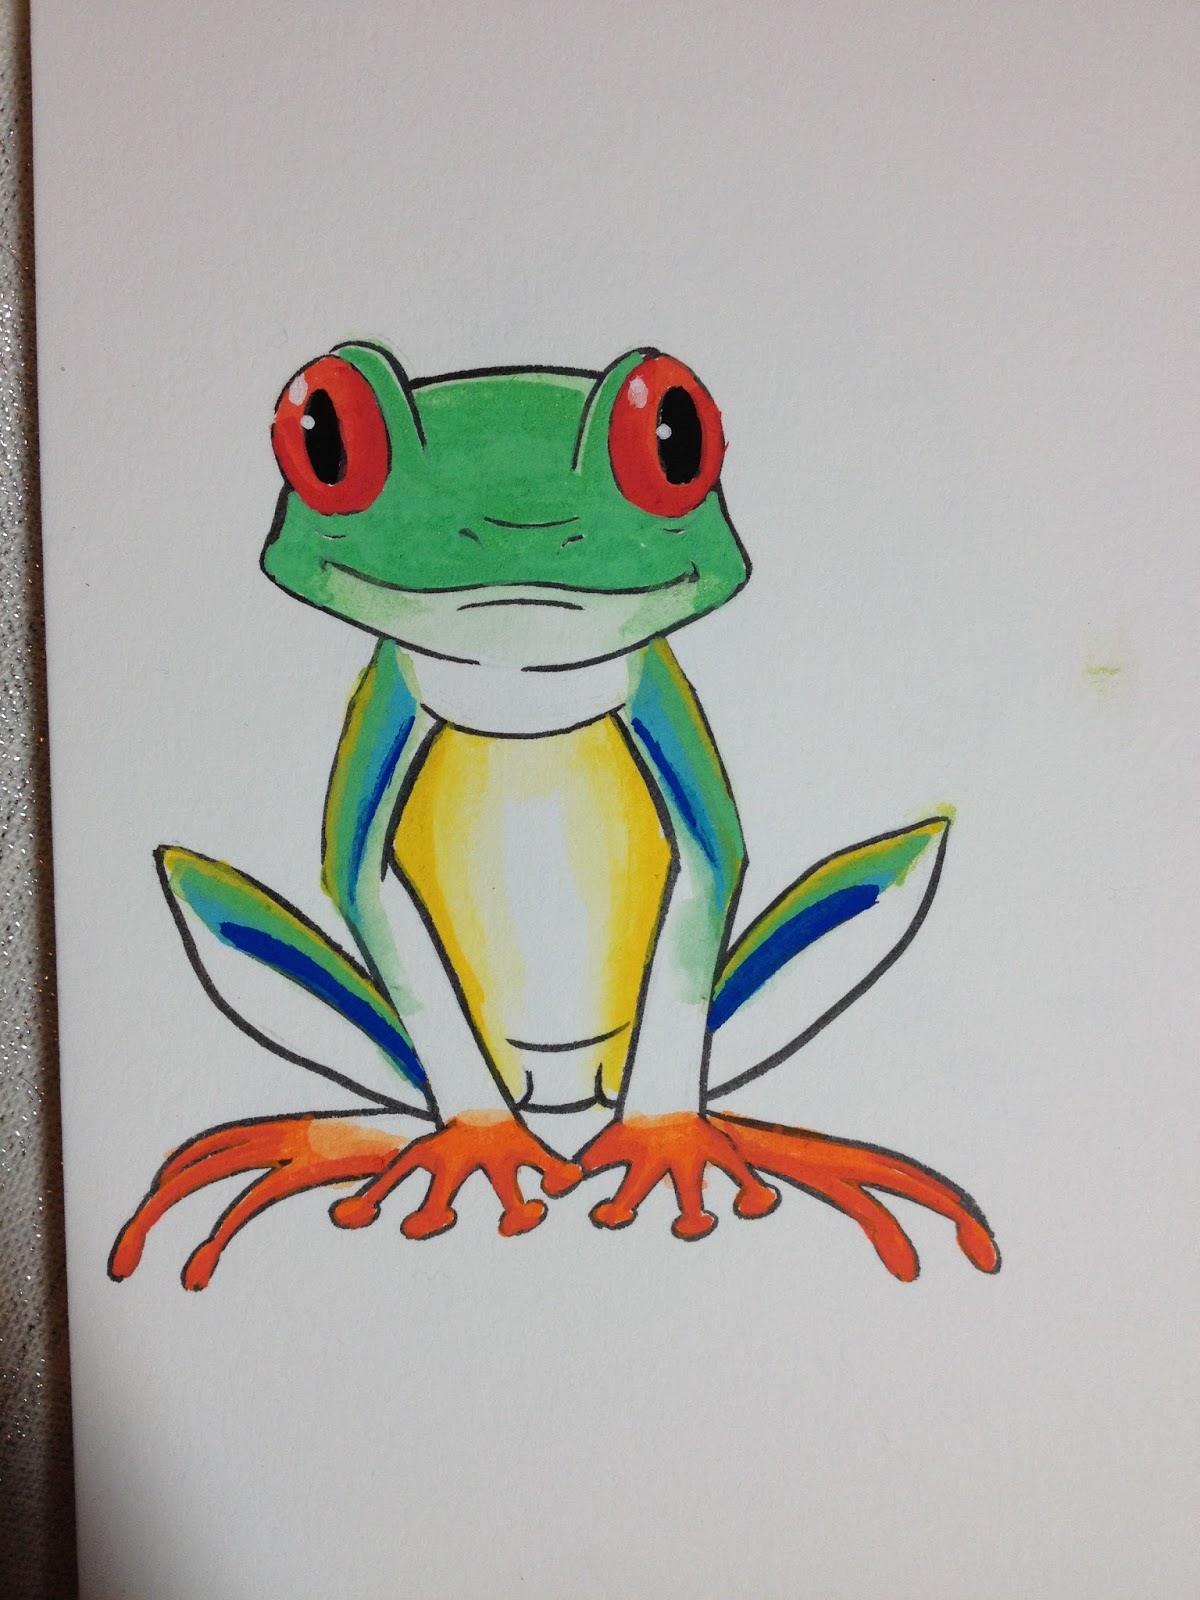
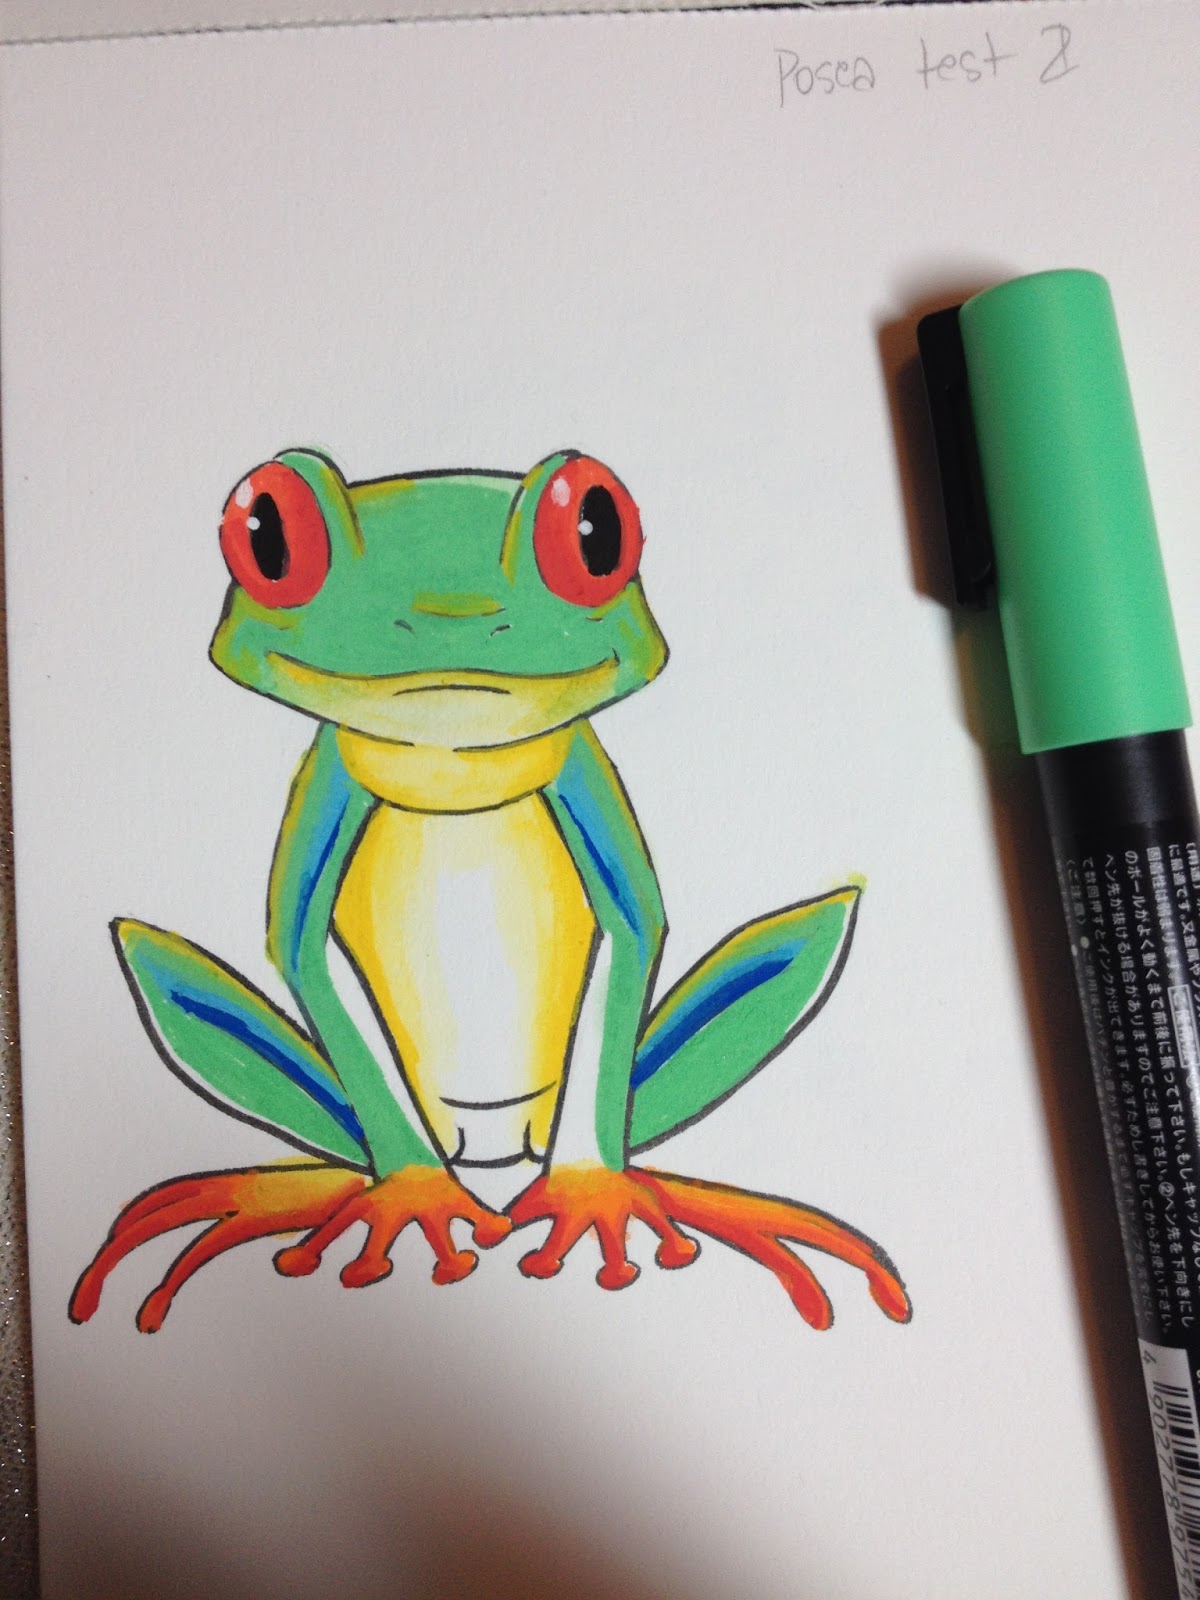
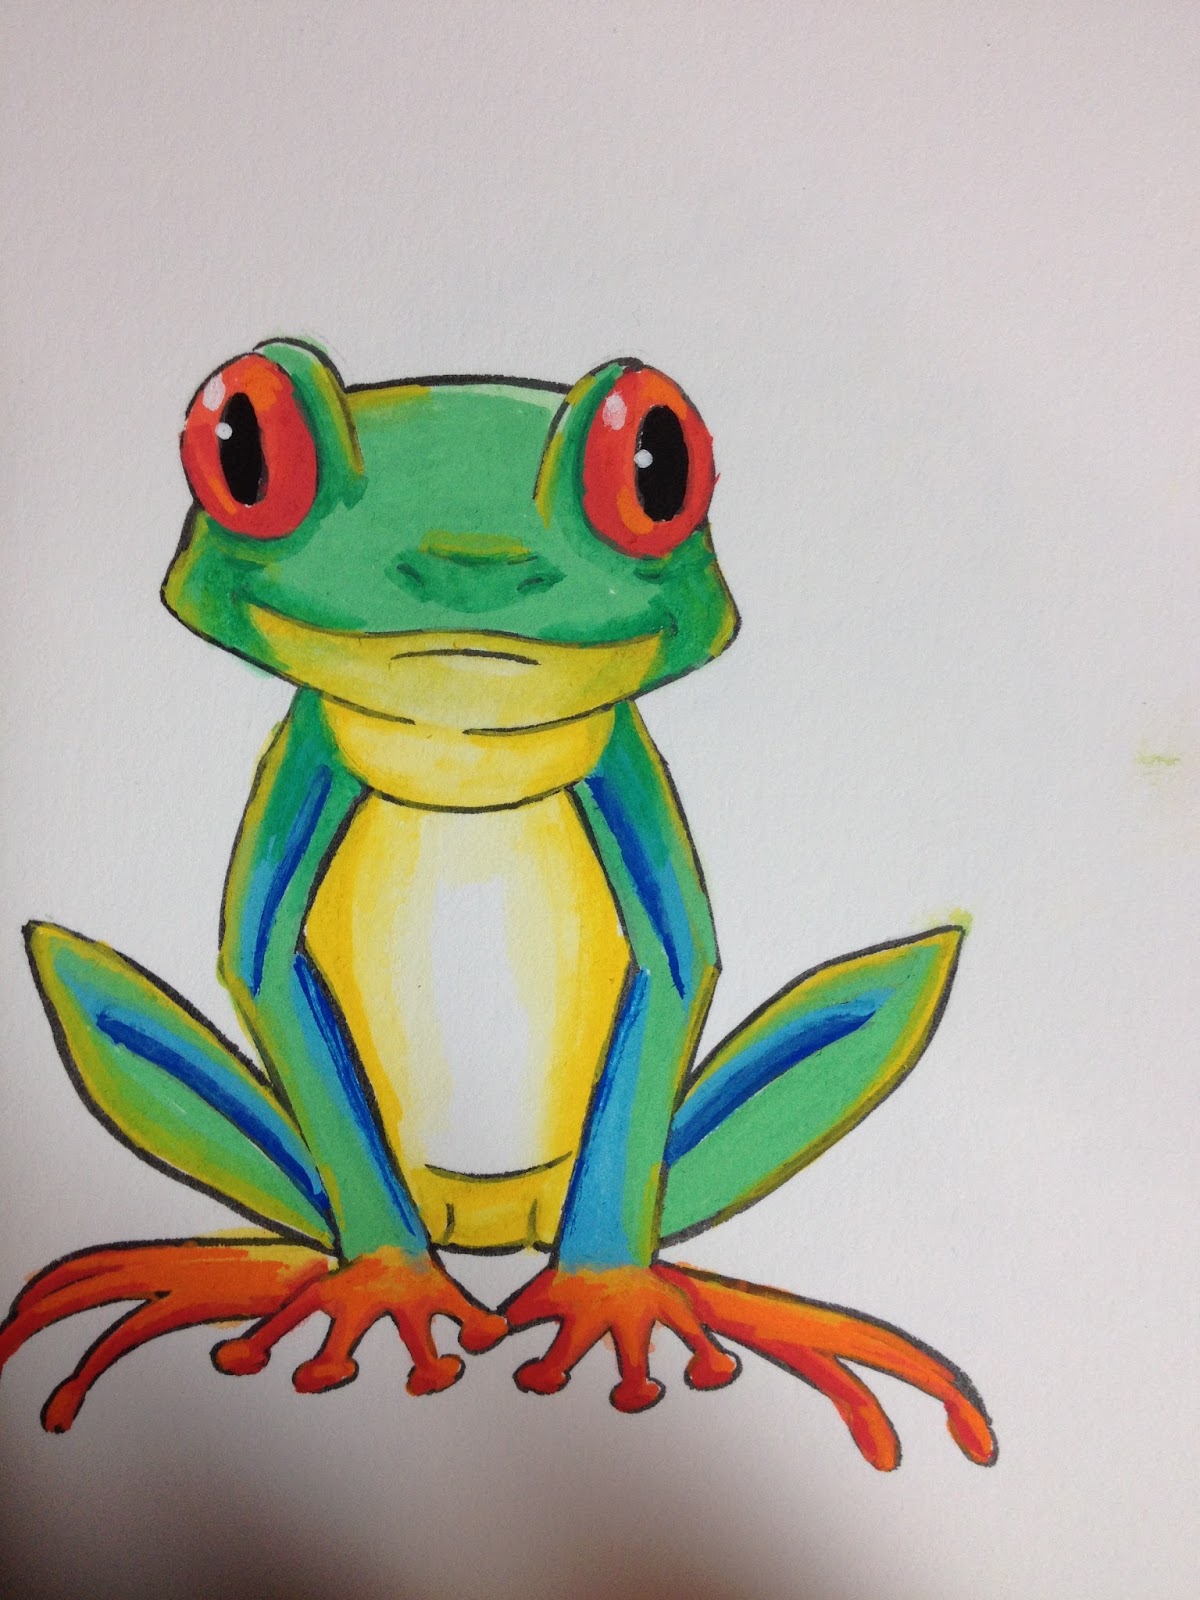

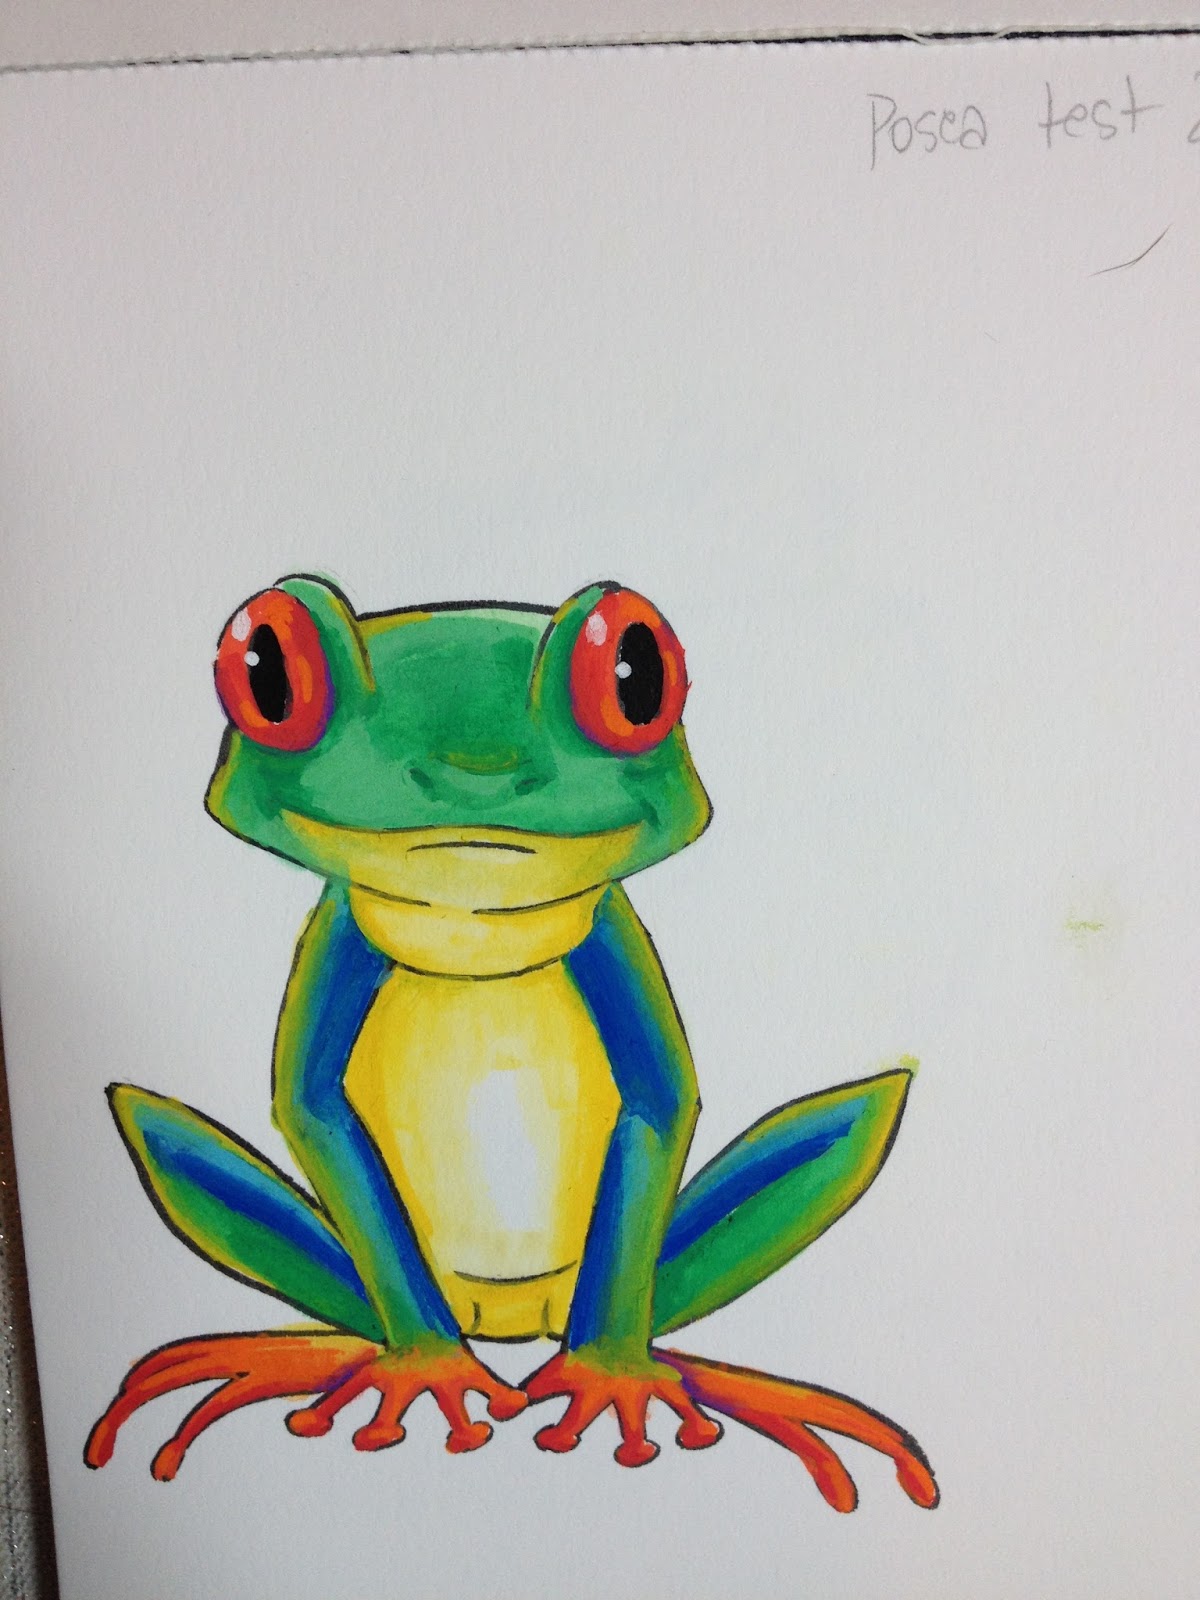


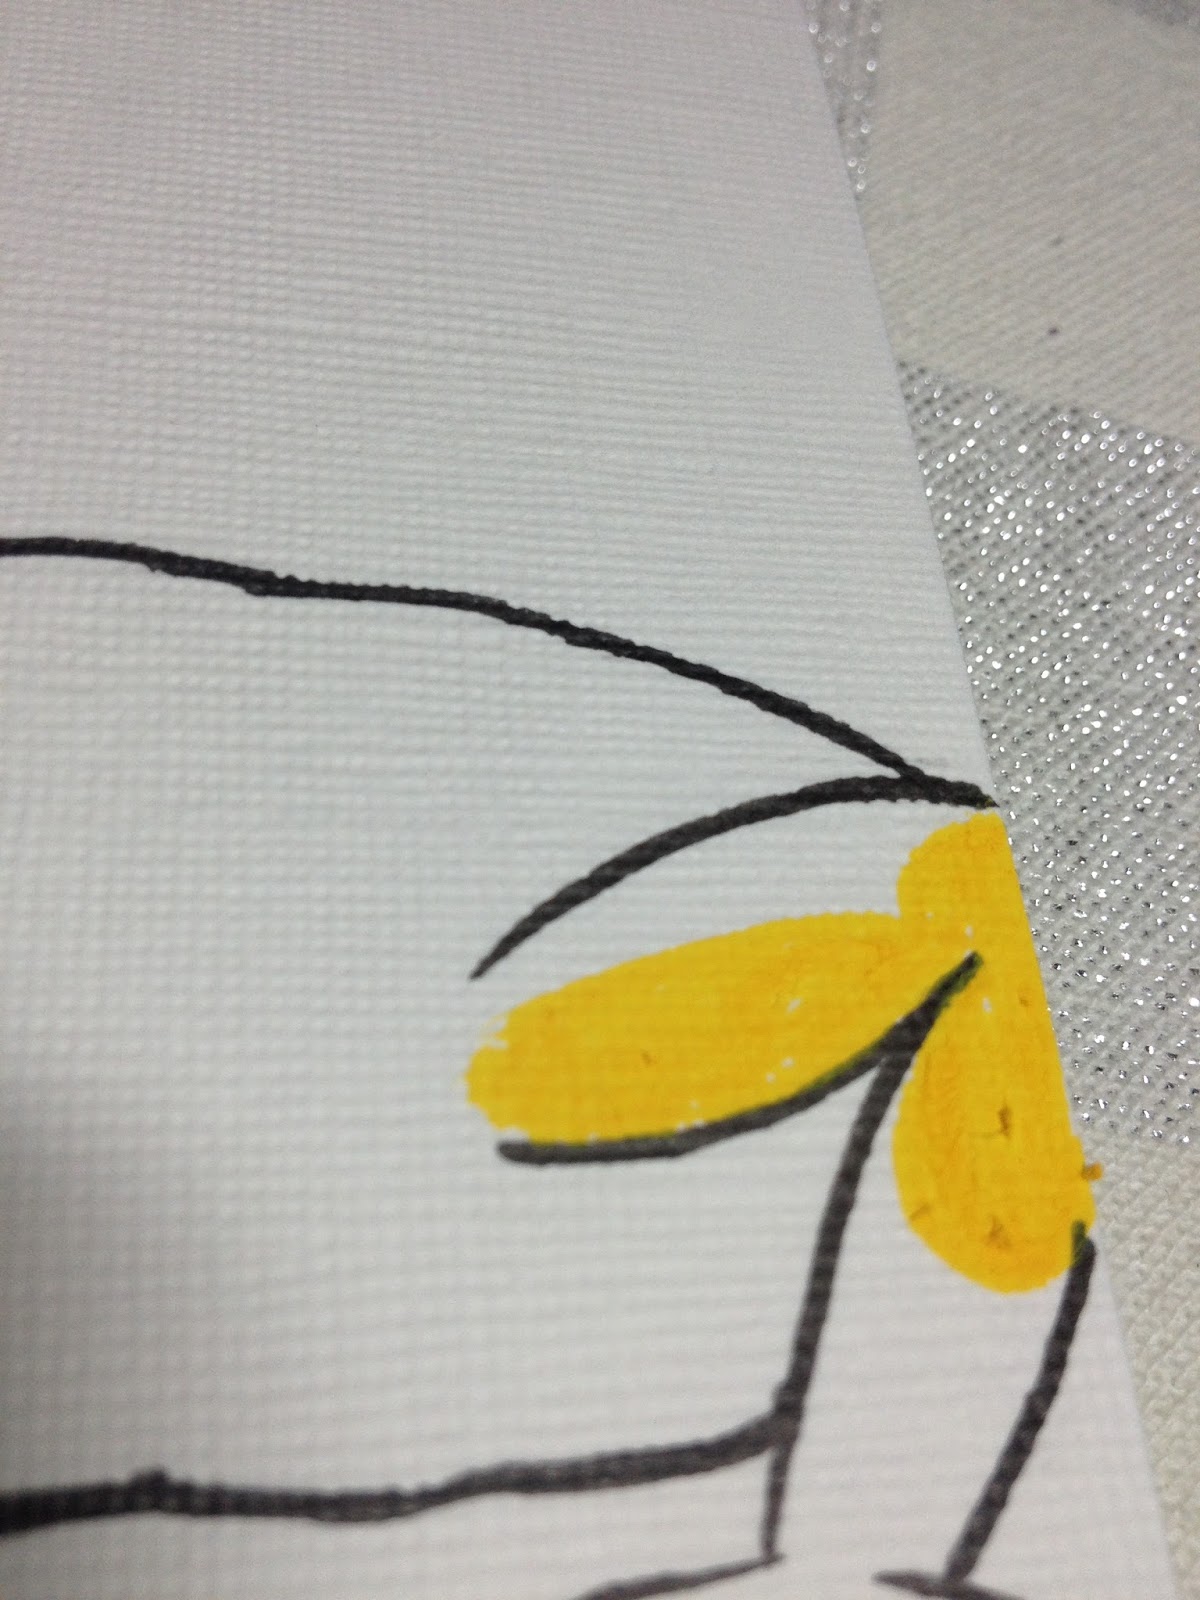
Although Stongehenge is tough, and could handle the water, it did start to pill with repeated applications, which slowed my working time. I had to stop and wait for the paper to dry before applying new layers of POSCA, lest the stiff nib scrub the paper into pills.
If you're interested in seeing how I I handle these markers, keep reading because I have a couple great videos towards the bottom of the post. One is a timelapse, for those of you who can learn quickly, and another is a step by step tutorial where I explain everything!
The Field Test- Strathmore Acrylic Paper
Since the Stonehenge paper pilled, I knew I'd need something even tougher- so I picked up some Strathmore Canvas paper while at David Art Supply in New Orleans. This canvas paper does not have an actual canvas surface, but a synthetic, plasticized surface, which seemed ideal.
I inked this salamander with a Sailor Mitsuo Aida brushpen. I thought it might run on the plastic-coated paper, but it seemed to do fine.
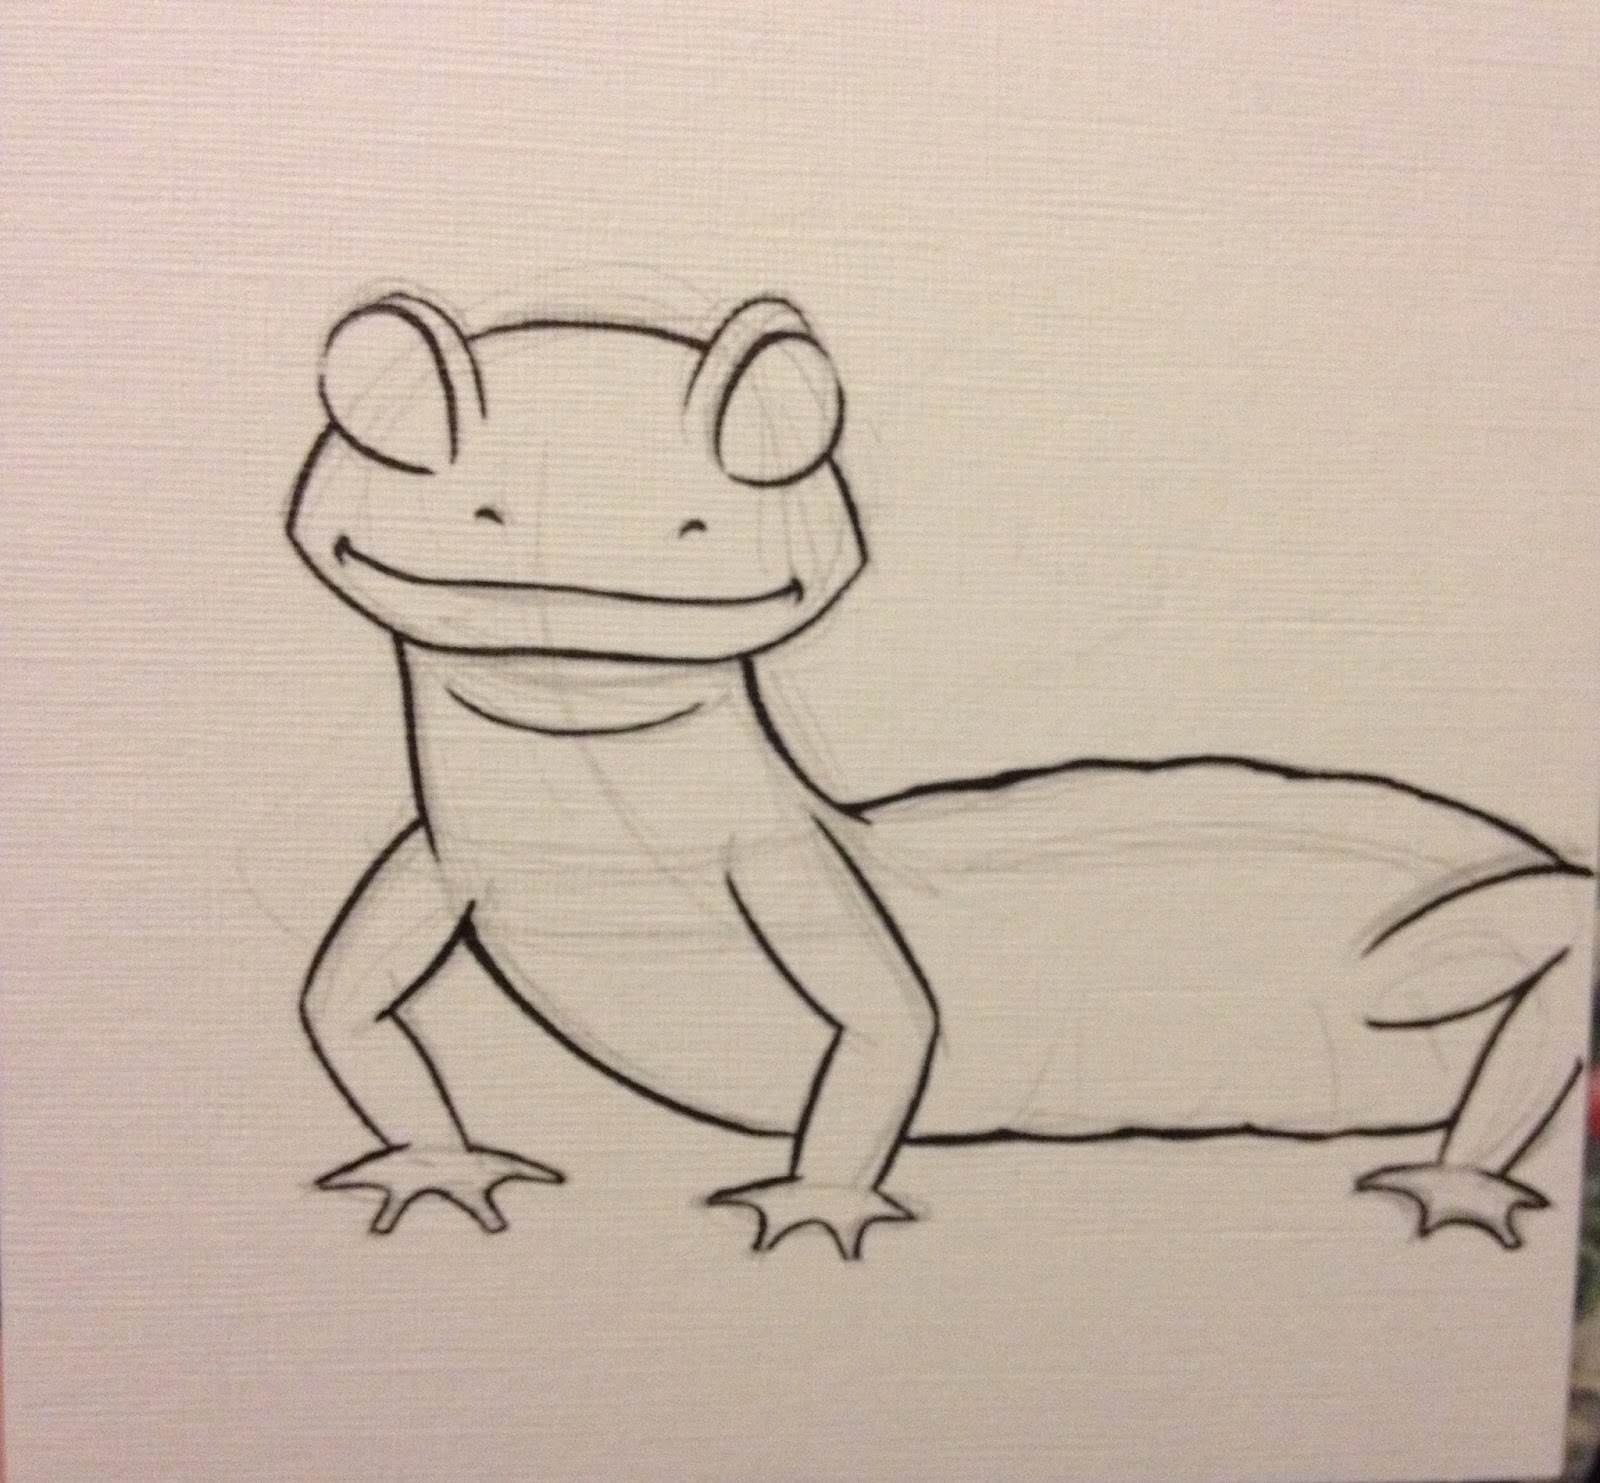

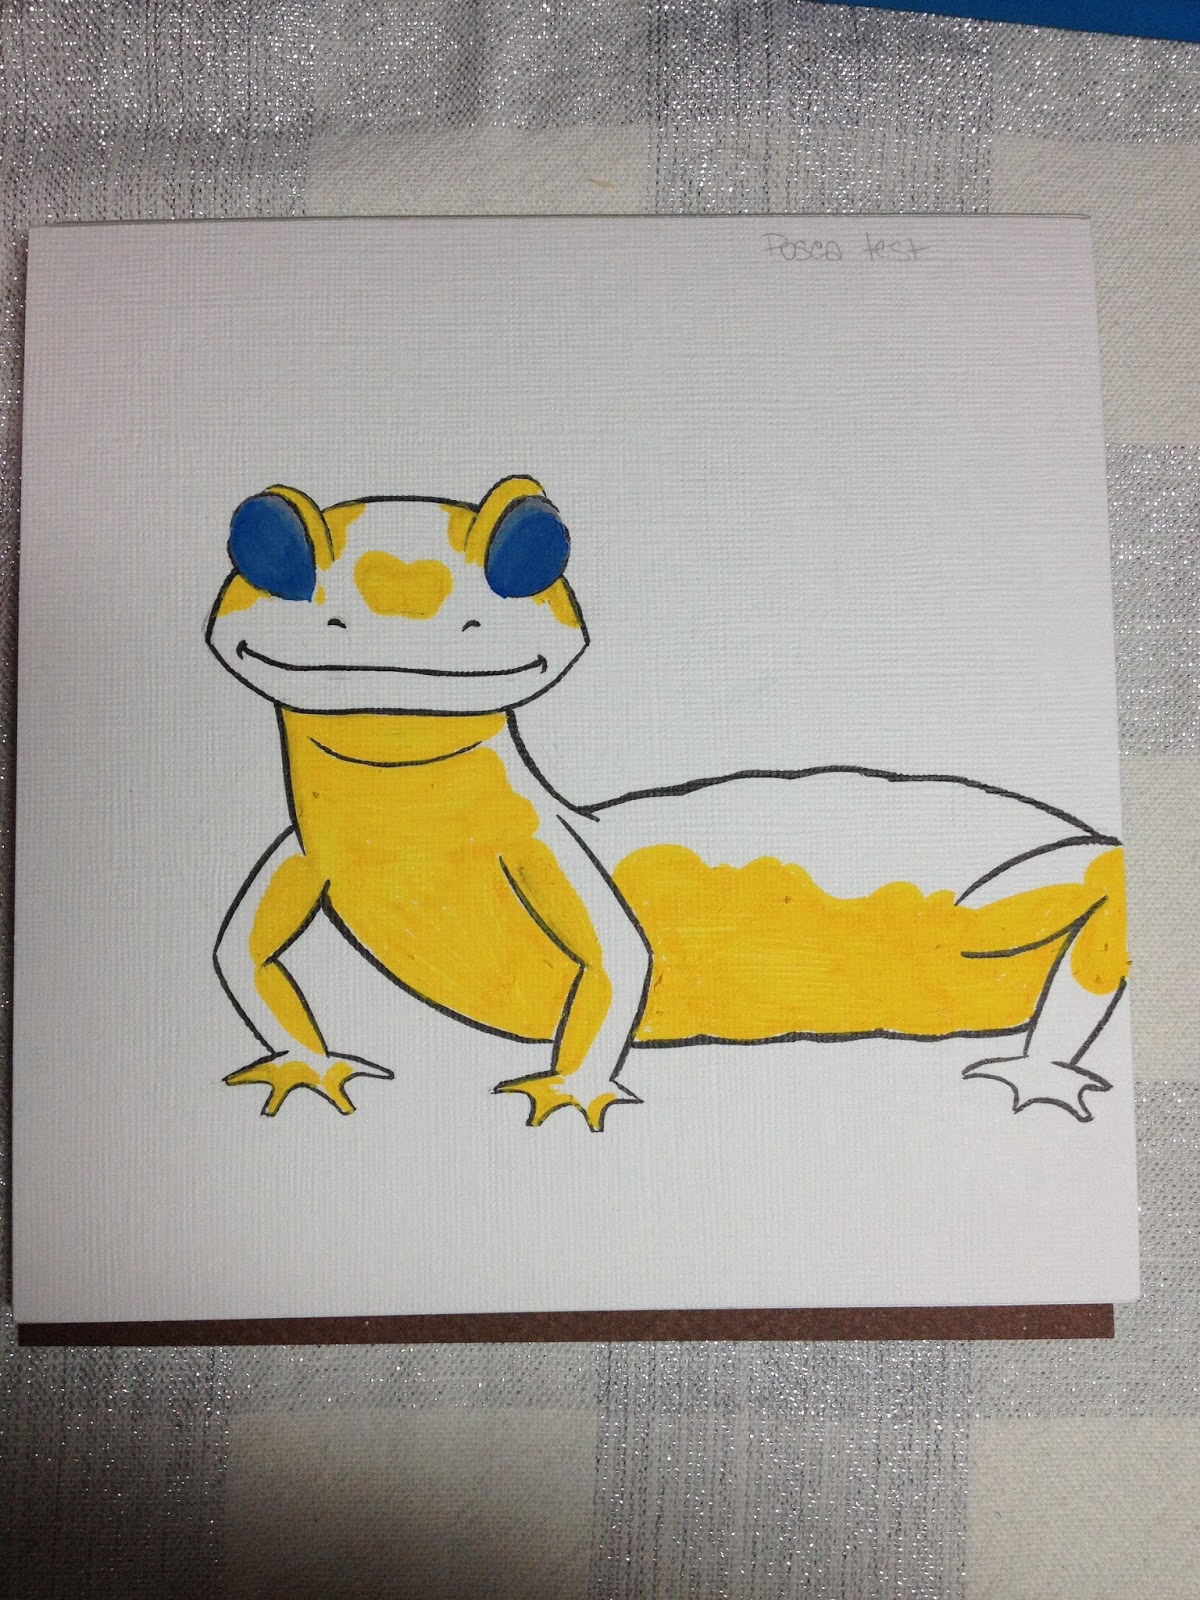
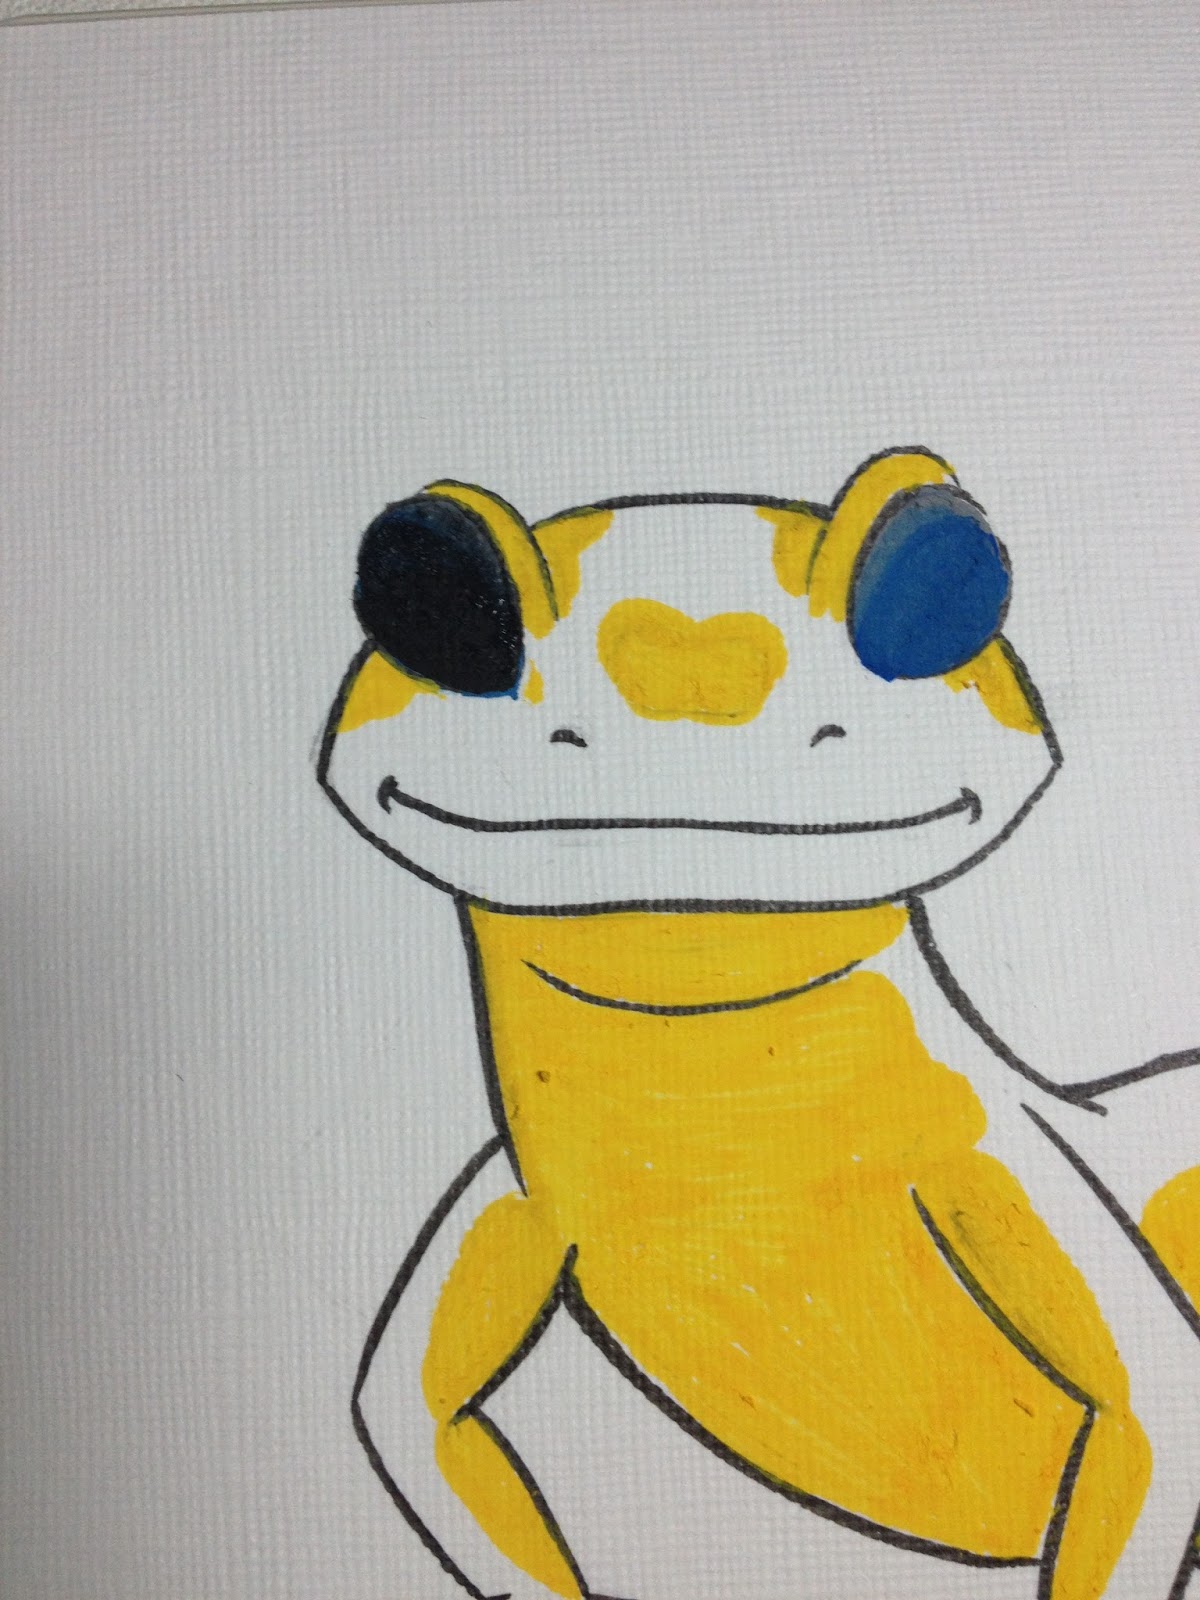
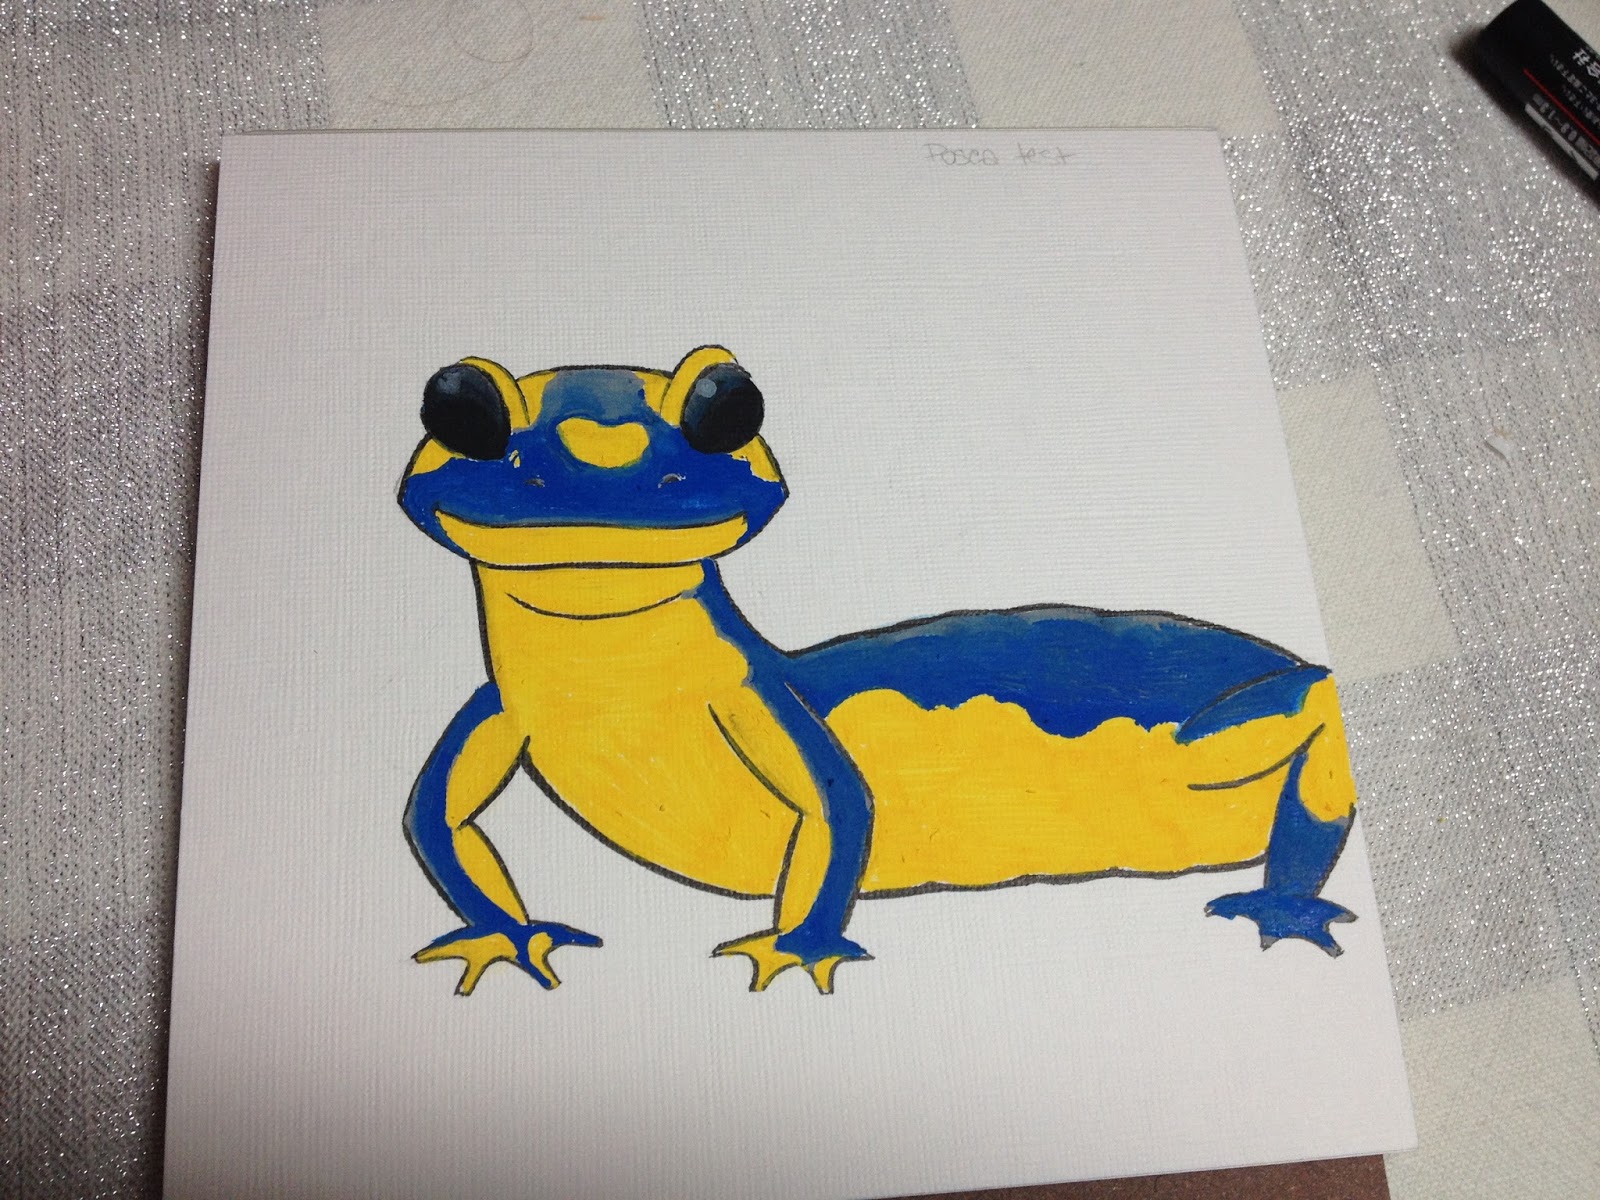

In retrospect, I should have left the yellow on the salamander's back open until I was ready to fill it in with yellow, but handling it this way also allowed me to build up color and gave the salamander a glossy appearance.


POSCA Tutorial Video- POSCA on Canvas, Amaterasu
Materials Used
Sailor Mitsuo AidaMono eraserDaler Rowney Nylon BrushesBlick mini canvas
POSCA Timelapse- POSCA on Black Canvas, Cat
The Verdict
These are a lot of fun to use, but don't make the mistake of thinking these are a replacement for waterbased or alcohol based markers, as they're very different.
POSCA markers are paint markers, and they work best on sturdy surfaces like gesso'd board, canvas, or canvas board. The stiff nibs of the bullet and chisel nib are prone to tearing up papers, so if you want to use POSCA markers, I recommend you skip the paper and go for sturdier scaffolding
POSCA markers
Permanent when dryWaterbasedCan be blended with water while wetOpaque
Alcohol Based Markers
TransparentCan be blended with alcohol solutions- isoproply alcohol, blender solutionsCan always be reworked with blender, alcohol, or other markersRelated Videos
Getting Started with Posca Paint Pens - Part 1 - Joseph Tubb
Getting Started With Posca Paint Pens - Part 3 - Blending- Joseph Tubb
Posca x Miss Wah - Kawaii Graffiti Canvas (Vol 1) - Miss Wah
Outside Resources
POSCA FAQ
More Inspiration: http://www.posca.com/uk/customisation
Workshops/Tutorials: http://www.posca.com/uk/creative-work...
POSCA Blog: http://www.posca.com/uk/news
If you enjoyed this post, or found it useful, inspiring, or informative, please consider backing my Patreon to help fund future posts like the one above. Posts like this take a lot of time, energy, resources, and research to write, photograph, record, and illustrate, and your pledge can go a long way towards ensuring there's a future for them. This blog is currently sponsor-free, meaning everything is paid for out of my pocket- the materials reviewed, the materials tested on, the equipment used to photograph, the equipment used to record, and a show of support from readers who enjoy my content, especially financial support lets me know that you guys are invested in my content. If a monthly pledge is outside your budget or comfort-zone, a one time donation can be made via the Paypal link in my sidebar. You can learn more about the community goals of my Patreon here.
If both of these are not an option for you, please consider pledging your time- clicking affiliate links when interested in the product, watching at least 30 seconds of the ads before videos, occasionally clicking ads on the blog that may be of interest to you. Every click ads up, and the money earned goes towards paying the bills, keeping the lights on, and funding more posts.
Please consider donating to this blog or purchasing from Natto-shop (http://nattosoup.com/shop) if you want me to continue publishing quality content. All materials tested were purchased from my own pocket. Keep on Truckin' Nattosoup is not under any sponsorship.
March 27, 2016
Target Art Supply Series: Miscellaneous Supplies
This post was sponsored by me. All materials featured in this post were purchased out of my own pocket. If you enjoy content like this, please consider pledging to
my Patreon
to help fund the future of Nattosoup Studio Art and Process Blog. Backers can unlock community goodies like more reviews and tutorials, as well as personal goodies, like Backer Exclusive Request Livestreams, comic downloads, and even physical rewards like stickers and charms. Your financial support not only compensates me for the time spent working on this blog (which is significant), but also goes towards purchasing more products to review and test. If a monthly contribution isn't really in your future, a one time donation via the Paypal link in my sidebar is also much appreciated. While your contributions are never mandatory, I would sincerely appreciate if you checked out my art supply review/ art tutorial focused
YouTube channel
for even more great content, and sat through at least thirty seconds of the ads on the videos you watch. Every ad adds up towards a sustainable lifestyle.
In the course of the Target Review Series, we've looked at Up and Up washable markers, Up and Up's Drawing Book, mechanical pencils from Target, ek tool's Journaling and Calligraphy pens, Up and Up washable paintbrush markers, and even Up and Up's washable watercolors. The vast majority of these products are aimed at school children, but my pickings were pretty slim at the Kenner Target- I bought the best they had, unless I'd covered the same product in the Walmart Art Supply Review Series. What remains are miscellanea- supplies that are important, but don't require a full post to review.
Of course, I cannot review all supplies sold at Target, so if there's a supply you're particularly curious about, or think my readers would be interested in, you can always either donate the product directly to me, donate a Target gift card, or you can make a donation via my Paypal link in the sidebar. Make sure you earmark what the donation should be purchasing (I can't read your mind, no matter how hard we try), and I'll get to it as soon as I can.
These products are all by Yoobi, a children's school supply manufacturer whose motto is 'one for you. one for me'. Their supplies are color coordinated in bright colors- hot pink, lime green, neon blue, vibrant purple, and they make all sorts of stationary for school or for home. Right now, their supplies seem to be the most prevalent (after Crayola), so it was difficult to NOT buy Yoobi supplies. While they do offer markers, crayons, and color pencils, and I've been given a donation to purchase those for review, I'm saving those for another date, as the Target review is already fairly extensive.
How Yoobi Works
Yoobi promises that when you purchase an item, Yoobi donates an item to their classroom packs, working with the Kids in Need Foundation.
Kids in Need Foundation
Kids in Need provides free school supplies to children in need via Resource Centers within their national network. These supplies are donated by companies like Yoobi and retailers, and Kids in Need Foundation does not have a warehouse where supplies are stored, so they cannot donate directly to schools, individuals, or families. You can learn more about the Kids in Need Foundation's mission here.
If you're interested in helping kids have fair access to school and art supplies, please consider donating to Kids in Need Foundation. Those of you who can afford to donate to Kids in Need Foundation should strongly consider doing so. I've donated $25, and if you can afford to match my donation, think about all the kids we can help together. $25 can provide a child with a backpack full of fresh supplies, levelling the playing field just a bit. You can also donate products, but they need to be new and in good condition.
Yoobi also donates supplies to the Starlight Childrens Foundation, which ensures that over 200 hospital schools have the supplies they need for their students to receive a good education.
Where to Buy Yoobi
The reason Yoobi is so prevelant at Target is not because it's a Target store brand (like the Up and Up products I've reviewed), but because it's a Target exclusive outside of the web. You can also purchase Yoobi supplies off their website, and will have access to a wider variety of goods than may be offered at your local Target. Yoobi's arts section has all sorts of goodies ranging from crayons to markers (to bundles!) in a tantalizing array of rainbow colors.
Yoobi doesn't just offer supplies for kids, they also offer colorful, fun office supplies to help you get organized. For those of you who are familiar with Poppin, Yoobi offers many similar products at a lower price point, and also does one to one donation with the abovementioned programs, so if you have a love of office supplies and a need for organization, you may want to consider Yoobi the next time you're decking out your desk. The Yoobi site has a free shipping option, so if you're looking to stock up on cute, well designed student grade art goodies or witty desktop organization, you should definitely check out the Yoobi site.
I have no affiliate program with Yoobi, but if you're interested in their products, you should definitely buy from their site or from your local Target, especially since they have a one for one donation program in place. I receive no compensation from this post, but if you enjoy my content, and would like to help fund more free to the public content like this, please consider backing my Patreon. Even a small pledge of $2 a month really helps provide the financial support necessary to keep this blog going.
Yoobi Mini Highlighters
I have artist friends who regularly use highlighters with their markers, so a young artist using highlighters to augment their marker collection isn't much of a stretch. These Yoobi highlighters were just so cute, and came in a rainbow of colors, I knew any artist looking to augment their collection wouldn't be able to resist giving them a shot. I sure couldn't, and into my cart they went.


The packaging is fairly sturdy plastic, and an interior sleeve securely held my highlighters in place. These highlighters fit inside my Yoobi pencil case almost perfectly, but took up a lot of room in the spacious case.

Some of the colors aren't exactly 'highlighters' the raspberry pink and purple are both a little dark to grab attention, but the numerous colors are perfect if you're into color coordinating your planner.
Although the packaging lists the color names, the markers themselves do not.
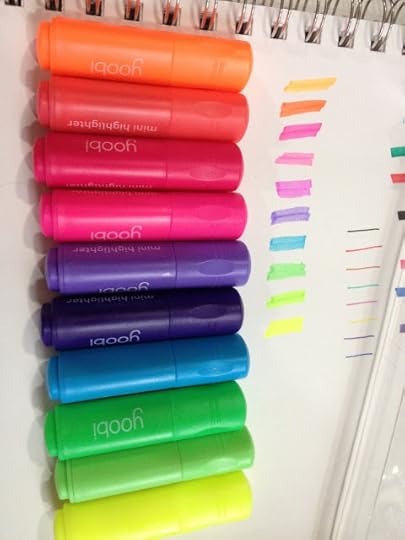


These highlighters are really cute, but difficult to handle, even with the caps posted to the back. They're more a novelty than a useful tool.

These mini highlighters have a tiny, stiff chisel nib.
I tested these markers for water solubility, and while they do dissolve in water, they quickly lose their brightness and fluorescent qualities.
Mini Field Test

This field test was sketched in my Blick sketchbook with a Prismacolor Fine Line Marker, which are alcohol marker proof and waterproof, and was allowed to cure for one hour before I attempted to apply color.

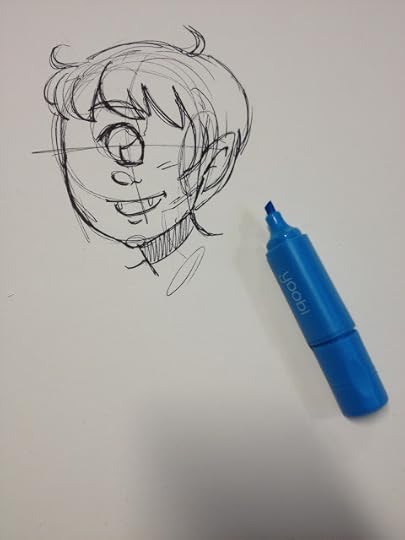


Despite allowing my Prismacolor Fine Line Marker to dry for an hour, the highlighters still smeared and reactivated the ink. I'm not sure if it was the abbreviated dry time (I usually allow inks to dry 24 hours before testing) or the highlighters themselves- I may have to test a few inks with these highlighters to figure it out. A highlighter that reactivates ink isn't good for artists or students- highlighters are intended to glide over ink without smearing what's underneath.


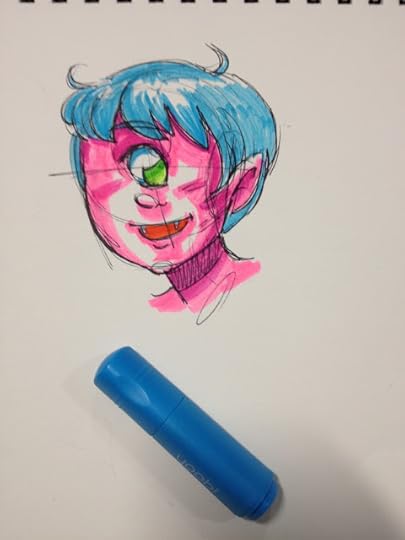


The inks don't really layer well, and repeated applications start to tear up the paper. These are waterbased markers, so if you DO want to use them for coloring, you need to allow the paper to dry thoroughly before applying the next layer.
The Verdict
These highlighters are really cute, and are fine for quickly highlighting small areas of text, but are difficult to handle as fluorescent markers. If you plan on using highlighters in your art, buy full size ones.
Yoobi EraserThis being a big box store, of course everything comes blister packed, lest one item walk away from the whole. The Yoobi erasers were no different.


The packaging says almost nothing about the erasers themselves- with student grade supplies, the materials used in production are rarely mentioned- and a lot about Yoobi.
The Fieldtest

For this test, I'm using my Write Dudes Gorilla Lead pencil as well as the Up and Up Mechanical pencil reviewed earlier in the Target Art Supply Review Series. The Write Dudes pencil has a darker, larger lead (a B, but maybe even a 2B) and the Up and Up Mechanical Pencil has a lighter lead, either an HB or an F.

First I attempted to erase normal writing.
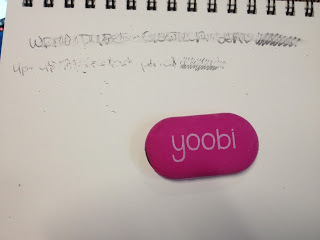
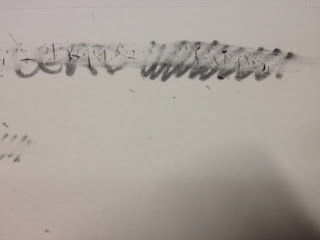
The Yoobi eraser couldn't cleanly erase the darker lead from my Write Dudes Gorilla Lead pencil, and had difficulty even erasing the HB .5 lead in my Up and Up mechanical pencils.

Next I tried to erase dense graphite coverage from both pencils.
 Gorilla Lead


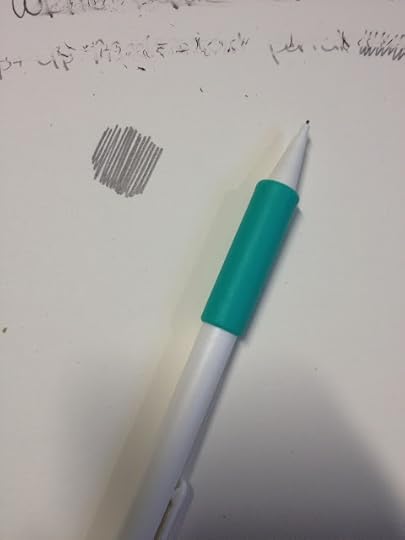 HB lead


Neither leads erased cleanly with the Yoobi eraser.
I recognize that this is a student grade eraser, but I am concerned that if it can't even erase cleanly in these tests, it would not be able to erase cleanly enough for a student to rework a drawing, or for a Scantron machine to accurately register marks made on a test. Even as a student grade supply, this particular eraser fails the test.
The Verdict
These Yoobi erasers are pretty awful compared to even the cheapest white vinyl eraser. They are rubbery and prone to smearing graphite. They leave a lot of eraser dust, and can't cleanly erase either the HB or B leads tested. I recommend skipping these particular erasers, and I generally recommend skipping out on colored or novelty erasers for art. I will be revisiting Yoobi erasers in a future post, as I have some coming in the mail.
Yoobi Pencil Case
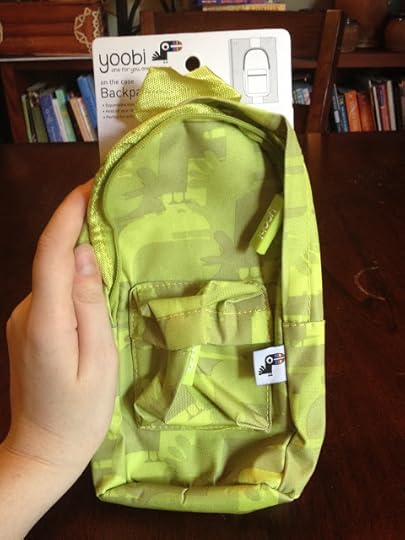

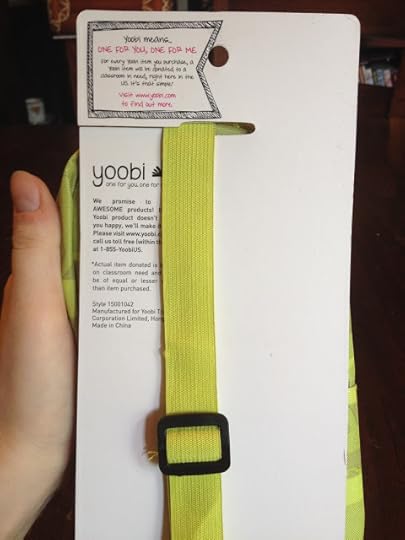


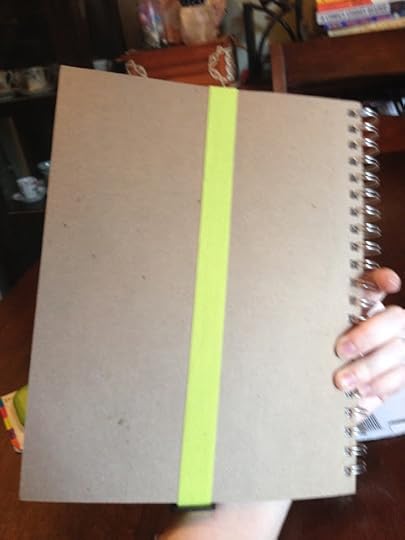
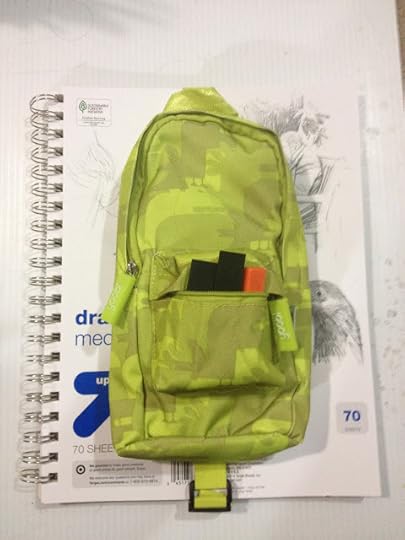
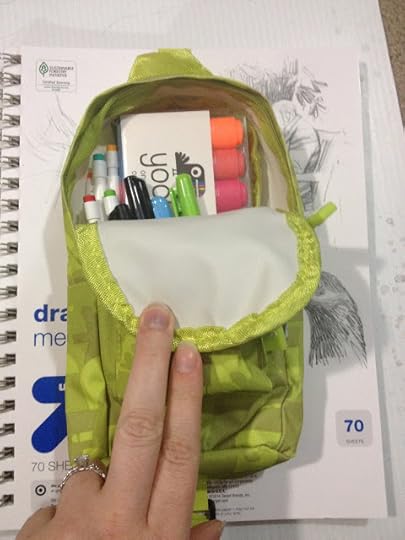
The elastic on this pencil bag is a little flimsy, but it is adjustable via a clip, so you can attach your pencil case to sketchbooks larger than my 8.5"x11" Up and Up Drawing Book, although I don't really recommend going much smaller, as the pencil case might overwhelm your book.
The interior is coated with white plastic, and the interior seams have seam binding, so this pencil case may be water resistant. The zippers have large, textured rubberized grips to help little (or big) fingers pull. The loop on the top of the pouch is made out of the same fabric as the seam binding, and feels a little cheap compared to the elastic.

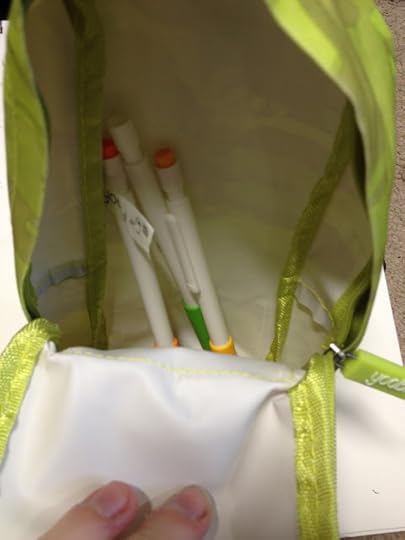

The zippers are a little sticky and difficult to get going, and the cute little pouch on the front is a little too small to really be useful. I found it difficult to pull out my erasers and extra leads from this pouch.
This case holds A LOT of stuff, so you may be tempted to overstuff it. This is great if you're a highschooler with a lot of things to carry- pencils, a variety of pens, erasers, mini rulers, a compass, highlighters, ect, but not necessary if you're an artist with a curated collection of everyday carry.
The Verdict
This pencil case has loads of room, and if you're still toting around a 15 pack of Crayola colored pencils and a 24 pack of crayons, you can shove those in here too. This is a fine pencil case, although you may find it more useful just to snip off the elastic as it tends to catch on things if not attached to a sketchbook.
Yoobi Pencil Sharpener
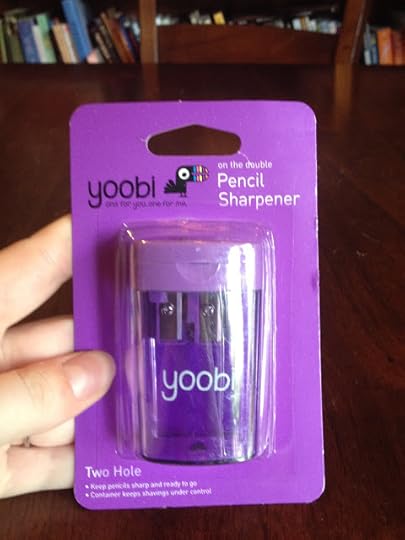

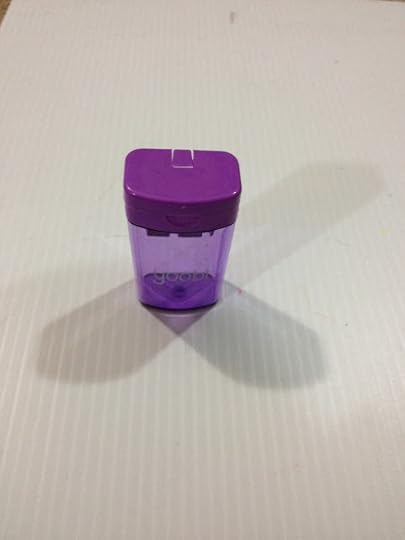


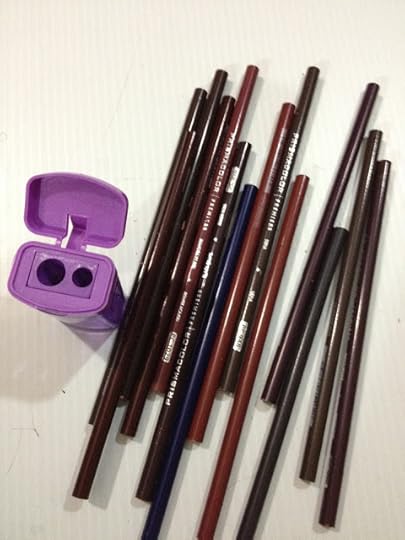

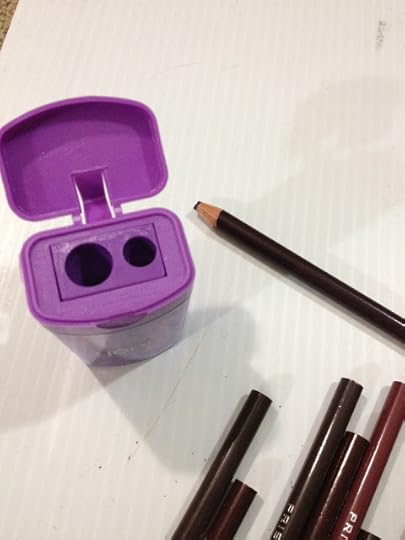
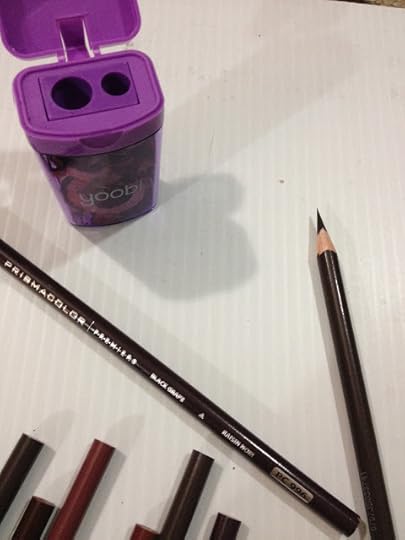
This particular Yoobi pencil sharpener is pretty awful- it snapped Prismacolor leads every time I used it. To be fair, Prismacolors are notorious for snapping off in hand sharpeners, especially if the pencils have been dropped in the past, and I usually use a KUM magnesium hand sharpener with no issue. It's a dual hole pencil sharpener, so if you have jumbo pencils in your collection, you should be able to sharpen them. The lead in those pencils tends to be thicker than that used in regular pencils, so it should be less prone to snapping.
The Verdict
Skip this sharpener. My absolutely favorite sharpeners don't tend to come with a compartment for shavings, I usually just use a box slated for the garbage as a bin in the meantime.
Overall Verdict
So far, I would recommend being very picky about your Yoobi purchases, as some work well and some do not. I'm revisiting Yoobi supplies in the future thanks to a donation from Heidi Black, so keep an eye out if you're interested in cheap art supply challenges or student grade supplies.
Please consider donating to this blog or purchasing from Natto-shop (http://nattosoup.com/shop) if you want me to continue publishing quality content. All materials tested were purchased from my own pocket. Keep on Truckin' Nattosoup is not under any sponsorship.
In the course of the Target Review Series, we've looked at Up and Up washable markers, Up and Up's Drawing Book, mechanical pencils from Target, ek tool's Journaling and Calligraphy pens, Up and Up washable paintbrush markers, and even Up and Up's washable watercolors. The vast majority of these products are aimed at school children, but my pickings were pretty slim at the Kenner Target- I bought the best they had, unless I'd covered the same product in the Walmart Art Supply Review Series. What remains are miscellanea- supplies that are important, but don't require a full post to review.
Of course, I cannot review all supplies sold at Target, so if there's a supply you're particularly curious about, or think my readers would be interested in, you can always either donate the product directly to me, donate a Target gift card, or you can make a donation via my Paypal link in the sidebar. Make sure you earmark what the donation should be purchasing (I can't read your mind, no matter how hard we try), and I'll get to it as soon as I can.
These products are all by Yoobi, a children's school supply manufacturer whose motto is 'one for you. one for me'. Their supplies are color coordinated in bright colors- hot pink, lime green, neon blue, vibrant purple, and they make all sorts of stationary for school or for home. Right now, their supplies seem to be the most prevalent (after Crayola), so it was difficult to NOT buy Yoobi supplies. While they do offer markers, crayons, and color pencils, and I've been given a donation to purchase those for review, I'm saving those for another date, as the Target review is already fairly extensive.
How Yoobi Works
Yoobi, pronounced “you-be,” means “one for you, one for me.” For every Yoobi item you purchase, a Yoobi item will be donated to a classroom in need, right here in the U.S. It’s that simple!Source
Yoobi promises that when you purchase an item, Yoobi donates an item to their classroom packs, working with the Kids in Need Foundation.
Kids in Need Foundation
Kids in Need provides free school supplies to children in need via Resource Centers within their national network. These supplies are donated by companies like Yoobi and retailers, and Kids in Need Foundation does not have a warehouse where supplies are stored, so they cannot donate directly to schools, individuals, or families. You can learn more about the Kids in Need Foundation's mission here.
If you're interested in helping kids have fair access to school and art supplies, please consider donating to Kids in Need Foundation. Those of you who can afford to donate to Kids in Need Foundation should strongly consider doing so. I've donated $25, and if you can afford to match my donation, think about all the kids we can help together. $25 can provide a child with a backpack full of fresh supplies, levelling the playing field just a bit. You can also donate products, but they need to be new and in good condition.
Yoobi also donates supplies to the Starlight Childrens Foundation, which ensures that over 200 hospital schools have the supplies they need for their students to receive a good education.
Where to Buy Yoobi
The reason Yoobi is so prevelant at Target is not because it's a Target store brand (like the Up and Up products I've reviewed), but because it's a Target exclusive outside of the web. You can also purchase Yoobi supplies off their website, and will have access to a wider variety of goods than may be offered at your local Target. Yoobi's arts section has all sorts of goodies ranging from crayons to markers (to bundles!) in a tantalizing array of rainbow colors.
Yoobi doesn't just offer supplies for kids, they also offer colorful, fun office supplies to help you get organized. For those of you who are familiar with Poppin, Yoobi offers many similar products at a lower price point, and also does one to one donation with the abovementioned programs, so if you have a love of office supplies and a need for organization, you may want to consider Yoobi the next time you're decking out your desk. The Yoobi site has a free shipping option, so if you're looking to stock up on cute, well designed student grade art goodies or witty desktop organization, you should definitely check out the Yoobi site.
I have no affiliate program with Yoobi, but if you're interested in their products, you should definitely buy from their site or from your local Target, especially since they have a one for one donation program in place. I receive no compensation from this post, but if you enjoy my content, and would like to help fund more free to the public content like this, please consider backing my Patreon. Even a small pledge of $2 a month really helps provide the financial support necessary to keep this blog going.
Yoobi Mini Highlighters
I have artist friends who regularly use highlighters with their markers, so a young artist using highlighters to augment their marker collection isn't much of a stretch. These Yoobi highlighters were just so cute, and came in a rainbow of colors, I knew any artist looking to augment their collection wouldn't be able to resist giving them a shot. I sure couldn't, and into my cart they went.
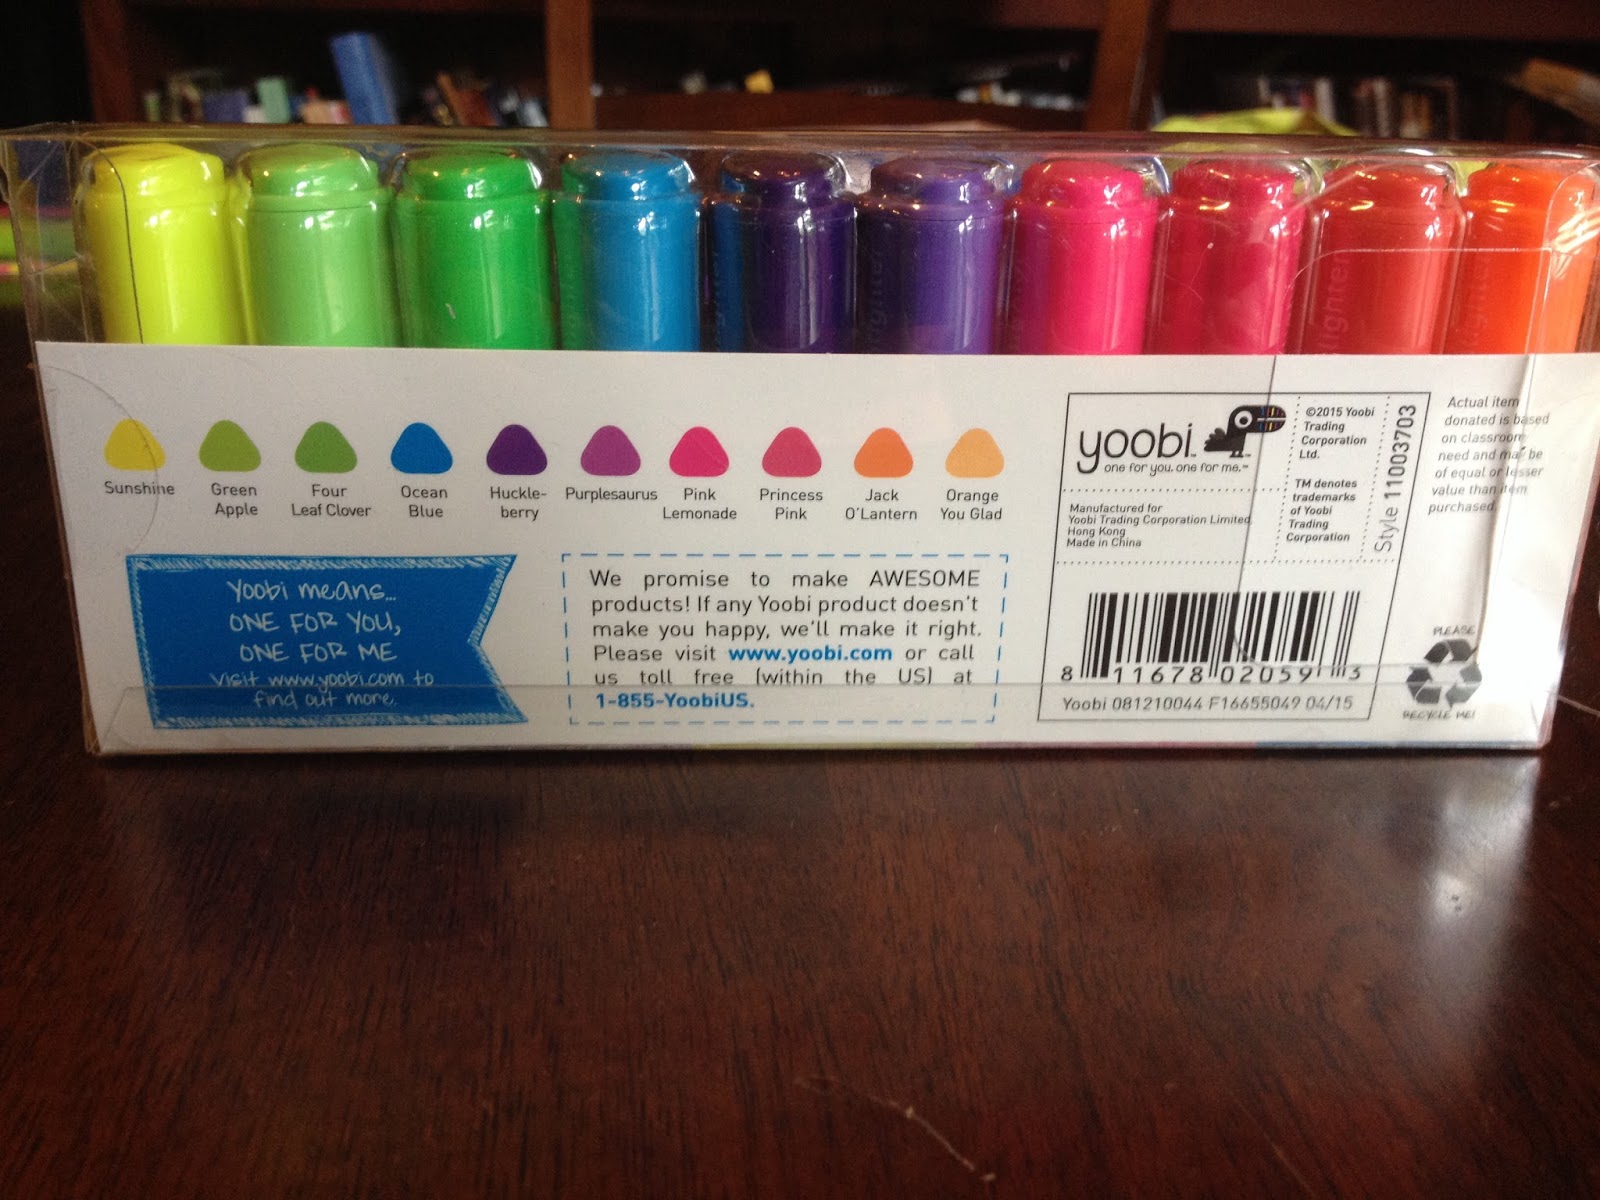
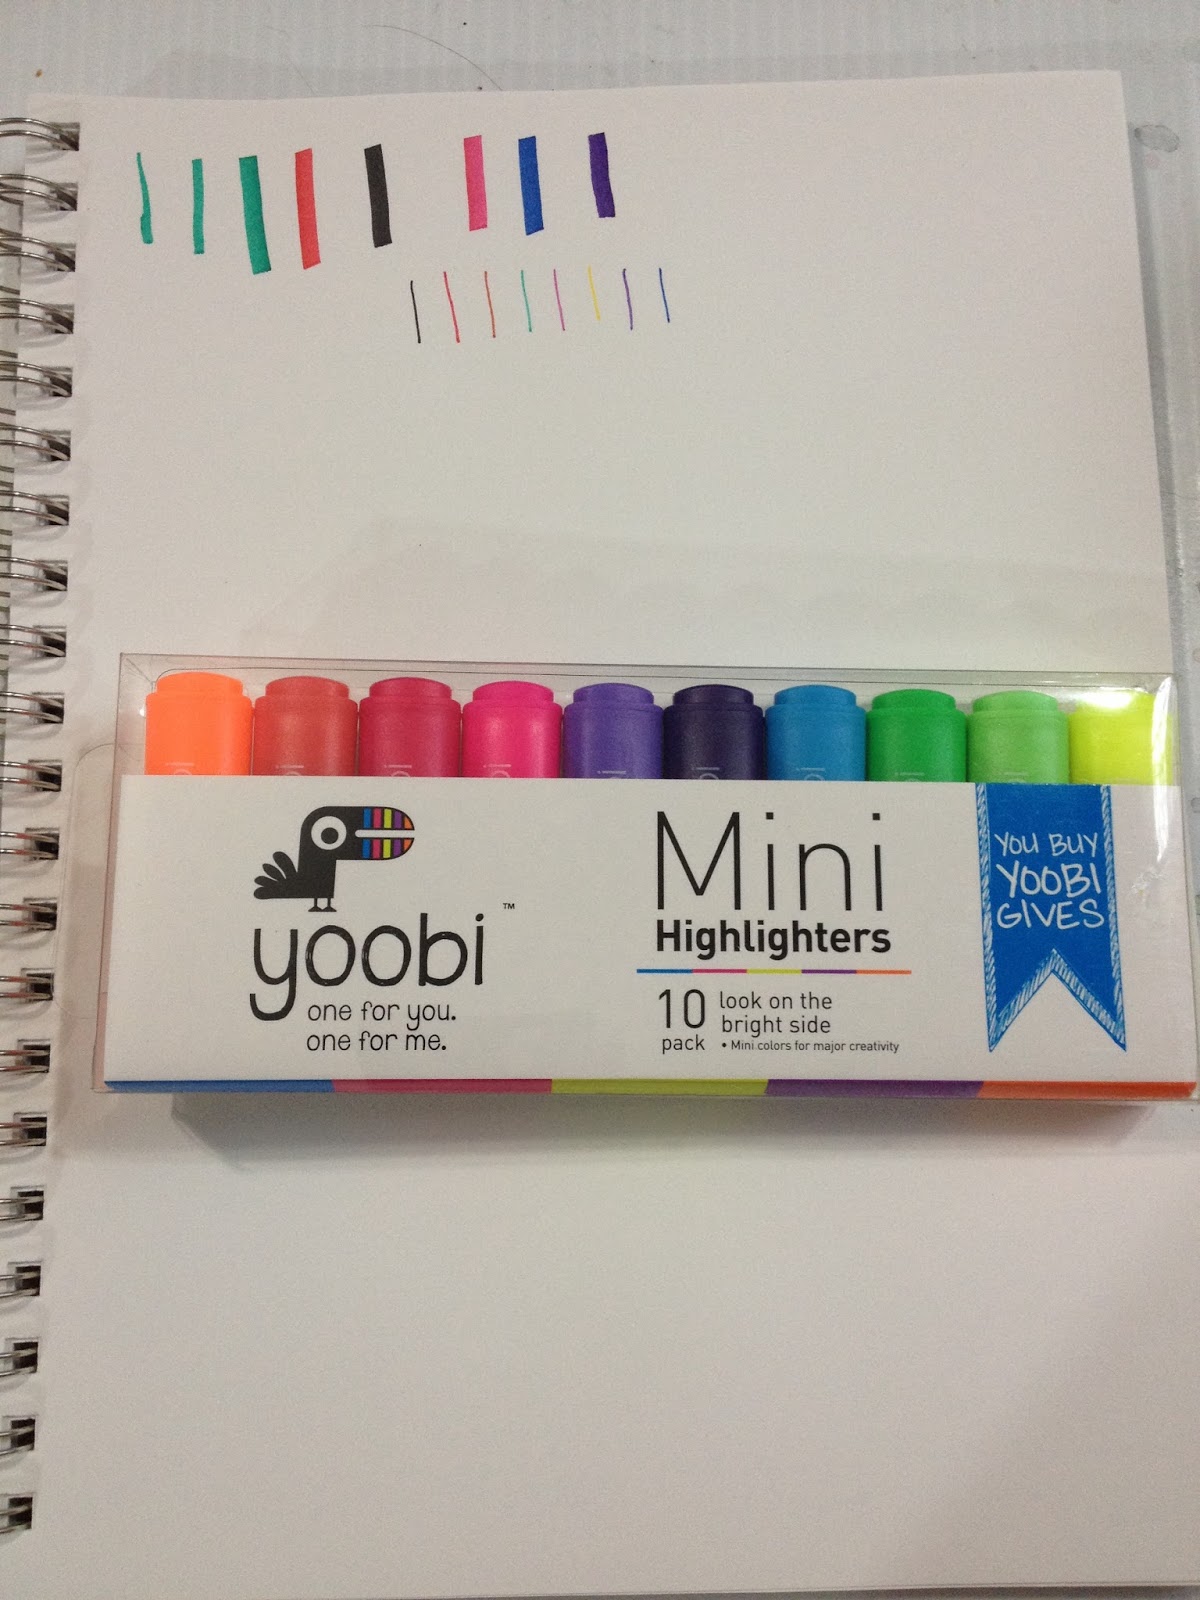
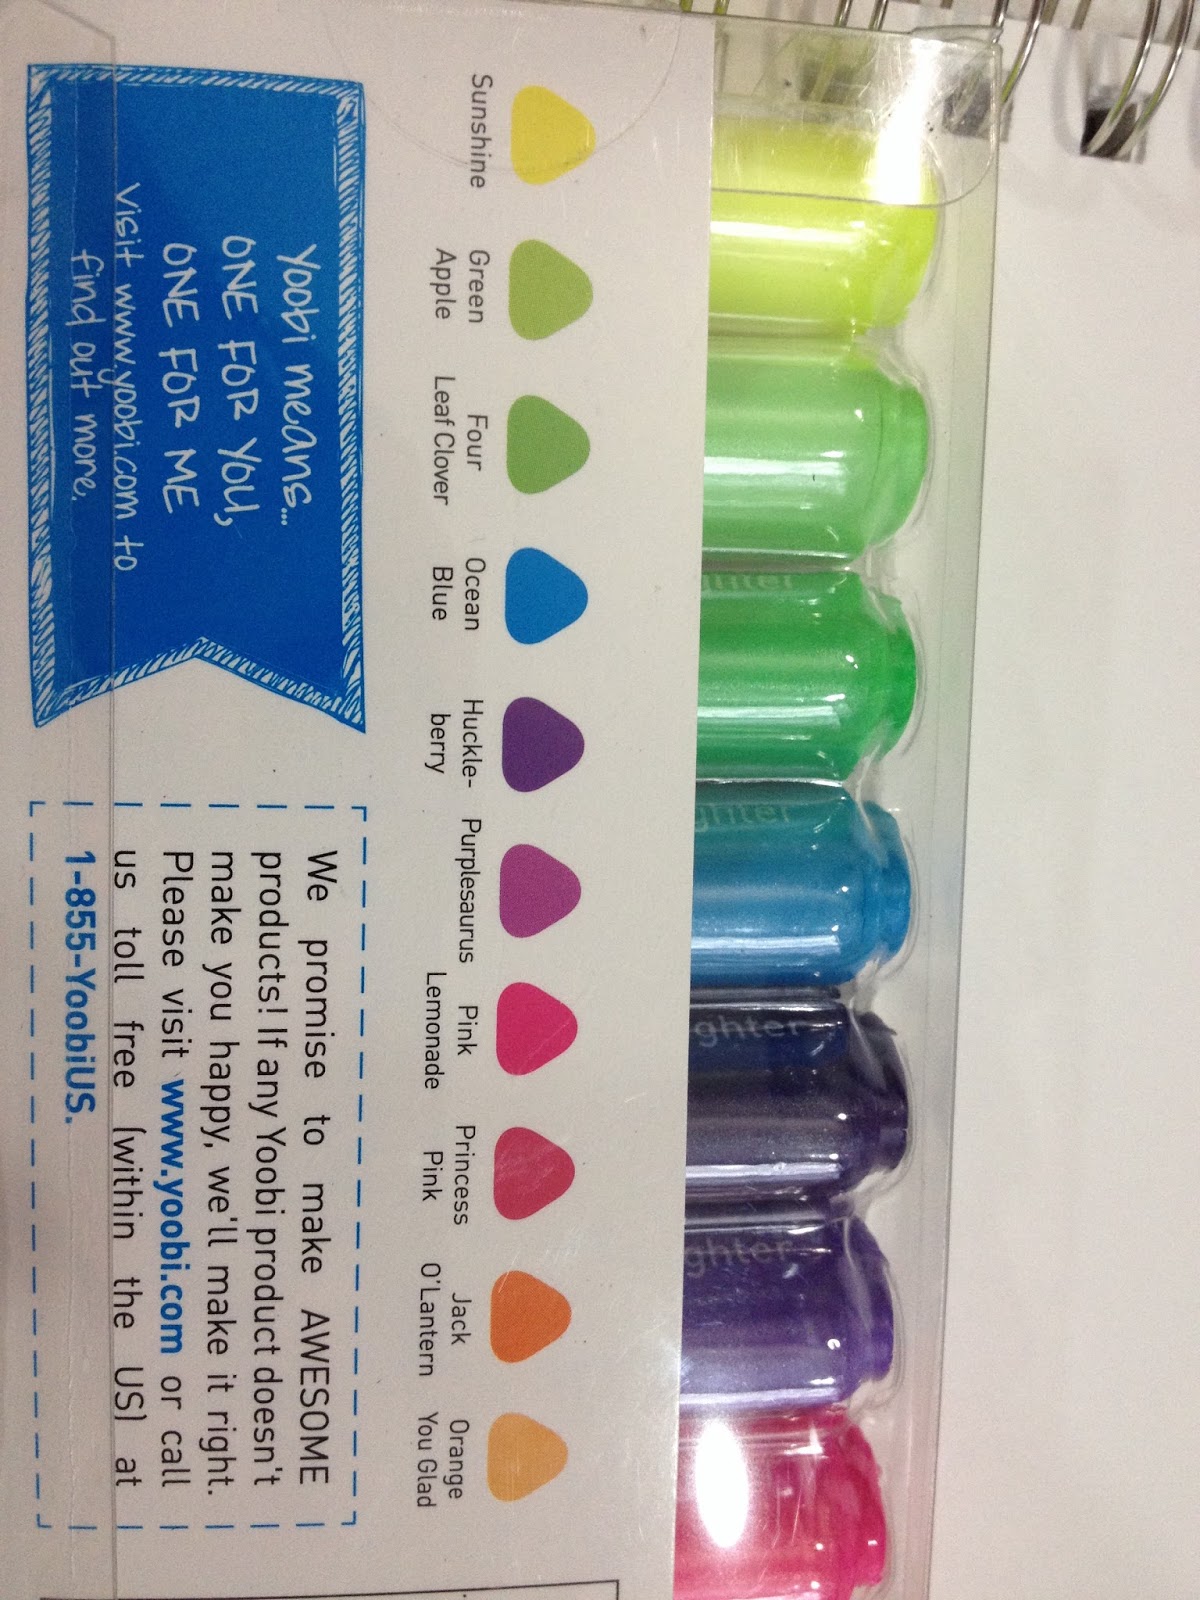
The packaging is fairly sturdy plastic, and an interior sleeve securely held my highlighters in place. These highlighters fit inside my Yoobi pencil case almost perfectly, but took up a lot of room in the spacious case.
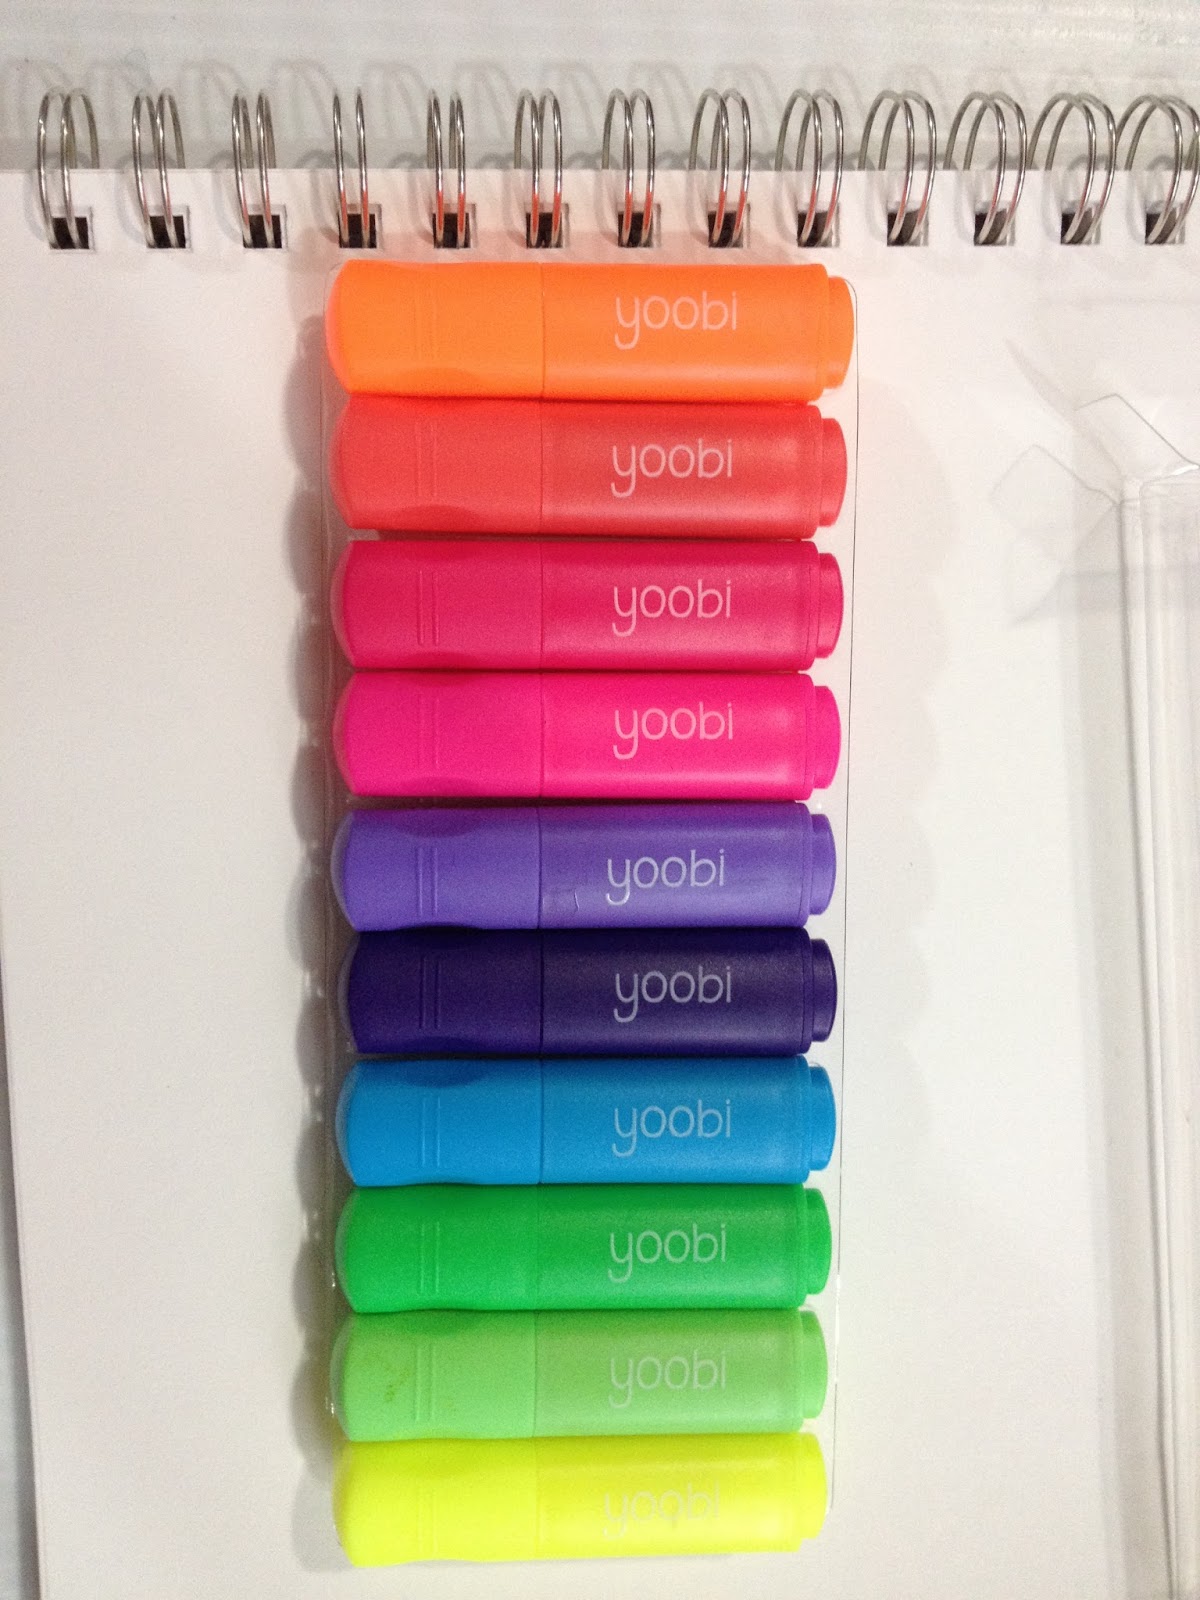
Some of the colors aren't exactly 'highlighters' the raspberry pink and purple are both a little dark to grab attention, but the numerous colors are perfect if you're into color coordinating your planner.
Although the packaging lists the color names, the markers themselves do not.

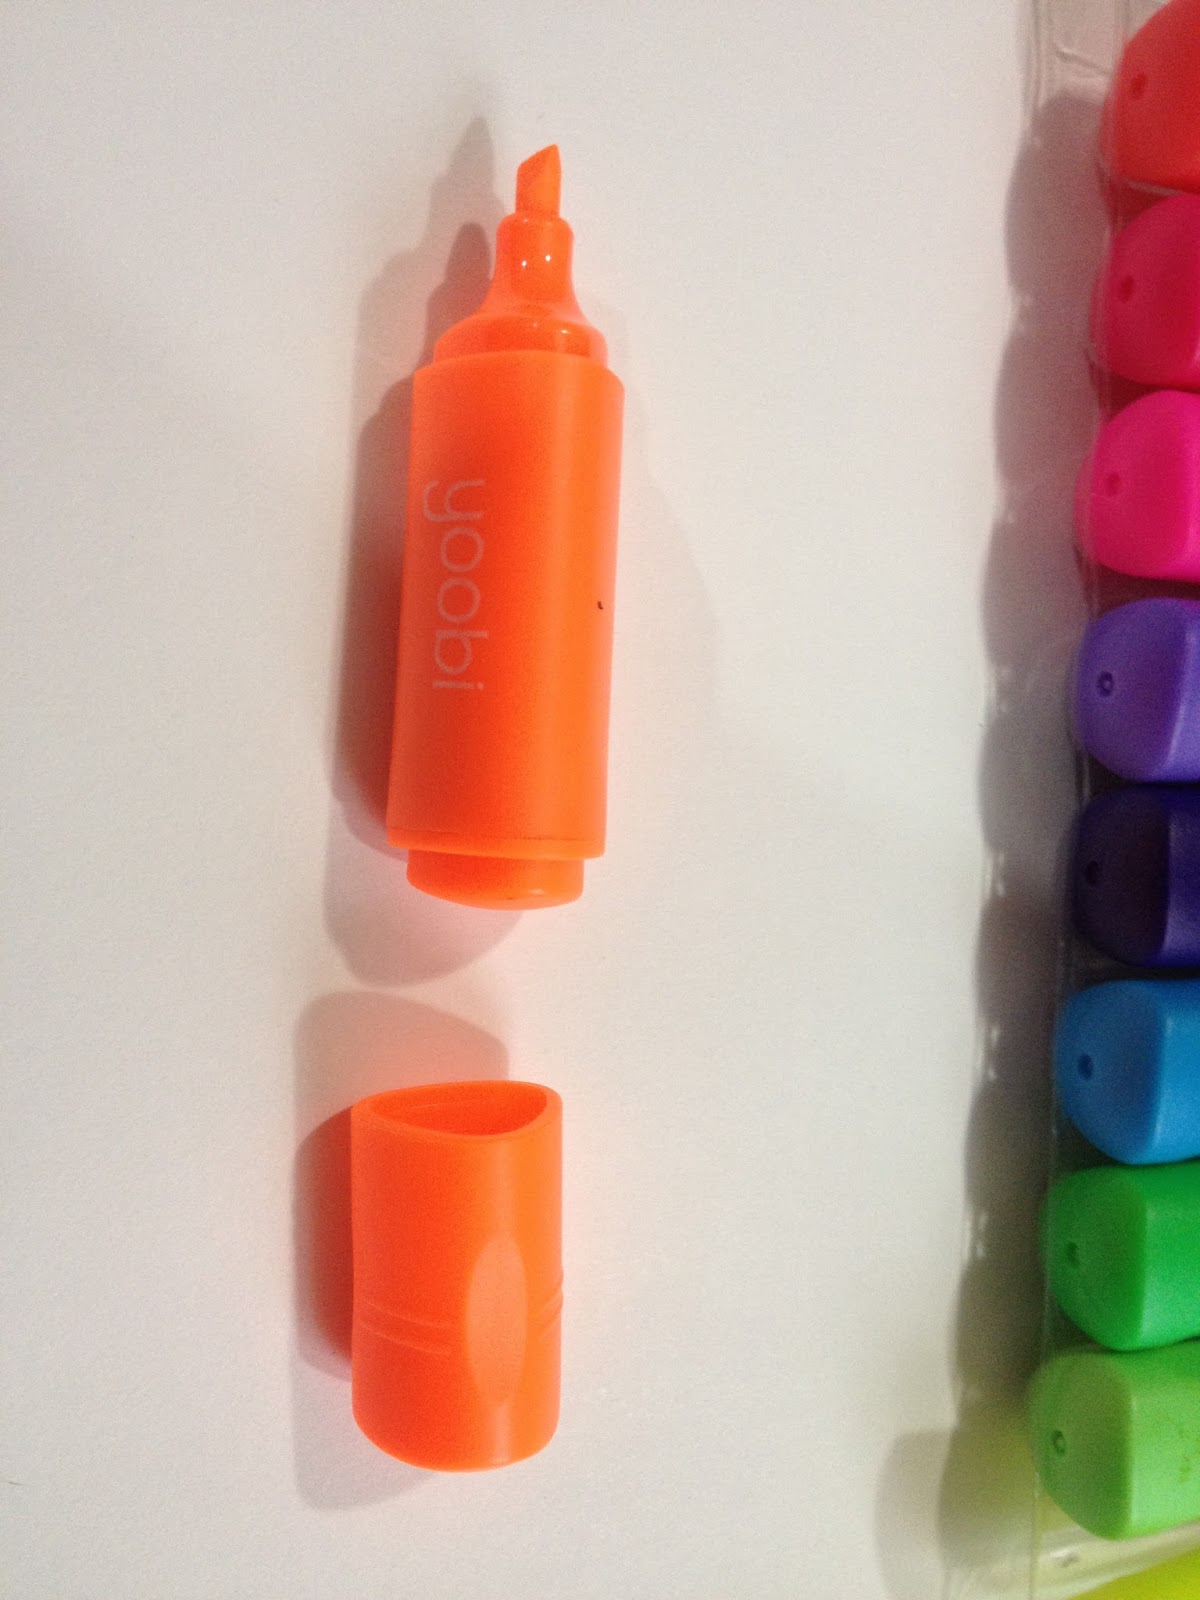

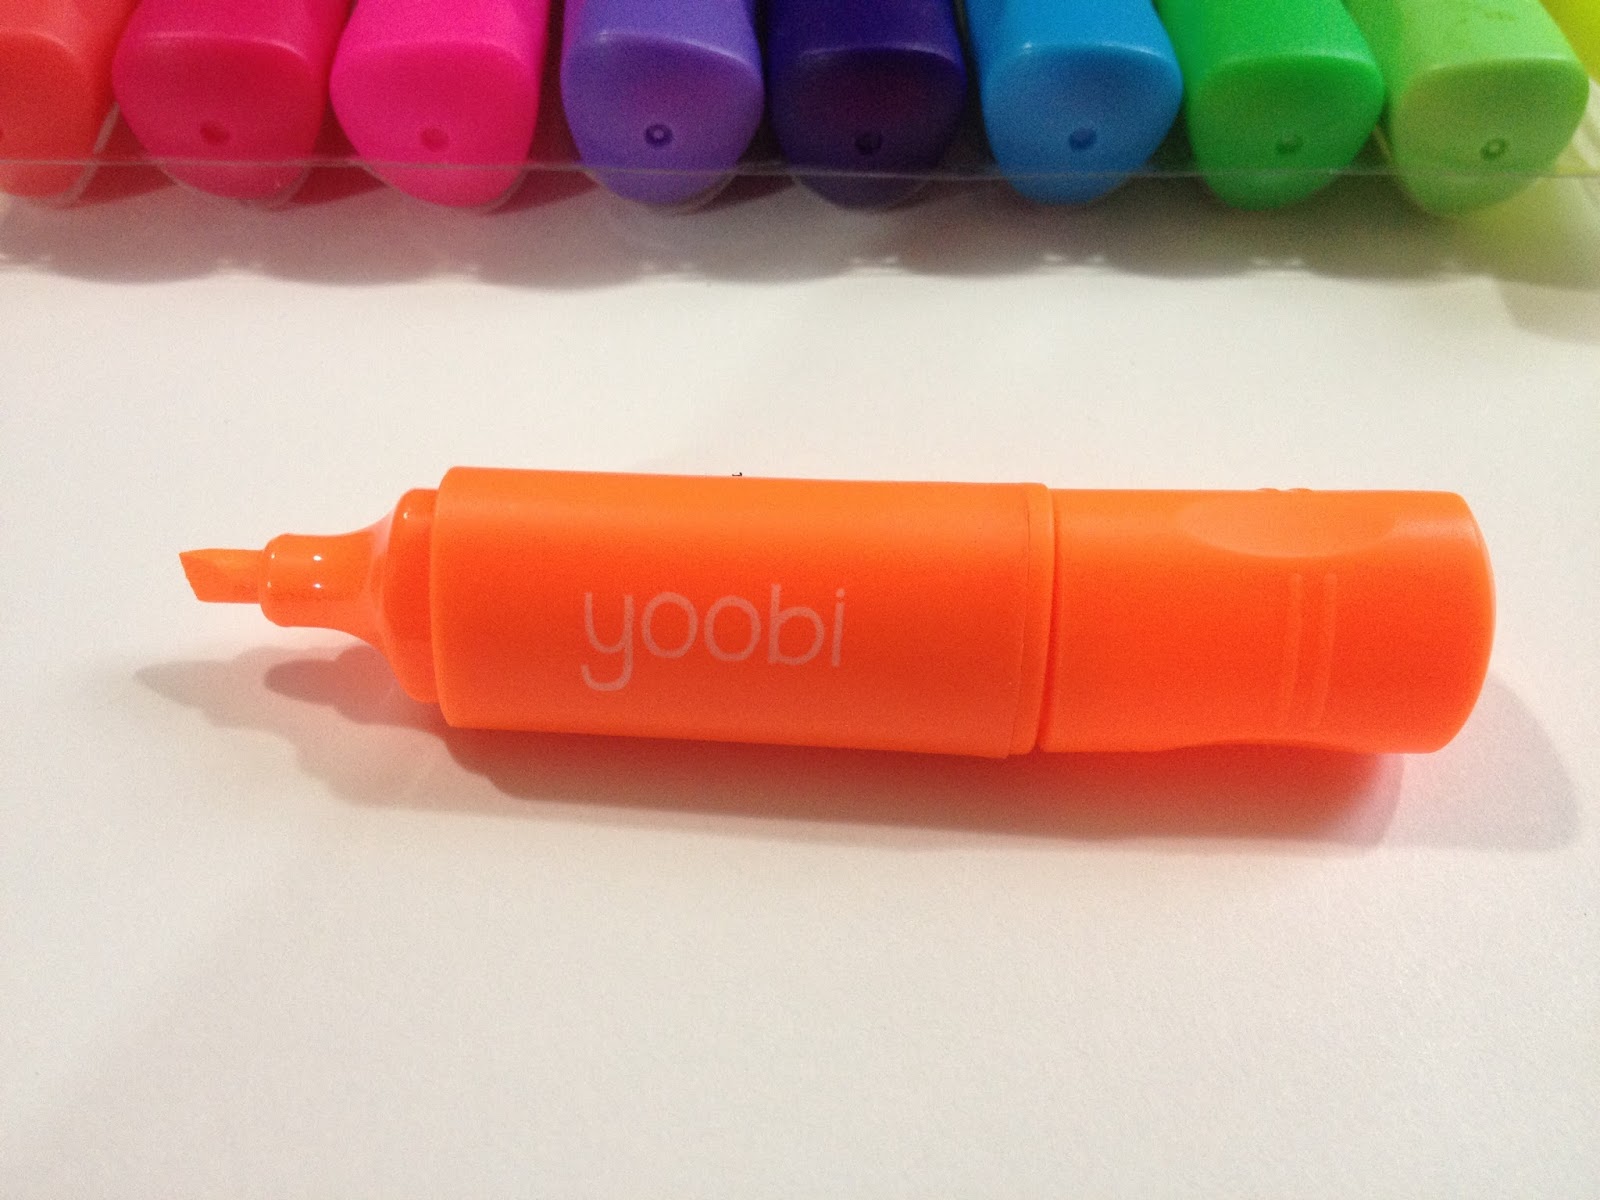
These highlighters are really cute, but difficult to handle, even with the caps posted to the back. They're more a novelty than a useful tool.
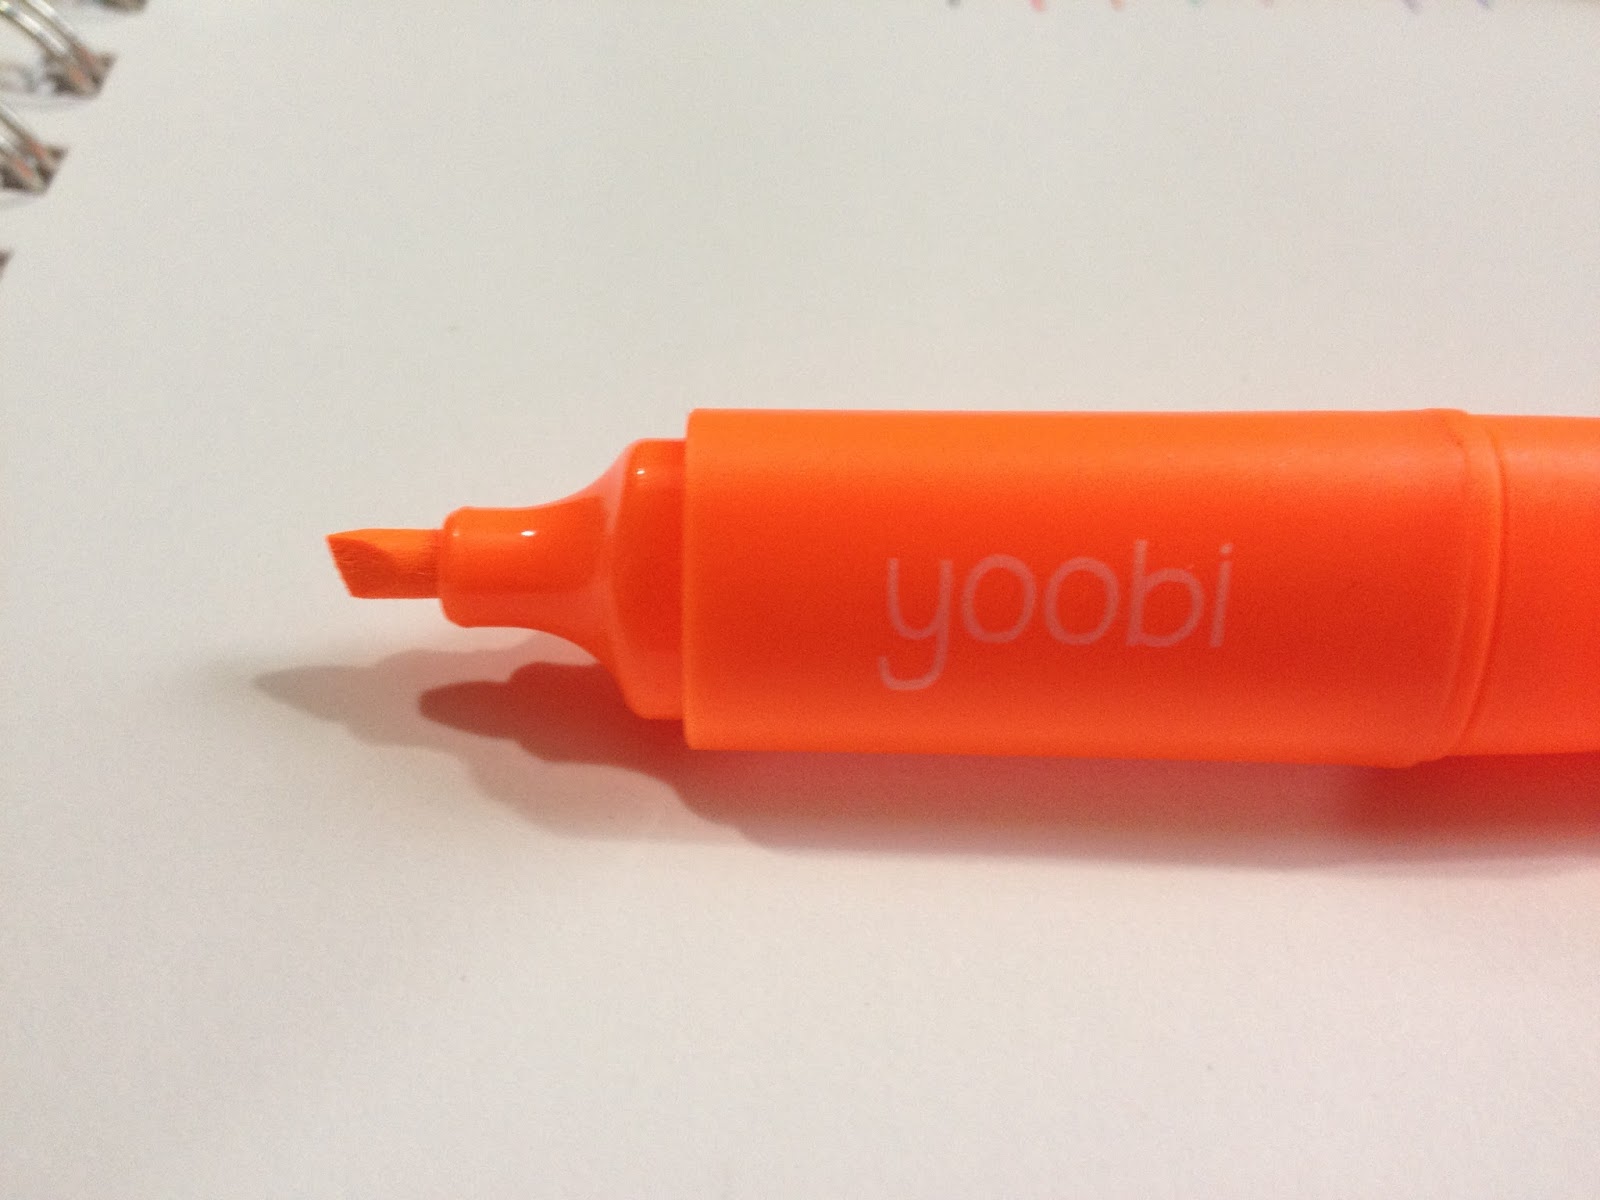
These mini highlighters have a tiny, stiff chisel nib.
I tested these markers for water solubility, and while they do dissolve in water, they quickly lose their brightness and fluorescent qualities.
Mini Field Test

This field test was sketched in my Blick sketchbook with a Prismacolor Fine Line Marker, which are alcohol marker proof and waterproof, and was allowed to cure for one hour before I attempted to apply color.
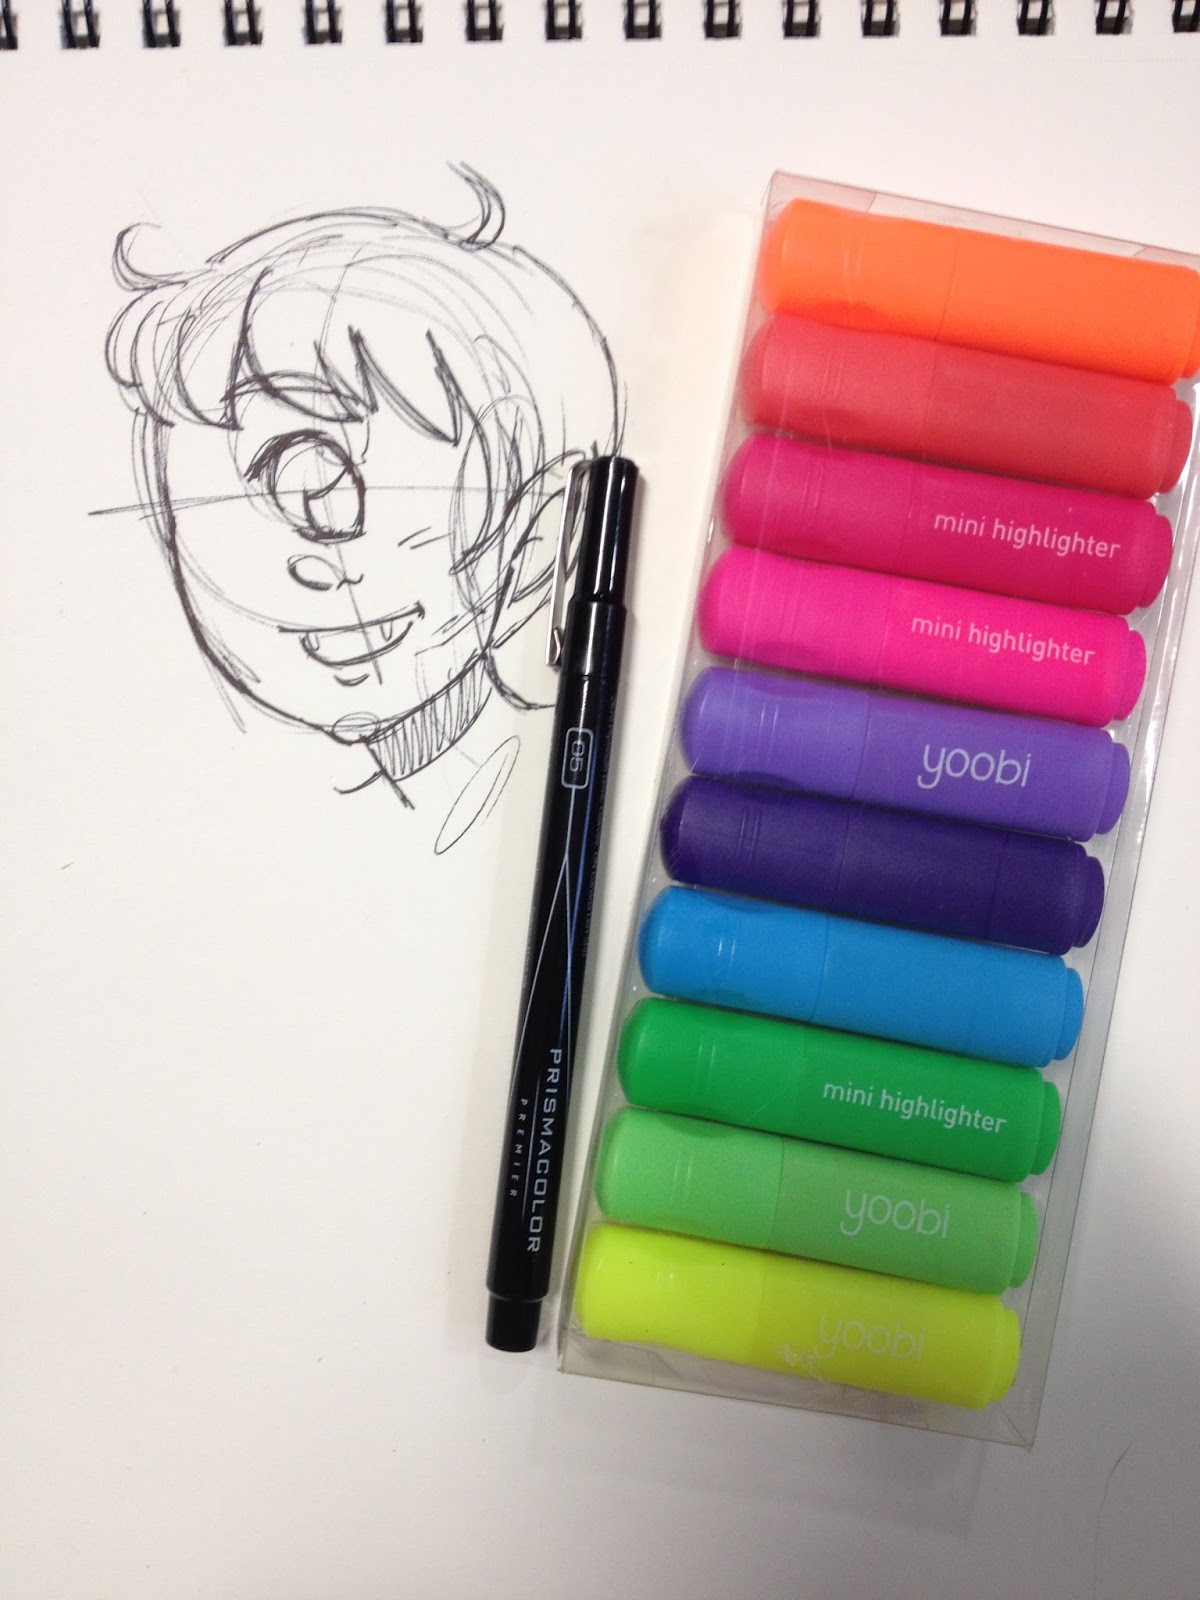
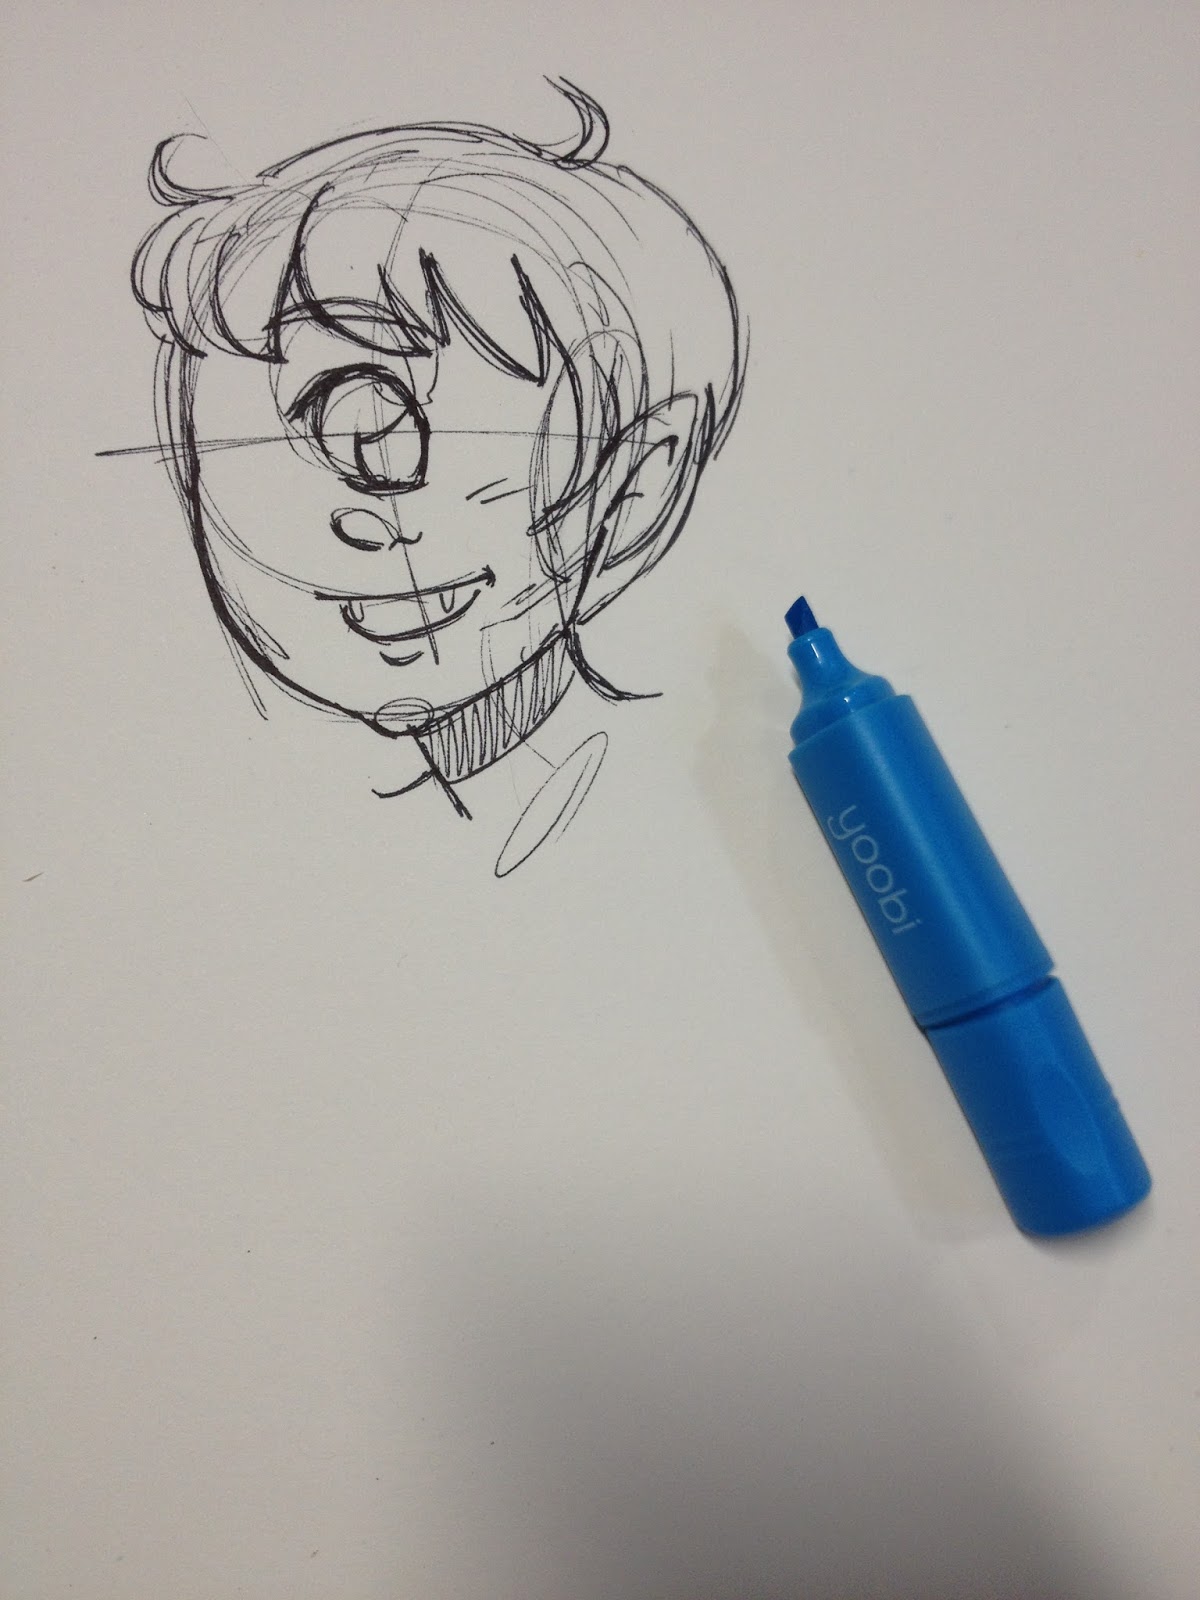
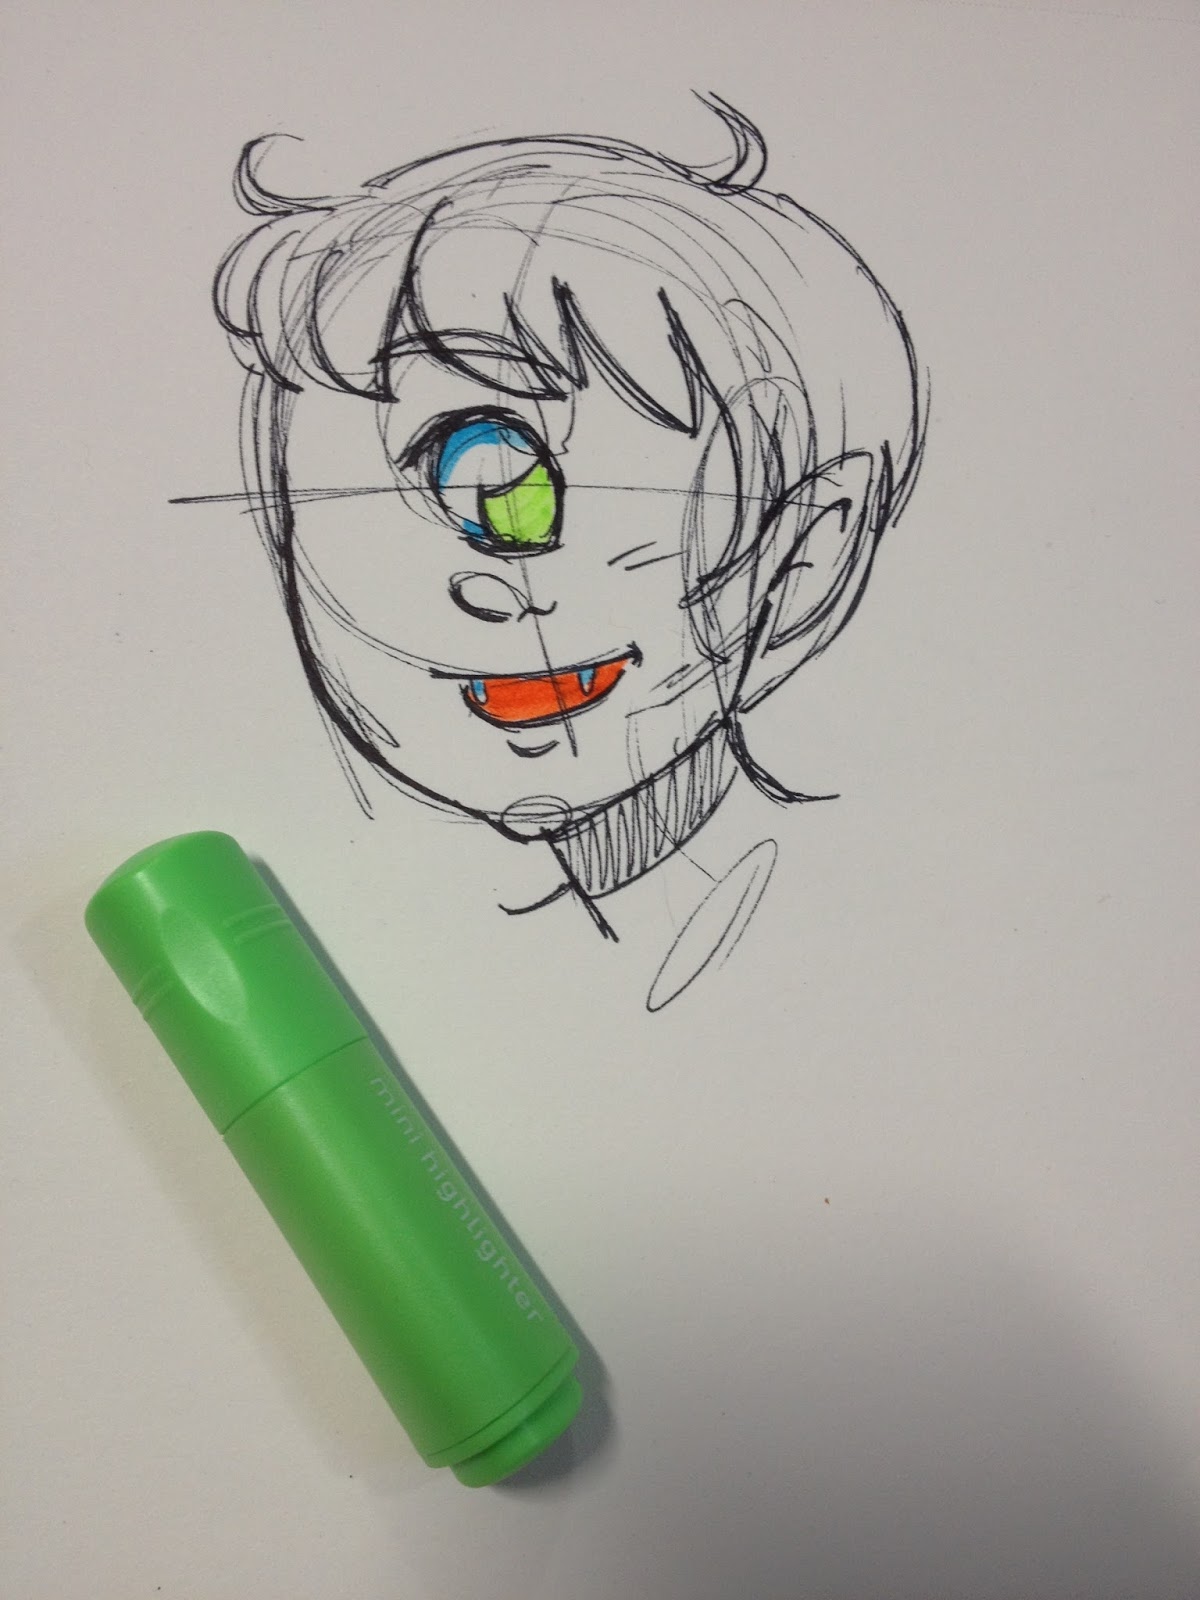

Despite allowing my Prismacolor Fine Line Marker to dry for an hour, the highlighters still smeared and reactivated the ink. I'm not sure if it was the abbreviated dry time (I usually allow inks to dry 24 hours before testing) or the highlighters themselves- I may have to test a few inks with these highlighters to figure it out. A highlighter that reactivates ink isn't good for artists or students- highlighters are intended to glide over ink without smearing what's underneath.
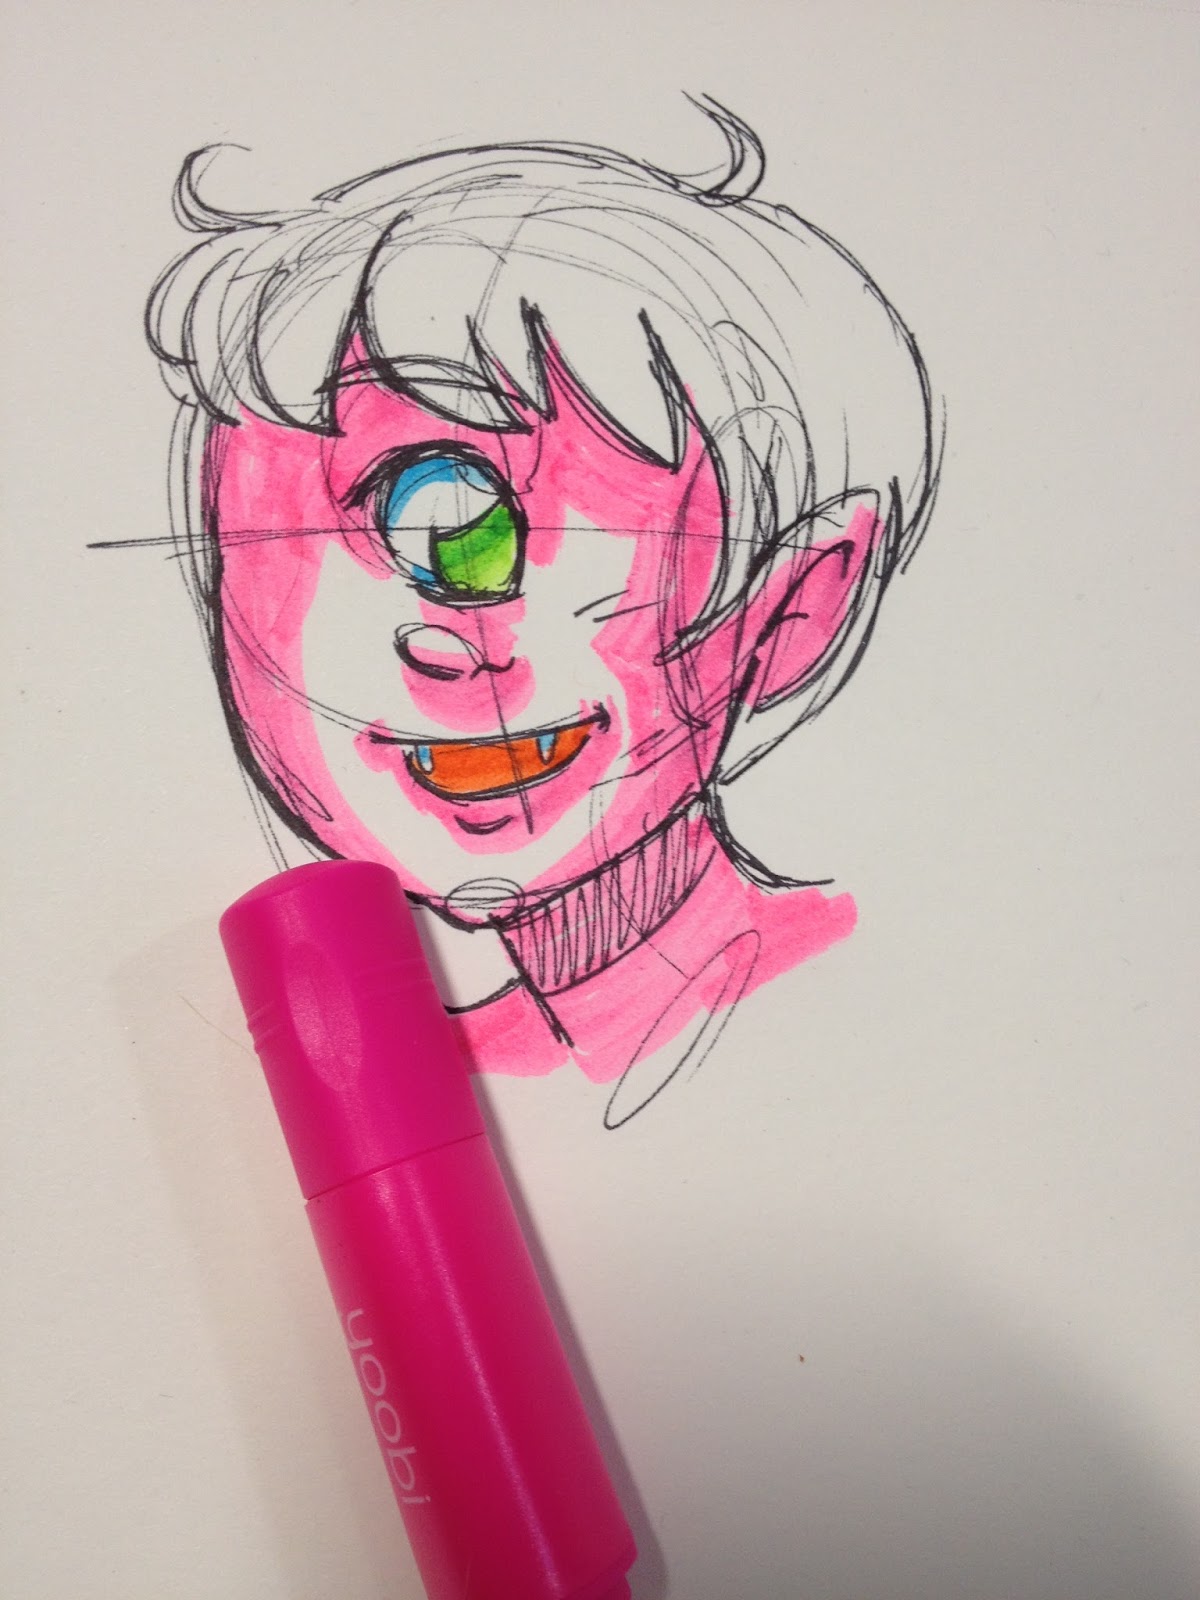
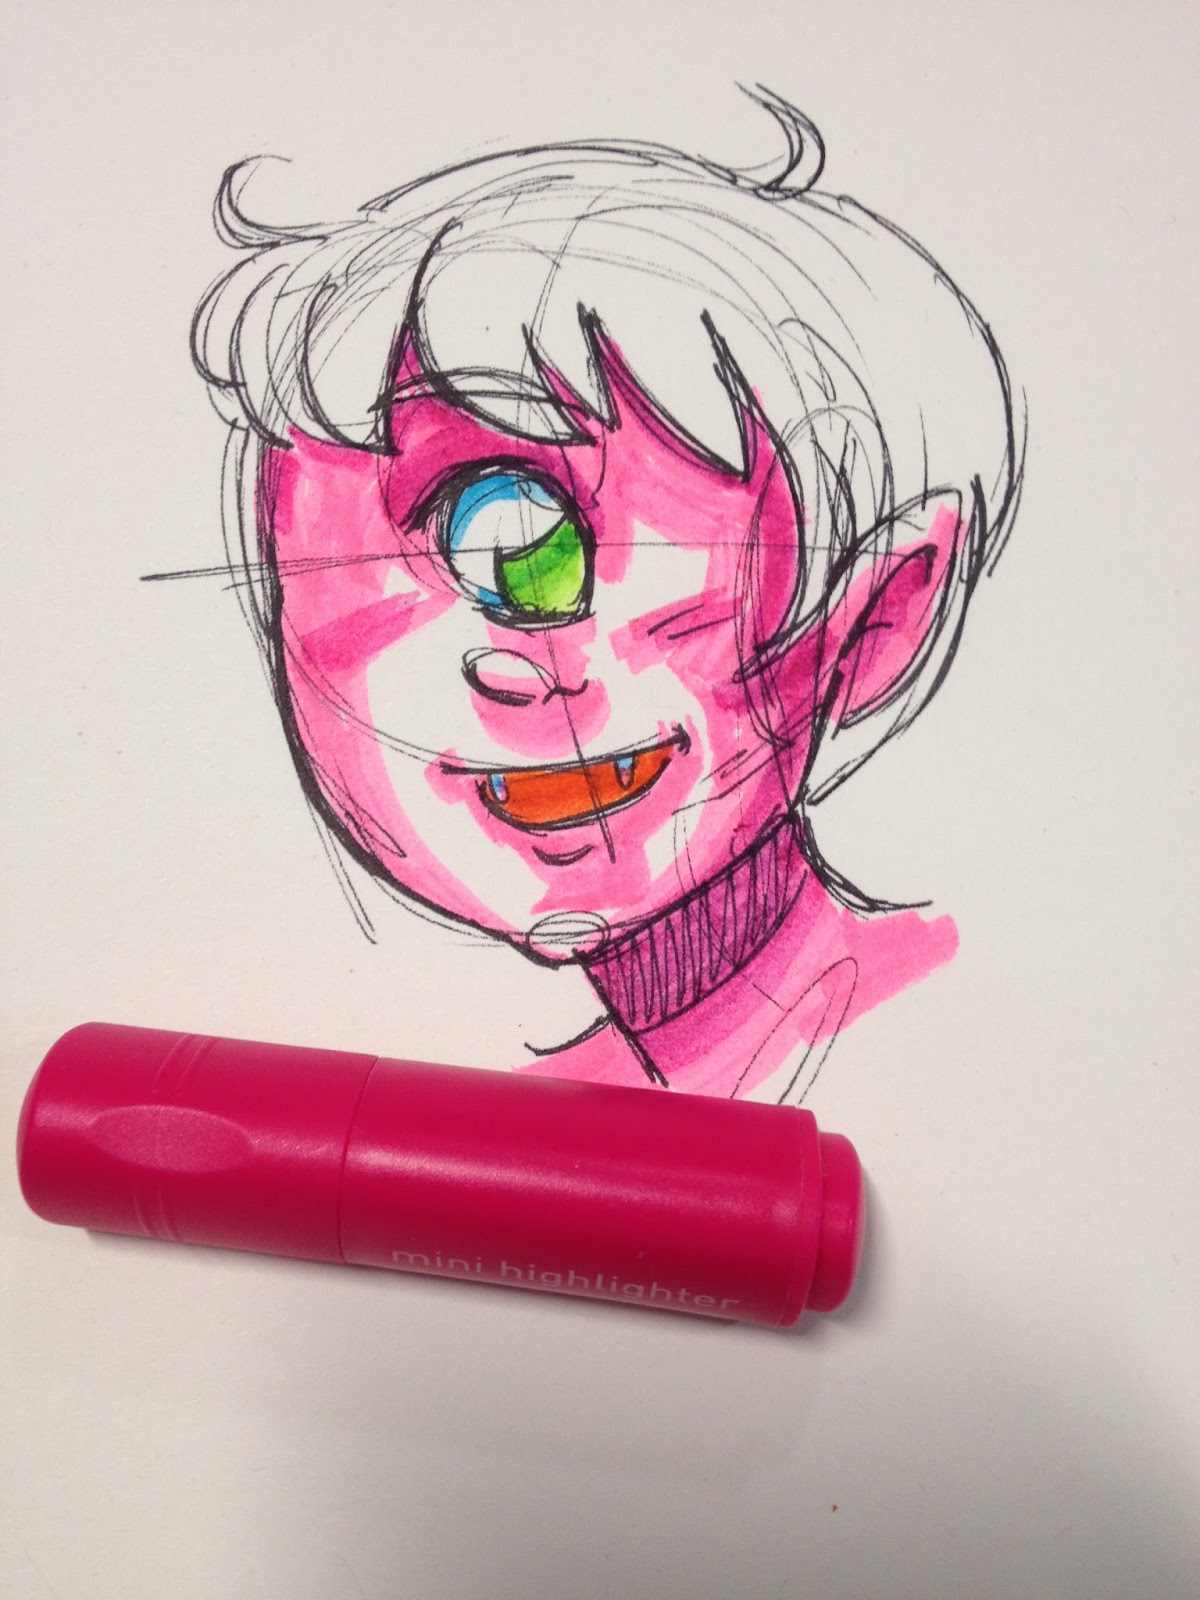

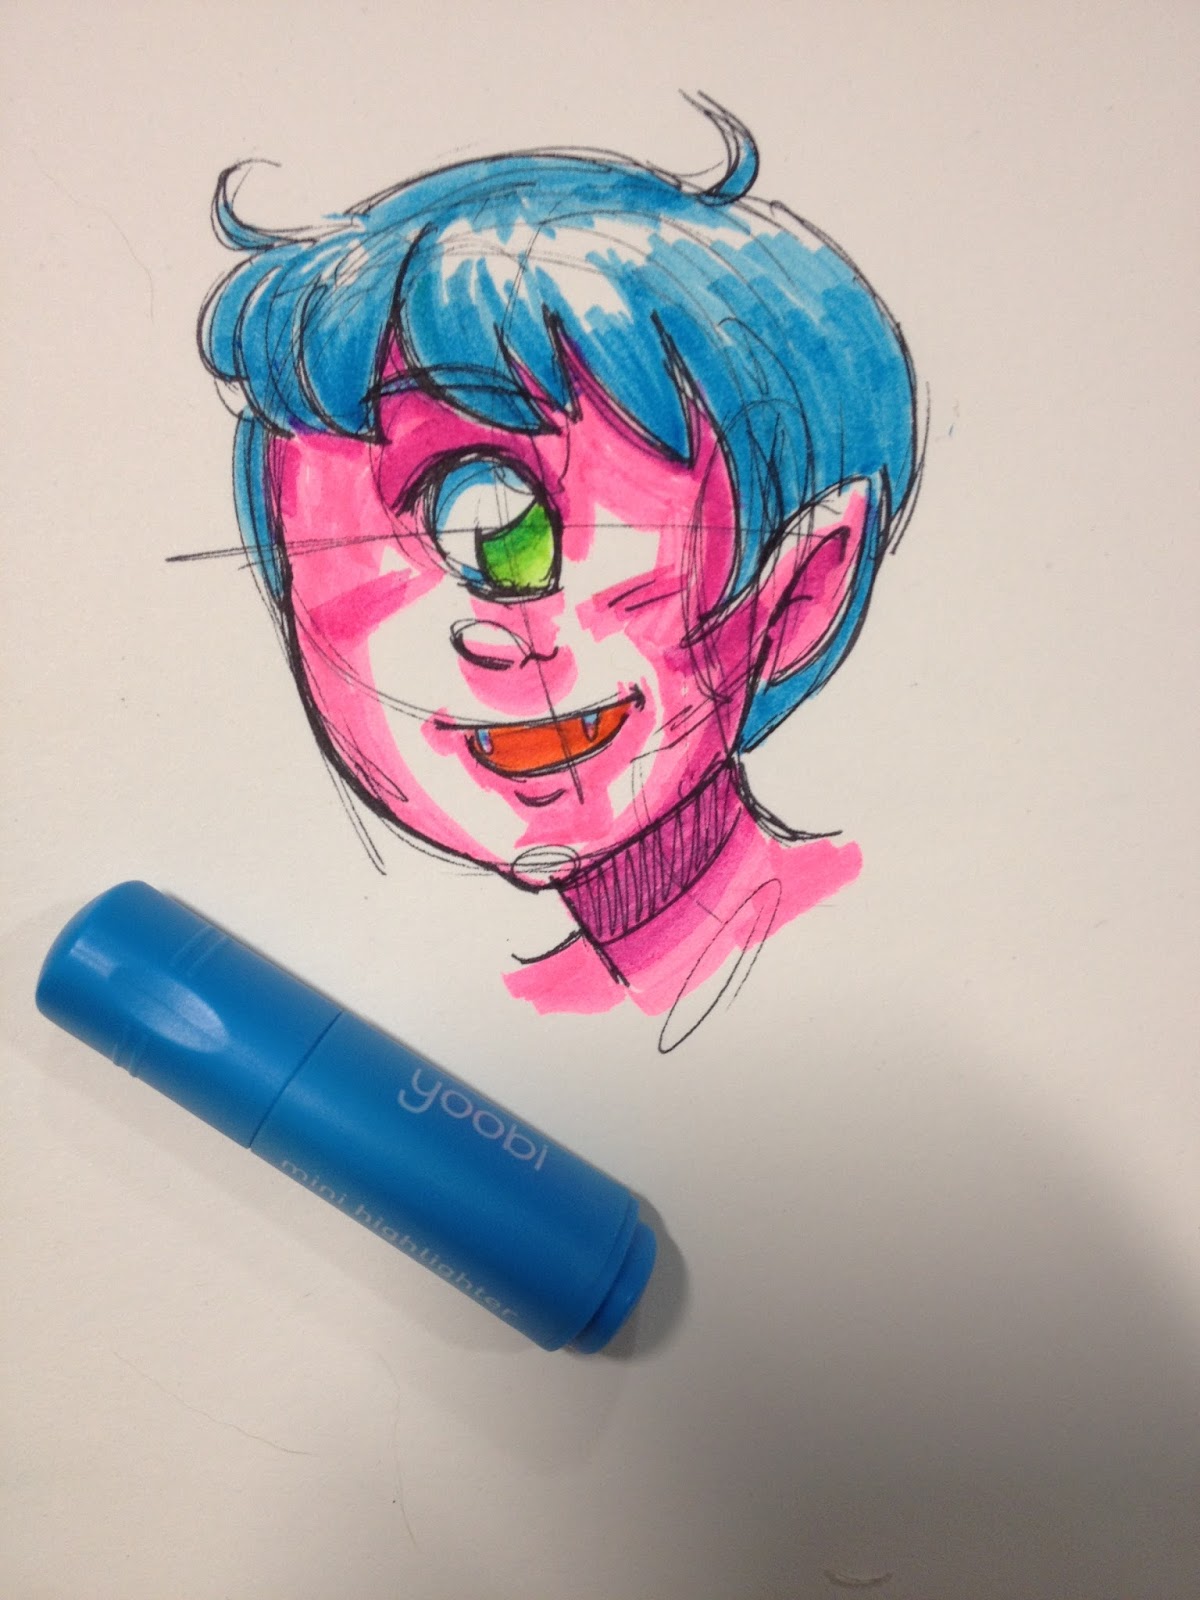
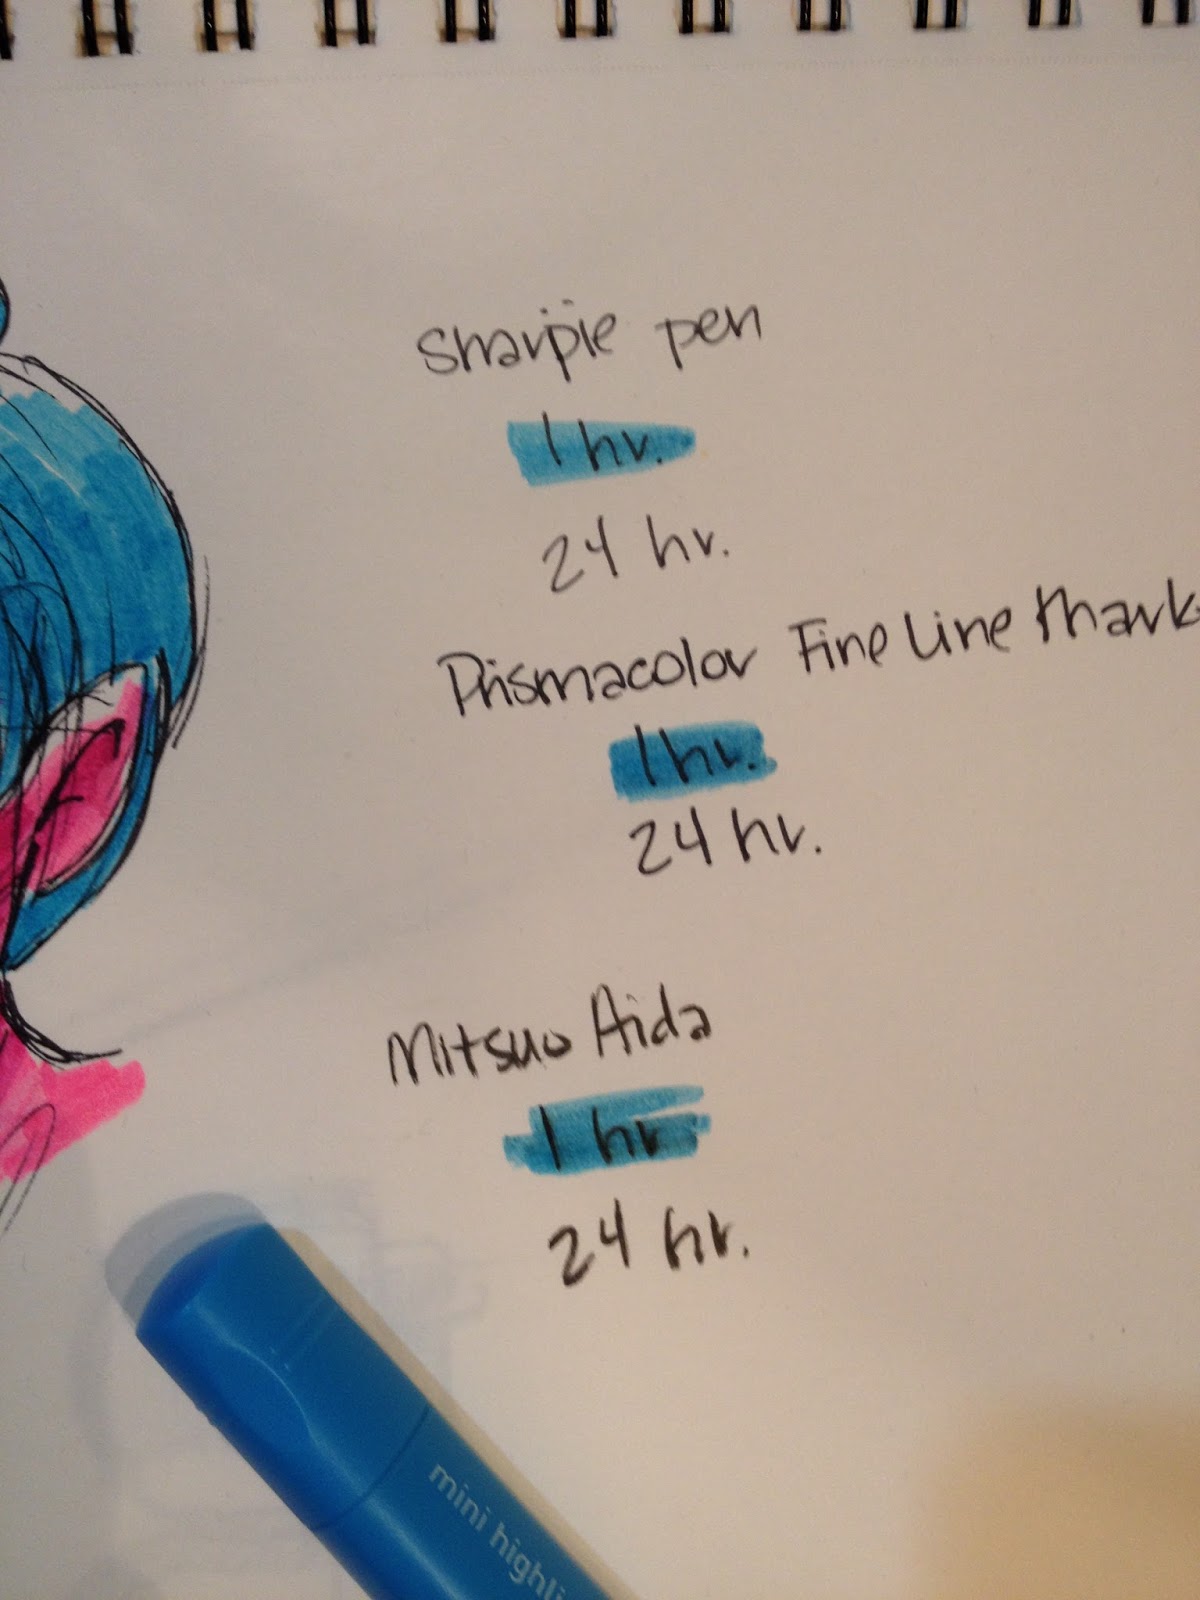
The inks don't really layer well, and repeated applications start to tear up the paper. These are waterbased markers, so if you DO want to use them for coloring, you need to allow the paper to dry thoroughly before applying the next layer.
The Verdict
These highlighters are really cute, and are fine for quickly highlighting small areas of text, but are difficult to handle as fluorescent markers. If you plan on using highlighters in your art, buy full size ones.
Yoobi EraserThis being a big box store, of course everything comes blister packed, lest one item walk away from the whole. The Yoobi erasers were no different.


The packaging says almost nothing about the erasers themselves- with student grade supplies, the materials used in production are rarely mentioned- and a lot about Yoobi.
The Fieldtest
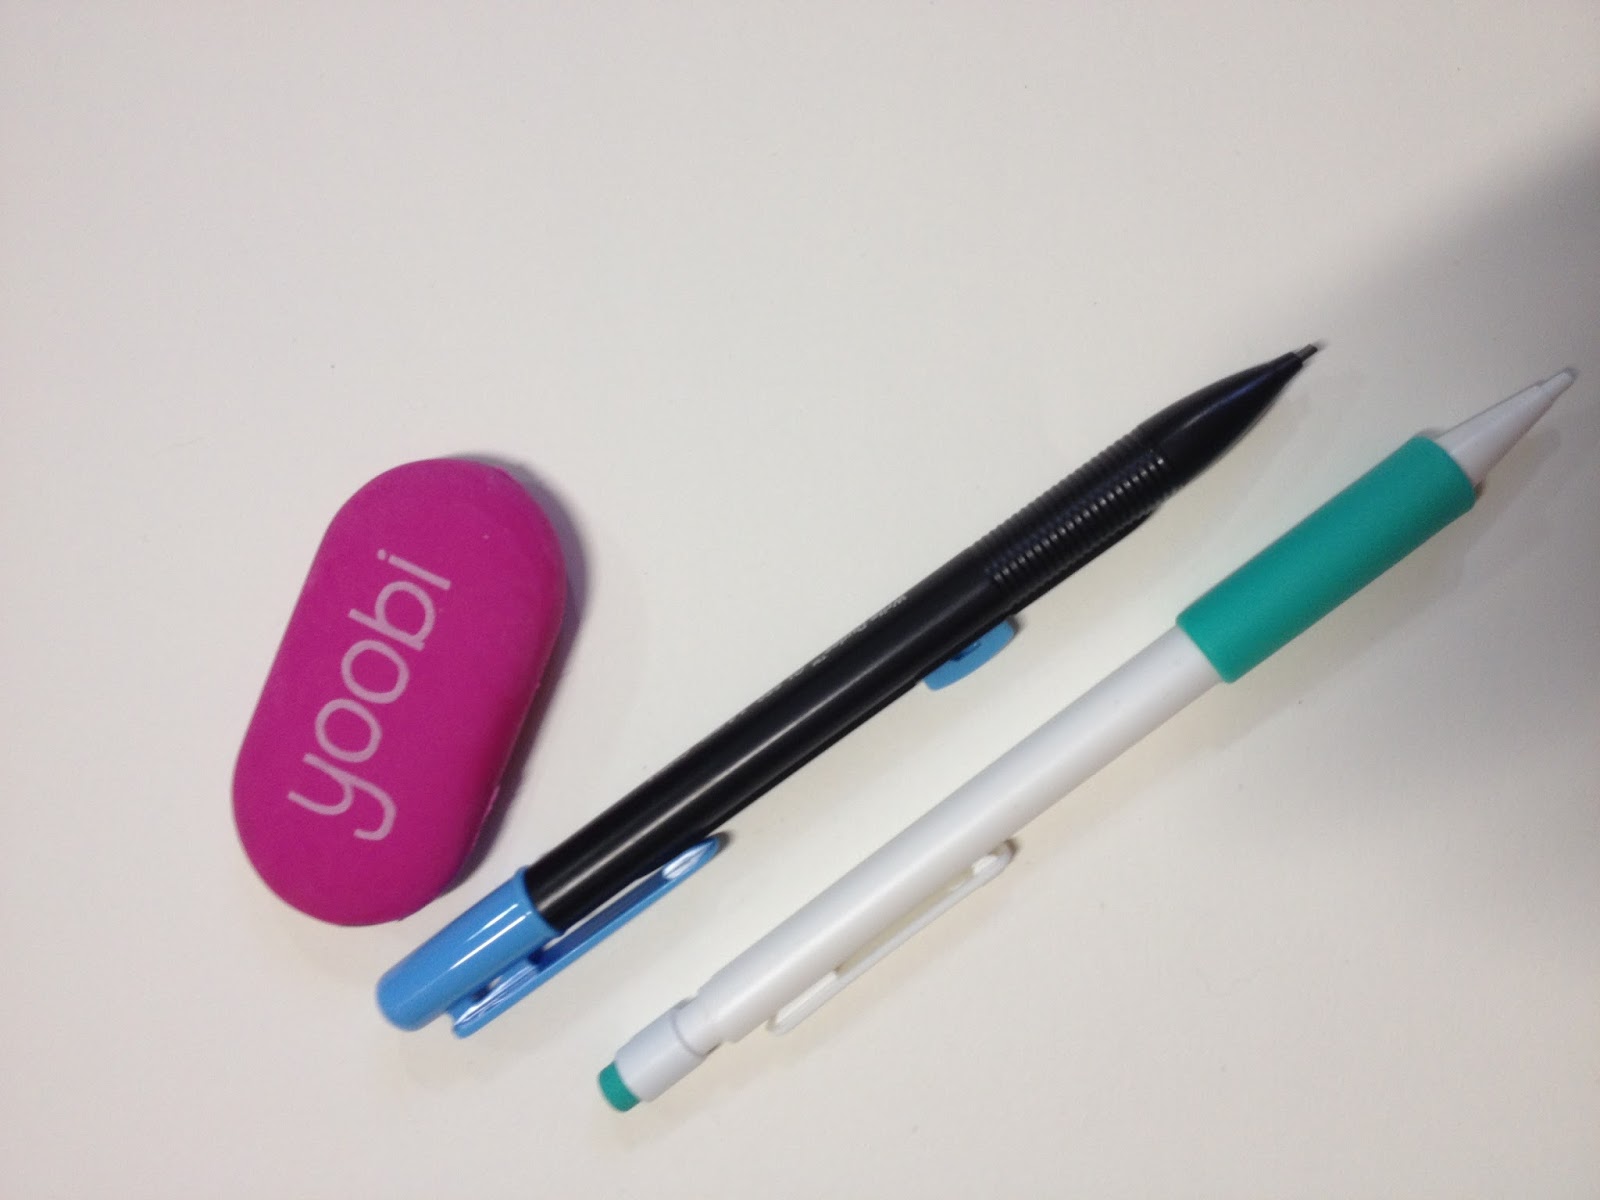
For this test, I'm using my Write Dudes Gorilla Lead pencil as well as the Up and Up Mechanical pencil reviewed earlier in the Target Art Supply Review Series. The Write Dudes pencil has a darker, larger lead (a B, but maybe even a 2B) and the Up and Up Mechanical Pencil has a lighter lead, either an HB or an F.

First I attempted to erase normal writing.


The Yoobi eraser couldn't cleanly erase the darker lead from my Write Dudes Gorilla Lead pencil, and had difficulty even erasing the HB .5 lead in my Up and Up mechanical pencils.

Next I tried to erase dense graphite coverage from both pencils.
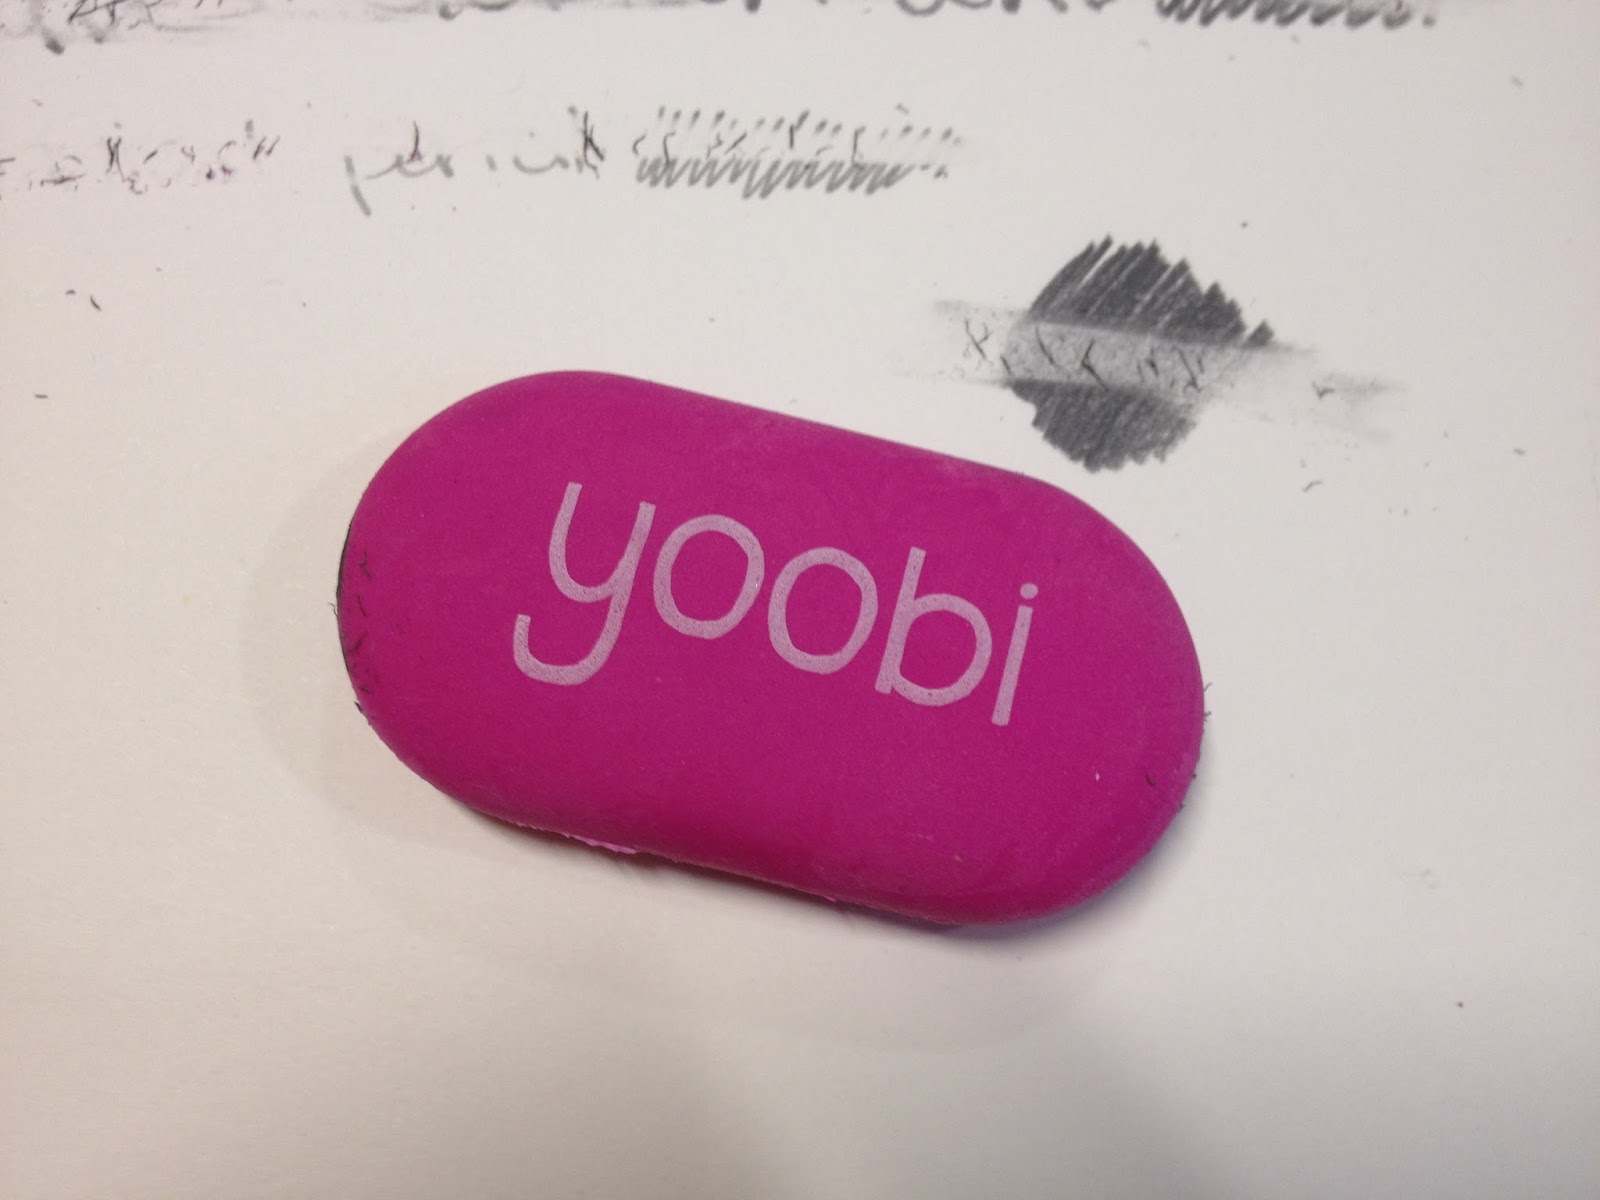 Gorilla Lead
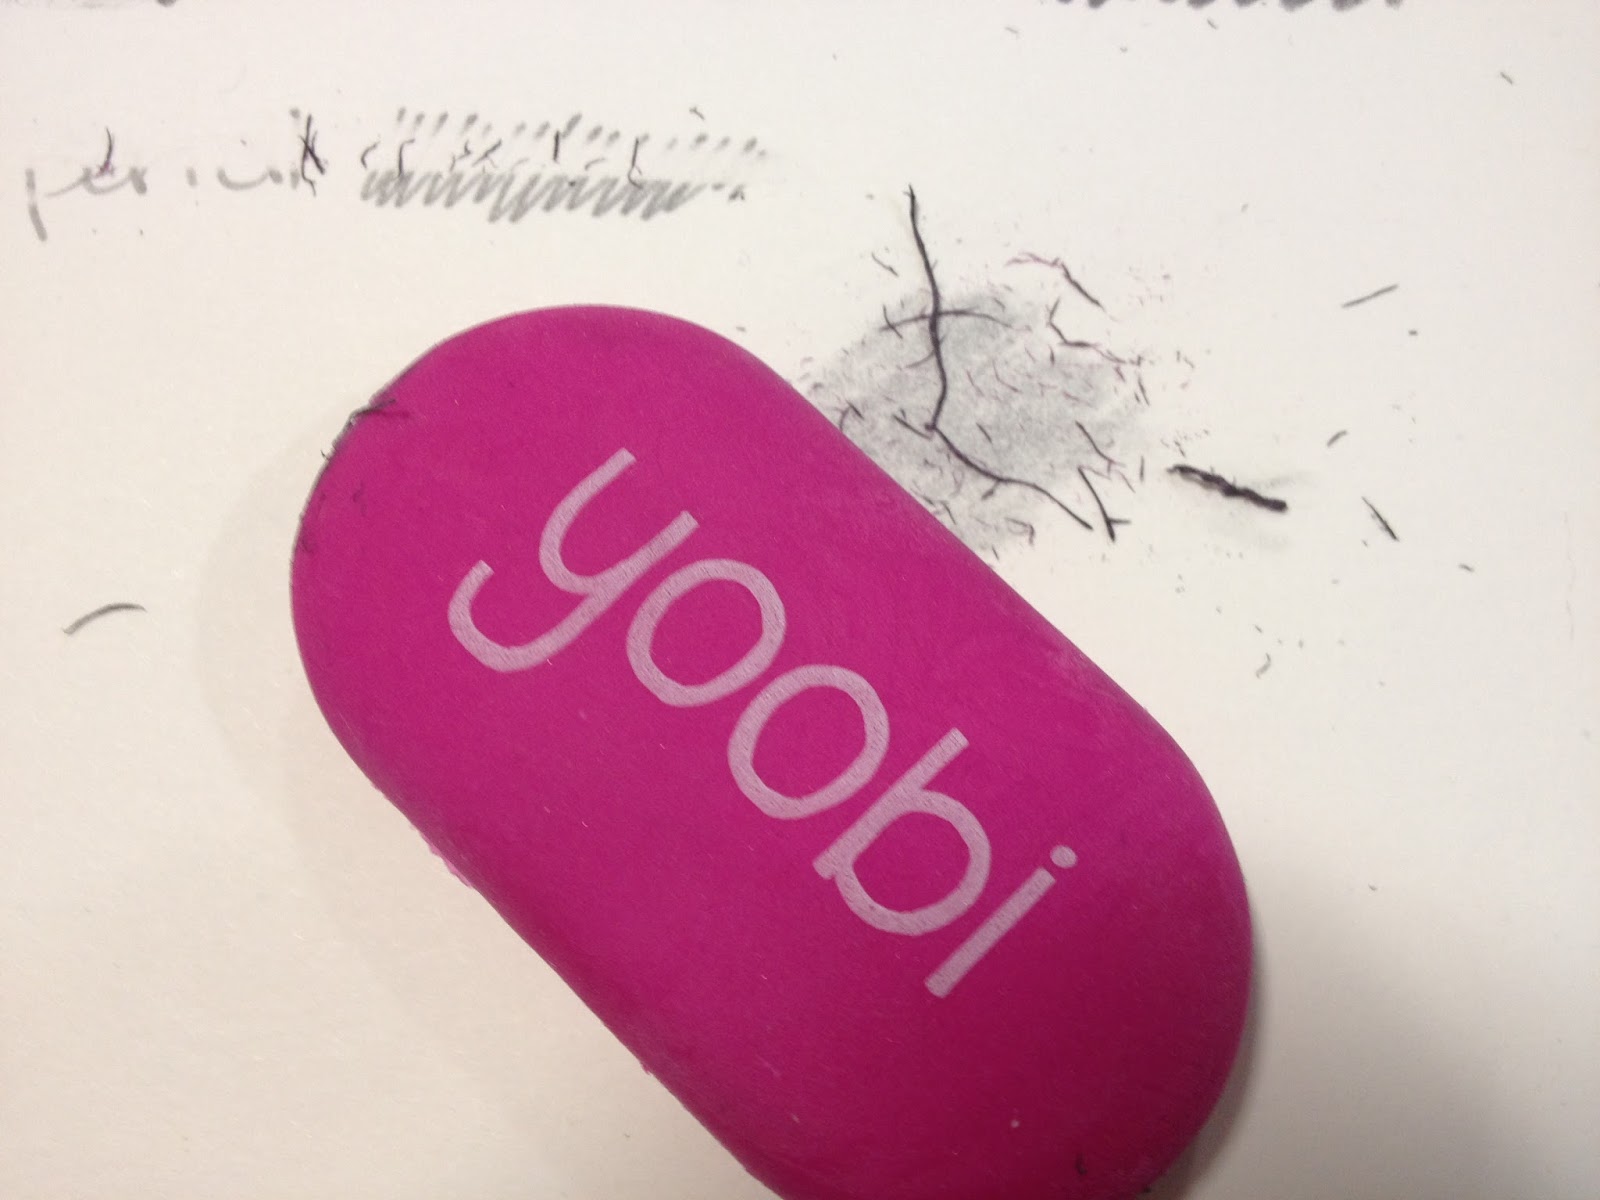
 HB lead
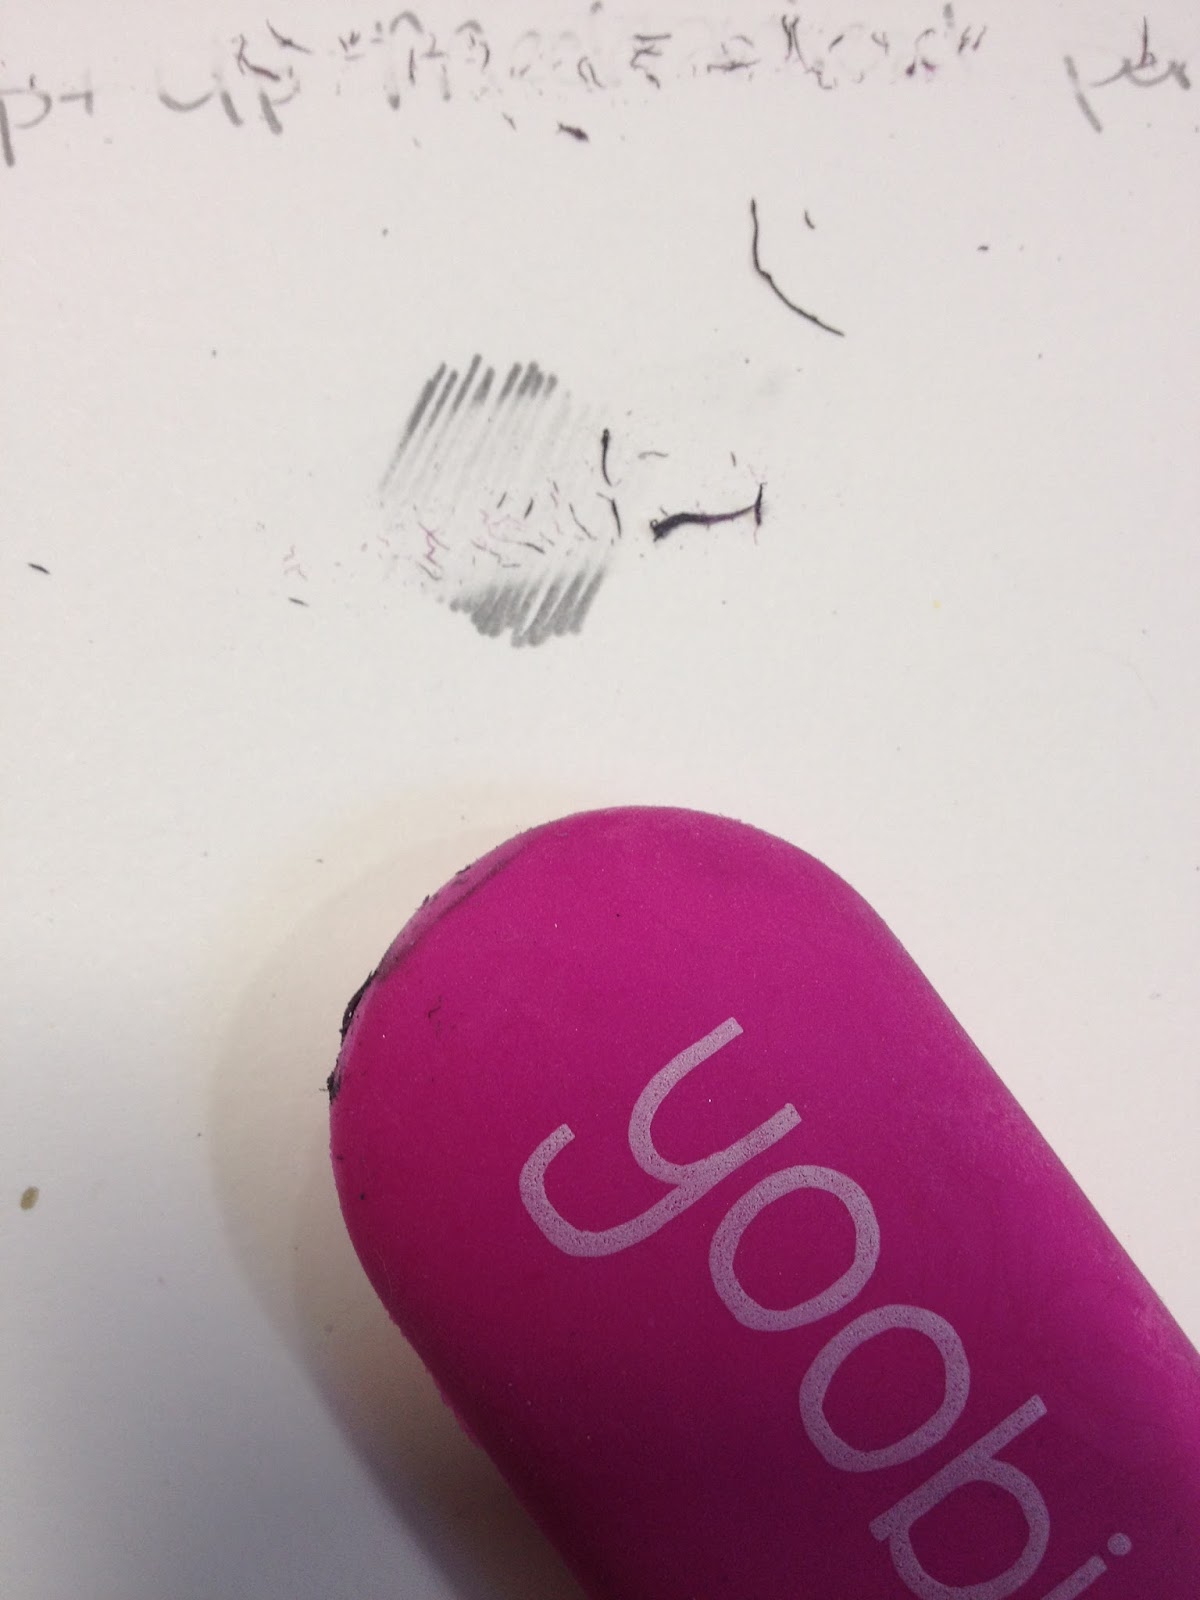
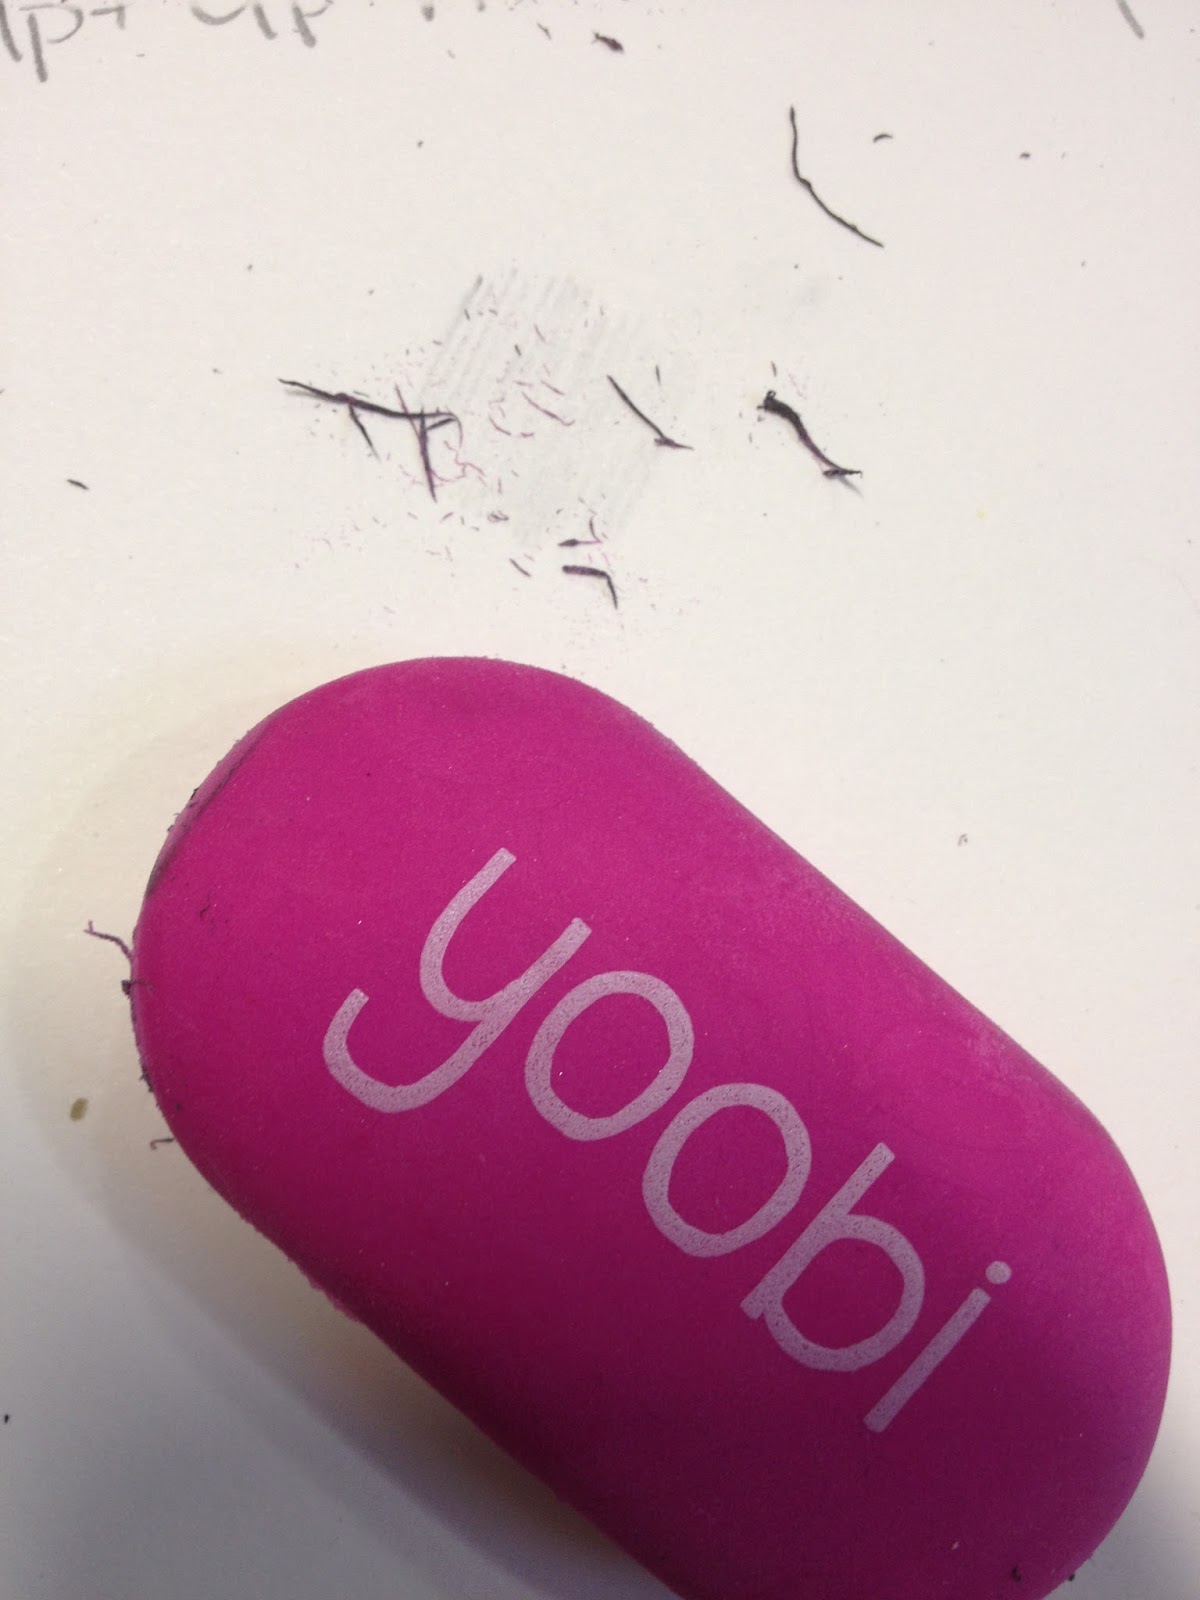
Neither leads erased cleanly with the Yoobi eraser.
I recognize that this is a student grade eraser, but I am concerned that if it can't even erase cleanly in these tests, it would not be able to erase cleanly enough for a student to rework a drawing, or for a Scantron machine to accurately register marks made on a test. Even as a student grade supply, this particular eraser fails the test.
The Verdict
These Yoobi erasers are pretty awful compared to even the cheapest white vinyl eraser. They are rubbery and prone to smearing graphite. They leave a lot of eraser dust, and can't cleanly erase either the HB or B leads tested. I recommend skipping these particular erasers, and I generally recommend skipping out on colored or novelty erasers for art. I will be revisiting Yoobi erasers in a future post, as I have some coming in the mail.
Yoobi Pencil Case

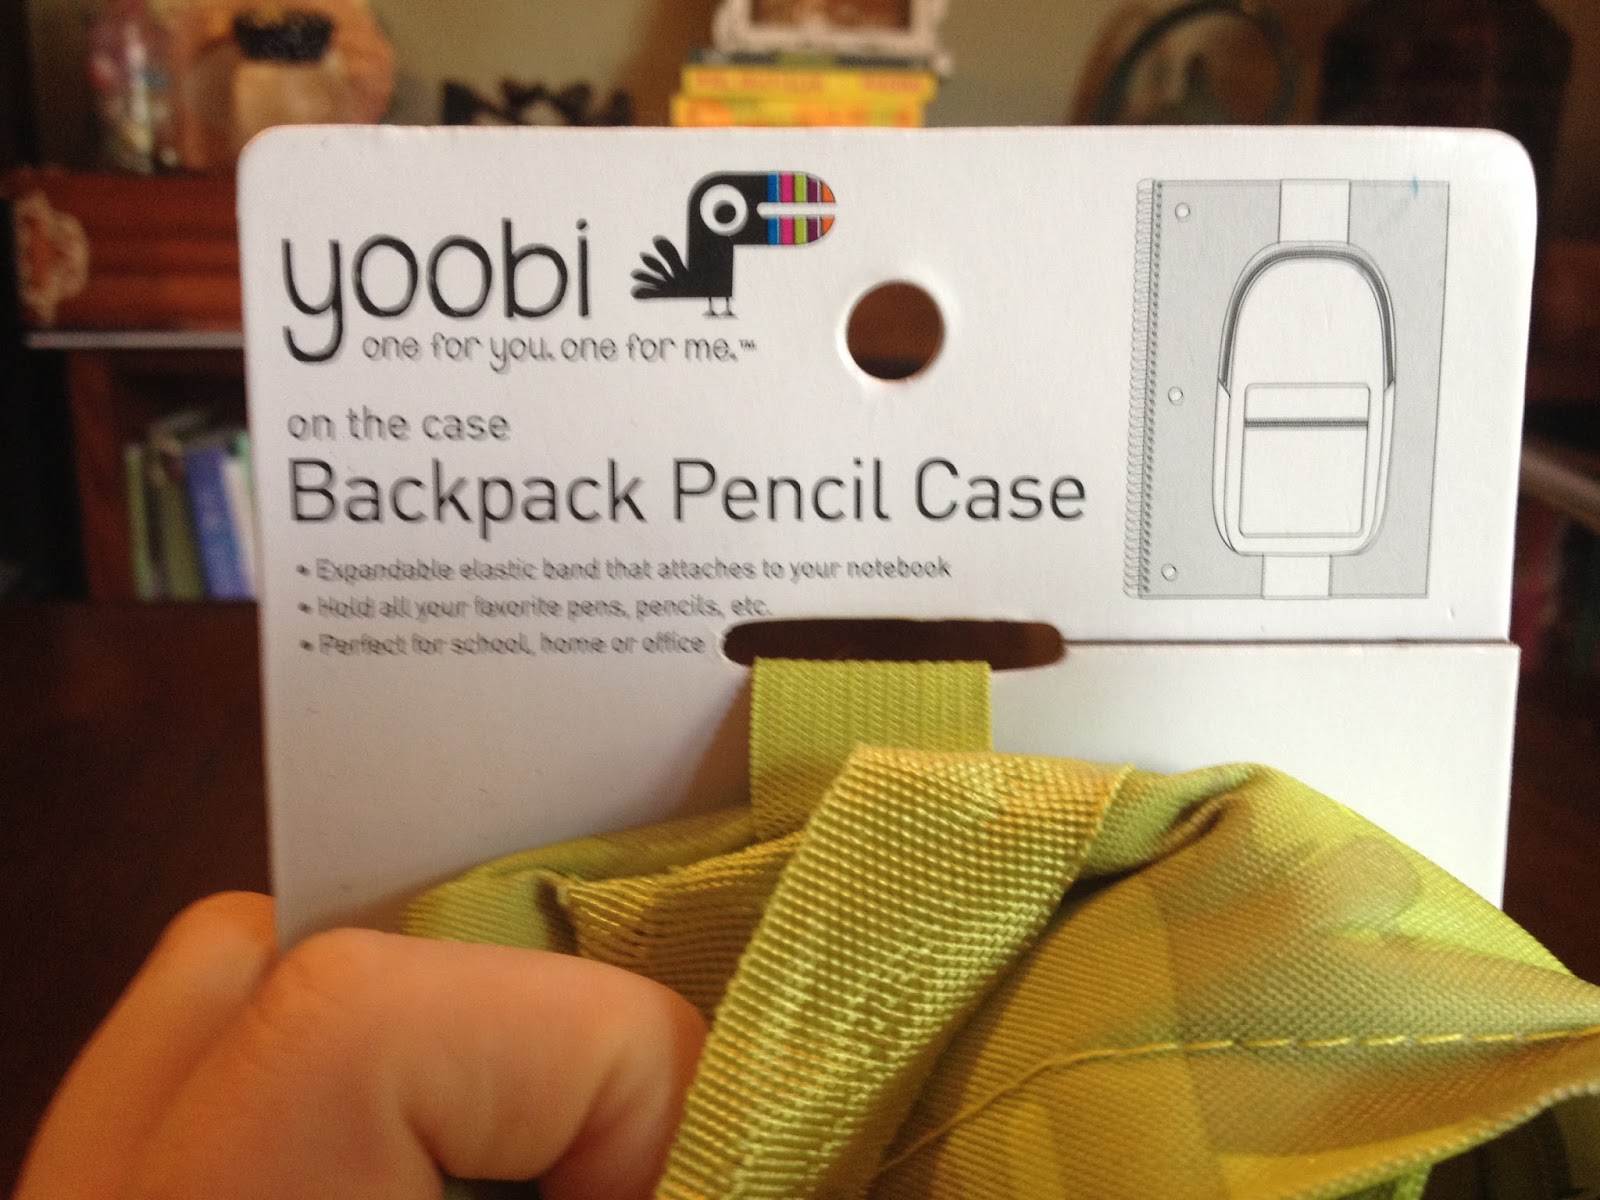


The elastic on this pencil bag is a little flimsy, but it is adjustable via a clip, so you can attach your pencil case to sketchbooks larger than my 8.5"x11" Up and Up Drawing Book, although I don't really recommend going much smaller, as the pencil case might overwhelm your book.
The interior is coated with white plastic, and the interior seams have seam binding, so this pencil case may be water resistant. The zippers have large, textured rubberized grips to help little (or big) fingers pull. The loop on the top of the pouch is made out of the same fabric as the seam binding, and feels a little cheap compared to the elastic.


The zippers are a little sticky and difficult to get going, and the cute little pouch on the front is a little too small to really be useful. I found it difficult to pull out my erasers and extra leads from this pouch.
This case holds A LOT of stuff, so you may be tempted to overstuff it. This is great if you're a highschooler with a lot of things to carry- pencils, a variety of pens, erasers, mini rulers, a compass, highlighters, ect, but not necessary if you're an artist with a curated collection of everyday carry.
The Verdict
This pencil case has loads of room, and if you're still toting around a 15 pack of Crayola colored pencils and a 24 pack of crayons, you can shove those in here too. This is a fine pencil case, although you may find it more useful just to snip off the elastic as it tends to catch on things if not attached to a sketchbook.
Yoobi Pencil Sharpener
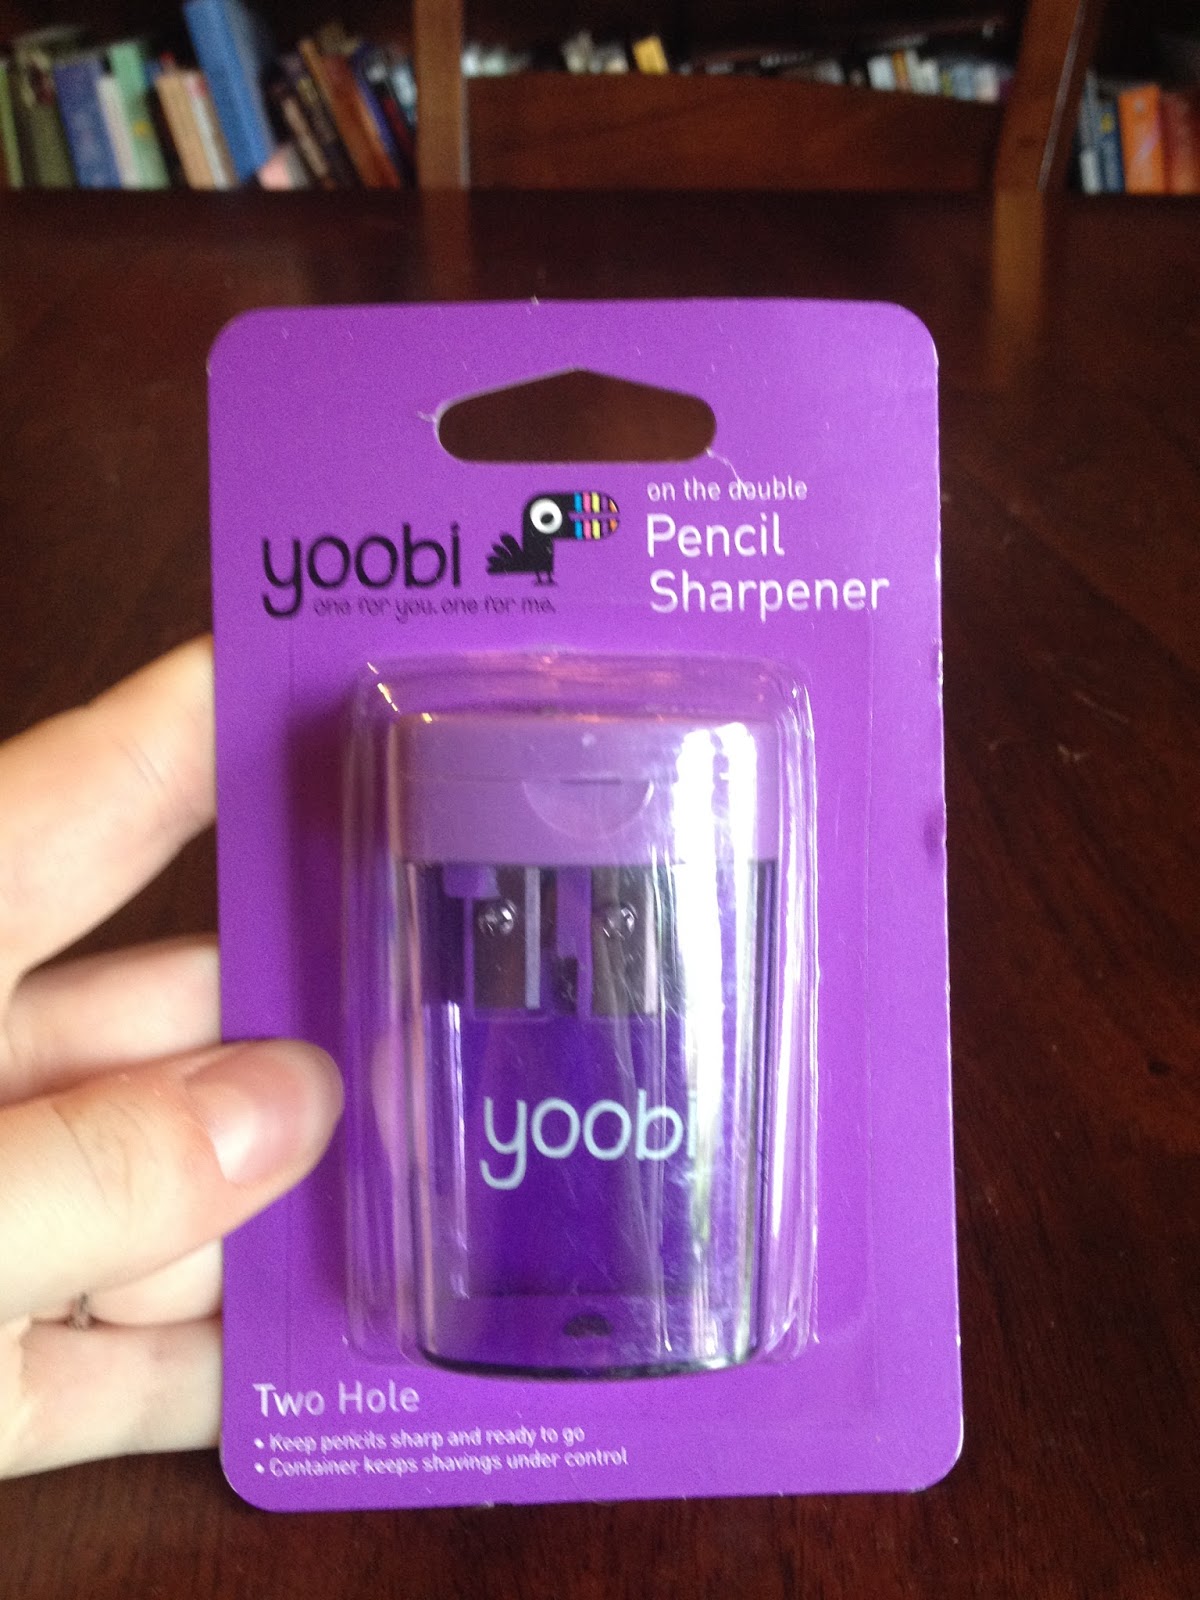
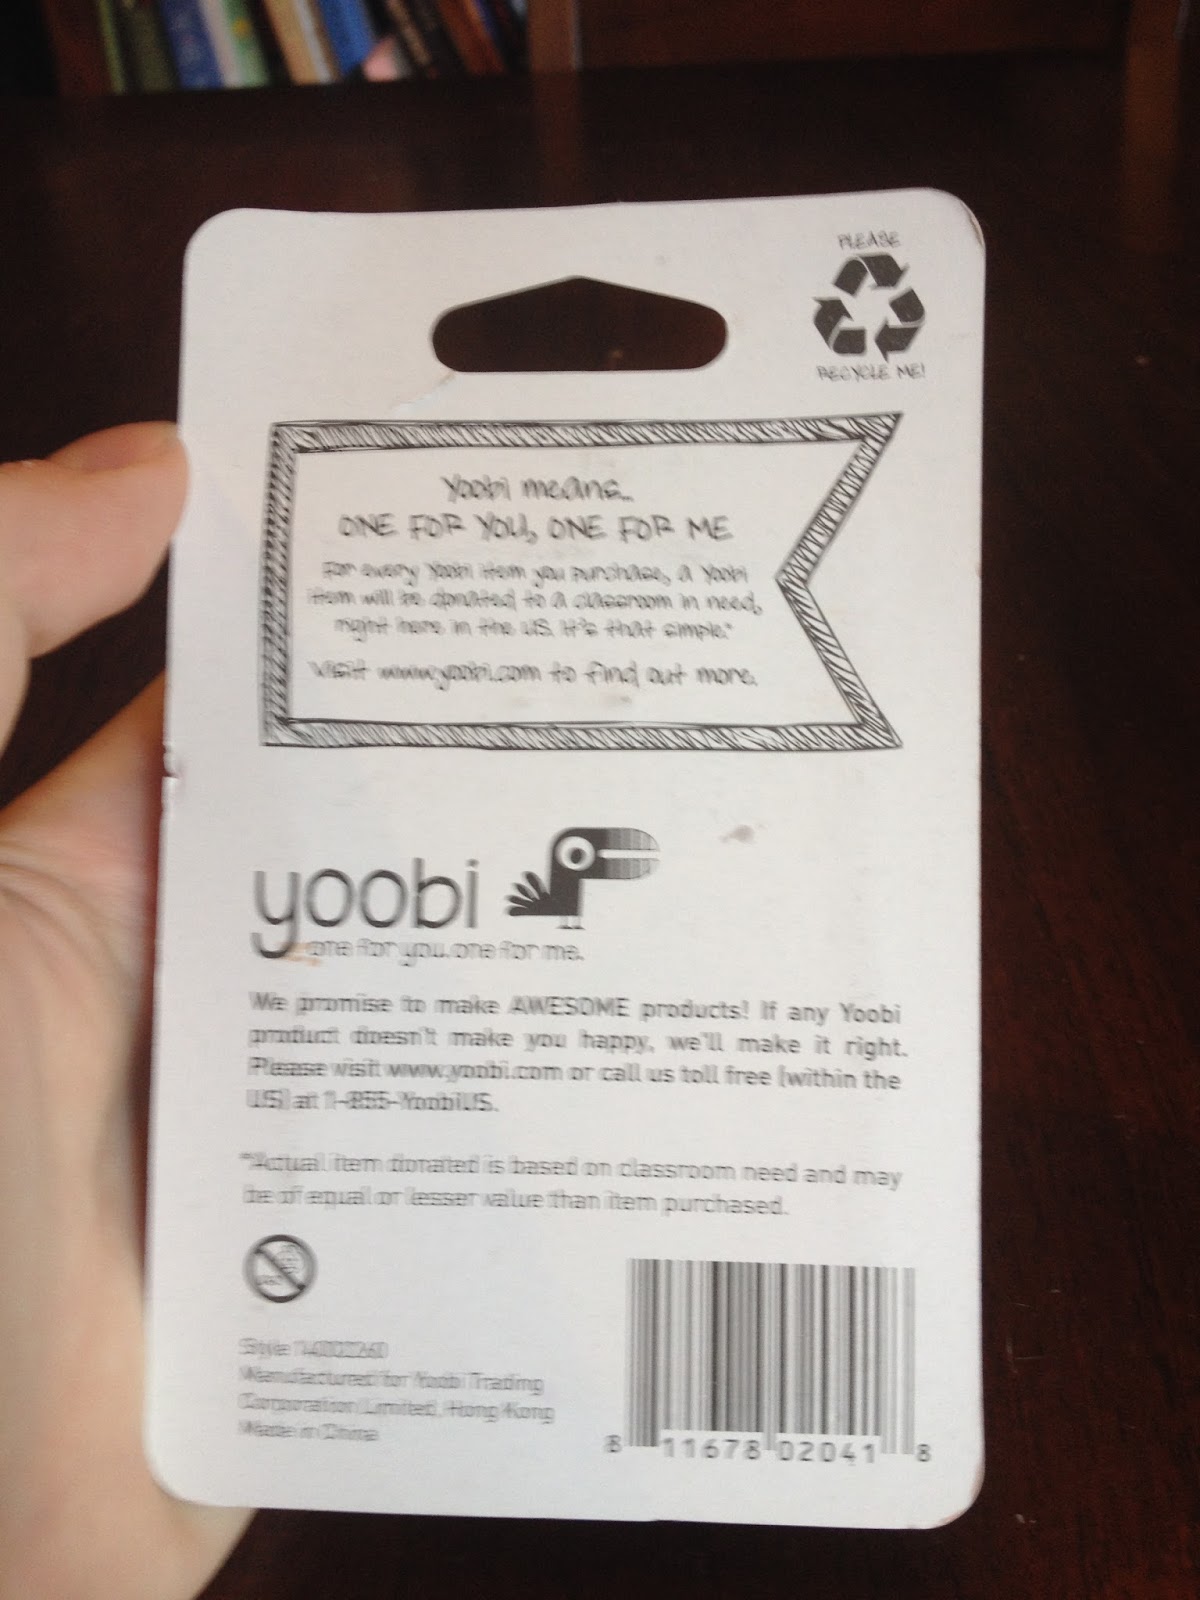
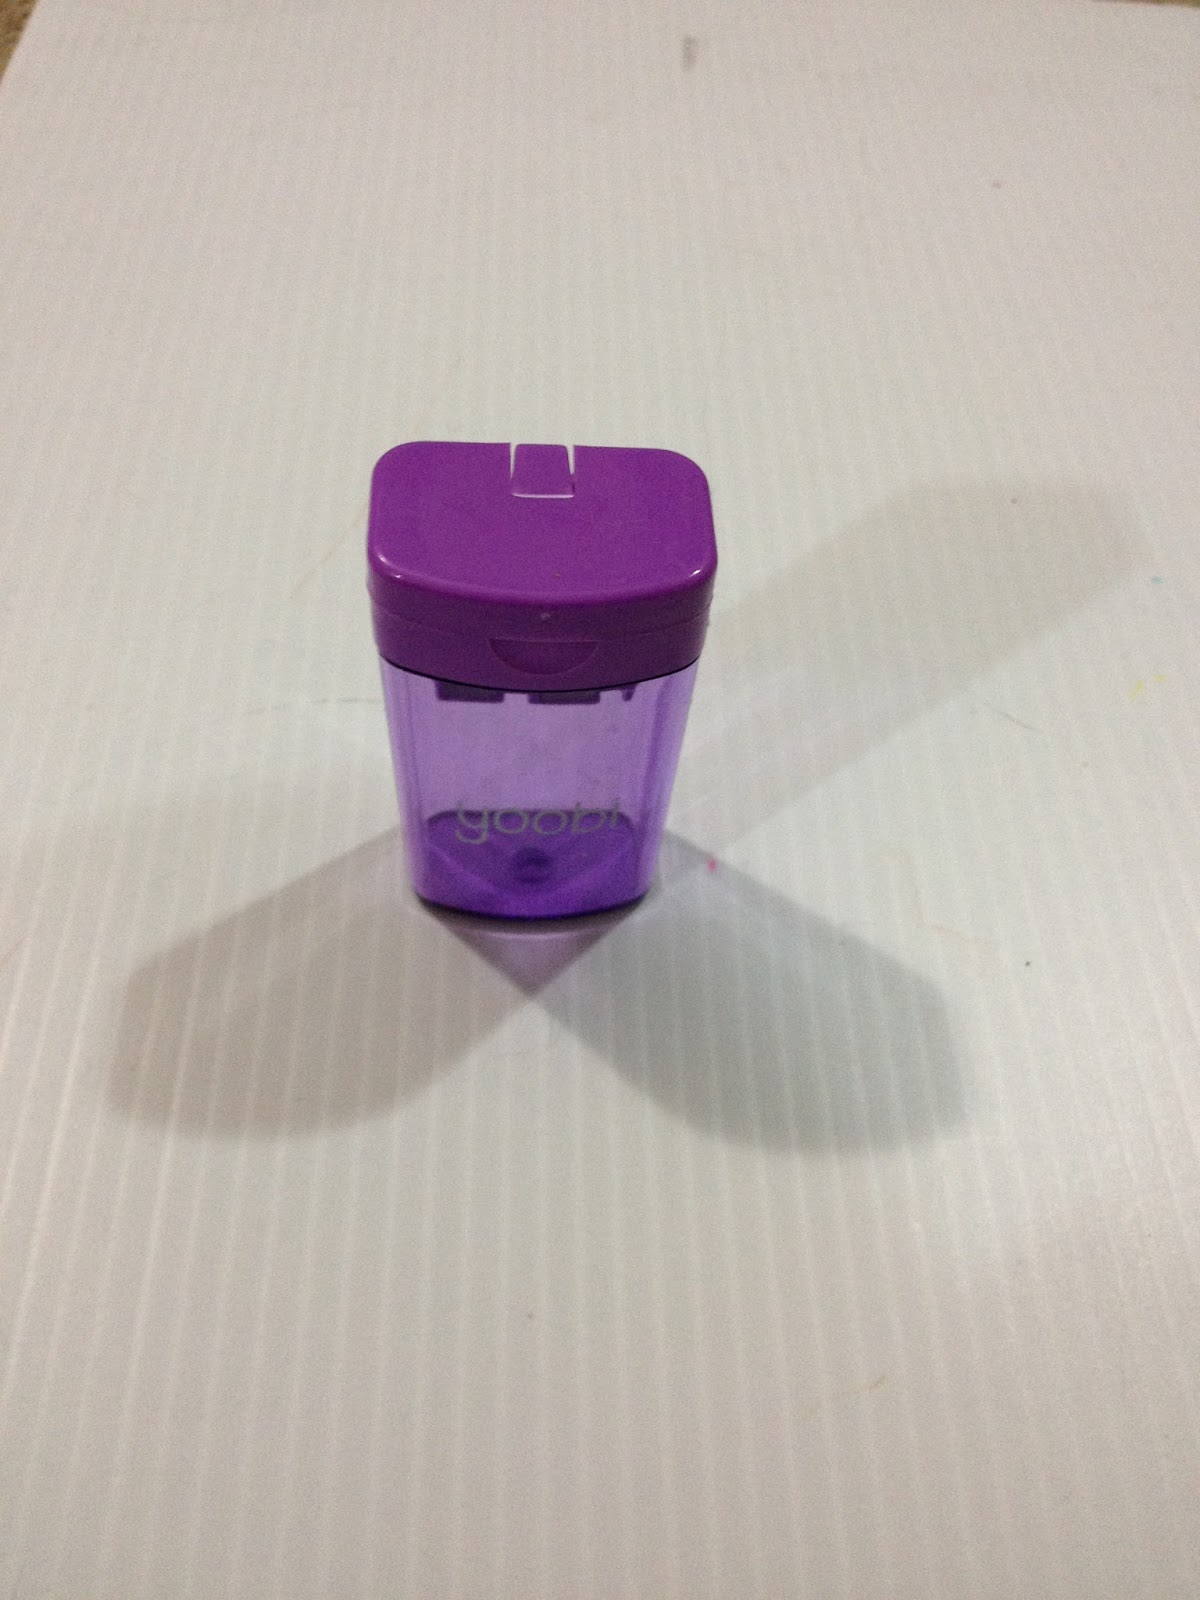

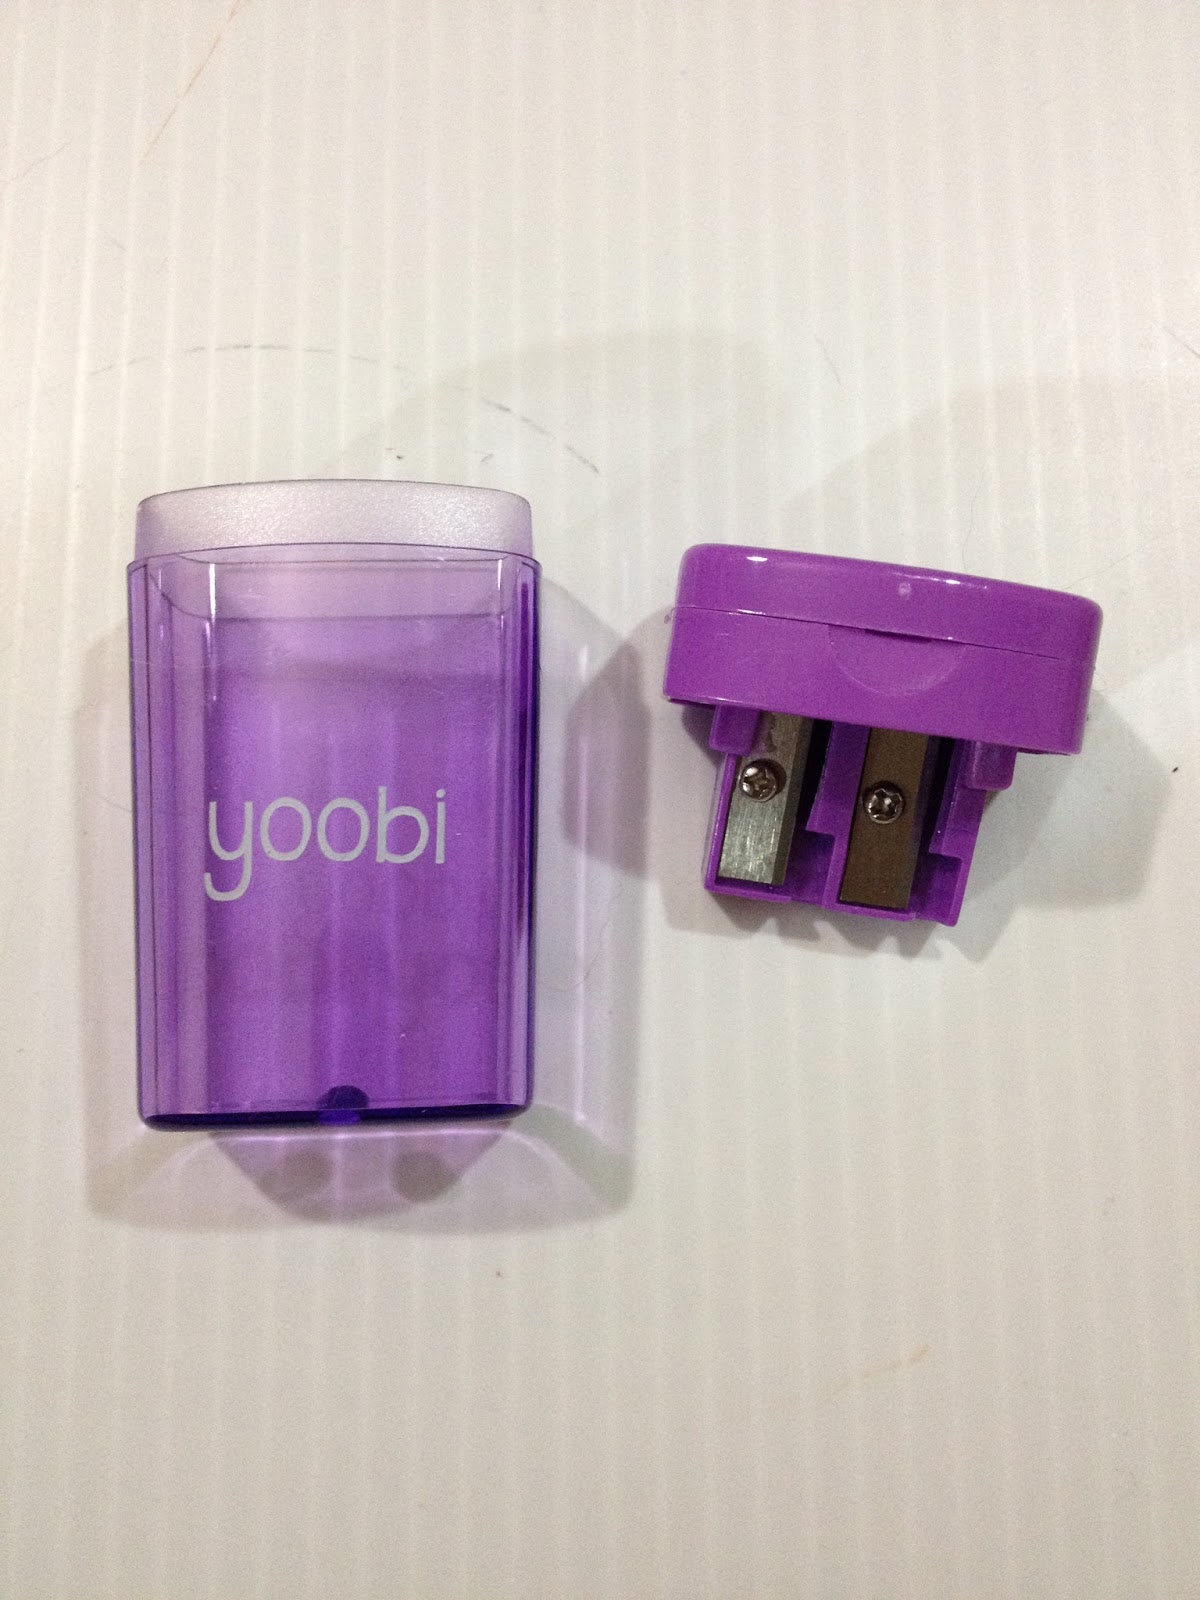
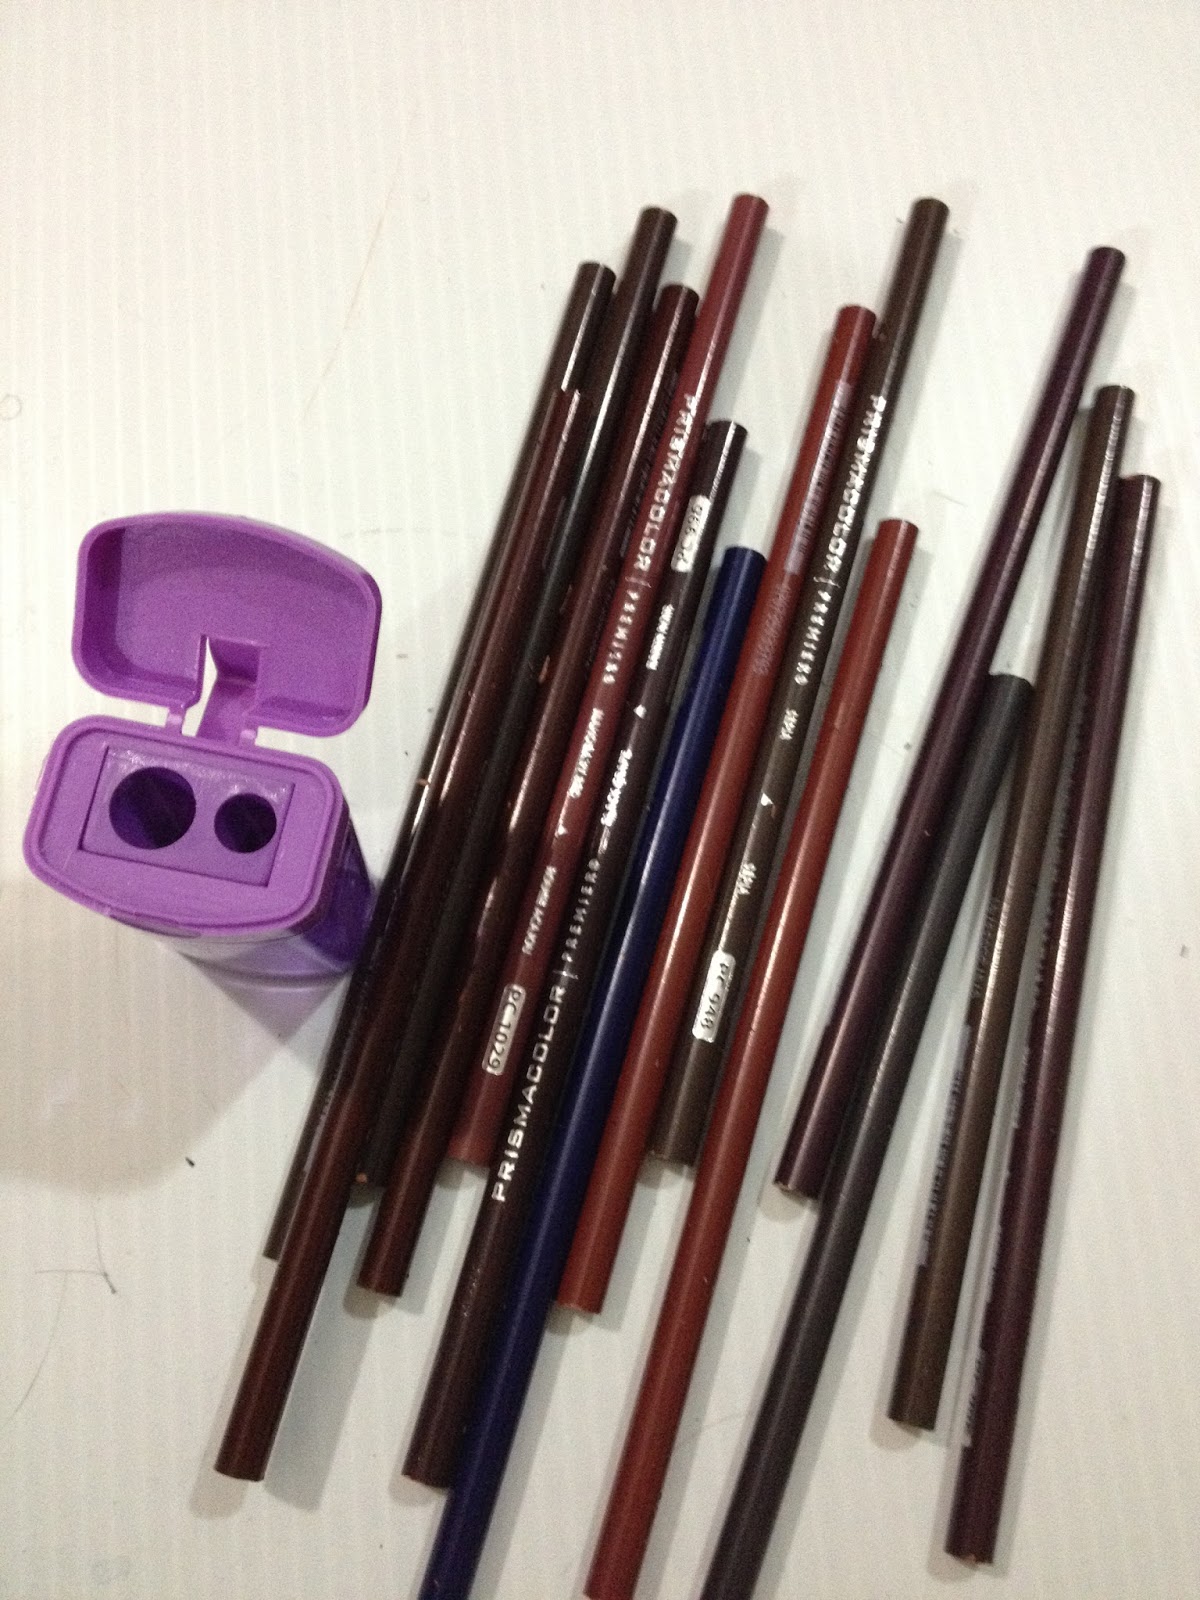

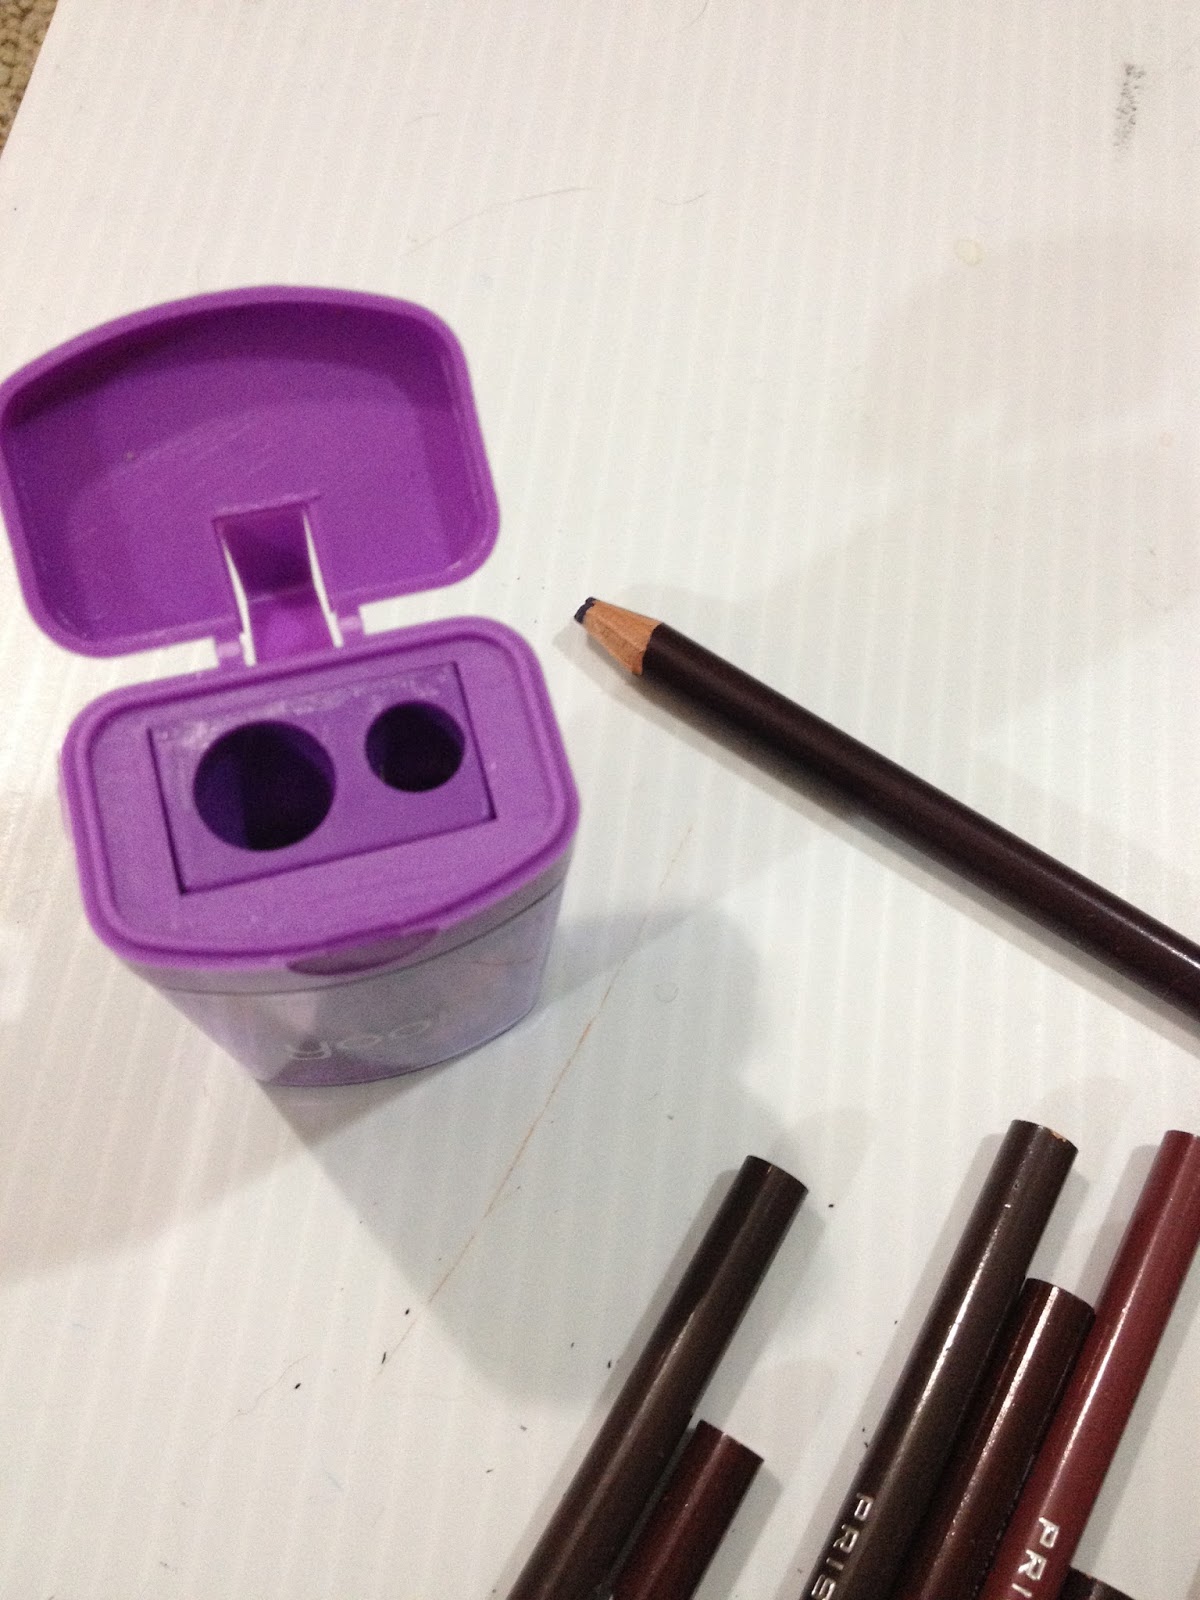

This particular Yoobi pencil sharpener is pretty awful- it snapped Prismacolor leads every time I used it. To be fair, Prismacolors are notorious for snapping off in hand sharpeners, especially if the pencils have been dropped in the past, and I usually use a KUM magnesium hand sharpener with no issue. It's a dual hole pencil sharpener, so if you have jumbo pencils in your collection, you should be able to sharpen them. The lead in those pencils tends to be thicker than that used in regular pencils, so it should be less prone to snapping.
The Verdict
Skip this sharpener. My absolutely favorite sharpeners don't tend to come with a compartment for shavings, I usually just use a box slated for the garbage as a bin in the meantime.
Overall Verdict
So far, I would recommend being very picky about your Yoobi purchases, as some work well and some do not. I'm revisiting Yoobi supplies in the future thanks to a donation from Heidi Black, so keep an eye out if you're interested in cheap art supply challenges or student grade supplies.
Please consider donating to this blog or purchasing from Natto-shop (http://nattosoup.com/shop) if you want me to continue publishing quality content. All materials tested were purchased from my own pocket. Keep on Truckin' Nattosoup is not under any sponsorship.
March 24, 2016
MTAC 2016 Con Announcement
This weekend, I'm tabling at MTAC (Middle Tennessee Anime Convention) in my current home-town, Nashville, TN!
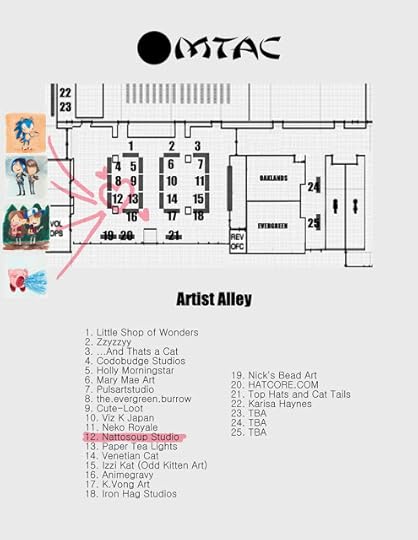
I'll have all sorts of goodies, including copies of 7" Kara and Chainmail Bikini, ashcan mini books, and loads of mini prints.


I restocked my cute ribbon barrettes and pins and I have loads of super cute designs to choose from if you're in the mood for some kawaii wearables.


I also have grab bags- $7 for a surprise bag full of goodies ranging from $10-$14 in value! I have a limited number of these, so get them while they last.

I will also have non-anime original art- succulents, flower, and mushroom illustrations in Copic marker and watercolor, as well as some original Kara illustrations.

I'm taking commissions all weekend- at con (dots for eyes, detailed chibis, pencils, and inks) as well as mail-ins (everything else) and I recently added a BUNCH of new commission options to my portfolio including markers, digital, and detailed watercolors.
New Mini Watercolors


So if you're at MTAC this year, make sure you swing by table 12 (Nattosoup Studio) in the artist alley and say hi!
Please consider donating to this blog or purchasing from Natto-shop (http://nattosoup.com/shop) if you want me to continue publishing quality content. All materials tested were purchased from my own pocket. Keep on Truckin' Nattosoup is not under any sponsorship.
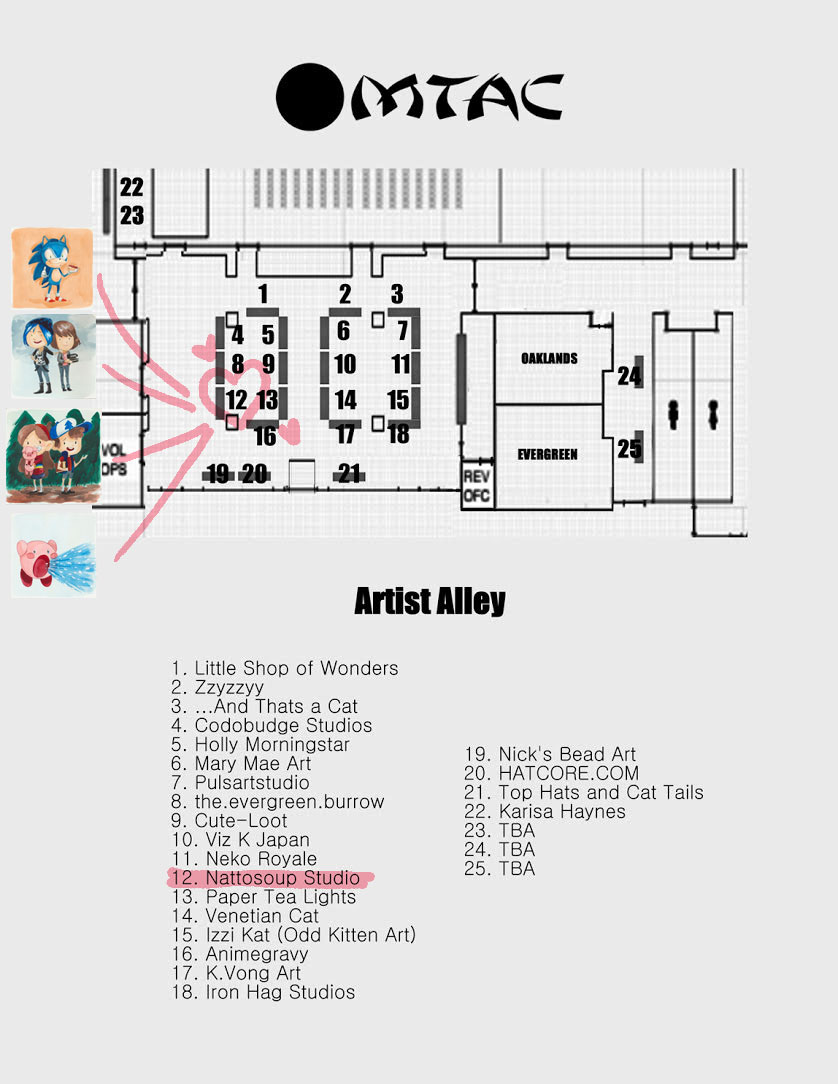
I'll have all sorts of goodies, including copies of 7" Kara and Chainmail Bikini, ashcan mini books, and loads of mini prints.
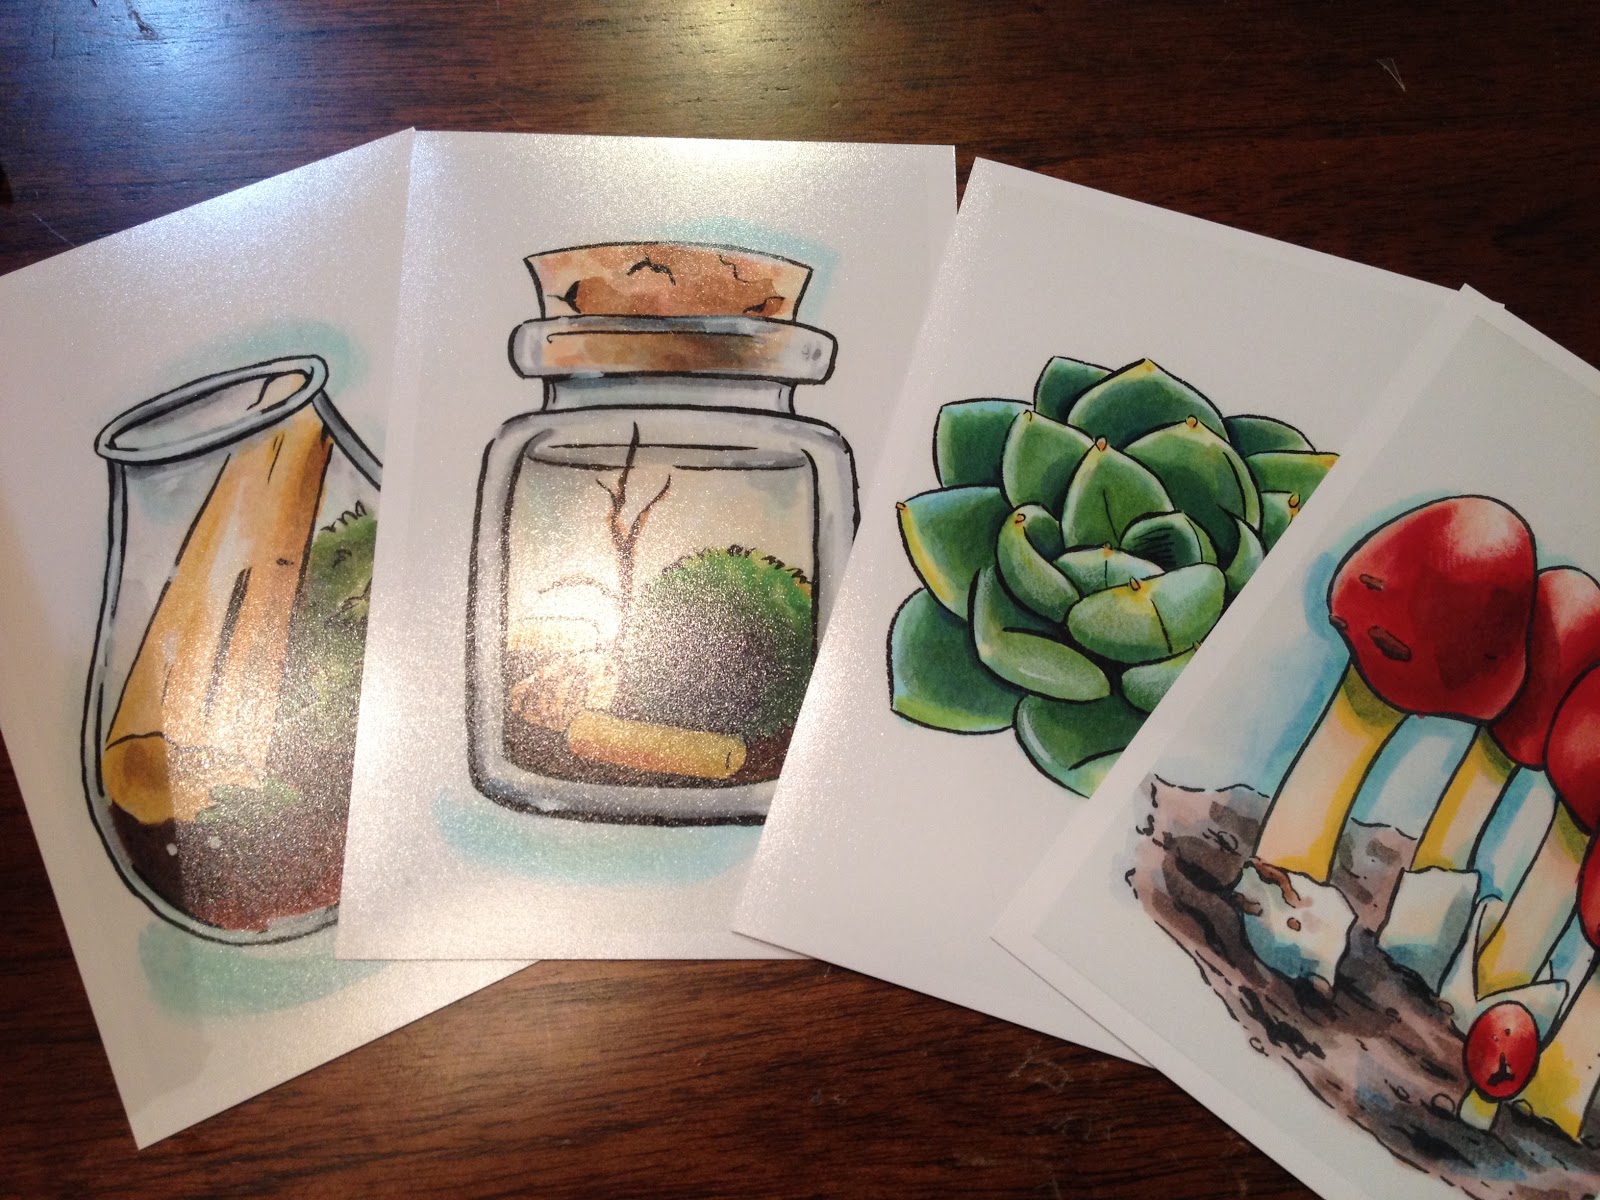

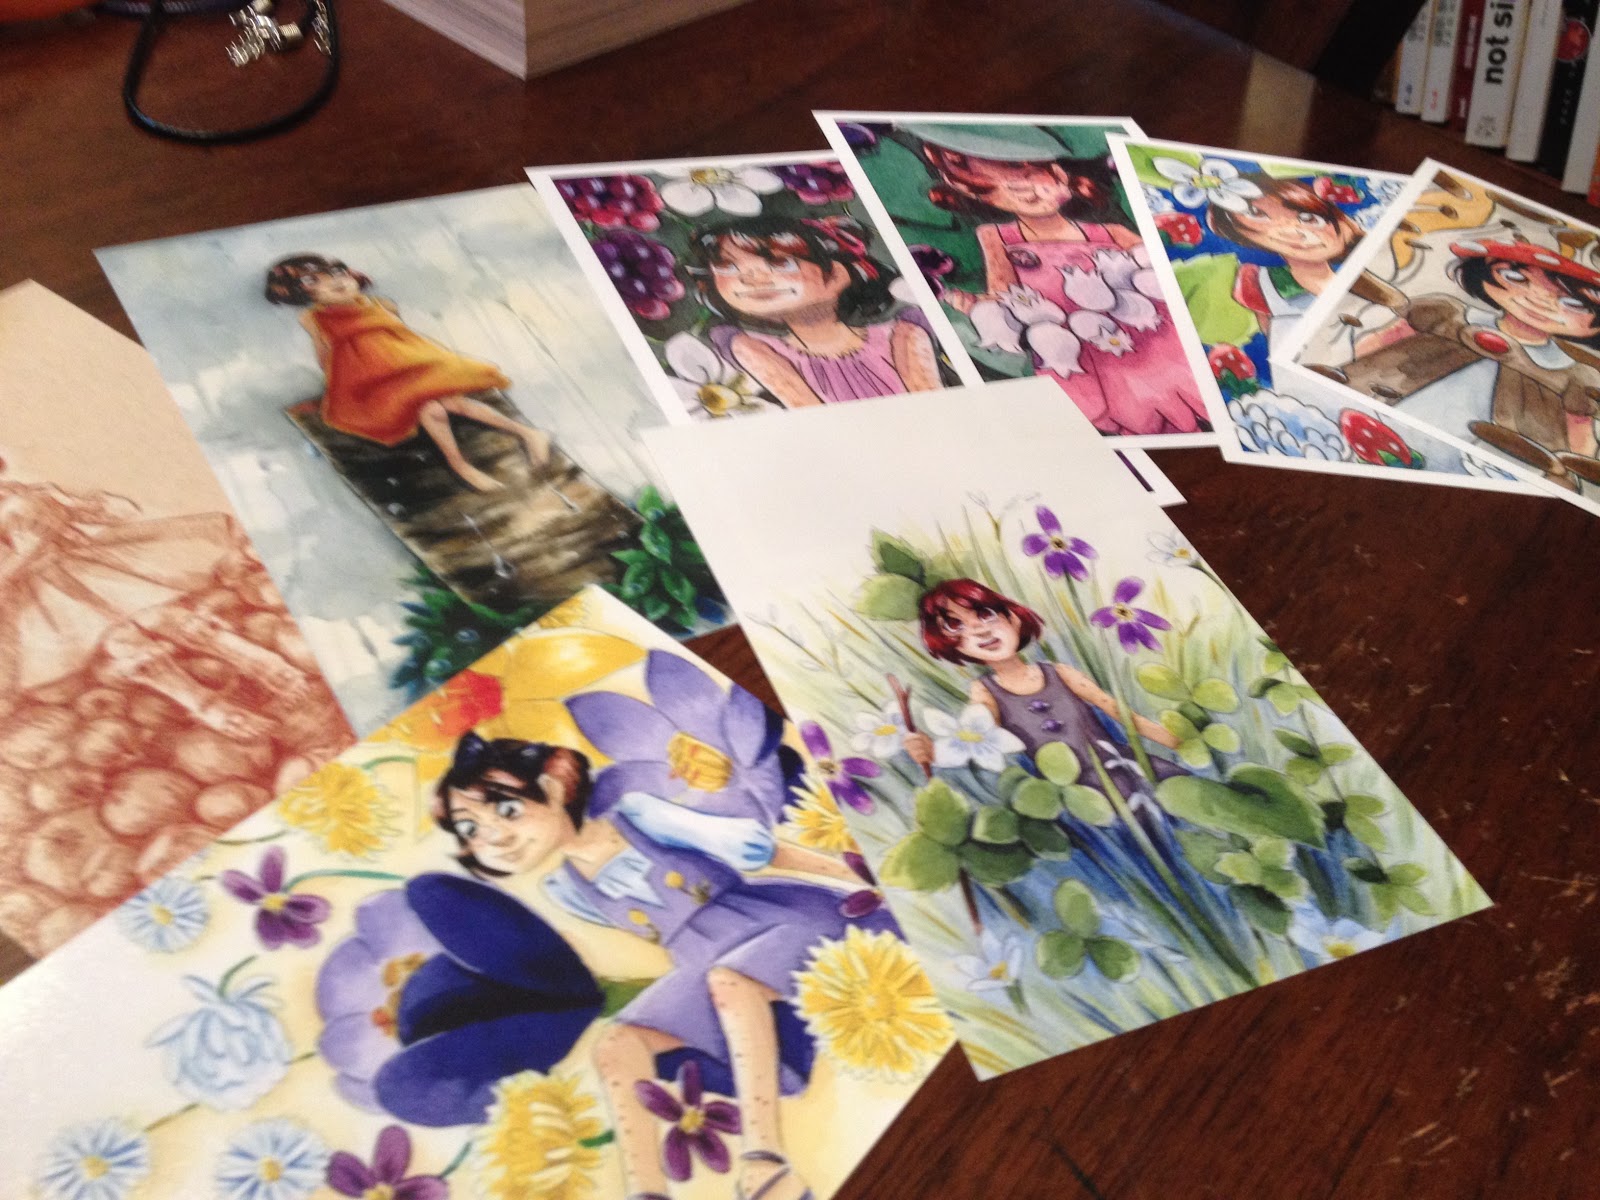
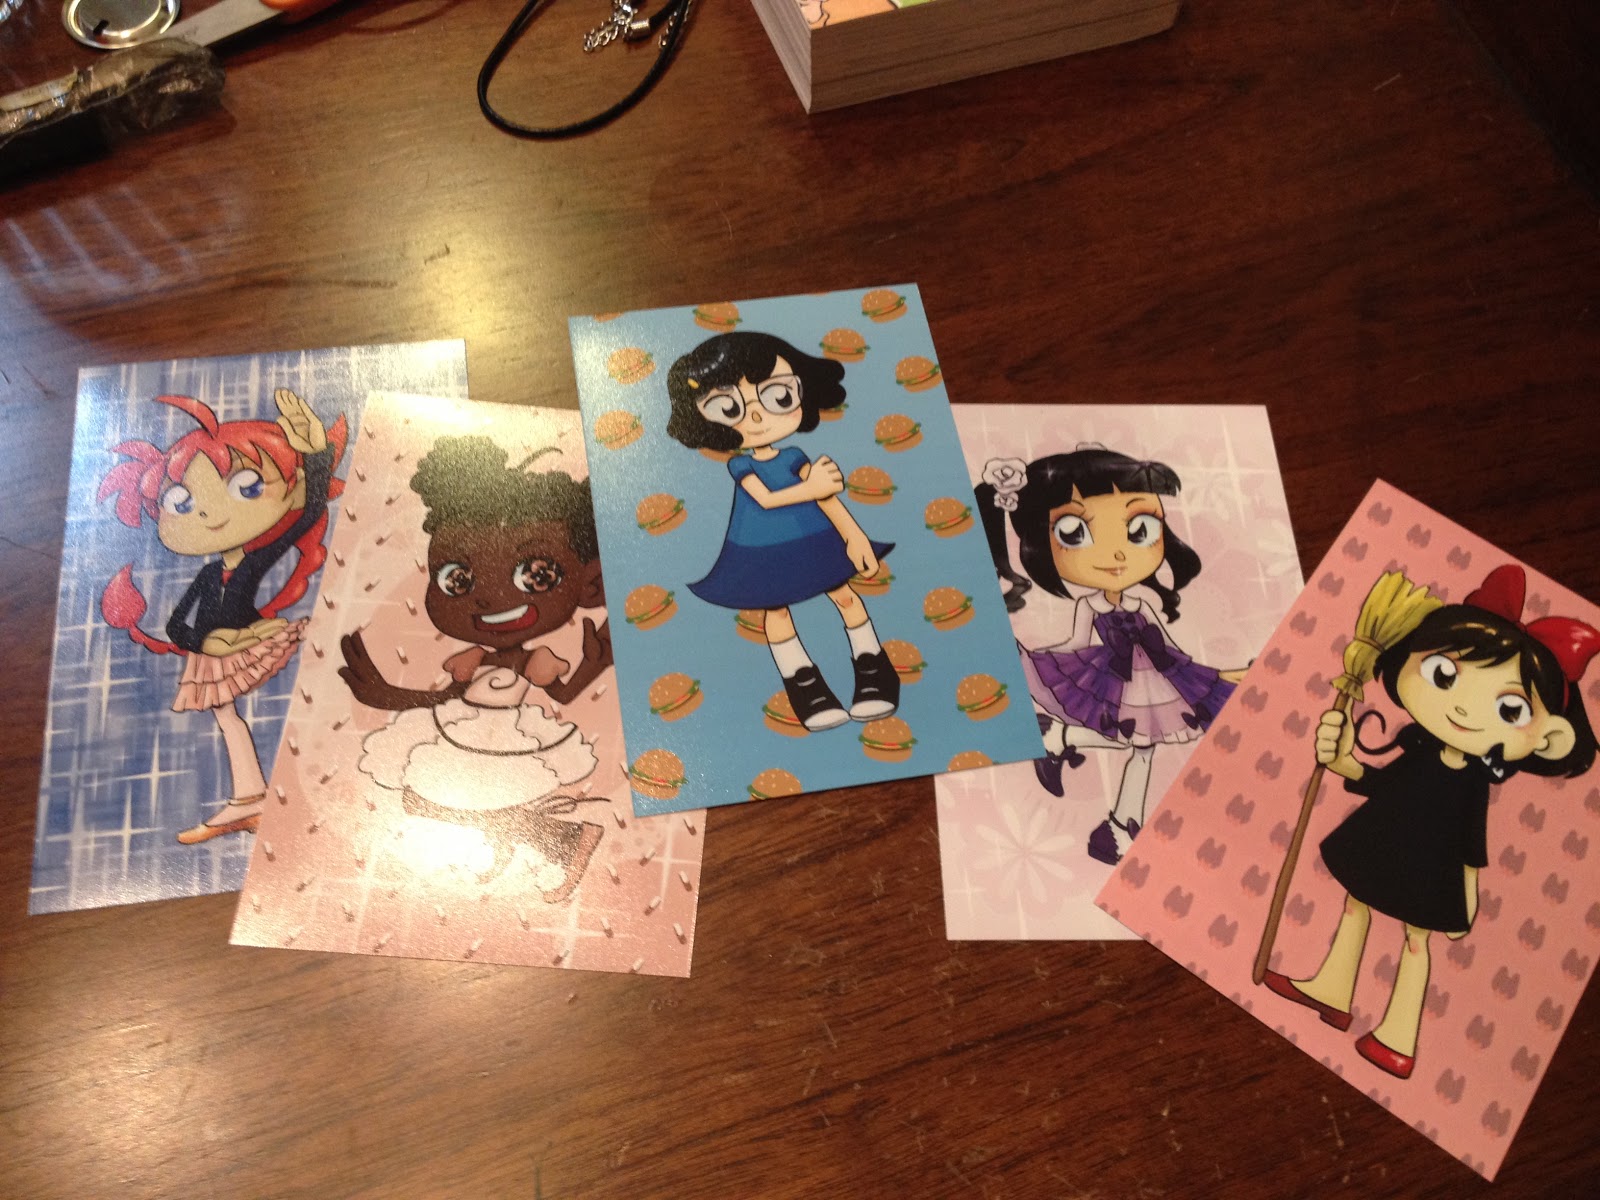

I restocked my cute ribbon barrettes and pins and I have loads of super cute designs to choose from if you're in the mood for some kawaii wearables.
I also have grab bags- $7 for a surprise bag full of goodies ranging from $10-$14 in value! I have a limited number of these, so get them while they last.
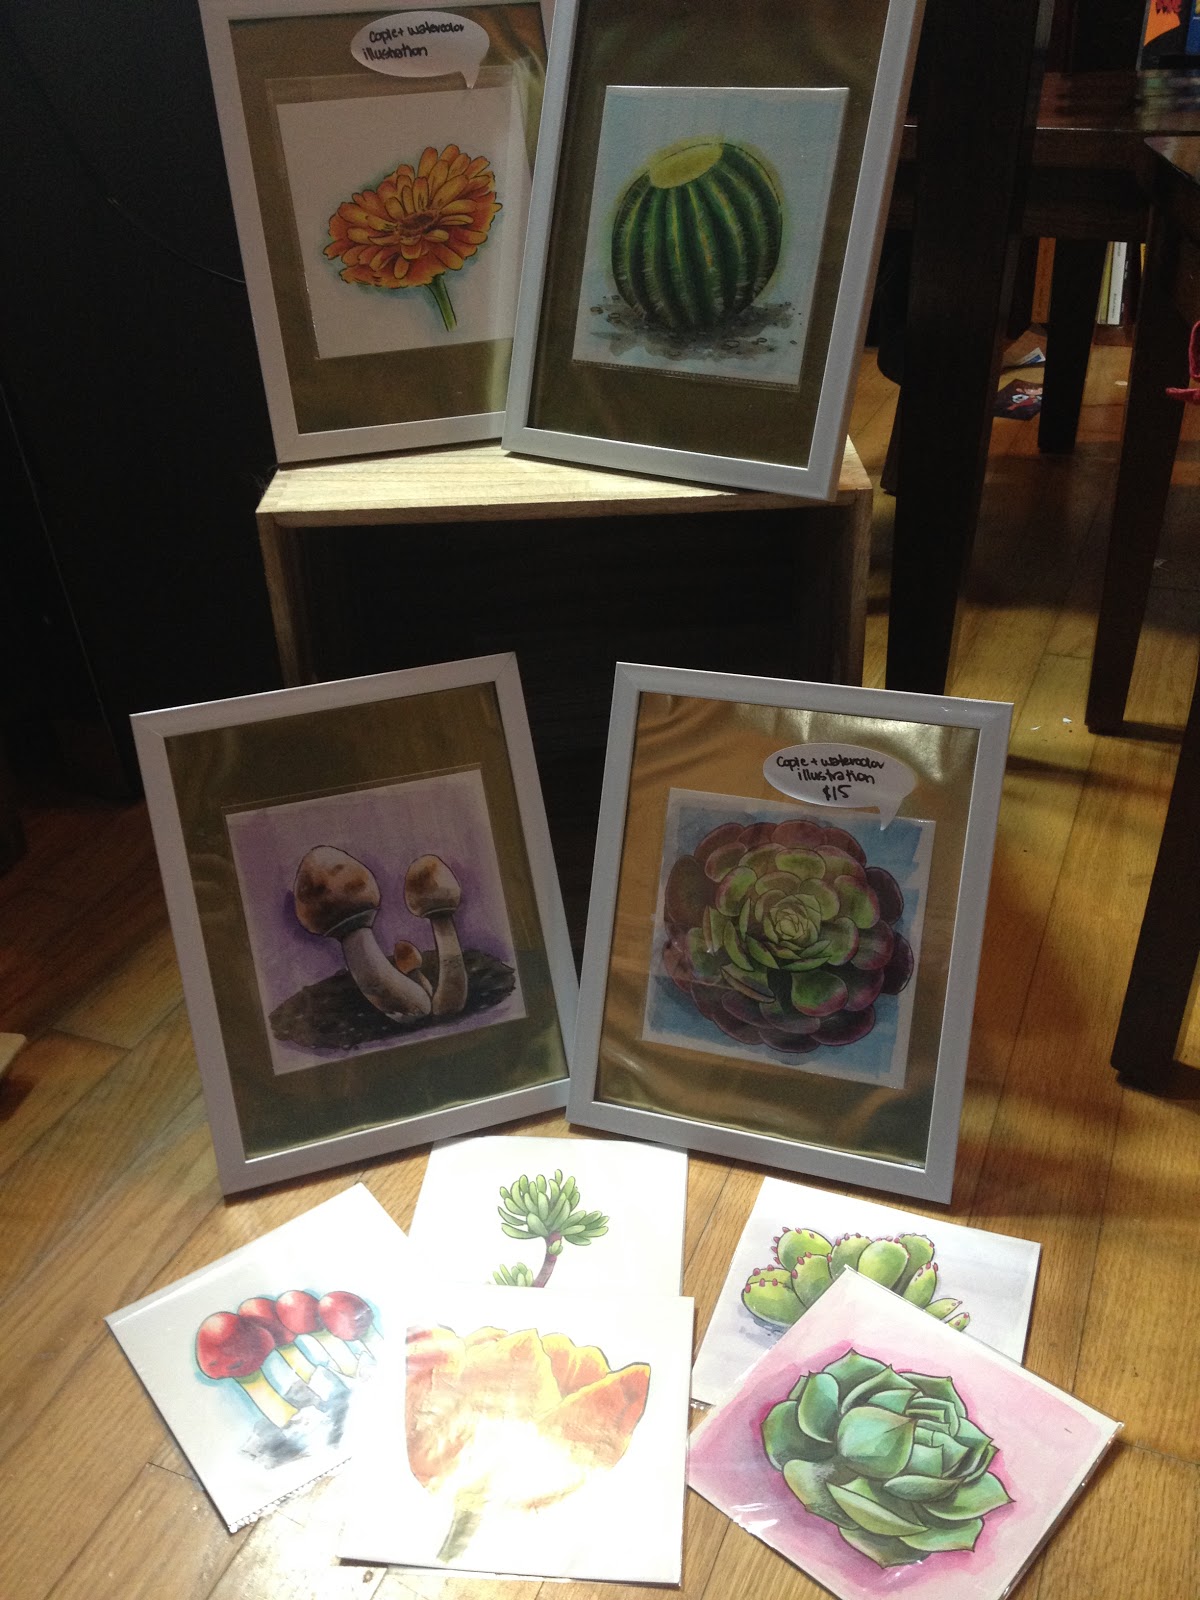
I will also have non-anime original art- succulents, flower, and mushroom illustrations in Copic marker and watercolor, as well as some original Kara illustrations.
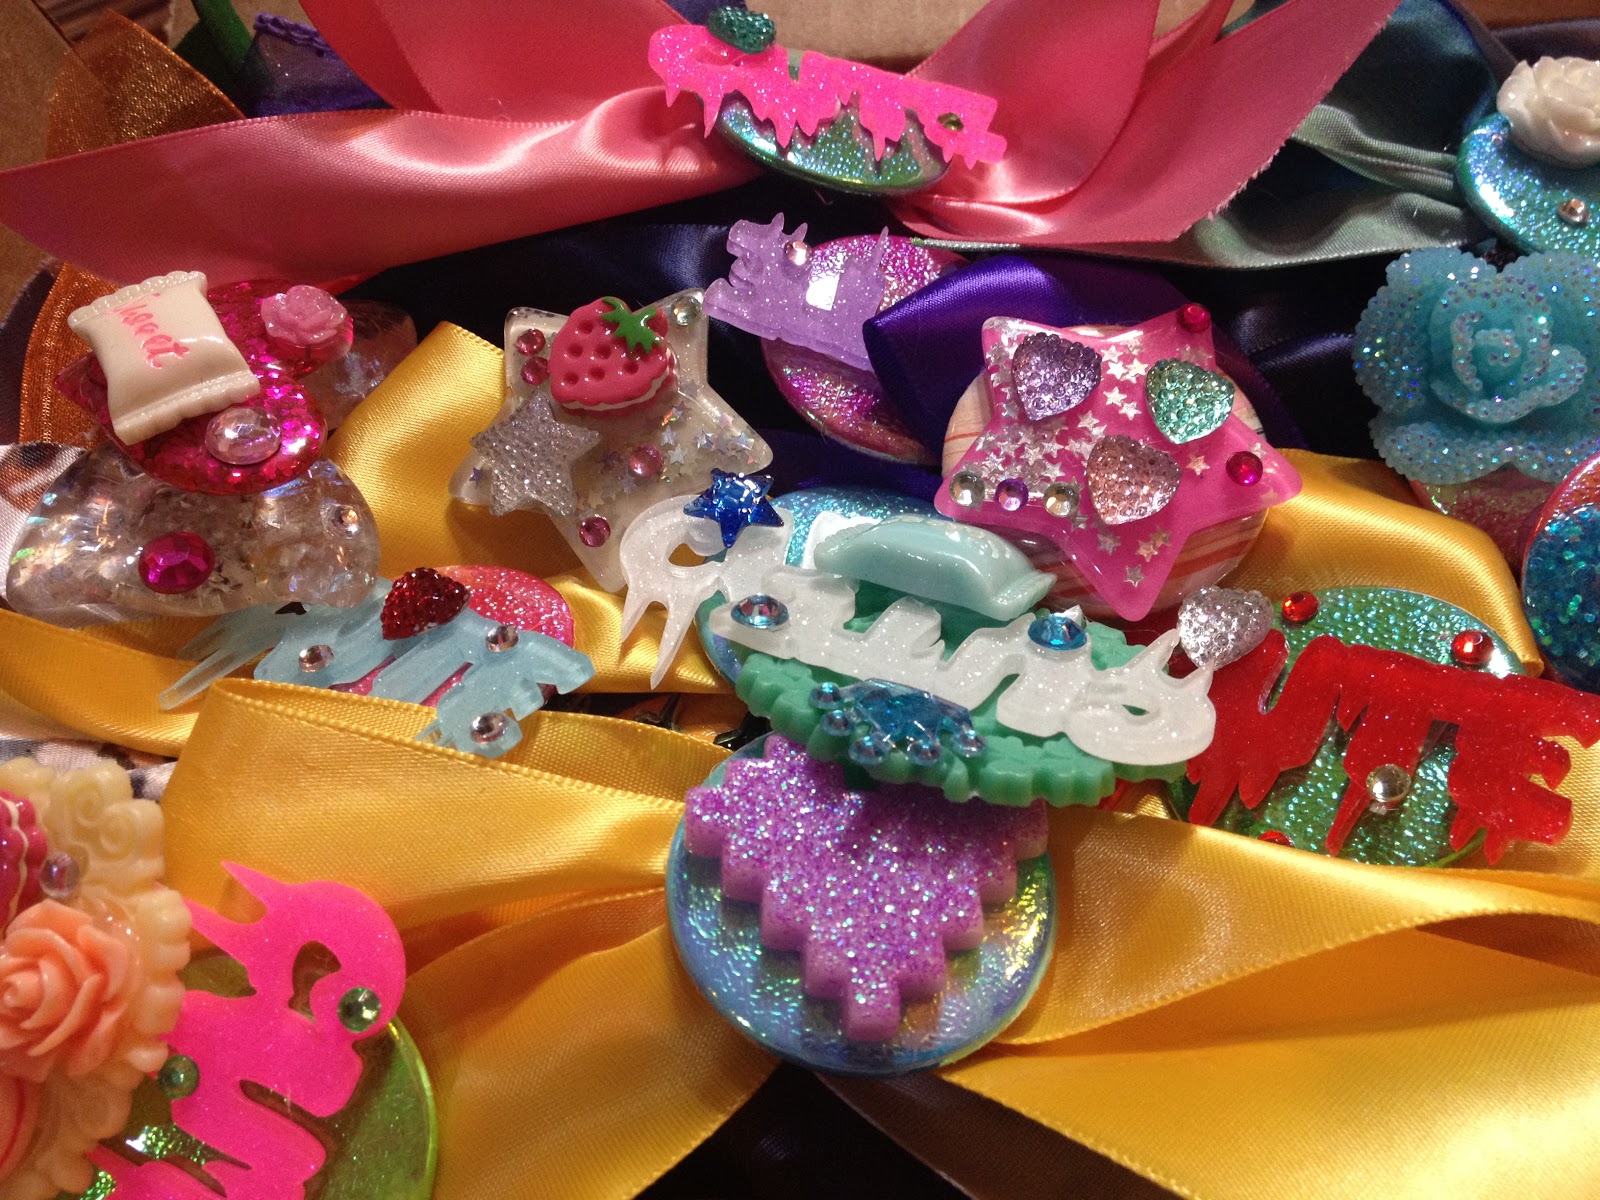
I'm taking commissions all weekend- at con (dots for eyes, detailed chibis, pencils, and inks) as well as mail-ins (everything else) and I recently added a BUNCH of new commission options to my portfolio including markers, digital, and detailed watercolors.
New Mini Watercolors
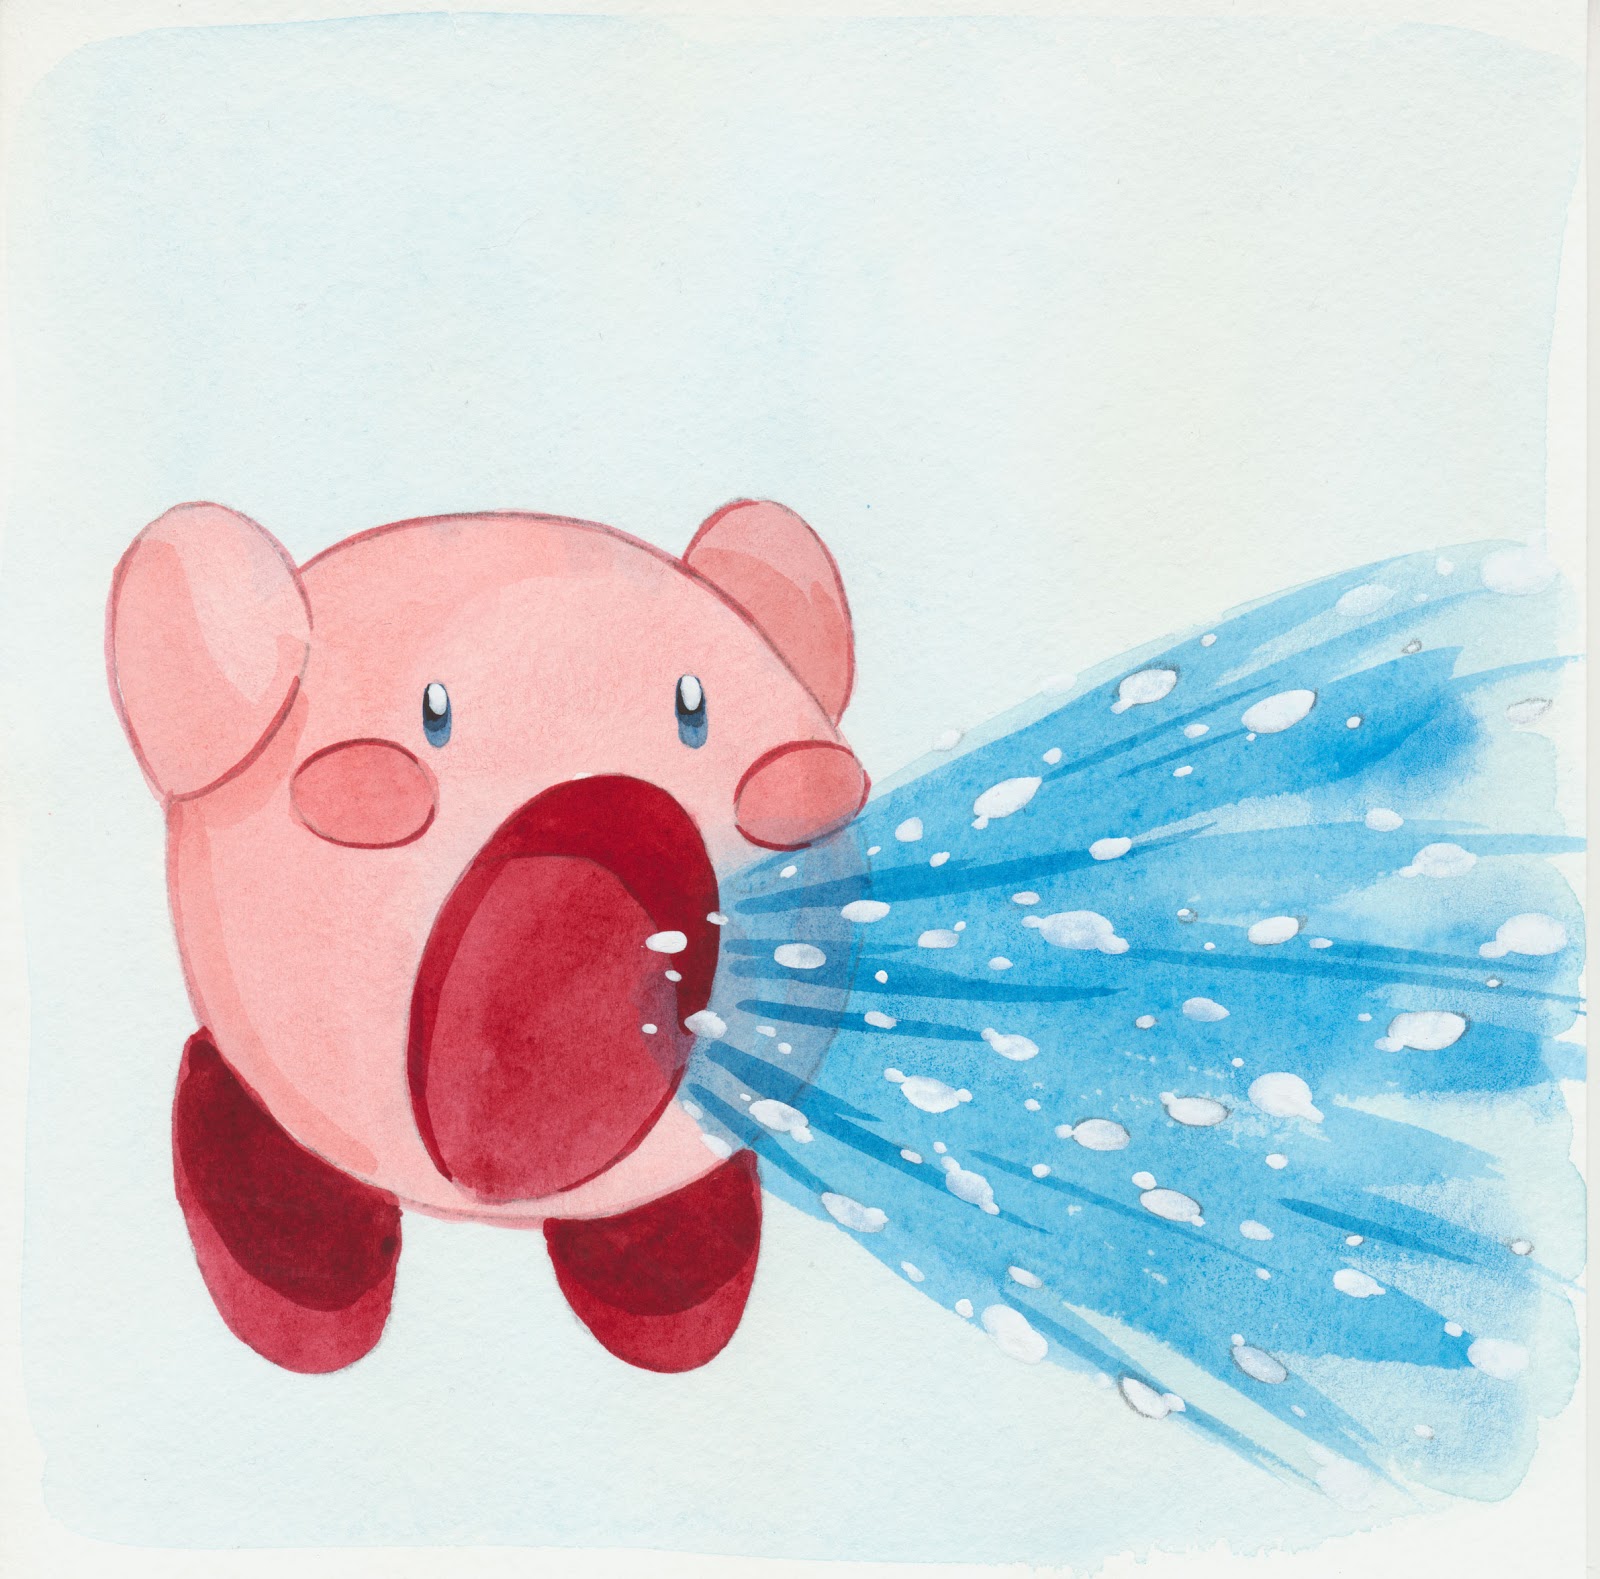


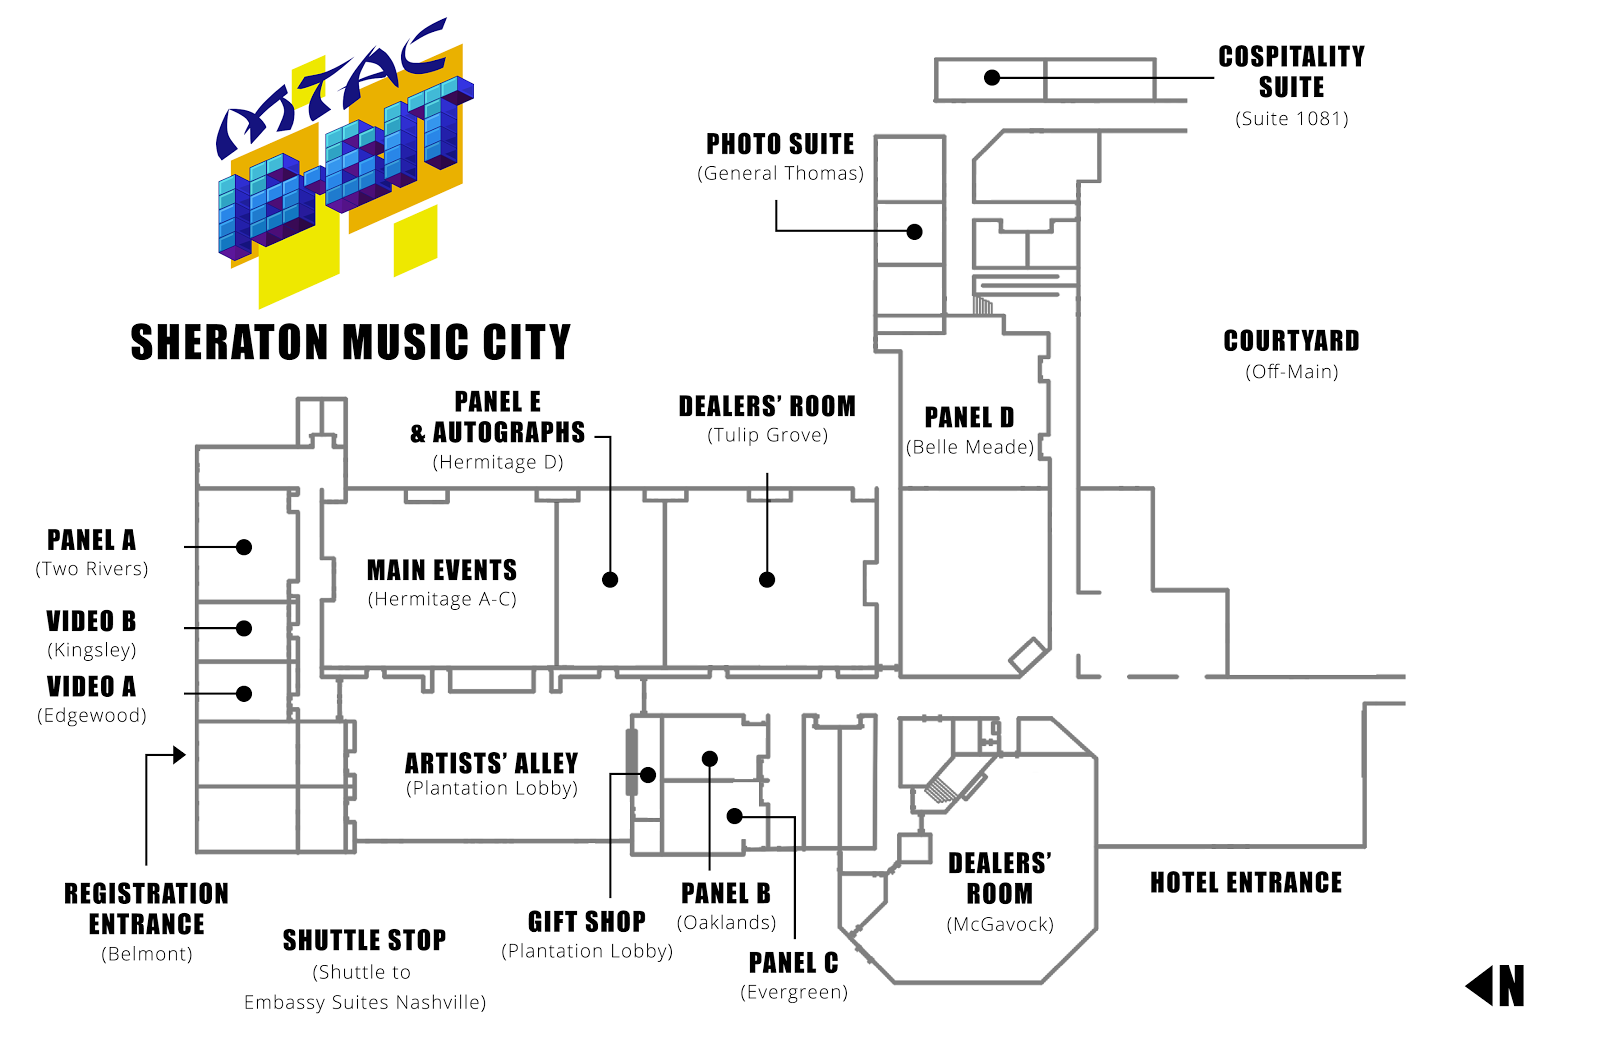
So if you're at MTAC this year, make sure you swing by table 12 (Nattosoup Studio) in the artist alley and say hi!
Please consider donating to this blog or purchasing from Natto-shop (http://nattosoup.com/shop) if you want me to continue publishing quality content. All materials tested were purchased from my own pocket. Keep on Truckin' Nattosoup is not under any sponsorship.


