
Becca Hillburn's Blog, page 42
June 3, 2016
The Cost of Content
Content Costs Something To Make
I've written about this topic, on an extremely personal level, quite a few times. Every time I talk about it on Twitter, or write about it here, it seems there are new people who are surprised that creating content for you to enjoy costs me money. There are new people who admit they'd never thought about how the content they enjoy was made, so this is a topic that bears repeated exploration. I wish more creators would write about it, so we could get a variety of voices and solutions involved, but unfortunately, making a living from your content is something creators can be cagey about.
After all, we assume in this country that if something is good, if something is worthwhile, or worthy of our time, the creator MUST be getting compensation from somewhere, if not from us, right?
While there are grants for art projects, and there are companies that pay employees to update the company blog, Instagram, or YouTube, many content creators on the internet are doing so on their own dime.
The Very Basic Formula
Time+Experiences+Resources (consumables)+Assets (how the content is provided to you)
So a YouTube tutorial about using Frisket with your alcohol markers would look like:
Time spent drawing the image (20 min)+time spent inking the image (15 min)+time spent setting up the recording space (10 min)+time spent recording (3 hours) + years of experience using alcohol markers so I know how to get the look I want the first time (6 years) + physical alcohol markers+physical alcohol ink+correct paper+graphite+frisket+ink from pen+eraser+camcorder+SD card+ computer+editing software+ time spent editing+experience with editing+access to music/resources+access to YouTube through internet connection
This formula doesn't take into consideration the 6 years of higher education in fine art and comics, the two degrees I hold, the years of practical experience spent drawing comics, painting, or rendering with markers, or the 7 years I've spent reviewing art supplies, presenting panels, and talking to people about the craft of making art and comics. This formula also doesn't take into consideration the electricity I need to run the lights I use to see my work, the cost of food and running water I need to stay alive, or the work I may have to turn down in order to make time to produce the content you access for free. The content I produce would not be possible without these sacrifices.
So this content, which I shared online to benefit others free of charge to them, has actually cost me a lot to make. This is true for all web content- webcomics, wikis, AMAs, blog tutorials, reviews, all web content costs the creator.
How Creators Recoup This Cost
Some creators help defray this cost, and even make a career out of content creation through sponsorships- a company pays them to make content on demand for a specific purpose. Other creators help defray operating costs by accepting products sent gratis from the company- they are legally required to disclose this, but many do not. For this blog, I have decided to place ads in the sidebar, utilize affiliate links with a couple of the suppliers I purchase from often (Amazon and Dick Blick). I also started a YouTube channel to expand the audience, and to recoup some of the operating costs through ad revenue. YouTube only pays creators if 30 seconds of a video ad is watched, or if overlay/card ads are clicked, so if you enjoy a creator's content, and would like to help support the creation of more, please try to watch 30 seconds of each ad whenever feasible. Finally, I launched a Patreon, because I wanted to give my readers a say in the content I create. The Patreon has allowed backers to unlock additional content like tutorials and livestreams, and has given me the funds necessary to commission other creators to write content for the blog. I currently do not have any sponsorships to help cover the costs of running this blog, but I have information for those interested here.
Without financial support from Amazon Associates, YouTube ad revenue, and Patreon, I would have had to massively scale back the amount of work I do on the blog, and probably would not have been able to launch the YouTube channel. I'm still not paying my bills with this, but at least I'm not running myself into the red creating content for others to enjoy.
My monthly breakdown:
Since the majority indicated that you do not attend conventions, I am omitting that as a source of funding for/from this blog or the YouTube channel. I am also discounting sales from my shop because at this time, they are negligible.
Amazon Associates- < $15, Patreon- $47, YouTube- $25
Total revenue from blog and YouTube: $87 per month
This is $1,044 per year, if those estimates remained steady- they vary month to month, but the Patreon has steadily grown since it's launch two months ago. Regardless, $1044 is not a living wage. $1044 is not fair compensation for all the work that goes into this blog, or into the YouTube. This blog sees 1.4k hits per day, on a bad day. On a good day, 1.8k hits. That's about 715,400 pairs of eyeballs on my blog every year. Even if many of those eyeballs belong to loyal readers, that's still a lot of eyeballs, and not a whole lot of income for the amount of time and resources that go into updating.
Fortunately, that $1044 is not the entirety of my income. Conventions, especially MTAC and Mechacon, have improved over the years to the point where I can set a little money aside for a rainy day. Of course, at conventions, I really work for that money- I am customer service, production, and inventory all in one. I am busy cranking out commissions, selling copies of 7" Kara Volume 1, and pushing Sassy Buttons (all of which are available in my online shop, for those of you who don't attend conventions, but still enjoy my work). Every year, I try to participate in a couple for-profit anthologies, and my take from the project often depends on how well the Kickstarter itself does. This year, I'm finally wrapping up Gizmo Grandma, so I should see some income from those illustrations as well. Outside of convention recaps written for this blog and How To Be a Con Artist, those sources of income don't have much to do with the blog or the YouTube, and have more to do with my work as a professional illustrator.
Like so many artist blogs, this blog was created with a couple purposes in mind- to sell my work (commissions and comics) and to attract industry attention. Over the years, the focus has shifted a bit (ok, a lot) towards art education and information, but my passion for comics (and making a living through my comics) hasn't changed. This year, I'm using my passion for comics in general, and my own comic in particular to fuel much of the content for the blog and YouTube- comic craft tutorials are a focus as I work on finishing Chapter 6 from Volume 2 of 7" Kara.
I'm sure the numbers I shared with you guys, while kinda pitiful and sad, aren't unique to this blog. Although other comic artists, fine artists, and art supply reviewers might be reticent to share their numbers, I have a creeping suspicion that those who don't enjoy some of the benefits of sponsorship might have difficulty breaking even on supplies, or difficulty justifying the time spent creating content.
If you enjoy something, have learned something, were inspired by something, or have otherwise benefited from the existence of a thing, please keep the creator's needs in mind. Please do not divorce the creation from the creator.
Ways you can help contribute to creators whose content you enjoy:
Use affiliate links provided when making purchasesClick ads that are relevant to your interestsTurn off ad blockers, or add your favorite creator-owned sites to a pass listWatch at least 30 seconds of ads that run on YouTube- don't just skip the ad, the creator sees no money from thatPurchase regularly from the creator's shopContribute to their donation/tip jar if there's one upBack their Patreon
How You Can Contribute Here
My Comic
My Shop
My Digital Shop
My Patreon
My YouTube
The biggest source of support you can provide is purchasing a physical copy of 7" Kara, Volume 1 from my online shop. At $15 per book (the book costs me $8 each to order from my printer, and you get a free wooden charm in the bargain), this doesn't have a large financial impact, but the emotional impact is huge- I live to make quality illustrated books that can be enjoyed by all ages. Even if you don't personally enjoy comics, please consider ordering a copy of 7" Kara for someone you love, especially if you enjoy my art or enjoy this blog. Giving my work a fair chance is the biggest favor you, as a reader, can do for me.
Please consider donating to this blog or purchasing from Natto-shop (http://nattosoup.com/shop) if you want me to continue publishing quality content. All materials tested were purchased from my own pocket. Keep on Truckin' Nattosoup is not under any sponsorship.


June 1, 2016
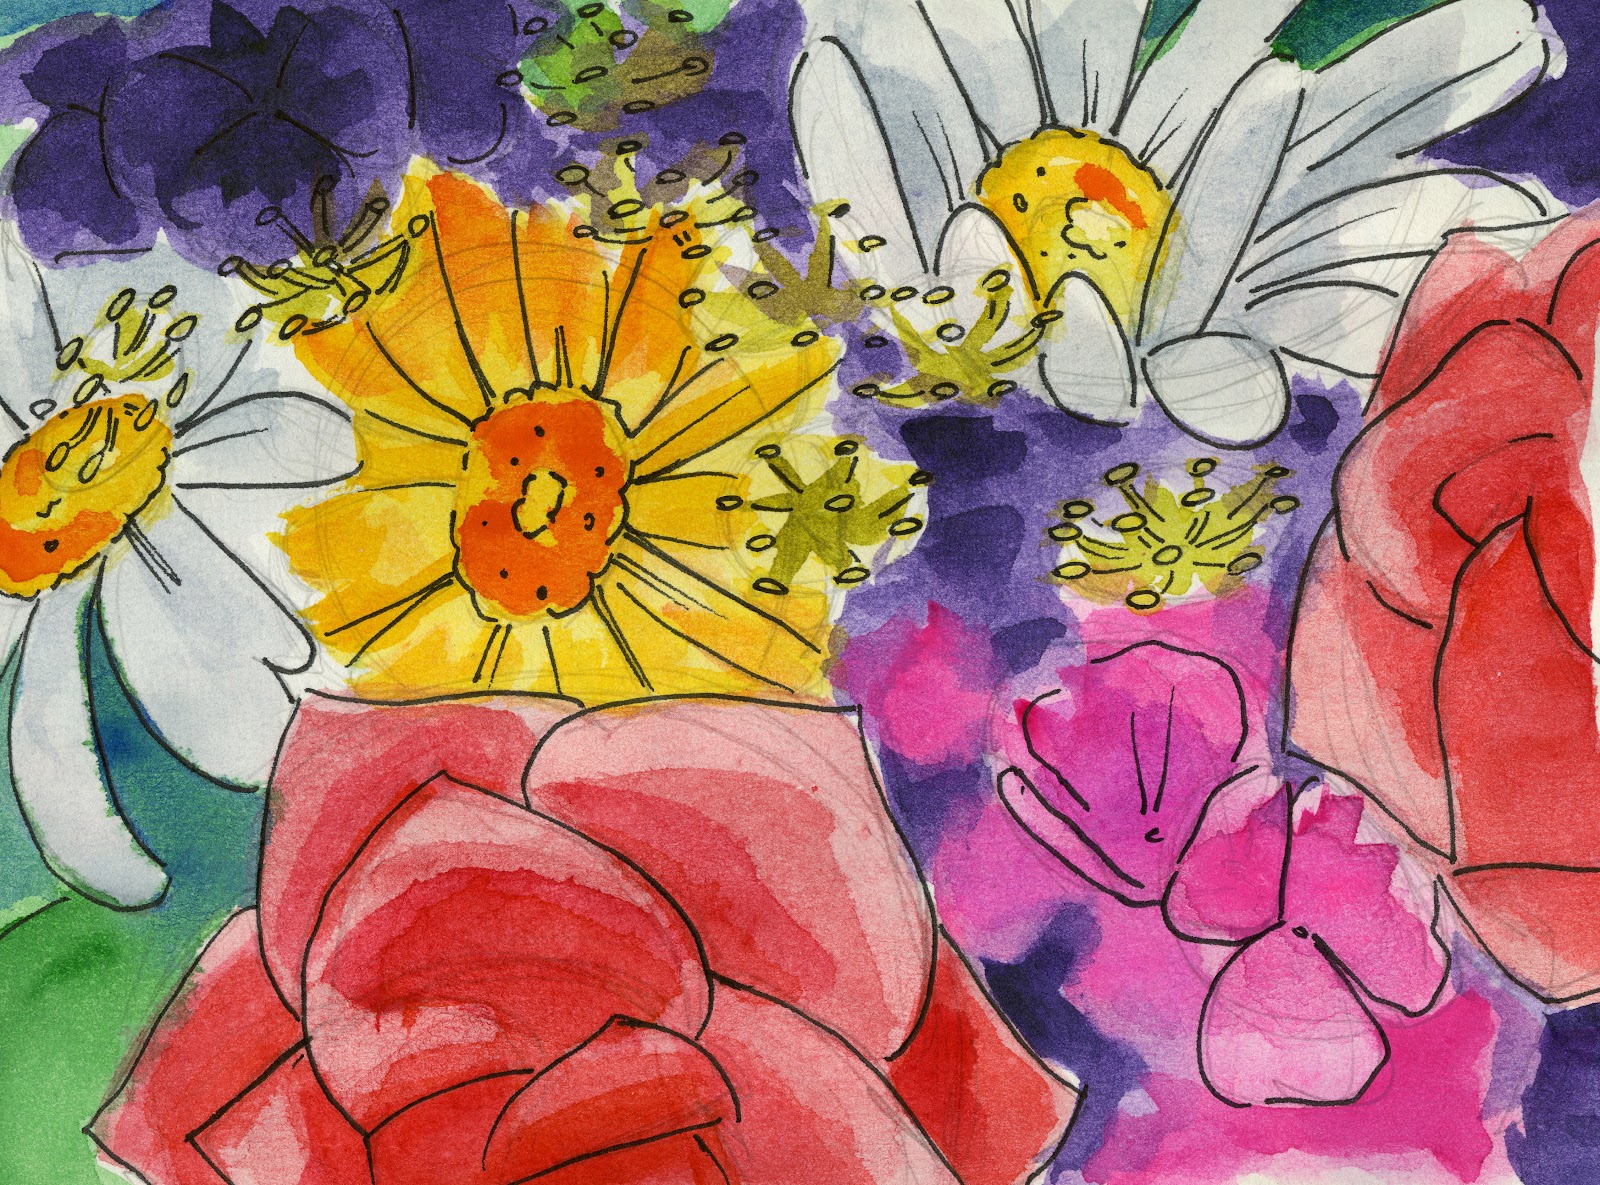
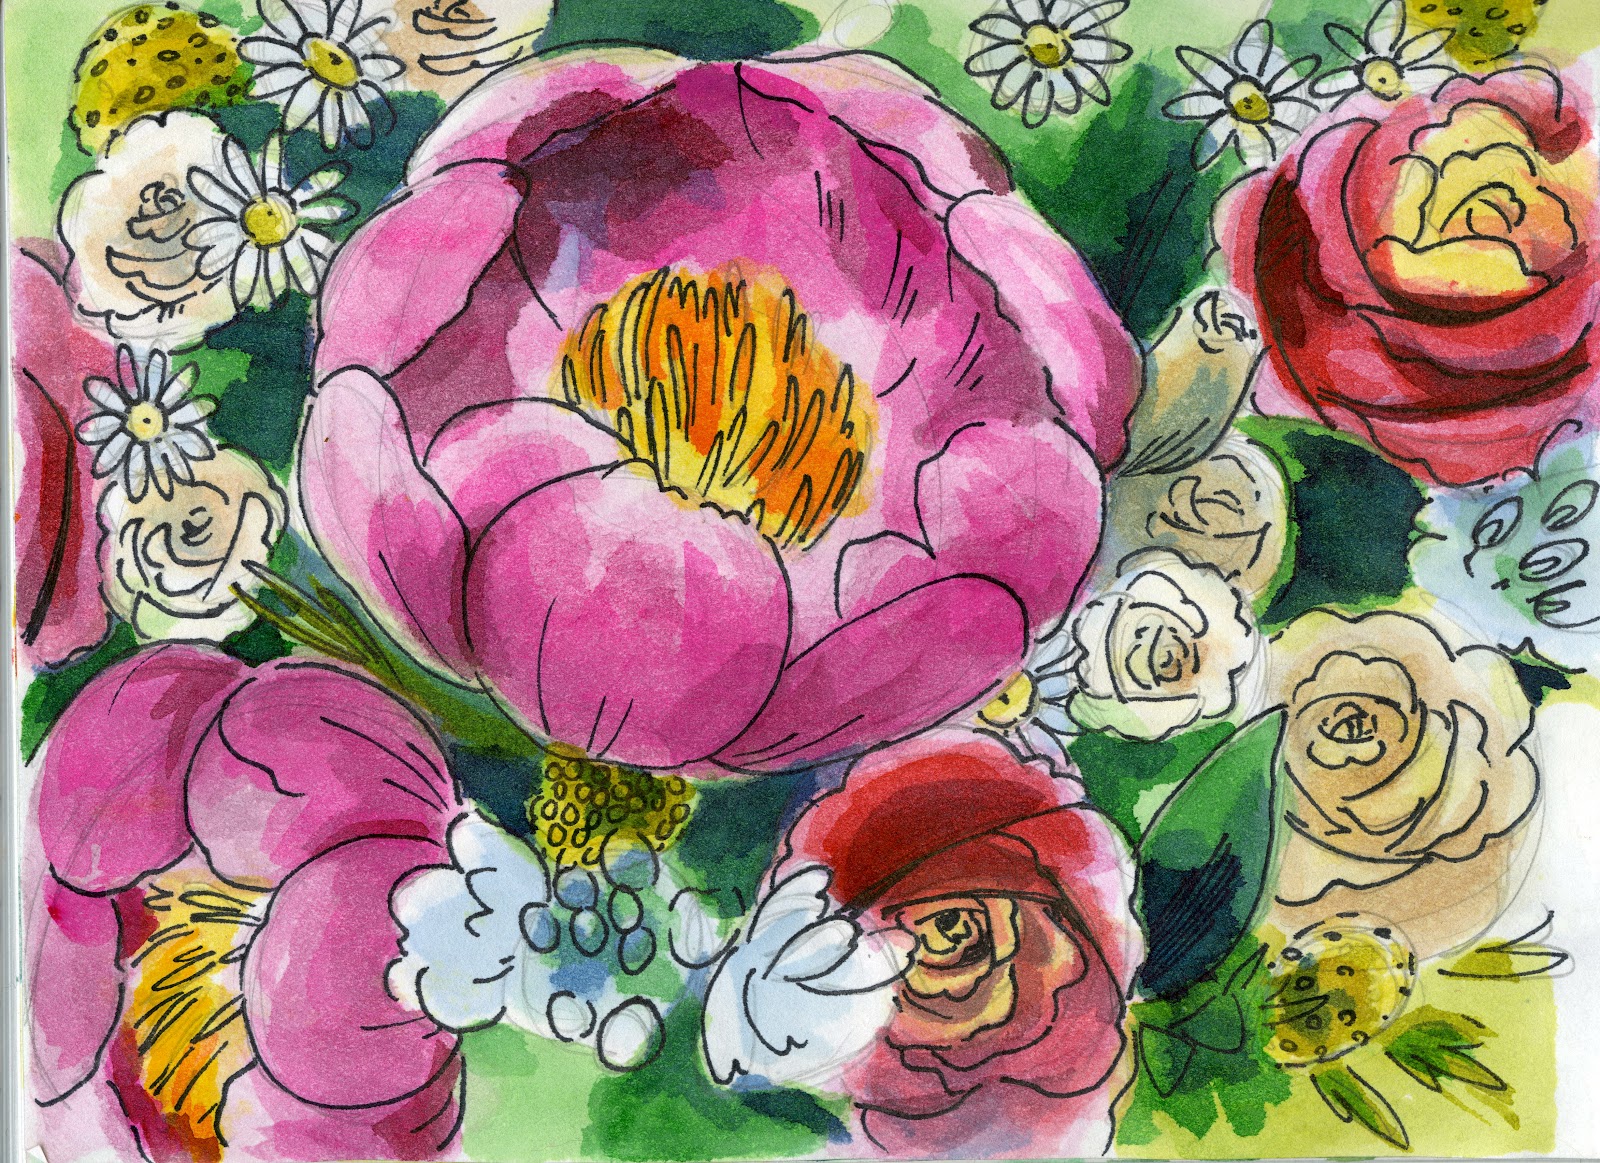
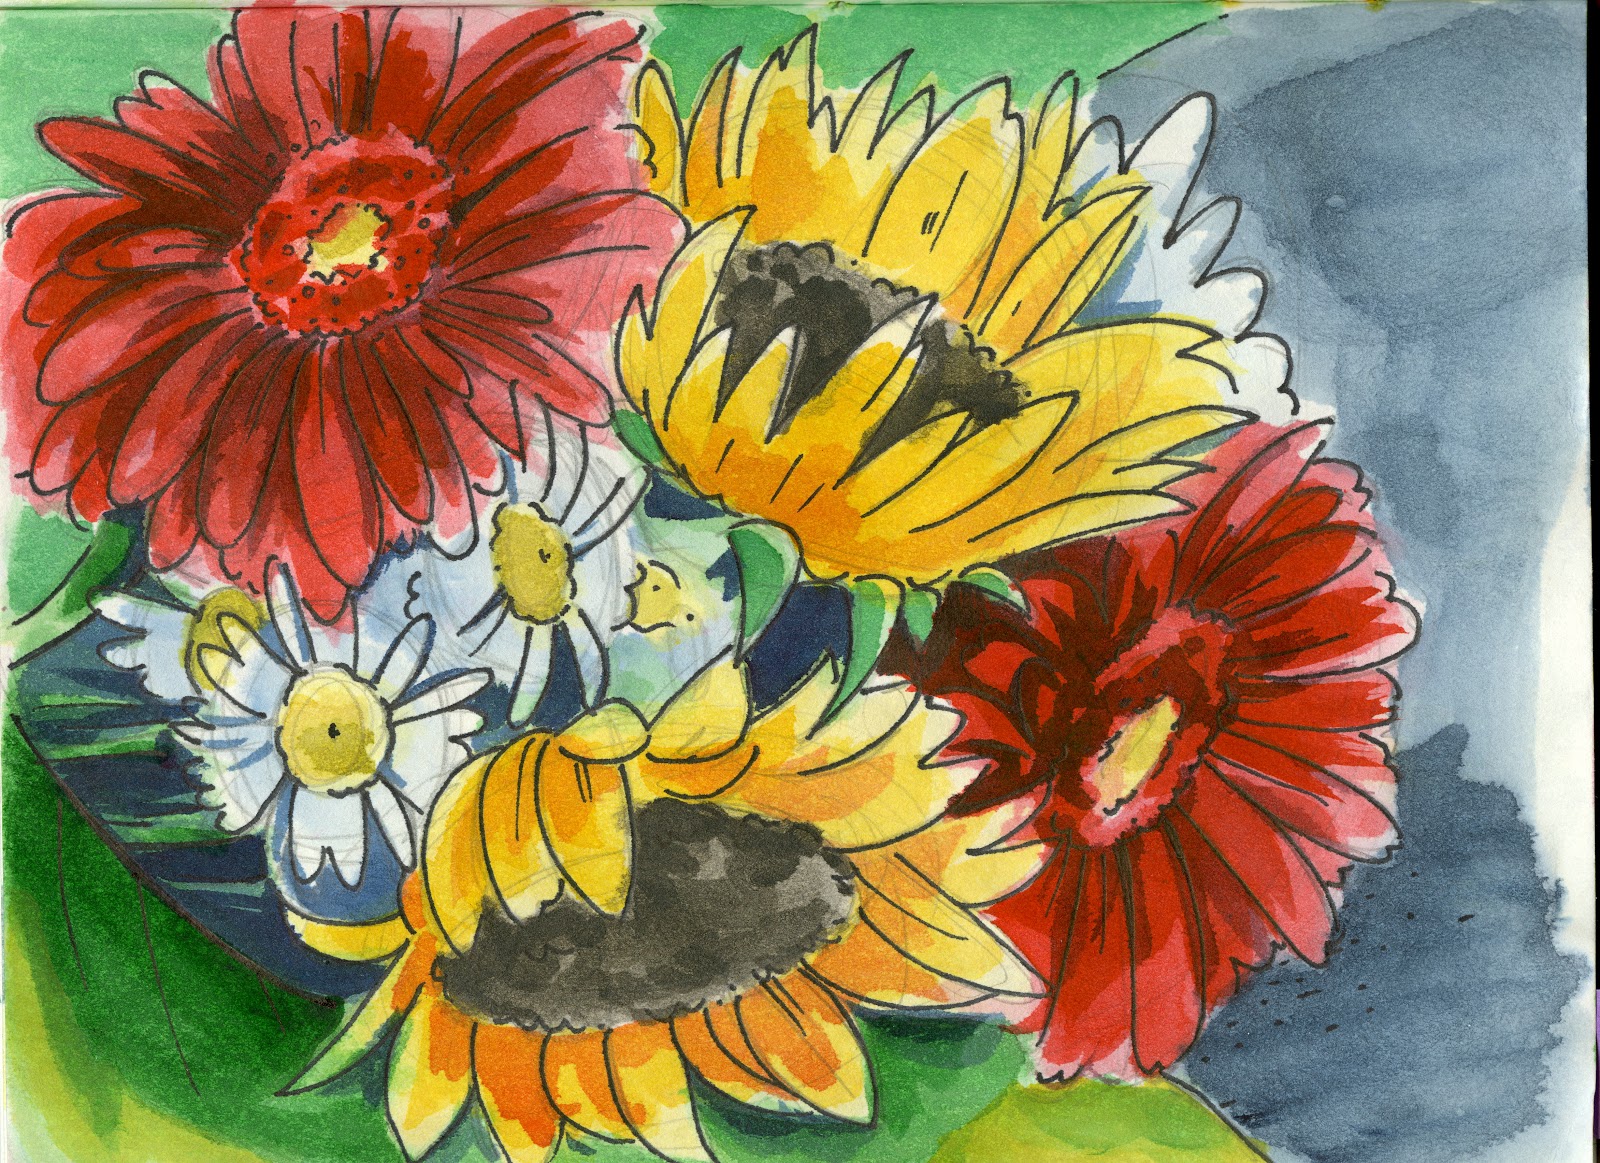
Floral Watercolor Sketches
I've been accused of many things as an comic artist and illustrator. My watercolor abilities have come under fire quite a few times, my ability to render in other styles is always under accusation, and if I were to be called a 'one trick pony', there would be an assumption that I have at least one trick.
With these sort of egregious accusations made about my work, I am constantly trying demonstrate flexibility, an ability to learn from my mistakes, and a willingness to learn new things. Of course, the fact that I post all over the internet makes it difficult for followers on a specific platform to really follow my progress. All of these watercolor sketches have been shared at various points on my Instagram, but I don't think they've popped up in a Sketchbook Tour on YouTube (or as a tutorial), made an appearance on my Tumblr, or have hit my Behance just yet. Since all these networks have different size requirements, it can be frustrating to make sure everything is appropriately crossposted, just as it's frustrating trying to get everyone on the same social platform. I never know where the 'right' eyes- the eyes that have jobs to dole out, might be peeking, so while I do my best, I know a lot flies under the radar.

There are ten illustrations total, with nine below the cut, so keep reading!

These studies were painted on cheap paper- I purchased a few sketchbooks based on a recommendation from Hobby Lobby, but it seems the books purchased, while identical in appearance and wrapped in shrink wrapped plastic, were not the ones recommended- so that's a strike against stores that sell their art supplies blister packed or shrink wrapped. I decided to try to make the best of bad paper, rolling with the punches and changing my approach, so these floral studies are very different from my usual flower studies.
The paper is most definitely NOT watercolor paper- it stays damp forever, and individual strokes remain apparent on the page, so blending isn't an option. This requires careful application and color planning- washes are not an option. Rather than mixing colors in individual palette pans, I work from the open area attached to my pans and palette, so colors aren't exact. Unlike my other watercolors, these cannot stand alone without the lineart, which is applied after everything is dry.


Both on the blog and on my YouTube channel , I encourage you guys to use the best materials for YOU- not necessarily the most expensive, and certainly not the cheapest just because they're cheap. Sometimes I don't follow my own advice- I purchase so many products to review, and I don't want them to go to waste, so I'll force myself to utilize materials that underperform or that I dislike. The sketchbook that these floral sketches are in is awful- it's a handmade, leather bound sketchbook from Hobby Lobby, and painting on the paper is like painting on toilet paper. You can't blend, its slow to dry, it's unforgiving. I would not recommend this paper to anyone, especially not to an artist who is still learning.
But like resistance training, learning how to deal with challenging materials can make you a stronger artist, and whenever I use nice watercolor paper after fighting this sketchbook, I find that I've levelled up in ability.
And while none of the above sketches are fine art, they are all charming, and have an appeal that differs from my regular work. They're loose, spontaneous- sketched in pencil and inked after the watercolor dried. I find them charming, and am considering releasing them as a postcard set at some point in the near future, so keep an eye on my shop!
Please consider donating to this blog or purchasing from Natto-shop (http://nattosoup.com/shop) if you want me to continue publishing quality content. All materials tested were purchased from my own pocket. Keep on Truckin' Nattosoup is not under any sponsorship.
With these sort of egregious accusations made about my work, I am constantly trying demonstrate flexibility, an ability to learn from my mistakes, and a willingness to learn new things. Of course, the fact that I post all over the internet makes it difficult for followers on a specific platform to really follow my progress. All of these watercolor sketches have been shared at various points on my Instagram, but I don't think they've popped up in a Sketchbook Tour on YouTube (or as a tutorial), made an appearance on my Tumblr, or have hit my Behance just yet. Since all these networks have different size requirements, it can be frustrating to make sure everything is appropriately crossposted, just as it's frustrating trying to get everyone on the same social platform. I never know where the 'right' eyes- the eyes that have jobs to dole out, might be peeking, so while I do my best, I know a lot flies under the radar.

There are ten illustrations total, with nine below the cut, so keep reading!
These studies were painted on cheap paper- I purchased a few sketchbooks based on a recommendation from Hobby Lobby, but it seems the books purchased, while identical in appearance and wrapped in shrink wrapped plastic, were not the ones recommended- so that's a strike against stores that sell their art supplies blister packed or shrink wrapped. I decided to try to make the best of bad paper, rolling with the punches and changing my approach, so these floral studies are very different from my usual flower studies.
The paper is most definitely NOT watercolor paper- it stays damp forever, and individual strokes remain apparent on the page, so blending isn't an option. This requires careful application and color planning- washes are not an option. Rather than mixing colors in individual palette pans, I work from the open area attached to my pans and palette, so colors aren't exact. Unlike my other watercolors, these cannot stand alone without the lineart, which is applied after everything is dry.


Both on the blog and on my YouTube channel , I encourage you guys to use the best materials for YOU- not necessarily the most expensive, and certainly not the cheapest just because they're cheap. Sometimes I don't follow my own advice- I purchase so many products to review, and I don't want them to go to waste, so I'll force myself to utilize materials that underperform or that I dislike. The sketchbook that these floral sketches are in is awful- it's a handmade, leather bound sketchbook from Hobby Lobby, and painting on the paper is like painting on toilet paper. You can't blend, its slow to dry, it's unforgiving. I would not recommend this paper to anyone, especially not to an artist who is still learning.
But like resistance training, learning how to deal with challenging materials can make you a stronger artist, and whenever I use nice watercolor paper after fighting this sketchbook, I find that I've levelled up in ability.
And while none of the above sketches are fine art, they are all charming, and have an appeal that differs from my regular work. They're loose, spontaneous- sketched in pencil and inked after the watercolor dried. I find them charming, and am considering releasing them as a postcard set at some point in the near future, so keep an eye on my shop!
Please consider donating to this blog or purchasing from Natto-shop (http://nattosoup.com/shop) if you want me to continue publishing quality content. All materials tested were purchased from my own pocket. Keep on Truckin' Nattosoup is not under any sponsorship.
May 29, 2016
My Convention Planning Timeline
People keep requesting timelines and checklists on How to Be a Con Artist, not realizing that every artist eventually makes their own. While my timeline may not work for you, I hope it helps you create one that will.
1 full year in advance
Check the show out as an attendee
Hit up the artist alley
Talk to other artists, get a feel for the show
Buy from other artists, make a few friends
Start following the show on Twitter/Facebook
Find out when the Artist Alley opens, mark calendar
Begin brainstorming new things to sell
As Soon as Artist Alley Opens
Apply for show
Pay for show ASAP
Mark show on my sidebar of convention appearances, so blog readers will know
Rest assured knowing I have a table
9 months before show
If designing new charms
Begin researching companiesDesign charmsOrder samples
If ordering through a new company
Determine their production timeline
Find out when next submission period is
Plan your product appropriately to hit that deadline
6 months before the show
Start any new merchandise I'm planning for that con year, if possible
If I decide to share it, watermark it and tag the convention I will debut it at
If ordering charms from a new company, order charms now
3 Months before Show
If intending to make new signage, make new signage
If intending to swap out display, banner, or tablecloth, now is the time to do so
Keep in mind:
Build A Sign has less than one month turnaround on all banners I've ordered from them, but they may make a mistake, and you need to give yourself time to send it back if necessary
1 month in advance
Begin restocking things like prints by reordering
Begin taking inventory of existing stock and determining what to reorder/what to discontinue
Reorder charms if necessary
If assembling an ashcan, begin assembly now
Reorder business cards/postcards if out
2 weeks in advance
Begin working on new original art I plan selling at show
Begin printing and assembling Sassy Buttons
New prices signs, printed and laminated
Go through kitty and make sure I have enough of the appropriate bills
1 week in advance
Print and cut stickers
Print, cut, glue, laminate bookmarks
Print Ashcans at Office Max/Office Depot
Assemble Ashcans
Two days before leaving for show
Pull down 6' table from attic
Demo setup
Photograph final setup for reassembly at show
Pack everything
Con announcements on Twitter, Tumblr, Blog, Instagram with table number
At show, morning of
Tweet appearance at con
Tweet and Instagram commissions throughout the day
Work on some sample commissions to 'seed' the commission pile and inspire customers
After show, night of
Tweet/Tumblr/Instagram commissions completed that day using the convention's hashtag to drive sales for next day
Please consider donating to this blog or purchasing from Natto-shop (http://nattosoup.com/shop) if you want me to continue publishing quality content. All materials tested were purchased from my own pocket. Keep on Truckin' Nattosoup is not under any sponsorship.
May 26, 2016
SketchBox Premium Vs Basic
This joint review was made possible thanks to the generosity of my
Patreon
backers, and is a special feature. I have no intention of regularly reviewing three art supply subscription boxes a month, as these reviews are very time consuming to research, record, and write, and take time and focus away from what I really love- making comics. If you enjoy content like this, and would like to help fund more, please consider becoming a backer on Patreon, as those funds are used to offset the costs of running this blog. This month's SketchBox Basic and SketchBox Premium boxes were purchased out of my own funds, and were in no way sponsored or donated by SketchBox. All opinions are my own, based on 10+ years of artistic experience, 6+ years of art school, and 7+ years of reviewing art supplies. Any questions can be sent to my email using the contact form to the left.
Why a Joint Review?
To satisfy the demands of my YouTube audience, many of whom take offense that I dare to say SketchBox Basic and SketchBox Premium are not worth my money compared to other services. I believe (based on analytics) most of them don't actually check the blog for the full review despite my repeated encouragement, which does include a breakdown of the products included in Premium Boxes. I figured you guys would enjoy seeing a comparative review of the two tiers Sketchbox offers, so I'm happy to share it here.
Special May thanks to my April backers:
Ryan
C. Ellis
Andrew Benedict
Yolaine
Wayne Norris
Chris
Michael Suriano
Yusagi
Entreat
Ristro
Sketchbox Basic Vs Sketchbox Premium Unboxings
SketchBox BasicFor the comprehensive May 2016 Basic Box overview, please check out my May 2016 ArtSnacks Vs SketchBox Basic post.
SketchBox Basic Overview
The Price Breakdown
Included in Both:
FW Acrylic Pearlescent Ink $6.00 on Paper and Ink Arts, $4.59 on DickBlick (http://www.paperinkarts.com/fwacry.html) (http://www.dickblick.com/products/dal...)
Pentel Arts Color Brush (Black) $8.39 on Pentel store (http://www.pentel.com/store/color-brush), $6.19 on DickBlick (http://www.dickblick.com/products/pen...)
Basic Box Exclusive:
Princeton Art & Brush Co Real Value Brush Selection
Synthetic Hair- White Taklon- $9.50 on Princeton Site, $4.89 on DickBlick
Total:
High end, using MSRP when available: $19.28
Using common artist store, Dick Blick- $15.67
Basic Box: $25+$5 shipping
The Materials Inside
FW Acrylic Pearlescent Ink
http://www.daler-rowney.com/content/f...
Pentel Arts Color Brush
http://www.pentel.com/store/color-brush
This is a waterbased, dye based brush pen that remains water reactive even after it's dry. Those of you who are familiar with the Pentel Pocket Brush may recognize its cousin, but may have difficulty finding a place for it in your comic craft. The large ink cartridge on the back is replicable, IF you can find replacements.
Princeton Art & Brush Co Real Value Brush Selection
Synthetic Hair- White Taklon
http://www.princetonbrush.com/real-va...
These stiff synthetic brushes are suited more towards heavier bodied acrylics than to the ink like acrylics included in the Basic Box. Applying ink directly from bottle to paper with these brushes leaves much to be desired, and I recommend you purchase a softer synthetic with a larger belly- capable of holding more ink.
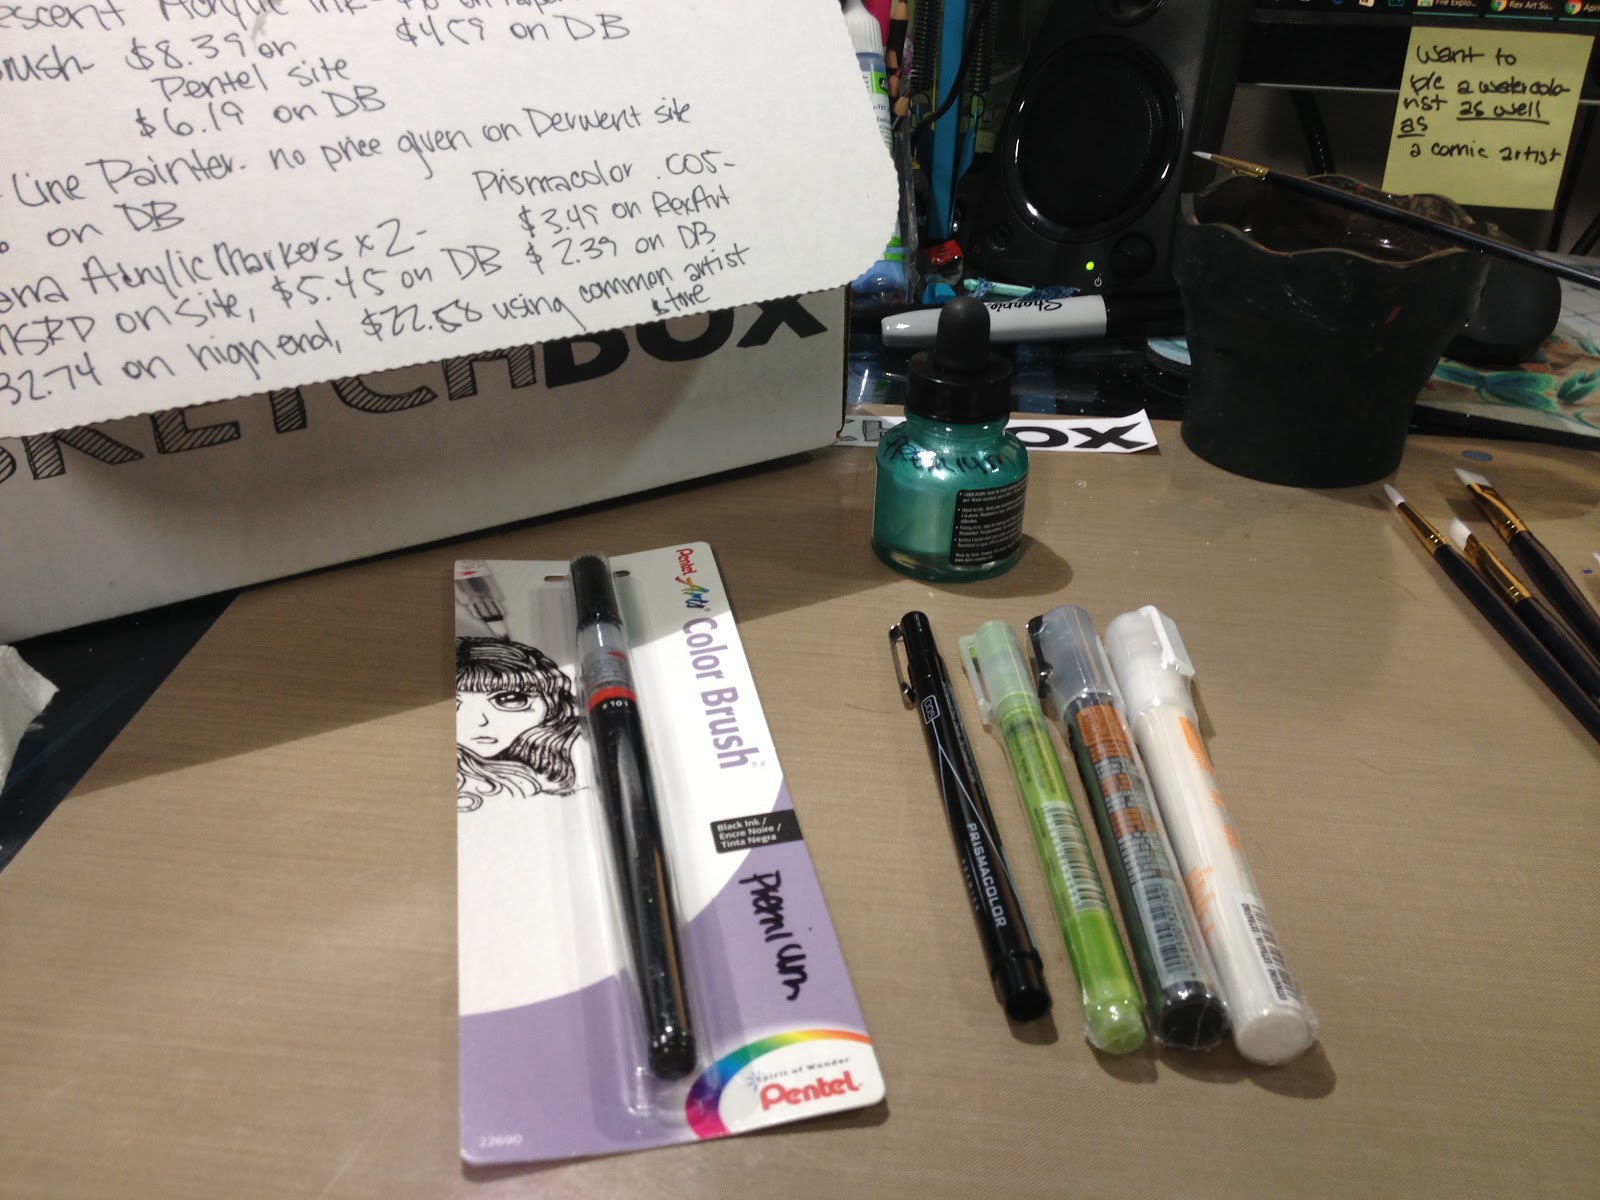
SketchBox PremiumMay 2016 SketchBox Premium BrandsDaler RowneyFW AcrylicMontana DerwentPrismacolorMay SketchBox Premium Box Includes:
Daler Rowney FW Acrylic Pearlescent Ink2 Montana Acrylic Extra Fine Ballpoint Acrylic Pens (white and black)Prismacolor Illustration Marker (technical pen, .005mm)Derwent Graphik Acrylic Fine Point Pen (Envy)Pentel ColourBrush brushpen (waterbased)The Cards The Card Reads
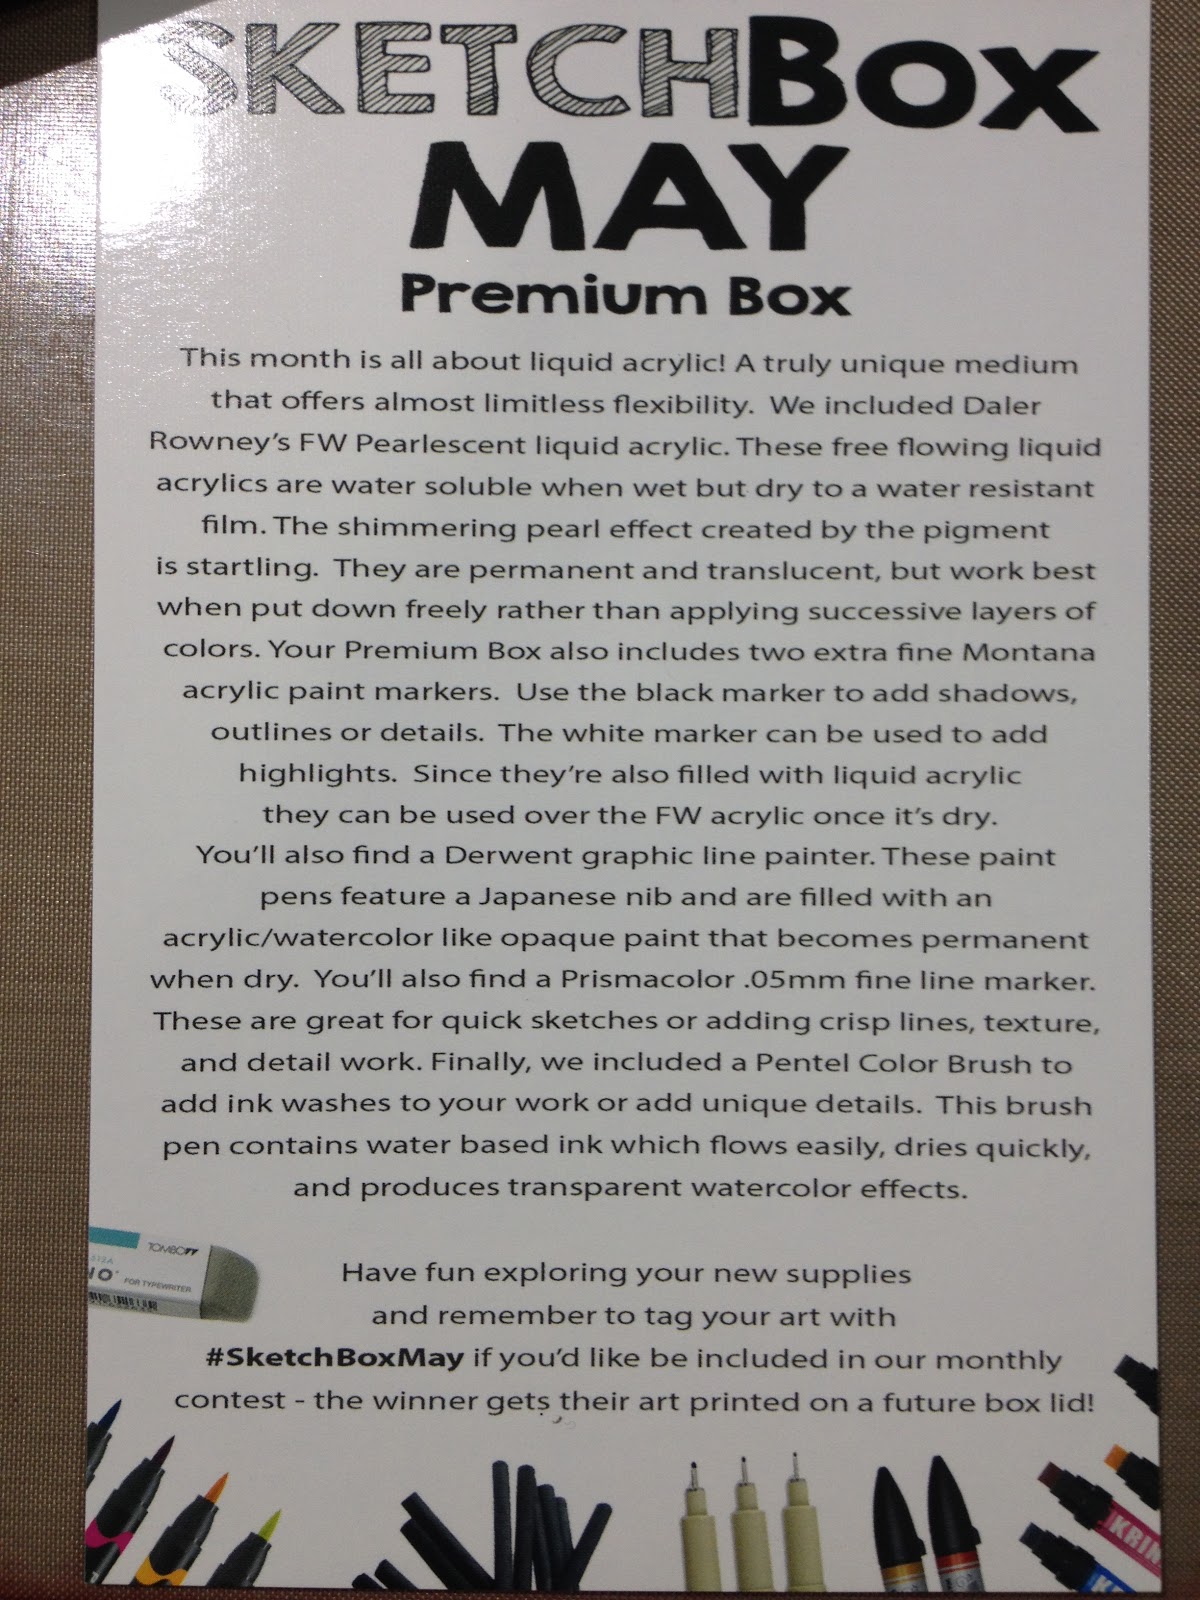
SketchBoxMayPremium Box
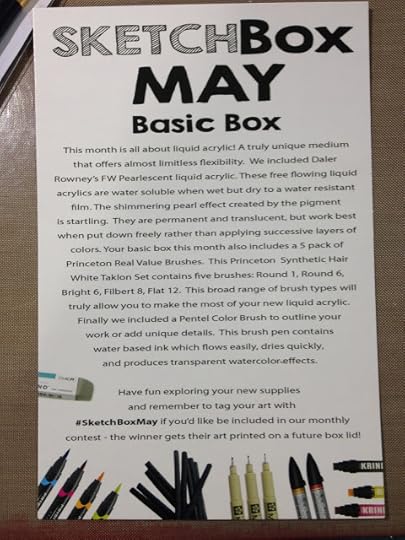
This month is all about liquid acrylic! A truly unique medium that offers almost limitless flexibility. We included Daler Rowney's FW Pearlescent liquid acrylic. These free flowing liquid acrylics are water soluble when wet but dry to a water resistant film. The shimmering pearl effect created by the pigment is startling. They are permanent and translucent, but work best when put down freely rather than applying successive layers of colors. Your Premium Box also includes two extra fine Montana acrylic paint markers. Use the black marker to add shadows, outlines, or details. The white marker can be used to add highlights. Since they're also filled with liquid acrylic, they can be used over the FW acrylic once it's dry. You'll also find a Derwent graphic line painter (sic). These paint pens feature a Japanese nib and are filled with an acrylic/watercolor like opaque paint that becomes permanent when dry. You'll also find a Prismacolor .05mm fine line marker. These are great for quick sketches or adding crisp lines, texture, and detail work. Finally, we included a Pentel Color Brush to add ink washes to your work or add unique details. This brush pen contains water based ink which flows easily, dries quickly, and produces transparent watercolor effects.
Have fun exploring your new art supplies and remember to tag your art with #SketchBoxMay if you'd like to be included in our monthly contest- the winner gets their art printed on a future box lid!

 The Card Reads
SketchBox MayFeatured ArtistJosie
My name is Josei and I'm a young artist and product design student from the beautiful capital of Germany. I love drawing since I was able to hold a pen and creating what comes to mind, rather than following just one art style. Drawing is kind of a therapy for me to overcome daily life and connect with other people. Art is what keeps me motivated- as Pablo Picasso once said: "The purpose of art is washing the dust of daily life off your soul":)
Instagram: @JosilixFacebook: http://www.facebook.com/josilix
We're so thankful for the talent that Josei shared with us, if you'd like to get your art featured- email an example of your work to us at info@getsketchbox.com
Sketchbox Premium Unboxing
The Price Breakdown

Included in Both:
FW Acrylic Pearlescent Ink $6.00 on Paper and Ink Arts, $4.59 on DickBlick
Pentel Arts Color Brush (Black) $8.39 on Pentel store, $6.19 on DickBlick
Premium Box Exclusive:
Derwent Graphik Line Painter- No openstock products or MSRP given on Derwent Site, $3.96 for openstock on DickBlick , could be as low as $3.58 per marker if purchased as a 20 piece set and divvied up.
Montana Acrylic Markers (x2) Extra Fine tips
No MSRP on site, $5.45 on DickBlick, $4.26 if a set of 6 is purchased and divvied up.
Prismacolor Fine Line Marker .005 mm
$3.49 on RexArt $2.39 openstock on DickBlick
Total:
$32.74 on high end
$22.58 using common artist stores like DickBlick
Box Cost: $35+$5 shipping
The Supplies Inside
Exclusive to Premium Box
Derwent Graphik Line Painter
http://www.pencils.co.uk/en/gb/6130/graphik-line-painter-pens
Have used these in the past, the issue is they tend to be hugely messy and bleed everywhere- tend to leak even when stored properly. Cool idea, poor execution.
Montana Acrylic Markers, Extra Fine
https://www.montana-cans.com/en/marker-und-inks/acrylic-marker/acrylic-marker/montana-acrylic-marker-0.7mm-extra-fine
These tend to clog up and splutter when used for inking. Cool idea again, spotty execution on textured paper (I used Strathmore's 400 series mixed media journal)
Prismacolor Fine Line Marker .005 mm
Technical pen, I regularly use these in my travel kit. Water and alcohol marker safe. A bit of an odd pick for an acrylics box.
Supplies, Demonstrated
Note: Please watch the SketchBox Premium Unboxing video above for context

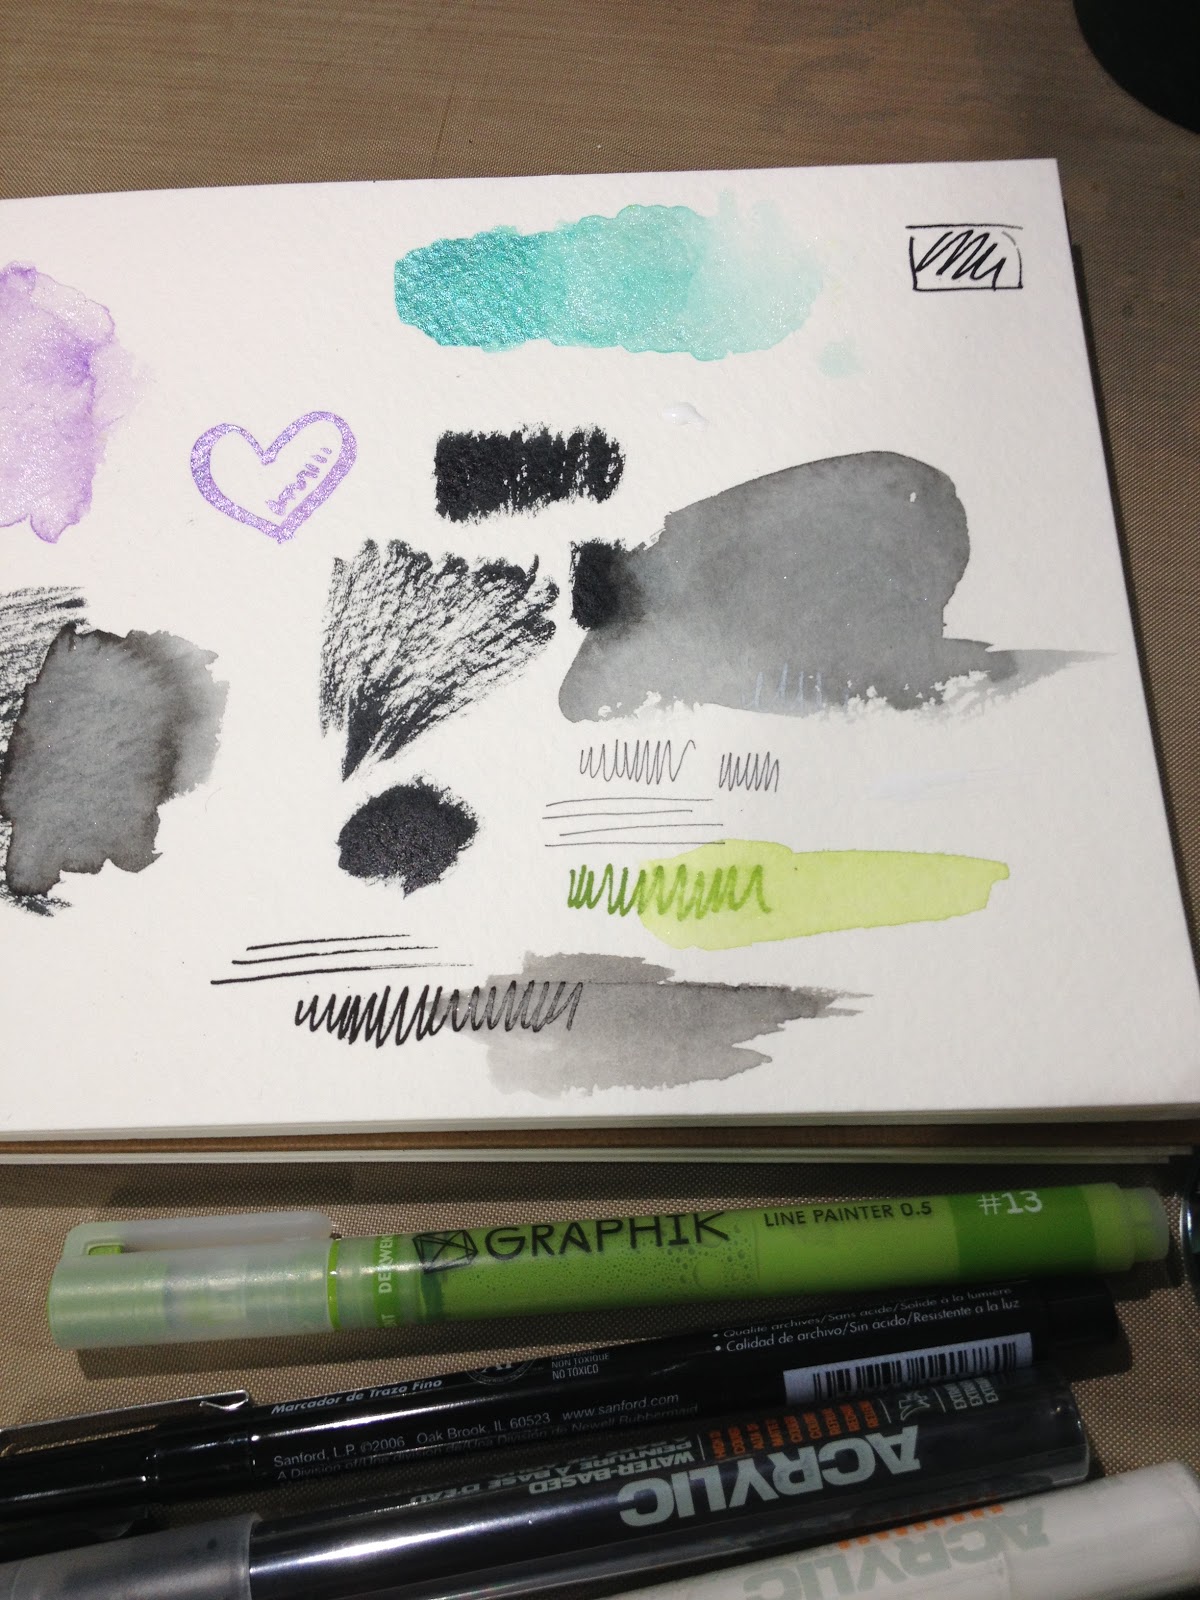
Testing opacity on black paper. All acrylics in this box had varying degrees of opacity, making all relatively suitable for use on black or dark papers or canvas.

Water testing on watercolor paper- blending out acrylics while still wet.


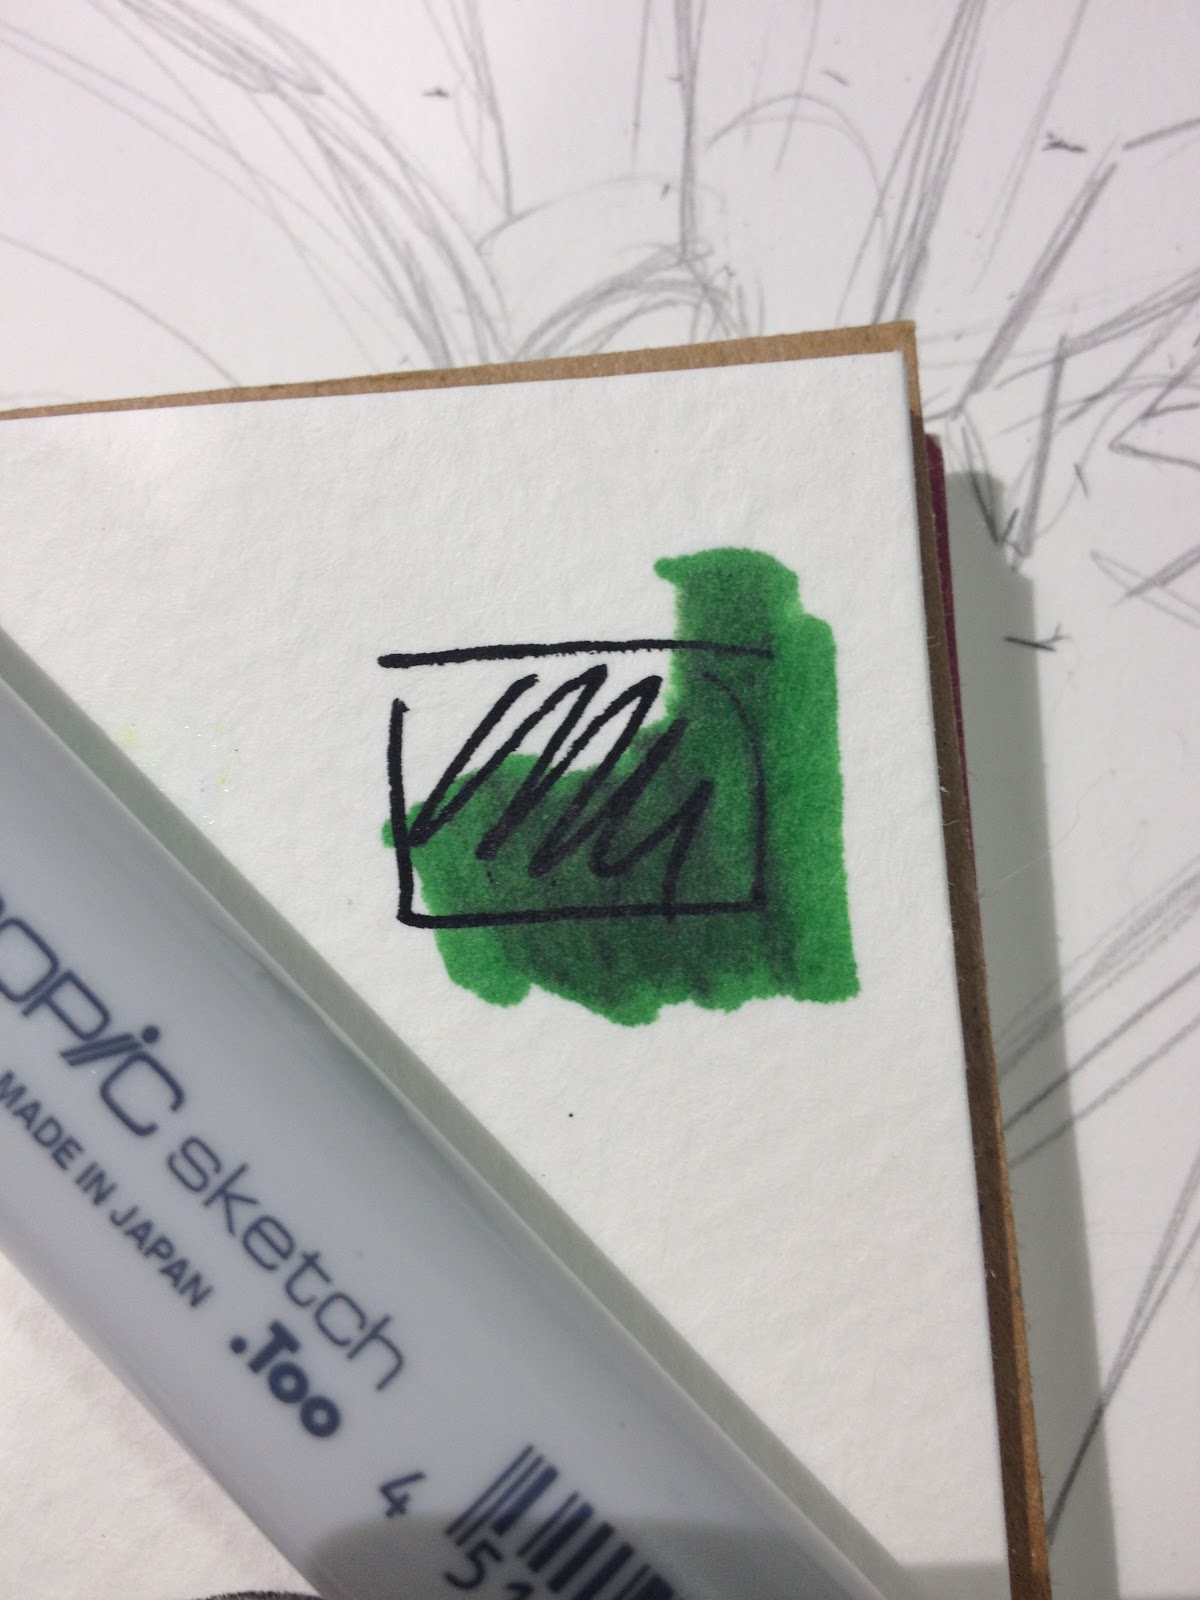
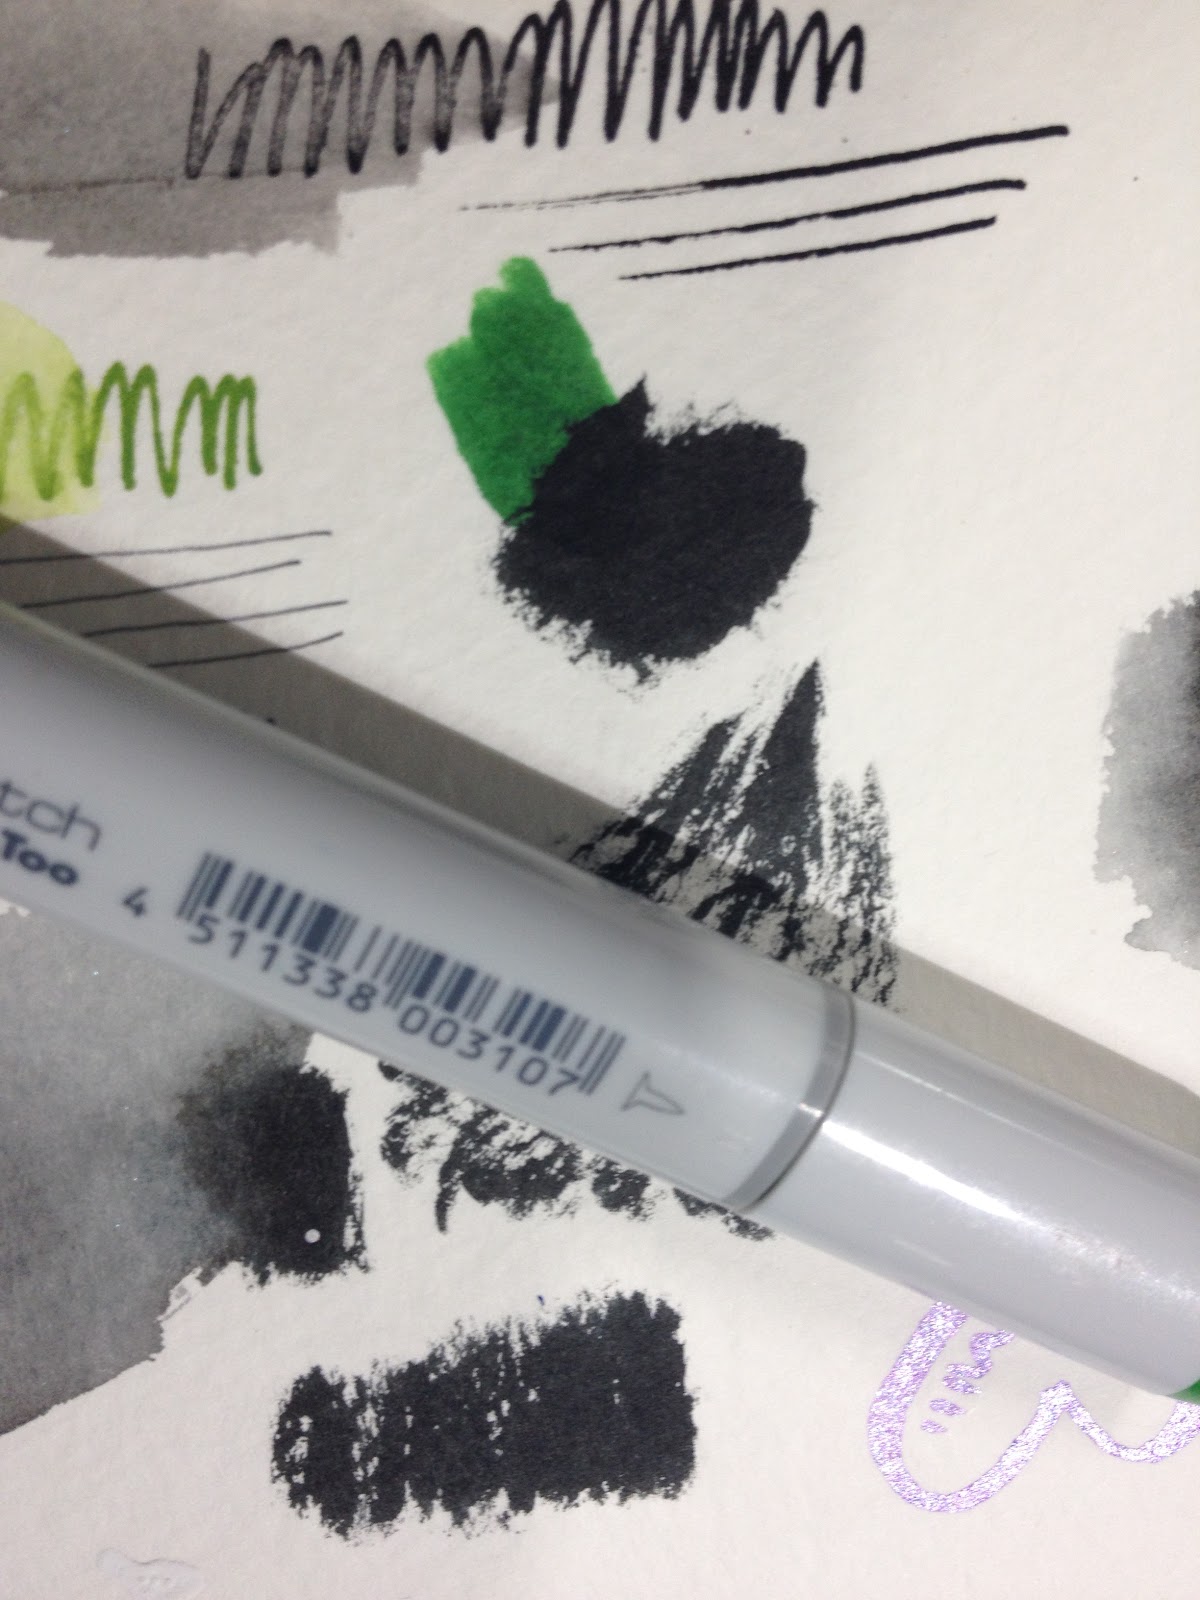
Copic-safety test. Acrylics are not Copic safe, and are not suitable for use with alcohol markers if applied first. If you intend to use acrylics with your alcohol markers, apply markers first.

Combined SketchBox Basic and SketchBox Premium ChallengeVIDEO
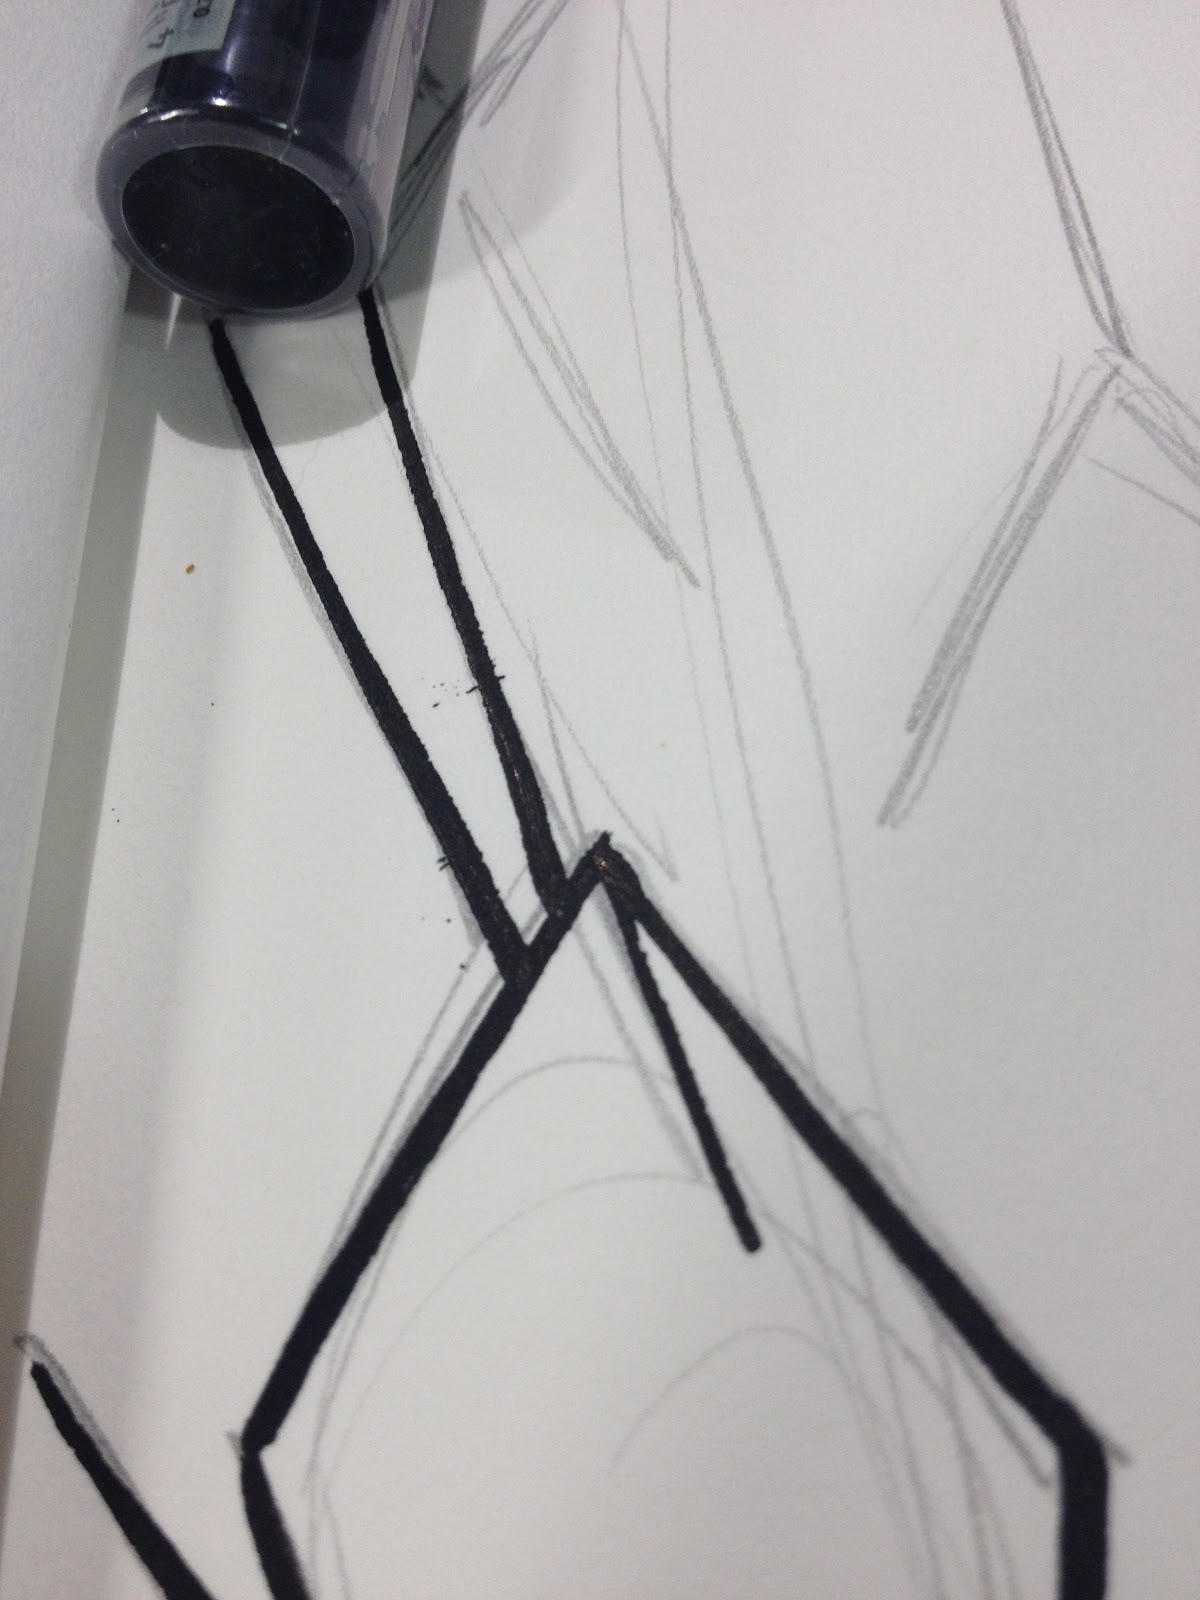
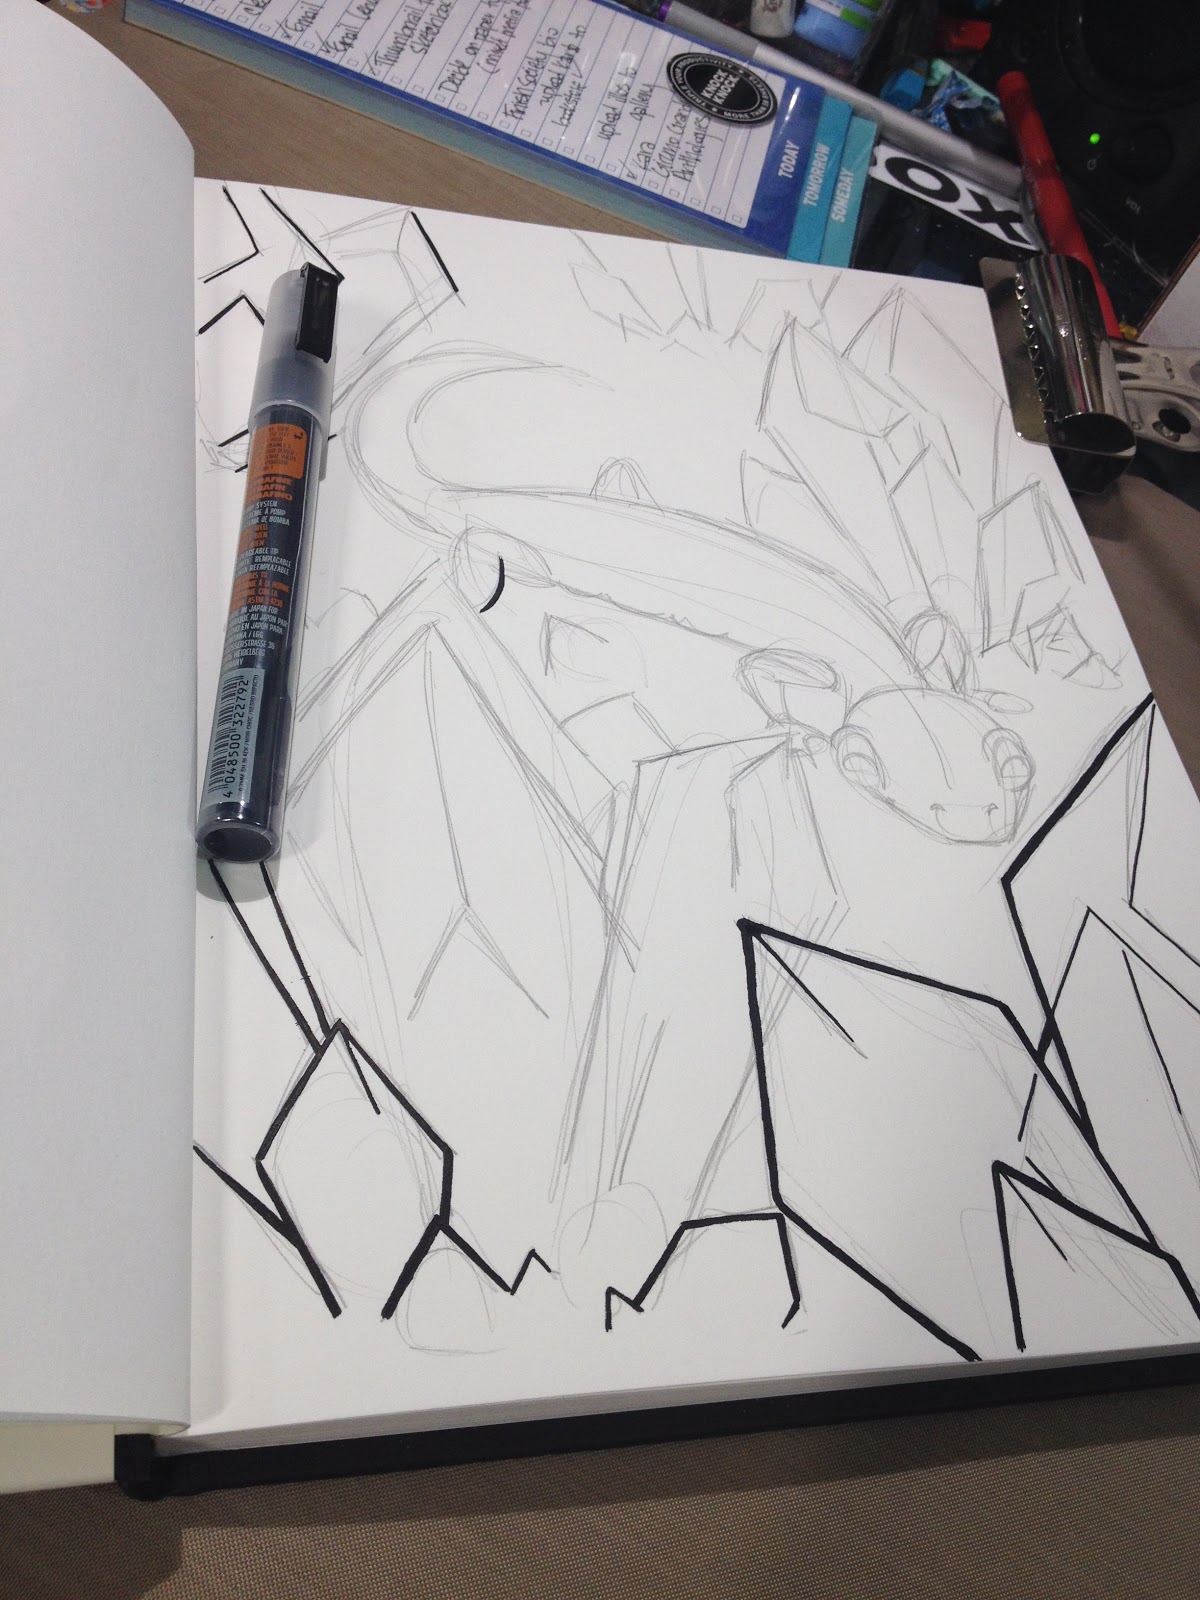
After sketching my initial design in my Strathmore Mixed Media journal, I set about inking it with the Montana black acrylic ballpoint marker. This marker takes awhile to dry, and is prone to catching and sputtering on the paper.


Inking this piece took a couple days.

I applied an overall inkwash using the Pentel Arts Colour Brush and a cup of water. Watch the video above for a demonstration of this technique!


I utilized materials from both the Basic and Premium Boxes, as well as the FW Acrylic Fluorescent ink from my May ArtSnacks, and my collection of acrylic markers (Montana and Liquitex)


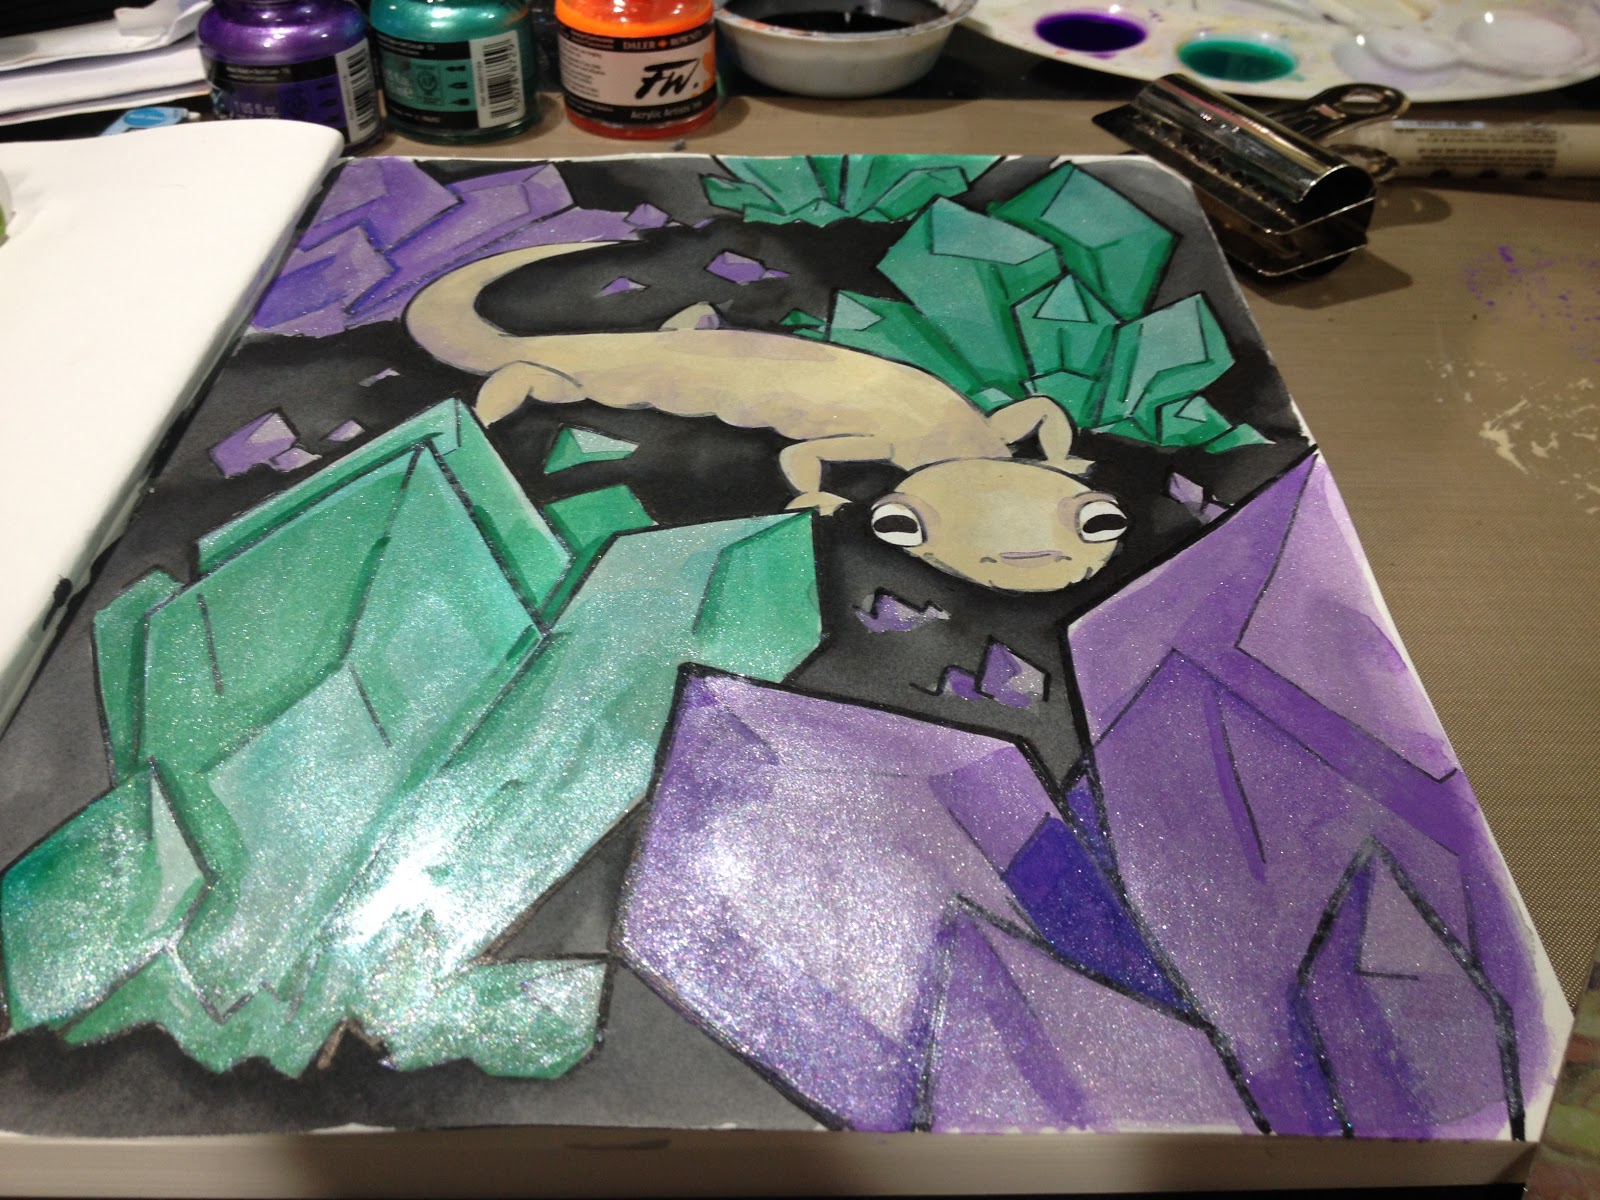
I utilized alternating layers of the Pearlescent ink and coordinating Liquitex acrylics to build up shadow and tone on the crystals.

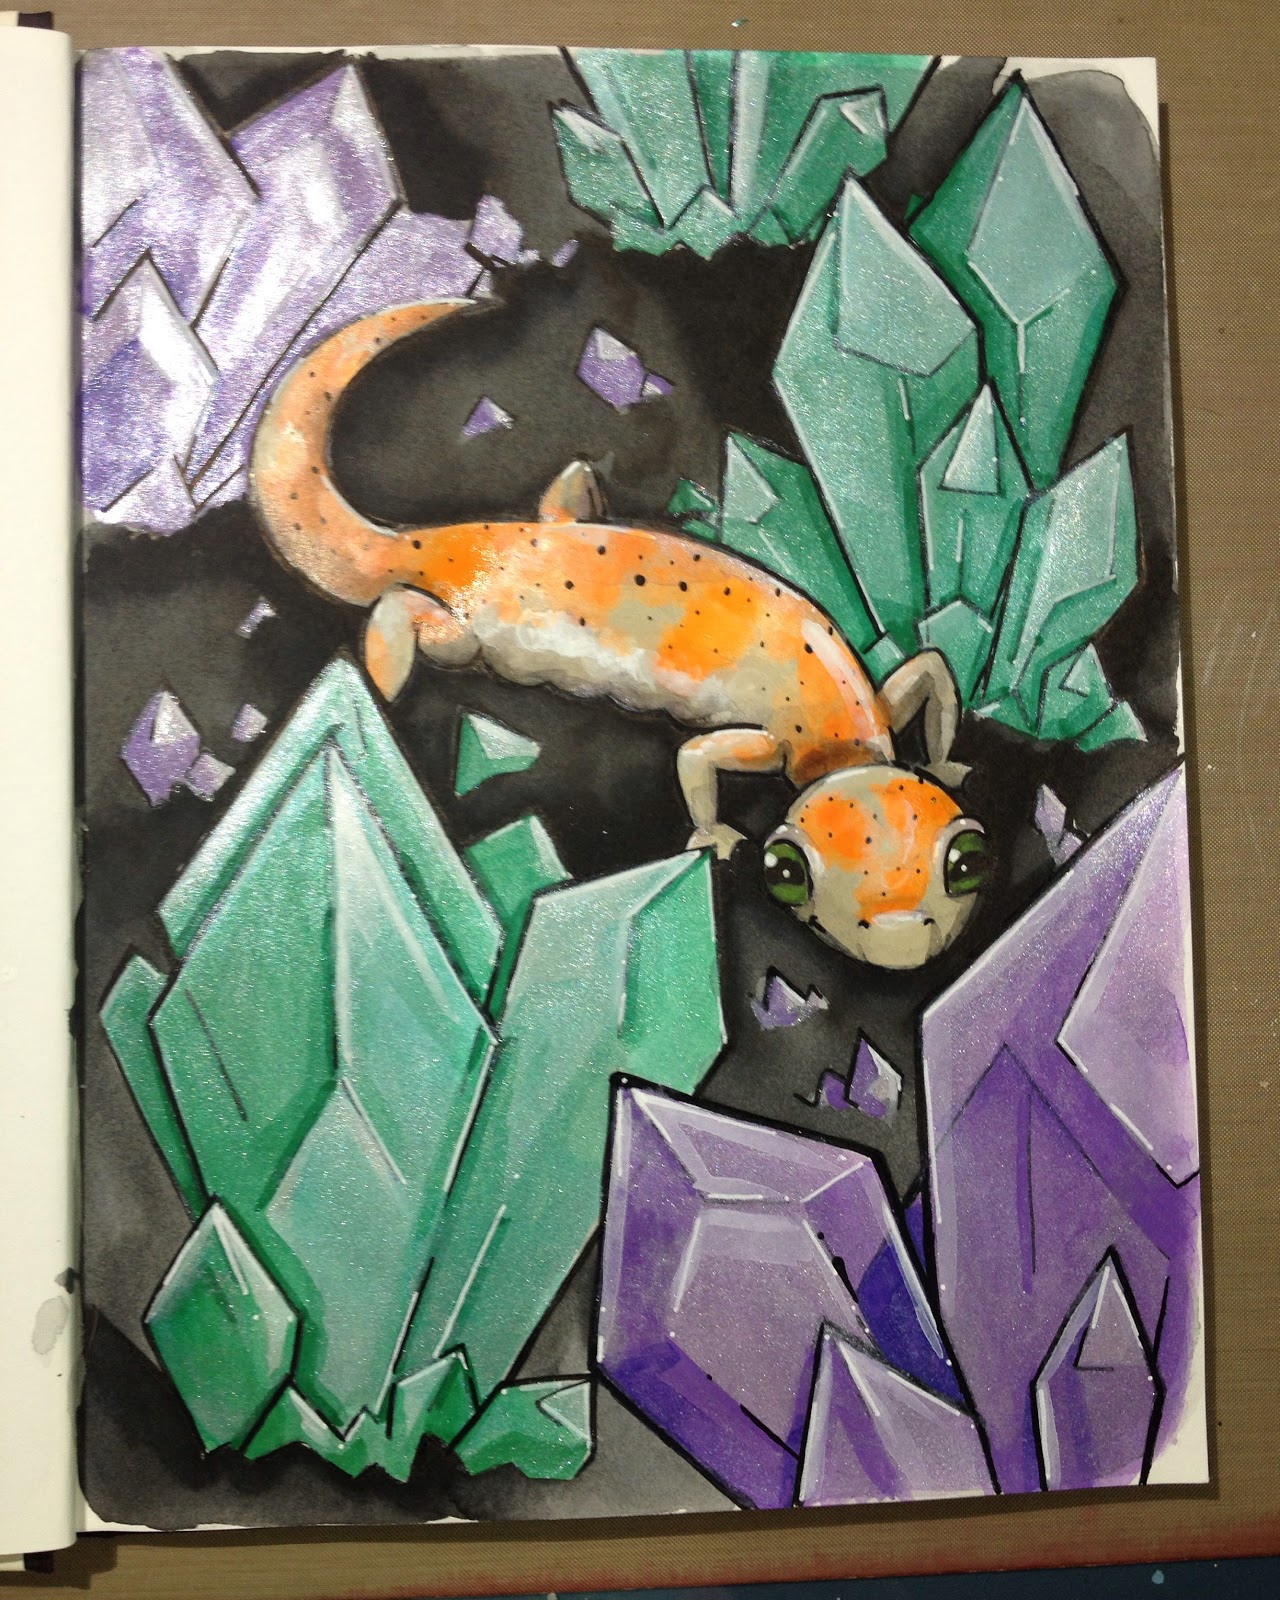
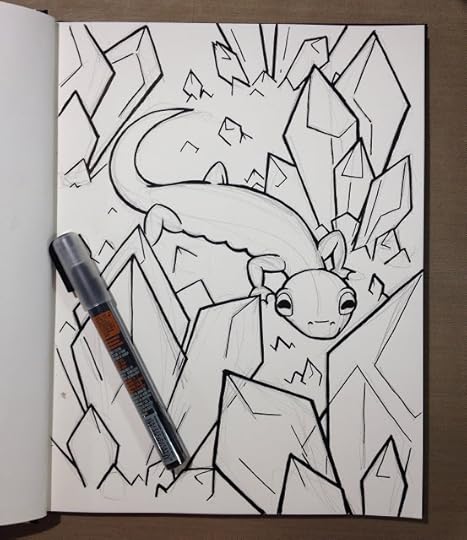
The salamander was rendered with Titanium Buff Liquitex acrylic (in their chisel marker), with the orange spots rendered with FW Acrylic fluorescent orange ink from my May ArtSnacks. The eyes were rendered with the Graphik Line Painter, and the black spots were drawn on using the Montana black.


 The VerdictAs I went through the boxes, I kept thinking the same thing- May's Basic Box felt particularly anemic. Does SketchBox subsidize their Premium Boxes with overpriced Basic Boxes?
I do agree that the Premium Box IS better than the Basic Box, but shouldn't that be a given? We are paying $10 more for this box, so it should include more products, or higher quality products. What I don't understand is why the Basic Box often relies on cheap, poorly made products (like January's Artists Loft watercolor pencils) as filler.
But honestly, even though the Premium box DOES include more product, it's still short of the $35 mark, regardless of whether you use MSRP (when available, it's often not) or if you shop smart.
Personally, I find both boxes to be overpriced given the contents, although Premium Box is a better deal (at least this month). I was excited by the variety of acrylic materials included in the Premium box, and felt like the ball point acrylic Montana markers were an interesting twist. I find the $40 a month price tag to be far too hefty to recommend this box, and the quality in the Basic Box also too low to recommend.
Please consider donating to this blog or purchasing from Natto-shop (http://nattosoup.com/shop) if you want me to continue publishing quality content. All materials tested were purchased from my own pocket. Keep on Truckin' Nattosoup is not under any sponsorship.
Why a Joint Review?
To satisfy the demands of my YouTube audience, many of whom take offense that I dare to say SketchBox Basic and SketchBox Premium are not worth my money compared to other services. I believe (based on analytics) most of them don't actually check the blog for the full review despite my repeated encouragement, which does include a breakdown of the products included in Premium Boxes. I figured you guys would enjoy seeing a comparative review of the two tiers Sketchbox offers, so I'm happy to share it here.
Special May thanks to my April backers:
Ryan
C. Ellis
Andrew Benedict
Yolaine
Wayne Norris
Chris
Michael Suriano
Yusagi
Entreat
Ristro
Sketchbox Basic Vs Sketchbox Premium Unboxings
SketchBox BasicFor the comprehensive May 2016 Basic Box overview, please check out my May 2016 ArtSnacks Vs SketchBox Basic post.
SketchBox Basic Overview
The Price Breakdown
Included in Both:
FW Acrylic Pearlescent Ink $6.00 on Paper and Ink Arts, $4.59 on DickBlick (http://www.paperinkarts.com/fwacry.html) (http://www.dickblick.com/products/dal...)
Pentel Arts Color Brush (Black) $8.39 on Pentel store (http://www.pentel.com/store/color-brush), $6.19 on DickBlick (http://www.dickblick.com/products/pen...)
Basic Box Exclusive:
Princeton Art & Brush Co Real Value Brush Selection
Synthetic Hair- White Taklon- $9.50 on Princeton Site, $4.89 on DickBlick
Total:
High end, using MSRP when available: $19.28
Using common artist store, Dick Blick- $15.67
Basic Box: $25+$5 shipping
The Materials Inside
FW Acrylic Pearlescent Ink
http://www.daler-rowney.com/content/f...
Pentel Arts Color Brush
http://www.pentel.com/store/color-brush
This is a waterbased, dye based brush pen that remains water reactive even after it's dry. Those of you who are familiar with the Pentel Pocket Brush may recognize its cousin, but may have difficulty finding a place for it in your comic craft. The large ink cartridge on the back is replicable, IF you can find replacements.
Princeton Art & Brush Co Real Value Brush Selection
Synthetic Hair- White Taklon
http://www.princetonbrush.com/real-va...
These stiff synthetic brushes are suited more towards heavier bodied acrylics than to the ink like acrylics included in the Basic Box. Applying ink directly from bottle to paper with these brushes leaves much to be desired, and I recommend you purchase a softer synthetic with a larger belly- capable of holding more ink.
SketchBox PremiumMay 2016 SketchBox Premium BrandsDaler RowneyFW AcrylicMontana DerwentPrismacolorMay SketchBox Premium Box Includes:
Daler Rowney FW Acrylic Pearlescent Ink2 Montana Acrylic Extra Fine Ballpoint Acrylic Pens (white and black)Prismacolor Illustration Marker (technical pen, .005mm)Derwent Graphik Acrylic Fine Point Pen (Envy)Pentel ColourBrush brushpen (waterbased)The Cards
 The Card Reads
SketchBoxMayPremium Box
This month is all about liquid acrylic! A truly unique medium that offers almost limitless flexibility. We included Daler Rowney's FW Pearlescent liquid acrylic. These free flowing liquid acrylics are water soluble when wet but dry to a water resistant film. The shimmering pearl effect created by the pigment is startling. They are permanent and translucent, but work best when put down freely rather than applying successive layers of colors. Your Premium Box also includes two extra fine Montana acrylic paint markers. Use the black marker to add shadows, outlines, or details. The white marker can be used to add highlights. Since they're also filled with liquid acrylic, they can be used over the FW acrylic once it's dry. You'll also find a Derwent graphic line painter (sic). These paint pens feature a Japanese nib and are filled with an acrylic/watercolor like opaque paint that becomes permanent when dry. You'll also find a Prismacolor .05mm fine line marker. These are great for quick sketches or adding crisp lines, texture, and detail work. Finally, we included a Pentel Color Brush to add ink washes to your work or add unique details. This brush pen contains water based ink which flows easily, dries quickly, and produces transparent watercolor effects.
Have fun exploring your new art supplies and remember to tag your art with #SketchBoxMay if you'd like to be included in our monthly contest- the winner gets their art printed on a future box lid!
 The Card Reads
SketchBox MayFeatured ArtistJosie
My name is Josei and I'm a young artist and product design student from the beautiful capital of Germany. I love drawing since I was able to hold a pen and creating what comes to mind, rather than following just one art style. Drawing is kind of a therapy for me to overcome daily life and connect with other people. Art is what keeps me motivated- as Pablo Picasso once said: "The purpose of art is washing the dust of daily life off your soul":)
Instagram: @JosilixFacebook: http://www.facebook.com/josilix
We're so thankful for the talent that Josei shared with us, if you'd like to get your art featured- email an example of your work to us at info@getsketchbox.com
Sketchbox Premium Unboxing
The Price Breakdown
Included in Both:
FW Acrylic Pearlescent Ink $6.00 on Paper and Ink Arts, $4.59 on DickBlick
Pentel Arts Color Brush (Black) $8.39 on Pentel store, $6.19 on DickBlick
Premium Box Exclusive:
Derwent Graphik Line Painter- No openstock products or MSRP given on Derwent Site, $3.96 for openstock on DickBlick , could be as low as $3.58 per marker if purchased as a 20 piece set and divvied up.
Montana Acrylic Markers (x2) Extra Fine tips
No MSRP on site, $5.45 on DickBlick, $4.26 if a set of 6 is purchased and divvied up.
Prismacolor Fine Line Marker .005 mm
$3.49 on RexArt $2.39 openstock on DickBlick
Total:
$32.74 on high end
$22.58 using common artist stores like DickBlick
Box Cost: $35+$5 shipping
The Supplies Inside
Exclusive to Premium Box
Derwent Graphik Line Painter
http://www.pencils.co.uk/en/gb/6130/graphik-line-painter-pens
Have used these in the past, the issue is they tend to be hugely messy and bleed everywhere- tend to leak even when stored properly. Cool idea, poor execution.
Montana Acrylic Markers, Extra Fine
https://www.montana-cans.com/en/marker-und-inks/acrylic-marker/acrylic-marker/montana-acrylic-marker-0.7mm-extra-fine
These tend to clog up and splutter when used for inking. Cool idea again, spotty execution on textured paper (I used Strathmore's 400 series mixed media journal)
Prismacolor Fine Line Marker .005 mm
Technical pen, I regularly use these in my travel kit. Water and alcohol marker safe. A bit of an odd pick for an acrylics box.
Supplies, Demonstrated
Note: Please watch the SketchBox Premium Unboxing video above for context
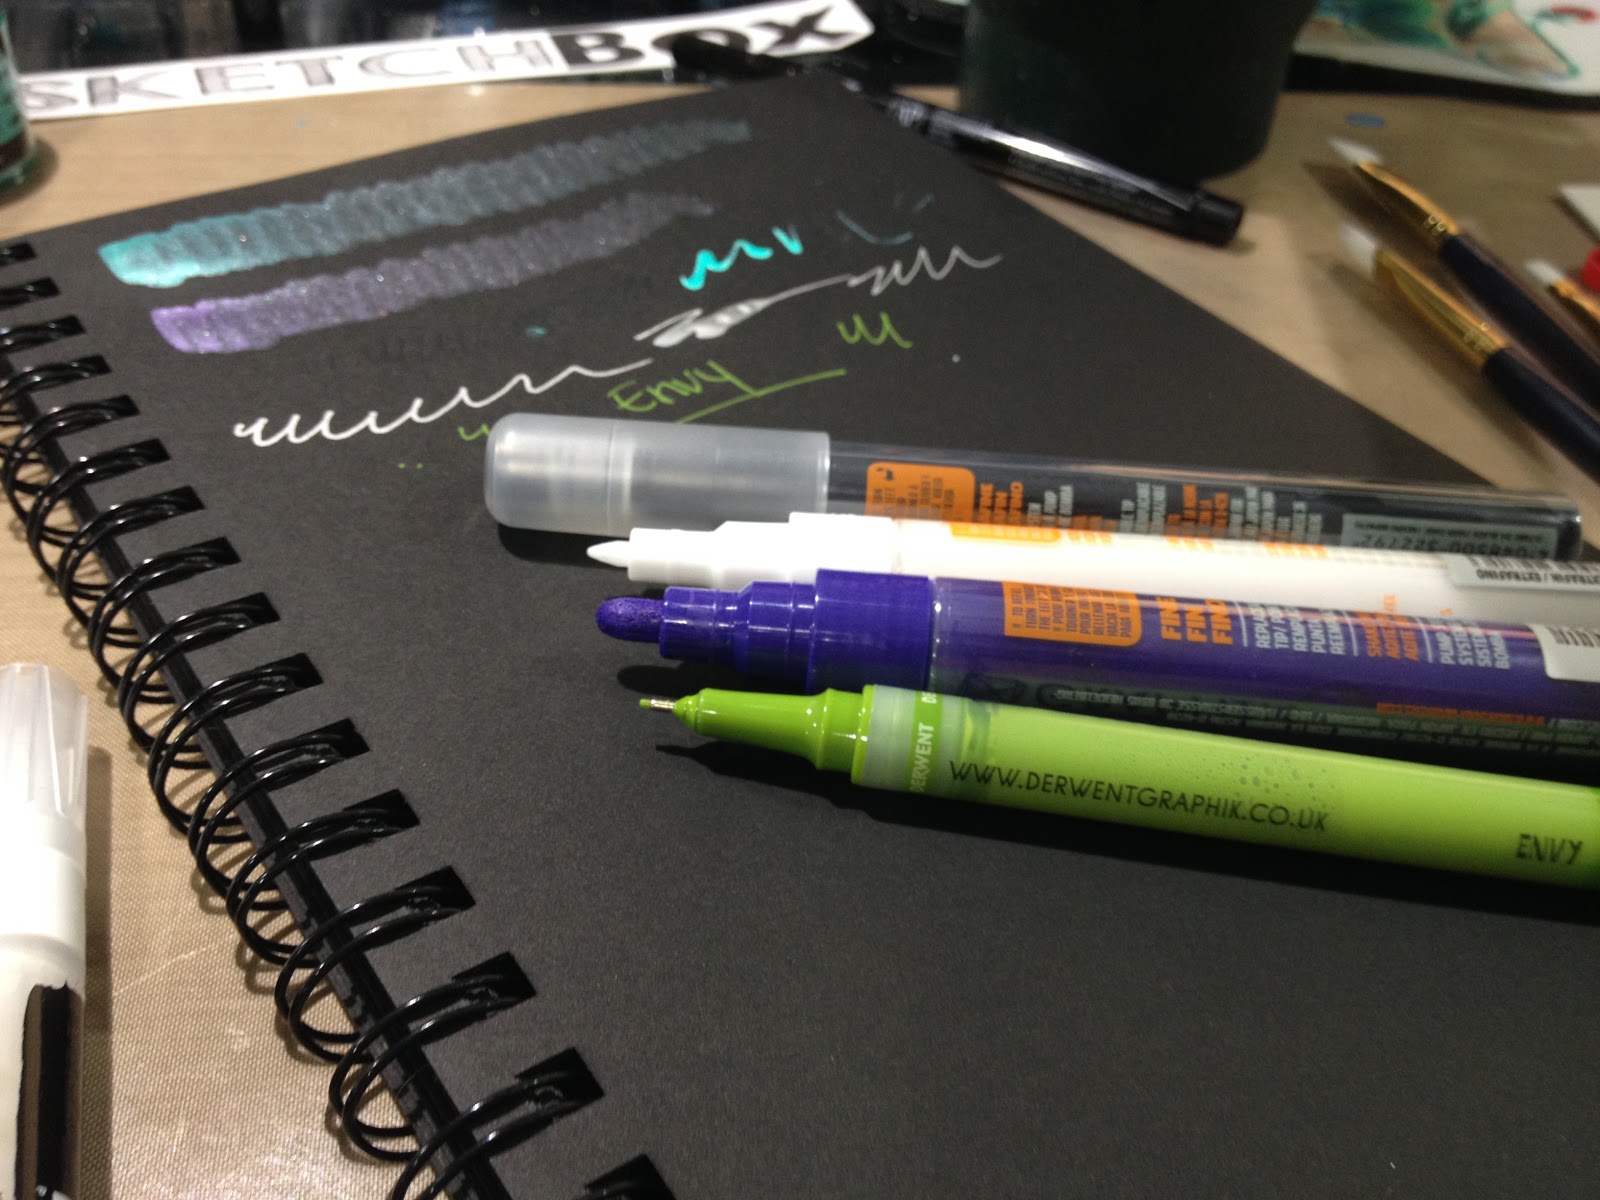
Testing opacity on black paper. All acrylics in this box had varying degrees of opacity, making all relatively suitable for use on black or dark papers or canvas.
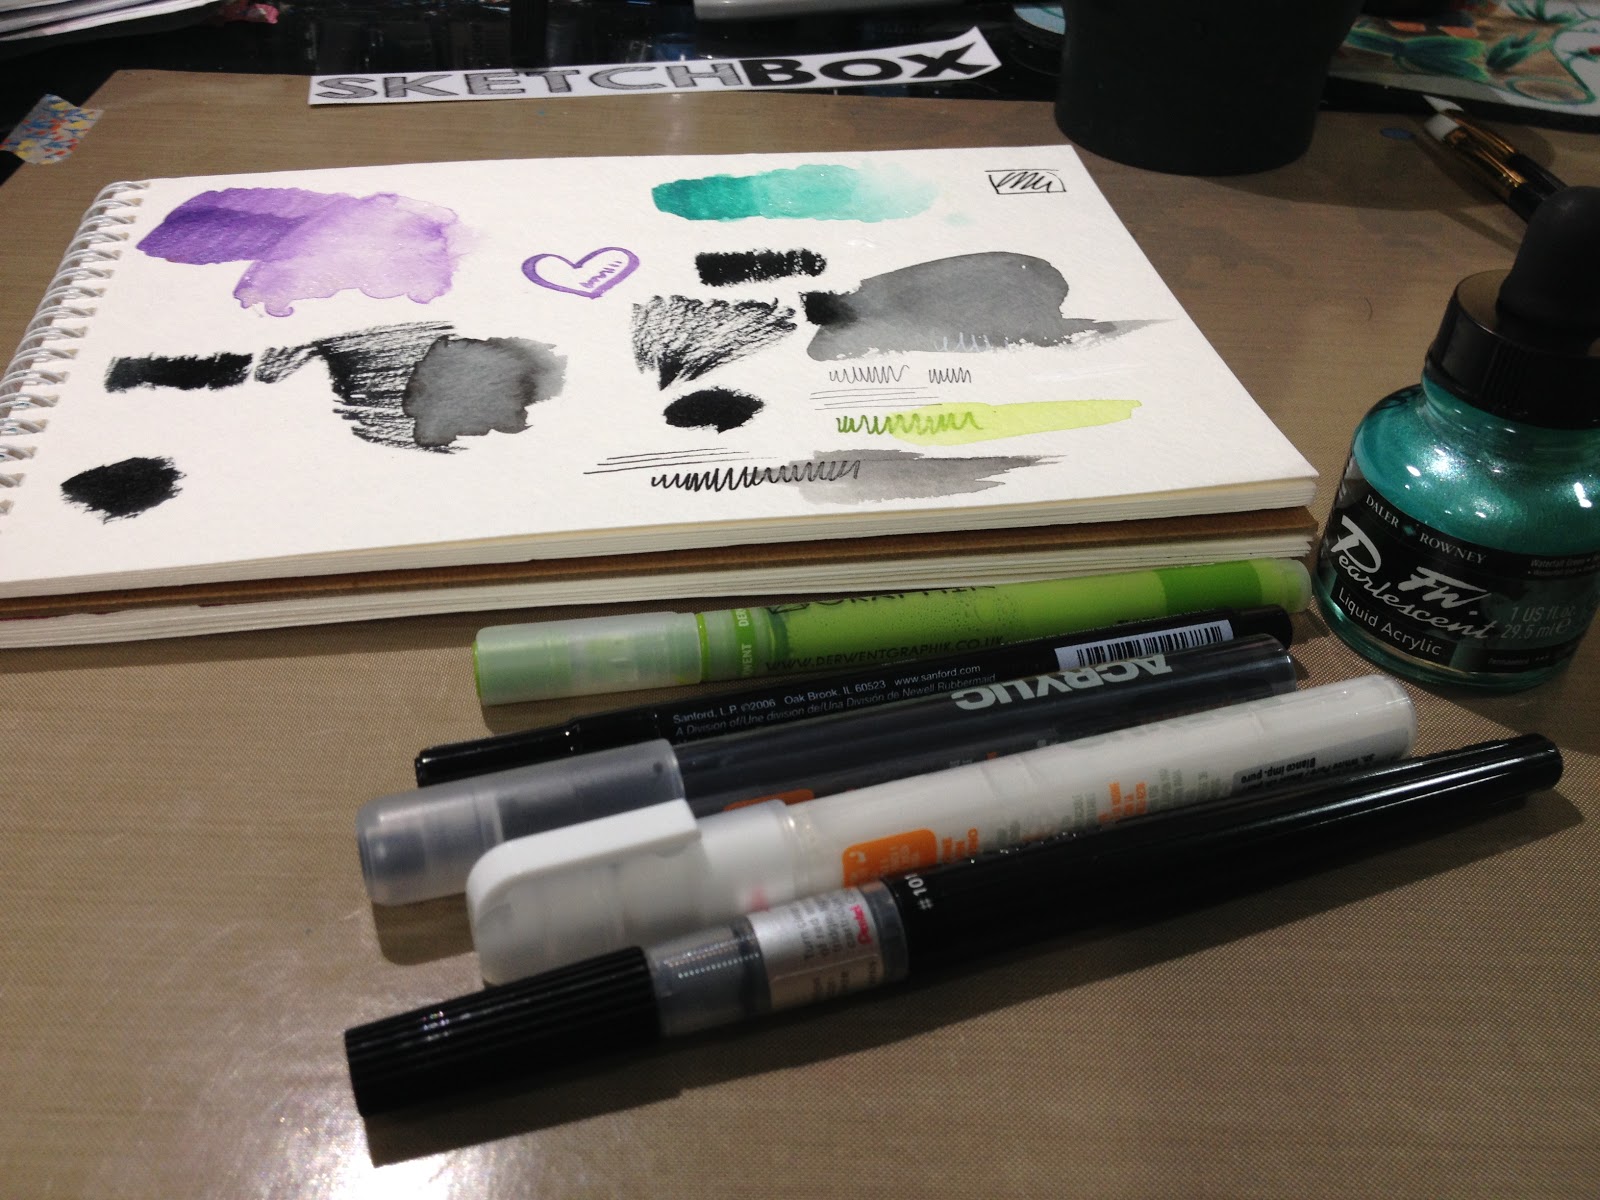
Water testing on watercolor paper- blending out acrylics while still wet.
Copic-safety test. Acrylics are not Copic safe, and are not suitable for use with alcohol markers if applied first. If you intend to use acrylics with your alcohol markers, apply markers first.
Combined SketchBox Basic and SketchBox Premium ChallengeVIDEO
After sketching my initial design in my Strathmore Mixed Media journal, I set about inking it with the Montana black acrylic ballpoint marker. This marker takes awhile to dry, and is prone to catching and sputtering on the paper.
Inking this piece took a couple days.

I applied an overall inkwash using the Pentel Arts Colour Brush and a cup of water. Watch the video above for a demonstration of this technique!


I utilized materials from both the Basic and Premium Boxes, as well as the FW Acrylic Fluorescent ink from my May ArtSnacks, and my collection of acrylic markers (Montana and Liquitex)

I utilized alternating layers of the Pearlescent ink and coordinating Liquitex acrylics to build up shadow and tone on the crystals.

The salamander was rendered with Titanium Buff Liquitex acrylic (in their chisel marker), with the orange spots rendered with FW Acrylic fluorescent orange ink from my May ArtSnacks. The eyes were rendered with the Graphik Line Painter, and the black spots were drawn on using the Montana black.


 The VerdictAs I went through the boxes, I kept thinking the same thing- May's Basic Box felt particularly anemic. Does SketchBox subsidize their Premium Boxes with overpriced Basic Boxes?
I do agree that the Premium Box IS better than the Basic Box, but shouldn't that be a given? We are paying $10 more for this box, so it should include more products, or higher quality products. What I don't understand is why the Basic Box often relies on cheap, poorly made products (like January's Artists Loft watercolor pencils) as filler.
But honestly, even though the Premium box DOES include more product, it's still short of the $35 mark, regardless of whether you use MSRP (when available, it's often not) or if you shop smart.
Personally, I find both boxes to be overpriced given the contents, although Premium Box is a better deal (at least this month). I was excited by the variety of acrylic materials included in the Premium box, and felt like the ball point acrylic Montana markers were an interesting twist. I find the $40 a month price tag to be far too hefty to recommend this box, and the quality in the Basic Box also too low to recommend.
Please consider donating to this blog or purchasing from Natto-shop (http://nattosoup.com/shop) if you want me to continue publishing quality content. All materials tested were purchased from my own pocket. Keep on Truckin' Nattosoup is not under any sponsorship.
May 23, 2016
May 2016 SketchBox Basic Vs ArtSnacks
Thanks to Denise Hillburn (my mother) for the gift of ArtSnacks for the year! SketchBox Basic subscription purchased by me out of personal funds. If you would like to help support this blog, and continue posts like this, please consider donating to my Paypal, or contributing to my
Patreon
. Future unboxings and reviews will be unlocked to the public at the $15 level each month, but backers have access regardless of funds raised. If you would like to see me review a SketchBox premium box, please consider
gifting
a subscription.

Thanks to the generosity of my Patreon backers, I've also purchased a May Premium SketchBox to review. The SketchBox Basic Vs. SketchBox Premium review is coming up soon, so keep an eye out for it! This review is the usual SketchBox Basic Vs. ArtSnacks comparative review, similar to the reviews shared over past four months.
Special April Thanks To:
Ryan
C. Ellis
Andrew Benedict
Yolaine
Wayne Norris
Chris
Michael Suriano
Yusagi
Entreat
Ristro
Previous SketchBox Vs. ArtSnacks
January- Winner: ArtSnacks
February- Winner: SketchBox
March- Winner: ArtSnacks
April- Winner: ArtSnacks
SketchBox: $25mo/$240 yr
ArtSnacks: $20mo/$200 yr
May SketchBox Basic Includes:Princeton Art & Brush Co Real Value Brush Selection
Synthetic Hair- White TaklonFW Acrylic- Pearlescent InkPentel ColourBrush
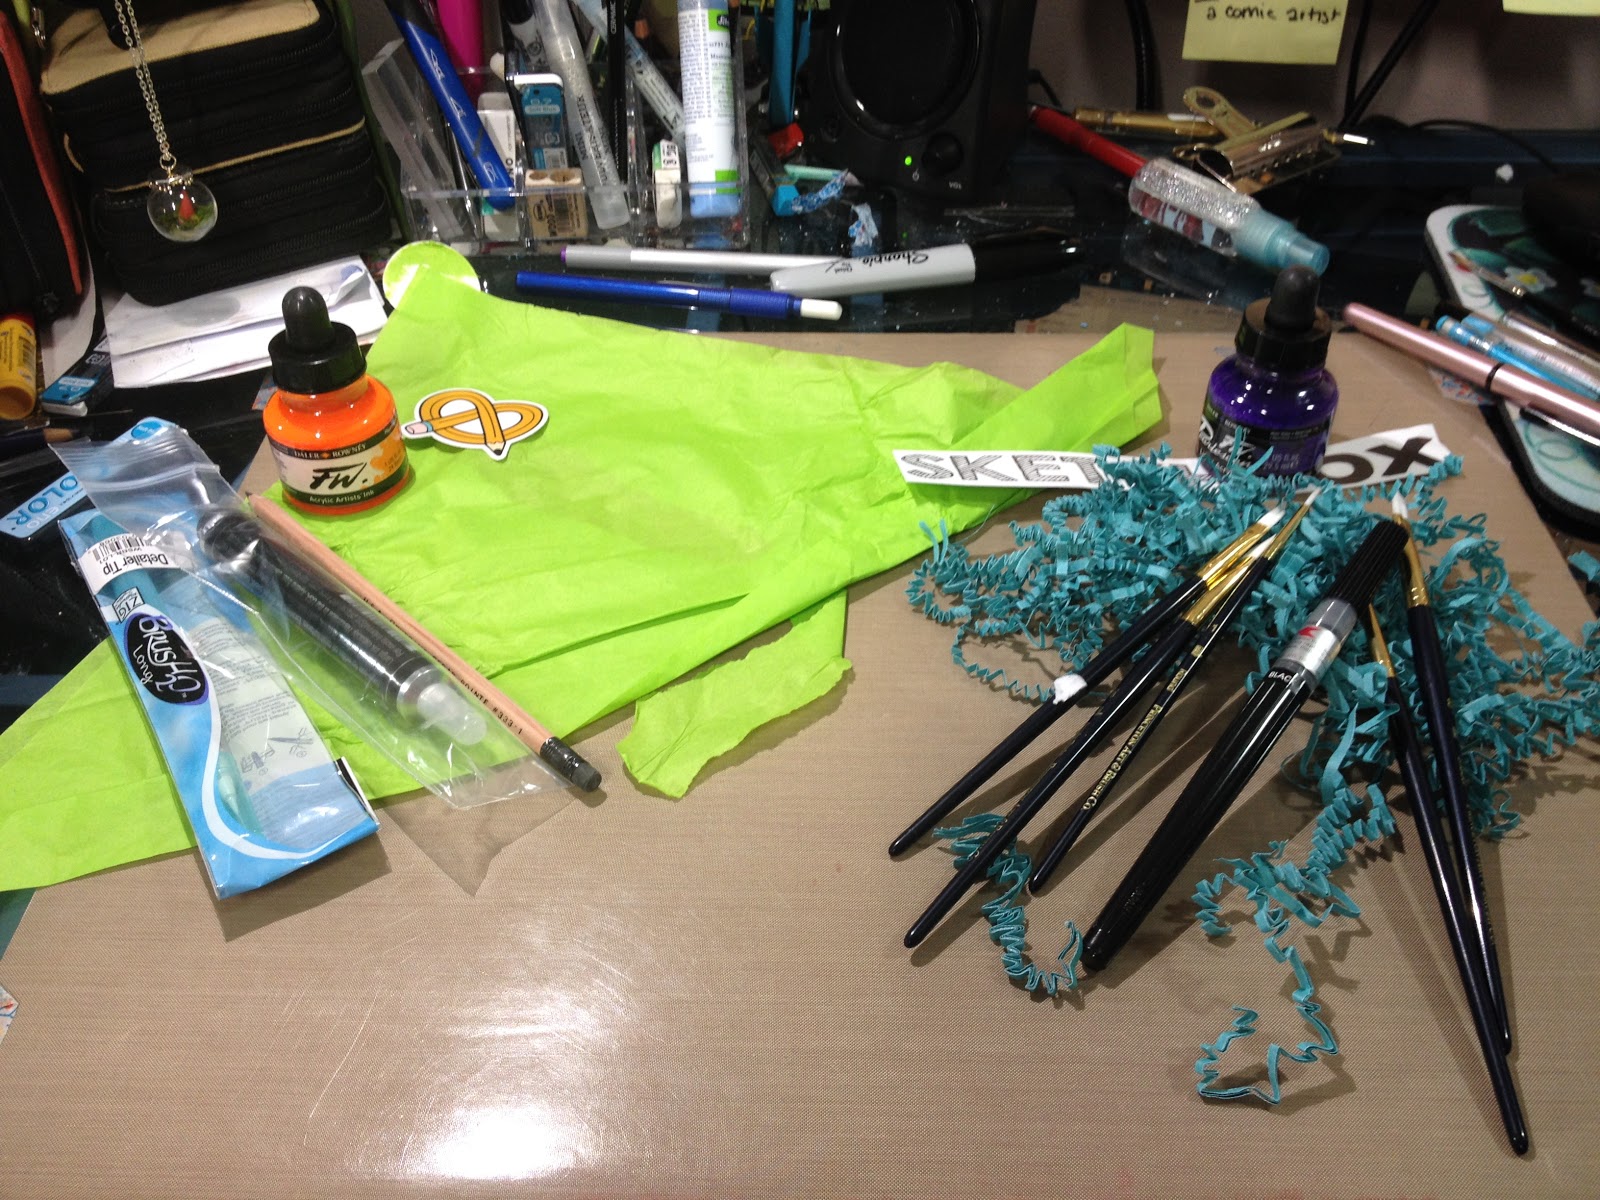
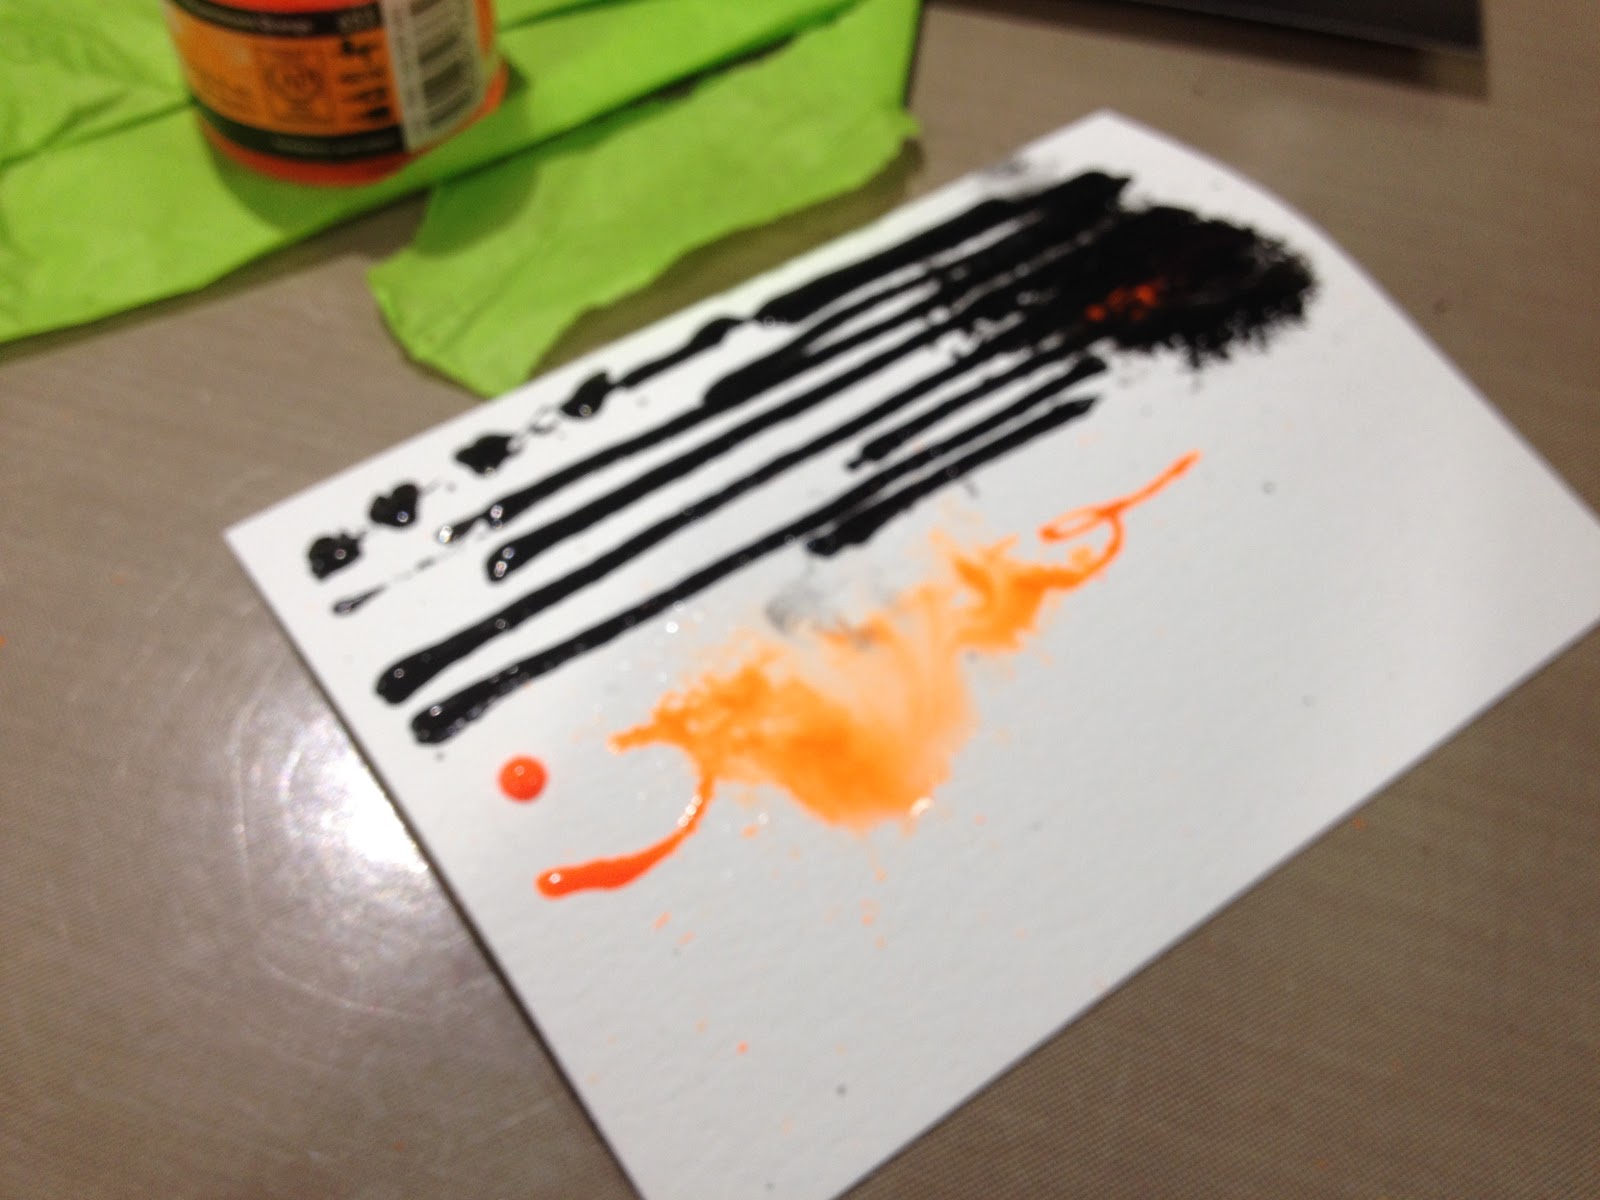
May ArtSnacks Includes: Krink K-90FW Acrylic Ink- Fluorescent OrangeKuretake Brush20General's Cedar Pencil
May ArtSnacks Vs SketchBox Basic- Becca Hillburn
Read the rest of the post under the cut!
Artsnacks This Month's Brands Are:Daler RowneyKuretakeGeneral'sKrinkThe Card

 The Card Reads:
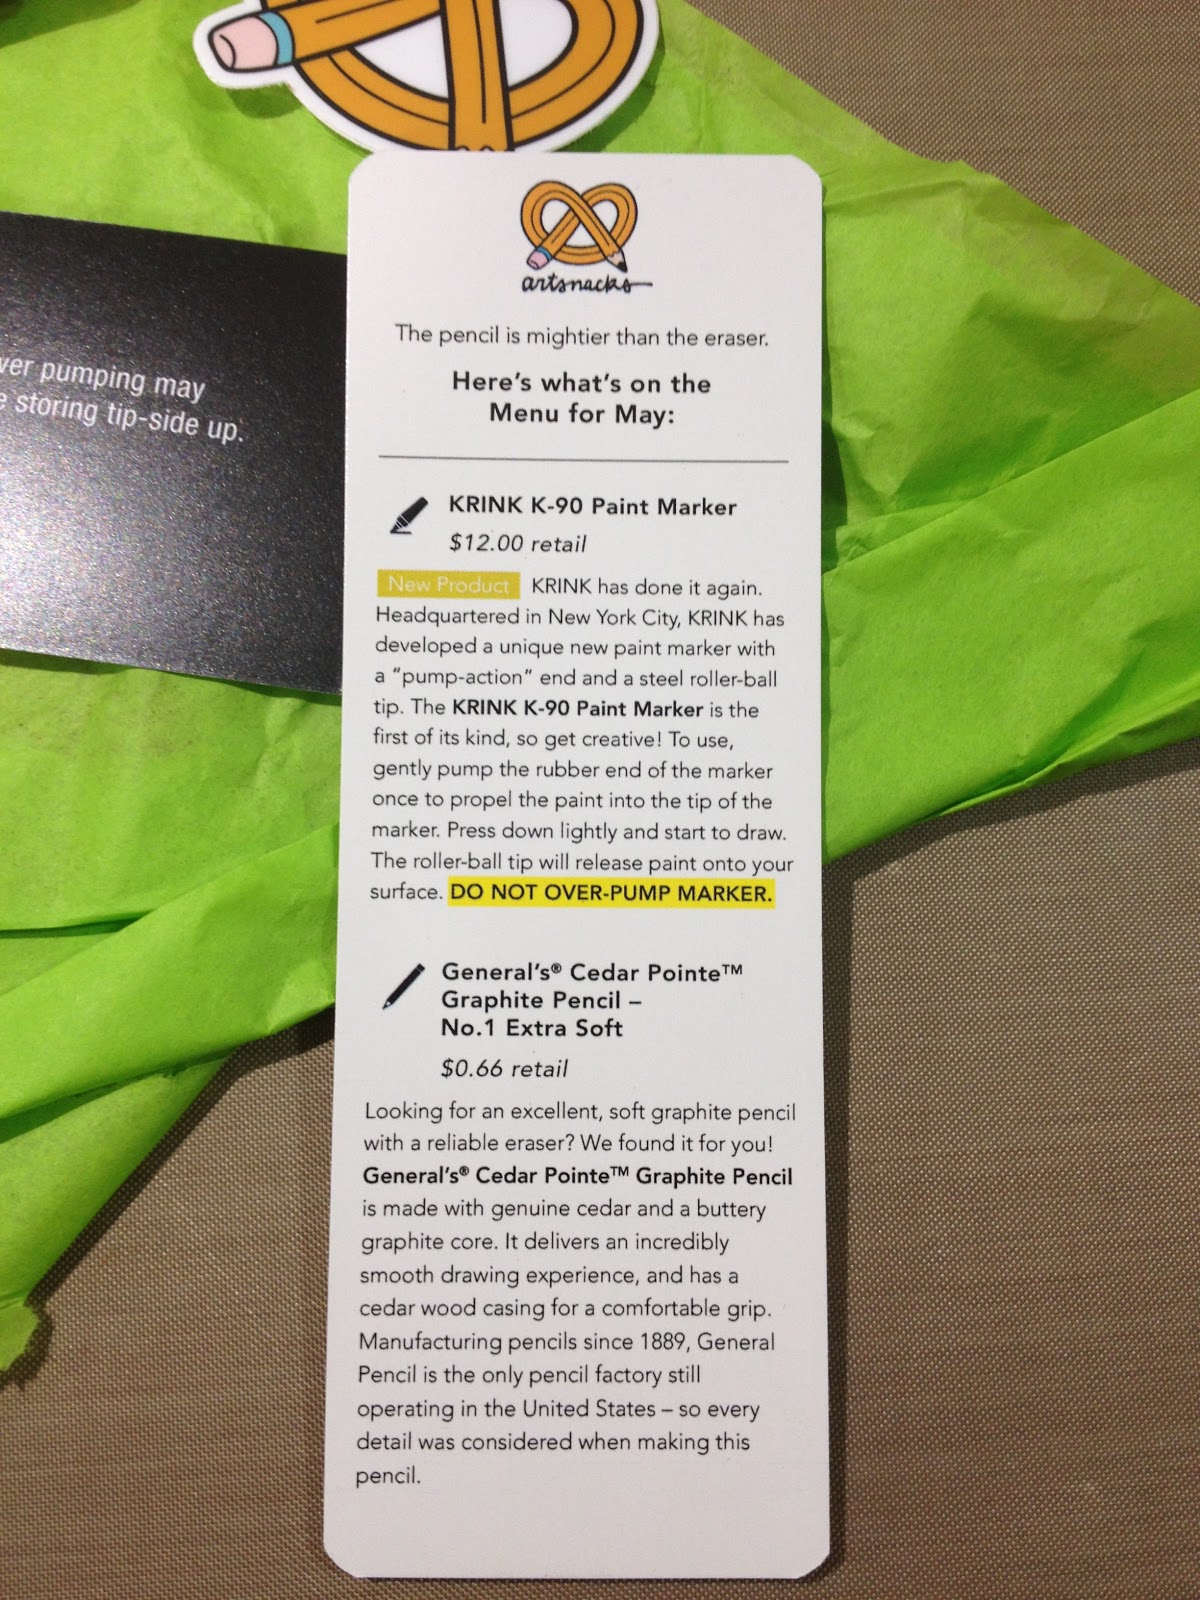
The pencil is mightier than the eraser.Here's what's on the Menu for May:
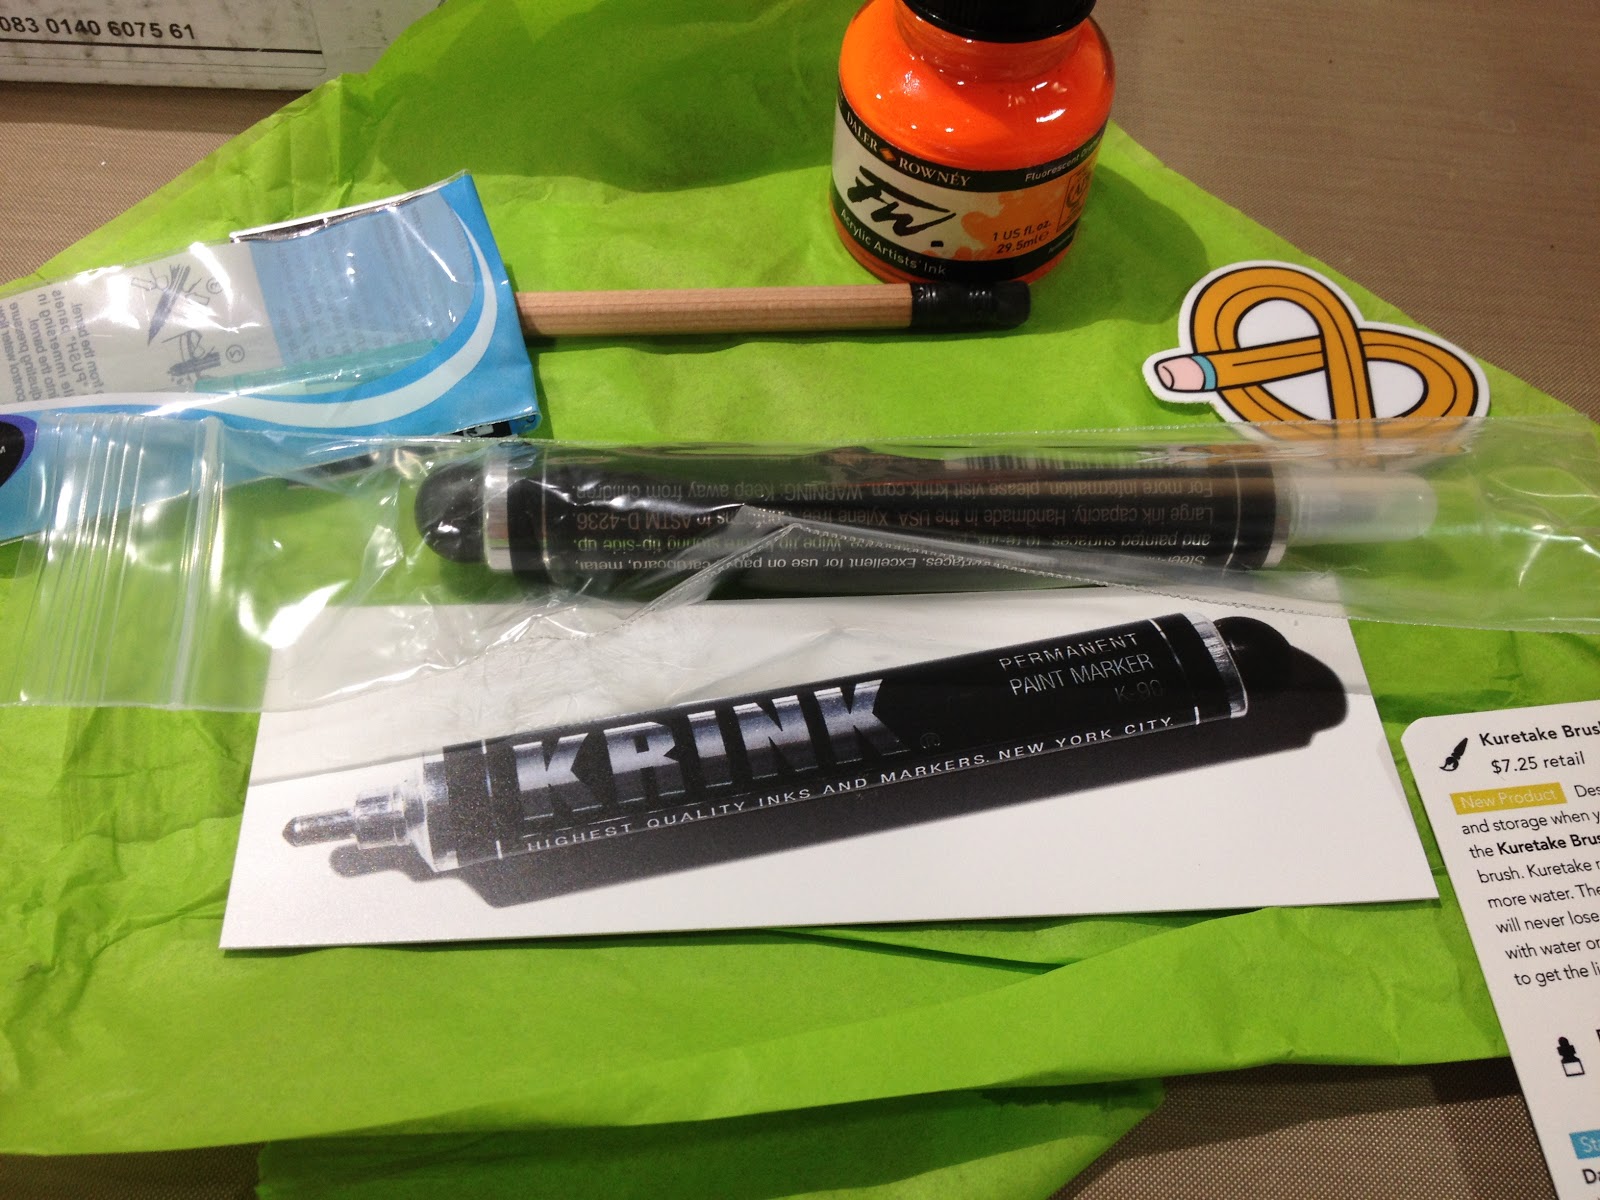
Krink K-90 Paint Marker$12.00 retailNew Product KRINK has done it again. Headquartered in New York City, KRINK has developed a unique new paint marker with a "pump action" end and a steel roller-ball tip. The KRINK K-90 Paint Marker is the first of its kind, so get creative! To use, gently pump the rubber end of the marker once to propel the paint into the tip of the marker. Press down lightly and start to draw. The roller-bball tip will release paint onto your surface. DO NOT OVER-PUMP MARKER.
General's Cedar Pointe Graphite Pencil- No. 1 Extra Soft$0.66 retailLooking for an excellent, soft graphite pencil with a reliable eraser? We found it for you! General's Cedar Pointe Graphite Pencil is made with genuine cedar and a buttery graphite core. It delivers an incredibly smooth drawing experience, and has a cedar wood casing for a comfortable grip. Manufacturing pencils since 1889, General Pencil is the only pencil factory still operating in the United States- so every detail was considered when making this pencil.
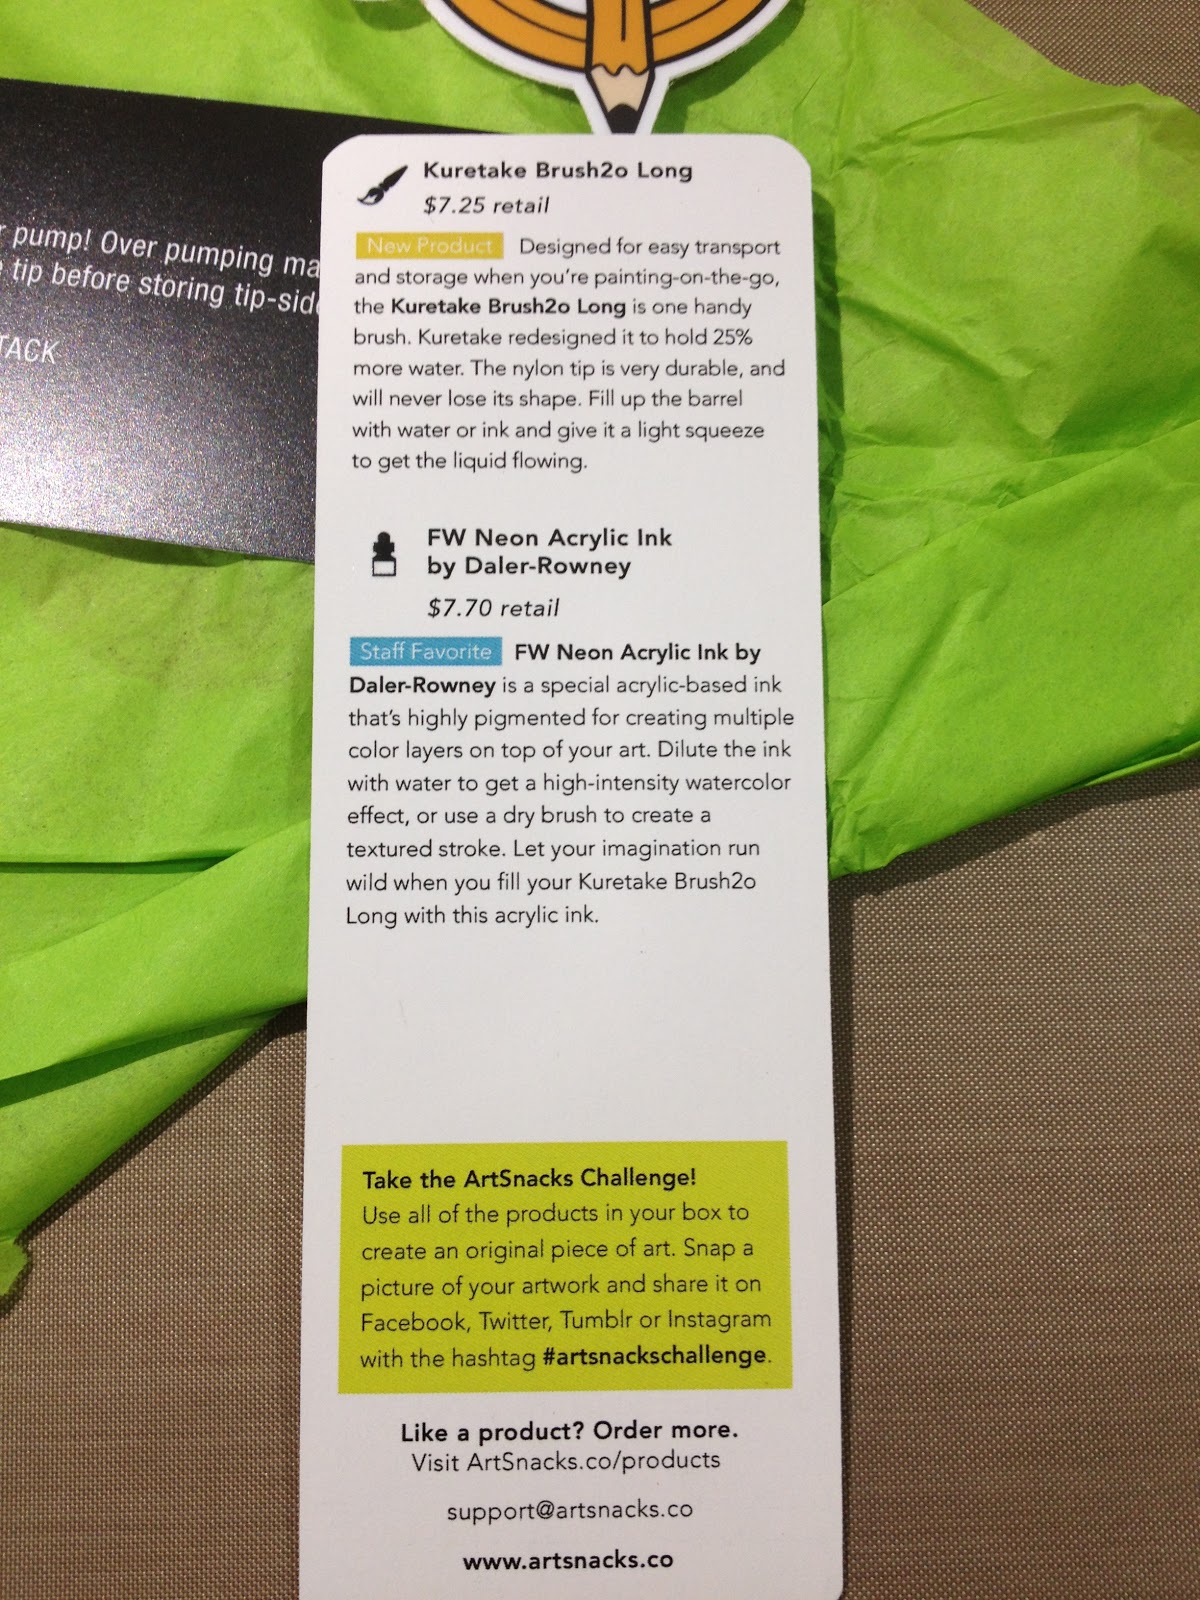
Kuretake Brush20 Long$7.25 retailNew product Designed for easy transport and storage when you're painting-on-the-go, the Kuretake Brush20 Long is one handy brush. Kuretake redesigned it to hold 25% more water. The nylon tip is very durable, and will never lose its shape. Fill up the barrel with water or ink and give it a light squeeze to get the liquid flowing.
FW Neon Acrylic Ink by Daler-Rowney$7.70 retailStaff Favorite FW Newon Acrylic Ink by Daler-Rowney is a special acrylic-based ink that's highly pigmented for creating multiple color layers on top of your art. Dilute the ink with water to get a high-intensity watercolor effect, or use a dry brush to create a textured stroke. Let your imagination run wild when you feill your Kuretake Brush20 Long with this acrylic ink.
Take the ArtSnacks Challenge!Use all of the products in your box to create an original piece of art. Snap a picture of your artwork and share it on Facebook, Twitter, Tumblr, or Instagram with the hashtag #artsnackschallenge
Like a product? Order more.Visit ArtSnacks.co/productssupport@artsnack...www.artsnacks.co
The Price Breakdown:

Kuretake Zig BrushH20 (New product)- Currently unavailable on Amazon, but the listing is there $5.39 on Marker Supply
Krink K-90 (new product)- $12.00 on Krink online shop (only place available at time of writing)
Generals CederPoint Soft Pencil3 Dozen- $24.00 on the General's store or .66 cents per pencil12 Pack on Amazon: $5.40
FW Acrylic Ink Fluorescent Orange $4.59 on DickBlick Most places seem to only sell this as a set of 6
PlaZa- Set of 6- $35.19 or $5.87 each
Total: $22.64
The Supplies Inside
FW Neon Acrylic Ink
This neon ink is very intense- and STAYS intense (and fluorescent) even as you water it down. I know a lot of artists want a neon watercolor (and that's not really feasible) and this acrylic ink is a good solution to that problem.
General's Cedar Pointe
I'm not really one for traditional wooden pencils, but the Cedar Pointe is ok- it smells nice, has a softer graphite, and the eraser is pretty good.
Zig Brush20I've used quite a few of Zig's waterbrushes in the past, and I like them- they perform consistently and tend not to leak. As recommended, I filled the Brush20 with the fluorescent orange ink (and a little water).
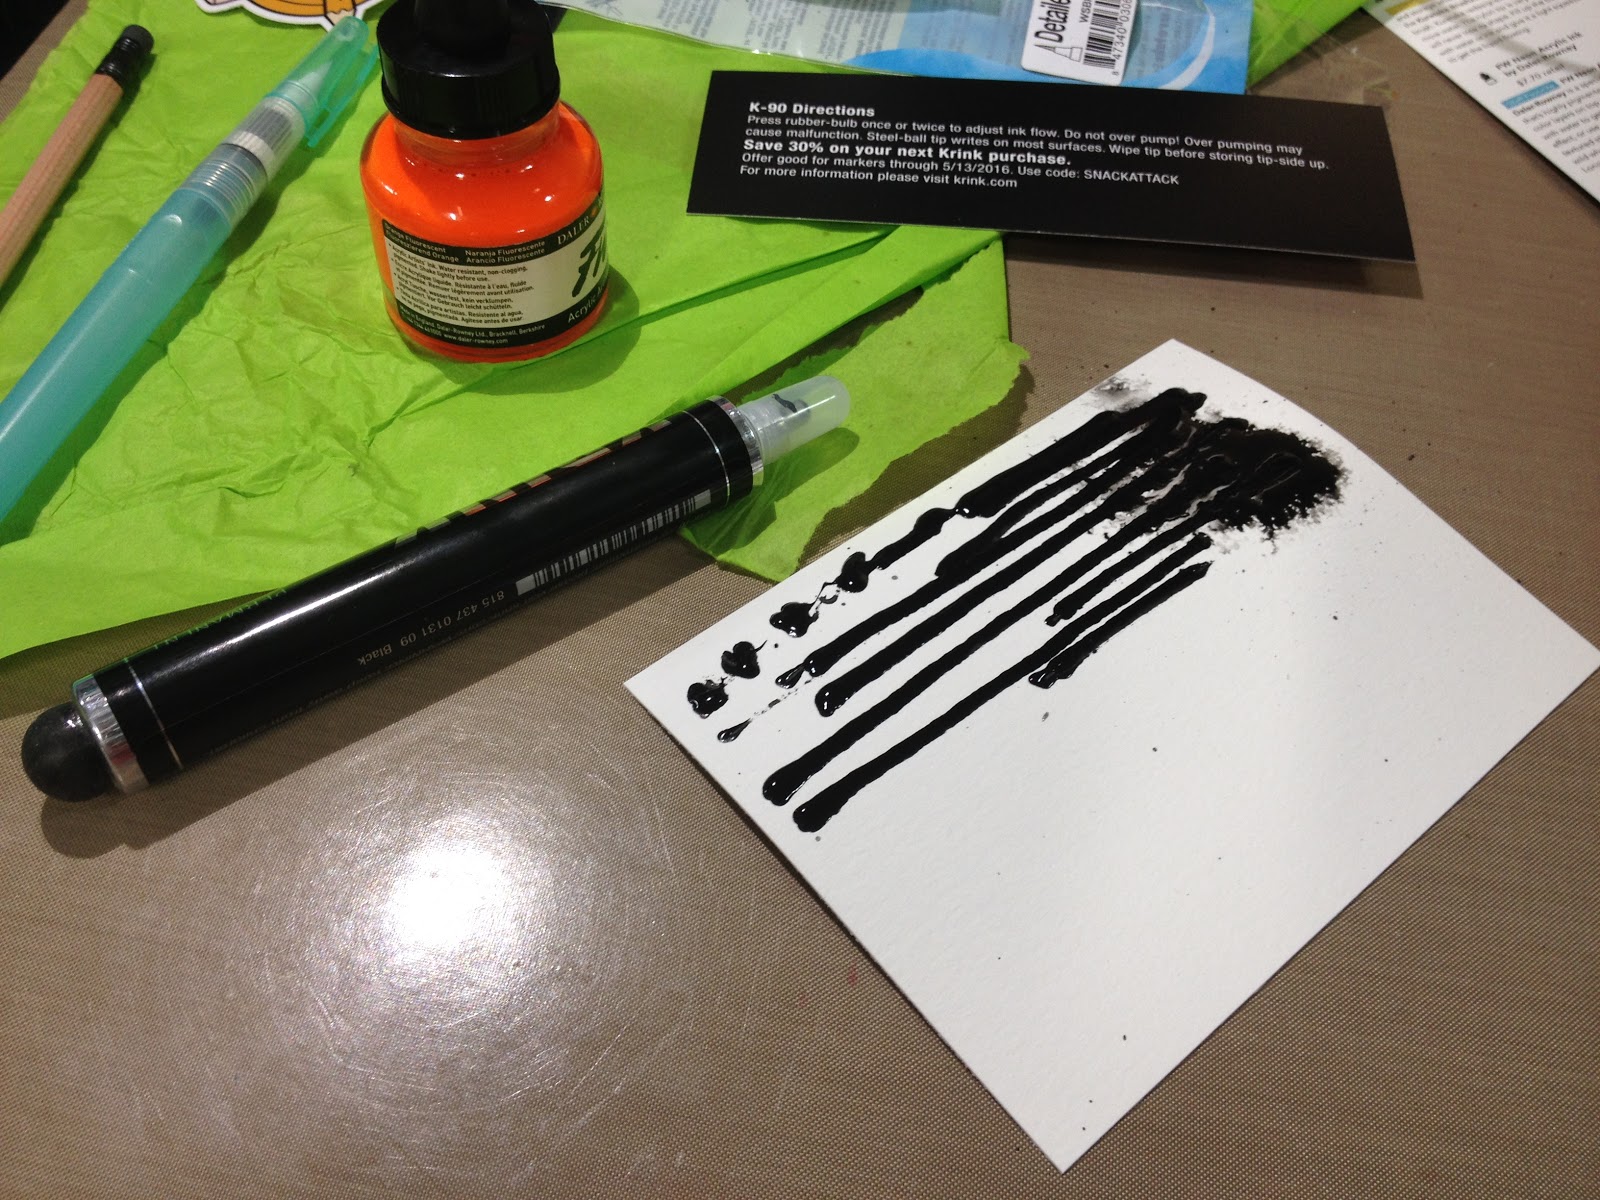
Krink K-90
The largest rollerball I've seen. When using the Montana Extra fine from my SketchBox Premium (also a roller ball acrylic marker) I had A LOT of issues with spitting and gumming up, I wonder if that's going to be an issue with the K-90 as well?-- Note: this is not an issue at all.
Supply Overview and Demonstration
May ArtSnacks Overview- Becca Hillburn

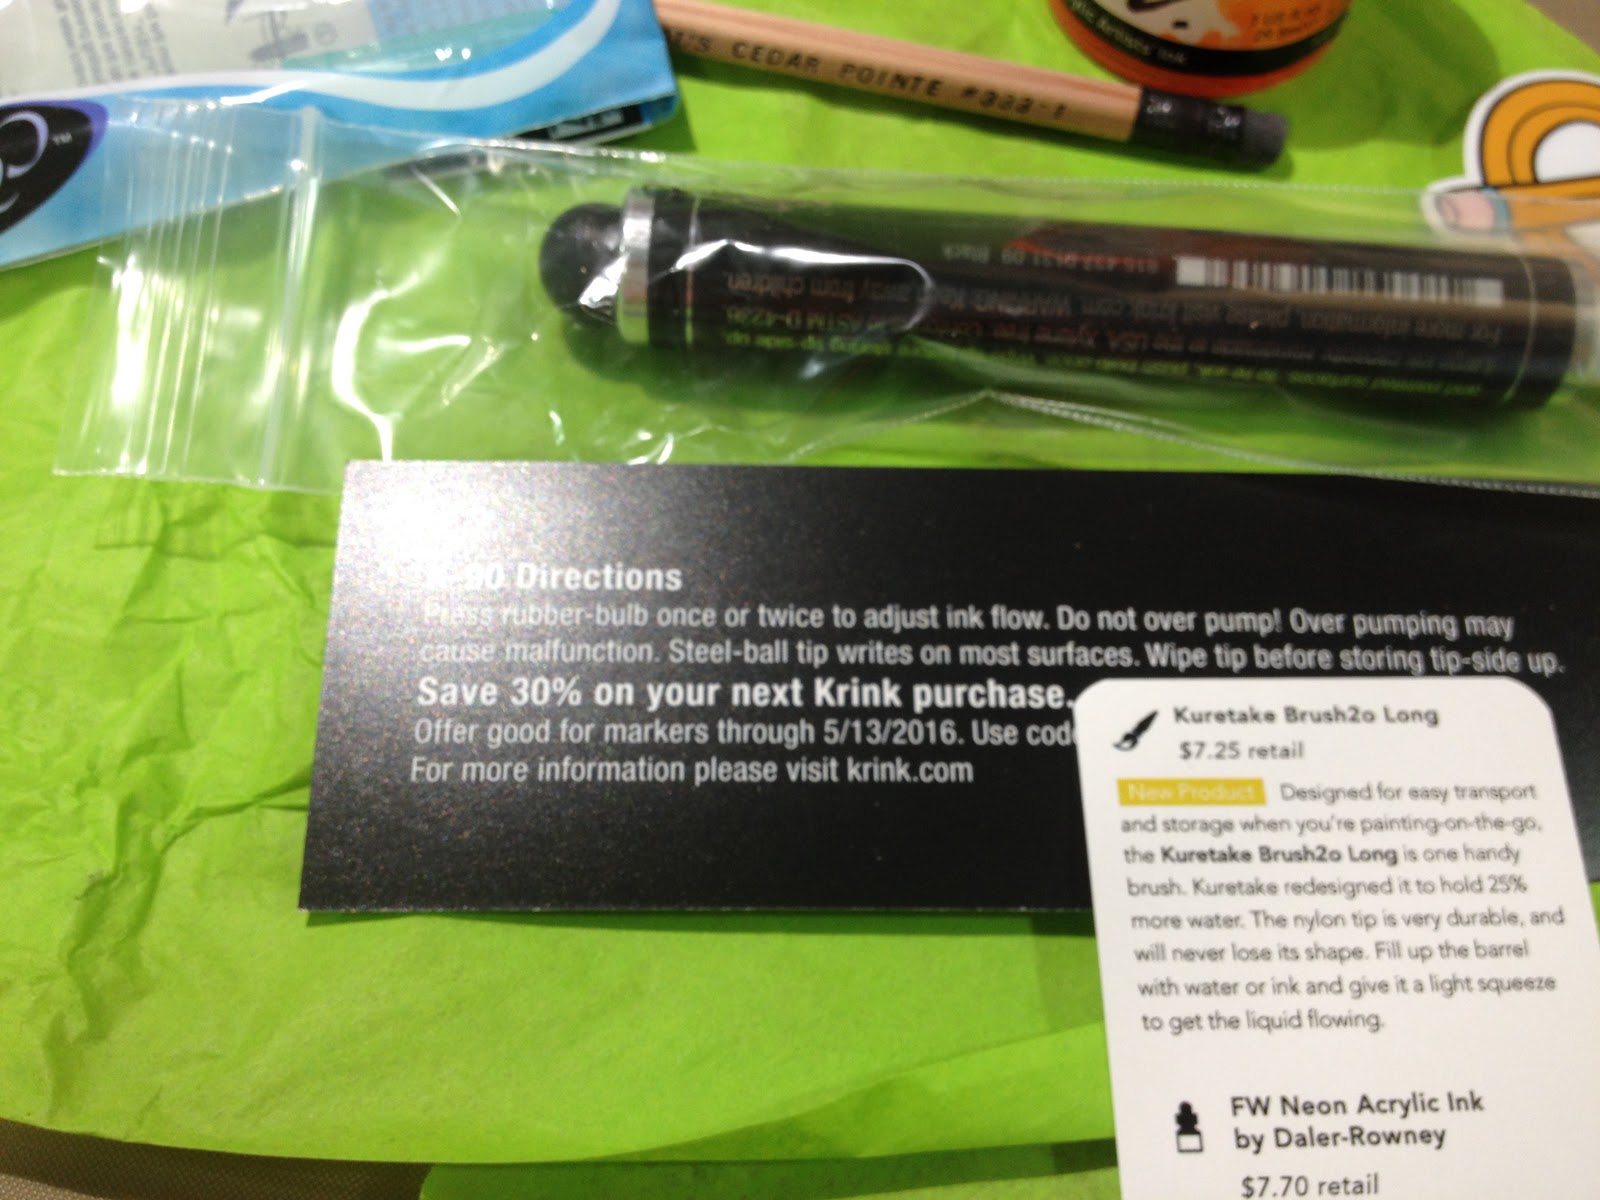
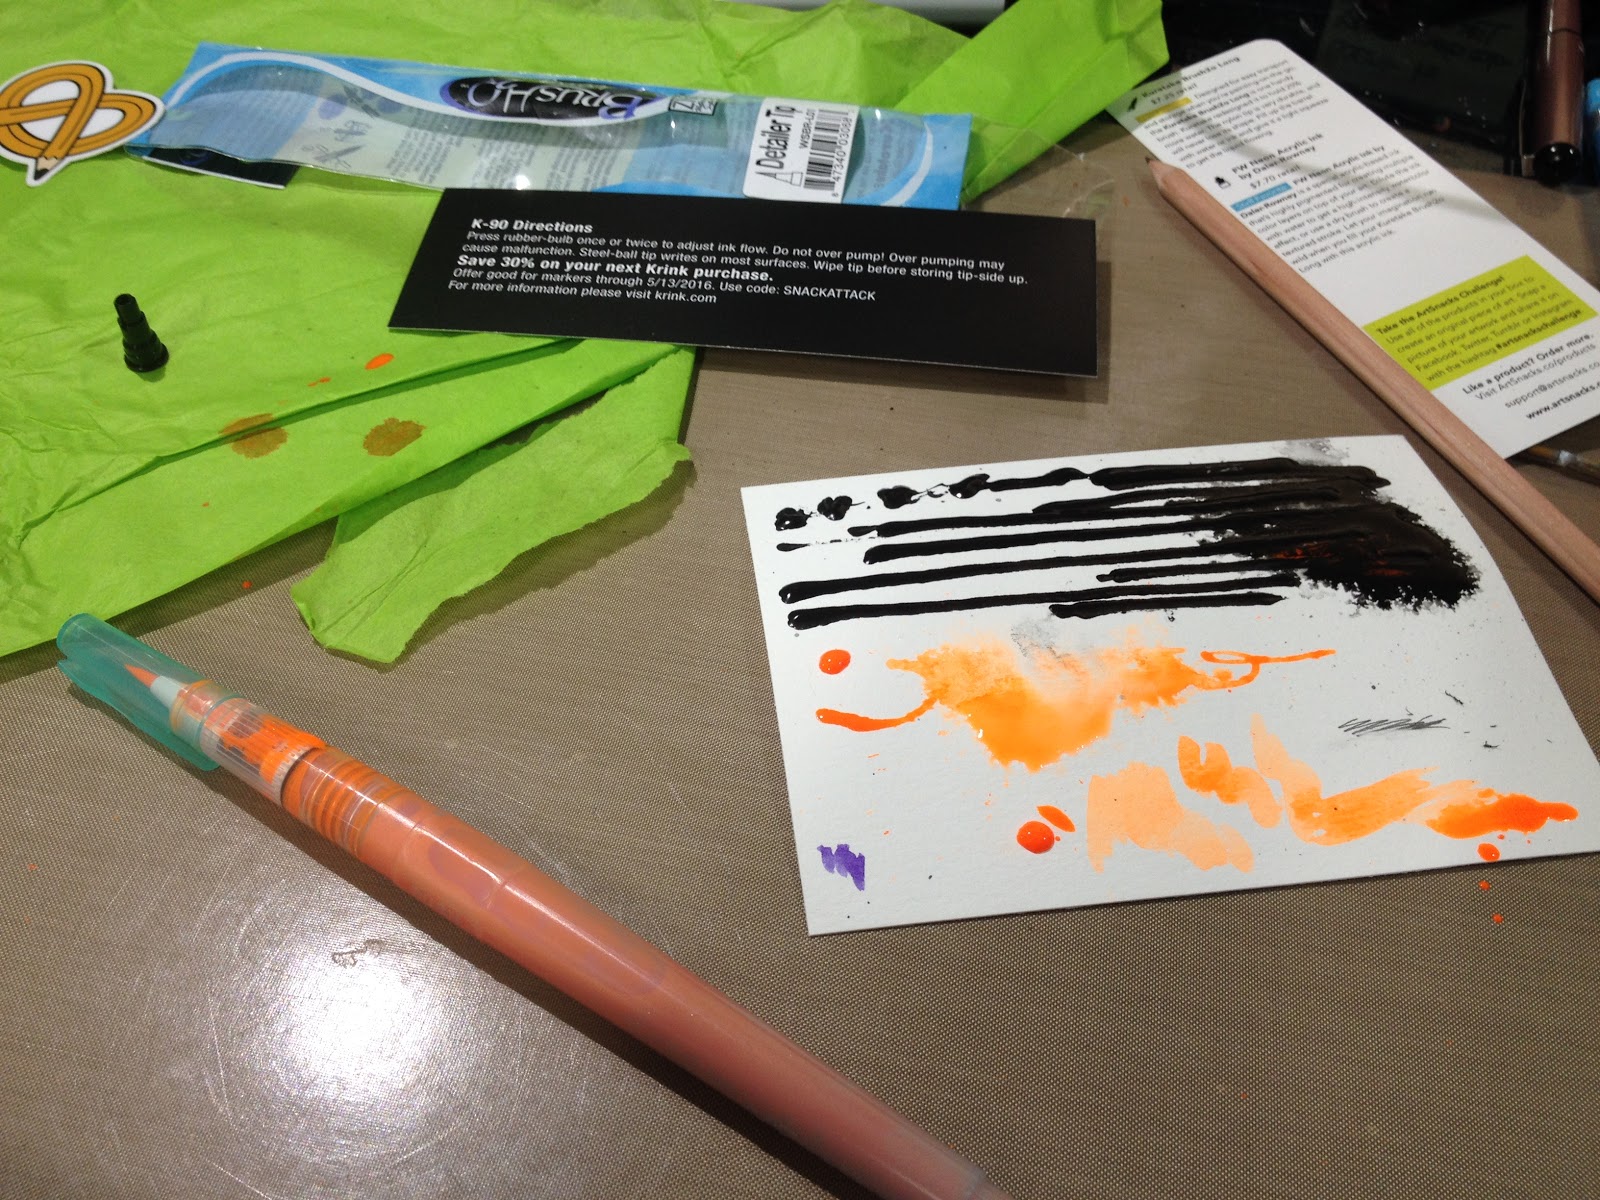
My KRINK K-90 came with an information card explaining how to use this unique product.

The card reads:
K-90 Directions
Press rubber-bulb once or twice to adjust ink flow. Do not over pump! Over pumping may cause malfunction. Steel-ball tip writes on most surfaces. Wipe tip before storing tip side up.
Save 30% off your next Krink purchase.
Offer good for markers through 5/13/2016 Use code: SNACKATTACK
For more information please visit krink.com
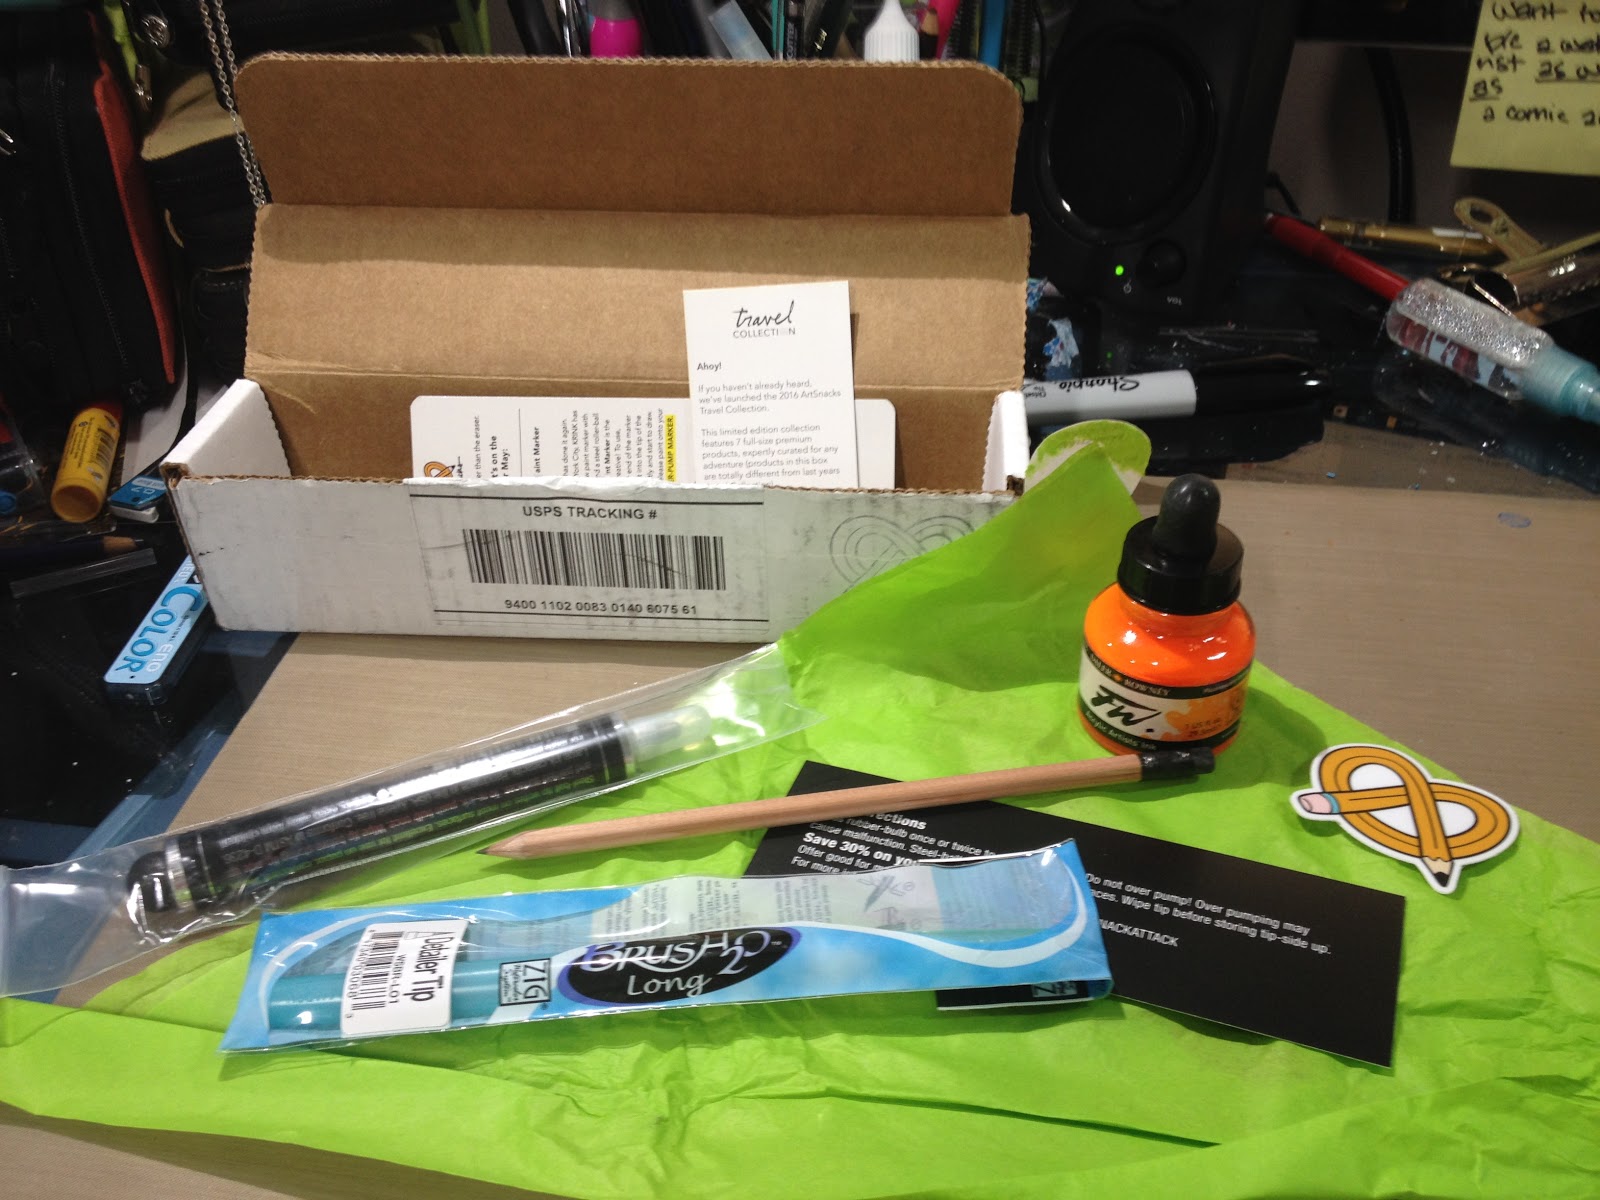
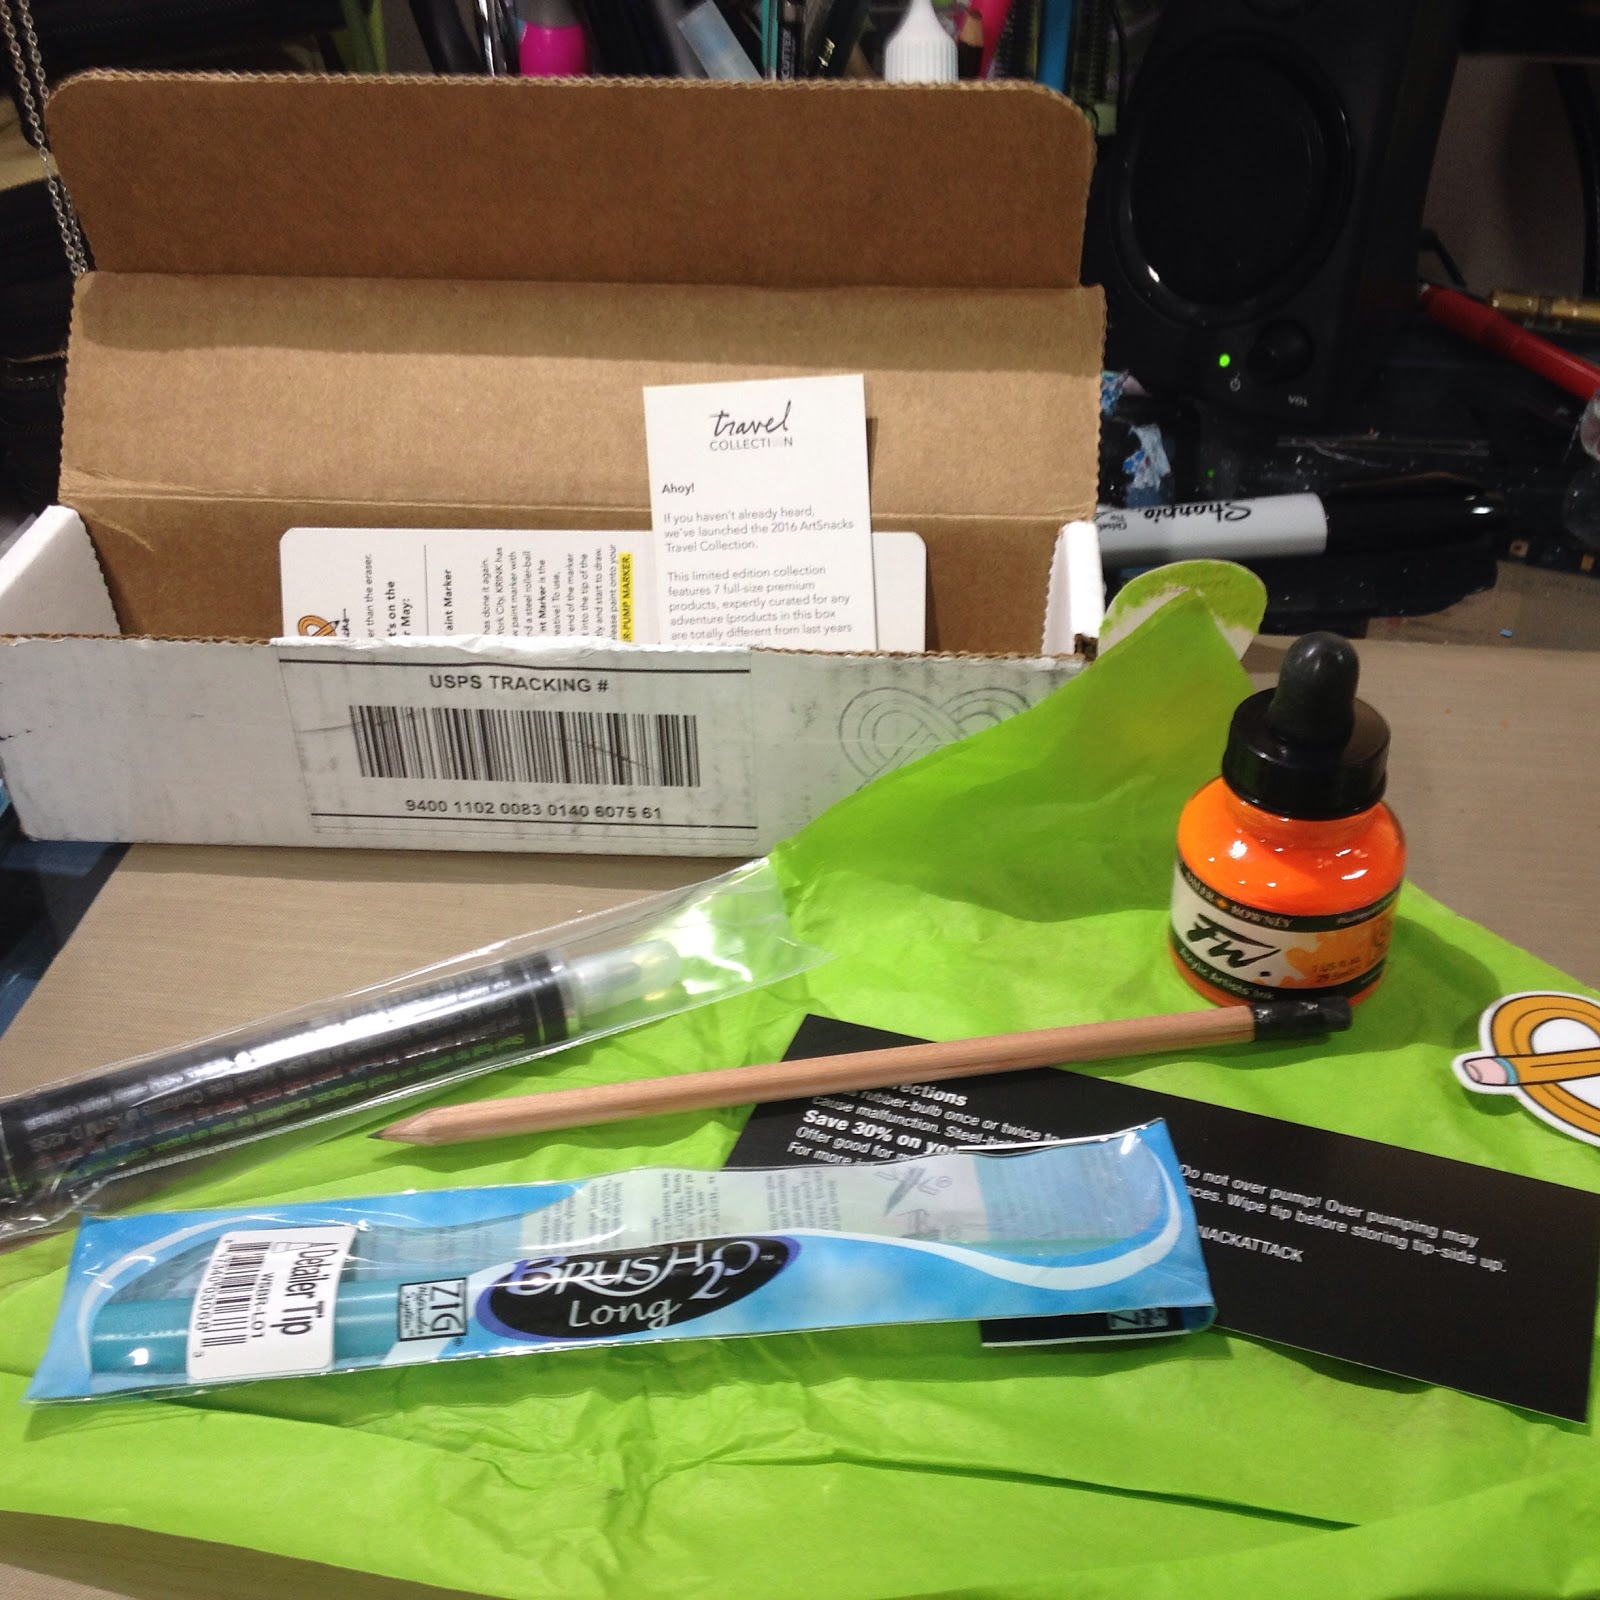
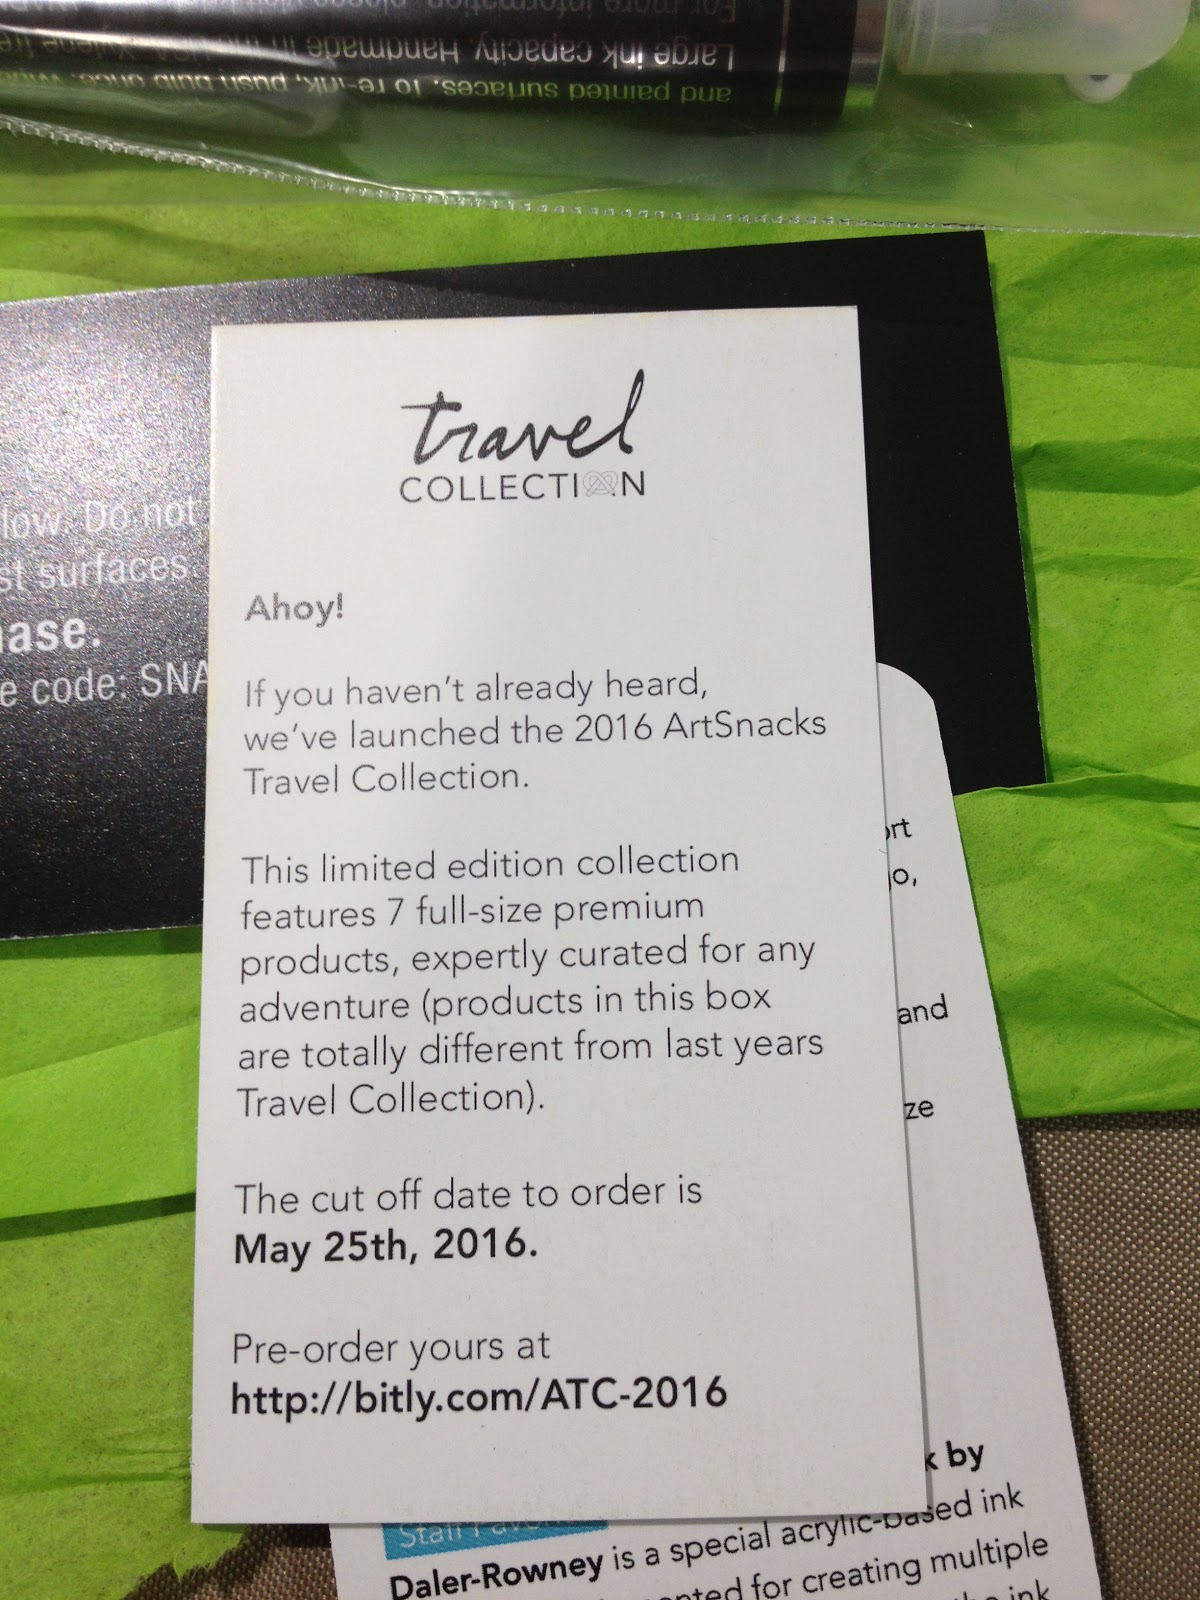
And the box also came with an advert for the upcoming travel Collection.
 The Card Reads:
Ahoy!
If you haven't already heard, we've launched the 2016 ArtSnacks Travel Collection.
This limited edition collection features 7 full-size premium products, expertly curated for any adventure (products in this box are totally different from last year's Travel Collection)
The cut off date to order is May 25th, 2016
Pre-order yours at
http://bitly.com/ATC-2016
I don't plan on purchasing a box to review, but if you're interested in seeing me review it, you're welcome to gift a subscription, and I'll give it the Nattosoup treatment. The travel Collection is $79 with free US shipping. If you're having difficulty doing so, you can also contribute funds towards the travel Collection by donating to the Paypal link in my sidebar, and mentioning that the proceeds should go towards the purchase of the travel Collection.
For a demonstration of these products, please watch the video linked above!


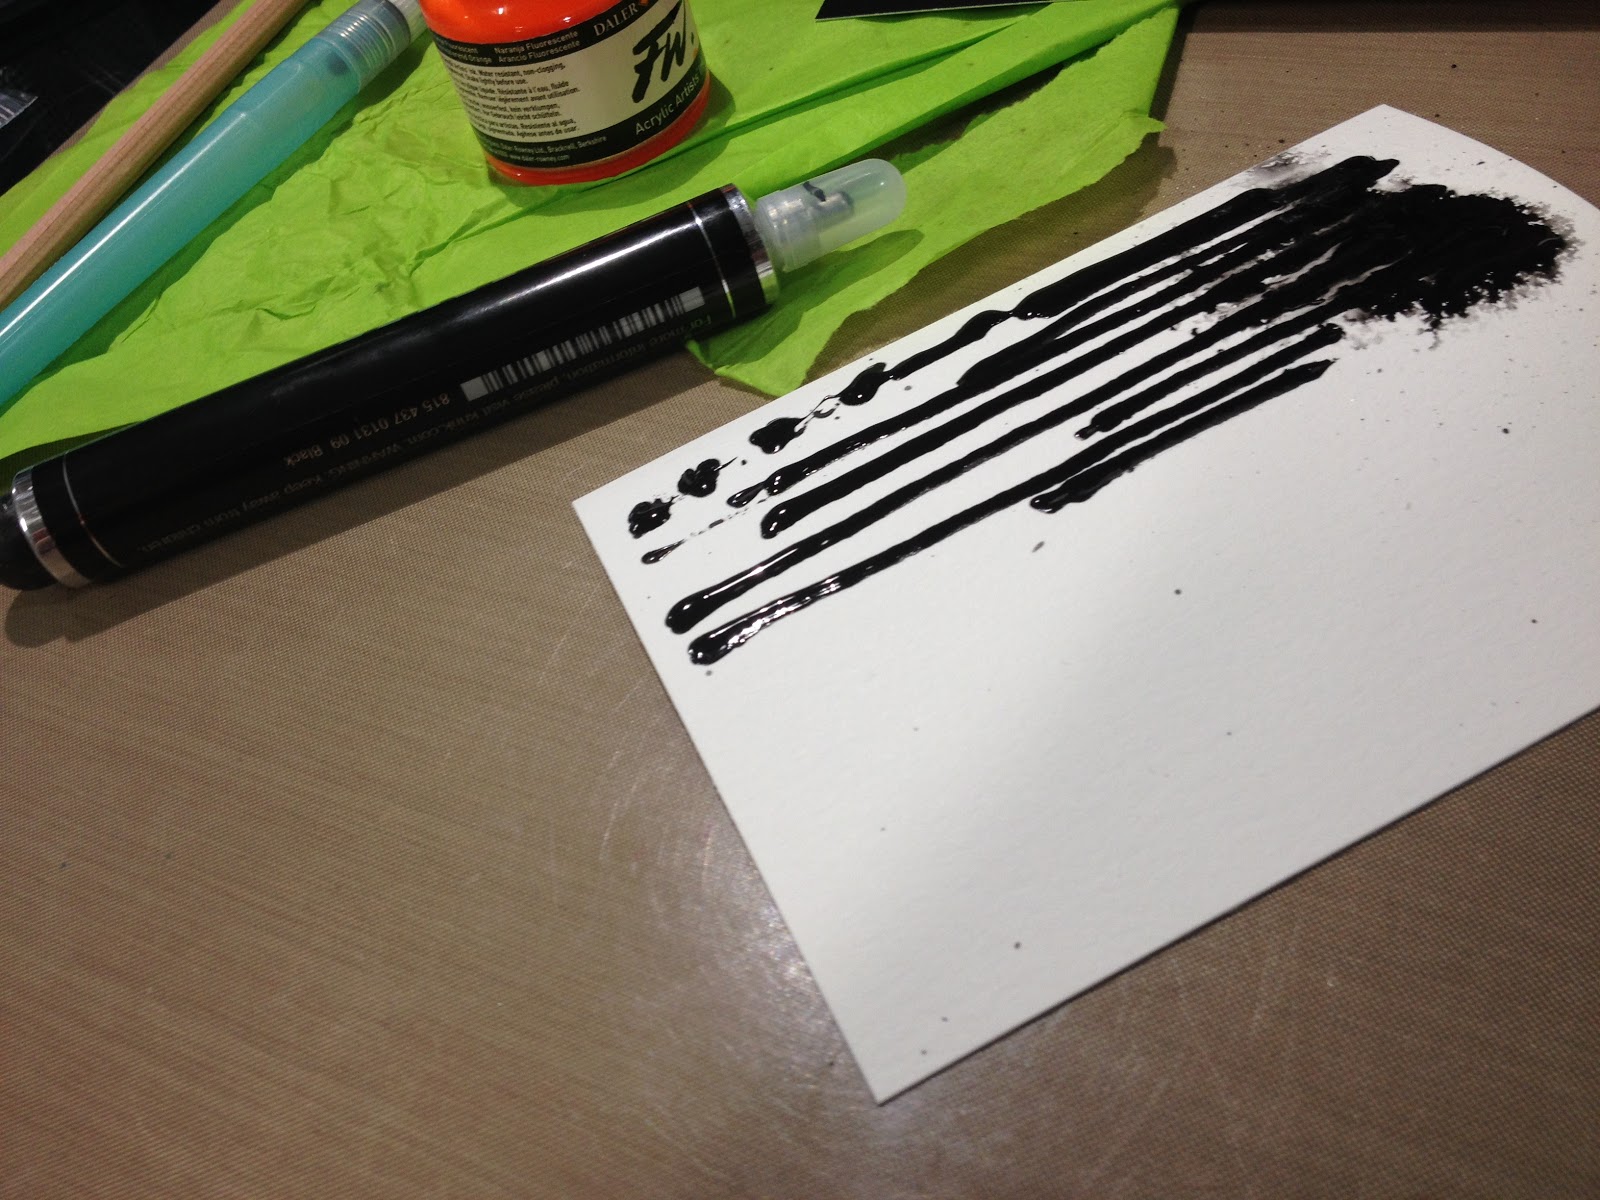
The Krink K-90 is a heavy body acrylic that handles in a unique way. It reminds me of a grease pen my dad had back when I was a kid. After speaking to Lee with ArtSnacks, I found out that Krink did indeed repurpose an industry product to perform as an art tool, which I think is really neat.
If you like light, delicate linework, this is NOT the acrylic pen for you, but this unique acrylic marker seems really well suited for gestural work, large scale graffiti, or loose renditions.


Both the FW Acrylic and K-90 acrylic inks are water soluble, an you can achieve interesting effects simply by spraying the still wet ink with a spray bottle of water.

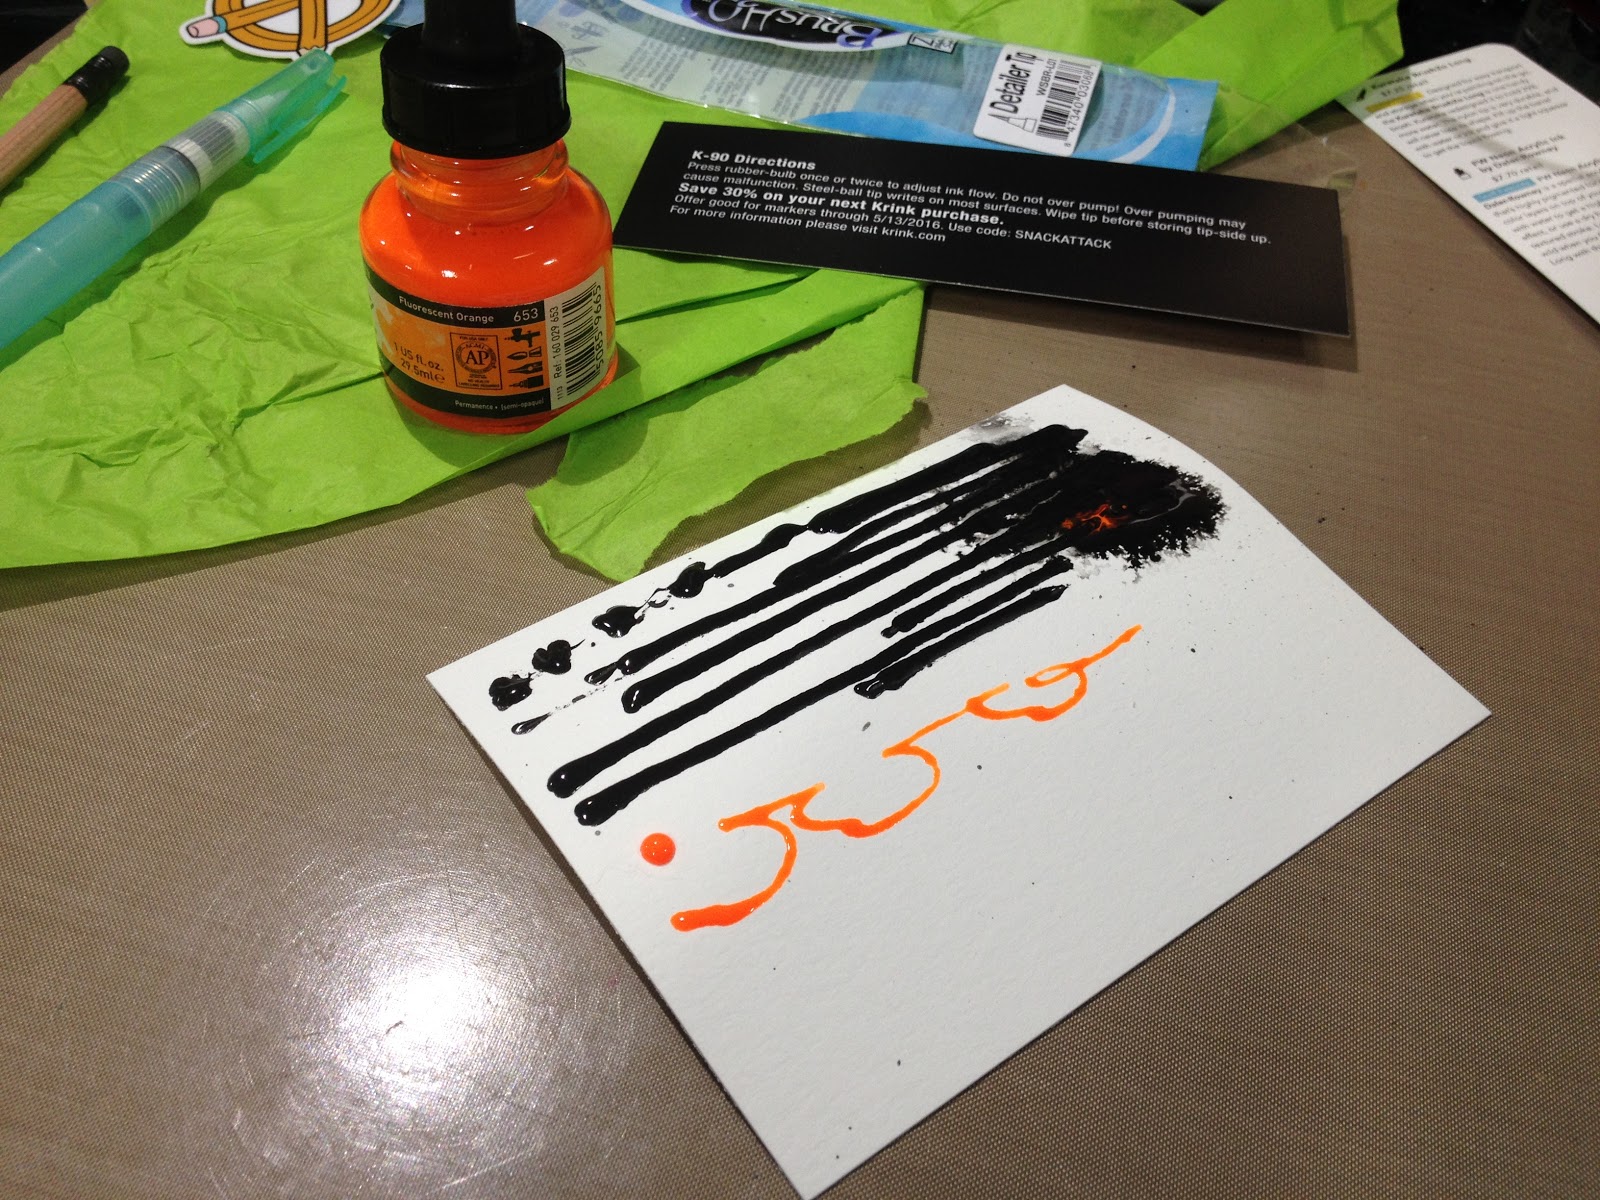
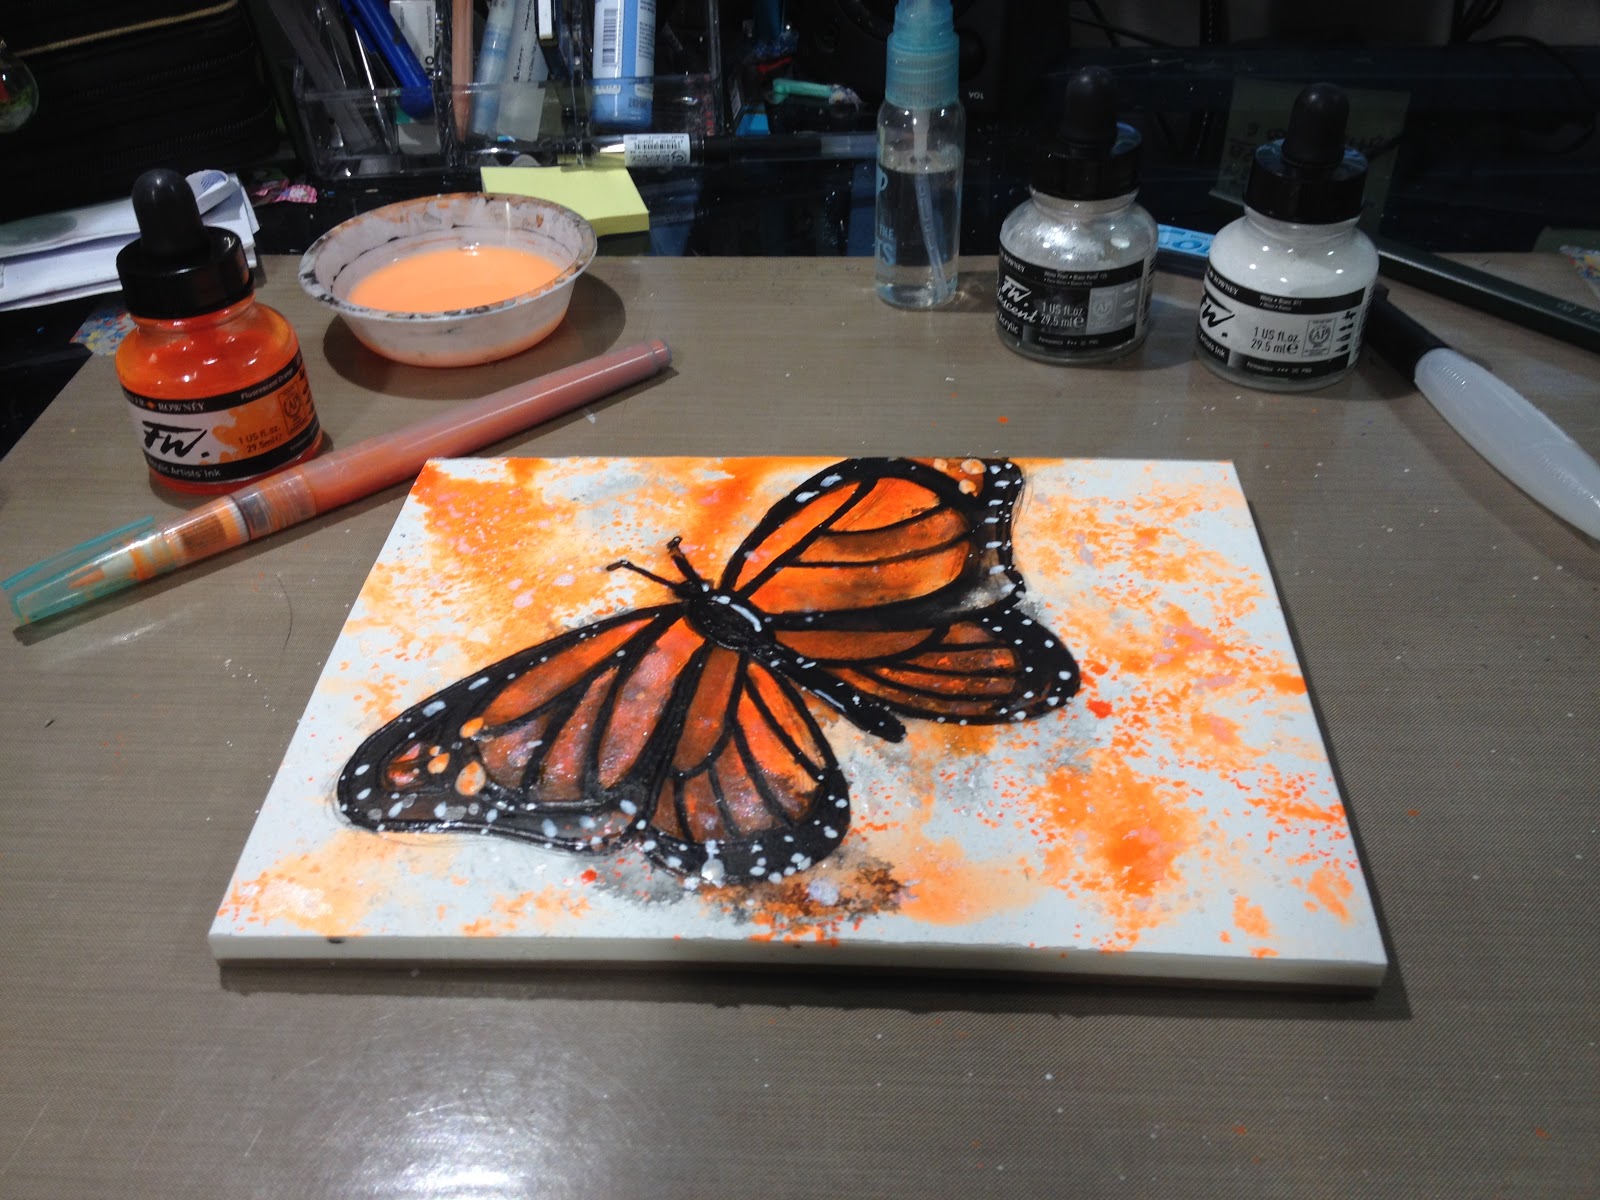
I filled my Kuretake Brush20 with a mixture of the FW Fluorescent ink and water. The FW ink becomes even more fluorescent (although less saturated) with the addition of water, so it's really fun to play around with this ink.
ArtSnacks Challenge
Video here


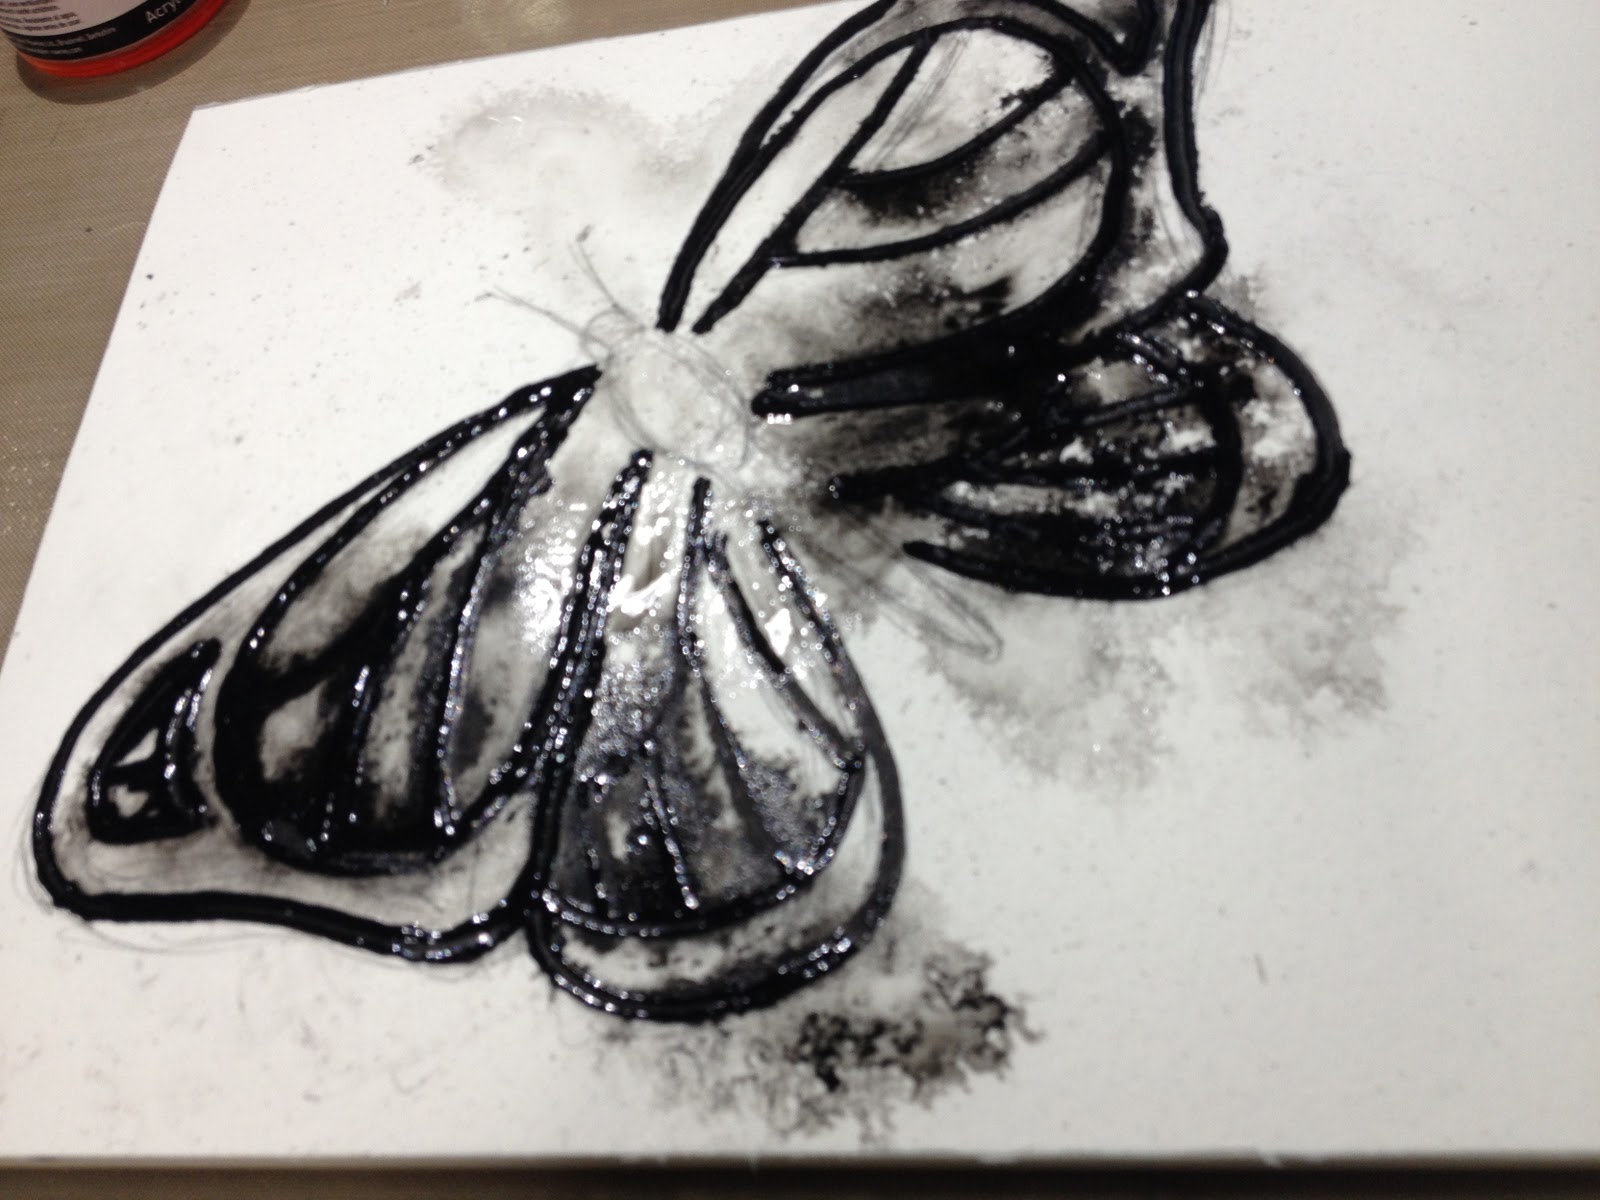
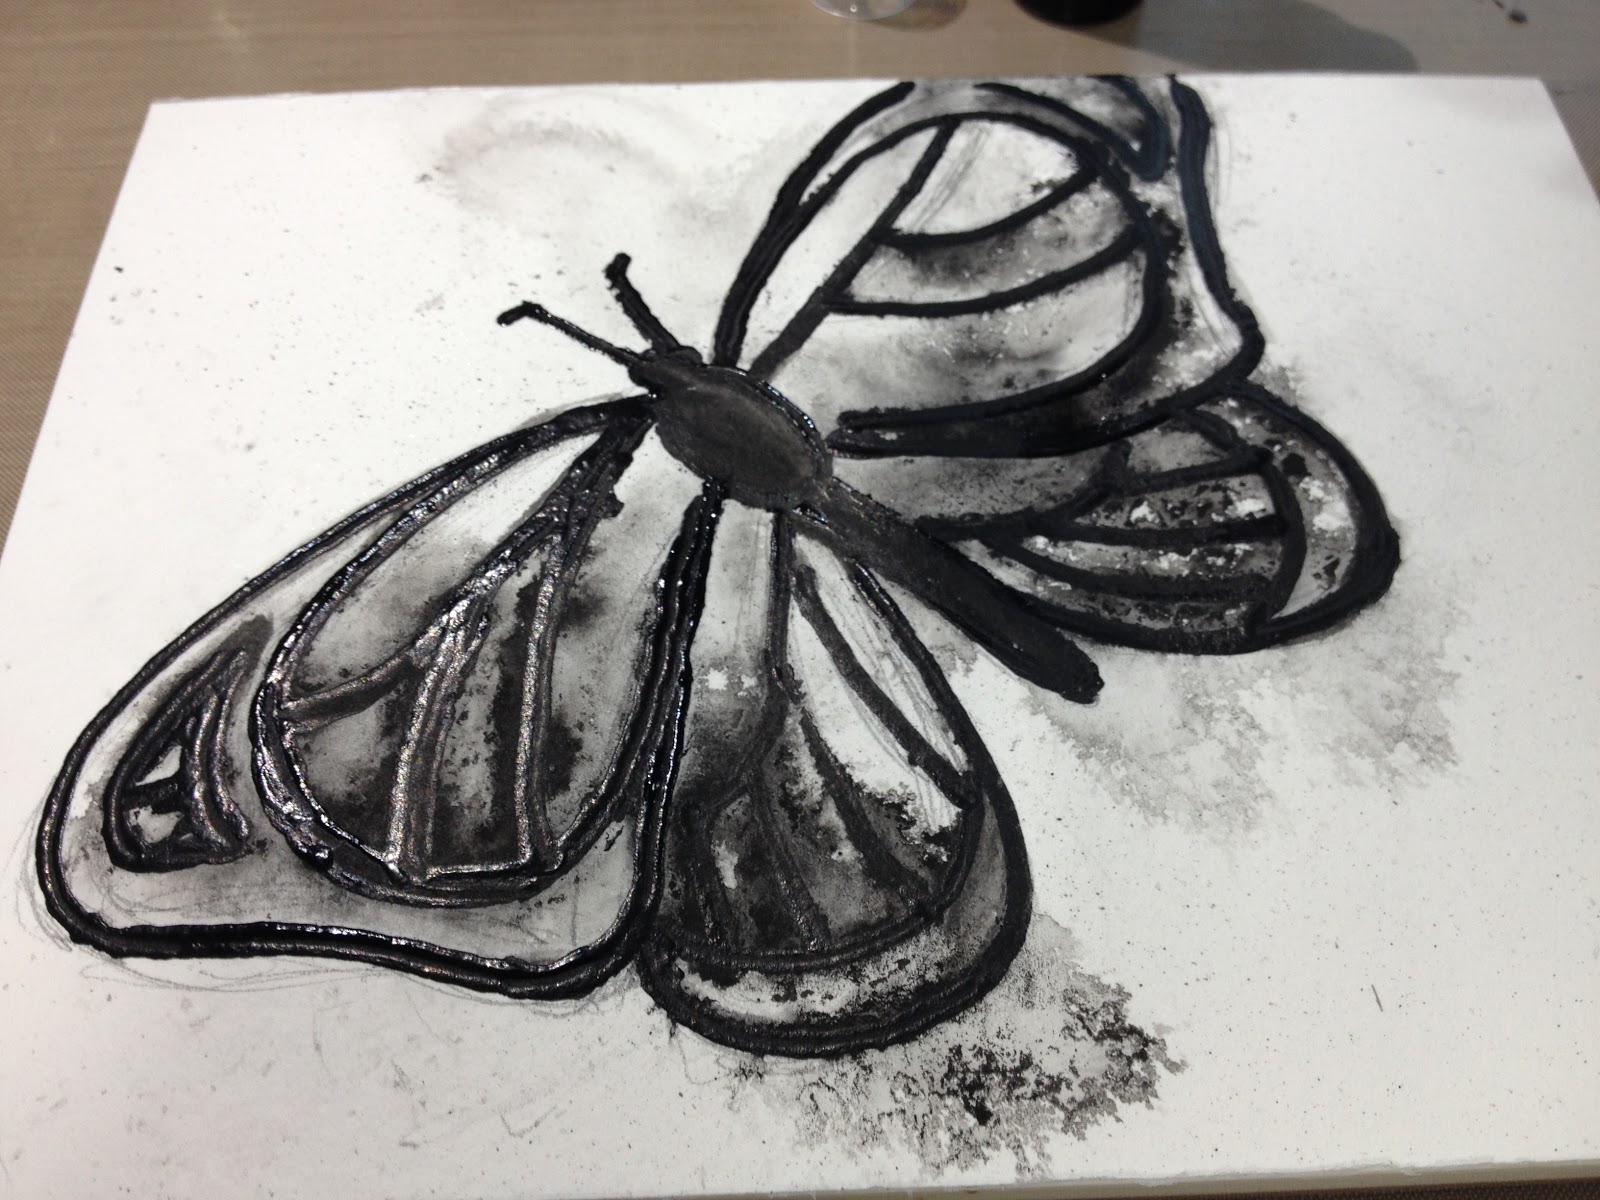
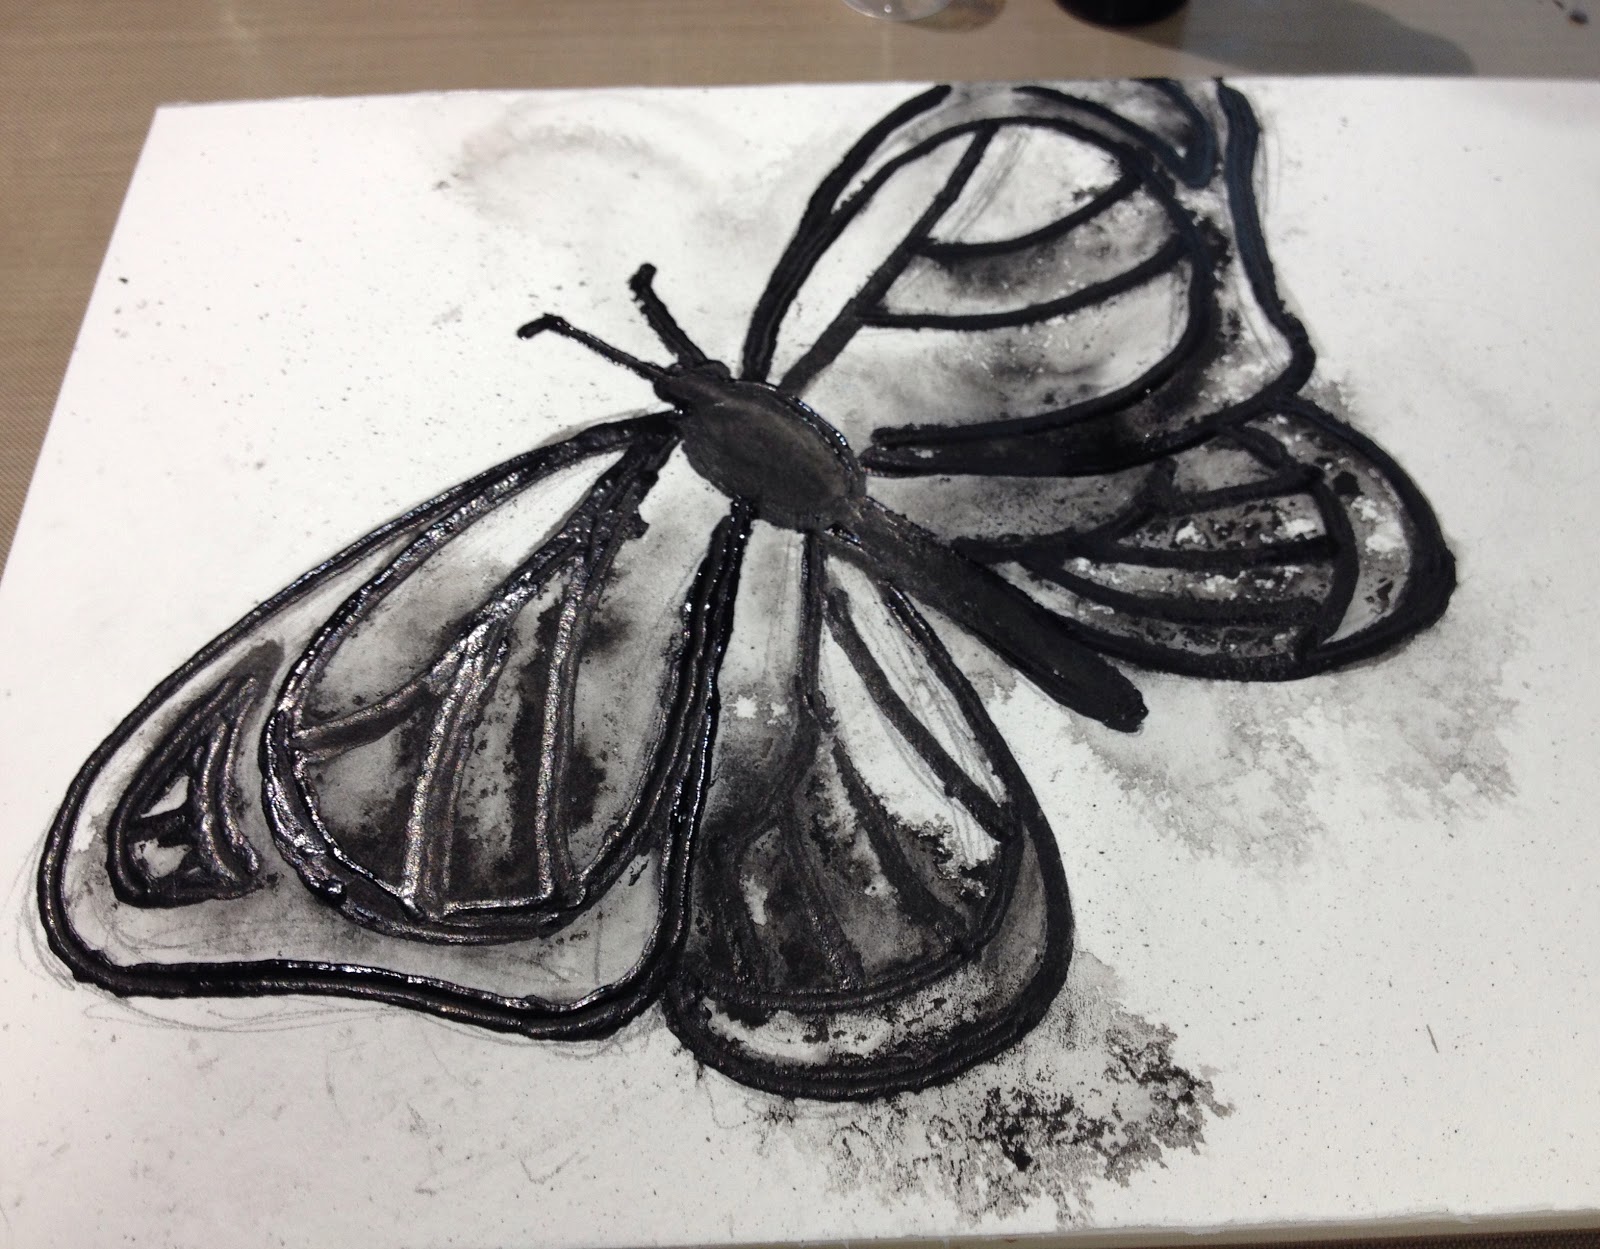
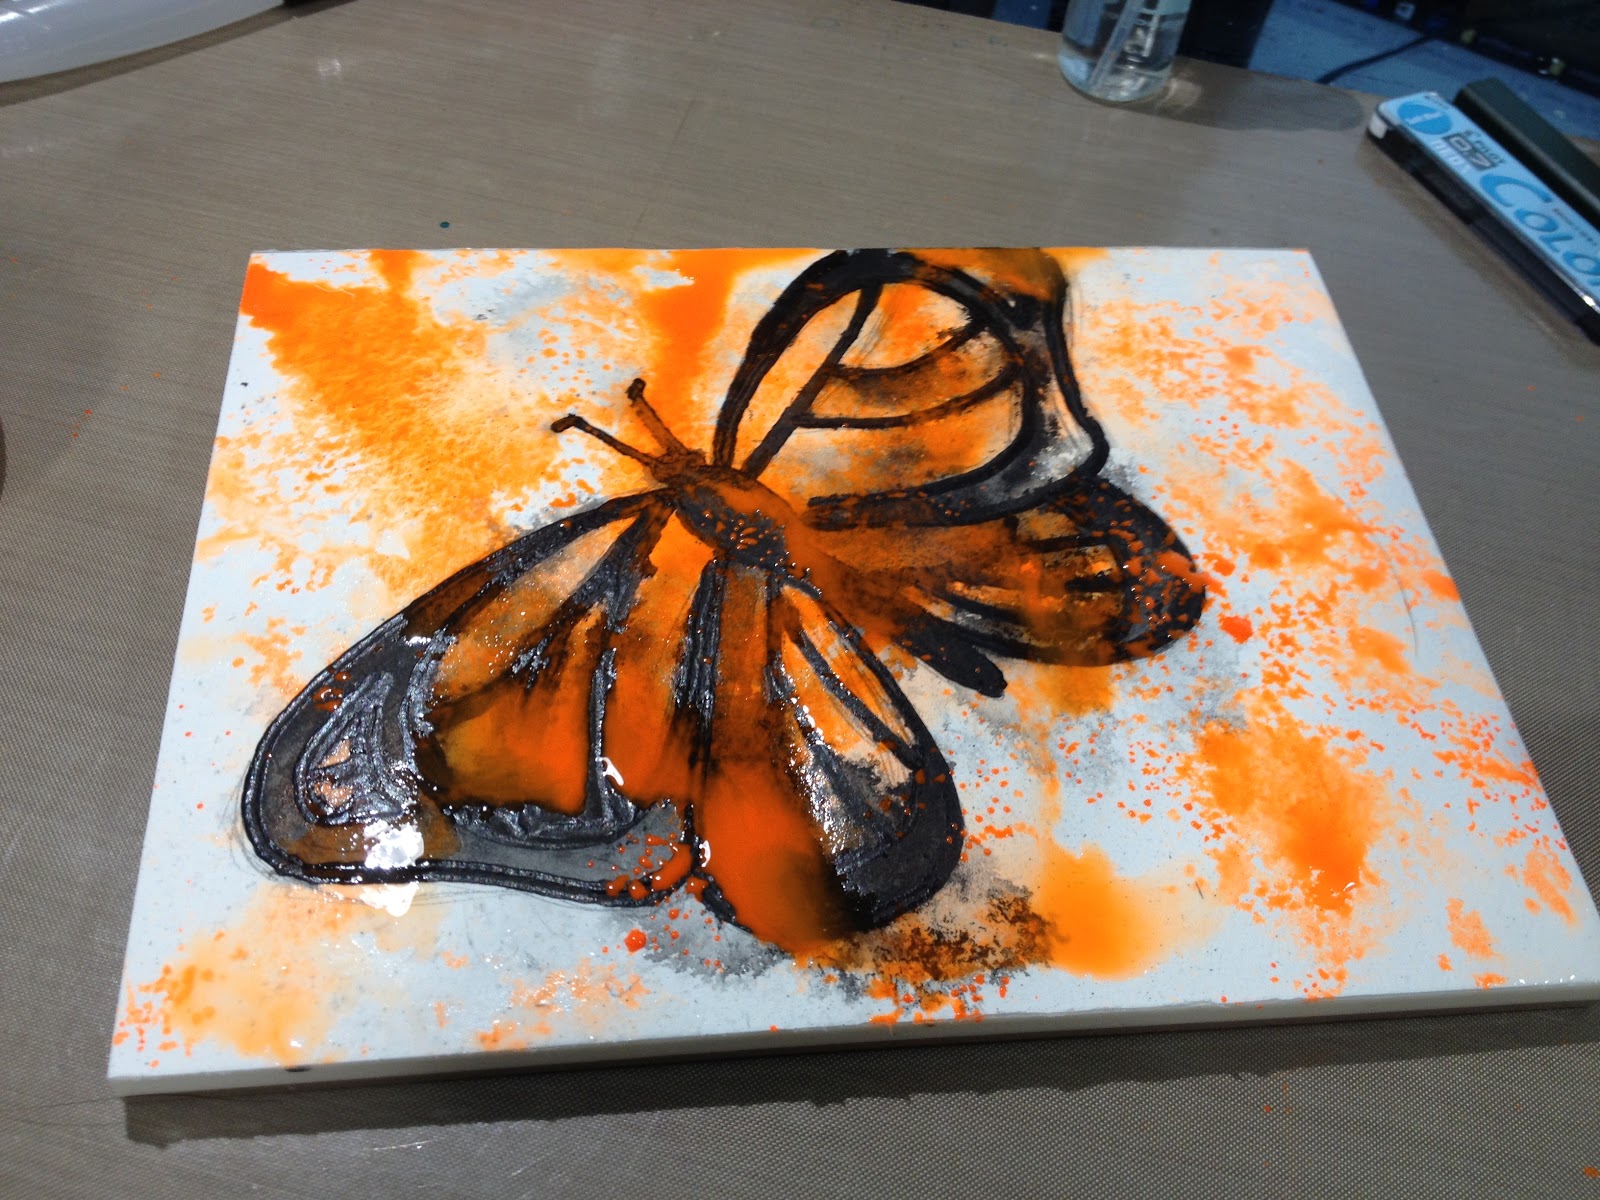
Spritzing the wet Krink K-90 with water causes it to feather out.


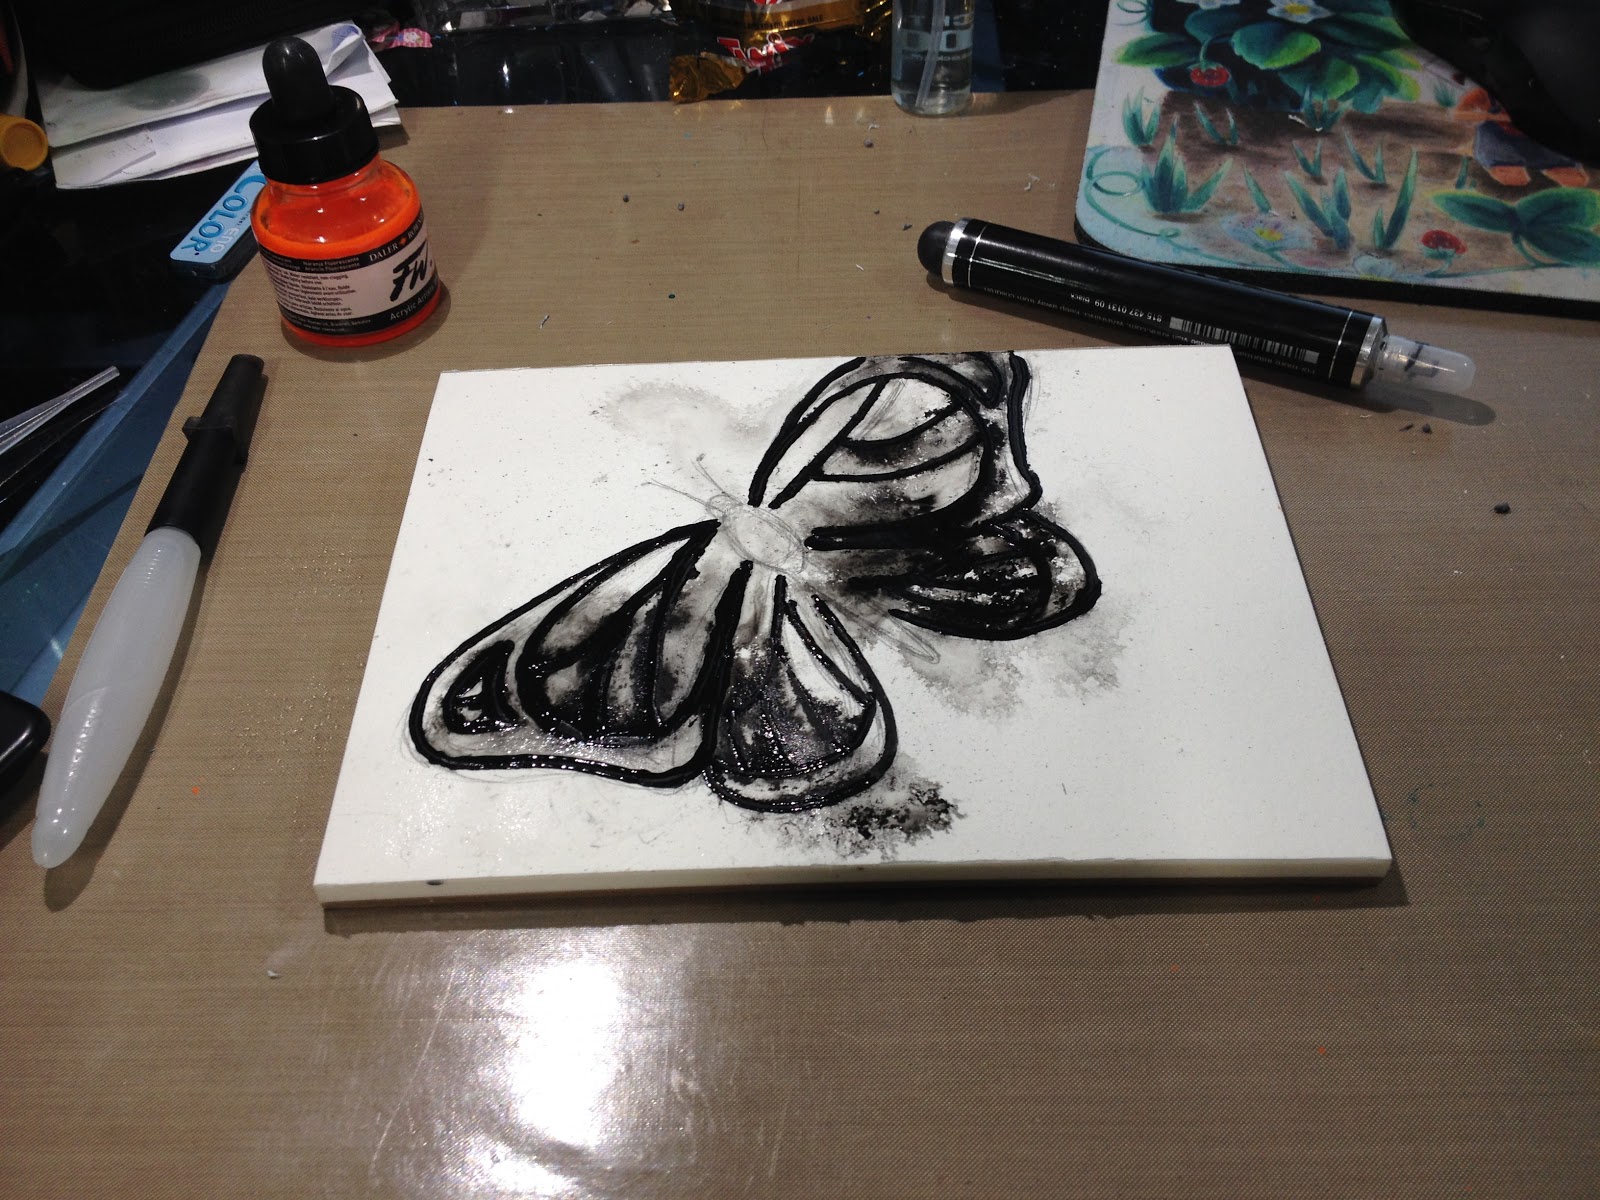
Adding FW Acrylic to the butter fly and spritzing it with water to achieve an uncontrolled bleed.


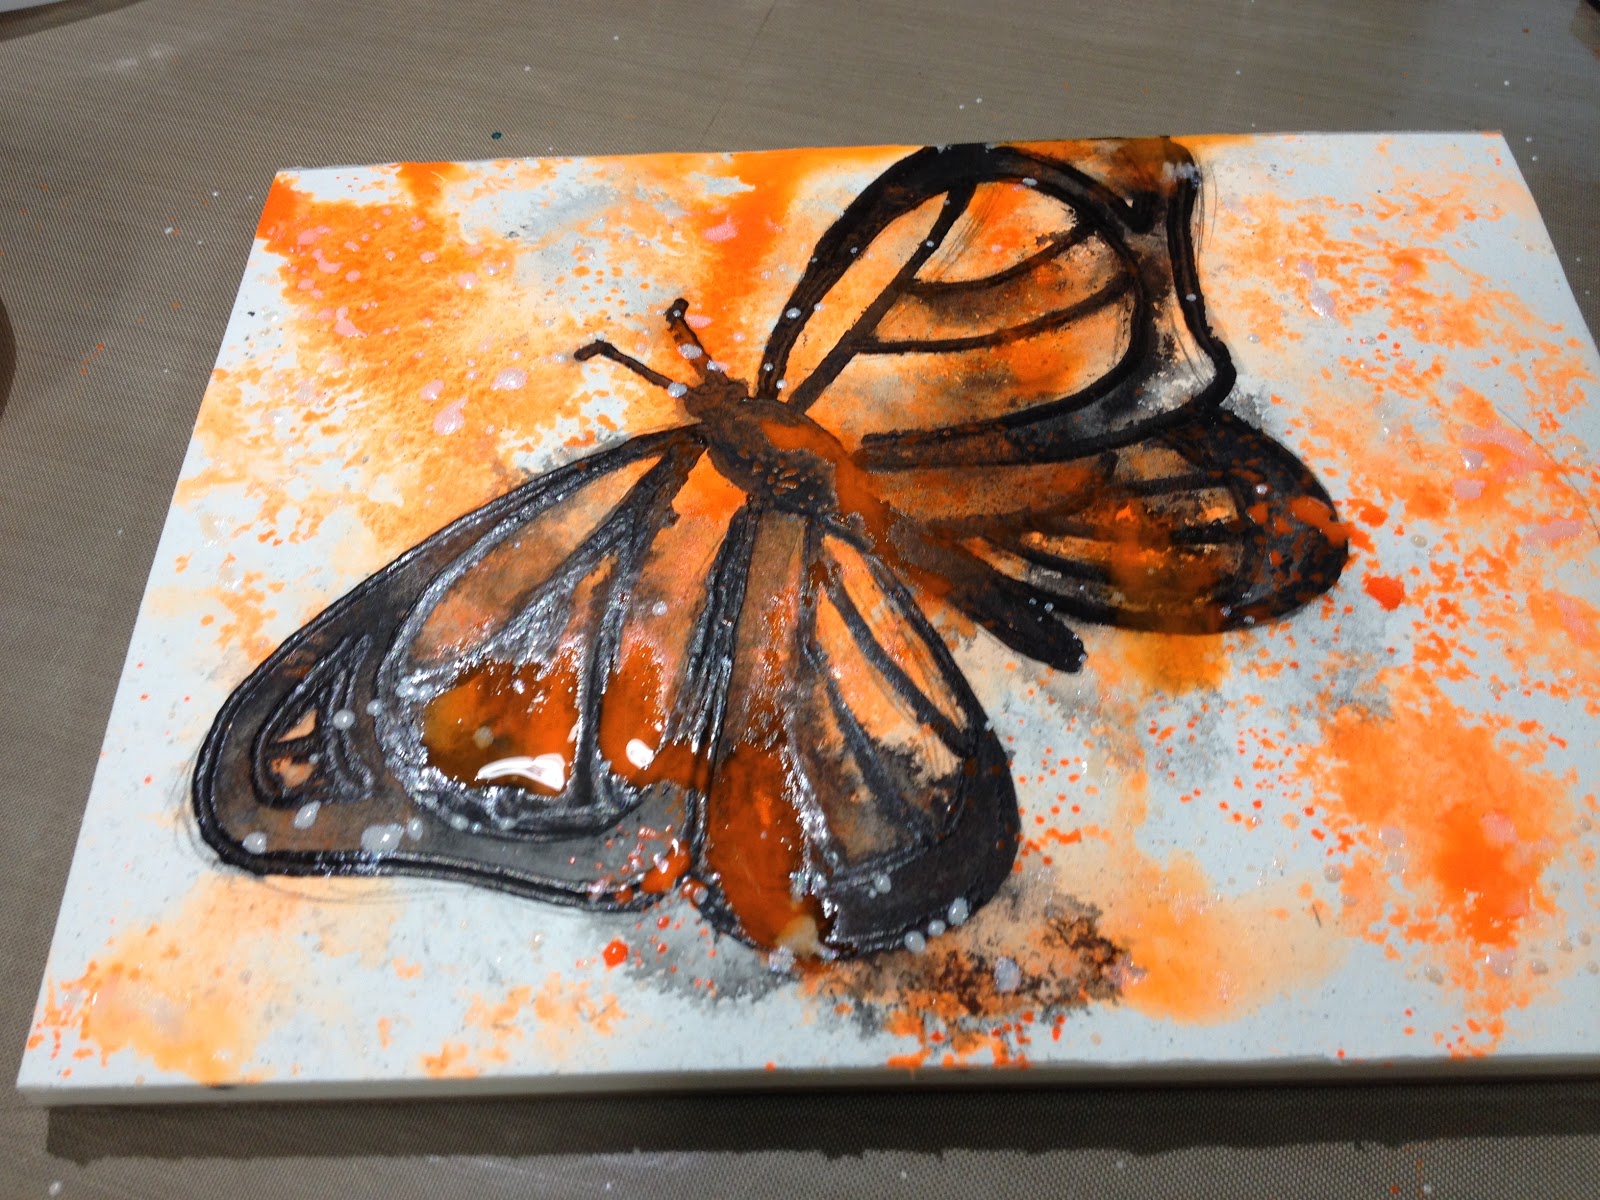
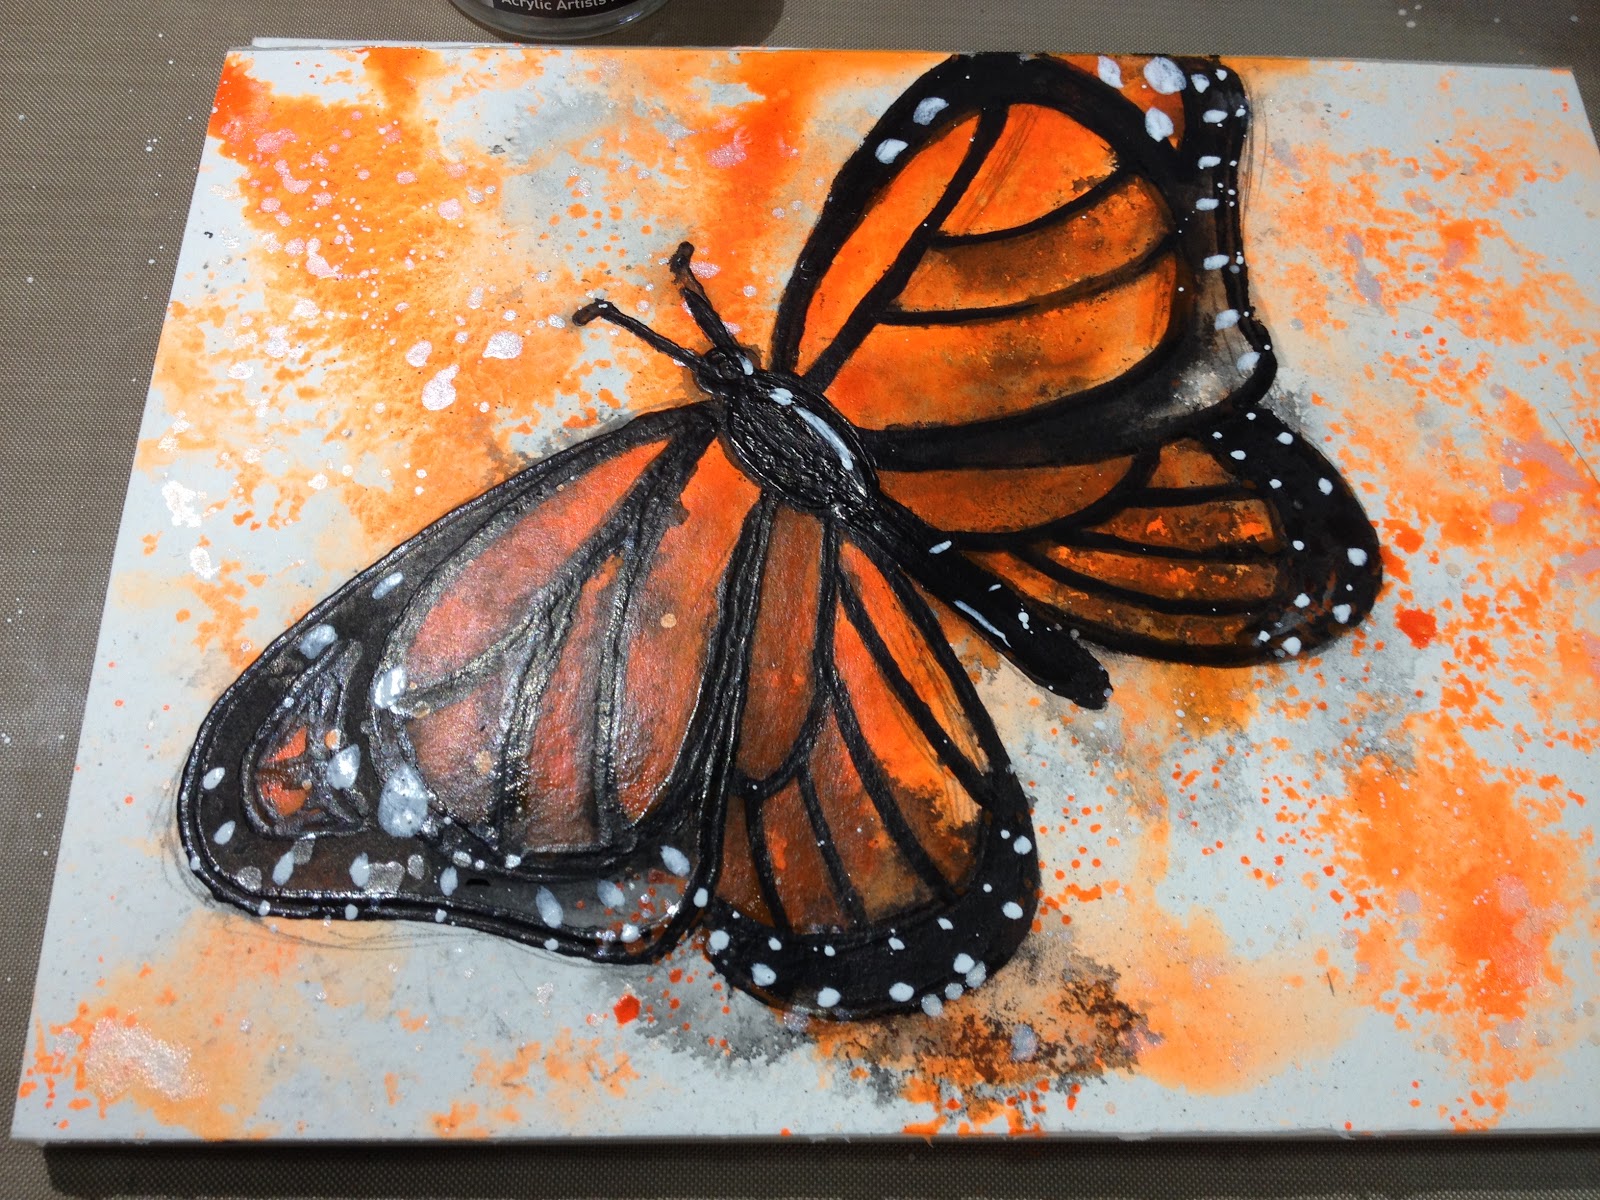
Using FW's Pearlescent ink in white to add iridescent sparkles, and spritzing a few of those with water to encourage bleeding and dispersion.
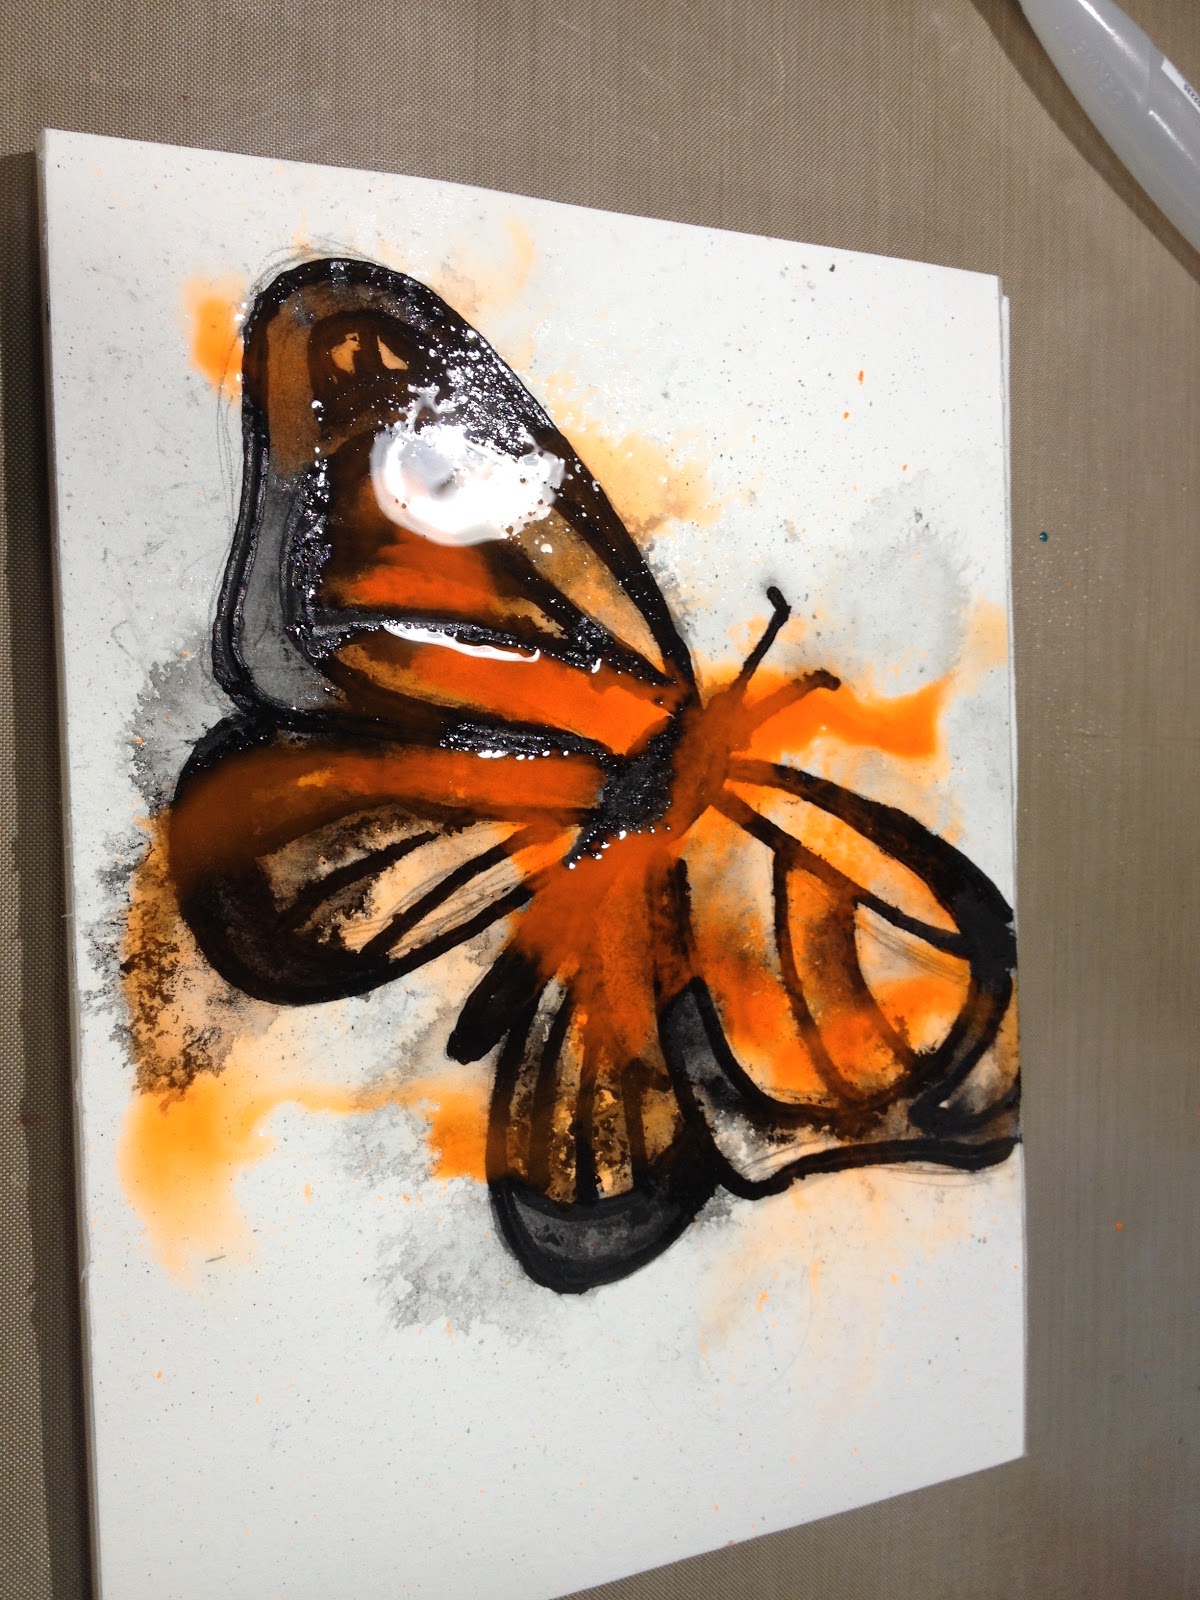
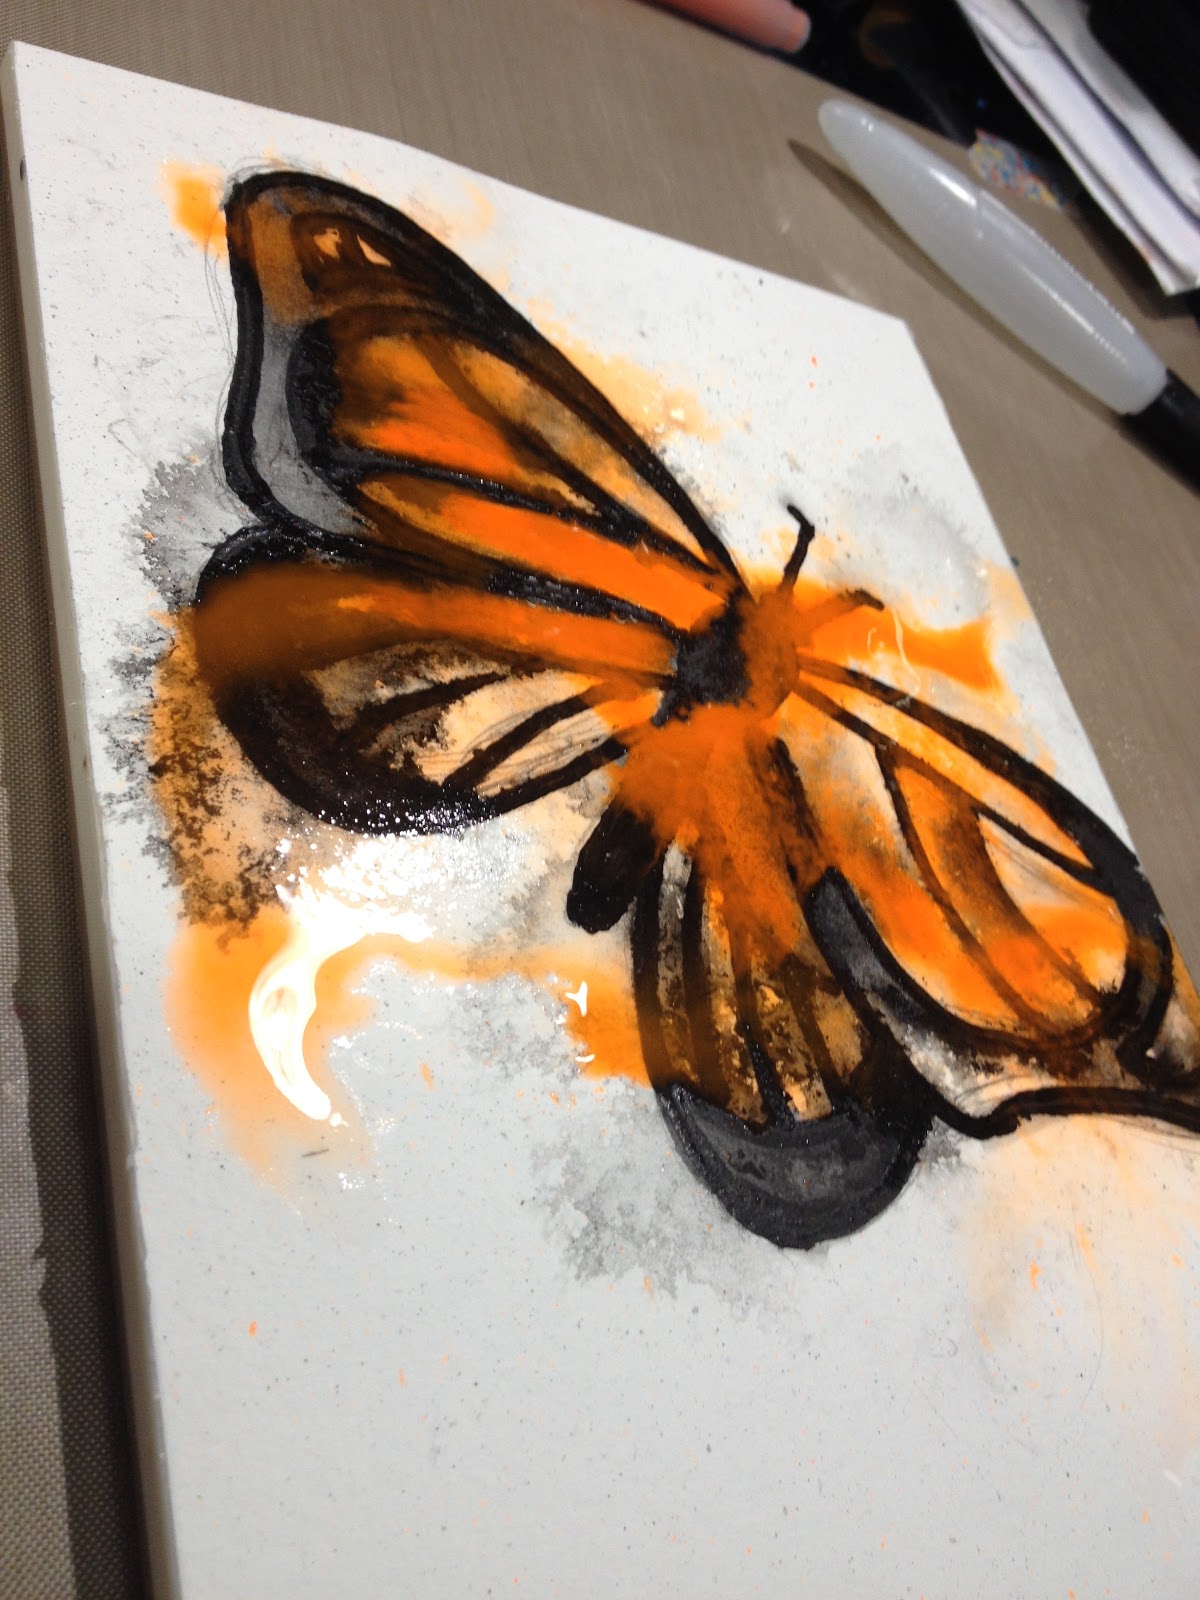
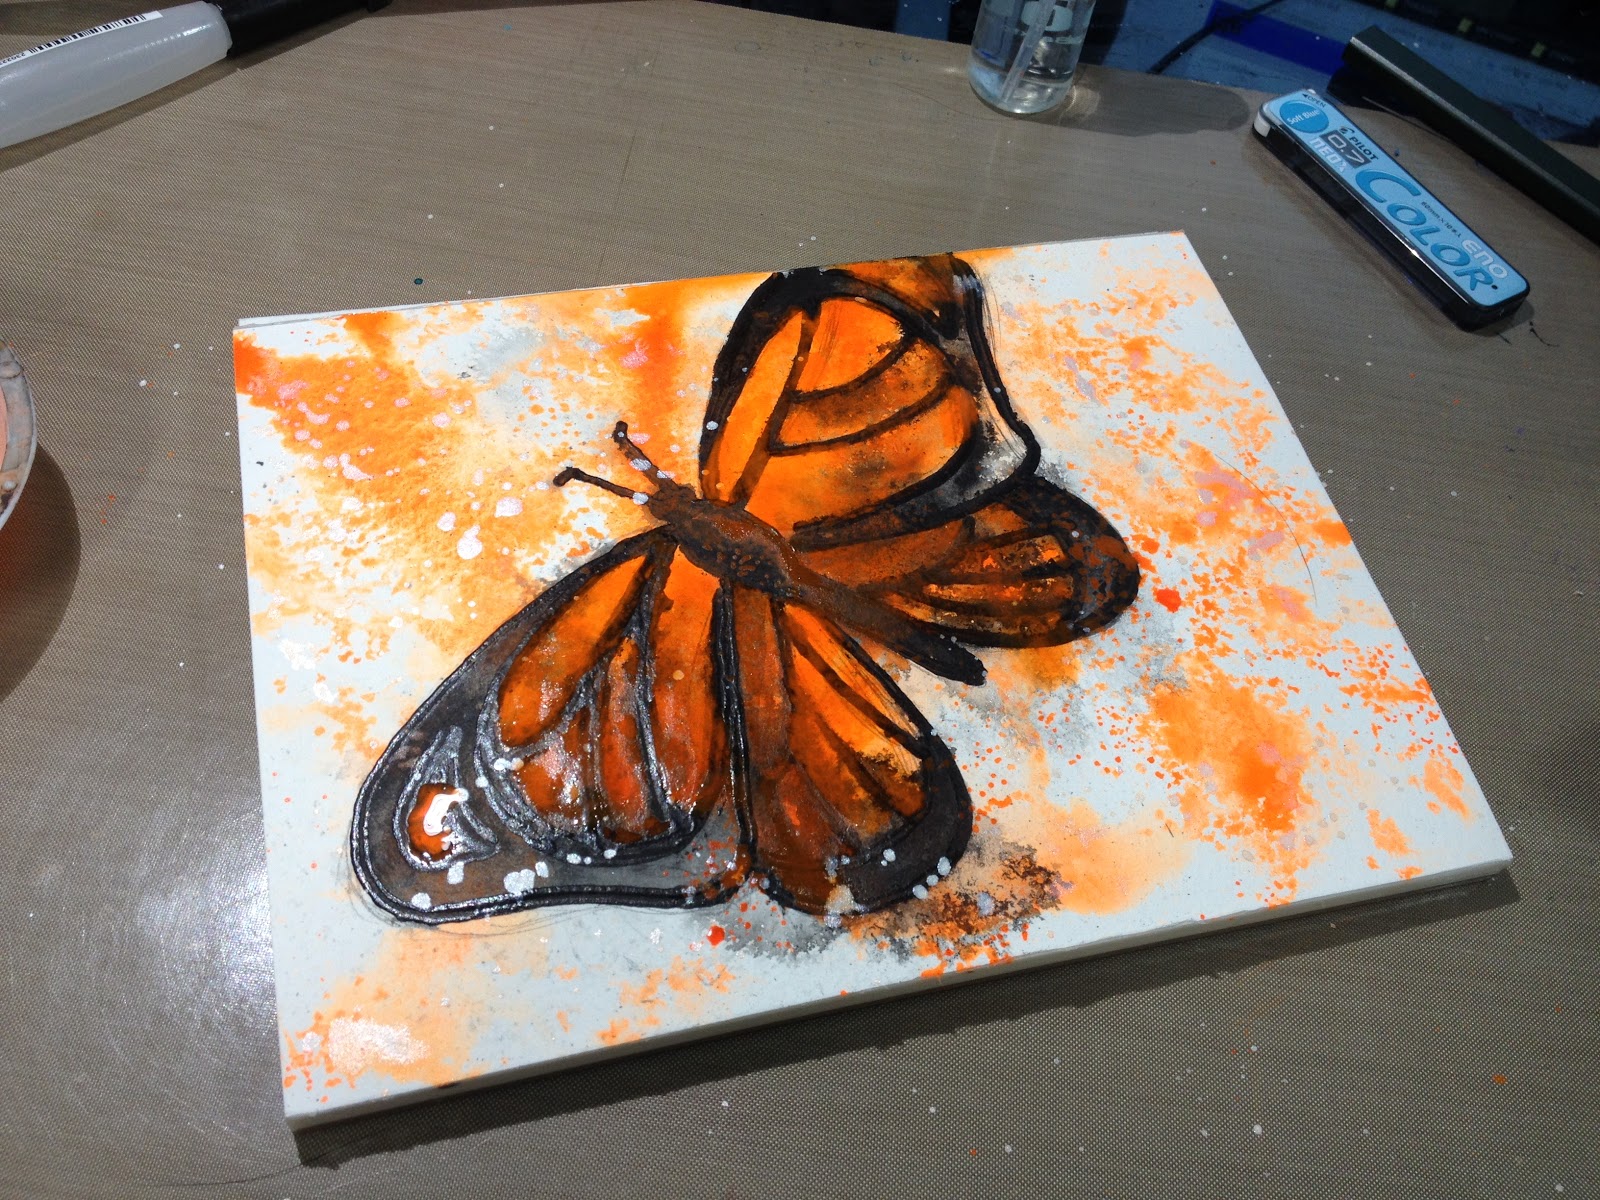
 Once my ink had dried, I was able to apply another layer of K-90 on top, to clean up my linework a bit.


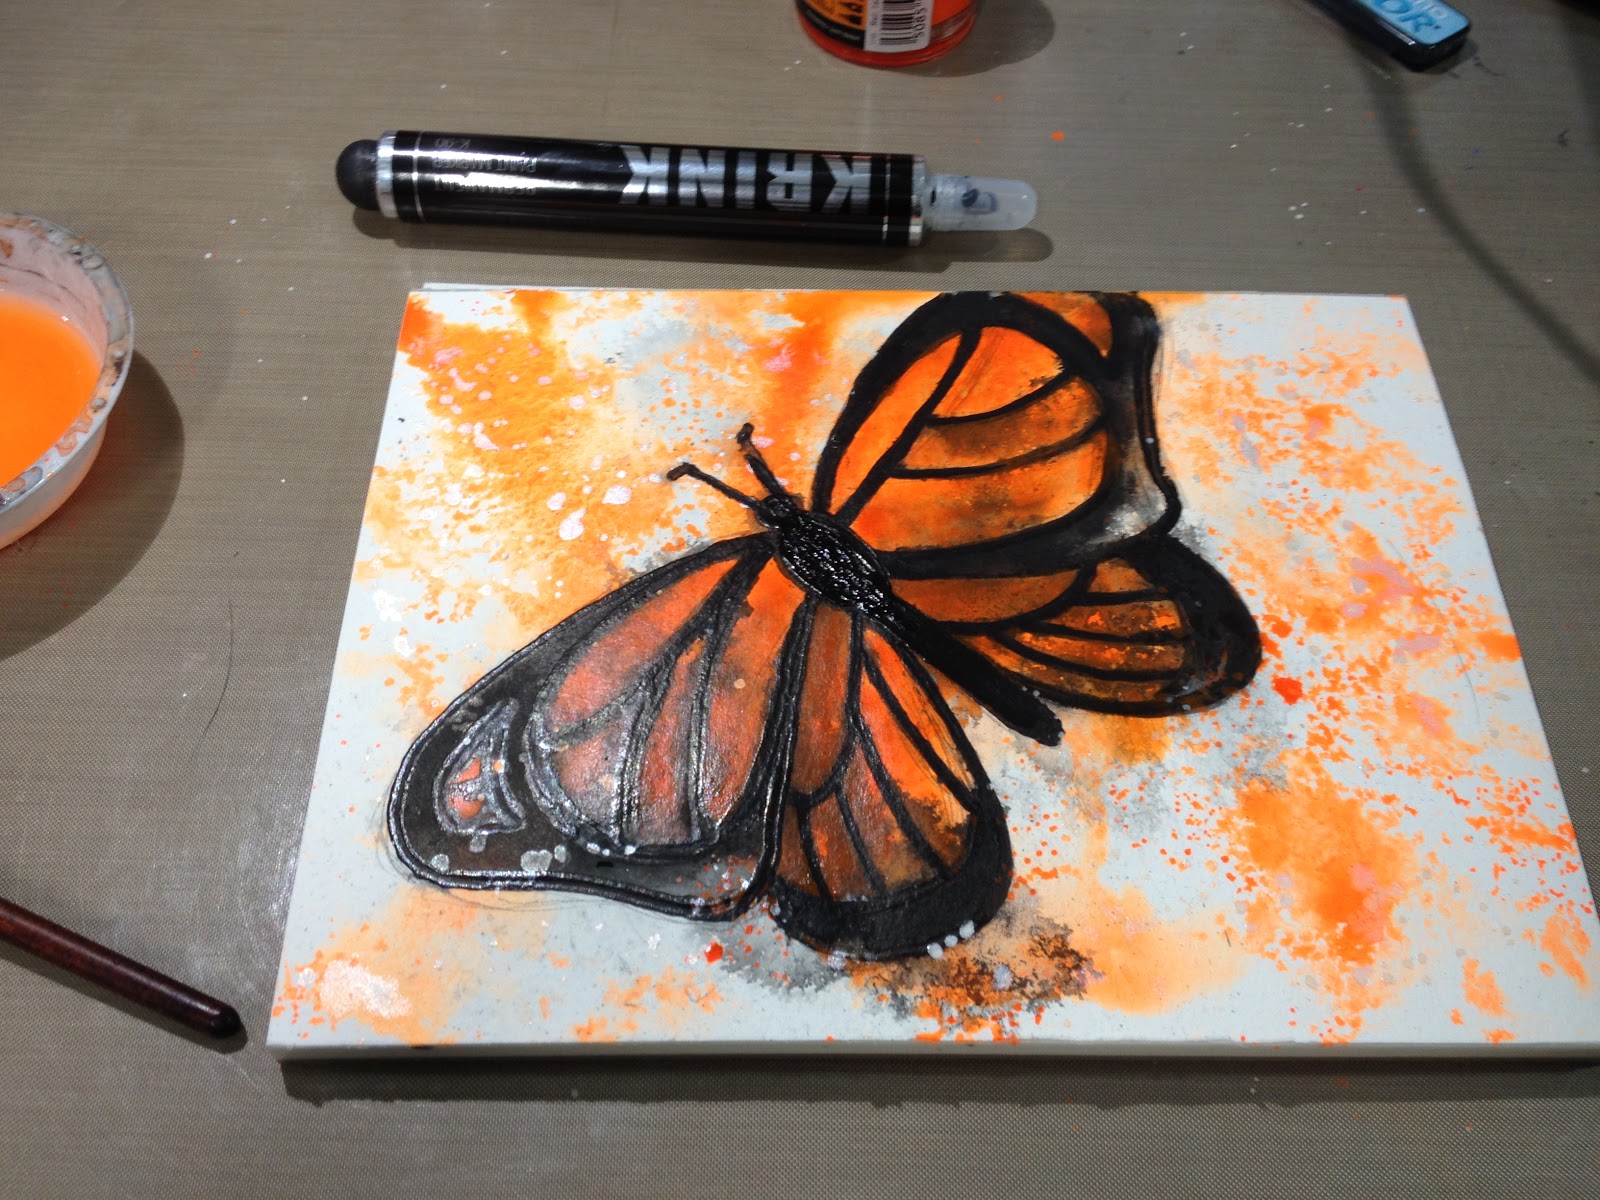
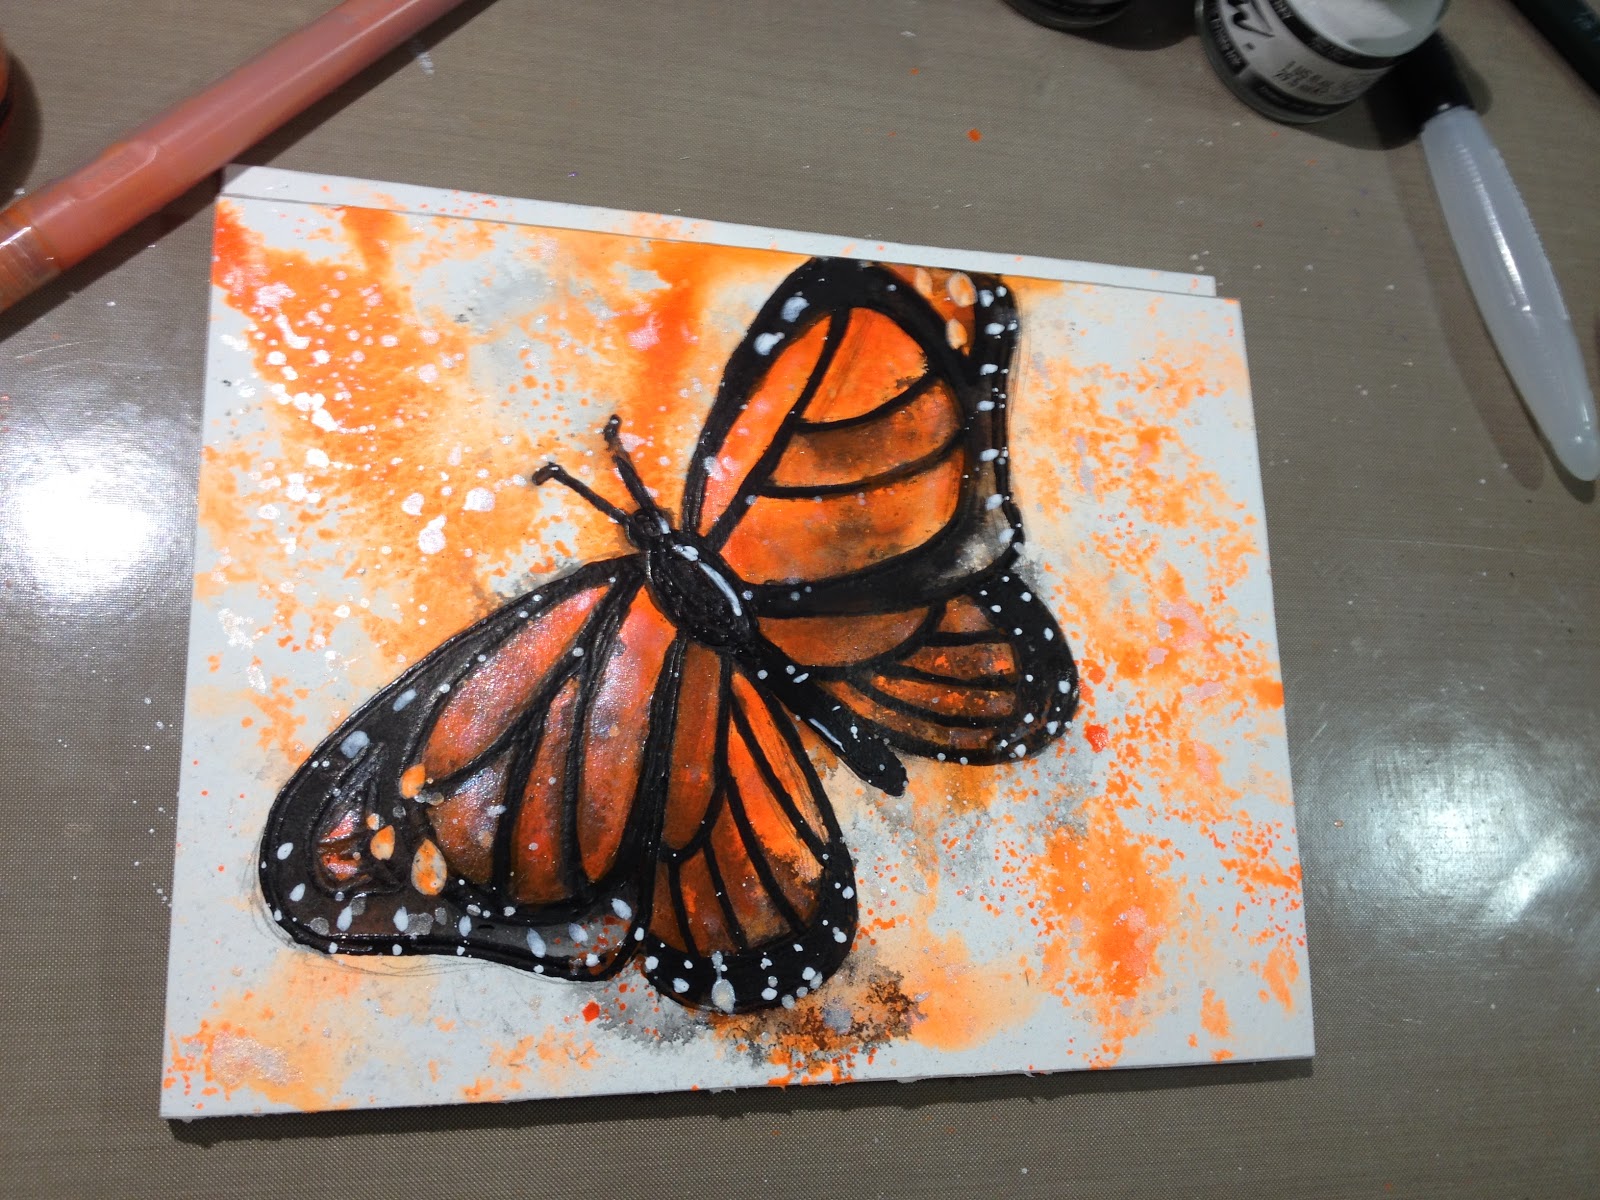
The finished result is much rougher than I usually work, but I had a blast playing with these materials in a new way.
The Verdict:
I had fun playing around with the Krink K-90's unique heavybody acrylic, and although it's not a product I could often utilize in my work, I can see many artists finding a place for it in their repertoire. I'm impressed with ArtSnacks continued efforts to bring consumers new and unique products- as a reviewer, I've come to value novelty. The Kuretake Brush20 did leak often when squeezed, but I may have overfilled it. In general though, waterbrushes like the Brush20 are versitle tools that I highly recommend to other artists who utilize traditional media. The most unremarkable inclusion, the General's Cedar Pointe, was completely overlooked in my Challenge illustration. I feel like with just the addition of a sketchbook, one could take this box on the go and create coherant pieces.May 2016 SketchBox Basic
The box reads:
Art by Hannah Hill
Made with the March Premium Box
artbyhannah.deviantart.com
instagram @hannahhill


This Month's SketchBox Basic Brands Are: Daler-RowneyPrincetonPentel
The Card


The Card Reads:
SketchBox MayFeatured ArtistJosie
My name is Josei and I'm a young artist and product design student from the beautiful capital of Germany. I love drawing since I was able to hold a pen and creating what comes to mind, rather than following just one art style. Drawing is kind of a therapy for me to overcome daily life and connect with other people. Art is what keeps me motivated- as Pablo Picasso once said: "The purpose of art is washing the dust of daily life off your soul":)
Instagram: @JosilixFacebook: http://www.facebook.com/josilix
We're so thankful for the talent that Josei shared with us, if you'd like to get your art featured- email an example of your work to us at info@getsketchbox.com
 The Card Reads:
SketchBox
May
Basic Box
This month is all about liquid acrylic! A truly unique medium that offers almost limitless flexibility. We included Daler Rowney's FW Pearlescent liquid acrylic. These free flowing liquid acrylics are water soluble when wet but dry to a water resistant film. The shimmering pearl effect created y the pigment is startling. They are permanent and translucent, but work best when put down freely rather than applying successive layers of colors. Your basic ox this month also includes a 5 pack of Princeton Real Value Brushes. This Princeton Synthetic Hair White Taklon Set contains five brushes: Round 1, Round 6, Bright 6, Filbert 8, Flat 12. The broad range of brush types will truly allow you to make the most of your new liquid acrylic. Finally we included a Pentel Color brush to outline your work or add unique details. This brush pen contains water based ink which flows easily, dries quickly, and produces transparent watercolor effects.
Have fun exploring your new supplies and remember to tag your art with #SketchBoxMay if you'd like to be included in our monthly contest- the winner gets their art printed on a future box lid!
The Price Breakdown

Princeton Art & Brush Co Real Value Brush Selection
Synthetic Hair- White Taklon- $9.50 on Princeton Site , $4.89 on DickBlick
FW Acrylic Pearlescent Ink $6.00 on Paper and Ink Arts, $4.59 on DickBlick
Pentel Arts Color Brush (Black) $8.39 on Pentel store, $6.19 on DickBlick
The Supplies Inside
FW Acrylic Pearlescent Ink
http://www.daler-rowney.com/content/fw-artists-inksI love FW's Pearlescent Ink- I use the white pearl ink often. The lovely purple acrylic ink can be used as is, or diluted for a lovely purple shimmer.
Pentel Arts Color Brush
http://www.pentel.com/store/color-brushThe less impressive cousin of the Pentel Pocket Brush (a staple for comic artists), this waterbased pen remains water soluble even after dry. Can be used for nice inkwash effects on the go.
Princeton Art & Brush Co Real Value Brush Selection
Synthetic Hair- White Taklonhttp://www.princetonbrush.com/real-value-series-9100-short-princeton-brush-company-short-brush/These stiff synthetic brushes are better suited to heavier acrylics than these light ink types.
Total:
High end, using MSRP when available: $19.28
Using common artist store, Dick Blick- $15.67Cost of Box: $25+$5 shipping
Supply Overview and Demonstration
May 2016 SketchBox Basic Unboxing- Becca Hillburn
I highly recommend you watch the video above for product demonstrations and explanations!

Removing these synthetic brushes from their package was a bit of a chore, and I was unable to pry a large chunk of glue from one of the brushes. The handles are nicely finished with a matte coating, and the ferrules are well crimped, but these brushes don't hold much water, and are better suited to applying/pushing paint around.


The Pentel Arts Colour Brush works well for drybrush on heavy tooth papers like watercolor paper, and a little water makes for an easy inkwash.
SketchBox Challenge (NOTE: This is a combined challenge using materials from both SketchBox Basic and SketchBox Premium, and should not be used to judge the value of the individual boxes)
May 2016 SketchBox Basic and SketchBox Premium Challenge- Becca Hillburn
VIDEO HERE


Lineart completed with the Montana Acrylic ballpoint marker from my Premium Box.

Inkwash background applied using the Pentel Arts Colour Brush and a little clean water. For a demonstration of this technique, please check out the video above!

Jewels were initially painted in with the violet Pearlescent ink from my Basic Box and the seafoam green Pearlescent ink from my Premium Box.
Salamander's body was rendered with watered down Liquitex acylic from their acrylic markers, not included in box.


Further layers were applied to the crystals using opaque acrylic markers from my personal collection.


Orange spots were added with the FW Fluorescent ink from the May ArtSnacks, initially applied with the Kuretake Brush20.


 The Premium Box
Later this week, I'll release a post comparing my Basic and Premium Boxes, so for a more in depth review, please keep an eye out for that! I'm going to go over prices and value then.
May 2016 SketchBox Premium Unboxing- Becca Hillburn
The Verdict
Although I had fun playing with this month's Basic and Premium supplies, I found that I was not inspired to create anything using the supplies from just one box. Although FW Pearlescent inks are fantastic, I wasn't impressed with the Princeton brushes, and would have preferred one GOOD brush to five mediocre brushes. I found the Pentel Arts Colour Brush to be a confusing inclusion in a box aimed towards acrylic, and think that including one of the Montana acrylic markers (that were included in the Premium box) would have been a stronger choice.
Winner- ArtSnacks
Item for item, I feel like these two boxes are a tie, but there's a $10 difference to consider. ArtSnacks is $20 shipped, SketchBox Basic is $30, so for your money, ArtSnacks is a better value.
If you enjoy content like this, find it inspiring, informative, or helpful, or if I've ever helped you save money (through wise investment or through not purchasing a faulty product), please help others (and me!) by sharing content you enjoy to your social media. A timely share to your Facebook, Twitter, Tumblr, Pinterest, or G+ not only introduces others to my blog, helping them find content they will enjoy, but it helps me expand my audience. You can find handy social network buttons below this post, so please take a moment and share the good work! If you REALLY enjoy content like this, and would like to help me continue to create it, please consider funding future projects by backing my Patreon. And if you'd enjoy even more content, please check out my YouTube channel (all of the above videos are from there!) for lots of tutorials, reviews, demonstrations, and overviews that aren't shown on the blog.
Please consider donating to this blog or purchasing from Natto-shop (http://nattosoup.com/shop) if you want me to continue publishing quality content. All materials tested were purchased from my own pocket. Keep on Truckin' Nattosoup is not under any sponsorship.
Thanks to the generosity of my Patreon backers, I've also purchased a May Premium SketchBox to review. The SketchBox Basic Vs. SketchBox Premium review is coming up soon, so keep an eye out for it! This review is the usual SketchBox Basic Vs. ArtSnacks comparative review, similar to the reviews shared over past four months.
Special April Thanks To:
Ryan
C. Ellis
Andrew Benedict
Yolaine
Wayne Norris
Chris
Michael Suriano
Yusagi
Entreat
Ristro
Previous SketchBox Vs. ArtSnacks
January- Winner: ArtSnacks
February- Winner: SketchBox
March- Winner: ArtSnacks
April- Winner: ArtSnacks
SketchBox: $25mo/$240 yr
ArtSnacks: $20mo/$200 yr
May SketchBox Basic Includes:Princeton Art & Brush Co Real Value Brush Selection
Synthetic Hair- White TaklonFW Acrylic- Pearlescent InkPentel ColourBrush
May ArtSnacks Includes: Krink K-90FW Acrylic Ink- Fluorescent OrangeKuretake Brush20General's Cedar Pencil
May ArtSnacks Vs SketchBox Basic- Becca Hillburn
Read the rest of the post under the cut!
Artsnacks
 This Month's Brands Are:Daler RowneyKuretakeGeneral'sKrinkThe Card
 The Card Reads:
The pencil is mightier than the eraser.Here's what's on the Menu for May:
Krink K-90 Paint Marker$12.00 retailNew Product KRINK has done it again. Headquartered in New York City, KRINK has developed a unique new paint marker with a "pump action" end and a steel roller-ball tip. The KRINK K-90 Paint Marker is the first of its kind, so get creative! To use, gently pump the rubber end of the marker once to propel the paint into the tip of the marker. Press down lightly and start to draw. The roller-bball tip will release paint onto your surface. DO NOT OVER-PUMP MARKER.
General's Cedar Pointe Graphite Pencil- No. 1 Extra Soft$0.66 retailLooking for an excellent, soft graphite pencil with a reliable eraser? We found it for you! General's Cedar Pointe Graphite Pencil is made with genuine cedar and a buttery graphite core. It delivers an incredibly smooth drawing experience, and has a cedar wood casing for a comfortable grip. Manufacturing pencils since 1889, General Pencil is the only pencil factory still operating in the United States- so every detail was considered when making this pencil.
Kuretake Brush20 Long$7.25 retailNew product Designed for easy transport and storage when you're painting-on-the-go, the Kuretake Brush20 Long is one handy brush. Kuretake redesigned it to hold 25% more water. The nylon tip is very durable, and will never lose its shape. Fill up the barrel with water or ink and give it a light squeeze to get the liquid flowing.
FW Neon Acrylic Ink by Daler-Rowney$7.70 retailStaff Favorite FW Newon Acrylic Ink by Daler-Rowney is a special acrylic-based ink that's highly pigmented for creating multiple color layers on top of your art. Dilute the ink with water to get a high-intensity watercolor effect, or use a dry brush to create a textured stroke. Let your imagination run wild when you feill your Kuretake Brush20 Long with this acrylic ink.
Take the ArtSnacks Challenge!Use all of the products in your box to create an original piece of art. Snap a picture of your artwork and share it on Facebook, Twitter, Tumblr, or Instagram with the hashtag #artsnackschallenge
Like a product? Order more.Visit ArtSnacks.co/productssupport@artsnack...www.artsnacks.co
The Price Breakdown:
Kuretake Zig BrushH20 (New product)- Currently unavailable on Amazon, but the listing is there $5.39 on Marker Supply
Krink K-90 (new product)- $12.00 on Krink online shop (only place available at time of writing)
Generals CederPoint Soft Pencil3 Dozen- $24.00 on the General's store or .66 cents per pencil12 Pack on Amazon: $5.40
FW Acrylic Ink Fluorescent Orange $4.59 on DickBlick Most places seem to only sell this as a set of 6
PlaZa- Set of 6- $35.19 or $5.87 each
Total: $22.64
The Supplies Inside
FW Neon Acrylic Ink
This neon ink is very intense- and STAYS intense (and fluorescent) even as you water it down. I know a lot of artists want a neon watercolor (and that's not really feasible) and this acrylic ink is a good solution to that problem.
General's Cedar Pointe
I'm not really one for traditional wooden pencils, but the Cedar Pointe is ok- it smells nice, has a softer graphite, and the eraser is pretty good.
Zig Brush20I've used quite a few of Zig's waterbrushes in the past, and I like them- they perform consistently and tend not to leak. As recommended, I filled the Brush20 with the fluorescent orange ink (and a little water).
Krink K-90
The largest rollerball I've seen. When using the Montana Extra fine from my SketchBox Premium (also a roller ball acrylic marker) I had A LOT of issues with spitting and gumming up, I wonder if that's going to be an issue with the K-90 as well?-- Note: this is not an issue at all.
Supply Overview and Demonstration
May ArtSnacks Overview- Becca Hillburn
My KRINK K-90 came with an information card explaining how to use this unique product.
The card reads:
K-90 Directions
Press rubber-bulb once or twice to adjust ink flow. Do not over pump! Over pumping may cause malfunction. Steel-ball tip writes on most surfaces. Wipe tip before storing tip side up.
Save 30% off your next Krink purchase.
Offer good for markers through 5/13/2016 Use code: SNACKATTACK
For more information please visit krink.com
And the box also came with an advert for the upcoming travel Collection.
 The Card Reads:
 Ahoy!
If you haven't already heard, we've launched the 2016 ArtSnacks Travel Collection.
This limited edition collection features 7 full-size premium products, expertly curated for any adventure (products in this box are totally different from last year's Travel Collection)
The cut off date to order is May 25th, 2016
Pre-order yours at
http://bitly.com/ATC-2016
I don't plan on purchasing a box to review, but if you're interested in seeing me review it, you're welcome to gift a subscription, and I'll give it the Nattosoup treatment. The travel Collection is $79 with free US shipping. If you're having difficulty doing so, you can also contribute funds towards the travel Collection by donating to the Paypal link in my sidebar, and mentioning that the proceeds should go towards the purchase of the travel Collection.
For a demonstration of these products, please watch the video linked above!
The Krink K-90 is a heavy body acrylic that handles in a unique way. It reminds me of a grease pen my dad had back when I was a kid. After speaking to Lee with ArtSnacks, I found out that Krink did indeed repurpose an industry product to perform as an art tool, which I think is really neat.
If you like light, delicate linework, this is NOT the acrylic pen for you, but this unique acrylic marker seems really well suited for gestural work, large scale graffiti, or loose renditions.
Both the FW Acrylic and K-90 acrylic inks are water soluble, an you can achieve interesting effects simply by spraying the still wet ink with a spray bottle of water.
I filled my Kuretake Brush20 with a mixture of the FW Fluorescent ink and water. The FW ink becomes even more fluorescent (although less saturated) with the addition of water, so it's really fun to play around with this ink.
ArtSnacks Challenge
Video here
Spritzing the wet Krink K-90 with water causes it to feather out.
Adding FW Acrylic to the butter fly and spritzing it with water to achieve an uncontrolled bleed.
Using FW's Pearlescent ink in white to add iridescent sparkles, and spritzing a few of those with water to encourage bleeding and dispersion.
 Once my ink had dried, I was able to apply another layer of K-90 on top, to clean up my linework a bit.
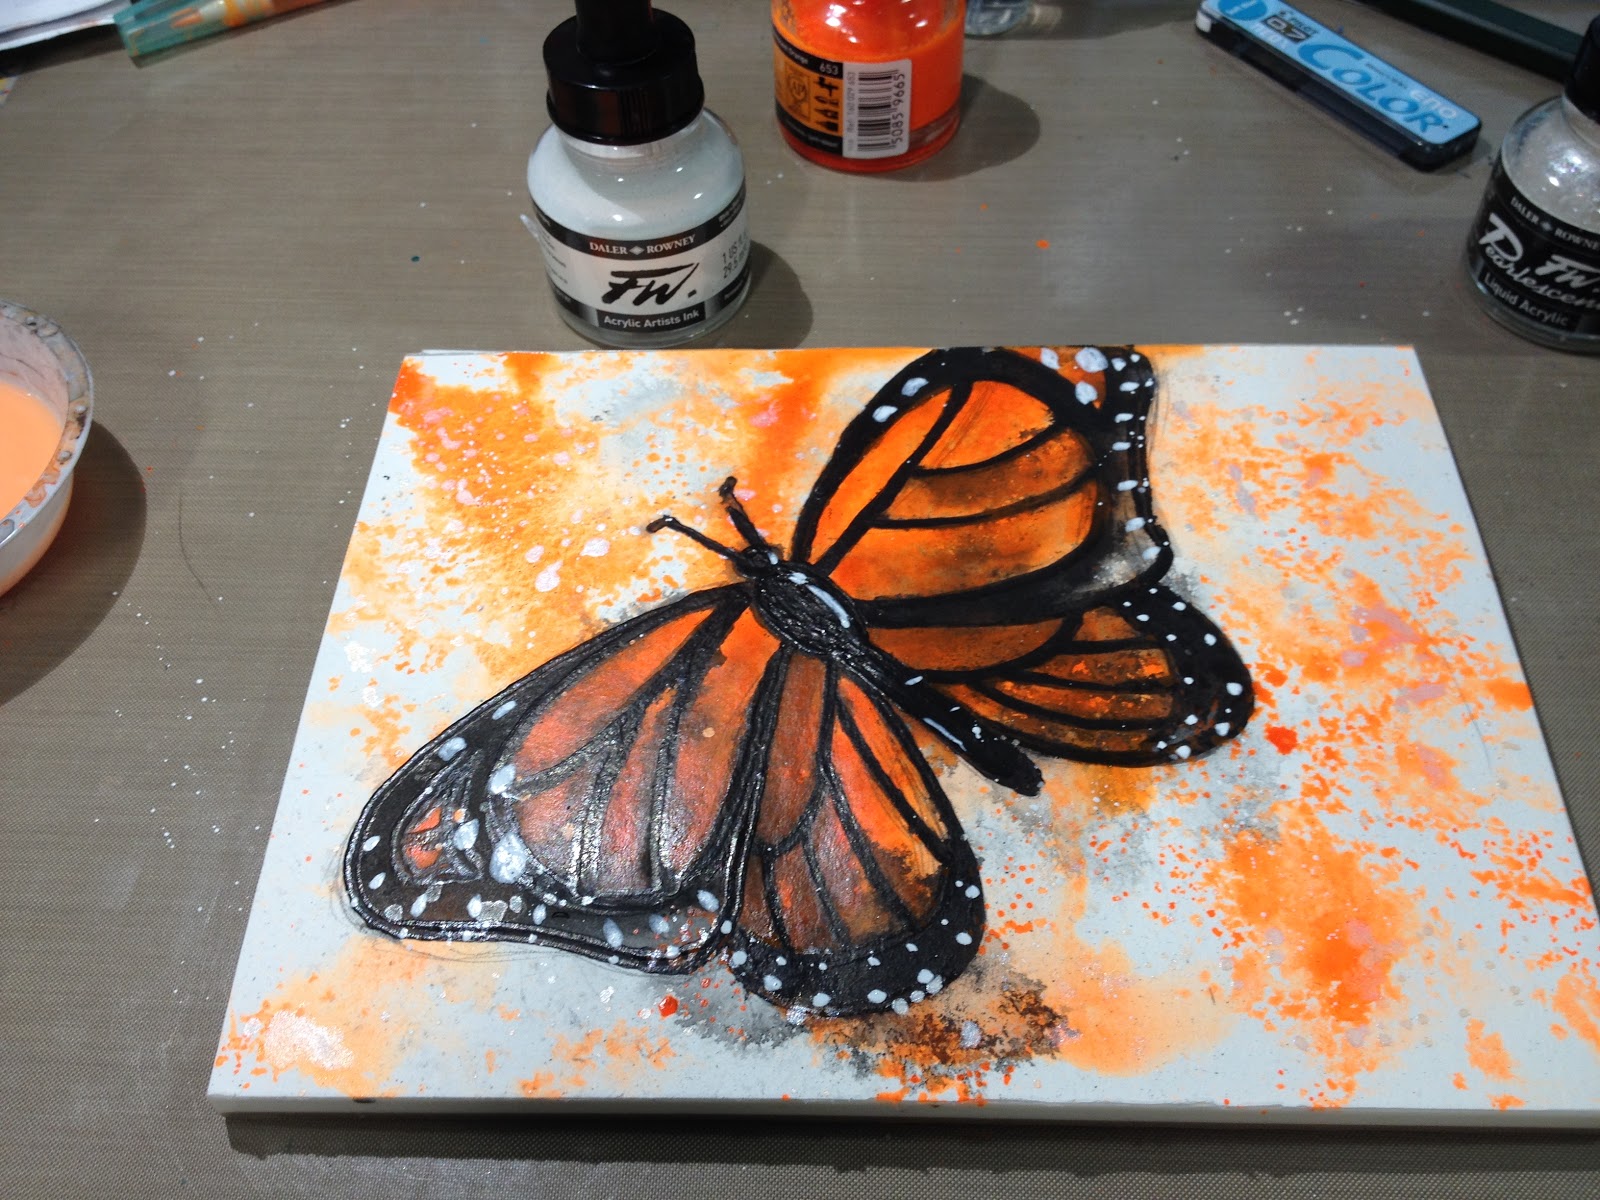
The finished result is much rougher than I usually work, but I had a blast playing with these materials in a new way.
The Verdict:
I had fun playing around with the Krink K-90's unique heavybody acrylic, and although it's not a product I could often utilize in my work, I can see many artists finding a place for it in their repertoire. I'm impressed with ArtSnacks continued efforts to bring consumers new and unique products- as a reviewer, I've come to value novelty. The Kuretake Brush20 did leak often when squeezed, but I may have overfilled it. In general though, waterbrushes like the Brush20 are versitle tools that I highly recommend to other artists who utilize traditional media. The most unremarkable inclusion, the General's Cedar Pointe, was completely overlooked in my Challenge illustration. I feel like with just the addition of a sketchbook, one could take this box on the go and create coherant pieces.May 2016 SketchBox Basic
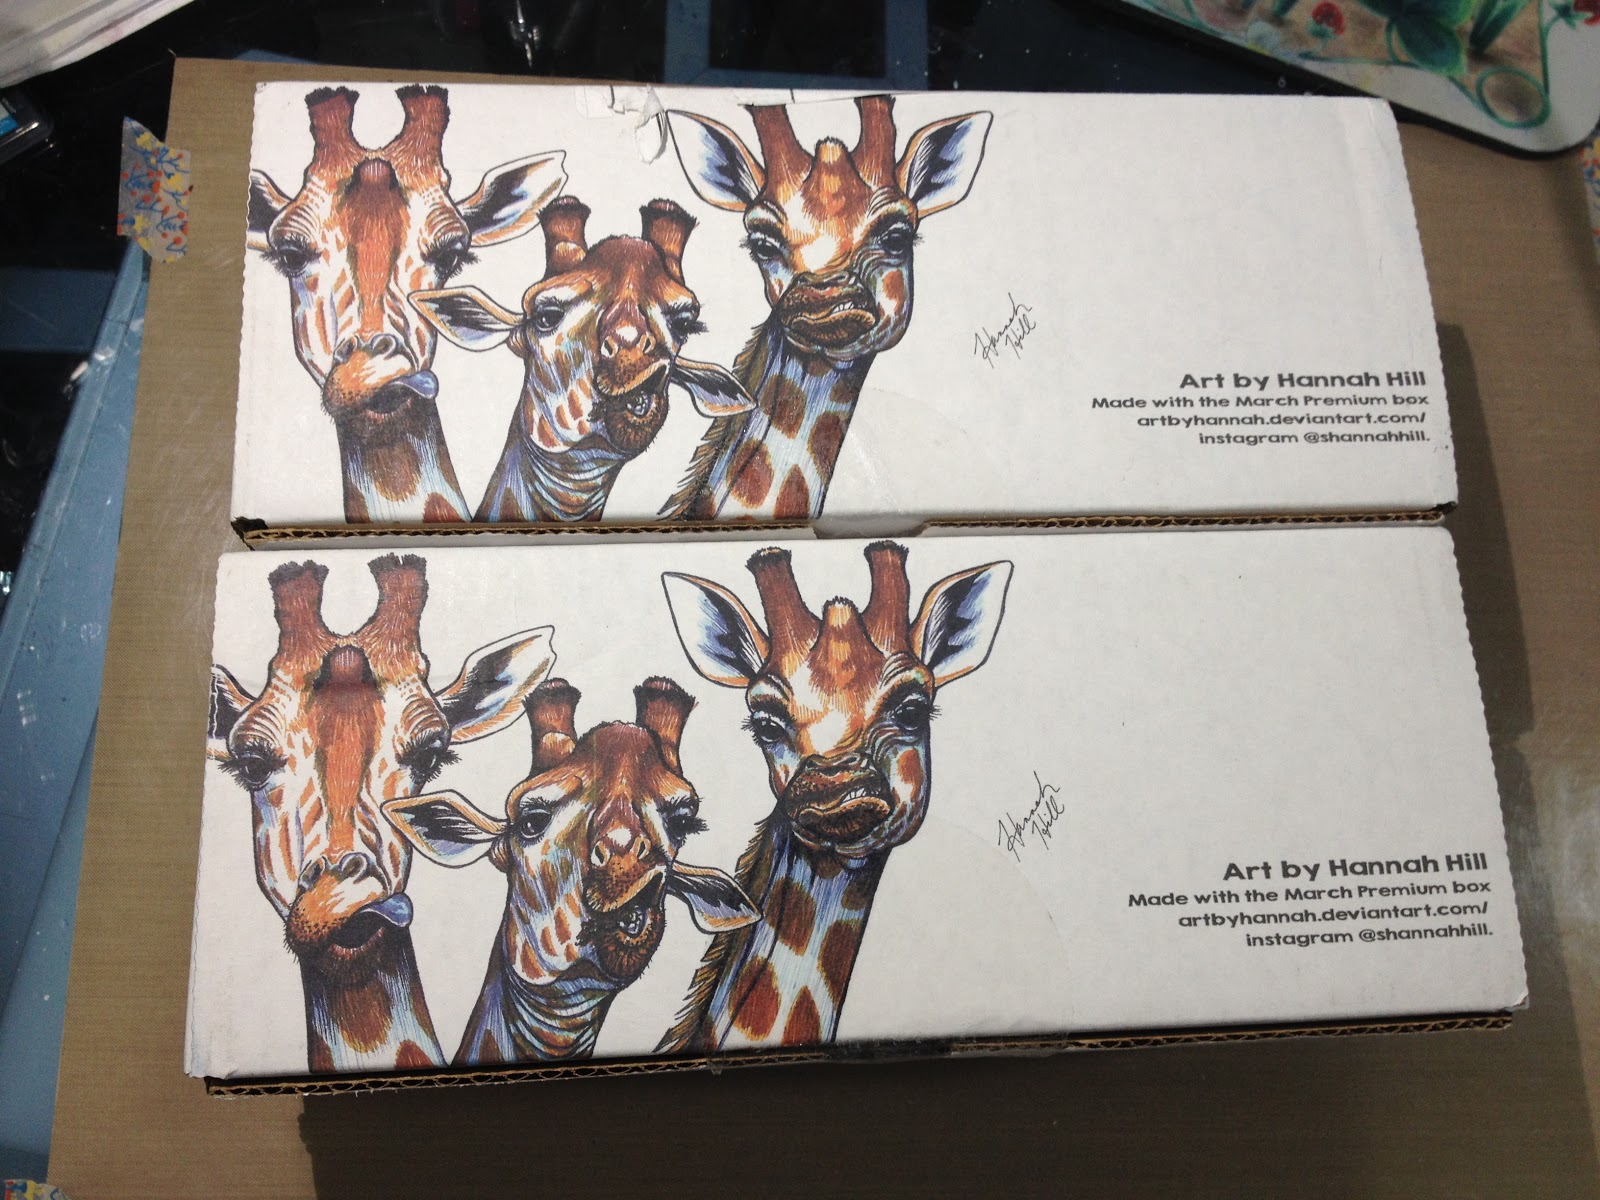
The box reads:
Art by Hannah Hill
Made with the March Premium Box
artbyhannah.deviantart.com
instagram @hannahhill

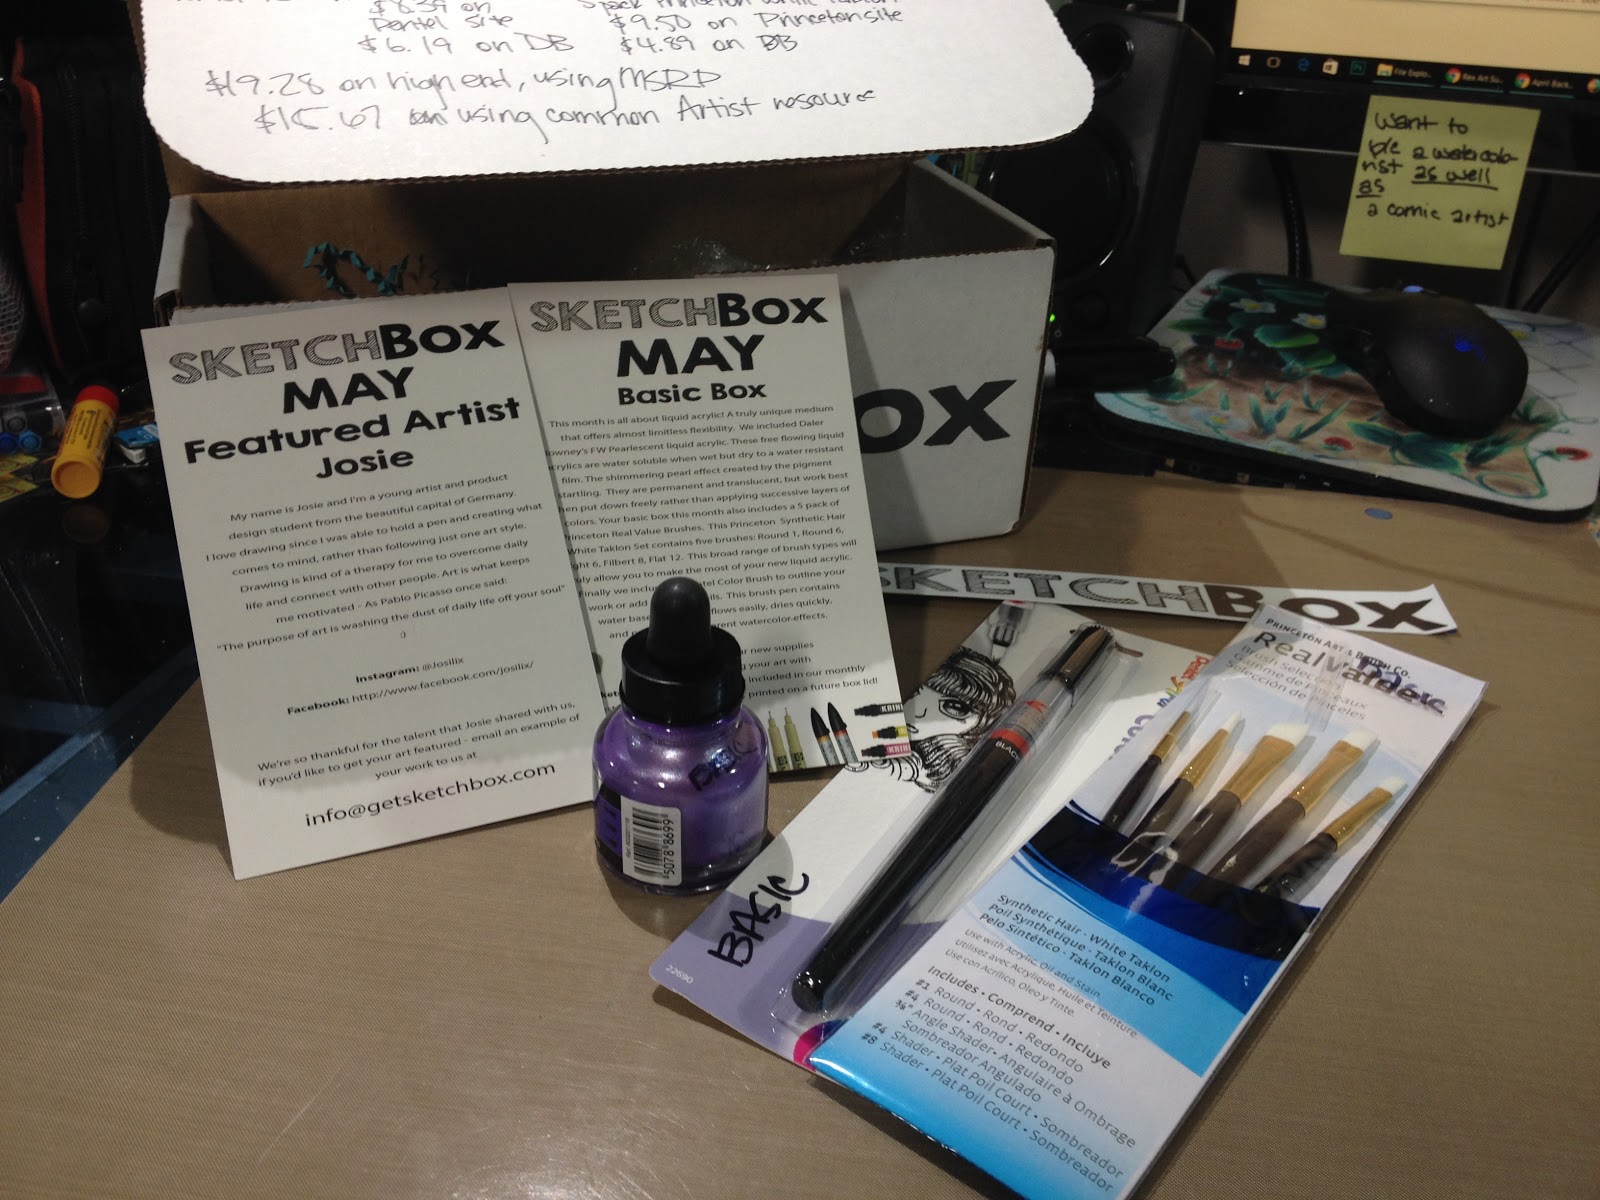
This Month's SketchBox Basic Brands Are: Daler-RowneyPrincetonPentel
The Card
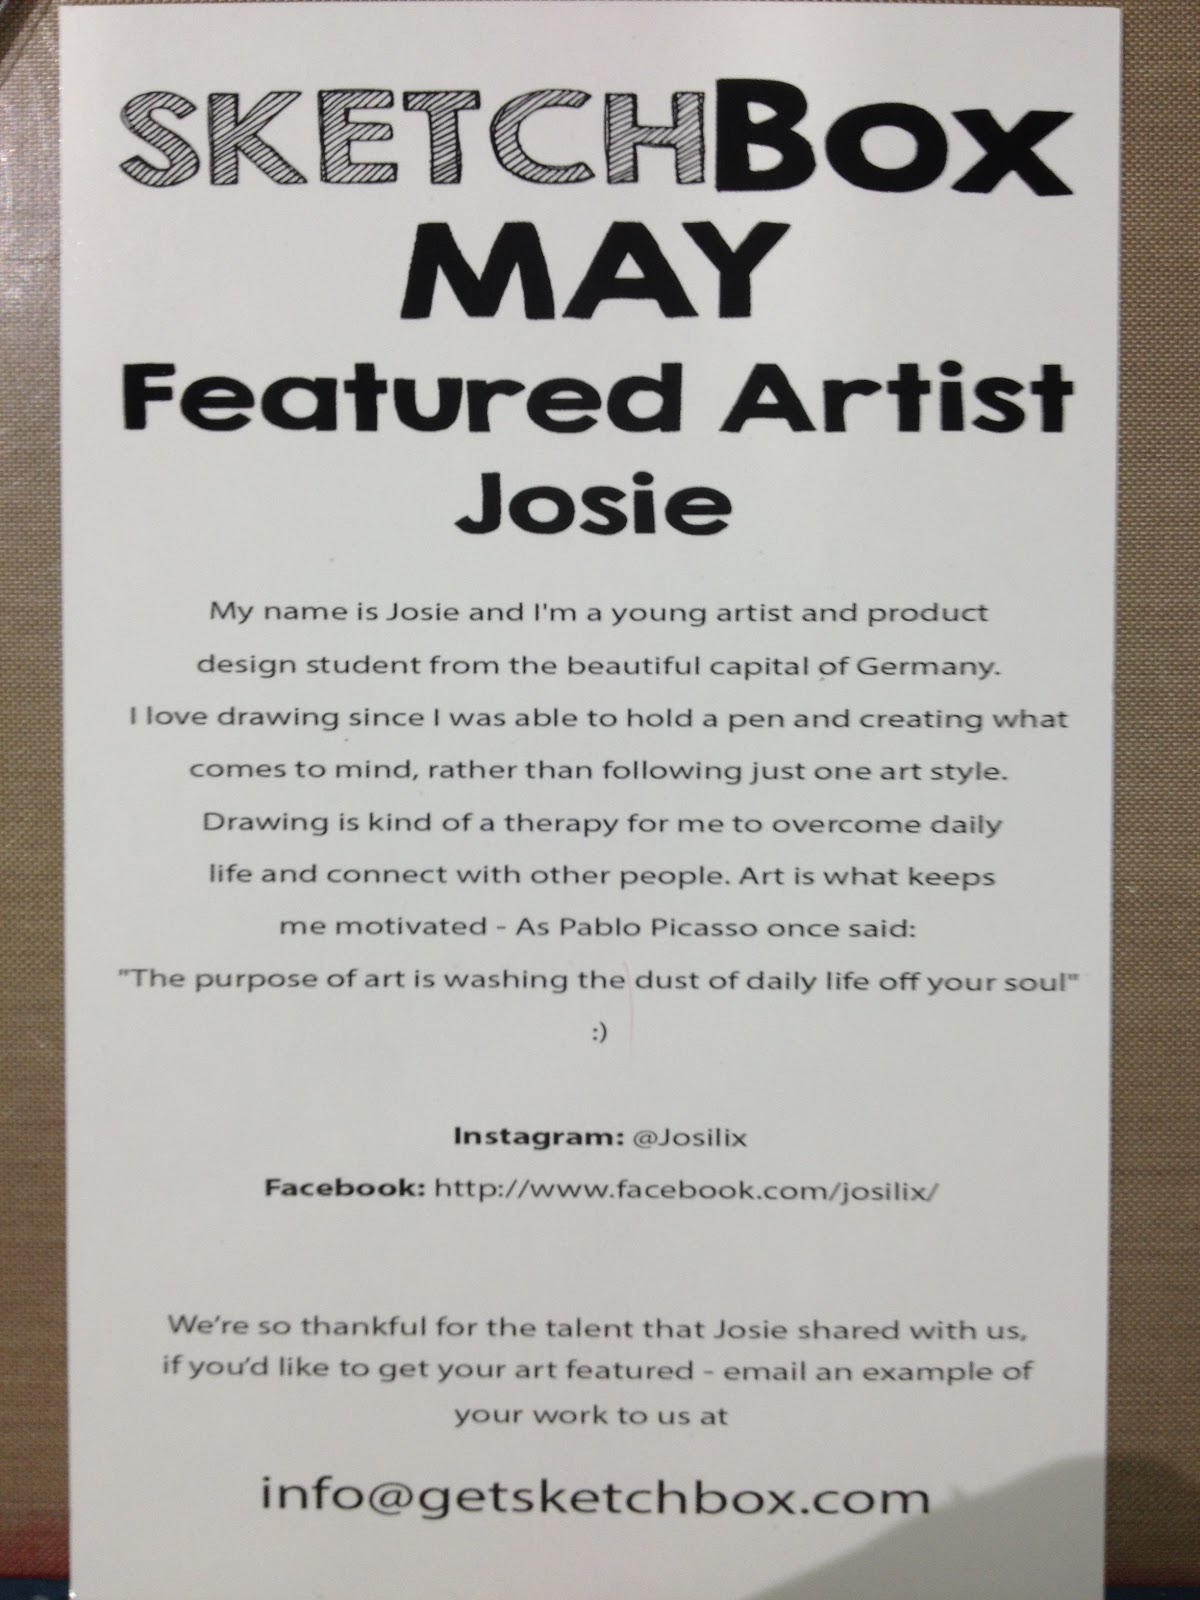

The Card Reads:
SketchBox MayFeatured ArtistJosie
My name is Josei and I'm a young artist and product design student from the beautiful capital of Germany. I love drawing since I was able to hold a pen and creating what comes to mind, rather than following just one art style. Drawing is kind of a therapy for me to overcome daily life and connect with other people. Art is what keeps me motivated- as Pablo Picasso once said: "The purpose of art is washing the dust of daily life off your soul":)
Instagram: @JosilixFacebook: http://www.facebook.com/josilix
We're so thankful for the talent that Josei shared with us, if you'd like to get your art featured- email an example of your work to us at info@getsketchbox.com
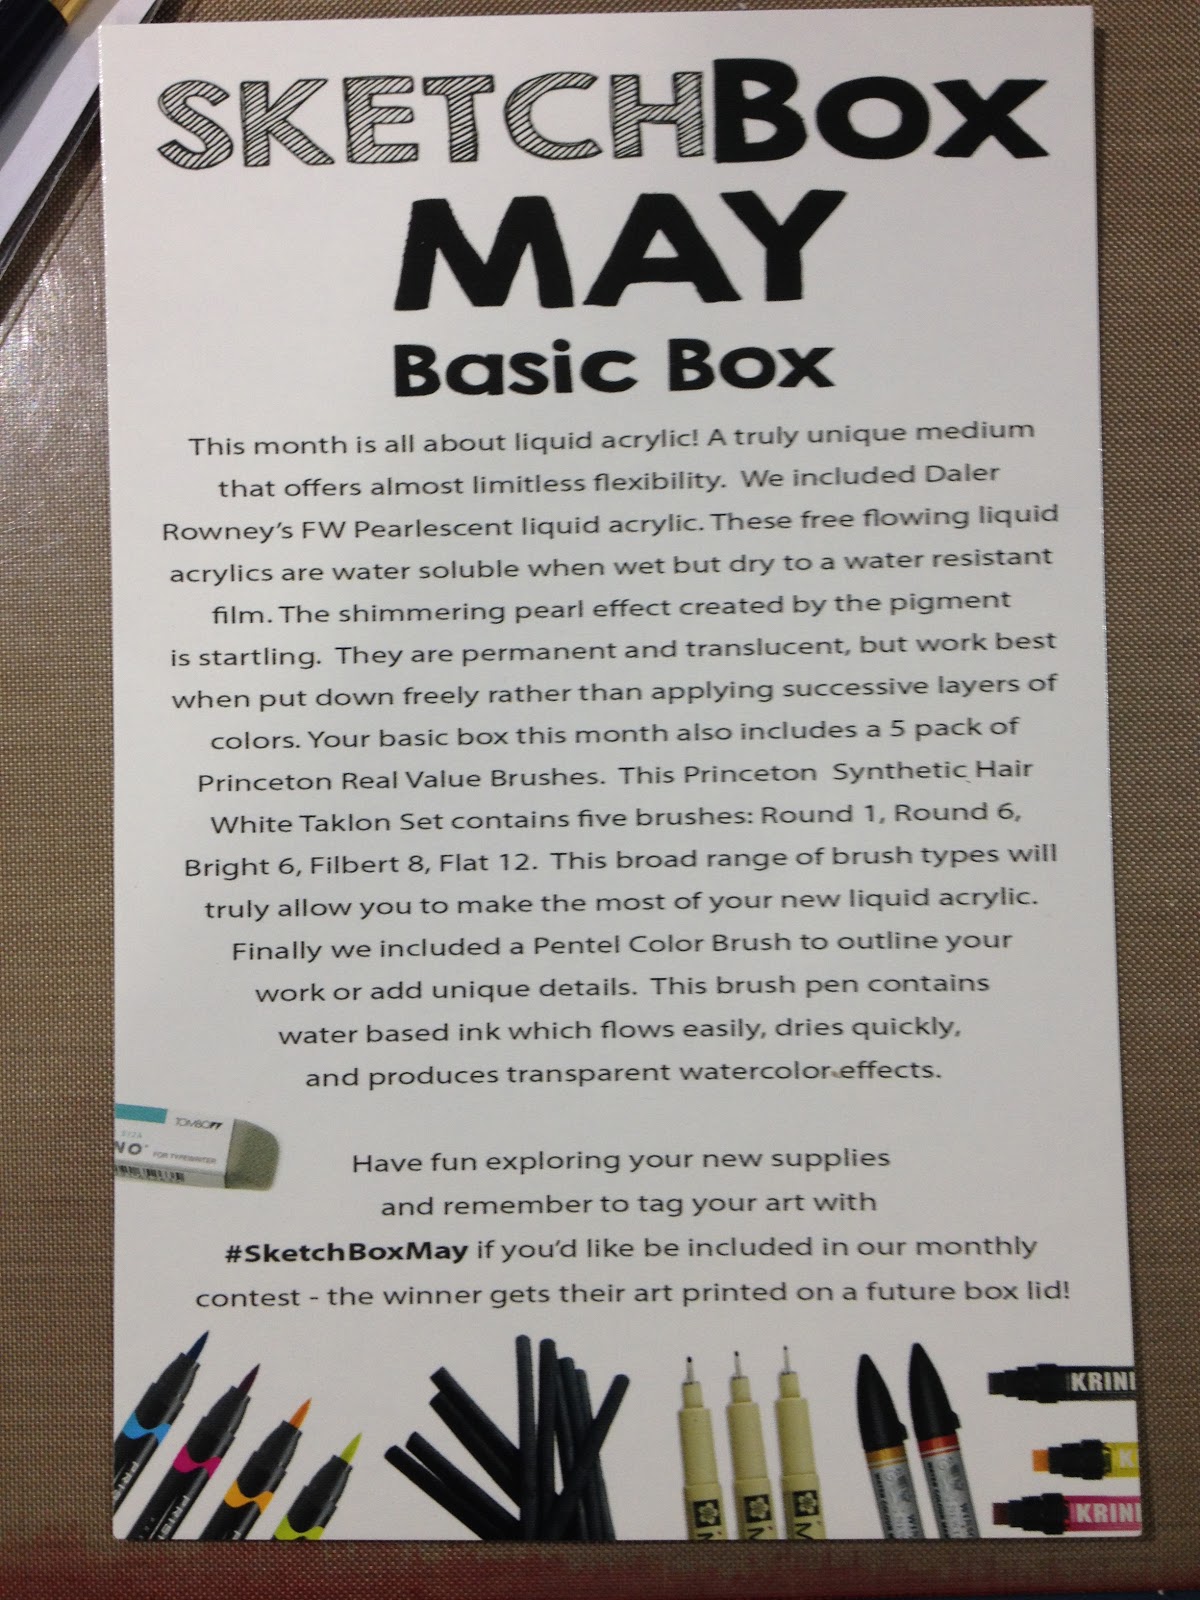 The Card Reads:
 SketchBox
May
Basic Box
This month is all about liquid acrylic! A truly unique medium that offers almost limitless flexibility. We included Daler Rowney's FW Pearlescent liquid acrylic. These free flowing liquid acrylics are water soluble when wet but dry to a water resistant film. The shimmering pearl effect created y the pigment is startling. They are permanent and translucent, but work best when put down freely rather than applying successive layers of colors. Your basic ox this month also includes a 5 pack of Princeton Real Value Brushes. This Princeton Synthetic Hair White Taklon Set contains five brushes: Round 1, Round 6, Bright 6, Filbert 8, Flat 12. The broad range of brush types will truly allow you to make the most of your new liquid acrylic. Finally we included a Pentel Color brush to outline your work or add unique details. This brush pen contains water based ink which flows easily, dries quickly, and produces transparent watercolor effects.
Have fun exploring your new supplies and remember to tag your art with #SketchBoxMay if you'd like to be included in our monthly contest- the winner gets their art printed on a future box lid!
The Price Breakdown
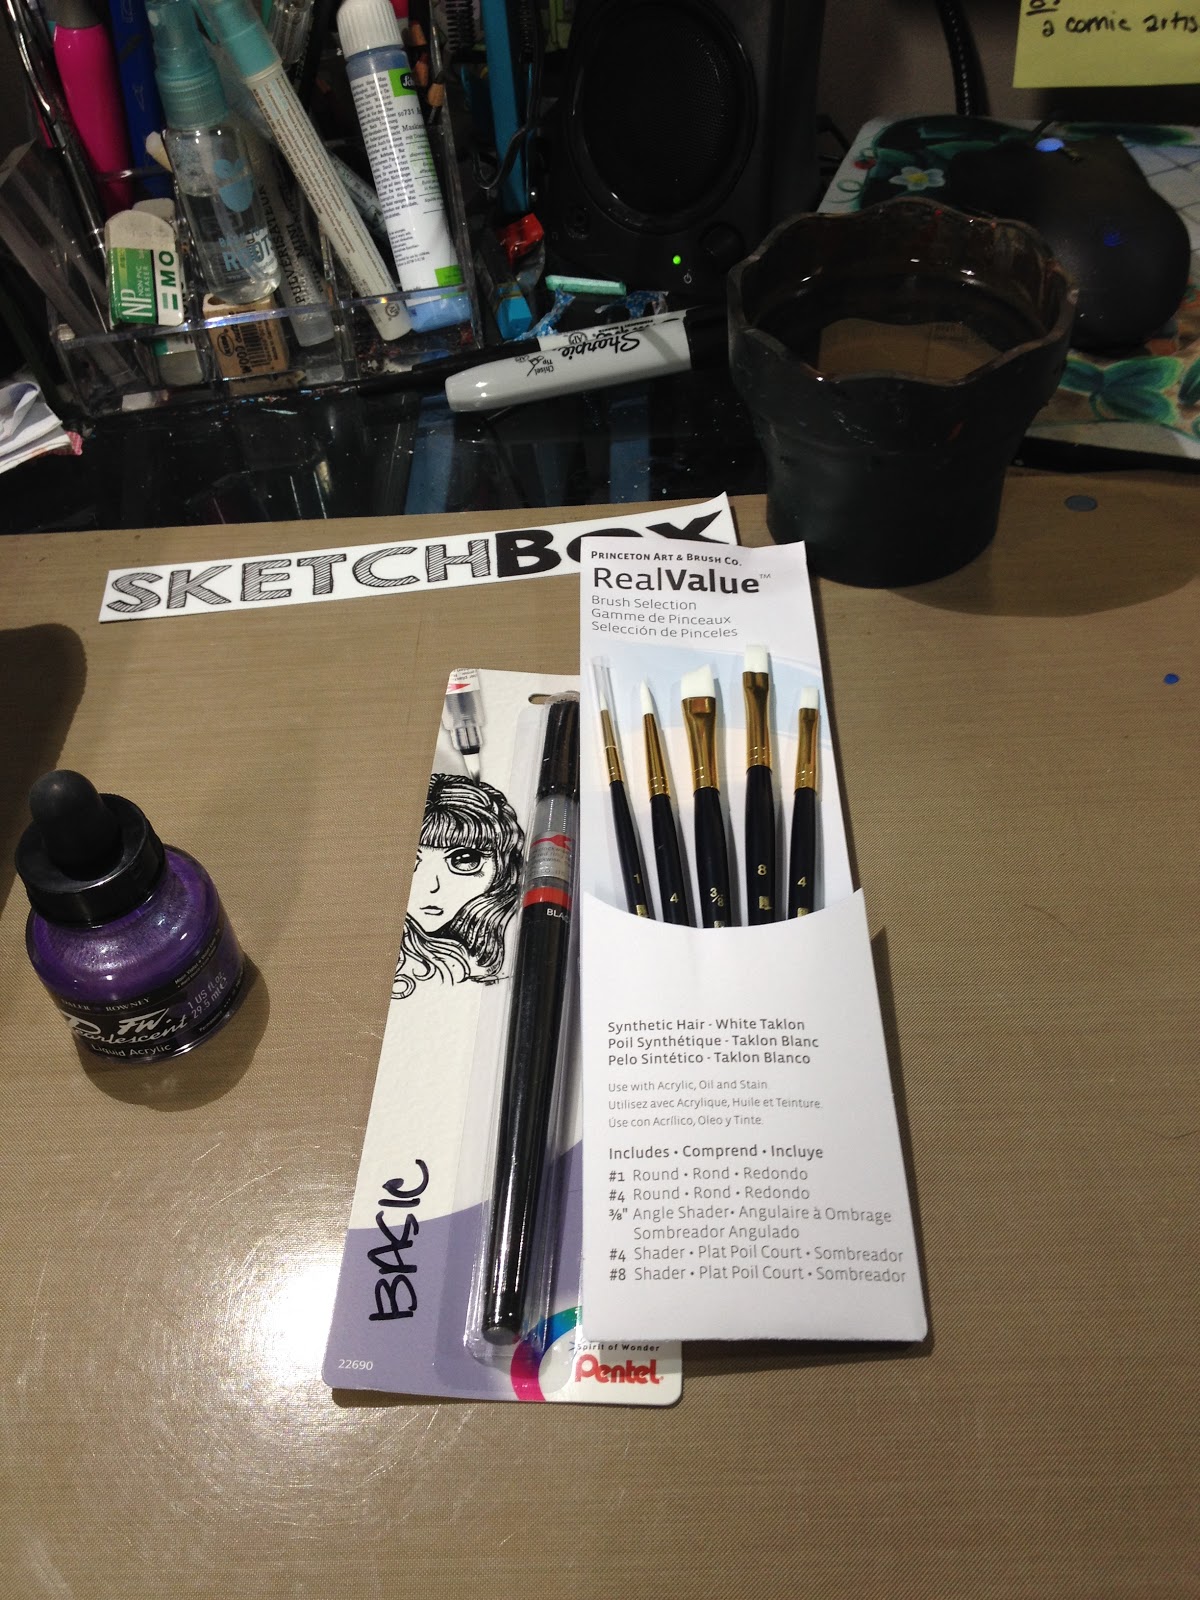
Princeton Art & Brush Co Real Value Brush Selection
Synthetic Hair- White Taklon- $9.50 on Princeton Site , $4.89 on DickBlick
FW Acrylic Pearlescent Ink $6.00 on Paper and Ink Arts, $4.59 on DickBlick
Pentel Arts Color Brush (Black) $8.39 on Pentel store, $6.19 on DickBlick
The Supplies Inside
FW Acrylic Pearlescent Ink
http://www.daler-rowney.com/content/fw-artists-inksI love FW's Pearlescent Ink- I use the white pearl ink often. The lovely purple acrylic ink can be used as is, or diluted for a lovely purple shimmer.
Pentel Arts Color Brush
http://www.pentel.com/store/color-brushThe less impressive cousin of the Pentel Pocket Brush (a staple for comic artists), this waterbased pen remains water soluble even after dry. Can be used for nice inkwash effects on the go.
Princeton Art & Brush Co Real Value Brush Selection
Synthetic Hair- White Taklonhttp://www.princetonbrush.com/real-value-series-9100-short-princeton-brush-company-short-brush/These stiff synthetic brushes are better suited to heavier acrylics than these light ink types.
Total:
High end, using MSRP when available: $19.28
Using common artist store, Dick Blick- $15.67Cost of Box: $25+$5 shipping
Supply Overview and Demonstration
May 2016 SketchBox Basic Unboxing- Becca Hillburn
I highly recommend you watch the video above for product demonstrations and explanations!
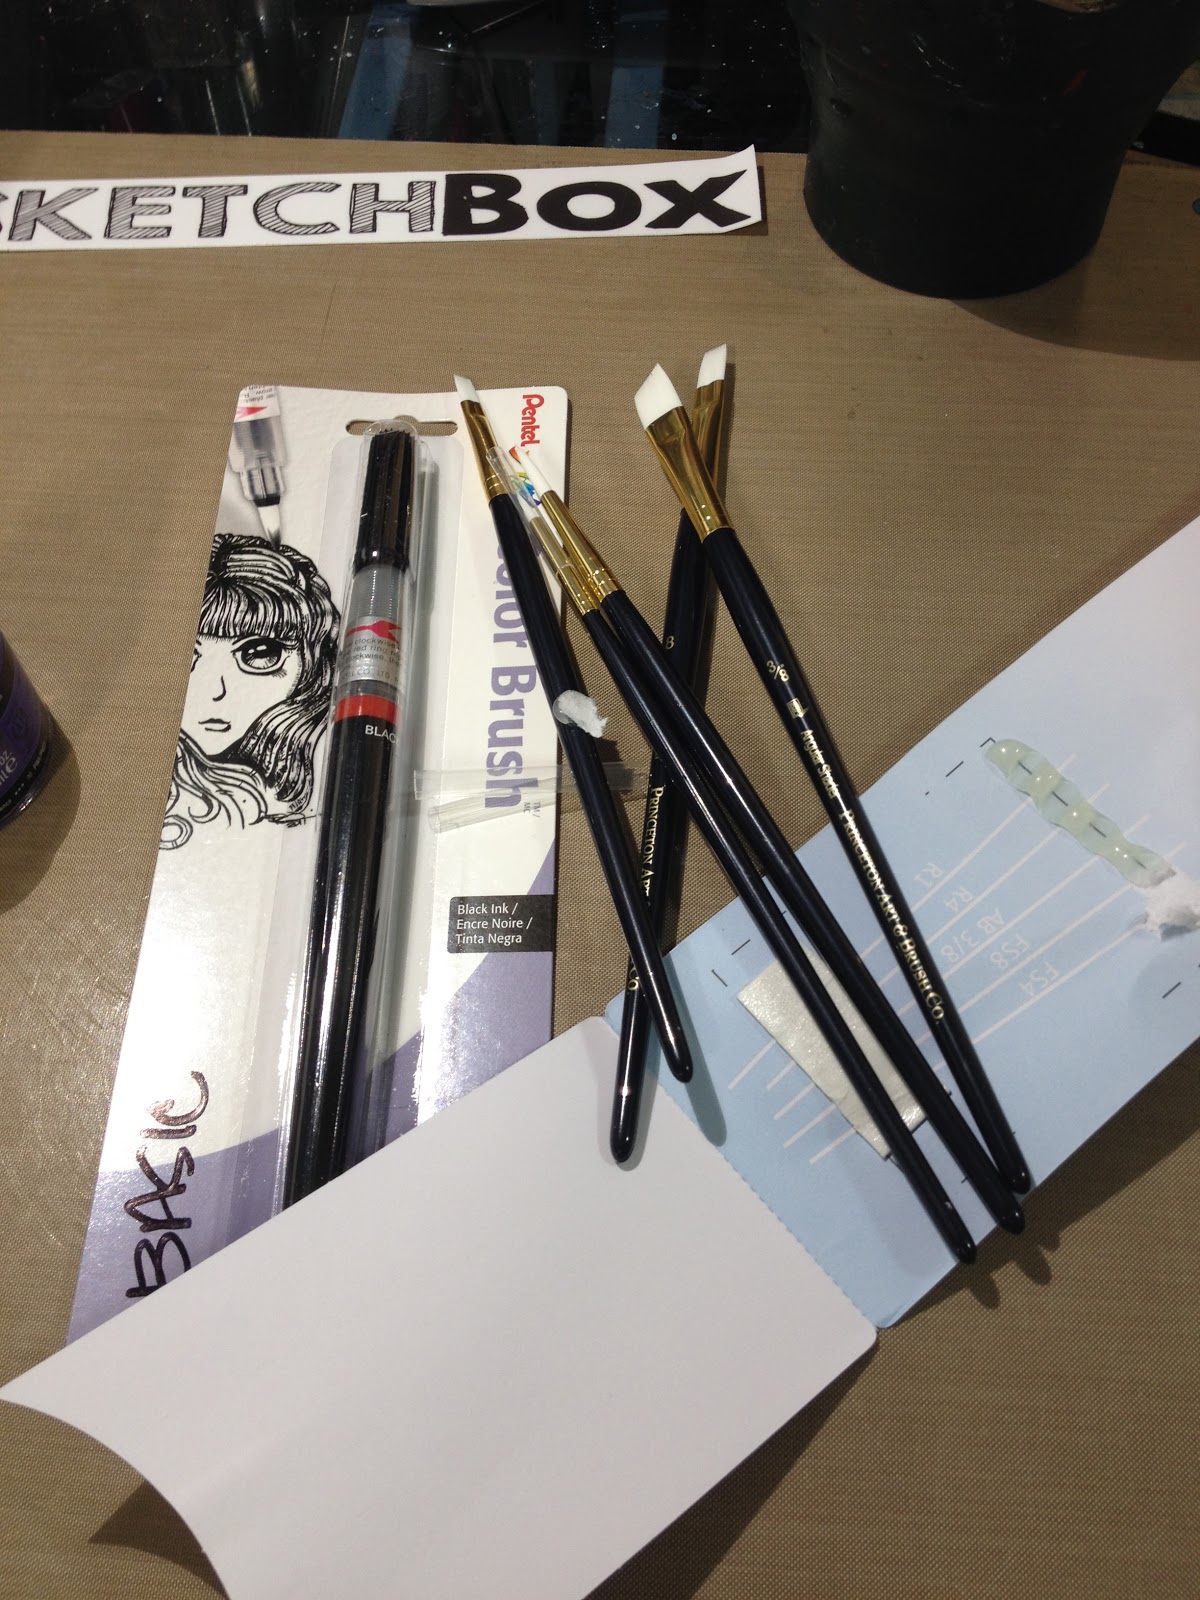
Removing these synthetic brushes from their package was a bit of a chore, and I was unable to pry a large chunk of glue from one of the brushes. The handles are nicely finished with a matte coating, and the ferrules are well crimped, but these brushes don't hold much water, and are better suited to applying/pushing paint around.
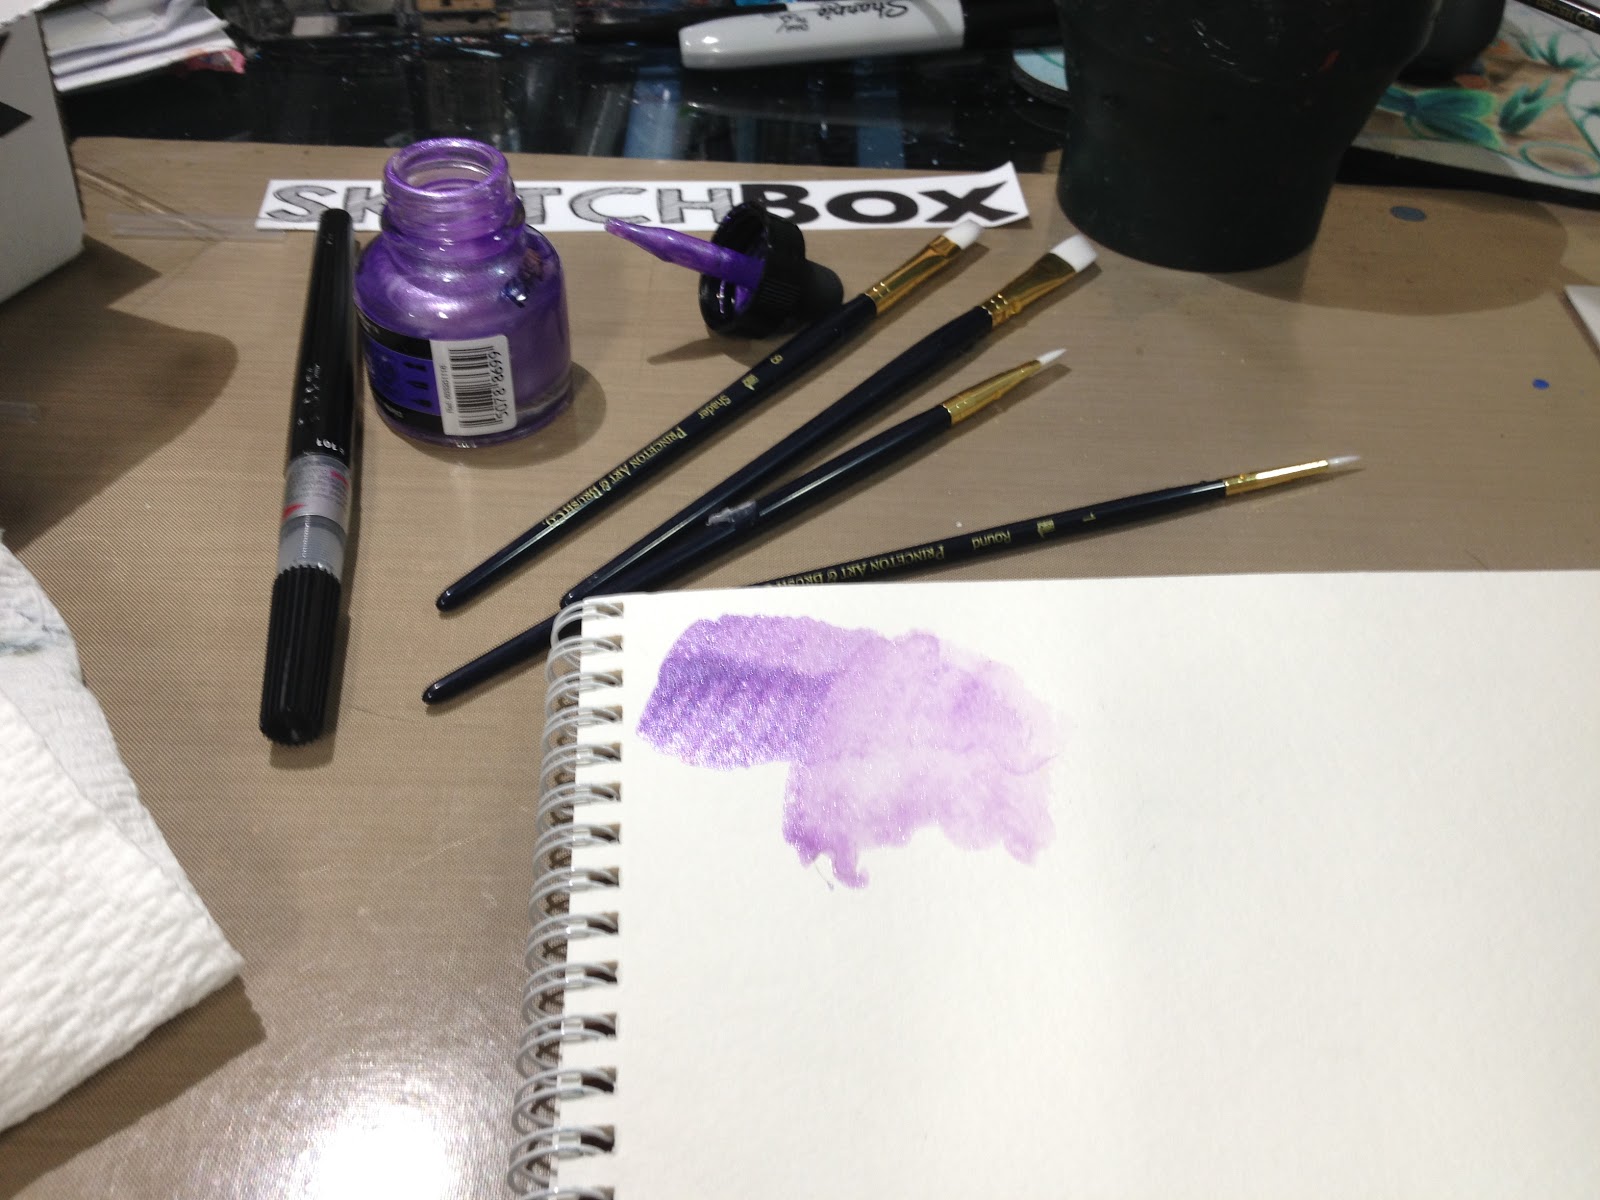
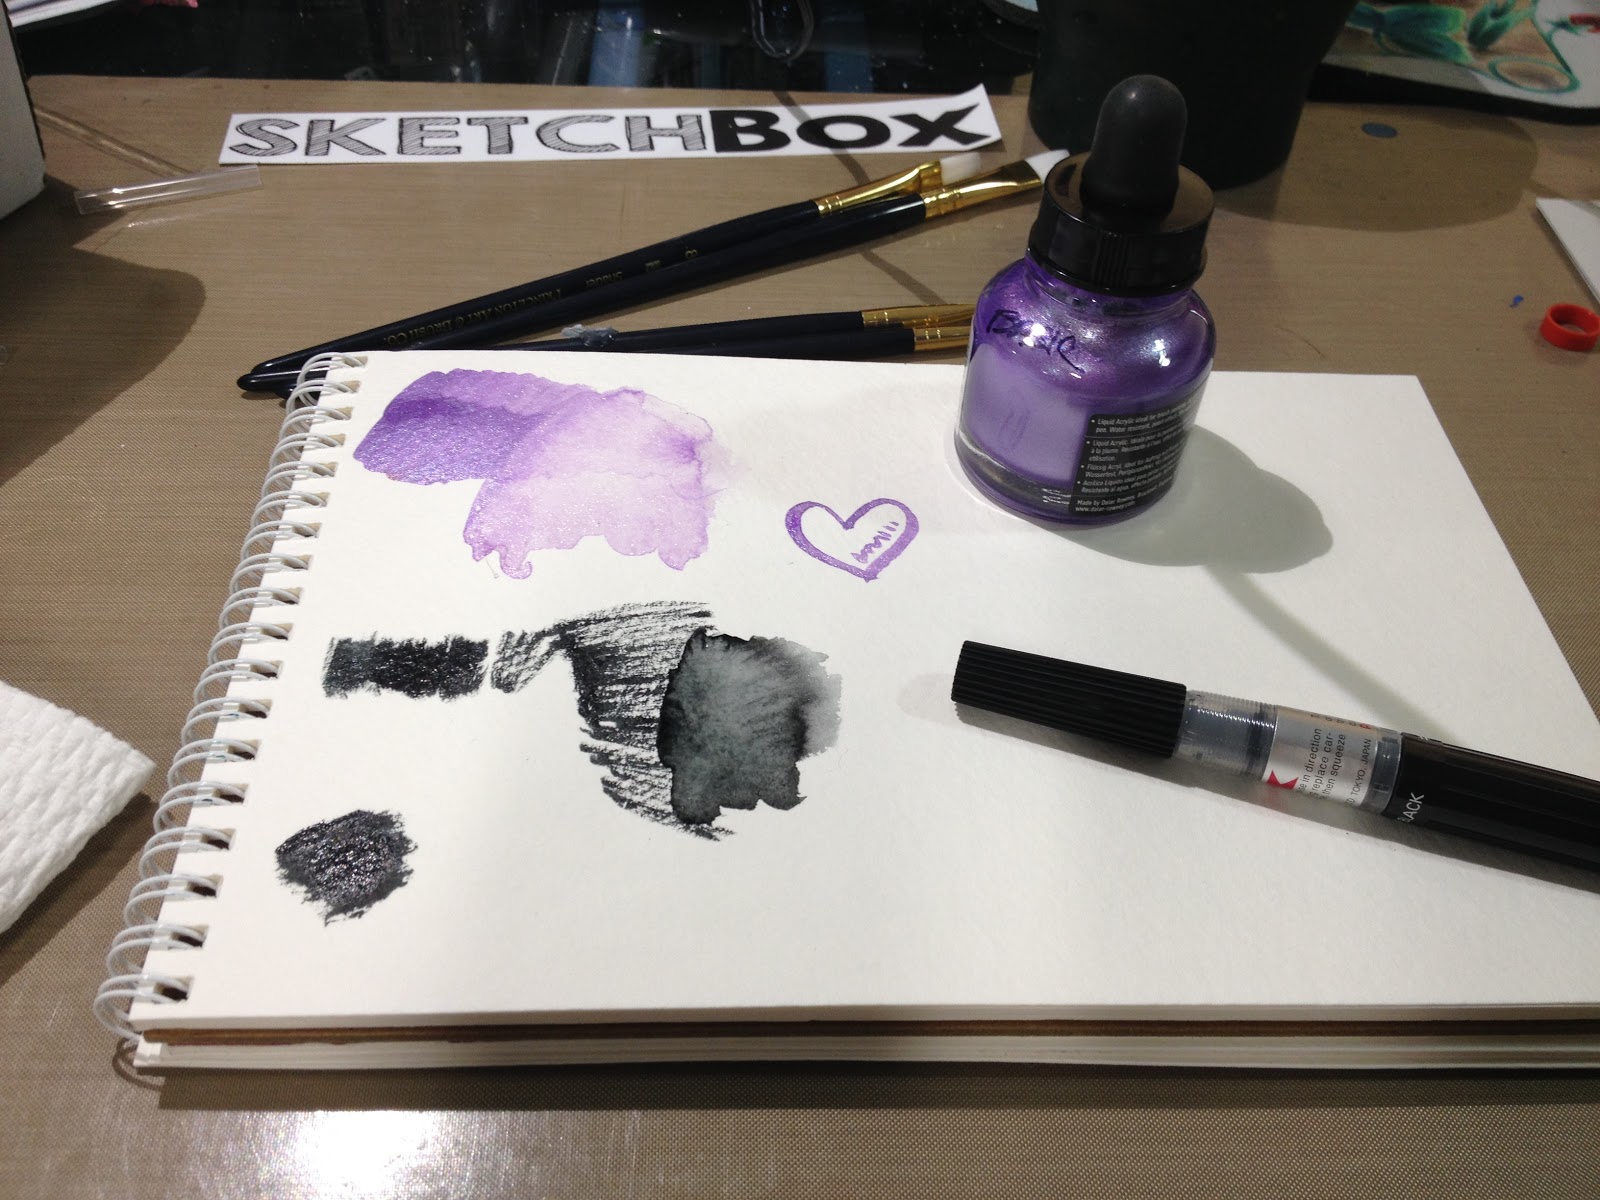
The Pentel Arts Colour Brush works well for drybrush on heavy tooth papers like watercolor paper, and a little water makes for an easy inkwash.
SketchBox Challenge (NOTE: This is a combined challenge using materials from both SketchBox Basic and SketchBox Premium, and should not be used to judge the value of the individual boxes)
May 2016 SketchBox Basic and SketchBox Premium Challenge- Becca Hillburn
VIDEO HERE


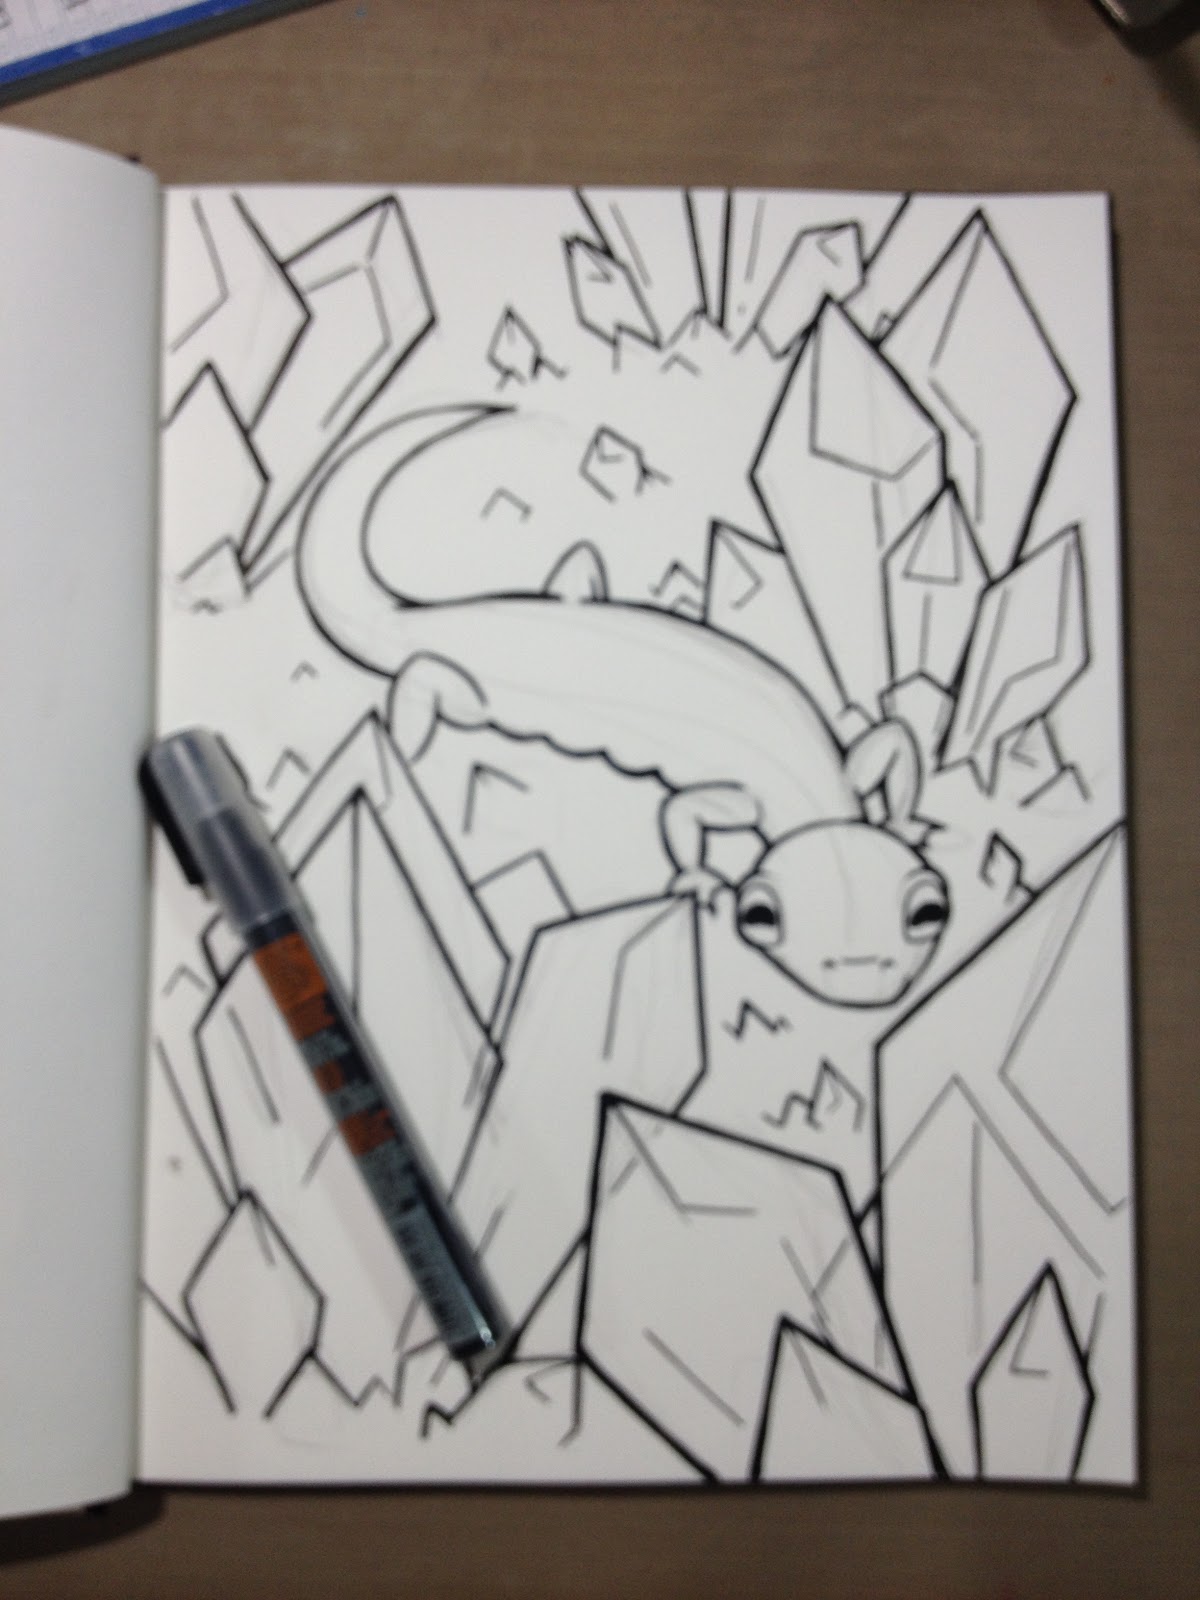
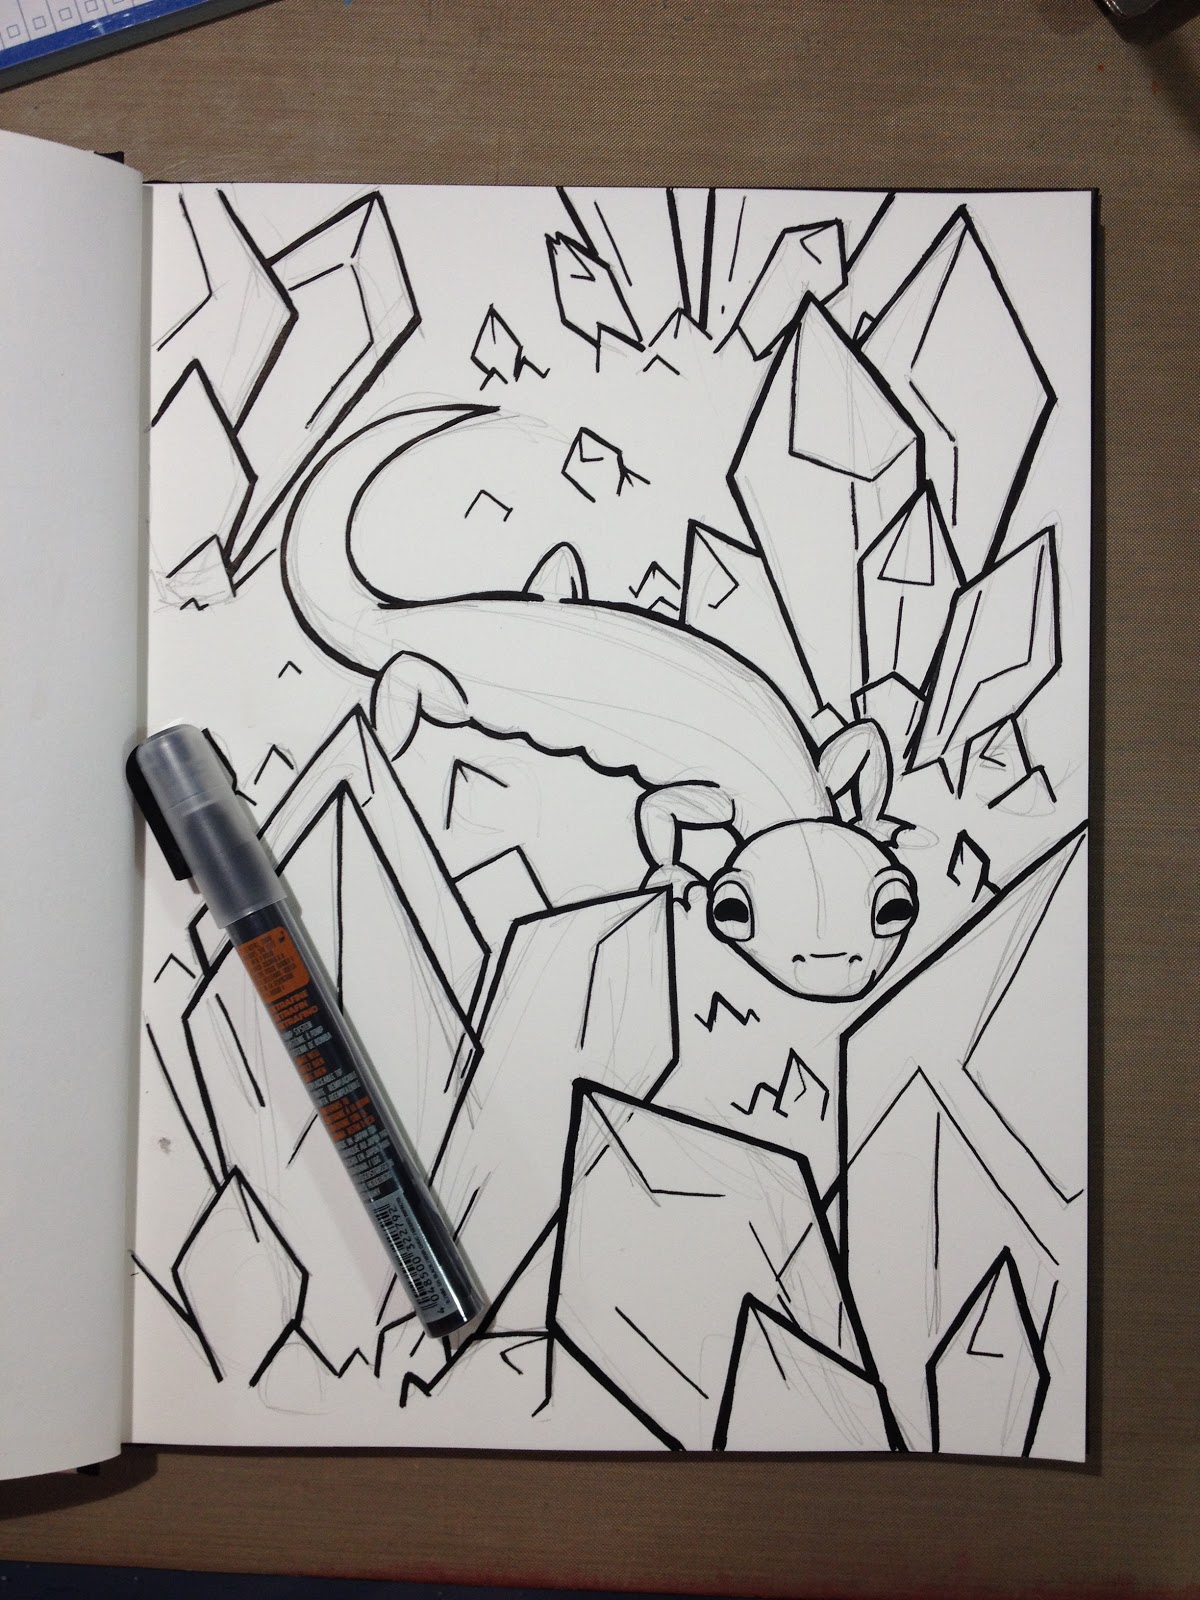
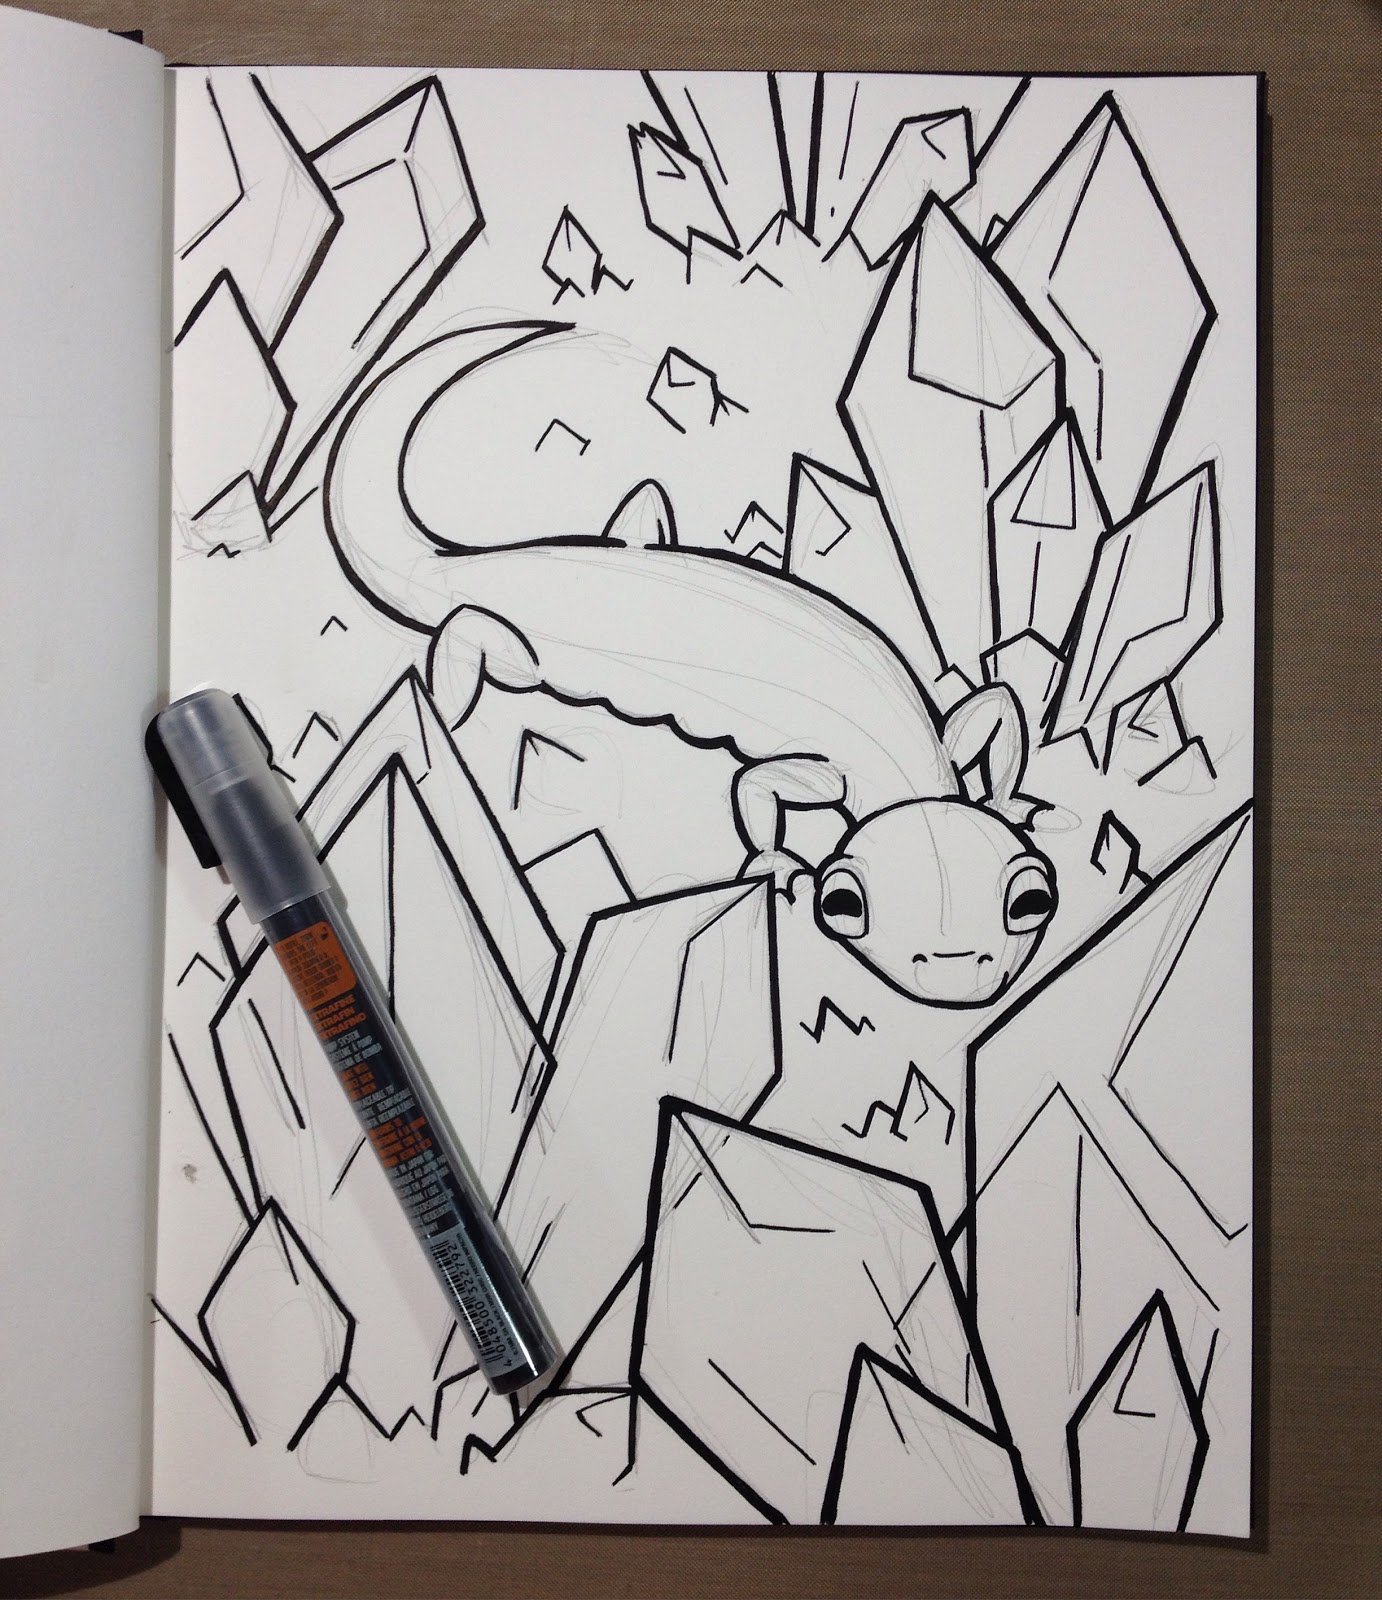
Lineart completed with the Montana Acrylic ballpoint marker from my Premium Box.
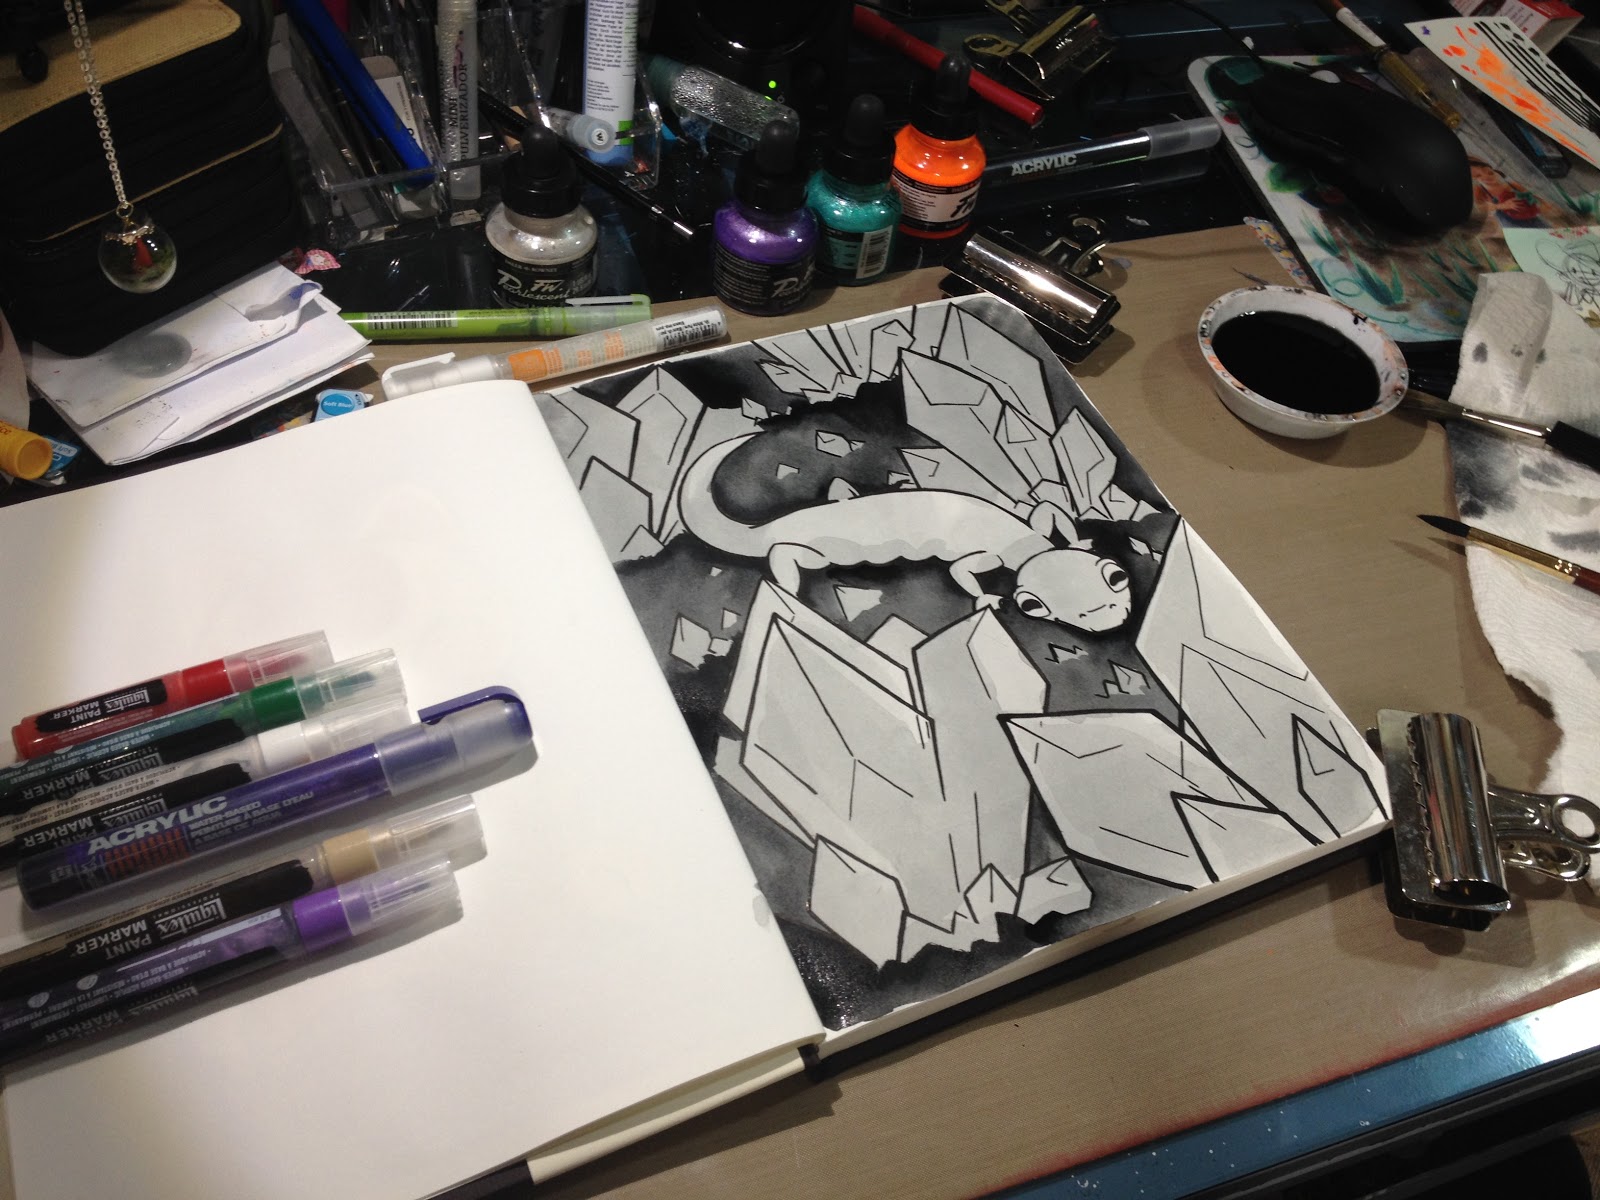
Inkwash background applied using the Pentel Arts Colour Brush and a little clean water. For a demonstration of this technique, please check out the video above!

Jewels were initially painted in with the violet Pearlescent ink from my Basic Box and the seafoam green Pearlescent ink from my Premium Box.
Salamander's body was rendered with watered down Liquitex acylic from their acrylic markers, not included in box.
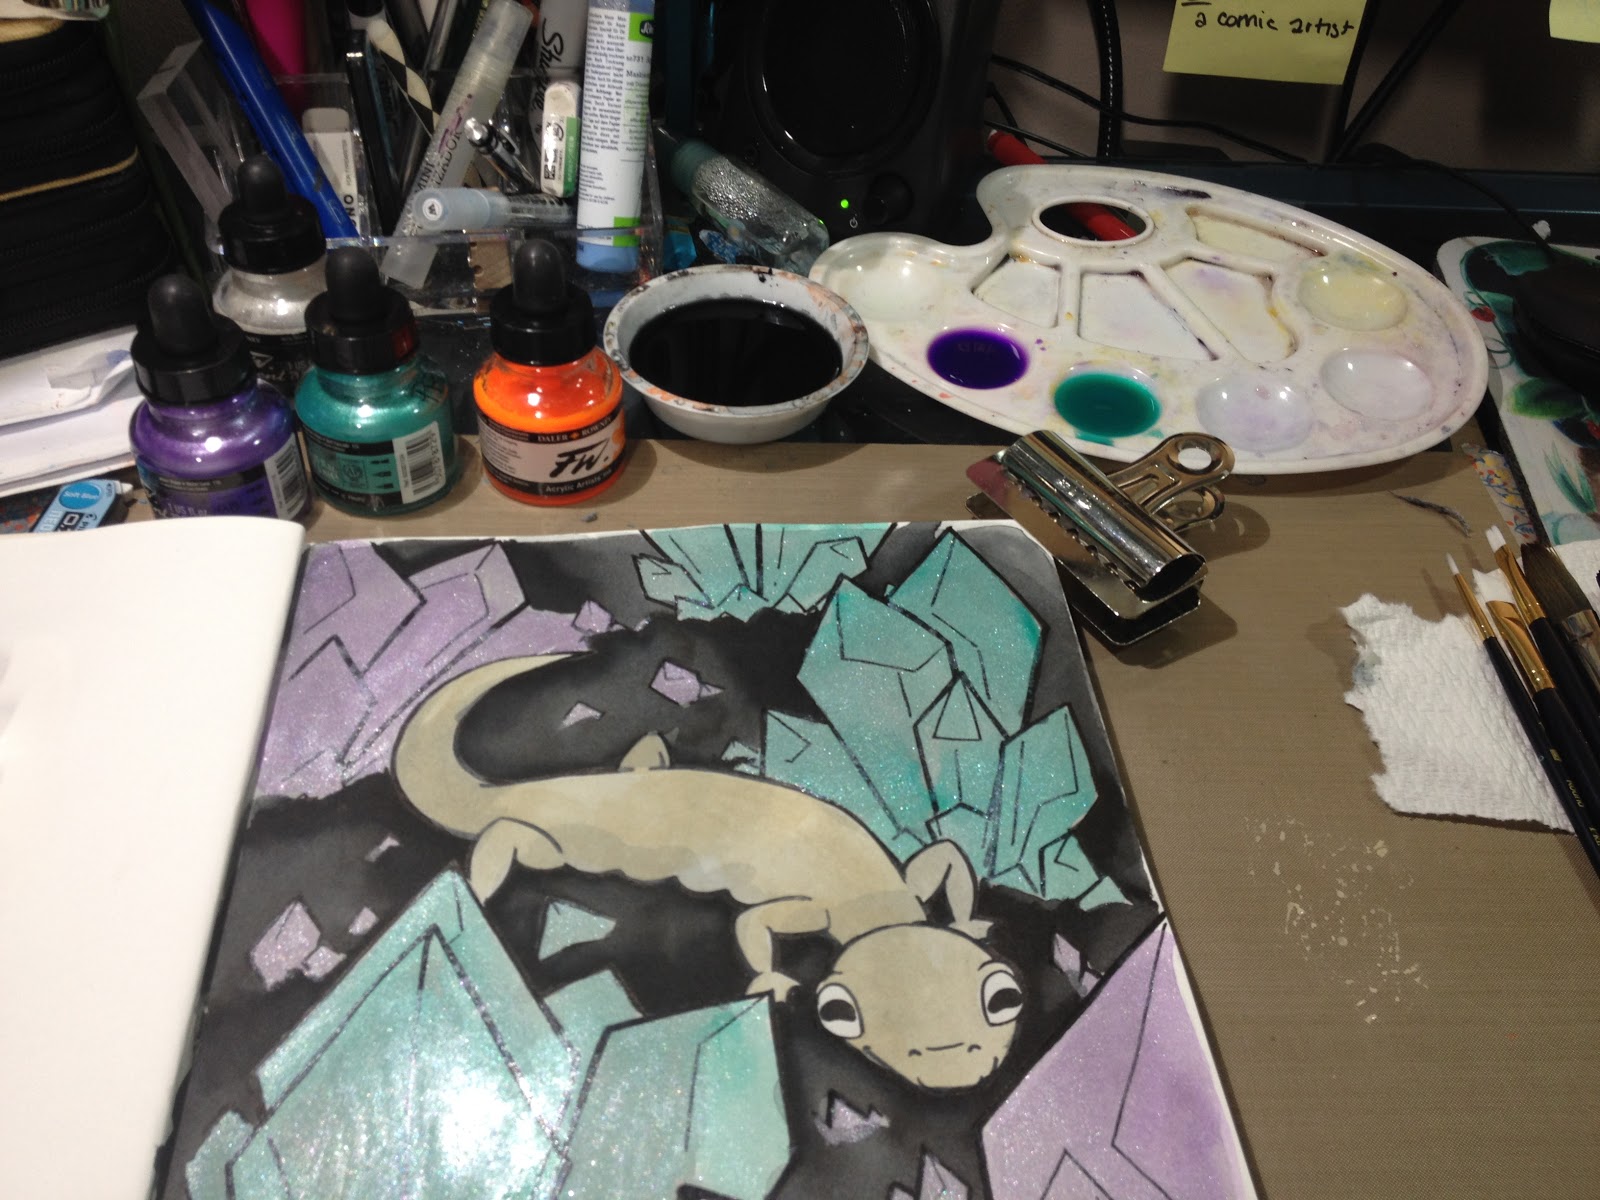
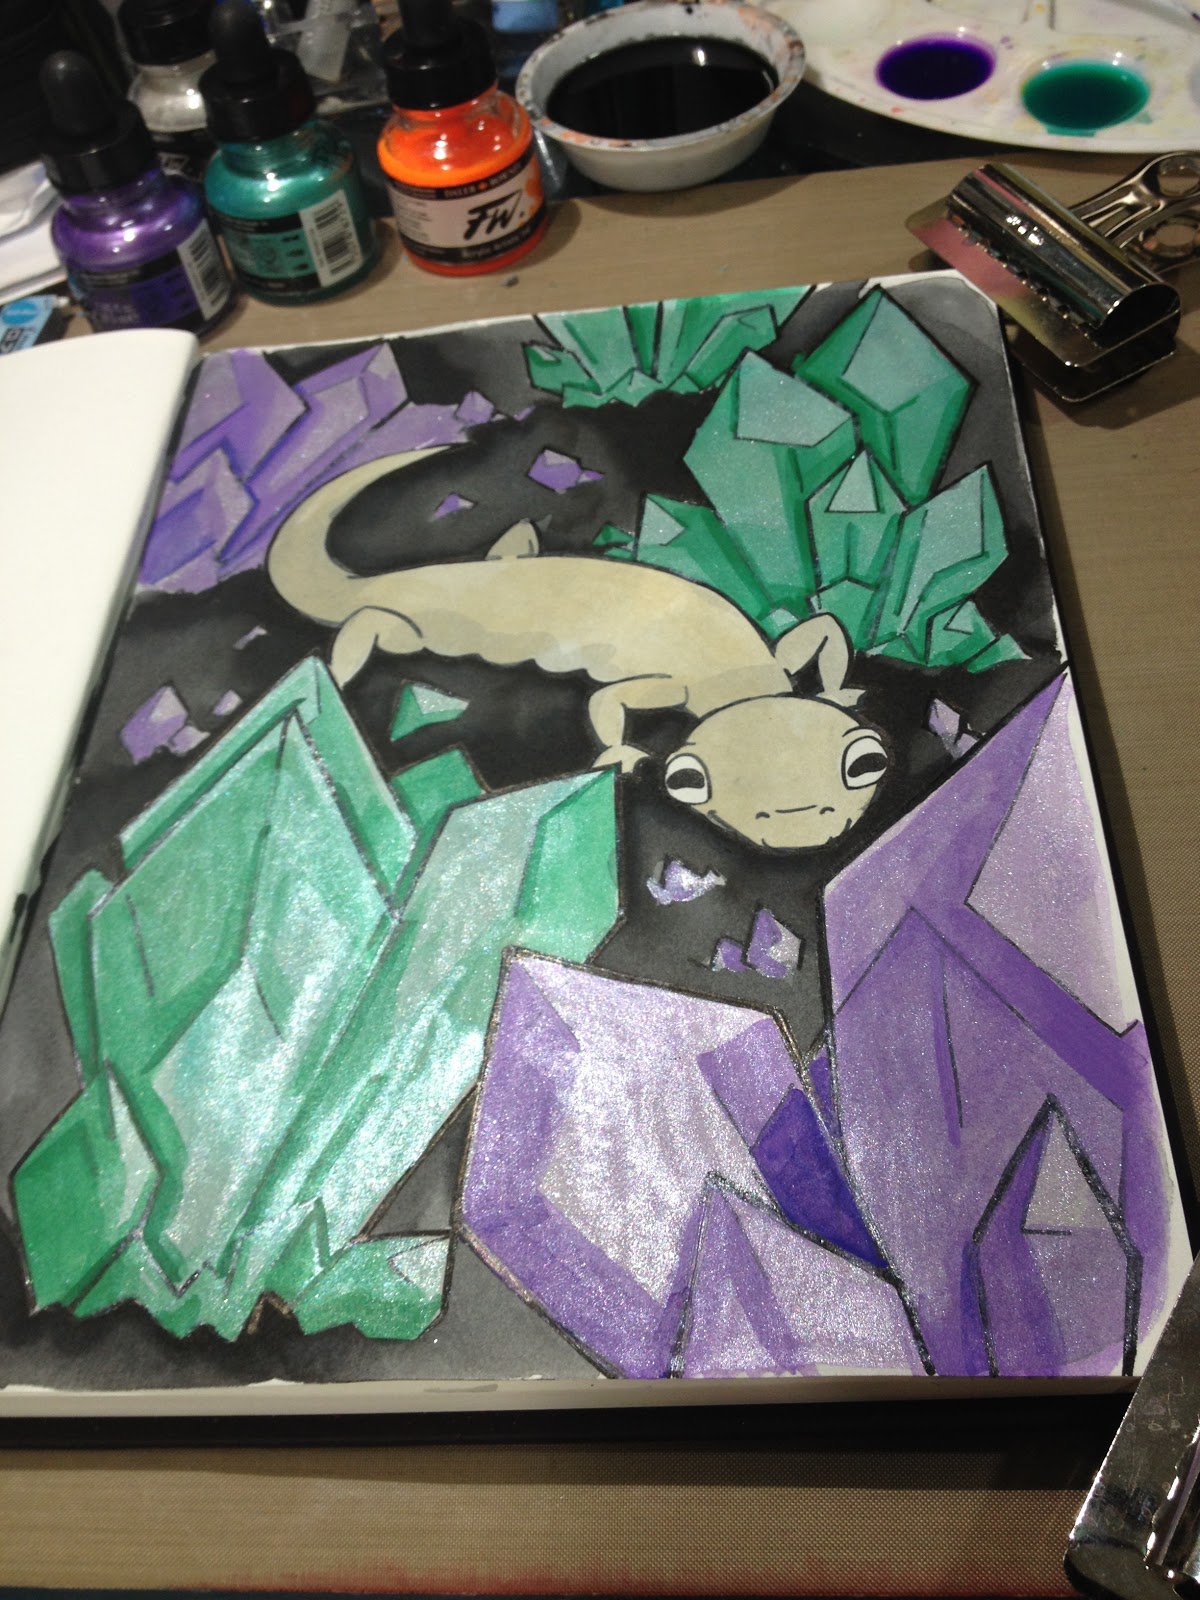
Further layers were applied to the crystals using opaque acrylic markers from my personal collection.

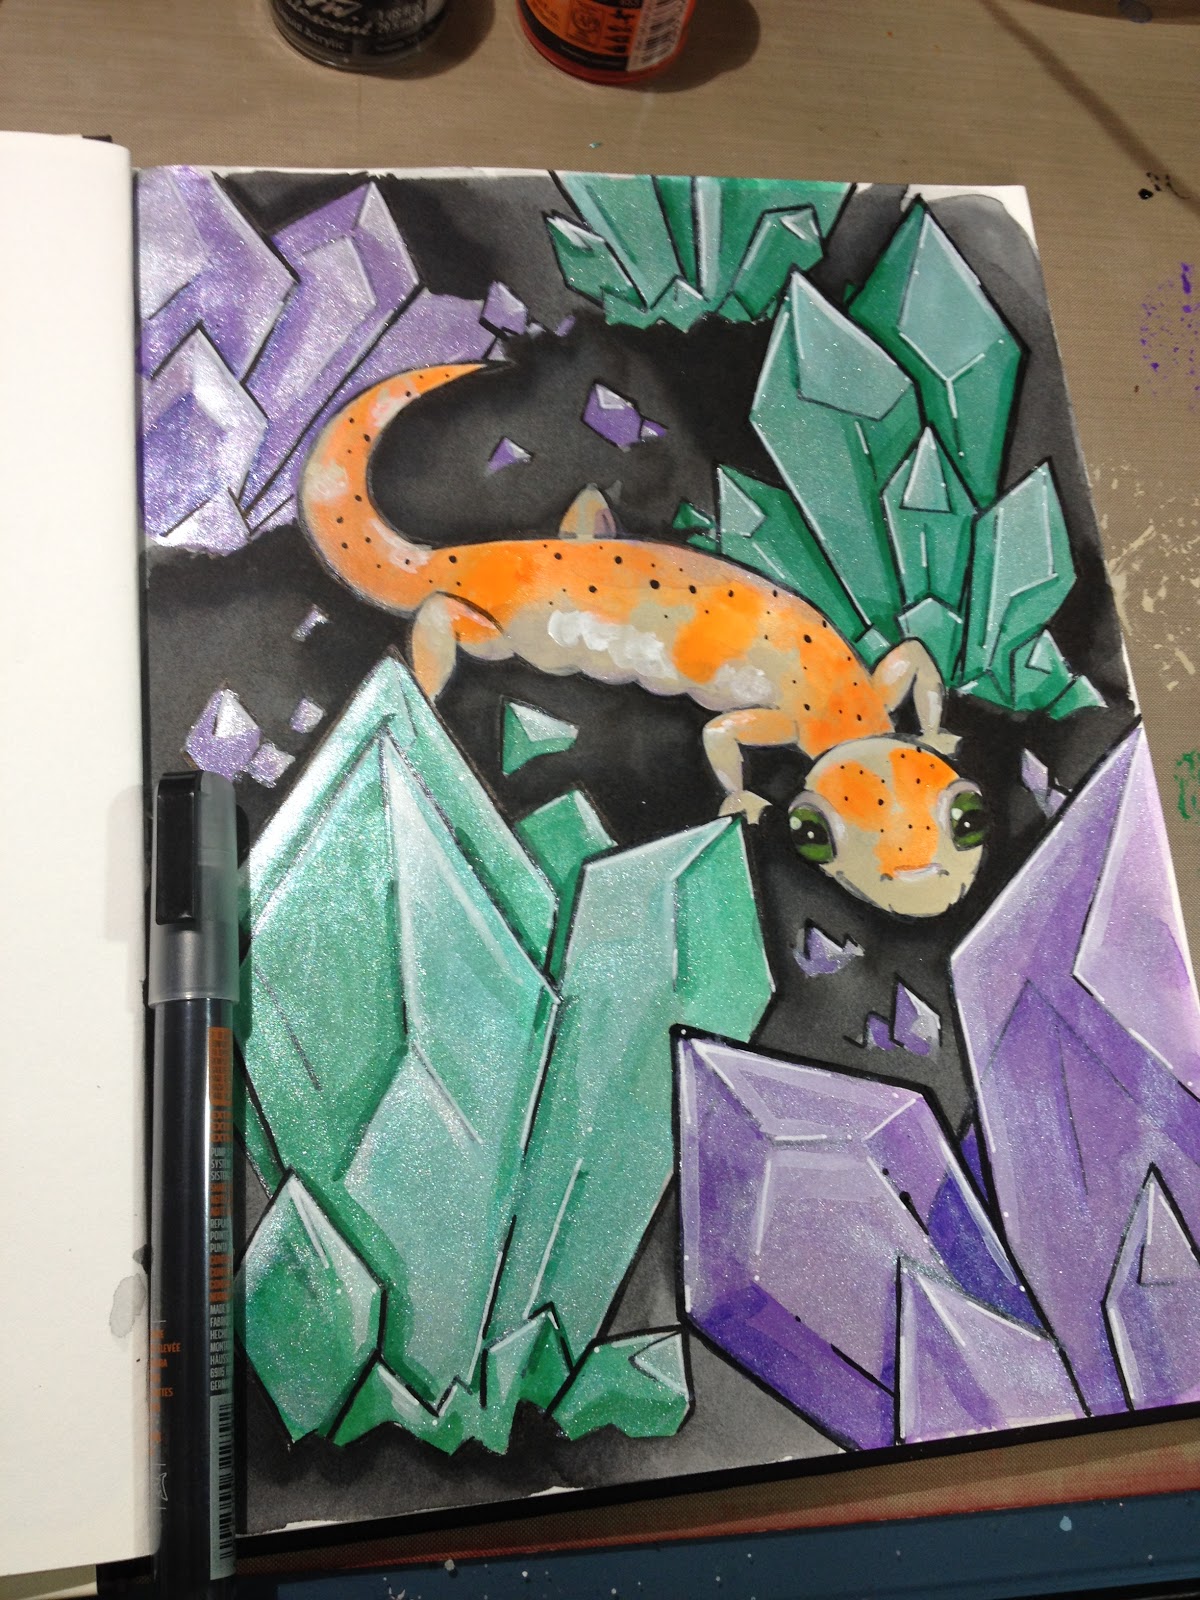
Orange spots were added with the FW Fluorescent ink from the May ArtSnacks, initially applied with the Kuretake Brush20.
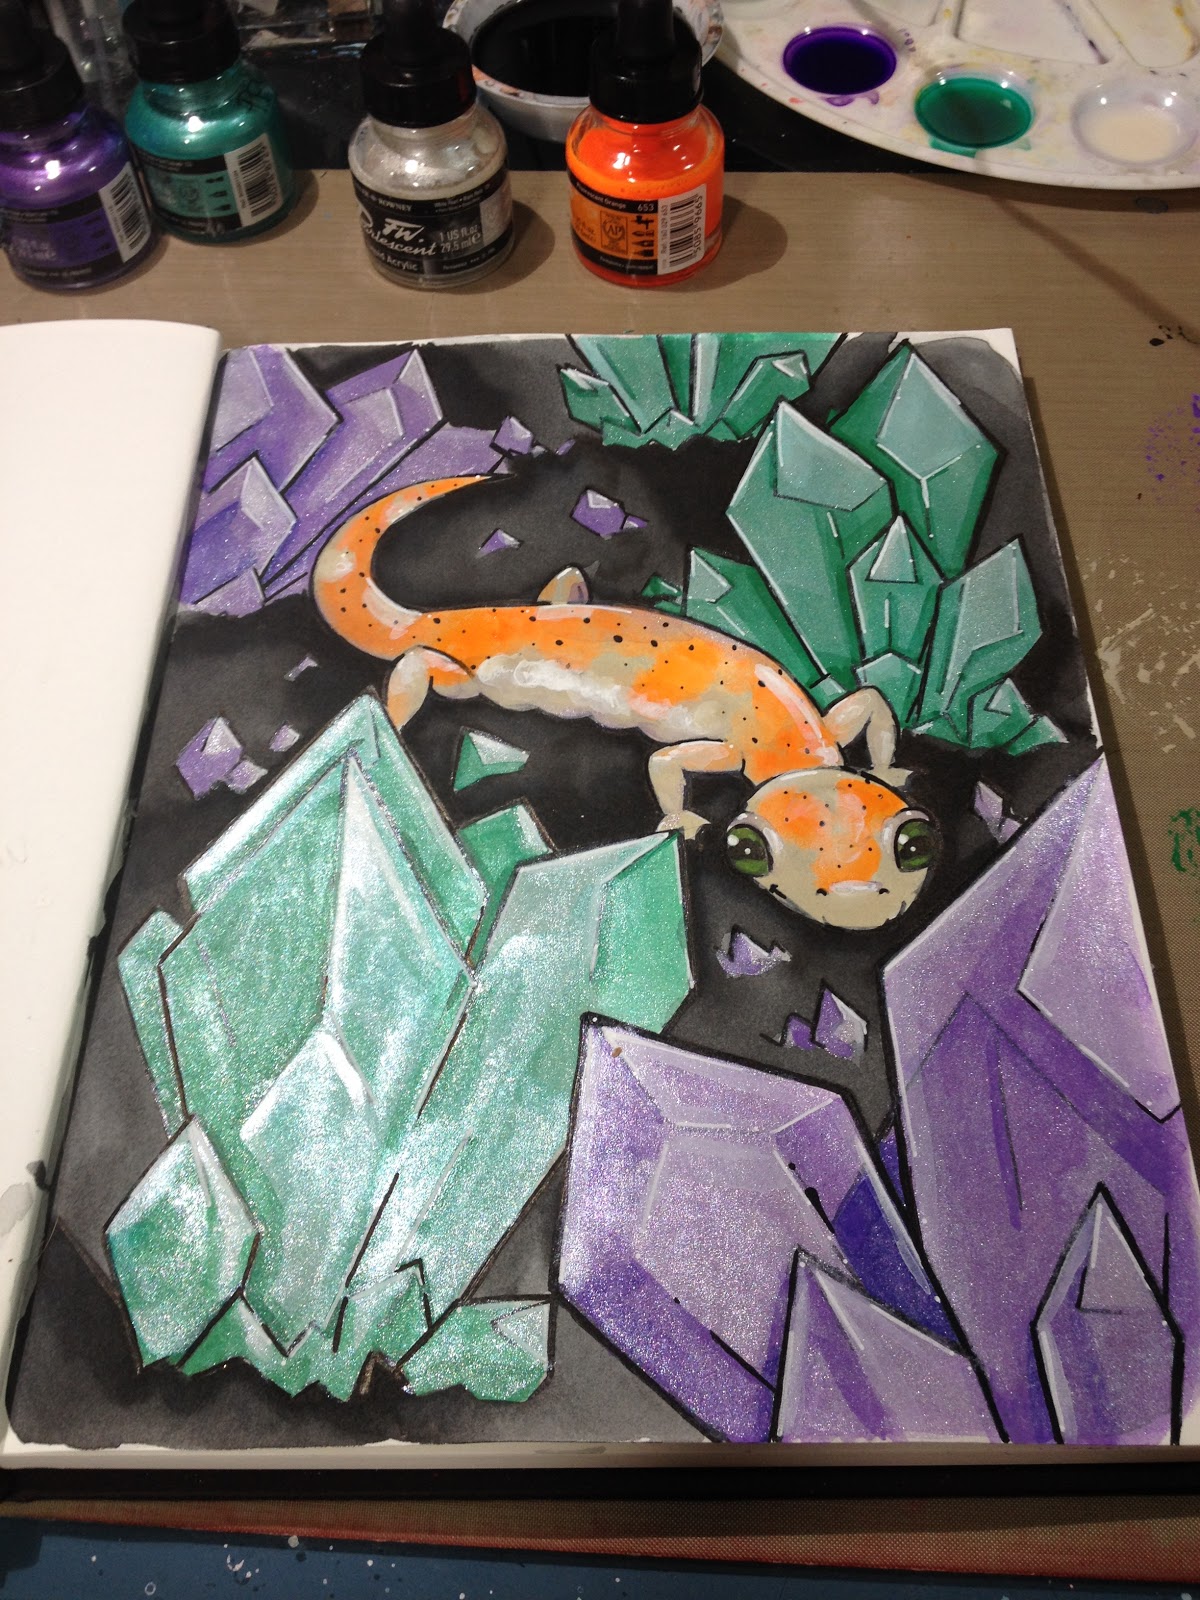
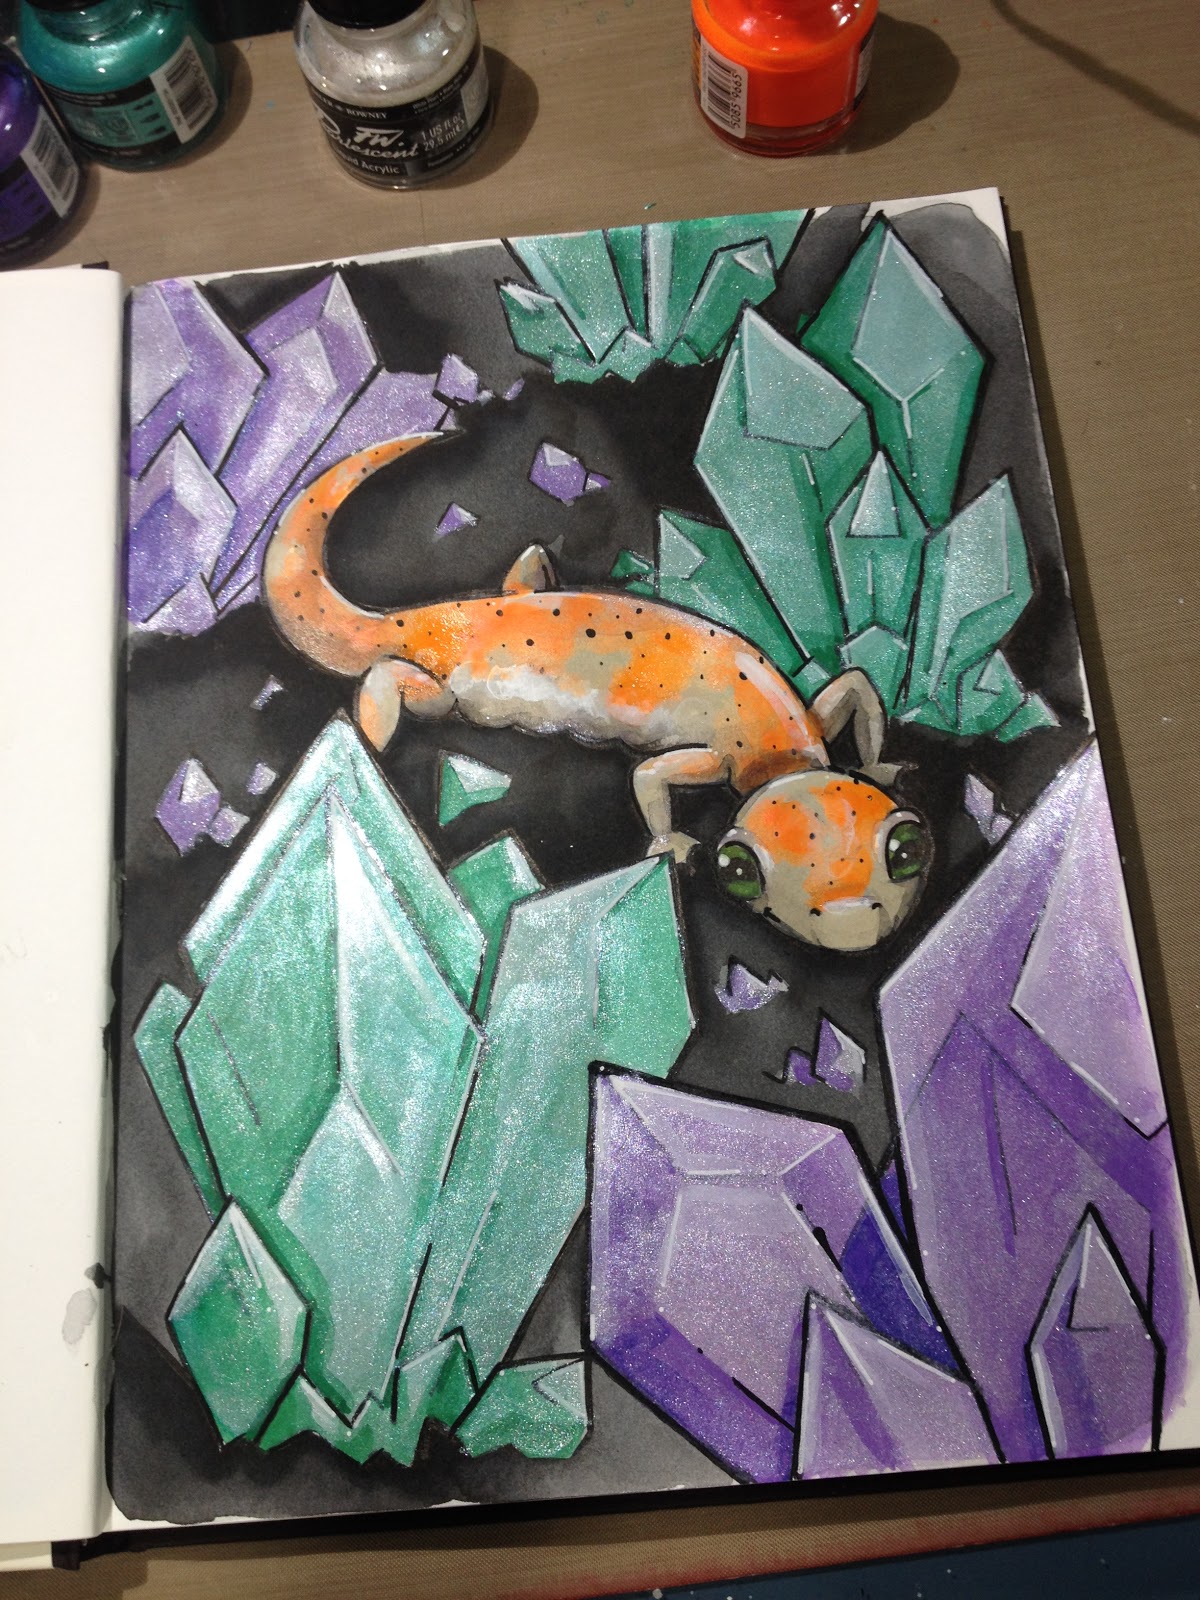

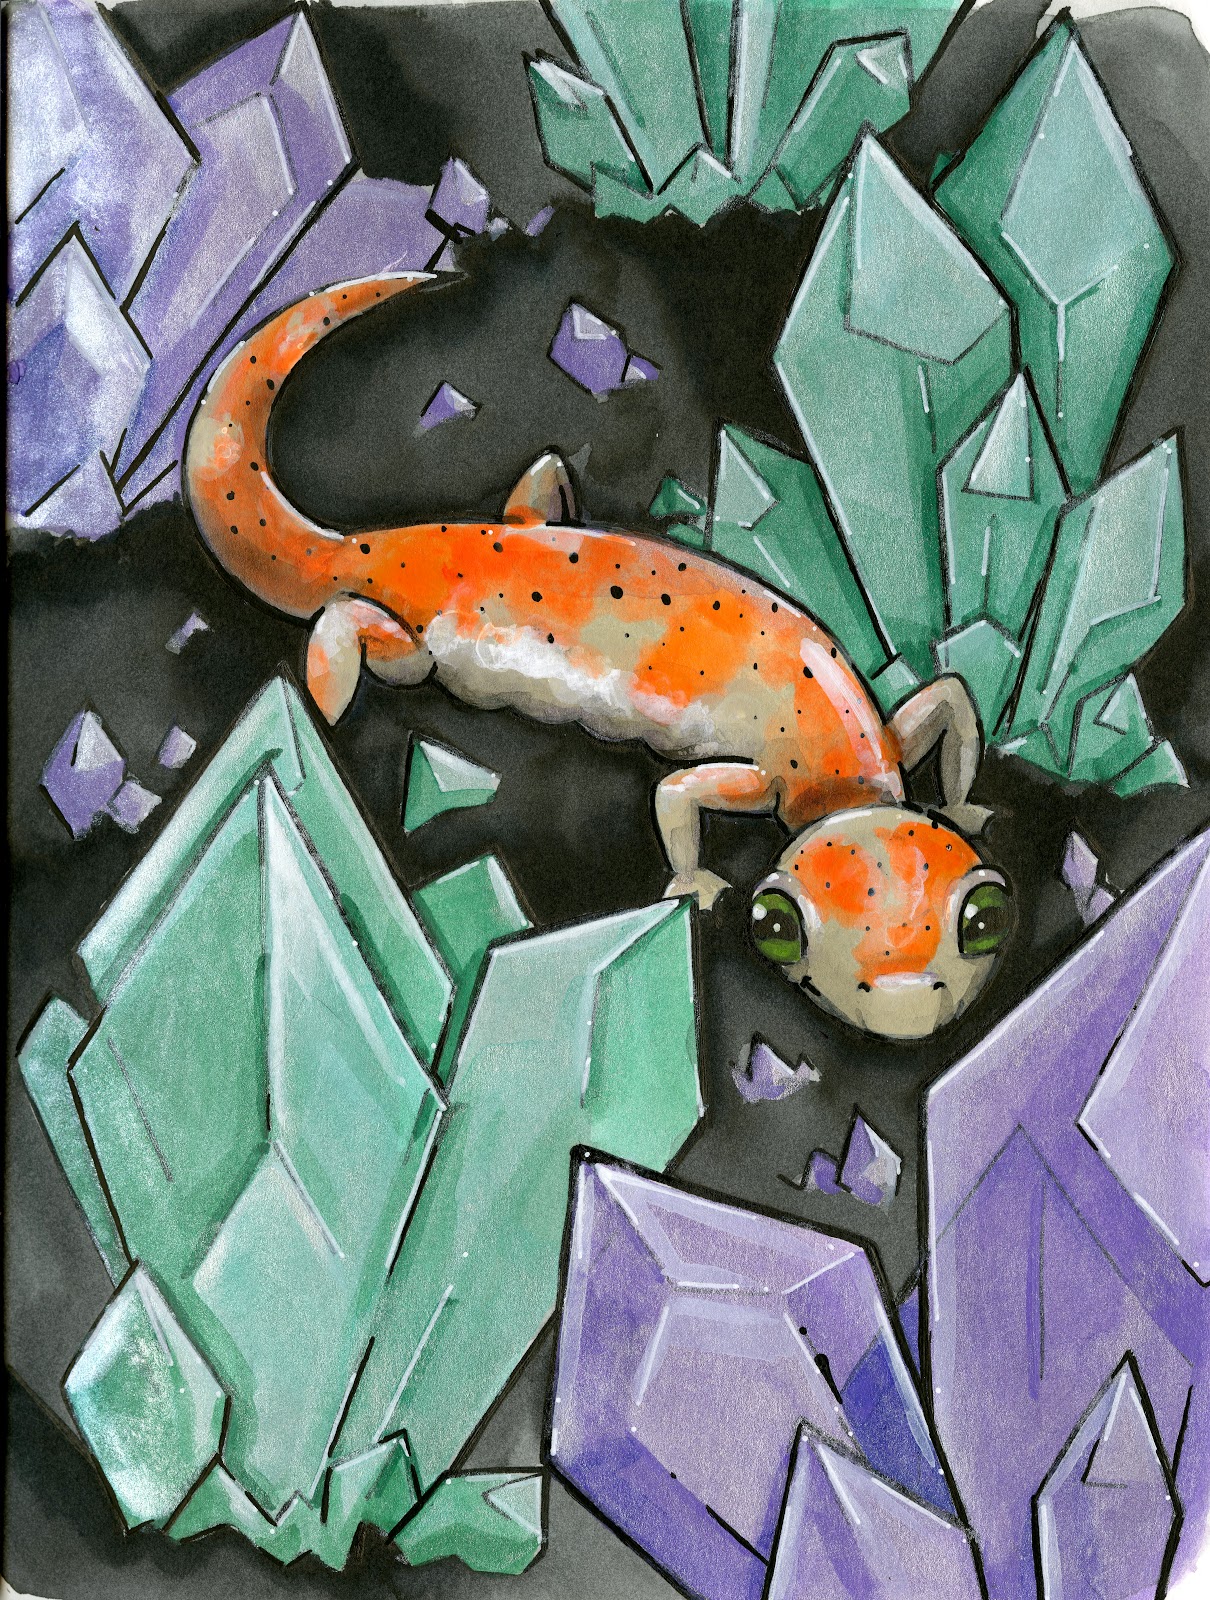 The Premium Box
Later this week, I'll release a post comparing my Basic and Premium Boxes, so for a more in depth review, please keep an eye out for that! I'm going to go over prices and value then.
May 2016 SketchBox Premium Unboxing- Becca Hillburn
The Verdict
Although I had fun playing with this month's Basic and Premium supplies, I found that I was not inspired to create anything using the supplies from just one box. Although FW Pearlescent inks are fantastic, I wasn't impressed with the Princeton brushes, and would have preferred one GOOD brush to five mediocre brushes. I found the Pentel Arts Colour Brush to be a confusing inclusion in a box aimed towards acrylic, and think that including one of the Montana acrylic markers (that were included in the Premium box) would have been a stronger choice.
Winner- ArtSnacks
Item for item, I feel like these two boxes are a tie, but there's a $10 difference to consider. ArtSnacks is $20 shipped, SketchBox Basic is $30, so for your money, ArtSnacks is a better value.
If you enjoy content like this, find it inspiring, informative, or helpful, or if I've ever helped you save money (through wise investment or through not purchasing a faulty product), please help others (and me!) by sharing content you enjoy to your social media. A timely share to your Facebook, Twitter, Tumblr, Pinterest, or G+ not only introduces others to my blog, helping them find content they will enjoy, but it helps me expand my audience. You can find handy social network buttons below this post, so please take a moment and share the good work! If you REALLY enjoy content like this, and would like to help me continue to create it, please consider funding future projects by backing my Patreon. And if you'd enjoy even more content, please check out my YouTube channel (all of the above videos are from there!) for lots of tutorials, reviews, demonstrations, and overviews that aren't shown on the blog.
Please consider donating to this blog or purchasing from Natto-shop (http://nattosoup.com/shop) if you want me to continue publishing quality content. All materials tested were purchased from my own pocket. Keep on Truckin' Nattosoup is not under any sponsorship.
Watercolor Marker Tutorial
Watercolor Marker Tutorial with NattosoupMaterials
Preferred brand of watercolor markers ( I like Winsor and Newton's watercolor markers)Watercolor paper of choices (I use all sorts of papers- Fluid, Canson XL, as well as nicer papers like Fabriano)Waterproof ink/tool of choice (I rely on the Sailor Mitsuo Aida for my inks!)Pencils, erasers of choice GatorboardMasking tape
Process
1. Pencil an image on nice watercolor paper that doesn't have too rough a texture (Fluid pads, Fabriano pretorn watercolor paper)
2. Ink with Sailor Mitsuo Aida waterproof brushpen. Available on Jetpens. Allow to dry overnight.
3. Erase pencil lines with Mono white vinyl eraser, available on Jetpens, brush away eraser crumbs with drafting brush.
4. Affix to Gatorboard with white masking tape.
5. Create a side palette with masking tape on gatorboard. Could probably just use the plastic Gatorboard, but it might stain. You can also use flat pieces of scrap plastic, like from packaging.
6. Apply ink to side palette, wet brush with clean water, begin to apply background.
7. Allow layer to fully dry, begin additional layers, as covered here.
8. If you want to build up significant saturation, allow paper to dry and apply directly from marker. Allowing paper to dry prevents pilling. If you want to blend out, apply water immediately. Some color can be lifted up with a paper towel while area is still wet.
Resources
Outside Resources
Materials Used in this Tutorial
Please consider donating to this blog or purchasing from Natto-shop (http://nattosoup.com/shop) if you want me to continue publishing quality content. All materials tested were purchased from my own pocket. Keep on Truckin' Nattosoup is not under any sponsorship.
May 20, 2016
Recommended Tools for the Aspiring Comic Artist
As a freelance illustrator and comic artist, I am hugely dependent on the goodwill and generosity of my readers. If you find content like this useful, please use the affiliate links in this post- it is no additional cost to you, and it helps me out a lot. If you would enjoy more content like this, please consider investing in Nattosoup Studio and becoming a Patron through
my Patreon
. Without your generosity, I see no reward for posts like this, so if it's helped you in anyway, please let me know, and please share it with your friends on your social networks. You can find handy social network share buttons at the bottom of the post. By sharing my posts with your friends and fans, you help me expand my audience, as well as establish credibility.
If you wish to redistribute this list for educational purposes, please let me know, and I can provide a for-print version. Otherwise, please do not repost without proper credit, posts like this take a really long time to put together.
Sketching GearPencils
Mechanical:
Color Eno (In Soft Blue, to hold my blue lead)- $3.92 on Amazon
Pentel GraphGear- Although this pencil is a bit pricey, I've used mine daily for over seven years, two and a half of which were a graduate program for comics, so you know it's seen a lot of mileage. Still goin' strong- $16.00 for the pencil and the clic eraser set on Amazon.
Leads
Color Eno .7 lead, Soft Blue- 3 pack, $8.99 on Amazon Prime
Pentel Hi Polymer .7 lead, B- $7.99 for 3 pack on Amazon Prime
Pentel Hi Polymer .7 lead, HB, $6.29 for 3 pack on Amazon Prime
Wooden Pencils:
Prismacolor Pencils for sketching
To see these in use, check out these sketchdumps and my post on using Strathmore Toned Tan (link) paper
Mixed set of Basic 24- $19.79 on Amazon with Free Shipping
Note: You don't need all of these colors, a selection is nice, but even starting with three is great. Stars denote what I consider to be essential.
Recommended Colors:
*Black
Sienna Brown
Black Raspberry
Tuscan Red
Black Grape
90% Warm Gray
Dark Umber
*Sepia
Black Cherry
*Henna
*Mahogany Red
*Terra Cotta
Openstock colors on DickBlick are $1.29 each, bulk discount starts at 12+
Wooden Pencils for Drawing
I don't use wooden lead pencils much anymore, but I relied heavily on them for graphite illustrations during undergrad. If you draw large images, you may find that wooden graphite pencils are easier on your hands than plastic or metal mechanical pencils.
I personally prefer softer leads- a light hand with a soft lead is easier to erase than a medium hand with a harder lead, as harder leads tend to cut into the paper, leaving graphite trapped in the groove. I recommend, based on personal preference:
H
HB
B
B2
Although I don't necessarily have a favorite brand of drawing pencils, I've been happy with Mono pencils in the past.
Mono $13.99 on Amazon with Free Shipping
Derwent $11.62 on Amazon with Free Shipping
General's $12.74 on Amazon Prime
Prismacolor $18.18 on Amazon Prime
Erasers
Mono Eraser- 10 pack- $5.95 on Amazon Prime
Mono Pen Style Stick Erasers, Round and .5mm with refills, $15.70 on Amazon
Pentel Clic Erase- $3.98 for a pack of on Amazon (add on item)
Pencil Sharpener
I've used Kum brand sharpeners for years, and I highly recommend them. They're consistently the best sharpeners I've ever used
Kum Double Hole Sharpener- Works well for pencil colors and jumbo pencils $4.50+ $5 shipping on Amazon
Kum Long Point- Good for sharpening pencils for sketching- $6.89 with Prime on Amazon
Papers
Sketching
Blick 9"x12" Sketchbook- $4.78 on DickBlick
OR
Strathmore 9"x12" Sketchbbook- $4.93 on DickBlick
Strathmore Toned Drawing Paper
Comic Paper
Strathmore 500 Series Plate Bristol- 11"x17- $30.27 for 24 sheets, +$4.95 shipping- Plate finish Bristol board has a smooth finish due to the clay that's added to the surface. Perfect for marker work, or juicy inks with technical pens or fude pens. Inks should be allowed to dry for 24 hours before erasing, to prevent ghosting.
Strathmore 500 Series Vellum Bristol- 11"x17"- $27.54 with Prime on Amazon Vellum finish bristol has a tooth to it, and is ideal for color pencil or inking techniques like drybrush.
Semi-Smooth- $26.67 on DickBlick for 24 sheets. Semi- Smooth finish bristol board is the median between plate and vellum- it has low texture that works well with markers, color pencils, and inks. Ideal for pencils.
Watercolor Papers
Note: Watercolor comics have different needs from watercolors. Painting a longform comic on a higher quality paper like Canson Arches would just be completely unfeasible due to the expense.
140 lb, cold press Canson XL Watercolor Paper- 11"x15"- $7.31 on DickBlick
140lb Canson Montval, 11"x15" (what I use for 7" Kara)- $7.59 on DickBlick
Inking
Fude pens- I use fude pens for a lot of my inking. Below are a few of my favorites.
Kuretake Fudegokochi- $6.58 on Amazon Prime
Sailor Mitsuo Aida (review link) $4.45 on Jetpens, discluding shipping
Kuretake No. 33 (large foam brush pen) (review link) $4.40 on Amazon Prime
Brush Pens
Pentel Pocket Brush (review link)$10.99 on Amazon Prime, includes two refill cartridges
Sakura Pigma Brush Pens- Available in 9 colors, including black. Alcohol and waterproof when fully dry.
Set of 6, $12.99 on DickBlick
Prismacolor Illustration Markers (these are brush pens)
Available in 8 colors as brush pens, technical pens in matching colors also available.
Openstock colors
Black
Blue
Brown
Green
Orange
Purple
Red
Sepia
Sets:
Brush Tip, all colors (8 pens)- $11.63 on DickBlick
Pentel Pocket Brush- $12.93 with Prime on Amazon- The only brushpen on my list with individual nylon bristles. Handy if you enjoy drybrush techniques, and useful for filling large areas. The ink inside is not waterproof.
Sakura Pigma Professional Brushpens- $9.99 for set of three on DickBlick
Set includes FB, MB, and BB
Technical Pens
I have mixed feelings about technical pens. I still use them from time to time, but I see so many aspiring artists relying entirely on technical pens. The sooner you learn how to use brush pens and brushes, the faster you'll be able to produce attractive work with lineweight. Technical pens are useful for drawing technical things- cars, buildings, objects with dead lineweight (no variation in lineweight), but can prove a hindrance in cartoony styles.
Good
Sakura Microns
8 Piece set, (Pigma Brush, Pigma 1.0 mm Graphic, .50 mm, .45mm, .35mm, .30mm, .25mm, .20mm) $16.64 on Amazon Prime
Better
Copic Multiliners
Set A-2- .03, .05, .1, .3, .5, .8, 1.0mm- $15.59 on Amazon
Best
Copic Multiliners SP- features a metal body with replaceable nibs and replaceable ink (reusable)
Set A- 10 Technical Pens- .03, .05, .1, .2, .25, .3, .35, .4, .5, .7, Brush Small- $43.85 on Amazon
Individual pens:
.5- $11.74 on Amazon Prime
.1- $9.49 on Amazon Prime
.3- $7.97 on Amazon Prime
Brush Small- $8.84 on Amazon Prime
Brushes
Inking with a brush seems like a daunting task- not just any brush is up to the task, and the wrong brush can really discourage artists from inking. While at SCAD, the Winsor & Newton Series 7 was highly recommended, but it can be a bit pricy. I've found that Jerry's Artarama's house brand, Creative Mark, makes an excellent substitute that costs far less.
I recommend purchasing your inking brushes in person if possible. A good inking brush comes to a sharp point with no stray hairs when wet.
Creative Mark Rhapsody
Size 00
Size 0
Size 1
Size 2
Inks
Winsor & Newton Waterproof India Ink- $8.89 on Amazon Prime (not Copic proof)
Kaimei Drawing Sol K (Copic Proof, not Waterproof)- $11 on Jetpens
TechnicalScanners
Scanner- Small Size
CanoScan 9000F MKII Color Image Scanner- I use the older version of this photo scanner at home, and I love how well it handles watercolors!
Large Format (not necessary, but helpful)- A large format scanner can be a hefty investment that may not be necessary for your work.
Brother MFC-6490CW Wireless All-in-One Inkjet Printer- I used this three in one scanner and printer while in graduate school at SCAD. The scan quality isn't the best, so save your watercolors for the CanoScan, but this machine is perfect for printing out blue lines and scanning your inks.
Epson Expression 11000XL- The pricetag on this scanner is hefty, so only purchase this scanner when you're serious about working mainly in watercolor, and need those high quality, large format scans. Photoshop can stitch your illustrations together, so the recommended CanoScan 9000F above will be able to handle most of your comic needs.
Printers
Inkjet- Inkjet is ideal because it's water-soluable, so when you print out bluelines, your watercolor washes will dissolve the ink, leaving just your pencils (or waterproof inks)
Canon Pro9000 Mark II- A large format inkjet printer that's perfect for printing out bluelines. This is what I use in my studio, and it can handle heavier papers like 140lb watercolor paper and even illustration board.
Laser printer- Laser printers use toner, which is perfect for printing out finished lineart. You can use watercolor or alcohol marker over lineart printed with toner.
Dell C1760nw Color Laser Printer- This small format printer can't handle a wide range of sizes (it performs best at 8.5"x11") but the print quality is good for convention merch and toner is cost effective compared to inkjet ink.
Tablet- Many artists work almost entirely in the digital realm. A tablet is a great investment, especially if you plan on taking freelance work. There are many affordable tablet options on the market, so there's definitely a tablet to suit your needs and budget.
For affordable tablet recommendations, please read Frenden's Yinova, Monoprice, and Huion reviews.
What I use:
Surface Pro 3- If you're thinking about a Cintiq or Cintiq Companion, I highly recommend you head out to Best Buy to test drive a Surface Pro. I love mine, and it works for almost everything I throw at it- it can handle Photoshop, large format scans, and functions as a regular laptop. I do all of my digital freelance work on this laptop, and most of my convention prep as well. This tablet is perfect for traveling- I've knocked out inks while waiting at airports, heck, I've inked while on the plane (once we hit altitude). This is a great alternative to Cintiqs, especially if you travel often. The hardware works well, but 3's are notorious for failure, and Microsoft's tech support is the worst I've ever experienced, so while I love my Surface Pro 3, I recommend not buying one unless you live near a Microsoft store, as their customer service is much better in person.
Intuos Pro 9"x11"- There are so many great Intuos alternatives on the market these days, I probably would have explored those before buying a tablet, but I've had this tablet for years. It's so large I can only use it at my desktop, making it impossible for travel.
Software
Photoshop- I've used Photoshop for years and while many of my comic friends are switching over to Clip Studio Paint (formerly Manga Studio), and are very happy with it's price and performance, I have trouble learning new software. I use Photoshop for color correction and digital corrections on traditional watercolor, and have been happy with the results and interface for years. I also use Photoshop for inking freelance work, but am open to switching programs to something that's lighter weight.
Adobe has switched to a monthly subscription service that may prove more affordable for many artists who use PS sporadically. The above link is for a free month trial.
InDesign- For a more affordable option, you can lay books out in Clip Studio Paint. A free option (that I can't vouch for) is Scribus, a desktop publishing app from the Libre Foundation.
Native Scanner Software (for my Epson printer)
Google Drive- I work with large files regularly, and I need to store archival copies of my comic pages at various stages. This eats hard drive space quickly, and it's handy to have backup storage in the cloud. I paid plans for both Google Drive and One Drive. Google Drive is currently longterm storage that I don't access often, but may need to give others access to.
One Drive- Is for short term storage that I can access on my Surface Pro and my desktop.
If you enjoyed this post, or found it useful, or maybe even inspiring please take a moment to let me know! I have a handy contact form in my left hand sidebar that will allow you to email me without ever leaving the blog. If you know someone who might also enjoy this post, please consider sharing it to your social networks using the handy links below. Not only will you help your friends out by introducing them to a new, useful resource, but you'll help me out by helping me expand my audience and build credibbility
Please consider donating to this blog or purchasing from Natto-shop (http://nattosoup.com/shop) if you want me to continue publishing quality content. All materials tested were purchased from my own pocket. Keep on Truckin' Nattosoup is not under any sponsorship.
May 18, 2016
Guest Post: Breakfast on a Cliff Process
When Jessica contacted me I requested that Sugartoast focus on how two creators collaborate to make a webcomic when the two creators must work long distance. What I didn't realize at the time was that half of team SugarToast is the artist
Kobacha
, who makes fantastic comic-assets and shares them on her DeviantArt. If you haven't given her DA a spin yet, I highly recommend you check it out!

Hello, readers! We are Sam and Jess, an artist/ writer team. We collaborate under the name of Sugartoast to create the Breakfast on a Cliff webcomic. Breakfast on a Cliff is a full-color, slice of life comic that follows the story of Cinna Okimura after he transfers to his new high school. Cinna must figure out how to do well in school and become super popular while still winning the all the ladies’ hearts (and possibly the heart of a new best friend while he’s at it).
 Cinna
Cinna
Even though we create the comic as a team, we follow the same basic comic process as other individual comic artists for bringing our ideas to life. Each page is planned, scripted, sketched, and inked.
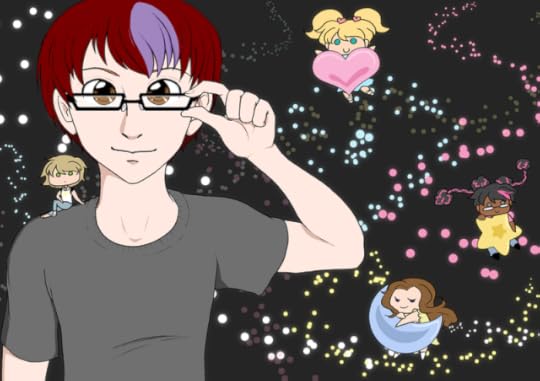 Cast of Breakfast on a Cliff Image from Kobacha's DeviantArt
During the planning stage, we talk about various plot points in the story itself. This usually involves events that are far-reaching and possibly a long way off from where we are currently in the story. As we were roommates when we first created Breakfast on a Cliff, we were initially able to discuss the plot in person and decide on events that would move Cinna and the rest of the characters from plot point A to plot point B. We no longer live together, so we plan out the comic in various Microsoft Office documents and discuss them via text or over Skype. Many of these discussions are silly and might have some relevance to whatever media Sam or Jess has been watching. A lot of what we discuss ends up retconned or thrown out.
Any ideas that are not thrown out are worked into the script. Jess is in charge of scripting out all of the events. Each script usually contains three or four “stories” that make up a comic chapter. Most of these stories are directly or loosely related to each other and chronologically follow Cinna’s various life events as he progresses through school. The scripts are composed mainly of dialogue and character actions with occasional mentions of setting or other points that are relative to scenes.The scripts are written in Word documents and stored in their own folder on DropBox.
As we work in primarily digital format, we also refer to the penciling stage as the sketching stage, Sam, usually sleep deprived, starts sketching based on the scripts. The scripts are generally written out so that they are suitable for 4 panels. Sam will look over the script and throw back any issues at Jess, usually without doing any thumbnailing prior. Any editing to the script is also done during this stage.
Because of the nature of Breakfast on a Cliff’s comic structure, there is a template which we generally work off of for each individual page. While this makes things a little faster, this does limit some expression on the page -- which we usually compensate for in the art.
Sketches are usually drawn in a color such as light blue or purple in Photoshop, as this helps keep things clean when it comes time to do lineart. The sketches are usually fairly loose, and don’t incorporate any background elements in great detail. Sometimes, backgrounds are indicated by simply writing a note as to what is supposed to be happening in the panel.
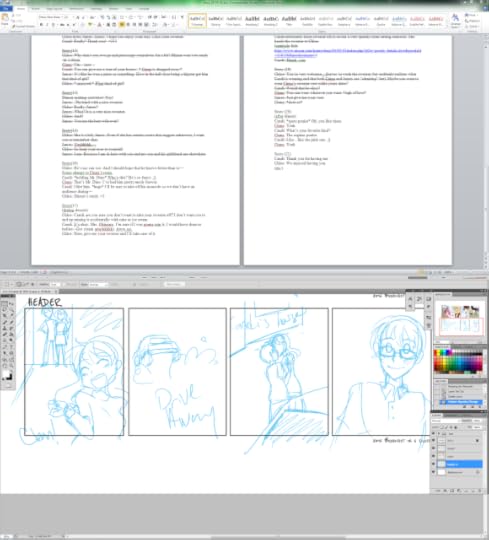
Penciling takes the longest as a panel can be redrawn several times to incorporate dialogue, basic background sketches, and whatever else may be needed. The dialogue is generally written or typed on the page to account for space needed for it, to help ensure consistent flow with the script.
Each comic page is inked and colored by Sam in Photoshop. She does lineart first in a layer that is separate from the sketches and then, in most cases, colors the entire comic afterward in another layer. The lineart is generally done using the Pencil tool in Photoshop, and is done in a way to make it easier to fill multiple areas for color.
Because we want to keep the art style simple, most of the coloring is done as flats without shading. Occasionally, Sam will host a Livestream as she inks and colors. Finished pages are saved as hi-res PSD files for future printing and as resized png files for posting on the comic site. Comic pages are also stored in their own folder on DropBox.
We try to keep all of our work for Breakfast on a Cliff organized on DropBox. We both have access to it and it serves as a handy place to store ideas, references, and materials for when one of us can’t get in touch with the other.
Since we work as a team, we try to split the work as evenly as possible. Sam is in charge of all of the artwork and other visual aspects of the comic, such as the main site’s layout. Jess is in charge of writing as well as uploading the comic pages and maintaining the various social media pages.
You can find Breakfast on a Cliff on Smackjeeves at boac.smackjeeves.com. For more of Sam’ s work, visit http://nagareboshi.org/. For more of Jess’s work, visit http://jazeki.deviantart.com/.
DeviantArt (Jess): http://jazeki.deviantart.com/DeviantArt (Kobacha): http://kabocha.deviantart.com/Webcomic: boac.smackjeeves.com
Tumblr: sugarytoast.tumblr.com
Twitter: https://twitter.com/SugaryToast
Comic only DeviantArt: http://sugarytoast.deviantart.com/
Please consider donating to this blog or purchasing from Natto-shop (http://nattosoup.com/shop) if you want me to continue publishing quality content. All materials tested were purchased from my own pocket. Keep on Truckin' Nattosoup is not under any sponsorship.

Hello, readers! We are Sam and Jess, an artist/ writer team. We collaborate under the name of Sugartoast to create the Breakfast on a Cliff webcomic. Breakfast on a Cliff is a full-color, slice of life comic that follows the story of Cinna Okimura after he transfers to his new high school. Cinna must figure out how to do well in school and become super popular while still winning the all the ladies’ hearts (and possibly the heart of a new best friend while he’s at it).
 Cinna
CinnaEven though we create the comic as a team, we follow the same basic comic process as other individual comic artists for bringing our ideas to life. Each page is planned, scripted, sketched, and inked.
 Cast of Breakfast on a Cliff Image from Kobacha's DeviantArt
During the planning stage, we talk about various plot points in the story itself. This usually involves events that are far-reaching and possibly a long way off from where we are currently in the story. As we were roommates when we first created Breakfast on a Cliff, we were initially able to discuss the plot in person and decide on events that would move Cinna and the rest of the characters from plot point A to plot point B. We no longer live together, so we plan out the comic in various Microsoft Office documents and discuss them via text or over Skype. Many of these discussions are silly and might have some relevance to whatever media Sam or Jess has been watching. A lot of what we discuss ends up retconned or thrown out.
Any ideas that are not thrown out are worked into the script. Jess is in charge of scripting out all of the events. Each script usually contains three or four “stories” that make up a comic chapter. Most of these stories are directly or loosely related to each other and chronologically follow Cinna’s various life events as he progresses through school. The scripts are composed mainly of dialogue and character actions with occasional mentions of setting or other points that are relative to scenes.The scripts are written in Word documents and stored in their own folder on DropBox.
As we work in primarily digital format, we also refer to the penciling stage as the sketching stage, Sam, usually sleep deprived, starts sketching based on the scripts. The scripts are generally written out so that they are suitable for 4 panels. Sam will look over the script and throw back any issues at Jess, usually without doing any thumbnailing prior. Any editing to the script is also done during this stage.
Because of the nature of Breakfast on a Cliff’s comic structure, there is a template which we generally work off of for each individual page. While this makes things a little faster, this does limit some expression on the page -- which we usually compensate for in the art.
Sketches are usually drawn in a color such as light blue or purple in Photoshop, as this helps keep things clean when it comes time to do lineart. The sketches are usually fairly loose, and don’t incorporate any background elements in great detail. Sometimes, backgrounds are indicated by simply writing a note as to what is supposed to be happening in the panel.
Penciling takes the longest as a panel can be redrawn several times to incorporate dialogue, basic background sketches, and whatever else may be needed. The dialogue is generally written or typed on the page to account for space needed for it, to help ensure consistent flow with the script.
Each comic page is inked and colored by Sam in Photoshop. She does lineart first in a layer that is separate from the sketches and then, in most cases, colors the entire comic afterward in another layer. The lineart is generally done using the Pencil tool in Photoshop, and is done in a way to make it easier to fill multiple areas for color.

Because we want to keep the art style simple, most of the coloring is done as flats without shading. Occasionally, Sam will host a Livestream as she inks and colors. Finished pages are saved as hi-res PSD files for future printing and as resized png files for posting on the comic site. Comic pages are also stored in their own folder on DropBox.
We try to keep all of our work for Breakfast on a Cliff organized on DropBox. We both have access to it and it serves as a handy place to store ideas, references, and materials for when one of us can’t get in touch with the other.
Since we work as a team, we try to split the work as evenly as possible. Sam is in charge of all of the artwork and other visual aspects of the comic, such as the main site’s layout. Jess is in charge of writing as well as uploading the comic pages and maintaining the various social media pages.
You can find Breakfast on a Cliff on Smackjeeves at boac.smackjeeves.com. For more of Sam’ s work, visit http://nagareboshi.org/. For more of Jess’s work, visit http://jazeki.deviantart.com/.
DeviantArt (Jess): http://jazeki.deviantart.com/DeviantArt (Kobacha): http://kabocha.deviantart.com/Webcomic: boac.smackjeeves.com
Tumblr: sugarytoast.tumblr.com
Twitter: https://twitter.com/SugaryToast
Comic only DeviantArt: http://sugarytoast.deviantart.com/
Please consider donating to this blog or purchasing from Natto-shop (http://nattosoup.com/shop) if you want me to continue publishing quality content. All materials tested were purchased from my own pocket. Keep on Truckin' Nattosoup is not under any sponsorship.
May 16, 2016
Guest Post: A Voyage to Panjikant, a graphic novel by Margueite Dabaie
Hi, everyone! Just a quick introduction—my name is Marguerite Dabaie. I live in Brooklyn and draw comics and illustrations. The comic I’ll be talking about today, A Voyage to Panjikant, is historical-fictional project about the 7th-century Silk Road, and I researched the topic for two years before I began scriptwriting/drawing. I’m currently running a Kickstarter campaign to publish the book—here’s my introduction on the KS page:
A Voyage to Panjikant is a work of historical fiction set in the 7th century and follows the story of sixteen-year-old Upach, a headstrong and spunky teenage girl whose greatest desire is to follow in her father Shafnoshak's footsteps and travel the Silk Road in order to become a successful merchant. The problem, however, is that women were rarely afforded the freedom to leave their hometowns.
While I plan on distributing the book outside of Kickstarter, almost all of the rewards are only available through the campaign, so please check it out!
How I create my Voyage to Panjikant pagesGoing into this project, I wanted the flexibility of digitally inking the pages with the ability to hand-watercolor, as well. The reason is because I work much faster digitally than I do by hand, but I knew from the get-go that I wanted the pages to be watercolored and that digital watercoloring doesn’t look nearly as good as the real thing (yet).
The reason why I have a mental clawlike grip on the idea of these pages being watercolored is because I want to evoke the look of Tang-Dynasty pottery, which is runny and glazy and super colorful. I really wanted to make the pages look fresh and bright (art and architecture in Central and East Asia was colorful, after all), so I needed to definitely color the pages, and the “controlled chaos” that watercolor brings is perfect because it hearkens back to the work actually being produced back then.


I mean, check these out… I love how runny the glaze is. Awesome.
My first step is to draw roughs: What I used to do is draw these with a pencil in a cheap lined notebook (the idea being that sometimes I want to get away from the computer), but I found that this ends up being too inefficient for me, so I’m going to go back to digitally drawing the roughs on a layer in the same file as the final inks.
 An example of one of my incredibly rough roughs.
My digital inking game is very rudimentary—I just use the basic brush in Photoshop with shape dynamics turned on. I’ve been slowly getting into using Manga Studio as well, but… old habits die hard. I have a tablet monitor that I use at these times that greatly speeds up the process.
 Going to town with the tablet monitor.
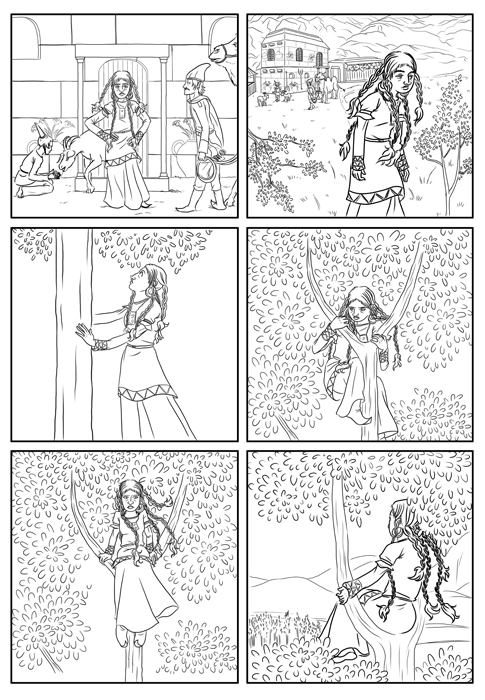 Here’s the inked version of the rough drawing above. Looks a little cleaner, I hope.
I create a lot of patterned fields throughout the comic. In this dream sequence, my protagonist is dreaming up a lot of patterns. I will draw one part of the pattern on a separate layer and either create a pattern through the “define pattern” option and fill an area with a pattern that way, or I will hand-tile the pattern by using separate layers. Redundant, but for the larger patterns (such as the one on the man to the far left), it gives me more control.
The typeface I use is my handwriting—I used myscriptfont.com to create a font out of my own handwriting and I use it throughout. I tried experimenting with other typefaces at first but none of them to me “flowed” as well as my own handwriting did.

A quick example of the handwriting-turned-typeface.
Once it’s all inked, it’s time to print it out!
I print the pages on Rives BFK paper—which is actually a printmaking paper, not a watercolor paper. The reasons why I chose this paper are A) it’s cheaper than comparatively good watercolor papers like Arches, Canson, etc., B) the thinner paper (175 gsm) works and is thin enough for the copier, and C) it’s resilient enough to withstand scrubbing in case I need to lift some of the color.
I cut the paper down to size and take them and the digital files to a very, very small printer I know—really he’s a one-man show who’s able to do what I ask very affordably. He actually had no idea if the lines would be waterproof after printing the work out and it turns out they work just fine! So it’s a win/win for me.
Now it’s watercolor time! Due to size constraints, I tend to color the pages two at a time, though if I can devise a way to paint more, I will (Brooklyn apartment, after all, ha ha). I use multiple watercolor palettes, label the colors I have in each cup, and love using the tube paints.

For each page, I make small printouts x4 on crummy paper and paint watercolor sketches so that I can play around with color variations and have a more concrete plan of attack before I begin painting the final pages.

I paint wet-on-wet because I want that aforementioned controlled chaos and really want the colors to blend on the page more than through my mixing.

Starting out with the basic background colors…

Adding yellow ochre to the cobalt violet and watching the two mingle on the page.

Stepping back. I wanted the older gentleman in the background to blend in slightly, so I used viridian (a rather transparent color) as the baseline on the green to assure that I’d be able to paint colors over it.

Here’s how the final page ended up looking.
You can find a short video where I watercolor one of my Panjikant pages here.
All that’s left is to scan the pages back in and do some minor digital correcting and they’re ready to go!
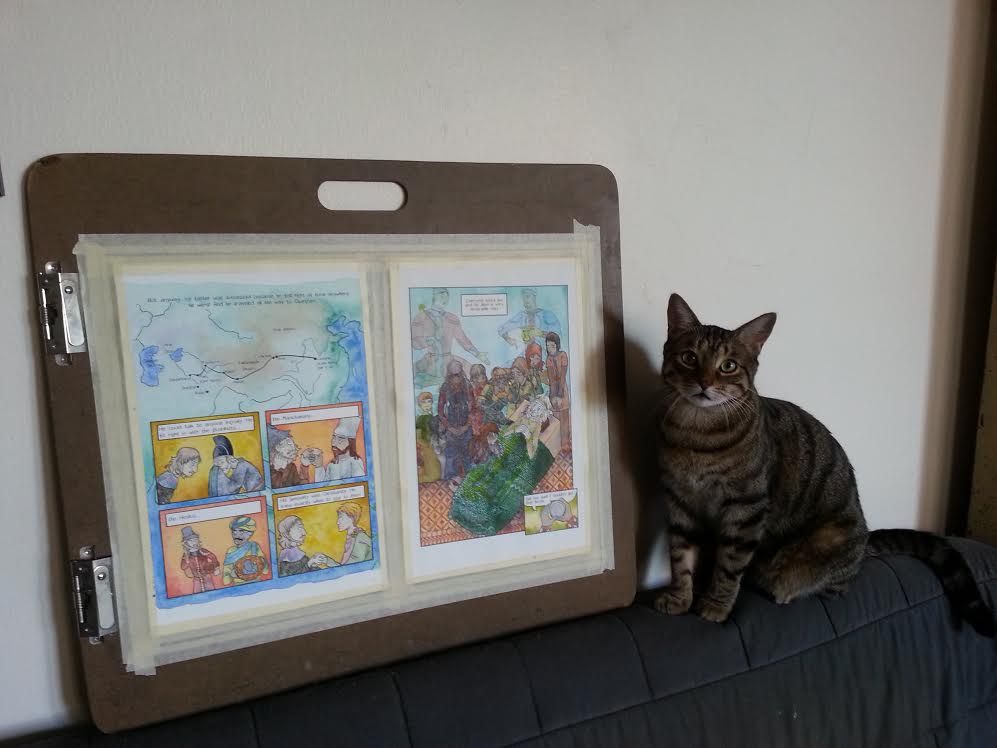 Clearly, my cat is also an enormous help with the process.
More about the Kickstarter
The Kickstarter campaign is to cover the printing costs for “A Voyage to Panjikant.” The book will be hardcover, 6” x 9”, 190 pages, and in full cover.
It was originally going to be perfect-bound softcover, but the campaign has since reached a stretch goal and all backers will receive hardcover books!
You already met your goal—why should I back it now? While I plan on selling the final book outside of the campaign, the price I set for backers to receive a copy of the book ($20) was for the softcover only—I plan on selling the hardcover books at a more competitive rate. Anyone who backs the Kickstarter at $20 and up will receive the hardcover version of the book. This is a great chance to snag a hardcover copy of Panjikant at a reduced price! Also, almost all of the backer rewards I offer are exclusive to the campaign and will not be sold outside of it. Some reward examples: a bookplate with a hand-illustrated sketch, handmade handkerchiefs with patterns and fabrics created exclusively for the campaign, and hand-watercolored prints featuring an original drawing unused in any print previously.
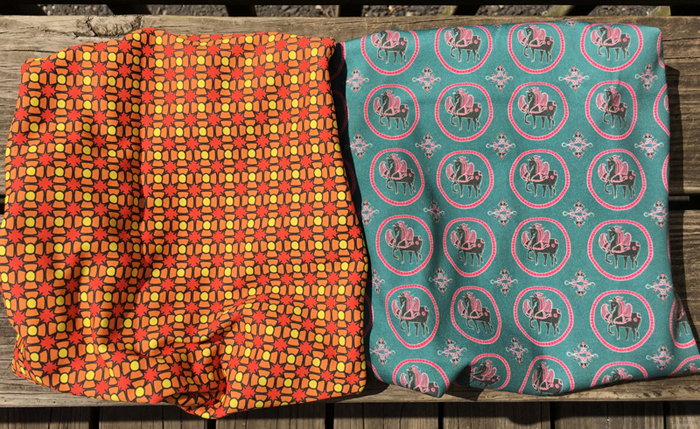
Here’s the fabric I’ll be using for the handkerchiefs. What I do is digitally create and color the patterns in the same way that I describe above, use Spoonflower to print my digital designs onto fabric, and hire a friend who is incredibly good at sewing to make the hankies themselves.

These are examples of the hand-watercolored prints, though they will be a totally new design exclusive to the Kickstarter. Using the same copy shop I go to for my pages, I create black-and-white prints of a drawing and watercolor each one in a different way, assuring that each print is a unique piece.
How much time is there left?
ONE MORE WEEK! And then it’s over!
Links, please!
Kickstarter: http://kck.st/1Uc9d5E“A Voyage to Panjikant” project page: http://panjikant.iranhistoryforum.com
Marguerite’s Twitter: http://twitter.com/mdabaie
Marguerite’s Facebook: https://www.facebook.com/margo.dabaie
Thanks so much for you time!
Please consider donating to this blog or purchasing from Natto-shop (http://nattosoup.com/shop) if you want me to continue publishing quality content. All materials tested were purchased from my own pocket. Keep on Truckin' Nattosoup is not under any sponsorship.

May 11, 2016
YouTube: 1K Giveaway Winner Announcement
1K Subscribers Giveaway Annoucement-BeccaHillburn
If you missed out on the 1k Giveaway, fear not, because I have at least two more planned. 2.5k subscribers will see a Comic Supply Giveaway (I've already started ordering the goodies!) and 5k subscribers means a watercolor supplies giveaway, so if you like those sorts of things and you aren't a subscriber yet, get on it! And if you ARE a subscriber, please consider sharing my channel with your arty friends and family! I regularly release art tutorials, reviews, and demonstrations to help others wet their artistic feet, feel more confident in their art, and buy the supplies that will help them achieve the results.
Please consider donating to this blog or purchasing from Natto-shop (http://nattosoup.com/shop) if you want me to continue publishing quality content. All materials tested were purchased from my own pocket. Keep on Truckin' Nattosoup is not under any sponsorship.


