
Ruth Soukup's Blog, page 78
June 26, 2015
10 Pantry Staples to Always Keep on Hand
Today I am happy to welcome back my friend Cherie Lowe from the Queen of Free, who has graciously joined us here at LWSL as a regular monthly contributor. Cherie is the author of the amazing book, Slaying the Debt Dragon, which she wrote after paying off more than $127,000 in debt! I am so excited to have her bringing her wealth of knowledge & experience on this subject to LWSL–please join me in making her feel right at home!
* * *

“There’s nothing to eat in this entire house!” Raise your hand if you’ve ever uttered these emphatic (and probably untrue) words. It’s easy to feel overwhelmed when you’re hungry. In fact, I get more questions about remaining on budget in the category of food (grocery shopping, dining out, and meal planning) than any other area. It seems like feeding our faces and saving money run counterproductive to one another. But I have good news and hope for you, friends.
You don’t have to live like that.
You can prepare meals at home, saving time and money, while even preparing healthier foods. You don’t have to feel overwhelmed at dinnertime. You don’t have to resort to quick fixes or frozen foods, even. And you can definitely avoid the drive-through trap. Your pantry is your first and mightiest weapon of defense when it comes to defeating your panicked hangry state of being and helping you stay on budget. But what should you purchase and how can you keep it stocked? I’m so glad you asked.
I strongly believe every family should have a “Pantry Top Ten.” While you don’t have to make David Letterman styled witty cracks about each item on your list, you do need to identify the foods you eat most frequently and staples that assist in making quick and easy meals. Depending on their tastes and budget, every family’s top ten will look a little bit different. But the mere practice of defining ingredients you can maximize in your kitchen for multiple meals will help you recognize to save money, time, and your sanity when it comes to feeding your family.
With that being said, I’d love to share our family’s Top Ten. Perhaps some of these items will land on your list, too.

In the Pantry
Peanut Butter
Does it get any more classic than a PBJ? Peanut butter (or another nut butter if your household has an allergy) can be a quick and filling food when you need to get your hunger under control. Even if it just fills the gap as a snack before you prepare a meal, it will satiate quickly. Use it in sandwich form or mix into oatmeal for a breakfast that packs a punch.
Rice
Rice is a suitable side and can even function on its own as a main dish. Used in a number of world cuisines, whether you fry it, serve it with a curry, or build a burrito bowl with rice as a base, you’ll be a kitchen hero if you keep plenty on hand. You can even purchase rice in a 25 lb. bag to save per ounce and rarely run out. Depending on your family’s flavor and nutritional choices, you can choose from a wide palate of rice varieties. Our family loves Jasmine rice because of its sweet flavor and ability to cook quickly.
Beans
Of course you can’t mention rice without following it with its fellow frugal food friend, beans. Canned or dried, beans are one of the most economical foods certain to fill you up and provide a protein wallop. I try to keep both dried and canned black beans on hand. When I have time, I soak the beans overnight in my crockpot; rinse, drain, refill with water and then cook all day long on low. Then I freeze them in individual bags. However, there are some nights when I use a can in chili or as a side dish.
Pasta
Gluten free, whole wheat or plain ‘ole pasta, you can choose your favorite shape or even flavor. No matter your preference, you need to keep a box or two of pasta on hand. Its versatility allows you to use it in salads, in soups, as a main dish, or on the side of your main course. Quick and filling, pasta allows you to fill your family at a low price.
Bread
It’s always a good idea to have a loaf or two of bread on hand. Whether you’re building your favorite sandwich or whipping up some French toast, bread is affordable. When you find a good deal on your favorite brand, purchase a couple of extra loaves and keep them in your freezer until you’re ready to use them.
Applesauce
It’s not exactly a fancy side dish but especially if you have kids, this fruit source fits the bill. Both incredibly economic and with a long shelf life, applesauce helps keep your costs down and bellies full.
Salsa
It’s rare that there’s not an extra jar of salsa on our on our shelves. It’s just one of those foods that you don’t realize you need until it’s all gone. Add it to a mashed avocado for a delish dip for chips and veggies. Top that those beans and rice with it. Use it on soups or on top of baked potatoes. Salsa has a low price tag and high flavor.

In the Fridge/Freezer
Cheese
I realize cheese isn’t shelf stable and so technically it’s stored in your fridge or freezer, not the pantry, but everything is better with cheese. Top eggs or sandwiches or pasta. Melt on chips or serve on a salad. Make homemade pizza or a yummy casserole. Cheese flexes its meal (and snack) muscles in a number of directions and almost everyone loves it.
Eggs
Whether whipping up some famous chocolate chip cookies or making a quick sandwich, eggs are a staple we always keep on hand. Fried rice, French toast, or a simple egg noodle can all be made with few other ingredients and eggs. Once again, you’ll need to store them in the refrigerator, not the pantry. If someone in your family has an allergy to egg, look for an egg replacer that might fill the same role.
Peppers, Onions, & Mushrooms
I grouped these three veggies together for a reason. For our family, these three veggies can work in a number of foods. We use them as pizza toppings and in fajitas. We top salads and sometimes sandwiches with them. They’re easy to whip up in an omelet or add to pasta. When you get home from the grocery store, go ahead and chop them and store in separate airtight containers. Already prepared and at your finger tips, you’ll easily prepare meals without having to spend extra time chopping or thinking about what to fix.
* * *
I’d love to know what’s on your top ten list! What items would meet your family’s unique needs and tastes? What sorts of dishes do you regularly prepare that would benefit from a supporting cast of ingredient characters like these staples? Why not crack out a pencil and paper and begin drafting your Pantry Top Ten today!
Cherie Lowe is an author, speaker and hope bringer.
Her book Slaying the Debt Dragon details her family’s quest to eliminate over $127K in debt in just under four years. As her alter ego the Queen of Free, Cherie provides offbeat money saving tips and debt slaying inspiration on a daily basis.
Pin It
The post 10 Pantry Staples to Always Keep on Hand appeared first on Living Well Spending Less®.


June 24, 2015
Easy Chicken Satay


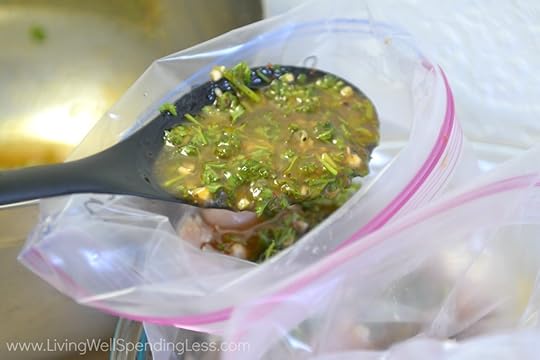
Our theory here at LWSL is that you can never have too many quick & easy freezer meals ready to go, especially ones that use budget-friendly chicken! Of course the same old chicken can get boring fast. This tender, juicy, flavor-packed Easy Chicken Satay is a great way to mix things up! My family couldn’t get enough of the yummy peanut sauce, and I loved that it was another quick & easy freezer meal to add to my rotation!
To make it as part of a freezer cooking day, just split the marinade & chicken into multiple bags, then throw it right into the freezer–no cooking required! Making it ahead of time is not necessary, though, as it is equally delicious just marinated in the fridge for about 30 minutes.
You can use any type of chicken but my family much prefers the boneless, skinless chicken thighs, which are a darker, juicier meat and also tend to be cheaper than the boneless skinless breasts. Traditional satay is grilled on skewers, but you can easily skip that step–the flavor will still be the same!
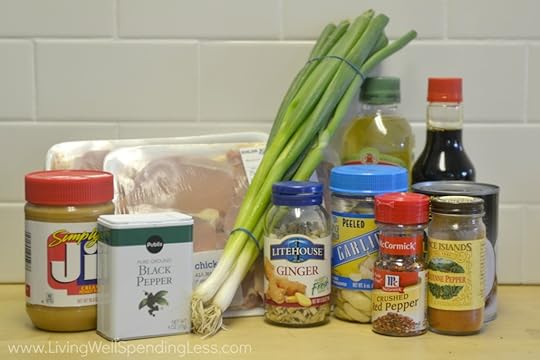
Here is what you need:
1 bunch green onions
1 can coconut milk
2 teaspoons cumin
4-6 cloves of garlic, minced
2 teaspoons brown sugar
1 teaspoon black pepper
1 teaspoon cayenne pepper
1 1/2 teaspoons freeze dried or fresh grated ginger
3-4 pounds boneless, skinless chicken
Peanut Sauce
1 cup creamy peanut butter
3-4 cloves garlic, chopped
2-3 tablespoons soy sauce
2-3 tablespoons brown sugar
1/4 cup warm water
1-2 tablespoons milk
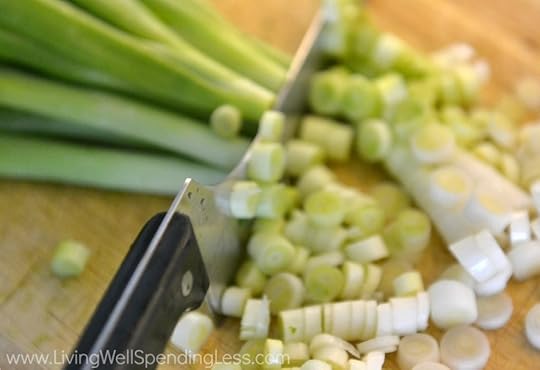
Step 1: Chop green onions and set aside. Chop or mince garlic and set aside.

Step 2: Mix together coconut milk, cumin, garlic, ginger, brown sugar, black pepper, cayenne pepper, green onions and garlic.

Step 3: Divide chicken into two gallon size freezer bags (be sure to label bags first!) Divide marinade into bags over top of chicken. Freeze until needed.

Step 4: To make peanut sauce; chop garlic and mix with peanut butter, soy sauce, brown sugar and warm water. Divide into 2 bags and be sure to label bags first. Freeze until needed.

Step 5: Thaw chicken; if kabobs are desired, cut chicken into smaller pieces and thread onto skewers.

Step 6: Grill 5-7 minutes on one side, then turn over and grill 5-8 minutes longer. Alternate directions: Arrange chicken in casserole dish and bake at 400 degrees for 30-40 minutes.
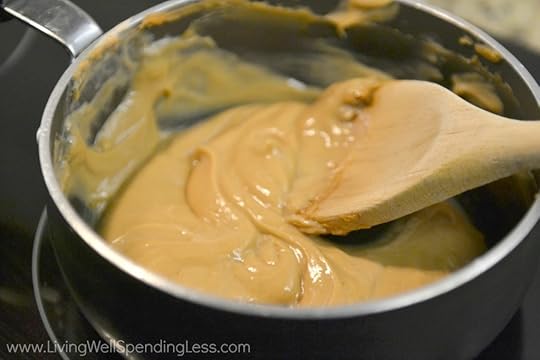
Step 7: To reheat the peanut sauce, put in a small sauce pan on low and add 1-2 tablespoons of milk. (Depending on how thick you like your sauce) Keep stirring until defrosted and heated through.

Step 8: Serve chicken with peanut sauce and a side of rice.

Print This!
Recipe: Easy Chicken Satay
Summary: This simple chicken dish is packed with flavor and served with a yummy peanut sauce!
Ingredients
1 bunch green onions
1 can coconut milk
2 teaspoons cumin
4-6 cloves of garlic, minced
2 teaspoons brown sugar
1 teaspoon black pepper
1 teaspoon cayenne pepper
1 1/2 teaspoons freeze dried or fresh grated ginger
3-4 pounds boneless, skinless chicken
Peanut Sauce (for cooking day only)
1 cup creamy peanut butter
3-4 cloves garlic, chopped
2-3 tablespoons soy sauce
2-3 tablespoons brown sugar
1/4 cup warm water
1-2 tablespoons milk
Instructions
Chop green onions and set aside. Chop or mince garlic and set aside.
Mix together coconut milk, cumin, garlic, ginger, brown sugar, black pepper, cayenne pepper, green onions and garlic.
Divide chicken into two gallon size freezer bags (be sure to label bags first!) Divide marinade into bags over top of chicken. Freeze until needed.
To make peanut sauce; chop garlic and mix with peanut butter, soy sauce, brown sugar and warm water.
Thaw chicken; if kabobs are desired, cut chicken into smaller pieces and thread onto skewers.
Grill 5-7 minutes on one side, then turn over and grill 5-8 minutes longer. Alternate directions: Arrange chicken in casserole dish and bake at 400 degrees for 30-40 minutes.
To reheat the peanut sauce, put in a small sauce pan on low and add 1-2 tablespoons of milk. (Depending on how thick you like your sauce) Keep stirring until defrosted and heated through.
Serve chicken with peanut sauce.
Preparation time: 5-7 minutes
Cooking time: 12-14 minute(s)
Number of servings (yield): 4

* * *
Do you like your peanut sauce spicy or sweet?
Pin It
The post Easy Chicken Satay appeared first on Living Well Spending Less®.
June 22, 2015
How to Organize a Garage Sale

I’ll be honest. I’m not a huge fan of garage sales, even though I’ve organized quite a few of them over the years. My personal opinion is that they are a lot of work–more work than they are worth! I would personally rather get a higher price on my big-ticket items by selling them on Ebay, Craigslist or Facebook, and then donate the rest to charity.
However, there are many, many people who would vehemently disagree with me, and that’s okay! You might live in area where garage sales are a booming business, or you just might not want to mess around with trying to sell things online, and instead just want to get it all done in one shot. That’s okay too.
In any case, there’s no denying garage sale season is upon us, and if you are going to host one, this is the time to do it! Of course knowing exactly where to start can be a little overwhelming, especially if you’ve never hosted one before.
The key is to take it one step at a time! Here is how to organize a garage sale from start to finish, in 9 simple steps:

1. Gather your items
First things first, assemble the items you wish to get rid of. As you’ve been spring-cleaning and organizing your house, you may be accumulating a fairly sizable “donate or sell” pile.
If you’re afraid you don’t have quite enough to warrant your own sale, consider partnering with a few neighbors or friends. Garage sales are most successful when they offer lots of small “impulse buy” items (or well-promoted big ticket items).
As you’re assembling, do it with the mentality that nothing will be returning to your house. Say your goodbyes and resolve that whatever remains unsold will be tossed or donated (and not saved for a future sale).

2. Make sure a garage sale is your best option
When it comes to selling your stuff, there are several methods to choose from and each works better for different items. Explore eBay, Craigslist and even Facebook as potential sale-sites.
As a general rule of thumb, eBay is great for collectable, higher-value or easy-to-ship items. Things that are name-brand or items that have a larger price tag will find the best buyer on eBay (provided you’ve sold before and have a decent rating).
If eBay seems a little overwhelming, upscale consignment shops are sometimes an option for clothing or brand name goods. Handbags, coats and even home décor can fetch great returns.
Craigslist works well for items you wish to sell locally, like furniture, strollers, sports equipment and things that don’t necessarily have a niche market, but are not impulse buys. Facebook is free and you can enlist your friends as possible buyers, so it’s always worth a try.
Garage sales are the best method to attract impulse buyers. Garage sale patrons are often looking for a bargain that’s easy to carry out and take home. This isn’t to say you can’t sell a sofa or put out your Barbie collection at a garage sale, but you might not get the best return. Things like kitchenware, clothing, toys, books, knickknacks and decorative items go great at garage sales.

3. Set prices to sell
Get some tags and mark items to move. Be prepared to make some deals and throw in some extra items to sweeten the deal. Garage sales are often hit heavily in the morning (when the selection is best) and then start to dwindle down as the day wears on. You can attract shoppers throughout the day by advertising 50% off at a set time of day or 2-for-1 deals to keep things moving.
Keep items marked with large, clear prices. Buyers will pull over if they see something that looks like a great bargain. Be sure to provide shopping bags or boxes for your shoppers. Keep some newspaper handy to wrap up breakable treasures.

4. Pick a prime date
Does your neighborhood have an annual garage sale? Is the local fair in town and driving traffic through your area? Is there an art walk in your neighborhood? These are the times to plan your sale. Base your marketing on the times when your town is most popular.
If you live in a college town, consider a sale the weekend that campus opens to attract students seeking furnishings and décor. The weekend that everyone goes home after graduation can also work because bargain shoppers will be searching for deals that college students leave at the curb as they unload their dorm rooms.
If you live somewhere that’s popular for holiday weekends, then host a sale for travelers and weekend visitors over Memorial Day or Labor Day weekend. However, if you live in a town that people LEAVE for holidays, you may miss your target audience at those times.

5. Let people know!
Put those artistic and creative skills to use by crafting some big ol’ signs and posting flyers. Many garage sale patrons are “impulse stoppers” so be sure they can see that you’re offering great reasons to get out of the car. Don’t shy away from balloons, streamers and tables that add height and make attractive selling stages. This might even be a great time to let the kids have their bake sale or lemonade stand. (Try this Easy Rolling Slushie Stand for added fun and portability.)
Post flyers listing off some of your best deals. If you’re offering toddler clothing, car seats or vintage barware, advertise it! Post flyers in places you think your target audience will hang out—daycare centers, senior centers, your local library (if you have a lot of books) or your local popular coffee shop. Ask local store owners and restaurateurs if they’d be willing to let you post a few flyers and don’t neglect college campuses or schools in the area!
Advertise on Craigslist and post your event on your Facebook page to ensure your friends and family members will turn out. Word of mouth will bring in some buyers, especially if they know what you’re selling and they’re expecting a sweet deal on a coveted item.

6. Start early
Prime rummage sale hours start at 5am. Yes, you read that right. Early-morning bargain hunters get up at the crack of dawn to get the best deals. Ensure that you don’t miss out on an audience of ready shoppers by starting your sale too late.
Entice visitors by offering coffee or promoting an “early bird special” to get more shoppers to your sale right away. Typically sales last into the early afternoon or until your items are sold. To best get yourself game-ready for the early morning hustle, get plenty of rest and go to bed early. It WILL be a long day, but it’ll definitely be worth it if you plan well.

7. Don’t be afraid to make a deal
If you’re nervous about being haggled or bartered with, let it go. People will try to eke out the best deals, so instead, try to see it as two people doing each other a favor. Your customer gets a great item to give new life to, and you’re clearing out your clutter without having to haul things to the Goodwill or to the dump. (Plus, you’re making cash in the process!)
If someone asks for a deal, go for it! If you’re concerned about not getting a fair price for your items, consider selling those items on eBay or Craigslist where you have more control over the price. While shoppers are looking for an amazing score or treasure, they’ll be happy and satisfied if they feel they’re paying Goodwill prices or less for practical items that they need.

8. Get help
Enlisting the help of your neighbors, friends, social media network, husband and kids are all crucial parts of a successful garage sale. This is the time to let your kids try their hand at selling, so it can be a great lesson in making change and understanding how buying and selling works.
Get friends to spread the word and if someone has a few items to sell, let them join you—with the caveat that your friends take their stuff home if it doesn’t sell. (After all, you don’t want to make your yard the dumping ground for everyone’s stuff!)
Enlist a few people to take cash and make change. Provide your assistants with $20 change in singles and small bills and a receipt book or notebook to record the item, the price, and to calculate the total sale. Be sure your cashiers have a calculator and a measuring tape on hand in case they have to field any questions. You also want to make yourself very available, as you’ll be able to best answer inquiries about the age and use of your stuff.
Set yourself and your mentality up for success by maintaining realistic expectations. If you have furniture items and your husband or friend has a truck and is willing to deliver, include that on your flyers and advertising (and thank them!). That can be a make or break point for many shoppers who would pay for an item if they could only fit it in their car.

9. Donate & eliminate the remaining items
At the end of your garage sale, it can be tempting to store items for another day to try out your saleswoman tactics again. If you’ve carefully followed the advice above, you should be prepared to part with everything you’re selling. The objective is to feel comfortable with the clutter-free mindset: this garage sale is helping you clean out your clutter and eliminate extra items you have lying around your home. Garage sales can bring in a lot of money but they are rarely the place you’ll get $500 for a rare book (eBay) or $250 for a gently used futon (Craigslist).
When you’ve finished your garage sale, count out your earnings and round up your remaining items. Inventory what you have left and determine whether each item realistically belongs in the trash or if you can donate it to the Goodwill, a women’s shelter, a preschool or another charity in your area.
With a few smart strategies and some time and effort, you can walk away from your garage sale richer and with less clutter. If you donate your items to a good cause, you can also walk away with a happy and clutter-free conscience.
* * *
Are you a garage sale pro? Share your tips below!

Pin It
The post How to Organize a Garage Sale appeared first on Living Well Spending Less®.
June 19, 2015
How to Avoid Credit Traps


This is a guest post from Kim Anderson of Thrifty Little Mom
“If I use my credit card I get a cash back bonus!”
“If I open a new credit card account today I can save an extra 10%?”
“Wow, if I transfer my current balance I can get 0% interest for a year?”
“Hey, I can get 20,000 bonus miles if I spend $1,000 on my card in the next few months!”
Do any of these statements sound familiar to you? I think that deep down inside, we all know the truth. In fact, I’m positive that the credit card companies know it. Credit card bonuses are like spending magnets. When we get it in our heads to purchase something with a credit card, we instantly start justifying the purchases with all the bonuses we’ll get. The question you should be asking yourself is this: “do I really need this or am I using these credit card incentives to make my irrational spending seem rational?”
While credit card tricks can lure in even the most savvy spender, here are a few tips to avoid being caught in the trap:

Recognize Credit Cards for What They Are
When you use a credit card, you aren’t using your own money; you are borrowing money. The best thing you can do for your family is ditch the regular use of credit and stick with debit cards or CASH. You won’t be tempted to spend money you don’t actually have for things you don’t actually need.

Evaluate Whether You NEED it Now
Before you make a purchase on a credit card, consider if this is an item that you need now. Could you put the purchase off, save up the cash, and go back and pay cash without needing to borrow money from the credit card company? This kind of premeditated decision will most likely save you the most money.
Don’t forget about getting your spouse’s input on timing. There have been many times when I get really excited about something that I thought my husband was going to be on board with buying only to find out that he didn’t really want it or didn’t feel like we needed it at the time.
You may also find that just by walking away, you forget about the purchase altogether. Problem solved.
These kinds of premeditated decision making efforts will most likely save you the most money.

Make Sure You Aren’t Spending More For a Higher Cash Back Precentage
Some credit card companies offer higher percentage cash back bonuses for particular retailors or during particular seasons of the year. Are you shopping at those retailors simply because of the incentive? Could you get a similar item cheaper somewhere else without the cash back bonus? Always compare prices before you jump at cash back motivated deals.
Discover Card has cash back incentives that change quarterly. One quarter might give you cash back on travel while another quarter gives you cash back on entertainment. During the dining out incentive quarter we always found ourselves eating out way more simply because of the 5% cash back during that time.
Then we had credit cards that gave us an increased percentage back or discount by making purchases from an online retailer and accessing the retailer through the credit card company’s website. It was tempting to order something this way without comparing prices. Always compare prices before you jump at cash back or discount motivated deals.

Actually apply your cash to your purchase
When I used to use credit cards I often found myself seeing the return money as “a penny saved is a penny that’s mine to do whatever I want with.” When I bought the item, I mentally subtracted the cash back amount as a discount on the actual price of the item to help me rationalize purchasing it. But when it came time to choose how I was going to get my reward, I usually chose the coffee shop gift card. At the end of the day, I didn’t actually save my family money. I chose to spend our money on expensive coffee as if I were getting the coffee for free. If I had applied the cash to the bill, we would have more money sitting in our bank account.
When it comes time to choose your cash back return, consider applying that money directly to your monthly bill, or get a check and put it in your checking account. This choice validates why you bought the item in the first place- to save your family money.

Get the facts about signup incentives
One of the first store credit cards I signed up for was Victoria Secret. I had landed my first job and decided it was high time I started getting myself some quality undergarments. There was a huge sale going on and the saleswoman led me to believe that I could get $75 in sale merchandise for signing up for a store credit card. Without much investigation I thought, “Why not?”
I was misinformed. A month later a coupon book arrived in the mail that gave me $75 off merchandise split up on coupons spread throughout the year. One coupon per month. I was bummed. I should have read all the fine print about the bonuses rather than relying on what I was hearing the sales woman say. When a sales person tells you about a credit card sign up promotion, be sure to get some kind of physical description about what you are actually getting before you get too excited and be sure you read the fine print.

Beware of transfer fees
If you find yourself in a situation where you are wanting to transfer your debt balance from one credit card over to another with a 0% interest rate, make sure you read all the fine print associated with that transfer. Sometimes you will be charged a 3-5% transfer fee. So if you have $5,000 on the card, your fee could be $250. In that case your new balance on your new 0% interest rate card is $5,250. Then you usually only have about 12 months to pay that off before your interest rate can be over 20%! When you see 0% interest be sure that you are aware of how long it lasts, what the fees are and how much your interest rate will jump once that introductory period is over.
With credit cards, ignorance is never bliss. Always give yourself time to think about big purchases before you make them on a card, use your perks to actually save money and be an informed consumer. With that strategy you can avoid credit card traps in your future and save yourself some unnecessary debt and frustration.
Kim Anderson is a blogger and writer at Thrifty Little Mom where she
encourages families to pursue financial freedom while finding joy in frugal living. She live is Atlanta, GA with her electrical engineer husband, her talkative 3 year old son and the family Beagle Bit. She has a slight obsession with iced coffee, has trouble taming her creative side and never leaves home without a coupon.
* * *
Have you ever been caught in a credit card trap?

Pin It
The post How to Avoid Credit Traps appeared first on Living Well Spending Less®.
June 17, 2015
Spice Rubbed Steak Salad


It’s hard to work up the motivation to cook in the summertime–it’s just too darn hot! Luckily this super easy, oh-so-flavorful spice rubbed steak takes just five minutes of prep before throwing in the freezer. Then just grill the meat to your own tastes, slice it and add it to this simple salad and voila–dinner is made! My family loved the steak-salad combination, & the salad was a breeze using pre-chopped & washed lettuce.
To make it as part of a freezer cooking day, just rub down both pieces of meat, then place them into two bags, cover with remaining marinade, and then throw them right into the freezer–no cooking required! Making it ahead of time is not necessary, though, as it is equally delicious just thrown directly on the grill.
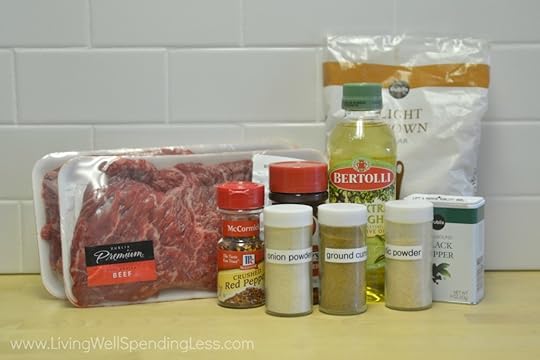
Here is what you need:
1 cup olive oil
2 tablespoons packed brown sugar
2 teaspoons ground cumin
2 teaspoons chili powder
2 teaspoons garlic powder
1 teaspoon onion powder
1/2 teaspoon ground black pepper
1/2 teaspoon crushed red pepper flakes
1 teaspoon season salt
2 3-4 lbs skirt steak (or ask the butcher, if you can’t find skirt steak)
Cooking day only
romaine lettuce
cherry tomatoes, sliced
croutons
blue cheese crumbles
blue cheese dressing or your favorite dressing
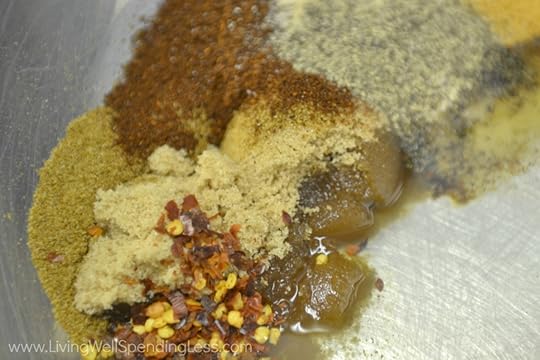
Step 1: Whisk together brown sugar, cumin, garlic powder, chili powder, onion powder, season salt, ground pepper, and red pepper flakes with olive oil.

Step 2: Place steaks in spice rub and massage spices into steaks then place in bags. (If freezing, be sure to label bags ahead of time.)
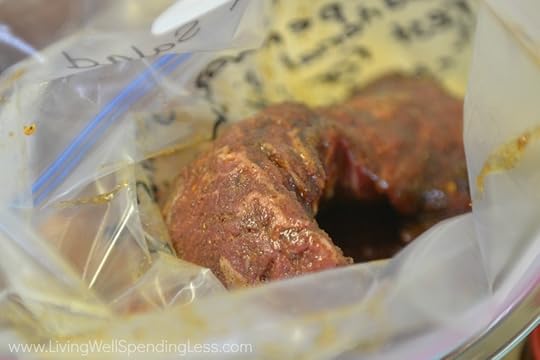
Step 3: Marinate steak in bag for at least 30 minutes or longer, or press out air from bag and freeze.

Step 4: Thaw if frozen. Grill 3-6 minutes per side(depending on how you like it), basting with additional marinade, if desired.

Step 5: Let meat rest for 5-7 minutes, then slice thin (use a very sharp knife or an electric knife if you have one) and serve on a bed of lettuce with blue cheese crumbles, croutons, and cherry tomatoes and you favorite salad dressing.
Print This!
Recipe: Spice Rubbed Steak Salad
Summary: This well seasoned steak brings a ton of flavor to this simple fresh salad.
Ingredients
1 cup olive oil
2 tablespoons packed brown sugar
2 teaspoons ground cumin
2 teaspoons chili powder
2 teaspoons garlic powder
1 teaspoon onion powder
1/2 teaspoon ground black pepper
1/2 teaspoon crushed red pepper flakes
1 teaspoon season salt
2 3-4 lbs skirt steak (or ask the butcher, if you can’t find skirt steak)
Cooking day only
romaine lettuce, chopped
cherry tomatoes, sliced
croutons
blue cheese crumbles
blue cheese dressing or your favorite dressing
Instructions
Whisk together brown sugar, cumin, garlic powder, chili powder, onion powder, season salt, ground pepper, and red pepper flakes with olive oil.
Place steaks in spice rub and massage spices into steaks then place in bags. (If freezing, be sure to label bags ahead of time.)
Marinate steak in bag for at least 30 minutes or longer, or press out air from bag and freeze.
Thaw if frozen. Grill 3-6 minutes per side(depending on how you like it), basting with additional marinade, if desired.
Let meat rest for 5-7 minutes, then slice thin (use a very sharp knife or an electric knife if you have one) and serve on a bed of lettuce with blue cheese crumbles, croutons, and cherry tomatoes and you favorite salad dressing.
Preparation time: 5-7 minutes
Cooking time: 12-16 minute(s)
Number of servings (yield): 6

* * *
What is your favorite salad topping?
Pin It
The post Spice Rubbed Steak Salad appeared first on Living Well Spending Less®.
June 15, 2015
How to Plan a Party in 48 Hours


I’m no stranger to party planning. Even so, over the past few years, throwing big, elaborate, Pinterest-worthy shindigs (like this Sweet Shop party or this CAKE party or my all time favorite, this Beachy Mermaid party) has become less and less of a priority for me. Don’t get me wrong–I still love having people over, but more often than not our get-togethers these days are impromptu, last-minute affairs with little fuss, marked by loud, wet kids and takeout pizza or Chinese food.
One of the main reasons for this shift, other than being busy, is that as our girls have gotten older, we have begun giving them a choice between having a party or going away somewhere for a few days.
More often than not, they choose the trip, so I was not at all surprised this year when my youngest, Annie, told me that she again wanted to go visit Miss Edie for her birthday. Since Annie’s birthday always falls right on or around Memorial Day, it is actually great weekend to go away. Thus, I called Edie and asked if we could come for a visit, but Edie surprised me by asking if she and her girls could come visit us this time instead.
Annie seemed perfectly happy with this solution, and then, when we asked what she wanted to do on her birthday, all she said was “play Legos and eat cake.”
Done.
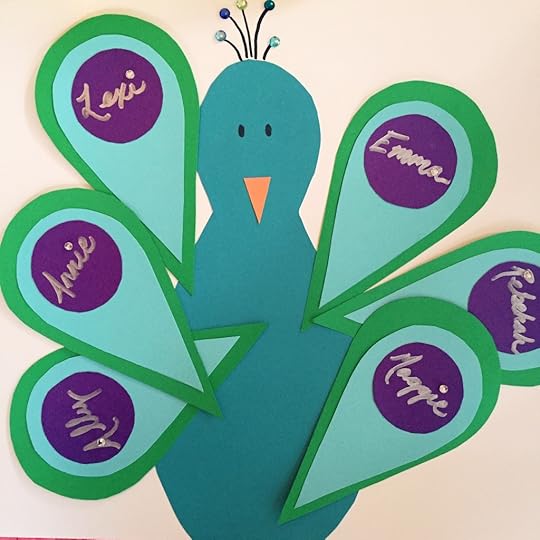
But then, just two days before her big day, she crawled in to my lap, put her arms around my neck, looked at me with her big blue eyes, and very sweetly said, “Mommy, can I please, please have a Peacock Party? Pretty please?” If you have ever met Annie, you know that that girl simply oozes with charm and personality, and that when she turns it on, she is nearly impossible to resist. I explained that Memorial Day weekend and that most people were probably already busy, but that I would see what I could do.
At the very least, I promised to make her a peacock cake. (Side note–Annie has been obsessed with peacocks for a while now–we have no idea why.) And with that, we had less than 48 hours to invite the guests, bake a cake, plan the decorations, come up with an activity or two, plan the menu, prepare the food, and stick to a budget of less than $150. It was going to be a crazy couple of days, but with no plans for the weekend, I was up for the challenge.

Saturday, 11:00am
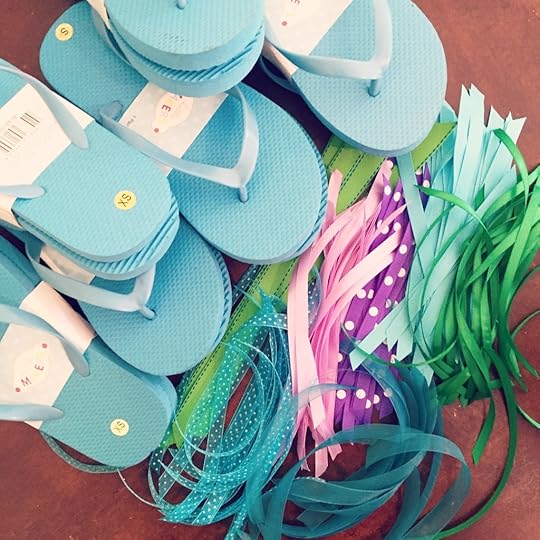
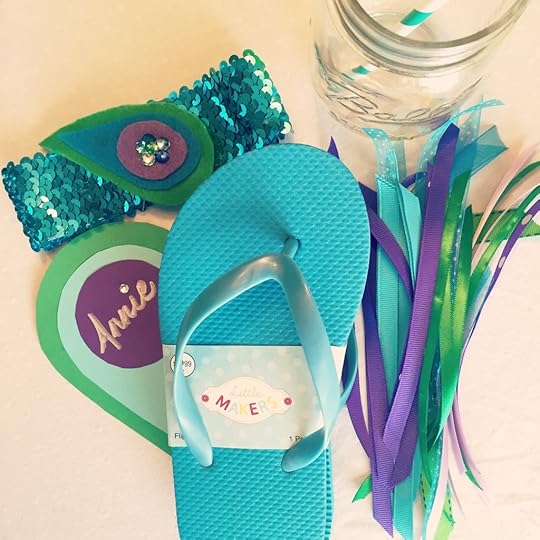
Without a clear vision in mind, my first step was to head to JoAnns to gather a few basic supplies. Luckily the holiday weekend meant they were having a great sale, and I managed to pick up some flip flops, ribbon, sequined headbands, scrapbook paper, candy melts, and tulle–all in shades of green, blue, & purple–for around $40 after using a 20% off coupon I was able to pull up on my phone. I also swung by Publix to pick up the ingredients for the 7 layer salad I had already been planning to try this weekend, as well as some Jello and cake mix, spending about $25.
From the store, I texted the mom of one of Annie’s classmates, asking if there was any time she might be free on Monday. She said early afternoon. I decided to set the party time for 11am.

Saturday, 1:00pm
Knowing the cake was going to be the most complicated part of this whole process, I decided to work on that project first. I first created a template out of card stock for the peacock features, then drew them onto a piece of paper and taped wax paper overtop. I then melted my lime green, aqua blue, & purple candy melts and piped them onto the wax paper. This process was a bit of a fiasco, partially because I forgot to buy more Wilton decorating bags and had to use Ziploc bags instead, which don’t work nearly as well, and partially because the tips kept getting jammed. In the end, they didn’t turn out quite as smooth as I had envisioned, but perfection is overrated and I really had no choice but to keep going!

Saturday, 3:00pm
After finishing the candy feathers (and cleaning up the huge mess left behind!), I quickly whipped up the first layer of Jello (purple) for the Jello salad. Using the same peacock feather templates, I cut the shapes out of some felt scraps I already had on hand & hot-glued them to the sequined headbands I had found in the dollar bin at the craft store. This was a pretty easy project!
Saturday 4:00pm
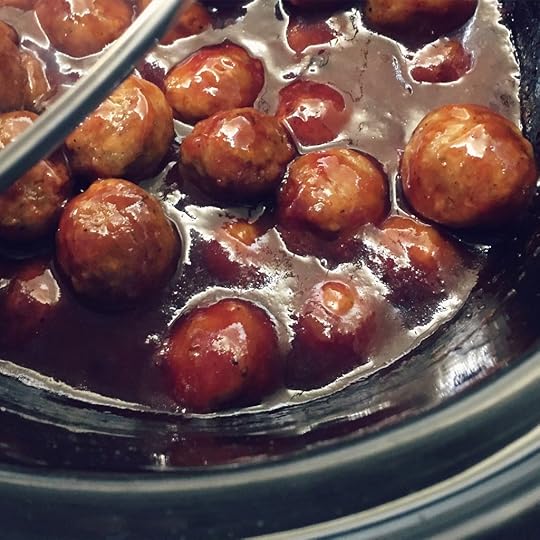
I began searching through the freezer & pantry to see what we could serve along with the Jello and 7-Layer Salad. Chuck suggested Grape Jelly Meatballs–one of our go-to party staples–and I was happy to see we already had all the ingredients on hand. We also had quite a few different freezer meals on hand, including Greek Chicken, Sweet & Spicy Chicken, & Thai Chicken, as well as the steak from these Grilled Steak Tacos. We decided that we would serve a smorgasbord of grilled meats along with our favorite Cheesy Potato Casserole, and call it good.
We also continued contacting a few friends to see if they could join us. Amazingly enough, everyone we asked said yes, and we ended with a total guest count of 6 girls and 15 adults.

Sunday 7:00am
I was up early to start working on the cake, which I knew was going to be an ordeal. Annie had requested chocolate, but after searching Pinterest for inspiration, I was eager to try my hand at a swirl cake. I decided to give her the best of both worlds, and layer chocolate with vanilla rainbow swirl. To make the swirl cake, I mixed up two boxes of vanilla cake mix per the box directions, then divided the batter into 5 bowls, adding a different shade of food coloring to each bowl. I then dropped random spoonfuls of the different colors into my greased and floured pans (a 9″ & 6″ round), baked them, inverted the cakes onto a cooling rack, then washed the pans and filled the pans again with the remaining batter. After the vanilla layers were finished, I baked the chocolate layers. Somewhere in there, I also made the 2nd (blue) layer of the Jello salad.

Sunday 10:00am
With all the cake layers baked and cooling, I started on the frosting. I knew I wanted to use a ruffle technique I’ve done several times before. It looks complicated but it is actually not hard at all. However, the Swiss Merengue Buttercream frosting it requires is a little more time consuming than other frosting recipes, as you must separate the eggs, then melt the sugar into the egg yolks over a double boiler, all while stirring constantly, and then whip the yolks for 10-12 minutes until they have completely cooled and until stiff peaks form, at which point you add the butter. I didn’t mind doing it once, but I was a little annoyed at myself for not making enough. With just a 1/4 of the cake left to go, I ran out of frosting and had to start the whole process over again. All in all, it was a pretty minor setback.
At some point Chuck headed back to the store to pick up the ingredients for the cheesy potatoes, as well as more eggs and more butter, and one of those DIY helium tanks for the balloons, spending around $45.
Sunday, 1:00pm
With the cake finally out of the way, the rest of the party seemed like a, well, piece of cake! The girls helped me prep the ribbons for the flip flops, then helped me create the tail feather name cards, which would also double as the tails for the “Pin the Tail on the Peacock game.” I also made the third (green) layer of the Jello salad.
Sunday, 4:00pm
With little left to do but prepare the food and blow up balloons–both of which would have to wait until morning, I decided to set the kids’ table. I used a white tablecloth I made a couple of years ago (using Edie’s tutorial), bunched some tulle in the center, and put the flip flops, headbands, and name cards at each place. Simple but cute!
Monday, 7:00am
I was up early again, this time to get the meatballs into the crockpot. I also made a list of all the prep that needed to happen so that I would be sure to not forget anything. First on the list? A special breakfast of Dutch Babies for the birthday girl!
Monday, 8:30am
With breakfast out of the way, I could finally set up the outside table with a white tablecloth & the remaining tulle. Pretty simple, but cute & festive! I got to work on the 7 layer salad, which was surprisingly easy to make. It looked so pretty!

Monday, 9:30am
I prepped the cheesy potato casserole & set it aside to bake after the guest arrived. We set out our plastic “mason jar” party cups (purchased HERE years ago) with some cute aqua & white paper straws, and Chuck whipped up a big batch of homemade lemonade using the lemon juice we had frozen from our own lemon tree.

Monday, 10:00am
The girls helped me blow up the balloons–green, purple, & aqua, of course! I got myself dressed & ready, then helped the girls pick out their clothes and do their hair. I realized that I hadn’t thought about plates or silverware. Luckily I had a variety of disposable plates & cutlery on hand. They didn’t match at all, but oh well–perfection is overrated! I put the cake out on the table, and with 15 minutes to spare, we were ready to party!

The party itself, I’m happy to say, went off without a hitch and came in well under budget. The food, despite being a random sampling of our freezer meals, was a hit. The kids had fun making their flip flops and everyone loved the cake–the colorful inside was met with lots of oohs and aahs!! All the kids inevitably ended up in the pool and Chuck and I had a blast getting to spend time with friends we don’t see nearly enough. When it was all over, we were exhausted, but only in the best possible way.

In the end, I think there were a few key elements that made it possible for us to pull off a fun, budget-friendly party in just two days. First, I’ve thrown LOTS of parties before. I already had all the basic supplies–tablecloths, cups, drink dispenser, etc.–on hand, so I didnt have to spend time or money worrying about them. Second, we had the whole weekend free to focus 100% on making it happen–there were no distractions, just pure party prep for 48 hours straight. Third, I wasn’t worried about having everything be perfect. Because it was such short notice, I knew my guests wouldn’t be expecting all that much. If something went wrong, it wouldn’t be that big of a deal. As long as Annie was happy and the guests had fun, it would be a win. And it was!


Pin It
The post How to Plan a Party in 48 Hours appeared first on Living Well Spending Less®.
June 12, 2015
7 Financial Habits to Start in Your 20’s

This is a guest post from Kalyn of Creative Savings
As much as we learn certain habits as children and into the teen years, I believe there’s no decade as definitive as your 20’s. Every experience is new, the high school drama is left behind {I hope!}, and you start blossoming into the person you were meant to be. But it can also make or break your financial success.
What you do as a 20-something, will inevitability impact the decades to come, and that’s never been more true when finances come into the picture. Years of frivolous spending can take their toll, and before we know it, we’re 50 years old and don’t have any more than a few dollars saved for retirement.
That’s why it’s SO important to learn these 7 habits now — so they can replace bad habits before it’s too late. However, even if you’ve passed over the 30 mark and beyond, there’s still hope! Follow these same principles and you can quickly turn your path into one of success too.

1. Learn How to Budget NOW
If you haven’t set up a working budget yet, now is the perfect time to start! Budgeting might seem restrictive, but it’s really not. Instead, this habit gives you the freedom to tell your money where it should go, and also encourages you to live within your means.
You can use my Beginner’s Guide to Budgeting series if you’re new to the whole budgeting concept, but a simple explanation is to write down all the expenses you currently have, and figure out how much you need per paycheck {or monthly} to cover them. Then you can use a cash-envelope or digital system to track what you’re spending.
If you have money left over from this exercise, it’s always great to start saving up for the long term and pay off any accumulated debt, which we’ll discuss next!

2. Pay Down Student Loan and Credit Card Debt
Before you save for future dreams, you need to get rid of any and all debt as soon as possible. If you carry debt from a college education, or have racked up credit card debt from mindless spending, then you have some extra work to do!
Use this time to get a second job, or do odds and ends to put money towards each balance. These can be things like pet sitting, house cleaning, or even virtual assisting. Don’t be afraid of hard work — embrace it!
Being young means we have more energy right now, and can create a more stable future by putting in the extra effort today.

3. Save Towards the Long Term
The 20’s are a great time to dream about your future and what lies ahead. Do you want own a house? Maybe invest in a rental property? See the world? Buy a more reliable car? Start stashing away money for retirement? Whatever it is you want, you need to write down these goals, then save to make them happen.
It’s way too easy to go into debt for all these things, and while I don’t think getting a loan, such as a mortgage, is necessarily bad, the more cash you can put towards it, the better. But saving cash does takes time.
Be patient, and live as frugally as possible so you can save money for the things you really want. And even though retirement seems far away, putting any extra you can towards a 401K or IRA account will eventually pay off.

4. Invest in Quality Items
While living frugally is a must, there are some items you just don’t want to buy cheap, or you’ll literally pay double, sometimes triple over time for things that won’t last.
An example of this would be a car. Paying $2,000 or less for a clunker might sound reasonable, but how much will you end up paying to replace all those expensive parts in the long run? It’s often better to do some research, and buy a reliable vehicle that will last you through the 200,000 mile mark.
The same goes for appliances in your home — look for ones that conserve energy and save water — or even furniture that doesn’t fall apart, but stands the test of time. Yes, it will be more money in the long run, but you won’t have to replace it for a good long time!

5. Learn How to Cook
Even if you didn’t grow up learning how to make simple meals, it’s time to grab a cookbook, browse Pinterest, and teach yourself a few basics starting right now.
Making meals at home is going to be hands down cheaper than going out, and can make the biggest impact in your budget. As a 20-something, I know how easy it is to just grab a burger from the drive-thru, or live off delivery pizza, but you can make food that is just as yummy and quick with a few simple ingredients.
When you get the hang of cooking {and maybe even start to enjoy it!}, you can begin meal planning in advance, and even try your hand at freezer cooking.

6. Continue to Educate Yourself
In trying to live a frugal lifestyle, I’ve come to realize that continual learning is mighty important. There is always something new to try, or practical advice to listen to from others who have already been there.
It’s easy to hide behind pride and think we have this whole “life thing” figured out, but it’s okay to admit that you don’t. In fact, you’ll be respected even more if you don’t try to have the answers for everything.
Surround yourself with friends who encourage you, and older adults that challenge you. Subscribe to personal finance and frugal lifestyle blogs, and go to the library to check out a few money-related books. I list some of my absolute favorites in the post, How to Think Like a Millionaire.

7. Learn to Be Content
Contentment does not come easy to me, and I’m betting it probably doesn’t for you either. It’s something we must challenge ourselves with everyday — to stop comparing, and to stop trying to “keep up” with those who are further down the road than we are.
Being happy right where you are takes practice, but your soul will be filled with so much joy, and you’ll be able to turn any circumstance into a positive learning experience.
Don’t give up. Learn to love what you have, and focus on the things that last. If you master only one thing, let it be this! Everything else will just be icing on the cake. (These 7 ways to be more content are a great place to start!)
Kalyn Brooke is a full-time writer and blogger at CreativeSavingsBlog.com, where she gives a fresh perspective on frugal
living, and the kick-in-the-pants you need to create a budget from scratch. She lives in beautiful Southwest Florida with her news-photographer husband and one terribly destructive rabbit. She loves making to-do-lists, reading good books, eating chocolate peanut butter ice cream, and pursuing big big dreams… all carefully planned out, of course.
* * *
What habits do wish you had learned in your 20’s?

Pin It
The post 7 Financial Habits to Start in Your 20’s appeared first on Living Well Spending Less®.
June 10, 2015
Simple Summer Chicken Sandwich


The price of meat just keeps on going up, which is why here at LWSL we firmly believe that you can never have too many quick & easy freezer meals to choose from that use budget-friendly chicken! Of course, finding fresh new ways to serve the same old chicken can definitely be a challenge.
Luckily this tender, juicy, flavor-packed Simple Summer Chicken Sandwich is sure to be a new family favorite–it definitely was for mine! In fact, my husband declared it his new favorite (and that’s saying something, especially considering that I served it with arugula and Tomato-Basil Mayo–two things I thought for sure he’d balk at!)
To make it as part of a freezer cooking day, just split the marinade & chicken into multiple bags, then throw it right into the freezer–no cooking required! Making it ahead of time is not necessary, though, as it is equally delicious just marinated in the fridge for about 30 minutes.
You can use any type of chicken but my family much prefers the boneless, skinless chicken thighs, which are a darker, juicier meat and also tend to be cheaper than the boneless skinless breasts.
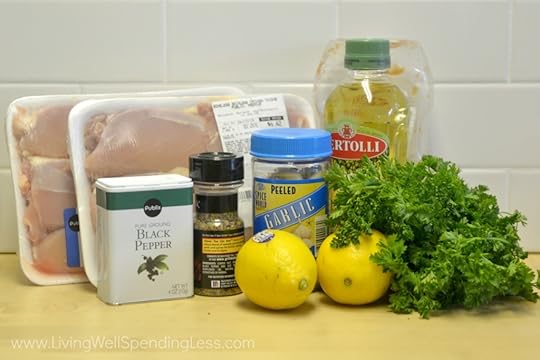
Here is what you need:
2 lemons
1 cup olive oil
6 cloves garlic
1 cup ketchup
2 teaspoons McCormick Montreal steak seasoning
1/2 teaspoon black pepper
1/4 teaspoon cracked red pepper
1/2 cup fresh parsley, chopped
3.5-4 pounds boneless chicken
Cooking day only
Arugula (optional)
Tomato Basil Mayo (optional)
hamburger or kaiser rolls

Step 1: Squeeze lemons to release fresh lemon juice.
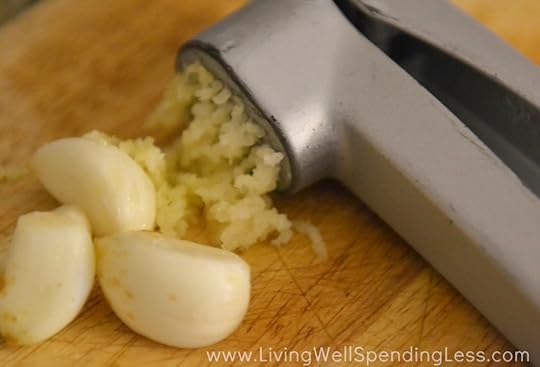
Step 2: Mince or crush garlic in garlic press.
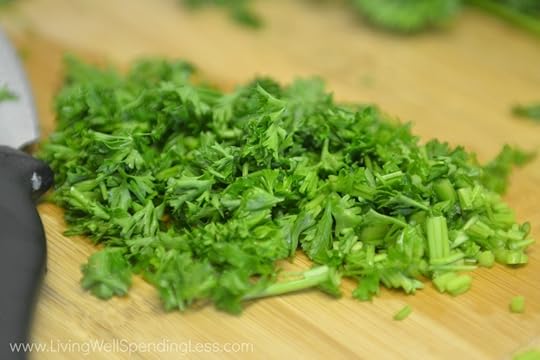
Step 3: Chop parsley, set aside.

Step 4: Whisk lemon juice, olive oil, minced garlic, parsley, cracked red pepper flakes, steak seasoning, ketchup & pepper together in bowl, then divide into 2 1-gallon freezer bags. (If freezing, be sure to label bags ahead of time.)
Step 5: Marinate chicken in bag for at least 30 minutes or longer, or press out air from bag and freeze.

Step 6: Thaw if frozen. Grill 7-8 minutes per side, basting with additional marinade, if desired. Alternatively, you can pour contents into slow cooker. Cook on low for 3-4 hours or high for 2-3 hours, or place in casserole dish and bake at 400 degrees for 30-40 minutes.
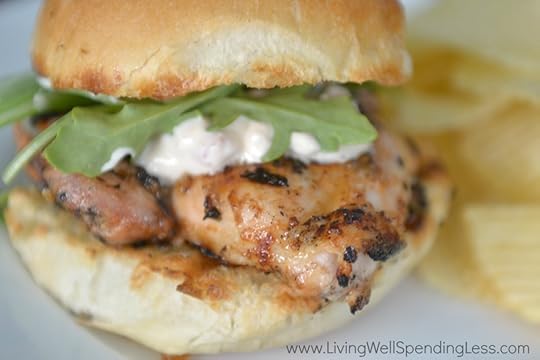
Step 7: Serve chicken on roll with arugula and tomato basil mayo.
Print This!
Recipe: Simple Summer Chicken Sandwich
Summary: These fresh flavors come together so easily and fast. It’s the perfect summertime meal!
Ingredients
2 lemons
1 cup olive oil
6 cloves garlic
1 cup ketchup
2 teaspoons McCormick Montreal steak seasoning
1/2 teaspoon black pepper
1/4 teaspoon cracked red pepper
1/2 cup fresh parsley, chopped
3.5-4 pounds boneless chicken
Arugula (optional, cooking day only)
Rolls (cooking day only)
Tomato basil mayo (optional, cooking day only)
Instructions
Squeeze lemons to release fresh lemon juice.
Mince or crush garlic in garlic press.
Chop parsley, set aside.
Whisk lemon juice, olive oil, minced garlic, parsley, cracked red pepper flakes, steak seasoning, ketchup & pepper together in bowl, then divide into 2 1-gallon freezer bags. (If freezing, be sure to label bags ahead of time.)
Marinate chicken in bag for at least 30 minutes or longer, or press out air from bag and freeze.
Thaw if frozen. Grill 7-8 minutes per side, basting with additional marinade, if desired. Alternatively, you can pour contents into slow cooker. Cook on low for 3-4 hours or high for 2-3 hours, or place in casserole dish and bake at 400 degrees for 30-40 minutes.
Serve chicken on roll with arugula and tomato basil mayo.
Preparation time: 5-7 minutes
Cooking time: 12-16 minute(s)
Number of servings (yield): 4

The post Simple Summer Chicken Sandwich appeared first on Living Well Spending Less®.
June 8, 2015
How to Make Money as a Freelance Writer


This is a Guest Post from Gina @ Horkey HandBook
Have you ever wondered how you can make money while you stay at home with your kids? Believe it or not, there are a few ways to accomplish this and not get sucked into a scam. In fact, Ruth wrote a post about this very topic not too long ago, called 15 Smart Ways to Earn Money at Home.
I was personally inspired to look for a way to work from home by my friend Shannon, who successfully works from home knitting the cutest baby and kids hats with four kiddos – three of which are home with her all day long. I don’t have the crafting skills personally, so I needed to figure out how else I could utilize my skill-set to accomplish this. Since it can be hard to determine what’s legitimate and what’s a scam online, I wanted to share with you my experience of what’s worked well for me.

My Journey into Freelance Writing
Freelance writing is a legitimate and viable way to make either a part or full-time income online. You can work from home and make a decent living using your innate writing abilities. But how do you get started?
I started looking into the world of freelance writing in April of last year. It started out as my side-hustle (as I assessed its viability to support my family) and is now my full-time gig. My husband is a SAHD and I’m the breadwinner – I’m highly motivated to get and keep well-paying clients!
I’m here to share my journey – what worked for me – as I broke into the freelance writing game last year. Here are five steps to help you get started making money from home as a freelance writer today.

1. Determine Your Writing Niches
It’s important to determine what you’re interested in writing about in the beginning. Determining 2-3 main niches (writing topics) will give you a focus as you later look for jobs or guest posting opportunities.
How do you go about this? It’s best to consider what you currently have going for you. Here’s are a few questions to get you started.
What is your professional experience?
What is your educational experience?
What are your interests/hobbies?
What organizations do you belong to?
When I started thinking about my niches, personal finance and nutrition/health and fitness immediately came to mind. I spent the last decade as a financial advisor, which made this a good fit for my primary niche. Health and fitness topics interest me – if you ask my husband, it makes for a lot of my conversation topics! This became my secondary niche or focus.
If you check out my Hire Me page, you’ll also see that I highlight some additional areas, copywriting being one of my most favorite. One could argue this is a writing type vs. a writing niche, but either way it’s one of my focuses. I also write about freelancing (this post being a great example) and parenting/lifestyle topics.
I don’t limit myself to just these areas, but I do feature them on my website for a reason. These are the types of writing jobs that I’d like clients to seek me out for and I have samples to back them up.

2. Start Acquiring Samples
You can acquire writing samples by publishing posts on your own blog, by guest posting on other people’s blogs or by securing unpaid writing gigs. I started with all three. I launched my own website (see more on this in step three) and started writing what I considered “businessy” type topics in the beginning. I hadn’t finalized my niches at this point (or the main theme of my website), but I wanted to have content to refer potential clients to, that represented my writing style and skill-set.
I also asked around for guest posting opportunities. If you know of people in your sphere of influence that have blogs, ask them if they’d let you guest post. Are you a part of any social media groups or forums where you could ask if anyone’s looking for guest post submissions? Both of these avenues worked well for me.
Lastly, don’t shy away from writing for free (gaining a regular unpaid contributorship) in the beginning. I did this (at one point I was writing for free for four different outlets) and I still do for two websites.
One of them is the Huffington Post. I was able to secure this opportunity after responding to an online ad they had looking for new contributors. It’s been a great sample for my portfolio, as the name is instantly recognizable.

3. Establish a Web Home Base
You don’t have to have your own website to be a freelance writer. I think eventually you’ll want to as you continue to build your business, but there are many successful writers that don’t.
You do need a place to display your samples and refer clients to however. In addition to your own website, you could also display samples on your own Professional Writing Pinterest board or establish a Contently profile (this is my friend Renee’s).
Both Pinterest or Contently could be the primary place or an additional way that you display your writing portfolio. Personally, I have my Hire Me page and a Pinterest portfolio (both links are above).
My Hire Me page has some samples, but also walks a client through what I have to offer them. My Pinterest board houses all of my samples and allows my content to be seen by almost anyone, with the additional perk of being able to be re-pinned by others as well.
If you’re just getting started and unsure of setting up your own website, I’d go with either a Pinterest board or Contently profile. Both are free and easy to use. I don’t have a Contently profile (I don’t need another portfolio or place to update), but I have gotten lots of compliments on my Pinterest board.

4. Develop a Pitch
I’ve found that it works best to have a templated pitch ready in your email drafts folder. That way you can tweak it to accommodate whatever writing job you’re applying for quickly. Having it ready allows you to pitch more jobs too!
My first pitch was rather awful and that was after I had taken a course! It was short and sweet, which was nice, but didn’t include any links to my work. That’s kind of important, no?
Since then, my pitch has gone through dozens of revisions. I’ve continued to learn what other people are doing that’s working and also can tell whether my current version is converting well or not after trying it for a bit. Another reason that your pitch would continuously go through revisions, is that over time you’ll have better and better samples to display.
I really like my current pitch and it’s been converting well, which helps. Here are a few tips to keep in mind as you create yours:
Keep it short and sweet. Include enough information, but not too much. You want people to read it after all!
Show some personality. Enough to be memorable, but not too much where you sound unprofessional.
Accurately display your experience. Have you been blogging for awhile (it doesn’t matter if it’s socially or professionally)? I list that I’ve been blogging since 2010, which is true – it just wasn’t for money! But it sounds good.

5. Pitch, Pitch, Pitch
Securing writing gigs is really just a numbers game. The more you put yourself out there, the higher your odds of success.
One of the BEST things I did early on was adopt the mindset of a man. I had read somewhere that men will apply for jobs that they are roughly 60% qualified for, whereas women needed to be virtually 100% qualified or they won’t apply.
If you’re female, my advice to you is to also think like a man and apply for writing jobs that you are even remotely interested in or qualified for. You never know what you’ll get, what will pay well or where that opportunity can lead!
Determine how many jobs you’re willing to apply for on a daily or weekly basis and be consistent. Even though my client roster is almost full at the moment, I still apply for 5-10 new jobs on a weekly basis. Client attrition is normal and not all jobs are going to be long-term. I want to keep my marketing efforts going strong and be selective about the new clients that I take on, rather than letting my lead pipeline dry up!
Making money as a freelance writer from the comforts of your own home is totally doable – I’m proof! If you’re just getting your feet wet, start by figuring out what you want to write about and trying to secure some samples. Then figure out where you’re going to display them.
Use these samples when you draft your pitch and keep a sample pitch email as a draft in your email. Lastly, pitch, pitch, pitch. Determine how many pitches you can realistically send out per day or week and go for it.
This is just the tip of the iceberg when it comes to starting a successful freelance writing business, but it’s enough to get started. Good luck!
Gina Horkey is a writer, with a background in personal finance.
She also offers editing, virtual assistance and business coaching services and recently launched a course, called 30 Days or Less to Freelance Writing Success for aspiring writers for the web. In June of 2015, she plans to be writing and traveling around the US in an RV, young family of four in tow! Please stop by Horkey HandBook and say hello!

Pin It
The post How to Make Money as a Freelance Writer appeared first on Living Well Spending Less®.
June 5, 2015
High, Low, and Interesting


The statistics about family dinnertimes are pretty staggering. According to the Journal of Adolescent Health, kids and teens who share family dinners 3 or more times per week are less likely to be overweight, more likely to eat healthy foods, get better grades, are less likely to do drugs, drink, or become sexually active, have better relationships with their parents, fewer emotional and behavioral problems, greater emotional well-being, more trusting and helpful behaviors towards others and higher life satisfaction.
Wow.
Of course your kids are anything like mine, getting them to share details about their day can be a challenge. Questions like “how was school?” or “how was your day?” are usually meant with a shrug and a generic “fine” or “good,” while “what did you learn?” or “what did you do?” receive the inevitable “I don’t remember.”
It can be infuriating!
After all, most of us, as parents want to be actively involved in our kids’ lives. We want to hear about the ups and downs, the triumphs and the failures, to be there to cheer on the successes, and to wipe the tears away when they fall.
But how are we supposed to do that when they won’t talk?
While every family is a little different, here are a few strategies that might help liven up your dinnertime conversations and get your kids to open up.
Ask Specific, Open-Ended Questions
One solution to avoiding “fine,” “good,” or “I don’t know” is asking very direct and specific questions that don’t allow for a yes or no answer, and that help kids go back through their day in their mind to recall specific events.
Here are a few examples of questions you might want to try:
Who did you play with today?
Who did you sit with at lunchtime?
What subject are you studying in Social Studies?
What book is the teacher reading to the class right now?
Who was the speaker at the school assembly?
Who got in trouble today?
What was the hardest thing you had to do today?
What rules at school are different than rules at home?
What was the most fun thing you got to do today?
What was the funniest thing that happened today?
What are you most looking forward to tomorrow?

Use Conversation Starters
Sometimes it can be hard to think of what to say, especially when you are put on the spot! Even though I know I should ask open-ended questions, I inevitably resort back to the standard, “how was your day?”
Luckily there are some great resources for parents that can help with this problem! My friend Courtney DeFeo recently developed something called “Conversation Cups,” that I absolutely adore. These bright, colorful cups are printed with a whole variety of thoughtful questions that are designed to get the conversation flowing around the table. My kids love them!
Additionally, TableTopics Family Cards are another fun tool we have used to get our kids talking. They come in a cool Lucite cube that you can keep out on the coffee table or nearby shelf for impromptu chats, and the questions are definitely intended to get kids talking!

Make it a Game
Several years ago, my husband and I came up with a simple dinnertime game that has made all the difference for our family. At first, when my oldest daughter Maggie was very young, it was called High-Low. The concept was pretty simple—we all took turns sharing our best and worst moments of the day. Early on, we made a rule that it was okay to have more than one high—we called this High-High—but you couldn’t weren’t allowed to have Low-Low. If you had a low, you also had to think of a high, and if you had two lows, you needed two highs to balance it out.
This game worked for a while, and eventually our younger daughter Annie was old enough to play too. Even so, their answers were often generic and repetitive. We had to ban using “this yummy dinner” as a high and added a few more rules—highs & lows couldn’t be something that hasn’t happened yet, and they can’t be the same two days in a row.
But even the new rules didn’t solve the problem. We still heard very little other than “I don’t know” or “I don’t remember” when it came to talking about their day.
And then one day, we had a little brainstorm that changed everything. What our game was missing, my husband and I decided, was the element of competition and a little incentive to share something that was actually interesting. Thus, we (so creatively) changed the name of our game from “High-Low” to “High, Low & Interesting.”
Our new rules of the game are that in addition to our normal highs & lows, each person must also share their most interesting moment of the day. And then, once everyone has had a turn to share, we vote. Each person can only vote once, and you cannot vote for yourself. And here’s the kicker: the person with the most interesting story wins a dollar.
In our house the winner changes a lot between all four of us, which means that it usually only ends up costing us about $3 or $4 a week. In the event of a tie between the girls, they play “Rock, Paper, Scissors” to determine who gets the dollar.
But let me tell you, it’s pretty amazing what a simple dollar can do
This simple tweak has completely transformed our dinnertime conversations. My kids have miraculously learned to actually remember what happens during their day. It has encouraged them to pay more attention to the world around them, and also helped them to separate the mundane details from things that are actually significant. After all, the competition is stiff and if they don’t share something good, they won’t get any votes. Needless to say, we now hear about everything!

* * *
As kids get older, keeping them plugged in and engaged in family conversations is increasingly important. Research has shown, again and again, that the families who eat—and talk—together stay together, and that kids raised in families who eat dinner together on a regular basis are happier and ultimately more successful. Get the conversation going and you just never know where it might lead!

Pin It
The post High, Low, and Interesting appeared first on Living Well Spending Less®.


