
Ruth Soukup's Blog, page 125
November 18, 2013
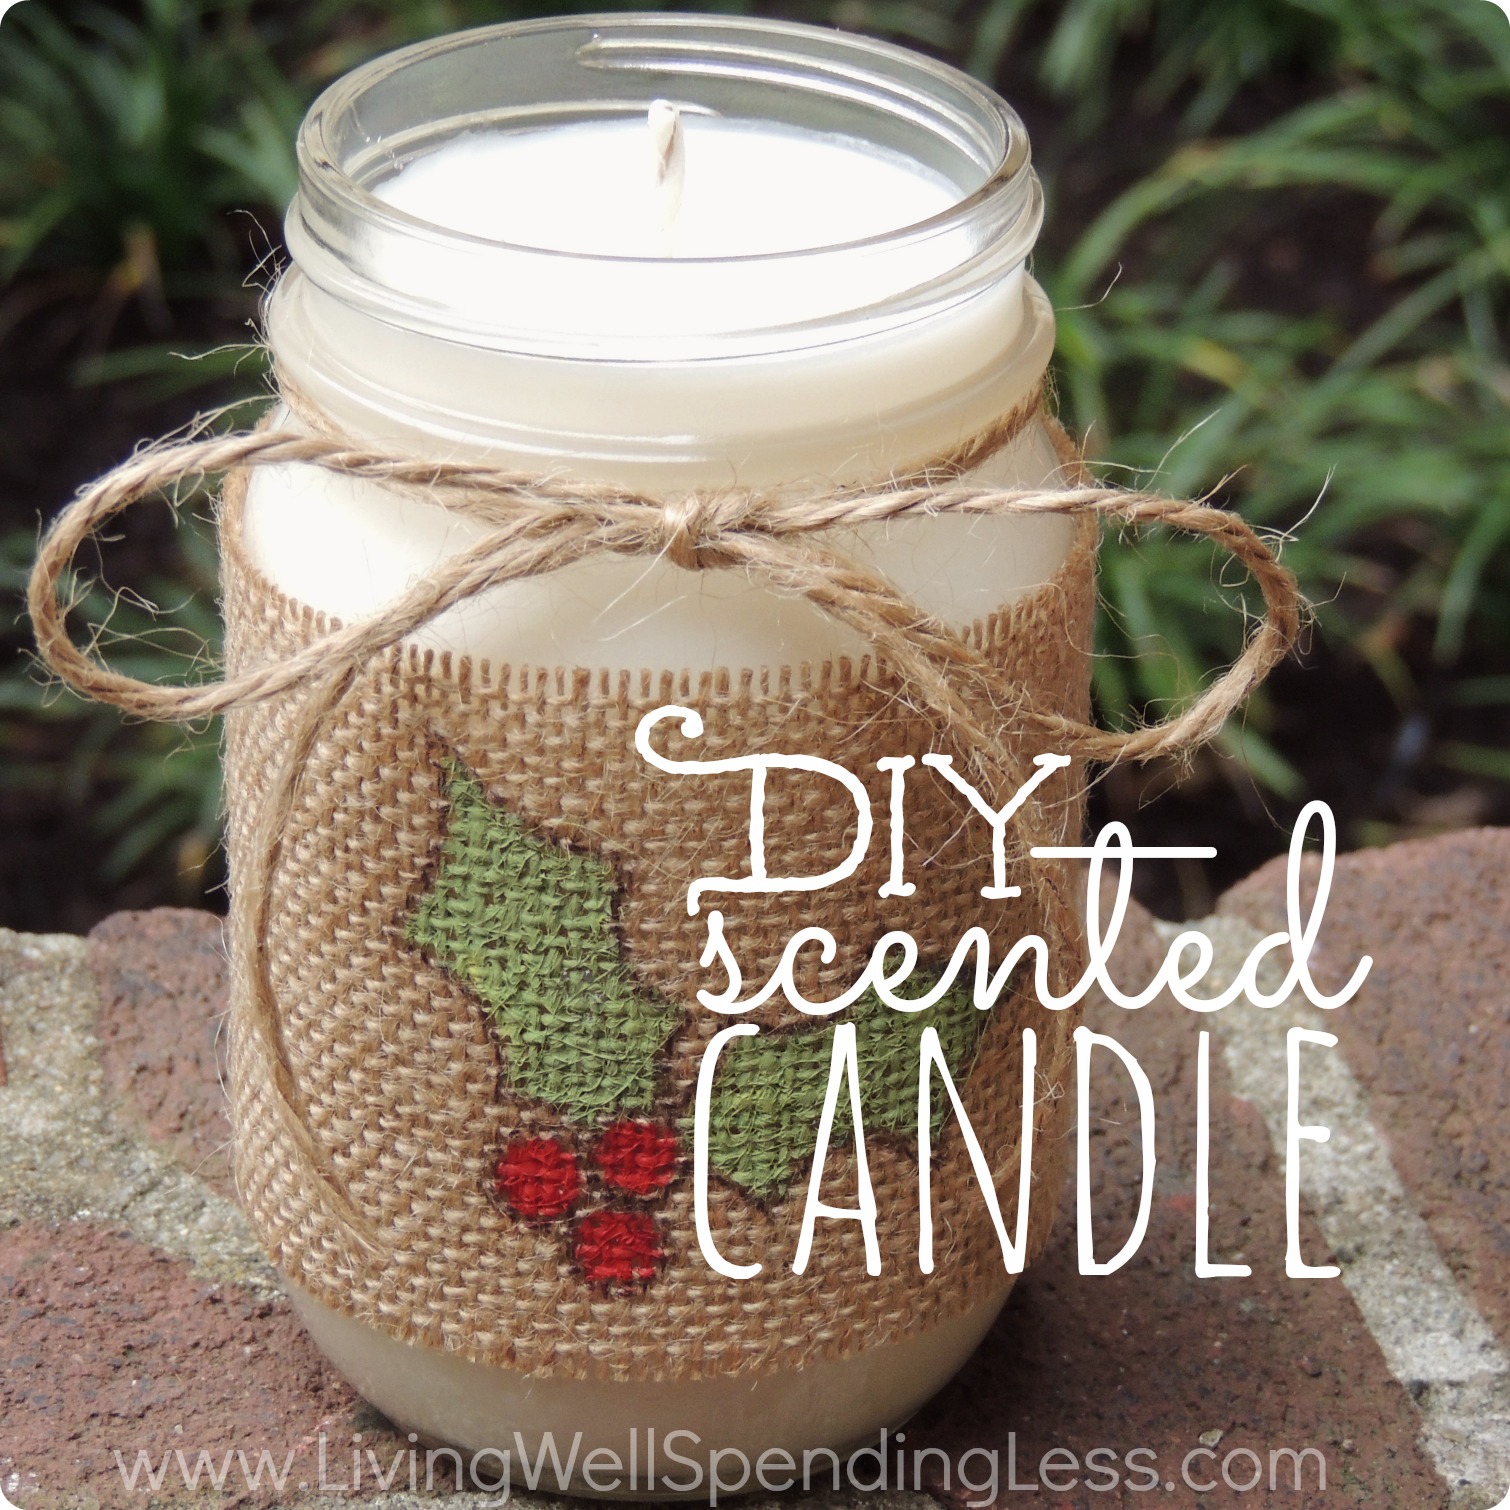
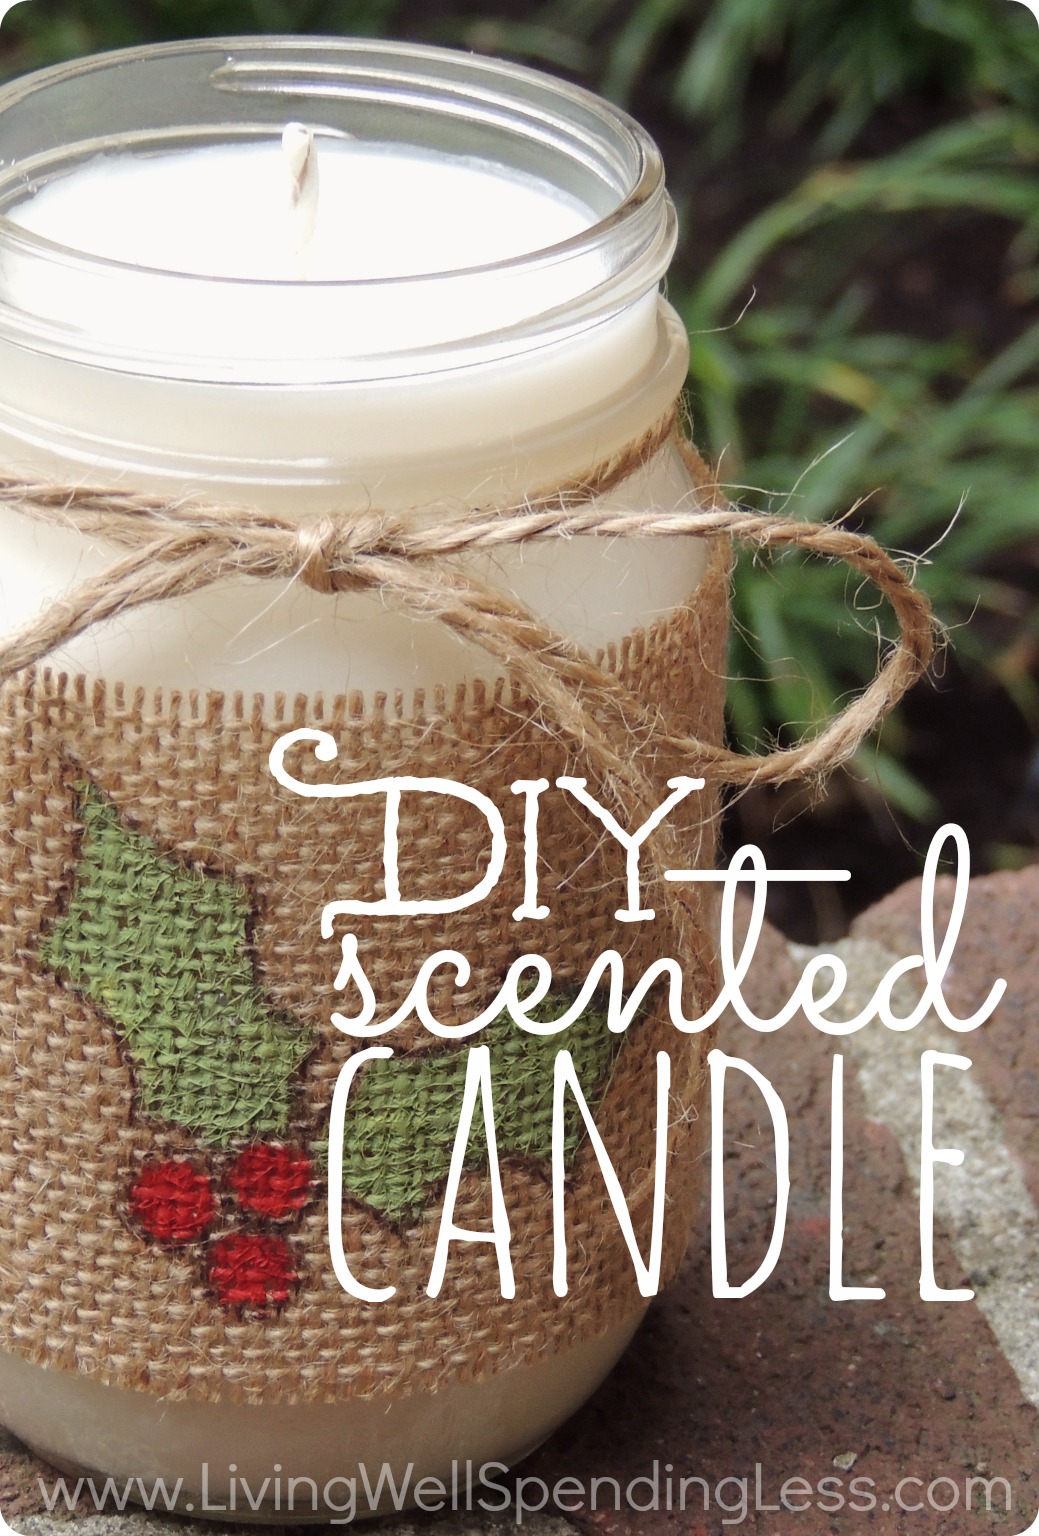
DIY Scented Candle {Handmade Holidays}
This year I am beyond thrilled to introduce you to a revamped series here at LWSL called Handmade Holidays! In past years I have shared my own holiday gift ideas, but this year I thought it would be fun to get some inspiration elsewhere. I asked eight of my favorite up-and-coming bloggers to share a simple and frugal handmade gift idea. I was so blown away by all the amazing ideas they came up with, and I think you will be too. Each Monday, from now until Christmas, one of these talented women will be sharing their gift idea. Please be sure to welcome them here to LWSL, and to take the time to check out their blogs. You will be so glad you did!
* * *
This is a guest post is from Gabby of Essentially Eclectic
Hello! My name is Gabby and I am super excited to be guest posting at LWSL! Today I’m going to be sharing with you how to make a quick, simple, and lovely handmade gift to give this holiday season!
My go-to gift during the holidays is normally some kind of food: Homemade hot chocolate mix, fresh baked frosted cookies, cherry cheese bread, peppermint bark, fudge…and the list goes on! I love giving these sorts of tasty gifts (and receiving them too! Yum!), but sometimes sweets are not quite the right fit for that special someone you have in mind. If this is the boat you find yourself in this holiday season, then I just might have a great gift idea for you.
There are three reasons I love giving homemade mason jar candles to friends during the holidays. First, they’re a surprisingly customizable: there are many different fragrance oils and colorants to choose from, and you can decorate your jar however you like!
Next, they’re very simple to make and therefore don’t take much time. It’s really just a matter of mixing, melting, and pouring (and maybe decorating, if you want!). Most of the time spent making this project is spent simply waiting for your wax to melt and cool once it’s poured. Best of all, the whole gift can be made for just a few dollars! (Remember that making them in bulk will be most cost effective, and be sure to use your coupons at the craft store!)
Here is what you need:
Soy candle wax (or a candle wax of your choice)
Candle wick
Mason Jar
Hot glue gun
A piece of card stock
A double boiler (or a saucepan and a glass bowl big enough to sit over the pot)
A food thermometer
Oven mits
Fragrance oil
Colorants (optional)
Container with spout (optional)
Before you begin, be sure you have the appropriate type and size wick for the size and kind of candle you are making. If you are using soy wax, for example, be sure your wick is suited to soy candles. If your mason jar is wide, make sure your wick is wide enough in diameter to burn optimally. In most craft stores where you can find these supplies, recommendations will be made on the packaging as to what type and size wick you should use depending on your project (and I promise it’s a lot simpler than it sounds!)
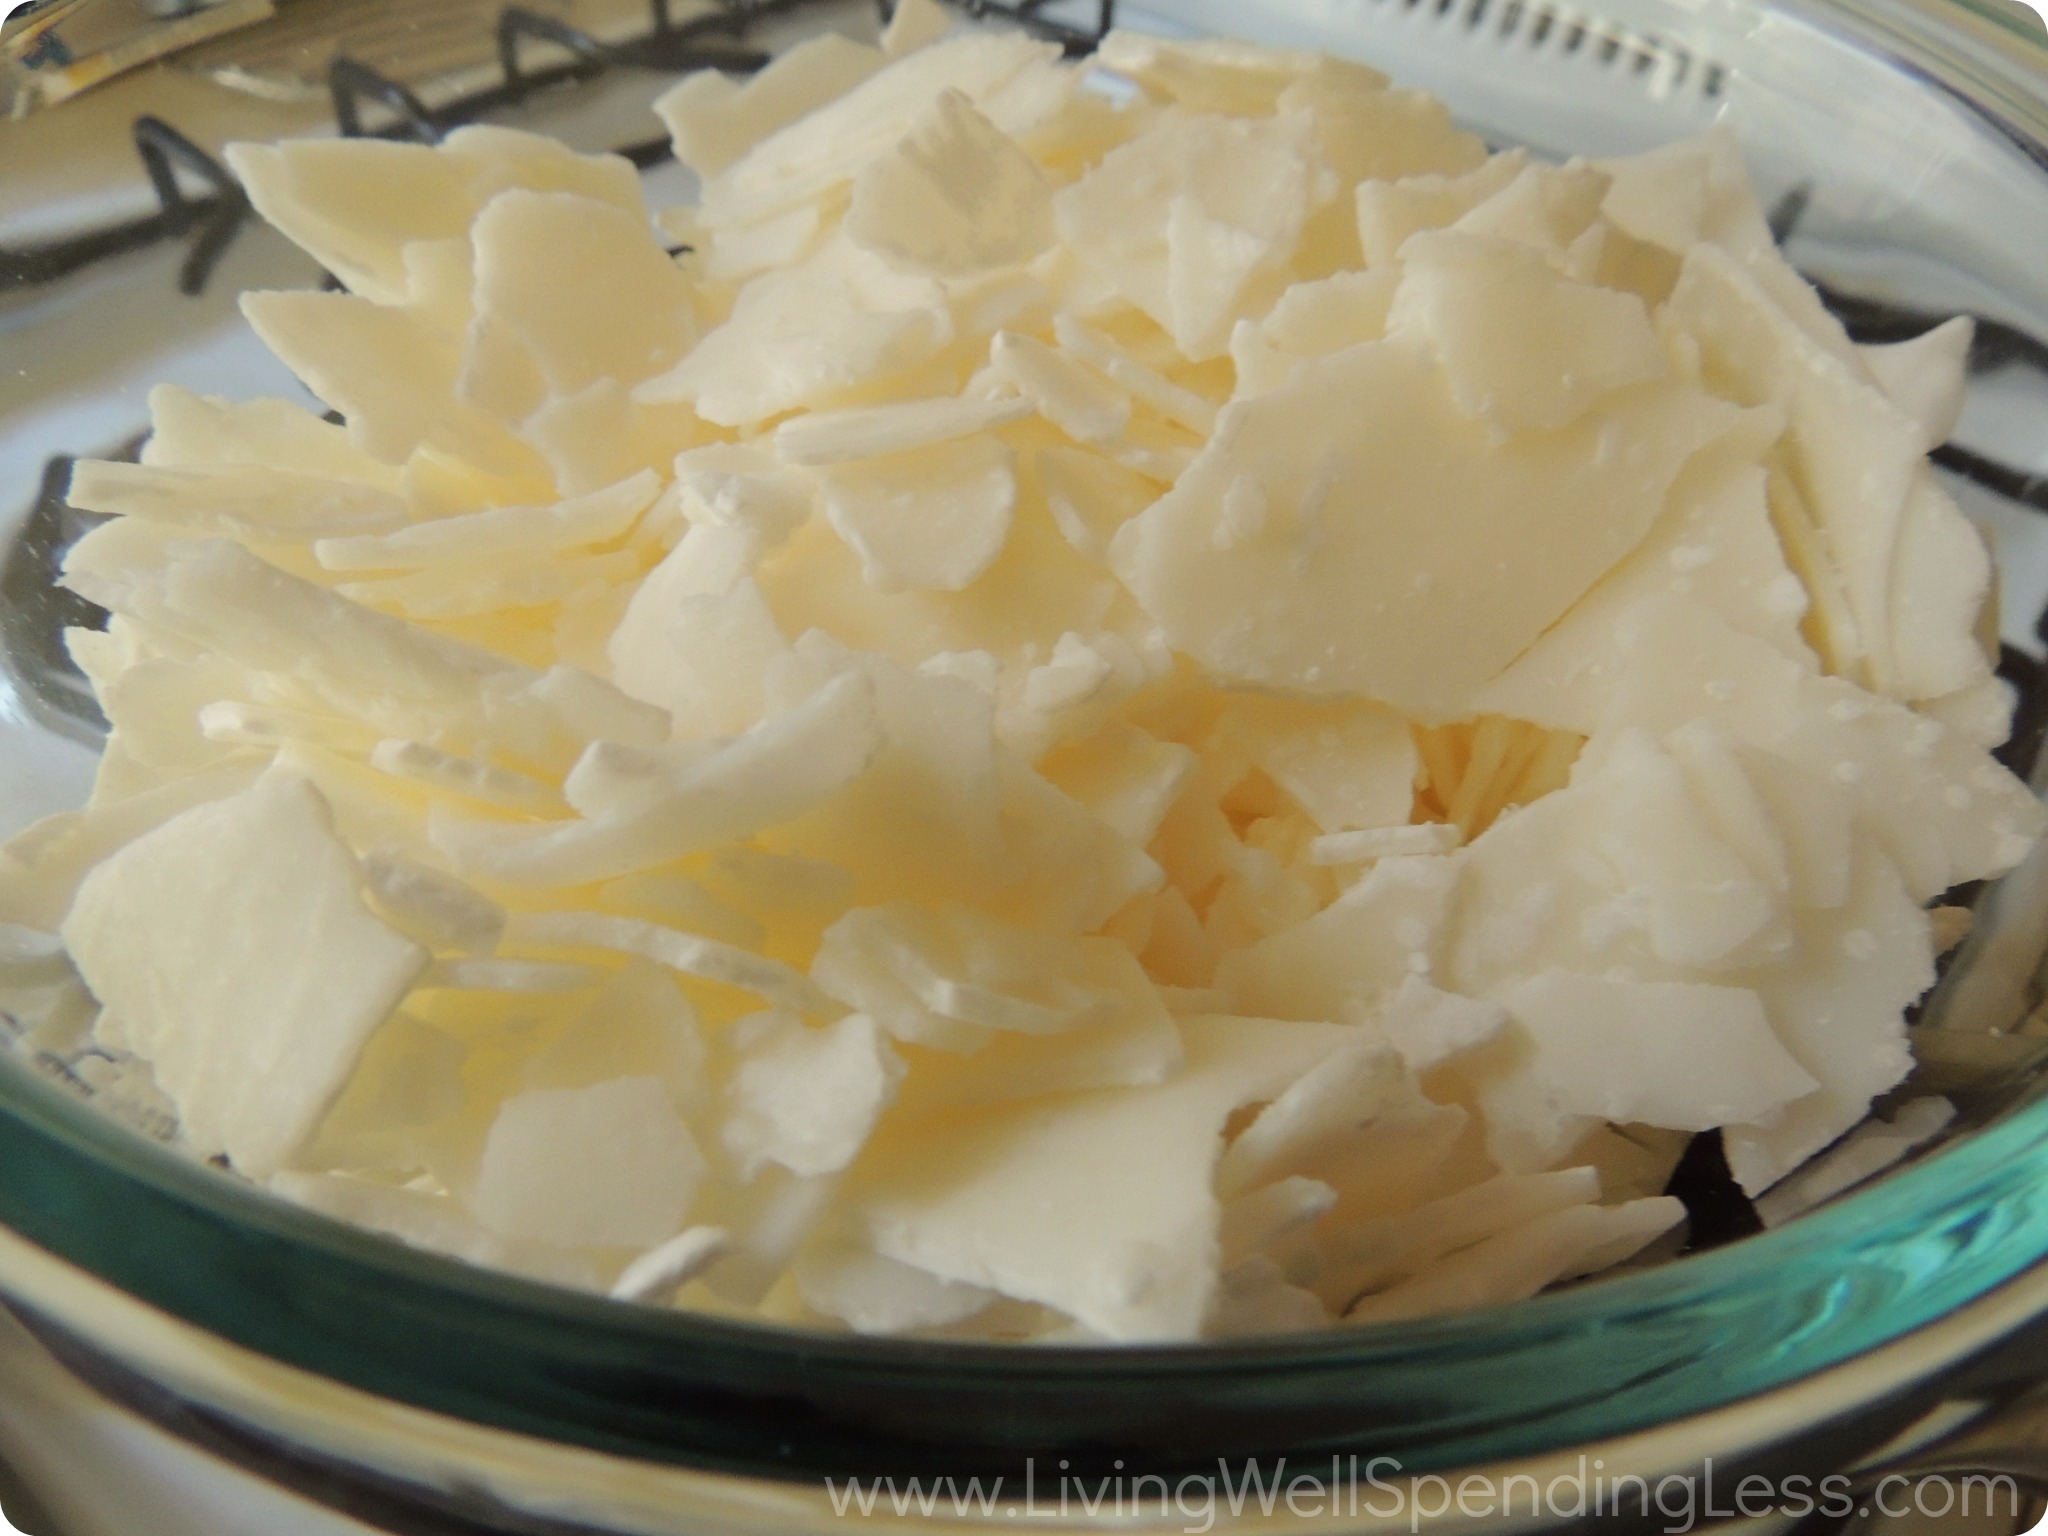
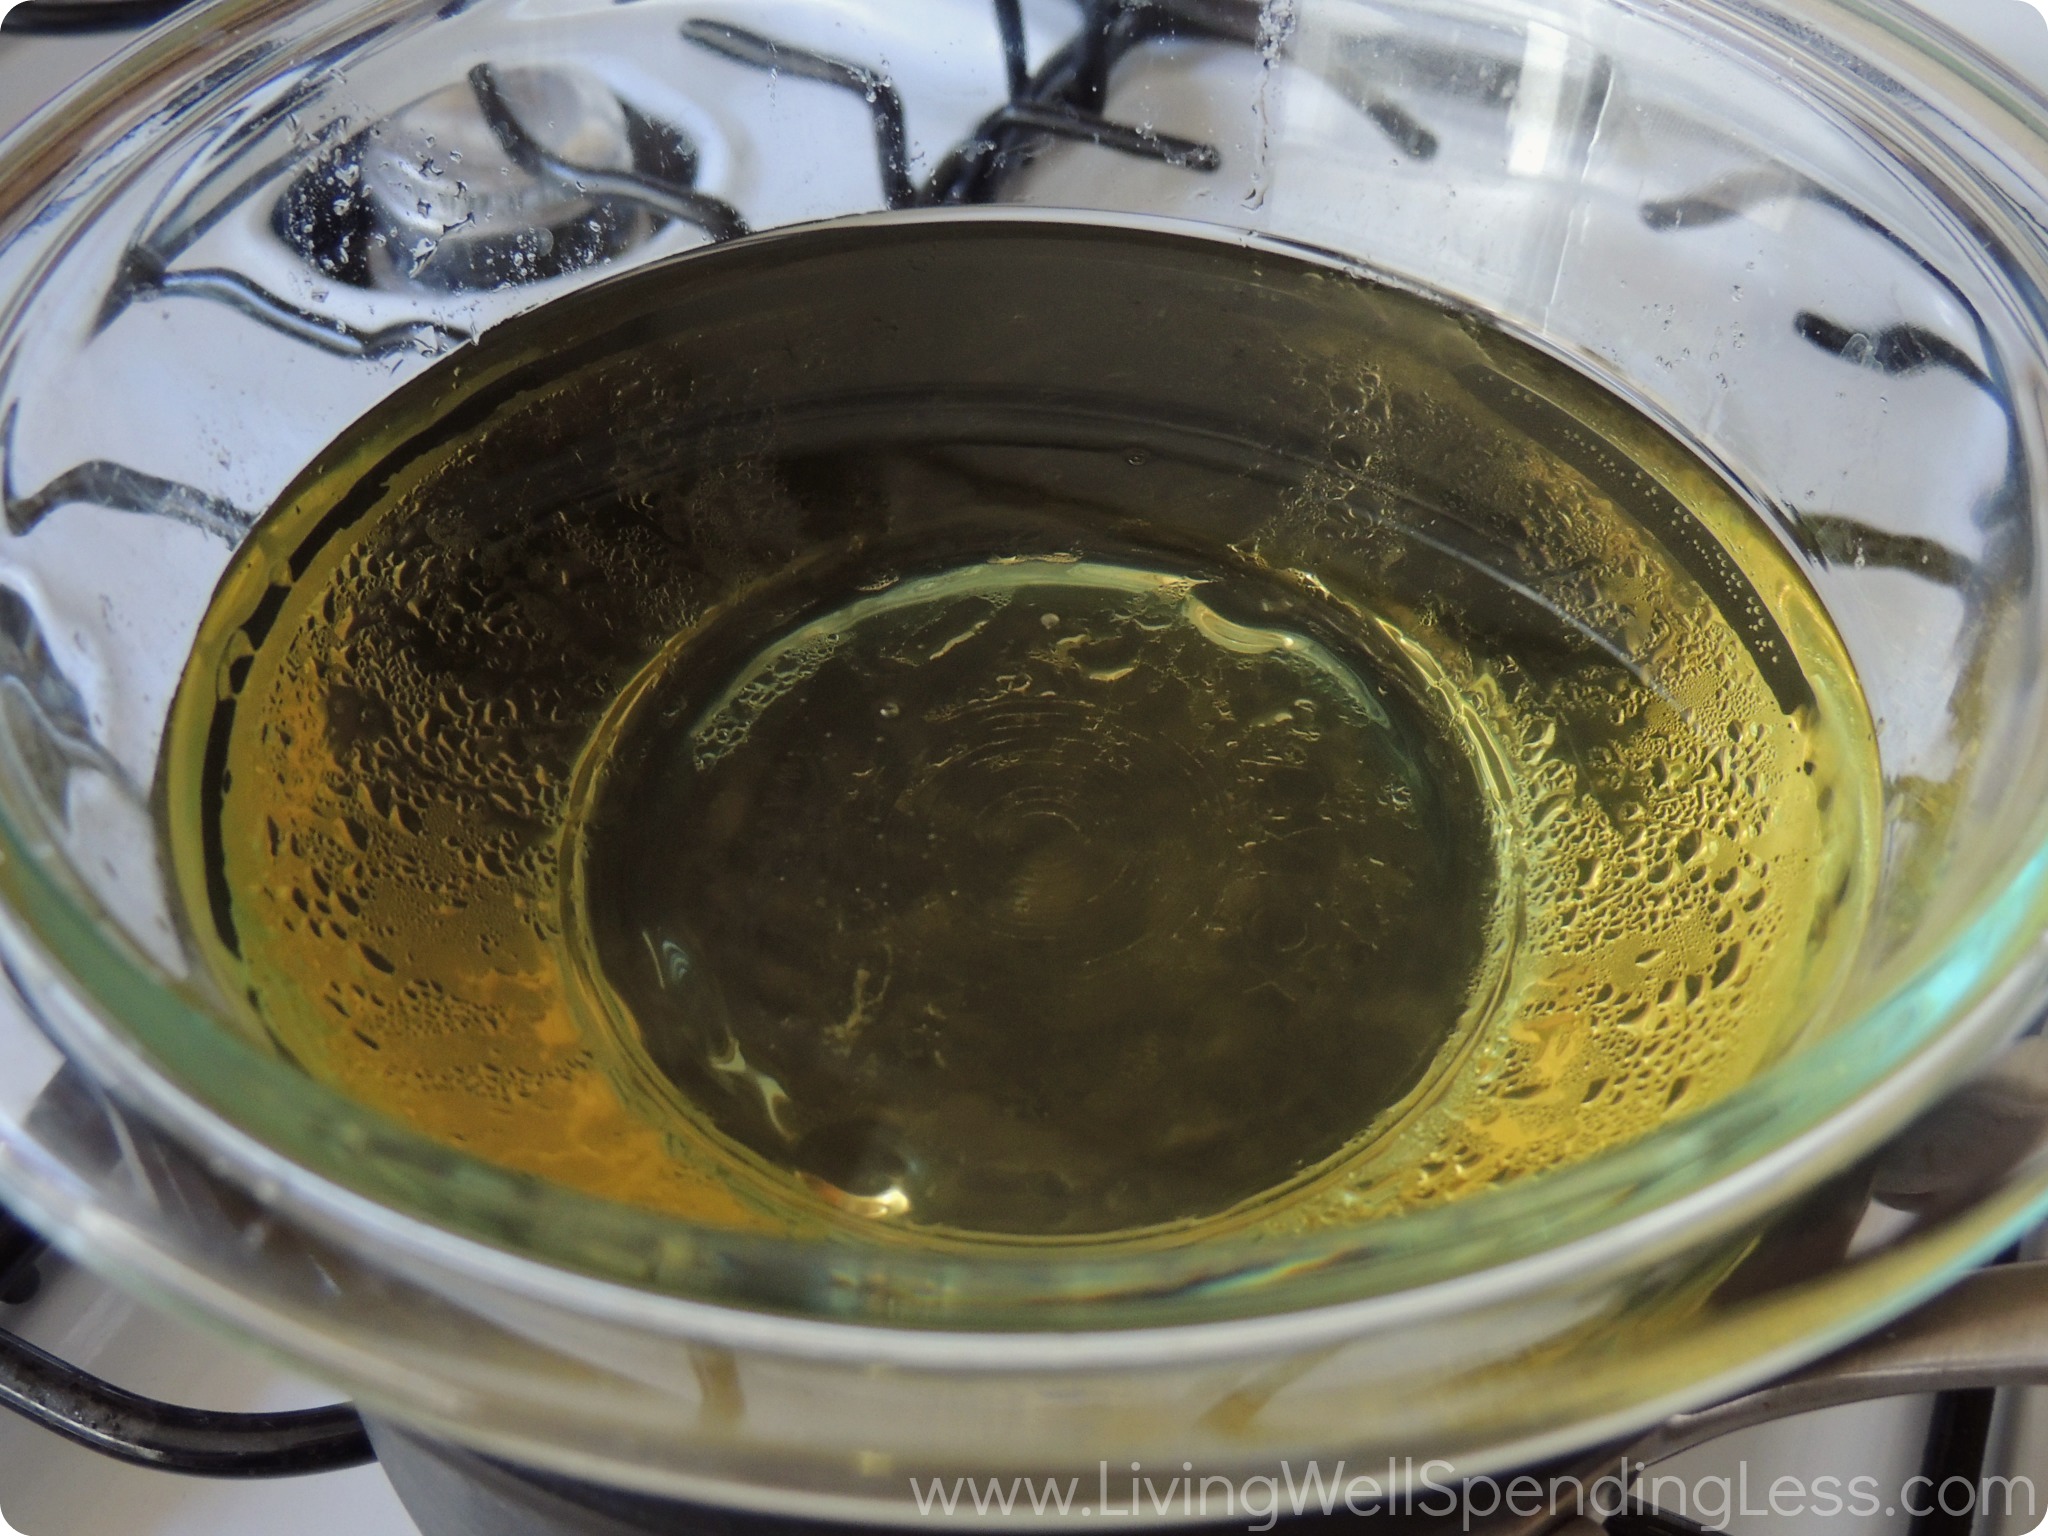
Step 1: Begin melting your wax. For this project I used soy wax that I melted in a make-shift double boiler made from a saucepan and a pyrex bowl sitting over it. I planned to fill one pint-sized mason jar, so I melted approximately 14 ounces of soy wax (I purchased a 1lb container of soy wax and had very little left over). I melted the wax on low to medium-low heat. Never leave melting wax unattended!
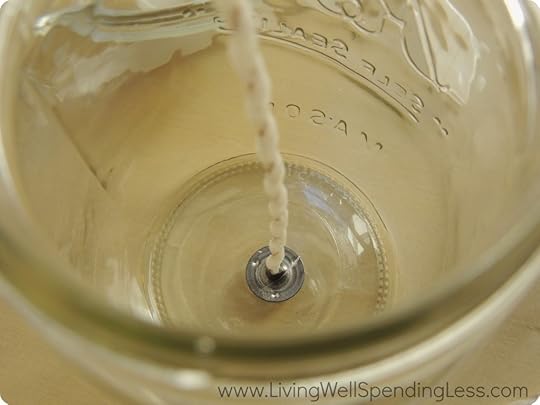
Step 2: While this is melting (and while you’re keeping an eye on your wax), secure your wick to the bottom of your mason jar. Apply a bit of hot glue to the center of your jar and hold it in place until it dries.

Step 3: Arrange your wick such that it stands upright. My wick was a bit stiff and stood upright reasonably well on its own, but I didn’t want to risk it falling over when it was sitting in a jar of hot wax. I ended up taking a piece of leftover thick card stock, cutting it into a circle, hole-punching the center, and then cutting away a section of the circle so I would have room to pour my hot wax.
I then put a dab of hot glue on the rim of my mason jar and glued the card stock down so it would not get bumped off accidentally. (Fortunately, dried hot glue applied to glass is relatively easy to peel off when you’re done!) This is just one of several ways you could balance your wick—there are no rules, as long as your wick is standing up straight!
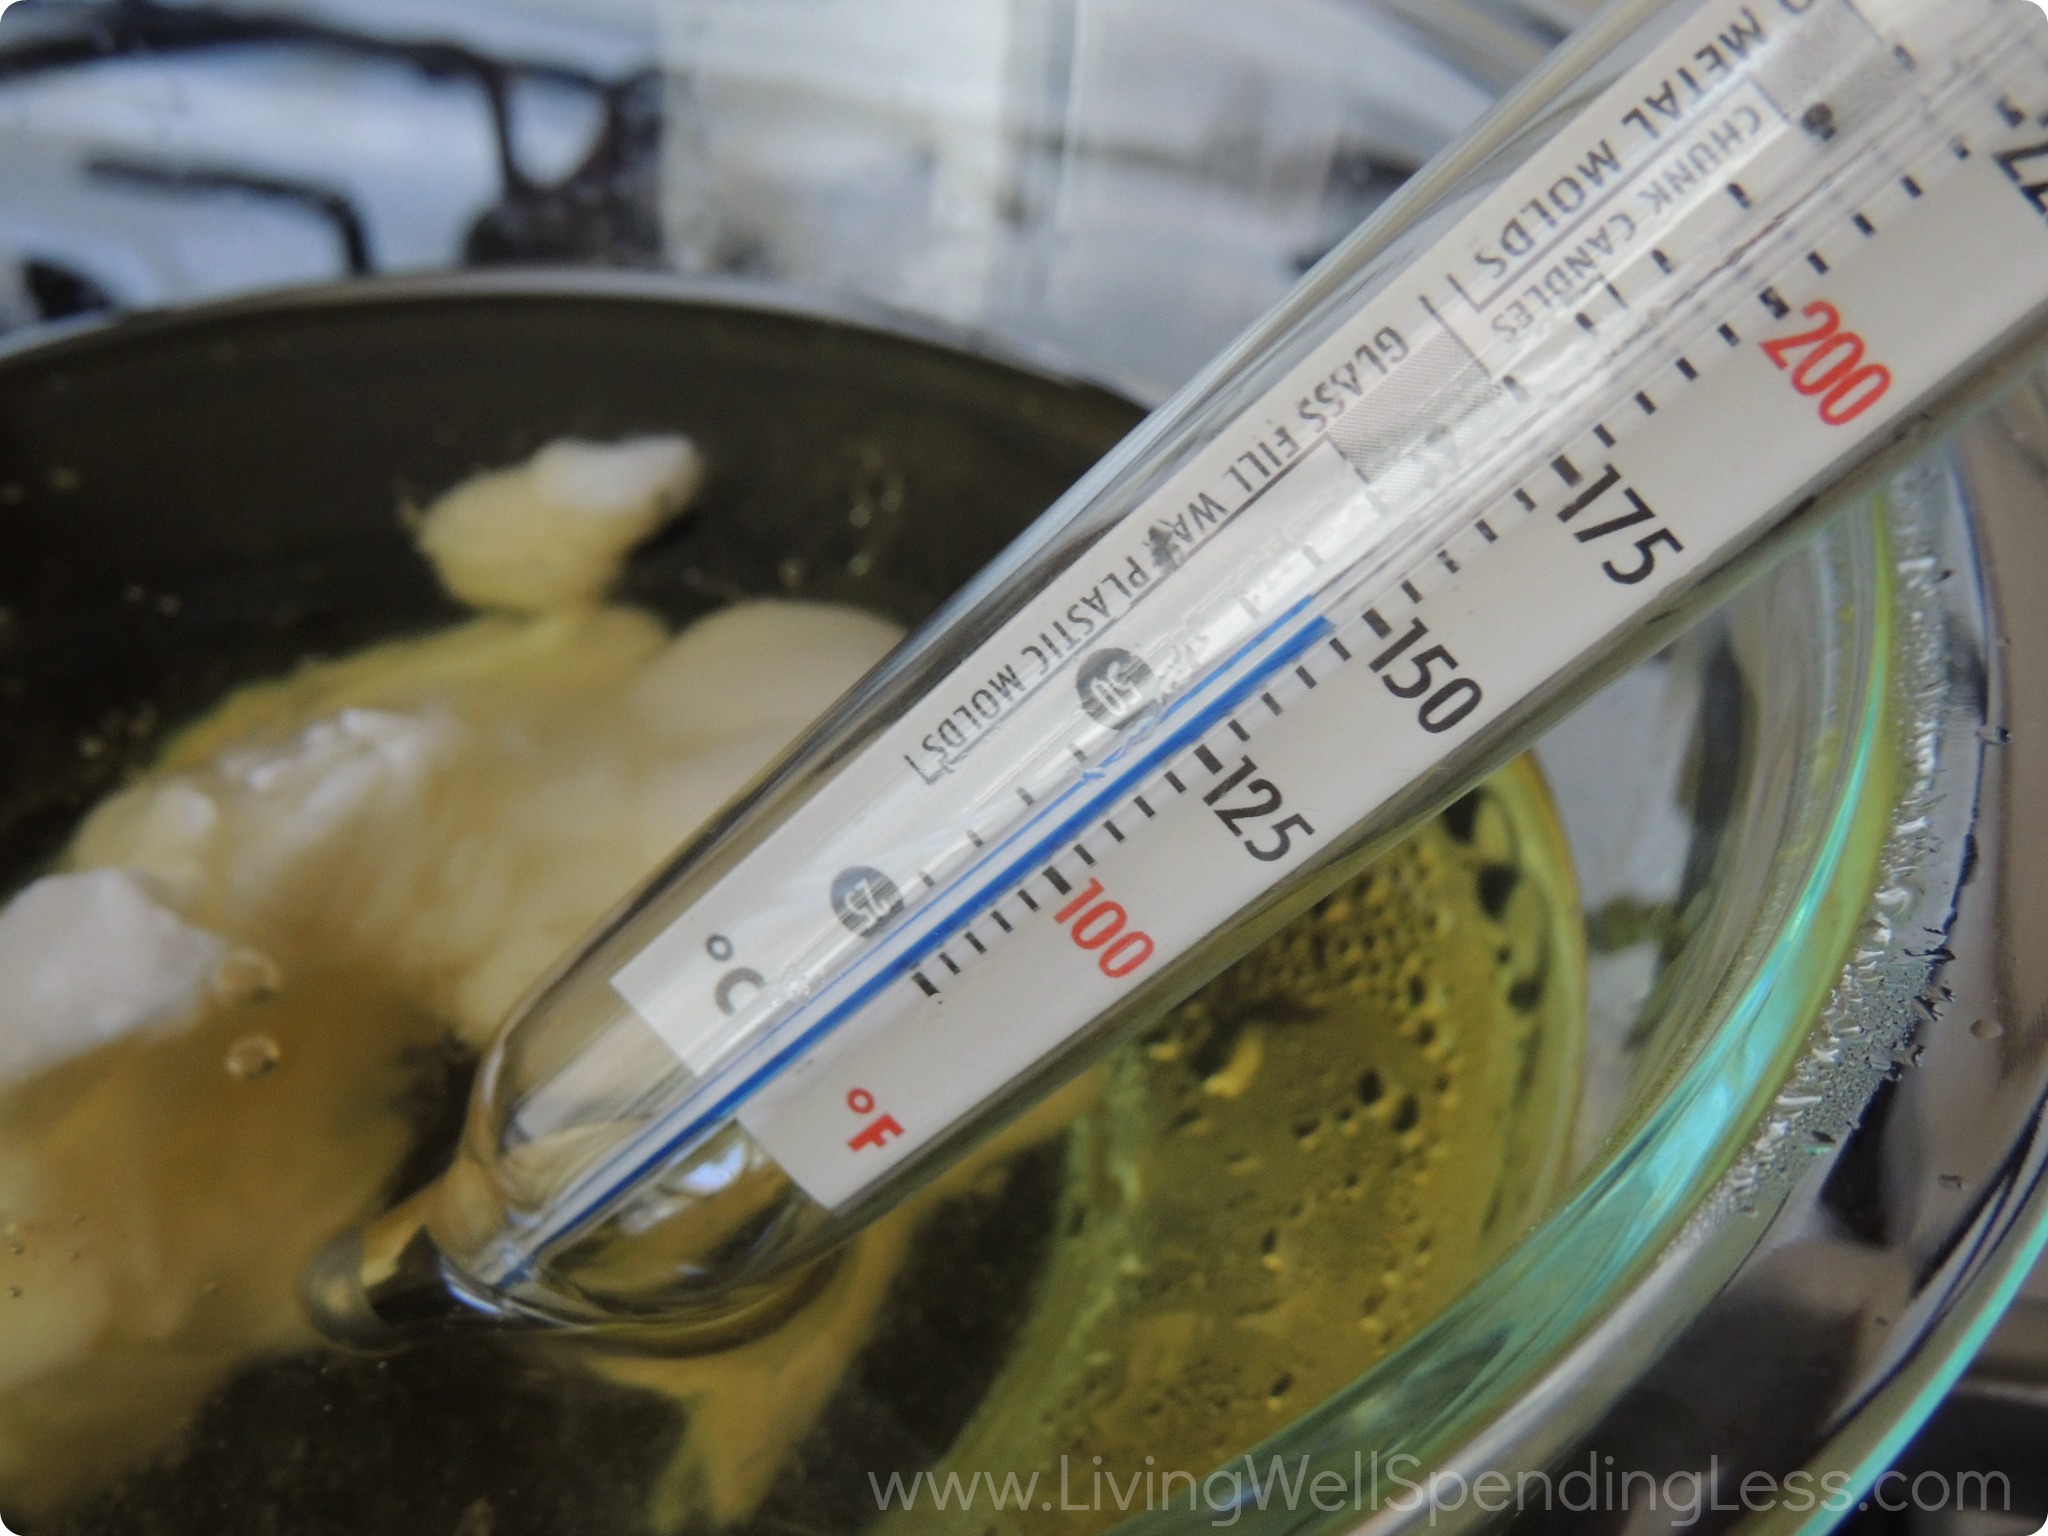
Step 4: When your wax is melted, allow it to cool a bit before adding in your colorants (if desired) and fragrances. Wax purchased in craft stores will typically come with a guide that recommends an ideal temperature for adding fragrances and colorants to your wax depending on the type of wax you’re using. For my wax, it was recommended to add in fragrance oil when the wax had reached between 120 and 140 degrees Fahrenheit. (This is because some fragrances can lose their scent when added to high-temperature liquids.)
To speed up the cooling process, I poured my hot wax into a room-temperature pyrex measuring cup with a spout.
If you purchased a fragrance oil or colorants designed for candle making, it should come with guidelines as to how much of each to use given the volume of wax you are working with. I ended up using approximately one ounce of a Milk and Honey fragrance oil from brambleberry.com. Bramble Berry’s website also offers a guide that suggests how much of their oils to use in a given project.
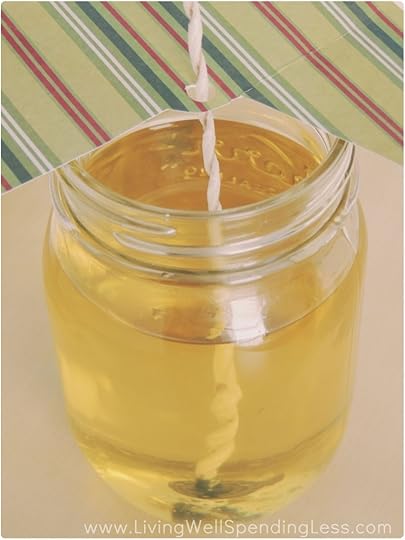
Step 5: Pour your wax into your mason jar and allow it to cool.

Step 6: When your wax has cooled completely, trim your wick to about 1/2”.
And viola! You have a lovely scented mason jar candle!
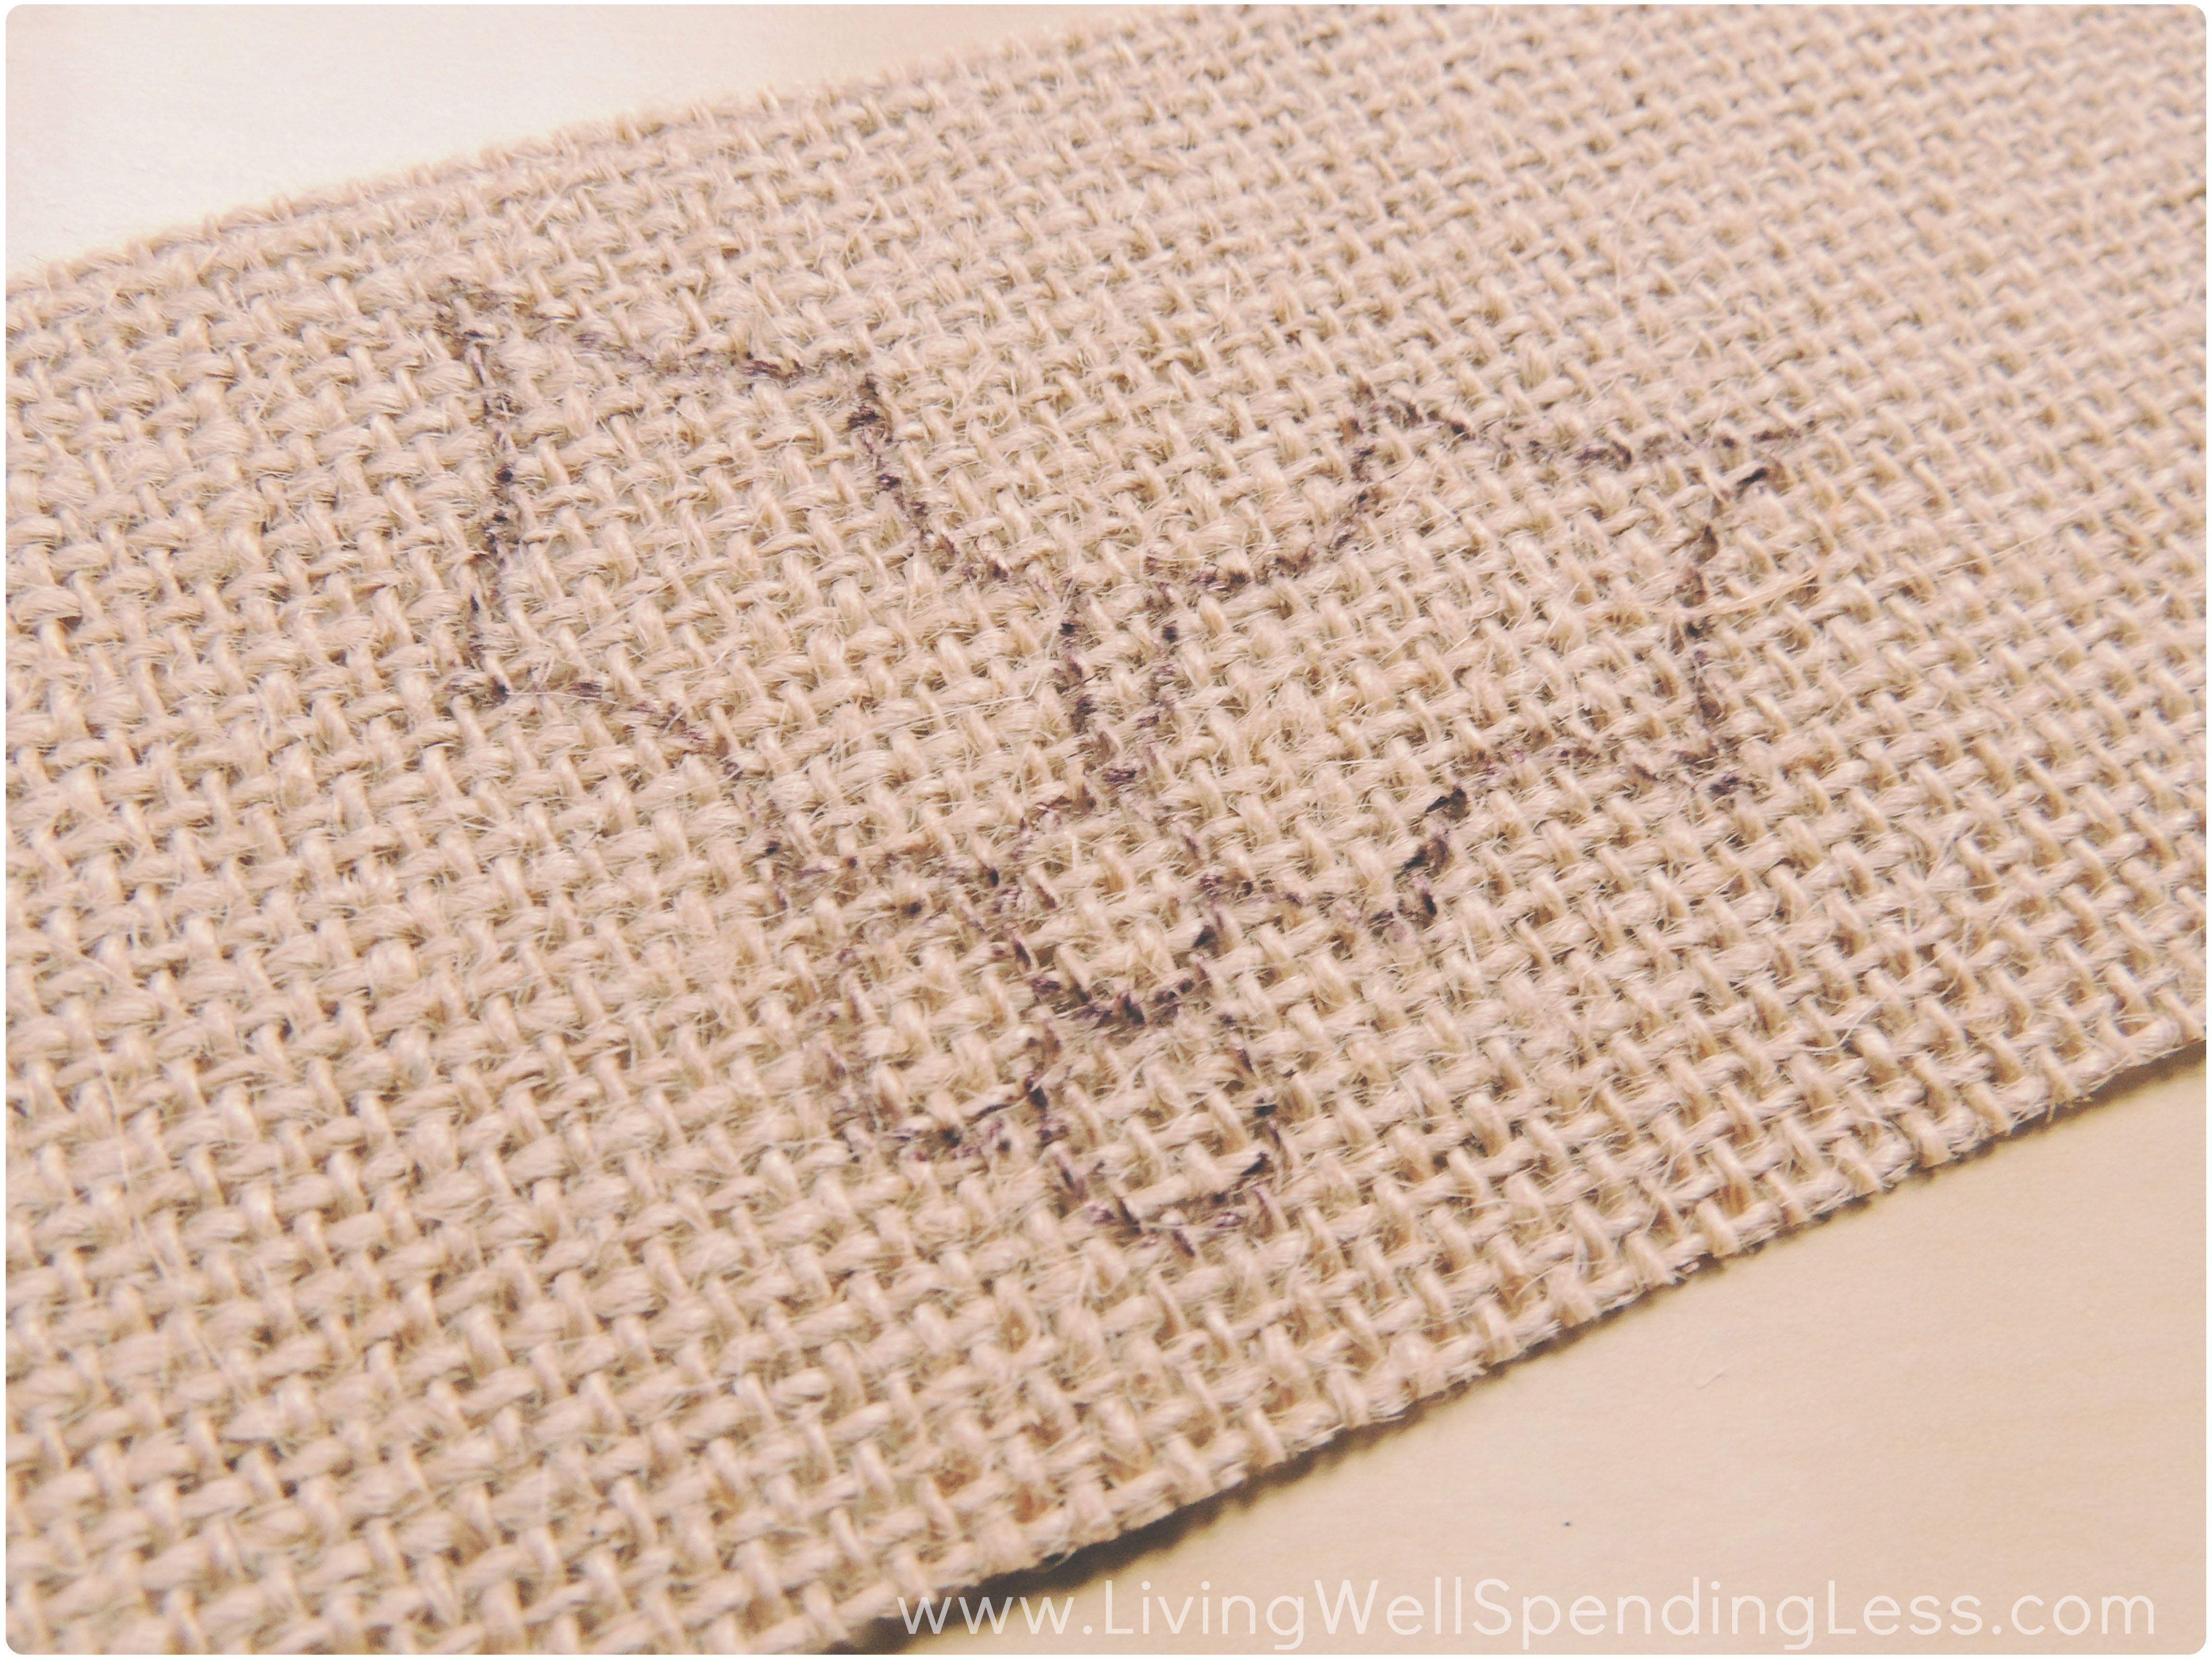
Step 7 (Optional): I decided to give my candle a sort of rustic look by decorating it with burlap and twine. I began by outlining my design in pen onto my burlap…
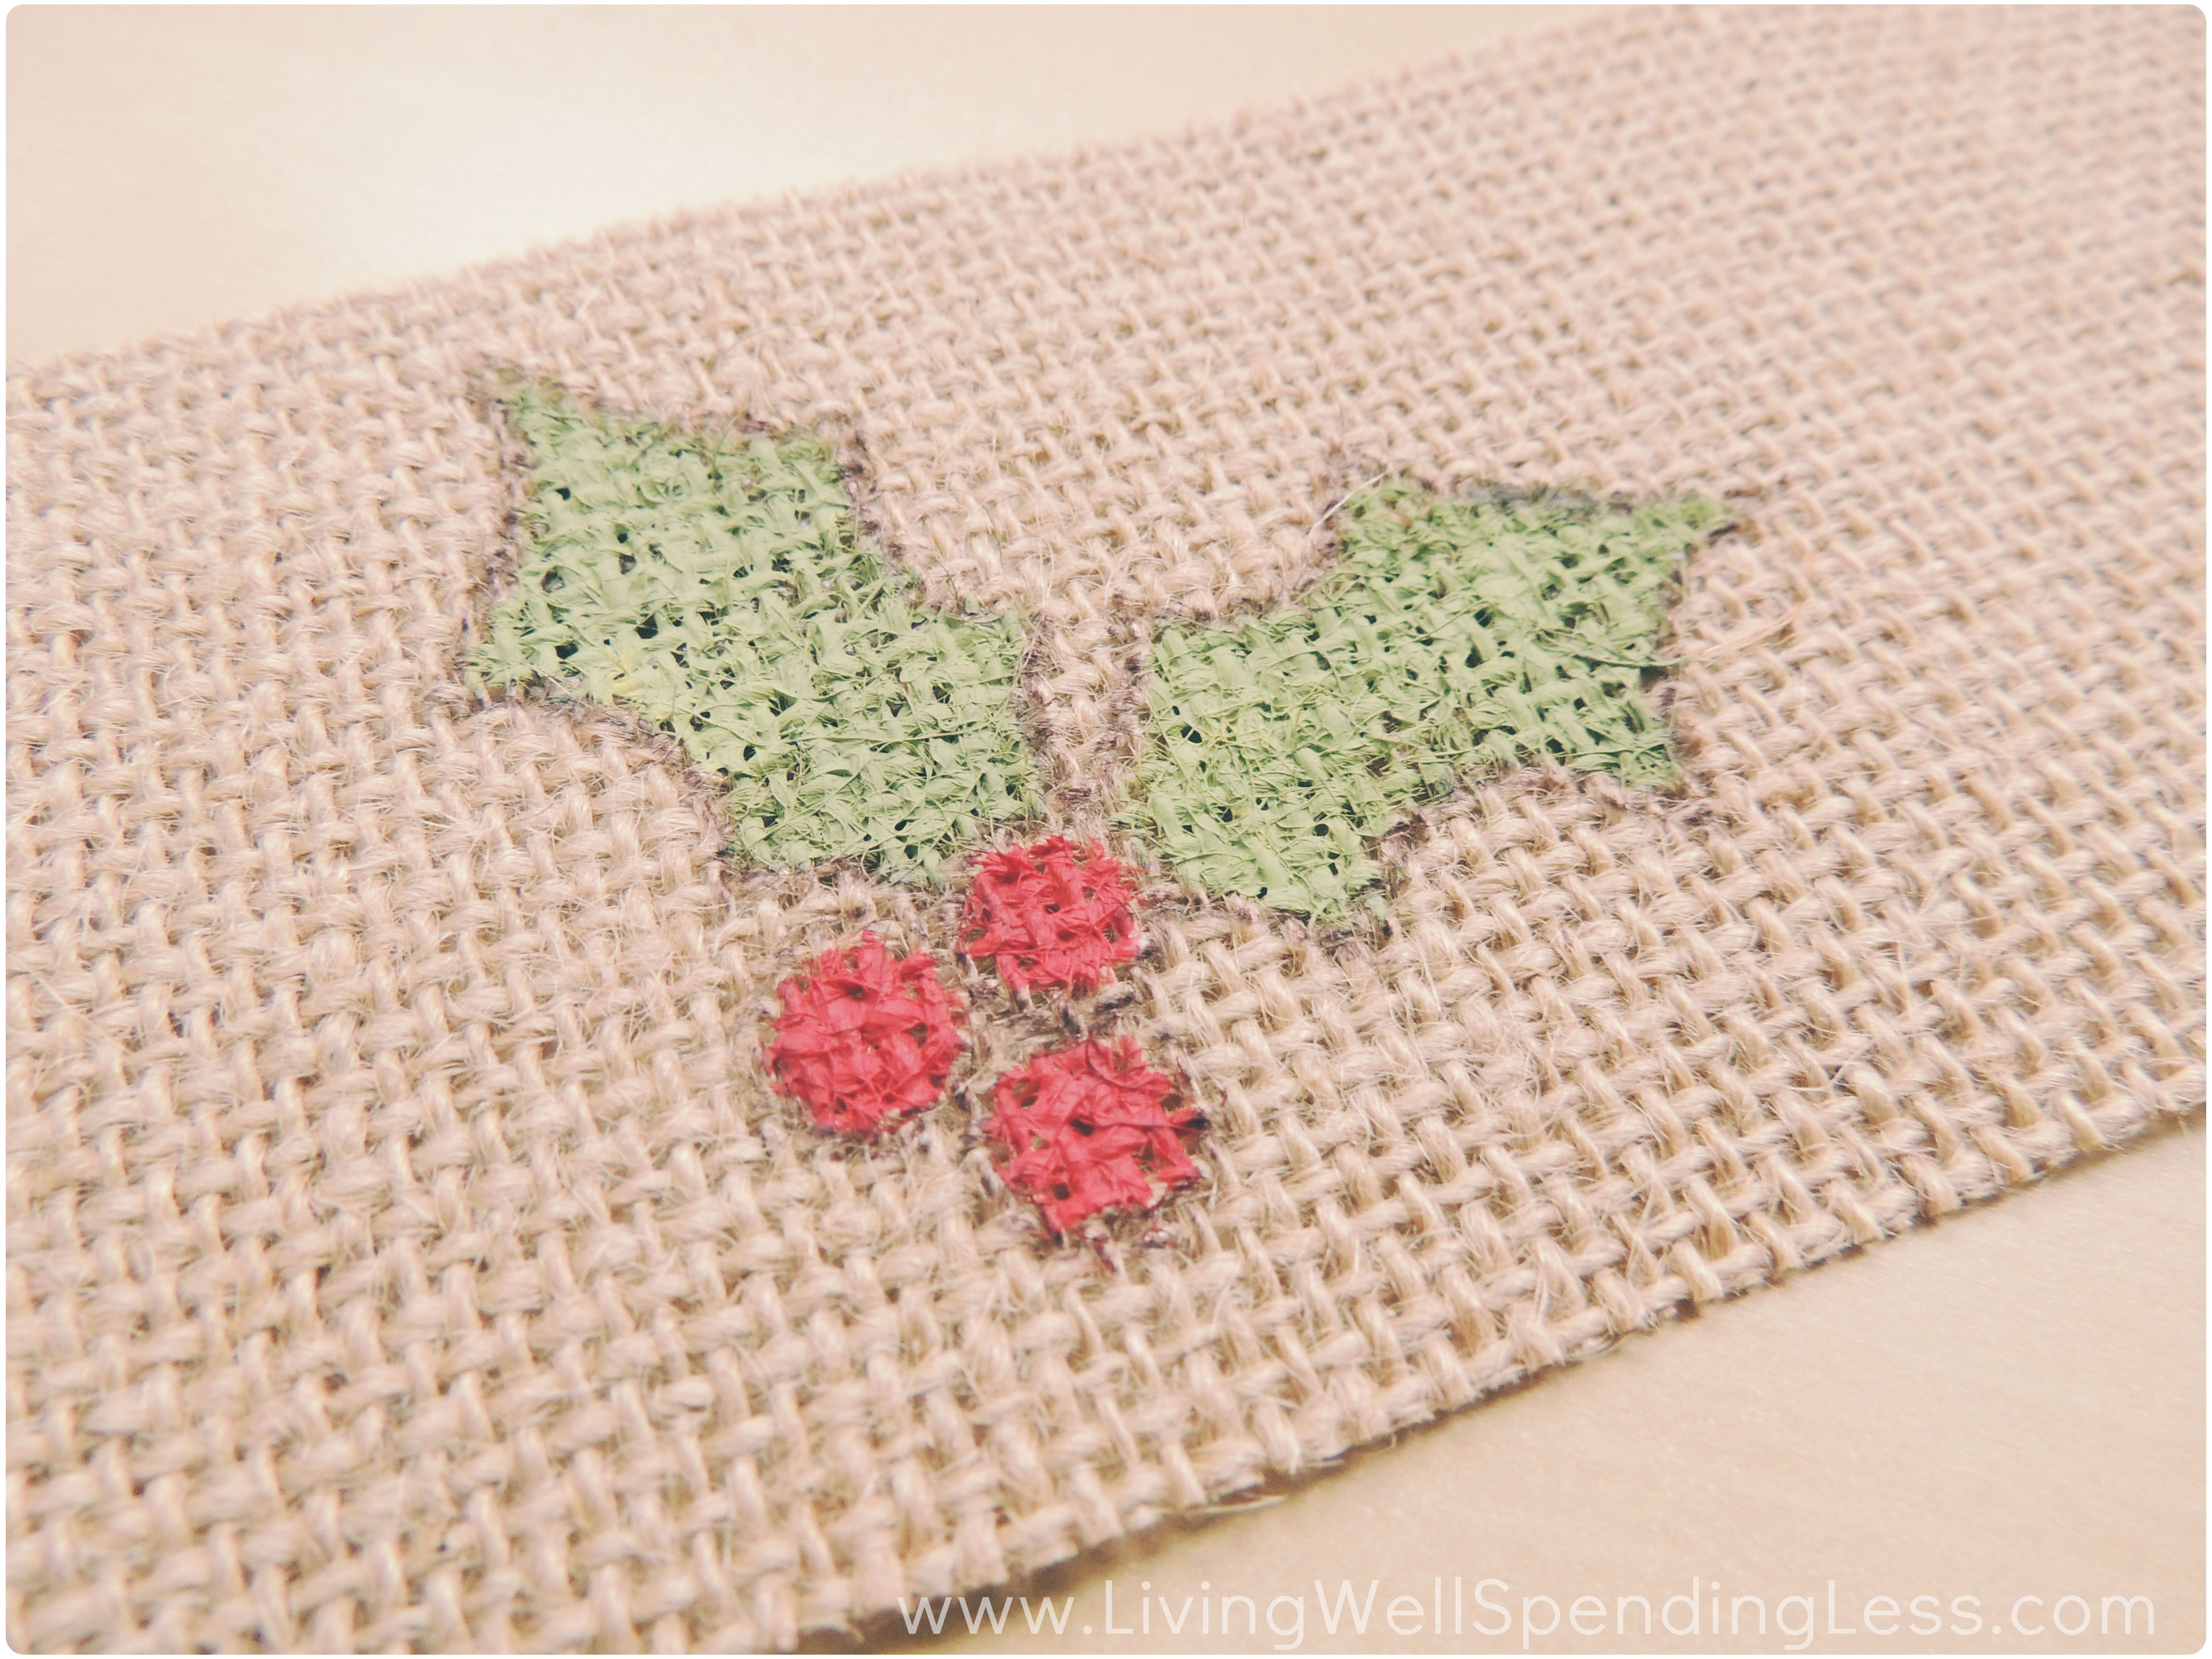
…before painting it with acrylic craft paint.
From there, I simply used hot glue to affix the burlap to the jar and tied on a twine bow.
And there you have it! An easy project and a lovely finished product. I hope you enjoyed this tutorial!
Gabby Whitaker of Essentially Eclectic is a DIY/craft/lifestyle blogger from Phoenix, Arizona. After moving to Boston, Massachusetts in the summer of 2012, she started blogging as a way to share her crafting creations, cooking escapades, and adventures in Boston with friends and family across the country. Some of Gabby’s favorite things include chai lattes, Downton Abbey, cozy bookstores, Netflix marathons and, of course, blogging!
* * *
What’s your favorite candle scent?
Pin It
The post DIY Scented Candle {Handmade Holidays} appeared first on Living Well Spending Less™.


November 17, 2013
Weekend Wandering

Happy Sunday! I hope you all are having an absolutely fabulous weekend! If you haven’t yet entered the LWSL Favorite Things Giveaway Extravaganza, be sure to do that today! I’m giving away a whopping $4,000 in prizes! Crazy!
I was SO inspired by you all this week! There were so many great posts to read and it was even harder than usual to choose my favorites. Here are just a few of the posts I loved:
* * *
First of all, these Easy Cheesy Scalloped Potatoes from Spend with Pennies really had me drooling. Cheese and potatoes? My two favorite things! I think they may have to go on the menu this week. Mmmmmmmm…..

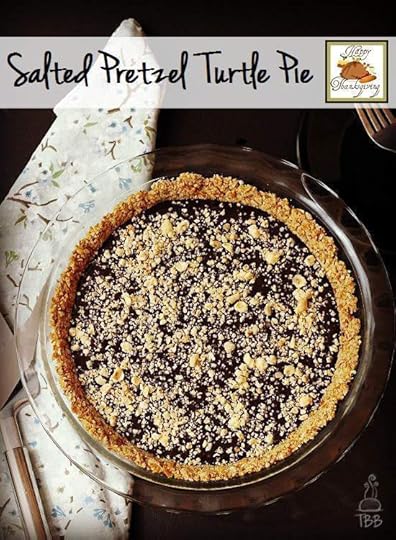
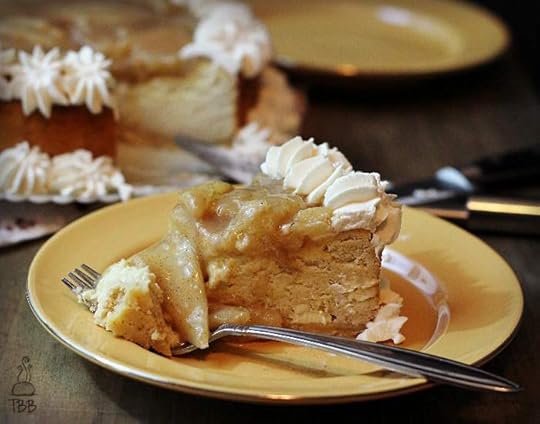
I was also drooling over this Salted Pretzel Turtle Pie from True Blue Baking! This would make a great alternative to your classic pumpkin pie at Thanksgiving Dinner!
How cute are these Gingerbread Man Marshmallow Pops from Cincy Shopper? Pretty sure my kids would go crazy for these!

And speaking of cute, I LOVED these adorable little Rolo Pilgrim Hats from Frugal Coupon Living!

I really loved these Free Thanksgiving Printables from The Blissful Bee. She has several cute designs to choose from that would make a great addition to your Thanksgiving decor!

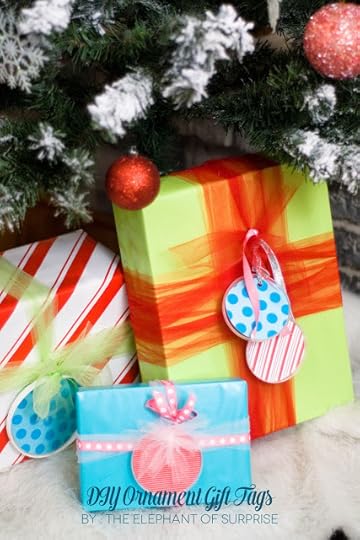
These DIY Ornament Gift Tags from Elephant of Surprise turned out so cute! I love that she used leftover items that would otherwise be thrown away, and I also love the bright & cheery wrapping!
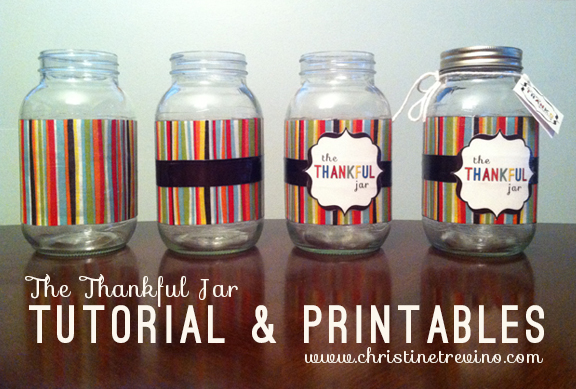
Loved this Thankful Jars Tutorial from Christine Trevino. Such a great idea & the free printables are super cute!
I buy almost everything at Amazon, especially Christmas gifts, and there are some amazing deals to be found this time of year! I really loved these tips for How to Purchase Amazon Lightning Deals from The Coupon Challenge.

Finally, I was very touched by this post on Why I Don’t Give Money to Homeless People from An Inviting Home. It is an issue I have struggled with too, and I absolutely loved her solution–it made me want to run out and do the same! Read the article. It will change you!

* * *
What did you love this week?
Pin It
The post Weekend Wandering appeared first on Living Well Spending Less™.
November 15, 2013
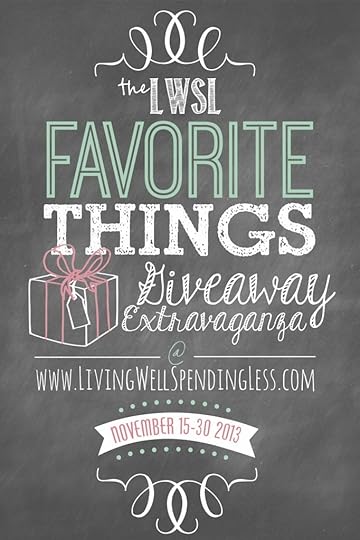
The LWSL Favorite Things Giveaway Extravaganza!
I was so giddy about sharing this post with you today that I could hardly sleep last night. I’m channeling my inner Oprah today, and friends, you better sit down for this, because it is B-I-G big.
Huge, actually.
I don’t do very many giveaways here at LWSL but this year I thought it would be fun this year to reach out to a few companies whose products & services I completely adore to see if any of them would be willing to share their goodness with you all. And guess what? They all said YES! When all was said and done, there were over $4,000 in amazing prizes to giveaway. It is by far the biggest giveaway I have ever hosted, and I can’t WAIT to show you all the awesome prizes I get to give away!
There are 32 prizes in all, which means your chances of winning one are pretty darn good! Even better, every single prize has a value of at least $50! Read about all the prizes below (and why they are my favorite things), then follow the instructions at the bottom of the post for how to enter. BE SURE TO READ THE INSTRUCTIONS CAREFULLY, as anyone who has not followed the rules will be automatically disqualified! Also, (and I am so very sorry that I have to do this), but this giveaway is only open to US residents.
My Favorite Things 2013:

One (1) Amazing Grace Wall Art from Red Letter Words {value $230}
I have been a fan of Red Letter Words for years, ever since I first spotted the artwork on another blog, and then I recently had the chance to meet the owner and artist, Dee, in person, and now I love this amazing family-owned company even more! Red Letter creates simple but gorgeous canvases from Bible verses and hymns. If you’ve been here before and read my Amazing Grace depression story, you probably already know why I am particularly partial to this beautiful set. One lucky winner will get this set in the 11×14″ canvas size in the color of your choice!
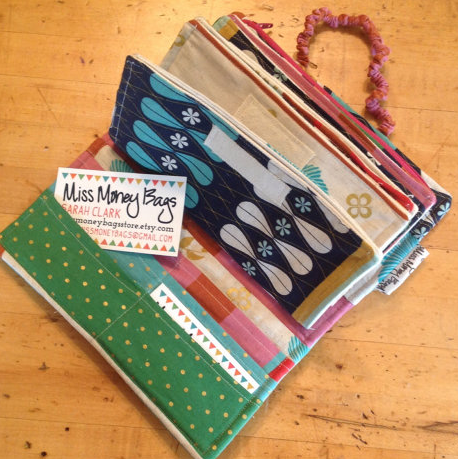
Three (3) Cash Envelope Wallets from Miss Money Bags - {value $75 each}
After completing Dave Ramsey’s FPU, my husband and I became fully committed to sticking to a cash budget. Unfortunately we have found that carrying around paper envelopes can be a real pain in the you-know-where–they rip like crazy! I am so excited to have found these absolutely DARLING handmade cash envelope wallets from Miss Money Bags. How stinkin’ cute are these things?!! You can get them in a variety of sizes and colors and patterns, and they are SO incredibly sturdy and well made! I absolutely love mine to pieces! Three lucky winners will get to choose a Miss Money Bags wallet of their very own!

One (1) membership to Dave Ramsey’s Financial Peace University {value $199}

One (1) membership to Dave Ramsey’s Legacy Journey {value 229}
And speaking of Dave Ramsey, I am SO excited to also be able to give away one memberships Financial Peace University and one membership to Dave Ramsey’s brand new course, The Legacy Journey. We completed the FPU course last year and I honestly can’t say enough good things about it. It forever changed the way we look at money, and the way we dealt with money issues as a couple. It is not just a financial course, it is a marriage saver!  We have now just started doing the Legacy Journey course and so far I am blown away. It is so freeing to have a long-term financial plan in place!
 Two (2) One Year Lunch/Dinner Subscriptions from eMeals {value $106 each}
I absolutely love the idea of meal planning, but the reality isn’t always so simple. First of all, it takes a lot of work and effort to come up with a whole week’s worth of yummy, family-friendly (but not too time consuming recipes.) Second, planning meals without first considering what is on sale at the grocery store can end up being really expensive. This is exactly why I love eMeals! Not only do they have a whole amazing lineup of yummy menus to choose from they put a lot of thought into choosing common ingredients that go on sale frequently, that are on season, and when possible, are even customized to your own store’s weekly sale cycles. Two lucky winners will each receive a one year lunch AND dinner subscription to the meal plan of your choice! Also, right now you can save 30% on a subscription when you use the promo code CYBER (their best on-site discount of the year!)

Four (4) Qubie Coupon Organization System Sets {value $50 each}
If you’ve been reading this site for a while, or if you learned to coupon using my Beginner’s Guide to Coupons, you might already be familiar with this little gem of a company, since I have been talking about my Qubie binder for a very long time now. For those of us who use and love coupons AND love to be organized, Qubie is a godsend. It is a 3-part coupon binder system that allows you to organize ALL your loose coupons, from grocery coupons in the large binder, to retail & restaurant coupons in the medium binder and store savings cards in the small one. I have personally used Qubie for almost 3 years now, and I am so excited to give FOUR lucky winners a Qubie Coupon Organization System of their very own.
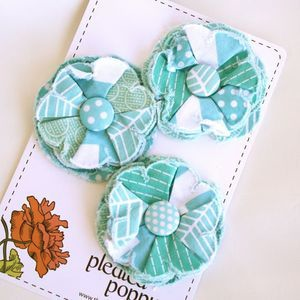
Four (4) $50 Gift Cards from The Pleated Poppy {value $50 each}
If you’ve never visited the Pleated Poppy Shop then you cannot do anything else until you spend some time drooling over all the ridiculously cute bags, flower pins, hair clips, scarves, Christmas stockings & more that she has to offer. Seriously, I die. Plus I absolutely adore Lindsey, the shop’s owner, and all her stuff is so colorful and pretty and cheerful…..I swear she must be the happiest person on earth! Four very lucky readers will each get a $50 gift card to go pick out the treasure of your choice from the Pleated Poppy Shop!

One (1) Fully Loaded Gift Basket from Dr. Smith’s {value $200}
Sadly for me, my girls are no longer babies. Even so, we still use our Dr. Smith’s ointment every single day. As I explained in this post earlier this year, my youngest daughter has extremely sensitive skin, and Dr. Smith’s is pretty much the only thing that gives her any relief from all the itchiness and painful dryness. (Get a $2.00 off coupon here) Dr. Smith’s is generously offering one reader an awesome gift basket loaded with baby products, including plenty of their own of diaper rash ointment!
 Two (2) Spots in Ashley Ann’s iPhonography course {value $100 each}
I’m not really sure how I first stumbled upon her site, but Ashley Ann Campbell’s Under the Sycamore was the first blog I ever read regularly. From the beginning I was captivated by her warm spirit and caring heart, and consistently blown away by her stunning photography. In fact, it was her photos first made me want to learn how to take better pictures! Luckily for me (and for you) Ashley now offers two different online photography courses, one for DSLR and one for iPhone photography. I have taken her DSLR course and it was sooooooo incredibly helpful, and I have no doubt that her iPhone course–which two lucky winners will receive–is just as amazing.

Four (4) $50 Gift Cards to Gussy Sews {value $50 each}
While attending my first blog conference I spotted the cutest purse I had ever seen. I couldn’t stop myself from asking the girl carrying it where on earth she had found it, and wouldn’t you know, it was Gussy herself! I immediately ordered my first market tote and have been a super-Gussy-fan ever since. I’ve even had lots of you ask about them after seeing them in my shopping videos! Everything she sells is absolutely gorgeous, from the handmade infinity cowls to the ruffled make-up bags to the oh-so-stylish diaper totes. It is a good thing we are committed to a cash budget because I seriously want them all! FOUR of you will score $50 gift cards to her shop!
 One (1) Madison Laptop & Camera Bag from Epiphanie {value $224}
While my Gussy totes are perfect for everyday, there are also times when I travel that I need to carry my laptop and my big DSLR camera. That is where my Epiphanie bag comes in! I cannot even tell you how much I love this bag, and how many compliments I get each time I use it! The inside is lined with soft padded flannel to protect my expensive gear, but the outside is sassy & stylish and the perfect accompaniment to any outfit. I personally love the teal, but one lucky winner will get this Madison bag in the color of their choice!

One (1) Google Nexus 7 Tablet from Staples {value $229}
Being a blogger means I use Google-owned services a LOT. For everything. All. The. Time. And frustratingly I happen to have 3 separate Google accounts, ALL of which I use on a daily basis! Because it is a pain to have to log in and out to all three accounts, on my laptop I usually end up using three different web browsers, which then slows down my computer to a crawl. Enter the Google Nexus, which has become my Google lifeline! It actually allows me to shift back and forth between all three Google accounts with just the press of a button. But don’t worry, it does other things a tablet should do too, like take pictures and play movies and surf the web, all in a super sleek package that fits nicely in my purse. And did I mention how reasonably priced it is? Staples carries it for just $229, and ONE of you very lucky winners will get one of your very own!
One (1) 2 Year Supply of LYSOL Air Filters + a Gift Basket of LYSOL Products {value $280}
Clean air and a clean house. Yep, those are definitely some of my favorite things! A few months ago I shared about some of my daughter’s breathing issues and how it has become such a priority for our family to improve our indoor air quality. Using a high-efficiency air filter is one of the least expensive – and most effective – things you can do to remove harmful allergens and pollutants from the air in your home, improving indoor air quality and the health of your family. This is especially important during the cold winter months, and one winner will receive a 2 year supply of LYSOL Air Filters + an awesome gift basket loaded with LYSOL cleaning products!
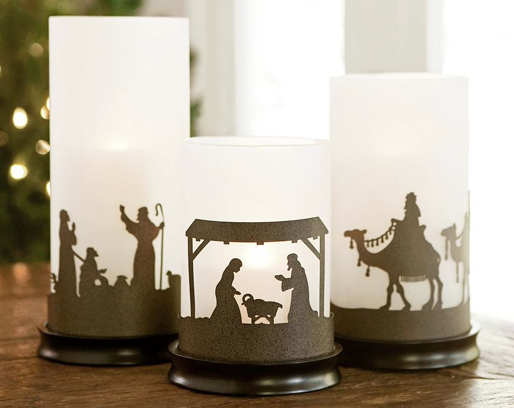
Three (3) Nativity Set from DaySpring a few years ago and no matter where I place it in my house, it always receives a ton of compliments! It is definitely one of my very favorite Christmas decorations! They’ve even managed to improve the set since I first bought it–now it comes with an extra set of non-Christmasy sleeves that allows you to use the set all year round. If you’ve never shopped at DaySpring before, this is a great time to check it out! In November they always have a few Super Deals going on, and this year’s selections are really good! Plus you can save an additional 20% off your entire order when you use the promo code HOLLEY20! Three very lucky winners will each receive a Nativity Hurricane Candle Set of their very own!
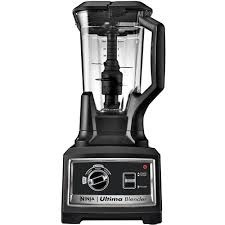
One (1) Ninja Ultima Blender {value $199}
I’ve been pining for a really good blender for years, but I couldn’t ever convince my husband that we needed to spend $500+ plus on one of those super fancy brands. Then, about six months ago, we read a Consumer Reports article and discovered the Ninja Brand. We ordered our Ninja blender the very same day and have been SO thrilled! With its triple blade and nearly instantaneous ice crushing power, the thing puts every other blender we have ever had to shame. One lucky winner will receive a Ninja Ultima Blender of their very own!
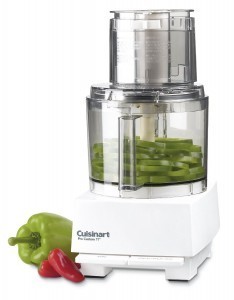
One (1)-$70 in Silk Products + a Cuisinart Food Processor {value $209}
As a vegetarian, I love cooking with Silk products, and as a thrifty shopper, I love that, in addition to being GMO-free and super healthy for you, Silk products actually go on sale AND they can be purchased with coupons! I also love cooking with my large capacity Cuisinart Food Processor, especially this time of year! In fact, I used it just this week for my Roasted Garlic Mashed Cauliflower! One lucky winner will receive $70 worth of Silk Free Product Coupons, as well as my favorite Cuisinart Food Processor (courtesy of Silk!)

One (1) set of 4 tickets to Universal Orlando & 4 tickets to Blue Man Group Orlando {value $1,067}
Living here in Florida, we are pretty spoiled in terms of family entertainment! Here in the Sunshine State there are no shortage of fun activities to keep us busy. Now that my girls are a little older, our favorite getaway spot this year has been Universal Orlando! For just a few dollars more than the price of a one-day ticket, we were able to get season passes, and we have had SO much fun exploring both Universal Studios and the Islands of Adventure theme parks (home of my favorite place on earth, The Wizarding World of Harry Potter. Butterbeer anyone? I die.) On our last trip we were also able to catch a Blue Man Group show. It was SO much fun! I was a little worried that my kids would get bored, but they both absolutely loved it! They talked about it the whole way home.
So, to finish off this awesome giveaway with a BANG, one of you VERY VERY LUCKY readers will win a package that includes FOUR Universal Orlando park tickets (a one day pass to both parks) and FOUR tickets to see the Blue Man Group at Universal Orlando. The total value of this ticket package is over $1000! Can I get a little woot woot? (Please note that travel is not included!)
HOW TO ENTER:
Please read the following instructions carefully! Entering is not difficult, but there are a couple of steps to follow to make sure your entry is counted. I would hate to see anyone be disqualified! Once again, this giveaway is open to US Residents only.
MANDATORY: Leave a comment in the comment section below answering the following question: Which of these Favorite Things are you most excited about the chance to win?
MANDATORY: Using the drop-down box (click the triangle) on the widget below, click the green “I commented” box. Please note that you MUST click this box to be entered to win! All the winners are chosen at random through this widget, so if you do not check the box, your comment will not be counted.
OPTIONAL: Once you have clicked the green “I commented” box, you will unlock the ability to get up to FIFTY (50!) additional entries into the giveaway. Use the widget to like LWSL and all the giveaway sponsors on Facebook, as well as to tweet about the giveaway, following on Pinterest, and subscribing to the LWSL weekly newsletter. (If you are already following or already a subscriber, all you have to do is click the box!)
* * *
Which of these Favorite Things are you MOST excited about?
Pin It
The post The LWSL Favorite Things Giveaway Extravaganza! appeared first on Living Well Spending Less™.
November 14, 2013
Thrifty Thursday {Week 36}

Happy Thursday, my thrifty friends! It is time once again to link up your budget-friendly blog posts. I loved seeing all your holiday ideas last week, and I’m again looking forward to seeing all your best Thanksgiving recipes, as well as some of your savvy holiday shopping tips and handmade gift ideas!
And speaking of holiday fun, I’ve got something BIG happening tomorrow that I guarantee you are ALL going to want to come back for! I can’t share all the details just yet, but let’s just say it is a giveaway so ginormous that it might actually knock your socks off!
Here are the most clicked links from last week
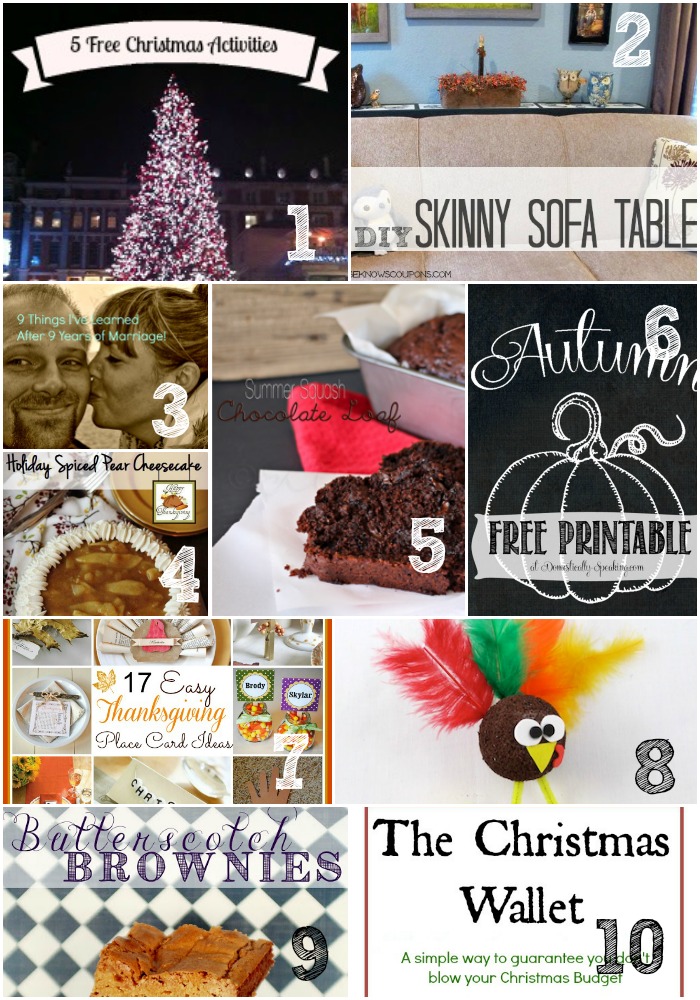
1. A Nicer Choice {Five Free Christmas Activities}
2. Rose Knows Coupons {DIY Skinny Sofa Table}
3. An Inviting Home {Nine Things I’ve Learned After Nine Years of Marriage}
4. True Blue Baking {Spiced Pear Cheesecake}
5. Kleinworth & Co {Summer Squash Loaf}
6. Domestically Speaking {Free Chalkboard Printable}
7. A Cultivated Nest {Easy Ideas for Thanksgiving Place Cards}
8. A Crafty Journal {Kid Friendly Thanksgiving Crafts}
9. The Moon and Me {Butterscotch Brownies}
10. Snails Pace Transformation {The Christmas Wallet}
Never linked up to a party before? Here’s how:
Scroll down, find the little blue “Add your Link” Button and click on that.
Follow the instructions on the next page – add a great image of your project and an interesting title. Make sure you link to the direct page of your budget friendly post – not the main page of your blog!
Try to visit at least a few other blogs at the party. Be sure to leave a comment to let them know you stopped by!
Please link back to this post somehow. There are badges available here; a simple text link is just fine too.
 Feel free to tweet about Thrifty Thursday so others can join the fun, and don’t forget to check back here Sunday morning to see which posts have been featured this week!
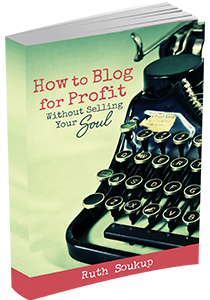
Finally, if this is your first time here I also invite you to check out my new eBook, How to Blog for Profit (Without Selling Your Soul). It is currently a bestseller on Amazon (with more than 75 five-star reviews!) and it is an awesome resource if you are interested in building your blog.
');
// ]]>
The post Thrifty Thursday {Week 36} appeared first on Living Well Spending Less™.
November 13, 2013
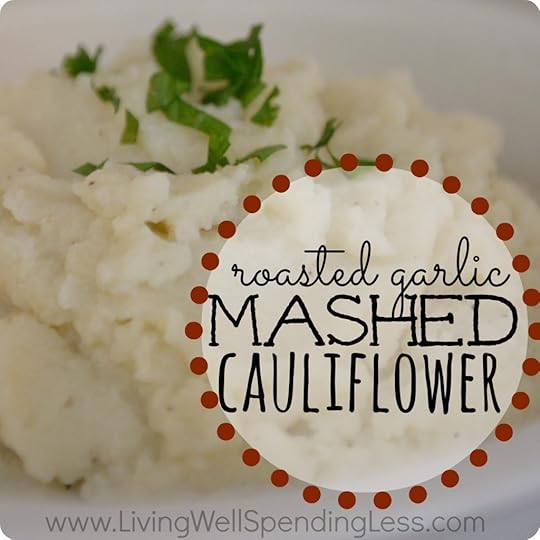
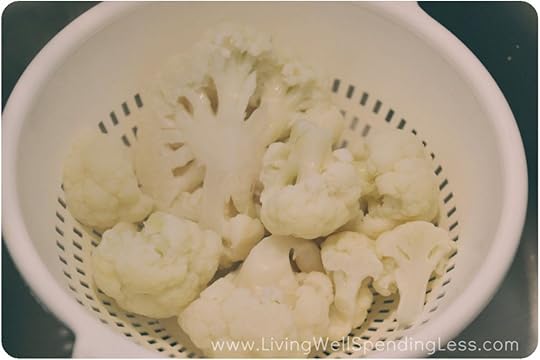
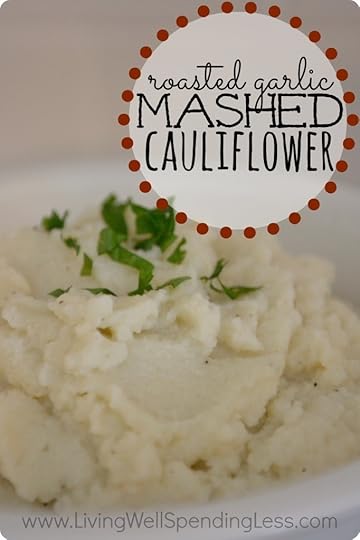
Roasted Garlic Mashed Cauliflower
Friends, it is time to face the cold hard facts: November & December are not kind when it comes to counting calories. One Thanksgiving dinner alone can provide the caloric requirements for a small country, and that’s not even counting the pie. (Mmmmmmmm……pie…..)
I hate watching my weight, I really do. I especially hate that the older I get, the more careful I need to be. So recipes that allow me to think I’m indulging in something I shouldn’t be when I’m actually being very good are exactly the kind of recipes I need. Yep, you got it: My diet plan is all about deception.
Which of course makes this recipe for Skinny Roasted Garlic Mashed Cauliflower pretty much perfect. Not only is it completely delicious and super low cal, it is a breeze to whip together and makes the perfect side dish to any meal, including Thanksgiving dinner!
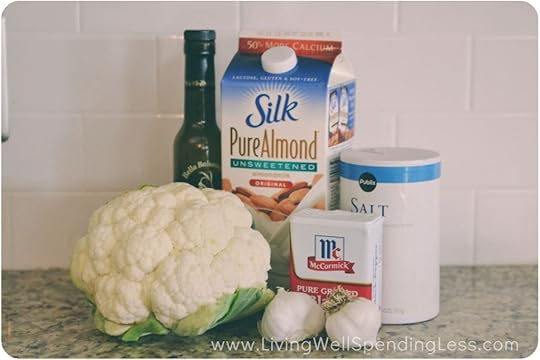
Here is what you need:
1 large head cauliflower
2 bulbs garlic
olive oil
1/3 cup Silk unsweetened almond milk
3/4 teaspoon salt
1/8 teaspoon pepper

Step 1: Slice off top of garlic bulb so that the inner cloves are exposed. Drizzle with olive oil. Wrap in foil and roast at 400 degrees for 25-30 minutes; set aside to cool.
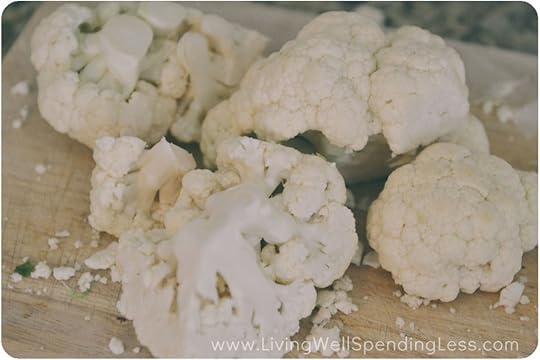
Step 2: Wash and cut cauliflower into medium chunks, removing all leaves and green parts.
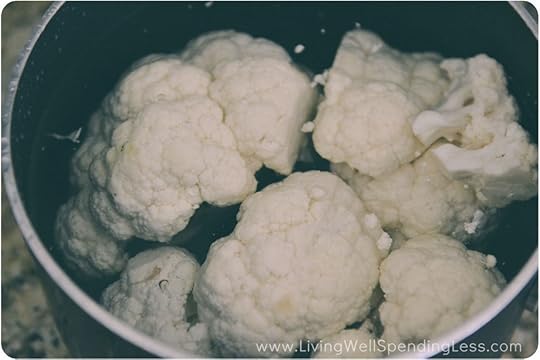
Step 3: Place cauliflower in large saucepan; cover with water and bring to a boil. Place lid on saucepan and boil for 8 minutes.
Step 4: Drain Cauliflower

Step 5: Pat cauliflower dry with paper towel
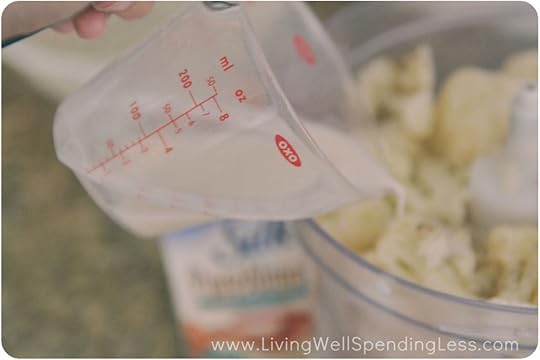
Step 6: Place cauliflower, Silk almond milk, salt, and pepper in bowl of large capacity food processer.
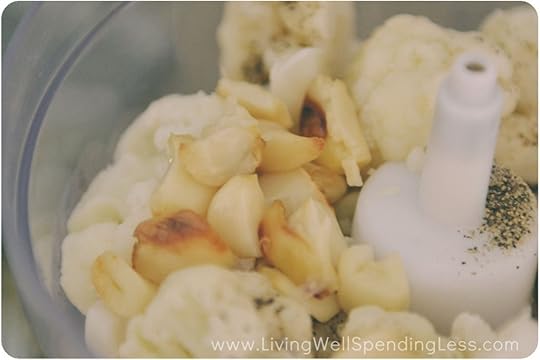
Step 7: Add roasted garlic.
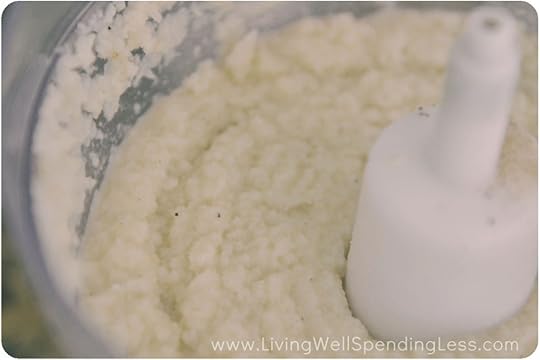
Step 8: Process until cauliflower is a smooth puree, close to the texture of mashed potatoes. Serve immediately or place in refrigerator to serve later. To reheat, bake in oven at 375 degrees for 30 minutes.
Print This!
Recipe: Roasted Garlic Mashed Cauliflower
Summary: Delish holiday side or a yummy substitute for mashed potatoes!
Ingredients
1 large head cauliflower
2 bulbs roasted garlic
olive oil
1/3 cup Silk unsweetened almond milk
3/4 teaspoon salt
1/8 teaspoon pepper
Instructions
Slice off top of garlic bulb so that the inner cloves are exposed. Drizzle with olive oil. Wrap in foil and roast at 400 degrees for 25-30 minutes; set aside to cool.
Wash and cut cauliflower into medium chunks, removing all leaves and green parts.
Place cauliflower in large saucepan; cover with water and bring to a boil. Place lid on saucepan and boil for 8 minutes.
Drain Cauliflower
Pat cauliflower dry with paper towel
Place cauliflower, Silk almond milk, salt, and pepper in bowl of large food processer.
Add roasted garlic.
Process until cauliflower is a smooth puree, close to the texture of mashed potatoes. Serve immediately or place in refrigerator to serve later. To reheat, bake in oven at 375 degrees for 30 minutes.
Preparation time: 40 minute(s)
Cooking time: 30 minute(s)
Number of servings (yield): 8
This post was underwritten by Silk. All opinions are mine. Silk products have been an important part of my family’s diet for many years, and I am thrilled and honored to represent Silk as a brand ambassador. Silk’s products include soy milk, almond milk (try the dark chocolate–soooooo good!), and coconut milk as well as dairy-free creamers, fruit & protein drinks, and iced lattes.
All Silk products are free of dairy, gluten, lactose, casein, egg, and MSG. They also contain no GMOs! Silk Soy, Almond, & Coconut milks all contain 50% more calcium than dairy milk (but fewer calories), and can easily be swapped out in your favorite cereals and recipes. Best of all, unlike traditional dairy milk, Silk products go on sale quite often AND have coupons available. In fact, you can get a $1.00 off coupon right on the Silk website!

* * *
Have you ever tried mashed cauliflower? What are your favorite healthy side dishes?
Pin It
The post Roasted Garlic Mashed Cauliflower appeared first on Living Well Spending Less™.
November 12, 2013
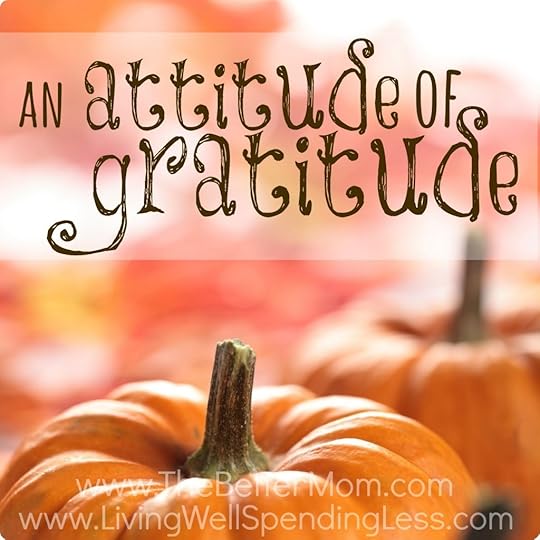
An Attitude of Gratitude
I’m happy to be contributing over at The Better Mom today!
It was one of those days.
By 8am I was ready to throw in the towel and the day had only just begun. The whole family seemed to wake up on the wrong side of the bed. My oldest was upset that I vetoed her chosen outfit and my youngest was upset that she had to go to school at all. My husband was mad no one was listening, and we were all tired from being up too late the night before. By breakfast time there had already been much crying, whining, fighting, and a whole lot of yelling.
As I sat down to the table and looked at the three unhappy faces glaring back at me I knew it was my job to find a way to redeem the morning. A stern lecture began forming in the back of my mind. I was ready to let them have it. I turned to my oldest daughter, opened my mouth to speak, and then quickly closed it again. I’m still not quite sure what stopped me, but in that moment I opted for a different approach.
Instead of lecturing, I simply said, Tell me five things you are grateful for.
Her face instantly lit up as she easily rattled off six or seven things she was thankful about. She was grateful for a yummy breakfast and clothes and a bed to sleep in and her American Girl Doll. She was even grateful for her sister and mommy and daddy and for her teacher and friends at school. Her four-year old sister chimed in, declaring that she was grateful for puzzles and the monkey bars and dress up clothes and candy. And then it was my turn.
What are you grateful for mommy?
{Finish reading this post over at The Better Mom}
* * *
How do you maintain an attitude of gratitude in your family?
Pin It
The post An Attitude of Gratitude appeared first on Living Well Spending Less™.
November 11, 2013
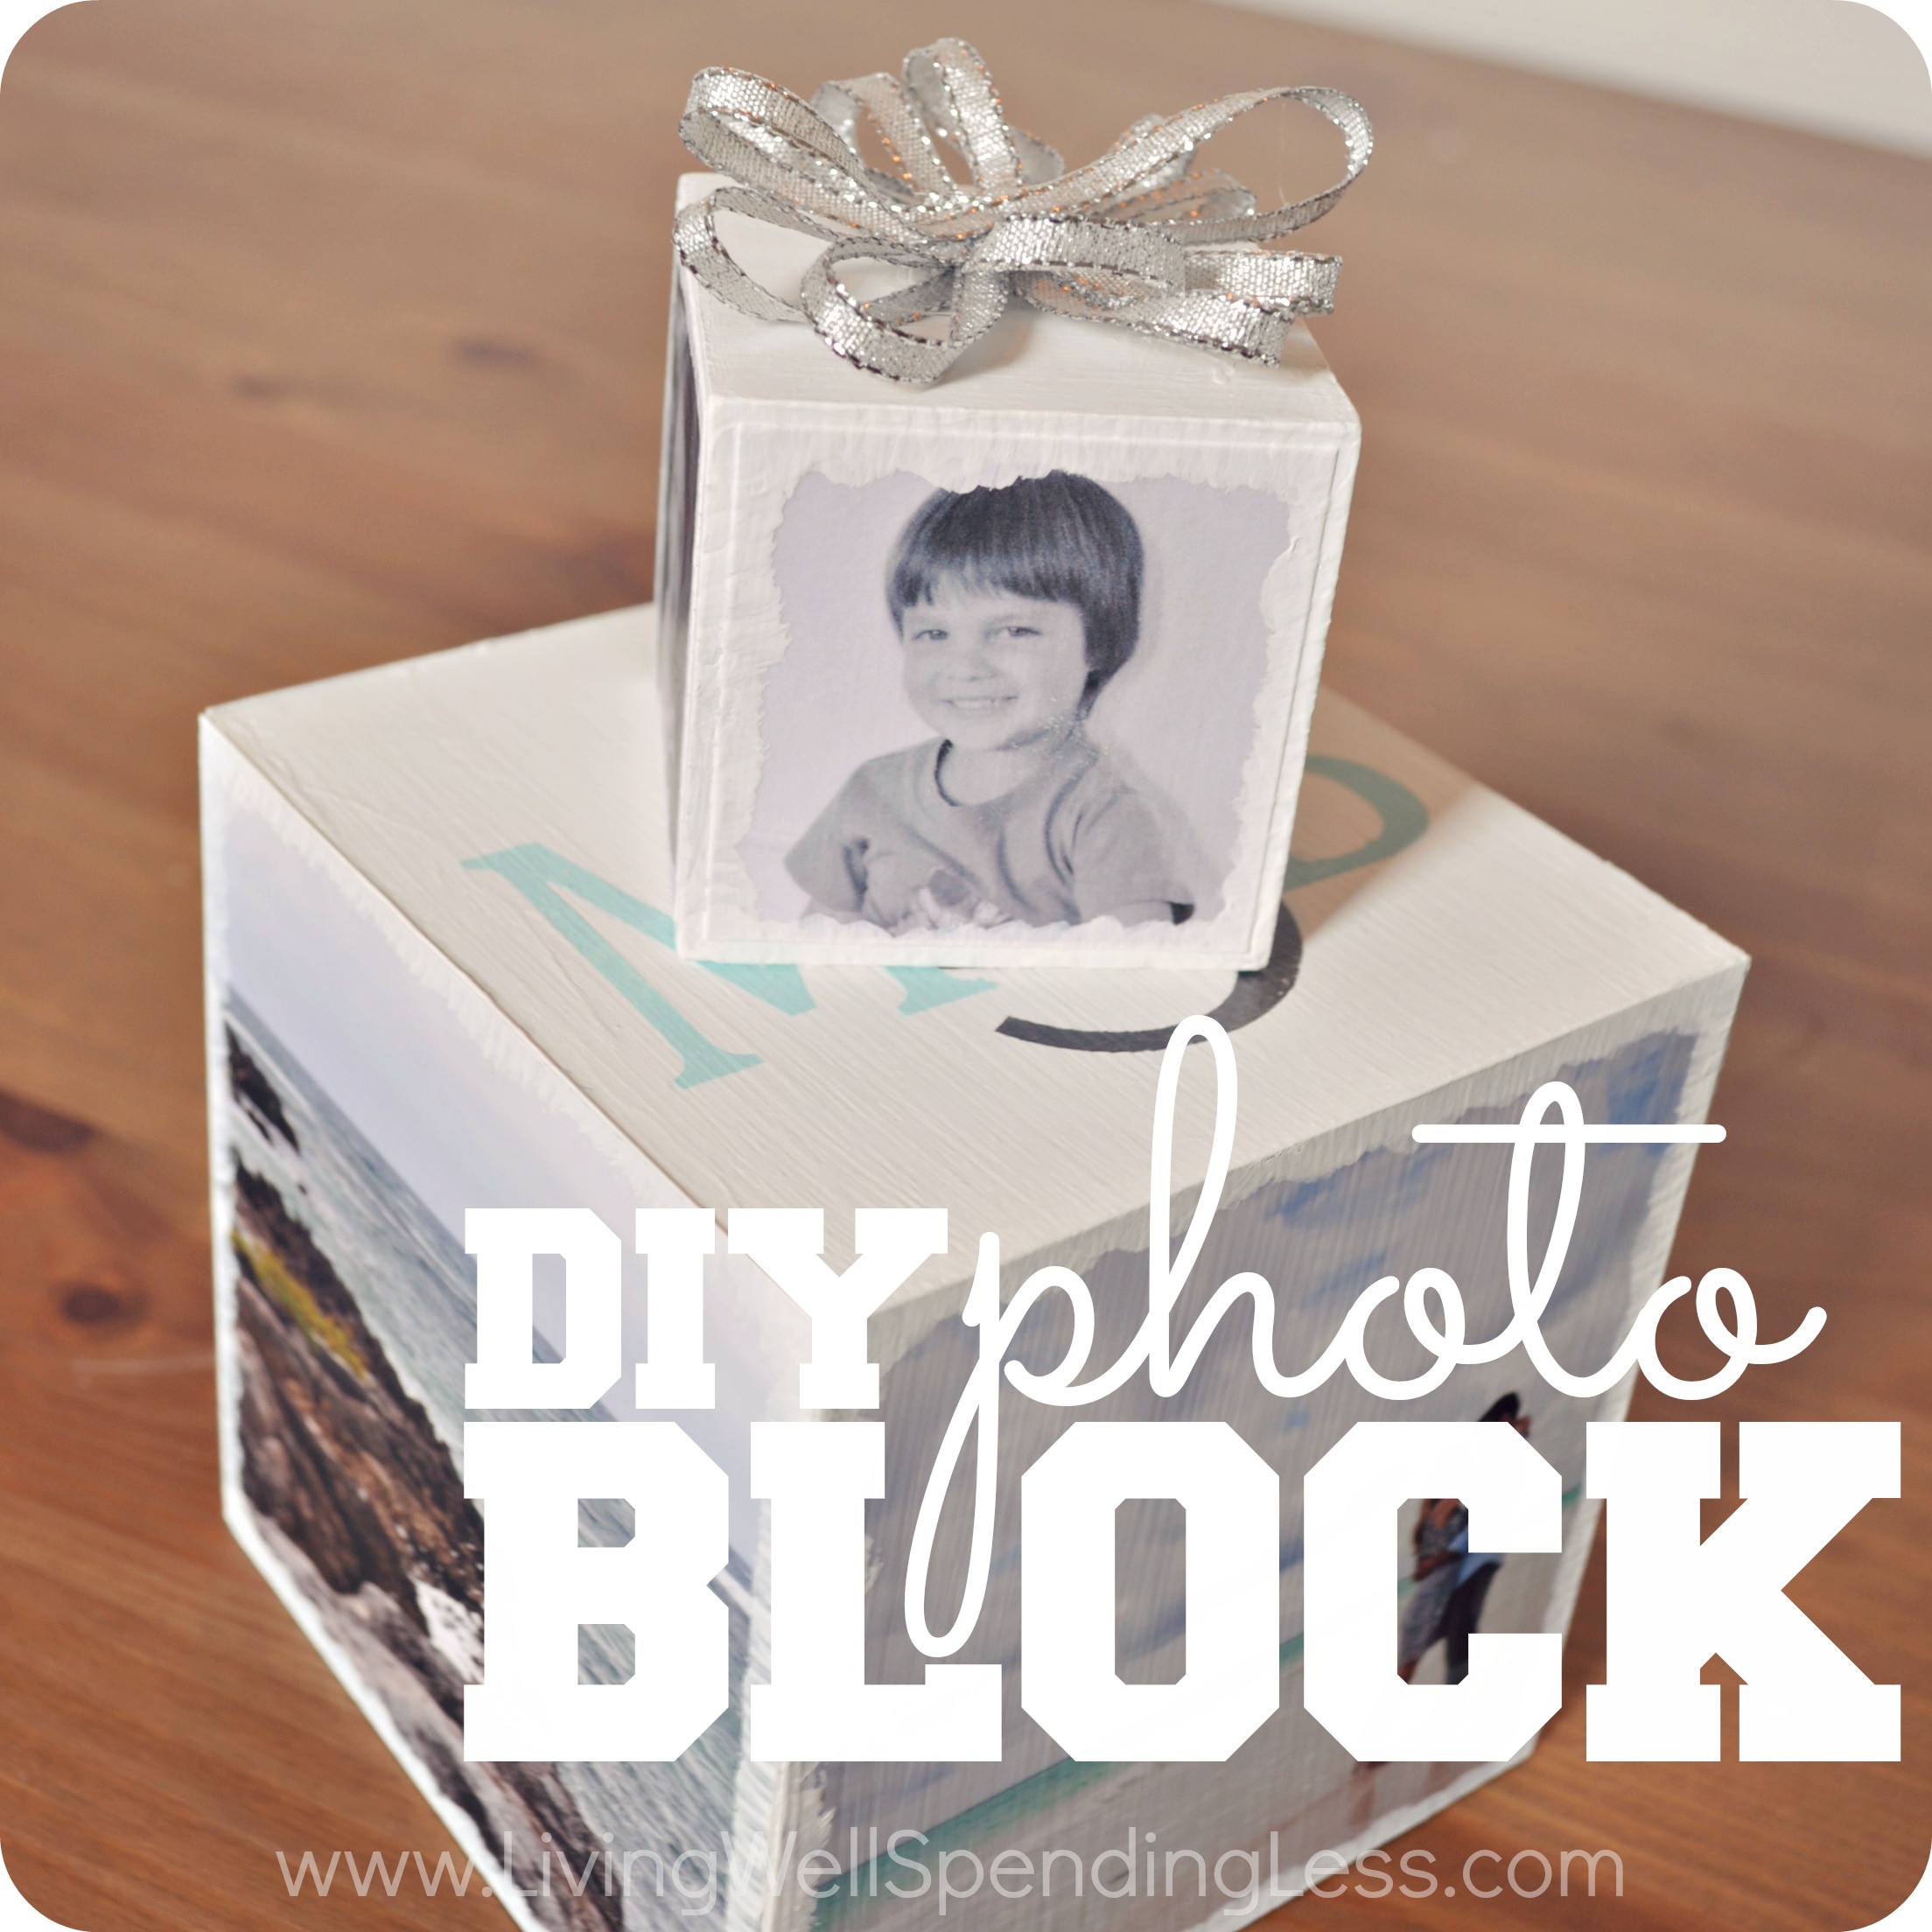
DiY Photo Block {Handmade Holidays}
This year I am beyond thrilled to introduce you to a revamped series here at LWSL called Handmade Holidays! In past years I have shared my own holiday gift ideas, but this year I thought it would be fun to get some inspiration elsewhere. I asked eight of my favorite up-and-coming bloggers to share a simple and frugal handmade gift idea. I was so blown away by all the amazing ideas they came up with, and I think you will be too. Each Monday, from now until Christmas, one of these talented women will be sharing their gift idea. Please be sure to welcome them here to LWSL, and to take the time to check out their blogs. You will be so glad you did!
* * *
This is a guest post is from Maggie of The Love Nerds
Hi everyone! I am Maggie from The Love Nerds, and I am so excited to be here at Living Well Spending Less sharing my Handmade Holiday gift idea with all of you.
Every year, I try to make as many handmade gifts as possible. While I don’t have a problem buying someone the sweater or DVD they might want, I much prefer giving something personal which is why I was so excited when Ruth reached out to me about participating in her Handmade Holidays series!
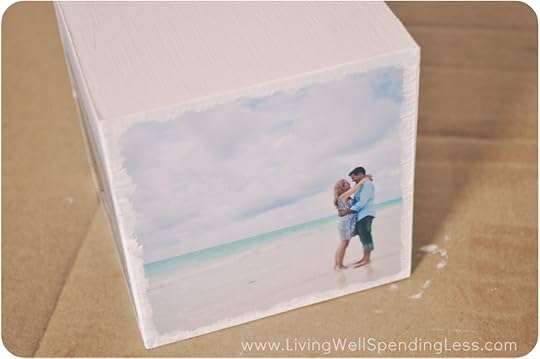
I have wanted to craft some photo blocks and decided it was the perfect project to share with all of you because it is so versatile. You can use a large block, as shown below, to make a fun statement piece for a shelf, or you can use a smaller block to make a meaningful ornament. I just love how the same technique can be used to make so many unique variations!
Here is what you need:
naked wood blocks
paint
photos sized to your block
mod podge (I used Matte)
2 paint brushes or sponges

Step 1: It can be hard to find large wood blocks, so I bought this 4×4 MDF block from McMemories on Etsy. I knew I wanted to have a white background for the project, so I started by painting the block with two coats of white paint.
Step 2: For your photos, I suggest two options. You can order your pictures at a photo center, keeping in mind your photo will need to be cropped down smaller and into a square; I love using wink flash for projects like these because they have a 4×4 photo size option.
You can also print out your pictures using a LaserJet printer. If you don’t a LaserJet printer at home, you could also make a jpeg/document with all of your appropriately sized photos on one sheet and have it printed somewhere like OfficeMax or Costco. I do not personally recommend printing your pictures out with an InkJet printer; I have tried multiple techniques, and the photos always bleed from the mod podge.

Step 3: When your photos are cut out and ready to go, place an even layer of mod podge on the first side you are working on. Then, starting at a corner, slowly rub your picture smoothly onto that side of the block. Then, let it dry before continuing to the next side. Be carefully not to put a photo face down on your work surface until it has dried.
Step 4: Once all photos are attached to the block and have had time to dry, put a thin layer of mod podge on top of each photo one at a time. Do not put a really thick layer on top or rub over the image too many times. The photos will have a white finish on top for awhile, but the mod podge will dry clear.
Again, be carefully not to put a photo face down on the surface until it has dried for at least 30 minutes. You will want at least 2 layers of mod podge on each side to seal the project.
Step 5: After the entire project dried, I decided to go back with the white paint and put a thin layer on the edges of the photos. I think the soft edges give the photos a bit of a vintage look. If you have any mistakes or uneven edges though, this technique will also allow you to mask any imperfections.

Step 6: I decided for this block to only put four pictures around the side and decorate the top. Since these were honeymoon pictures, I decided to paint the couple’s initials on the top. There are many methods you could use to do the same, such as hand painting or paint markers.
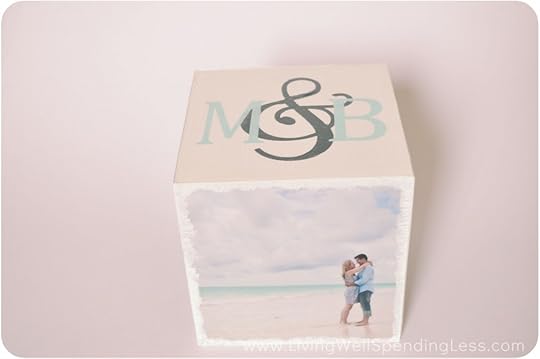
For my block, I decided to make two different stencils by cutting out the design onto vinyl with my Silhouette Cameo; the first stencil only had the ampersand, and the second stencil had the two letters. I made sure the first stencil was on smoothly and used a sponge to dab on the paint. After the paint dried, I took off the first stencil and completed the same process for the letters.
There are lots of gift ideas you can make by following this process. For example, if someone has had a new baby, consider putting photos of the baby around the block with the name and birth date on the top. I used honeymoon photos, but this would make a great gift for newlyweds if you use wedding pictures as well.

If you use a smaller block (2×2), you could cover 5 sides with photos and attach a ribbon on the top to make a Christmas ornament. Another option is to use wood boards instead of blocks and make wood canvases with photos on them. Whichever version you decide to make, this handmade gift will be cherished for its unique and sentimental value.

* * *
What handmade photo projects have you made as gifts before?
I am Maggie from The Love Nerds, which consists of my blog, Etsy shop, and event planning boutique. The blog is where I share my love for crafts, weddings, party décor, art prints, and cooking. I am recently married and working hard to make a home out of our apartment while on a budget. Many of my projects are centered on the nerdy interests of both me and my husband, from books and comic book superheroes to Star Wars and Dr. Who – almost all of which were highlighted at our wedding. I am excited to keep sharing our adventures with my readers and all of my crafty and business endeavors.
The post DiY Photo Block {Handmade Holidays} appeared first on Living Well Spending Less™.
November 10, 2013
Weekend Wandering
Happy Sunday! I hope you all are having a great weekend! I absolutely loved seeing all the great fall & Thanksgiving ideas you had to share this week! It is always so hard to choose, but here are just a few of the posts I loved:
* * *
First of all, there is just something about fall that makes me crave soup, and I was drooling over this yummy looking Roasted Garlic, Kale, & White Bean Soup from from Queen Bee Coupons!

I love collecting new ideas for Thanksgiving dinner, so I was totally intrigued by this recipe for Holiday Spiced Pear Cheesecake from True Blue Baking. Doesn’t it look and sound delicious?
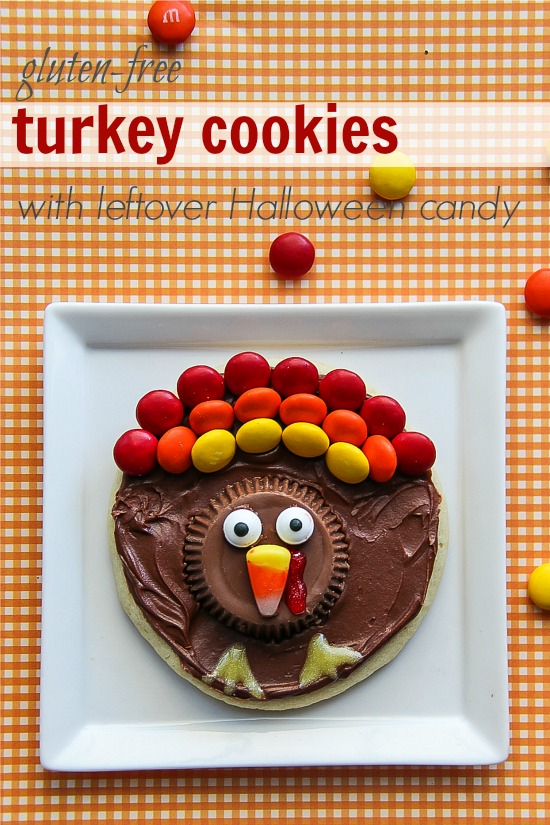
How cute are these Gluten Free Turkey Cookies from The Centsible Life? I just love that they are using leftover Halloween candy! GENIUS!
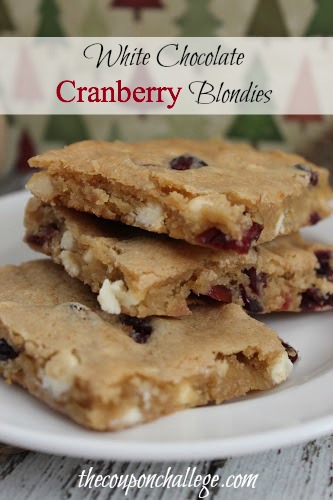
I’m also dying to try these White Chocolate Cranberry Blondies Recipe from The Coupon Challenge. If they are anything close to the Starbucks version I will be a happy girl!
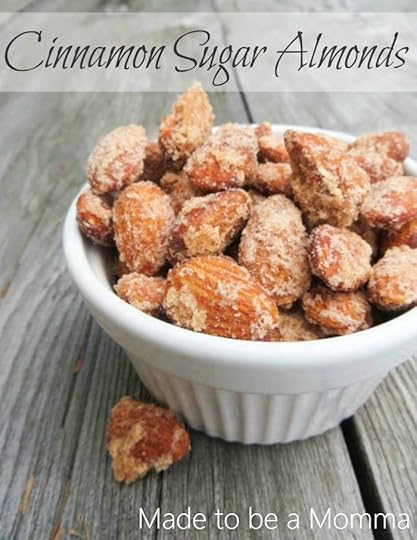
There is a place near my house that makes spiced almonds & it always smells so good I can hardly resist! I was so excited to find this recipe for Cinnamon Sugar Almonds from Made to Be a Momma to try some of my own at home.
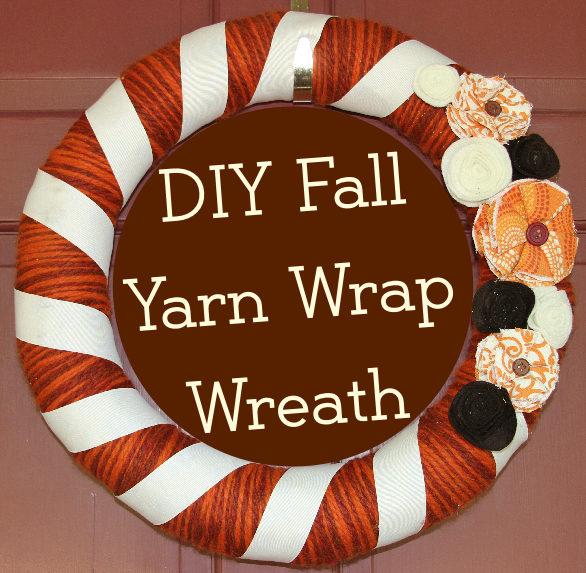
If you are still looking for something festive for your front door, you might want to try this Easy Fall Wreath from Thrifty Little Mom. Darling!
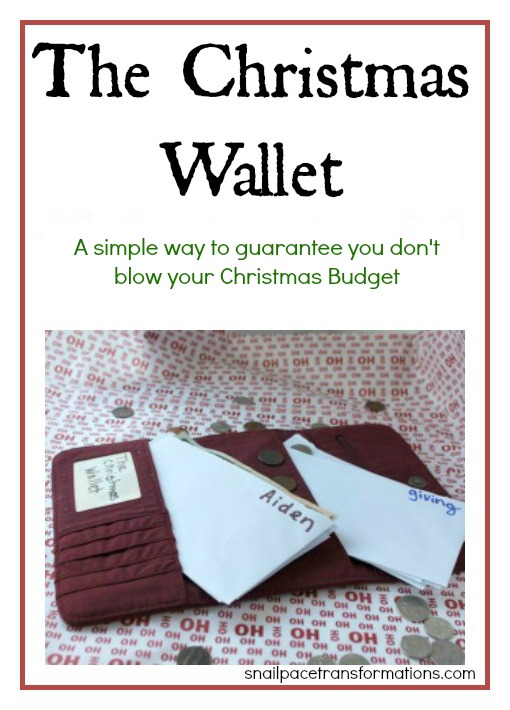
Finally, I loved this post about creating a Christmas Wallet to keep your holiday budget in check from Snail Pace Transformations. She had some great tips that I will definitely be using this year!
* * *
What did you love this week?
Pin It
The post Weekend Wandering appeared first on Living Well Spending Less™.
November 8, 2013
5 Practical Ways to Earn Money Online
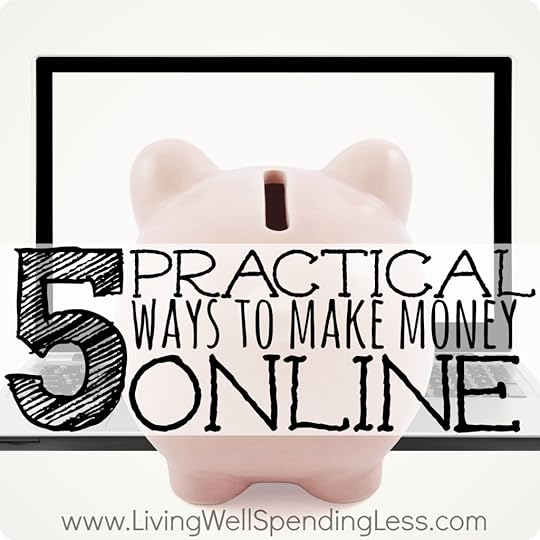
Christmas is right around the corner, which means there are now suddenly gifts to buy, parties & gatherings to plan for, charities to give to, and additional expenses of all kinds. All those extra costs add up quick! Every little bit helps, so if you are struggling to find a little extra room in your budget, you may want to consider one (or all) of these five practical options for earning extra cash, gift cards, or prizes online:
1. Get Paid to Take Surveys
The perks of becoming a survey-taker are pretty great considering that it takes absolutely no expertise beyond knowing how to use a computer. You can fill them out in your downtime–after the kids go to bed or while you are watching TV–and earn cash or prizes just for sitting around and answering questions. Lots of people even think it is fun! Payment can vary from $1-$50 depending on the survey, and on average a survey takes about 10-15 minutes to complete. Depending on the company you are working with, you will be paid in cash or points that can be redeemed for prizes or gift cards. Sometimes you will even receive free products to sample.
While there are many good and legitimate survey companies to choose from, there are also some not-so-reputable companies you should avoid. Never sign up with any company that requires a membership fee or that doesn’t tell you how much you will earn per survey. Always look to make sure the company you want to work with has a posted privacy policy. Savvy Seekers keeps a current list of legitimate paid survey companies & is a great place to research reputable companies.
2. Earn Swag Bucks
Another one of my favorite ways to earn easy money is by earning Swag Bucks just for doing the things you already do online, such as using search engines, printing coupons, watching videos, or making online purchases. Your Swag Bucks can then be redeemed for a variety of gift cards or PayPal credit. I have personally been earning Swag Bucks since 2010, and for me the easiest way to earn is by using Swagbucks as my search engine instead of Google or Bing. You can even download their toolbar so that you don’t have to go to the Swagbucks.com search engine page every single time you search. It will usually take me about a week (for me this is about 15-20 searches a day) to earn enough Swag Bucks for a $5 gift card. For some great tips on how to earn more Swag Bucks, check out this post. (Tip: If you are signing up for the first time, be sure to use the code LWSL to receive 70 extra Swag Bucks!)
3. Enter Sweepstakes & Online Giveaways
Taking advantage of online sweepstakes and giveaways is another fun and easy way to earn cash & prizes. There are literally hundreds of contests and giveaways going on at any given time, and it only takes a few minutes a day to submit entries online. Because sweepstakes are a great way for companies to promote their products and websites, many companies will actually set aside a section of their budgets to award prizes. After all, what better way is there to draw people in than to offer them a prize?
Like online surveys, however, you do have to be careful about which giveaways and sweepstakes are legitimate. For more details and tips on entering, check out this post on how to stretch your dollars through online sweepstakes.

4. Blog for Profit
While becoming a survey taker, earning Swag Bucks, and entering online sweepstakes are all quick & easy ways to earn some extra pocket cash or prizes, they probably won’t ever be able to earn you a full-time income. Blogging, on the other hand, does have the potential to become a full-time job you can do from home, if you are willing to put in the time and effort.
As I share in my bestselling eBook, How to Blog for Profit (Without Selling Your Soul), blogging for profit is certainly not a get-rich-quick scheme, but it does have amazing potential over time to allow you to do something you love while earning a sustainable income. If you have a passion or hobby you’d like to share with others, consider putting it into blog form. Starting a blog is really easy and practically free, but what blogging lacks in start-up costs you will more than make up for in time & effort. That said, there are currently thousands–if not millions–of people who are earning money from their blogs. If you are willing to work at it, chances are you can too!
5. Become a Virtual Assistant
Another great option for earning money online is becoming a virtual assistant. If you have a small blog that is not earning much money, but that has given you some experience in the day-to-day responsibilities of operating a blog, consider finding a job working for another blogger. It is not only a great way to earn additional income, it is a great way to get more exposure, advice, and experience that can be applied to your own blog. Most big bloggers that I know love the opportunity to mentor the people working for them! And don’t worry, if you are not a blogger but have other administrative skills there are plenty of non-blogging virtual assistant opportunities available as well! Lisa Morosky’s book, The Bootstrap VA, is a great resource for anyone looking to become a Virtual Assistant.
* * *
There are no shortage of ways to earn money online from the comfort of your own home, and how much you are able to earn will usually be dependent on how much time you are willing to take. Each of these ideas can be done independently, or you can start by taking advantage of some of the quicker and easier ways to earn money online–through surveys, earning Swag Bucks, and entering sweepstakes–while also working towards some long-term goals, such as starting a profitable blog or creating your own virtual assistant business. The fact is, the money is out there….are you willing to go for it?
This post was underwritten by SavvySeekers.com. All opinions are mine. SavvySeekers.com was founded by two professional women who have spent most of their careers working for the top market research companies. Based on that experience, Savvy Seekers shares their expertise on which online surveys are legitimate, how to get started and reasonable earning potential. Savvy Seekers is committed to providing you with reputable paid survey opportunities. They will only recommend companies who offer FREE surveys to participate in, who will send you the REWARDS they promise, who won’t try to sell you anything and who will keep your information CONFIDENTIAL.
Visit SavvySeekers.com and you can join as many of the survey companies as you want right away, or start with one and see how you like it. You can come back anytime and join some more. The more online survey companies you join the more rewards you will earn. It doesn’t cost you anything – participation is absolutely free!
* * *
Have you ever thought about making money online? What are some things that have worked for you?
Pin It
The post 5 Practical Ways to Earn Money Online appeared first on Living Well Spending Less™.


