
Ruth Soukup's Blog, page 124
December 6, 2013
Speed Cleaning for the Holidays

There is no time of year when I love my house–or enjoy being at home–more than during the month of December. There is just something magical about those twinkling Christmas tree lights and festive decorations. I love turning on some mellow Christmas music (the James Taylor Christmas album is my all time fav!) and cuddling up on the couch with a cup of spiked cocoa and a good book, or watching one of my favorite holiday classics. In fact, it might the only time during the whole year when I truly just chill.
But you know what totally ruins my Christmas spirit?
A messy house.
And while during the rest of the year, my regular speed cleaning routine usually works just fine, this time of year I just don’t have an extra hour a day to devote to cleaning. Thus, in the interest of maintaing my sanity, I have found a way to cheat & get it done in half the time. Granted, come January I will probably be due for some deep cleaning & reorganization, but if it gets me through the season with my sanity in tact, I am okay with that. Life is all about balance and giving yourself grace when needed!
What you will need:
Most of the year I prefer using these homemade green & thrifty cleaning products. Not only are they cheaper, but they smell better, and require me to keep far fewer bottles of stuff lying around! Even so, there is something to be said for convenience, and during the holidays my cheater go-to cleaning supplies include “green” disposable disinfectant wipes, Windex wipes, a Swiffer Wet Jet, and Swiffer Disposable Dusters.
General Guidelines:
Cleaning is much easier when you have less clutter, so the key to the plan is finding a quick and easy place to stash all the stuff. If you don’t have time to do a major de-cluttering session right now, find a big box or basket that you can store in an out-of-the-way place such as the garage, basement, or spare bedroom. Use this to collect the random clutter you’ve got around the house, then set a date in January to go through it all.
Start at the same end of the house each time you clean. (I start in our Master Bedroom and work my way through the living room and kitchen to the girls’ room and bathroom.)
Use a large laundry basket to collect items such as toys or clothing as you clean, then dump contents of basket into your garage box. It won’t be pretty but at least you’ll know where to find it (or where to tell the kids to look.)
On the days you need to sweep, mop, or vacuum, save it until the end, then do it all at once.
Keep daily shower cleaner in the bath/shower and spray down after each use.
The LWSL Holiday Speed Cleaning Routine:
Bedroom(s) 5 minutes each, depending on how much to pick up:
Always make the bed. Even if there are other things laying around, the room will look much, much cleaner.
Quickly pick up any clothes, toys, or dishes that are lying around.
Use a duster quickly dust the surfaces that really need it.
Bathroom(s) (5 minutes each) :
Squirt toilet bowl cleaner around the rim; let sit.
Use disinfectant wipes to quickly wipe down the sinks & countertop.
Use toilet brush to quickly scrub toilet.
Use disinfectant wipes to wipe down toilet seat & lid.
Use Windex wipes to wipe any spots off mirrors & to shine faucets.
Living Room/Dining/Home Office Areas (5-10 minutes):
Quickly pick up any shoes, dishes, toys, or other items & place in basket.
Use duster to quickly dust surfaces.
Tidy desk area, throw out junk mail, and place other mail in inbox.
Kitchen (5-10 minutes, depending on how many dishes):
Quickly pick up any items that don’t belong in kitchen and place them in basket(s). Gather any dirty dishes and put them next to sink.
Quickly unload (if necessary) then load diswasher.
Hand wash dishes/pots/pans as needed
Wipe down counters & stovetop.
Dry and put away any hand-washed dishes, then drain and rinse sink–the secret to a truly clean-looking kitchen is clutter-free counters and a nice clean sink.
Finishing Up:
Use a dry mop to clean hard floors. Spot clean with a sponge if necessary.
Vacuum rugs/carpet, especially around Christmas tree (if using live tree)
Clean glass surfaces & mirrors as needed with Windex wipes.
Dump collected items in your secret garage box until further notice.
Turn the lights down, light a holiday-scented candle & play some soft Christmas music!
And, just ’cause I’m nice like that, I thought it would be fun to put together a cute printable checklist that you can hang on your fridge or bulletin board as a reminder. Consider it an early Christmas gift! 

{Get your FREE Holiday Speed Cleaning Checklist here}
* * *
How do you keep your home neat and tidy during the holidays? Do you have any tips or tricks to share?
Pin It
The post Speed Cleaning for the Holidays appeared first on Living Well Spending Less™.


December 5, 2013
Thrifty Thursday {Week 38}

Welcome back to Thrifty Thursday! I missed you last week but I hope you all had a wonderful Thanksgiving with family and friends! Did any of you brave the crowds on Black Friday? I’d love to hear what you found! Is it just me or does it feel like we lost a week somewhere along the way? How is it that Christmas is now only 20 days away?!! Ack! In any case, I can’t wait to see what great budget-friendly recipes, household tips, DIY projects, and holiday ideas you all have to share this week!
Here are the most clicked links from two weeks ago:

1. Carrie this Home {12 Ways to Save Money}
2. A Cultivated Nest {My New Pantry & How I Organized It}
3. A Time to Freeze {Sample Freezer Cooking Plan}
4. Not Your Mainstream Mamma {Month Six of Becoming Debt Free}
5. Graceful Little Honeybee {Filling The Freezer on a Budget}
6. Creative Home Keeper {The Case for Christmas Cards}
7. This Silly Girl’s Life {How to Fake an Infinity Scarf}
8. Thrifty Little Mom {Is It Okay to Buy Gifts at Thrifty Stores?}
9. An Inviting Home {Keeping Track of Clean Sheets}
10. Taylor Made Ranch Blog {Take a Bite out of the Grocery Budget}
Never linked up to a party before? Here’s how:
Scroll down, find the little blue “Add your Link” Button and click on that.
Follow the instructions on the next page – add a great image of your project and an interesting title. Make sure you link to the direct page of your budget friendly post – not the main page of your blog!
Try to visit at least a few other blogs at the party. Be sure to leave a comment to let them know you stopped by!
Please link back to this post somehow. There are badges available here; a simple text link is just fine too.
 Feel free to tweet about Thrifty Thursday so others can join the fun, and don’t forget to check back here Sunday morning to see which posts have been featured this week!
Finally, if this is your first time here I also invite you to check out my new eBook, How to Blog for Profit (Without Selling Your Soul). It is currently a bestseller on Amazon (with more than 80 five-star reviews!) and it is an awesome resource if you are interested in building your blog.
');
// ]]>
The post Thrifty Thursday {Week 38} appeared first on Living Well Spending Less™.
December 4, 2013
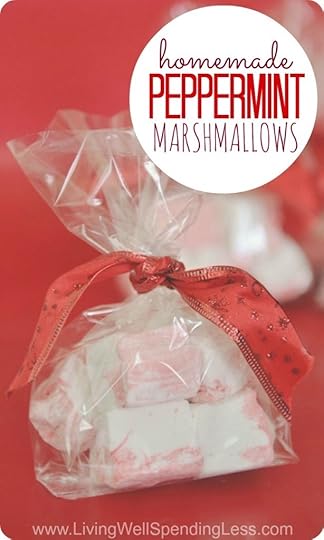
Homemade Peppermint Marshmallows
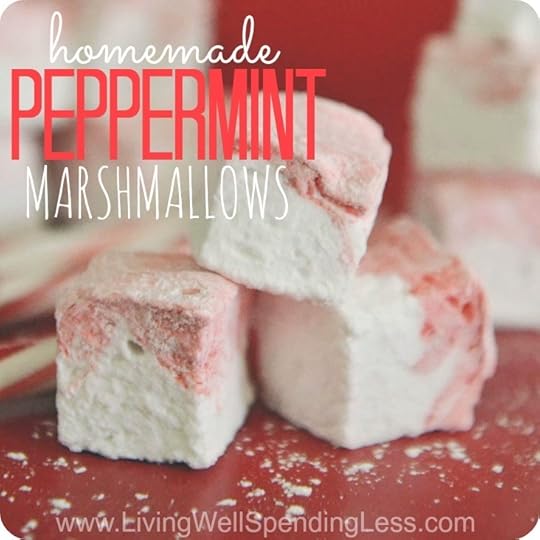
I’ll be honest, I’m not normally a big fan of marshmallows. My girls, on the other hand, can’t get enough of them, and when I saw they were charging $16.95 at Williams Sonoma for a box of 15 hand crafted peppermint marshmallows, I knew I had to figure out how to make these lil’ puppies.
And friends, let me tell you, homemade marshmallows are so, so, so, soooooooo much better than the store-bought kind. They can hardly even be called marshmallows. They should instead be re-named Sweet Nuggets of Heavenly Peppermint Fluff. Or something like that.
Even better, they are SO easy to make! Yes, you need a candy thermometer, but don’t let that scare you. I promise it’s not complicated or tricky. Like, at all. Plus a single batch makes approximately 88 marshmallows, which would sell for $99.44 at Williams Sonoma. Why not make them for all your friends and be a hero this Christmas?
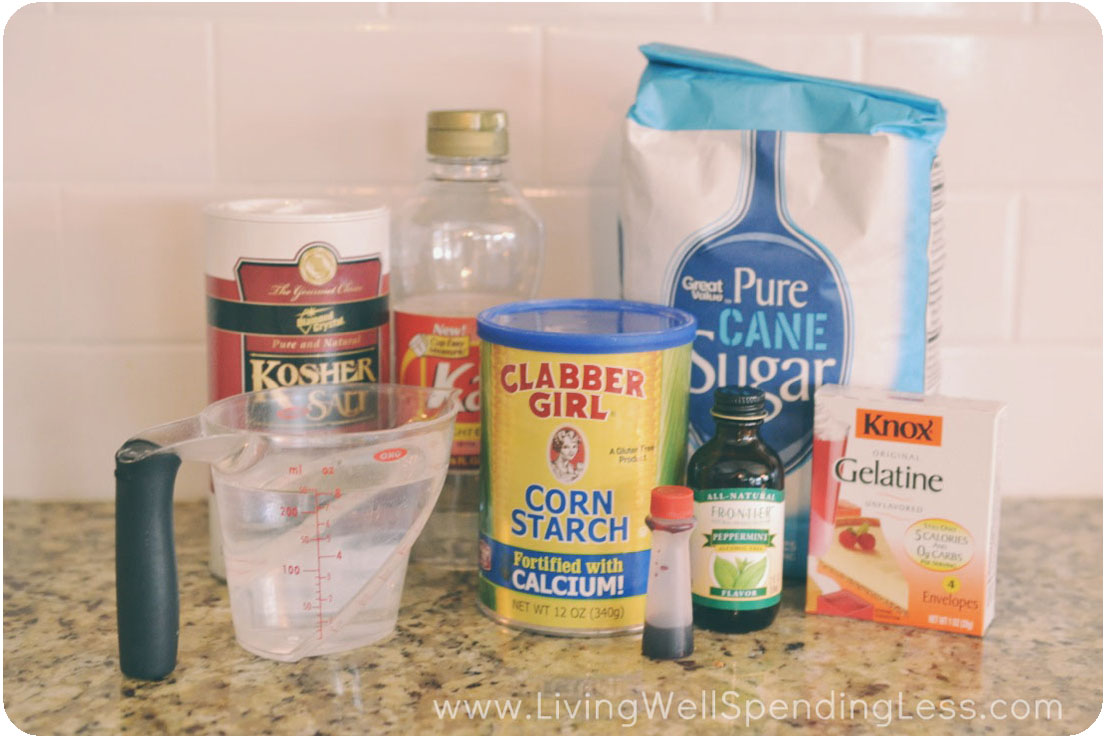
Here is what you need:
butter or Crisco
1/4 cup corn starch
1/4 cup powdered sugar
3 envelopes unflavored gelatin
1 cup ice water
1 1/2 cup sugar
1 cup corn syrup
1/4 teaspoon salt
1 teaspoon peppermint extract
red food coloring (optional)
candy thermometer (NOT optional!)
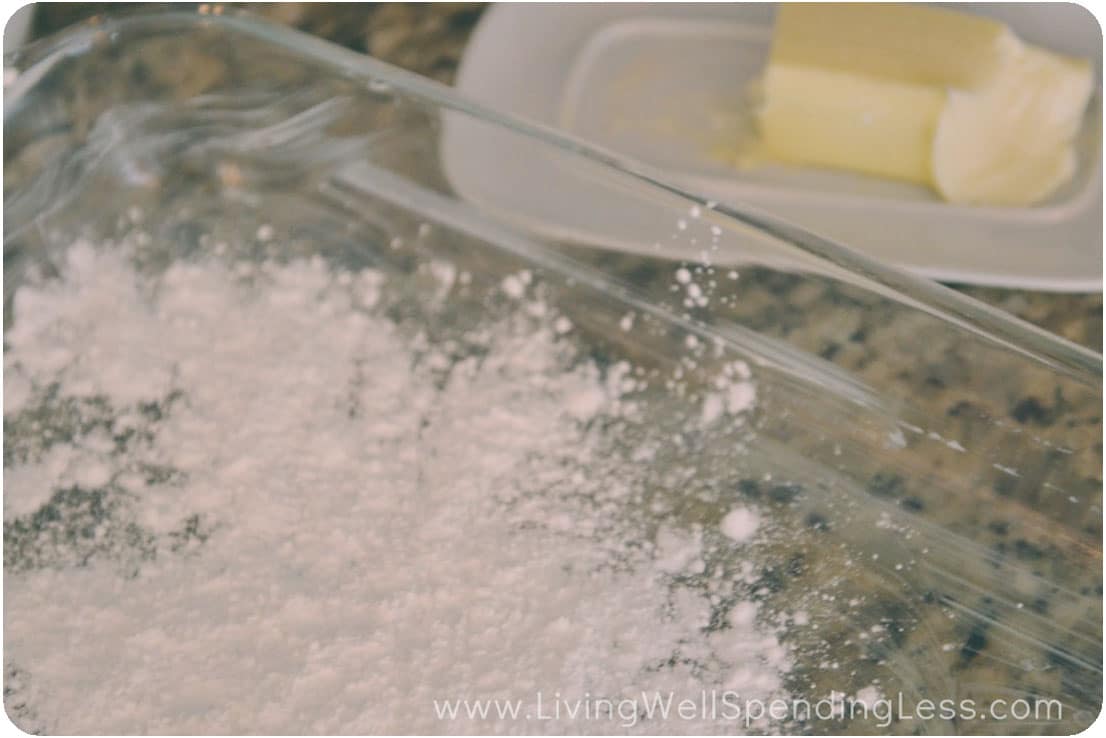
Step 1: Grease 9 1/2 x 11″ glass casserole dish with butter or Crisco. Mix together corn starch & powdered sugar; sprinkle a few spoonfuls of cornstarch mixture over butter or Crisco and tilt dish around until well coated. Set baking dish aside and save remaining corn starch mixture for later.
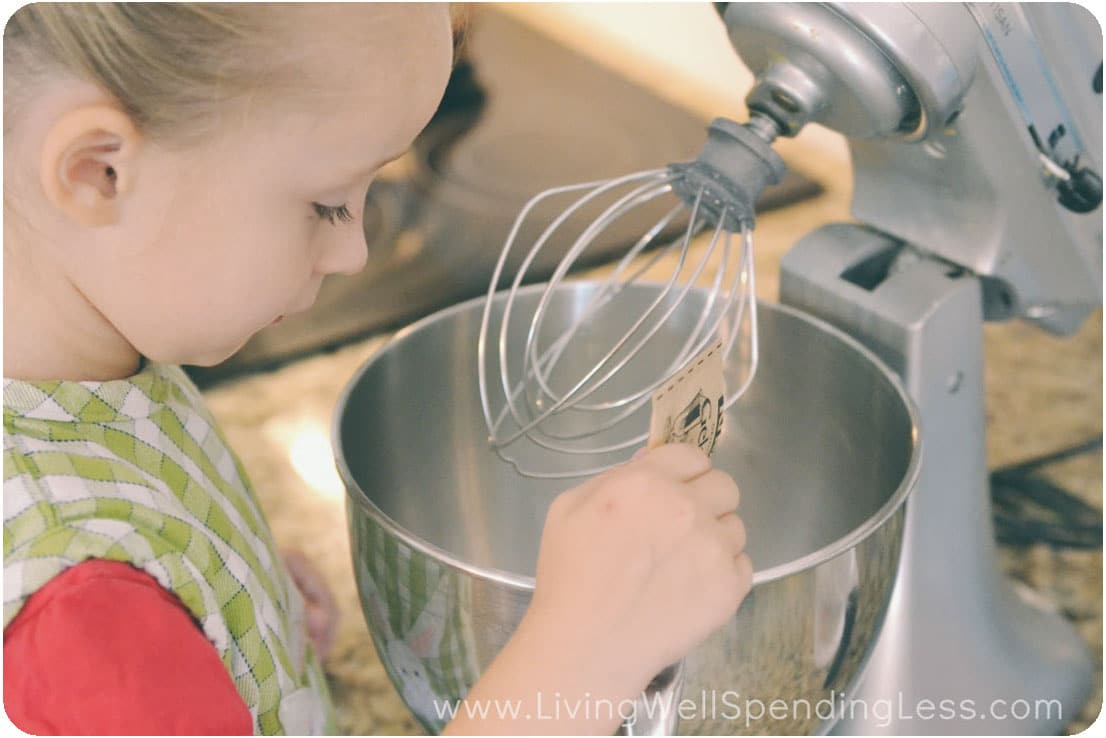
Step 2: Place gelatin and 1/2 cup ice water in the bowl of a stand mixer; set aside.
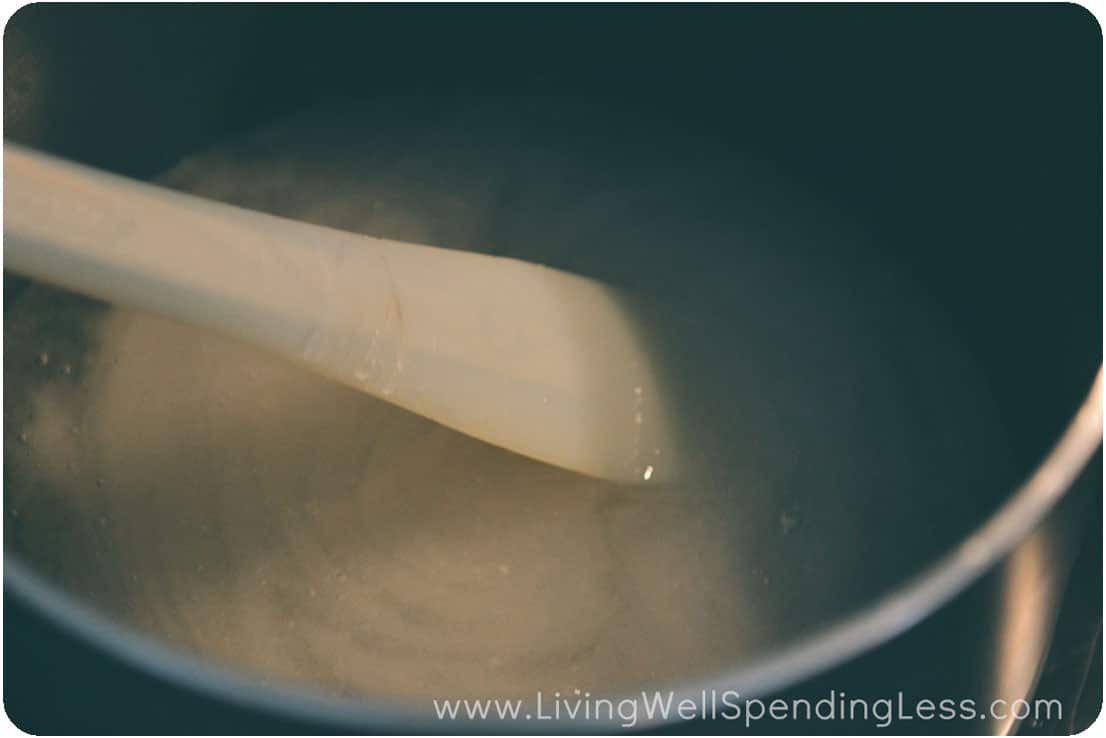
Step 3: Mix remaining water, sugar, salt, and corn syrup in saucepan; heat, covered, over medium-high heat for 3-4 minutes.
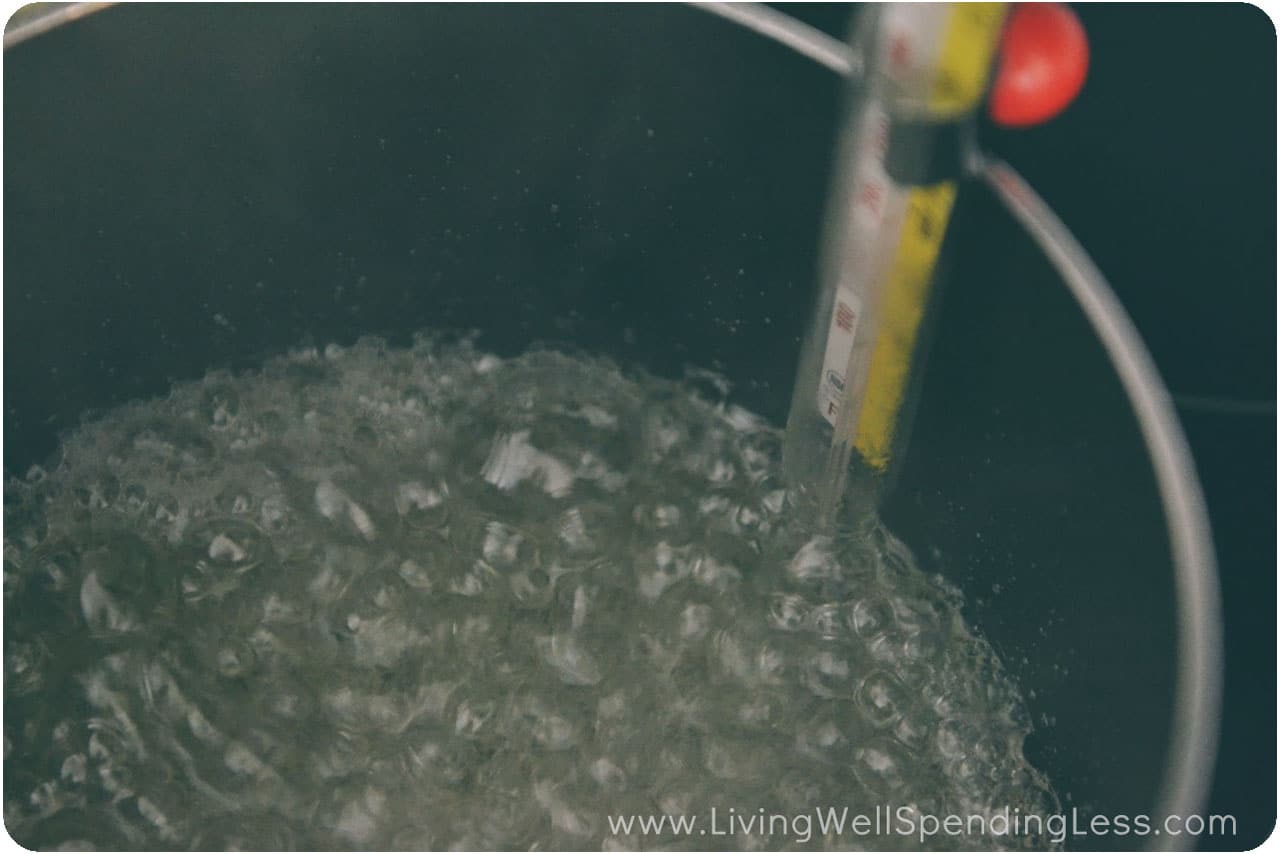
Step 4: Clip candy thermometer to side of saucepan; continue heating mixture until it reaches 240 degrees, approximately 6-8 minutes.
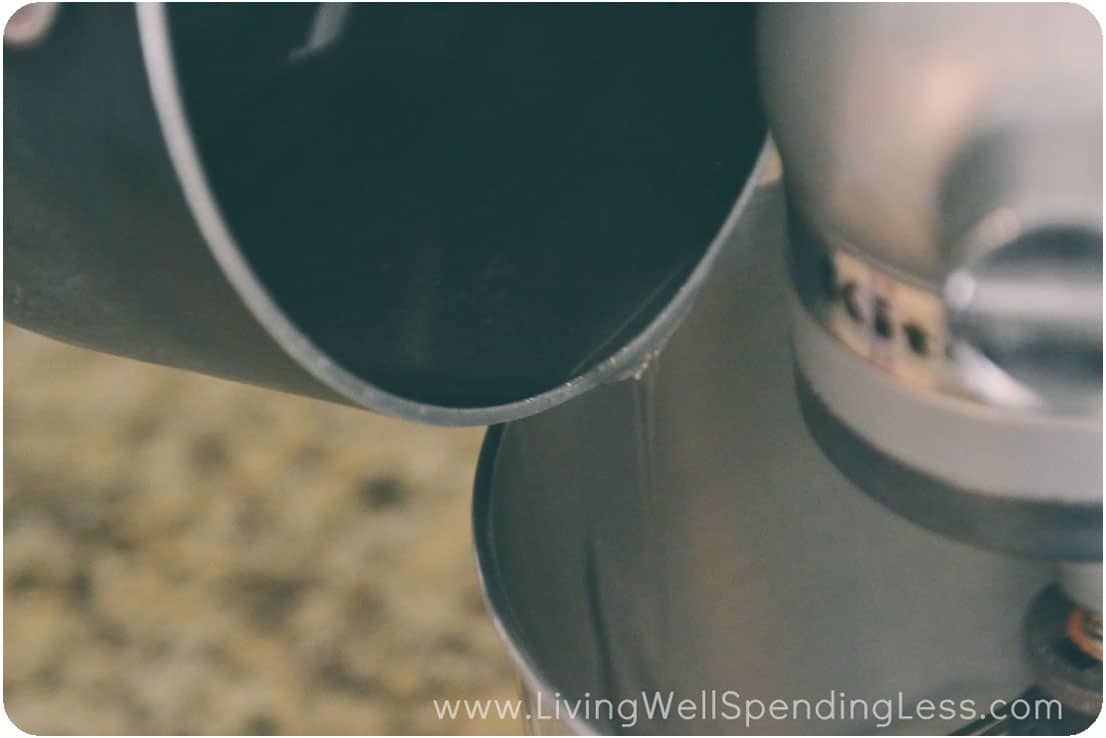
Step 5: Once mixture reaches 240 degrees, remove from heat. Turn on mixer on low (use whisk attachment) and slowly add syrup mixture to mixing bowl.
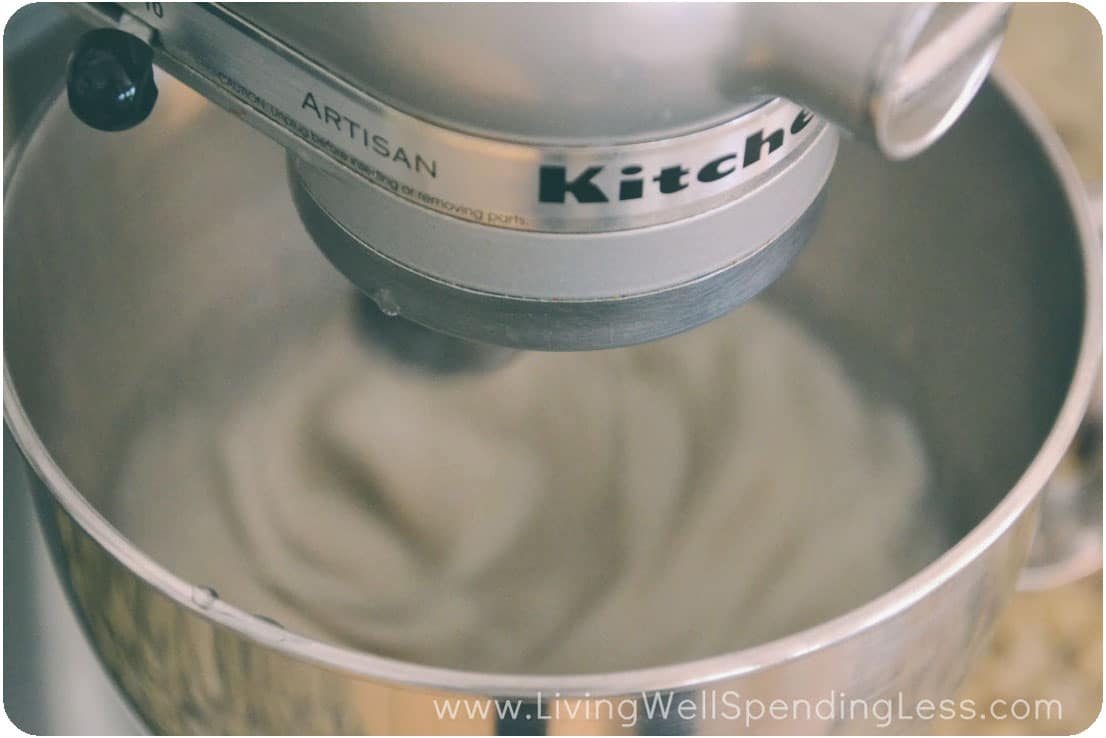
Step 6: Turn mixer to high speed and whip for 12-14 minutes, until mixture is quite thick. Add peppermint extract and whip 1 minute more.
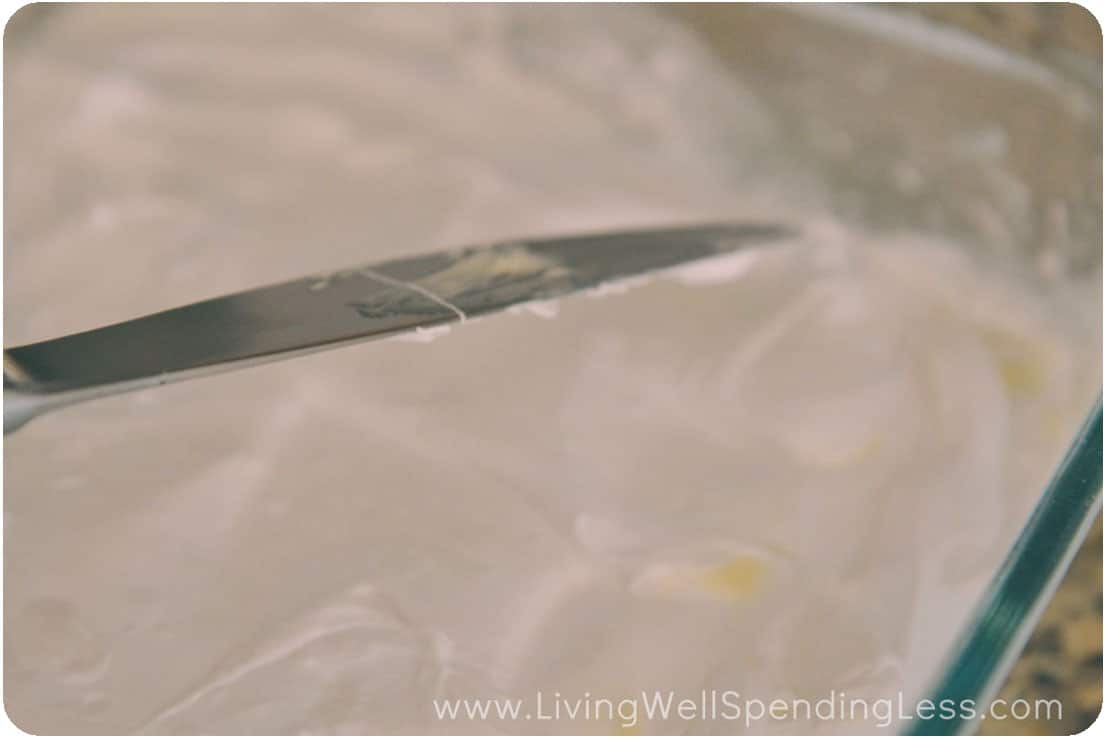
Step 7: Grease a spatula with butter or Crisco and transfer marshmallow mixture to prepared dish. Use a buttered knife to spread it smooth.
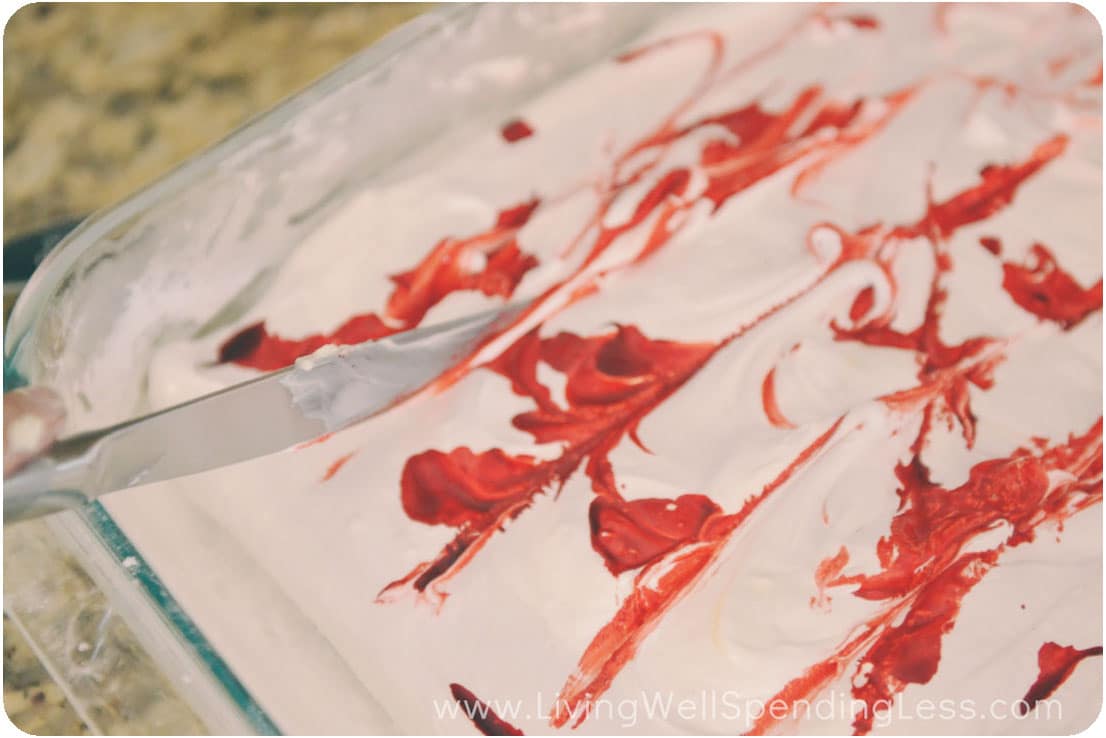
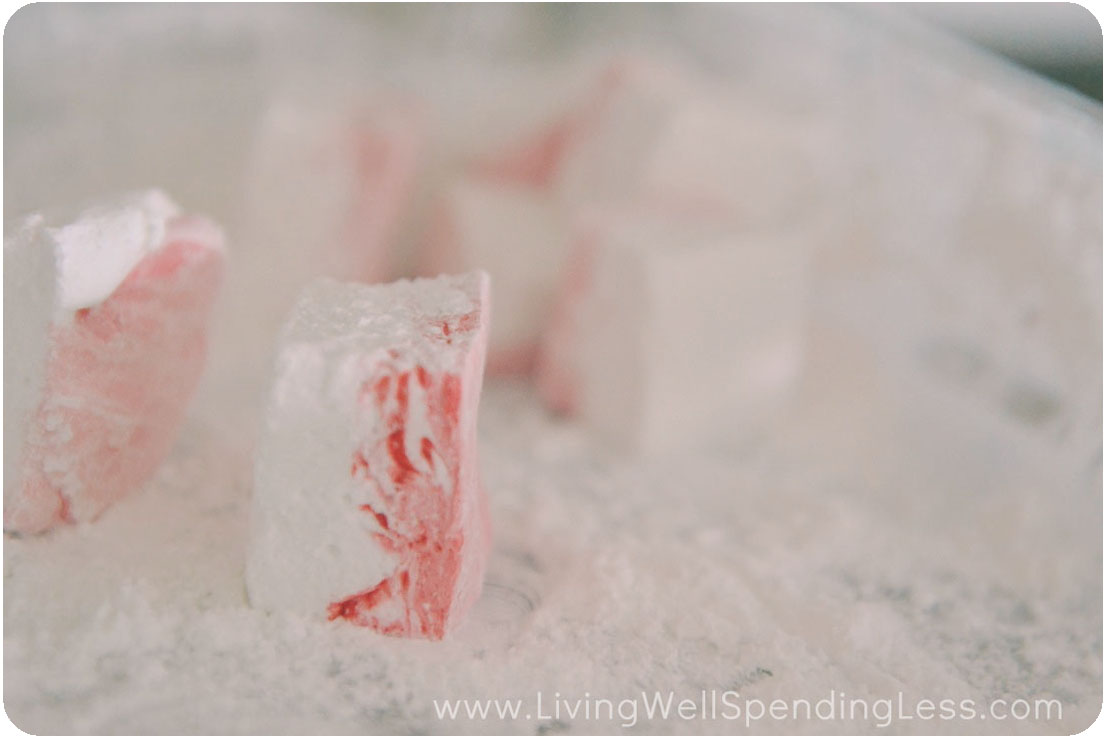
Step 8: (Optional) Drop red food coloring onto mixture and use buttered knife to pull color through marshmallow mixture to create swirls.
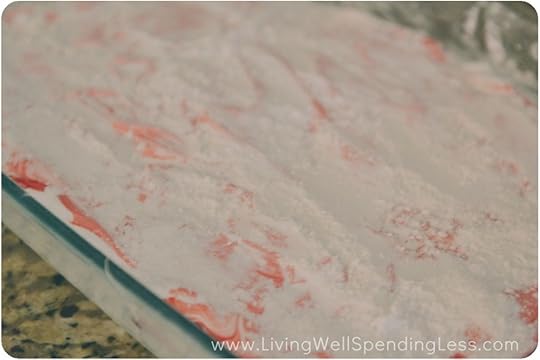
Step 9: Generously sprinkle the top of marshmallow with remaining cornstarch mixture. Let set overnight.
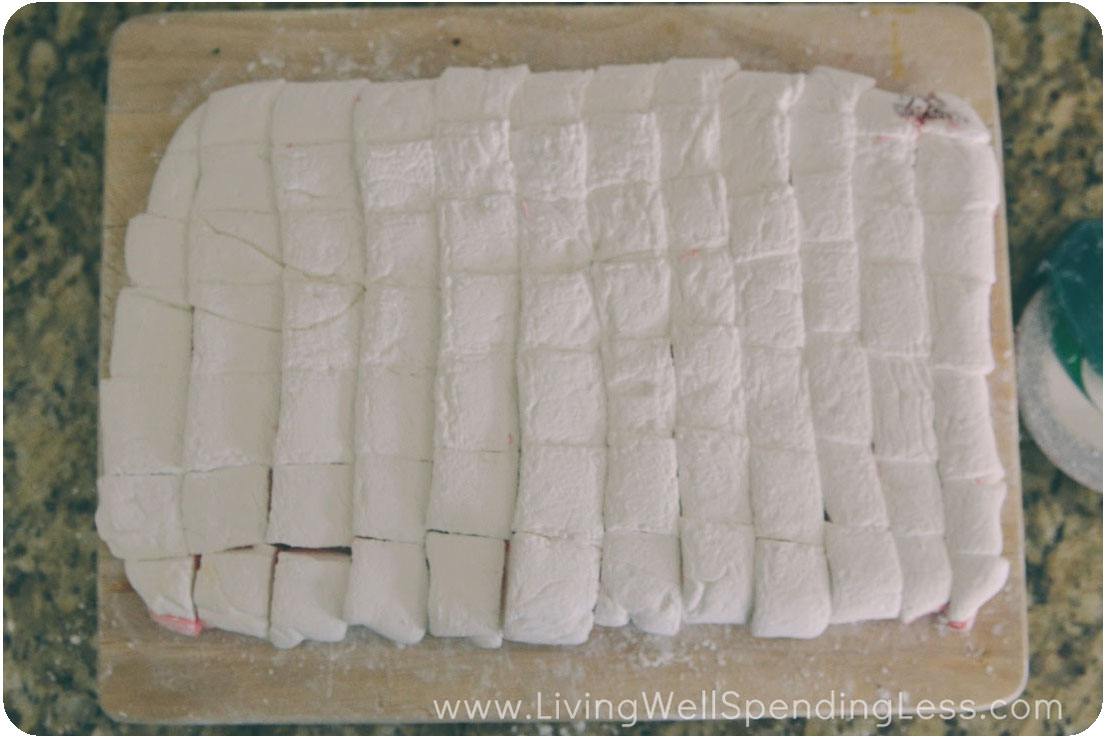
Step 10: Invert marshmallows onto a cutting board. Use excess cornstarch mixture to coat sharp knife, then cut marshmallows into 1×1″ squares.
Step 11: Coat cut edges with cornstarch/powdered sugar mixture & wipe off excess. Serve in hot chocolate or package in cellophane bags to give as gifts.

Print This!
Recipe: Peppermint Marshmallows
Summary: A decadent twist on the ordinary marshmallow
Ingredients
butter or Crisco
1/4 cup corn starch
1/4 cup powdered sugar
3 envelopes unflavored gelatin
1 cup ice water
1 1/2 cup sugar
1 cup corn syrup
1/4 teaspoon salt
1 teaspoon peppermint extract
red food coloring (optional)
Instructions
Grease 9 1/2 x 11″ glass casserole dish with butter or Crisco. Mix together corn starch & powdered sugar; sprinkle a few spoonfuls of cornstarch mixture over butter or Crisco and tilt dish around until well coated. Set baking dish aside and save remaining corn starch mixture for later.
Place gelatin and 1/2 cup ice water in the bowl of a stand mixer; set aside.
Mix remaining water, sugar, salt, and corn syrup in saucepan; heat, covered, over medium-high heat for 3-4 minutes.
Clip candy thermometer to side of saucepan; continue heating mixture until it reaches 240 degrees, approximately 6-8 minutes.
Once mixture reaches 240 degrees, remove from heat. Turn on mixer on low (use whisk attachment) and slowly add syrup mixture to mixing bowl.
Turn mixer to high speed and whip for 12-14 minutes, until mixture is quite thick. Add peppermint extract and whip 1 minute more.
Grease a spatula with butter or Crisco and transfer marshmallow mixture to prepared dish. Use a buttered knife to spread it smooth.
(Optional) Drop red food coloring onto mixture and use buttered knife to pull color through marshmallow mixture to create swirls.
Generously sprinkle the top of marshmallow with remaining cornstarch mixture. Let set overnight.
Invert marshmallows onto a cutting board. Use excess cornstarch mixture to coat sharp knife, then cut marshmallows into 1×1″ squares.
Coat cut edges with cornstarch/powdered sugar mixture & wipe off excess. Serve in hot chocolate or package in cellophane bags to give as gifts.
Preparation time: 30 minute(s) + drying time
Cooking time: 20 minute(s)
Number of servings (yield): 12
* * *
Have you ever tried making homemade marshmallows?
Pin It
The post Homemade Peppermint Marshmallows appeared first on Living Well Spending Less™.
December 2, 2013
DiY Magazine Rack {Handmade Holidays}

This year I am beyond thrilled to introduce you to a revamped series here at LWSL called Handmade Holidays! In past years I have shared my own holiday gift ideas, but this year I thought it would be fun to get some inspiration elsewhere. I asked eight of my favorite up-and-coming bloggers to share a simple and frugal handmade gift idea. I was so blown away by all the amazing ideas they came up with, and I think you will be too. Each Monday, from now until Christmas, one of these talented women will be sharing their gift idea. Please be sure to welcome them here to LWSL, and to take the time to check out their blogs. You will be so glad you did!
* * *
This is a guest post is from Hannah of Lovely Little Life.
If you are anything like my family, you probably have a magazine or two lying around your house. Maybe they are issues you don’t want to throw away or maybe you just haven’t made the time to read them yet. My husband and I have a couple subscriptions between the two of us which can accumulate into quite the pile after just a few months.
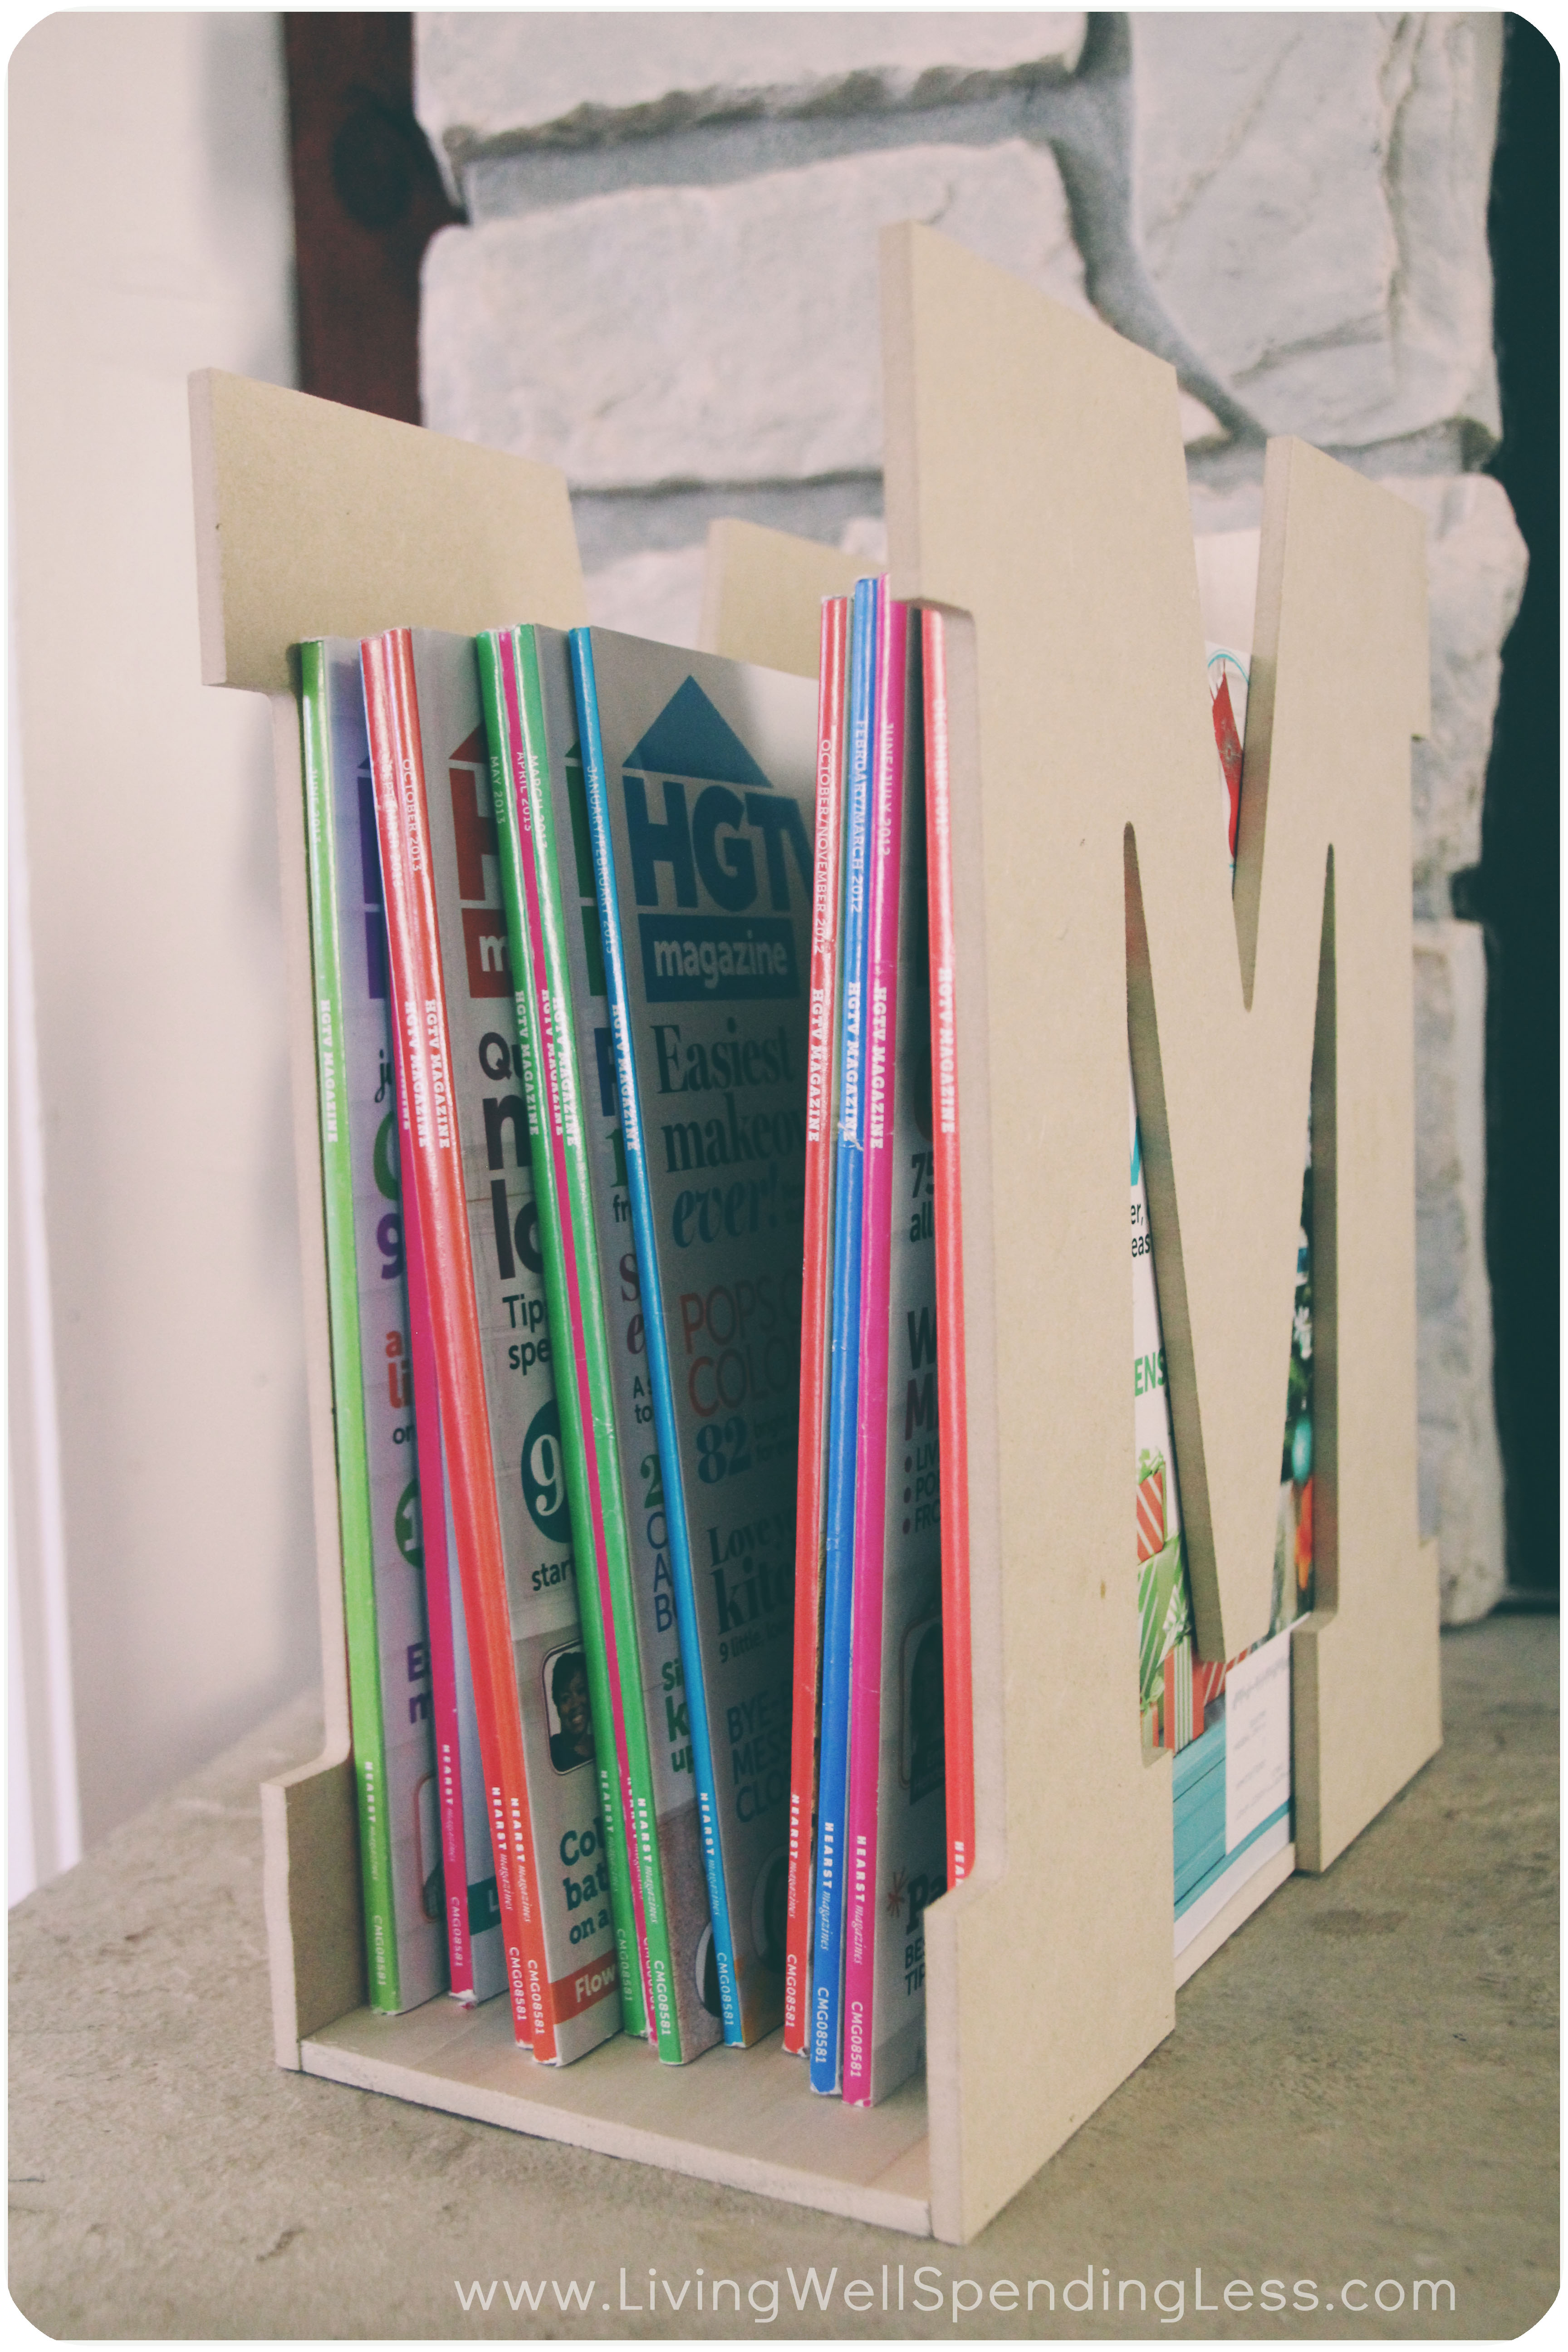
While browsing Etsy for options to help get our accumulation under control, I fell in love with this “M is for Magazine” holder by Paper Doll Wood Shop.

My mother-in-law has started asking for Christmas gift ideas and since this magazine holder was something I wanted and needed I immediately wrote down the information. Sadly, I soon realized it had been discontinued. I thought to myself how unfortunate that was and knew it would have made an awesome Christmas gift. My next thought was “What am I thinking?! I can make that myself!”
Now that my magazine holder is complete and I know just how easy it was to make I plan on building one for each of my siblings this year. It is THAT simple! So let’s get to it, shall we?!
Here is what you need:
2 Wood “M” Letters (13” tall) – mine were purchased at Hobby Lobby
1 Piece of ¼” Poplar Wood (at least 30” long)
Finish Nail Gun and ¾” Brad Nails
Paint (optional)

Step 1: Measure and cut the poplar wood. One piece will be used to create the back of the magazine holder and the other will become the bottom.

Step 2: Using a finish nail gun and the pieces of poplar wood you just cut, attach the back piece of the magazine holder to your “M’s”. After the back piece is secure, attach the bottom piece of poplar wood.
*Note: If you don’t have access to a finish nail gun, wood glue and clamps would work just as well!
Step 3: If you prefer a minimalist style décor, you may choose to stop here. I like the natural wood look myself!

Step 4: I ended up choosing to paint my magazine holder and picked white so it would work in any room. I used a paint & primer in one gloss spray paint.

* * *
What handmade gifts are you planning to make this year?
Hi! My name is Hannah. I’m a twenty-something girl all about DIY, home decor, crafting, and fashion! My blog is Lovely Little Life. I love to share upcycling projects and easy DIY decor.
Pin It
The post DiY Magazine Rack {Handmade Holidays} appeared first on Living Well Spending Less™.
November 27, 2013
Skinny Shepherd’s Pie

Shepherd’s Pie has never been one of those recipes I’ve just been dying to make. To be perfectly honest, it just doesn’t have a whole lot of appeal. It’s certainly not much to look at, and quite frankly just the name invokes thoughts of tasteless English mush. In fact, I probably would have gone my whole life without tasting it at all if my friend Angie hadn’t convinced me to give it a try.
My expectations of this recipe were pretty low, but Angie was absolutely right. Even more surprisingly, my whole family devoured it, despite the fact that it’s not all that pretty AND despite the fact that the vegetarian crumbles and mashed cauliflower make it super diet-friendly as well. Shepherd’s Pie….who knew?
Note: You can easily substitute 1 pound of real ground beef for the vegetarian crumbles, as well as leftover mashed potatoes for the mashed cauliflower. It will be just as delicious but not nearly as low in calories.
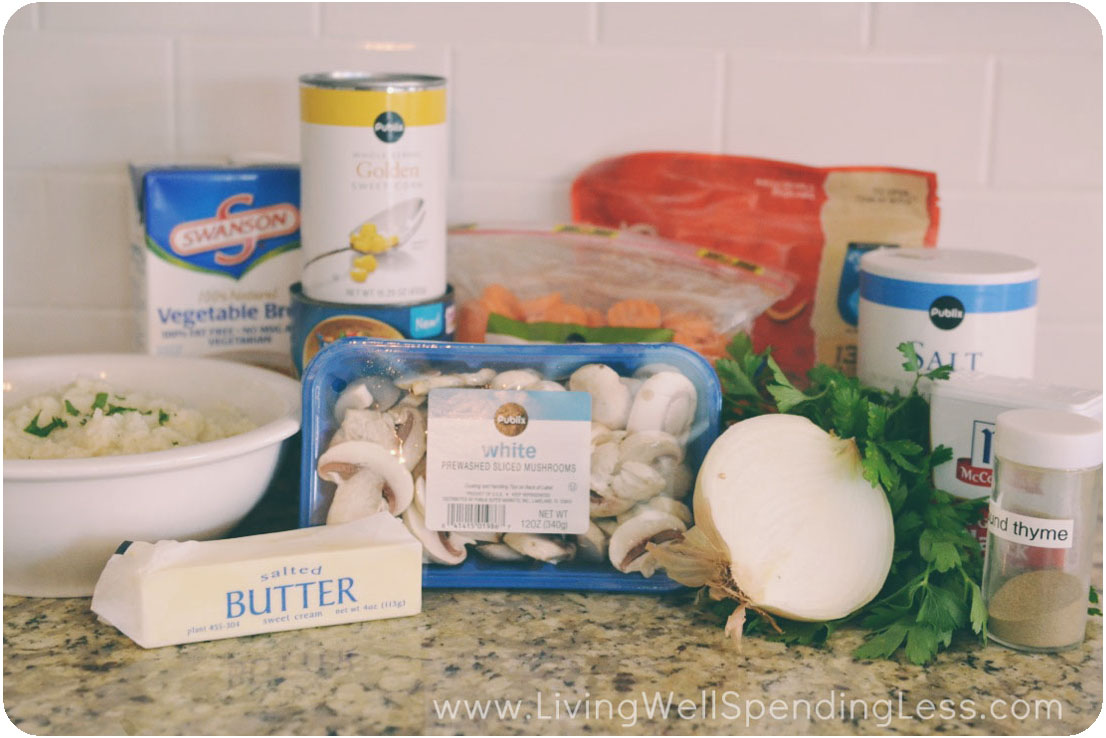
Here is what you need:
3 tablespoons butter
1/2 onion
1 package vegetarian protein crumbles (such as Boca or Morningstar)
8 ounces sliced mushrooms
8 ounces sliced carrots
1/2 cup vegetable broth or water
1 can corn, drained
1 can Progresso Recipe Starters, mushroom flavor
2 tablespoons fresh parsley
1/2 teaspoon dried thyme
1/2 teaspoon salt
1/4 teaspoon pepper
2 tablespoons flour
8 ounces sharp cheddar, grated (optional)
1 recipe Roasted Garlic Mashed Cauliflower

Step 1: Melt butter; chop onion. Saute onion until soft, 5-8 minutes.
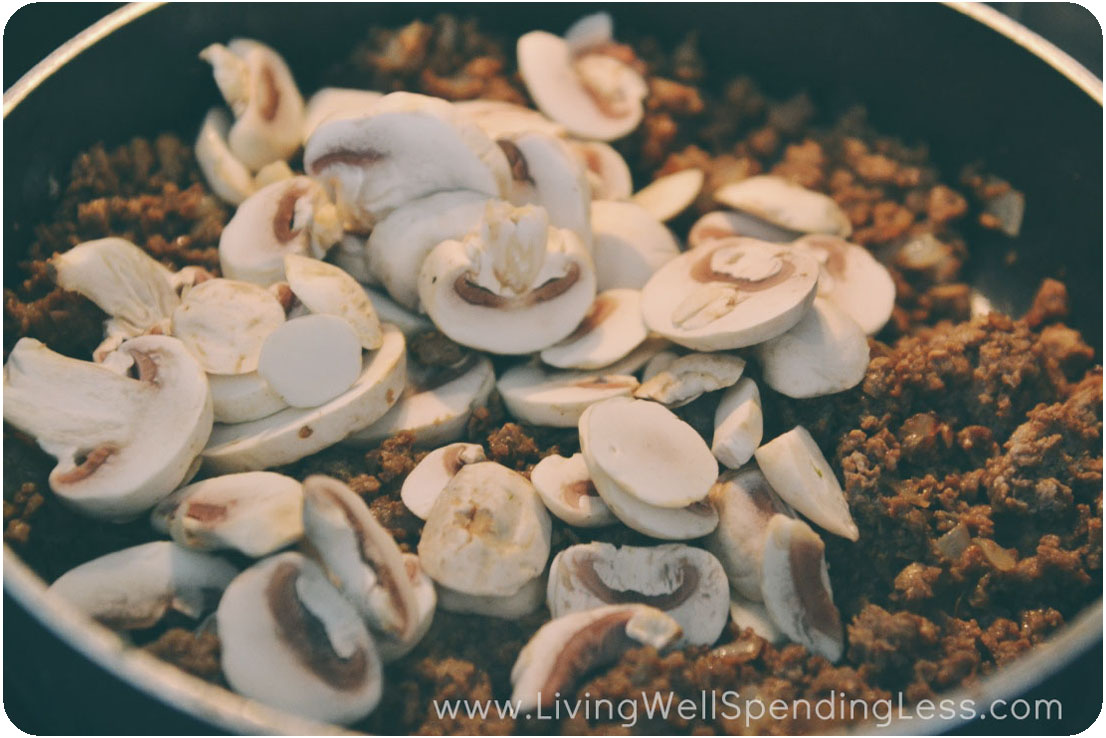
Step 2: Add vegetarian crumbles & stir well, then add mushrooms and saute 4-5 minutes more, cutting mushrooms into small pieces with spatula.

Step 3: Add carrots & vegetable broth. Stir well; cook 2-3 minutes more.

Step 4: Add corn, Recipe Starter, and spices. Stir well. Add flour. Bring to a boil, then reduce heat and simmer for 5 minutes. Transfer vegetable mixture to greased 2 1/2 quart casserole dish.

Step 5: Sprinkle with cheese (optional).
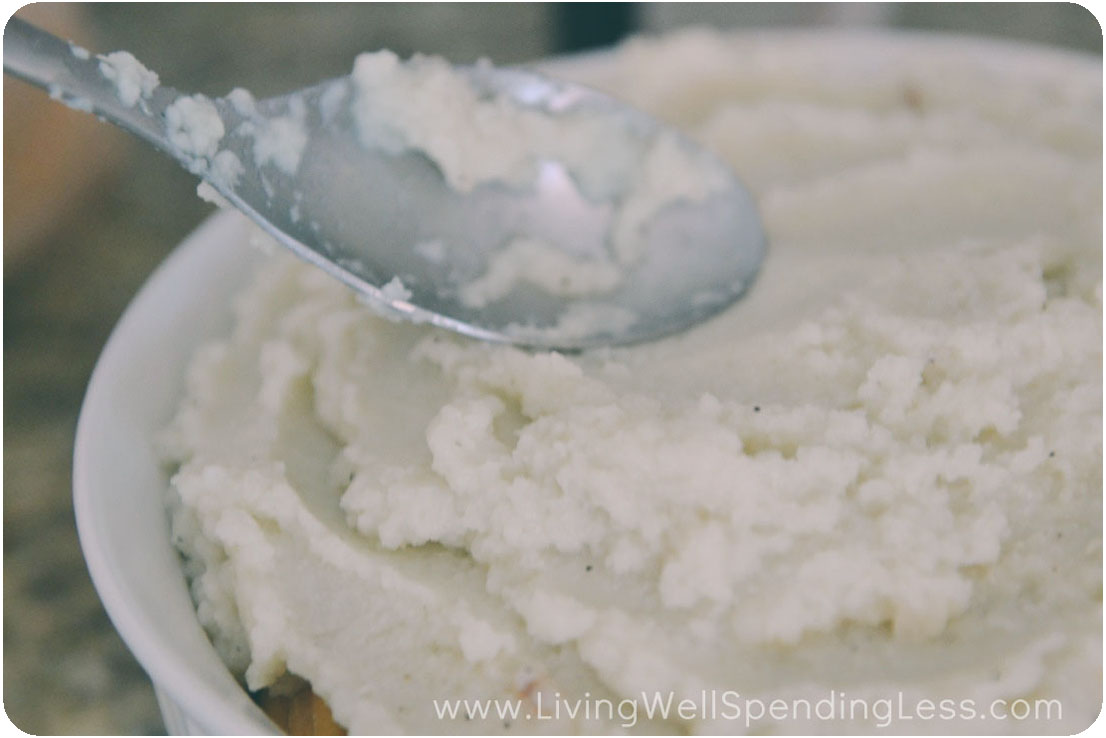
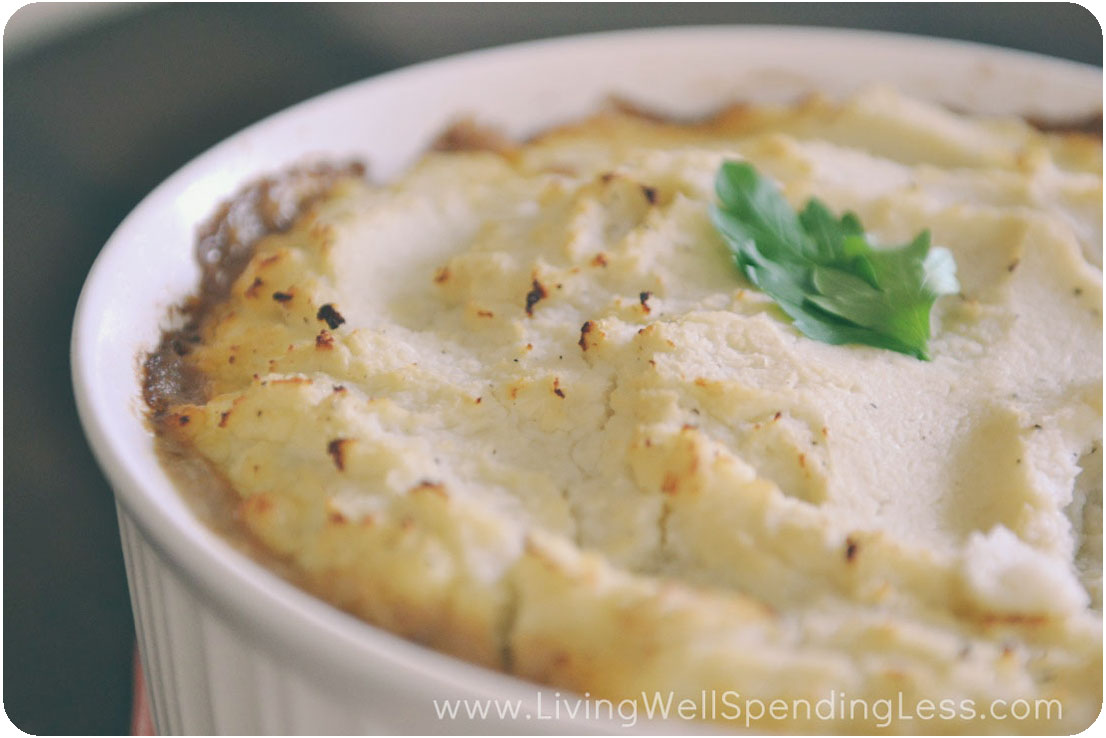
Step 6: Spoon mashed cauliflower (or mashed potatoes) over top of cheese. Bake at 375 degrees for 30 minutes, until mixture is bubbly and cauliflower is lightly browned.
Print This!
Recipe: Skinny Shepherd’s Pie
Summary: The ultimate comfort food with none of the guilt!
Ingredients
3 tablespoons butter
1/2 onion
1 package vegetarian protein crumbles (such as Boca or Morningstar)
8 ounces sliced mushrooms
8 ounces sliced carrots
1/2 cup vegetable broth or water
1 can corn, drained
1 can Progresso Recipe Starters, mushroom flavor
2 tablespoons fresh parsley
1/2 teaspoon dried thyme
1/2 teaspoon salt
1/4 teaspoon pepper
2 tablespoons flour
8 ounces sharp cheddar, grated (optional)
1 recipe Roasted Garlic Mashed Cauliflower
Instructions
Melt butter; chop onion. Saute onion until soft, 5-8 minutes.
Add vegetarian crumbles & stir well, then add mushrooms and saute 4-5 minutes more, cutting mushrooms into small pieces with spatula.
Add carrots & vegetable broth. Stir well; cook 2-3 minutes more.
Add corn, Recipe Starter, and spices. Stir well. Add flour. Bring to a boil, then reduce heat and simmer for 5 minutes.
Transfer vegetable mixture to greased 2 1/2 quart casserole dish.
Sprinkle with cheese (optional).
Spoon mashed cauliflower (or mashed potatoes) over top of cheese. Bake at 375 degrees for 30 minutes, until mixture is bubbly and cauliflower is lightly browned.
Preparation time: 30 minute(s)
Cooking time: 30 minute(s)
Number of servings (yield): 8

* * *
Have you ever tried Shepherds Pie?
Pin It
The post Skinny Shepherd’s Pie appeared first on Living Well Spending Less™.
November 25, 2013
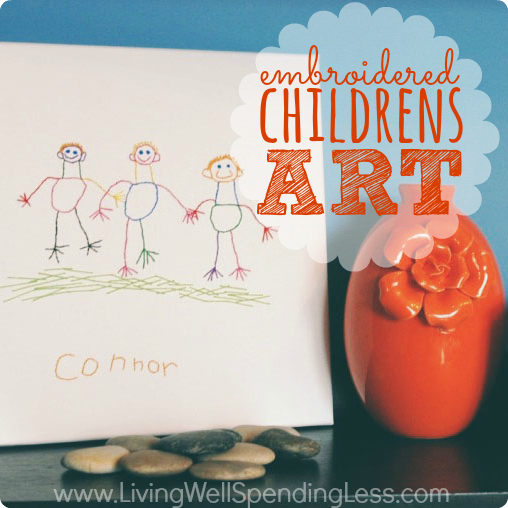
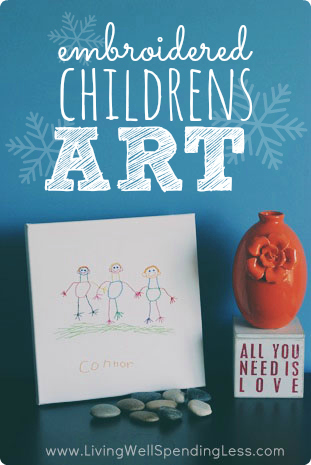
Embroidered Children’s Art {Handmade Holidays}

This year I am beyond thrilled to introduce you to a revamped series here at LWSL called Handmade Holidays! In past years I have shared my own holiday gift ideas, but this year I thought it would be fun to get some inspiration elsewhere. I asked eight of my favorite up-and-coming bloggers to share a simple and frugal handmade gift idea. I was so blown away by all the amazing ideas they came up with, and I think you will be too. Each Monday, from now until Christmas, one of these talented women will be sharing their gift idea. Please be sure to welcome them here to LWSL, and to take the time to check out their blogs. You will be so glad you did!
* * *
This is a guest post is from Jenn of Endlessly Inspired
When my oldest son was in Kindergarten, I saved everything he brought home. I mean, EVERYTHING. I just could not bear to throw out anything, especially his sweet little drawings that always featured people’s arms coming directly out of their heads. But now that he’s in 3rd grade and my middle son is now in Kindergarten and bringing home his own arms-growing-from-ear-hole masterpieces, we are being buried in papers and may or may not end up on Hoarders.
So I decided to try to find a way to create more permanent art from their masterpieces by embroidering their drawings onto a canvas. I love this idea, because it is a perfect gift for parents, grandparents, teachers, or anyone in your life who gets that squooshy feeling in their belly when they look at a painstakingly created drawing of people with chicken feet, giant round tummies and monkey ears.
Don’t be intimidated if you’ve never done embroidery before; I only used two extremely basic stitches {besides, you’re recreating a kid’s drawing — it’s not supposed to be perfect!}. And even better, you can find canvases so inexpensively nowadays at any craft store. The one I used was a 12″x12″ and came in a 2-pack that was on sale for about $5.
Here is what you need:
A child’s drawing
A plain canvas
Pencil
Needle
Embroidery floss

Step 1: Either choose an existing drawing or put your little artist to work.

The easiest kind of drawing to embroider is one that has clean, simple lines. As you can see, the picture Connor drew was filled in, but that’s ok. When we transfer it to the canvas, we can just trace the outlines. {Connor also decided which colors he wanted to use for each part of the picture, since I wasn’t too keen on an all-black picture.}
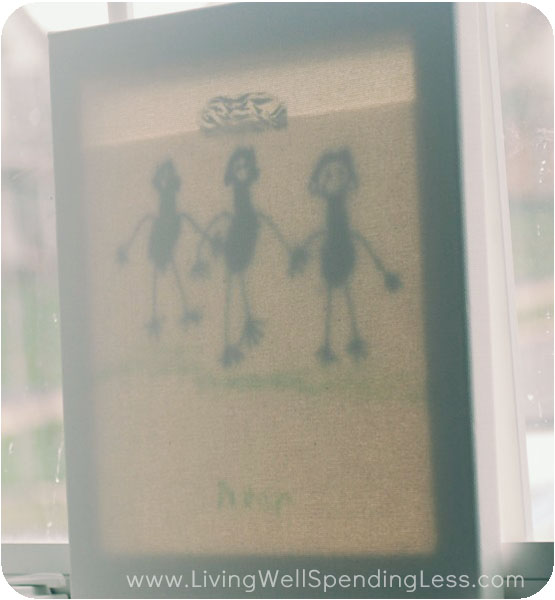
Step 2: Once you have a drawing, it’s time to transfer it to the canvas. There are a few ways to do this, so you can choose the method that you think is the easiest. I just taped the picture to the back of the canvas, held it up to a window and very lightly traced the design onto a canvas with a pencil.

You could also use a light box {here’s a great tutorial on how to create your own light box}, or the “carbon paper” transfer method I used in my Peace on Earth Globe tutorial.
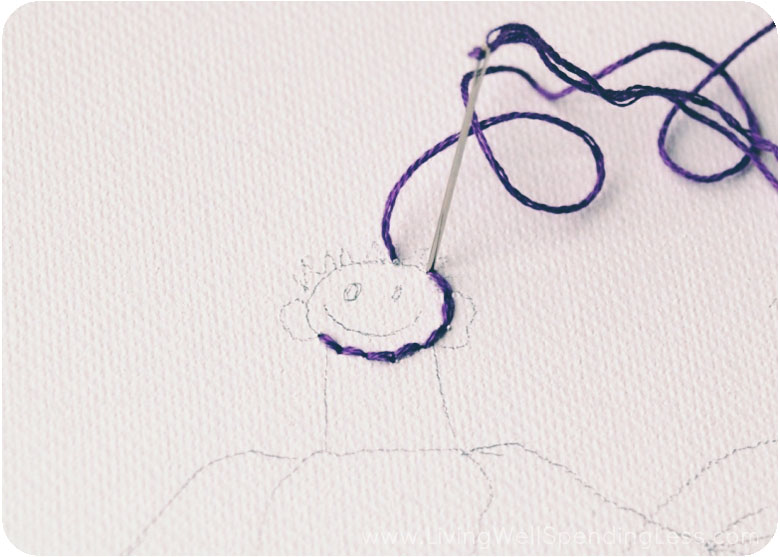
Step 3: Now it’s time to embroider! Like I said, please don’t be nervous if you’ve never embroidered before. It’s way easier than it looks. You can find a great post on how to do basic embroidery stitches here. For the vast majority of this canvas, I used a back stitch.
If you’ve never used embroidery floss before, it is actually 6 strands twisted together. For stitching on a canvas, you only want to use 3 strands, so separate the floss in half before threading your needle. Make a knot in one end of your thread, and at whatever starting point you choose, come up through the canvas from the back, and go back down to make your first stitch. {Most of my stitches were about 1/4″ long.} To make your second stitch, come up from the back about 1/4″ away from your first stitch and then go back down right next to it.
Step 4: When you are finished with one color, you’ll need to tie off your stitch in the back.

Step 5: Continue backstitching your entire drawing, changing colors when needed.

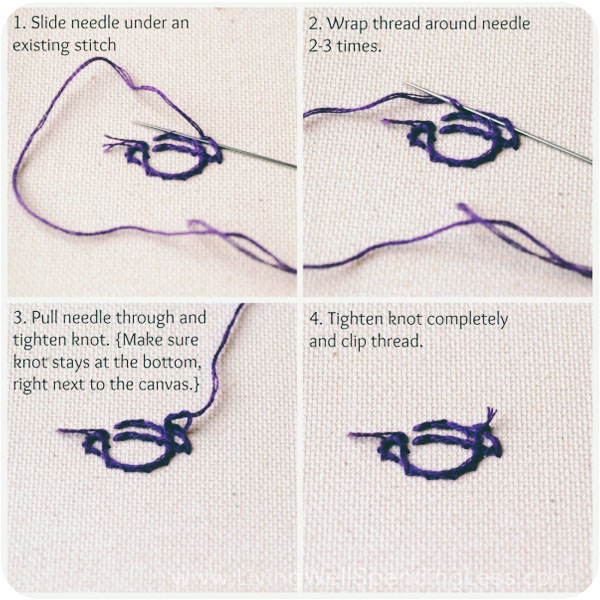
Step 6: To do the eyes, I used a stitch called a french knot, which is very similar to the technique you use to tie off the thread in the back. {Please try not to be too disturbed by the giant-needle-through-the-eyeball in Photo #1.}
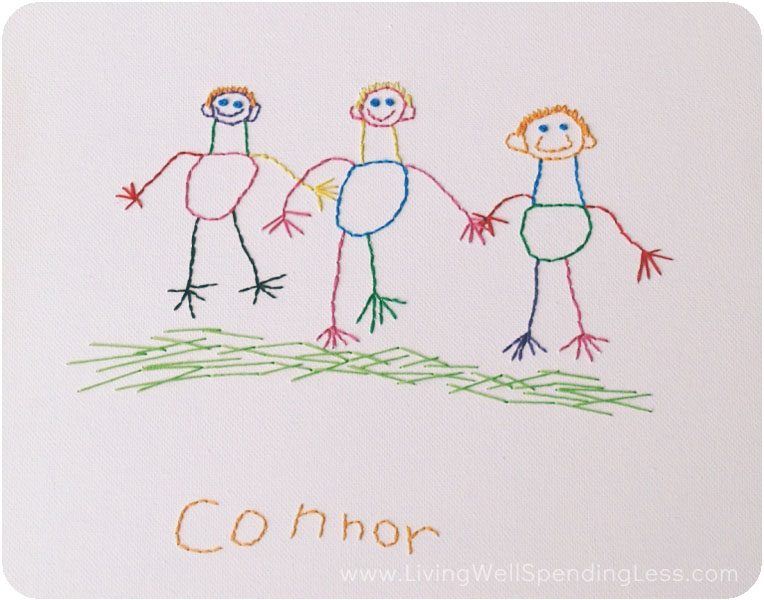
Step 7: For the grass, I used long stitches, placed randomly along the bottom. There was no rhyme or reason to them, I just slapped them on there, criss-crossing them back and forth until I was happy with how they looked.
Step 8: That’s it! While it looks like a ton of stitching, I completed the entire thing in about an hour and a half. Just park yourself in front of the TV and stitch your heart out. Or, if you have older kids, you could even have them do the stitching themselves.

What I love most about this project is that, not only will these make great, inexpensive gifts for family and friends, but my kids love seeing their art up on the wall. David, my 8-year-old who wanted no part of this project when I first mentioned it to him, saw Connor’s final canvas and immediately grabbed some paper and drew his own picture for me to embroider, complete with notes on which colors I was to use and which parts he wanted filled in with stitches.
I hope you enjoyed this tutorial and I hope I’ve inspired you to turn your own kids’ drawings into permanent works of art!!
Hi, I’m Jenn from Endlessly Inspired! I’m a freelance writer and editor who lives in central Pennsylvania with my husband and three boys. Yeah. That’s a lot of testosterone in one house. I love, love, love decorating, DIYing, crafting, baking, and cooking, and I’m constantly scouring everything I see for inspiration. My ideas can come from anywhere: Pinterest, books, magazines, Pinterest, catalogs, stores, TV shows, websites, other blogs, Pinterest, other people’s homes, nature {did I happen to mention Pinterest?}. You name it, and I’ve gotten an idea from it. {Literally. I selected the color scheme for our family room from a pocket pack of tissues. Totally not making that up.} I hope to teach others that, if you really pay attention to the world around you, you can get inspiration from anything!
* * *
Do you have trouble throwing away your kids’ drawings and schoolwork? What do you do with them?
The post Embroidered Children’s Art {Handmade Holidays} appeared first on Living Well Spending Less™.
November 24, 2013
Weekend Wandering

Happy Sunday, and, since there will be no Thrifty Thursday link party this week, Happy Thanksgiving! I wish you all a productive week of preparations, safe travels, and a wonderful holiday with your family & friends.
If you haven’t yet entered the LWSL Favorite Things Giveaway Extravaganza, be sure to do that soon! I get to give away a whopping $4,000 in prizes, including a Google Nexus Tablet, a Ninja Professional blender, and a ticket package to Universal Orlando!
As always, I was incredibly inspired by you all this week! Here are just a few of the posts I loved:
* * *
First of all, doesn’t this Pasta Fagioli from Over the Apple Tree look absolutely delicious and perfect for fall? Yum!

I’ve been busy collecting cookie recipes to try this year, and I think these Peppermint Chocolate Chunk Cookies from Kleinworth & Co will definitely need to make the list!

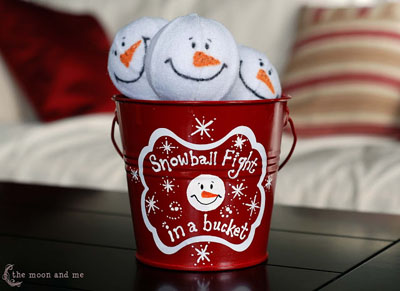
How cute is this Snowball Fight in a Bucket from The Moon and Me? My girls have never seen snow (at least not that they can remember) and they are begging to go someplace cold this year! I think they would get such a kick out of this project!
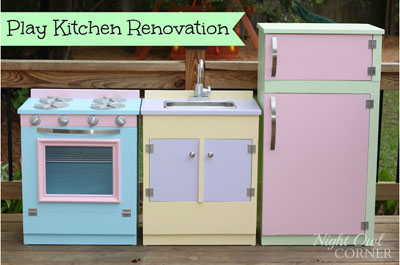
I loved this Play Kitchen Renovation from Night Owl Corner. How fun that she took one of her favorite childhood toys and revamped it for her daughter! I think it turned out nicer than any play kitchen you could buy in the store!
I am completely inept when it comes to tying scarves, so I just loved this easy tutorial on Faking an Infinity Scarf from This Silly Girl’s Life!

Is a dSLR Camera on your Christmas wish list? These 5 Tips for Buying a dSLR Camera from The Seasoned Homemaker are a must read!

If you are not sure Christmas cards are in your budget this year, be sure to check out these Free Christmas Card Templates from Got 2 Have Faith. Just insert your own photo & have them printed on regular photo paper for a stylish card that costs just pennies apiece!

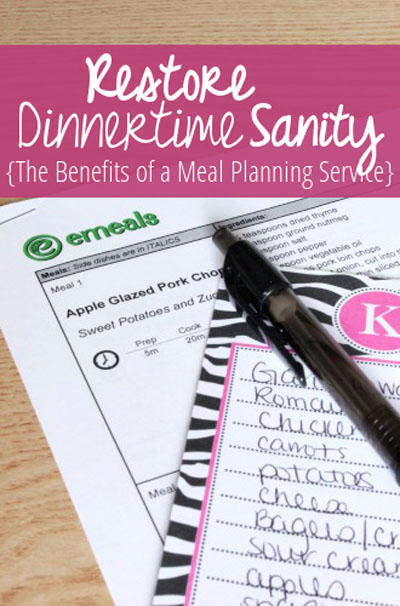
Have you considered using a meal planning service? Read all about the benefits of using one over at Creative Savings Blog.
Finally, I loved this post, Black Friday, Yea or Nay, from Mission to Save. It was full of useful tips for braving the stores. Are you planning to hit this stores this Friday?

* * *
What did you love this week?
Pin It
The post Weekend Wandering appeared first on Living Well Spending Less™.
November 22, 2013
7 Simple Ways to Enjoy More & Spend Less This Christmas

It’s the Most Wonderful Time of the Year.
Or so they say.
I don’t know about you, but the holiday season in my mind is often much more idyllic than the frenetic, stressful, and action-packed month I actually experience.
Ever feel that way?
Our already hectic schedules gets even crazier, and suddenly on top of everything else there are presents to buy, cards to send, parties to organize, pageants to attend, menus to plan, cookies to bake, bells to ring, carols to sing and goodness only knows what else.
With so much to do and buy and not enough time or money to get it all done, it is no wonder the holidays often have most of us feeling stressed rather than blessed.
Is there another way? Is it possible to carve out just enough time and purpose to create the joyful, peaceful holiday season we’re all longing for?
While there is no such thing as a perfect holiday, there is a way to enjoy more (and spend less) during the holidays. Over the years, my husband and I have adopted a few simple strategies, and they might just work for your family too:
Plan Ahead. It’s been said that a failure to plan is a plan to fail, and when it comes to the holidays, truer words were never spoken. Taking just a few minutes early in the season to set a budget, plan your menus, and determine your priorities can be the difference between memories to last a lifetime and a holiday you’d simply like to forget.
For the past few years I’ve used a simple printable holiday planner to map out a game plan for the months of November and December, and I can honestly say that it has made a huge difference in both my attitude and my wallet. You can get this year’s version here.
Planning ahead is especially important when it comes to food preparation, particularly if you do a lot of baking or cooking this time of year. The store sales are phenomenal around the holidays, but different things go on sale each week. Planning your menu, then buying the things on your list as they go on sale rather than all at once can shave hundreds of dollars off your holiday grocery bill.
Reserve Space in Your Schedule. Part of planning ahead (and spending less) is making a conscious effort to guard your time so that not every minute is filled with activity. All those activities add up! Before your calendar is booked, take the time to block out at least one day each week (but preferably more) for downtime. Resolve to make that time non-negotiable so that even if something comes up (and it will), you have no choice but to say you’ve already made plans.

The bonus to this strategy is creating more time for your family, which is so essential! We often get so wrapped up in our schedules and obligations that we forget to create a sense of wonder for our kids. There is something magical about a relaxed evening spent playing games or watching a It’s a Wonderful Life by the light of the Christmas tree, or an afternoon spent baking and decorating cookies just for fun. The best memories always happen in the margin.
Cut Down on Gifts. Take a cue from Charlie Brown and simply refuse to give in to the over-commercialization of the holiday season. There is no rule that says your children or grandchildren—or anyone else for that matter needs to receive a whole pile of presents in order to experience a happy holiday. On the contrary, bigger the frenzy, often the more over-stimulated, overwhelmed, and dissatisfied kids often become.

Vow this year to make your holiday season about something more than stuff. Foster an “Attitude of Gratitude” in your kids. Help them create & deliver simple handmade gifts or goodies to friends and family, focusing on the giving rather than receiving. When it comes to gifting, try following the “something you want, something you need, something to wear and something to read” rule.
Get Crafty. Not only is it cheaper, but handmade gifts are usually appreciated much more than something store-bought. There is just something so special and heartfelt about something you put together with your own two hands. Even better, taking the time to make your gifts is a great way to spend quality time with your family!

Handmade gifts don’t need to be elaborate or difficult, and often you can use materials you already have on hand. Some of my favorite handmade gift projects
Shop Smart. It is very easy to get caught up in the excitement of all the holiday sales & marketing and suddenly spend more than you wanted to. According to the Discover Holiday Shopping Survey, only 52 percent of consumers create a holiday budget, but doing so can save you a whole lot of heartache after Christmas has come and gone. Be realistic about what you can afford to spend, then stick to the plan!
According to that same survey, 70 percent of shoppers plan to shop the Black Friday & Cyber Monday sales. If you are one of them, be careful! Keep in mind that all stores are in the business of making a profit, and the way they do that is to get you in the door by enticing you with amazing sale items. They count on the fact that you will probably end up buying more than just the “loss leaders” you came in for!
Volunteer. When your time and budget is already stretched too thin, volunteering might seem like the last thing on earth you’d want to do during this time of year. Do it anyway. There is simply no better way to feel the joy of the holiday season than by freely giving of your time, energy and resources to those in need. I promise that the more you give, the more you will receive.

If you have children at home, volunteering—and involving your kids in the process—is even more important. It brings the focus away from what they can get and instead shows them the true spirit of the season.
There is no shortage of opportunities to serve this time of year, even for the youngest of kids. Some of my family’s favorite volunteer activities last year included delivering meals on Thanksgiving, ringing the Salvation Army bell outside the local Publix, filling Operation Christmas Child boxes, Christmas caroling to shut-ins, buying gifts for a local angel tree, and delivering cookies to the local fire station. There are also plenty of opportunities to serve in local care facilities, hospitals, food banks, schools and churches. Make the effort. You won’t regret it.
Eliminate the unessential. We are all pretty good at taking on more, but not always so good at cutting out the things we don’t necessarily need to be doing. Perhaps we do them out of habit, or because they are easy, or because we worry what our friends and family might say if we stopped.

Do we really have to send out 200 Christmas cards, or buy gifts for everyone we know? Is it that important to attend seven different holiday concerts, or to bake four different pies from scratch for Thanksgiving dinner?
If the hustle and bustle of the holidays has become a burden rather than a blessing, then it is probably time to reevaluate. Determine your priorities—those handful of people, values, and activities—that are most important to you this year. Accept the idea that there is no way to do it all, and then gracefully bow out of the obligations that don’t make the cut.
Here’s to a season of joy!
This post was written as part of the Discover Preferred Blogger Program. All opinions are mine. Discover believes in giving their customers the best service possible. They are building their company by listening to consumers and developing products and programs to help them get the most for their money. Beyond credit cards, Discover banking and payments offer rewarding products backed by the same commitment to high-quality service that they’ve had from the start.
The holidays often remind of us all of our blessings and is a special time of year to give back to the community. Discover cardmembers can donate their Cashback Bonus, dollar for dollar, to various organizations including the American Red Cross, Junior Achievement and Operation Homefront. Added Bonus: Discover will make an extra annual contribution to the charity that receives the most donations.

* * *’
How do you spend less and enjoy more during the holidays?
Pin It
The post 7 Simple Ways to Enjoy More & Spend Less This Christmas appeared first on Living Well Spending Less™.
November 21, 2013
Thrifty Thursday {Week 37}
Happy Thrifty Thursday once again! There is only a week to go before Turkey Day, and I am looking forward to seeing all your best holiday recipes, DiY projects, and Black Friday shopping secrets! Also, because of Thanksgiving there will be NO link party next Thursday, November 28th!
Finally, don’t forget to enter the LWSL Favorite Things Giveaway Extravaganza! I am giving away more than $4,000 in AMAZING prizes, including a Google Nexus Tablet, a Ninja Ultimate Blender, and a Universal Orlando ticket package valued at more than $1,000! There are 32 prizes in all, and trust me, you do NOT want to miss this giveaway!
Here are the most clicked links from last week
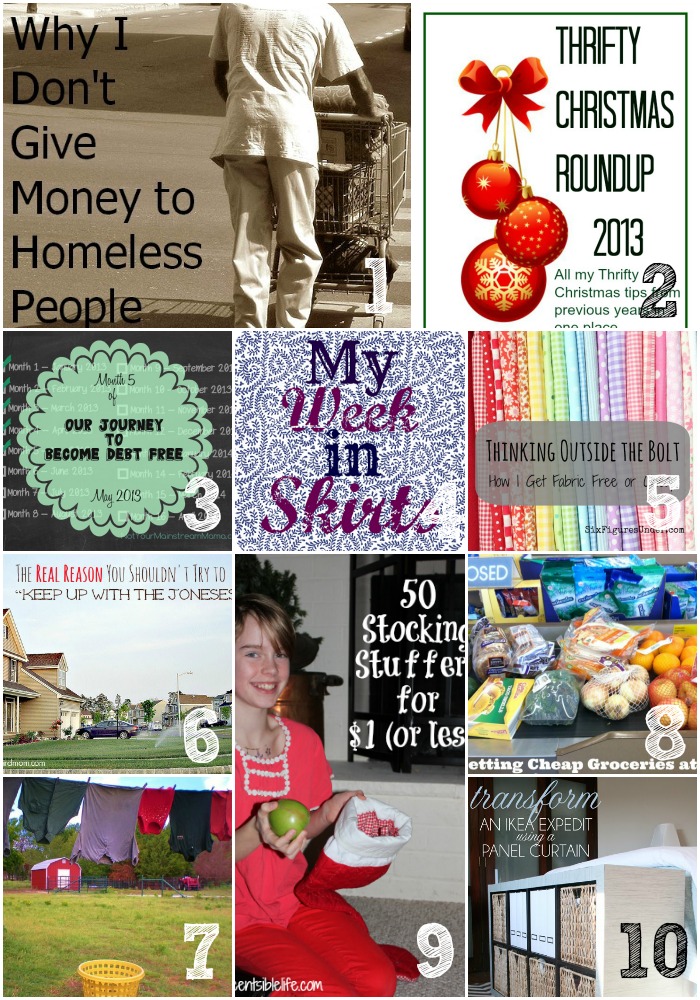
1. An Inviting Home {Why I Don’t Give Money to Homeless People}
2. Snail Pace Transformations {Thrifty Christmas Roundup 2013}
3. Not Your Mainstream Mama {Month Five of Becoming Debt Free}
4. Graceful Little Honey Bee {My Week in Skirts}
5. Six Figures Under {How I Get Fabric for Free or Cheap}
6. Early Bird Mom {The Real Reason You Shouldn’t Keep up With The Joneses}
7. Taylor Made Ranch {Living Deliberately: Voluntary Simplicity}
8. Cheap Recipe Blog {Getting Cheap Groceries at Aldi}
9. The Centsible Life {50 Stocking Stuffers under $1}
10. May Richer Fuller Be {Ikea Hack: Transform an Expedit using a Curtain Panel}
Never linked up to a party before? Here’s how:
Scroll down, find the little blue “Add your Link” Button and click on that.
Follow the instructions on the next page – add a great image of your project and an interesting title. Make sure you link to the direct page of your budget friendly post – not the main page of your blog!
Try to visit at least a few other blogs at the party. Be sure to leave a comment to let them know you stopped by!
Please link back to this post somehow. There are badges available here; a simple text link is just fine too.
Feel free to tweet about Thrifty Thursday so others can join the fun, and don’t forget to check back here Sunday morning to see which posts have been featured this week!
Finally, if this is your first time here I also invite you to check out my new eBook, How to Blog for Profit (Without Selling Your Soul). It is currently a bestseller on Amazon (with more than 75 five-star reviews!) and it is an awesome resource if you are interested in building your blog.
');
// ]]>
The post Thrifty Thursday {Week 37} appeared first on Living Well Spending Less™.
November 20, 2013
Parmesan Roasted Brussels Sprouts

I’m sure we all have our own holiday must-haves, but for me it is just doesn’t feel like Thanksgiving without Brussels Sprouts! I love them boiled or baked or sautéed, but my absolute favorite way to prepare these cute little buggers is roasting them with a little olive oil, salt & pepper, & parmesan cheese. It brings out a rich nutty flavor that is hard to beat!
For this particular post I cut them into quarters, but you can also slice the sprouts in a food processor to make a sort-of Brussels Sprouts hash. Either way, they are delicious and you really can’t go wrong!

Here is what you need:
2 pounds Brussels Sprouts
2 tablespoons olive oil
salt & pepper
1 cup grated parmesan cheese

Step 1: Preheat oven to 400 degrees. Cut bottoms & loose leaves off of Brussels Sprouts, then cut sprouts in half or quarters, depending on size, or use the slicing blade of your food processor to slice them into smaller pieces.

Step 2: Place cut Brussels Sprouts in large Ziploc bag. Pour in 2 tablespoons olive oil. Seal bag and shake well until Brussel Sprouts are coated.

Step 3: Spread out Brussels Sprouts on foil-lined cookie sheet. Sprinkle with salt & pepper. Roast for 20-24 minutes, stirring once.

Step 4: Remove Brussels Sprouts from oven. Sprinkle with parmesan cheese and return to oven for 2 minutes, until cheese is melted. Serve immediately.

Print This!
Recipe: Parmesan Roasted Brussels Sprouts
Summary: A scrumptious way to serve Brussels Sprouts!
Ingredients
2 pounds Brussels Sprouts
2 tablespoons olive oil
salt & pepper
1 cup grated parmesan cheese
Instructions
Preheat oven to 400 degrees. Cut bottoms & loose leaves off of Brussels Sprouts, then cut sprouts in half or quarters, depending on size.
Place cut Brussels Sprouts in large Ziploc bag. Pour in 2 tablespoons olive oil. Seal bag and shake well until Brussel Sprouts are coated.
Spread out Brussels Sprouts on foil-lined cookie sheet. Sprinkle with salt & pepper. Roast for 20-24 minutes, stirring once.
Remove Brussels Sprouts from oven. Sprinkle with parmesan cheese and return to oven for 2 minutes, until cheese is melted. Serve immediately.
Preparation time: 10 minute(s)
Cooking time:
Number of servings (yield): 4

* * *
What’s your favorite Thanksgiving side dish?
Pin It
The post Parmesan Roasted Brussels Sprouts appeared first on Living Well Spending Less™.


