
Ruth Soukup's Blog, page 75
September 2, 2015
Quick & Easy Pimento Cheese

 I am not a true Southerner. In fact, I was born about as far north as you can get within the continental United States, in the northwest corner of Washington State, only a few miles from the Canadian border. But a girl can dream!
You see, when I was a little girl, I watched Gone With the Wind and was instantly captivated. I couldn’t get enough. I watched it over and over again, swept away by the idea of a more gracious time, historically inaccurate as it may have been. As I got older, I watched movies like Steel Magnolias and Fried Green Tomatoes and fell in love with the South all over again. The accents, the traditions, the Southern hospitality. It just seemed so…. gentile.
In all honesty, Florida is not really the “South.” In fact, sometimes (especially in the winter) it feels like the whole state is made up of imports and snowbirds from the North. But it is closer than I ever thought I’d come. And when we moved, I made it my personal mission to become a “true” Southerner.
I subscribed to Southern Living magazine. I began wearing makeup to the grocery store. I started drinking sweet tea. I painted our lanai ceiling pale blue. I started monogramming everything. I ate grits. And collard greens. And black-eyed peas. I learned that oranges “mature” not “ripen.” I started to think alligators were pretty cute. I baked sweet potato pie.
And I discovered Pimento Cheese.
Also referred to as Southern Caviar, Pimento Cheese, is, quite frankly, heaven in a bowl. It’s perfect on cracker (or served on crustless Wonder bread the traditional way), but it also makes the BEST grilled cheese and is also really, really, really good served on hamburgers or hotdogs. In any case, it is a snap to make!
The secret for the best pimento cheese is in the cheese itself–it has to be freshly shredded. I am as big a fan of pre-shredded cheese as anyone you will ever meet, but this is the one time I take the time to actually shred a block of cheese from hand. But even with the hand shredding, this little bowl of deliciousness only takes about 15 minutes to make.
It might just be the most productive 15 minutes of your life!

Here is what you need:
1 1/2 cups mayonnaise
1 4 0z. jar diced pimiento, drained
1 teaspoon Worcestershire sauce
2 teaspoons finely chopped onion
1/4 teaspoon ground red pepper
1/2 cup chopped pecans, toasted (optional!)
1 lb. block sharp cheddar cheese

Step 1: Mix the mayo, drained pimiento, Worcestershire sauce, onion and red pepper together in a large bowl until well blended.

Step 2: Chop pecans then toast them for 8-10 minutes in a 350 degree oven; stir halfway through. Let cool for 5-10 minutes.

Step 3: Shred cheese in food processor or by hand. Don’t cheat and use pre-shredded cheese!

Step 4: Add pecans and cheese to mayo mixture, stirring until blended. Cover and chill in fridge for at least 20-40 minutes; serve with your favorite crackers.

Print This!
Recipe: Quick & Easy Pimento Cheese
Summary: The Southern Classic. Simply the best!
Ingredients
1 1/2 cups mayonnaise
1 4 oz. jar diced pimiento, drained
1 teaspoon Worcestershire sauce
2 teaspoons finely chopped onion
1/4 teaspoon ground red pepper
1 lb. block sharp cheddar cheese
Instructions
Mix the mayo, drained pimiento, Worcestershire sauce, onion and red pepper together in a large bowl until well blended.
Chop pecans then toast them for 8-10 minutes in a 350 degree oven; stir halfway through. Let cool for 5-10 minutes.
Shred cheese in food processor. Don’t cheat and use pre-shredded cheese!
Add pecans and cheese to mayo mixture, stirring until blended. Cover and chill in fridge for at least 20-40 minutes.
Serve with your favorite crackers.
Preparation time: 10-15 minutes
Cooling time: 20-40 minute(s)
Number of servings (yield): 16

The post Quick & Easy Pimento Cheese appeared first on Living Well Spending Less®.


September 1, 2015
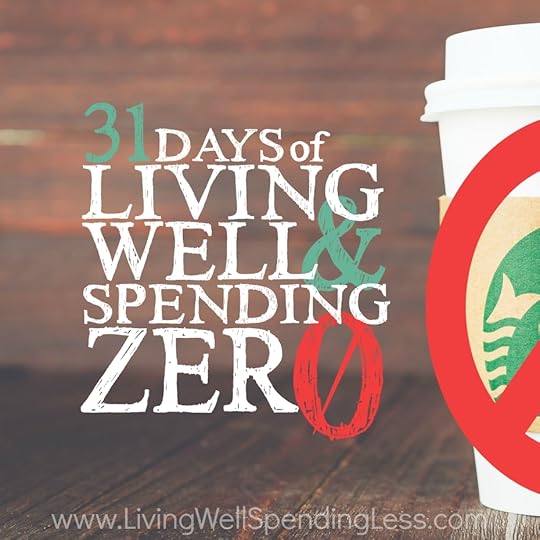
Join Us for 31 Days of Living Well & Spending Zero!
 Let’s face it–we all get off track sometimes when it comes to budgeting and managing our money wisely! Whether it be overspending on a vacation or little bad habits that add up over time, sometimes we just need to hit the reset button! If you’ve ever made it to the end of the month and wondered where all your money actually went, a month of no-spending might just be the perfect way to reset your spending habits.
Of course, going it alone can seem downright scary.
Luckily you don’t have to. Over the past four years, more than 100,000 LWSL readers have taken our FREE 31 Days of Living Well & Spending Zero challenge (many of them more than once), with incredible results. And while the challenge was pretty good, and definitely effective, we knew it could be even better.
And so, we decided to give it a makeover!
Beginning October 1st, we invite you to join the new & improved 31 Days of Living Well & Spending Zero Challenge! Simply sign up below to have our daily challenges for spending not just less, but absolutely ZERO, sent straight to your inbox each day.
First Name *
Email *
 As soon as you sign up & confirm your email, you’ll get our free PDF preparation guide sent straight to your inbox, which will help you know exactly what to do (and not to do) to prepare for your month of no-spending. Then, beginning October 1st, you’ll receive 31 practical and easy to implement daily ideas for planning your meals, getting your home in order, and becoming more creative—all without spending a dime.
Also, be sure to check your spam or, if you use Gmail, your “promotions” folder for an email from me (Ruth Soukup), and if you don’t see the email within fifteen minutes, please email us at admin@livingwellspendingless.com!
Still not sure? Here’s just a few things you’ll gain from taking this challenge:
Discover the surprising joy of zero spending, and make instant changes that will totally transform your attitude.
Learn how to use the food you already have on hand to create delicious, budget friendly meals for your family.
Be inspired to clean and declutter your living space in order to create the cozy space you’ve always dreamed of.
Gather innovative ideas for using those items you already have on hand to create new solutions for old problems.
Find encouragement and inspiration from others who have completed this same challenge—and lived to tell the tale.
Learn simple tricks and tips for selling your stuff, slashing your bills, and even saving on food.

Believe me, I know all too well how stressful it can be to feel like your budget is spinning out of control, and I’ve learned that sometimes hitting the reset button through a month of no-spending is the only way to get a handle on things once again. Over the course of thirty-one simple but powerful daily assignments, this 31 Days of Living Well & Spending Zero challenge will empower and inspire all of us to get our finances back on track.
By the way, if you’re not sure you want 31 days of emails flooding up your inbox, we have other options for joining the challenge as well! Very soon this challenge will also available in book form in either Paperback or Kindle format, or you can stop by here at LivingWellSpendingLess.com each day in October to read the daily challenge right on the blog.
Whichever way you decide to join, be sure to follow @RuthSoukup and share photos of zero spending moments on Instagram using hashtag #31DaysLWSZ for a chance to win daily prizes! I’ll also be broadcasting live each day of the challenge on Periscope, so be sure to download the free app & find me there as well!

Pin It
The post Join Us for 31 Days of Living Well & Spending Zero! appeared first on Living Well Spending Less®.
August 31, 2015
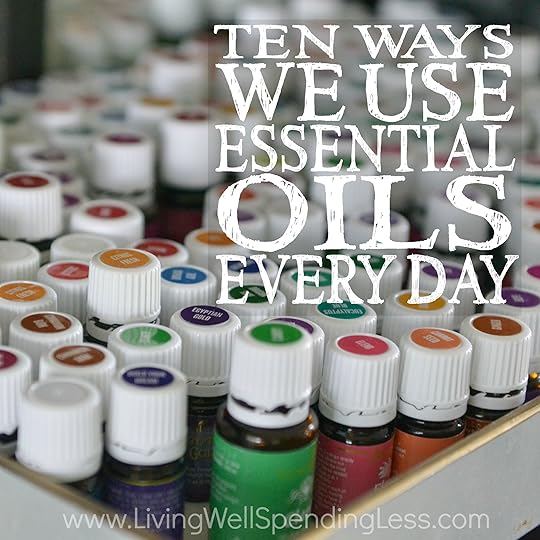
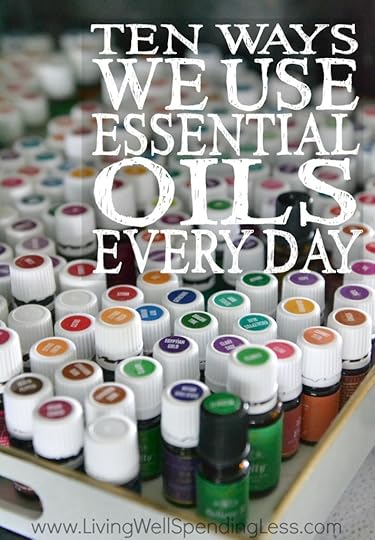
10 Ways We Use Essential Oils Every Single Day

There’s a part of me that still can’t believe I’m even writing this post.
You see, I’ve been using essential oils for about a year now, and never in a million years would I have believed that I would become such a fan, or that my engineer (and completely skeptical) husband would be even more enthusiastic about them than me! But the truth is, they have made such an amazing difference in our lives in so many different ways that it is hard not to want to talk about them all the time. (I don’t, because let’s face it–that would be really annoying!)
That said, I just need to start by letting you know that what I am allowed to say publicly on this blog is severely restricted by the FDA. I am not allowed to make any claims about healing or treating specific illnesses, or to use words certain words like “antiviral,” “antifungal,” “antimicrobial,” etc. As you can imagine, these restrictions, make it difficult to share in great detail exactly how and why we are using the oils in our everyday life, but I’m going to try!

While there are many different brands of oils available, (and always a lot of discussion over which oils are “the best,”) I personally use Young Living oils. You can read all my reasons for choosing Young Living here, but suffice to say I was mostly swayed by the fact that YL owns all their own farms (which you are allowed to visit—my brother and sister-in-law just finished helping with the lavender harvest in Idaho, and I will be visiting one of their farms in Utah in October), that they have a “Seed to Seal” guarantee, and that they produce oils that are 100% therapeutic grade, meaning they are safe for internal use, and not manufactured in a lab.
Everyone I know who uses oils uses them in slightly different ways, so this list is neither all-inclusive or the “end-all, be-all” when it comes to essential oils. Indeed, the longer I use them, the more I learn (and the more I love them!)
In any case, here are ten ways my family uses essential oils every single day:
To boost immunity & aid in overall good health
For me, this is probably the single most exciting change since I started using essential oils. The reason I started using oils in the first place was that I had been getting sick almost constantly, especially when I travelled, which was often. Over the course of a year, I had been on antibiotics five different times (and I am one of those people who believes antibiotics should only be used as a last resort!) I had strep throat twice, as well as the flu, bronchitis, and walking pneumonia. I was a mess, and I just couldn’t seem to get healthy.
I am happy to report that since I started using essential oils regularly a year ago, I have not been sick one single time. Not once! To me it feels like a miracle. There have been a few times over the past year where I felt like I might have something coming on—a slight scratch in the back of my throat or just being really tired—but I keep my immune system boosted with a drop of Thieves on my throat and by applying Immupower, Lemon, Oregano, & Thieves to the bottom of my feet.
To aid sleep & relaxation
My whole family uses oils to help promote relaxation, especially at night. Both my girls and husband love it when I apply lavender, chamomile, and a blend called Peace & Calming to their feet just before bedtime, and I have to admit that I love it too. It is a soothing little ritual for all of us. There is something about a gentle touch like this that is so important!

On our legs
For the past few years, my husband has been suffering from terrible leg cramps that wake him up at night and keep him up, sometimes all night. I had been massaging his calves with an oil blend called OrthoEase, along with some oils called Relieve It and copaiba, which definitely helped. Then I read something about how severe varicose veins—which my husband has—can cause leg cramps, especially a little. I then began applying a blend helichrysum and cypress directly to the backs of his legs as well. I am happy to report that he is no longer waking up at night from painful cramps!
On my daughter’s chest
My youngest daughter tends to get a little winded sometimes, particularly during allergy season or when she has been playing hard. When that happens we have found that applying a homemade salve of coconut oil whipped together with Lemon, R.C., Raven, and Thieves really helps her relax and feel better.

In the diffuser
I’ve never been a big fan of artificial air fresheners—to me they always smell so fake and overpowering—but I love diffusing oils in my home! My favorite blend to diffuse is Citrus Fresh—it just smells fresh and clean, and also helps fight germs in the air. My youngest daughter is a fan of diffusing lemon & lavender, while my older daughter loves joy. There is even a holiday blend called Christmas Spirit that seriously smells like Christmas in a bottle!
On my forehead
I often struggle with searing pain in my temples and forehead but have found that applying peppermint to my forehead, behind my ears, and to the back of my neck helps relieve the pain almost immediately.

To keep bugs away
I’m not a big fan of chemical bug repellents, but luckily for us, the Purification blend contains several oils that are known to be unappealing to bugs. In a pinch while traveling we have just applied a few drops of this oil directly to our skin, but at home I like to make my own homemade bug spray.
As a dietary supplement
In addition to oils, Young Living produces a number of supplementary products. There are two that I take every single day. The first is NingXia Red, which is their super-concentrated juice made from wolfberry extract. Wolfberries have the highest concentration of antioxidants of any fruit in the world, and not only is the NingXia delicious, it helps keep me healthy and gives me a daily boost of energy. I love it!
The second supplement I take daily is called AlkaLime, which helps regulate my body’s pH levels, and keeps me from becoming too acidic. I usually take this in the morning and at night. If you have never read about the importance of keeping your pH levels regulated, I highly recommend starting with this article!

In our beauty products
Tea tree is known to repel head lice, while there are several other oils, including clary sage, that help strengthen the hair follicle and promote hair growth. As such, I generally drop 20-30 drops of each into our shampoo & conditioner, which has the added bonus of making every shower smell and feel like a spa experience!
In my water
I love adding lemon or grapefruit to my water. Not only is it delicious, making my water that much more fun to drink, citrus oils can be a great way to boost your metabolism, which is always a good thing (especially for those of us who are finding in our 30’s that our metabolism isn’t quite what it used to be!) One word of caution when using citrus oils in water—the citrus oils will eat through plastic containers, so always use glass!
How to get started
Getting started with essential oils might feel a little overwhelming at first, especially when it feels like everyone is saying something different. To read in more detail why I specifically chose Young Living, you can check out my Essential Oils 101 page HERE.
If you are interested in trying essential oils, I highly recommend starting with the Young Living Premium Starter Kit, which comes with 11 of the most popular, most frequently used oils, as well as a diffuser and some additional samples for only $160. (Purchased separately these items would be more than $300.)
And, because I really believe these oils are life changing & I want anyone who buys them to fully understand how to USE them, when you purchase a premium starter kit through Living Well Spending Less using the instructions below, I will personally send you 3 more items–an Essential Oils Reference Guide, a full set of bottle labels, as well as an additional book that my husband and I have found to be incredibly helpful as we’ve learned more about using oils, called Surviving When Modern Medicine Fails by Dr. Scott Johnson. To get your freebies, simply follow the instructions below.

Here’s is what to do:
1. Head over to the Young Living page here and fill out your information. It only takes a second, I promise!
2. BE SURE the “Wholesale Member” option is checked so that you don’t end up paying retail prices (which are 24% more than wholesale).
3. BE SURE the “sponsor ID” and “enroller id” say 2081607 (This is so that I can send you your bonus freebies!)
4. If you do not feel comfortable putting in your social security number (this is only for tax purposes if you decide to turn this into a business) then you can get an EIN from the IRS in just a few seconds here and use that number instead (the IRS just needs to be able to connect some number with you for tax purposes). They need a Social Security Number or an EIN because if you make $600 or more per year selling Young Living products, you will receive a 1099 form in the mail (which is required by law). Young Living will never share this info with anyone.
5. Select which starter kit you want to get. Again, I highly recommend the Premium Starter Kit with the Home or Dewdrop Diffuser, which is the one that contains the 11 oils and also the one which will get you the additional freebies. Those are the oils that I use almost every single day! You can get the kit that’s $160, or you can get a kit for $170 with a different style diffuser. (I have both and I personally like the home diffuser better.)
6. If you already know that you want to be ordering regularly, then you can go ahead and sign up for Essential Rewards right there when you order your starter kit! It’s an amazing way to earn FREE oils with your order every month! It’s a completely OPTIONAL program, so if you’re just wanting the starter kit for now then you can just skip this part of the sign-up process. I’ll send over an email with more details on that part of things after you sign up.
7. Go through the checkout process. Young Living accepts most major credit cards, including Visa, MasterCard, Discover, and American Express.
8. After you sign up, FILL OUT THIS FORM letting me know that you signed up through this promotion so that I will know to send you your freebies
* * *
If you have any more questions about getting started with essential oils, please feel free to send us an email at admin@livingwellspendingless.com, or in the comments below! Also, if you are an essential oil user, I’d love to hear which oils you use most often, and why!
Pin It
The post 10 Ways We Use Essential Oils Every Single Day appeared first on Living Well Spending Less®.
August 28, 2015
5 Questions to Ask Your Spouse While Paying Off Debt

Today I am happy to welcome back my friend Cherie Lowe from the Queen of Free, who has graciously joined us here at LWSL as a regular monthly contributor. Cherie is the author of the amazing book, Slaying the Debt Dragon, which she wrote after paying off more than $127,000 in debt! I am so excited to have her bringing her wealth of knowledge & experience on this subject to LWSL–please join me in making her feel right at home!
* * *

This is a Guest Post from Cherie at Queen of Free
Marriage and money can get messy. When tensions run high, it’s easy to miscommunicate, misunderstand, and even misjudge your spouse. Beyond that, there lies a great temptation to shut down interaction altogether, which only causes hostility and mistrust to mound further. Before you know it, the result is a toxic environment where jealousy and envy replace joy and love.
No one wants that.
During our journey of paying off $127K in debt, my husband Brian and I placed a high priority on communicating – and then over-communicating – about our finances. I’ll be honest. At first the conversations weren’t very fun. Sometimes, they felt downright awkward or even tense. However, the more time we spent and the higher value we placed on talking regularly about money (and our failure to manage it well), the more comfortable the dialogue became. As our hearts unified, so did our dreams and goals for our financial future.
But where do you begin if you find yourself with a failure to communicate? How do you season your words with love and understanding? I’ll admit there’s no boilerplate plan for every married couple. However, these five conversations should improve the financial focus in your marriage.

“Did you know, above all else, I choose you?”
In our heart of hearts, we know that there was a reason why we walked down the aisle arm-in-arm with stars in our eyes after saying “I do.” Not knowing the joy and pain ahead, each newlywed star stuck with emotion begins marriage thinking true love conquers all. While that may ring true, the day-to-day stresses of life often lead us to replace the puffy hearts we once drew around our spouse’s photo with arrows and darts.
Before you begin any conversation about money, debt, or your plans for the future, recall exactly why you chose your spouse. Recollect and even list the character traits you love about your significant other. And verbally remind him or her how much you care.
Don’t forget that your spouse also chose you. He or she vowed for better or worse. He or she LOVES you – more than life goals, more than self-interest, more than anything else.
Your husband or wife needs to know that they matter more than money to you. Tell him or her. And repeat it often.

“How much do we make and how much do we owe?”
Believe it or not, many couples can’t answer those two questions. Or sometimes one spouse knows the answer but hasn’t shared the information with the other. So if you haven’t already, it’s time to have a discussion about the nitty gritty details.
Total up your income. Even if you aren’t on a regular salary, the average of your last five tax returns should give you a good estimate on how much you money you make.
After that, list your debts all out. The first time Brian shared our total debt, I nearly passed out. Faithfully, I made regular minimum payments, but I had never stopped to contemplate how much we owed in whole.
I know it might be frightening, but take the investigation one step further. Calculate how much you’ll end up paying out if you continue the practice of only making minimums. How much time will you invest? How much interest will be added to the original sum?
This type of chat isn’t for the faint of heart. Now is not the time for accusations and bringing up past wrongs. Be an analyst, examining the cold hard facts and do your best to let bygones be bygones. If you need to, place your hands palms up on the table and take deep breaths.
It’s going to be OK. I promise.

“What would we do if we didn’t have so much debt?”
There are many reasons why I love my husband – his quick wit, his baby blue eyes, his ability to lead and love others. Topping the list of his best attributes is the ability to ask excellent questions.
When we first started paying off debt, I just wasn’t sure how it was possible. We were already stretched so thin and we owed so much. However, Brian asked a simple question that captured my heart.
“What would we do if we didn’t have so much debt?” My adventurous spirit jumped from my heart into my mouth, as I began to dream of the places we would go together and with our children. I envisioned a world where my girls had a paid for college education. My thoughts wandered to a place where we could be abundantly generous, identifying and meeting needs we saw in our community and church. Bounding one step further, I pondered what sort of impact we could make in the world if every month all of the money we were sending toward payments went toward things we longed to support.
Eliminating debt does involve sacrifice. Over and over again, I repeat to audiences and readers, “Paying off debt is not complex. It’s just not easy.” Rather than jumping immediately to the lifestyle cuts and paring back spending, turn your eyes toward the positive outcomes.

“What expenses are on the horizon?”
At least once a month, if not once a week, you should discuss with your spouse your upcoming household expenses. Move beyond regular bills and think through holidays, birthdays, and seasons of life, too. License plates, oil changes, back to school, and even sports seasons can throw a wrench into your regular budget.
Before you spend a dime, discuss what impending extras might divert you off course. The mere act of discussing costs before they arrive can help you amply prepare and maybe even avoid a nasty fight.

“What can I do to help?”
This question revolutionized our marriage. Together we heard Andy Stanley – one of our favorite authors and speakers – utter these six simple words, claiming it to be the most powerful question in the universe.
After regularly trying to ask this question, I couldn’t agree more. When we lend our time, our talents, and even our treasure to our spouse, we show them exactly how much we care. We fight for them to be successful and whole. We value their efforts to pay off debt and we might even get excited about being a loving support, redoubling our own efforts.
This very vulnerable question means we will give up what is rightfully ours to help. It can be dangerous or even scandalous to make such a request. Human nature desires our spouse to immediately return the favor. However, that may come only with time or honestly might never come.
Sacrificial love comes at a cost. But it’s a price I’m willing to pay because I love Brian.
The worst thing you could do is to use this question to manipulate someone else. Dare to ask because you long to see your spouse fulfilled and fully alive, not because you have an angle or agenda of your own.
Financial unity drives intimacy. The more you practice regular and intentional communication, outside of stressful situations, the more your hearts are knitted together. Don’t just let your money happen to your marriage. Instead, develop a culture of openness where both spouses can see a future filled with common goals and mutual dreams by asking questions that make a difference.
Cherie Lowe is an author, speaker and hope bringer.
Her book Slaying the Debt Dragon details her family’s quest to eliminate over $127K in debt in just under four years. As her alter ego the Queen of Free, Cherie provides offbeat money saving tips and debt slaying inspiration on a daily basis.

Pin It
The post 5 Questions to Ask Your Spouse While Paying Off Debt appeared first on Living Well Spending Less®.
August 26, 2015
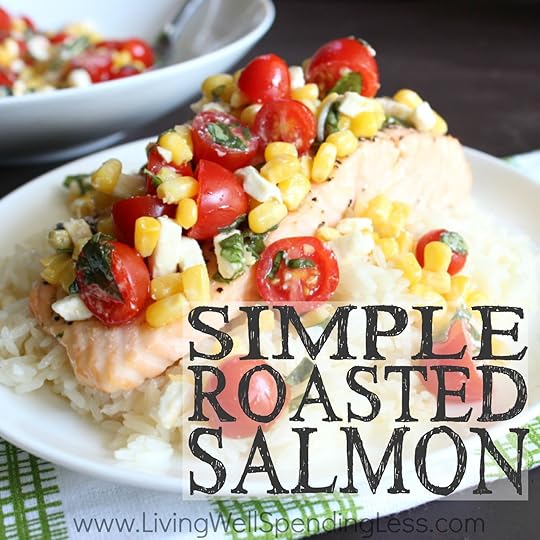
Simple Roasted Salmon

This is a guest post from Christin of Blue Crab Martini
Garden fresh veggies are at their peak right now, and this Simple Roasted Salmon is the perfect way to celebrate the flavors of the season without too much effort. Sweet corn, tangy tomatoes, and fresh basil all combined with oven roasted salmon- it’s perfection on a fork!
This time of year, when the weather is still warm but back-to-school activities have filled our schedule, I have little desire to spend my afternoons working over a hot stove. Instead, our family enjoys meals that are fresh, simple, and full of produce straight from the garden. This Simple Roasted Salmon is one of our favorites because not only is it incredibly delicious and healthy, but it comes together in under 20 minutes. That’s a win-win for busy families like ours! All you need are a handful of ingredients, most of which you can find at your local farmer’s market, or if you’re lucky, from your very own garden.
First, the salmon is rubbed with a light coating of olive oil and roasted in the oven until light and flaky. Then it’s topped with a relish of sweet corn, tomatoes, basil, and feta cheese (the feta is optional, but I think it adds a nice salty element to the dish). The cool crisp veggies pair perfectly with the warm and tender salmon. For a fun twist, you can add other tasty bits to the relish like fresh garlic, a squeeze of lemon juice, or a finely diced red onion. Of course, you can always get creative and use whatever you have on hand from your garden!
Although summer won’t last forever and soon it will be pumpkin everything, I plan on savoring every last kernel of sweet corn and every sun-ripened tomato. I hope your family will do the same and give this delicious recipe a try very soon!

Here is what you need:
2 salmon fillets, seasoned with salt and pepper
1 cup cherry tomatoes, sliced in half
1 cup fresh corn (or drained canned corn), chilled
2 TBS fresh basil, chopped
¼ cup feta cheese (optional)
Extra virgin olive oil

Step 1: Preheat your oven to 425*. Combine the cherry tomatoes, corn, basil, and feta cheese (optional) into a medium sized mixing bowl. Drizzle with olive oil (about ¼ cup) and stir to combine.

Step 2: Place the seasoned salmon fillets, skin side down, onto a foil-lined baking sheet. Drizzle with olive oil to keep them moist while they roast.

Step 3: Depending on the size and thickness of your salmon fillet, they should bake anywhere from 10-15 minutes (generally about 5-6 minutes per ½” of thickness). You will know that they are done when they are light and flaky (you can use a fork to test).

Step 4: To serve, spoon the corn and tomato mixture onto the roasted salmon fillet. This dish is tasty when served over rice, couscous, or a bed of fresh arugula. Enjoy!

Print This!
Recipe: Simple Roasted Salmon
Summary: These fresh flavors come together so easily to create a tasty dinner your whole family will love !
Ingredients
2 salmon fillets, seasoned with salt and pepper
1 cup cherry tomatoes, sliced in half
1 cup cooked fresh corn (or drained canned corn), chilled
2 TBS fresh basil, chopped
¼ cup feta cheese (optional- can be omitted)
Extra virgin olive oil
Instructions
Preheat your oven to 425*. Combine the cherry tomatoes, corn, basil, and feta cheese (optional) into a medium sized mixing bowl. Drizzle with olive oil (about ¼ cup) and stir to combine.
Place the seasoned salmon fillets, skin side down, onto a foil-lined baking sheet. Drizzle with olive oil to keep them moist while they roast.
Depending on the size and thickness of your salmon fillet, they should bake anywhere from 10-15 minutes (generally about 5-6 minutes per ½” of thickness). You will know that they are done when they are light and flaky (you can use a fork to test).
To serve, spoon the corn and tomato mixture onto the roasted salmon fillet. This dish is tasty when served over rice, couscous, or a bed of fresh arugula. Enjoy!
Preparation time: 5-7 minutes
Cooking time: 10-15 minute(s)
Number of servings (yield): 4
Christin Wade is the creator and writer behind
the food blog Blue Crab Martini, where she shares easy, fresh, and wholesome recipes. She lives in Annapolis, Maryland with her husband, two young boys ages 6 and 3, and the family dogs Cole and Rabbit. When she’s not baking, blogging, or being a mom you can find her on her paddleboard exploring the Chesapeake Bay.

Pin It
The post Simple Roasted Salmon appeared first on Living Well Spending Less®.
August 24, 2015
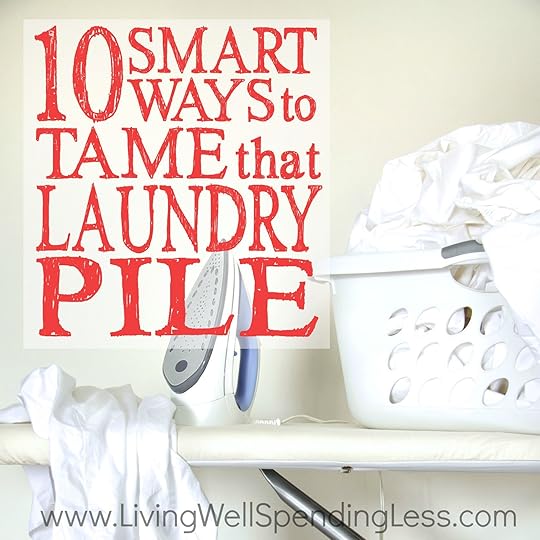
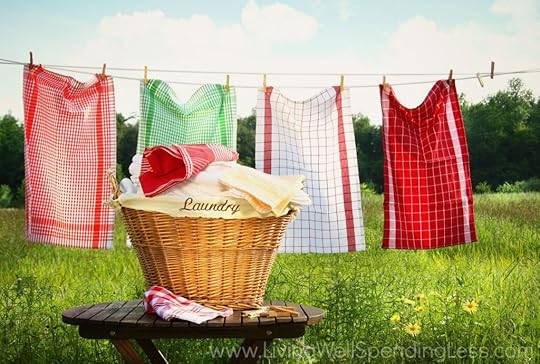
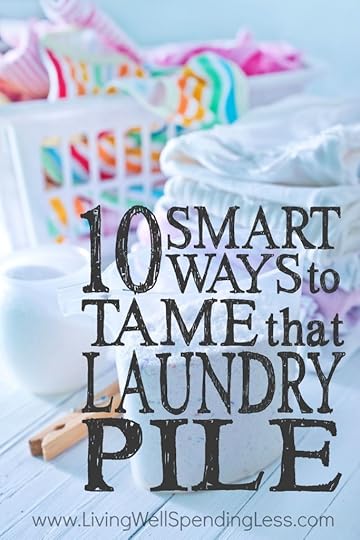
10 Smart Ways to Tame that Laundry Pile

Let’s face it–nobody loves doing laundry! Sure, the smell of clean clothes in the dryer is nice, and there’s something satisfying about seeing those piles of neatly folded towels all put away, but I’ll be the first to admit, it’s simply not my favorite task.
Unfortunately for all of us, that massive pile of laundry lurking in the corner isn’t going to magically clean itself. And since we all need clean clothes, eventually we need to stop procrastinating and just do it. So let’s look at the bright side—we’re at least lucky to have modern conveniences like high efficiency washers and turbo-fast dryers that help us tackle those laundry piles with a simple push of a button. Can you imagine what our grandmothers and great-grandmothers went through with wringer-washers and endless lines of clothes?
That said, I realize not all of us have access to laundry facilities in our homes or apartments. Laundry day can seem very daunting indeed if you have to make the trek to a laundromat each week. Whether at home or at your local laundromat, using an organized approach and a few tricks can help ease, appease, or at least keep up with that endless pile of laundry.
Even if you have a lovely laundry room in your home and you don’t mind doing laundry (or maybe you actually enjoy it), adding a few new tricks to your regular routine can make laundry day even more efficient. These ten ideas can not only save you some time, freeing up precious hours spent sorting, re-washing, ironing, and searching for socks, but also help make sure your clothing stays vibrant and lasts much longer.

1. Do Laundry Less Often
This may seem silly at first, but honestly, in our never-ending quest for cleanliness we probably wash things a little too often. Your kid’s pajamas don’t need to be washed with every wear. Your towels can be hung up and reused several times before they need to be laundered. If you wear a camisole under sweaters or undershirts under dress shirts, you probably don’t need to wash something every single time you put it on.
Many jeans designers (including Tommy Hilfiger) swear you should rarely, if ever, wash denim. Now, forgoing the wash altogether or freezing your jeans to kill germs might be a little gross, or…extreme…for some of us, but wearing jeans a few times before each wash extends their life and prevents fading.
Next time, pause before you toss something into the laundry pile to get yourself in the habit. Ask yourself if it’s really dirty or if you can get a few more wears out of it before you add it to the mountain of wash.

2. Buy Smart Fabrics and Practical Colors
As adorable as the outfit might be, hard-to-clean fabrics are not practical for children. Even if your child is a perfect angel who eats with the proper fork and always puts a napkin in their lap, I can guarantee you the minute they don that special occasion outfit, it’ll end up getting dirty. And that’s okay—getting dirty is part of the natural fun and exploration of being a child.
Instead of following your child around with an apron (and making yourself neurotic in the process) let them be kids and dress them in practical, easy-to-wash fabrics. Not only should you follow this admonition for your kiddos, but follow the same rule when selecting your own fabrics. Suits, dresses, and certainly casual clothing come in easy-to-wash cotton, rayon, hemp or other fabrics that are simple to launder and stay wrinkle-free. There’s nothing worse than fussing over a cute linen outfit all day because you can’t keep it from becoming a wrinkled mess! Do yourself a favor and gravitate towards the practical.
When you’re selecting linens for your home, do the same—take a lesson from hotels and buy sheets and towels in white (easy to bleach and keep clean) or a uniform solid color. There’s nothing worse than trying to figure out what to wash a red pillowcase with or finding your entire batch of whites has turned pink!
Sticking to practical colors can also end the lost sock conundrum. Yes, it’s less fun, but buying bulk packs of white athletic socks or black trouser socks ensures you’ll never have an odd patterned sock with no match. You’ll save tons of time sock hunting and sorting each week!
3. Train Your Family to Pre-Sort
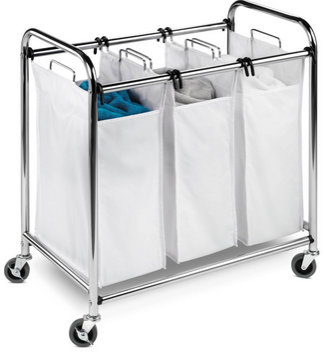
If your family members can identify colors, they’re old enough to sort their own laundry. Invest in a sturdy laundry sorter (our family has used this heavy duty triple sorter for 4 years & it still looks brand new) or multiple baskets and mark one for darks, one for lights, and one for whites. Sort any delicates, intimates or linens in a separate basket so you can keep an eye on them to be sure they receive the correct treatment and care.
Sorting your laundry is the single most important way to ensure your clothing ends up clean and not getting a “dingy” hue. Whites should be washed on hot, lights on warm, and darks and colors on cold to resist fading. When you simply toss everything together, you’ll find yourself with a lot of “grays”—faded blacks, dirty looking whites, and colors that have bled into other colors. Keep your laundry fresh and extend the life of your clothes by properly sorting each item as you take it off.

4. Treat Stains Immediately
When stains go through the laundry, they set. Once set, a stain becomes a monumental hassle to remove. Your odds of removing any trace of a stain are a lot higher if you manage to treat a stain the moment it happens—before it even has time to dry.
Check out my post on how to remove almost any stain if you need tips on specifics like grass, wax, blood, or food stains. The general rule of thumb is to use stain remover and detergent applied to the back of the stain. Rub gently to remove and then soak in a mixture of Oxi-clean and lukewarm water for 15-30 minutes. Launder immediately after.
Always check the manufacturer’s instructions before treating more difficult stains or any stain on a fabric that you might be unfamiliar with. For clothing items that are challenging (red wine on a suede jacket?), you may be better off to seek a professional dry cleaning service. Show them the stain and ask if the item can be saved.
5. Use a Mesh Bag for Delicates….and Socks!
Invest in several lingerie mesh bags—they can be a real lifesaver when it comes to washing delicate items, bras, camisoles, underwear and lightweight fabrics! Not only do they help the items stay safe and protected during the wash cycle (follow the gentle cycle or consider hand-washing if that’s what the manufacturer recommends), but they help prevent delicates from sneaking in the wrong cycle in a pant leg or shirtsleeve.
If you need to remember to remove the mesh bag before the items go into the dryer, try jotting down a note on your washer with a dry-erase marker. This helps ensure that “helpful husbands” won’t accidentally shrink your favorite sweater or singe your favorite blouse by tossing the whole load in the dryer to cook.
Mesh bags can also help solve the sock conundrum mentioned above. Designate a special bag just for socks and hang it on the side of your regular laundry sorters. Encourage your family members to put socks in the sorter (be sure they unroll them and don’t just toss them in there in a little ball) and you’ll keep track of those sneaky little socks once and for all.
6. Keep Your Laundry Room and Supplies Organized
Having a laundry area that’s organized and inviting makes a huge difference when you’re tackling your laundry pile (even if it’s just a closet that holds your sorters and detergent until you can haul them to the laundromat later).
Keep your detergent in an easy-to-access spot, along with any stain fighting tools you might need, dryer sheets, fabric softener, paper towels, and other important items. Put your iron and ironing board in an accessible spot or hang on the back of a door. Keep all of your laundry “tools” together so you have them on-hand and ready for any sudden stain-fighting crises.
Keep your dryer lint-free (a fire hazard) and run vinegar through your washer on a regular basis to keep it smelling fresh and mildew free. These little tricks keep your laundry area inviting. Also, logically, you want to create a “clean space” for clean clothes.
If you have gym clothing, sweaty towels, or young athletes who have particularly dirty contributions to your laundry pile, consider a sorter or hamper with a lid and liner to help reduce the smell. Sprinkle baking soda in the hamper and toss a dryer sheet or two in the bottom to keep things smelling fresh.
7. Remove from the Washer RIGHT AWAY
How many of us are guilty of forgetting a load of clothing in the washer? If you’ve ever done it, you know the horrible smell that comes along with this mistake! It can also cause mold and mildew to build up and cause a health hazard to your family. Always change the laundry from the washer to the dryer or remove clothing and hang or dry flat as recommended.
Even when it comes to easy, wrinkle-free knits, a day of sitting damp in a washer won’t do your tees any favors. Make sure you’ve allowed yourself enough time to let the laundry cycle through, and get it in the dryer before you forget. Try setting a timer, alarm, or reminder on your phone if your washer doesn’t buzz or if you might be too far away to hear. This will save you from doing double duty and rewashing loads of clothing (or worse, having sour-smelling clothes—ick!).
8. Hang and Press Immediately
On a similar note—hanging up your clothes straight out of the dryer can save hours on ironing. If clothes sit in the dryer, they’ll wrinkle (and even right out of the dryer, they require a little care). Immediately shake them out and hang them up. Check the seams, sleeves, and other bulky areas for any remaining dampness. If your clothes are a little damp, run the pieces through a shorter dryer cycle. You don’t want to deal with that slight mold smell when your clothes are already hanging in your closet.
Today, ironing almost seems to be a lost art. Rarely do women spend their time steaming, starching, and pressing everything. Many modern fabrics actually eliminate or at least greatly reduce, the need to whip out the old ironing board. Still, nothing adds polish and finesse to an outfit like details that are pressed and not folded or rolled.
Children’s clothing in particular can benefit from a quick press to the collars, trim and hem to keep them looking nearly new, wear after wear. If you haven’t ironed something recently, give it a try and you might be surprised and the polish that it adds to your outfit.

9. Organize Drawers and Closets for Efficient Put-Away
I know so many families whose laundry makes it to the dryer stage and then never gets properly put away, and the truth is, I am very guilty of this as well! Children’s clothing, especially, can end up in piles, or tossed in a drawer or on the floor of a bedroom. What happens then? We end up wearing the same outfits over and over because they’re clean and half our wardrobe languishes in the bottom of the drawer or in the put-away pile.
Let’s not let this happen!
Keeping a clean, organized closet will ensure you have access to all of your outfits and you can pick from things you love. It’ll save you loads of time in the morning when you’re facing the ever-present question of “what to wear” and save time when putting away the clean clothes as well. Pare your wardrobe down to what’s really important to you and then organize it in an easily accessible manner where you can readily see what you have available and easily choose what you really want to wear.
Not only will an organized closet streamline your choices and make life easier, but it will also keep your clothing from wrinkling on the hanger and being smashed into a space that’s too tight. It will save shirts from getting lost in the back of drawers and coming out wrinkled. Keep your delicates from getting snagged by storing them in soft, zipper containers rather than caught in wooden drawers.
10. Clean Selectively
Some items, such as suits, coats, and dresses, simply have to be dry-cleaned. High ticket items or pieces made of high quality fabric may be too expensive and too fussy to be cared for in most home laundry rooms. You can, however, save a bundle on your dry cleaning bill by spot cleaning items as much as possible and by using home dry-cleaning kits, like Dryel to tackle small stains.
These kits generally don’t remove tough stains, so you should always test fabric in an inconspicuous place to ensure you won’t leave a watermark or damage the area you’re trying to clean. For the most part though, these kits are helpful for refreshing any item. At less than $20 a kit, they can often work on up to 40 items of clothing, which makes the kits a real bargain in comparison to standard cleaning expenses.
However you choose to tame that laundry pile or scale “Mount St. Laundry,” doing it regularly and finding ways to make it a little easier (okay, and maybe a little bit more fun), can help you stop avoiding laundry day. Who knows—you may even start to look forward to it!
Pin It
The post 10 Smart Ways to Tame that Laundry Pile appeared first on Living Well Spending Less®.
August 21, 2015
5 Things to Know Before Buying a Home


This is a guest post from Kalyn of Creative Savings
Although everyone has their own idea of what the American Dream really looks like, you can’t deny that for many, homeownership is toward the top of that list. There’s something incredibly satisfying about buying your own place, making it yours, and taking responsibility for the repairs and upkeep. Okay, maybe not so much that last one, but you know what I mean!
However, the home-buying process can be pretty complex, and for first-timers, it’s hard to know exactly how to navigate in between interest rates, inspections, and negotiating a great deal.
After purchasing two separate homes in the past 5 years, I’m nowhere near an expert, but I have learned a lot along the way. If you’re thinking of taking the leap into homeownership, this post will help you get it right the first time. Although, these principles are a pretty good reminder for those getting ready to buy again too!

Be Sure of Your Investment
A home will be one of the biggest purchases you’ll ever make, which means you should consider ALL factors that come with owning a piece of property, not just the purchase price.
For instance:
Unless you’re absolutely certain you’re ready to put down roots and stay a while, owning a home might not be the best investment. Any less than 3 years in a home {as a general rule} means you’ll probably lose money when you sell it.
You don’t have to be an economy expert, but you should have a general idea of where the housing market is headed. No, you can’t always predict what’s going to happen {i.e. the 2008 crash}, but depending on interest rates and housing prices, you may want to hold off…….or jump right in.
Owning a home, albeit a bigger one, doesn’t just come with a monthly mortgage, it also comes with larger utility costs, maintenance, and repairs. Are you prepared to handle them? Make sure you have enough room in your budget to accommodate these extras.
After you’ve weighed all the costs versus benefits, and still believe owning a home is the best course of action, it’s time to move onto the next phase — house hunting. But there’s a few things you should know about that too.

Location Really Does Matter
I’m sure you’ve heard the over-used phrase, “Location, Location, Location”, and wondered if it was really true. I personally cannot harp on location enough! Because you can’t change the location of your home, short of selling it and moving to another area, you have to make absolutely sure you get it right.
A great way to start if you’re not familiar with the area, is to search the local news online archives for street names and neighborhoods. If a major crime happened there, you bet the news covered it. And while it doesn’t have to completely rule out a section of your town or city, it will help narrow down the options.
Another cause for concern, particularly if you live near the coast, lake, or river, is flooding. Get a hold of flood maps {you can find most of them online} to get a general feel of where those sections are. Again, it doesn’t have to rule out the home, but it will determine whether or not you need to add flood insurance as an additional cost.
Lastly, ask yourself if you can be happy with how close the home is to other homes. Do you want a big backyard? Could you add a fence for privacy? Generally, the closer you are to conveniences, the less space you’ll have outside, and vice versa. Determine the top 3 non-negotiables, then get as close as you can to meeting them.

Don’t Be Concerned with Cosmetics
Every time I watch HGTV and see a couple who can’t stop talking about the awful paint on the walls, I want reach through the screen, put my hands on their shoulders, and tell them paint does not matter. Paint is easily changed! They are letting color or the way the home is styled to affect and “blind” them to what really matters.
A good home should have good bones. Meaning, the structure, foundation, and roof should be your primary concerns. Then comes layout. Does the home have a good flow? Does it function the way you need it to? If not, is that something you can live with for now, but may want to change down the road?
Realtors can sell you on any home, so make sure you know ahead of time exactly what you’re looking for. And don’t let the cosmetics sway you, whether they’re good or bad.

The Banks are Not Your Friend
If you’re able to pay cash for your home and bypass a bank, do it. But for the rest of us, we don’t always have that option. In that case, it’s good to go into a bank and request a mortgage with as much information known beforehand as you can, because sometimes banks will take advantage of you!
From my experience, banks have always tried to push Adjustable Rate Mortgages {ARMs} over Fixed Rates, which means you might get a really good rate now, and even better if interest rates continue to lower, but you can never guarantee that will happen. On the other hand, banks are betting that interest rates will go up, so you owe them more interest over the life of your loan.
Another thing banks often do is approve you for a higher mortgage amount than you can reasonably afford. Remember, they are doing this based on estimates that you give them, and can’t possibly know every little expense you have. Go through your budget and come up with a monthly mortgage number that is comfortable and doable for your current finances. Then play with an online mortgage calculator to find the average price you should be looking for.

Expect the Worst
I don’t mean to be all doom and gloom, but when you’re in the fog of buying a dream home, you forget about all the responsibilities that come with it. When you buy a house, you also buy the responsibility to repair and maintain anything that breaks. And yes, things will break! And always when you least expect it.
Rather than invest any extra money in new furniture or a shopping spree at HomeGoods trying to get your home “just perfect”, set aside a portion of that money {at least $1,000} for an Emergency Fund.
This doesn’t eliminate the frustration when the air conditioner breaks or you have to replace an appliance, but knowing you have money set aside to cover or help with expenses is a real comfort, and will save you from a bigger financial catastrophe in the long run.
While it might seem like owning a home is the next step for you, I would be remiss to at least acknowledge that renting does have it’s perks. Depending on lease, you can easily pick up and move somewhere else. You also don’t have to maintain the property or fix repairs, thus leaving more time to spend with your family, doing what you love.
But there is also that sense of pride in having a place that is yours to do with as you please…..to work on with your own two hands, and create a cozy haven where families can gather and can become your refuge. So if you’re in, go all in, but now you know ahead of time what to expect!
Kalyn Brooke is a full-time writer and blogger at CreativeSavingsBlog.com, where she gives a fresh perspective on frugal
living, and the kick-in-the-pants you need to create a budget from scratch. She lives in beautiful Southwest Florida with her news-photographer husband and one terribly destructive rabbit. She loves making to-do-lists, reading good books, eating chocolate peanut butter ice cream, and pursuing big big dreams… all carefully planned out, of course.

Pin It
The post 5 Things to Know Before Buying a Home appeared first on Living Well Spending Less®.
August 19, 2015
Quick & Easy Vegetable Quiche

For some reason the idea of making quiche used to always scare me–maybe it’s the fancy name–but it is actually very easy and pretty fool-proof. I originally got this recipe from my friend Shannon, who inherited it from her very adorable and very French mother-in-law. For this particular version, I used a frozen broccoli, chopped onion, & cheddar cheese combination, but you could literally throw in pretty much any vegetable (or even meat!) that you have on hand.
As far as the crust goes, you can use a ready-made rolled refrigerated version, which is where the quick & easy part comes in, or, for slightly more effort (but a tastier, flakier crust) you can make your own using this easy tutorial. In any case, DO try this recipe, and sooner rather than later! You might just find you’re making it all the time!

Here is what you need:
1 pie crust
4 eggs
1/2 cup milk
1/2 cup cream
1/2 cup onion, finely chopped
1 10 oz bag frozen broccoli
2 cups shredded cheddar cheese
1/2 teaspoon season salt
1/4 teaspoon pepper

Step 1: Preheat oven to 350 degrees. Place crust in pie plate. Finely chop onion and set aside.

Step 2: Whisk eggs until well blended. Add milk, cream, salt, and pepper and whisk again.

Step 3: Place finely chopped onions on crust then top with broccoli.

Step 4: Top vegetables with shredded cheese.

Step 5: Pour egg mixture over cheese, then fold over crust edges as desired.

Step 6: Bake for approximately 35-45 minutes or until set in the center. If cheese is browning too quickly, cover with foil.

Step 7: Let stand for 10 minutes before serving.

P.S. Here are a few other combinations you might want to try in place of the broccoli:
Tomato Florentine
1/2 onion (diced) + 1 package frozen spinach (thawed) + 1 can fire-roasted dice tomatoes (drained)
Southwest
1/2 onion (diced) + 1 package frozen corn + 1 can green chiles (drained) + 1 can Rotel tomatoes (drained)
Ham
1/2 onion (diced) + 2-3 cups cooked ham (diced)
Print This!
Recipe: Quick & Easy Vegetable Quiche
Summary: This savory pie whips up in minutes and can be made with any combination of veggies.
Ingredients
1 pie crust
4 eggs
1/2 cup milk
1/2 cup cream
1/2 cup onion, finely chopped
1 10 oz bag frozen broccoli
2 cups shredded cheddar cheese
1/2 teaspoon season salt
1/4 teaspoon pepper
Instructions
Preheat oven to 350 degrees. Place crust in pie plate. Finely chop onion and set aside.
Whisk eggs until well blended. Add milk, cream, salt, and pepper and whisk again.
Place finely chopped onions on crust then top with broccoli.
Top vegetables with shredded cheese.
Pour egg mixture over cheese, then fold over crust edges as desired.
Bake for approximately 35-45 minutes or until set in the center. If cheese is browning too quickly, cover with foil.
Let stand for 10 minutes before serving.
Preparation time: 5-7 minutes
Cooking time: 35-45 minute(s)
Number of servings (yield): 8-10

Pin It
The post Quick & Easy Vegetable Quiche appeared first on Living Well Spending Less®.
August 17, 2015
9 Tech Tools to Simplify Your Life


This is a guest post from Michelle & Kira of Sunshine and Hurricanes
I know sometimes we can feel like technology has invaded our lives and just trying to keep track of it all can be overwhelming. There are new apps and gadgets coming on the market daily and most of the time you haven’t even figured out how to operate the ones you’ve already got. However, I promise you that it is possible to tame all this technology and make it work for you. We’ve even done the hard part for you and identified 5 tech tools to simplify your life that really will save you time, money and headaches.
Organizing
Does attempting to stay on top of your family’s busy schedule make you want to pull your hair out? A few months ago, my husband walked into our kitchen to find me sitting at the table in tears. I just couldn’t seem to find a way to keep him and I on the same page and working together when it came to our daily calendar. It felt like we kept missing appointments, practices and other important events. I was constantly apologizing for one oversight or another.
It was at this point that he and I discovered the family organizer Cozi. I consider this command central for my family now. It includes a calendar that you can color code for each family member and then share across devices, plus for all those family members with their own email account it will send out a weekly agenda. You can easily set reminders, keep track of to do lists and kids chores, as well as plan meals with shopping lists (and even store the recipes). Oh, and an added bonus is the app is FREE!! There is an upgraded version, but for most families, it isn’t a necessity.
Just a little bonus tech tool here: If you want to take your life organization to the next level and especially if you want to eliminate all the paper in your life, take a look at Evernote. It’s a little more “techie” and has a small learning curve, but it’s extremely loyal and growing fanbase indicate that it’s got something special going on.

Backing-Up
Today, many of us have essential parts of our lives stored on computers. Everything from all our personal contacts, to our cherished family photos and even important documents. So, it’s terrifying to think we could lose all of it in just a moment if our hard drives crash or our computers become infected with malware.
Despite the very well known risks, few people actually safely back up all the data they keep on their computers. Why?Mostly because they don’t know where to start and it seems overwhelming. However, I’m here to reassure you that it is easy, and although it requires a small investment, it’s more than worth living worry free knowing all your electronic data is safe and sound.
To protect computer files and your precious family photos, Crash Plan is considered best in class by many leaders in the tech industry, partially because it is about the easiest back up tool you can find. Made specifically for the everyday person, this affordable and highly secure cloud based solution offers unlimited storage for as little as $5 a month. All you have to do is install some software (they walk you through it, easy peasy) and you’re good to go. There is even a handy app that you can use to access backed up files from your smart phone when you’re away from home and don’t have your computer with you.

Kids and Technology
All of today’s technology probably poses the biggest problems for parents as we attempt to manage our kids use of technology and their online activities. We want them safe, but we can’t hover over them every second. Plus, it can be really frustrating trying to keep their tech time balanced with other activities. Luckily there is software and a whole host of apps to make our job as the tech police less stressful.
Net Nanny has been a leader in the area of parental control software earning a Gold and Excellence Award from Top Ten Reviews for 9 years in a row. Parents have the power with this tool to limit types of websites that are inappropriate for children such as gambling and pornography and provides an activity report of what children have been accessing online. Other capabilities include the ability to set time deadlines, remote access to make changes from a smartphone, and it can even mask swear words. It has a yearly price tag of $39.99 (but there often specials offering it for less), which is a small price to pay for peace of mind.
Managing the amount of time spent using technology can be an endless struggle between parents and children. The Screen Time App empowers parents by helping them track and place time limits on tech usage, block games and apps at certain times of day and it even has a feature where kids can earn extra screen time for good behavior or completing chores.
Perhaps you have an older child who has earned the privilege of having their own cell phone, but you still want to keep an eye on them. My Mobile Watchdog gives you the power to monitor your child’s smartphone use including text messages, pictures and contact history and provides the ability to block websites and turns off apps during homework, meal time or at night when they should be sleeping. Oh, and should they decide to ignore your texts and phone calls, the handy app Ignore No More lets you lock down their phone until they return your messages.
Passwords
These days it seems like we’re setting up a new password for something almost daily. There are passwords for your email, social media accounts, bank accounts, online retailers, rewards programs, even our children’s school information. Trying to keep track of them all can be a major source of frustration. As a result, even though we know it isn’t a good idea to use the same password for everything, many of us are still guilty of it.
Now you can keep your personal and financial online information more secure by creating unique passwords, but without having to remember them all. 1Password is an industry leader in password solution programs that is compatible with most computers and smartphones. Basically, the program works as your memory by storing all your passwords, but allowing you to use just one master password to login to everything. It will also securely store personal information like your address, social security number and credit card numbers and then will autofill forms for you saving you time and keep your privacy guarded. A single license costs $49.99 but covers a lifetime of use. There are also bundle deals if you want to use 1Password on multiple devices.
Charge on the Go
Whether we like it or not, our devices have become an indispensable part of how we function every day. We use them all day long for any number of critical tasks as well as to stay in touch with our spouses, children and friends. As a result, we’re often depleting our batteries before the day is done. If this happens somewhere that re-charging is accessible, no problem, but what happens when your phone dies in the middle of your child’s field trip to the local theme park (yes, this has happened to me) or at a conference and all the plugs are taken.
Portable chargers have become an easy and inexpensive solution to help us out in a pinch. Not much bigger than a tube of lipstick, you can fully recharge your phone with the juice from one of these handy gadgets. You can find them at just about any Target, Walmart or drugstore these days for under $15 or check Amazon.com and you might be able to pick one up on special for just $5 or $6. Just make sure you get one that is a minimum of 3200 mAh.
While I can’t solve all your technology troubles, I hope that these 5 tech tools will truly help you to calm a little of the everyday crazy. We don’t have to let technology run our lives, instead we can use it to our advantage by simplifying everyday challenges.
Kira Lewis and Michelle Myers are a blogging duo at
SunshineandHurricanes.com. Their blog promotes smart parenting with purpose and intends to provide useful resources for parents who want to raise children with strong values, common sense and the life skills necessary to become successful adults. Readers will find a diverse range of parenting topics, but specializes on issues specifically faced by parents with school aged children.

Pin It
The post 9 Tech Tools to Simplify Your Life appeared first on Living Well Spending Less®.
August 14, 2015
What Every Mom Needs to Know About Estate Planning


Nearly every day we hear news and stories about tragic accidents, illnesses and unexpected tragedies.
While estate planning can seem like a big, scary—even morbid—topic, the sobering truth is that we live in an uncertain world and any moment could be our last. As moms, we have a tendency to want to push these icky thoughts from our heads, believing that if we don’t talk about it, it won’t happen.
Unfortunately, this couldn’t be further from the truth.
If you are a parent, estate planning is vital to the well being of your family. After all, if your family must suddenly face the grief and loss of your absence, planning your affairs is the best way to comfort and provide continued care for your loved ones. Unfortunately, we can’t always predict the roads of life, but we can ease the worry and bring ourselves peace, knowing that if something happens, the people we love the most will be taken care of.
Starting the Conversation
I get it–just starting the estate planning conversation can be uncomfortable and daunting, even with your spouse. Before you begin, it helps to ensure both you and your spouse are in a relatively emotionally stable place, since extreme emotional stress will probably hinder your progress.. That said, it is also important not to delay the conversation. Know that it simply has to happen. Sometimes you have to dive right in.
Start by asking a poignant question that addresses what are surely mutual concerns, such as, “What would happen to our family if one of us falls ill?” Or try, “How can we be sure the girls will be cared for if something happens to us?” These tough (but necessary) questions can open the door to a broader conversation about creating a living will or discussing end-of-life health wishes.
While you’re talking, take notes and sketch out an outline of how you envision your plan as you go.

Here are a few of the estate planning points you will want to discuss & resolve:
Your Children
Allow yourself to consider what would happen to your family if one of you passed, or if, God forbid, something happened to both of you. Who would you want to watch over your children? What are your wishes for their future? How would you plan to provide for them financially in the case of death or illness?

Your End-of-Life Wishes
Yes, this is the part where you decide when it’s ok for your family to “pull the plug.” The life-support question is a tough one, but oh-so-important. This conversation can also include funeral and burial preferences (including religious service preferences). Determine who will act in your place to make healthcare decisions for you (who will have your medical power of attorney) and who will be the executor of your will and estate. (Your will executor is the person you name to be in charge of distributing your possessions and seeing your wishes are carried out.)
Your Stuff
Who will you designate as beneficiaries? How will your things be divided up upon your death? Will you leave a portion of your estate to charity or leave it all to your family? If you and your spouse face debt, also consider how your debt might affect your surviving spouse or children. (Particularly concerned about debt? Read: Who Will Inherit Your Debt When You Die?)

Picking Your People
Now that you’ve addressed those tough questions, your notes should reveal the names of a handful of trusted friends and family members. Now it’s time to start branching out and having these (admittedly also tough!) conversations with those close friends or family members designated as your guardians and executors.
While it makes for great romantic comedy or YA plotlines, leaving your children to someone without an in-depth, face-to-face conversation (and legal documentation) is simply lunacy. Discuss your plans with the potential guardian and be candid in your discussion—while clearly each person has their own parenting style, wishes about education, discipline, religion and other important topics should definitely be addressed.
Don’t default and assign the most convenient person as your children’s potential guardian, to have your power of attorney or be the executor of your estate. Choose someone able to carry out your wishes who is most aligned with your personality, your values and your beliefs. Never choose any person out of guilt or obligation. This is a very difficult choice, but facing an already difficult situation, you need someone with a level head and strong integrity.

Get the Basics Covered
At minimum, you should have a will and life insurance coverage. According to Dave Ramsey, 70% of Americans die without a will. That statistic just blows my mind! You can create a will online for very little cost. You’ll also want a “living will” (your healthcare directive) which outlines your basic end-of-life wishes and dictates both medical and financial power of attorney.
Setting up your life insurance policy can also be relatively easy—and for a young, healthy couple, you can secure coverage for a minimal monthly or annual fee. Even if your life insurance policy isn’t millions of dollars, try to get coverage that will (at minimum) cover your funeral expenses and other costs, plus provide a window of relief for your family. If your family is dependent on your income, be sure to purchase a policy with enough life insurance benefits to cover the financial hardship, as well as to address debts (like your mortgage) and expenses that will arise in your absence.
Seek Professional Guidance
If you have investments, a larger estate or you’re hoping to leave a legacy for your very young children, a living trust may be the best option to help your beneficiaries avoid time-consuming and expensive legal fees just to access their inheritance. Trusts are definitely more complicated, so please seek financial and legal advice to ensure you’re choosing the right option for your estate.
Similarly, if you feel you have a more complex estate: investments, real estate, various savings plan types, multiple bank accounts, and multiple children and beneficiaries (children from a previous marriage, for example), seek the advice of an attorney.
Attorneys charge anywhere from $500 to thousands to setup estate plans. However, setting up your will correctly is worth every penny. If you’ve ever seen a family torn apart arguing over an estate, you’ll know what I mean. Grief can cause emotions to run very high, so having a clear outline and plan ensures your family will remain peaceful and comforted during a difficult time.

Consider the Paperwork
Be sure to consolidate your important documents and trust a friend or family member with instructions detailing how and where to access your paperwork and important information. (I shudder to think how awful it would be if your executor couldn’t find your will or couldn’t properly distribute your money, possessions and last wishes.)
Upon your passing, your attorney, your executor and/or surviving family members may need access to your will (of course), trust information, insurance information (life, home, other), real estate deeds and auto titles, stocks, bonds and annuities certificates, your bank account information (including safe deposit box info), retirement plan documents (401K/IRA) and debt information (including credit cards, loans, mortgages and unpaid taxes). Be sure you give this information to a few trusted friends and/or family members, in case (again, God forbid) something happens to multiple loved ones at the same time.
* * *
Estate planning is a necessary part of caring for your loved ones, so even though it can be time-consuming and sometimes expensive, think of this process as an investment in your family’s future. As a parent, you want to do everything possible to ensure your children are cared for and safe. See estate planning as an extension of that caring, and take care of it now. There’s really no time like the present!

Pin It
The post What Every Mom Needs to Know About Estate Planning appeared first on Living Well Spending Less®.


