
Barb Drozdowich's Blog, page 44
March 25, 2015
How to Stay Safe on Facebook (Infographic)
With all the chatter about Facebook lately, I thought that this infographic is timely. When was the last time you reviewed your settings on Facebook?
I hope you enjoy all the tips below!
I found this infographic on Tech.co. Drop by and see their whole post here.

The post How to Stay Safe on Facebook (Infographic) appeared first on Bakerview Consulting.


March 22, 2015
Making Pictures Behave in WordPress Posts (video)
Today is the day for another video of Tech Hints. As much as I don’t like listening to myself talk, I’ve gotten a lot of compliments on these videos. I seem to be providing help where it is needed and that makes me happy 
Today’s video shows an easy method of making a collection of pictures line up in nice neat rows. I hope this helps some of you wrangle your pictures. Next week more information on pictures – the bane of everyone’s existence, it seems!

If you are enjoying my little videos of Tech Hints, please subscribe to this site to get them delivered to your inbox. The sign up is over on the right. I’d love it if you would share this post with a friend or two. Feel free to use those little share buttons below to do that!
Until next week!
The post Making Pictures Behave in WordPress Posts (video) appeared first on Bakerview Consulting.
March 18, 2015
The History of the #Hashtag (Infographic)
The Ubiquitous Hashtag
The subject of discussions everywhere. Didn’t you wonder the history of it? When I stumbled on this infographic, I couldn’t resist sharing. This infographic originates HERE

The post The History of the #Hashtag (Infographic) appeared first on Bakerview Consulting.
March 15, 2015
How to Manipulate Pictures or Graphics in WordPress Part 1 (video)
Today we are doing a little video to introduce the art of manipulating pictures in WordPress. I know that many people struggle with pictures, I’m creating as many detailed, yet short videos to walk you through the subjects of images or videos.
I’ve talked about manipulating pictures in other posts HERE, HERE and HERE.
Consider today’s video an introduction. This video covers basic insertion of pictures, moving them around the post and changing the size.

As always, feel free to ask if you have any questions. I know that this is a difficult subject for many, feel free to share with your friends who are struggling to conquer WordPress.
I hope you enjoyed today’s video. Look for more videos in the future on similar subjects to help you authors and bloggers!
The post How to Manipulate Pictures or Graphics in WordPress Part 1 (video) appeared first on Bakerview Consulting.
WordPress Plugins101 (infographic)
Today we are going to talk about one of my favorite subjects – WordPress plugins!
I found this infographic from WPJedi.com on The Ultralinx.com. I hope you enjoy all these pearls of wisdom!
The post WordPress Plugins101 (infographic) appeared first on Bakerview Consulting.
March 11, 2015
Social Media Around the World (Infographic)
I found another cool infographic that I want to share!
This infographic is brought to us by AddThis (one of the more popular sharing plugin people). This particular graphic gives us little snippets of information from 2014. I hope that you enjoy some of the information that is being shared here, but to emphasize a few of my favorites…Pinterest sharing is the only type of sharing that is increasing, the common ones – Facebook and Twitter – are decreasing. Mobile access increased 46% in 2014 – that’s huge. One thing that I frequently emphasize to my authors who primarily work on a desktop is that more and more of their readers are NOT on a desktop and because of this, they need to make sure that their platform – especially their blog – looks good on a mobile device.
As always, I hope that you pick up a few tidbits and share with your friends!

The post Social Media Around the World (Infographic) appeared first on Bakerview Consulting.
March 9, 2015
How to Customize your Dashboard and Other Workspaces on WordPress (video)

Great news!!
I’ve started a video series that will help everyone with those finicky little things about WordPress and Blogger. The videos will be posted on YouTube and introduced here for everyone to see.
We are starting this week with a video explaining How to Customize your Dashboard and Other Workspaces on WordPress. This video will help you understand how to make your WordPress environment YOURS!! Get away from the preset set up and customize it.
Try it for yourself and have fun!!
The post How to Customize your Dashboard and Other Workspaces on WordPress (video) appeared first on Bakerview Consulting.
March 4, 2015
What We Learned in Social Media 2014 (Infographic)
I am always a lover of stats! Not a lover of math  but a lover of stats!
Where some people will follow a feeling, I will research and follow the stats. Often when I hear about authors talking about what “works,” I’m curious as to whether they have stats to back up their feelings or whether it is just a hunch.
Today I’m going to share an infographic that I found a bit ago on Business 2 Community. Take some time and have a look at the numbers. I’m always impressed with the number of people (and the rate at which that number is increasing) that use a phone or a tablet to do social media.
What are your thoughts on this infographic? Learn something new? Going to re-think your social media platform? Let me know!![]()
The post What We Learned in Social Media 2014 (Infographic) appeared first on Bakerview Consulting.
March 1, 2015
Announcing Blog Tours, PR & More – a listing site
Exciting News today!
I’ve threatened and threatened…and now I’ve done it! I’ve create a site to list companies that help authors with Blog Tours and other PR matters.

Go ahead…..click on the graphic and go and check it out!
Are you back? Good!
Let’s discuss the why and the what of this site.
The ‘Why’ is easy – I get a lot of questions from authors as to where to find a blog tour company, where to find a PR representative….basically where to find someone or some company who will help with book promotion.
A couple of years ago, I responded to the “Where do I find a book blogger who will feature my book?” question by creating the Book Blogger List.

Many of you have found this site. It has listed just over 1700 book bloggers that are sorted according to the genre of books they are interested in. I get about 40 new submissions from book bloggers each week and the site gets somewhere between 400 and 600 hits each day with higher numbers seen on the weekends frequently. And frankly, every time it is mentioned – like it was recently by Publisher’s Weekly – the hits are off the charts.
Clearly there is a need for this sort of information type site.
So…now to the ‘What’ of the Blog Tours, PR and More site. This site lists for free companies, or individuals who help authors with the promotional side of our world. I make no judgements and do not vet any of the submissions. I leave it to authors to decide which company they wish to do business with. I just gather the information in one location so that it is easy to search.
Since most companies and people who help authors with promotions tend to specialize in certain genres, I’ve sorted all the entries by genre.
If you are looking for some help, bookmark this site and drop back by as it grows and adds new listings (it has only been in operation a week)
If you help authors with their promotions by arranging tours, or any other type of PR activity, feel free to click on the link and list your site for free. If you are feeling generous, there is a donation button on the front page to help cover my costs of hosting, domains etc.
Don’t hesitate to ask questions…or simply drop by and have a look around!
The post Announcing Blog Tours, PR & More – a listing site appeared first on Bakerview Consulting.
February 25, 2015
Self Publisher by Joel Friedlander and Betty Kelly Sargent
Today we are doing something a bit different. We’re going to talk a bit about Joel Friedlander’s latest book. He has published ‘The Self Publisher’s Ultimate Resource Guide.‘ This book is chock full of great resources for the self published author. As you can see from the book description below, there are 850 resources listed! I was honored to be listed and I’ve had the opportunity to go through this book and see who is listed and I must admit I’m in pretty good company!
I felt that a great deal of care and consideration went into creating this wonderful resource. Each entry has a brief description and a way of contacting that person/company. For those of you who are self publishing, I highly suggest that you pick up your own copy today!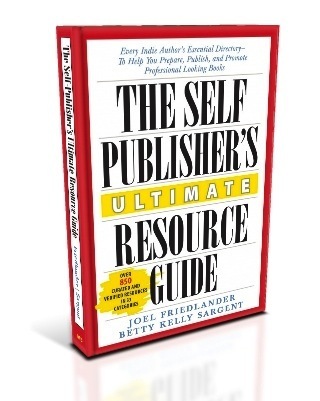 The Self-Publisher’s Ultimate Resource Guide is the first and largest collection of curated and verified resources for independent authors who plan to publish their own books. Produced by a team with long experience in both traditional and independent publishing, the over 850 resources are listed in an easy-to-use format that includes live links, phone numbers, email addresses and brief descriptive copy. The Guide makes vendors and other resources easy to find by separating them into 33 distinct categories within the 3 main tasks the self-publisher must deal with. How to Prepare, Publish, and Promote their books.
The Self-Publisher’s Ultimate Resource Guide ebook version is updated regularly to provide current information and links in the fast-changing indie publishing world, and the authors are actively soliciting input to keep listings current and comprehensive.
Early Praise:
“An essential reference to the best publishing resources for every self published author. Highly recommended!”
—Mark Coker, Smashwords founder
“Most authors are excited about the promise of self-publishing–until they actually try to do it. Then they quickly realize they will need a team of professionals to prepare, publish, and promote their book. And that’s where they get stuck. They don’t have the connections. That’s where The Self-Publisher’s Ultimate Resource Guide is a life-saver. This is the missing link that will enable authors to capitalize on the self-publishing revolution and become captains of their own literary destiny. I highly recommend it.”
—Michael Hyatt, New York Times Bestselling Author and Former CEO, Thomas Nelson Publishers
“Independent authors need a team to help create a fantastic finished product, and finding the right people can be a challenge when you first start out. This book will help authors to locate professionals to edit, publish and market their work—helping them to stand out in the crowded marketplace.”
—Joanna Penn, The Creative Penn
“Time is money. You’ll save a lot of both by referring to this easy-to-use resource. I’ll be promoting this valuable guide and urging my own author clients to use it.”
—Joan Stewart, The Publicity Hound
“Finally, a starting point from which to choose products and services, a veritable Yellow Pages for self-publishers. This thorough and respectable list of resources prevents the endless web searches and dead ends that frustrate so many authors, to make the indie publishing journey much less stressful.”
—Carla King, Self-Pub Boot Camp
Available on


The post Self Publisher by Joel Friedlander and Betty Kelly Sargent appeared first on Bakerview Consulting.


