
Laura Strutt's Blog, page 41
February 18, 2014
CHSI – Stitches 2014: It’s great to be home!
The last few days I’ve been on the road, demonstrating over on the Vilene stand at CraftHobby&StitchInternational – the UK’s largest trade show.
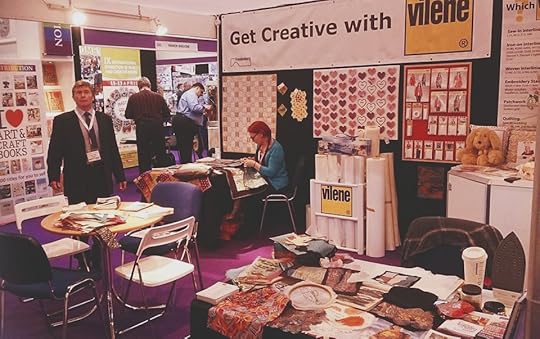 Photo: Kim Thittichai
This is one of my very favourite shows of the year – it is busy (very busy!) and it is a great chance to catch up with the folks behind some of the country’s leading craft and stitch businesses. I also love that I get to hang out with the wonderful Kim Thittichai and learn a whole heap of new and exciting techniques! We got to meet with heaps and heaps of creative folks from all parts of the creative sector from fashion designers and craft shop owners, to tutors, wardrobe mistresses, and designer-makes – and probably everyone else in between! It’s great to be able to show just some of the uses for the Vilene products, but I love finding out what folks are working on, and trying to help them to find a workable solution or easy to enhance their makes – there is nothing more inspiring than having a chat with creative folks! So, in the wake of this three-day event, I have come home with a notebook full of exciting new idea, opportunities to build on and projects to get underway – all in all it was a huge success and exhausting, did I say it was exhausting?!
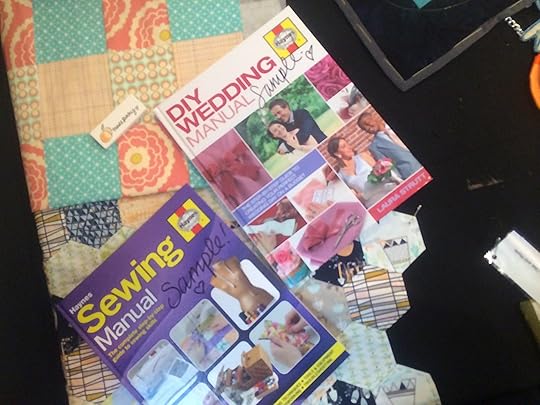 This was my first year attending Stitches since launching my own creative business, and it was a pretty rad feeling to be able to show off my Sewing Manual and my new book, The DIY Wedding Manual (published by Haynes)- it’s things like that, that make all the hard work of writing and putting a book together all worthwhile!
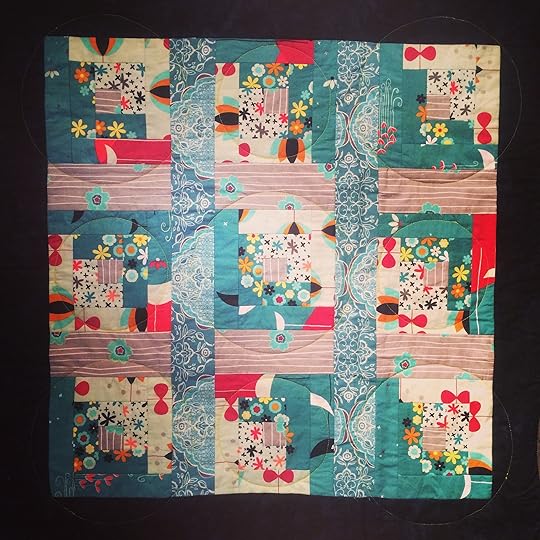 One of the things I love the very best is being able to add in fresh new makes to the collection of samples that I have been working on. I know we should love all our makes equally, but sometimes one of your finished makes really does stick out as one of the favourites – at this show I think that it would have to be this beautiful log cabin quilt – created with a collection of wonderful prints from the glorious range of Art Gallery Fabrics from my friends over at Hantex. I just can’t get enough of this…although part of me wishes that it wasn’t cot sized and that it was full double size so I could enjoy it on my own bed, I guess I’ll have to make another one some day!
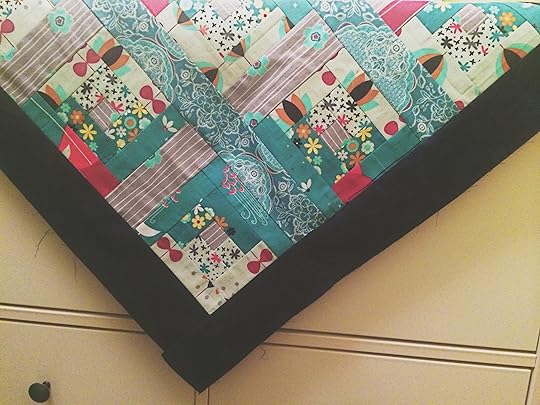 For those that are a little curious, this cot sized quilt was made using Vilene Quickscreen Square to create nine log cabin blocks, which were then joined with contrasting sashing and a neat border. To finish, I quilted the whole thing using a series of circles – drawing around dinner plates and saucers to get a really neat outline! This step-by-step tutorial will show you how to get neat log cabin blocks, everytime, using Vilene Quickscreen Square!
Quite a few companies that stopped in past the Vilene stand to check out some of my designs and find out more about techniques and tips for using Vilene in their projects paid me some really sweet compliments about the fabric labels that I use to identify my work. Whether you are making products to gift to friends and family, sell in an online store or offer as part of a design commission, or simply just to enjoy for yourself, adding in a fabric label is a great way to give your work a little signature – after all, you made it with your own fair hands so let’s just get on and celebrate it!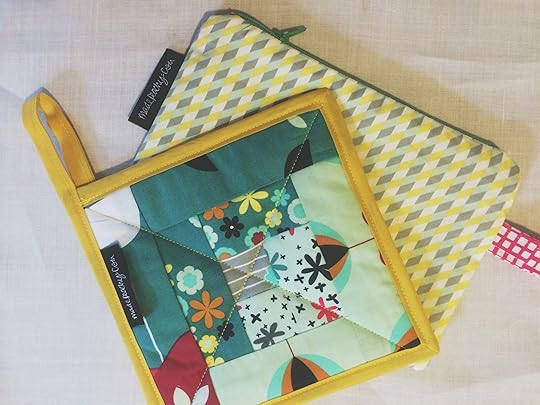 I spent a long time searching high and low to get just the right label – and by right, I’m talking the right look, the right feel and (most crucially!) the right price. For those that are interested in creating your own labels, you might want to check out – it offers a wide range of different styles, sizes and finishes, not only that they are able to work with your own artwork (like I did) or they can help you to create the design that is just right for you!
The next big event on my calendar is the Sewing For Pleasure Show which runs from the 20-23 March at the NEC, Birmingham. I am super stoked to be hosting and teaching some rad sewing skills in The Vilene Sewing Club – these beginner-friendly mini workshops will have you whipping up some cute little project, getting your hands on some lush fabrics and having a whole heap of fun all the way around! I totally can’t wait…tickets are on sale for the Show now! I’ll be able to share the details for all the workshops – and some sneak peeks of the fun projects that you’ll be able to make in the next couple of weeks – so, watch this space, as they say! If you’re planning on heading to the show, be sure to leave a comment and let me know, so I c an look out for you and say Hi!
I’m a little muddled as to what day of the week it is…I’ve got it on very good information that it is Wednesday, but somehow it feels as though it should be the weekend already, I guess that is the one draw back of working on Saturday & Sunday! I think the remainder of this week will be spent making my inbox a safe place again (so, if you’ve sent me an email, or are waiting for a reply, fear not, you are on my list!), I’ll be planning and preparing all the goodie bags for the upcoming workshops and getting back behind the sewing machine to finish up some commissions. Holy smokes! There is nothing like a packed out To Do List to make you wish there were more hours in the day!
The post CHSI – Stitches 2014: It’s great to be home! appeared first on Made Peachy.


February 17, 2014
Creative Reading: Reclaimed Textiles by Kim Thittichai
For the last few days I have had the utter joy of working with the incredibly talented and inspiring textile artist and tutor, Kim Thittichai – who I am beyond stoked to be able to call my friend.
One of the many exciting jobs that I have been working on is in the role of Creative Consultant for Vilene – aside from lots of time spent making and creating using the Vilene products, this also involves touring around the country demonstrating a whole host of different projects and application for these essential products. Now, that is all pretty rad, but one of my very favourite things about this gig is getting to spend time with the wonderful Kim Thittichai!
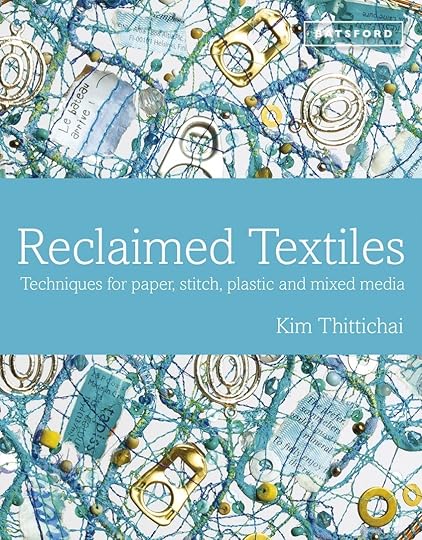 Reclaimed Textiles by Kim Thittichai, £19.99 Batsford
So, I wanted to share with you the long awaited release of her latest book! As one of our leading textile artists and tutors, Kim tours around the country – in fact, the globe, sharing her wisdom, imparting the skills and processes for a wide range of techniques and, most importantly, inspiring a whole heap of people.
In this, her fourth book, Kim not only demonstrates techniques and processes for creating wonderful textiles for reclaimed materials, but also presents a visual showcase of the works created by some of the very finests textile artists around.
Jam-packed with vibrant illustrations throughout, this book works through the various processes and methods for reclaiming, recycling and reusing, papers, thread, fibres, plastics and all manner of mixed media, then combining the with stitches, heating them with specialist tools and transforming them into something entirely new and exciting.
For those that are looking for a little guidance, or are perhaps branching out in to this glorious world of textile art then the series of step-by-step projects will help to get you started off in style. Kim’s book will take you on a creative journey through collage, patchwork, piecing and traditional stitching techniques, and then add in to the mix a range of innovative art techniques that allow the reader to go forth and create the kind of textile art that they want to make. If you’re an aspiring textile artist, this book is most certainly one to add to your bookcase!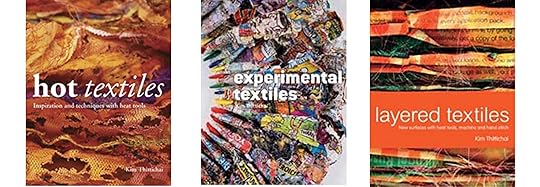 Check out Kim’s other books over on the publisher’s website.
 You can find our more about Kim over on her website, or keep up-to-date with her latest works, teachings and events over on her blog, and, if you’re looking to stock up on some supplies for an adventure in textile art, be sure to check out her mail order service Nid-Noi!
The post Creative Reading: Reclaimed Textiles by Kim Thittichai appeared first on Made Peachy.
Online Inspiration
It must be a new thing that if we can’t do a our favourite hobby the next best thing is to spend some time online, ‘researching’, absorbing new information, checking out new ideas and uncovering fresh inspiration.
We all find inspiration in different places, so I thought that I’d open up my browser history and share some of the sites that I frequent the most, for online creative inspiration and to indulge my need for all things handmade.
 The Sewing Directory
This is the one-stop-shop for stitchers! This is usually the first place that I check out to catch up with all the amazing news and events in the world of stitching. Not only that, there are a wealth of free projects, tutorials and how-to guides to get you off to a flying start. Created by passionate stitcher, Fiona Pullen, this site aims to make finding all the resources for sewing quick and easy!
 Craft Candy
The concept of Craft Candy is to bring the growing community of crafters together – and I for one really love this! Not only can you check out classes, workshops and events in your area (or the area that you find yourself in, using fancy GPS on the Free App!) but you can gain more exposure and recruit more like-minded folks for your very own knitting club or sewing bee by sharing the details of the events this the growing crafting community!
 Ravelry
If knitting, crochet and all things yarn related are your cuppa tea, then Ravelry will no doubt be your favourite yarn based hang out! Not only is this a place where you can connect with knitters and crocheters the whole world over, you can display and share photographs of your makes, find new projects and search out new designers – You can find me there under the user name MadePeachy so swing on over and say Hi!
 Pinterest
The only way to keep up with all the things that you love on the internet – craft projects to make, recipes to try, hair cuts you wish you were brave enough to sport, birthday party ideas – you name it, you can organise it onto it’s own dedicated ‘pinboard’. No longer do I have eleventy billion pages book marked, I can simply add each exciting image (and cleverly the link direct to the source so I can easily find it again!) over to a new board – this should come with a warning though, you can lose hours ( and hours and hours) just checking out new pins and repinning them onto your own boards! Yup – I’m more often than not checking out gorgeous images over on Pinterest, why not check out some of my boards?
This is where I stay in the loop with al your favourite bloogs – organise them into different categories and search out new fave reads!
You can follow Made Peachy with Bloglovin to stay up-to-date with the latest posts!
 Goodreads
If you’re a self proclaimed bookworm then come on over to the place where you can create and organise virtual bookshelves of book to read and books you’ve read. It is a great way to follow your favourite authors, search out new books and writers and read up on the latest reviews. It’s the second best thing to reading a book! You can view my profile, to see what I’m reading or what I want to read next and check out my 2014 Reading Challenge progress!
So, where is the first place that you check out when you fire up your computer?
The post Online Inspiration appeared first on Made Peachy.
February 15, 2014
Style Sunday: The Cape
They tell me that spring is just around the corner, or rather that spring is just behind that epic rain storm that is forecast.
While I’m not in any hurry to ditch my winter coat just yet, it might be a good time to get stitching for spring, you know, so there are a few new handmade pieces ready for when the spring weather finally hits.
Every spring time there is one garment that I always wish I owned, a cape. I’m not talking about a red Superman cape (although, that would actually be quite rad) I’m talking about a super cute, cross-over weather kind of cape.
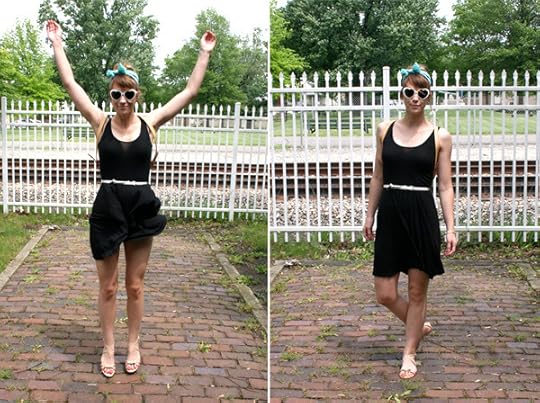
There is just something about them, I mean they just look so, freaking lush. While this gorgeous Sessun Hooded Cape, £195 Asos, in zingy ginger wool-blend is just breathtaking, it’s a little [read: a whole lot] out of my budget, so it’s back to the spring stitching plan for me I think! Check out this inspiration for making your own handmade Cape!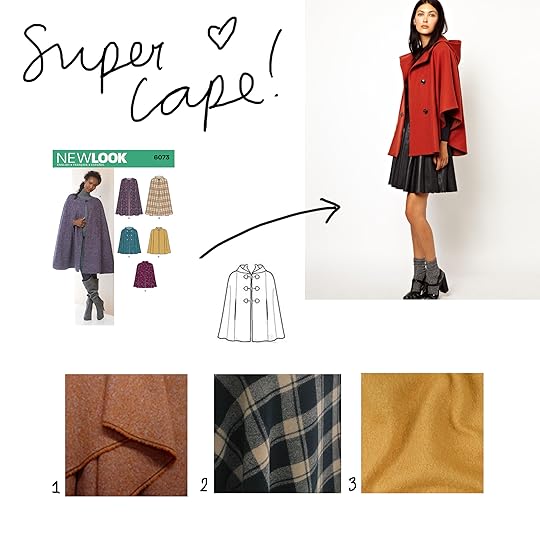 The PatternNewLook 6073 sizes XS-XL, £5,95, SimplicityNewLook
This classic cape come in two length variations, with different collars to choose from. Select design C for the cropped version with the hood.
The Fabric
1 Orange Tweed Wool, £13.99 per metre, Ditto
2 Black & Tan Check Wool, £20 per metre, CroftMill
3 Mustard Boiled Wool, £33.12 per metre, TuroFabrics
Oh! Sweet wow! This is just perfect, you know when you see a pattern and you know that this will be the thing that you pick out every morning and you create you OFTD around it? Well, for me this is just that! What’s on your spring stitching list?
The post Style Sunday: The Cape appeared first on Made Peachy.
February 14, 2014
Fancy Ideas for Simple Seams
During the last week I don’t think I have moved very far from my sewing machine, well no further than to make a cup of tea, and I like that kind of work week!
I’ve been busy working on some exciting designs to teach at some upcoming workshops, making a dent some fun quilting commissions and finishing up the last few samples for demonstrating over at CraftHobby&StitchInternational (This Trade show opens tomorrow, if you’re heading to the event, be sure to swing in past to Stand D02 and say Hello!)
I’m not complaining, far from it, me and my sewing machine are true besties – which is a good thing as we spend so much time together! Sitting at the sewing machine is often the time I think of new ideas for things I want to make. You know that feeling, you’re slowly piecing together eleventy billion squares to make a quilt top and you suddenly think, “I want to make a bag, you know one of those super cute ones. Yeah, with a big bow on the front and ruffles along the seams!” (Don’t tell me you don’t talk out loud when your sewing?!)
Whilst dreaming up some more fun makes I thought about quick and easy ways to add something fancy to simple projects, perhaps is it something that you make lots of – clothes or plushies for the Littles, cushion covers, quilts, dresses, accessories – or something that you think you might like to customise just a little bit.
Well, there are a few really quick and easy ways to add in a little something unique to simple seams, that can really set of your make in style. Here are Three Fancy Ideas for Simple Seams!
Add Piping
Piping is a really actually much easier to create than it looks! It adds a lovely band across the seam making a really pretty feature of it. One of the easiest ways to add piping to the seam is to cut a length of cord or yarn and press flat a strip of bias tape, these need to be a slightly longer than the fabrics that you are seaming, remember you can trim and neaten thins up later.
 For the piping to run along the seam in the fabrics, it needs to be neatly layered before stitching. With the first fabric place right side up, position the strip of bias on top, so that the right sides are facing and the raw edges are aligned. position the length of yarn or cord on top of the bias strip, before bringing the lower edge of the bias over and aligning this raw edge with the fabric and the first side of bias. This creates a loop of bias with the yarn neatly tucked inside. Place the second fabric to be joined into the seam on top of this sandwich, so that the right sides of both of the fabrics to be joined are facing. Pin in place ensuring that the yarn is pushed down into the tube of bias tape.
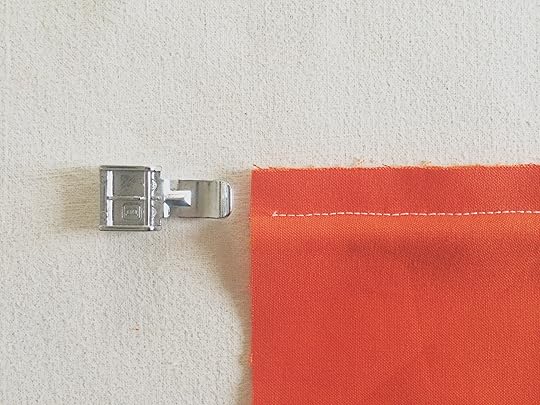 Grab a zip foot for your sewing machine, this will let you get in nice and close with the stitches along the length of the yarn, which will create the shaping of the piping. You need to do nothing more special than follow the length of yarn with a straight machine stitch to join the pieces together.
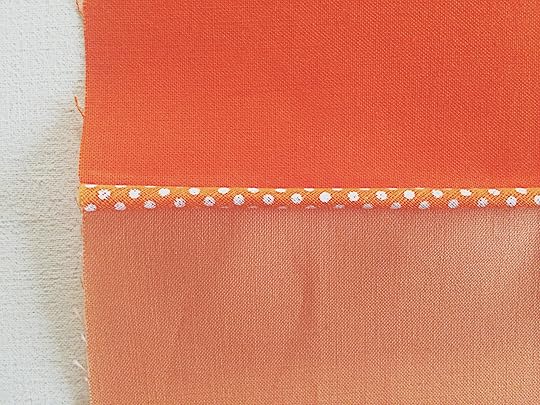 Press the seam open, and as you do open out the two piece of the binding and press flat with the the respective fabric, to press the iron over the length of piping, this will help to keep this band of accent stand proud from the seam.
Add Pom Pom Trim
There are very few makes that can’t be made just a little more fun with the addition of some colourful pom pom trimming – it is available in a whole heap of colours and sizes – so, you’ll be sure to find just the right one for your project.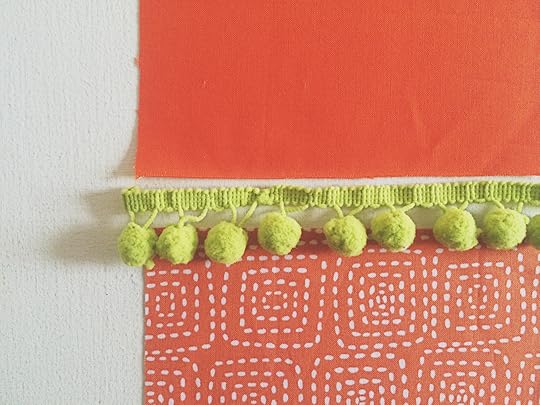 The fuzzy fibre balls are usually held in place along a woven band or piece of ribbon, stitching through this as you work the seam will hold this cute accent in place.
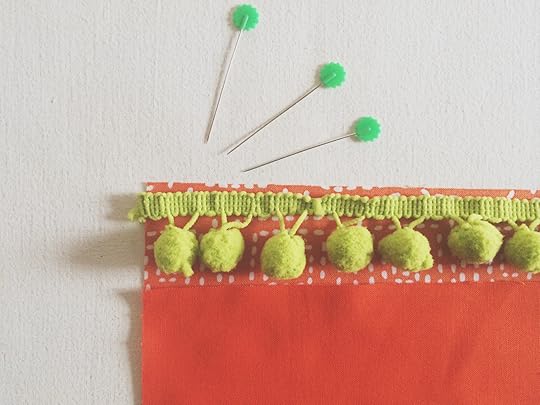 Place the first piece of fabric to be joined with the right side uppermost, position the pom pom trim along the length of the fabric. Depending on whether you want any of the woven or ribbon strip to be visible on the right side of the finished garment, you place it either right up to the raw edge, or (as I’ve done here) lay it so the centre of the woven band lies along the line where you will stitch when making the seam. Position the second piece of fabric on top with the sight sides of the two fabrics facing and the pom pom trim sandwiched in between and pin carefully in place. With a standard foot, work a neat line of straight stitches to join the seam and secure the trimming.
Here’s a handy hint - if you’re worried about the placement of the trim, or it moving as you work the seam, you can always work a line of stitching along the woven band to join it to the right side of the first fabric, taking a smaller seam allowance than you will use to join the fabrics, to hold it neatly in place before placing the second piece of fabric on top.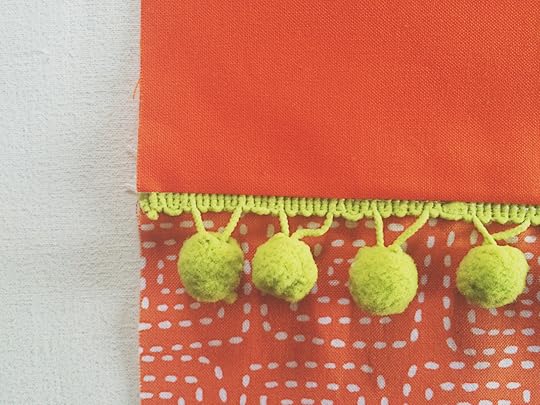 As the woven band will be secured inside the seam allowance, pressing all the fabrics up towards the upper fabric will help to keep the band of the pom poms laying flat on the surface, and pressing the fabrics together will encourage the fuzzy accents to hang free of the project.
Add A Ribbon
Ribbons come in so many colours, widths and finished this this quick addition to a seam can have a range of different effects on the finished piece.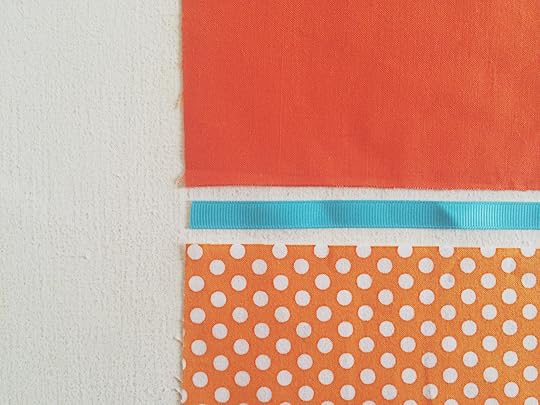 Trim a length of chosen colour, style and width of ribbon to the same as the length of the fabrics to be seamed.
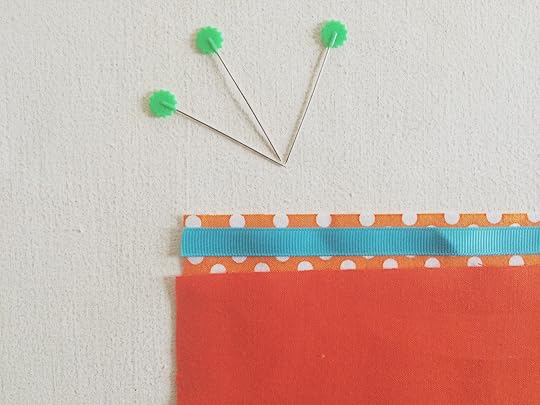 With the first fabrics place right side uppermost, lay the ribbon on top of the seam, depending on the width of the ribbon, and how much you want visible on the right side of the finished project, lay this close to the raw edge or align with the position of the stitched when you sew the seam. Place the second piece of fabric over the top, so that the right sides of the two fabrics are facing, and pin in place to secure.
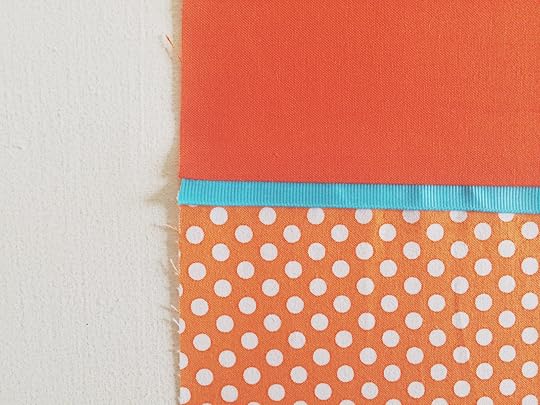 Work along the length of the fabrics with a straight machine stitch to secure the seam and hold the ribbon in place. Pressing the seam allowance towards the upper fabric will help the ribbon to lay flush on the surface of the fabric.
Neat, huh?
Now, go forth and make fancy some seams! How do you like to add a custom touch to your makes?
♥ – ♥ – ♥
I know what you’re thinking – those fabrics are the jam! Yeah! Yeah they are! This is from the awesome Stash Club bundle from Simply Solids! And, you may also recognise them from these cute coasters!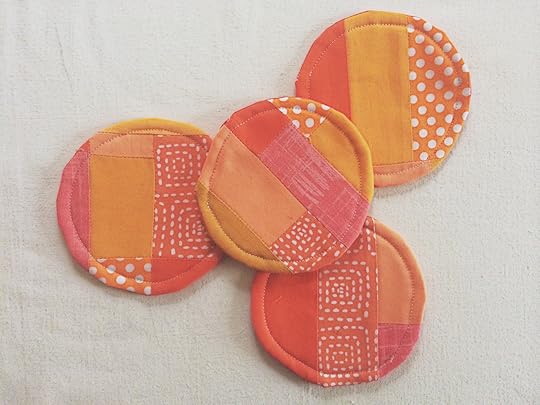
The post Fancy Ideas for Simple Seams appeared first on Made Peachy.
February 13, 2014
Happy (Emergency) Valentine!
Knitted Tattoo Heart pattern by Annypurls
It’s the day of Love people! I know, I know, for a lot of folks it feel as though this is just another overly commercial holiday, forcing people into insane (and often super expensive) consumerism. I get that, I really do. Of course, we should show those that we love, that we love them the whole entire year round. I mean, why just wait for one day to share your affections with your nearest and dearest? But, let’s be honest, it is lovely to receive a card, a small token of love and something that is really and truly heartfelt!
Did you get any super sweet Valentine’s this year? Have you sent any? More to the point, did you not send any under the illusion that ‘we don’t do Valentine’s’ only to wake up to a shower of flowers, chocolates and cards? Well, my creative friends, all is not lost, I thought I’d share with you a selection of my favourite (and FREE) printable Valentines cards to get you out of a spot of bother! So, check out these Emergency Valentine’s Printables!
1 Love Always ♥ TheCraftMom
2 Love You ♥ PersnicketyPrints
3 Heart Fountain Valentines ♥ MrPrintables
4 Valentines Garland ♥ WhiskerGraphics
5 Heart Pop ♥ LoveandLion
6 Love Arrow ♥ CraftyCupboard
7 Valentines Vouchers ♥ SugarandCharm
8 Typewrite Printable ♥ OneSheTwoShe
9 I Love Everything About You ♥ TriedandTrue
10 Valentine Fox ♥ BumbleNBirch
Enjoy your Valentine’s Day Lovebirds!
The post Happy (Emergency) Valentine! appeared first on Made Peachy.
February 12, 2014
The 5K Wedding: The US Edition
There has been a whole heap of talk about weddings over here right now – some might say rather to much for a married woman – but, this is because my new book – The DIY Wedding Manual, £18.99 Haynes – is becoming a bit of a talking point right now. The reason being that the concept of a budget wedding is growing in appeal.
I’ve recently shared my tips for cutting the cost of wedding expenses with Hello Magazine Online & also had a great chat with the folks at Downtown Radio.
So, yes, the subject of wedding costs is a pretty important one. It was definitely something that was at the forefront of our planning when we were getting our thinking caps on for our special day back in 2012. Turns out that we’re not the only couple on the planet taking a different approach to wedding finances. We set a budget at a rather modest (in comparison to the quoted national average!) £5K for our wedding and had to be pretty creative to get the day we wanted, for a price that we liked!
Now, before I share how we managed to work to this financial target, I decided to search out some other real brides, to find out about their 5k wedding and discover how they made it work for them…so, lovebirds, I bring you The 5K Wedding Series and first up, The US Edition!
All costs are listed in US$
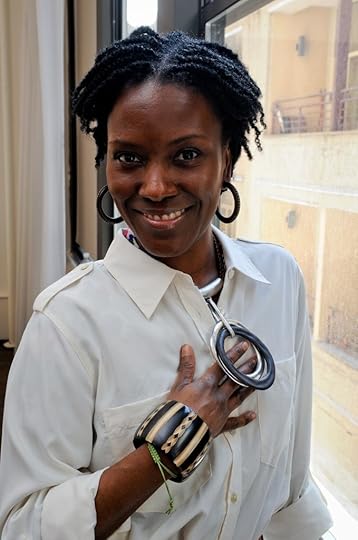 Tracy E Hopkins: Photo Kristen Somody Whalen
Tracy E. Hopkins is a freelance writer, blogger and budget shopping & wedding Consultant in New York City.
I didn’t want to spend over $5,000 for my wedding. And, even though my mother was going to chip in to cover the expenses, I didn’t want her to spend over $5,000 on the wedding either. That money would be better spent on our mortgage! I don’t believe in spending more money than you can afford. So spending $20,000 for a one day doesn’t make sense to me. Most people take our loans for their weddings and are in debt afterwards. Sometimes the marriage doesn’t even last as long as the wedding bills do. Even if I had $20,000 to spend on a wedding, I wouldn’t do it. There are ways to produce a wedding on a budget that looks like a million bucks!
My parents appreciated that I didn’t have to rely on them to pay for some big catered affair. My Mom, although she’s a little biased, says to this day that it was the best wedding she’s ever been to. My friends were very impressed that I could pull off a stylish wedding in New York City for under $5K. A family friend said our wedding really reflected who were are as a couple and was “like poetry.” And, people often ask me for advice on how they can save on wedding planning, which is why I’ve decided to offer my services as a budget shopping and wedding consultant. One bride-to-be contacted me and said she wanted to do a wedding just like mine. Although you can certainly take cues from what I did, your wedding should be unique to you and reflect your tastes and personality.
After attending a couple of wedding showcases in New York City, I was turned off by how much the wedding industry feeds on desperation. It’s such a profit driven industry. Brides-to-be are made to feel like they have to pay for a limo, expensive flowers, an expensive dress, a generic wedding hall, DJ and all of the other lavish trappings. If you’re very impressionable or if you’ve always thought that this is the only way to plan and pull-off a wedding, you will spend more than you can afford. So, by deciding to have my wedding reception at a restaurant in a neighborhood we both had a connection to, we eliminated the costs of renting a reception hall and hiring a caterer. The restaurant we selected was able to accommodate our 70 guests in an intimate setting and they charged us a flat fee per person and gave us a good rate for per bottle of wine. But, with a caterer, there are separate costs for everything including chairs, table linen, flatware, servers and bartender. We’d gone to several tastings at catering halls in Maryland, where I’m from, and the catering bill alone at one place was over $5K – and that only included passed hors d’oeuvres!
It was important for us to have a wedding that reflected our personalities. We like nature, so the ceremony setting at the Brooklyn Botanic Gardens’s Japanese Garden was perfect. And we’re not party people, so an evening wedding that turned into a huge party wouldn’t suit us. So, a brunch reception at a restaurant in Brooklyn was a perfect fit as well. The restaurant we selected is a South African restaurant called Madiba after Nelson Mandela, and the eclectic decor and open windows that fill the space with light were what attracted us. The restaurant was a real conversation piece. The owner is very fun-loving, gracious and he was excited to work with us and make our big day special. Being that we are a mixed race couple (although we don’t think of ourselves in terms of that label), that environment was also a good setting to bring our families together for the first time.
 The Budget Breakdown
Wedding ceremony location: Brooklyn Botanic Gardens Japanese Hill-and-Pond Garden, $350 for up to 50 guests
Reception venue/Food & Drink: Restaurant charged us $40 per person (we had 70 guests); $30 per bottle of wine (about 15 bottles), $3,250
Dress: $27, a brand new dress from Saks I won in an eBay auction. The woman selling the dress planned to wear it for her own wedding, but couldn’t fit into it and I was the only bidder.
Veil: $20 from Target.com; shoes, $25
Wedding jewellry: Fresh water pearl earrings and necklace found in Italy, $40
Transportation: $40 for a car service; This is the one area where I could have splurged more on since I was almost late to my ceremony because the car service we reserved didn’t show up!
Flowers & Decorations: The restaurant provided fresh cut flowers on the tables with no additional charge and my matron-of-honor made my wedding bouquet with a dozen white roses she picked up at a supermarket! They were beautiful, and better yet, no additional cost for me.
Guest place names & favors: Typed guest names on table cards I found for like $10, Jordan Almonds, $40 for 5-lb bag
Invitations & wedding day stationery: We printed our own invitations, $30 invitation kit from Party City
Wedding rings: My ring, $200; my husband’s ring, $70
Music & reception entertainment: Music from our I-pod, Free
Wedding cake: Cupcakes and a small top-tier cake, $184 ~
Wedding photographer (friend): $200
Violinist: $100 for an hour
Total Wedding Spend: $4,586
Five Tips for a Fabulous 5K Wedding from Tracy
1 My main tips would be to do as much as you can yourself and shop for bargains.
2 Don’t pay for an expensive reception venue and flowers – there are lots of alternatives, supermarket flowers can be just as pretty!
3 Shop around, you don’t necessarily need an overpriced wedding gown.
4 Make your own wedding music mix and hire a friend to take photos and video
5 Be creative – make your own invitations and table cards
♥ – ♥ – ♥
You can read more about Tracy’s fabulous 5K Brooklyn wedding over at the NYDailyNews and you can keep up-to-date with Tracy over on her blog, EverythingSheWants or get in touch with her directly via email at popandshop@gmail.com
♥ – ♥ – ♥
Next Up: The 5K Wedding: The Canadian Edition – I can’t wait to share another cash-savvy bride with you next week!
The post The 5K Wedding: The US Edition appeared first on Made Peachy.
February 11, 2014
Simply Solids Bundle Giveaway Winner!
You guys! Thanks you all so much for taking part in this contest – I was truly stoked reading though all your comments and the ideas for what you’d do with these rad fabrics!
I want to say a big Hello to all the new folks that have stopped in past to say hi and enter this giveaway! Whilst you’re over here why not grab a coffee (I like mine cold brewed over ice, and served by the gallon in a jar!) and take a bit of a look around! If you love to make things – I’m talking making like it’s impossible for your hands to stay still, then check out the Gallery – you’ll be able to find heaps of projects, tutorials and how-to guides, plus tasty ideas for food and drink!
 If you’ve not stopped by and said hello before, please leave a comment and introduce yourself – if you have a blog, share the link…I’m a colossal bookworm, so the more reads I can get my hands on the better! Be sure to check out my Diary Dates – it’s already getting pretty packed out with events, shows and workshops – shout out if you’re attending any of the events, it’s always rad to meet new creative folks out in the big wide world!
I don’t know about you, but when I find a new corner of the internet I like to have a bit of a snoop about, because I’m nosey like that! So, if you’re also a nosey little bee, you can find our more About me, check out my books on the Book Shelf or really satisfy your curiosity over at the FAQs. Got a blog? Then you might like to visit the Sponsor page to find out how to get your blog Ad included in the Made Peachy Blog Crushes (and it’s free!)
Anyway, let’s get back to business! It has taken me rather a long time collecting together all the entrants names from Twitter, Facebook and also the comments below and adding them, retro-style, into the ‘hat’ to draw the winner…so, let me not waste any more time, let’s announce the winner of the Simply Solids Giveaway…
Congratulations @Erinhen
This delicious bundle of fabrics is all yours – email over your your UK postal address so we can get this rad prize on its way to you!
 Didn’t win this time? You can buy a selection of bundles of these glorious fabrics from Simply Solids…or, sign up to the Monthly Stash Club – where you will receive a selection of solids or textured basics directly to your door, I’m pretty sure there is no better way to maintain your stash levels! Subscriptions start from £8.75 per month – so, what are you waiting for?
Now, before anyone freaks out, the Simply Solids website will be down for essential maintenance from 7pm (GMT) 12 Feb – 14 Feb – when it will be back up with an exciting brand new website relaunch!
pssst! If you want more project ideas for using these rad fabrics – stay tuned, because I’ll be sharing another make using another fab selection from Simply Solids very soon!
The post Simply Solids Bundle Giveaway Winner! appeared first on Made Peachy.
February 10, 2014
FREE Valentine’s Printable from Bumble&Birch – plus 5 creative makes!
I don’t think that my love for the amazing artwork by the talented Kimi Avila is a very well kept secret – her store BumbleNBirch is one of my very favourite places on Etsy for shopping handmade. So, Kimi and I have put our heads together and wanted to share some of the love for Valentine’s Day!
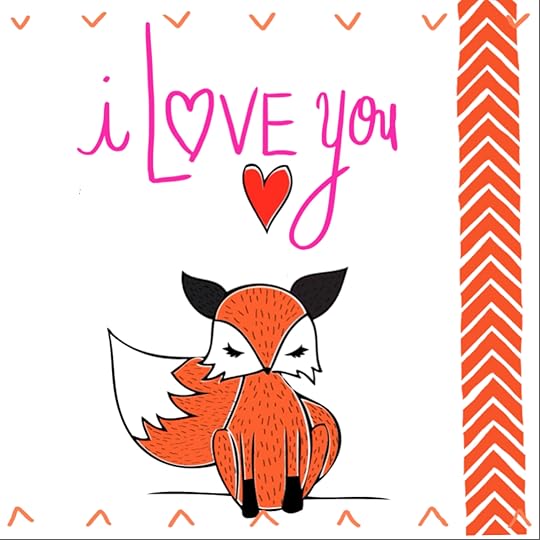
So, my friends, as a little Happy Valentine from Kimi & me we are totally stoked to bring you this exclusive FREE printable artwork created by Kimi’s fair hands.
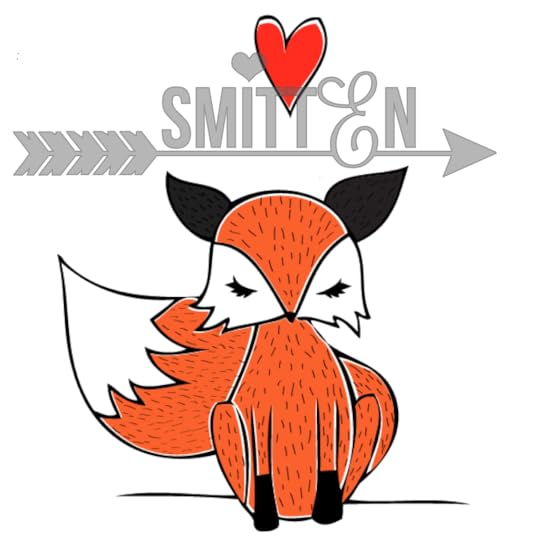
 Download your FREE Foxy Valentine printable artwork!
Not only that! Yes, a beautiful print – especially one with an adorable foxy critter – is going to look great in your home, but there is also so much more you can do with a little time and imagination, here are 5 creative ideas for your FREE printable to get you started! 1 Frame & Gift
Selecting a high quality cardstock (this will really set the artwork off in style!) print out on your home printer at 100% (or take to a lock copy shop if you’re feeling super fancy!) – if you want to make a larger piece to hang, easy – just scale up on your printer! Place in a frame – you can add a border of your choice, trim it to size or place under a mount board – secure in your frame and gift wrap for your Valentine – or, treat yourself and hang it in your favourite spot at home!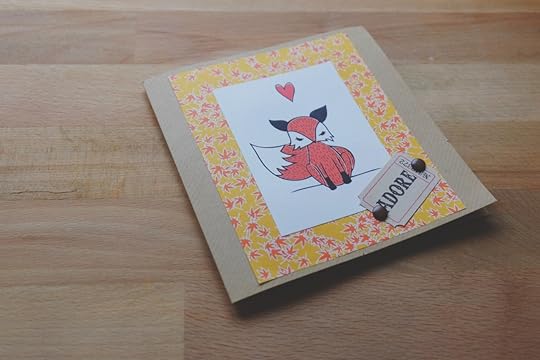 2 Create a card
Dig out a card blank and some pretty papers and motifs and get busy making a custom Valentine’s card – try printing at 40% to fit this to your card blank.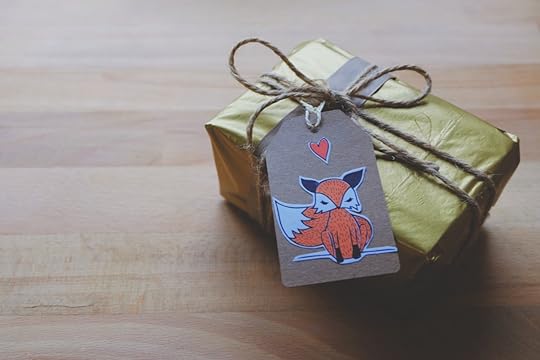 3 Create a gift tag
There is nothing more lovely than a well wrapped gift – so why not keep with the foxy theme and use this motif – printed at 30% – to create your own custom gift tag?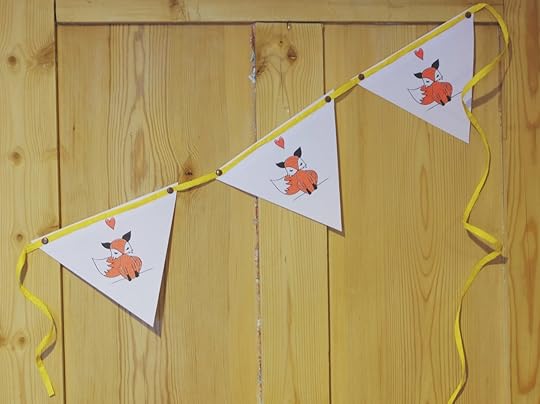 4 Bunting
Add a string of quick-make bunting to celebrate the Day of Love! Simply print out design a number of times and trim into pennants – you can alternate between the foxy motif and patterned papers, or just keep it simple with lots of little foxes. Secure on to a raffia ribbon with paper glue and mini brads, and hang for all to see!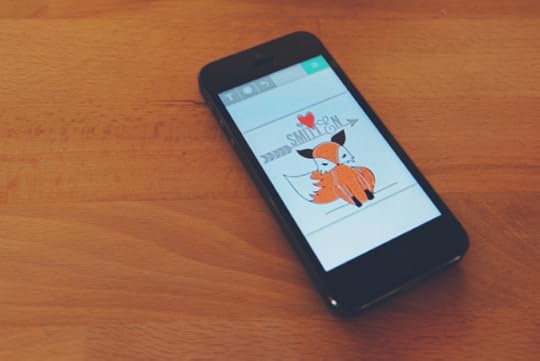 5 Send as a e-card
There are so many amazing photo editing apps that are just perfect for adding fancy touches, text and a little special something. Download the printable to your phone or iPad and use the features on a photo editing app to transform your printable into a sweet Valentine’s message that you can send by email or SMS.
These cute little designs were created using A Beautiful Mess App (top) & Rhona Designs App (bottom)- it’s pretty easy to make some striking designs!
♥ – ♥ – ♥
Now, that’s not all! Nope, there’s more…and by more, I mean that there is one more thing that is sure to blow your mind!
Kimi has also used this super cute character to create an awesome foxy print fabric over on Spoonflower!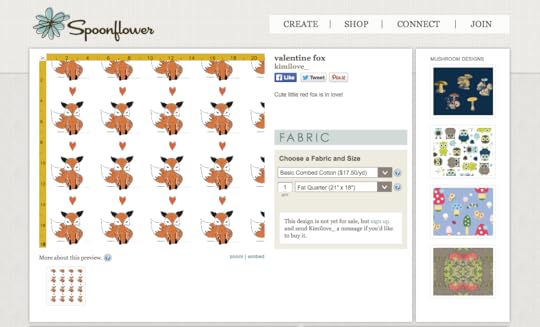 So, not only can you decorate your home with this adorable little guy, shower your loved ones with Foxy themed gifts and cards, you can even get hold of this awesome Valentine Fox fabric and make your own dress, baby blankets, cushions…the list is endless!
This fabric will be available soon, so be sure to check out Kimi’s profile over on Spoonflower!
This cute fox is such a versatile little dude – what are you going to do with your free printable?
The post FREE Valentine’s Printable from Bumble&Birch – plus 5 creative makes! appeared first on Made Peachy.
February 9, 2014
Guest Post: Mallory Muddiman
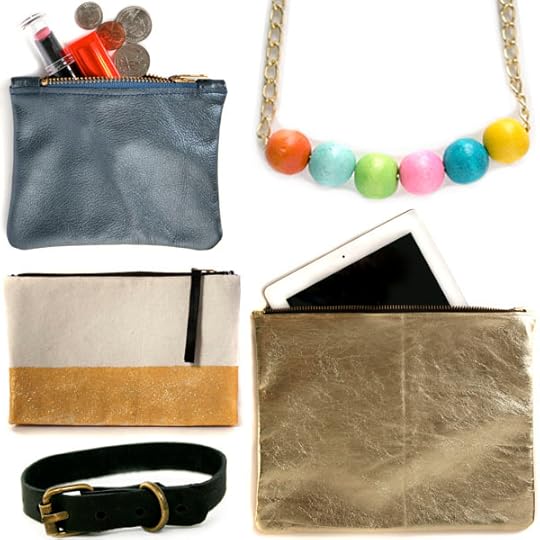
Ever had the dream of one day running your own creative business? Creating your own brand and selling your own range of unique handmade item? For so many of us creative folks that would be living the dream, right? But, what exactly does it take to set up and run your own handmande business from scratch? Mallory Muddiman has done just that, selling the most awesome line of handcradfted, fashion forward accessories on her very own online store. In this exclusive guest post, Mallory shares her journey from spark of inspiration, building her skills and launching her fabulous online boutique….
So, without any further ado, I shall hand you over to the incredibly talented Mallory Muddiman…
 Starting young
My mom taught me how to sew and craft at a very young age while she was working on her own projects. I loved it from the beginning. I wanted to constantly sew, draw and paint. I’m basically a remake of my mom – my poor dad!! I’m most inspired by people who aren’t afraid to be themselves, and people with drive. When I’m looking for visual inspiration for colour palettes and shapes I go to architecture and fine art first. As far as the past goes, the style of the 1960s inspires me the most. My style is fresh, girly, clean lined, and fun. Honestly, I design for myself. I try to make things that are special, things I’m looking to have add to my own closet. That’s usually a good sign that someone else is looking for the same things.
The most important thing I learned in college studying for a Degree in Fashion was to challenge myself and to have high standards. The first year was a year of design foundation courses including basic digital design. During years 2-4 we learned different sewing skills, including complex ones like tailoring and active wear – which are really valuable technical skills. Through the whole five year program, but especially while developing my senior collection the 5th year, I learned how to go through the entire design process. This includes how to be objective, to stand up for my viewpoint, and to take criticism in the right way. This has forever shaped how I work and how I think about deisgn.
 Having a vision
I’ve always wanted to have my own line and the best place to start was doing it all myself. I knew I could find a job right out of college in design in NY or another big city. That just wasn’t the path for me. I got married a month after graduation and I never want to leave Cincinnati, so I knew an online store was the answer. I also have great job working at a bridal store about 30 hours a week. So, this is where I started. I love hand-making my products, but I’d like to expand eventually – I can only do so much by myself! Well, myself and my mom because she works with me 1-2 days a week. The goal is to make enough to work on my store and blog full time…then I can eventually hire people to help me create – paying my mom would also be fantastic!
Any project that involves sewing is my favorite kind of make! This week my mom and I made pillows as a DIY for my blog, but I also get to enjoy them in my apartment. Those kinds of projects are the most gratifying since they are content for my site and I see them every day in my home. My store right now has a lot of non-sewn products, but I plan on adding some clothing this year. Clothing is definitely my favorite thing to makes, especially blouses.
 Design time
I never truly work the same way twice! I usually picture finished accessories in my head. From there I sketch them, think about it for a week or so then buy materials. After that I work up a prototype, then re-evaluate the cost, time involved, and the design itself. After that I scrap the idea, edit it or start producing it. The process of designing clothes is basically the same, but has more steps. It’s more of a constantly evolving process. Usually I start with quick thumbnail sketches of garments and prints. From there I edit, think about the different elements and re-sketch a few times. Next up is making patterns, mock ups, editing, fittings, changing patterns, mockup re-dos, fittings, prototyping, and editing again. Then like with accessories, I re-evaluating the cost, time and design again. I love this process way more than ‘production,’ but once I start producing and have 20 of one thing made it feels like such a huge accomplishment!
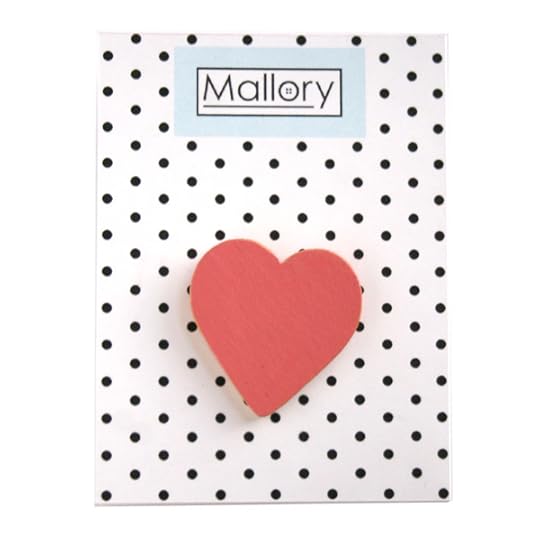 Red Heart Bobby Pin • $9.89
Time is always my downfall. I tend to think there is more time I can be productive in a day than there really is! Balancing my own business with a ‘real job,’ relaxation time, and spending time with my husband can be pretty tough. Really though, that’s my only complaint.
 Arrow Headband • $24.89
Starting right
It doesn’t take much money to get started really. Begin small with accessories and work your way up to harder and more costly products (this is excellent advice I gained from Elsie & Emma of A Beautiful Mess when I worked for them). Get your tax IDs and business licenses handled and find a good accountant. Then you can start making things! Keep in mind though, when it comes to handmade, quality is of the utmost importance. You need to respect your consumer and your creativity by following through with high quality craftsmanship and great customer service! A great design is nothing if you just throw the product together!
♥ – ♥ – ♥
Want to find Mallory online and show her some love?
Keep up-to-date with her creative world on her blog and shop her online store, and you can follower Mallory on Twitter and Instagram! Now, why not swing in past and say Hi…or treat yourself to that awesome Arrow Headband I know you’ve got your eye on!
The post Guest Post: Mallory Muddiman appeared first on Made Peachy.


