Ali Edwards's Blog, page 28
April 19, 2024
In Case You Missed It | April 19
Happy Friday, friends! Welcome to the latest
In Case You Missed It. Just a reminder that this is a quick post that will happen every Friday afternoon with all the updates and links that have happened throughout the week. So, let's get to it:
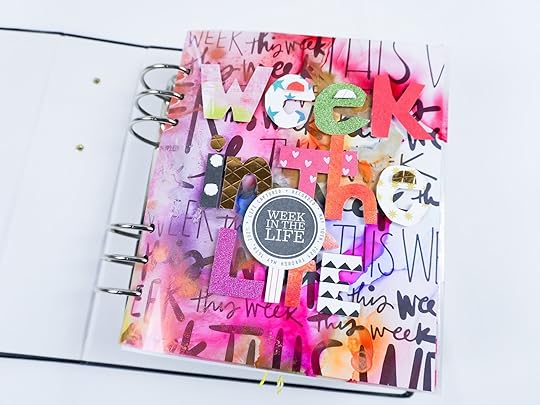
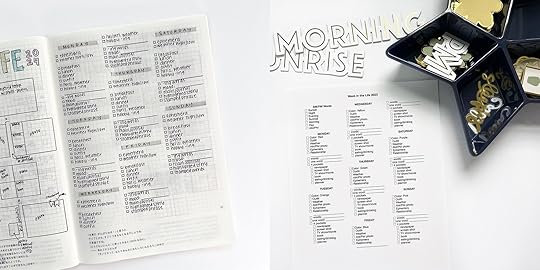
WEEK IN THE LIFE 2024 IS ALMOST HERE
Next Monday we kick-off our community documenting week for 2024 Week In The Life™. All this week we've been sharing great inspiration and tips from the community. Find those on the blog now! Be on the lookout for the dates and times of a few fun LIVE check-ins coming throughout the week. We can't wait to tell stories along side you! Stay tuned for more information. In the meantime, shop our new collection here.
APRIL REVEAL
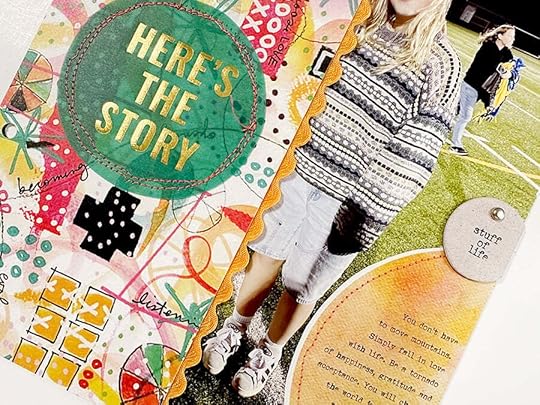
Last week we revealed a new Story Kit™ theme: AROUND HERE! Documenting the basics of everyday life is a story lens I return to again and again. This month we are using one of Ali's favorite phrases "around here" to document what's happening in this season of our lives. This kit is great for Project Life documenting or any other kind of story where you are capturing life in the moment. In addition to our new Story Kit™ theme, we also have a brand new Stories By The Month™ kit, the next edition in our Alphas Are Awesome series, and a new Seasonal Paper Pack.
Head to the blog
here for Ali’s post with all the details about this month’s release.
NEW STAMPS + RESTOCK
Last week we released a variety of new stamps sets and restocked some favorites. Each of these stamps is designed to enhance your documenting journey. To celebrate, ALL CLEAR STAMPS SHIP FREE WORLDWIDE starting at noon on Monday the 15th and running through April 23rd. No promo code will be required. Shop them here.APRIL DIGITALS
The first Friday of every month we have a new digital release available in the shop. Play with scale, recolor objects, add journaling, print multiples…the sky is the limit when playing with digitals. Shop digitals here.
2024 PROJECTS + PRODUCTS SCHEDULE
As we continuing easing into 2024 we put together an overview of our schedule of projects + product releases for the upcoming year. We are sharing this as a way for you to plan, think about what you might want to participate in this year, and simply share some of the things we have coming up to help support + inspire storytelling. For the last few years we've followed a fairly similar cadence for our releases and our major projects will follow that release schedule again this year. Please note that, as you might imagine, this schedule is subject to change throughout the year based on a variety of variables. Find the posthere.
As always, we’re so grateful to have you all as members of this community! Thanks for joining me today and have a great weekend!


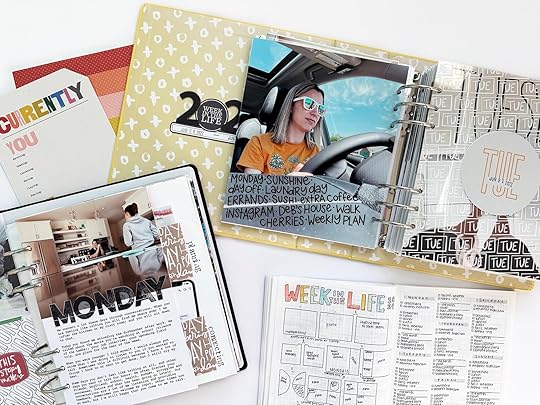
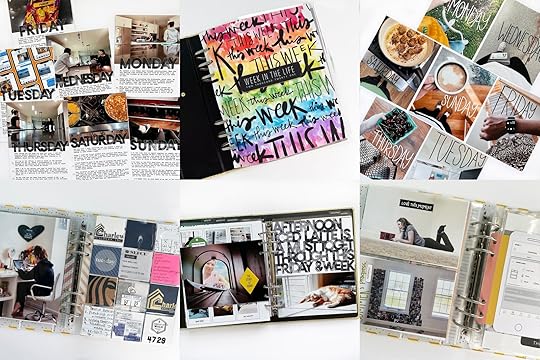
Week In The Life™ 2024 | Special Guest Jen Wong
Hi friends! I’m happy to be joining you to share my approach for Week In The Life this year. Week In The Life is one of my favorite projects. Time is moving fast and life is changing all the time, even if we don’t notice it, and this is one of those projects that is so fun to look back on and see how different (or similar!) things are today.
I’ll let you in on a secret: most of my Week In The Life albums are incomplete. While I am pretty good at capturing the photos and words during the week, I am not as good at finishing them up. I am not too worried though, since I have all the “stuff” to do it at some point, and this isn’t going to stop me from doing the project again this year!
It would be amazing though, to get the album done within a reasonable amount of time after the documenting week ends, so this year I’m attempting to further simplify my process. Week In The Life is not a very “crafty intensive” project like I tend to view December Daily. For me, it’s more about getting down the details of everyday life and some photos to go along with it.
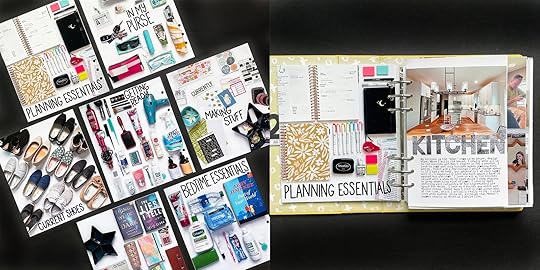
My Plan Before The Week BeginsSince I want to make this as simple as possible, it’s essential to have a “design formula.” Like others, I have created a loose template for how each day will look in the album, and then I will repeat it for the rest of the week. I’ll walk you through what I’ve done in the video below.
As you’ll see in the video, I’ve also thought about the types of things I want to capture during the week. I would like to include other voices in my documenting, so I’ve laid out at least one place to record that.
I have prepared a prompt list of things I’d like to capture during the week. These range from photos (e.g. photo of the inside of our fridge) to lists (e.g. jotting down our morning/bedtime routines). I can sometimes get stuck during the week wondering what to write or take photos of, especially later in the week, so reviewing this list definitely helps.
My Plan During The Documenting WeekThe WordsI’ve been journaling using an online note-taking app for years, and find this approach works great. It won’t be any different during the Week In The Life week, except I will likely fill in more details than usual. I am in a busy season of life, so I often take time during small pockets (e.g. waiting in line, waiting for my daughter at an activity, waiting for water to boil on the stove) to jot down some notes on my phone. Using an app that syncs to my computer and phone is key since I can do my journaling anywhere. If I feel I didn’t get enough down during the day, I will spend a little more time at the end of the day to fill in the gaps.
I’ve been guilty in the past of taking hundreds of photos which causes me to spend more time sifting and selecting the ones I want to use. I don’t want to feel overwhelmed by the amount of photos so I will simply be taking less. Because I’ve already laid out my design formula, I know I probably only need a minimum of 14 photos per day. I was surprised when I figured that out, because that’s a super low number compared to the large amount I’ve taken in the past! I’ll
probably aim to take a bit more, to have some variety and choice, but no more than 40, and hopefully closer to 20 on average per day.
I already save more “stuff of life” ephemera than I’ll ever use on a general basis but will be saving these in an old scrapbooking kit pouch to look through later. Some examples of things I like to keep are tags of items I purchased, interesting packaging, drawings from my
daughter, and receipts. I plan to have about two pages in my album to hold these items.
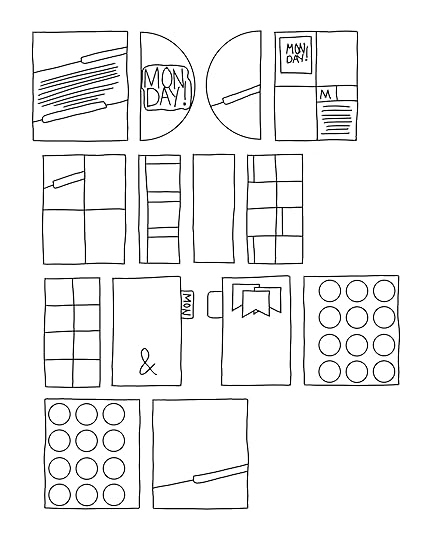
Here’s a look at how I’ve set up my album:
That’s my plan for Week In The Life this year. I’m looking forward to capturing my week with the community and hopefully connecting with some of you! You can find me on IG at @circleplusarrow.
April 18, 2024
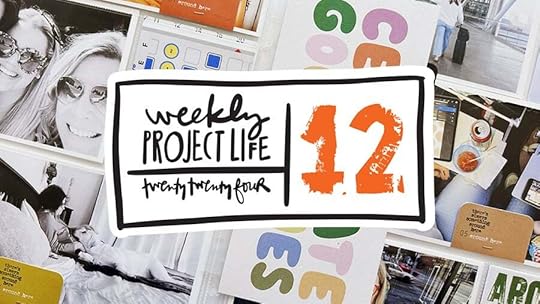
Project Life® 2024 | Week 12
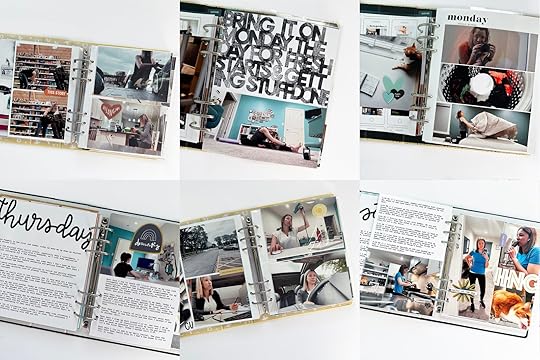
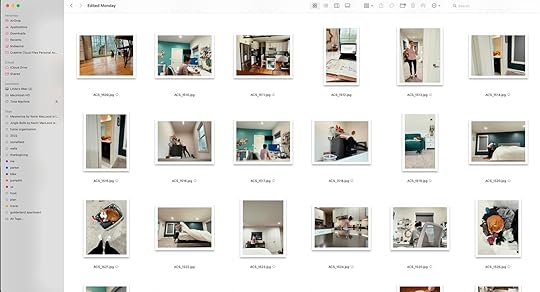
Diving back in to my 2024 Project Life album with Week 12.
During this particular week I traveled to Tennessee/Kentucky for meetings with Inked (who manufactures + distributes our products). It was so fun to travel with Katie again and get to see Lisa and Kelly in person. I kept this one fairly simple using elements from recent Story Kits to support my photos.
Let's dive in to my process video:
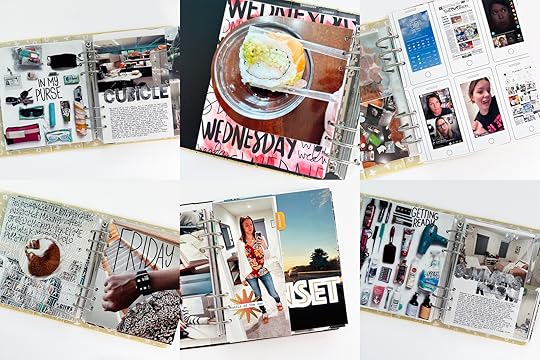
Here are images of my spread:
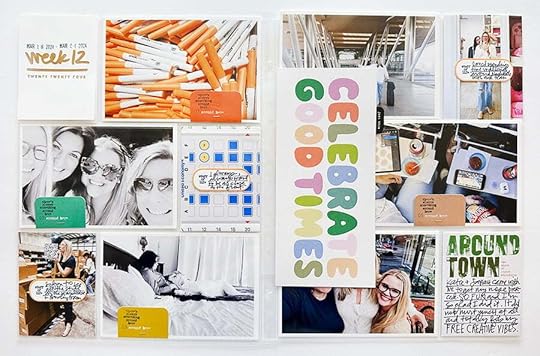
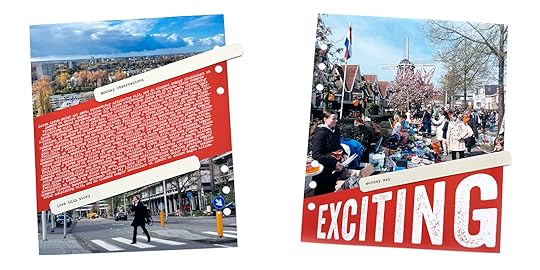
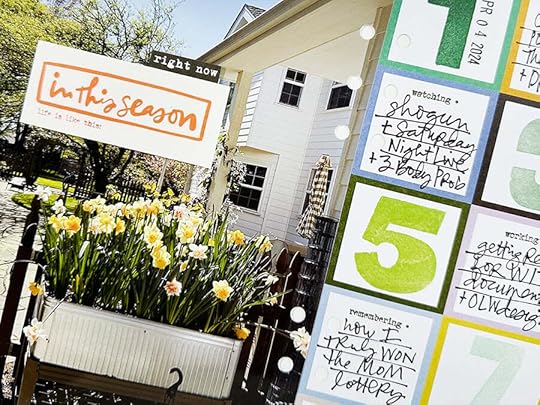
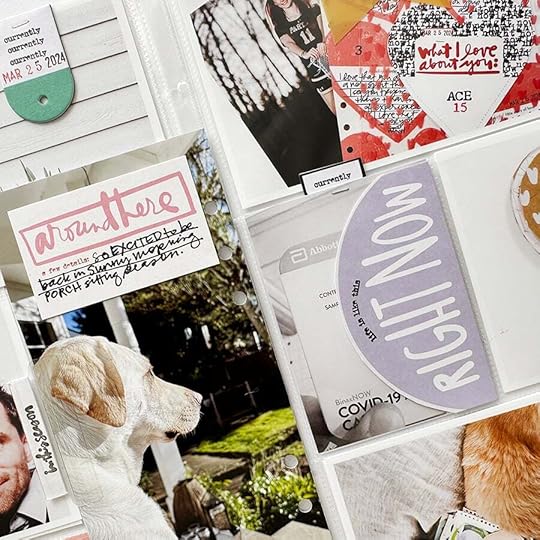
I started this one by printing out all my photos and slipping the "around town" card into the pockets.
On top of five of my 4x6 photos I added the tops of some 2x4 story cards from the Around Here Story Kit (the current Story Kit if you are reading this in real time). I'm saving the bottom pieces to be used in another project in the future. On top of the tabs I used the "there's always something around here" stamp from the Around Here Stamp and stapled those onto my photos.
On top of my 3x4 photos I added label stickers from my stash. On top of those I stamped "stuff of life" (also from the Around Here stamp) before using a Slick Writer to add a bit of contextual journaling on top.
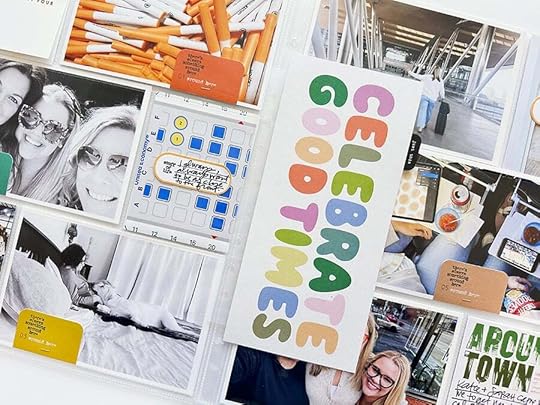
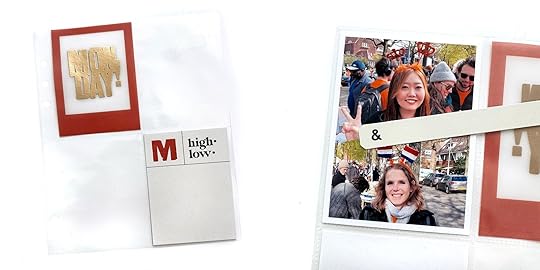
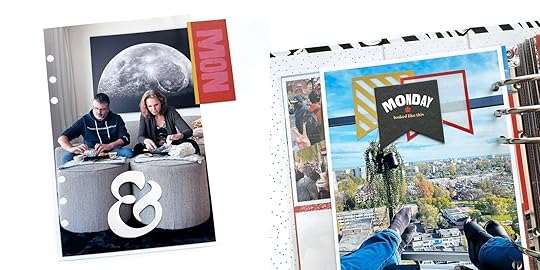
As an insert I used the two 3x8 papers from the recent Birthday Scrapbook Kit. Along the outside I added a sticker tab and this whole piece is added to my album using a page attacher (these are on re-order and we are just waiting for them to be restocked).

I wrote directly onto the numbered 3x8 paper using the numbers on the tabs to correspond (generally) to the numbers on the 3x8.
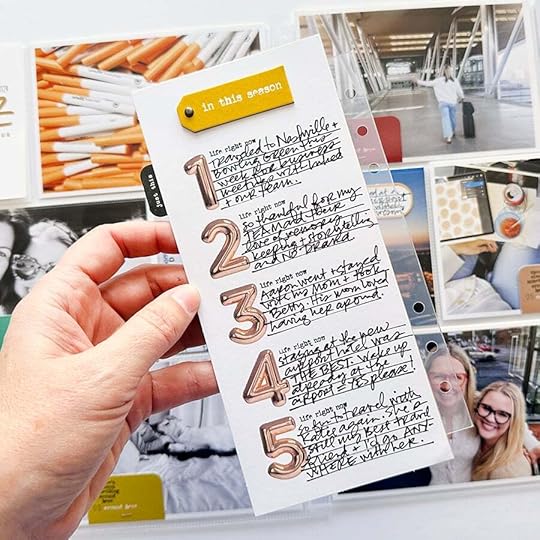
On the top of the journaling page I added a chipboard piece from the Around Here Story Kit.
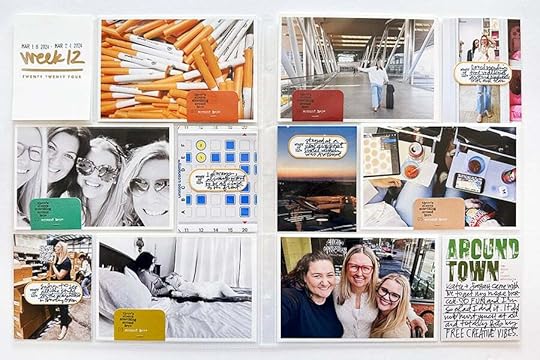
I finished this one off by adding journaling to the Around Town journal card.
Wonderfully simple!
SUPPLIES9x12 Album
9x12 Page Protectors
Around Here Story KitAround Here Stamp
Birthday Story Kit
Label Stickers (available currently in black)
StazOn Ink
Scrapbook.com Rolling Adhesive
Tiny Attacher
Epson PictureMate PM400 Printer
Other basic supplies can be found via my Amazon Storefront (printers, etc)
Week In The Life™ 2024 | Special Guest Denine Zielinski
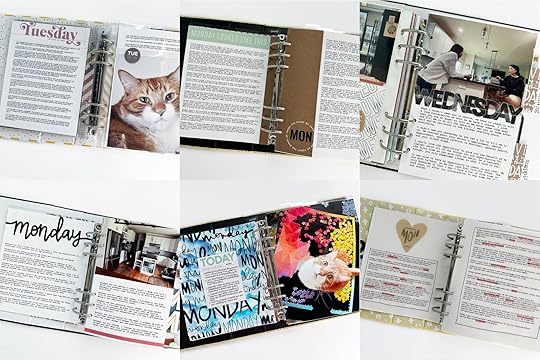
Hi friends! It’s Denine here, and I am excited to share my plans for Week In The Life 2024 with you today. This year, I am working in the 6x8 album. First, because I am in a season of life right now where I am not sure if I could fill a 10x8 album. Second, because it is just so darn adorable! I am totally in love with the font + the black and white color scheme, too.
Let me begin by saying that WITL was not a certainty for me this year. I’ve been feeling a bit unsure about my storytelling lately, and I questioned my ability to pull off such a huge project. This will be my fourth year participating, and my life just looks very different than it did for the first three years. That being said, I eventually came to my senses and knew that WITL was the right thing to do for me.
In the video below, you can see + hear me talk about this in more detail. I also walk you through my formula for each day as well as a few additional products that I have put to the side for possible use.
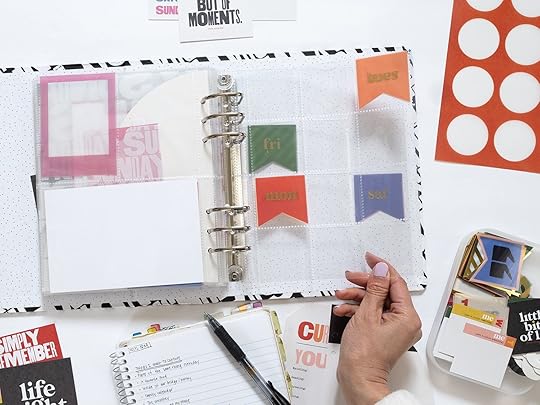
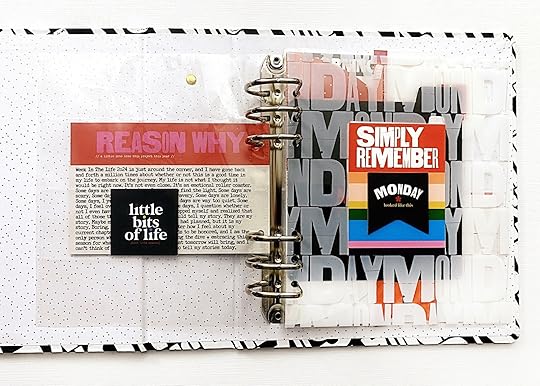
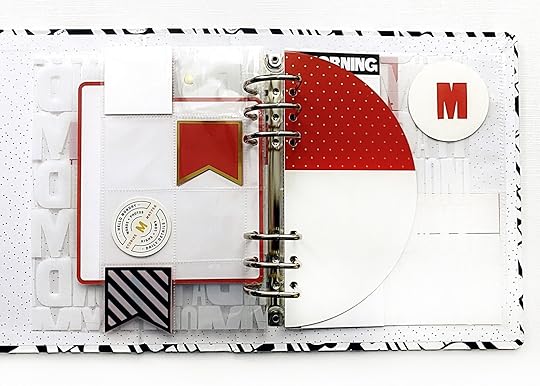
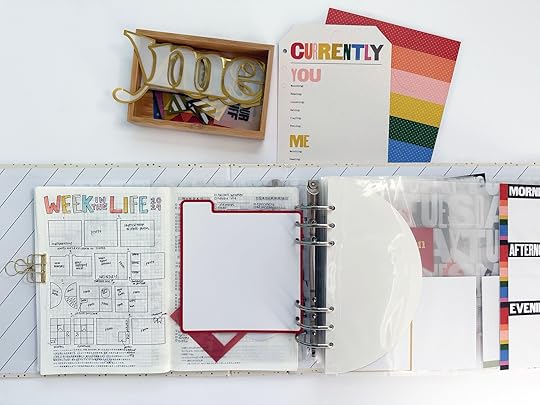
Here’s a look at my Monday pages set up in my album.
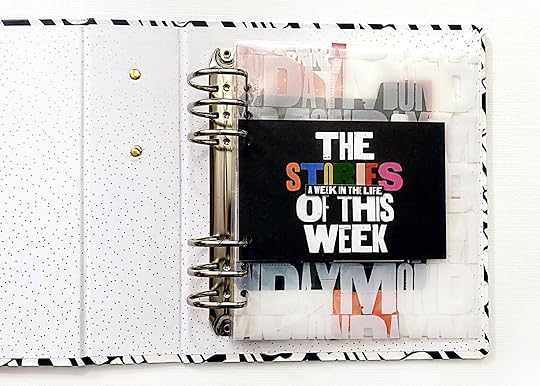
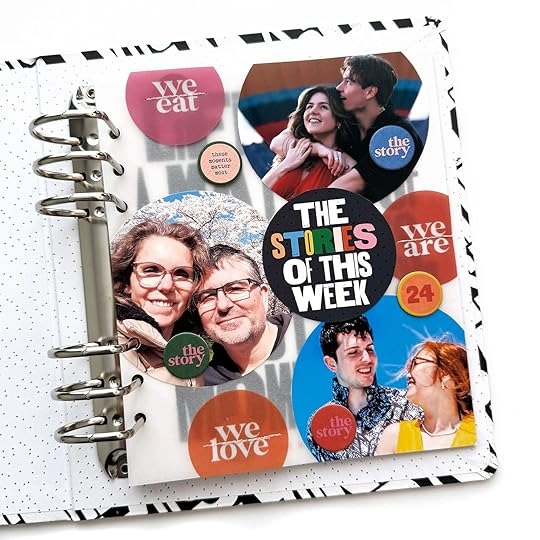
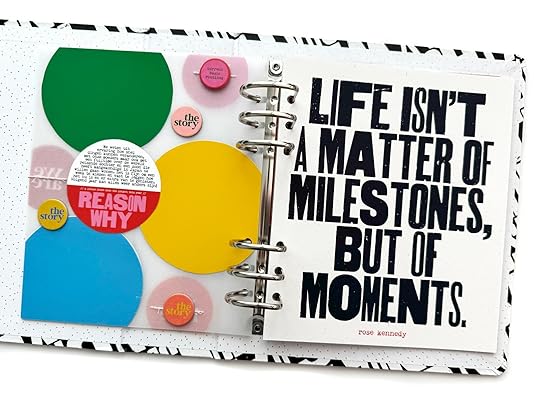
Inspired by Ali, I used the Stories of this Week and the Reason Why cards back-to-back as the intro to my album.
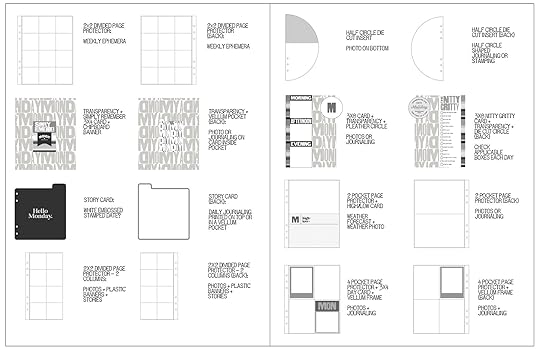
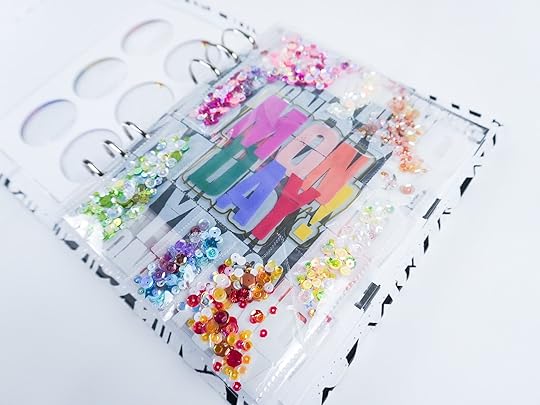
Next is a 2x2 divided page protector where I will collect bits of ephemera from the week. This is different from last year where I had a place for ephemera within each day.
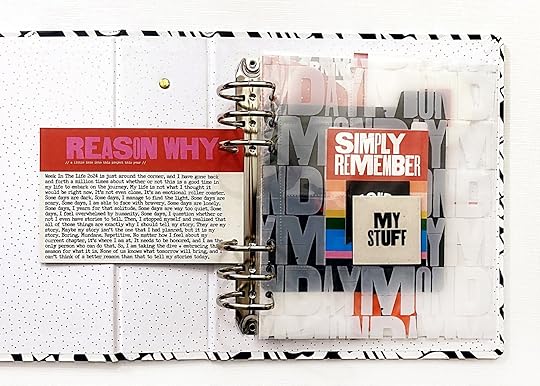
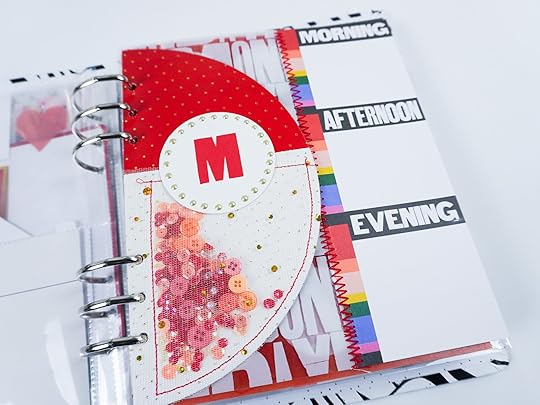
Each day will begin with the Transparency Divider. On top of each of those, I added the Simply Remember 3x4 card (I used the digital kit to print out six more of those). On top of each 3x4 card, I placed the day of the week chipboard banner.
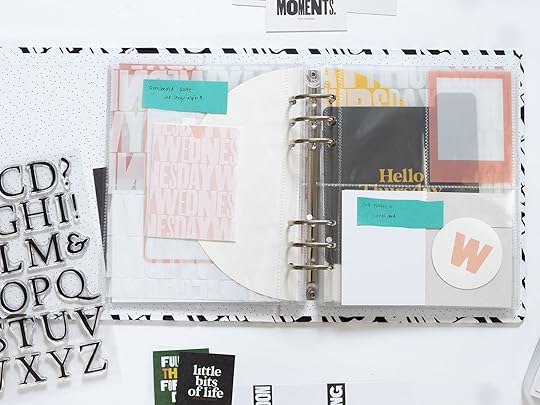
On the backside of the transparency, I also added the Vellum Pocket card. Right after that is the Cardstock Story card. I’m thinking that I may try to stamp + emboss the date on the front of each of these. We’ll see.
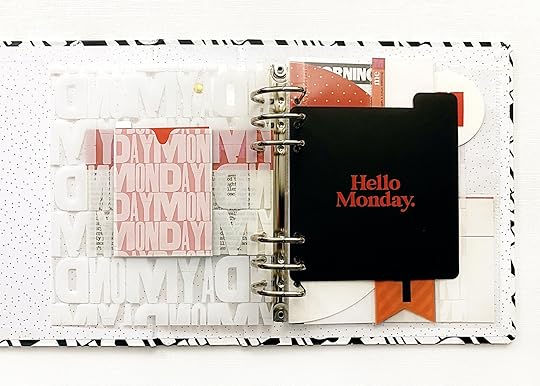
The back of the Story Card will most likely contain my journaling for the day. By this, I mean the journaling that I dictate into my phone each day. I will send it to my computer, clean it up, and print it out. Depending on how long it is (I can be wordy), I may add it directly to this card or create a pocket to hold the printed version. I like the pocket idea because it will allow me to do some stamping of some sort on the pocket itself.
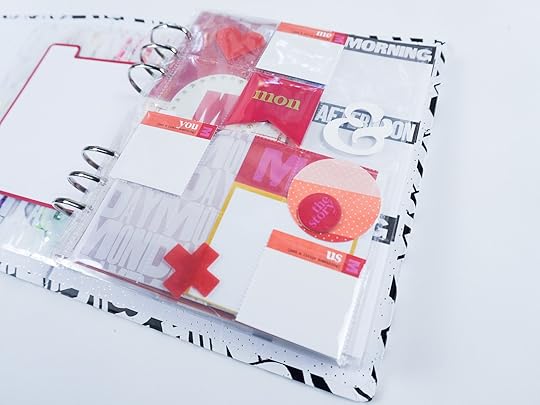
Next up is a 2x2 divided page protector (2 columns) where I will mix some of the plastic banners with the 2x2 Selfie Cards from the Mini Kit and add photos/journaling. If I end up with more pictures than I anticipate, I can always swap this out for a full size 2x2 divided page protector.
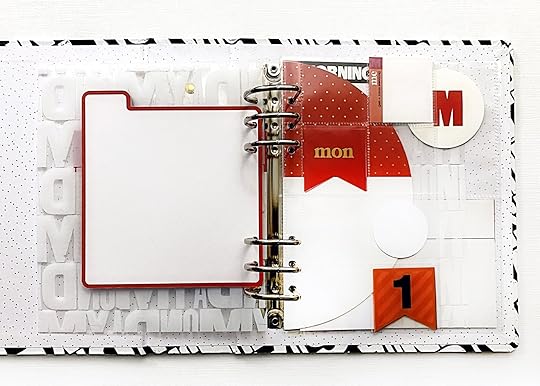
After that will be the Half Circle Die Cut insert. I’m thinking a photo on the bottom half of the front + journaling on the backside. Of course, the backside might be a fun place for some stamping, as well.
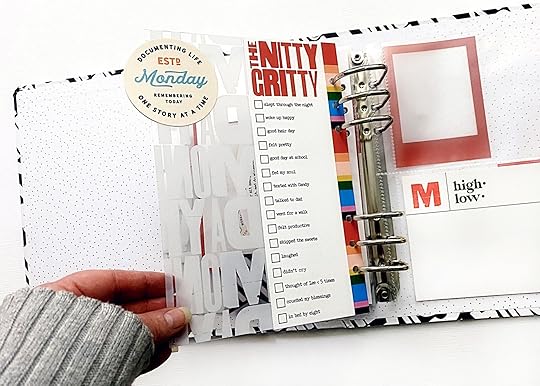
Inspired by Ali, I used the remainder of the transparencies with the 3x8 cards from the Main Kit. I wanted this page to be shorter than 7 inches, so I adhered the transparency so that the entire page only measures 5.75 inches across. As a tab of sorts, I added one of the Pleather Circles to the edge.
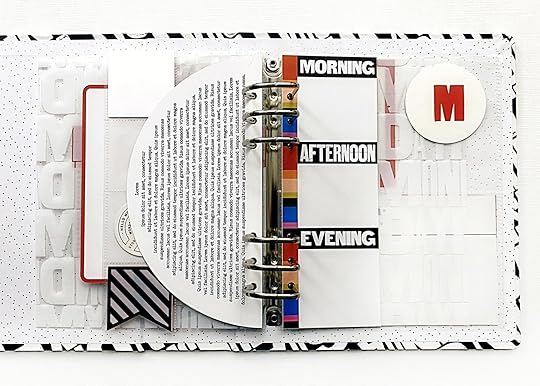
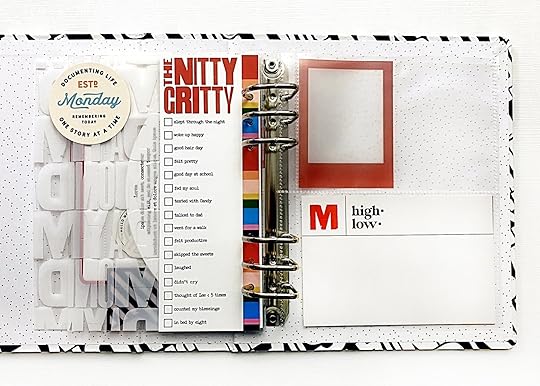
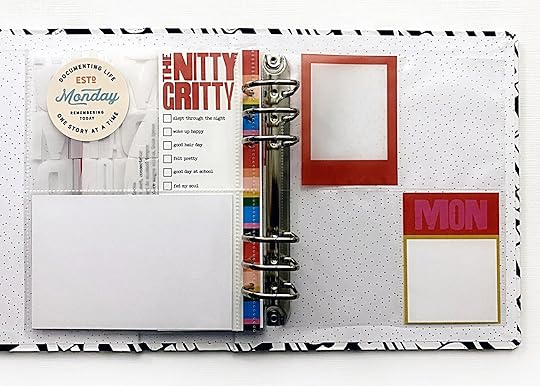
I used the digital version of this card to create my own “checklist” card to go back-to-back with the original 3x8 card. I titled those cards “The Nitty Gritty” created a sort of goal list that I will be able to check off each day. I will either do that with a pen or perhaps a tiny stamp. On the backside of the Pleather Circle, I added a circle from one of the papers in the Daily Quarterly Scrapbook Kit (enlarged to 2.5 inches).
After that is a 3-pocket page protector where I will use the High/Low journal card to document the weather. I will most likely pair that with an outdoor photo showing the weather.
To end each day, I have a 4-pocket page protector with the 3x4 card from the Main Kit and the Vellum Die Cut Frame from the Mini Kit. Of course, if I need more space for photos or journaling, I can always add more page protectors to accommodate that.
It’s funny how our brains work. It wasn’t until typing this post that I realized my page order is pretty much identical to Ali’s. That was totally subconscious. If you would have asked me what order Ali had her pages in prior to me placing my pages in the album, I would not have been able to tell you to save my life. Crazy, right? My brain knew a great design plan without me even realizing it!
Before I finish our little journey here today, I want to share a process video for how I created my Nitty Gritty card to go back-to-back with the 3x8 card from the Main Kit. I am totally stoked about this little checklist that I created for myself. You can create a checklist of your own with any goals or tasks for each day. You could also document your mood or the weather or even photos that you are planning to take each day for this project!
As always, I am by no means a pro in PSE, but I love to dabble and play. The video below will show you how I modified the digital version of the 3x8 card to make it my own.
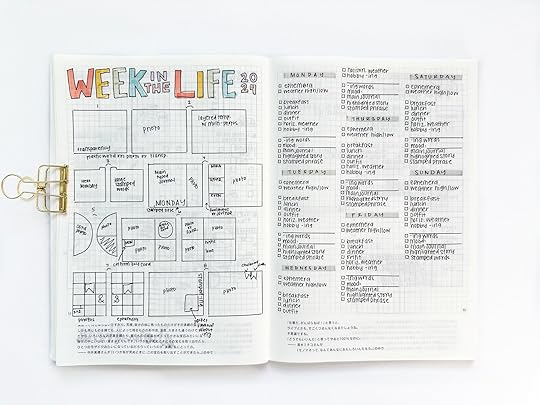
Sketched out, here is a quick look at my plan for each day. You can download a PDF of this plan here if you would like.
Thank you so much for joining me today on my little Week In The Life journey. I’m really excited for the community documenting week beginning on April 22. I’ve never done any planning for this project in the past, and I am feeling pretty good about diving into the week.
If you have any questions, please feel free to comment below. I love hearing from you guys! You can also find me on Instagram @denine2 and YouTube @Denine2.
Happy storytelling, my friends!
April 17, 2024
Week In The Life™ 2024 | Special Guest Nolana Lynch
Hello Lovely People! Week in The Life is almost here! Hurraayy!!! I am Nolana (@nehlan.has.a.plan over on Instagram) and I'm certainly ecstatic about participating in the project this year. I've spent the past month and more ruminating over what and how I'd like to document this year.
In addition to having FUNN, I'd love to focus on a deep dive this year, so setting up in advance is one of the keys to my "success”.
In this video, I share my initial album setup and chat about my ideas for this year!
Some of the recurring things I'd love to focus on this year are:
Daily Intentions/Goals/Plans Morning Routine Meals Temperature Mood Outfit of the Day Gratitude Note to Self Evening Routine
Other things I’d like to capture during the week are:
Things Around the House that Represent Life right now e.g. toys, toothpaste, etc Self-care/ Skin care regimens Work from Home Work from Office Activities e.g. Music Class, Soccer/Football, Weekend Brunch, and Morning walks Dishwasher Refrigerator LaundryJust an overall detailed capture of our everyday life!
SETTING UP MY ALBUM
When I commence my plans for my “Week in the Life” set up for the year, I begin by going through my previous albums to determine what has worked for me in the past, what I enjoyed, and what I haven't captured yet.
Here's a Flip Through of my previous Week in the Life albums:
Some of the things that I loved about my albums are having clear distinctions/an opening page between each day of the week. I also loved colour coding each day of the week to easily differentiate the days.
When I think about my different approaches over the years, I did enjoy the albums where there was ample journaling to support the photos for each day. It may seem like a little thing, but it was fun to look back on the weather that week - I’d add those in with the High and Low card this year. I also loved seeing what I was Reading, Watching, and Listening to at the time. I missed that in my 2022 and 2023 albums, so I am putting things in place to document those this year using the “Currently” tag in the mini kit.
I also loved my approach last year, it was light, but exactly what I needed to not feel overwhelmed, but still participate with the community. I loved journaling during the day, so that my thoughts came through, and I was not waiting until the end of the day to document it all. That fuss-free approach, may be for persons who may want to embark on the project, but it may seem like a large undertaking - KEEP IT SIMPLE all the way!
Here are some of my ideas for using bits from the collection:
Hello “…day” cards - I will use these to write my intentions/goals for the day Big plastic words on white transparency - add vellum stars, sequins, or other embellishments to create a title page for each day. Morning, Afternoon, Evening - Meals, or Wellness activities throughout the day like Meditation, Exercise, Naps (lol), etc.On the back of the 3x8 card, I'd like to put my Outfit of the day Vellum pockets - I can use these for my Daily Gratitudes at the end of each day or to document recipes of my meals if used opposite the above cards for meals. I love the idea of using the high and low cards for the weather - I typically don't register/remember what the high or low of my days are so I feel like this is a great way to pull out additional details of the day, and I was pleasantly surprised to see the weather in my 2021 album. The 3x4 Mon - Sun cards are also great ones to document a daily gratitude list or if you have one thing per day or a word/phrase per day the 4x6 Monday - Sunday card works well too For the mini kit, the You, Me, US cards are great for documenting things that we did separately and together as a family. I am looking forward to doing that this year. The 6-circle page is great to use as a family introduction page one circle for our details and the other for our photo. The vellum circle pages I'd love to use to collect ephemera. The half circles will be used for my journaling summary of the day
Here are some things I'd be doing during the week to help me document all the things I've listed:
Set alarms on my phone for each day of the week, for the times I need to capture moments eg. Meals, Drop-offs, etc Where possible, journal at points during the day, or the end of the day to get my freshest thoughts on each day. Chat with my son's teachers to kindly request great photos of his daily activities that week.
Thank you so much for stopping by the blog today and I am excited to see what you’re documenting for Week in the Life this year!
Cheers!
April 16, 2024
Week In The Life™ 2024 | Special Guest Jennie Rey

Hi friends, Jennie here with my plans for Week in the Life 2024. The community documenting week this year is the week of the 22nd of April which is kind of a crazy week for me. We will be traveling for a part of it and it includes a national holiday, so no ordinary week for sure but it will be a fun one!
With a busy week like that I would like to be as prepped as possible so let me tell you a bit about my plans.
To set myself up for success I decided on a few design elements and thought of a set of pages I will repeat for each day.
Each day will begin with a page with some of my observations of the day, prompted by one of the paper labels from the main kit. I’ve used similar labels before for a December Daily Product Play lesson where I put them on the page on an angle and I decided to do the same here. I’ve created a template where I can add two photos with my journaling in between. Each day will end with a similar page with another label, this time the ‘day of the week was…’ label. My plan is to choose one word for the day and put it below my photo in a bold font.

Same as Ali I decided to use the half circle page upside down and cover the front with a black and grey polka dot background I created in Photoshop using one of the journal cards from the Main Kit. I added the plastic ‘day of the week’ pieces on top with a label with the date on it (created using the digital paper labels and number stamp set).
On the back I will add a photo and a paper label with one of the ING-words. I created a template for the photo so I can add the label in the same angle as the other pages.
I will include 2 page protectors per day: a 2x2’s one with the 2x2’s ‘you, me & us’ cards and a page protector with 4 3x4 pockets. I’ve stamped the day of the weeks on the vellum frame cards and embossed them with gold embossing powder and cut the ‘highs & lows’ card in half to be able to add them to the 3x4 pockets. I also created a template to be able to add 2 photos to one 3x4 pocket with a label added on top on an angle.
If I have enough photos I will add 2 big photos of 5x8,25 inches back to back, with one of the ‘days of the week’ journal cards as a tab. I would like to add one big photo of the two of us and add one of the pleather ampersands and tell a story of something we are doing the same or differently. On the other big photo I am planning to add a few of the plastic and chipboard banners.
I also would like to use the vellum circle pages and use them as a place to collect photos, ephemera and embellishments of the whole week of that specific color.
To keep track of the photos/journaling/other I will need per day I’ve created a list:
2 horizontal photos of 3,5x7 inches (for the first page)1 vertical photo of 4x6 inches (for the half circle)1 square photo of 7x7 inches (for the last page) 4 3x4 photos (or 3 3x4 photos and 2 2,25x3 photos) (for the 3x4’s page protector)3 photos of breakfast/lunch/dinner of 2,25 x 1,75 (for the morning/afternoon/evening 3x8 card)1 photo of the weather (for the back of the 3x8 card)Max 13 2x2 photos (for the 2x2’s page protector)2 vertical photos of 5x8,25 inches (back to back – you & me)Max 12 1,5x1,5 photos (for the vellum circle pages)For my journaling I would like to have:
observations of the day a high & a low
one word for the day
And I would like to collect photos, ephemera and embellishments in the colors: red, orange, black, yellow, green, blue and pink.
To be as prepped as possible I also created my cover page with some recent photos of the six of us.
You can see more of my preparations and how I created my cover page in the video below.
Love this project so much! Hope you all have fun documenting a week in your life, I am so glad we are doing this together!
Jennie has graciously shared a few of her templates as a free download. Find them here.
Instagram: @thereypie
YouTube: Jennie Rey
April 15, 2024
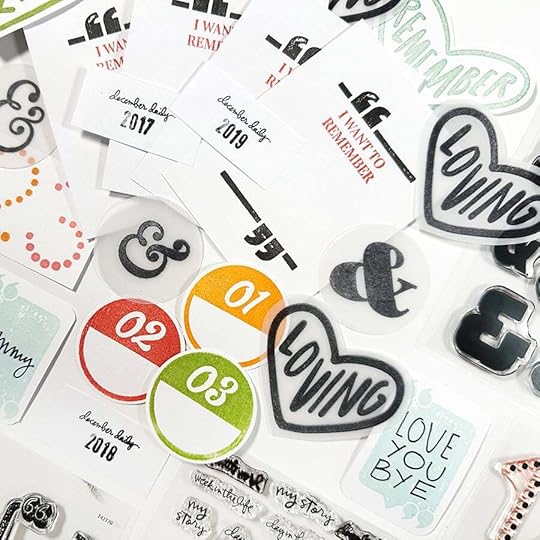
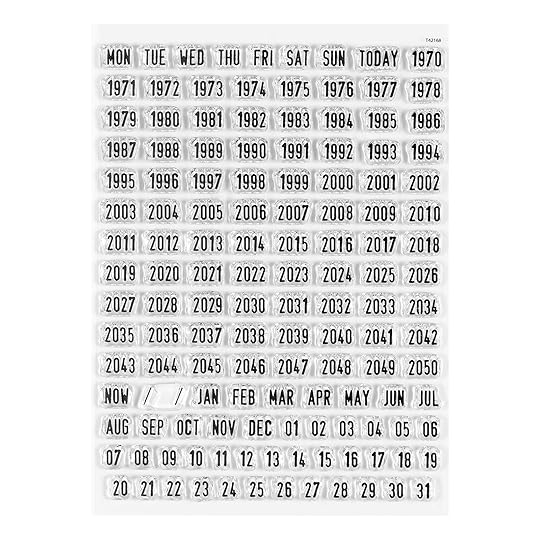
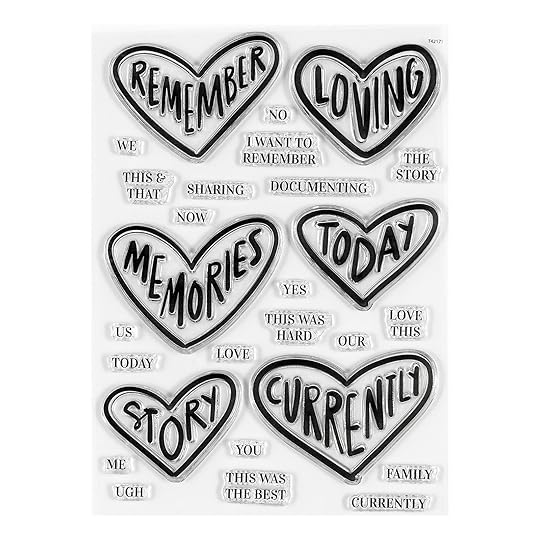
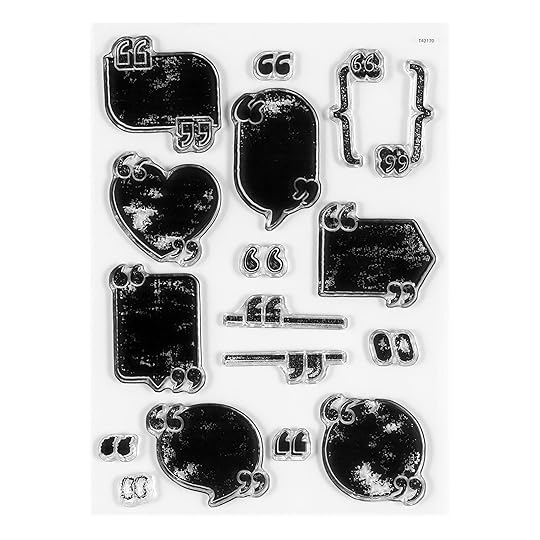
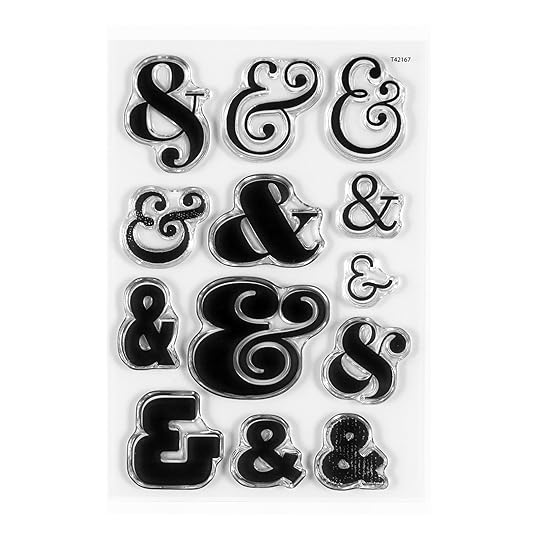
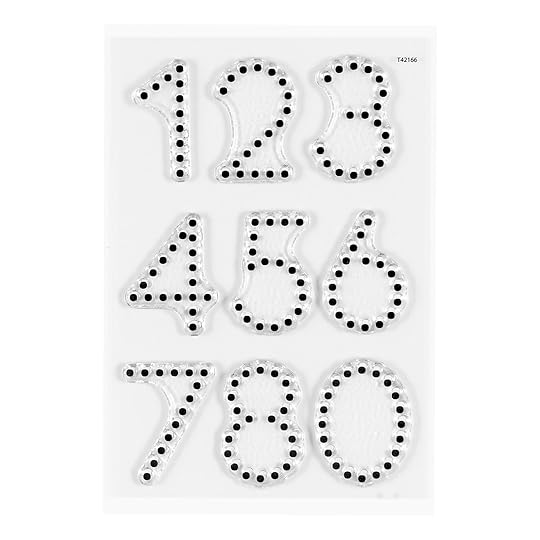
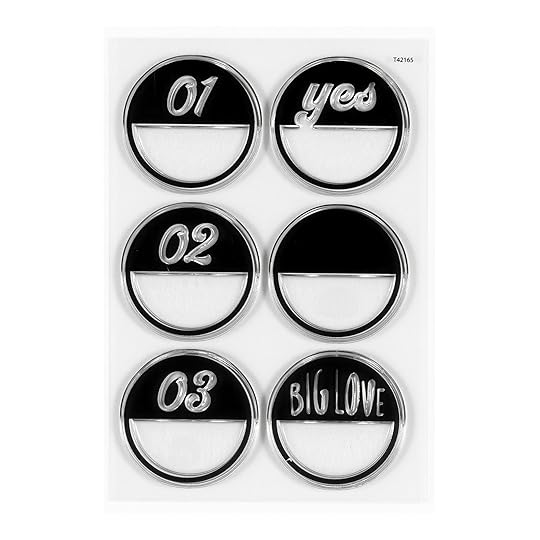
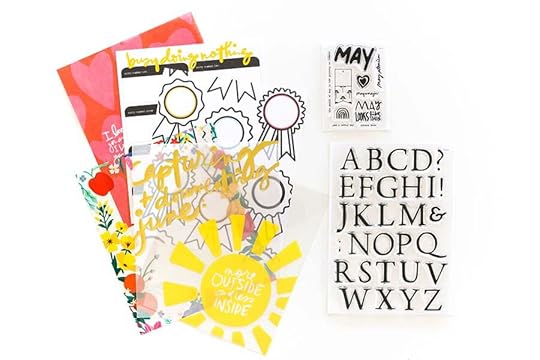
April Stamp Release + Restocks

Today we are sharing a look at our 2024 Stamp Release + Restocks. These stamp sets are available now. There are 7 new stamps (listed below) and 5 older stamps that have been re-ordered:
All regular priced, clear stamps ship free worldwide through April 23rd at 11:59pm ET. No promo code required. These stamps will be available digitally on Friday, May 3rd.
Here's a walk-through video of the restocks + new releases:
Here's a video with the new releases in use:
Here's a PDF download of the page I used to create these album spine labels (click here). I did need to trim them down just a bit more.
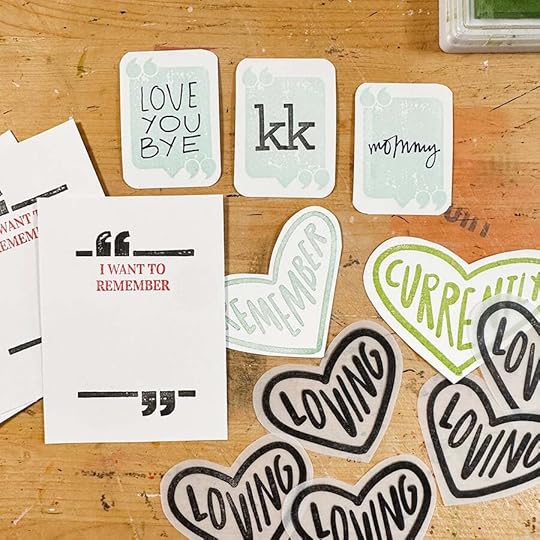
Stamping on vellum using StazOn ink is so fun! Loved stamping out these hearts to create vellum embellishments.

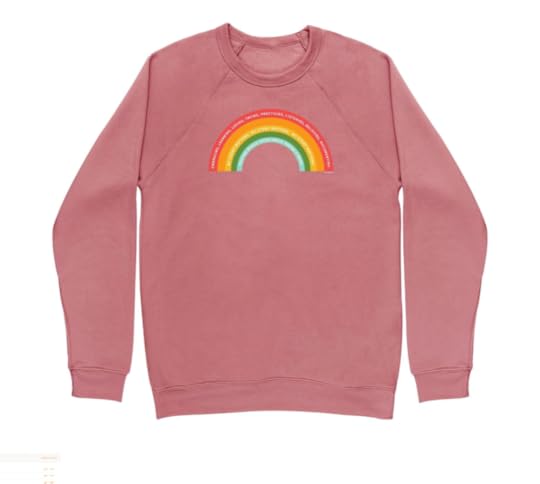
We also have a new sweatshirt available in the shop now:
Week In The Life™ 2024 | Special Guest Linda Jordan
Hi everyone! It’s Linda and I’m so excited that it’s Week in the Life season again. I have documented this project every year since 2015, so this will be my 10th year of documenting a week in my life. This project is one of my favorites, but it is a big project! Over the years I have found a rhythm that works for me in this project. Hopefully some of these tips help you feel ready to dive in this year!
Take some time before the documenting week to look back through your older Week in the Life albums. If this is your first year, no worries, look back on other’s albums online. Ali has shared all of her’s here on the blog, I have a few of mine on my youtube, and lots of others in the community have shared album walk-throughs.
When looking back on older albums, take notes of what worked and what didn’t work. What do you love about those albums? What did you document that you are so happy to see recorded? What is missing that you wish you had captured? Keep these things in mind when developing your plan for this year’s project.
When I first started this project, I didn’t touch my products until after the documenting week. I liked to go in fresh, capture my stories, and then put it all together afterwards. However, I found that I collected too much in one area and not enough in another. I also struggled to put my albums together because I would lose momentum and excitement for this project. A few of my albums got put away, unfinished, and were finished years later. And that is totally fine!
But, for me, I really want to finish this project soon after the documenting week. I’ve found the best way to do this is to come up with an album plan ahead of time. This helps guide your documenting week and it lets you play with those products when you’re excited about them! For the past few years, I have laid out an album formula ahead of time and started to put my album together. I’ve slipped things into the pockets, added larger pieces into my album, and even created some custom pieces ahead of time. This definitely helps cut down on the work that is needed to finish the album afterwards.
That said, as much as I love playing with the products early and having a plan, it really helps me to put the album away during the week and focus on collecting the words + photos. It’s really easy to get overwhelmed with a project of this size and breaking these pieces apart into separate steps really helps keep it manageable.
One of my favorite ways to approach this project is to create a scavenger hunt list of things I want to search for during the week. This is especially helpful if you are concerned about your photos being boring or all over the place. To do this, I look through my album plan and come up with some ideas for filling specific spaces in my formula. Having a scavenger hunt helps keep me on the lookout to take photos during the week and makes the documenting process fun! When creating scavenger hunt list items I have 3 different type of things I search for: (1) something that I look for every day; (2) something I look to capture once per the week; and (3) something that I look for 7 of, but they are necessarily on specific days.
Here are some “scavenger hunt” list items I am using this year or have used in the past.
Daily items:
The weather, either a screenshot of the app or a photo that depicts the weather My outfit My deskBreakfast, coffee, lunch, and/or dinner Something circular From where I stand (looking down at my feet) Specific items prompted by products in the kit (e.g. one year there were large words representing times of day and I did one for each day) A relationship (I looked for a photo of my daughter + I interacting each day) Screenshots of what I’m doing on my phone Daily news (I use the front page app) My planner Something I’m grateful for
A specific color of the day
Items to capture once:
A full family photo A photo of each family member A photo of the front of my house Currently items (reading, watching, listening, etc.) Morning routine/evening routine
Items to capture 7 of:
spaces in my home/life Flat lays of various items (see photos for examples)
Once I have an album formula + scavenger hunt in mind, I create a checklist of the items I want to collect every day and over the course of the week. For me, the best place to keep this checklist is out on my desk, but it might work better for you in your bag, on your phone, or on your computer. In addition to my scavenger hunt items, I might add other items I want to collect to my list. Pictured are my 2024 list (left) and my 2023 list (right).
Some additional items to collect:
A quote per day A word that summarizes the day
A phrase to stamp out large Ephemera
This brings me to my next tip, though, keep your plan realistic! It’s easy to get caught up in all the ideas of things you want to collect and make a list that’s unmanageable. Once you’ve made your list of all of the things you want to collect, you might want to consider narrowing it down a bit to make sure it’s something you can collect and use in an album.
I want to keep my project to one album per year which means, at most, 8 pages per day (and that’s tight). If you have a tendency to take too many photos, you might want to sketch out your album in advance and give yourself a realistic list of how many photos you can include per day. If you tend to not take enough photos, you might want to come up with a plan that allows you to include fewer photos and set up reminders for yourself so you don’t forget to capture the week.
While a scavenger hunt list is fun, you also want to leave some room to capture the details of life as it happens! I aim to have only a few scavenger hunt list items per day and the rest of the pockets will be filled with whatever I capture from the day. I also know that this is super manageable for me because I’ve done this project many times in the past. If you are concerned with falling off this project, maybe pick one scavenger hunt list item to seek out per day and fill in the rest with whatever you happen to capture.
Making yourself the star of your album is probably the most important piece of advice I have for this project. It’s easy to get caught up in expectations about capturing your family’s story but it rarely works out that everyone cooperates the way you’d like. You can’t follow each of your family members around paparazzi style and everyone comes to the table with different opinions, interest levels, and skill levels for capturing photos.
I find that this project is most successful when I focus on myself and this project as a week in MY life and view others in my life as supporting characters. I try to capture my daughter and significant other throughout the week and include them in my album, because they are important pieces of my life. This year my daughter lives away at college and I will definitely ask her to send me photos + details each day.
But, if they don’t cooperate, don’t want to be pictured that often, or they forget to take photos when they’re off doing their own thing, that’s okay. I would put the odds at my daughter sending me something to be about 50/50 on any given day. If she does, that’s great, and I’ll include it. If not, that’s okay too. This is my album and my story, and that’s totally worth documenting on its own. The rest is just extra!
When I first started this project, I journaled what happened each day in chronological order and then tried to pair it with photos in my albums. I found that these were super time consuming to put together and, honestly, are somewhat boring to read when I’m looking back. When I flip through those earlier albums I tend to gloss over the words and look at the photos.
Since then, I have evolved to use prompted writing for my main journaling each day. This helps me guide my storytelling and make it more interesting. I will probably follow this same format this year. Some of the prompts I’ve used in the past:
Around here Some days/most days Mondays are for… Real life right now means… Today I… I want to remember… Time stamps
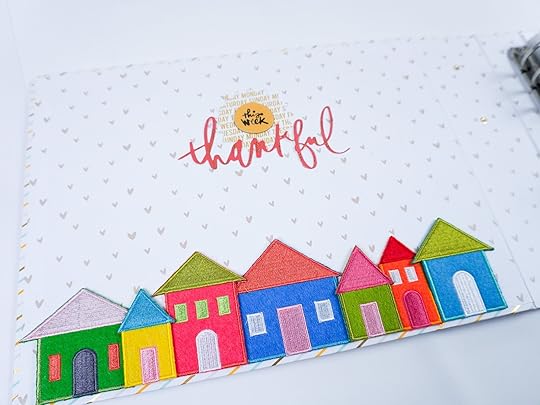
I am thankful for…
I also have added shorter prompts in the past few years to add some additional words throughout the album. For example, last year, I focused on capturing my relationship with my daughter because it was her last year at home before college (see top right photo for example). Each day I would write something about our interactions at that point in time, including both facts and feelings. I love having these to look back on! This year I’m focusing on capturing words + photos about my hobbies each day.
Once you have a plan for your words, I highly recommend taking the time to write them down during the documenting week. For me, I use a word document on my ipad/phone and add to it each evening. You could also use a physical journal, your planner, or a specific app designed for journaling like Day One.
One of the hardest pieces of this project, for me, is narrowing down my photos. I tend to take way too many photos and have many attempts at the same shot. A couple of years ago, I realized that I could make this project much more manageable by taking some time each evening to delete the duplicates/ones I dislike on my phone (or favorite the ones I do want to use) and then use an app to edit them. My favorite is A Color Story. Then I add them to specific folders for each day on my phone, and ultimately dragged to my computer, and this helps me when I’m ready to put my album together. It also gives me some photos to share of my day on instagram to connect with the community and keep up the momentum for the project.
The photo above shows my folder of edited photos for this project from Monday last year. Did every single one of these end up in my album? No. But, when it came time to put my album together I had fewer photos to choose from and they were already edited so all I had to do was crop to the size I wanted + print.
This is one I always need to remind myself of, because I’m such a perfectionist. But, it’s okay to fudge the details. If you forget to take a photo of something one day, that’s okay, you can use something from the following day, or week, or even month! The point is to capture your life at this point in time, and when you look back on “a week in 2024” it won’t really matter if your photos are a little off.
If you know going into this project you are likely to miss photos, don’t put pressure on yourself to capture things on specific days. Instead, focus on capturing details over the course of the week. In 2022, rather than focusing on capturing specific items on each day, I focused on capturing photos of specific places in my life + flat lays of specific items. I did not take these photos one per day, instead I just took 7 photos during the week (I believe most were taken on the Saturday) and then I added one to each day in my album.
It’s also okay to skip something. If you set out to capture a photo of your outfit everyday and you only get six of them, you can just put something else in that spot on the seventh day. Photos of six of your outfits over the course of a week will still be really great to look back on!
Finally, after the documenting week, I find it’s easiest to put everything down for a bit. Maybe finish editing up your photos and drafting your words, but then let it sit for a few days. Think about what you captured, relax after the documenting week (it’s a lot!), and then dive back in with fresh eyes a few days later.
I hope my tips help get you ready for this project. Above all else, though, keep it fun! We’re doing this because we enjoy the process… don’t forget that, so make sure you’re enjoying it. And, if you’re not, change it up.
I am sharing my set up and plan for this year over on youtube, you can find my video here.
You can find walk-throughs of some of my completed WITL albums here.
You can also find me over on instagram: @lindalovescreating
April 12, 2024
In Case You Missed It | April 12
Happy Friday, friends! Welcome to the latest
In Case You Missed It. Just a reminder that this is a quick post that will happen every Friday afternoon with all the updates and links that have happened throughout the week. So, let's get to it:
APRIL REVEAL
Earlier this week we revealed a new Story Kit™ theme: AROUND HERE! Documenting the basics of everyday life is a story lens I return to again and again. This month we are using one of Ali's favorite phrases "around here" to document what's happening in this season of our lives. This kit is great for Project Life documenting or any other kind of story where you are capturing life in the moment. In addition to our new Story Kit™ theme, we also have a brand new Stories By The Month™ kit, the next edition in our Alphas Are Awesome series, and a new Seasonal Paper Pack.
Head to the blog here for Ali’s post with all the details about this month’s release.
NEW STAMPS + RESTOCK COMING NEXT WEEK
The countdown starts now! We're excited to announce we're releasing all new stamps on Monday, April 15th at 12pm ET. Each of these stamps is designed to enhance your documenting journey. Expect new designs, along with a few favorites making their way back to the shop. To celebrate, ALL CLEAR STAMPS SHIP FREE WORLDWIDE starting at noon on Monday the 15th and running through April 23rd. No promo code will be required. Ali will be sharing a blog post on Monday with stamping examples and inspiration!
WEEK IN THE LIFE 2024 IS ALMOST HERE
Next week we will kick-off six days of inspiration, tips, and fun as we get closer to our 2024 Week In The Life™ community documenting week. Stay tuned for more information. In the meantime, shop our new collection here.
APRIL DIGITALS
The first Friday of every month we have a new digital release available in the shop. Play with scale, recolor objects, add journaling, print multiples…the sky is the limit when playing with digitals. Shop digitals here.
2024 PROJECTS + PRODUCTS SCHEDULE
As we continuing easing into 2024 we put together an overview of our schedule of projects + product releases for the upcoming year. We are sharing this as a way for you to plan, think about what you might want to participate in this year, and simply share some of the things we have coming up to help support + inspire storytelling. For the last few years we've followed a fairly similar cadence for our releases and our major projects will follow that release schedule again this year. Please note that, as you might imagine, this schedule is subject to change throughout the year based on a variety of variables. Find the post here.
As always, we’re so grateful to have you all as members of this community! Thanks for joining me today and have a great weekend!
April 10, 2024
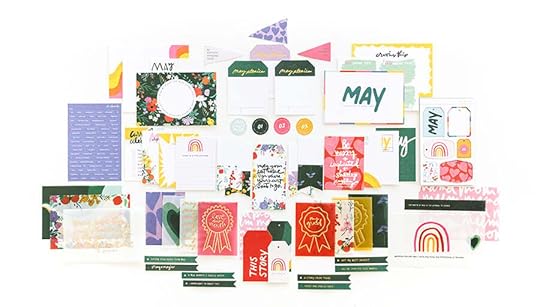
Around Here Story Kit + May 2024 Stories By The Month
Today's the 10th of the month and that means a new
Story Kit, Story Stamp, and Stories By The Month kit.
This month we are focusing on stories related to the theme of
Around Here.
Documenting the basics of everyday life is a story lens I return to again and again. This month we are using one of my favorite phrases "around here" to document what's happening in this season of our lives. This kit is great for Project Life documenting or any other kind of story where you are capturing life in the moment.
Initial story ideas for this theme include:
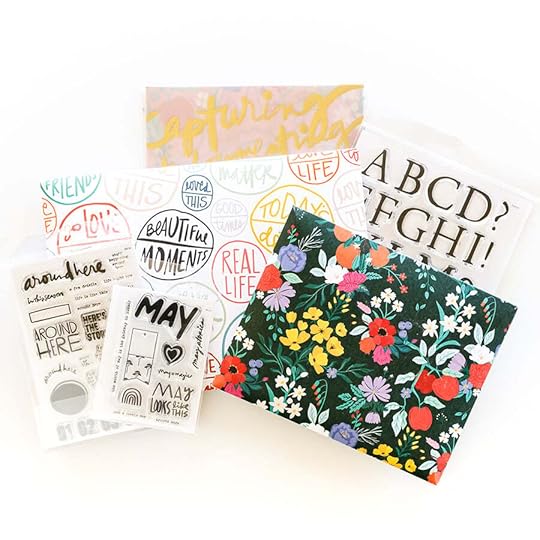
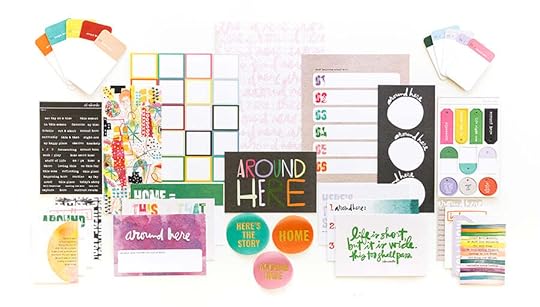
Make a list of things that are happening in your own "around here." Pick one thing from your "around here" list and tell more of the story (deeper rather than wider). Use an "-ing" word list to document what's happening in your life right now. STORY KIT™
The
Story Kit™ includes:
Here's a video overview of the
Story Kit™ and Add-On options this month:
STORY STAMP™
The
Stamp Set:
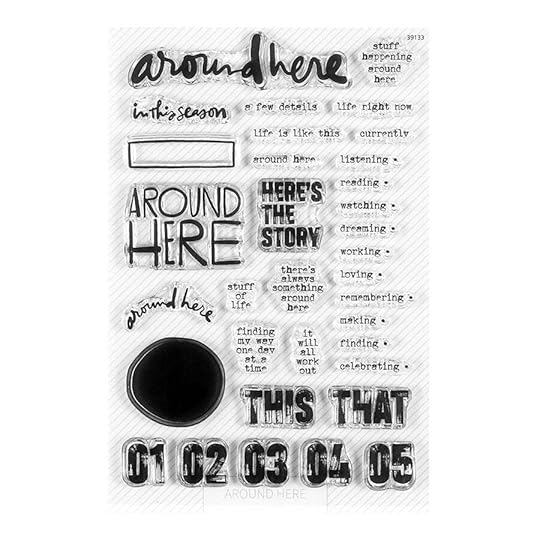
Here's a video overview of the Story Stamp:
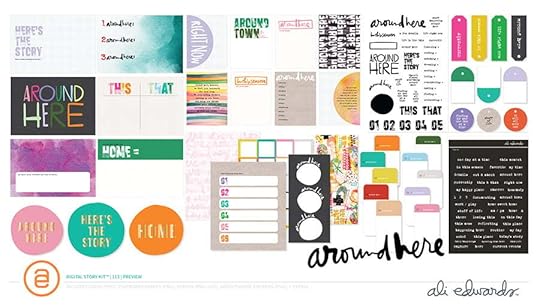
STORY CLASS // INCLUDES DIGITAL STORY KIT
Here's a look at what's included in the Digital Story Kit™:
Your digital kit and the classroom and any Add-Ons purchased will be available to you on the 12th once your card has been charged for the month.
This kit is also available to physical kit subscribers as an Add On each month.
Here are a few project samples from Ali:
Again, thanks so much for subscribing and/or considering our
Story Subscription program! If you have any questions about this program please let us know below in the comments.
We are changing things up with our Stories By The Month™ subscription for 2024 and
you can read all the details here.
Here is a full look at the kit this month:
And a video overview:
This subscription is a great option for those who are looking to tell more calendar/everyday life sorts of stories.
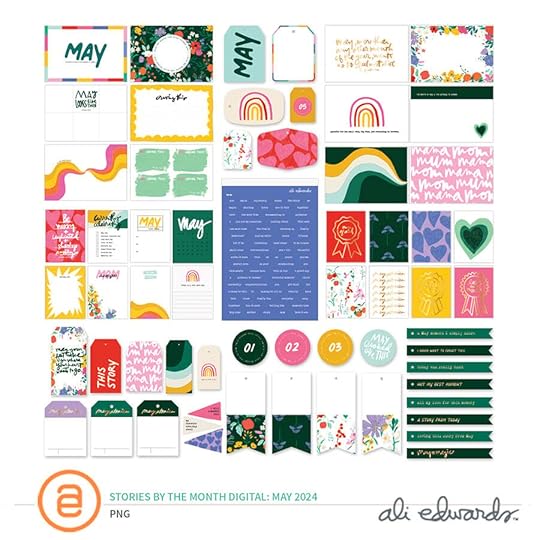
Our Digital Stories By The Month™ kit is now called Inspiration By The Month™. With this subscription you receive access to the Inspiration By The Month™ classroom and the digital kit.
This kit is also available to physical Stories By The Month™ kit subscribers as an Add On each month.
This 6x8 stamp set is available to subscribers to add to their box during the Add On period and
also offered in the shop for anyone else.
Here's a look at the alpha stamp in action:
Here's a still image: