
Week In The Life™ 2024 | Special Guest Denine Zielinski
Hi friends! It’s Denine here, and I am excited to share my plans for Week In The Life 2024 with you today. This year, I am working in the 6x8 album. First, because I am in a season of life right now where I am not sure if I could fill a 10x8 album. Second, because it is just so darn adorable! I am totally in love with the font + the black and white color scheme, too.
Let me begin by saying that WITL was not a certainty for me this year. I’ve been feeling a bit unsure about my storytelling lately, and I questioned my ability to pull off such a huge project. This will be my fourth year participating, and my life just looks very different than it did for the first three years. That being said, I eventually came to my senses and knew that WITL was the right thing to do for me.
In the video below, you can see + hear me talk about this in more detail. I also walk you through my formula for each day as well as a few additional products that I have put to the side for possible use.
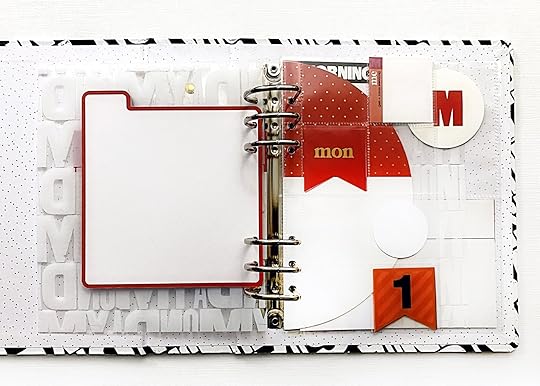
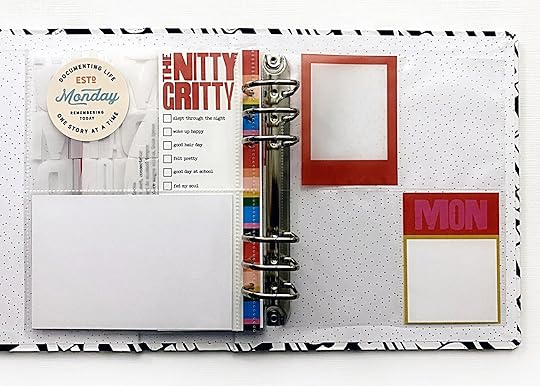
Here’s a look at my Monday pages set up in my album.
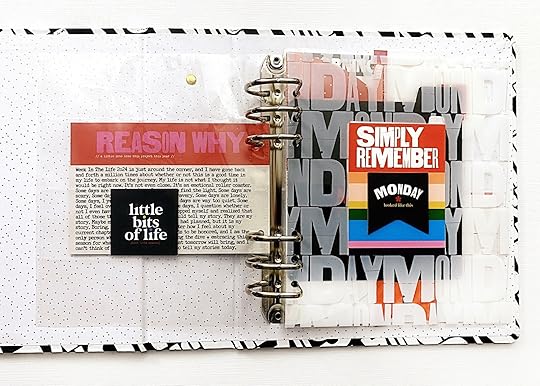
Inspired by Ali, I used the Stories of this Week and the Reason Why cards back-to-back as the intro to my album.
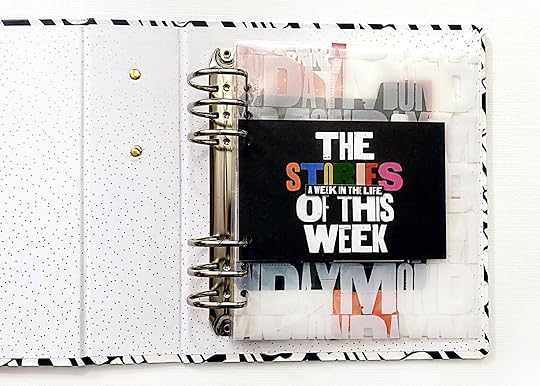
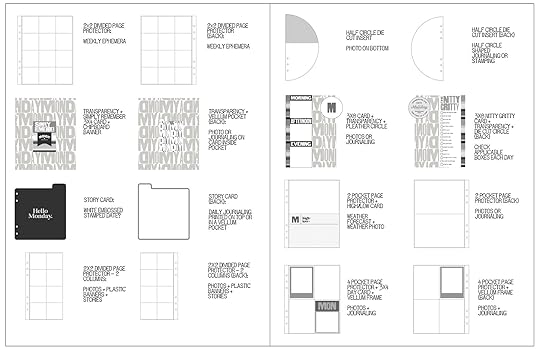
Next is a 2x2 divided page protector where I will collect bits of ephemera from the week. This is different from last year where I had a place for ephemera within each day.
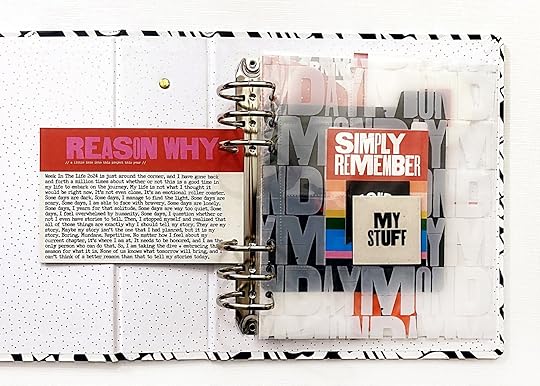
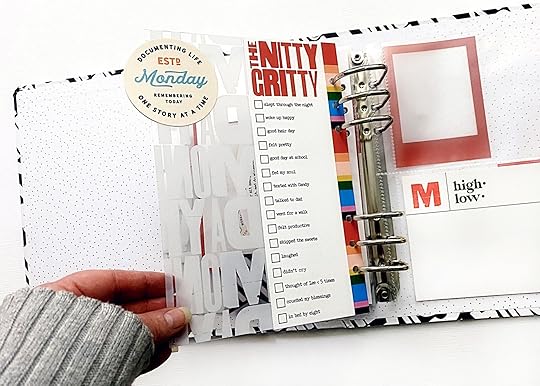
Each day will begin with the Transparency Divider. On top of each of those, I added the Simply Remember 3x4 card (I used the digital kit to print out six more of those). On top of each 3x4 card, I placed the day of the week chipboard banner.
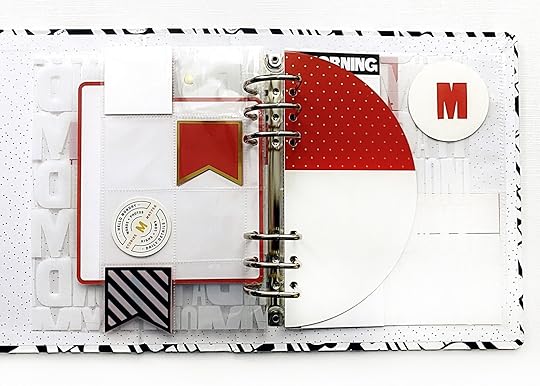
On the backside of the transparency, I also added the Vellum Pocket card. Right after that is the Cardstock Story card. I’m thinking that I may try to stamp + emboss the date on the front of each of these. We’ll see.
The back of the Story Card will most likely contain my journaling for the day. By this, I mean the journaling that I dictate into my phone each day. I will send it to my computer, clean it up, and print it out. Depending on how long it is (I can be wordy), I may add it directly to this card or create a pocket to hold the printed version. I like the pocket idea because it will allow me to do some stamping of some sort on the pocket itself.
Next up is a 2x2 divided page protector (2 columns) where I will mix some of the plastic banners with the 2x2 Selfie Cards from the Mini Kit and add photos/journaling. If I end up with more pictures than I anticipate, I can always swap this out for a full size 2x2 divided page protector.
After that will be the Half Circle Die Cut insert. I’m thinking a photo on the bottom half of the front + journaling on the backside. Of course, the backside might be a fun place for some stamping, as well.
Inspired by Ali, I used the remainder of the transparencies with the 3x8 cards from the Main Kit. I wanted this page to be shorter than 7 inches, so I adhered the transparency so that the entire page only measures 5.75 inches across. As a tab of sorts, I added one of the Pleather Circles to the edge.
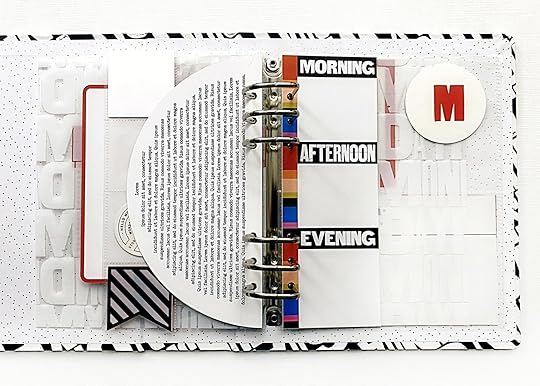
I used the digital version of this card to create my own “checklist” card to go back-to-back with the original 3x8 card. I titled those cards “The Nitty Gritty” created a sort of goal list that I will be able to check off each day. I will either do that with a pen or perhaps a tiny stamp. On the backside of the Pleather Circle, I added a circle from one of the papers in the Daily Quarterly Scrapbook Kit (enlarged to 2.5 inches).
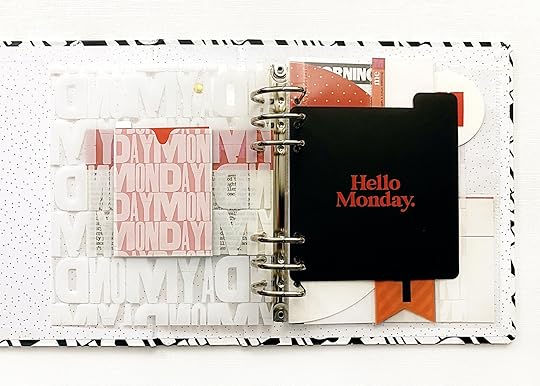
After that is a 3-pocket page protector where I will use the High/Low journal card to document the weather. I will most likely pair that with an outdoor photo showing the weather.
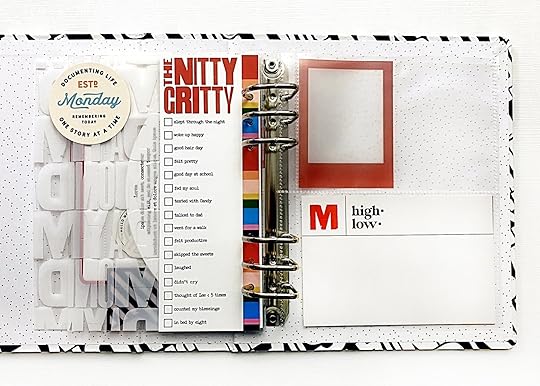
To end each day, I have a 4-pocket page protector with the 3x4 card from the Main Kit and the Vellum Die Cut Frame from the Mini Kit. Of course, if I need more space for photos or journaling, I can always add more page protectors to accommodate that.
It’s funny how our brains work. It wasn’t until typing this post that I realized my page order is pretty much identical to Ali’s. That was totally subconscious. If you would have asked me what order Ali had her pages in prior to me placing my pages in the album, I would not have been able to tell you to save my life. Crazy, right? My brain knew a great design plan without me even realizing it!
Before I finish our little journey here today, I want to share a process video for how I created my Nitty Gritty card to go back-to-back with the 3x8 card from the Main Kit. I am totally stoked about this little checklist that I created for myself. You can create a checklist of your own with any goals or tasks for each day. You could also document your mood or the weather or even photos that you are planning to take each day for this project!
As always, I am by no means a pro in PSE, but I love to dabble and play. The video below will show you how I modified the digital version of the 3x8 card to make it my own.
Sketched out, here is a quick look at my plan for each day. You can download a PDF of this plan here if you would like.
Thank you so much for joining me today on my little Week In The Life journey. I’m really excited for the community documenting week beginning on April 22. I’ve never done any planning for this project in the past, and I am feeling pretty good about diving into the week.
If you have any questions, please feel free to comment below. I love hearing from you guys! You can also find me on Instagram @denine2 and YouTube @Denine2.
Happy storytelling, my friends!


