
Ali Edwards's Blog, page 27
April 28, 2024
Week In The Life 2024 | Ali's Saturday
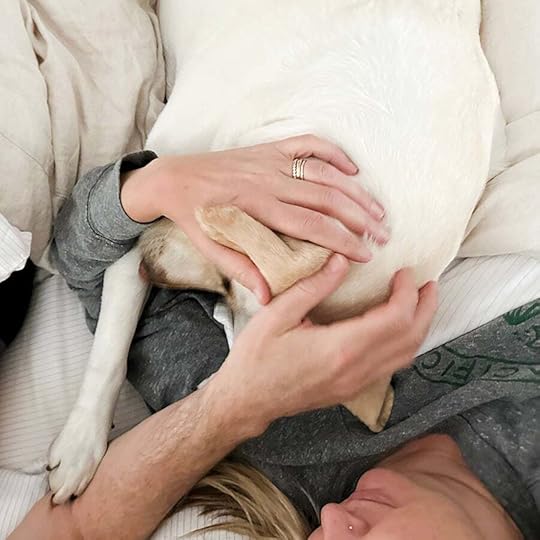
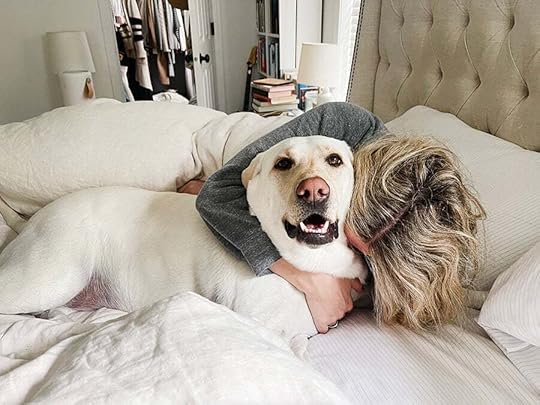
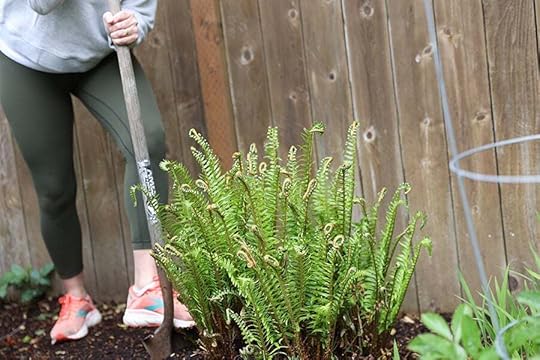
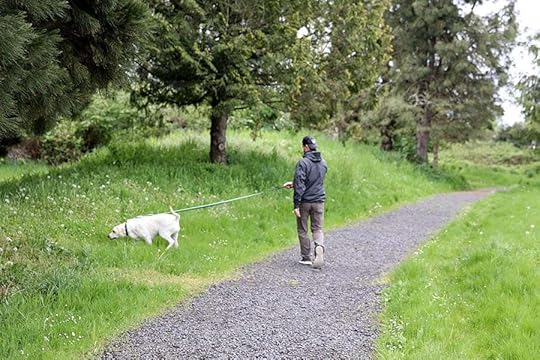
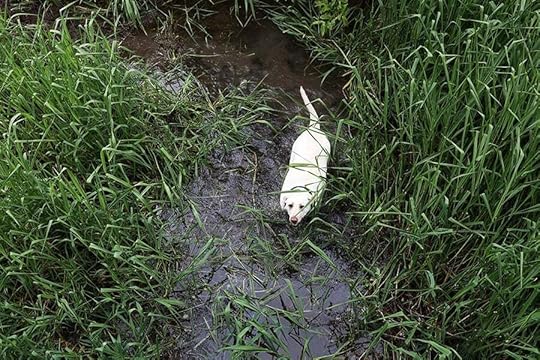
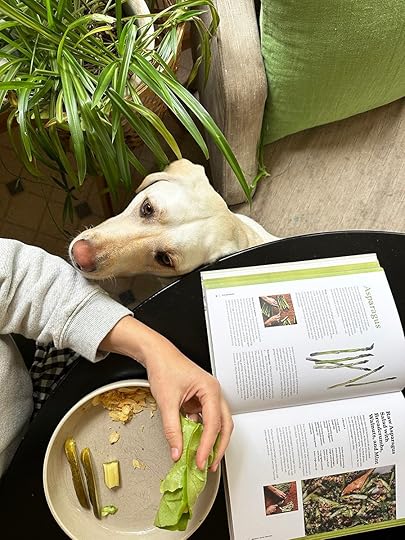
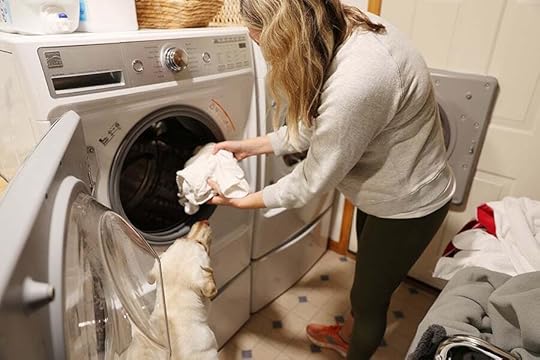
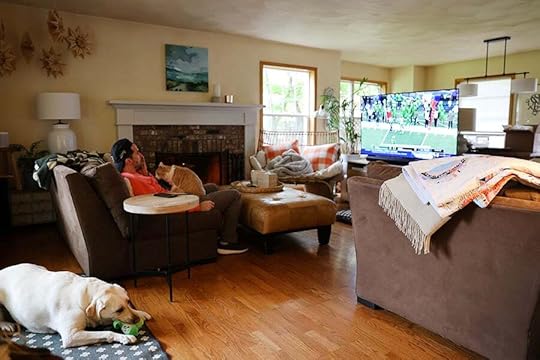
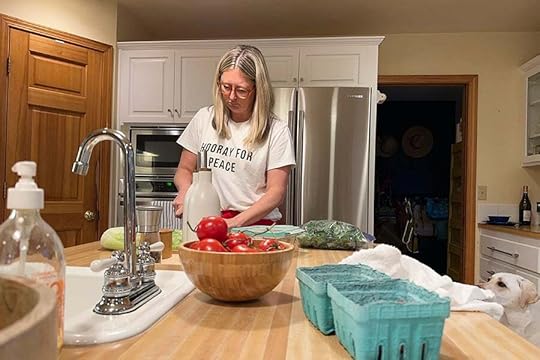
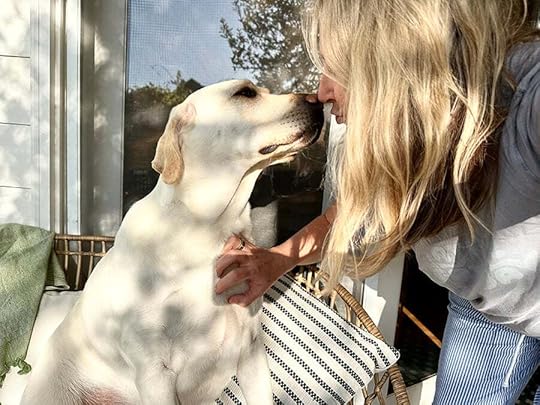
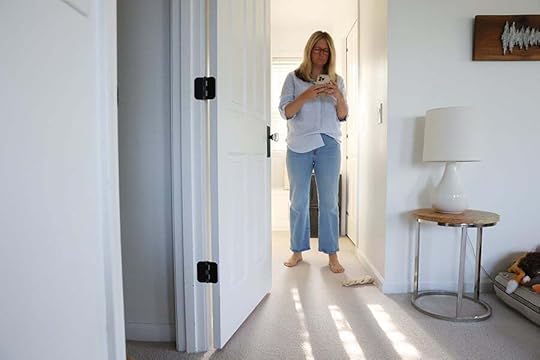
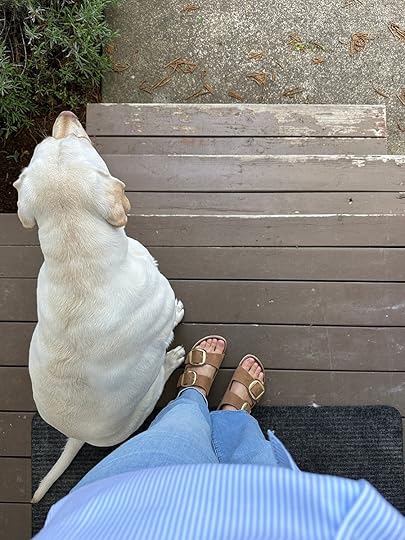
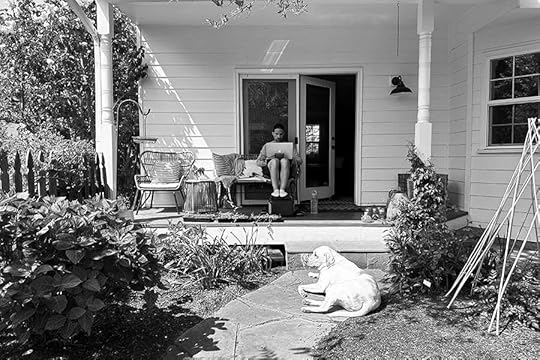
Here's a look at my calm, easy, late-to-wake-up, pet snuggling, rainy, dog-walking, plant-digging, book-reading, green loving, laundry switching Saturday.


April 27, 2024
Week In The Life 2024 | Ali's Friday

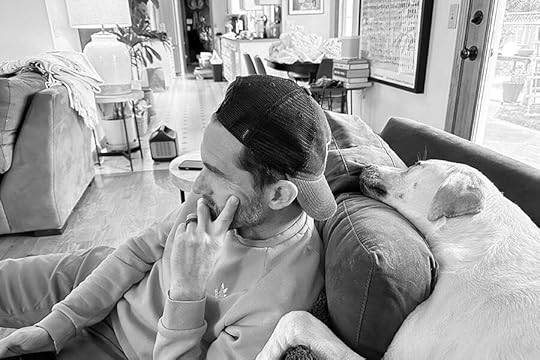
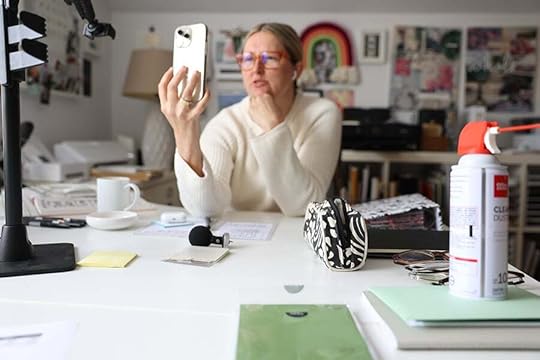
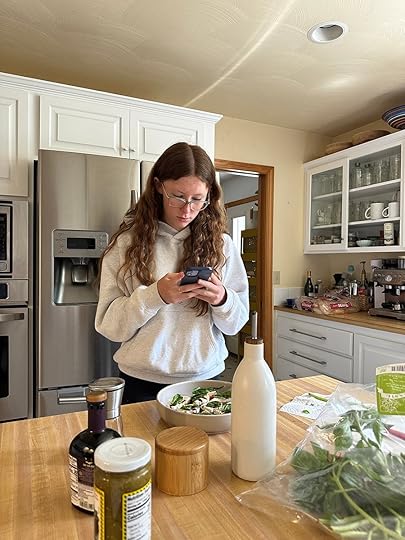
Friday started when I woke up and immediately ran through the list of all the things on my mental list for today. Anyone else do that?
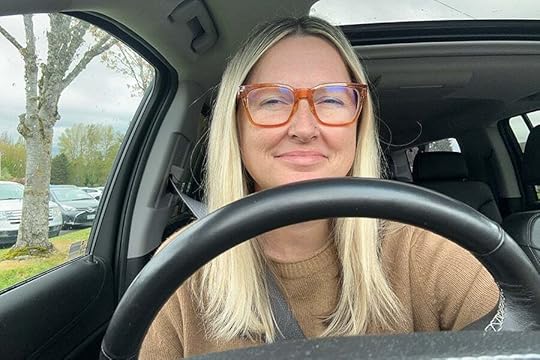
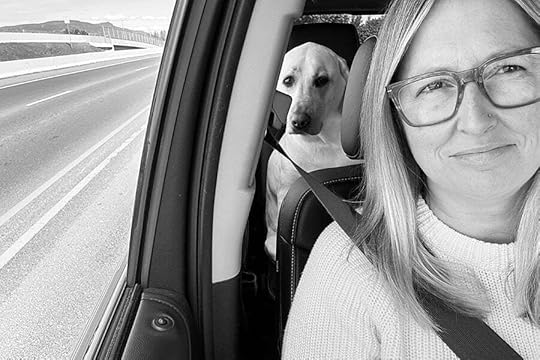
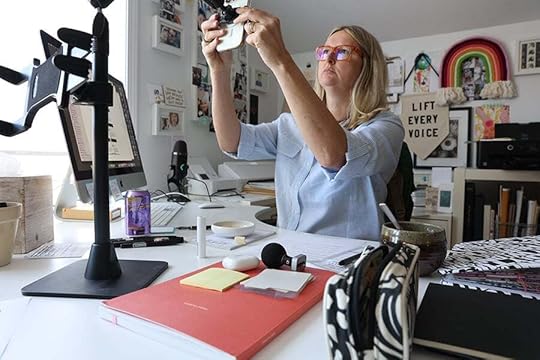
I also had a bunch of eyes on me.
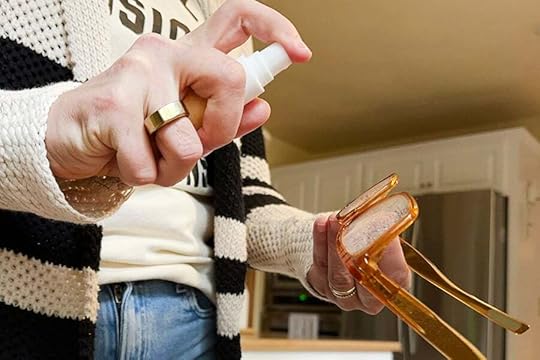
Keeping my glasses clean is an ongoing battle.
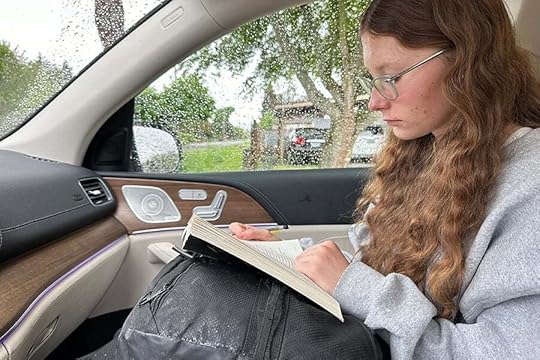
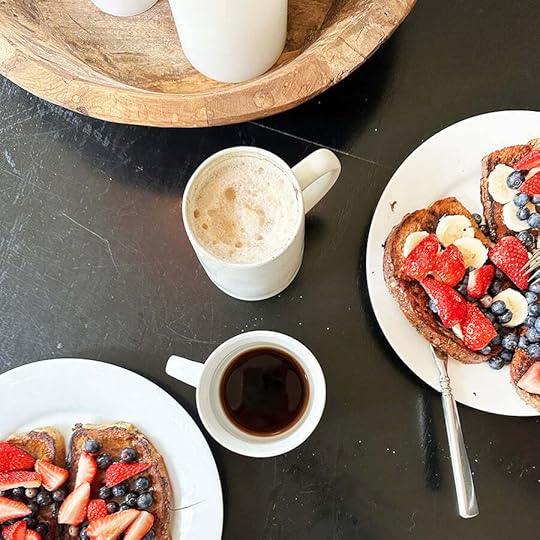
Finishing up a bit of reading on the way to bagels.
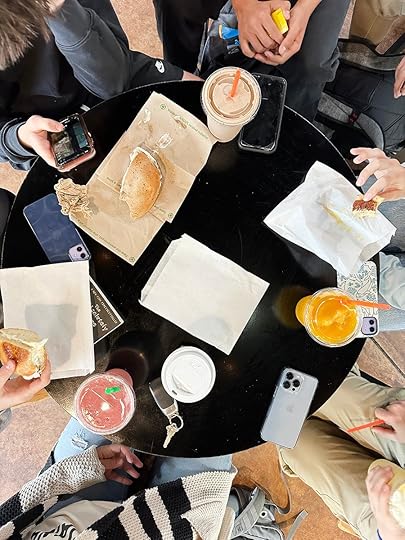
First up was taking Anna and her friend Libby to their Friday morning bagel gathering. They started doing this at the beginning of the year and it’s been such a fun tradition. And they let me hang out and listen to their conversations about sports and school and the weekend. It makes me so happy to know her friends.
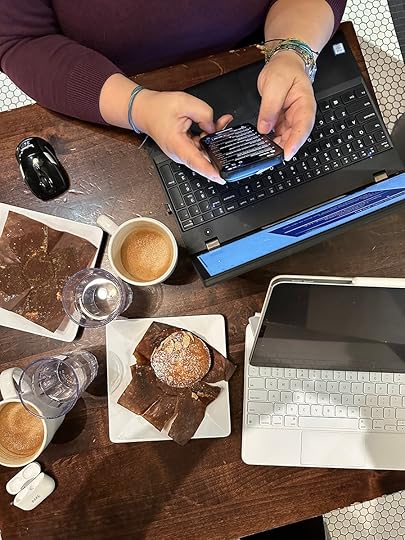
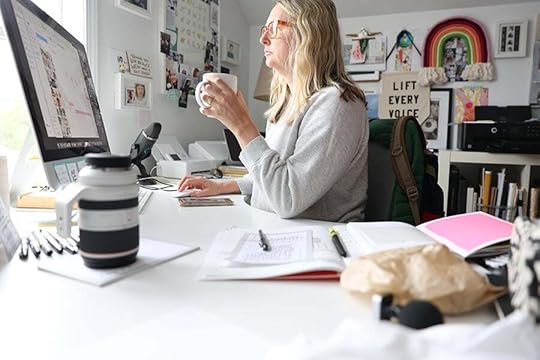
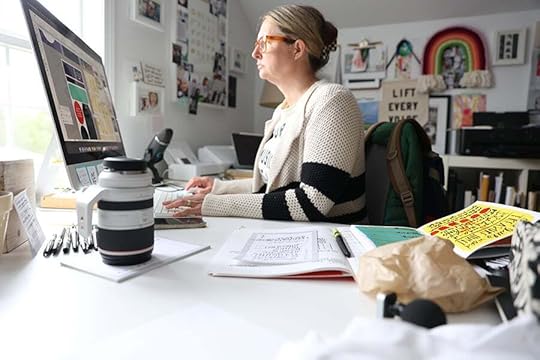
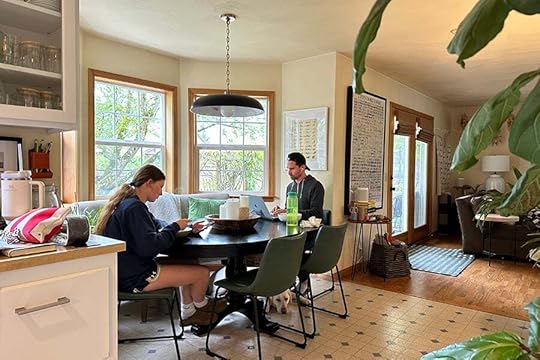
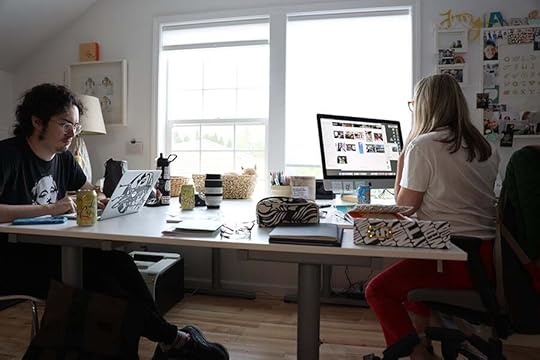
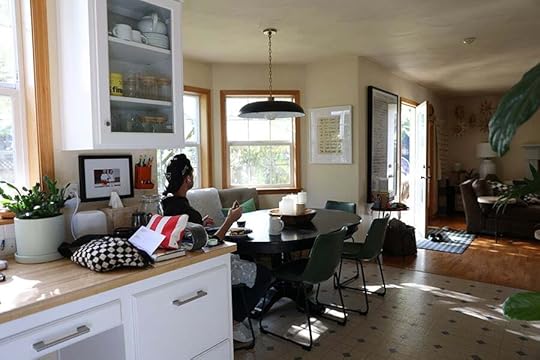
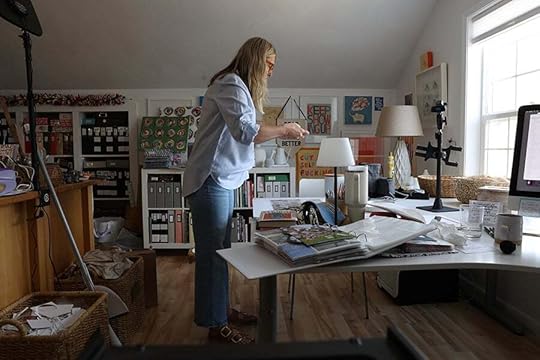
Next up I got to meet my friend Sarah at a local coffee shop for our co-working Friday. A couple months ago we were with Katie and the three of us decided it might be fun and healthy for us as work-at-home people to meet up on Friday mornings and sit together and do our own work. We’ve done it a couple times now and it’s such a great way to get me out of the house. Today Katie had a sick kid so it was just me and Sarah.
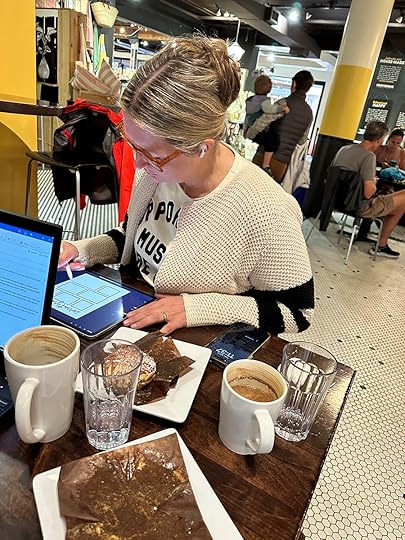
We chat for a bit and then we get down to work.
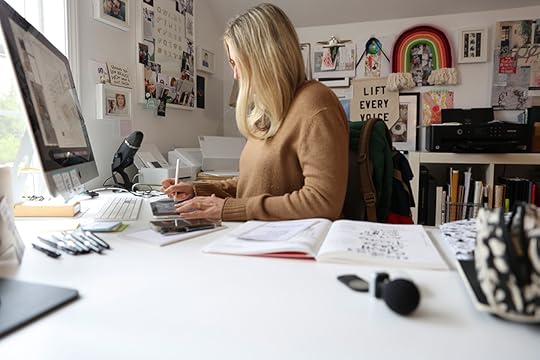
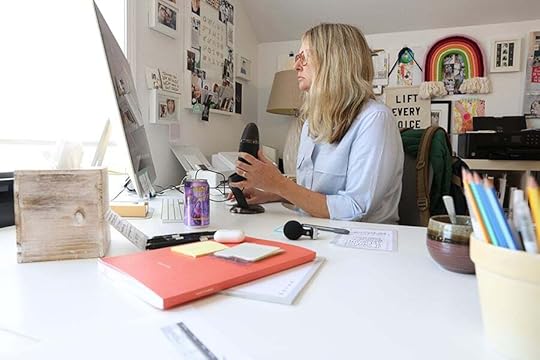
I worked on my newest Substack writing. I like having a designated time for working on that kind of writing (or working on the Just Write prompts). It’s nice to have a specific time set up where I’m not distracted by all the good stuff in my office. I also did some word art/drawing for our Story Play collection next year. I listened to the new Taylor Swift.
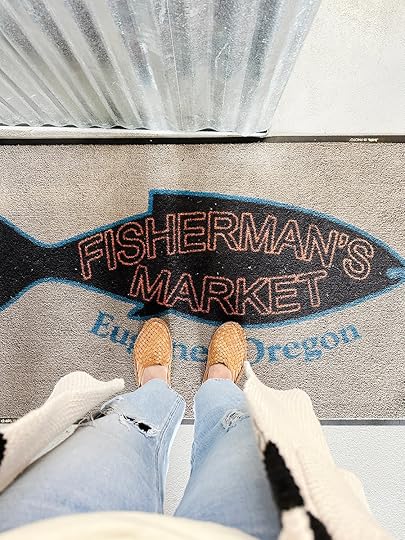
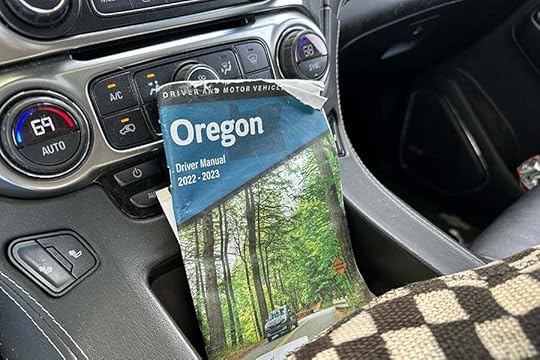
After Sarah and I finished up working I ran a couple errands including picking up some crab for our weekend and getting the shorter post placed in my nose piercing.

I also stopped at the grocery store for a few things to go with our crab: sourdough bread (this is a low gluten one that works for me), potato chips, butter lettuce, grapes and a salad dressing.
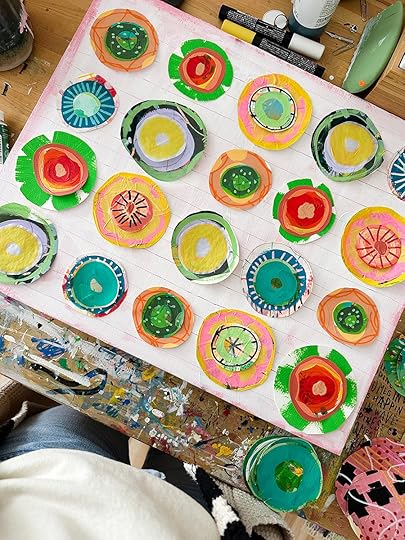
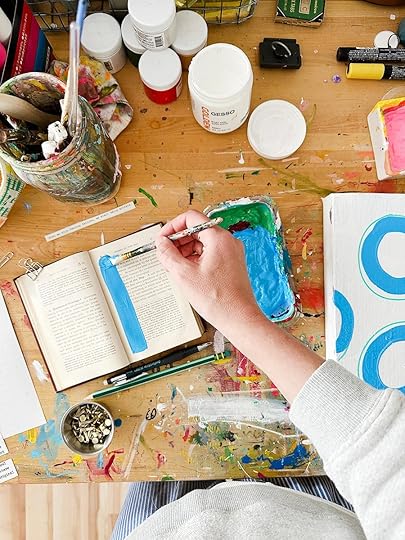
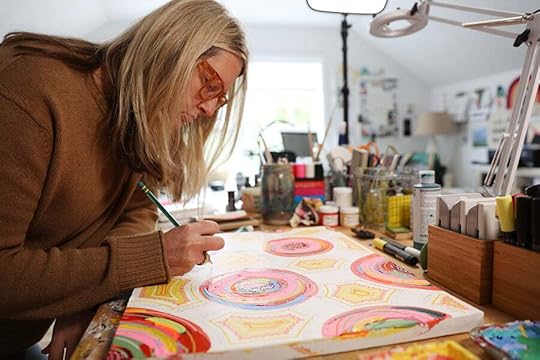
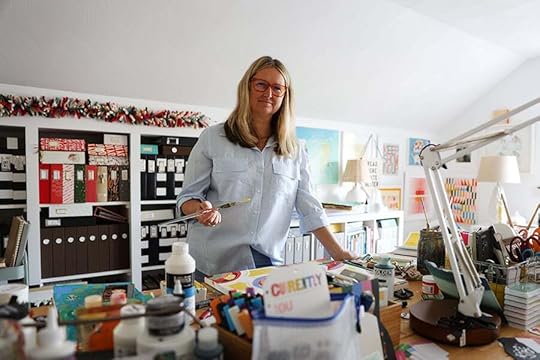
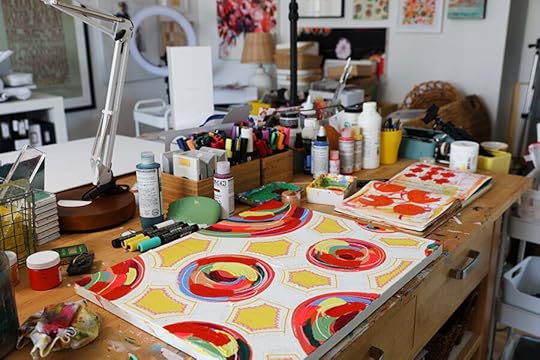
Working on a new canvas that includes all the circles I cut out of painted pages from earlier this year on top of an older Rifle Paper calendar. I'm really loving that something I worked on months ago can become part of something I create today.
Continued working on Story Play kit designs and listened to Led Zeppelin.
Friday is a kid transition day around here so everyone is headed to their other homes after school. Aaron and I look forward to these Friday’s and we usually start our hang out adventures around 4pm. Earlier this week we talked about heading out somewhere in our camper van but decided to just stick close to home (lots of rain in the forecast and lots of good TV we are excited about). It’s also the first weekend in a while where there isn’t a volleyball tournament for either of the girls. I'm ready for some hang around the house time.
I'm going to wrap up my work day early today to hang out with Aaron (my photos will be added into my project). I'll be back tomorrow morning with images from my Saturday.
April 26, 2024
In Case You Missed It | April 26

Happy Friday, friends! Welcome to the latest
In Case You Missed It. Just a reminder that this is a quick post that will happen every Friday afternoon with all the updates and links that have happened throughout the week. So, let's get to it:
WEEK IN THE LIFE 2024 IS HERE
Monday we kicked-off our community documenting week for 2024 Week In The Life™. All this week Ali's been sharing her words + photos over on the blog. We've also had several live chats over on Instagram. Find them here. Ali will continue to share her daily posts, through the end of the documenting week and then will likely take a break for a few days before beginning her album. As always, she will be sharing her process on the blog. In the meantime, you can still shop our new collection here.
PIECES OF JOY IS COMING
Our documenting week for the Pieces of Joy collection is coming May 6th. We'll be sharing more details as we get closer.
APRIL REVEAL
Earlier this month we revealed a new Story Kit™ theme: AROUND HERE! Documenting the basics of everyday life is a story lens I return to again and again. This month we are using one of Ali's favorite phrases "around here" to document what's happening in this season of our lives. This kit is great for Project Life documenting or any other kind of story where you are capturing life in the moment. In addition to our new Story Kit™ theme, we also have a brand new Stories By The Month™ kit, the next edition in our Alphas Are Awesome series, and a new Seasonal Paper Pack.
Head to the blog
here for Ali’s post with all the details about this month’s release.
APRIL DIGITALS
The first Friday of every month we have a new digital release available in the shop. Play with scale, recolor objects, add journaling, print multiples…the sky is the limit when playing with digitals. Shop digitals here.
2024 PROJECTS + PRODUCTS SCHEDULE
As we continuing easing into 2024 we put together an overview of our schedule of projects + product releases for the upcoming year. We are sharing this as a way for you to plan, think about what you might want to participate in this year, and simply share some of the things we have coming up to help support + inspire storytelling. For the last few years we've followed a fairly similar cadence for our releases and our major projects will follow that release schedule again this year. Please note that, as you might imagine, this schedule is subject to change throughout the year based on a variety of variables. Find the post here.
As always, we’re so grateful to have you all as members of this community! Thanks for joining me today and have a great weekend!
Week In The Life 2024 | Ali's Thursday
Thursday was a pretty quiet day overall which is representative of lots of days in this particular season of life.
Today I'm giving thanks for this very ordinary day working from home and getting Anna where she needed to go. I don't long for anything different.
We woke up to rain which is just fine with me for a couple days. It means I can wait a bit longer to turn on the sprinklers and all the things that are growing will be super happy to have a good long drink.

I got a note from someone on IG yesterday reaching out to make sure everything was okay because my eyes looked sad and something about the shower photo from Wednesday made her feel like maybe I was in a challenging season. I appreciated her concern and believe she was coming from a place of kindness.
Honestly, I love the season I am in and am actually really, really happy.
I choose not to wear much, if any, makeup and I think sometimes that might come across a certain way especially as I get older. Some days I wear mascara but probably most days I don't. I've never really loved how it feels on my face.
The girls, on the other hand, are super into makeup and skin care and all the things. I love that for them.
But first coffee.

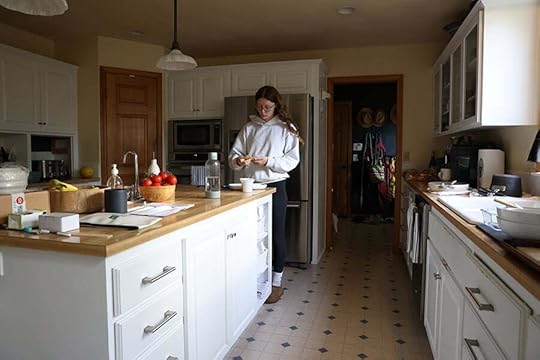
Both girls were in the kitchen at the same time this morning and both were wearing top knots and hoodies.
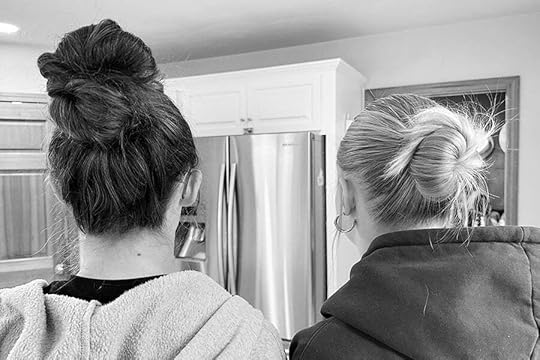
Audrey got a really nice compliment about her bun skills at volleyball practice yesterday so she was excited to wear her hair like that to school today.
I was talking to a friend on the phone yesterday comparing last year and this year. One of the big differences is that the girls are both in high school now. They have always gone to separate schools but have generally had more time to spend together outside of school. This year they are both busy with sports and friends and there's a lot of coming and going - not always at the same time. Weekends have been full of volleyball tournaments (not in the same location) and then they spend every other week with their other parents. I'm excited for summer when they will have a chance to hang out together a bit more.
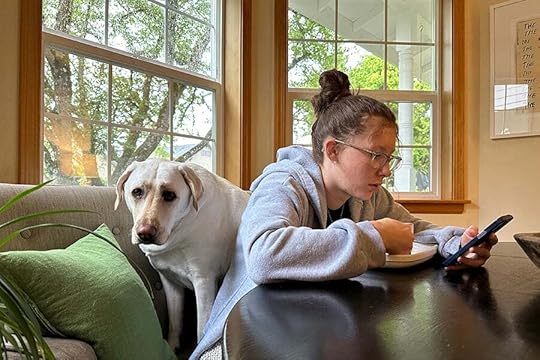
Betty is always trying to crowd someone out of this seat.
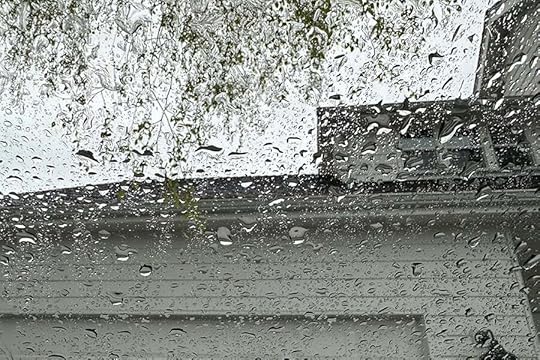
Evidence of rain.
On the way to school today Anna and I were talking about her math test coming up in her first period class. She was running down some of the things the test was going to cover and I had zero recollection of any of it even though it was probably something I learned in high school too.
We had a good laugh about that.
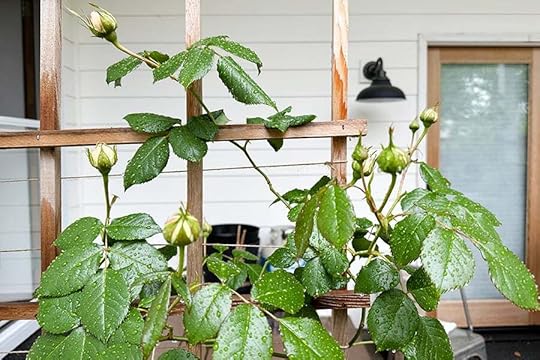
After dropping her off I did a quick walk around the yard. These rose buds are so big!
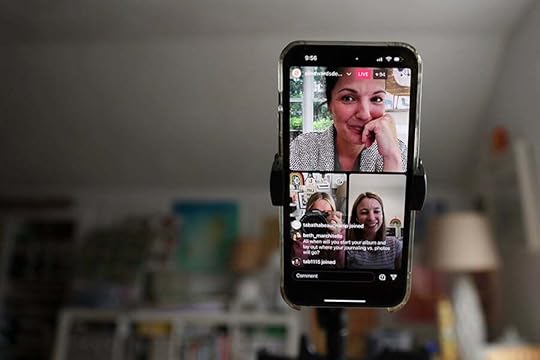
Next up was an Instagram live with Lisa and Linda talking about this project. You can find the conversation here. Lots of good sharing about where we are at and how things are going and what's next for each of us in this project.
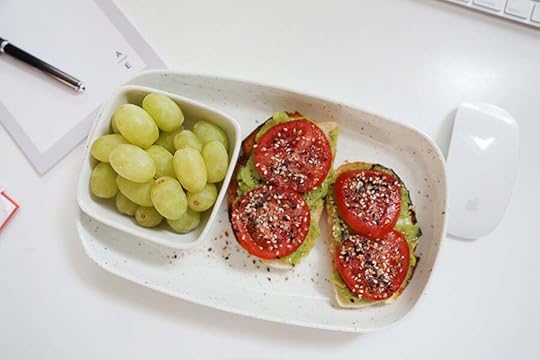
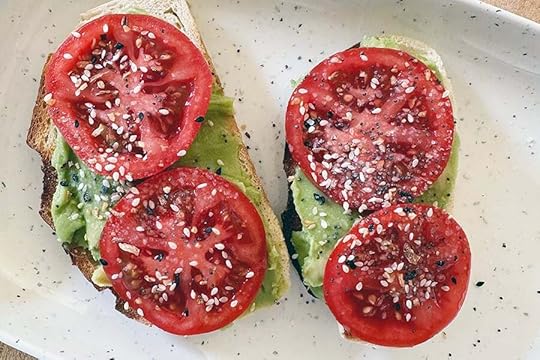
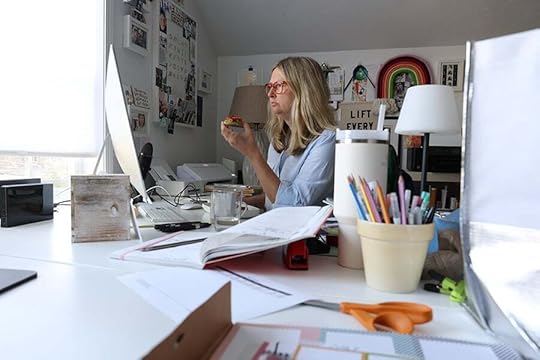
After the live I made myself some breakfast - back to the avocado and tomato toast. This time I ate it with some grapes at my desk.
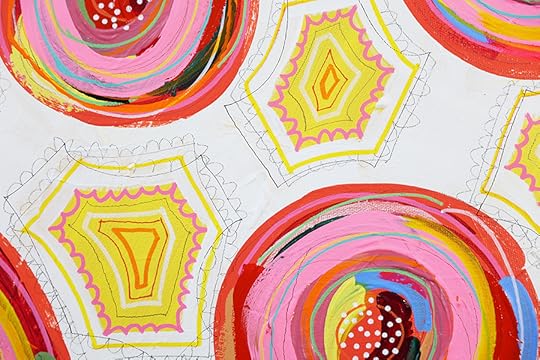
Decided to call this one done (or at least done for now) and start a new canvas.
Today I worked on designs for next year's Story Play collection. I'm using an iPad for some hand drawn words.
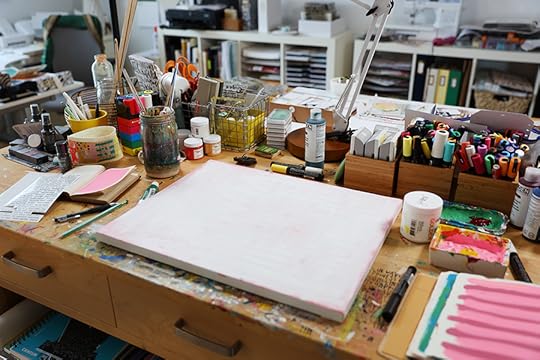
The new canvas.
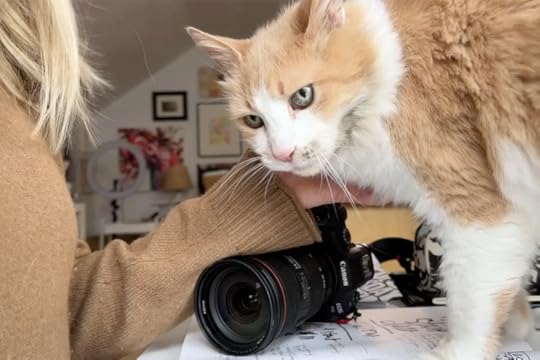
Sammy can get very bossy about pets.
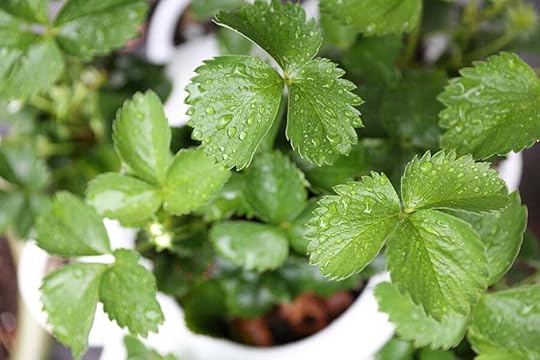
I went outside to capture a few things happening in the yard on this rainy Thursday. Raindrops on strawberry leaves.
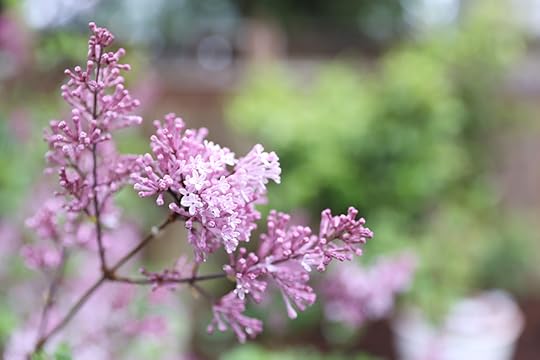
Lilacs blooming.
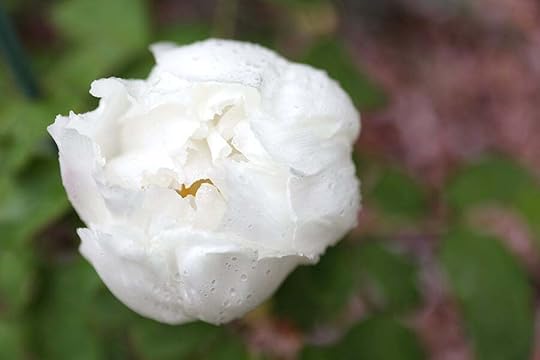
The Japanese tree peony showing off.
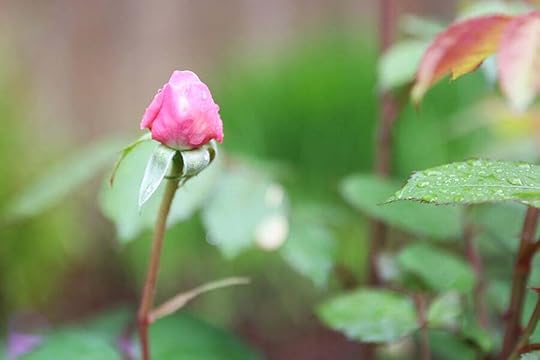
Another David Austin rose getting ready to open.
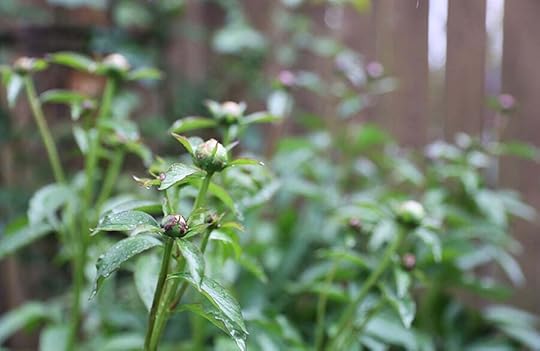
Big fat peony buds that will most likely bloom sometime next month.
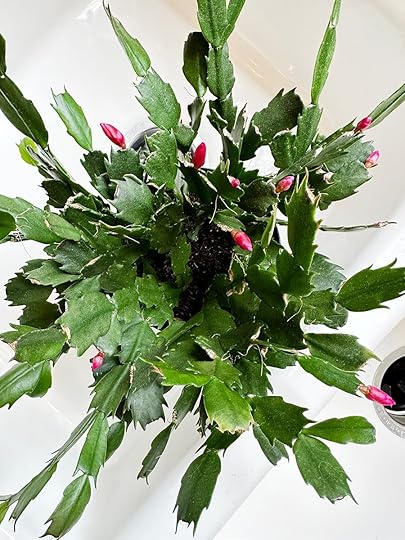
A Christmas Cactus that decided now was a good time to bloom.
Who's to judge? Now seems as good a time as any.
I also love that my neighbor gave me this cactus a number of years ago and it's still happy.
Headed back over to pick Anna up from school and chatted with a friend on the phone along the way.
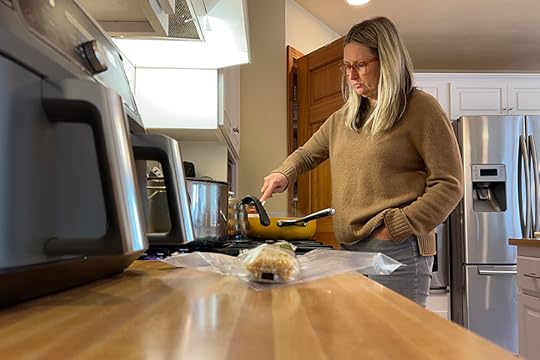
Anna had a short turn around time before needing to go back to school for a lacrosse game tonight. I made her some spaghetti.
Aaron was having his late lunch while Anna was having her early dinner.
I went back to my desk to work on this post before heading out to Anna's lacrosse game.

She scored her first goal today which was super fun. I love her team and her coaches. They have been super flexible with her club volleyball schedule which has made it so she goes to practice and games when she can and she's really enjoyed being able to play.
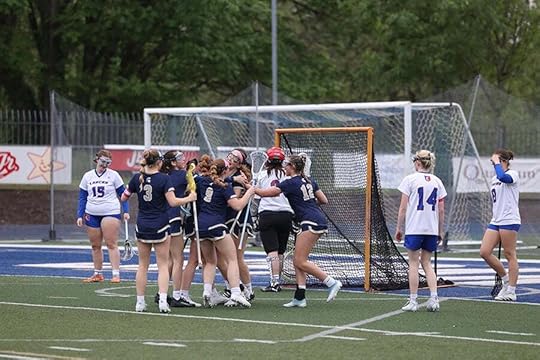
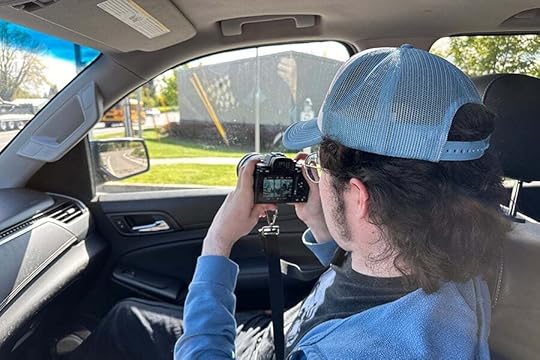
I also had fun letting some of Anna's friends test out my big camera. I love when kids have an interest in photography - they took some great photos! One of her guy friends took the above photos (way to go Jayden).
I wrapped up my evening here at my desk editing the photos taken at the lacrosse game so Anna could share with her friends. Technology is amazing.
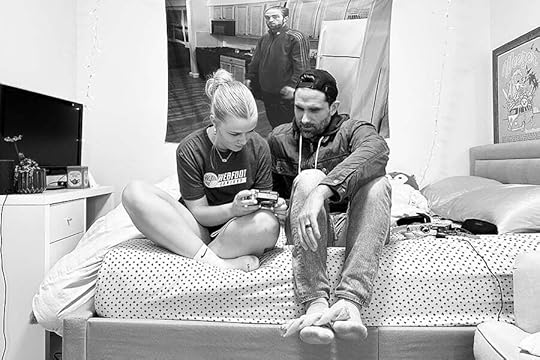
Before heading to bed I snapped this one of Audrey + Aaron setting Audrey up with a point + shoot camera. I love these people so much.
Thank you for being here today.
April 25, 2024
Week In The Life 2024 | Ali's Wednesday
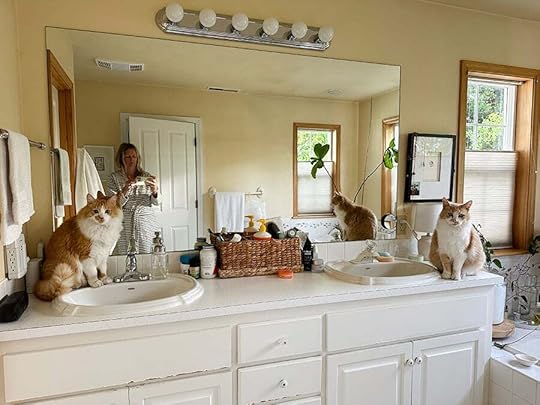
Walking into the bathroom first thing and finding both cats on the counter is definitely worth a photo. Ernie (the one on the left) is an only-drink-from-running-water cat. Actually he really only drinks from faucets. We tried one of those cat fountains and he wasn't into that either. Sam (the one on the right - he's the one who is always in his basket in my office) has recently decided that he wants to drink only very fresh water also but he prefers it in a small dish.
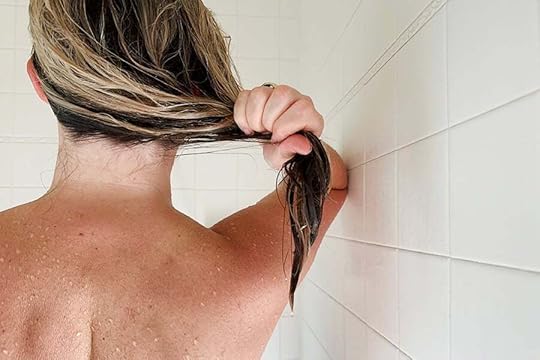
I took a shower first thing today and brought my phone in with me to listen to a podcast. I decided to try a new shower angle (I've played around with a few different shots in the past) and really liked how this one turned out.
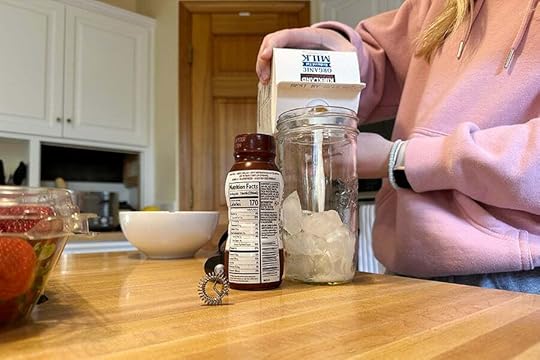
Audrey making her morning matcha latte on her way out the door to school.
I made a lunch for Anna (most of the time the kids are responsible for this task for themselves) because she has high school spring volleyball practice after school followed by lacrosse practice and won't get home until around 8pm. It's a long day but she really has fun.
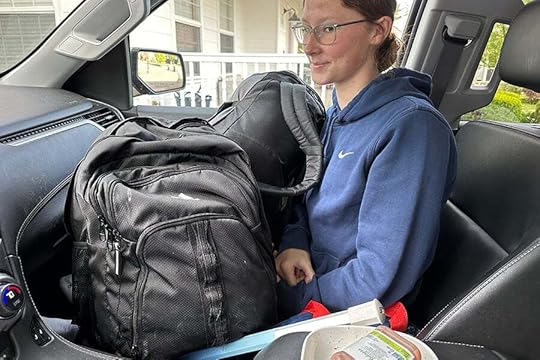
Both sports have their own backpack, plus her school backpack, and her lacrosse stick. It's also a lot. She asked if I'd come back and drop off the lacrosse back pack after school because she was running a little late and wasn't going to have time to put it in her sports locker at school.
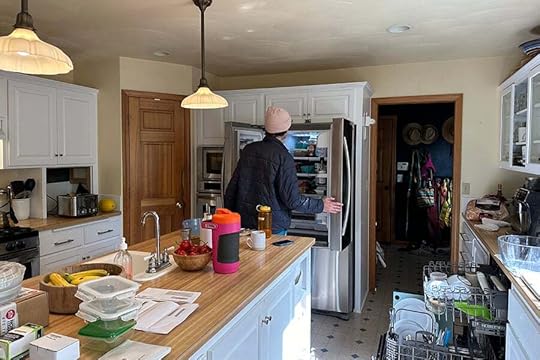
I hustled back home for a 9am meeting and found Elliott getting breakfast for himself before heading out for school.
Some days we have team meetings and today it was first thing. Katie runs the meeting and we talked about an upcoming class I'm working on for this summer (a "use your stash" class) and Pieces Of Joy (community week coming the week of May 6th) among other house-keeping items.
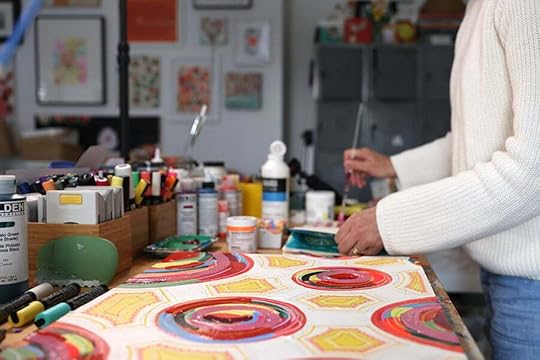
More paint! More paint! More paint!
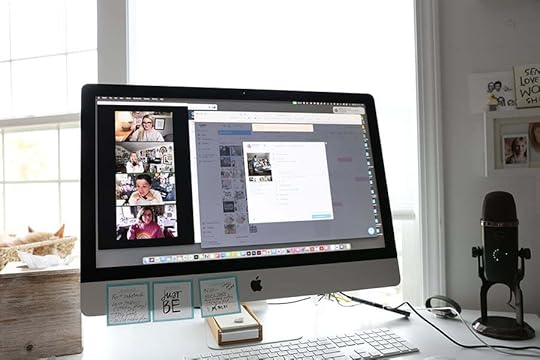
Some days I have video calls with friends who don't live here to connect and catch up.
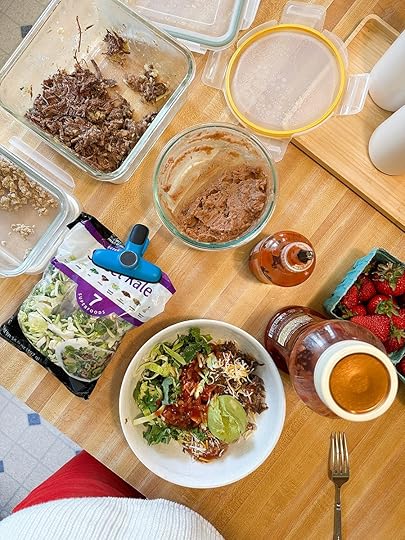
Leftovers are highly valued around here.
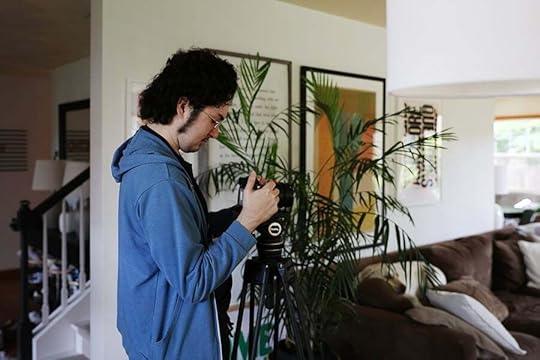
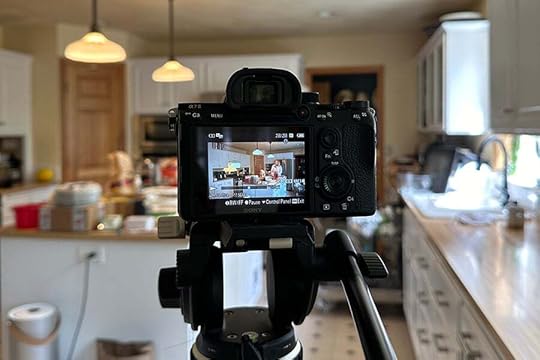
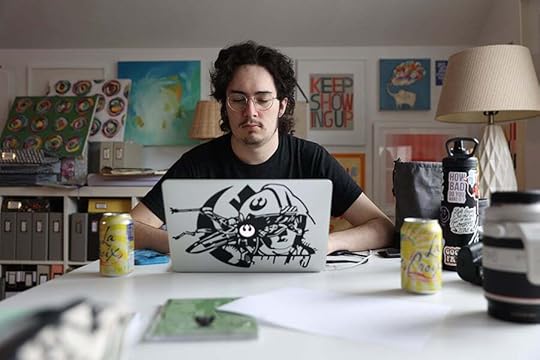
Yesterday Simon texted that he was having a not-so-great day so I invited him to come over today for dinner, or whenever he wanted. He came over around lunch time and showed me all the gear he's rented from his community college film program. Simon's tried a few different paths since graduating from high school and has landed on film studies (which if you've been around here for very long you know that makes a ton of sense). Simon has always, always loved movies.
He has really been loving and growing in this program. He's having the best time learning how to take photos and shoot video and work with Photoshop and Lightroom and other programs.
Can you guys believe that his path would end up intersecting mine in so many areas?
I see you. You see me.
This program has really let him lean into his own imagination and creativity. There are fewer rights and wrongs and more room for doing things different because one's own creative voice seems to be valued.
I loved that he ended up over here during Week In The Life.
Currently he's participating in an independent living program that teaches young adults with autism how to live on their own. He'll be moving up to the next level of independence later this summer and he's excited.
He also got a job this summer with our local minor league baseball team as a camera person for their broadcast. He went to a training last week and he was giddy when telling me all about it.
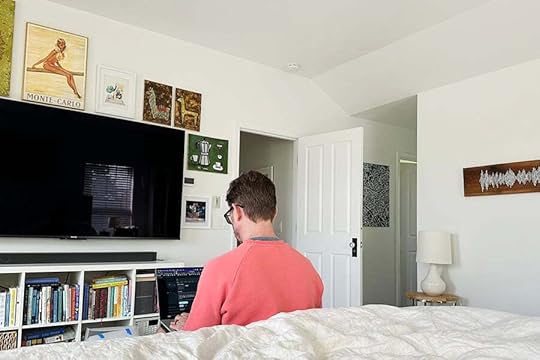
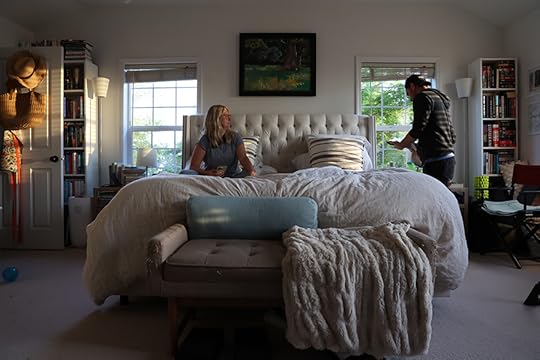
Some days Aaron chooses to work from our bedroom. He recently got glasses and he looks so good in them.
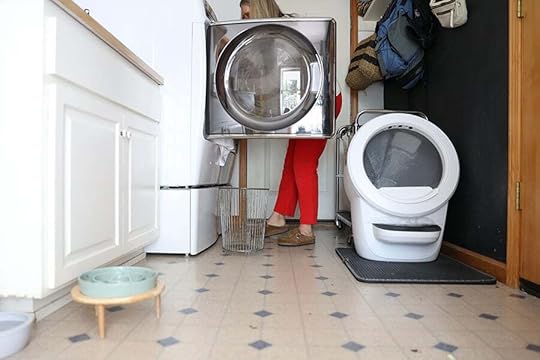
Doing a load of towels (both kitchen and bathroom towels). Let's see if I remember to move them into the dryer before I go to bed. That giant white thing is a Litter Robot and it was worth every penny.
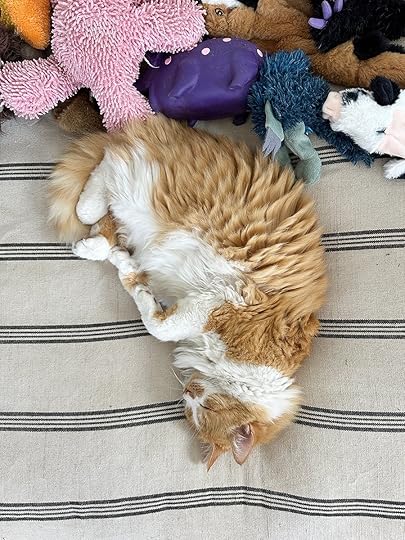
Most days Ernie likes to sleep on Betty's bed in our room. He blends right in with Betty's pile of toys.

Most days there are many, many pairs of shoes here. Sometimes no one knows who they belong to.
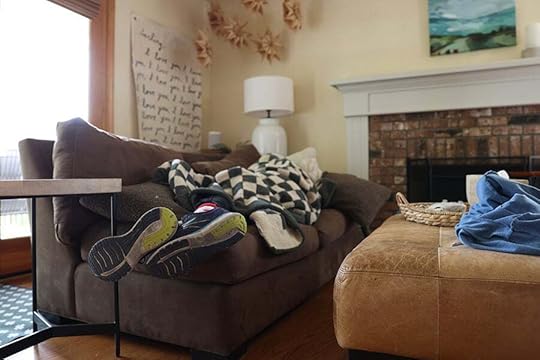
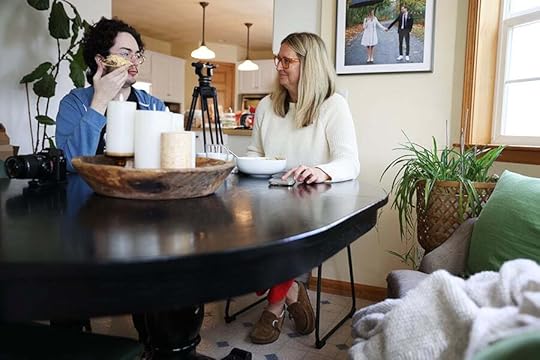
Simon and I ate leftovers for lunch and then he took a nap on the couch with his feet hanging off the end.
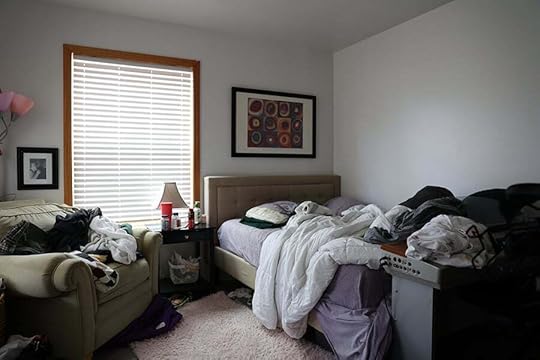
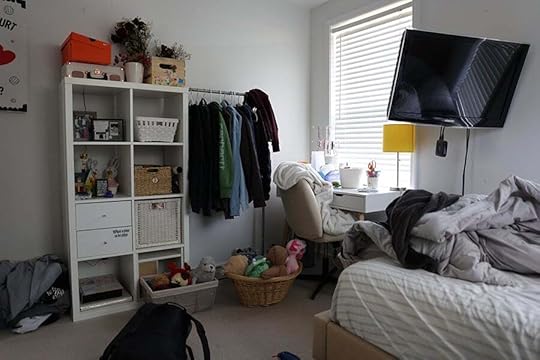
Elliott's room for the collection of room photos this year.
Headed over to Anna's school to drop off her lacrosse backpack and stick after practice. She also asked me to bring her another set of contacts.
One of my favorite things most days is watching Betty's ears flap in the wind as we drive down the road.
After dropping Anna's stuff off I came home and asked Simon if he wanted to go to the a local plant nursery. I suggested he could bring his camera and play around with some shots.

He had a couple of lego guys in his pockets (his leading characters) and set up some shots of a particular guy sitting next to his ice cream sandwich.
I have a Substack newsletter in progress to talk more about Simon's recent creative photography adventures. My Substack is currently free and a place separate from this for me to share writing. It's just getting started and is called "Echoes + Evidence." You can check it out + subscribe here. The most recent post is about getting my nose pierced.
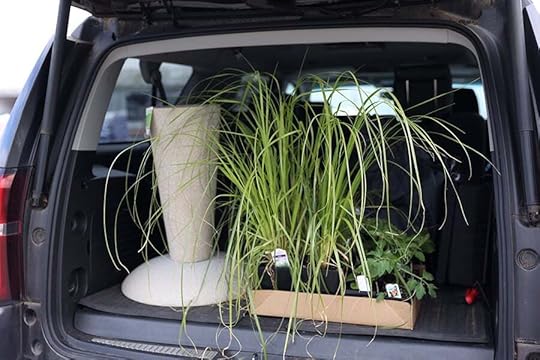
I had fun looking at all the plants and bringing a few (or more than a few) home along with a new birdbath. My previous one cracked during an ice storm this past winter.
After our adventures at Johnson Brothers we came home and Simon worked on a homework assignment and I did a few more things on my list.
Sometime soon I'm going to do a compilation of this photo of Simon over the years. I love that he still wants to come over and work on homework or just hang out. I love that he feels like it's a safe place to come to when the world feels hard.
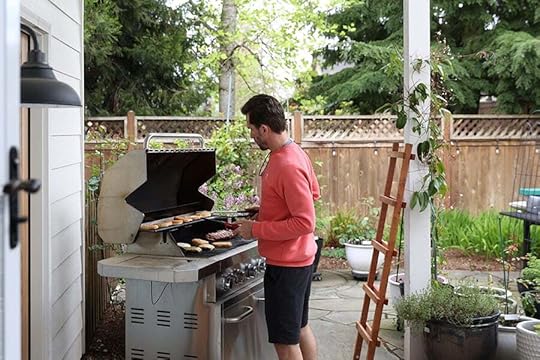
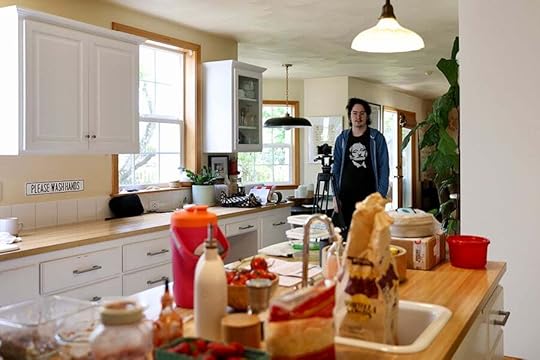
Aaron made burgers for Elliott and his friend and Simon.
Gotta use up those tomatoes remember?

Anna texted that she forgot her cleats for lacrosse and could I bring them? Remember all those backpacks she had in the morning? The cleats didn't make it in. I feel so thankful that her school is really close and it's not a big deal to just run things over there (and Betty gets to go for a ride so that's always a win).
PS: Don't forget to take screenshots of text messages from this week!
When I got home from dropping off Anna's cleats Simon and I watched a bit of the Tiger documentary on Disney+ (while he ate the burger). He took off not too long after because he'd gotten a text message from a friend inviting him to laser tag + pizza with her church group. He said that one text message made up for his bummer day yesterday.
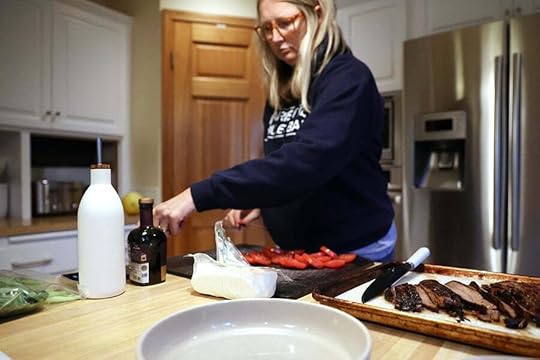
I cooked a late dinner for me and Anna after I picked her up from lacrosse practice. I used a pork loin that Aaron had cooked for me on the BBQ earlier to make pork noodles with rice noodles, pork, celery, green onion, kale, chicken broth, and soy sauce. It was super simple + really good.
And then I came upstairs to finish up this post.
Today was a good day.
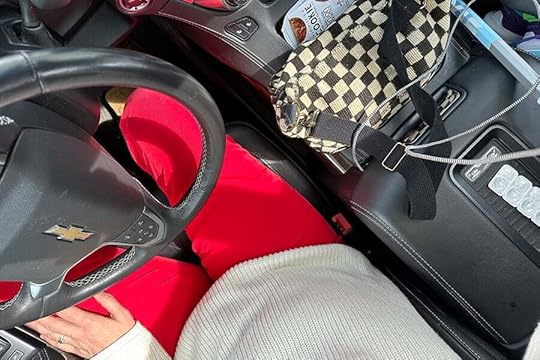
I got to see Simon. I got to do work I love. I got to buy some new plants. I got to support Anna with drives and meals. I got to watch Betty's ears flapping in the wind with her head out the backseat window. I got to walk into rooms of my house and run into Aaron who still makes my heart skip a beat (man that is super cheesy but I write the truth). I got to wear bright red pants. I got to meet with my team who help me get to do the things I want to do. I got to take photos that are evidence of my existence. I got to put together a bunch of words to go with those photos. I got to catch up with a friend on the phone. I got to paint on canvas and in an art journal. I got to watch Simon doing something that he seems to be truly enjoying that's mentally and emotionally and creativity stimulating. I got to eat pork noodles. I got to listen to Stevie Nicks.
April 24, 2024
Week In The Life 2024 | Ali's Tuesday
Welcome to Tuesday for Week In The Life 2024.
One of the questions I got yesterday after sharing my day was whether I was using any "lenses" this year. In some past years I've used a lens each day (such as "around here" or "gratitude") to help focus my journaling. I'm not doing that this year but as I was thinking about it I recognized that I'm actually using one simple lens this year: in this season.
I've been using the word "season" a lot recently and I love using it as a way to describe different chapters of my life. It also helps me understand at a deeper level that things simply come and go.
Here's a look at my Tuesday:
Aaron and Audrey were already out of the house by the time I was up today. Betty was up at 6:30am but I think she just went downstairs and got in bed with Elliott. She waited patiently outside our door for her breakfast.
Anna making her breakfast and coffee. Today she had a PSAT and got to leave school once that was done. In the car on the way to school we talked about how this is a good chance to practice the test and to just do your best but not put all your worth on the outcome of a standardized test.
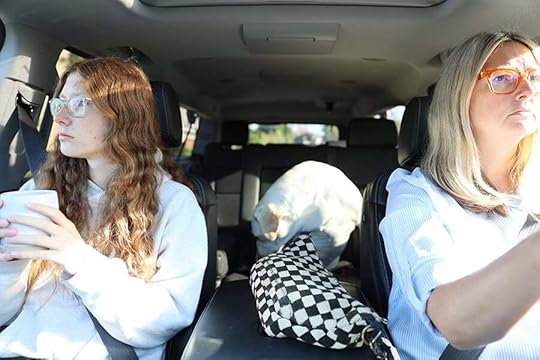
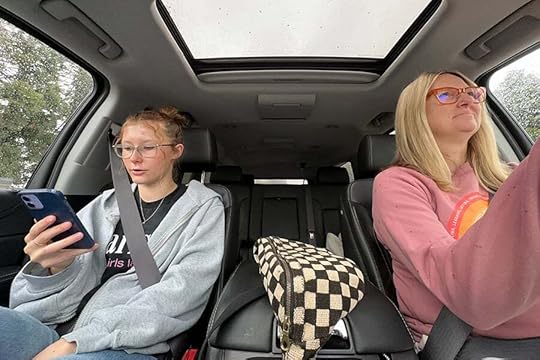
Our morning drive takes about 5-7 minutes to get her to school. Betty loves to come along for the ride. We both look super serious in this photo - we were easing in to the day. Today I'll do this drive four times: school drop off, school pick-up, lacrosse drop off, lacrosse pick up.
Next year when I do this project it's likely that all our kids will be drivers.
I have so many photos of driving kids to school over the years. This is a shot I've repeated year after year and one that I love looking back on in my projects.
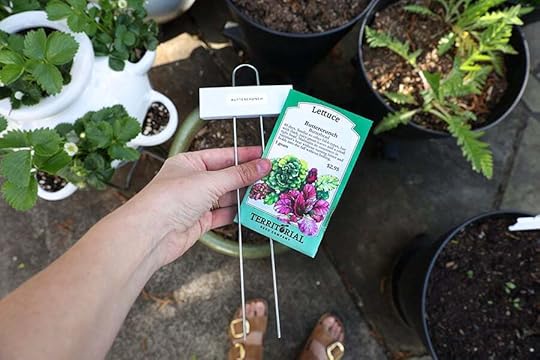
Today's outdoor morning task was to plant some buttercruch lettuce in one of my empty pots. It's a tiny little task that I will be enjoying throughout the summer.
Aaron eating breakfast and listening to his sports and/or pop culture podcasts.
Adding some paint to my current canvas. I'm loving that I'm taking photos of my painting in progress each day this week.
Breakfast toast. We don't always buy tomatoes all year long - we tend to save it for the summer months when they are more local. On the last Costco trip Aaron bought some to have on burgers (weather warming up also means more burgers) and I'm trying to remember to use them whenever possible. They were really good added onto my avocado toast.
Sometimes I eat breakfast at my desk and sometimes I eat at the table and sometimes I don't eat breakfast.
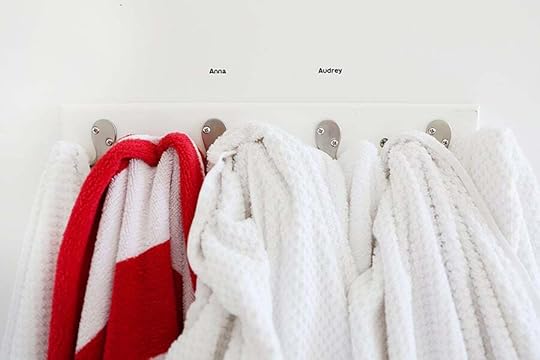
After I'd sat at my desk working on my current Project Life spread I got up and went to the kids bathroom and bedrooms to take some photos. I took a photo similar to this a few years back when each kid had their own towel cover. I like how this one shows the passage of time simply by the labels.
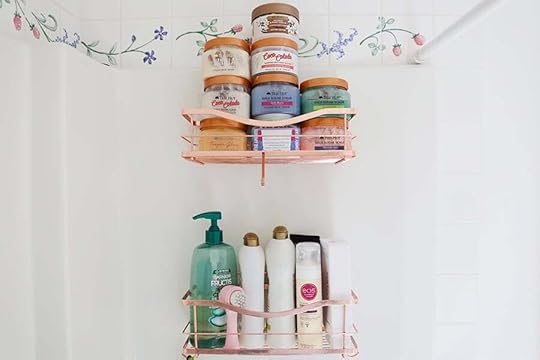
I shared a photo similar to this (a close up part of the top section) a few months ago on Instagram. I knew I wanted to take another one to add into my project this year. Two teen girls means a wide variety of product (way more than I use) and scents and scrubs and make up.
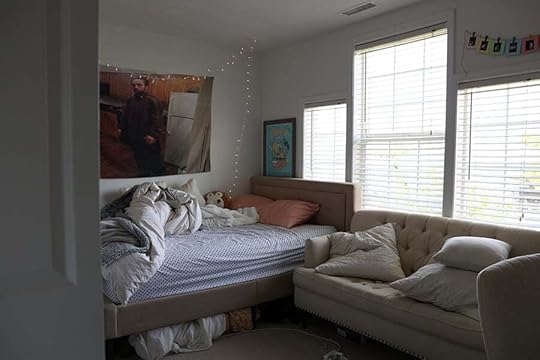
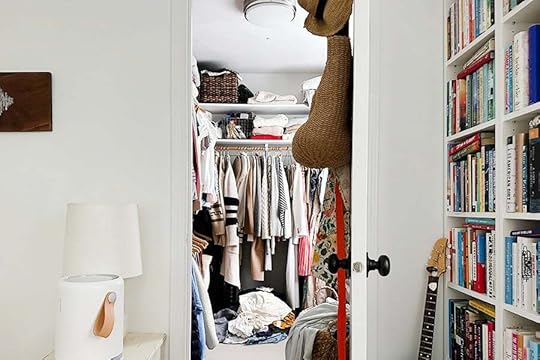
Audrey's room which started out as Anna's room when I moved in 14 years ago.
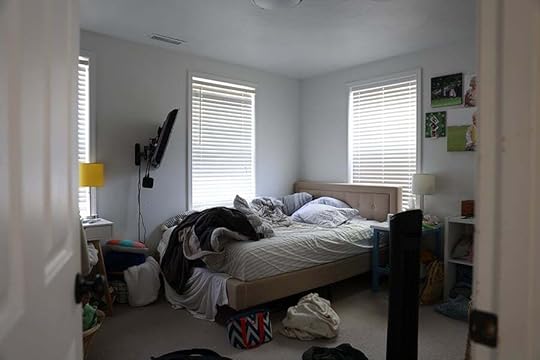
Anna's room which started out as Simon's room.
I love that she has two baskets of stuffed animals. I love that she's saving and drying all the roses she's received from her boyfriend. I love the the hanging rack for sweatshirts is helping even just a tiny bit with putting her clothes away.
Back in the office and taking photos of my Project Life spread.
On my Instagram chat with Laura earlier today (you can watch that here) I talked about this photo and how I often take photos of the transitions. I also mentioned that the transitions I experience throughout the day become the reminders to me to take another photo. In this case I was heading out to pick up Anna from her early school release.
Evidence of this season.
She came home and was super excited because we had those tomatoes and some mozzarella and basil so she could make a caprese salad for lunch. She's taking a photo of her lunch to share on the socials.
While she made her lunch I started some beef in the instant pot for shredded tacos for dinner.
Aaron taking advantage of the awesome weather and his laptop.

Anna had the whole afternoon off until across practice at 6:30pm. She was due for a rest. She's in a going-going-going season with sports and friends and school. Also, there's nothing like you own bed.
Painting in progress. Just letting it evolve. It might look very different tomorrow.
Recording a voice over for my Project Life video after editing.
Getting ready for my Instagram chat with Laura talking about this project.
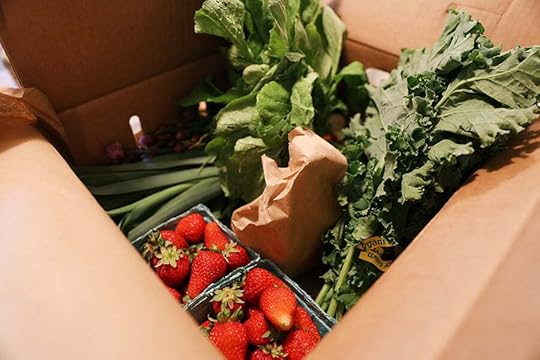
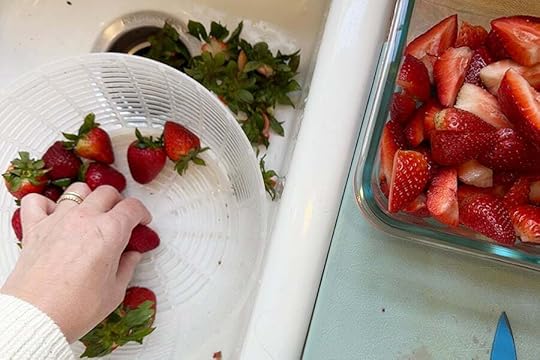
Our local farm delivery box arrived with the first strawberries of the season along with some spring onions, leeks, snap peas, chives, kale, ground pork, and ground sausage.
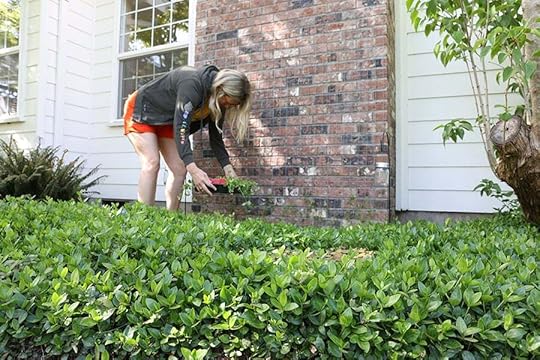
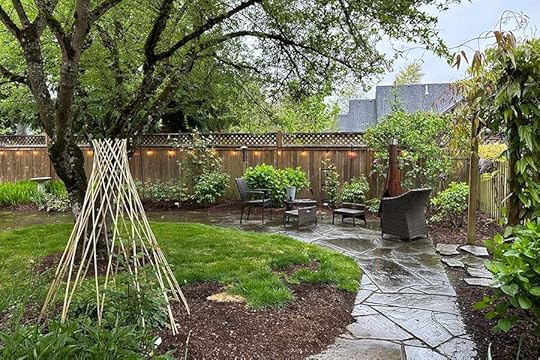
After I finished up my work tasks I headed outside to cross a few things off my metal list. I added a couple more sweet pea starts to my experiment on the chimney (there's a cattle panel wrapped around to give them some supports).
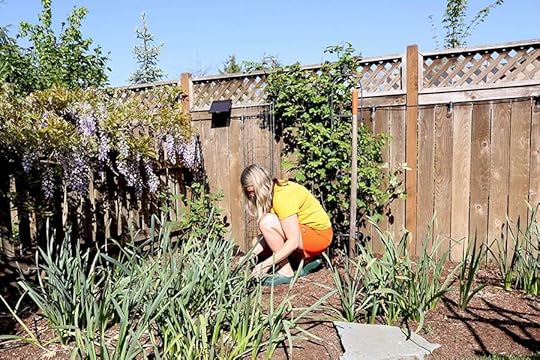
I also decided to try growing sweet peas between two roses in the area where I've grown pumpkins. I grabbed one of my round cattle panels I've used in pots in the past and dug a hole for it and planted some sweet peas around the outside. Curious to see if this will work. With gardening I'm really more curious than anything else.
I definitely plan to plant some pumpkins in this space too.
It was 71 degrees here today. In April.
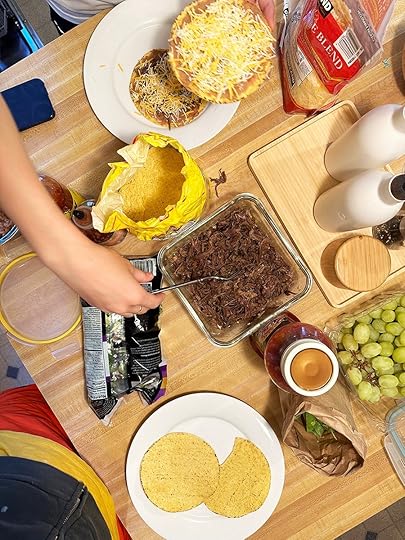
Dinner was shredded beef tostadas. Anna's dishing hers up - it was just the two of us eating together tonight. Audrey was having dinner with her Mom. Aaron was waiting until later. Elliott was still out and about.
Then it was off to lacrosse practice.
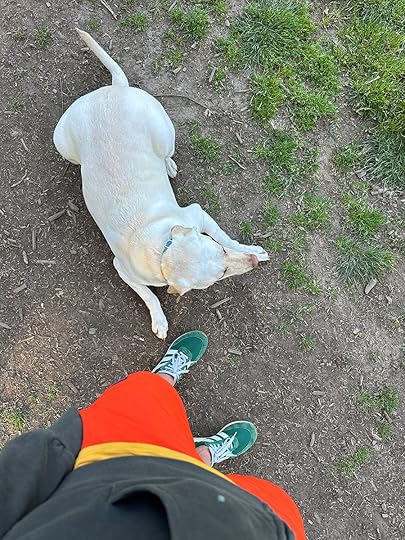
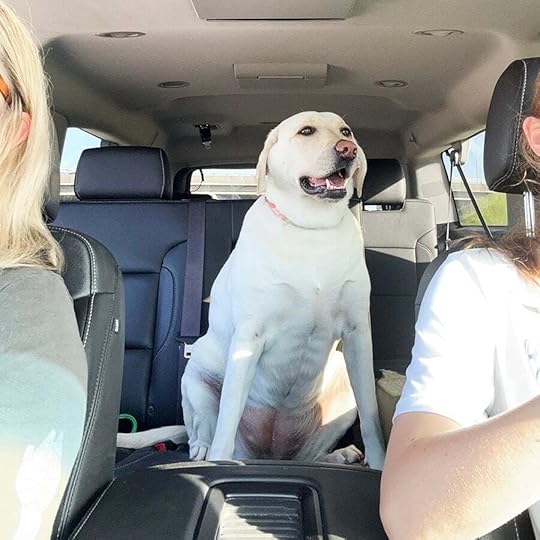
After dropping Anna off I took Betty to the dog park. We come every couple of weeks and do a few laps around the perimeter. Betty is the kind of dog that will play and then when she notices me walking away she follows. She's the first of all the dogs I've had to stick so close.
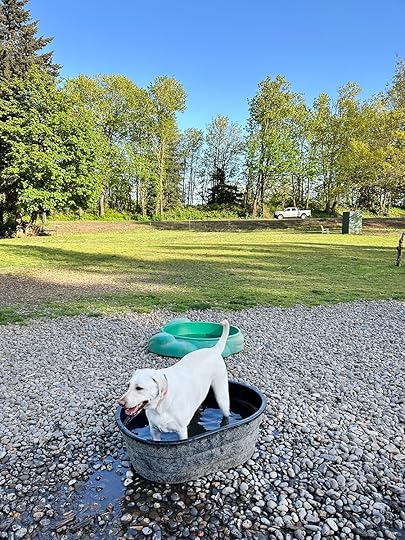
Water dog all the way.
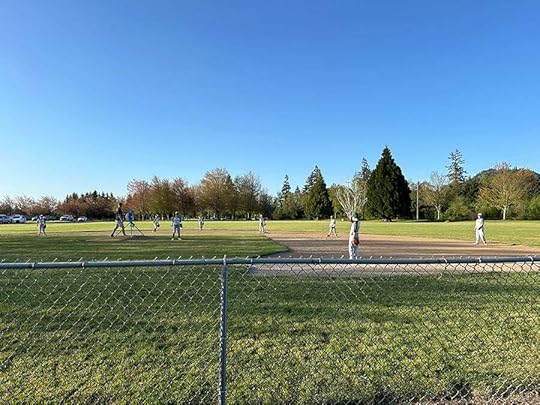
After the dog park Betty and I headed over to a local ball field to watch Graham (Katie's son) play baseball. We were just there for a little bit but it was so fun to watch him out there (he's a serious baseball dude). Katie texted me later that he stole home to win the game. Go Graham!
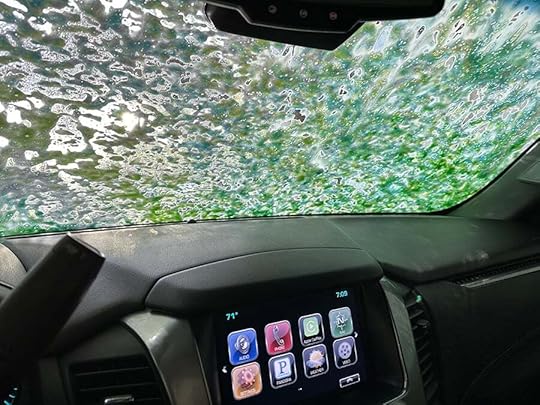
Next I took the suburban through the car wash. It's pollen season around here already and the car is just covered with a thin layer of yellow pollen. I love that this photo includes both the time and the temperature. After the carwash I did a quick trip home to chop up the veggies and then headed back out again to pick up Anna from lacrosse practice.
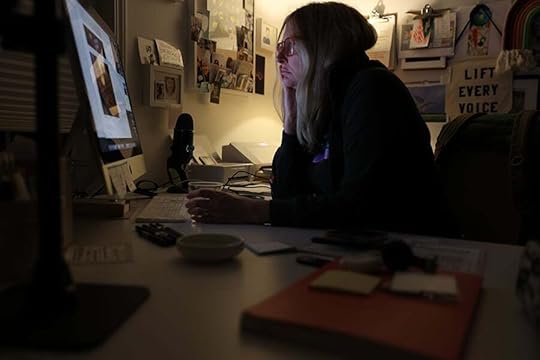
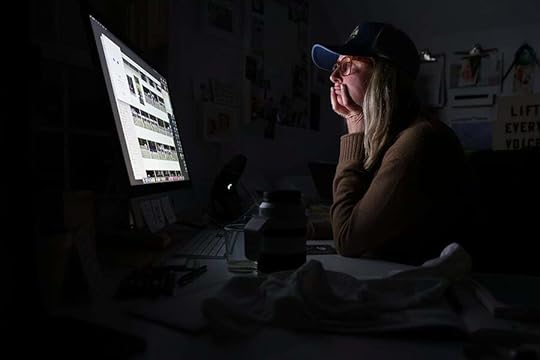
And this is me now - back in the office for just a few before heading to bed to watch the Shogun finale. In this season of life I don't find myself working in the evenings very often except during this project and sometimes during December Daily®. There were years and years that I worked all kinds of hours when the kids were smaller and I was doing "all" the things (so thankful for my team now). I've learned how to better leave work stuff in the office - especially reminding myself that the list will still be there tomorrow. Katie has been so good helping me remember that over the years.
This project is so worth it. Even when I'm tired at the end of the day I know that it is 100% worth the effort to get these stories recorded.
Thanks for being a piece of my story.
April 23, 2024
Project Life® 2024 | Week 15

Today I'm sharing a look at Week 15 in my Project Life album for 2024.
I had lots of photos for this particular week because I took Anna to a big volleyball tournament in Reno. I added a full 9x12 page protector as an insert to hold those photos/stories.
For this one I mainly used pieces from the April Stories By The Month kit.
Let's dive into my process video:
Here's a look at the spread:

For this week I decided to use the vellum frames (and one paper version of the same design) from the April SBTM kit to hold some of my photos. I cropped them in Photoshop and then digitally added the journaling and yellow frames. I filled the other pockets with photos and 2, 4x6 journaling cards from the same kit.
I added handwritten journaling to the 1, 2, 3 card and added a tab along the top of that card. In order to do that I had to cut a slit in the page protector (normally that side is closed off).

I used this page protector as my insert to hold a big collection of photos from our adventure. I also added in a 3 inch circle of journaling (it has a front and a back). Along the top edge I added an "April Story" tab from the sticker sheet.

Another thing I added to the pockets were the hearts I stamped on vellum using the new Hearts 6x8 Stamp Set. I slipped them into the pocket back to back and then used a tiny attacher to staple them in place.

I loved taking all those volleyball photos! So fun. I also really loved taking some time to watch some YouTube videos with suggestions on where to stand and what settings to use on my camera.

Additional journaling about the week/this season was handwritten onto a 4x6 journal card.

My sweet pea starts are very leggy! Ha. I'm trying them in a new place this year - going up our chimney. We will see if it works.
Here's the spread without the insert:

9x12 Album
9x12 Page Protectors
April 2024 Stories By The Month Kit
3 Inch Circle Punch
StazOn Ink
Vellum
Rolling Date Stamp
Hearts 6x8 Stamp Set
Scrapbook.com Rolling Adhesive
Tiny Attacher
Epson PictureMate PM400 Printer
Other basic supplies can be found via my Amazon Storefront (printers, etc)
Week In The Life 2024 | Ali's Monday

Welcome to my Week In The Life 2024 post for Monday.
PROJECT REFLECTIONS
All day long I continued to give myself permission to ease into this project. I let myself get what I got when I could get it and I'm so glad I decided to pick up my big camera. I took a combination of phone photos along with my Canon EOS R6 over the course of the day and it's likely I'll continue that pattern throughout the rest of the week.I love that what I captured today feels very representative of this particular season of my life and I'm so glad to be diving into this project once again.
I mentioned last week on Instagram that I was thinking I'd work in my album during the documenting week but I don't think I'm going to do that now that I'm actually living the week. I'm going to let myself just focus on the words + photos and then bring them together in the coming weeks.
Not included in this post but additional images from today that I will include in my album: screenshots from family, friends, the New York Times, a local veggie order, and FaceTime meeting. I'm trying to be conscious of grabbing those as they happen during the day (and I love that they just end up in my phone camera photo roll).
PERSONAL REFLECTIONS
As I went about my day I was flooded with memories of photos from past Week In The Life projects. I started doing this project in 2005 and moved into this house in 2010. That means I've been taking photos around this same house for 14 years throughout various seasons of my life. The cast of characters is older and stuff of life has happened over and over again within these walls as we've all grown and evolved.
I love the repetition of photo angles and locations year over year. I feel acutely aware of the passage of time and the fleeting nature of each individual season.
As I look at myself in the photos from today I see that I am older and more open and less rigid. I've gotten better at letting go.
Here's a look at my Monday:

Betty gets me up each morning these days. Breakfast, vitamins and a dental bone (in that order) and then she heads outside. When she comes back in I either lay on the couch, go back to bed, or make myself a coffee to start my day. Today I went back upstairs and got back in bed for a bit before getting up to capture some images and drive Anna to school.

Evidence of Anna.

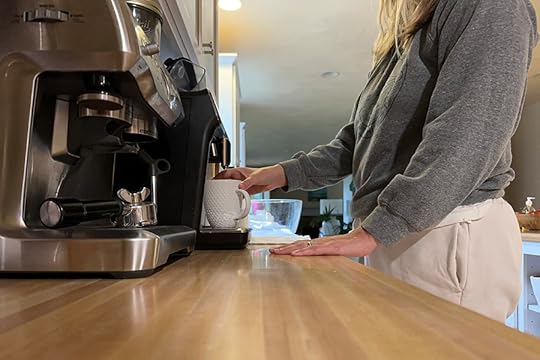
A couple months ago Aaron decided he wanted to try out a new style of coffee maker. I still drink plain black coffee - now I just push a button and it appears.

Photos of people taking photos are always fun. I took this one with my phone to show how I was taking a photo of the coffee maker.

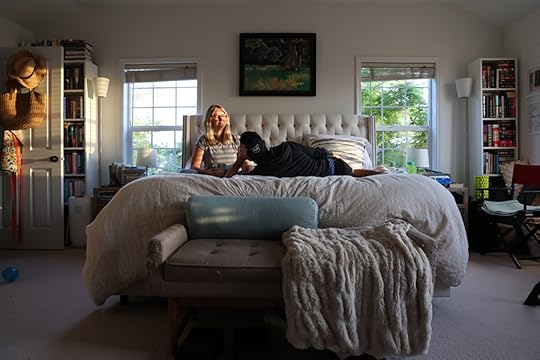
These days she often goes and sits on our bench even if I'm not able to go sit with her.

Morning vibes from my people:
Aaron: "Ah, I'm not ready for photos!" Audrey: "I’m having a great hair + makeup day!"Elliott: Still sleeping. Anna: "Can we take Libby to school?"

Well lived-in and well loved and still the center of activity.

Two alarms today for a hair appointment and the time I need to get girls from one volleyball practice to another.

In this season Aaron drives Audrey to school most days (some days she carpools). Her high school is across town and they usually leave around 8am. This morning she made herself a smoothie.


Anna doesn't start school until 9am so she gets to leave a little later. Today we picked up her friend Libby and took her to school with us.

"My mom's doing this project called Week In The Life so she's taking a lot of photos." Anna tells Libby as they get out of the car. Having a parent that did this kind of project every year of your life must leave some kind of impression. I wonder if she'll want to do this for herself someday.

One of the highlights of Betty's day is going for a ride in the car. She loves the window rolled down (no matter the weather). She's awesome in the car.

After dropping Anna off I headed to the backyard to do a morning outside task. I've been trying to do that recently - starting my day with a short task outside before heading to my office. Today's task was emptying and then washing all my bird feeders.

While I was cleaning out the bird feeders Aaron made us some eggs.

After I washed out all the birdfeeders I left them out to dry on the kitchen counter and headed up to my office. This morning I listened to The Daily (The Evolving Danger of the New Bird Flu) and started Long Shadow: In Guns We Trust (both podcasts).

In this season I'm trying to begin my office time with some painting on canvas. I'm often just adding a single color in swipes and swishes across the canvas before heading to my computer. I'll repeat this throughout the day as I come and go from this space.


Painting has been making me so happy.

At my desk I check email. I transfer money to Simon for next month. I look at the “mess” in my office and decide what I need to prioritize this morning before my 1pm hair appointment. On my work list this week I’ve got the following: Story Play designs for next year, overview videos for next month’s subscriptions, OLW prompt for next month, and PL catch up. I decide to start by creating the Illustrator files for the Story Play kits.
In this season I find myself scheduling for the week more than for a day - meaning I know what needs to get done for this week and then I can plan my days around that (which day will I be at my desk the most, etc).

I start working on a new Project Life spread by printing photos and gathering supplies.

Betty is never very far.

Aaron's been working on his laptop a lot lately (vs. in his office). He loves the light in this room. Me too.
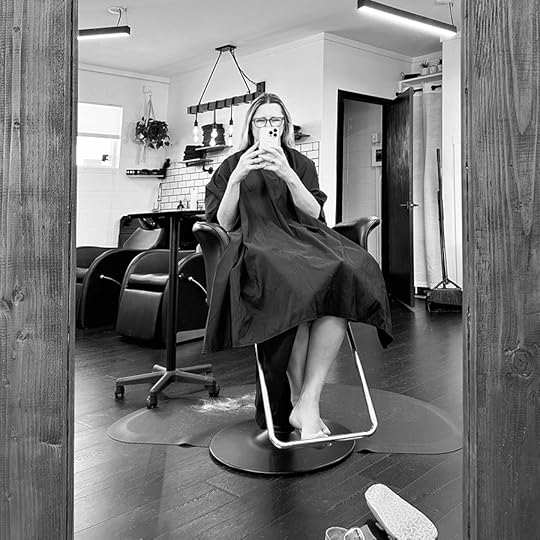
At 12:30 I head to my hair appointment. I left before my blow dry in order to make it home in time for a meeting with Simon's support team (I got a screenshot of that to add to my album).

When I got back from my hair appointment I did a quick walk around the yard before heading back to my office for a bit. During this time of year I love just walking out into the yard to see what's happening. Things progress so fast in the yard once we hit this time of year.


Audrey had a friend over after school. They made mac + cheese and listened to Hamilton.

The roses are coming. I can't wait.

It's rare to get a shot of all three of them at the same time. Sam, Betty and Ernie.

Strawberries are coming.

Wisteria is here. The wisteria is one of the reasons I wanted to buy this house. It was giant when I moved into this house and it's still going strong. These blooms are brief each year and they always remind me of being in college and walking around Corvallis and seeing these and being amazed with them.

My first peony blooming this year is a Japanese tree peony (the others are still about a month away). I planted it last fall and am so excited to see what it does - this is a huge bloom.

Aaron moved his working operation out to the backyard. He's got a full set up now with the Jackery generator we use in the camper. It's been such a warm spring - so thankful for the sunshine.

Back in my office I added a few more thick swishes of paint, checked email, and started editing these photos and composing this post.

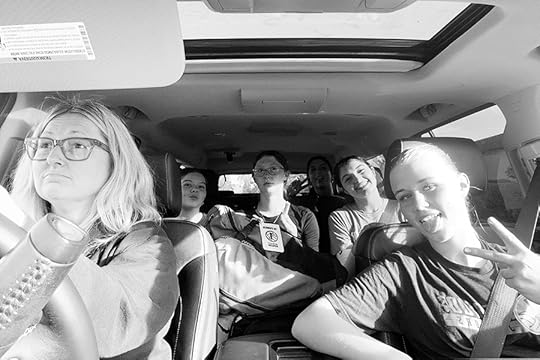
Around 6:20pm I headed out with Audrey to pick up Anna, Aune, Adriana, and Ady from their high school volleyball practice (they started spring weights and open gym two weeks ago) to their club volleyball practice. I've known all these awesome young women since they were 4 and 5 years old. I love having them around and love their families too. One of their parents will bring the girls back after their practice ends at 9pm.
I'm cherishing the time I get to ride in the car with the girls - it's one of the main places that sharing about life happens and I love listening. Audrey has her permit now and Anna isn't far behind.
I stopped at the grocery store after dropping off the girls and got some basil and sliced mozzarella to have with our dinner. Some days I cook and some days Aaron cooks and some days we order take out. We did a giant Costco run last weekend so we are pretty stocked and I'm trying to get back into planning our dinners.
In this season we sometimes eat dinner in bed while the girls are at practice. Currently watching Baby Reindeer (while we wait for the season finale of Shogun).
When the girls got home I went downstairs and chatted with them for a bit and gave them food suggestions. They ended up heating up some of the steak and eating some leftover beans and chips while they talked about their practices.
I'm really thankful for this season (and I honestly hope that I've said that or something along those lines in most seasons of my life - even the challenging ones).
I'm looking forward to telling the story of the rest of the week as it unfolds.
April 20, 2024
Week In The Life™ 2024 | Special Guest Jessica Luther
Hey there everyone, this is Jessica Luther! I’m excited to be here as a guest on the blog today to share some of my thoughts and ideas on Ali’s Week in the Life project. I’ve participated in Week in the Life for the last three years and those albums act as time capsules for stages and phases of our life that have passed us by. Before I dive into my plans for this year's album, I wanted to share what has worked for me in the past. Looking back and thinking about what I’ve done previously, helps me decide how I’d like to move forward with this year's approach.
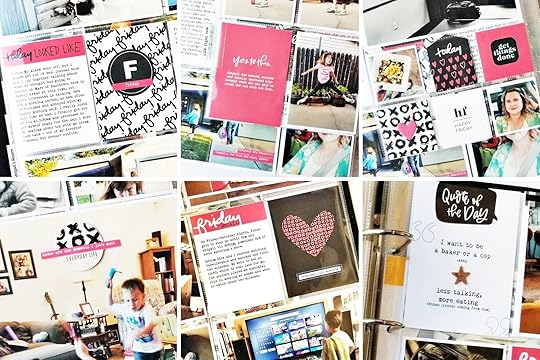
What I’ve done in years past that has worked for meOne of my favorite pages to include with any multi page project is a title page photo collage. It’s a great spot to showcase your favorite photos from the project or include photos taken but not actually used in the project and it’s fun to get a glimpse of what's to come. Two of the three years, I’ve included my reason why on this page.
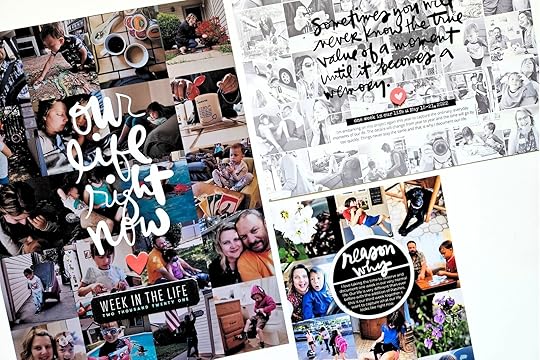
I like including an intro page in my week in the life projects specifically, it’s helpful to have a designated page that has all the details of right now. I include info like our ages, where my husband and I are working, where the kids go to school and what grade they’re in. I’ve also used this page to list the shows we watched during the week.
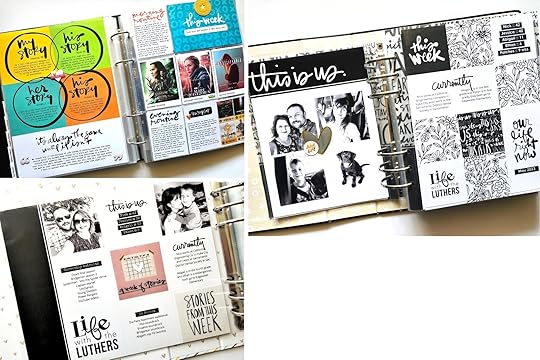
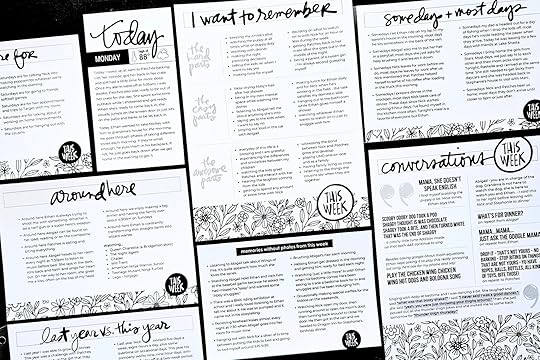
In last year's album (2023), I used a few storytelling lenses that helped me gather information from that specific time. Each day had a toay card that included the temperature high of the day and some journaling, with a few other journaling areas labeled with the day of the week mixed in with the photos. The lenses I used were: around here, some days + most days, moments not captured with a photo, this year vs. last year, the hard parts… the easy parts… the awesome parts, conversations, saturdays are for. I gathered information throughout the week and put them into the different lens categories and added a digital stamp that said “this week” onto each of those pages.
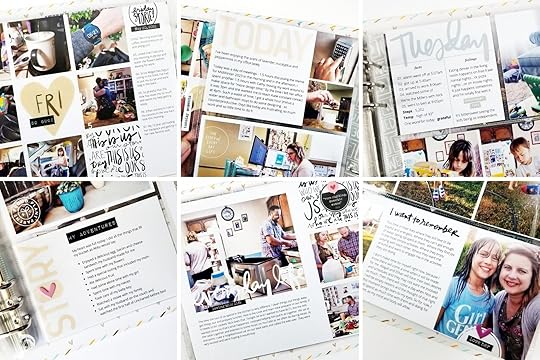
The previous year’s approach (2022) was much less structured in gathering and documenting all the stories. I used the daily facts + feelings cards and included things like temperature, steps and word of the day. I also used the digital stamps to create consistent journaling cards using story + today + I want to remember. Those journaling cards were used each day. An extremely detailed look at this album can be found as a bonus lesson in the Storytelling with Week in the Life class Ali released last year.
My first year (2021) I used so many digital stamps to create the journaling cards, I also had purchased a few of the shop embellishments from that year's collection. I picked a color for each day based on the leather tags and used that color to create any of the filler cards and journal areas. I also had a quote of the day for most of the days and it is by far my favorite, I’ll be listening extra hard this year for those wonderful gems.
I’ll be documenting my week in the life May 13-19, 2024 and this year I’ve decided to do Monday-Sunday. Typically I like to break up my Saturday and Sunday to provide a better look at what weekends look like for us at the time. Often our two days run into each other and documenting Sunday-Saturday has worked really well for me in the past. However, I’m really excited about changing it up this year and using the main kit as it was designed.
To gather my stories throughout the week I use Ali’s Daily Sheets that she shared a number of years ago. In addition to those, I’ve created a sheet that includes prompts that will help me collect specific details for this year’s project. You can download that file here.
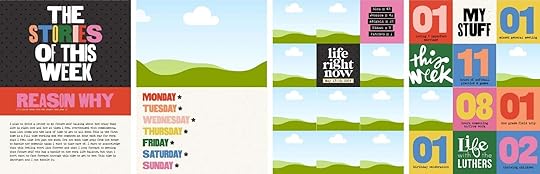
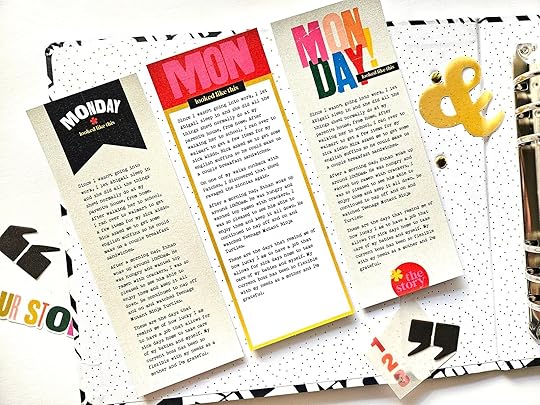
I’ll be using Canva to layout and create all the pieces I need to print for my album. I like to place everything into the album file for visual reference, even if I plan to use the physical products. I guess you could say, this file set-up is my digital version of foundation pages. I’ll be starting my album out this year with a few 4x6 cards from the main kit. The stories of the week card is so bright and fun, it really sets the tone for the rest of the album. I hope to have a 4x6 family selfie for above the days of the week card. For that card, I plan to handwrite descriptive words from each day. The facing 2x2 pocket page will have photos of each of us and some currently details. I’ve already placed our ages since I already have that info. The backside of the 2x2s will have numbers from the week and possibly an image of the audiobook I’m listening to that week and a show I’m hoping to be watching (Bridgerton S3 releases that week!)
The ideas I’m sharing below are using photos from years past to provide a visual of what I’m thinking about doing.
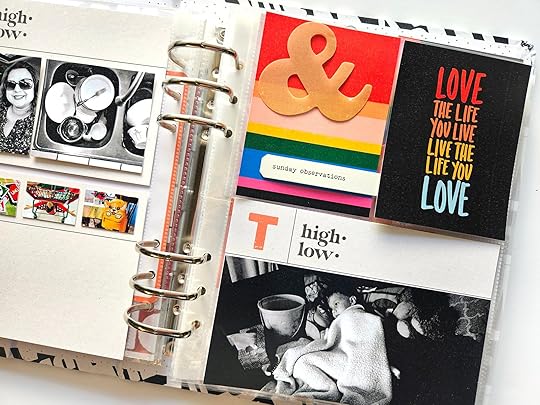
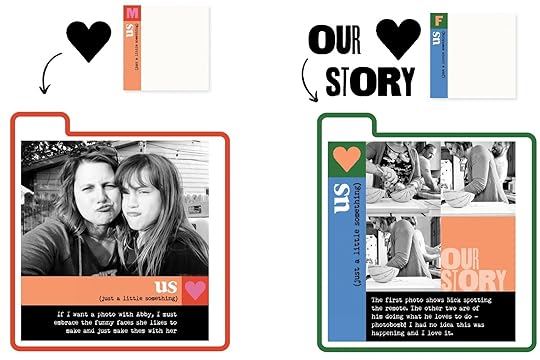
Me + You + Us // 2x2 cards (mini kit)These would be super fun to pair with black and white photos, especially if the photos vary in lighting quality and have color casts. Depending on the story I’m documenting with these 2x2’s, the front side of this 12 pocket page protector could be all about us. The non-photo pockets would probably be filled with the words and I thought it would be fun to also include these large you + me 2x2’s if there was room. They were created with the icons digital stamp set, using the same colors from Monday.
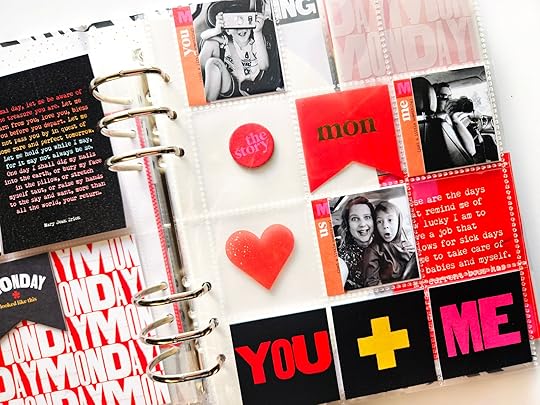
I suspect that I won’t have a human or pet relationship to document with these cards each day, so I wanted to do a little brainstorming prior to the documenting week. Thinking of a material item that I rely on heavily to act as one of my “you” subjects. I could write about how using it makes a difference in my daily life as the “us” card. If I were highlighting my favorite felt-tip colored pens, my storytelling could be something like, “with our powers combined, my task list looks fun and appealing.”
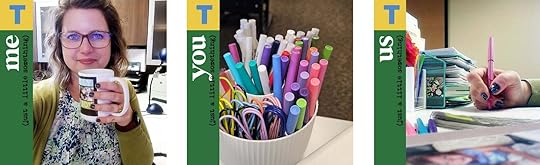
The paper stock these cards are printed on is so nice, its quality stock that feels good in my hand so I want to use it in my album as opposed to printing the digital card with my journaling. I plan to handwrite on the upper high + low area in just a few words the high and low from the day and I’ll print my longer journaling on sticker paper to adhere to the lower section of the card. I purchased the same sticker paper Ali has been using and the link is in the supply list below.
When I was playing with the digitals, I wanted to come up with other ways I might use the 4x6 cards. For days when I don’t need it for words, it is the perfect spot for photos. Below are some ideas, along with some 3x4 filler cards I found in my digital stash. I linked where you can get them in the supplies list below.
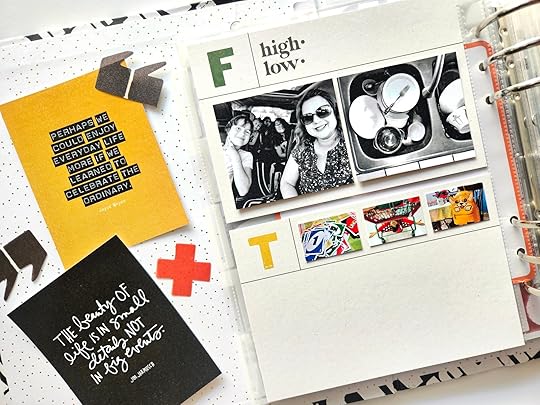
Another way I might use these is to include some details about the highs + lows from the day in the upper area and two photos to support those details down below.
The striped card below is made from the 3x4 Simply Remember card in the main kit. I just covered the words with red. In the sample below, I paired it with a vellum ampersand from the mini kit and one of those fun word strips from the main kit.
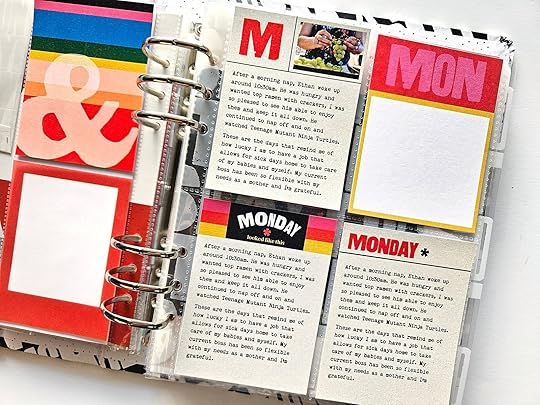
In my album I’ll be using a 3x8 - 2 pocket page protector for the morning/afternoon/evening cards. I plan to attach the vellum pocket card to the outside of the 3x8 pocket next to it and have a quote from the day in the same pocket (inside the page protector). To help with keeping the bulk more level throughout my album, I’ll be rotating the morning/afternoon/evening card from the left to right pocket and placing the vellum pocket at the tops and bottoms of the adjacent pocket.
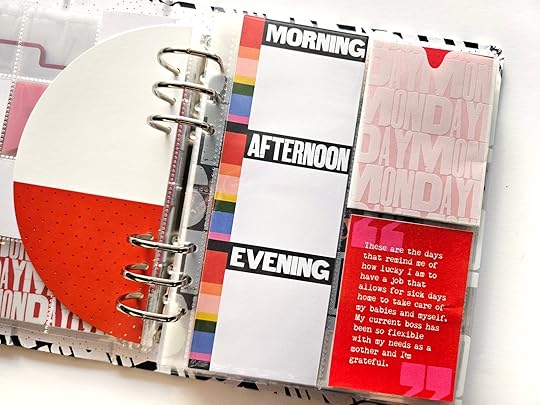
I’ve been holding the vellum pockets in place with a paperclip, but after removing it to photograph this and seeing the indentation it’s making, I’ve taken the paperclips out and just slid them into nearby pockets.
Depending on the colors in my photos, I may make all these images black and white. A high contrast black and white image would look awesome with the bold colors of this collection.
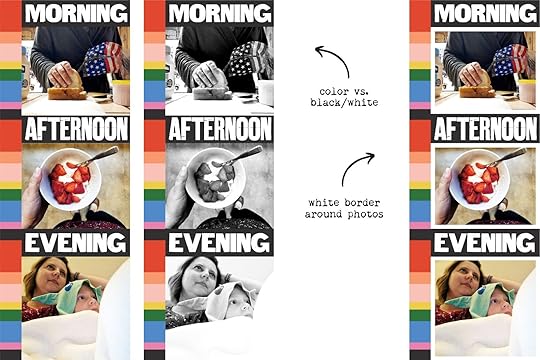
Another decision that will need to be made is whether to have a small white border around the photos I add onto these cards.
More ideas using digital productsOn the backside of the morning/afternoon/evening card, I’ve created a 3x8 card for journaling. Here are a few ideas I was playing around with. I'm leaning towards using the one in the middle that is made using the day 3x4 card from the collection paired with a cropped portion of the digital chipboard banner from the same day.
I’m not sure that I’ll need a 3x4 journaling card option, but I wanted to come up with one (or more) to make sure I’m ready when it comes time to put my stories into the album.
The upper left option is the 4x6 card in half with a photo covering the high/low words, lower left is the blank portion of the 4x6 card with a cropped rectangle of the digital chipboard banner and it has a few color blocks flanking it that coordinate with the day colors, the lower right is the blank portion of the 4x6 card with Monday cropped from the 4x6 that has all the days listed and a thin black line added below the day.
On the adjacent page you can see another filler card I created with the striped pattern and a transparent white ampersand stamp.
Ideas for the back of the Hello day dividersThere are so many possibilities with the backside of these inserts. If I were to use them for journaling, I would print my typed up stories on clear sticker paper and overlay it on the entire insert and just trim flush to the edge.
As of now, prior to my documenting week I plan to use it for a large photo. I love the idea of having it be a high contrast black and white image, but I’m totally open to a color photo if it looks good there. I’d like to add a stamped word or a word phrase strip to the tab area.
In the below photo you can see one of the 3x4 filler cards I made with the digitals. I love the look of a transparent white stamp (heart) on top of the striped background. It’s a great spot to add a physical embellishment or add it in the pocket just as it is.
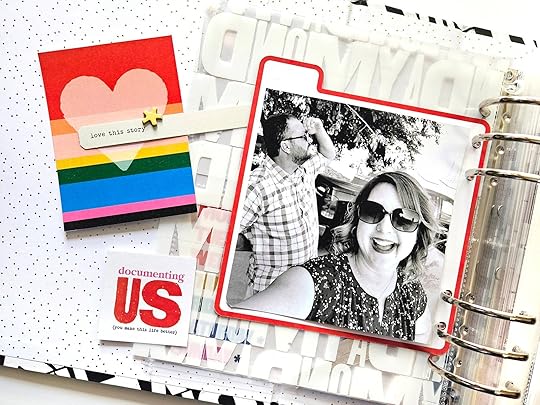
One of my favorite things about digitals is the ability to create something new. Maybe you didn’t get the physical mini kit or maybe 2x2 is just too small for the you, me and us topics you want to include. The back of the insert is a fun spot to create your own photo + card + journaling collage. In the two examples below, I just used a cropped portion of the us card, covered the day letter and added the heart stamp in its place. Then I added a small area to include some words with my photo(s). I plan to just print the square collage and attach it to the physical inserts, but if you don’t have them you could print it as is, fussy cut around the solid line, punch some holes and add it into your album.
Here’s a look at the Canva file I’ve set up with the design formula I plan to use for the week. Each day has been set-up with the appropriate cards and colors applied to the quote cards. Keep in mind that I like to have my file represent the final project as closely as possible, so I place the digital version of the physical items I plan to use in the locations they will be used in the album. A great example of that are the transparent dividers, hello day inserts and banners. All of those items will be physical items that I already have, I just have them placed in the file so I can have a better visual of what it will look like when it’s all pulled together.
What you’re seeing in the above screenshot is my opening title pages, all of my Monday pages and the majority of Tuesday. I used the black digital version for the transparency dividers so they would show up better in my file. I will be using the physical transparencies in my album.
All the variations of journaling cards and photo options that I shared above are included at the bottom of my file for easy access when it comes time to plug in all my photos and words. I like to do as much brainstorming and creating prior to the documenting week as possible, so I’m able to start bringing it all together as soon as I get my photos edited.
Thank you so much for joining me here, I hope that something you’ve seen or read has sparked an idea for your own project. If you’d like to see how my project unfolds, I invite you to follow me on Instagram @jlutherdesigns
If you’re interested in learning Canva, I recommend taking the Create with Canva course.
April 19, 2024
Project Life® 2024 | Week 14

Continuing along with my Project Life 2024 project with Week 14.
This week I've included some of my recent projects using the Around Here Story Kit as inserts (6x8 projects going right into my 9x12 album). In addition I added in another insert for the main April card from the Stories By The Month Kit which gives me a fun chance to play with a see-through pocket on the top.
Let's dive in to the process video:
And here's a look via images:

For my repeated element this week I used a 3 inch circle punch and cut the circles in half. Each of my 4x6 photos got one added on top. On top of the 1/2 circles I used a stamp from the Around Here Story Stamp and curved it to fit. After stamping I used a Kuretake Brush Pen to add context to the photo.

I've also switched things up for my weekly title cards. For the first 12 weeks I used cards that I created with the foil quill on my Silhouette. For the next 12 weeks I printed the PDF on transparency - which I love because it can layer on top of anything! I envision diving into my 3x4 pattern card stash or layering on top of vellum cards from the Stories By The Month kits or layering on top of photos.
I'm also adding the weekly dates (and need to go back through the first 12 weeks and add stamped dates).

Each month this year I've been adding in the monthly card from the Stories By The Month kit as an insert to the weekly spread. This time I'm using a 2-pocket 4x6 page protector with the month card on the bottom. In the top pocket I added in a vellum circle from the Around Here Story Kit with the hello April paper tag from the Stories By The Month kit.

I also added two circle chipboard pieces from the Around Here Story Kit on the outside of the front and back of the page protector.

The next few inserts are projects I put together for the Around Here classroom.

Along the outside edge of the last insert I adhered two of the 1/2 circles from the April Stories By The Month kit back to back and stapled it in place to create a large tab along the outside edge.

One of the spreads from the Around Here kit using and
this number stamp set.

On the back of that page I added a full page photo of our cherry tree with a Betty cameo.

And then I added a couple word phrase stickers onto my photo enlargement.
Here's a look at the spread without an inserts:

I really love how this one turned out. Hope you have a great weekend!
9x12 Album
9x12 Page Protectors
Around Here Story Kit
Around Here Stamp
Birthday Story Kit
April 2024 Stories By The Month Kit
Numbers Stamp Set
Kuretake Brush Pen
3 Inch Circle Punch
StazOn Ink
Scrapbook.com Rolling Adhesive
Tiny Attacher
Epson PictureMate PM400 Printer
Other basic supplies can be found via my Amazon Storefront (printers, etc)


