
Ali Edwards's Blog, page 29
April 5, 2024
DIY Transparency Dividers
Hi everyone. My name is Kelly Ishmael, and today I am sharing some techniques and tips for working with the digital versions of transparency dividers - specifically the 10x8 Transparency Dividers included in the 2024 Week in the Life™ digital release.
Like I shared in the video above, one of the most common questions we get is how to replicate the look of transparency dividers when the text or graphics are designed in white. The limitation (and frustration) lies in the fact that most home-use or desktop inkjet printers do not possess the ability to print the "color" white. For most of these types of printers, white is the absence of color rather than a color itself. If you have ever tried to print something white on a transparent background, this is why it has come out of the printer with nothing on it.
So today I am sharing three options for using these digital files to create your own transparency dividers.
The easiest way to use a digital transparency is to create an overlay on a photo. Especially for transparencies with white designs, this approach gives the same basic look without having to use a Silhouette or Cricut.
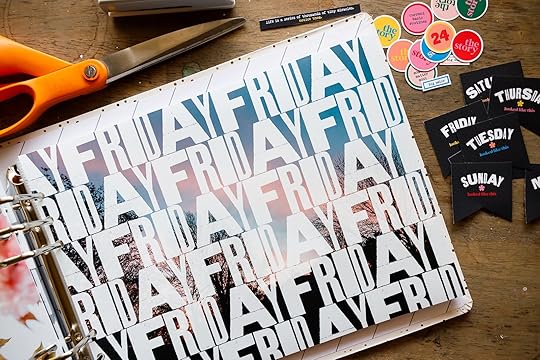
I am sharing my process below using Photoshop, but I believe this process is very similar in Photoshop Elements.
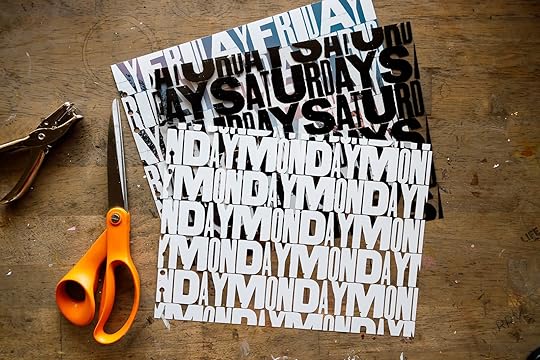
Option 2 - Creating an Inkjet Print in a Different Color
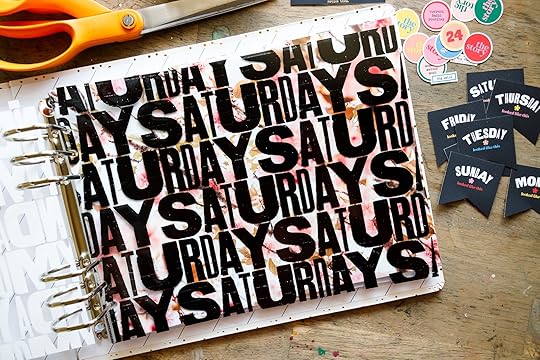
Another simple option for using a digital transparency is to print the design in a color other than white. In the example below, I printed the transparency with my Inkjet printing using black ink - obviously it's a different aesthetic, but still looks great.
In this process video, I am sharing how I set up the transparency to print. But since everyone's computer/printer set up is a little different, your process might be different.
A couple of notes: 1) It is really import to let the ink dry completely before putting it in your album or manipulating it in any way, and 2) the faint horizontal lines in my printed example above are not from the digital file - they are mostly likely due to needing to clean my print heads.
Graphi Clear Film for Inkjet Printers
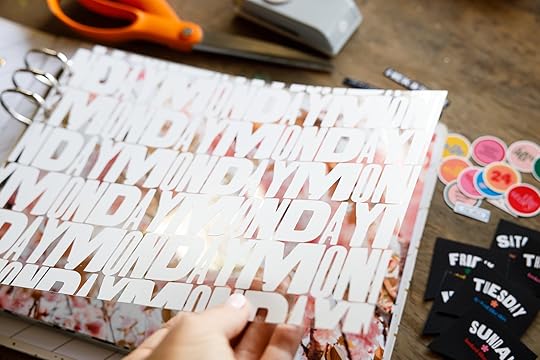
For the most realistic version of the transparency dividers (as compared to the physical product), you can use a Silhouette or a Cricut to cut the designs out of vinyl and then adhere that onto a piece of clear plastic.
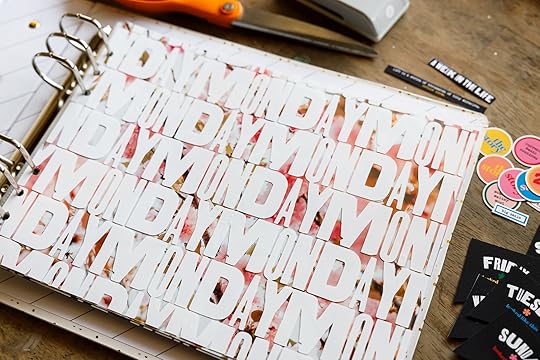
We have included *.studio3 and *.svg format cutfiles in the download for each of the dividers, but I am sharing how I set up the cut in Silhouette Studio if you would like to see more about that process. I am also sharing how I applied the vinyl to my clear plastic.
For reference, the Silhouette cut settings I used for the Oracal vinyl are:
Blade Depth - 2Force - 10Speed - 5
Oracal 651 12x12 Matte Vinyl Sheets
Graphix 12x12 Clear Plastic Sheet
Full disclosure, this was a time consuming process and a real practice in patience, but I was super pleased with the final outcome.
I hope this gives you some ideas for using the digital transparency dividers or provides you with some help in the process. Please let me know if you have any questions in the comments and I'll do my best to help.
P.S. If you are new to hybrid scrapbooking, here are some great classes about working with digital products:
Hybrid
Hybrid Product Play
Hybrid All Year Round
Create with Canva


April 4, 2024
Week In The Life 2024 | Ali's Design Formula + Storytelling Approach
Our Week In The Life™ community documenting week is coming up starting on April 22nd and I'm so excited to tell the story of my week alongside you!
In today's post I'm sharing my design formula for this year's project using products to support my stories from our
2024 Week In The Life™ collection.
Before we dive into the design formula for this album I want to share a couple thoughts:
Your story matters. You, the you who is reading this right now, have a story to tell. You are alive. You have thoughts and feelings. You are living in a season. You might be struggling or you might be feeling a lightness. You might be at the beginning of a parenting journey or somewhere else along the path. You might be working in an office all day or working from home or driving your kids around from one thing to the next (or a unique combination of all those things). If you are on this page you likely enjoy scrapbooking, memory keeping, and/or journaling. Maybe you've been collecting supplies for years and waiting for the "perfect" time to jump in. There is honestly never going to be a perfect time - there's simply time. Come play with us! You don't have to do this the same way I'm doing it. Maybe this year a simplified version where you just focus on the words + the photos makes the most sense. Maybe you want to try something different like documenting in our Week In The Life™ notebook. Maybe you just want to follow along and take a bunch of photos. Maybe you want to make good use of your stash and build your own formula! Maybe you want to make each day have a unique design. Do what makes the most sense for you in this season of life!
WHY A DESIGN FORMULA?
For an in-depth project like this one that often includes a lot of words + photos I love the ease that comes from having a set design foundation. It takes some of the guess work out of the entire process.
My goal in setting this up in advance is to create homes for my words + photos. This will help me know approximately how many photos I'll want to use.
Don't forget to check out my
Storytelling With Week In The Life workshop if you are looking for more tips and ideas for embarking on and completing this type of project. In that workshop I have the content organized into four sections:
Looking Back: Video walk-throughs of all my past Week In The Life™ albums along with thoughts on what Ali's learned over the years Before Documenting: Establishing your mindset, setting up your Design + Story Plans (based on what's most important to you to document in any given season) During Documenting: Tips and ideas for capturing your words + photos during the actual week After Documenting: Bringing your words + photos into your album (basically how to tackle completing the project after you've collected all your content)
You can also check out
all my past Week In The Life™ posts in the archives here. That includes all my posts featuring my photos, words and bringing them together in albums. Here are a few of my personal favorites to get you ready:
Week In The Life™ Photo Tips What Stories Will You Tell? Our Days Are Built With StoriesANYTHING NEW TO MY APPROACH THIS YEAR?
In past years I've approached this project with a sole focus on the words + photos during the documenting week and waiting to bring it all together in the album until the week has ended. I've always loved how that's given me a chance to simply focus on the words and the photos without having to think about the album. That also helped me spread out the project and make it more manageable during some very busy seasons in my life.
This year I'm considering changes things up a bit and writing/working directly in my album during the documenting week. I'm in a different season of life now and the way I've set up my album this year
Let's dive in to my process video for setting up my album:
Here's a look at my design formula for 2024:
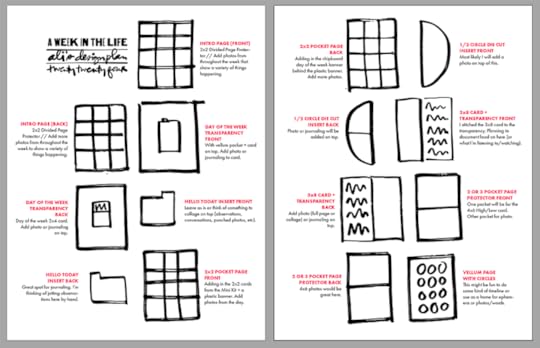
Download the printable PDF here.
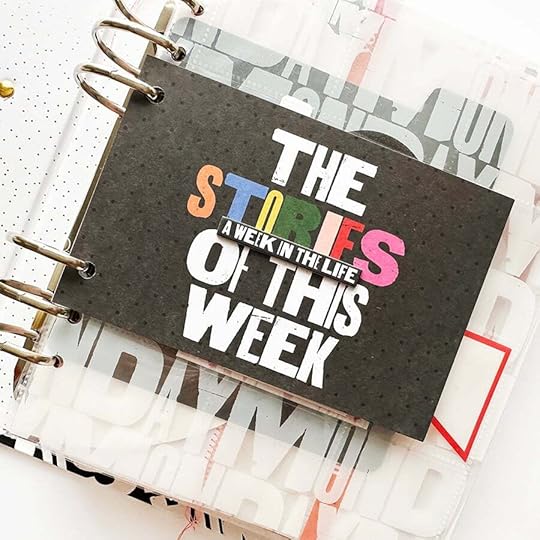
Here's a look at it all in my album:
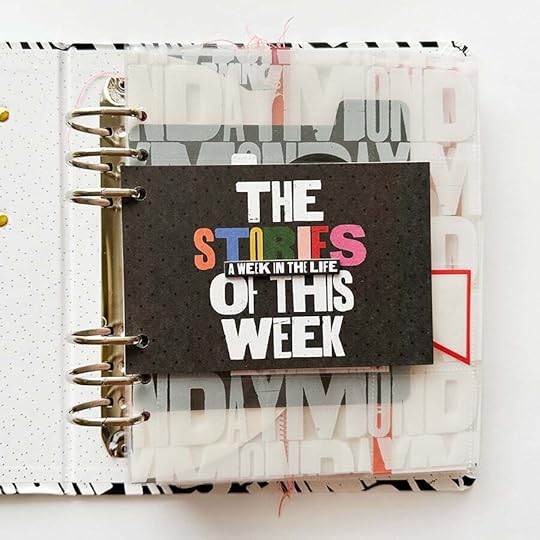
I'm starting off my album with two back to back 4x6 cards from the
Main Kit. On top of the "the stories of this week" card I adhered the "a week in the life" chipboard piece.

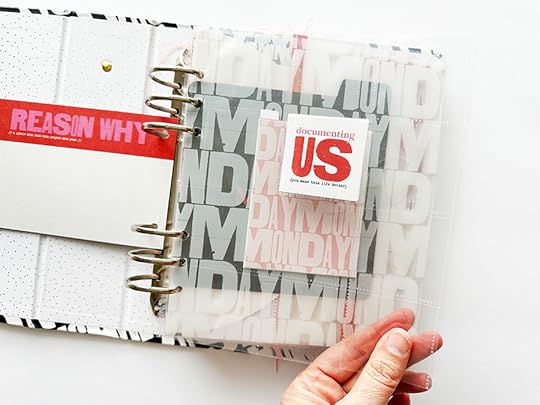
On the back side I've got the Reason Why card. I'm planning to handwrite my reason why I'm embarking on this project again this year on this card.
My plan is to include a random collection of 2x2 images from throughout the week in this first page protector. I'll add those at the end of the week.
Last year I added photostrips at the end of the week to the front of the album and I loved how it looked.
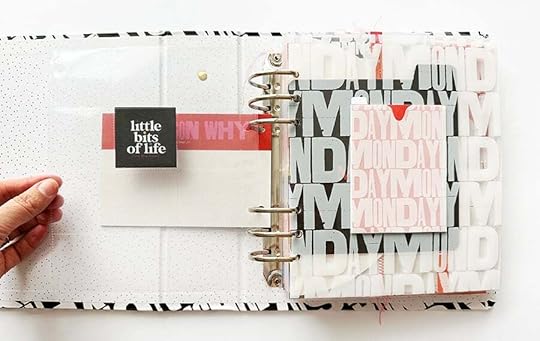
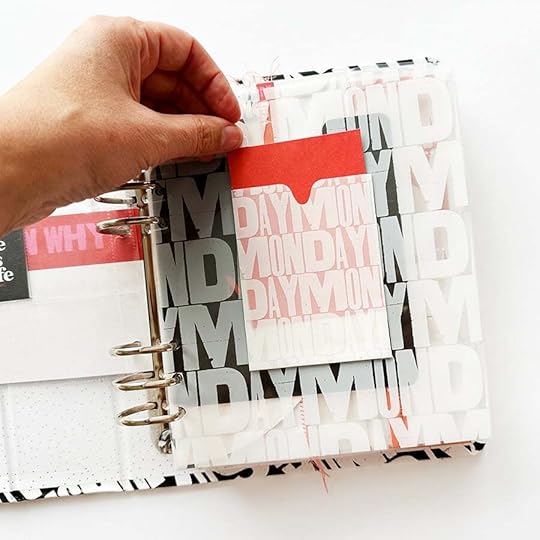
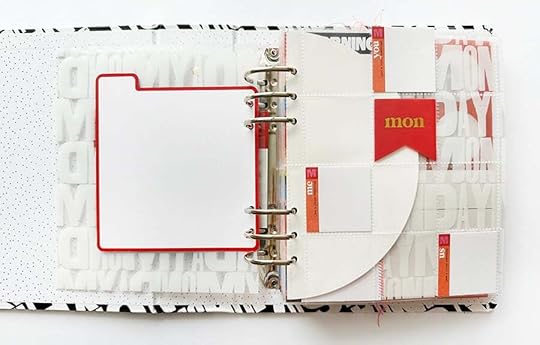
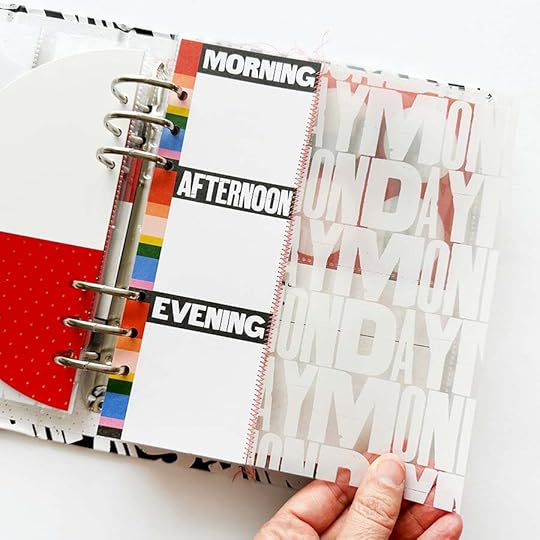
I'll fill both the front and the back with 2x2 photos. The first page in my design formula that will be repeated for each day is the day of the week transparency. I cut down the 10x8 transparency to 7 inches wide and I use the leftover piece for another page as you'll see below.
On top of the transparency I adhered the vellum day of the week pocket card from the Main Kit.
On this card I'll be adding either a photo or journaling. It's just ready + waiting for me to add a piece of the story.
On the back side of the transparency I adhered the 3x4 daily card from the Main Kit. I'll either add a photo or journaling on this spot.
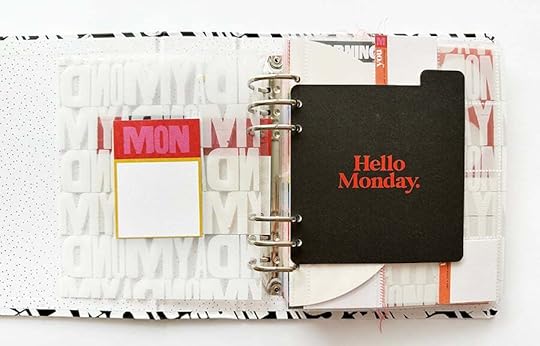
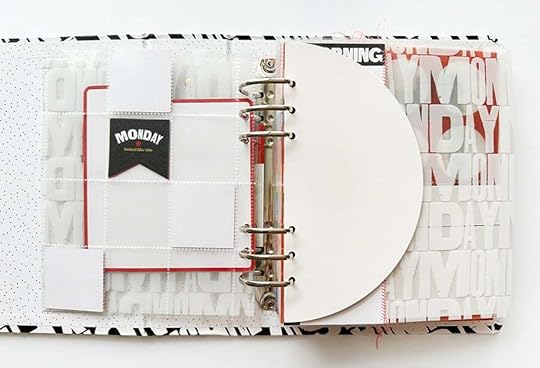
Next up are the die cut cards. I'm thinking of things I could add on top of the "hello Monday" card:
maybe quotes from family members (think cut up strips of black type on white paper) maybe circle punched photos (small ones that would be collaged around the title) use a white POSCA paint pen to handwrite something on top - such as a note to self or other memory from the day maybe just leave it as it is
I think I'm going to use this space (on the left) for journaling (again thinking I might do this throughout the day in real time). This would also be a great place for a collage of photos.
Next up is a 2x2 page protector. Right now I've got a plastic banner along with the three Monday cards from the
Mini Kit.
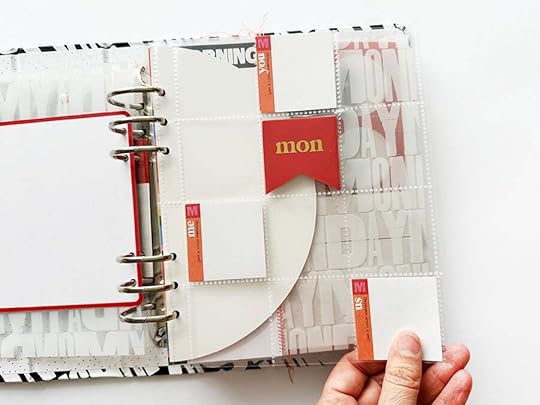
In addition to those embellishments I'll be adding 2x2 photos from the day.
On the back side of the plastic banner I've added the day of the week chipboard banner. I'll add photos from the day here.
Next up is the 1/2 circle die cut page. It's pretty likely that I'll include one or two full page photos for each day and I'm thinking that I'll do that around this 1/2 circle insert. Depending on what I choose to do with photo enlargements I can either use this 1/2 circle for journaling or another photo/collage of photos.
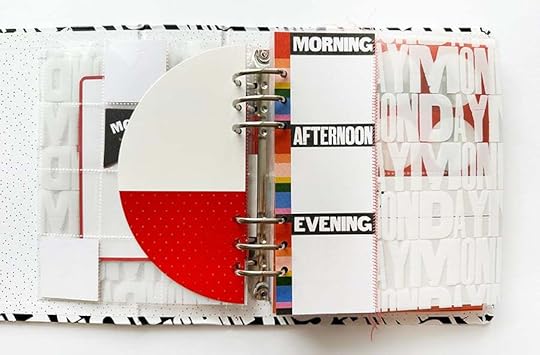
On the other side of the 1/2 circle I'll either add a photo or journaling.
Here's where I took the piece of transparency I cut (from the 10x8) and stitched it to the 3x8 card from the Main Kit. I'm thinking I'll add what I'm listening to and watching in these spots. This would also be a fun spot to document your food or your car trips or some other thing that you repeat in your life each day.
The back of the 3x8 would be a great place for a photo, collage of photos, or journaling.
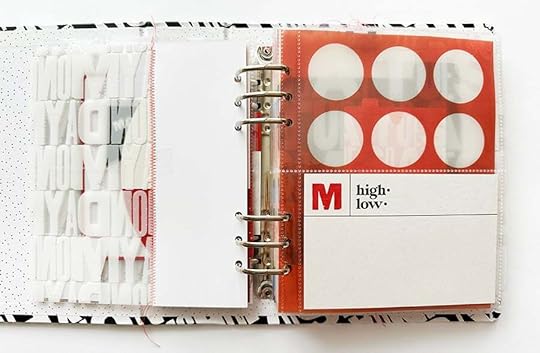
Next up is either a 2 pocket or 3 pocket page protector. I've slipped the high/low cards for each day into this spot and will add journaling or photo on top. The other pockets will be filled with photos.
More homes for photos or journaling on the back.
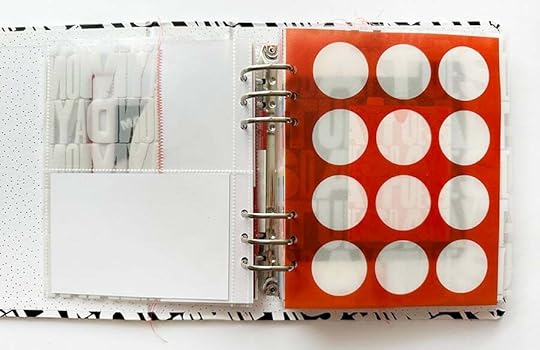
The last page in my daily design formula are the vellum pages with circles. Ideas for this page include:
some kind of a timeline: stamp times on each circle and write a bit about what's happening at that time (loving this idea) a home for circle punched ephemeras small photos punched into circles little moments captures using words/photos
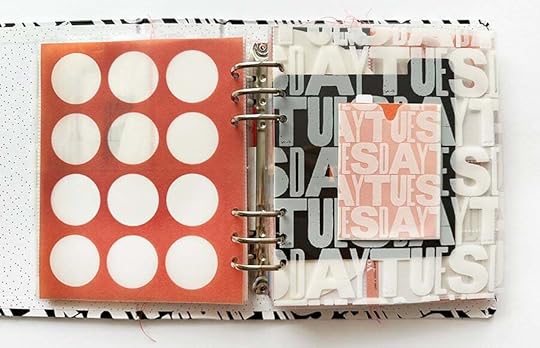
I'm not sure yet what I'll do on the back of the vellum. I'll either repeat something along the lines of what I'm doing on the front or something else. It will be fun to see what happens.
And repeat! As you'll see in the video above I followed the same design formula for each day of the week. Remember, this is what works for me and it's okay if you want to try something different!
Do you have fun ideas that you are planning to play with in your album that fit your season of life? I'd love to hear about it in the comments below.
Week In The Life Main Kit Week In The LIfe Mini Kit Week In The Life 6x8 Album Week In The Life Transparency Dividers Week In The Life Yardstick Half Circles Week In The Life Plastic Banners Week In The Life Vellum Papers Red Line Tape Rolling Adhesive 6 Hole Punch Sewing Machine
April 2, 2024
Project Life® 2024 | Week 11
Jumping back into
Project Life after traveling, playing with our Story Play | Love Story Kit, and being sick (man, so over it).
Let's dive right in to the video for Week 11:
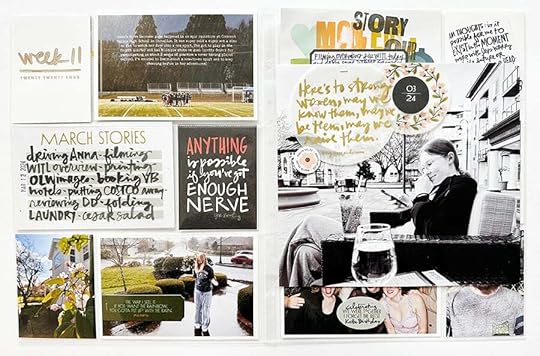
Here's a look via photos:
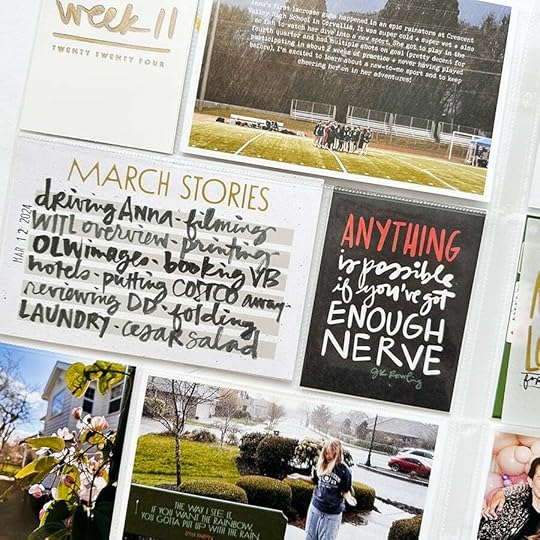
I kept this week fairly simple in order to catch up and because it felt good! I loved just adding in a few highlights from that particular day in March on the March Stories card using a Kuretake Brush Pen.
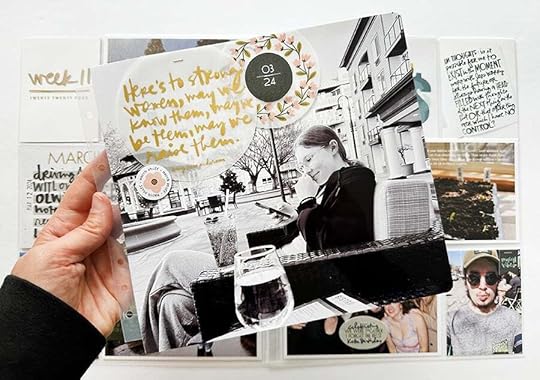
To highlight a couple photos I decided to print enlargements. This one is 9 inches wide x 8.25 inches tall. On top of the photo I added some punched vellum circles and other circle die cuts from the March Stories By The Month Kit.
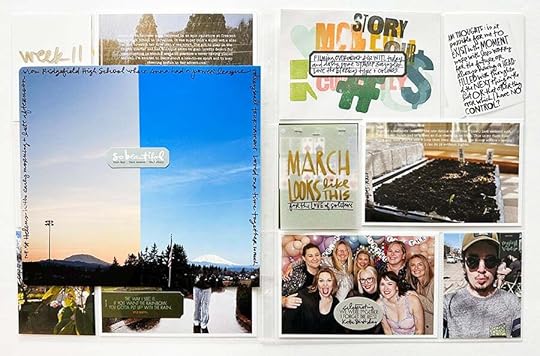
On the other side I combined a morning + an afternoon photo of Mt. St. Helens I took during one of Anna's day long club volleyball events.
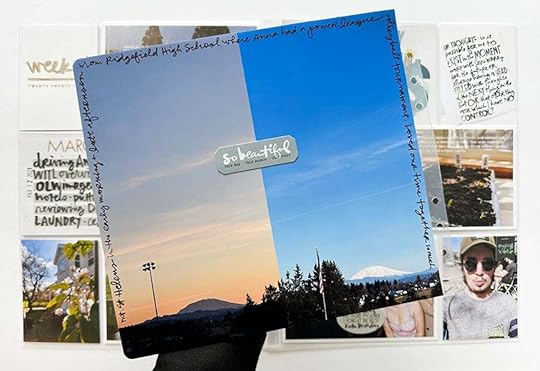
I used a Slick Writer to journal around the outside edge and added a March die cut in-between the two images.
Here's what the spread looks like without the insert:
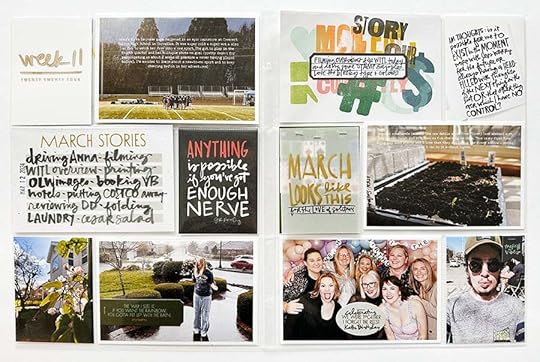
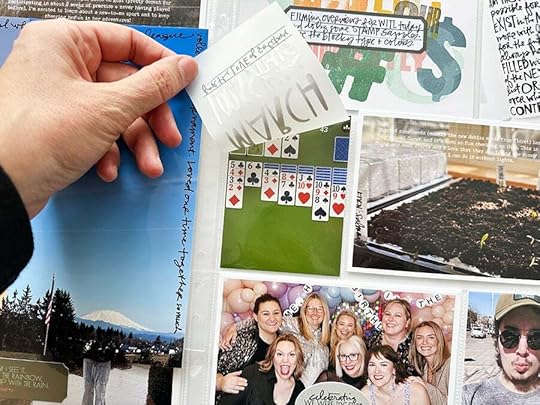
I added the "March looks like this" vellum using staples to the outside of the page protector. One too many games of Solitaire this past month!
9x12 Album 9x12 Page Protectors 4 Inch Circle Punch 3 Inch Circle Punch StazOn Ink Scrapbook.com Rolling Adhesive March 2024 Stories By The Month Kit Tiny Attacher Epson PictureMate PM400 Printer Other basic supplies can be found via my Amazon Storefront (printers, etc)
March 29, 2024
In Case You Missed It | March 29
Happy Friday, friends! Welcome to the latest
In Case You Missed It. Just a reminder that this is a quick post that will happen every Friday afternoon with all the updates and links that have happened throughout the week. So, let's get to it:
STORY PLAY LOVE STORY | DOCUMENTING WEEK
All this week Ali and Linda have been sharing ideas and inspiration related to our Love Story Story Play collection. Find their posts on the blog now.
WEEK IN THE LIFE 2024 IS HERE
The all new Week In The Life™ products for 2024 are now available! We have two new albums, our journal, a gorgeous main kit, an incredibly fun themed mini kit, and a collection of coordinating Week in the Life™ products. All of the products are in the warehouse and ready to ship! This year Ali will be documenting her week beginning Monday, April 22nd, 2024. Don't forget Ali's Storytelling With Week In The Life™ class is currently $5 off with code WITL until 3/31.
Our collection digitals for Week In The Life™ will be available on Friday, April 5th. Layered templates will be coming to the shop closer to the documenting day.
WEEK IN THE LIFE 2024 | FINAL HOURS FOR FREE SHIPPING
Free shipping for our all new 2024 Week In The Life™ products fends tonight! Use code WITL2024SHIP for FREE domestic shipping ($20 international flat rate) on Week In The Life category when you spend $75+. Offer valid until 3/29 at 11:59pm ET. Cart must include a minimum subtotal of $75 from the Week in the Life™ shop category to qualify. Offer subject to change.
SAVE $5 ON STORYTELLING WITH WEEK IN THE LIFE
To celebrate the release of our 2024 Week in the Life™ collection, we're offering $5 off of enrollment in Ali's Storytelling With Week In The Life class. Register and learn more here.
2024 STORY PLAY COLLECTION
The 2024 Story Play Collection is now available in the shop. Last year we introduced a new collection and community documenting project called Story Play and we are so excited to bring it back for 2024. This year's four themed kits can be purchased individually or in a bundle. Here are a list of the themes and the month's we will be inviting you to join us in documenting this year: Love Story (March), Foodie (June), Read (August), Day In The Life (September)
Digital kits (including stamps) are now available. Once these kits sell out, they will not be restocked.
Shop the collection now
here.
MARCH DIGITALS
The first Friday of every month we have a new digital release available in the shop. Play with scale, recolor objects, add journaling, print multiples…the sky is the limit when playing with digitals. Head to the link in our bio now to find this month’s digital releases. Shop digitals here.
2024 PROJECTS + PRODUCTS SCHEDULE
As we continuing easing into 2024 we put together an overview of our schedule of projects + product releases for the upcoming year. We are sharing this as a way for you to plan, think about what you might want to participate in this year, and simply share some of the things we have coming up to help support + inspire storytelling. For the last few years we've followed a fairly similar cadence for our releases and our major projects will follow that release schedule again this year. Please note that, as you might imagine, this schedule is subject to change throughout the year based on a variety of variables. Find the post here.
ONE LITTLE WORD® 2024
Did you pick a word for the year in December or January and forget it already? We can help with that! In our #onelittleword community we make our words visible in our lives via simple monthly creative prompts centered around reflective writing, photography, and other creative avenues (with lots of encouragement to make it your own based on the season you are in in your own life). Some people work in journals, some in albums, and some just come to listen to the conversations and apply the prompts to their lives in their own way. We have monthly zoom calls where we share our individual journeys and reactions to the prompts and cheer each other on as we take action to connect with our words in our own lives. We'd love to have you adventure with us this year! The cost is $50 for the year which comes out to be about $4 per month for community, connection, and guided prompts. Shop the collection
here. Visit our "Classes" page to see all of the details for this year's workshop. Register + learn more here.
As always, we’re so grateful to have you all as members of this community! Thanks for joining me today and have a great weekend!
Story Play | Love Story | Ali Project 04
Thanks so much for joining me for me for our Story Play | Love Story week!
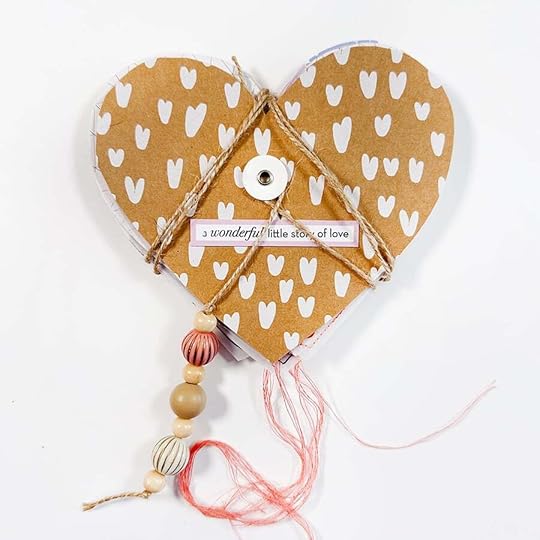
For my last project I'm sharing a little minibook created using a cut file I've added for you below and cutting up the packaging the Love Story Kit came in this year. Sometimes a kit like this can simply act as a jumping off point for a story your heart wants you to tell.
As I thought about what kind of story I wanted to tell for this last project what I most wanted to do was focus on the things I'm loving about each of my family members right now. The time to do this is not only when you are feeling love for another, but when you might be struggling (I talk more about this in the video). Look for the good in each other. Look for the heart of each other. Look for the light in each other. Find the goodness and write it down.
Download the digital package here (includes .studio cut file + png + PDF that can be used as a template).
Let's dive in to the video:
Here are additional photos:
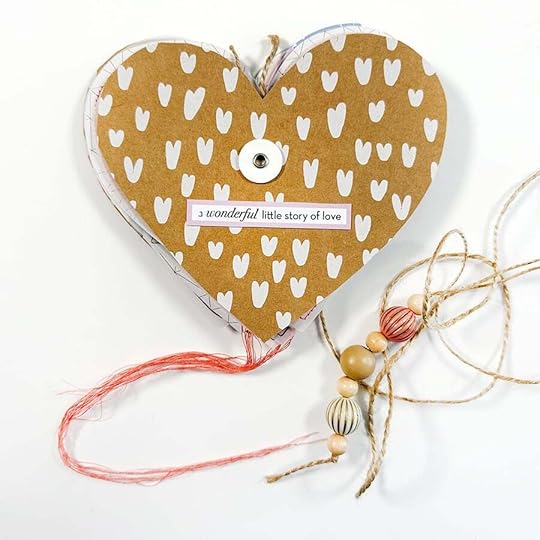
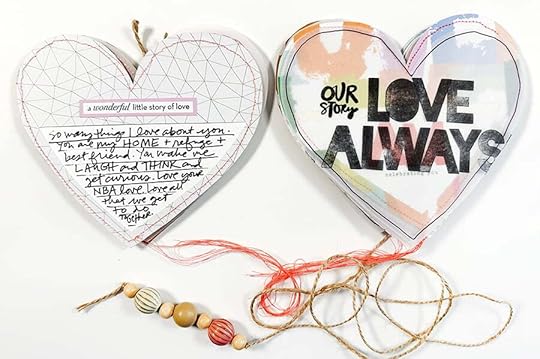
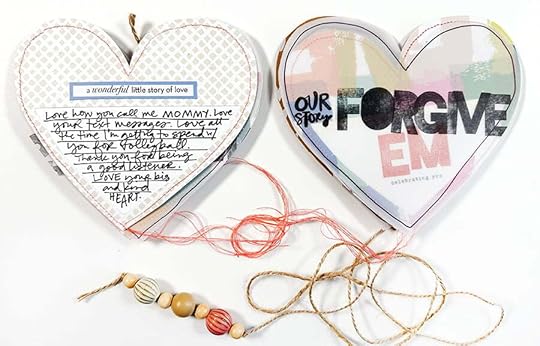
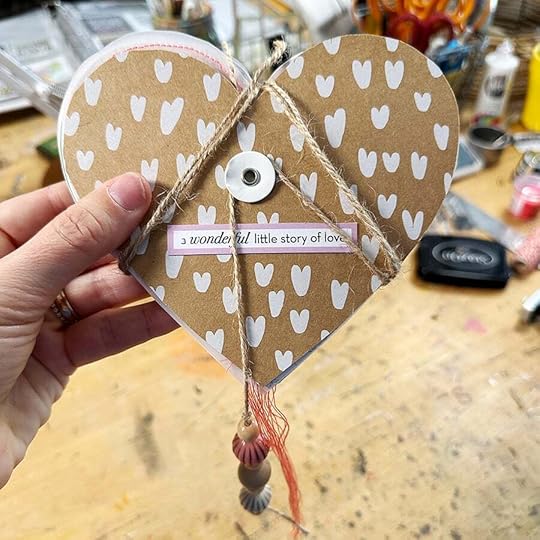
I used the Love Story Kit packaging to create a front + back cover for my project. I attached twine to the back (you'll see more below + step by step in the video) and added a few wood beads to the tail end.
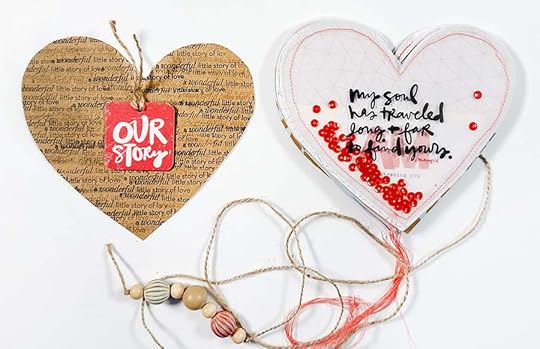
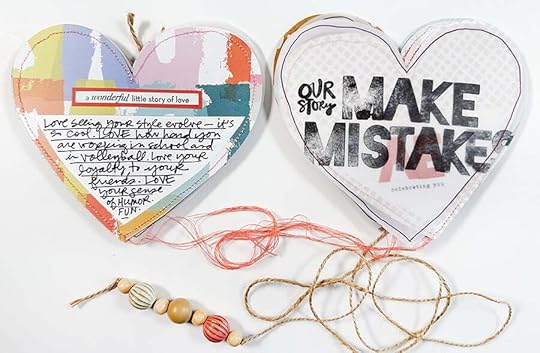
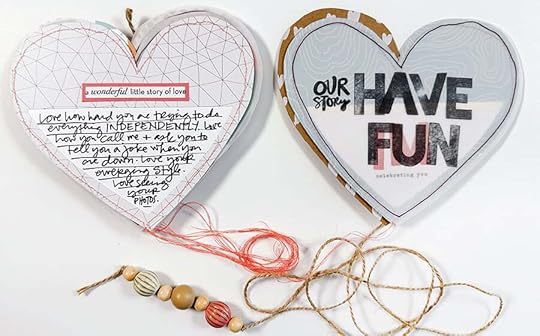
On the inside cover I repeat stamped "a wonderful little story of love" and rounded the corners on the "our story" chipboard piece.
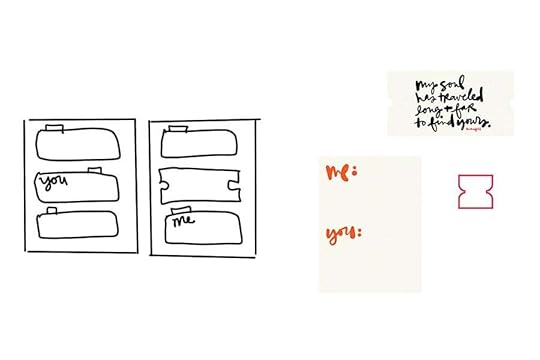
The first page in the project is a shaker with the "my soul" quote printed on transparency (this is available as a PNG for you in the download) and a piece of vellum on the back with red sequins inside.
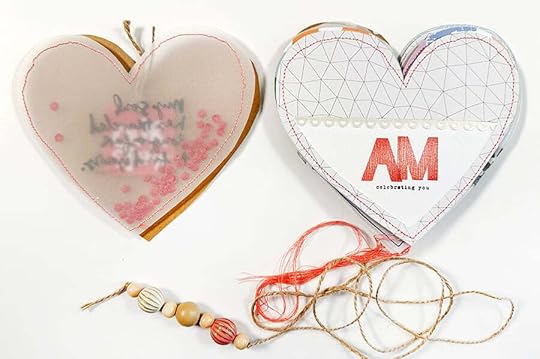
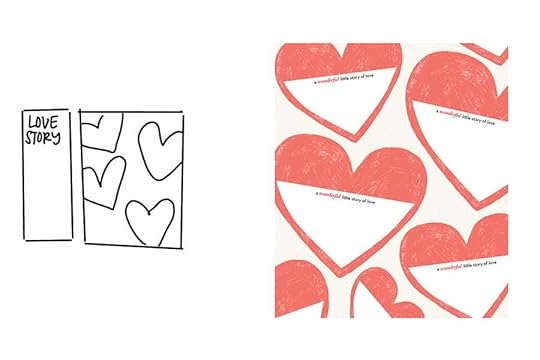
For half the pages in this project I used my Silhouette to cut out the front + back of the heart shapes using pattern paper from past Scrapbook Kits. If you don't have a Silhouette you can use the PDF in the download as a template for the front + the back.
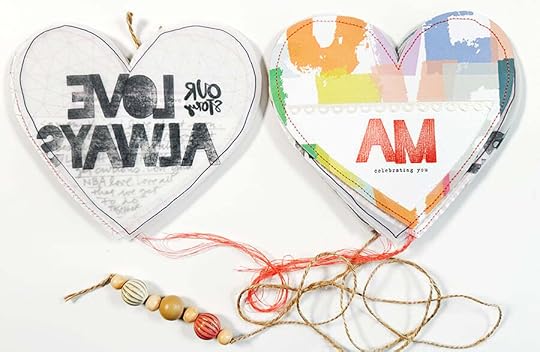
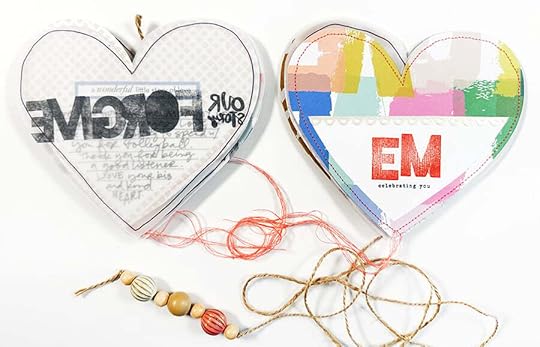
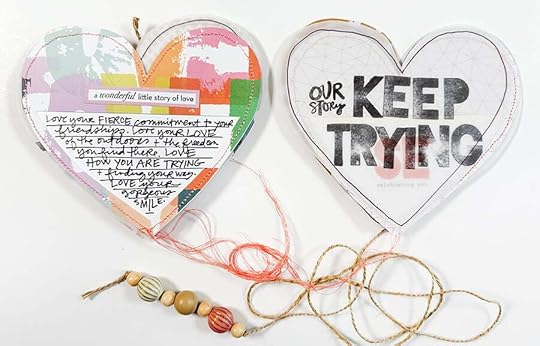
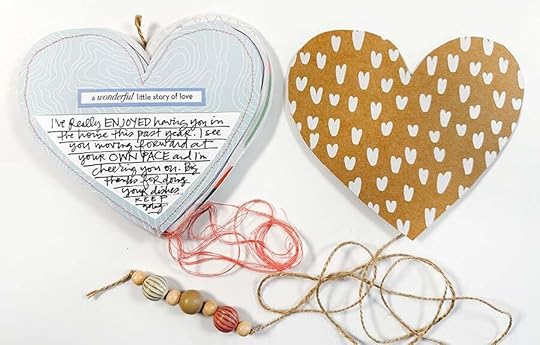
I added white cardstock between the two layers of hearts to create a home for my journaling. On the front I stamped my family member's initials using this stamp set + added some adhesive scallop ribbon along the edge. Under their initial I used the "celebrating you" stamp from the Birthday Story Stamp. I finished off each heart by running it through my sewing machine and chose to leave thread tails. Colleen Attara did that on a beautiful heart piece she sent me when Aaron and I got married and I always loved the look.
On the back of the die cut pattern paper hearts I added a stamped label (using a pattern paper from the Labels Scrapbook Kit) and used a Slick Writer to add my journaling.
In between the die cut heart pages I did vellum hearts with sentiments stamped on top. Next to each sentiment I used the "our story" stamp from the Love Story Stamp Set and drew an outline around the heart to finish it off.
I seriously love how this turned out.
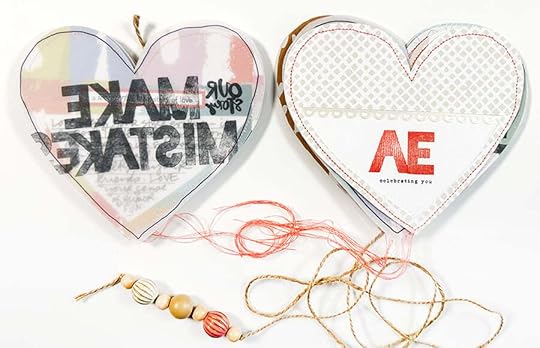
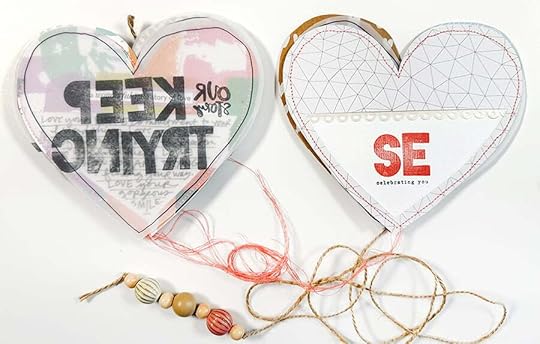

I cut another heart from the packaging to end the album. I wanted to be able to use the circle piece that comes with the packaging for my own twine so I ended up cutting off the top flip and adhering it to the other side of the heart:
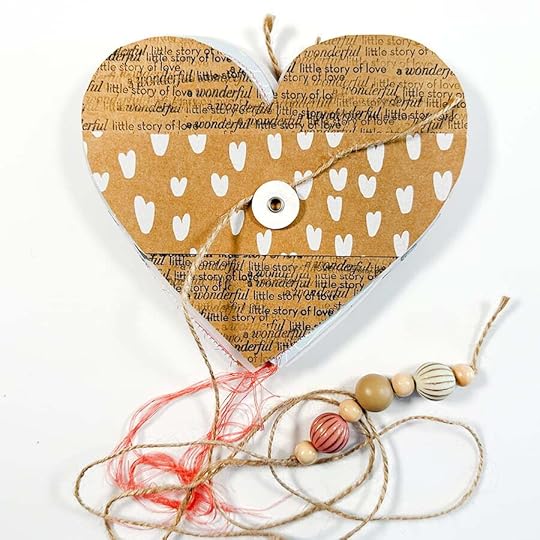
I repeat stamped the same stamp as I did in the beginning and then used red line tape to adhere the strip on the back before tying the twine in place. I left a long tail and added a few wood beads to the bottom. Watch the video to see how it gets all tied up.
This was such a fun project and I loved the chance to think about my family while I was making it and document those feelings + thoughts along the way.
Our Story Play series will be back again in a couple months with the next theme! Grab the bundle to play along here!
Love Story Kit Love Story Stamp Set Story Play Bundle May Arts Adhesive Scallop Trim Pattern Papers from past Scrapbook Kits Birthday Story Stamp ("celebrating you") White Cardstock Vellum Black Staz On Ink Redwoods Ink (red) Slick Writer Pen Alpha 6x8 Stamp Set Twine Wood Beads Sewing Machine Printable Transparency Red Sequins Silhouette Other basics available (trimmer, etc) from my Amazon Storefront
March 28, 2024
Story Play | Love Story | Ali Project 03
Welcome back to Story Play | Love Story.
Today I'm using the prompt pattern paper as a jumping off point to document four things I'm loving about Anna right now.
Here's a look at my process:
Here are some photos of my project:
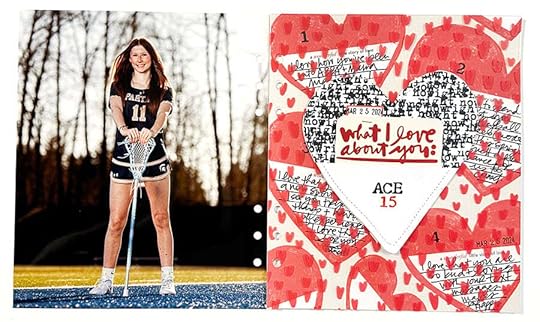
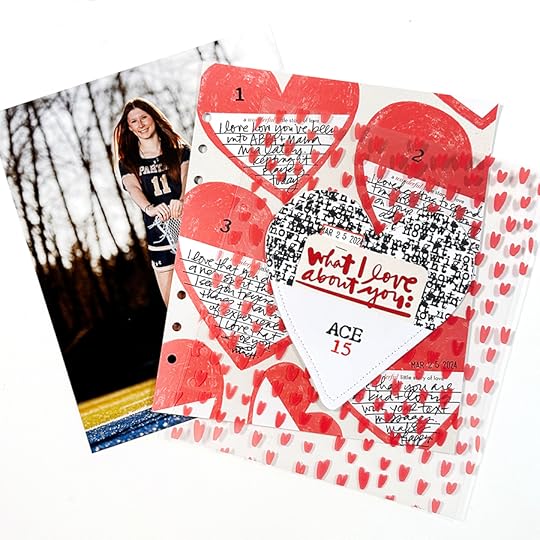
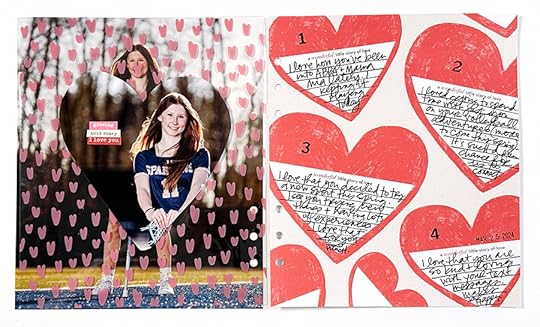
This one is a 3-page spread that include a full page photo + an insert with hearts on top + a prompt pattern paper.
PS: If you'd like to learn more about how I establish my design foundations check out my Start Here workshop.
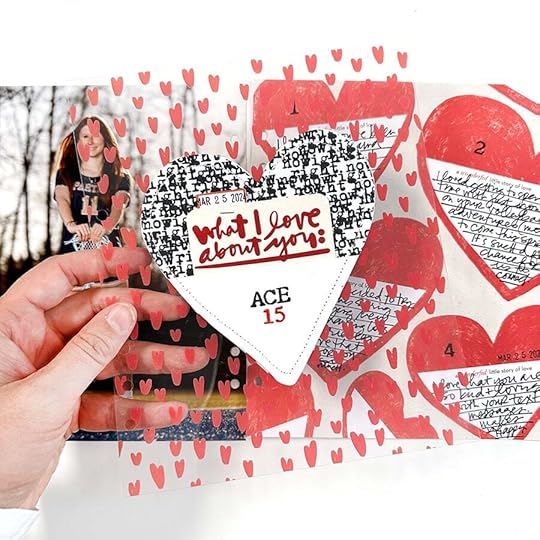
On top of the heart transparency I added a "right now" stitched heart pocket (from a previous release). I slipped the top part of the "what I love about you" journal card into the pocket and added a tab sticker with the date. On the bottom of the stitched heart I stamped Anna's initials and her age.
I printed out a second photo (sized it to 5 inches wide x 6 inches tall in order to be close to the size of the stitched heart) and used the stitched heart as a template to cut out the photo.
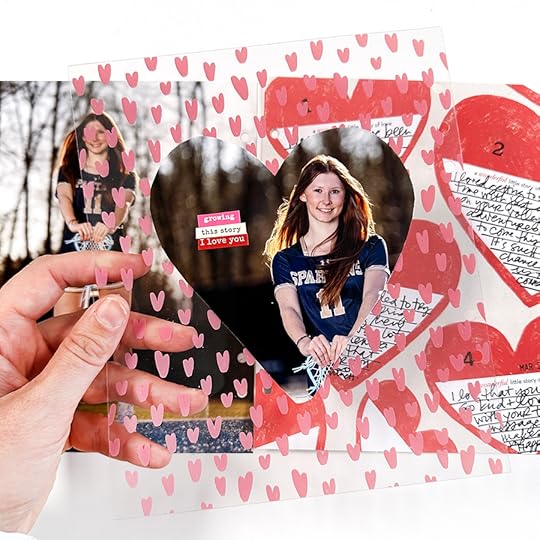
I added a few word/phrase stickers on top of the photo.
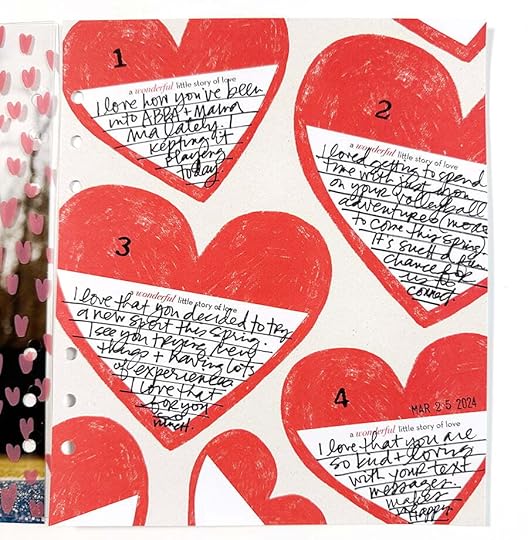
I used a Slickwriter to add my story directly on top of the hearts on the prompt pattern paper. It's an easy, fun home for your words!
Story Play Love Story Kit (bundle also available) StazOn Ink Large Stitched Heart Pocket Illustrated Faith Small Typewriter Stamp Set 6 Hole Punch Slick Writer Additional basic supplies can be found via my Amazon Storefront
March 27, 2024
Story Play | Love Story | Ali Project 02
Welcome back to Story Play | Love Story.
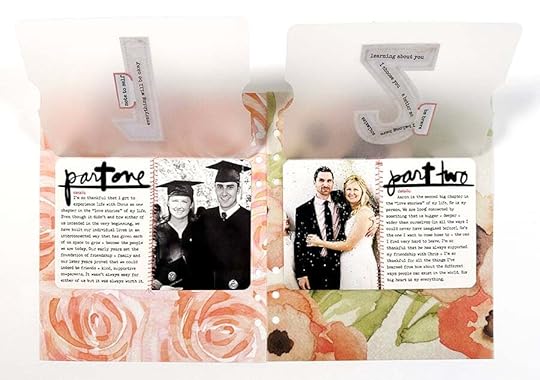
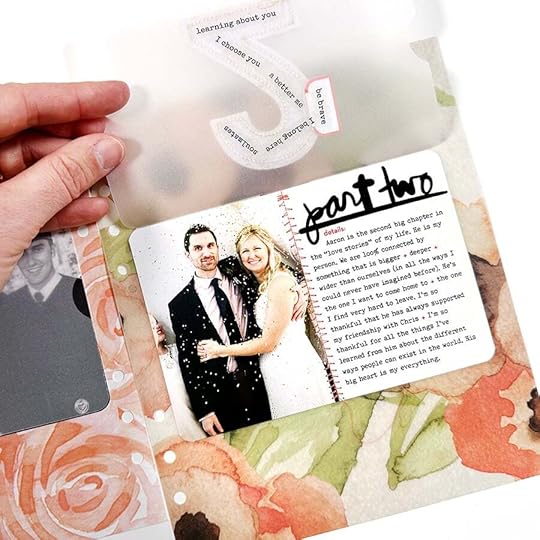
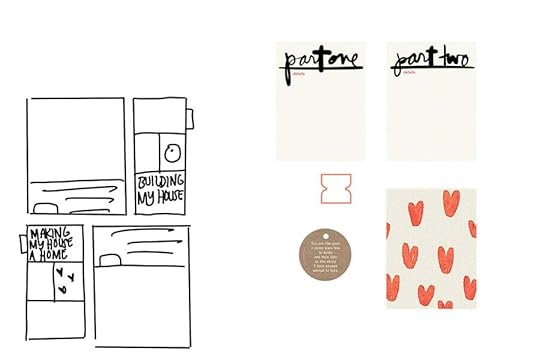
It's possible that you, like me, have lived more than one love story in this life. For today's Love Story project I decided to use the Part One and Part Two journal cards as a jumping off point for the two big love chapters in my own life. You might not have the same Part One and Part Two as I do, but you might have another story in your life with two distinct chapters and these cards are a great jumping off point for telling that story.
As I was editing my video for this project I kept thinking about how our stories are built one word at a time, one project at a time, through the various chapters of our lives. I was also thinking about how fun it is to compare and contrast now + then and to invite ourselves back into stories from our past to see how we might tell those stories differently today than we might have done with real time documenting.
We evolve and I'm so thankful for that.
Let's dive in to today's video:
Here's a look at my project via photos:
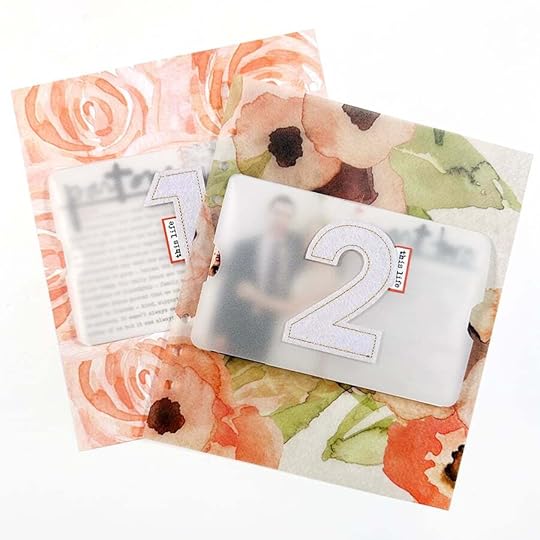
The background pattern paper on the left is from the Grow Scrapbook Kit and the pattern vellum on the right is from the September 2023 Stories By The Month Kit.
On the underneath side I added some clear word/phrase stickers to the backs of the felt numbers + tabs.
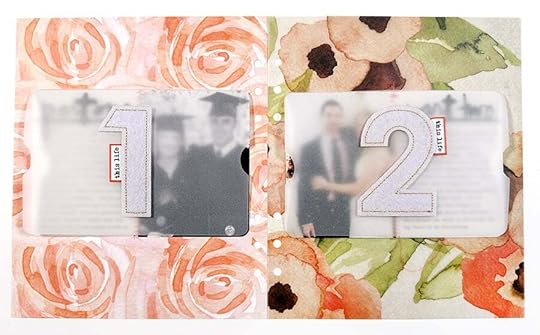
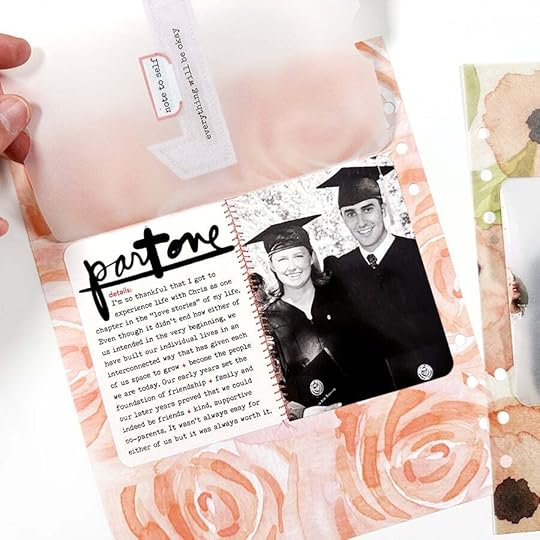
I ended up using the digital journal cards for this project since it was easy to just add text and print. You can also handwrite or use sticker paper or run the actual journal card through the printer. I paired each of my journaling cards with a 3 inch x 4 inch photo and rounded the outside corners. I temporarily adhered the photo/words combo to the background before running it through my sewing machine.
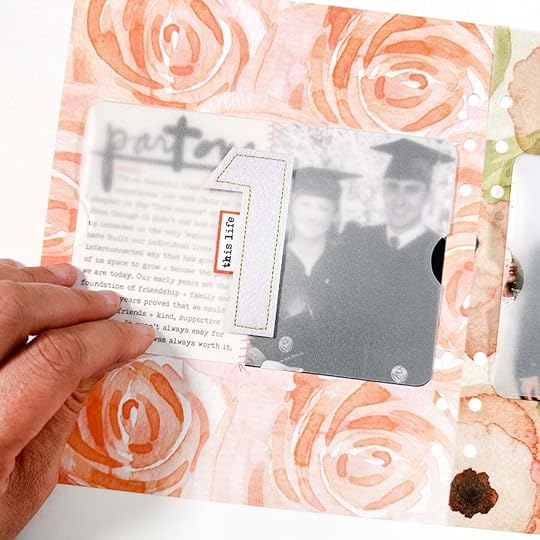
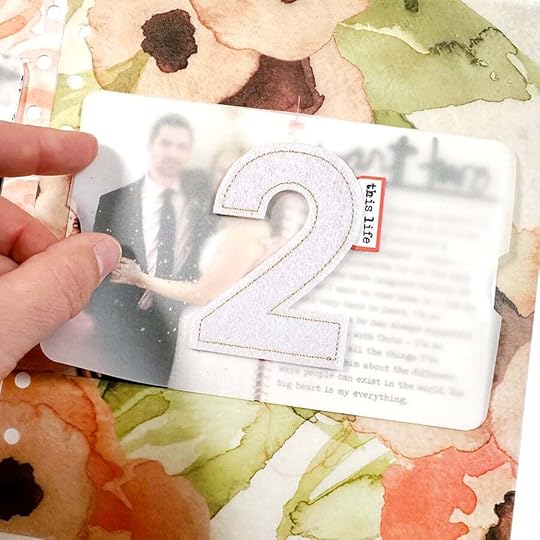
You could easily call it good with the words + photos stitched in place but I decided to play around with adding a vellum numbered flip up. To do this I cut a piece of plain vellum to 6 inches wide x 4.5 inches tall in order to fold over the top .5 inches. Because I had already stitched my cards to the background paper I made a small square cut from the vellum in order for it to fit folded over on top.
On top of the vellum I added a felt number (from December Daily®) and used the tab stickers + a "this life" stamp from the Pieces Of Me Stamp Set.
On the underside of the number I added clear word/phrase stickers.
Along the outside edges of the vellum I used a 1 inch circle punch to punch a partial circle.
Story Play Love Story Kit (bundle also available)
Story Play Love Story Stamp
StazOn Ink
1 Inch Circle Punch
Grow Scrapbook Kit Pattern Paper
Pattern Vellum from September 2023 Stories By The Month™ Kit
Pieces Of Me Stamp
Corner Rounder
Vellum
Felt Numbers (from December Daily® release)
Clear Word/Phrase Stickers
Brother CS7205 Sewing Machine
Epson PictureMate PM400 Printer
6 Hole Punch
Additional basic supplies can be found via my Amazon Storefront
March 26, 2024
Story Play | Love Story | Ali Project 01
Welcome back to Story Play | Love Story!
I'm so excited to dive into this Story Play kit with you today. I love these kits so much because they are awesome for straight-forward storytelling and/or as a jumping off point for more crafty fun.
When was the last time you got lost in your memories via your photos? Photos are LIFE. I spent some time going back in my archives as I was looking for photos of me and Aaron and it was simply the best. I also really loved seeing the videos that popped up when I searched via "people" in Photos.
As you are looking back through your photos, think a little about the chapters of this particular love story.
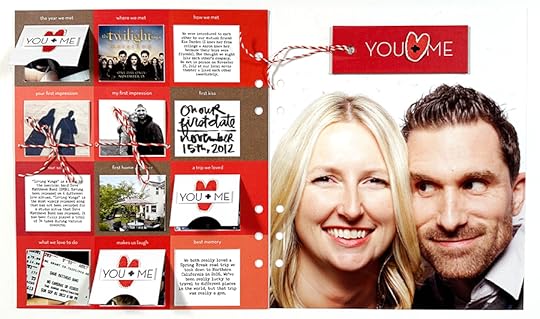
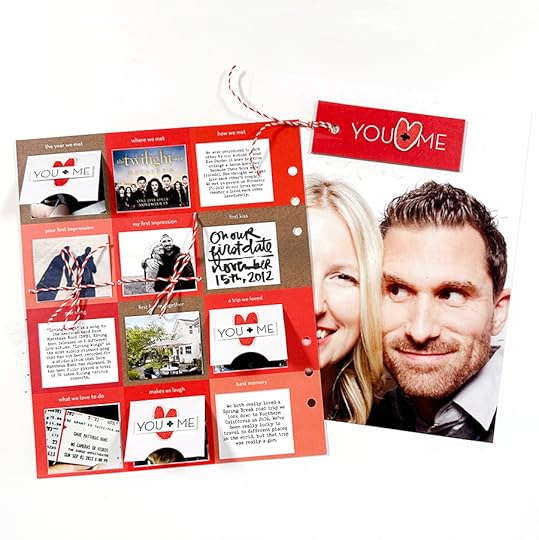
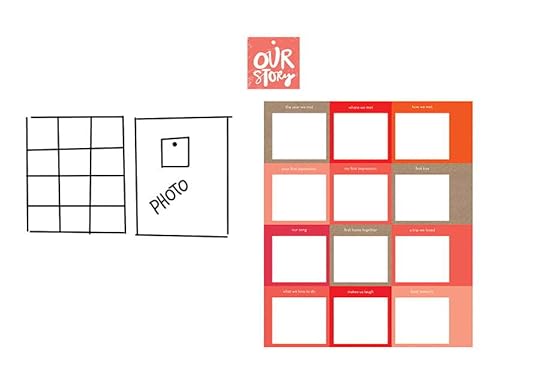
One of my favorite design formulas is a full page photo + a prompt page. For today's project I started off thinking I was going to go really simple but I ended up letting myself play a little more and enjoyed the process of playing around with the different things you could do with that pattern paper.
With this pattern paper you can:
Cut out the squares to use them in a 2x2 pocket page protector. Cut out the white portion and add text or a photo behind. Crop a photo to 1.75 inches x 1.5 inches and add it on the white space. Cut three sides of the white square and fold along the top to create a flip up. Use a 1 inch circle punch to punch out the partial circle along the bottom.
Here's my process video of this page coming together. Let's dive in:
Here are some close up images of this project:
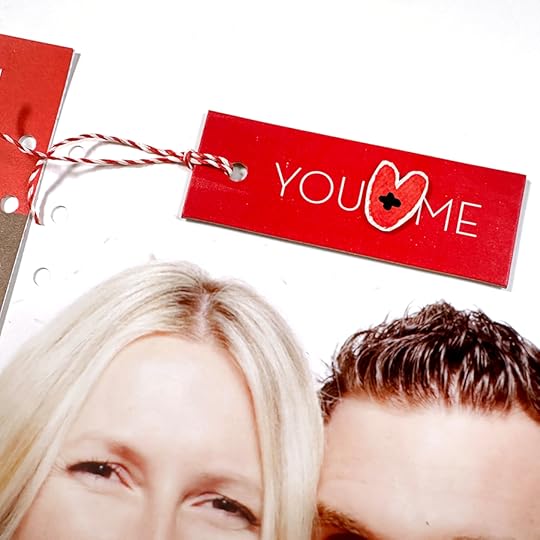
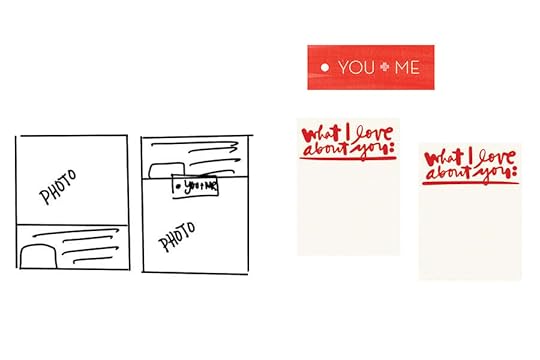
Chipboard piece + cut out heart from one of the 3x4 cards + a black POSCA Paint Pen on top. I added red/white twine through the hole on the chipboard tag and adhered the whole thing with foam adhesive.
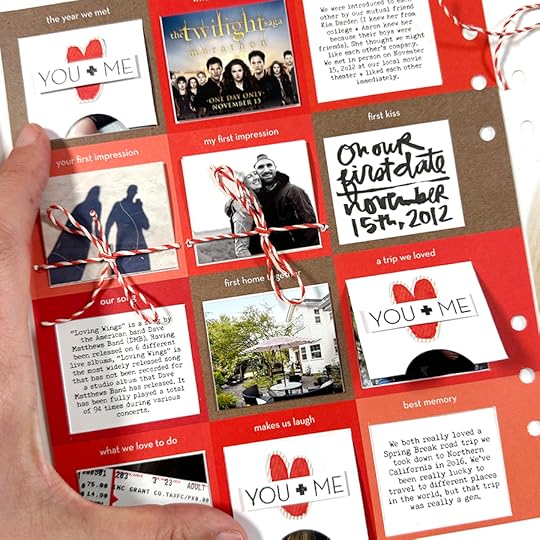
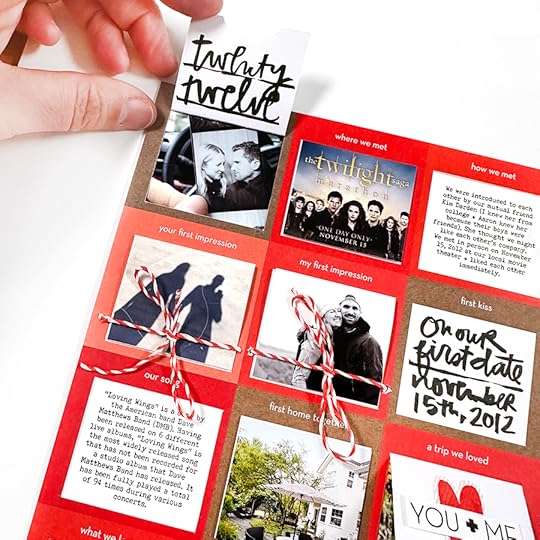
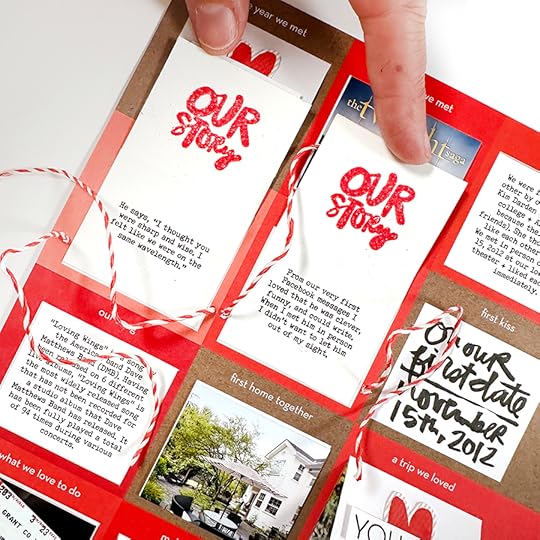
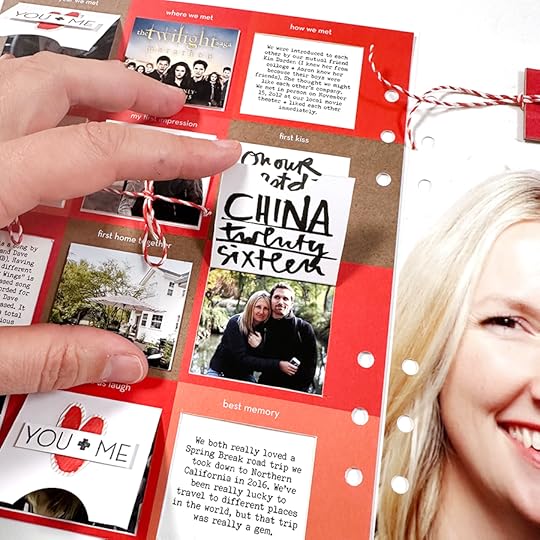
I had fun mixing and matching the treatment of the squares. Some I cut out completely (the ones with the text), some I folded up, and some I built on top (the folded photos with the twine).
On the outside of the folded up portions (I used a 1 inch punch to remove part of the bottom of the white) I added a cut out heart (from the 3x4 journal card) and stamped "you + me" using the stamp set.
The size of the white squares are 1.75 inches x 1.5 inches.
On the underside of the flip-ups I added a few details using a brush pen.
For the "first impression" spots I created flip-ups and used red/white twine to hold those in place.
On the underside (these measure 1.75 inches wide x 3 inches tall) I stamped + embossed using red embossing ink.
This was such a fun project to put together!

Story Play Love Story Kit (bundle also available) Story Play Love Story Stamp StazOn Ink 1 Inch Circle Punch Black POSCA Paint Pen Foam Adhesive Squares Paper Piercer Versamark Embossing Ink Red Embossing Powder Kuretake Brush Pen Red + White Twine Epson PictureMate PM400 PrinterCraft Knife
Metal Ruler6 Hole PunchAdditional basic supplies can be found via my Amazon Storefront
March 25, 2024
Story Play | Love Story | Story Planning With Linda

We are kicking of our Story Play | Love Story week with a story planning lesson from
Linda.
The concept behind story planning is to take a little time to go through the pieces of the kit and see what stories might be sparked, establish some stories you might want to tell, and then pick which products will best support those stories.
Linda's in our Story Classroom each month sharing her story plan ideas for each of our Story Kits.
Let's take a closer look at Linda's ideas for using the Love Story Kit:
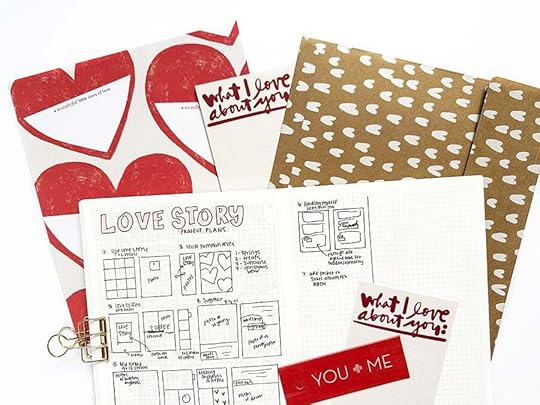
Hi there! This is Linda and I’m so excited to be here today to share with you my project planning for the Love Story Play mini kit. I have to admit that I wasn’t 100% sure I was going to use this kit when it was first released because I don’t really have a lot of romantic love stories to document considering I got divorced a couple of years ago. However, there is still so much love in my life and this kit works for all kinds of stories about love.
My first step is always to look through the kit in its entirety. As I get to each item, I think about a few things:
Is this something I want to add into my stash because it’s a great basic, or do I want to use it in a specific project? For embellishments, is this something I want to use all on one project, or should I use these a little at a time as additional embellishments? Does this include a story prompt I want to use as a jumping off point for a story? For papers, is this something I want to cut up or keep whole? Does this product lend itself well to project life?
Next, I go through the products again and begin lumping together the products I want to use in a specific project and sketching out the project ideas. I also make note of the album I will add it into, the specific story I want to tell, any specific photos I want to include, and which products I want to use.
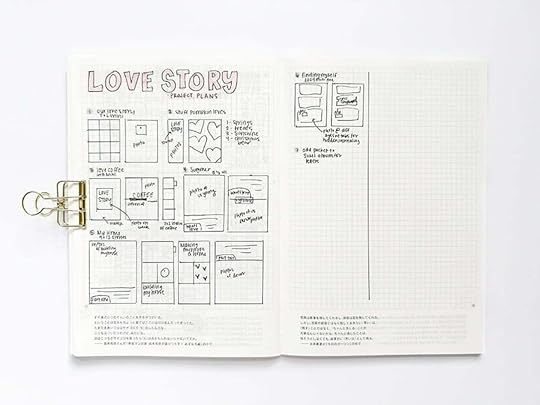
In the video, I walk through my process for planning out 6 project ideas using this kit, as well as talk through some other ideas. If you prefer still images, or if you want them to reference, I have also included photos of each of my plans below.
STORY PLANS
1. Our love story
2. Stuff Pumpkin loves
3. I love coffee

4. Love Summer (my daughter)
5. My home
6. Finding/loving myself
My next step to tackle these projects will be to break them down into action items. This is a process I shared in my class Plan, Prep & Play that is still available for purchase.
Essentially, this means I will break down each project into the steps I need to get it created and work on a few of the projects at a time to speed up my process. These steps will include things like selecting/editing/printing my photos, writing out my journaling, and assembling my pages.
Here is a final look at all my story plans in one place:
Thank you so much for joining me today in story planning with the Love Story Play mini kit. I hope this gave you some ideas for projects with this kit! If you found this post helpful, I create a similar styled lesson for each of the story kits in the story kit classroom.
If you want to see these projects come together, I will share them on my instagram as I complete them: @lindalovescreating. If you have any additional ideas or questions please leave them below.
I hope you have fun telling stories with this kit!
March 22, 2024
In Case You Missed It | March 22
Happy Friday, friends! Welcome to the latest
In Case You Missed It. Just a reminder that this is a quick post that will happen every Friday afternoon with all the updates and links that have happened throughout the week. So, let's get to it:
WEEK IN THE LIFE 2024 IS HERE
The all new Week In The Life™ products for 2024 are now available! We have two new albums, our journal, a gorgeous main kit, an incredibly fun themed mini kit, and a collection of coordinating Week in the Life™ products. All of the products are in the warehouse and ready to ship! This year Ali will be documenting her week beginning Monday, April 22nd, 2023. Don't forget Ali's Storytelling With Week In The Life™ class is currently $5 off with code WITL until 3/31.
Our collection digitals for Week In The Life™ will be available on Friday, April 5th. Layered templates will be coming to the shop closer to the documenting day.
SHIPPING DETAILS: Use code WITL2024SHIP for FREE domestic shipping ($20 international flat rate) on Week In The Life category when you spend $75+. Offer valid until 3/29 at 11:59pm ET. Cart must include a minimum subtotal of $75 from the Week in the Life™ shop category to qualify. Offer subject to change.
SAVE $5 ON STORYTELLING WITH WEEK IN THE LIFE
To celebrate the release of our 2024 Week in the Life™ collection, we're offering $5 off of enrollment in Ali's Storytelling With Week In The Life class. Register and learn more here.
INSTAGRAM WEEK IN THE LIFE COLLECTION REVEAL
Ali + Lisa were live on our Instagram account last week with a fun and informal LIVE collection preview. You can find a recording of that conversation here.
PIECES OF JOY
Thank you so much for your enthusiasm around our Pieces of Joy collection! The folios are currently sold out as well. We have reordered them and we are investigating final delivery dates. However those will likely be available closer to summer. The digitals are now available. Shop the collection here.
2024 STORY PLAY COLLECTION
The 2024 Story Play Collection is now available in the shop. Last year we introduced a new collection and community documenting project called Story Play and we are so excited to bring it back for 2024. This year's four themed kits can be purchased individually or in a bundle. Here are a list of the themes and the month's we will be inviting you to join us in documenting this year: Love Story (March), Foodie (June), Read (August), Day In The Life (September)
Digital kits (including stamps) are now available. Once these kits sell out, they will not be restocked.
Shop the collection now
here.
MARCH DIGITALS
The first Friday of every month we have a new digital release available in the shop. Play with scale, recolor objects, add journaling, print multiples…the sky is the limit when playing with digitals. Head to the link in our bio now to find this month’s digital releases. Shop digitals here.
2024 PROJECTS + PRODUCTS SCHEDULE
As we continuing easing into 2024 we put together an overview of our schedule of projects + product releases for the upcoming year. We are sharing this as a way for you to plan, think about what you might want to participate in this year, and simply share some of the things we have coming up to help support + inspire storytelling. For the last few years we've followed a fairly similar cadence for our releases and our major projects will follow that release schedule again this year. Please note that, as you might imagine, this schedule is subject to change throughout the year based on a variety of variables. Find the post here.
ONE LITTLE WORD® 2024
Did you pick a word for the year in December or January and forget it already? We can help with that! In our #onelittleword community we make our words visible in our lives via simple monthly creative prompts centered around reflective writing, photography, and other creative avenues (with lots of encouragement to make it your own based on the season you are in in your own life). Some people work in journals, some in albums, and some just come to listen to the conversations and apply the prompts to their lives in their own way. We have monthly zoom calls where we share our individual journeys and reactions to the prompts and cheer each other on as we take action to connect with our words in our own lives. We'd love to have you adventure with us this year! The cost is $50 for the year which comes out to be about $4 per month for community, connection, and guided prompts. Shop the collection
here. Visit our "Classes" page to see all of the details for this year's workshop. Register + learn more here.
As always, we’re so grateful to have you all as members of this community! Thanks for joining me today and have a great weekend!


