
Nancy Zieman's Blog, page 64
May 4, 2019
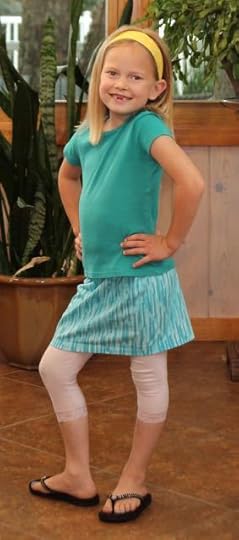
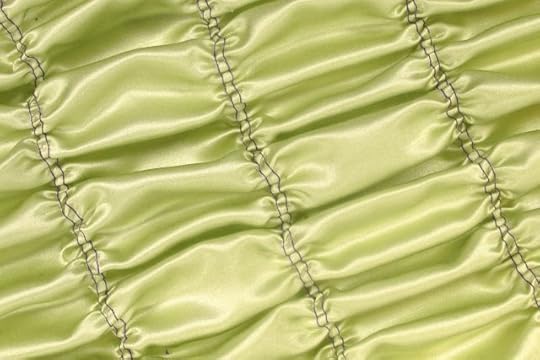
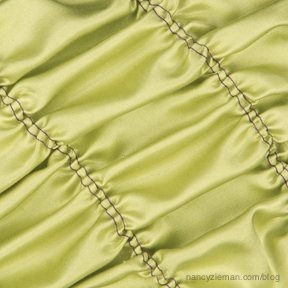
I Sew For Fun Project Tutorial: Super-Simple Skirt
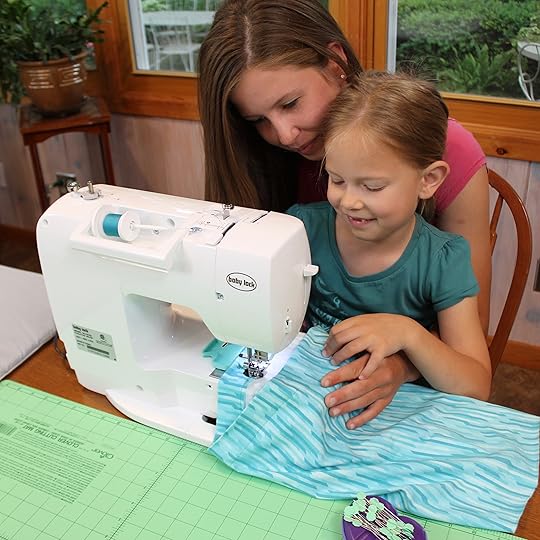
Sew a Super-Simple Skirt with a little elastic and 5/8 yd. knit fabric! Your budding little sewists will bloom, as they create their first clothing project, with this FREE! I Sew For Fun Super-Simple Skirt Sewing Tutorial by Nancy Zieman.

You’ll find this sweet skirt sewing project, plus 19 additional I Sew For Fun projects, in Nancy Zieman’s 72-page book, I Sew For Fun. Nancy shares her step-by-step directions for 20 super-easy sewing projects.
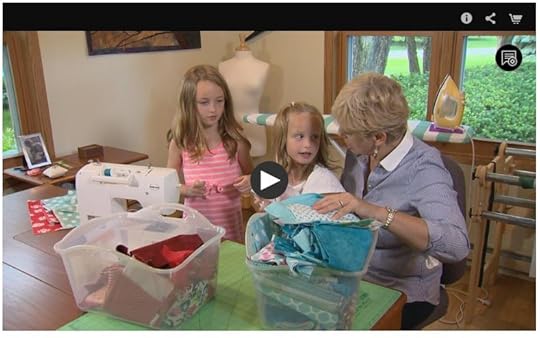
Tune in and watch Nancy and her granddaughters, along with friends, take a modern approach to sewing. Nancy shares her team sewing-for-fun experience along with many tips for a big partner, and numerous insights for involving a little sewing partner—all while making simple, easy to sew kid-friendly projects. Watch I Sew For Fun on Sewing With Nancy!
Skirt Sewing Tutorial
Supplies Needed:
5/8 yd. knit fabric
1 yd. of 1″ wide elastic
Instructions:
Please read all instructions before beginning. Use the width of the presser foot as the depth of the seam allowance.
1. Take a few measurements to determine the size of the fabric rectangle to cut:

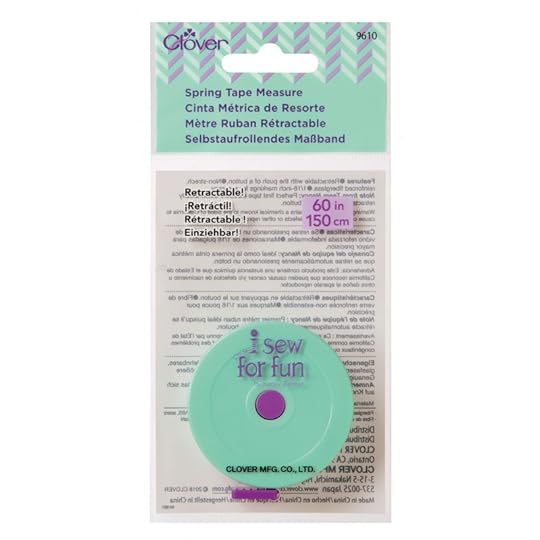
Have your little partner get out their tape measure, and show them how to take measurements.
Measure waistline and add 10″ to that measurement.
Measure your littler partner to determine the finished skirt length and add 3″:
- Example: Waist measures 20″ + 10″ = 30″. Length measures 11″ + 3″ = 14″
(This measurement allows for a 1-1/2″ casing and a 1-1/2″ hem).
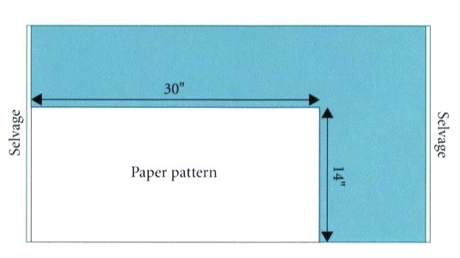
Draw a pattern rectangle on paper, using the final waist (width) and length measurements.
-For the example, draw the 14″ x 30″ rectangle on paper.
Cut the pattern rectangle from your knit fabric. (The length measurement (14″) should be parallel to the selvages of the fabric.)
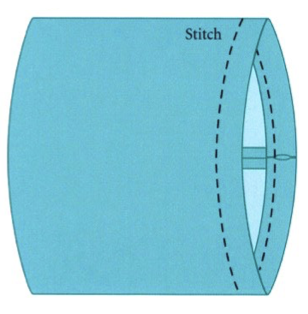
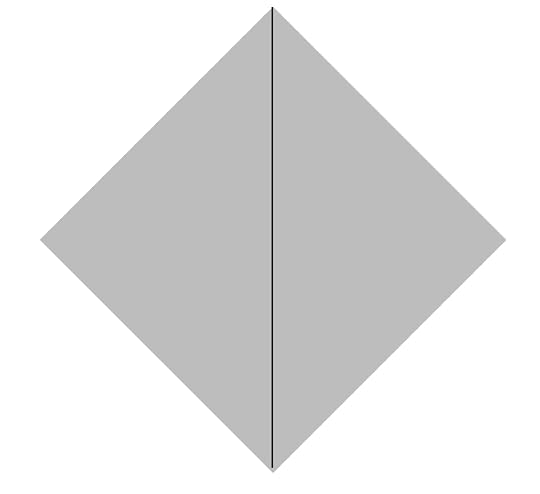
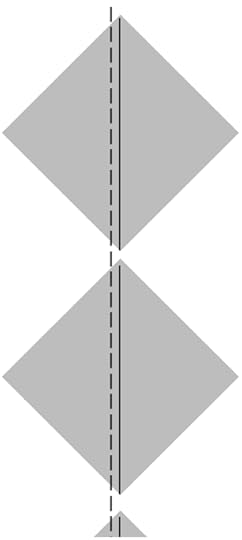
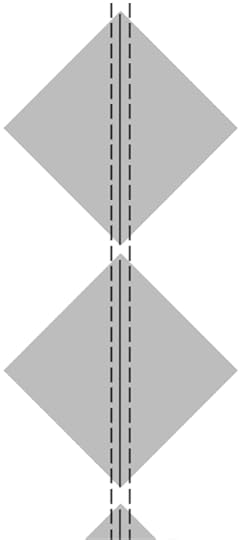
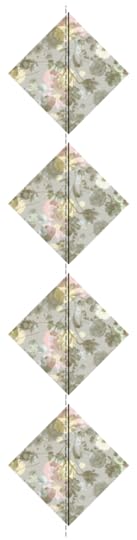
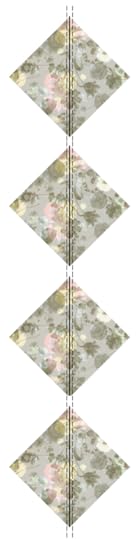
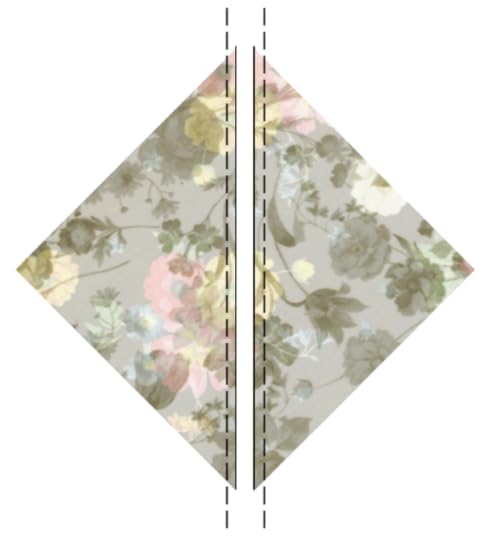
2. Stitch the back seam:
Fold fabric rectangle in half, right sides together, meeting short edges. Pin or use Wonder Clips to hold seam together.
Stitch about 1/2″ from the top edge; stop and backstitch, removing pins / Wonder Clips as you stitch.
Lift the presser foot and start stitching again about 1″ from last stitches.
The area that you left unstitched will be the opening for the elastic.
Continue stitching seam, backstitching at the bottom edge.
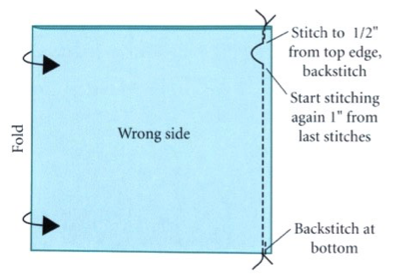
Press seam open.
Turn skirt right side out.
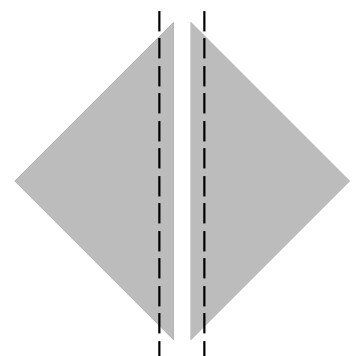
3. Make casing:
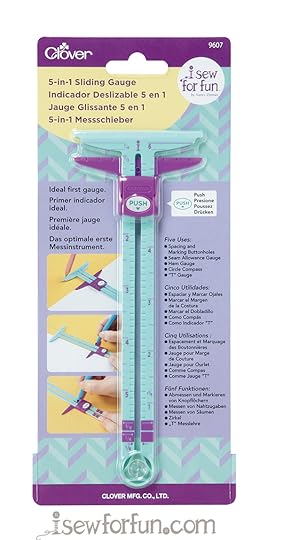
Turn under a 1-1/2″ at the top edge of the skirt forming the casing, using I Sew For Fun 5-in-1 Sliding Gauge to measure accurately. Press. Use I Sew For Fun Heart Shapped Straight Pins or I Sew For Fun Wonder Clips to secure.
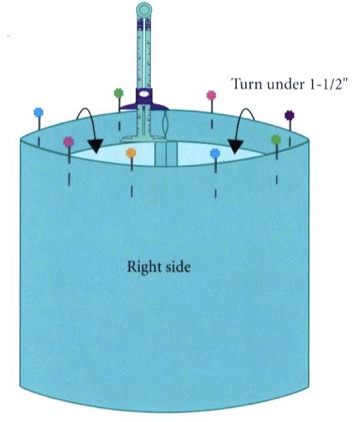
Stitch, guiding the edge of the presser foot along the cut edge of the casing, removing pins / Wonder Clips as you stitch.
The bulk of the fabric will be to the inside of the sewing machine.
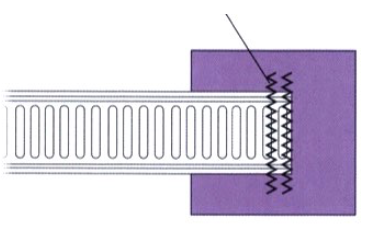
4. Prepare elastic and insert into casing:
Cut elastic about 2″ smaller than the finished waist measurement. Or, have your little partner try on the skirt, and snug up the elastic to fit comfortably; mark elastic. Trim elastic at the markings.
Center a 2″ square of firmly woven fabric under one cut edge of the elastic. Securely zigzag the elastic to the fabric.
Show your little partner a zigzag stitch, and let him/her try this new stitch on the small segment of elastic.
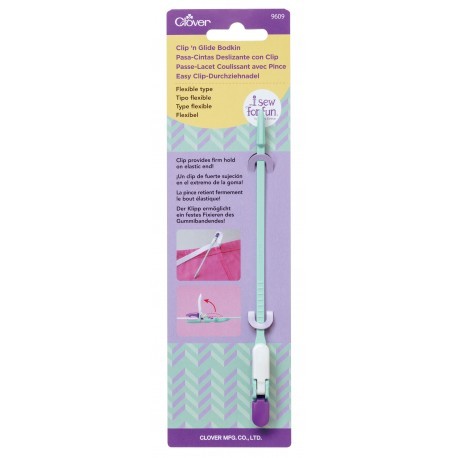
Use the I Sew For Fun Clip ‘n Glide Bodkin to thread elastic through casing. The fabric square helps stop the free end of the elastic from being drawn into the seam opening.
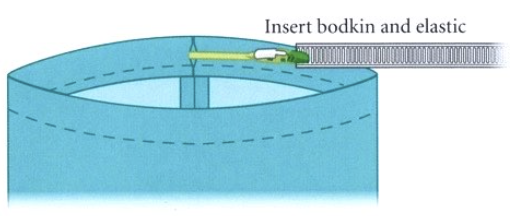
Help your little partner feed elastic into casing.
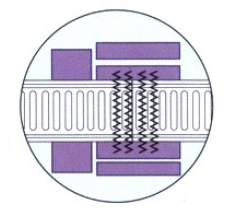
“Kiss” the other end of the elastic against the first end. Zigzag through the elastic and fabric several times. Trim away excess fabric as shown.
Distribute fullness evenly around the casing.
Optional: Hand stitch opening in casing closed.
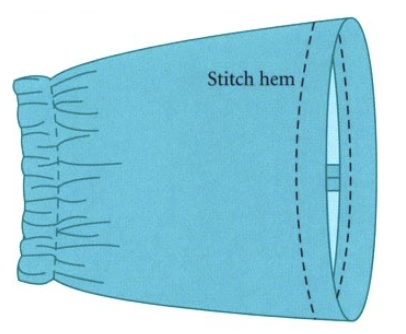
5. Hem the skirt:
Turn a 1-1/2″ hem to the wrong side of the skirt, using 5-in-1 Sliding Gauge . Secure with pins or Wonder Clips . Press.
Stitch, guiding the edge of the presser foot along the cut edge of the hem, removing pins / Wonder Clips as you stitch.
Now that you and your little sewing partner have completed this super-simple skirt project, next sew a coordinating skirt for their 18″ doll! Nancy shares complete instructions for the 18″ doll skirt, plus 19 additional I Sew For Fun projects, in her 72-page, I Sew For Fun book.
You’ll find this sweet skirt sewing project, plus 19 additional I Sew For Fun projects, in Nancy Zieman’s 72-page book, I Sew For Fun book. Nancy shares her step-by-step directions for 20 super-easy sewing projects.
Tune in and watch Nancy and her granddaughters, along with friends, take a modern approach to sewing. Nancy shares her team sewing-for-fun experience along with many tips for a big partner, and numerous insights for involving a little sewing partner—all while making simple, easy to sew kid-friendly projects. Watch I Sew For Fun on Sewing With Nancy!

Watch I Sew For Fun on Sewing With Nancy online at NancyZieman.com.
For a complete listing of all I Sew For Fun companion products by Nancy Zieman, visit isewforfun.com

To win a NEW! I Sew For Fun Clip ’n Glide Bodkin from Clover, please leave a comment below sharing a sewing project you’ll be stitching with your little sewing partner.

The randomly selected winner of a set of eight Landscape Quilt Note Cards by Nancy Zieman, from the April 27 blog post is, Dee.
Her comment is: My favorite is Out on a Limb because it best describes the life and work of Nancy Zieman. She was always “out on a limb”…cheerfully leading and in the forefront of new trends in sewing, inspiring us to follow her as she tried those new ideas. And, obviously, she was a talented artist in many mediums. I miss her gentle “Bye for now.”

Be sure to check out the 2019 Modern Mini Quilt Challenge!
Happy Sewing,
Team Nancy Zieman
Nancy Zieman Productions, LLC.

Content in this feed is © copyright 2019 by Nancy Zieman Productions, LLC and may not be republished without written permission. You’re welcome to forward the email to a friend or colleague but it’s not okay to add the RSS feed automatically as content on a blog or other website.
The FTC requires us to tell you that Nancy Zieman Productions, LLC has provided products by other companies in the course of doing business. The FTC requires us to advise you to take this information into consideration when reading this posting.
Make sure you are subscribed to Nancy Zieman Productions, LLC enews mailing list so you won’t miss a thing. Sign up here . Join us on Facebook , plus a host of other social media channels. Connect With Nancy and Friends today!


May 2, 2019
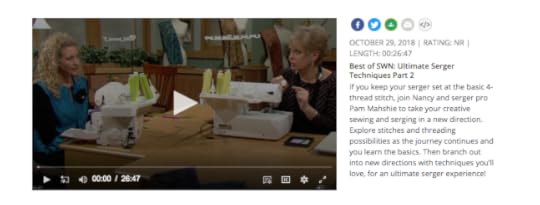
More Ultimate Serger Tips and Techniques
Do you find yourself wishing you had time to take a serger sewing class, yet never finding the time? Solution: Take a serger technique workshop at home. Watch Sewing With Nancy online! It’s a 2-part workshop with Nancy’s guest, Pam Mahshie, Baby Lock’s National Sewing Ambassador.
Here’s a preview of the second episode.
Quilt Binding using a 4-thread overlock stitch
With just a few changes, the basic overlock stitch can be modified to stitch binding on a quilted project. Learn how fusible thread streamlines the sewing process, producing professional results.
Gathering with a Cover Stitch
If you’ve gathered fabric before, you’ve probably stitched a row or two of basting stitches and then pulled the threads to gather the fabric. Gathering on a serger with a cover stitch can be automatic—stitch and gather at the same time. Curious? Learn now by watching online!
 Creating Pintucks
Create texture with pintucks, again using the cover stitch setting. Light to medium weight fabric can easily take on dimension once you know how to set up your serger.
Embellishing with Decorative Threads
Decorative threads and your serger are a prime choice for embellishing. The amazing part of this technique is that the stitching is done from the wrong side of the fabric—the pretty part only shows once the stitching is complete.
Watch Ultimate Serger Techniques (Part One, and Part Two) on The Best of Sewing With Nancy online.

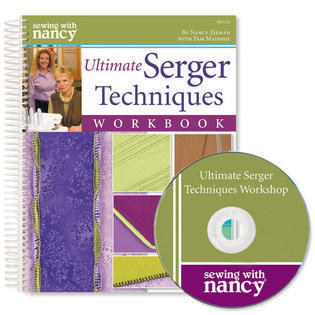
A Serger Workbook with 33 Serger Techniques!
Several seasons ago, Pam and Nancy presented a three-part Sewing With Nancy series simply called the Serger Workshop. The Ultimate Serger Techniques Workbook spiral bound book combines the information from this series. Learn 33 techniques using 10 different serger stitches! Now is your chance to win this workbook by leaving a comment telling us a serger technique you’d like to try. One winner will be selected randomly.
Be sure to check out the 2019 Modern Mini Quilt Challenge!
Have Fun Serging,
Team Nancy Zieman
Nancy Zieman Productions. LLC.
Content in this feed is © copyright 2019 by Nancy Zieman Productions, LLC and may not be republished without written permission. You’re welcome to forward the email to a friend or colleague but it’s not okay to add the RSS feed automatically as content on a blog or other website.
The FTC requires us to tell you that Nancy Zieman Productions, LLC has provided products by other companies in the course of doing business. The FTC requires us to advise you to take this information into consideration when reading this posting.
Make sure you are subscribed to Nancy Zieman Productions, LLC enews mailing list so you won’t miss a thing. Sign up here . Join us on Facebook , plus a host of other social media channels. Connect With Nancy and Friends today!
May 1, 2019
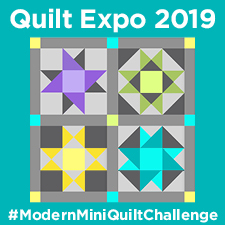
Join the 2019 Quilt Expo Modern Mini Challenge

Enter the #ModernMiniQuiltChallenge
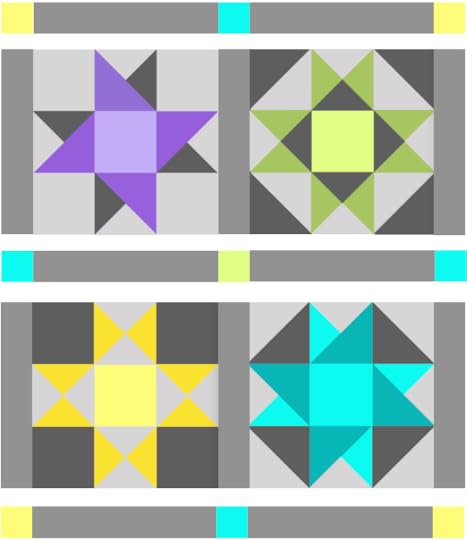
Quilt Expo and Nancy Zieman Productions are excited to announce the third-annual Modern Mini Quilt Challenge, taking place throughout the month of May on social media! You’re invited to join the challenge by stitching one 24-inch square (or smaller) modern mini quilt in fabrics featuring a modern color palette and design.
Brainstorm, design, and plan. Then, stitch! Enter the 2019 Quilt Expo Modern Mini Quilt Challenge by emailing your image to qechallenge@gmail.com.

2019 Quilt Expo Modern Mini Quilt Challenge Complete Entry Rules:
Sew a mini modern quilt to showcase your quilting talents. Submit your entry by emailing a high-resolution image of your quilt to qechallenge@gmail.com by 5 p.m. CST on Tuesday, May 21, 2019.
Mini Quilts must be no more than 24-inches square, and may be pieced, appliquéd, mixed, or other.
Mini Quilts must be made from fabrics in a modern color palette and design.
Mini Quilts must be quilted through three layers by hand, by machine, or both.
You may enter ONE modern mini quilt that is completed within the last year.
Entries must be sent to qechallenge@gmail.com ; participants are encouraged to share progress and quilt photos on social media using hashtag #ModernMiniQuiltChallenge .
Submitted entries will be shared on Quilt Expo’s Facebook page throughout the month of May at facebook.com/QuiltExpo.
Winners selected by a panel of judges, plus five randomly drawn winners, will be announced on Tuesday May 28, 2019.
Judging takes place May 23–24, 2019.
Open to US residents only.
Grab the Quilt Expo Modern Mini Quilt Challenge badge and let your friends know about this fun quilt challenge! Visit facebook.com/QuiltExpo for details.
View the Gallery of Quilts
Photos will be hosted by Wisconsin Public Television on the public Quilt Expo Facebook Page in the 2019 Quilt Expo Modern Mini Quilt Challenge album. You may comment and ask questions directly on the photo. Of course, you can always share photos within Facebook, too. You do NOT have to have a Facebook account to enter the challenge. By emailing your photo to the address above, you’re acknowledging and consenting to having the image shared in public online social media venues. Subscribe or “LIKE” the Quilt Expo Facebook page to see all the new mini quilt images as they are added. View entries in the photo album here.
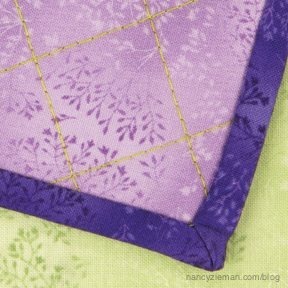
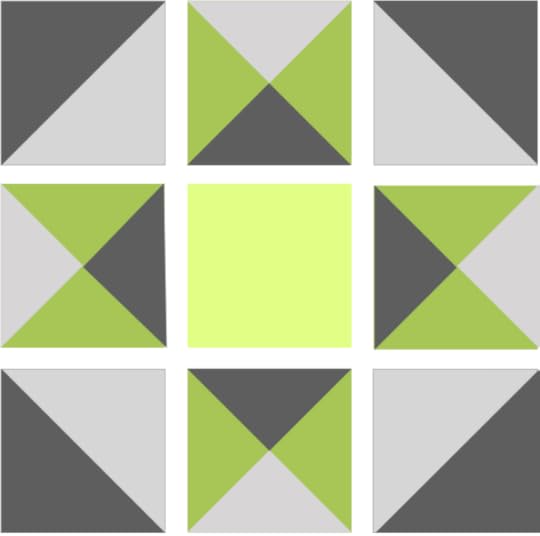
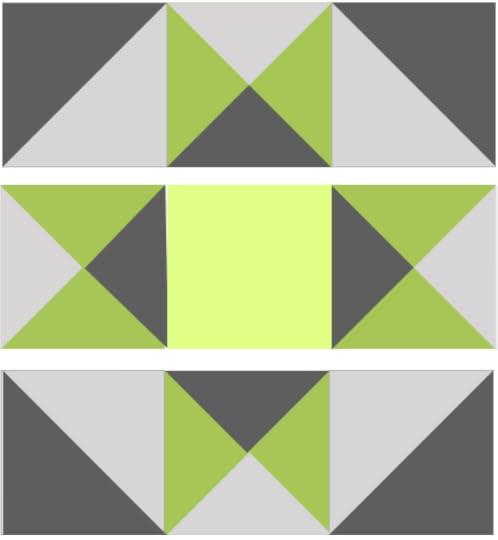
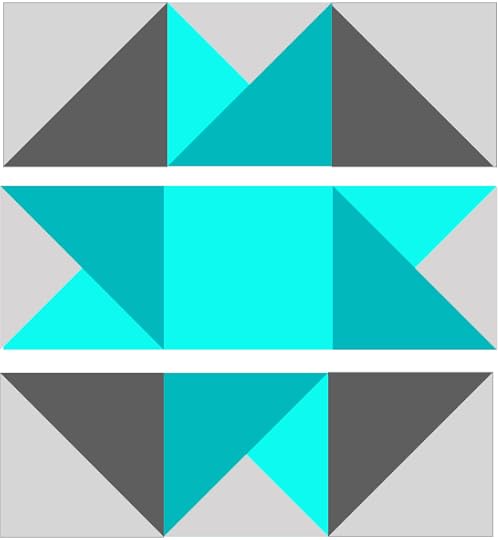
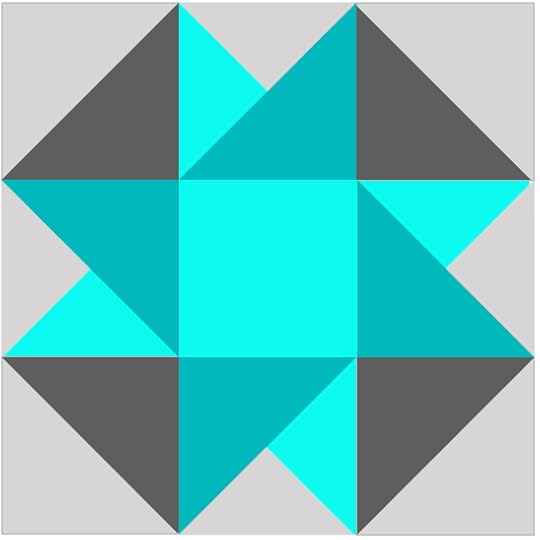
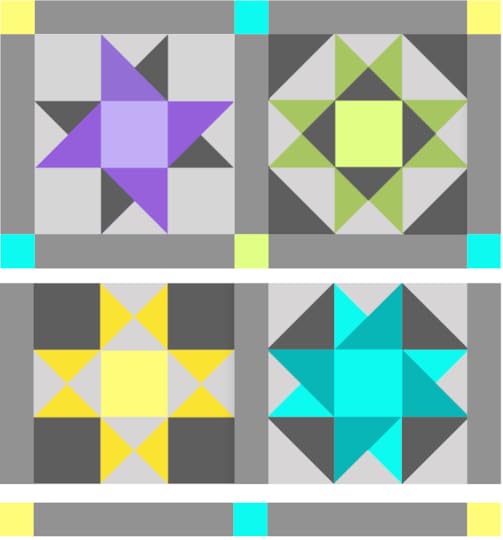
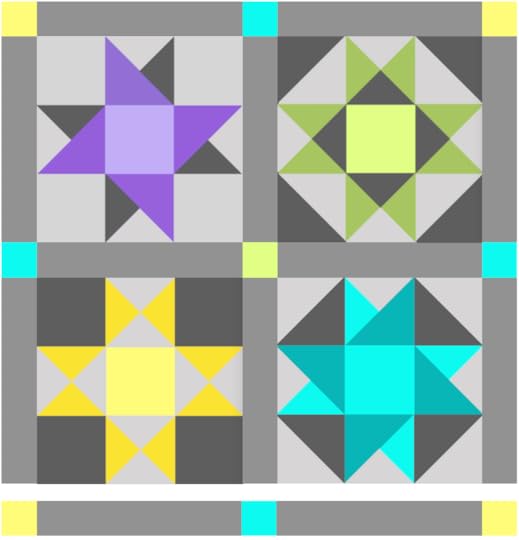
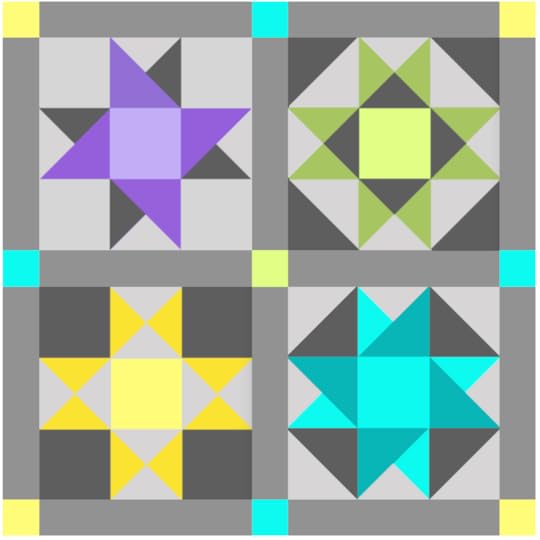
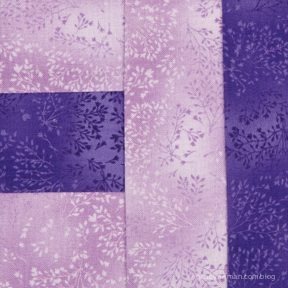
How to Make Our Modern Mini Four-Block Wall Hanging
Approximate finished size: 15-1/2″ x 15-1/2″
Choose the Fabrics
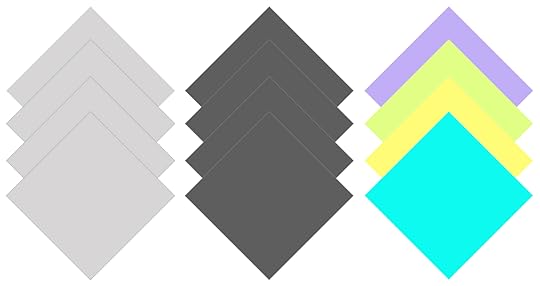
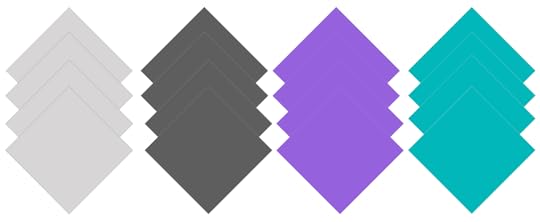
 Dark Purple, Light Purple, Dark Green, Light Green, Dark Yellow, Light Yellow, Dark Turquoise, Light Turquoise, Dark Grey, Light Grey and Medium Grey
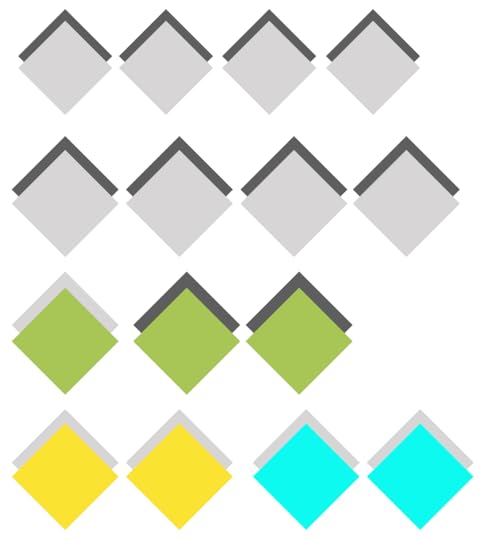
Cut Fabric for Block
Cut four 2-1/2″ squares of Light Grey
Cut four 2-1/2″ squares of Dark Grey
Cut one each 2-1/2″ squares of Light Purple, Light Green, Light Yellow and Light Turquoise
Cut four 2-7/8″ squares of Light Grey
Cut four 2-7/8″ squares of Dark Grey
Cut four 2-7/8″ squares of Dark Purple
Cut four 2-7/8″ squares of Dark Turquoise
Cut seven 3-1/4″ squares of Light Grey
Cut three 3-1/4″ squares of Dark Grey
Cut two 3-1/4″ squares of Dark Green
Cut two 3-1/4″ squares of Dark Yellow
Cut two 3-1/4″ squares of Light Turquoise

Construct Units
All seam allowances are scant 1/4″ unless otherwise stated.
The step-by-step photos illustrate construction of the block.
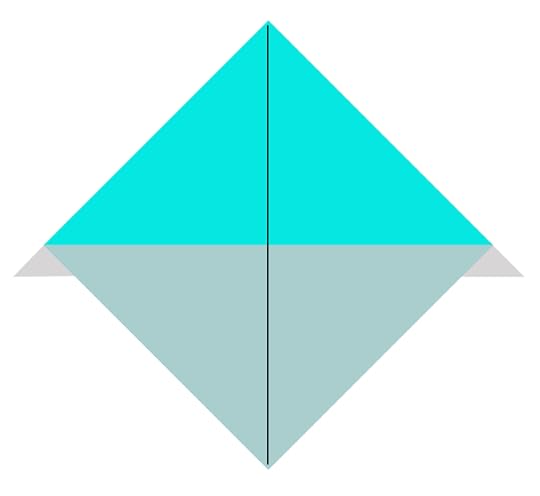
Half Square Triangles (HSTs)
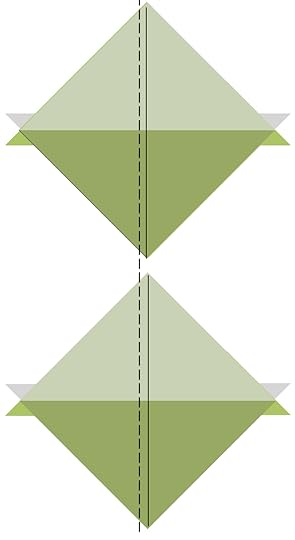
1. Create half-square triangle blocks.
Align squares right sides together.

Mark blocks using a No-Hassle Triangles Gauge and an erasable gel pen.
Use a No-Hassle Triangles Gauge . The left side of the gauge is designated to create 1/2-square triangle blocks. Depress button on sliding portion of the gauge and move to size of the desired 1/2-square triangle.
Stack two squares, right sides together. Place No-Hassle Triangles Gauge on block set, corner to corner.
Match corner marks of gauge with corner of block sets. Mark fabric through center of gauge with an erasable gel pen .
Stitch Half Square Triangles
Align presser foot along one side of center mark, stitch.
Kiss the next block set to the stitched block and chain stitch from one block to the other.
Rotate block, stitch along other side of center mark.
Cut blocks apart along center markings with a rotary cutter, ruler, and mat.
Press seams to darker fabric.

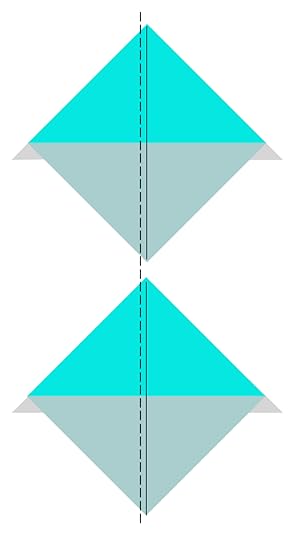
Quarter Square Triangles (QSTs)
2. Create quarter-square triangle blocks.

Stitch Quarter Square Triangles

Meet right sides of fabric 1/2-square triangle blocks, with print opposing sides, as you match centers.
Create 1/4-square triangle blocks from two 1/2-square triangle blocks.
Draw a second line from corner to corner across the 1/2-square triangle blocks.

Align presser foot along one side of center mark, stitch.
Kiss the next block set to the stitched block and chain stitch from one block to the other.
Rotate block, stitch along other side of center mark.
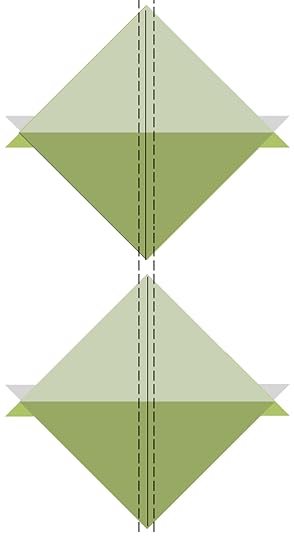
Clip threads between chain stitched blocks.
With a rotary cutter, mat, and ruler, cut the blocks apart along centerline markings.
Press seams to one side.

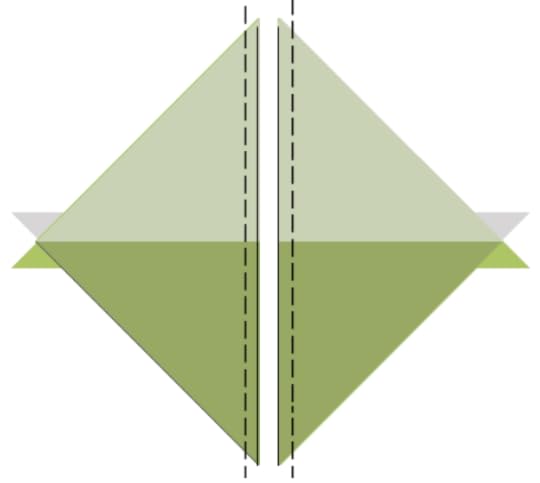
Modified Quarter Squares
3. Create modified quarter-square triangle blocks.
Align each 1/2-square triangle unit to one solid square, right sides together.

Mark as a 1/4-square using a No-Hassle Triangles Gauge and an erasable gel pen .
Stitch Modified Quarter Square Triangles
Align foot along one side of the center marked line; stitch a scant 1/4″ from center marked line. Do not cut the threads.
Kiss the next block set to the stitched block and chain stitch from one block to the other.
Align foot along second side of center marked line; stitch.
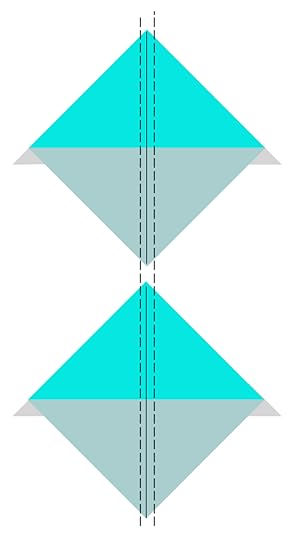
With a rotary cutter, mat, and ruler, cut the blocks apart, and along centerline markings.
Clip threads between chain stitched blocks.
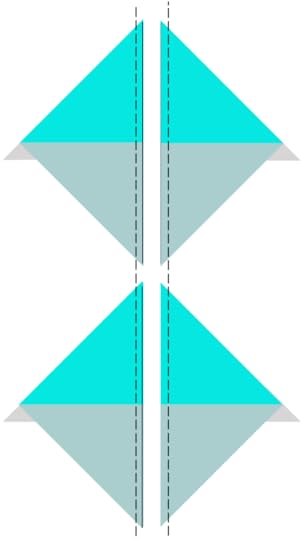
Press seam allowances toward the darker fabric.

Assemble the Blocks
All seam allowances are 1/4″ unless otherwise stated.
1. Arrange the squares according to the diagram.
2. Working with one row at a time, join blocks, right sides together. Press seams flat; then press seams to one side.
3. Stitch rows to complete each of the four blocks.
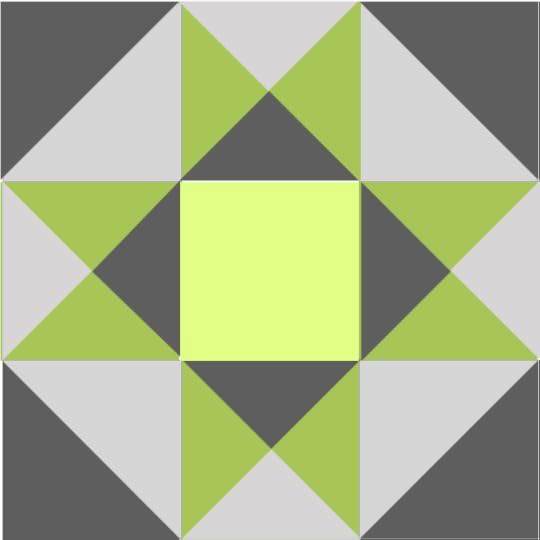

Assemble the Quilt Top
All seam allowances are 1/4″ unless otherwise stated.
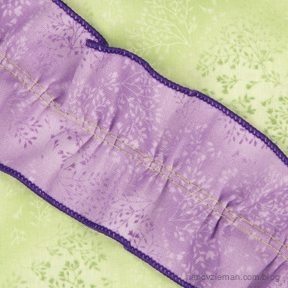
1. Arrange the blocks and sashing according to the diagram.
2. Complete sashing.
Prepare block rows
Position sashing strips between blocks at left and right edges of each row of blocks.

Working with one row at a time, join sashing to blocks, right sides together. Press seams flat; then press seams toward sashing.
Prepare sashing rows by arranging sashing rows, placing cornerstones between sashing sections and at left and right edges of sashing.
Join cornerstone squares to short ends of sashing sections right sides together. Press seams flat; then press seams toward sashing sections.
Join sashing rows to block rows.
Position sashing rows between block rows and at top and bottom edges of the quilt.

Quilt, bind, and finish quilt as desired. This Mod-Mini Four-Block Quilt is an ideal project to straight line machine quilt with The New! Ultimate Quilt ‘n Stitch Presser Foot!
Join the Mod Mini Quilt Challenge
2019 Quilt Expo Modern Mini Quilt Challenge Complete Entry Rules:
Sew a mini modern quilt to showcase your quilting talents. Submit your entry by emailing a high-resolution image of your quilt to qechallenge@gmail.com by 5 p.m. CST on Tuesday, May 21, 2019.
Mini Quilts must be no more than 24-inches square, and may be pieced, appliquéd, mixed, or other.
Mini Quilts must be made from fabrics in a modern color palette and design.
Mini Quilts must be quilted through three layers by hand, by machine, or both.
You may enter ONE modern mini quilt that is completed within the last year.
Entries must be sent to qechallenge@gmail.com ; participants are encouraged to share progress and quilt photos on social media using hashtag #ModernMiniQuiltChallenge .
Submitted entries will be shared on Quilt Expo’s Facebook page throughout the month of May at facebook.com/QuiltExpo
Winners selected by a panel of judges, plus five randomly drawn winners, will be announced on Tuesday May 28, 2019.
Judging takes place May 23–24, 2019.
Open to US residents only.
Grab the Quilt Expo Modern Mini Quilt Challenge badge and let your friends know about this fun quilt challenge! facebook.com/QuiltExpo
Nearly $3,000 in prize packages!
Visit QuiltExpo.com/ModernMiniQuiltChallenge for complete details and prize package listing.
View the Gallery of Quilts
Photos will be hosted by Wisconsin Public Television on the public Quilt Expo Facebook Page in the 2019 Quilt Expo Modern Mini Quilt Challenge album. You may comment and ask questions directly on the photo. Of course, you can always share photos within Facebook, too. You do NOT have to have a Facebook account to enter the challenge. By emailing your photo to the address above, you’re acknowledging and consenting to having the image shared in public online social media venues. Subscribe or “LIKE” the Quilt Expo Facebook page to see all the new mini quilt images as they are added. View entries in the photo album here.

Are you entering the 2019 Quilt Expo Modern Mini Quilt Challenge? Leave a comment below for a chance to win a Mod Mini Mystery Fat Quarter Pack from Riley Blake Designs!
Happy Quilting,
Team Nancy Zieman
Nancy Zieman Productions, LLC.
Content in this feed is © copyright 2019 by Nancy Zieman Productions, LLC and may not be republished without written permission. You’re welcome to forward the email to a friend or colleague but it’s not okay to add the RSS feed automatically as content on a blog or other website.
The FTC requires us to tell you that Nancy Zieman Productions, LLC has provided products by other companies in the course of doing business. The FTC requires us to advise you to take this information into consideration when reading this posting.
Make sure you are subscribed to Nancy Zieman Productions, LLC enews mailing list so you won’t miss a thing. Sign up here . Join us on Facebook , plus a host of other social media channels. Connect With Nancy and Friends today!
April 30, 2019
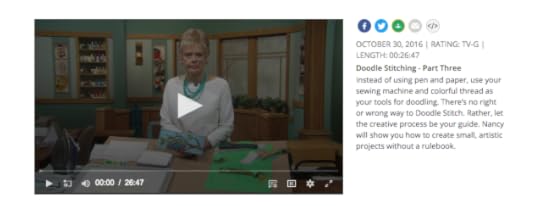
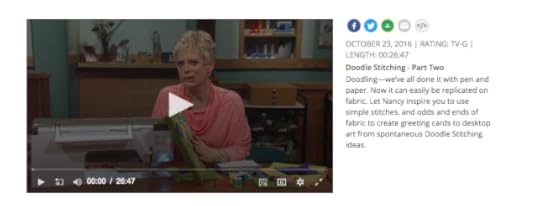
Learn More “Stress Free” Doodle Stitching
Do you like to doodle? Many of us enjoy sketching or even scribbling absentmindedly, dreaming we’re budding artists! The same action can be translated to needle and thread, randomly stitching on small pieces of fabric while learning creative techniques.
Watch the Doodle Stitching TV show (Part One, Part Two, and Part Three) online now. You’ll also find details, tips, and techniques in the Doodle Stitching book, available at Nancy’s Notions.

Clip ‘n Stitch Doodling
Let’s kick off Doodle Stitching Part Three with a Clip ‘n Stitch Doodle project. Small snippets of fabric fused to a background layer are the doodling tools. This is not a lengthy process, rather a random act of creativity!
Popsicle Garden
One of the benefits of doodle stitching is becoming comfortable with free-motion quilting. Creating a Popsicle Garden is an ideal way to learn the tricks of the trade while stitching a whimsical work of art. Circles and rectangular shapes are all that’s needed, along with a little stitching time. Watch online to see how easy it is to try free-motion quilting on this smaller scale.
Doodle Outside the Lines
Next on Doodle Stitching Part Three, a scarf was the fabric chosen for the last of the creative projects. Nancy liked the look of doubling the sheer layers to create even more subtle shades of color. Each section was roughly stitched with sketchy stitches. We liken the stitching to coloring in a book. You can’t make a mistake when you purposely Doodle Outside the Lines.
The Book: Doodle Stitching
Nancy guides you through her fun techniques for painting with thread and scraps of fabric. You don’t need to worry about perfection—these techniques are made to give you beautiful results, whether you’re a beginner or a seasoned sewist.
Nancy’s signature style of stress-free techniques and easy projects inspires and empowers. Plus, she shows you how to translate pencil-sketched doodles onto fabric with your sewing machine.
Doodle Stitching Book
Full color photographs and illustrations
Step-by-step instructions
Double-wire binding so that pages lay flat when open—no more struggling to keep your page from turning or bending; plus it’s easier to keep your book right next to you as you work
Soft cover, 40 page book by Nancy Zieman, Sewing With Nancy
Watch Doodle Stitching—Part Three on Sewing With Nancy online.
Do you like to doodle and/or create fabric art? Leave a comment below to be eligible to win a copy of the Doodle Stitching Book, from Nancy’s Notions.
Happy Sewing,
Team Nancy Zieman
Nancy Zieman Productions. LLC.
Content in this feed is © copyright 2019 by Nancy Zieman Productions, LLC and may not be republished without written permission. You’re welcome to forward the email to a friend or colleague but it’s not okay to add the RSS feed automatically as content on a blog or other website.
The FTC requires us to tell you that Nancy Zieman Productions, LLC has provided products by other companies in the course of doing business. The FTC requires us to advise you to take this information into consideration when reading this posting.
Make sure you are subscribed to Nancy Zieman Productions, LLC enews mailing list so you won’t miss a thing. Sign up here . Join us on Facebook , plus a host of other social media channels. Connect With Nancy and Friends today!
April 27, 2019
Nancy Zieman Original Giclée Canvas Landscape Art Prints
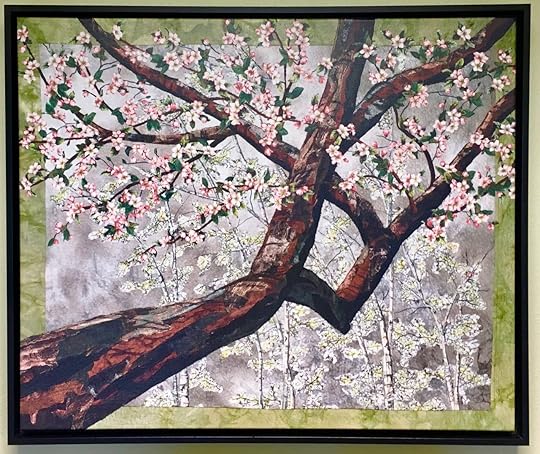
Now Available! Original Framed Giclée Canvas Print Reproduction of Artwork by Nancy Zieman, using only the highest quality Giclée printing techniques.
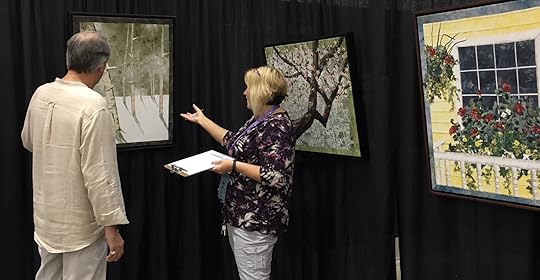
Now you can have your very own Landscape Quilt Art Print by Nancy Zieman—enjoy in your home or give as a gift.
Out on a Limb – 25″ x 30″ $239
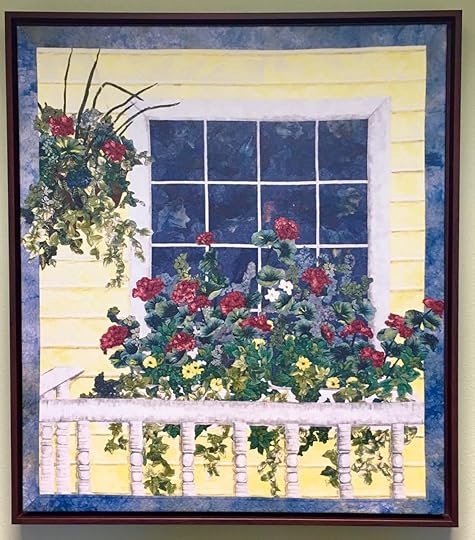
Front Porch – 31″ x 27″ $249
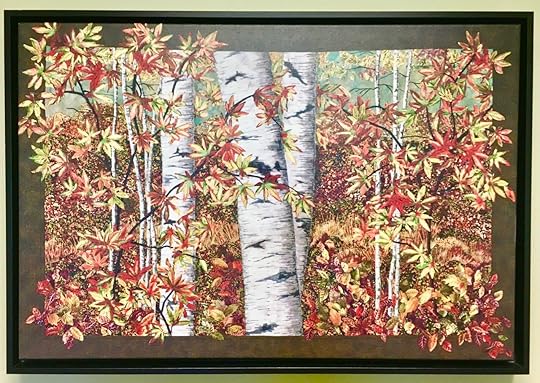
Peak Color – 21″ x 31″ $229
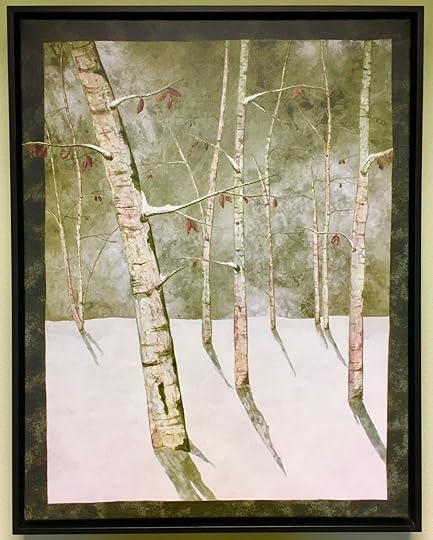
Moon Lit Birches – 31″ x 24″ $239
To purchase your Landscape Quilt Canvas Print Reproduction of Landscape Quilt Artwork by Nancy Zieman, please mail the completed order form and check or money order to Nancy Zieman Productions, LLC.
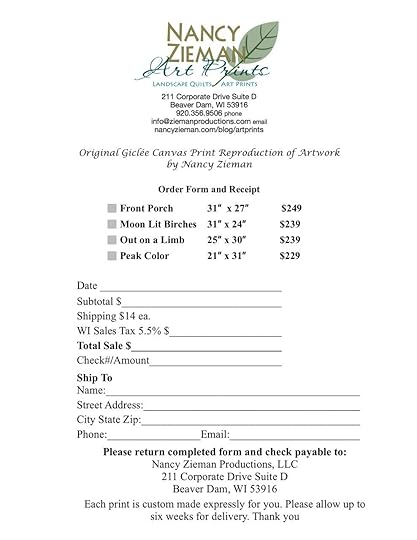
Print the Order Form—and Order Today!
You will receive a certificate of authenticity with each purchase of Original Giclée Canvas Print Reproduction of Artwork by Nancy Zieman.
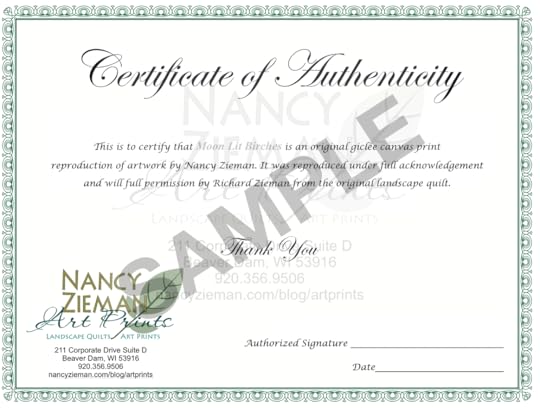
Each print is made expressly for you. Please allow up to six weeks for delivery.

For a chance to win a set of eight Landscape Quilt Note Cards by Nancy Zieman, please leave a comment below and tell us which Original Giclée Canvas Print Reproduction of Artwork by Nancy Zieman is your favorite.


The randomly selected winner of Nancy Zieman’s New! Afternoon Picnic Fat Quarter Pack is Barbara Anderson.

Her comment is: The Kings Crown is beautiful and appropriate for April of 2019.
Happy Sewing,
Team Nancy Zieman
Nancy Zieman Productions. LLC.
Content in this feed is © copyright 2019 by Nancy Zieman Productions, LLC and may not be republished without written permission. You’re welcome to forward the email to a friend or colleague but it’s not okay to add the RSS feed automatically as content on a blog or other website.
The FTC requires us to tell you that Nancy Zieman Productions, LLC has provided products by other companies in the course of doing business. The FTC requires us to advise you to take this information into consideration when reading this posting.
Make sure you are subscribed to Nancy Zieman Productions, LLC enews mailing list so you won’t miss a thing. Sign up here . Join us on Facebook , plus a host of other social media channels. Connect With Nancy and Friends today!
April 25, 2019
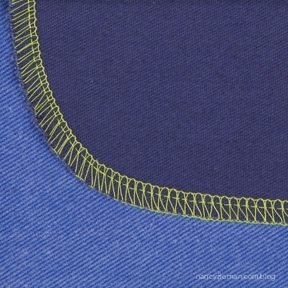
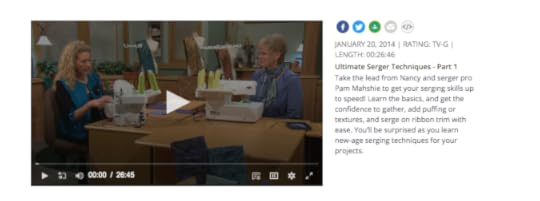
Ultimate Serger Tips and Techniques
Do you use your serger sewing machine to its fullest? Are you using it for more than just clean finishing edges? To ensure you are getting the full value from your purchase, Nancy Zieman invited serging specialist, Pam Mahshie, National Baby Lock Ambassador, to be her guest on Sewing With Nancy. Pam is a magician with the serger! Simply watch online at Sewing With Nancy.
Here’s a preview of what you’ll see during the first episode of Ultimate Serger Techniques:
Beginning and Ending Seams
You can’t go in reverse on your serger to lock the stitches, but you can stitch over the thread tails. Learn Pam’s clever ways to lock the thread tails at both the beginning and end of the seams.
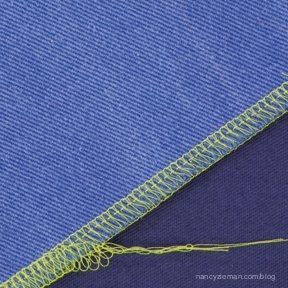
Serge a Curve
Sometimes it is difficult to serge around curved edges without getting loopy threads hanging off the edge. This technique will give you smooth results every time.
Piecing Options
Piecing a quilt top with your serger might have never crossed your mind. Yet, for simple quilt designs, the serger is a fast and accurate way to make a quilt top. Seam traditionally or . . . with decorative threads and the seams exposed. Either way, your serger can be a go-to quilting machine.
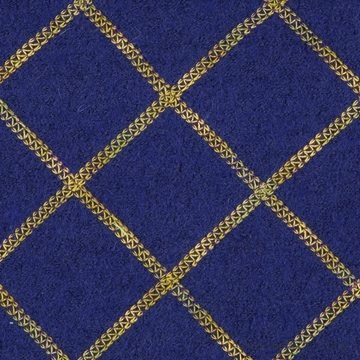
Piping
Home décor, wearable art, or kids’ clothes—those are all categories where piping accents add interest and texture. With a serger, piping is easier than ever to include in a seam or along the outer edge of your next project.
Adding a Blanket Stitch
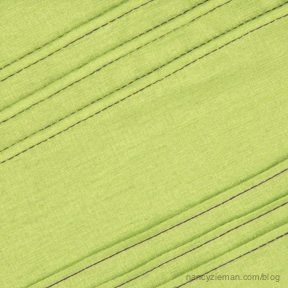
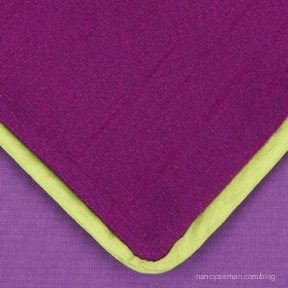
A blanket stitch is an ideal way to finish the edges of fleece. Why?—The stitches will always be even and the process extra easy. Learn how to add a blanket stitch with a 3-thread flatlock setting.
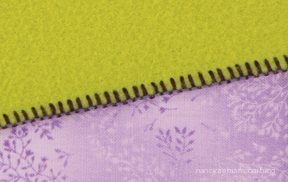
Watch Ultimate Serger Techniques on The Best of Sewing With Nancy online.
A Serger Workbook with 33 Serger Techniques!Several seasons ago, Pam and Nancy presented a three-part Sewing With Nancy series simply called the Serger Workshop. The Ultimate Serger Techniques Workbook and DVD is a spiral bound book with DVD that combines the information from this series. Learn 33 techniques using 10 different serger stitches! Now is your chance to win this workbook and DVD from Nancy’s Notions by leaving a comment telling us a serger technique you’d like to try. One winner will be selected randomly.
The randomly selected winner of Eileen Roche’s book, Machine Embroidery in 6 Easy Lessons from Designs in Machine Embroidery from the April 11 and 18 blog posts is Carla T.
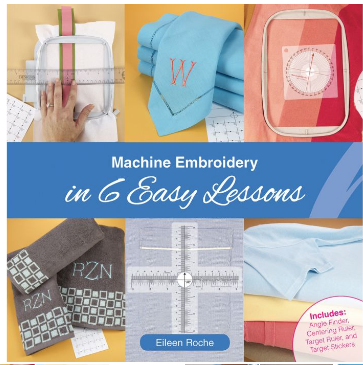
Her Comment is: I have never done any machine embroidery so I would definitely need a resource to start with. This would be the perfect resource. Thank you for the opportunity to win!

April is National Serger Month! Celebrate with Baby Lock!
Have Fun Serging,
Team Nancy Zieman
Nancy Zieman Productions. LLC.
Content in this feed is © copyright 2019 by Nancy Zieman Productions, LLC and may not be republished without written permission. You’re welcome to forward the email to a friend or colleague but it’s not okay to add the RSS feed automatically as content on a blog or other website.
The FTC requires us to tell you that Nancy Zieman Productions, LLC has provided products by other companies in the course of doing business. The FTC requires us to advise you to take this information into consideration when reading this posting.
Make sure you are subscribed to Nancy Zieman Productions, LLC enews mailing list so you won’t miss a thing. Sign up here . Join us on Facebook , plus a host of other social media channels. Connect With Nancy and Friends today!
April 23, 2019
More Stress Free Artistic Doodle Stitching
Doodling—we’ve all done it with pen and paper. Those same concepts—drawing squiggles, circles, rectangles, and silly shapes—can be done with fabric, trim, and/or stitching. Why should you doodle at your sewing machine with fabric? It’s a great way to use fabric odds and ends while being creative.
Watch the Doodle Stitching TV show online now. You’ll also find details, tips, and techniques in the new Doodle Stitching book, available at Nancy’s Notions.
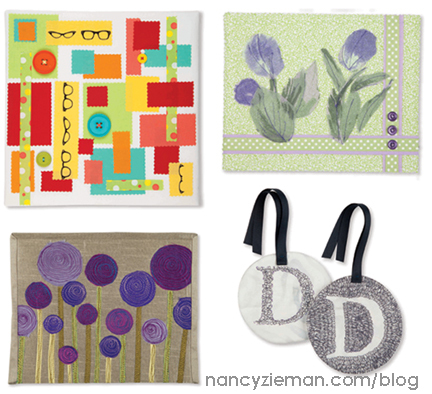
Collage Doodle
A Collage Doodle is where we’d would like to start in Doodle Stitching Part Two. Gather buttons, small pieces of fabric, leftover ribbon, and do a little stitching to create a greeting card or a small piece of wall art. The process is spontaneous with artsy results.
[image error] If giving as a greeting card, apply card stock behind the collage prior to stitching around the outer edges.

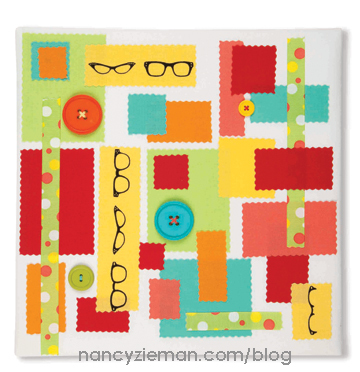
Fuse ‘n Doodle
Next, doodle with fabric and your iron! Cut rectangles and squares that are backed with fusible web, arrange on a background fabric, then press! After adding ribbon and button accents, you’ll have an art piece that was made with odds and ends of fabric, yet looks like it could be hung in a modern art studio. See how easy it is on Doodle Stitching Part Two.
Daydream Stitching
When you’re doodling on paper, most likely you’re not paying much attention to what’s happening around you, as Nancy Zieman said she was known to do in history class. When you’re brain is not thinking of the task at hand, it’s the BEST time to experiment with simple, doodle-type free-motion stitching. For those of you intimidated by the process, put your brain in neutral and daydream while stitching. Watch online as those doodles transform with sewing machine and thread.

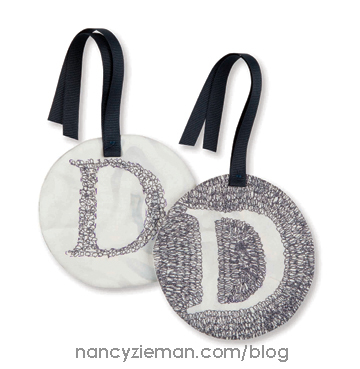
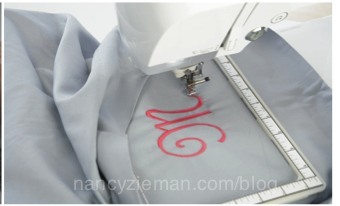
Squiggle Monograms
When we think of monograms, our mind’s eye sees large, preciously stitched letters. Hmm, not so if you’re doodling. The same type of impact can be made with squiggle stitching, creating the shape of the letter, or stitching the negative space around the letter to make the un-stitched fabric “pop” with distinction. It’s a 20-minute stitching exercise that will satisfy the doodler inside of you; watch now.
The Book: Doodle Stitching
We’ll guide you through fun techniques for painting with thread and scraps of fabric. Don’t worry about perfection—these techniques are made to give you beautiful results, whether you’re a beginner or a seasoned sewist.
This signature style of stress-free techniques and easy projects inspires and empowers. Plus, you’ll learn how to translate pencil-sketched doodles onto fabric with your sewing machine.
Doodle Stitching Book
Full color photographs and illustrations
Step-by-step instructions
Double-wire binding so that pages lay flat when open—no more struggling to keep your page from turning or bending; plus it’s easier to keep your book right next to you as you work
Soft cover, 40 page book by Nancy Zieman, Sewing With Nancy
Watch Doodle Stitching (Part One and Part Two) on Sewing With Nancy online.
Do you like to doodle and/or create fabric art? Leave a comment below to be eligible to win a copy of the Doodle Stitching Book, from Nancy’s Notions.
Happy Sewing,
Team Nancy Zieman
Nancy Zieman Productions. LLC.
Content in this feed is © copyright 2019 by Nancy Zieman Productions, LLC and may not be republished without written permission. You’re welcome to forward the email to a friend or colleague but it’s not okay to add the RSS feed automatically as content on a blog or other website.
The FTC requires us to tell you that Nancy Zieman Productions, LLC has provided products by other companies in the course of doing business. The FTC requires us to advise you to take this information into consideration when reading this posting.
Make sure you are subscribed to Nancy Zieman Productions, LLC enews mailing list so you won’t miss a thing. Sign up here . Join us on Facebook , plus a host of other social media channels. Connect With Nancy and Friends today!
April 20, 2019
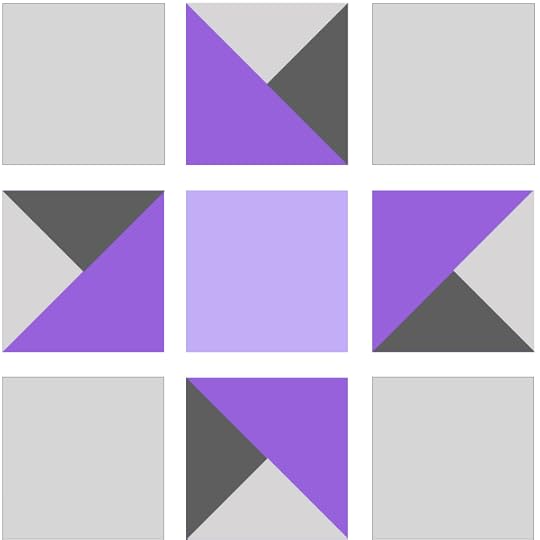
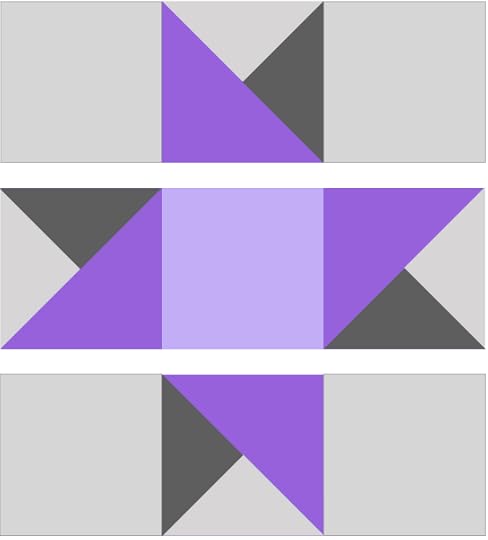
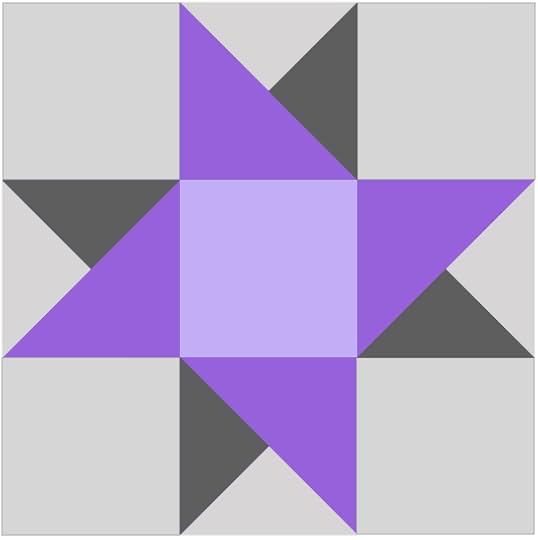
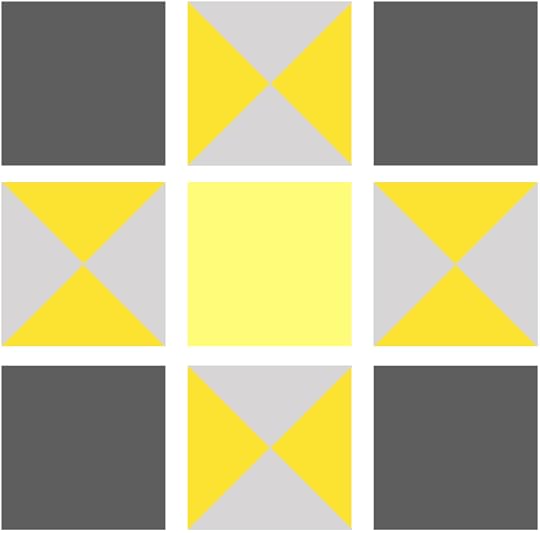
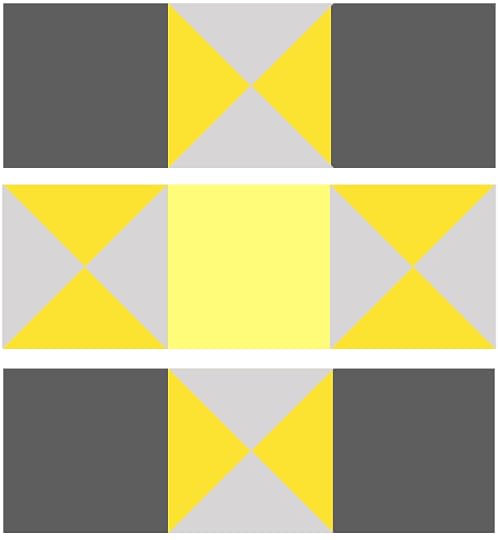
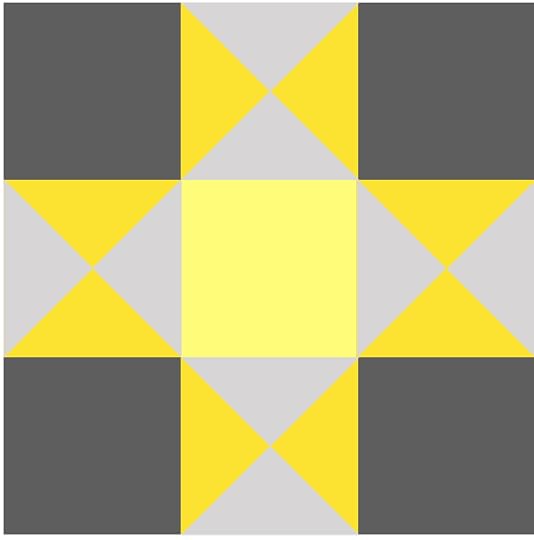
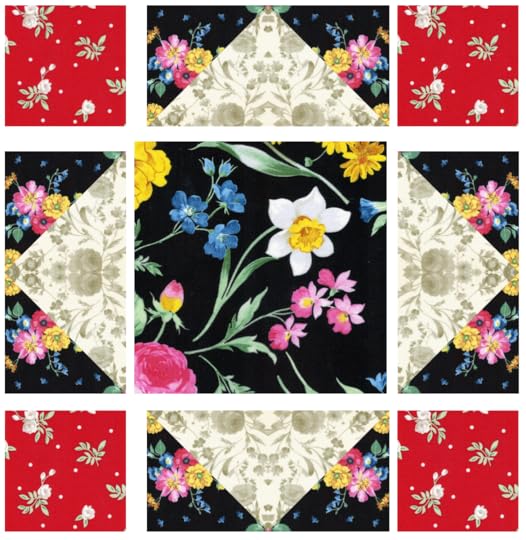
April 2019 Block of the Month: King’s Crown Quilt Block

2019 Block of the Month—April: “King’s Crown” Quilt Block
In January, Team Nancy Zieman introduced the first of 12 blocks in the New! Summer Picnic 2019 FREE! Block of the Month Series. Find the January and February Quilt Block Tutorials under Popular Blog Posts: 2019 Block of the Month. Join the New! Summer Picnic 2019 Block of the Month Series, anytime, by viewing the supply listing in the January 5th NZP Blog Posting.
Each month, we’re featuring one quilt block design. The quilt blocks are created using Nancy Zieman’s NEW! Afternoon Picnic Fat Quarter Pack* from Riley Blake Designs (*18″ x 22″ fabric rectangles) plus background, sashing, border, and binding fabrics. Follow along as we demonstrate how to create the April “King’s Crown” Quilt Block (below).
Keep your fabric choices sorted using this handy Fabric Planner diagram. Download the planner HERE. Make notes or pin swatches to remind you of the fabric placements.
2019 Block of the Month Afternoon Picnic April PDF

Choose the Fabrics
For the New! Summer Picnic 2019 FREE! Block of the Month Series, “King’s Crown” April Quilt Block, select the following fabrics from your Nancy Zieman’s NEW! Afternoon Picnic Fat Quarter Pack from Riley Blake Designs and a Nancy Zieman’s No-Hassle Triangle Gauge by Clover.
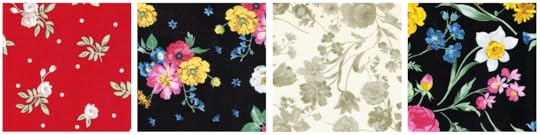
Afternoon Picnic Red Rose, Afternoon Picnic Black Floral, Afternoon Picnic Cream Tonal, Afternoon Picnic Black Main
April “King’s Crown” Block
Instructions: (Each block is a 12″ finished square. Finished quilt measures approximately 44-1/2″ x 57-1/2″)
Cut Fabric for Block
Cut four 3-1/2″ squares of Afternoon Picnic Red Rose.
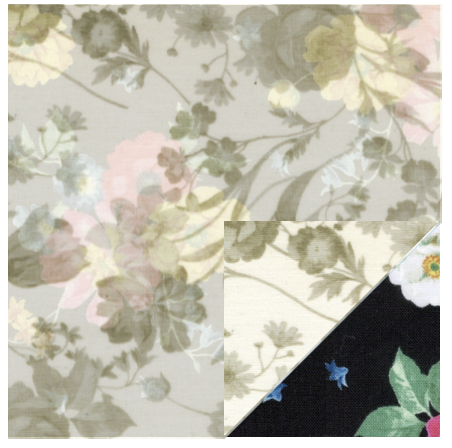
Cut four 3-7/8″ squares of Afternoon Picnic Black Floral and Afternoon Picnic Cream Tonal.
Cut one 6-1/2″ square of Afternoon Picnic Black Main.

Construct The Units
All seam allowances are scant 1/4″ unless otherwise stated.
The step-by-step photos illustrate construction of the block.
Half Square Triangles (HSTs)
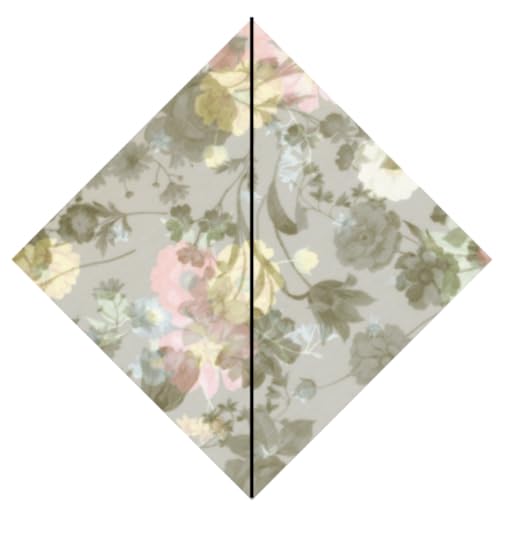
1. Create eight half-square triangle blocks.
Align 3-7/8″ squares cut from Afternoon Picnic Black Floral , and Afternoon Picnic Cream Tonal right sides together.
Mark blocks using a No-Hassle Triangles Gauge and an erasable gel pen.
Use a No-Hassle Triangles Gauge . The left side of the gauge is designated to create 1/2-square triangle blocks. Depress button on sliding portion of the gauge and move to size of the desired 1/2-square triangle.
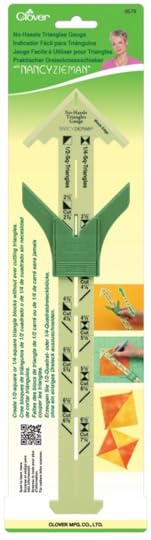
Stack two squares, right sides together. Place No-Hassle Triangles Gauge on block set, corner to corner. Match corner marks of gauge with corner of block sets. Mark fabric through center of gauge with an erasable gel pen .
Stitch Blocks
Align presser foot along one side of center mark, stitch.
Kiss the next block set to the stitched block and chain stitch from one block to the other.
Rotate block, stitch along other side of center mark.
Cut blocks apart along center markings with a rotary cutter, ruler, and mat.
Press seams to darker fabric.
Assemble Blocks
Layout block following diagram. Rotate squares as necessary.

Join Squares
Place half square triangle sets, right sides together, in pairs.
Chain stitch from one square set to the next. Clip threads between. Press seams open or to one side.
Place corner squares onto center set, right sides together, in pairs. Chain stitch from one square set to the next. Clip threads between sets. Press seams open or to one side. Creating top and bottom rows.
Place middle sets onto center square, right sides together, stitch. Press seams open or to one side. Place square sets, right sides together, to form rows. Press seams open or to one side.
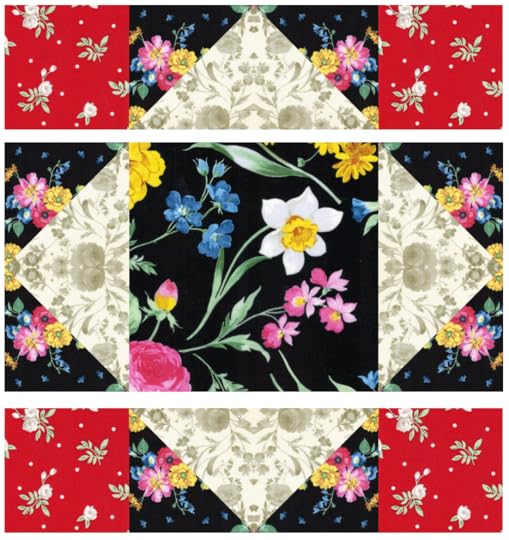
Stitch rows together to create complete block. Press seams open or to one side.
Nancy Zieman’s No-Hassle Triangles Quilt Blocks book shows how to create 12 additional quit blocks. For best results, use the No-Hassle Triangles Gauge.
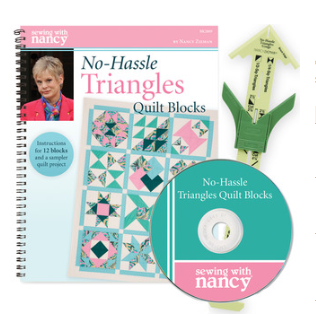
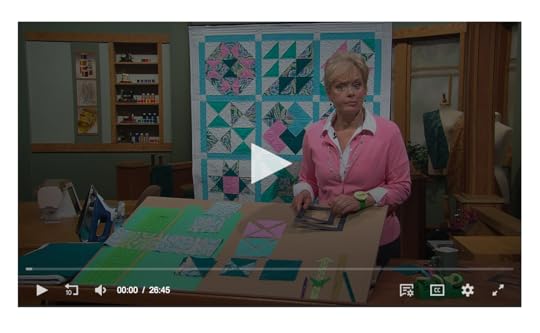
Watch No-Hassle Triangles Quilt Blocks (Part One and Part Two) on The Best of Sewing With Nancy online.
For a chance to win Nancy Zieman’s New! Afternoon Picnic Fat Quarter Pack please leave a comment below.
The randomly selected winner of a Supersize 5-in-1 Sliding Gauge from Clover Needlecraft from the April 13 blog post is, Carolyn T.

Her comment is: I morphed from watching Nancy on my local PBS station to YouTube on my P.C. to getting NZP emails on my phone! When home I watch Sewing With Nancy while walking on my treadmill, headphones on and tablet propped in front of me.
Happy Quilting,
Team Nancy Zieman
Nancy Zieman Productions, LLC.
Content in this feed is © copyright 2019 by Nancy Zieman Productions, LLC and may not be republished without written permission. You’re welcome to forward the email to a friend or colleague but it’s not okay to add the RSS feed automatically as content on a blog or other website.
The FTC requires us to tell you that Nancy Zieman Productions, LLC has provided products by other companies in the course of doing business. The FTC requires us to advise you to take this information into consideration when reading this posting.
Make sure you are subscribed to Nancy Zieman Productions, LLC enews mailing list so you won’t miss a thing. Sign up here . Join us on Facebook , plus a host of other social media channels. Connect With Nancy and Friends today!
April 18, 2019
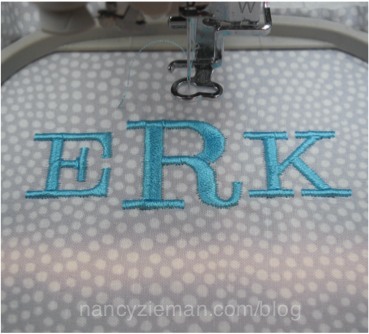
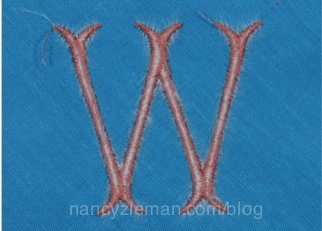
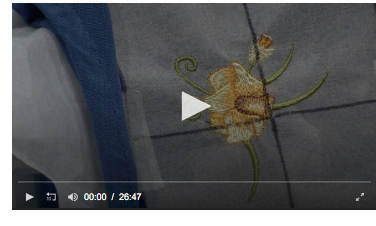
Machine Embroidery in Six Easy Lessons – Part Two
Six lessons, it’s usually a great start in learning a new skill set—be it dancing, Zumba, or hang gliding! (Anyone hang glide?) That same 6-lesson approach can easily be applied to the creative skill that Nancy Zieman’s guest, Eileen Roche has mastered. Eileen is the editor of Designs in Machine Embroidery Magazine, and she joins Nancy in the Sewing With Nancy program Machine Embroidery in 6 Easy Lessons, Part 2.
Last week, The NZP Blog featured the first video in this series, showcasing Lessons 1–3. You can also watch the first episode online if you missed seeing it last week. Now it’s time for the final three lessons.
Lesson #4: Hooping
The fourth lesson showcases hooping. Hooping the fabric and stabilizer is like buckling-up for a car trip. It’s got to be done, and it’s got to be done right!
Eileen teaches a hands-on class called 50 Ways to Hoop Fabric. Who knew there’d be so many ways to position fabric in a hoop? We didn’t go over the 50 techniques during this Sewing With Nancy TV series, but we did show some of the most common hooping techniques. Our favorite techniques involve using an ironing board and shelf liner!
Lesson #5: Embroidering
It’s the fifth of 6 lessons and it’s finally time to sit at the machine and sew! Embroidering is the fifth lesson, and it can be as simple as pushing a button. But, before giving that button a tap, there are a few more checks and balances to review.
Lesson #6: Finishing Tips
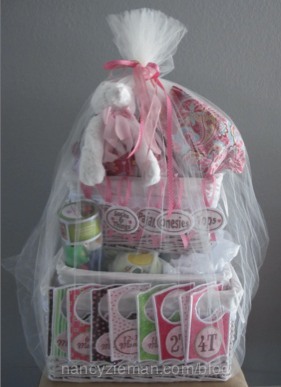
All of your planning and preparation in the first five lessons have brought you to this point, lesson #6—the Finishing Tips! The steps are simple, but important, and then you can enjoy your accomplishment. Critiquing the design, removing the stabilizer, trimming the threads—all seem obvious, but there are hints that accompany each step.
In her book, Eileen added presentation as part of lesson #6! If you’re giving away your embroidered creation, take time to make the packaging as pretty as the embroidery.
Watch Machine Embroidery in Six Easy Lessons—Part Two online!
Machine Embroidery in 6 Easy Lessons, Part 2 is the featured video this week. Watch 52+ of the most recent Sewing With Nancy shows online at www.nancyzieman.com.
You’ll find all machine embroidery guidelines in Eileen’s book/DVD, Machine Embroidery in 6 Easy Lessons.
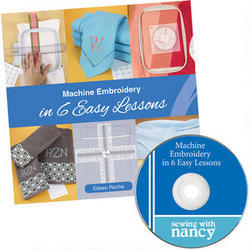
What’s your biggest embroidery stumbling block? Post it below and we’ll choose a random winner. The winner will receive Eileen Roche’s book, Machine Embroidery in 6 Easy Lessons from Designs in Machine Embroidery.

Happy Embroidering,
Team Nancy Zieman
Nancy Zieman Productions. LLC.
Content in this feed is © copyright 2019 by Nancy Zieman Productions, LLC and may not be republished without written permission. You’re welcome to forward the email to a friend or colleague but it’s not okay to add the RSS feed automatically as content on a blog or other website.
The FTC requires us to tell you that Nancy Zieman Productions, LLC has provided products by other companies in the course of doing business. The FTC requires us to advise you to take this information into consideration when reading this posting.
Make sure you are subscribed to Nancy Zieman Productions, LLC enews mailing list so you won’t miss a thing. Sign up here . Join us on Facebook , plus a host of other social media channels. Connect With Nancy and Friends today!
April 16, 2019
Learn Stress Free Doodle Stitching
 Create small works of fiber art! We’ve all doodled, sketching with short pencil strokes or shapes in the margins of notes or homework. In part one of the Sewing With Nancy program, Doodle Stitching, Nancy Zieman shows how to translate those sketched doodles onto fabric with sewing machine stitches. The sewing is fast, and the end result very gratifying.

Watch the Doodle Stitching online now. You’ll also find details, tips, and techniques in the new Doodle Stitching book, available at Nancy’s Notions.
Zigzag Doodles
In Doodle Stitching Part One, Nancy begins by doodling with a zigzag stitch. Queen Ann’s Lace flowers can easily be sketched with a condensed zigzag stitch and a little sewing savvy. You’ll be impressed how using what’s commonly known as a bartack stitch can turn into an artistic design.
Sketch ‘n Stitch
Odds and ends of silk cut into squares and stitched to a fabric showcase is the next doodle project in Doodle Stitching Part One. Learn to use a single motif of a decorative stitch that’s already programmed into your sewing machine as part of the doodling process. Like the pencil and paper sketching, each Sketch ‘n Stitch project is its own, unique work of art.
Playful Decorative Stitching
Odds are, most of us who sew or quilt rarely use the decorative stitches built in or programmed into our machines. These artistic stitches are just waiting to be tested and featured in an upcoming project. Nonchalantly testing out a variety of stitches on fabric without care of direction is our next doodle stitching experiment. Not only can you create an interesting art piece, you’ll see what magical stitches your machine has in store for you.
The Book: Doodle Stitching
We’ll guide you through fun techniques for painting with thread and scraps of fabric. Don’t worry about perfection—these techniques are made to give you beautiful results, whether you’re a beginner or a seasoned sewist.
Nancy’s signature style of stress-free techniques and easy projects inspires and empowers. Plus, We’ll show you how to translate pencil-sketched doodles onto fabric with your sewing machine.
Doodle Stitching Book
Full color photographs and illustrations
Step-by-step instructions
Double-wire binding so that pages lay flat when open—no more struggling to keep your page from turning or bending; plus it’s easier to keep your book right next to you as you work
Soft cover, 40 page book by Nancy Zieman, Sewing With Nancy
Watch Doodle Stitching online.
Do you like to doodle and/or create fabric art? Leave a comment below to be eligible to win a copy of the Doodle Stitching Book, from Nancy’s Notions.

The randomly selected winner of a copy of the book, Trusty Triangles—a Row-by-Row Sampler Quilt, from Nancy’s Notions, from the April 2 and 9 blog posts is, Simone.

Her comment is: I also love the Star gazer pattern–it will look wonderful and fun on some quilts I’m working on now!
Happy Sewing,
Team Nancy Zieman
Nancy Zieman Productions. LLC.
Content in this feed is © copyright 2019 by Nancy Zieman Productions, LLC and may not be republished without written permission. You’re welcome to forward the email to a friend or colleague but it’s not okay to add the RSS feed automatically as content on a blog or other website.
The FTC requires us to tell you that Nancy Zieman Productions, LLC has provided products by other companies in the course of doing business. The FTC requires us to advise you to take this information into consideration when reading this posting.
Make sure you are subscribed to Nancy Zieman Productions, LLC enews mailing list so you won’t miss a thing. Sign up here . Join us on Facebook , plus a host of other social media channels. Connect With Nancy and Friends today!
Nancy Zieman's Blog

- Nancy Zieman's profile
- 21 followers

