
Nancy Zieman's Blog, page 141
July 12, 2014
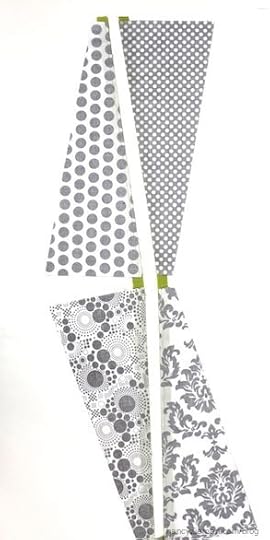
Topsy Turvy Table Runner—Sew Easy!
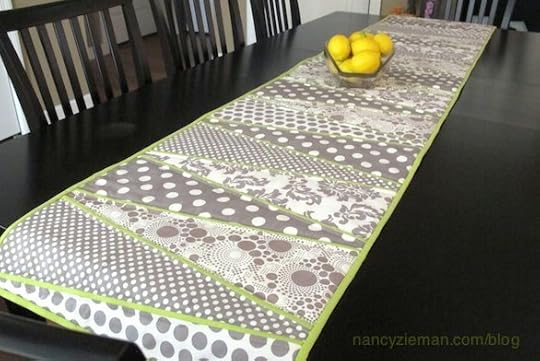
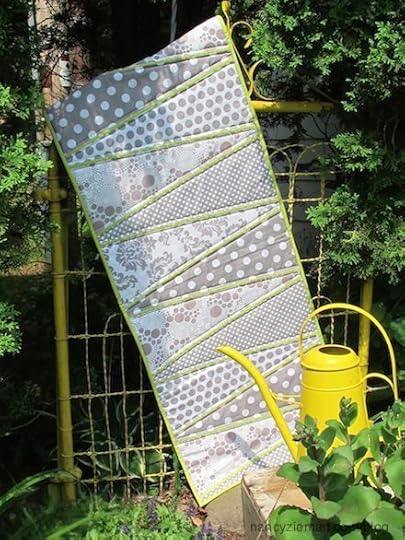
Riley Blake Designs sent me a collection of grey and white prints that really caught my eye. Teaming them with a lime-colored solid, I knew a table runner was soon to be created. The design I chose is a nontraditional Dresden plate. No round shapes here—the wedge-shapes of the Dresden are stitched, well topsy-turvy, to create a linear look. This finished table runner is approximately 18″ x 86″. You could shorten or lengthen depending upon your table size.
Supplies for the Topsy Turvy Table Runner:
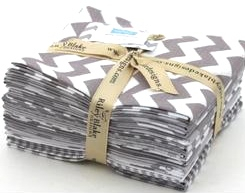
Eight (8) coordinating fat quarters. Featured collection is the
Basic Variety Fat Quarter Pack in Grey from Riley Blake Designs.
1 yard of solid-colored cotton fabric for sashing strips and binding. Featured fabric is a Cotton Solid in Lime from Riley Blake Designs.
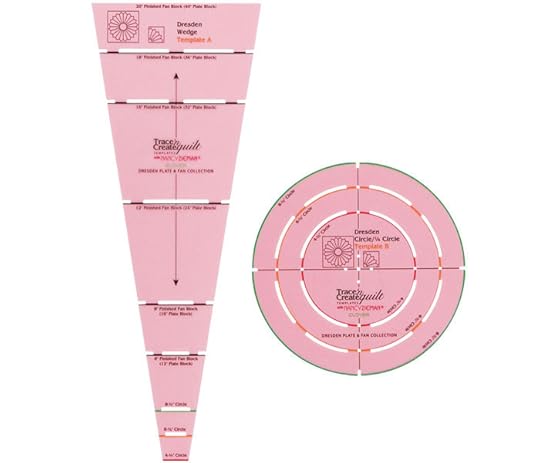
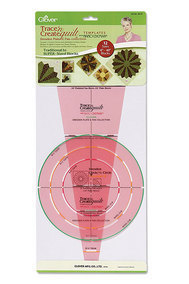
Clover’s Trace ‘n Create Quilt Templates—Dresden Collection (only the wedge shape, template A) will be used.
Cutting Instructions:
Twenty-four 18-1/4″ long wedges are needed for this project.
Select eight coordinating fat quarters. Press fat quarters.
Note from Nancy: The instructions reference using fat quarters (18″ x 22″ cuts.) In lieu of using fat quarters, you could also cut wedges from standard yardage. Cut 18-1/4″ crosswise strips of coordinating fabrics. Consider using four coordinates, rather than eight, to save on yardage.
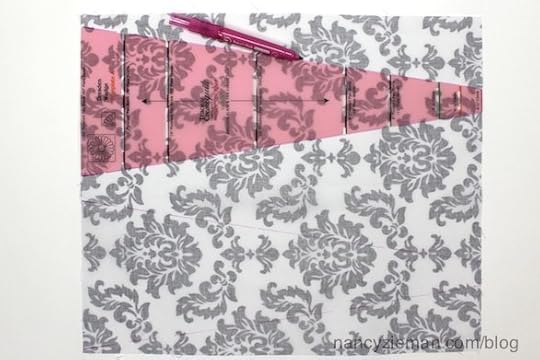
Position Template A on the wrong side of a fat quarter. Align the template at a corner and along one straight edge.
Trace along both sides of the template.
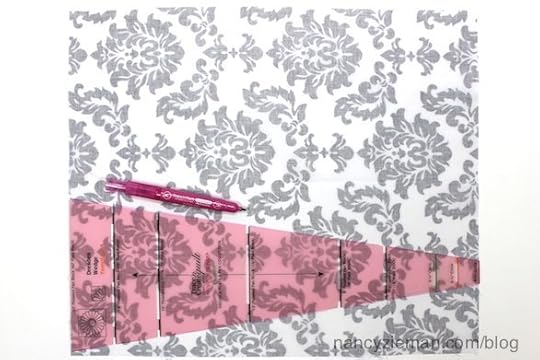
Rotate the template 180-degrees. Align one edge of the template with the previously traced mark, trace along the opposite side of the template.
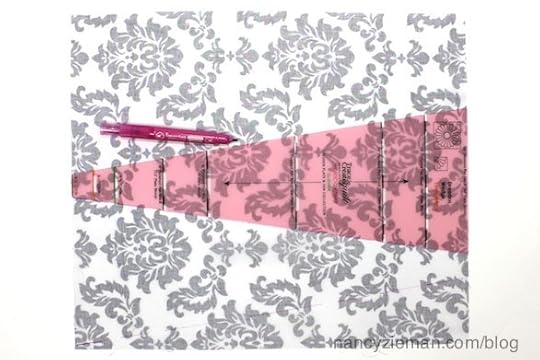
Rotate the template a second time. Again, align one edge of the template with the previously traced mark; trace along the opposite side of the template.
Note from Nancy: Stack 3–4 fat quarter sections together to save time tracing the wedge shapes on each fat quarter.
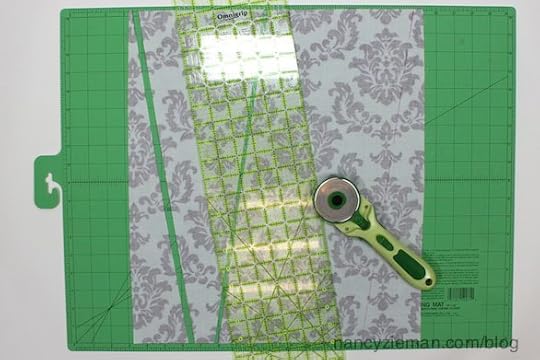
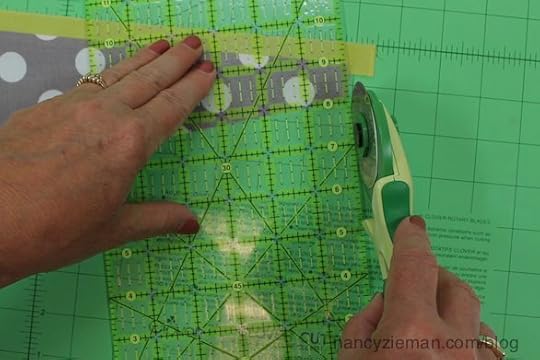
Place the traced fabric on a cutting mat, align an acrylic ruler along the traced marks, and cut. (The Trace ‘n Create Quilt Templates are designed for tracing, not cutting.)
Cut 12, 3/4″ crosswise strips from the solid fabric to use as sashing.
Cut seven 2-1/2″ crosswise strips to use as binding; set these strips aside.
Stitch the Wedges to the Sashing Strips
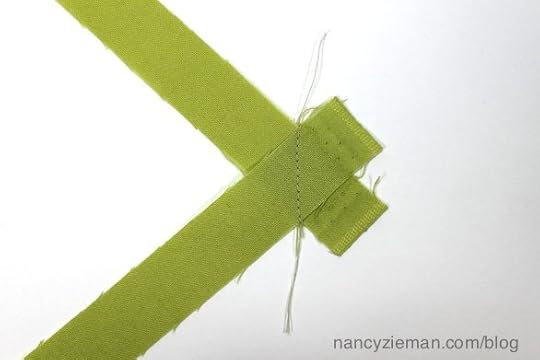
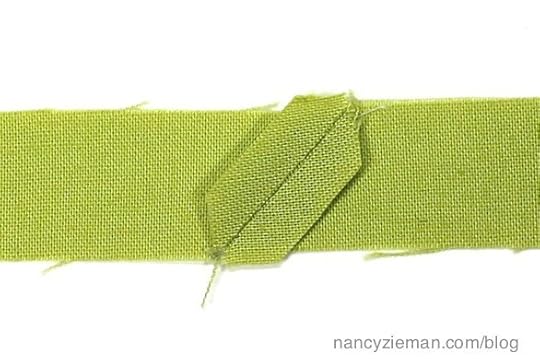
Seam the sashing strips. Align right sides, cross the ends creating a 90-degree angle, and stitch across the fabric strips as pictured.
Trim the seam allowances to 1/4″ and press.
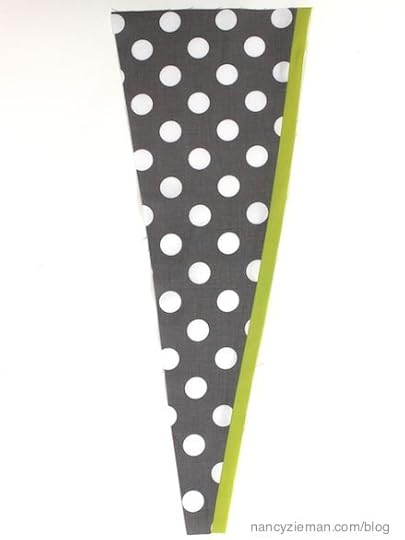
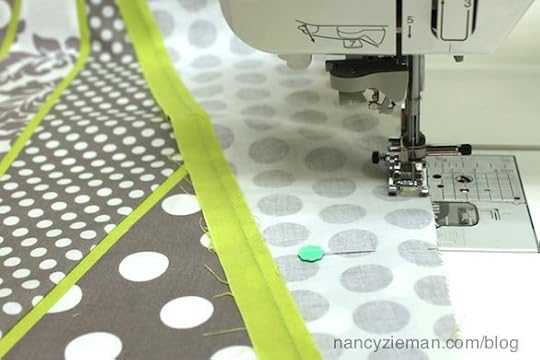
Align the first wedge to the sashing strip, right sides together, with the narrow end at the top of the sashing strip. Stitch with a 1/4″ seam allowance. Notice that the wide end of the wedge is at the end of the sashing strip.
Place a second wedge on the sashing strip, wide end first, leaving 1″ between the wedges. Stitch the second wedge to the sashing strip.
Continue adding wedge shapes to the sashing strips, alternating the wedges and again, leaving 1″ between the wedges. Position the wedges on the strip with the wide end of the wedge following a wide end or a narrow end of the wedge following a narrow end.
Note From Nancy: In order for the wedges to be sewn together in the topsy-turvy manner, half the wedges will have sashing on the left side and the other half will have the sashing sewn to the right side. That’s the reason for alternating the position of the wedges on the sashing strips.
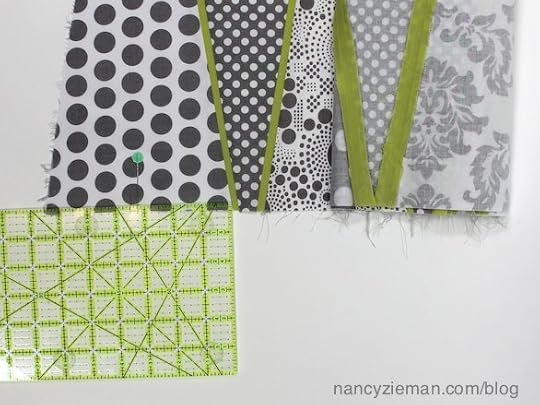
Separate the wedges, cutting between the 1″ space.
Press the seam allowances toward the wedges.
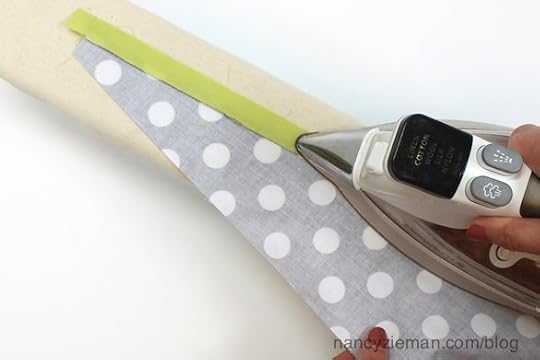
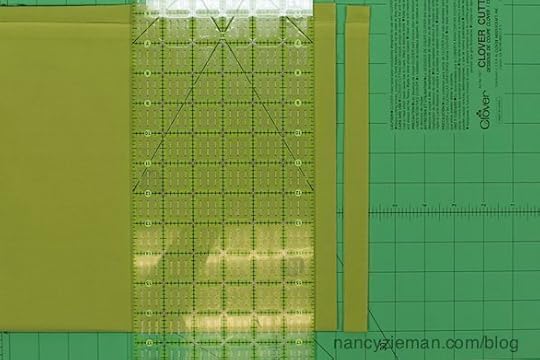
Align the ruler along the cut edge of the narrow end of the wedge, trim off the excess sashing. Repeat on the wide end.
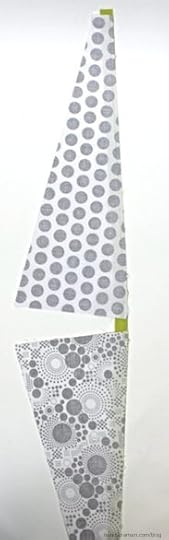
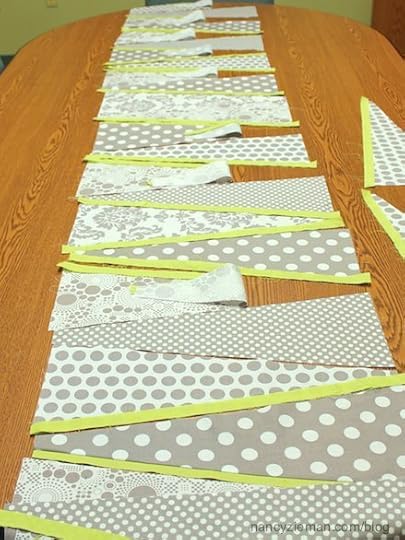
Determine the layout of the wedges, alternating the wedges in the topsy-turvy layout!
Note from Nancy: Learn from my mistake! My staff and I didn’t alternate the positioning and stitching of the wedges on the sashing strips. Half of the sashing strips had to be removed and restitched. Oops! That’s why this photo shows some of the wedges without sashing strip.
Pin and stitch the wedges together, using a 1/4″ seam allowance.
Straighten the narrow ends of the table runner. Place a pin at the center of the end wedges. Measure 1/4″ from the pin to add a seam allowance. Extend the seam allowance the length of the wedge.
Cut along the seam allowance mark, trimming off the excess fabric.

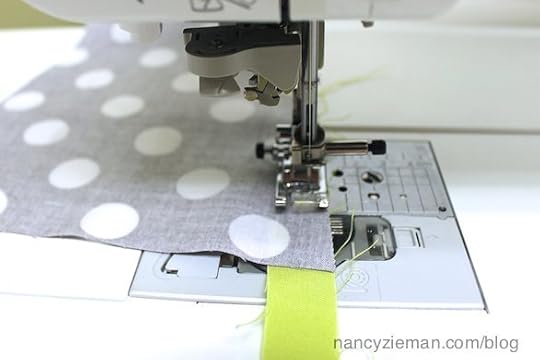
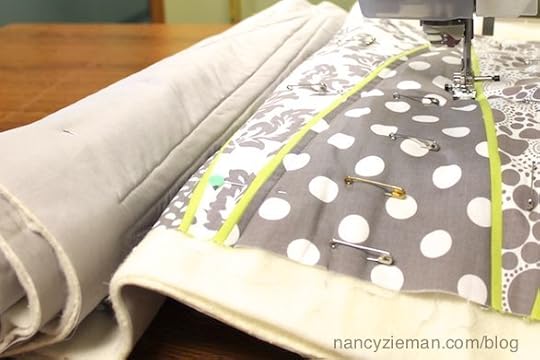
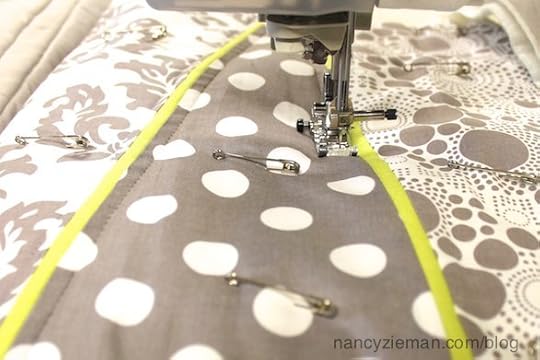
Back the table runner with batting and a backing fabric. Pin the layers together using safety pins.
Straight stitch the layers together. Stitch, guiding the edge of the presser foot along the sashing seam. Repeat stitching on each side of all the sashing strips.
Bind the table runner, using your favorite technique. Click here for binding instructions.
Another view of the table, hmm, garden runner.
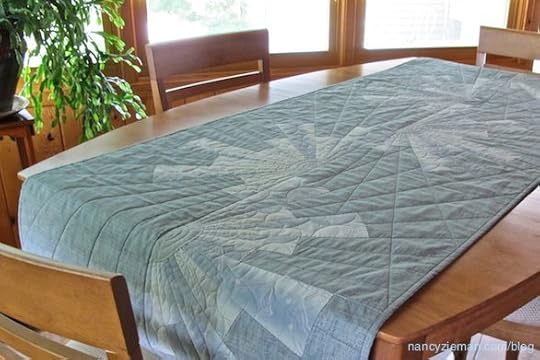
Click here to create another table runner, using the same template. This is such a versatile template!

For a chance to win the Basic Grey Variety Fat Quarter Pack from Riley Blake Designs, please leave a comment sharing what you’d like to create with this fat quarter pack. And, for a chance to win a Trace ‘n Create Quilt Template—Dresden Collection from Clover, please leave a comment sharing what you’d like to create with this template.
The random winner from my blog, A Perfect Palette for Patchwork, wins a set of Clover’s Trace ‘n Create Quilt Template–Grandmother’s One Patch Collection and Trace ‘n Create E-Tablet & Paper Tablet Keepers Templates from Clover. Sue-z-q said she’d make a tablet keeper using, “Shades of bright green OR shades of orange.”
Bye for now,

Content in this feed is © copyright 2014 by Nancy Zieman and may not be republished without written permission. You’re welcome to forward the email to a friend or colleague but it’s not okay to add the RSS feed automatically as content on a blog or other website.


July 10, 2014
Add Personalized Touches to Your Knit Sewing Projects
This week’s online Sewing With Nancy video feature is the second episode of Sew Knits with Confidence. During the first episode, I covered knit sewing basics, taking the “Less is Best” approach to sewing. Still taking the easy approach, it’s now time to learn how to add personalized touches to your knit sewing projects.
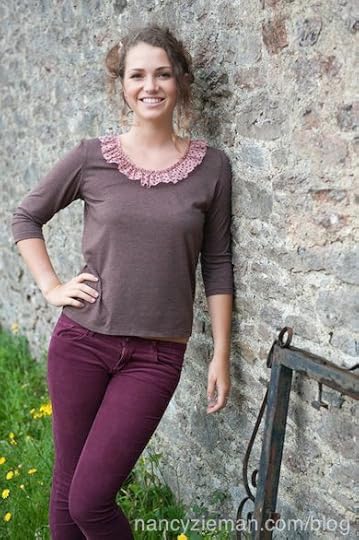
Extra Touches
Combine knits and lightweight woven fabric such as organza around the neck and hemline for a trendy finish. The sewing is streamlined with the help of paper-backed fusible web. Press, fuse, stitch—it’s a three-step process!
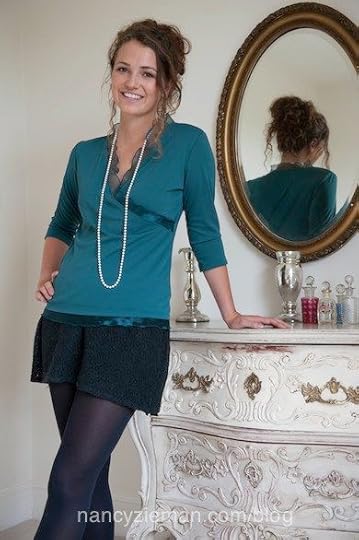
Ruffles

Another creative option is to add ruffles. This time the organza edges are not finished, giving a shabby chic appearance. Bias strips with a minimum of gathering add this easy extra touch to your favorite knit top.
Pleated Posies
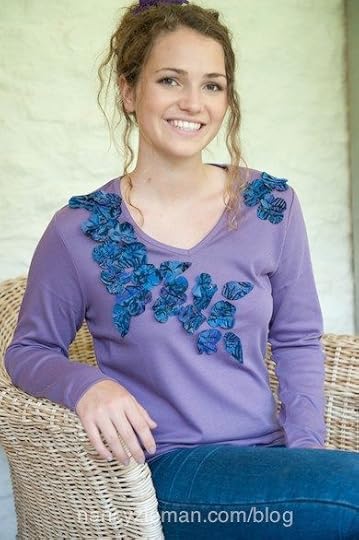
Cotton batik or lightweight knit creates these tumbling petals. A stiletto or even a seam ripper will serve as a valuable tool as you add texture.
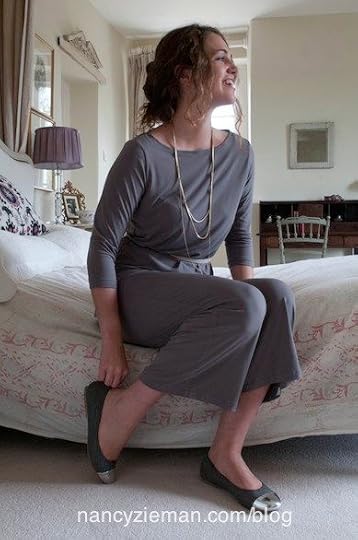
T-shirt Makeover
Could it be that the fabric for your next creation is hanging in your closet? An over-sized tee-shirt can easily be transformed into a more attractive knit top. Sometimes you can use the existing neckline and only modify the body shape. Other times you can turn a billboard tee-shirt into a knit top with an attractive silhouette. Knowing how to sew gives you the tools to be creative!
Embroidery on Knits
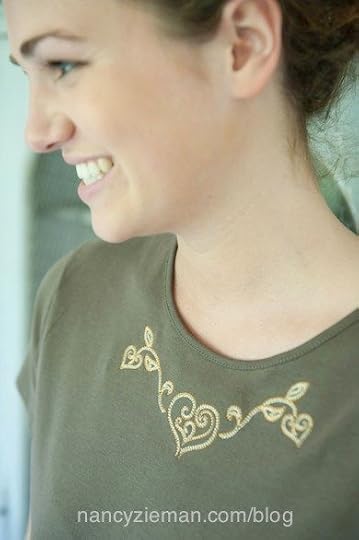
In this second episode, I show you how to gain confidence when sewing and embroidering on knits. Make it easy on yourself and don’t over plan or over stitch. The streamlined steps are made possible by selecting knit-friendly stabilizers.
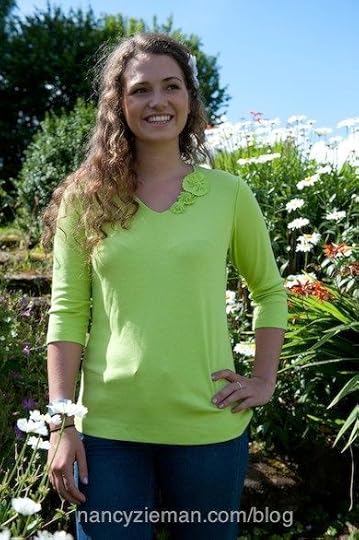
Flouncy Tee

The cascading flounces created for this tee are raw-edge and easy to achieve. Use your favorite knit top pattern and make a few modifications to create a top with charming details.
All the techniques featured on TV, plus many more, are in my book, Sew Knits with Confidence.
For a chance to win a copy of Sew Knits with Confidence, let me know your most challenging part of sewing with knits. A random winner will be announced on July 17.
Watch Sewing With Nancy online
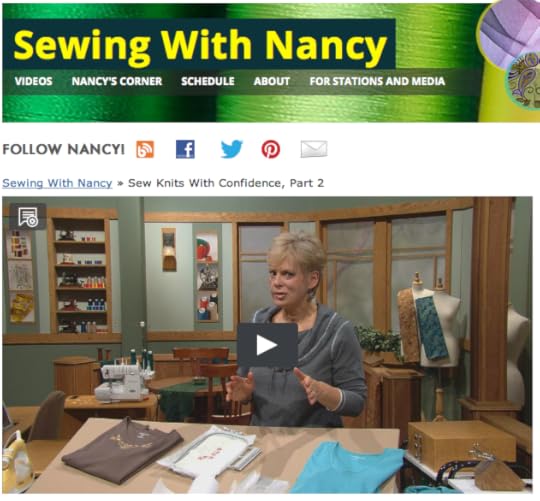
There are 52 programs to watch online, or on your iPad, iPod Touch, or iPhone. Click here to downloaded the app.

Bye for now,
Content in this feed is © copyright 2014 by Nancy Zieman and may not be republished without written permission. You’re welcome to forward the email to a friend or colleague but it’s not okay to add the RSS feed automatically as content on a blog or other website.
July 8, 2014
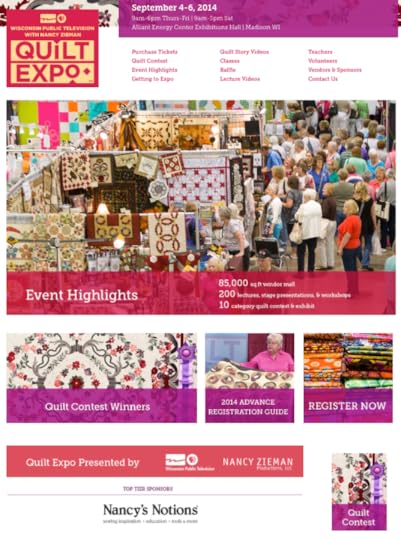
Quilt Expo–Celebrating 10 Years
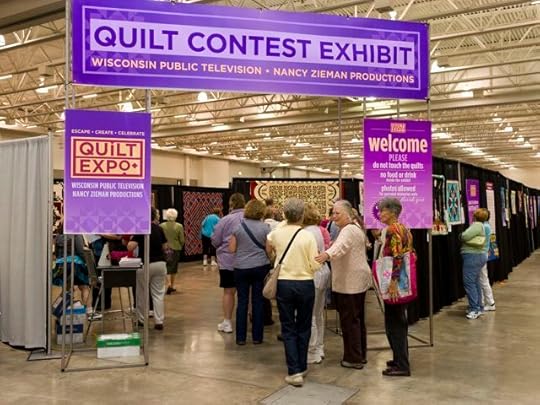
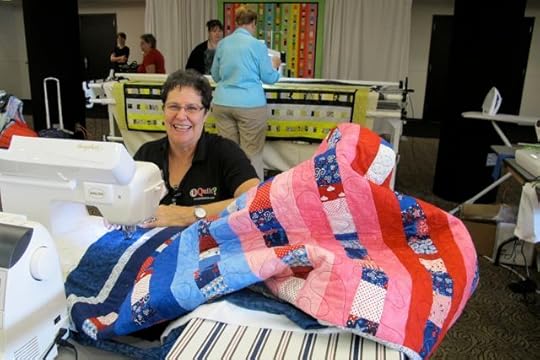
We’re gearing up for the 10th annual Quilt Expo, September 4-6, 2014 in Madison, WI, in the Exhibition Hall at the Alliant Energy Center. I have the pleasure of partnering with Wisconsin Public Television to produce this amazing annual event for quilters.

Quilt Expo Class Registrations are in full swing. Click here to register today! Or go to wiquiltexpo.com and click on Register Now! Advance Registration Guides arrives in mailboxes the week of July 7. You may also view online at wiquiltexpo.com. Be sure to join the mailing list to receive future mailings.
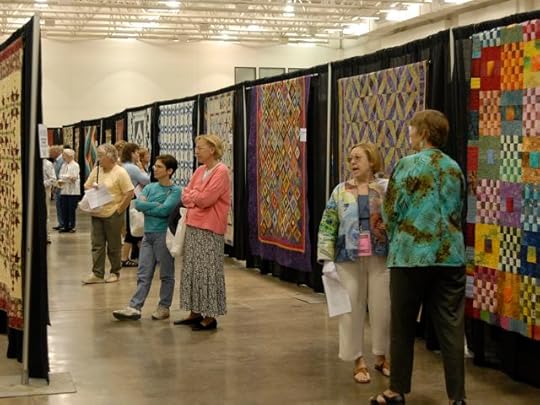
Quilt Expo carries on the event’s tradition of providing inspiration, education, fellowship, and entertainment for quilters of all levels. It’s also an opportunity to see hundreds of quilts that showcase the artistry and stitching talents of quilters across the country. Attendees can view all the quilt contest entries, including the winners, and even participate by casting a ballot for their favorite 2014 contest quilt to win the Viewers’ Choice Award.

Notable quilting authorities will present informal one-hour lectures and teach Sit & Sew and Hands-on workshops. It’s a wonderful chance to learn new techniques and products from the experts.
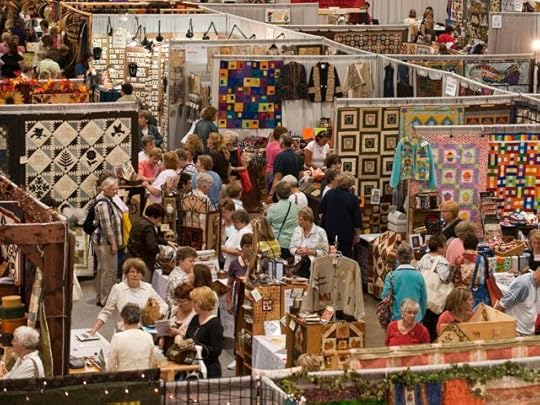
Anyone who loves to shop will delight in a vendor mall brimming with a wide selection of fabrics, patterns, notions, gifts, sewing machines, longarm quilting systems, and more. You’ll also need a little time to relax and get off your feet, so don’t forget to take in the free stage presentations.

Thursday and Friday evenings offer a chance to unwind and laugh with Lola Jenkins Don’t Let Anyone Burst Your Bubble and Jane Sassaman’s Under the Influence. Make plans early—seating is limited.
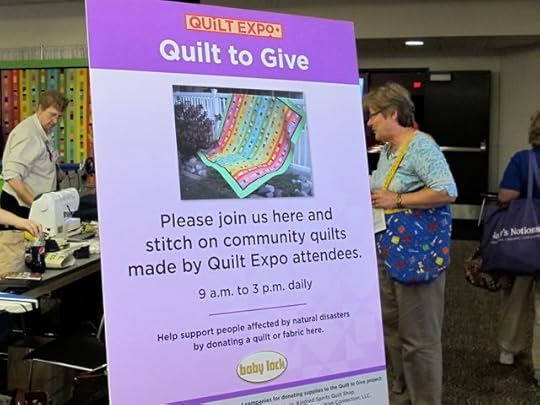 Last year at Quilt Expo, 16 bed-size quilts were generously donated to the Quilt to Give community service project. Plus an additional 15 community quilts were stitched and completed by Quilt Expo attendees. All of these quilts were given to families and individuals in need. This year, quilts will go to Enchanted Makeovers and Domestic Abuse Intervention Services (DAIS). Both organizations are in need of twin-size quilts.
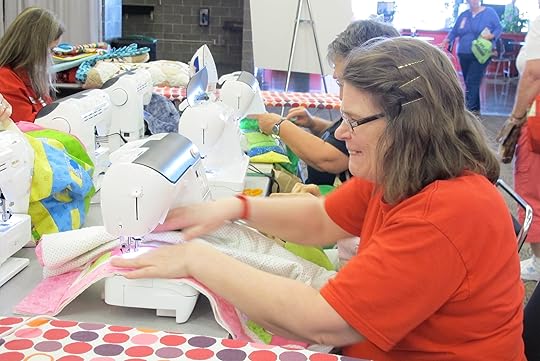
This year Baby Lock will again sponsor Quilt to Give! 9 a.m.–3 p.m. daily in the atrium. Here are three ways you can participate: 1) Plan 1/2-hour or more of time to sit, sew, and give. 2) Donate solid fabrics in bright colors (1/4 yds. or more)—fabric coordinates are welcome. 3) Donate a new bed quilt.
Want to review the quilting process ahead of time, or see what type of fabrics to donate? Click on the Quilt to Give tab above. You’ll see the process in 10 easy steps.
For all things Quilt Expo, sign up to receive the eNewsletter in your email inbox. To learn exclusive event happenings “Like” Quilt Expo on Facebook.
For a chance to win two tickets to the 2014 Quilt Expo, leave a comment and tell us what you’re looking forward to at Quilt Expo.
Bye for now,
Content in this feed is © copyright 2014 by Nancy Zieman and may not be republished without written permission. You’re welcome to forward the email to a friend or colleague but it’s not okay to add the RSS feed automatically as content on a blog or other website.
July 5, 2014
Sew a Makeup Bag that Makes a Difference
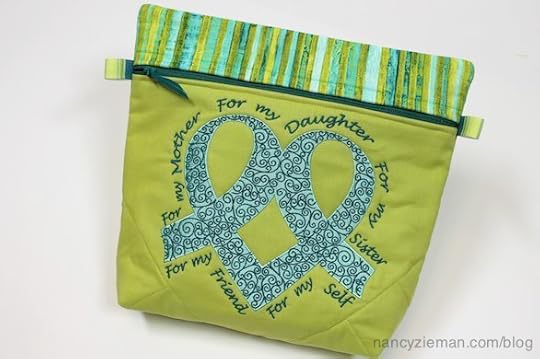
I’m often asked to donate items for auctions, which I’m glad to do. When asked to gather a basket of goodies for Relay for Life, I knew that something special was needed for that basket. An embroidered makeup bag with an embroidery that supports cancer awareness as the focal item of the giveaway.
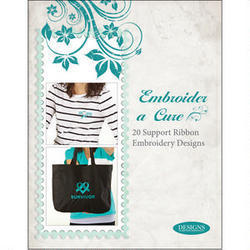
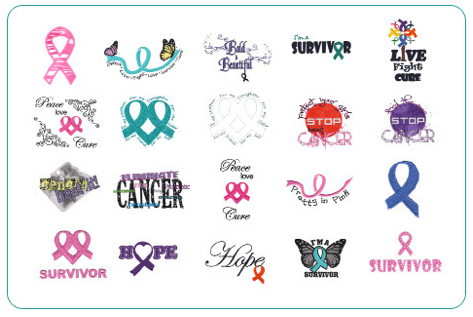
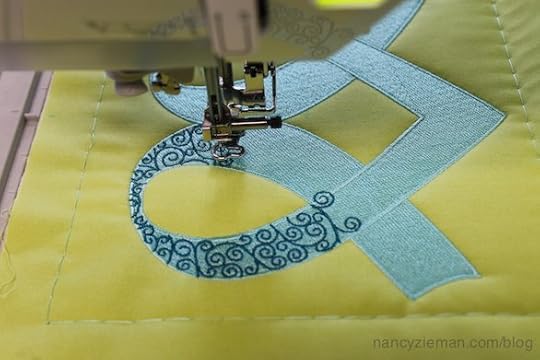
Embroider A Cure
It was easy to find the embroidery. Embroider a Cure, which features 20 support ribbon embroidery designs, a product from Designs in Machine Embroidery is the collection of embroideries that I selected. (All net proceeds from the Embroider a Cure Collection go to the Be The Difference organization, supporting ovarian cancer research.) I was drawn to the double ribbon design and chose thread colors that represent ovarian cancer awareness.
Makeup Bag that Makes a Difference
Perfect for any overnight stay, this bag is fast to create, but also makes a statement!
Fabric and supplies:
Two Fat Quarters, each 18″ x 22″ (We chose a solid lime quilting cotton.)
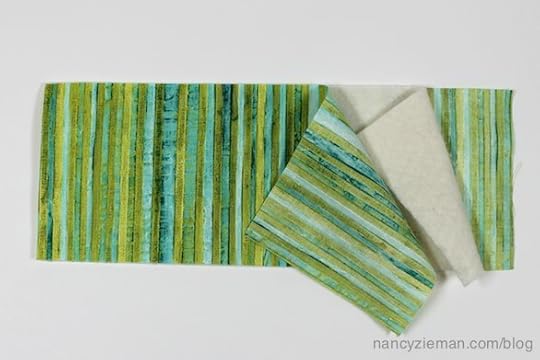
Two Coordinating Fabric Strips, each 5-1/4″ x 14″ (We chose a striped quilting cotton.)
One Cotton Batting, 18″ x 22″
One Cotton Batting, 5-1/4″ x 14″
Two 3″ lengths 1/2″–3/4″ Grosgrain Ribbon
One 14″ zipper
To construct a makeup bag:
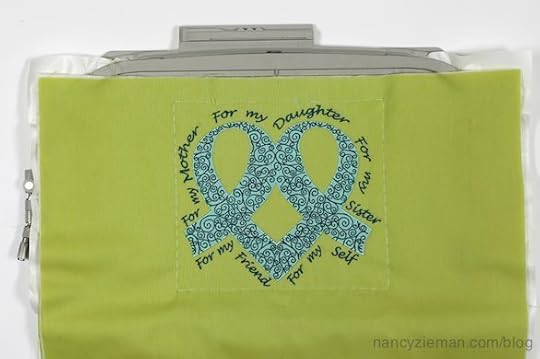
Hoop sticky-backed stabilizer in a 8″ x 12″ hoop. Remove the paper covering within the hooped area.

Select a meaningful embroidery design from the Embroider a Cure Collection .
Transfer the design to your embroidery machine.
Layer batting between the fat quarters.
Spray a very light coating of fusible spray to hold the layers together.
Apply the layers to the embroidery hoop, centering one short end in the hoop.
Optional: Use a placement sticker to position the embroidery on the fabric.

Center the design. (If using a placement sticker, remove the sticker before beginning the embroidery process.)
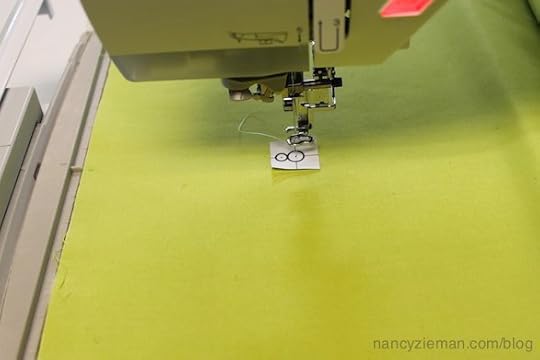
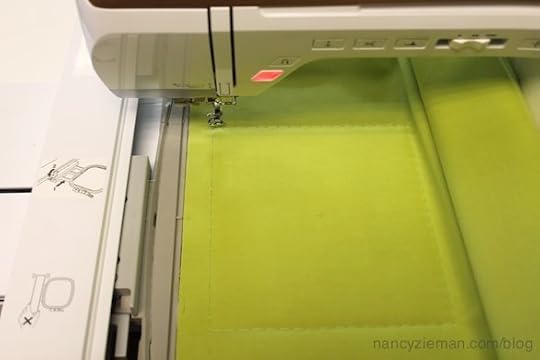
If your machine has this capability, add a basting stitch outline to hold the layers securely in the hoop. This is a built-in option on my Baby Lock Ellisimo .
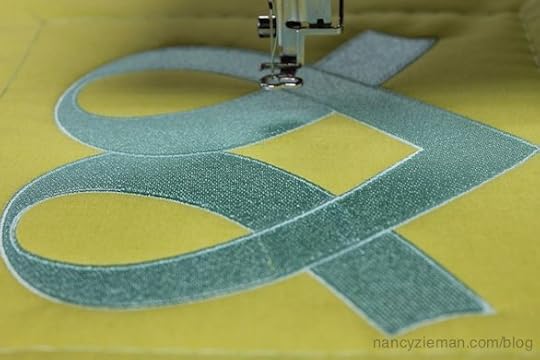
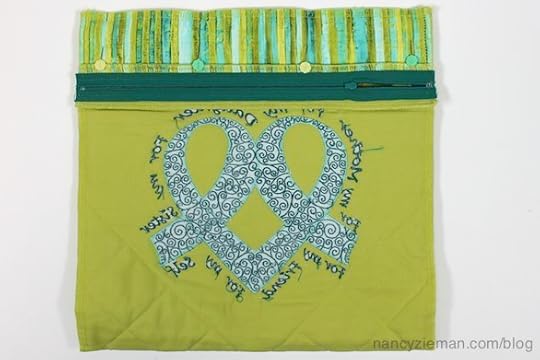
Embroider! I chose a design that features Ovarian cancer awareness. It’s a two-color embroidery that is beautifully digitized.
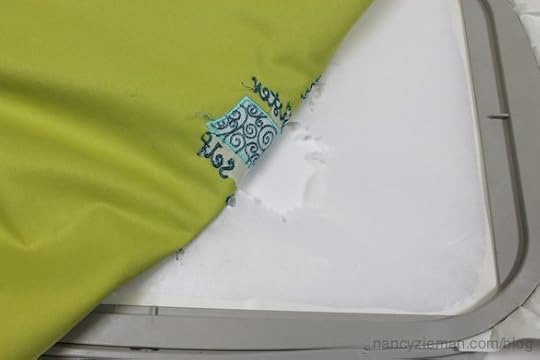
Gently remove the embroidery from the hoop.
Pin the layers together in preparation for quilting the fabrics.
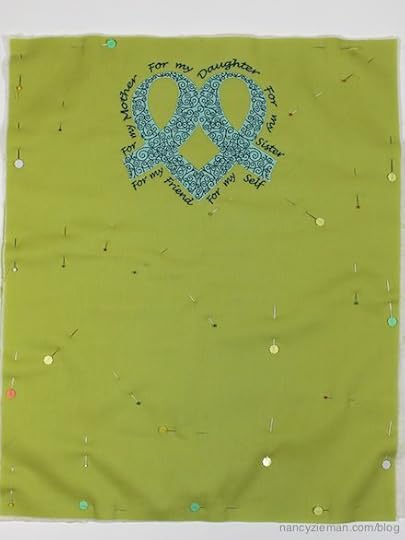
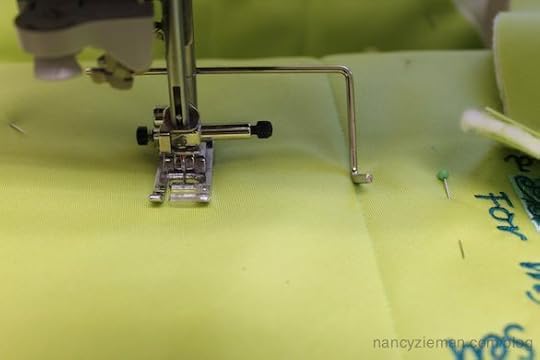
Add a quilting guide bar to the sewing machine. We set the distance between the needle and the bar at 1-1/2″.
Determine the quilting pattern—gridded on the diagonal or vertical/horizontal. We chose diagonal.
Draw one stitching line on the fabric with a washable marking pen .
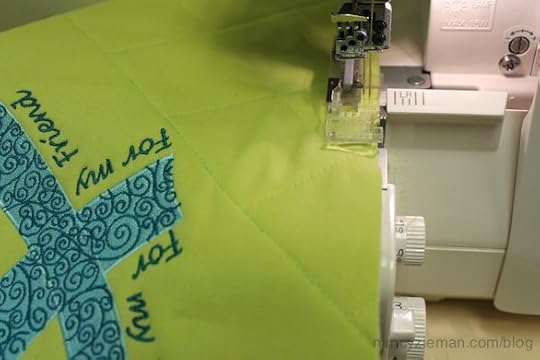
Stitch along the marked line with a straight stitch, removing the pins as you come to them.
For all subsequent lines, guide the quilting bar along the previously sewn line. Repeat.
After completing the stitching in one direction, mark another diagonal line and stitch in the opposite direction.
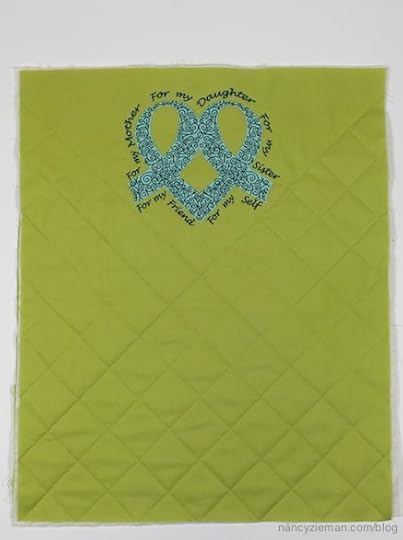
Trim width to 12″, keeping the embroidery design centered. Length will not be trimmed and will remain about 22″
Clean finish all the raw edges by zigzagging or serging.
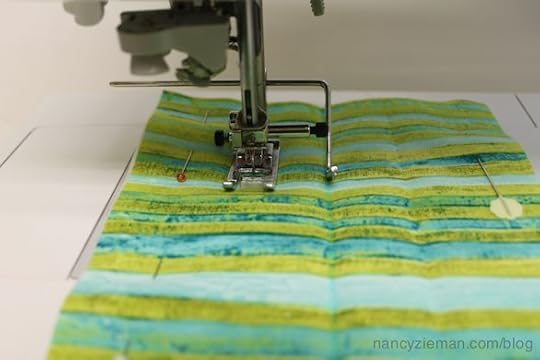
To create the Upper Front Section, layer batting strip between the 5-1/4″ x 14″ coordinating fabric pieces. We stitched several rows of channel stitching.
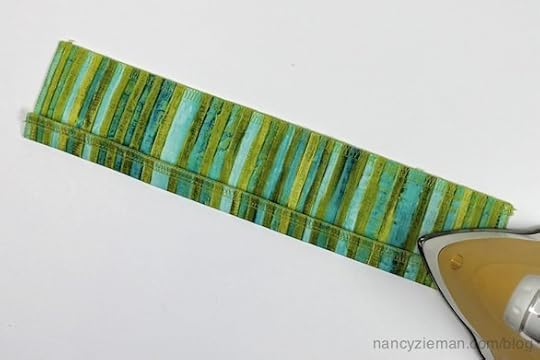
Trim the Upper Front Section to 3-1/4″ x 12″. Clean-finish all raw edges by zigzagging or serging.
Fold under 5/8″ on one long edge of the Upper Front Section and press.
Fold under 5/8″ on one short edge of the Front/Back Section and press.
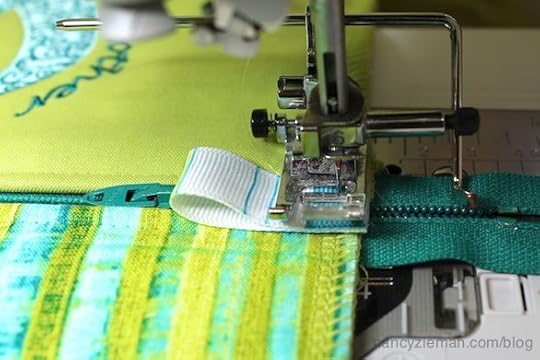
Position the folded edge of the Front/Back Section along the left edge of the zipper teeth, with the zipper facing up and the tab extending above the edge. Stitch the fold to the zipper.
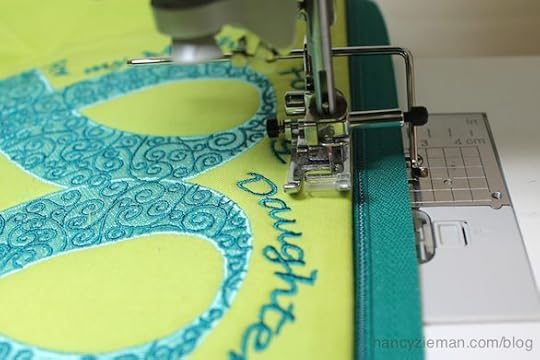
Position the folded edge of the Upper Front Section along the opposite edge of the zipper teeth. Align the edges of the two sections; stitch.
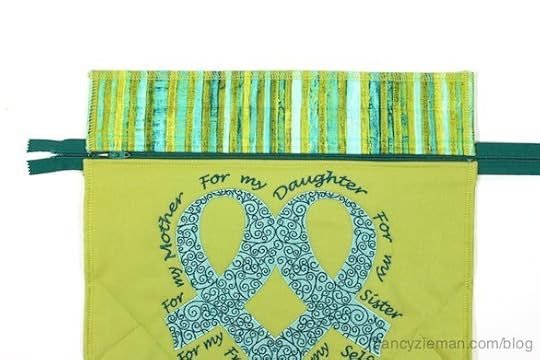
Open the zipper and bartack across the top zipper teeth, stitching close to the fabric edge. Repeat at zipper bottom, stitching close to the fabric edge.
Fold 3″ ribbon sections in half, with the short ends together.
With the loop toward the center of the bag, align the ribbon ends with the raw edges at the zipper; stitch.
Trim off the excess zipper tape.

Add a label to the back, if you like!

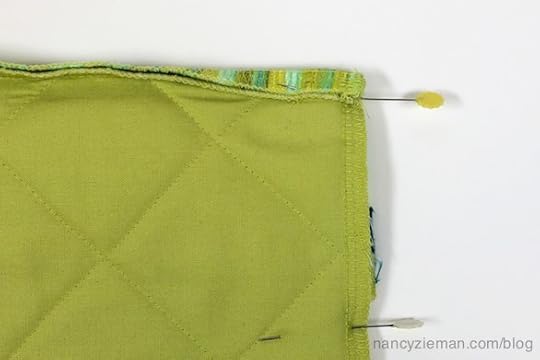
Fold the bag in half, right sides together, meeting sides and top edges.
Open the zipper half way, providing an opening to turn the bag right side out.
Stitch or serge the top with a 1/4″ seam.
Wrap the top seam toward the bottom, folding the seam at the stitching line. Stitch the side seams from the wrapped corner to the lower fold with a 1/4″ seam.
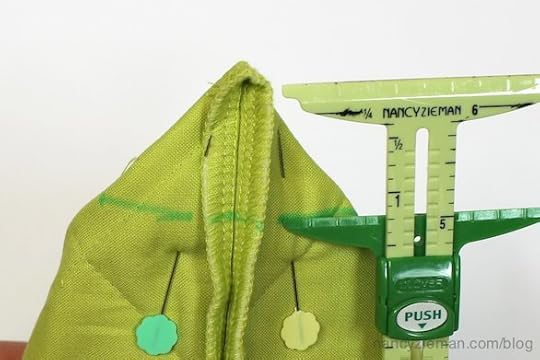
Form the bag bottom:
Open out the lower corners and center the lower seam.
Mark 1-1/4″ from the point of the corner. (My favorite measuring tool is the 5-in-1 Sliding Gauge .)
Stitch or serge along the marked seamline.
Trim the corner seams and turn the bag right side out.
Take time to stitch a makeup bag for a friend, family member, or for yourself. Take time to read the words!
Bye for now,
Content in this feed is © copyright 2014 by Nancy Zieman and may not be republished without written permission. You’re welcome to forward the email to a friend or colleague but it’s not okay to add the RSS feed automatically as content on a blog or other website.
July 3, 2014
“Less is Best” When it Comes to Sewing Knits
Knit fabrics and knit sewing patterns are enjoying a resurgence in popularity. Plus, the fabric options are varied and exciting! If you’re new to sewing or if it has been awhile since you’ve sewn with knits, why not watch my latest Sewing With Nancy TV series, Sew Knits With Confidence.
Less is Best!
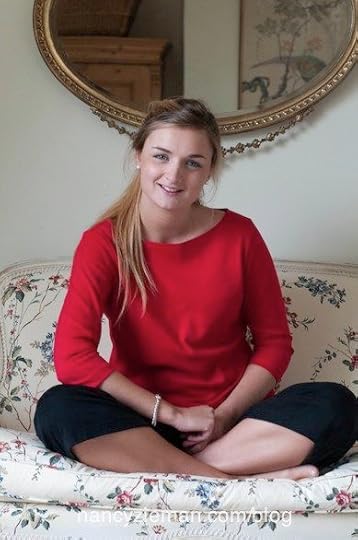
Begin with a great knit fabric and a simple pattern; let the fabric be the focal point. Here are a few pattern options; of course there are many others.
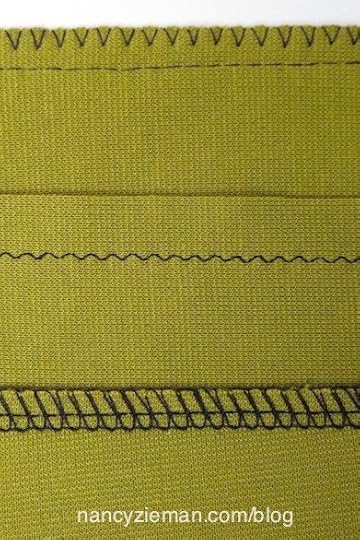
Knit Fabrics & Seams
Learn streamline ways to stitch or serge seams. You’ll see that I don’t like to “over sew” the fabric; less is more when it comes to sewing knits. By the way, I used the new Bare Knits .
Plus, learn how to effectively use your serger to ease layers together. Sergers and knits are best buddies.
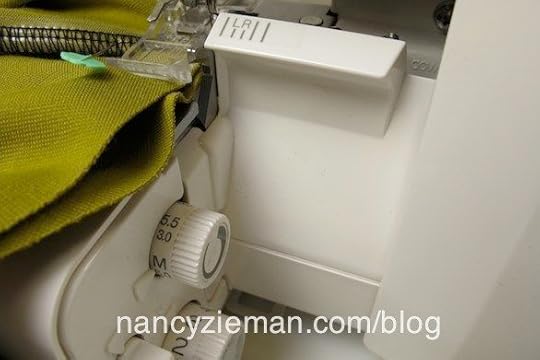
You’ll also learn pressing tips.
Edge Finishes
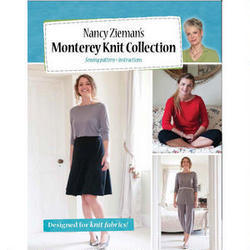
Add a quick, yet clean finish to the neckline, sleeve, or any other outer edge. In this knit combo, called the Monterey Knit Collection, the sewing is minimal. Since knits are the ultimate no-ravel fabric, you’ll quickly build your sewing skills and gain stitching confidence.

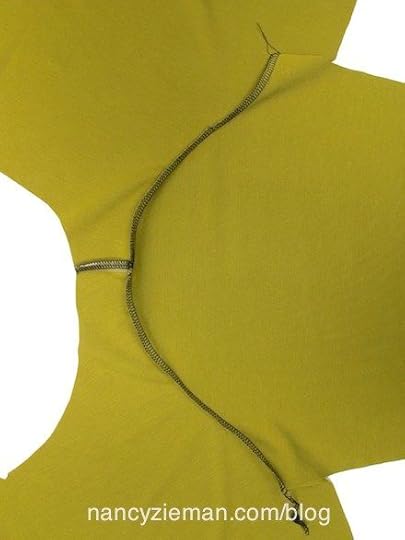
Flat construction
You’ll never feel like your stitching in circles when you adapt the flat construction way of assembling knits. Set the sleeve in flat, stitch the underarm and side seams in one step—what a speedy way to sew!
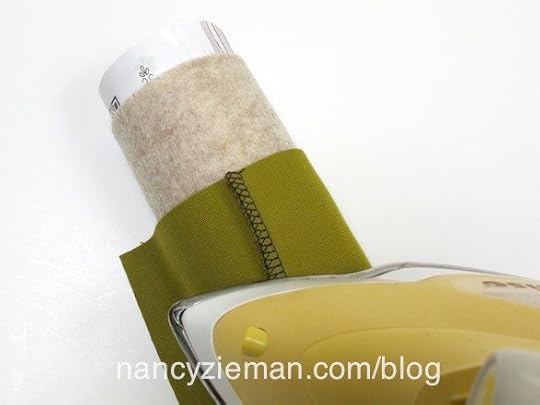
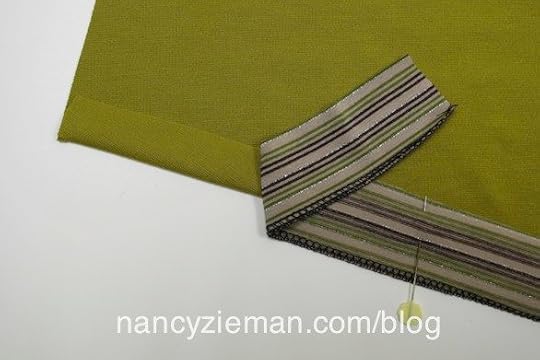
Hem options
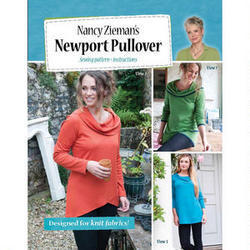
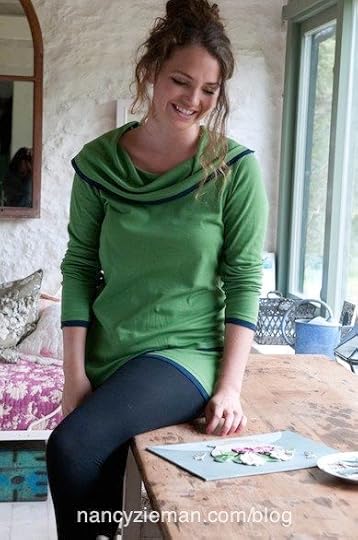
Knit hems don’t have to be boring! Use a double needle, cover stitch, or even fusible web for trendy hem finishes. The featured pattern, the Newport Pullover, features a two-toned hem, accomplished with the help of fusible web.
Now for another color way!
All the techniques featured on TV, plus many more, are in my new book, Sew Knits with Confidence.
For a chance to win one of my patterns, tell me which one of my four patterns you like the best and why! A random winner will be announced on July 17.

The random winner of the a Circles Sew Simple book and tool set, from my June 26 blog posting, is Peggy A. Here’s her comment, “I was fascinated by this process the first time I saw it on PBS. The program is saved on my DVR! I would use this for table toppers, bed quilts, pillow tops, and lots of home dec projects I have on hold. My granddaughter has circles in her bedroom. I know she would love to make a quilt with me for herself. I see baseballs, soccer balls, volleyball balls, basketballs…”
Watch Sewing With Nancy online.
There are over three seasons of programs to watch online, or on your iPad, iPod Touch, or iPhone. Click her to downloaded the app.
Bye for now,
Content in this feed is © copyright 2014 by Nancy Zieman and may not be republished without written permission. You’re welcome to forward the email to a friend or colleague but it’s not okay to add the RSS feed automatically as content on a blog or other website.
July 1, 2014
Free Patriotic Quilt Pattern
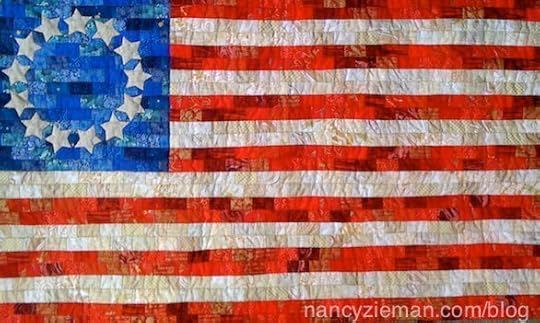
I received the email below from Stephanie Kepecs, a Sewing with Nancy viewer, who wanted to share the American Flag quilt pattern that she designed for her son.
I was watching your show recently and was struck by a quilter who was making quilts for soldiers (the Nancy’s Corner segment with Cathy Ott’s recycled honor quilt). Sewing with Nancy has been a weekly vacation for me for many, many years. I thought you may be interested in an American Flag that I designed. I am not a professional; I teach quilting as a volunteer. Thanks for all the happy hours. Stephanie
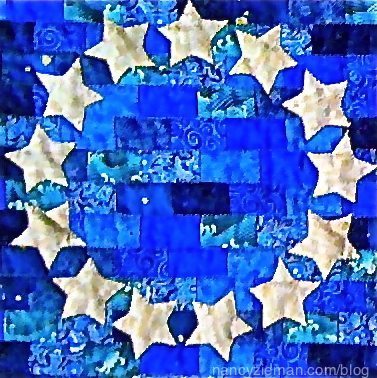
I was impressed—the quilt design, entitled The Betsy Ross Flag, is stunning! Yet, the most amazing part is that Stephanie and her friend Joanne Perlmutter, co-designer, wanted you to have the pattern too!
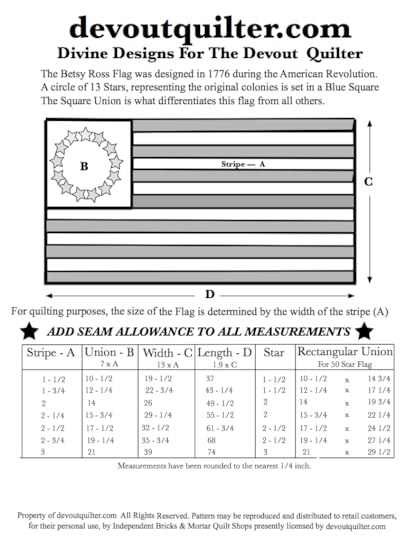
Free Quilt Pattern
Click here to download the free quilt pattern, instructions and images. Please note that the instructions are the property of devoutquilter.com. All rights are reserved. The pattern may be reproduced for your personal use. Quilt shops and other retailers should contact devoutquilter.com to receive permission to reproduce the pattern/instructions.
There are three sheets to download; the instructions are extremely well written.
Please thank Stephanie and Joanne!
They also allowed me to share two more of their quilt patterns. Click here to find free downloadable patterns for Love The Dove Quilt and Genesis Wall Hanging. Please take time to thank them for their patterns by leaving a comment at their website, devoutquilter.com.

My thanks to Stephanie and Joanne!
Bye for now,
Content in this feed is © copyright 2014 by Nancy Zieman and may not be republished without written permission. You’re welcome to forward the email to a friend or colleague but it’s not okay to add the RSS feed automatically as content on a blog or other website.
June 28, 2014
A Perfect Palette for Patchwork
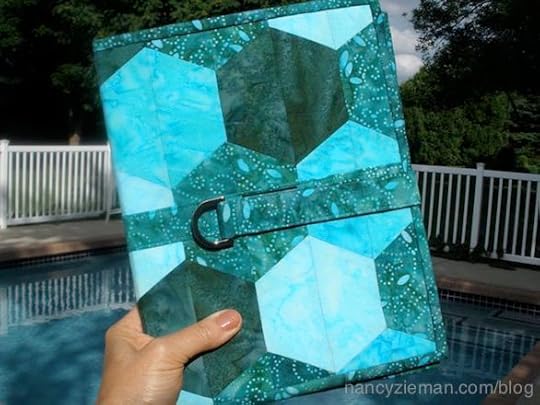
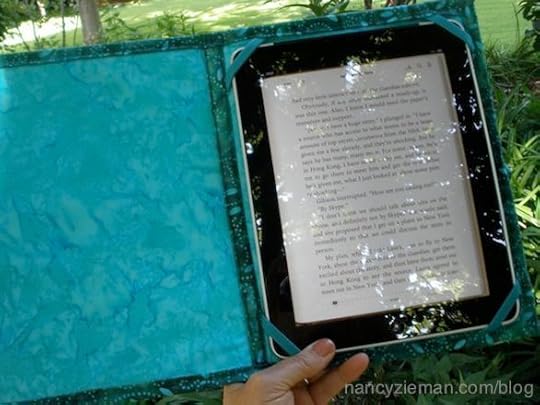
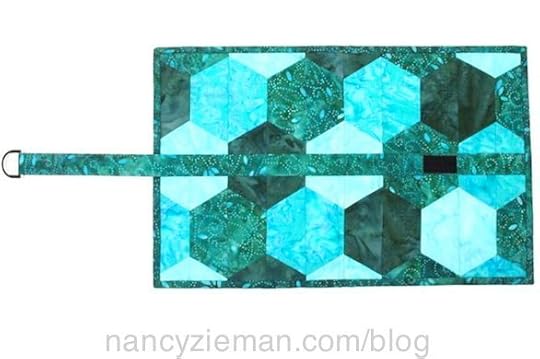
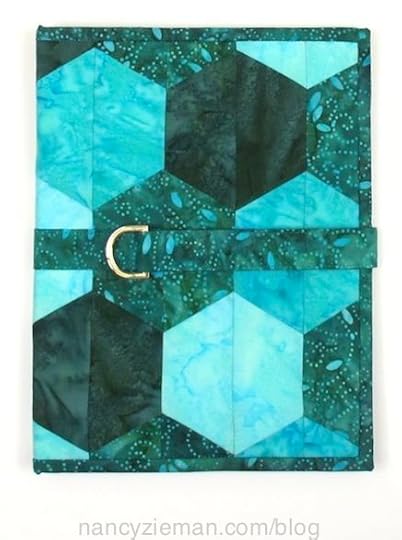
In the summer, I’m a lazy quilter. Time outside takes precedence over time in my sewing studio, yet I do love to create and test out new techniques. If you, too, are looking for a creative, yet a quick project, try our Tablet Keeper for an iPad (shown) or other e-reader tablets. Firm with custom-made plastic inserts to keep your e-reader protected, you’ll be reading next to the pool or out on the deck in style.
The technique I’d like to share is a Faux Hexagon. The dreaded—at least for me—Y-seam is not to be seen. (I’ve been known to refer to Y-seams as Why Seam! I digress!) With this technique you can get the look of Y-seams with simple straight stitching.
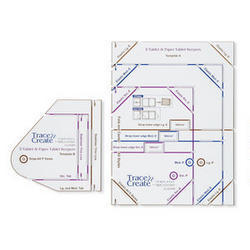
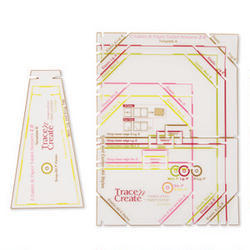
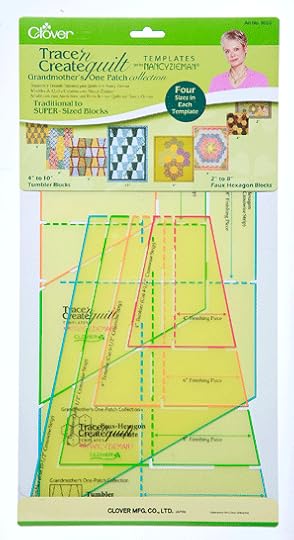
Instructions are written for using Trace ‘n Create Quilt Template–Grandmother’s One Patch Collection and Trace ‘n Create E-Tablet & Paper Tablet Keepers Templates, both products that I designed for Clover.
Choose Clover’s Trace ‘n Create Tablet Keeper Template or Trace ‘n Create Tablet Keeper Template 2.0. Depending on your electronic device make and model, you’ll select the template that fits your electronic tablet. For the iPad, select Clover’s Trace ‘n Create Tablet Keeper Template.
Click here to view the original Tablet Keeper Template device listing.
Click here to view the Tablet Keeper 2.0 device listing. If you don’t see your tablet listed, email us at info@ziemanproductions.com and we’ll add your electronic device to the listings.
 Quantities are for 44/45″ wide cotton quilting fabrics. Measurements include 1/4″ seam allowances. Sew with right sides together unless otherwise stated.
Fabrics shown in photos: Assorted batiks and wax batiks (on sale this week at Nancy’s Notions).
Supplies for Faux Hexagon Tablet Keeper
1/4 yard OR 1 fat quarter dark green/blue for faux hexagons
1/4 yard OR 1 fat quarter light blue for faux hexagons
1/4 yard OR 1 fat quarter multi-color blue/green medium-dark for faux hexagons, strap closure, inner spine, and binding
1/3 yard OR 1 fat quarter medium-blue for faux hexagons and inner tablet
5/8 yard medium-weight fusible interfacing, such as Pellon’s Shirtailor
1/3 yard Pellon Peltex Ultra-Firm Stabilizer (non-fusible)
1 Package Clover 1″ Create-a-Strap
1 Package Clover 5/8″ Create-a-Strap
1 Set Clover Pre-Cut Tablet Keeper Shapers
1-1/2″ Sew-On Hook and Loop Tape 3/4″ wide
1/2 yard 1/2″ Elastic or 1 quality nonslip hair band
Helpful Notions: Rotary cutter, mat & ruler, fine-tip marking pen or pencil, sharp tip scissors, spray starch/fabric stiffener, 1/4″ quilting/patchwork presser foot, zipper foot and coordinating thread.
Cut Fabrics
From dark green/blue fabric, cut:
• Three 2-1/4″ wide strips. From strips, trace and cut eleven 2″ faux hexagon shapes using Faux Hexagon Template from the Trace ‘n Create Quilt Template–Grandmother’s One Patch Collection.
From light blue fabric, cut:
• Three 2-1/4″ wide strips. From strips, trace and cut fourteen 2″ faux hexagon shapes using Faux Hexagon Template from the Trace ‘n Create Quilt Template–Grandmother’s One Patch Collection.
From multi-color blue/green medium-dark fabric, cut:
• Three 2-1/4″ wide strips. From strips, trace and cut fourteen 2″ faux hexagon shapes using Faux Hexagon Template from the Trace ‘n Create Quilt Template–Grandmother’s One Patch Collection.
• One 2″ wide x 32″ long strip for strap closure. Note from Nancy: If using a fat quarter, cut: Two 2″ wide x 16-1/2″ long strips and stitch together to equal one 2″ wide x 32″ long strip.
• One 1-1/4″ wide x 10-3/4″ long strip for inner spine.
• 64″ of 2-1/2″ wide strips. Join strips to make bias binding.
From medium-blue fabric, cut:
• One 17″ wide x 10-3/4″ long interior rectangle.
• Three 2-1/4″ wide strips. From strips, trace and cut eleven 2″ faux hexagon shapes using Faux Hexagon Template.
Note From Nancy: Prior to cutting faux hexagon pieces, I like to use Mary Ellen’s Best Press, a clear crisp spray starch, to stiffen the fabric. The crisp fabric increases accuracy in cutting and makes it easier to stitch a bias edge and a straight edge together.
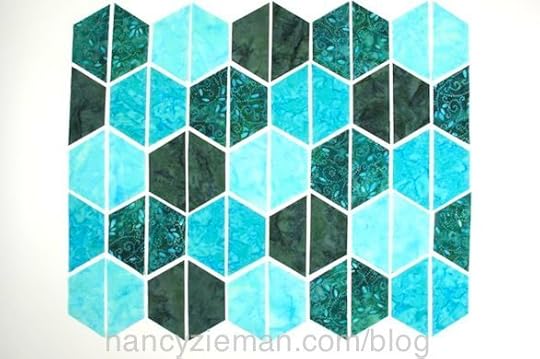
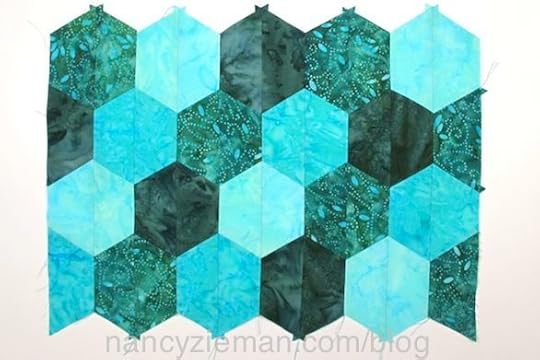
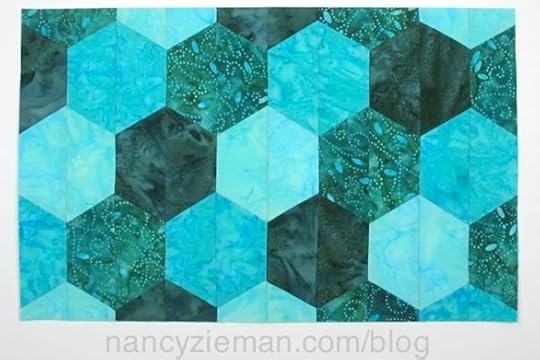
Layout Shapes
Referring to Faux Hexagon Unit Assembly Diagram, layout pieces in ten columns—five faux hexagon shapes per column, creating a honeycomb design.
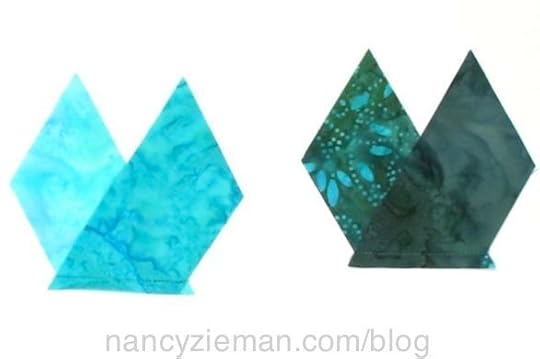
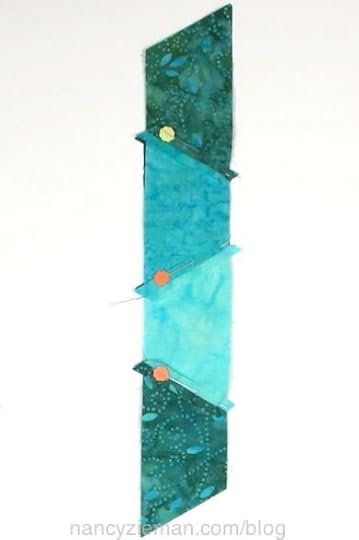
Stitching
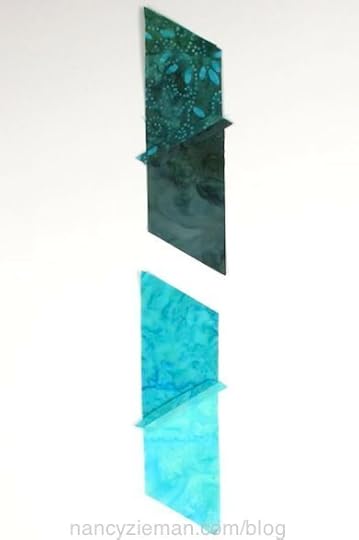
Align right sides and edges of shapes, extending the seam allowances 1/4″, creating a V-shape.
Align edge of 1/4″ presser foot with edge of the fabric. Stitch. The first and last stitches should land at the V-shapes of the seam allowance. Press seams open. Repeat, stitching together pieces of each column.
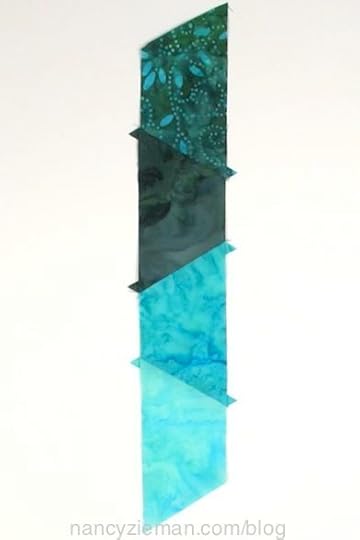
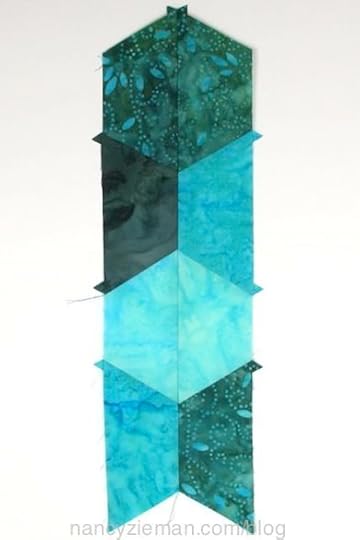
Align column seams, right sides together. Stitch; press seams open. Continue adding columns until the ten-column Faux Hexagon unit is complete.
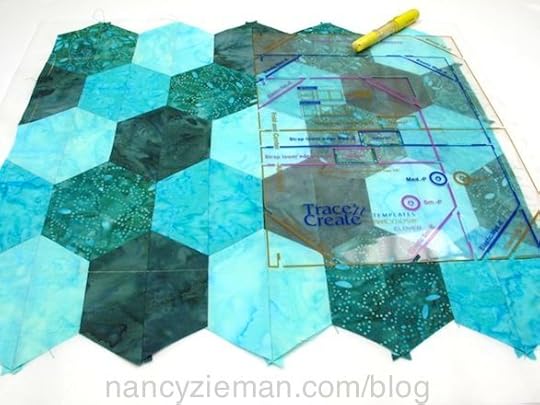
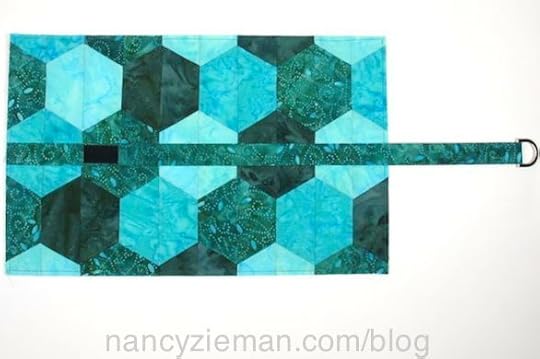
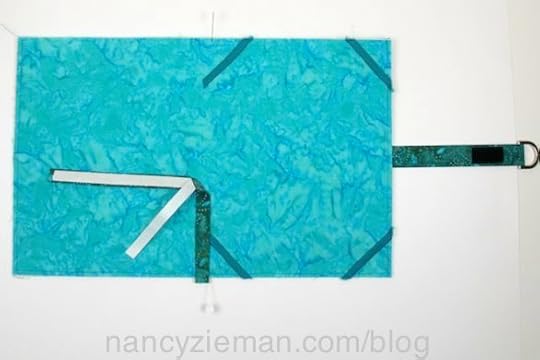
Place Tablet Keeper Template on top of pieced unit. Center left edge of template to center of Faux Hexagon unit. Trace around template edges and trim off any excess fabric.
Press medium-weight fusible interfacing (cut the same size as the Faux Hexagon unit) to the wrong side of the Faux Hexagon unit. Place Pellon Peltex Ultra-Firm Stabilizer (cut the same size as the Faux Hexagon unit) to the wrong side of the Faux Hexagon unit. Pin.
Assemble Tablet Keeper
Create a Strap using the 1″ Create-a-Strap, following the directions included in the Trace ‘n Create E-Tablet & Paper Tablet Keepers Templates. Position and topstitch the strap to the fabric.
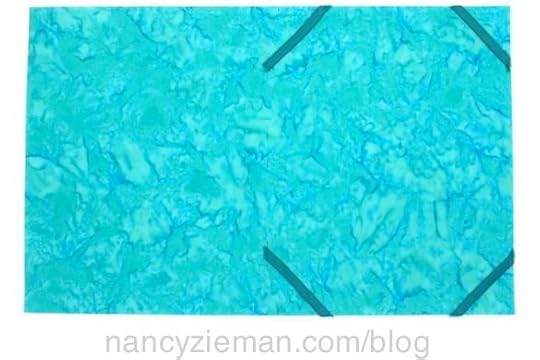
Create the E-Tablet Interior: Press medium-weight fusible interfacing to wrong side of medium-blue fabric interior rectangle. Align Tablet Keeper Template A to right edge of right side of interior rectangle. Mark inner spine and elastic placement lines. Flip template to left and mark inner spine markings. Connect inner spine markings, creating two parallel markings.

Cut and place elastic at markings, machine baste edges.
Pin interior fabric to outer Faux Hexagon unit wrong sides together. Edgestitch along sides and lower edge, folding strap out of the way of the stitching line. Do not stitch across top.
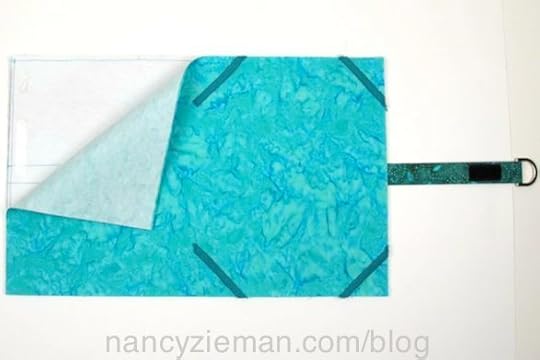
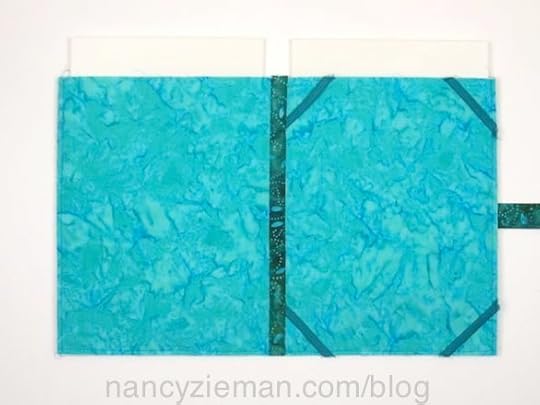
Create Inner Spine: Place fusible side of 5/8″ Create-a-Strap to wrong side of multi-color blue/green medium-dark fabric strip and press. Fold and press along perforations.
Position inner spine strip to interior, centering strip between markings. Edgestitch along both sides of strip, stitching through all layers. Insert Pre-Cut Tablet Keeper Shapers between outer and inner fabrics and edgestitch along top.
Join 2-1/2″ wide multi-color blue/green medium-dark fabric strips for binding. Attach binding to Tablet Keeper following the instructions included with Clover’s Trace ‘n Create E-Tablet & Paper Tablet Keepers Template.
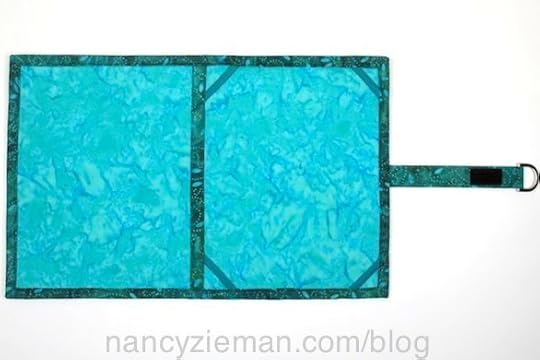
Note From Nancy: If you’re not an iPad owner, the Tablet Keeper has options for three different electronic and paper tablet sizes. Whether you’re low-tech or high-tech, use this template to test out other patchwork designs.

For a chance to win a set of Clover’s Trace ‘n Create Quilt Template–Grandmother’s One Patch Collection and Trace ‘n Create E-Tablet & Paper Tablet Keepers Templates, please leave a comment below sharing the fabrics and colorations you’d feature in your Tablet Keeper.

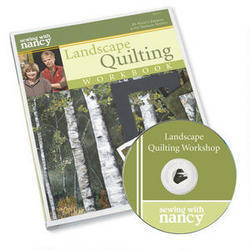
The random winner of a copy of Landscape Quilting Workshop workbook is Peggy who said, I’m doing an evening scene of Louisiana cypress trees at sunset. The colors are mostly deep reds and purples with hints of gold showing through. I also did free motion stitching in the water using metallic thread in the bobbin. Very effective.
Bye for now,
Nancy Zieman—author, pattern designer, businesswomen, producer, and national sewing authority—is the host of the popular show Sewing With Nancy®, which appears exclusively on public television stations across the United States and Canada. Follow Nancy’s Blog at NancyZieman.com/Blog and sign up to receive Nancy’s E-News for the latest news in Sewing, Quilting, & Creating.
Content in this feed is © copyright 2014 by Nancy Zieman and may not be republished without written permission. You’re welcome to forward the email to a friend or colleague but it’s not okay to add the RSS feed automatically as content on a blog or other website.
June 26, 2014
Sewing In Circles—It’s a Good Thing!
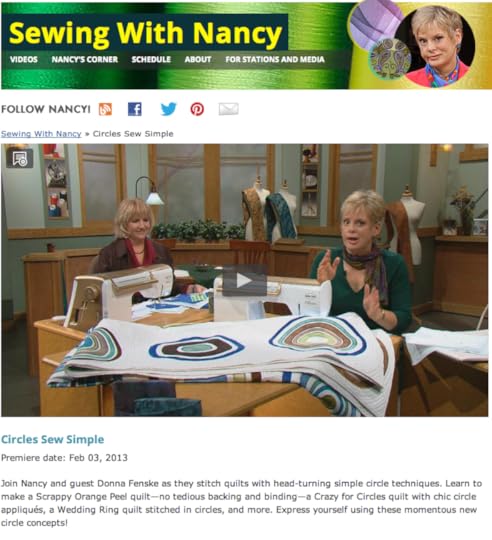
Sewing in circles may conjure less than positive images in your mind, but not to worry! Learn how to sew circles around past methods of making circular appliqué shapes in this week’s Sewing With Nancy video feature, Circles Sew Simple, click to watch online. Learn how to create perfect circle appliqués, satin-stitched circles, and circle-based quilting projects during this half-hour online video.
Donna Fenske, Sewing With Nancy designer joins me on TV, for the Circles Sew Simple episode.
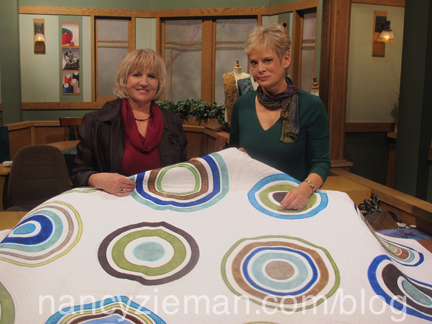
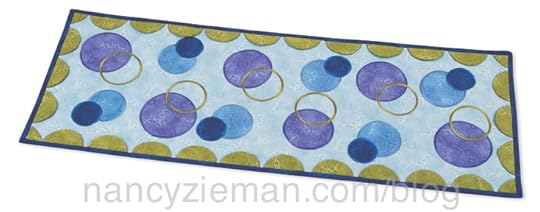
Appliquéd Circles
This 13″ x 35″ table runner features the basics of circle stitching. Satin stitched and appliquéd circle accents are the ideal point to begin. What a great project to practice and perfect your perfect circles. All the instructions and the tool are included in the Circles Sew Simple book and tool set.
Supplies List
1/2 yd. light blue cotton quilting background fabric
1/4 yd. purple cotton quilting fabric for large circles
1/8 yd. medium-blue cotton quilting fabric for medium circles
1/8 yd. dark-blue cotton quilting fabric for small circles
3/4 yd. green cotton quilting fabric for half-circles border
1/2 yd. flannel backing
3/8 yd. Fusible Easy Knit Interfacing
Prep the fabrics as detailed in the Circles Sew Simple book. The book’s included with the tool!
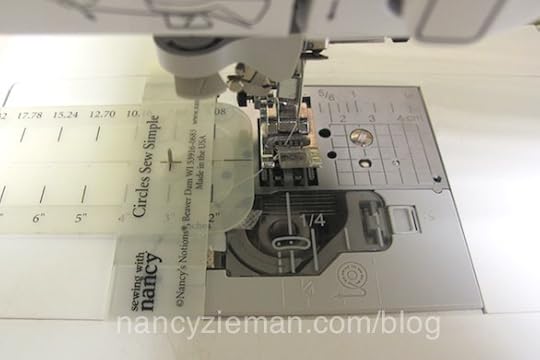
Here’s the Circles Sew Simple Tool !
The Circles Sew Simple Tool easily attaches to your machine with double-sided tape—included with the tool!
Stitch perfectly symmetrical circles with this unique tool.
Create straight stitched, satin stitched, or appliquéd circles in 26 sizes: circles range in diameter from 2″–27″.
The tool includes the Circle Gauge Base, Cross Bar Attachment, Tack and Guard in two sizes, double-sided tape, and Circles Sew Simple book with step-by-step instructions for attaching and using the tool, plus 6 projects.
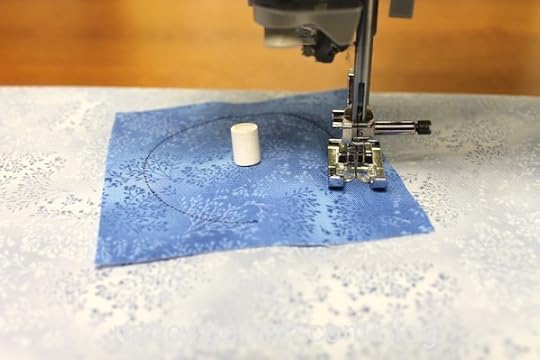
Back fabrics with interfacing and mark center circle placement on the wrong side of the fabric.
Position table runner background fabric over Tack point at center circle marking.
Position appliqué fabric over Tack point. Cover Tack with Guard.
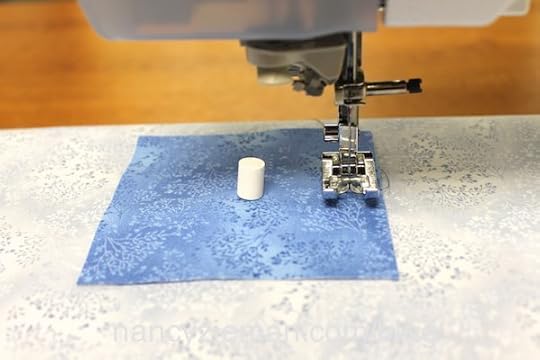
Thread machine with rayon thread and set machine for a straight stitch; stitch circle.
Trim close to stitching line.
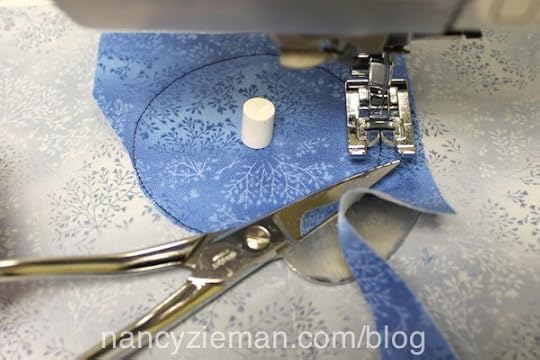
Change machine settings for a satin stitch. Stitch with the satin stitch to cover the straight stitching.
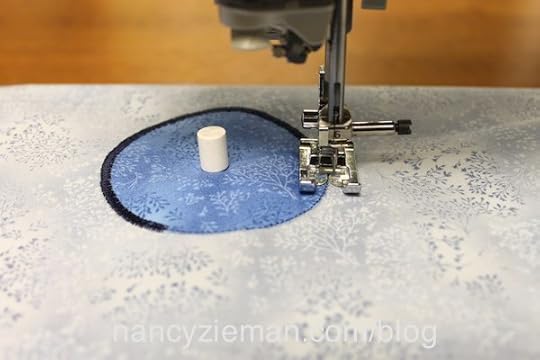
Stitch open circles using the same method—just leave out the appliqué fabric.
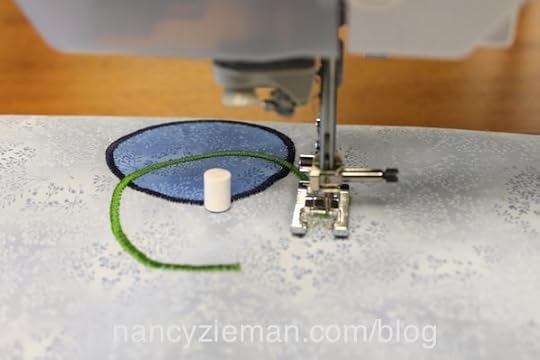
Repeat the process until you’ve created all the circles you desire.
Learn how to create the half-circles for the border and finish the table runner following the instructions included in the Circles Sew Simple book.
Also in this week’s online video feature, Circles Sew Simple, you’ll learn how to make the Crazy for Circles Quilt. Incorporate appliquéd circles and a quilt-as-you-go technique to make super-sized blocks for a bed quilt. Designed by Donna, this queen-sized quilt features 13 fabric coordinates and gives you permission to go crazy for circles!
Quilt a Scrappy Orange Peel vintage-inspired pattern with an updated twist. What’s different? Circles are stitched to perfection with the Circles Sew Simple Tool. We’ll show you how to create a circle envelope that uniquely transforms into a reversible quilt.
For a chance to win a Circles Sew Simple book and tool set, leave a comment below about your next circle project.
From my blog, How Did You Learn to Sew, I did a giveaway of two books, Seams Unlikely and Nancy Zieman’s Sewing A to Z. Our request was that the Sewing A to Z book be given to someone you know who would like to learn to sew or quilt. Each one teach one! The random winner is Corrine K. Schlomer. I also started sewing through 4-H. However, in my teen’s I sewed with my mom during the summers and that’s when the sewing bug bit me! We lived on a farm and I helped my mom prepare meals to feed the “men”. We developed a unique system of one cooking the noon meal while the other got to sew. Then we’d trade jobs and the morning seamstress did the dishes while the noon cook got to sew! For the supper meal we would flip jobs. We created a good share of our clothing in this way. I have wonderful memories of those days spent with my mom in her fabulous sewing room in the basement. (I still feel an urgency to ramp up my sewing during the summer!) Later when I started my teaching career, my mom told me about this sewing show on PBS called Sewing With Nancy and I continued to learn! My family teases me about watching your show—guess I’m a bit of a fanatic—but both of my children (now grown) know exactly who Nancy Zieman is! I’ve sewn all of my life and it’s still one of my favorite pastimes. It was probably the greatest gift my mom ever gave me.
Watch Sewing With Nancy online
There are three seasons of programs to view online, or on your iPad, iPod Touch, or iPhone. Have you downloaded the app?
Bye for now,
Content in this feed is © copyright 2014 by Nancy Zieman and may not be republished without written permission. You’re welcome to forward the email to a friend or colleague but it’s not okay to add the RSS feed automatically as content on a blog or other website.
June 24, 2014
Discover The Fun of Fabric Circles
By Donna Fenske, Nancy’s Notions Guest Blogger
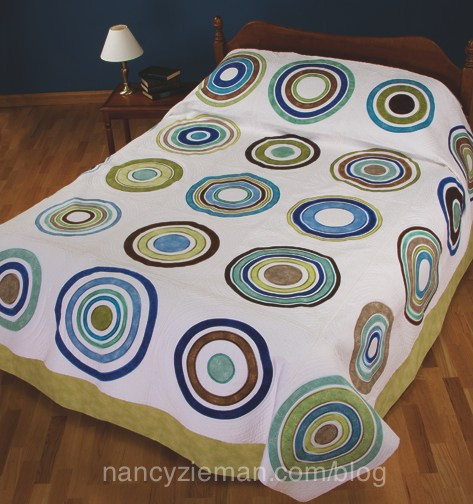
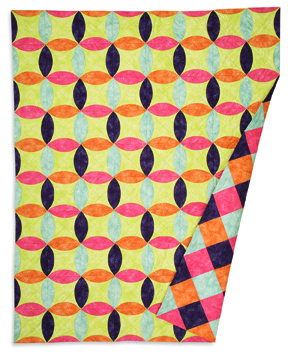
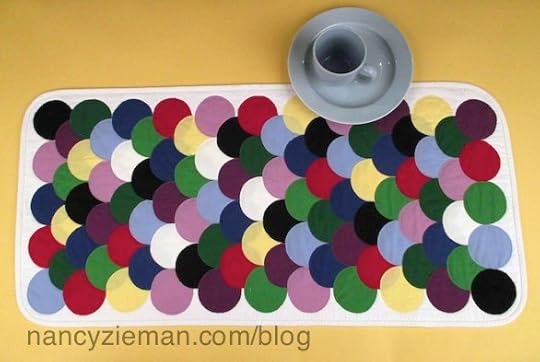
Make a colorful statement on your dining room table or buffet, family room coffee table, kitchen countertop, or even your bedroom dresser with a Shell Game Table Runner. This project calls for lots of circles, so keep your sanity in check by using precut fabric circles. You’ll save time and get right to the fun part of this project—design and construction.
Start by cutting the fabrics and batting for the table runner. Choose a plain white, or tone on tone white print, and cut a 16″ x 34″ rectangle for the background, and three 2-1/2″ wide crosswise strips for binding. Cut an 18″ x 36″ rectangle of the same, or a different fabric, for backing. Also, cut an 18″ x 36″ rectangle of batting.
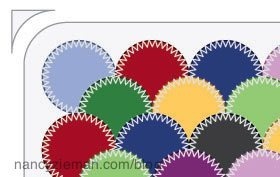
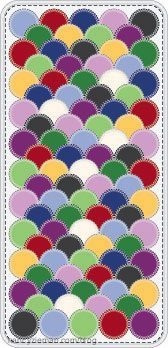
You’ll be working with 3″ fabric circles for this project, and you’ll need a total of 100 of them. We used 10 each of 10 different colors to really make this table runner colorful, which means it matches a lot of the color schemes in your home, too. Get ready to place your fabric circles by applying adhesive spray or glue stick to the wrong side of the precut fabric circles.
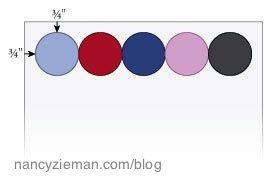
Next, arrange the circles on the background fabric. Place the background fabric on a flat work surface, right side up. Arrange fabric circles 3/4″ from the top and side edges. To match our sample, arrange circles in the following manner:
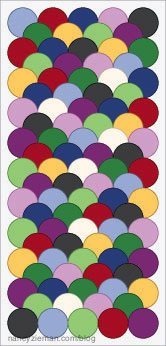
- First row: Place five circles across the width of the fabric, with edges of circles touching.
- Second row: Repeat the shell design by overlapping four circles at the intersections of the five circles in the previous row.
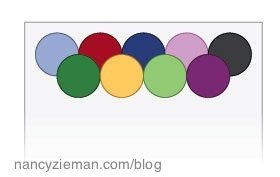
- Repeat the pattern, alternating rows of five circles across with rows of four circles across, to complete 21 rows.
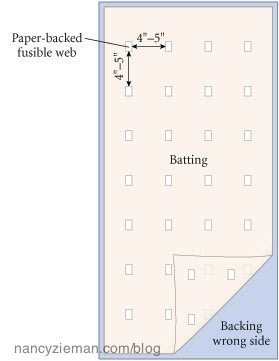
Hold all project layers together temporarily for quilting by “fuse tacking” the backing fabric, batting, and background fabric. Fuse 1″ strips of the 5/8″ wide paper-backed fusible web 4″–5″ apart on the front and back of batting. Position the 18″ x 36″ backing fabric on a pressing surface, wrong side up. Remove the paper backing from the fusible web strips on one side of the batting. Turn that side toward the wrong side of the backing fabric, and center the batting on backing fabric, and smooth out wrinkles with your hands. Remove paper backing from the fusible web strips on the side of the batting now face up. Center the 16″ x 34″ background fabric over the batting, and smooth out wrinkles with your hands. Use your iron to press the layers together.
Then, appliqué all of the circles onto the background fabric. Thread your sewing machine with clear monofilament thread, or a matching thread. Stitch the circles to the background fabric using a blanket stitch or zigzag stitch.
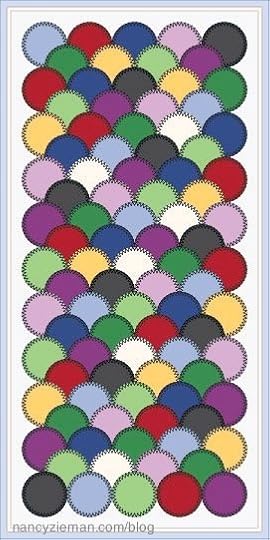
Finally, bind the table runner. Use the Curved Corner Cutter Ruler to trim the four corners of the table runner into a rounded shape.
Trim away excess batting and backing fabric. Create and add binding all the way around the table runner using your favorite binding technique.
Download free pattern instructions for this project, including a curved corner template.
Thanks, Donna Fenske, for being my guest blogger.
Bye for now,
Content in this feed is © copyright 2014 by Nancy Zieman and may not be republished without written permission. You’re welcome to forward the email to a friend or colleague but it’s not okay to add the RSS feed automatically as content on a blog or other website.
June 21, 2014
How to Make a Simple, Yet Stunning Landscape Quilt
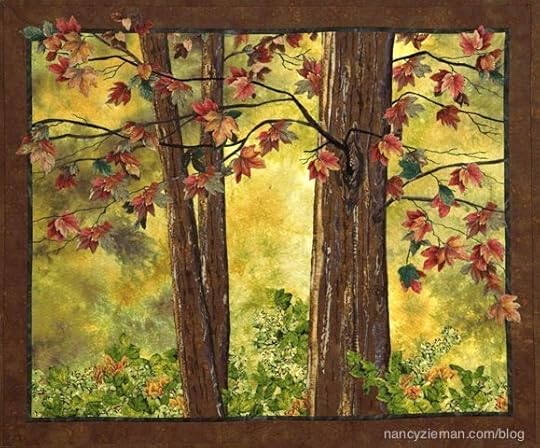
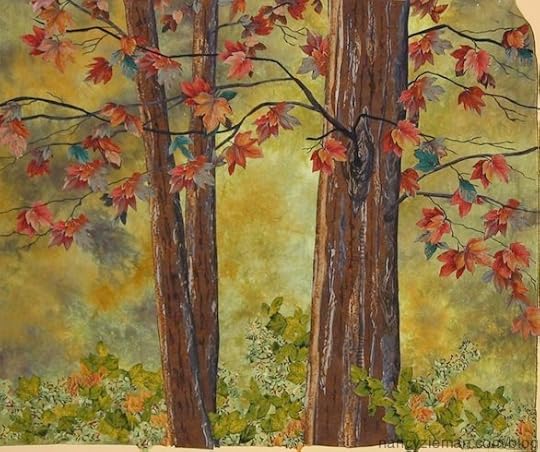
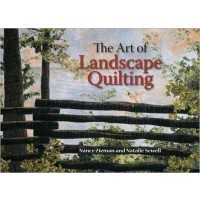
Simple landscape scenes can be elegant and moving, not just easy to create. Natalie Sewell, my landscape quilting mentor and buddy, and I find that a design doesn’t have to be intricate or complicated to be stunning. Here’s a quilting tutorial on how I created the scene, Wolf River Woods. The following instructions were first featured in The Art of Landscape Quilting.
My Favorite Quilt—Well, at least one of them!
I was inspired to write this blog posting after reading the Sew Mama Sew “My Favorite Quilt” series. Check out the postings from other quilters.
How to make a landscape quilt
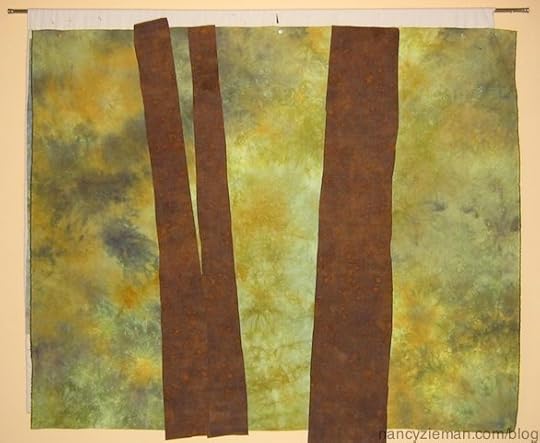
A photo was used as the inspiration for the design. Obviously, I did not interpret the design literally—it’s used as a guideline.

The hand-dyed background fabric sets the mood for the scene—a sunny autumn day. The leaf and tree fabric choices seem to echo the colors playing across the canvas.

Work on a design wall. For me it’s a layer of flannel and Quilted Iron Quick sewn like a large pillow (without the pillow form) and a casing added at the top, through which I insert a curtain rod. This design wall is portable, although I keep mine hung year ’round.
Three brown trees, one fat and two skinny, are the first elements in the quilt. I roughly cut out the trees and glued them to the background fabric with a paper glue stick. No worries, the glue dries fast and clear and will not gum up your sewing machine.
Texture was added to the trees by cutting strips of the remaining two bark fabrics and gluing them to the tree trunks. One of the fabrics had a splendid knothole, which I cut out and glued to the fattest tree. After deciding that the light came from the left, I shaded all three trees on the right with a black marking pen .
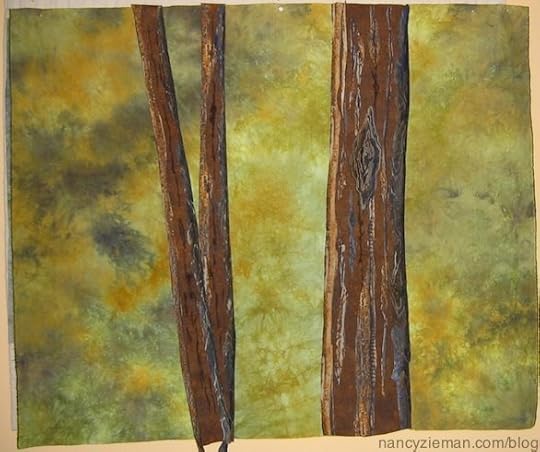
Next, I added dark branches to all three trees by cutting skinny strips of my darkest fabric.
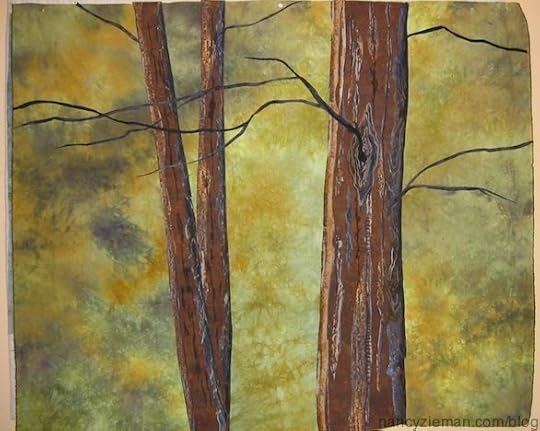
I began the slow but satisfying process of adding leaves, carefully cut from the large leaf fabric depicted in the photo.
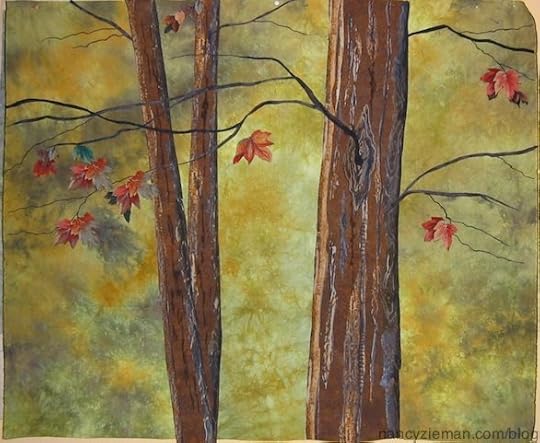
After adding many more leaves (mostly red but a few green) I messy cut the two ground cover fabrics, using both their right and wrong sides. To enhance the fall mood, I “diced” up a few of the red and gold leaves with my favorite scissors and sprinkled them on the ground cover. Notice how few leaves it takes to convey a wooded scene in fabric compared with the thousands a photograph would depict.
The design process continues after adding borders. A few leaves and branches in the border lend drama to the design.
Overview of the finishing steps
The landscape quilting bends many quilting rules. Messy cutting, fussy cutting, basting with a paper glue stick, and using the other right side of the fabric as well as the traditional right side are just a few of the ways that Natalie and I show you how to be creative with fabric.
After designing, tried ‘n true quilting techniques take over. The raw edges are basted down using free-motion techniques with clear thread in the needle, the quilt is squared, borders can be added, batting and backing are layered and then are stippled. For detailed finishing steps, reference our book, The Art of Landscape Quilting.
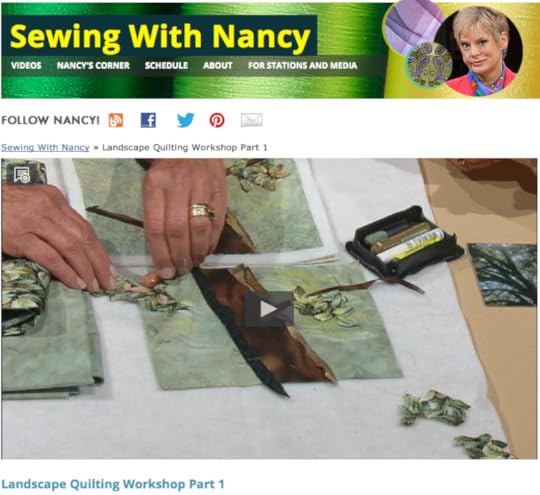
Watch how to Landscape Quilt Online
Natalie and I share basic landscape quilting techniques in the 3-part series, Landscape Quilting Workshop. Click here to view episode one, episode two, and episode three.
For a chance to win a copy of Landscape Quilting Workshop workbook, tell us the subject of your first or next landscape quilt.
Bye for now,
Nancy Zieman—author, pattern designer, businesswomen, producer, and national sewing authority—is the host of the popular show Sewing With Nancy®, which appears exclusively on public television stations across the United States and Canada. Follow Nancy’s Blog at NancyZieman.com/Blog and sign up to receive Nancy’s E-News for the latest news in Sewing, Quilting, & Creating.
Content in this feed is © copyright 2014 by Nancy Zieman and may not be republished without written permission. You’re welcome to forward the email to a friend or colleague but it’s not okay to add the RSS feed automatically as content on a blog or other website.
Nancy Zieman's Blog

- Nancy Zieman's profile
- 21 followers

