Carrie Vitt's Blog, page 31
January 11, 2018
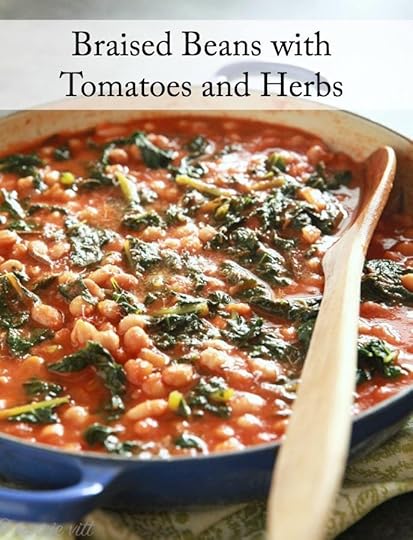
Braised Beans with Tomatoes and Herbs
Is it ok to eat legumes and nightshades when you have a thyroid disease? I get this question often and have found there is a lot of confusion around the topic.
With our clients at Biodynamic Wellness, we’ve found that properly prepared legumes are a healthy addition to a thyroid-healing diet for most people.
Carbohydrates are important for the health of the adrenals and also for the liver in converting the thyroid hormone T4 to the active form T3. Of course, you don’t want to eat a super high carb diet, because that can have negative effects on the body, but around 100g of carbs spread throughout the day is a good amount for most people.
An ultra low-carb diet may be trendy right now, but if you have thyroid disease, this isn’t the best idea. Too few carbs can backfire and leave the adrenals fatigued or cause low thyroid conversion in the liver. This is why I’ve always used legumes in my recipes here on the blog and in my cookbook.
If you’ve been on a strict low-carb diet and aren’t seeing the results you’re looking for, then I recommend talking to your practitioner about adding some properly prepared legumes, lentils, and possibly gluten-free grains back into your diet and see if that changes your symptoms.
What about nightshades?
If you struggle with arthritis or pain in the joints, then it’s best to avoid nightshades. Some common nightshades are eggplant, peppers, potatoes and tomatoes. But, in our practice, we’ve found that if you don’t have these symptoms, then nightshades can be a healthy addition to a thyroid-healing diet.
Braised beans are an ultimate comfort food in the wintertime and I love that they make for great leftovers! I cook them on the stove, but I bet this recipe would also work well in the slow cooker.
Serves 8
Braised Beans with Tomatoes and Herbs Save Recipe
Print Recipe
My Recipes
My Lists
My Calendar
Ingredients
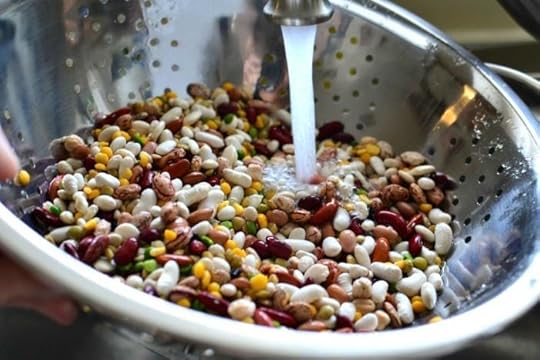
1 cup dried cannellini beans, soaked overnight* (you could also use white navy beans)1 cup dried chickpeas , soaked overnight*2 tablespoons unsalted butter or ghee1 onion, chopped3 cloves garlic, chopped2 stalks celery, chopped24 ounce jar crushed tomatoes4 cups chicken stock 3 sprigs fresh rosemary3 sprigs fresh thyme1 head Lacinato kale, chopped (you could use chard if you prefer)2 teaspoons Celtic sea salt1/2 teaspoon freshly ground black pepper1/4 cup grated Pecorino Romano cheese (optional)Instructions
*Place the cannellini beans and chickpeas in a large bowl. Cover with water and add 2 pinches of baking soda. Let soak overnight at room temperature.The next day, drain and rinse the beans. Melt butter in a large pot over medium heat. Add the onion, garlic and celery and cook until just tender, about 5 minutes. Add the crushed tomatoes, chicken stock, drained and rinsed beans, rosemary and thyme and bring to a boil. Reduce the heat to a simmer and let cook until the beans are tender, about 4 hours.About 20 minutes before serving, bring a pot of water to boil and add the kale to the boiling water. Cook for 8 minutes and then drain. (This step removes the goitrogens which can inhibit the uptake of iodine in the thyroid. For a video explaining the benefits of this, check out my Instagram feed page and see my IG story titled “kale”)When the beans are tender, stir in the cooked kale, sea salt and black pepper. Sprinkle with Pecorino Romano and serve.7.6.74578https://deliciouslyorganic.net/braised-beans-recipe-legumes-nightshades-thyroid-disease/Copyright 2016 Deliciously Organic
The post Braised Beans with Tomatoes and Herbs appeared first on Deliciously Organic.


January 4, 2018
12 Ways to Improve Thyroid Hormone Conversion
 Is your body underconverting thyroid hormone? Are you producing enough T4, but not enough T3?
Did you know that your liver might be to blame?
Let me explain. . .
Your thyroid produces T4 and sends most of it to the liver to be converted into the active form, T3. If you’re underconverting, then you don’t necessarily have a thyroid problem, instead, you need to support your liver so it can efficiently convert the hormone for you.
Liver congestion is pretty common nowadays, and can not only cause low T3 in the body, it also can cause estrogen dominance, severe headaches, blood sugar imbalance, chemical sensitivities, skin issues, and dark circles under the eyes, among other things.
As a Nutritional Therapy Practitioner, I see this all the time, but the good news is there are some easy steps you can take to improve thyroid conversion.
Here are 12 ways to help improve thyroid conversion:
1. Do a castor oil pack over your liver 3-4 times a week. Castor oil packs are a gentle way to decongest the liver and lymphatic system.
2. Reduce your sugar intake as much as possible. The liver is one of the three organs that controls your blood sugar levels. The more sugar you eat, the more stress you put on your liver which can reduce thyroid hormone conversion. If you’d like to kick the sugar habit, click here to grab my buttermint recipe and give them try.
3. Rub one drop of Zendocrine over your liver twice a day. I love the doTERRA essential oil blend, Zendocrine, and I personally use it every day. It’s a blend of Tangerine Peel, Rosemary Leaf, Geranium Flower/Leaf, Juniper Berry, and Cilantro Herb essential oils. It’s an amazing blend to add to your daily regimen to support the liver.
A little side note: I was on a real food diet for many years, and despite all of my efforts I would still get a break out on my chin each month before my cycle. These breakouts are usually hormone/liver related. So, I started using Zendocrine daily and it completely cleared up those annoying monthly breakouts! This has worked for so many others that I’ve shared this tip with!
4. Diffuse essential oils each day, such as Lavender, Lemon, Jasmine, Rose, Ylang, Ylang, etc. to reduce your stress and relax the body. Your sense of smell is directly connected to your emotional brain, so diffusing oils can immediately change how you feel and reduce stress. Stress puts strain on the adrenals, liver and pancreas and causes an imbalance in blood sugar levels (yes, this can happen even if you don’t eat sugar), so using oils each day to reduce cortisol levels will give your liver the support it needs to be able to work more efficiently.
5. Make sure you are eating enough carbohydrates. While a low-carb diet is all the rage right now, going too low carb can inhibit the conversion of T4 to T3 in the liver. A minimum of 100g of carbohydrates a day from foods such as properly prepared legumes, lentils, potatoes and other starchy vegetables is a good place to start. And, if you’ve been on a very low-carb or grain-free diet for more than 12 months, I would consider talking to your practitioner about adding back some properly prepared gluten-free grains or fermented sourdough.
6. Eat two Brazil nuts a day. Brazil nuts contain selenium and this nutrient helps convert T4 to T3. I like to purchase raw Brazil nuts, soak them (to remove the phytic acid) and then dehydrate them in the oven. Check out my Instagram Story I did on this topic.
7. Read my 20 Steps to Heal From Adrenal Fatigue and see what steps you can add to your daily regimen. When the adrenals are fatigued, this puts extra strain on the liver, and this can reduce thyroid hormone conversion.
8. Take my free class about how to use real food, stress reduction, essential oils, and gentle detox to support the thyroid. I teach the class alongside fellow NTP, Season Johnson, and I think you’ll find it incredibly helpful!
9. Drink 1/2 a cup of beet kvass first thing in the morning, at least 10 minutes away from food. Beet Kvass is a tonic that helps decongest the liver.
10. Practice forgiveness. Nothing burdens the liver like harboring anger or bitterness.
11. Consume foods rich in Vitamin A daily. Vitamin A is actually essential for proper detoxification. It’s important to remember that Vitamin A is found only in animal foods. Your richest sources are liver (beef, lamb, duck, chicken), cod liver oil, butter, egg yolks, raw cream and cultured raw sour cream. There is a HUGE misconception out there that vegetables, especially carrots and squashes, are excellent sources of vitamin A. This is absolutely false. Vegetables are wonderful sources of beta-carotene. But beta-carotene is only useful to humans as it is broken down and converted in the body to vitamin A by the body’s vitamin A stores. This presents a tremendous challenge and serious health problem for vegans. This also explains why most long-term vegans eventually present with disorders linked to liver congestion and why it is not uncommon to see jaundice in vegans. While most vegans have good intentions, they may not have been properly educated as to the significant role vitamin A plays in detoxification as well as in skeletal formation and thyroid function.
12. Avoid intermittent fasting. While this is all the rage right now, most who are struggling with thyroid issues, need to avoid intermittent fasting because it puts too much strain on the adrenals and liver. Here’s a video Kim Schuette, CN, and I did on this topic.
Have you found other steps that have helped you increase your conversion of thyroid hormone? If so, please share in the comments below!
SaveSaveSaveSave
SaveSaveSaveSave
SaveSaveSaveSave
SaveSave
SaveSave
The post 12 Ways to Improve Thyroid Hormone Conversion appeared first on Deliciously Organic.
December 13, 2017
Peppermint Bark Recipe (Dairy-Free)

Peppermint Bark is an iconic Christmas treat, so I tweaked things a bit to bring you a real food and dairy-free version!
There are lots of different options with this recipe. First, you can follow the recipe as is. Or, if you can’t do brown rice syrup, then you can omit the candy canes and use all-natural red sprinkles to make the candies look festive. Just choose whichever version works best for you.
I highly recommend using a food grade peppermint essential oil for this recipe. Peppermint extract contains some peppermint oil, but is combined with alcohol, so you won’t get as big of a peppermint flavor. I personally use doTERRA Peppermint essential oil and I find it lends the perfect flavor!
Another thing to note is that the white chocolate will remain mostly firm at room temperature, but isn’t quite as solid as regular white chocolate. So, I recommend storing the candies in the fridge and then leaving them out at room temperature for an hour before serving.
I hope you enjoy!
Makes one 11x7 pan of peppermint bark
Dairy-Free Peppermint Bark20 minPrep Time
60 minCook Time
1 hr, 20 Total Time
Save RecipePrint Recipe
My Recipes
My Lists
My Calendar
Ingredients
For the dark chocolate layer:12 ounces Enjoy Life Chocolate Chips 6 drops Peppermint essential oil For the white chocolate layer:8 ounces cocoa butter , melted1/4 cup cashew butter 2 tablespoons maple syrup 1/2 teaspoon vanilla extract 6 drops Peppermint essential oil For the peppermint topping:8 all-natural candy canes (optional, see above for other options)Instructions
Line an 11x7 baking dish with parchment paper (the paper needs to come up the sides of the baking dish. Place all, but about 3/4 cup of chocolate chips in a heatproof bowl and set the bowl over a pot with simmering water (or use a double boiler) until melted. Remove the bowl from the heat and add 1/3 of the remaining chocolate chips to the hot chocolate, and whisk until the chocolate chips are melted. Repeat this two more times with the remaining chocolate until all of the chocolate is melted. If your chocolate isn’t melting, you can place the bowl back over the hot water for about 10 seconds at a time. Whisk in the peppermint essential oil and the pour the chocolate into the prepared baking dish.Let the chocolate sit for 10 minutes at room temperature and then place it in the fridge for about 20 minutes.Meanwhile, place the cocoa butter in a heatproof bowl and set the bowl over a pot of simmering water (or use a double boiler) until melted. Remove from the heat and whisk in the cashew butter, maple syrup, vanilla and peppermint oil. Let the mixture sit for 20 minutes to cool.Remove the baking dish from the refrigerator and pour the white chocolate mixture over top of the dark chocolate. Place back in the refrigerator for 20 minutes, then remove and sprinkle the crushed candy canes overtop, gently pressing them into the white chocolate. Refrigerate for another hour. Cut into squares and serve.7.6.64577https://deliciouslyorganic.net/peppermint-bark/Copyright 2016 Deliciously Organic
The post Peppermint Bark Recipe (Dairy-Free) appeared first on Deliciously Organic.
December 11, 2017
Crispy Brussels Sprouts with Port Reduction
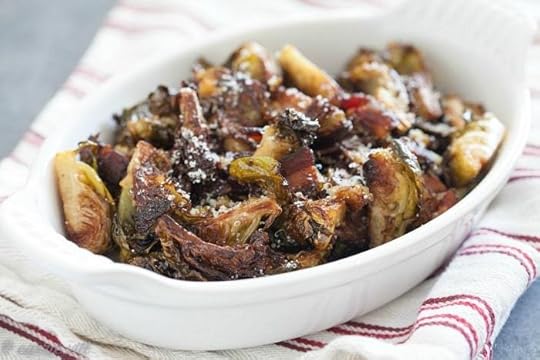
I was chatting with a friend about holiday recipes the other day and she told me about a local restaurant, Bo-Beau, that makes crispy Brussels sprouts with bacon, parmesan cheese and a port reduction. It sounded like a recipe my family would enjoy, so I gave it a shot and, wow, she was right. It’s pretty incredible!
For this recipe, keep in mind the Brussels sprouts have to be roasted for longer than you might be used to. When they turn golden to dark brown that’s when you know they are crispy enough.
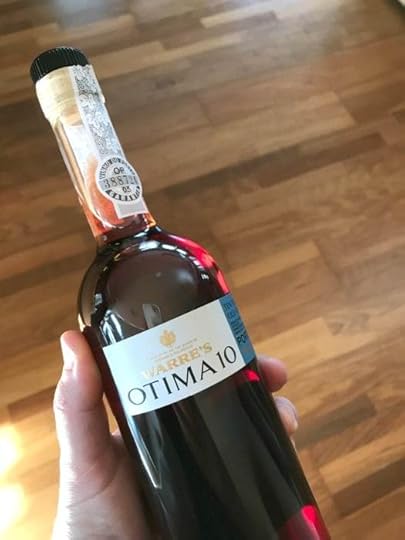
Do you have to use port? No. But for the sake of properly testing this recipe I did use port and balsamic. I think you could substitute a pomegranate juice in its place (though I have not tried that). Here’s the picture of the port I used that I found at Whole Foods.
This dish takes Brussels sprouts to a new level and would go well with a Christmas roast, turkey or alongside other holiday vegetable dishes.
Here are some Christmas favorites you might enjoy!
Roast Beef Tenderloin
Breakfast Frittata (a great one to make when family or friends are in town)
Cranberry Kombucha Jello
Gingernsnaps
Chocolate Swiss Roll Cake
Turkey Roulade
Grain-Free Gingerbread Men
Lentil Soup with Swiss Chard and Sausage
Sugar Cookies
Serves 4
Crispy Brussels Sprouts with Port ReductionSave RecipePrint Recipe
My Recipes
My Lists
My Calendar
Ingredients
For the Brussels sprouts:1 pound Brussels sprouts, ends trimmed and cut into quarters1 tablespoon ghee or palm shortening 6 pieces pastured, thick-cut bacon, cut into 1-inch pieces1/4 teaspoon Celtic sea saltFor the reduction:1/2 cup port1/2 cup balsamic vinegarFor serving:1/4 cup parmesan cheese, gratedInstructions
Preheat the oven to 400ºF and adjust the rack to the middle position. Line a baking sheet with parchment paper. Toss the Brussels sprouts, ghee, bacon and sea salt together and then spread out in an even layer on the baking sheet. Roast for 15 minutes, stir and then for another 15 minutes. Roast until the Brussels sprouts are a golden to dark brown and the bacon is crispy.While the Brussels sprouts are roasting, place the port and the balsamic vinegar in a medium sauce pan over low heat. Bring the mixture to a low simmer and continue to cook until reduced down to 1/2 cup, about 20-30 minutes.To serve, drizzle the reduction over the roasted Brussels sprouts and bacon and top with parmesan cheese.7.6.64576https://deliciouslyorganic.net/crispy-brussels-sprouts-balsamic-reduction/Copyright 2016 Deliciously Organic
The post Crispy Brussels Sprouts with Port Reduction appeared first on Deliciously Organic.
December 6, 2017
The Best Vitamins and Supplements for Optimal Health
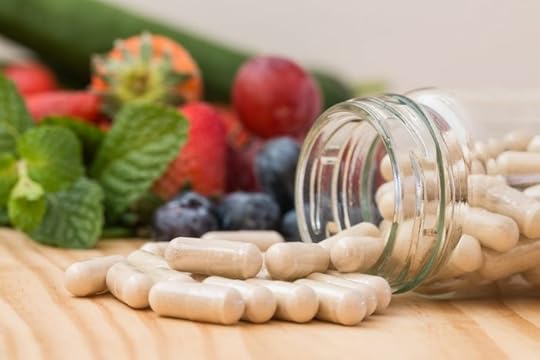
Choosing vitamins and supplements can be incredibly confusing. I could write for days about how to find just the right ones for a particular need or issue, but instead I want to offer a few things you need to know about choosing your own supplements and then share a list of my favorites.
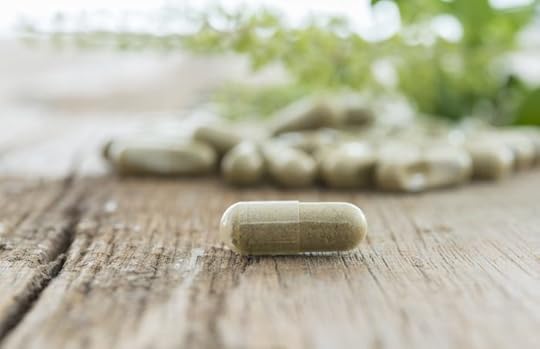
First, did you know that for a vitamin to be labeled “natural” only ten percent actually has to be natural? The other 90% can be synthetic!
Synthetic nutrients manufactured in a lab are different from the ones found in nature and are often used simply because they’re cheaper. In their naturally-occurring state, vitamins always appear in a synergistic complex, balanced with other nutritional cofactors and in the right biological concentrations. Our bodies can only utilize vitamins as they naturally occur in food, regardless of whether they’re water soluble or fat soluble. So while synthetic vitamins are cheaper, they usually don’t have identical effects on our bodies and can sometimes actually cause harm.
Here are some examples:
Vitamin C never occurs in an isolated form in nature – it’s always accompanied by natural complex nutrients which are essential for vitamin C’s bioactivity. The synthetic form, ascorbate, is an isolated form which the body can’t properly utilize alone.
Vitamin B6 provides fabulous support for the adrenal glands and helps maintain a healthy nervous system. But the synthetic form of B6 – pyridoxine – has been shown to cause liver damage when used in long term “therapeutic” dosages (over 200 mg/day).
Chromium, in its natural form, is a mineral that can help control blood sugar levels. But most chromium you’ll find on the market is a synthetic version called “chromium picolinate” which doesn’t work the same way in the body because it’s not in a natural form.

Even worse, when you buy a supplement from a company without knowing exactly where the nutrients come from, you run the risk of completely wasting your money.
The New York Times reported in 2015 that the “New York State attorney general’s office accused four major retailers on Monday of selling fraudulent and potentially dangerous herbal supplements and demanded that they remove the products from their shelves. The authorities said they had conducted tests on top-selling store brands of herbal supplements at four national retailers — GNC, Target, Walgreens and Walmart — and found that four out of five of the products did not contain any of the herbs on their labels. The tests showed that pills labeled medicinal herbs often contained little more than cheap fillers like powdered rice, asparagus and houseplants, and in some cases substances that could be dangerous to those with allergies.”
This is also why it’s not a great idea to purchase supplements from places like Amazon – it’s hard to know exactly what you’ll get.
Standard Process is one of our favorite brands we use for our clients at Biodynamic Wellness, but you can only purchase them from a practitioner’s office. Standard Process has found people selling their products on Amazon, but those those companies selling on Amazon are doing so against Standard Process’ policy and some were found to be selling bottles that didn’t actually contain the items on the label. I highly recommend purchasing all supplements from a nutritional practitioner, or from another trusted source online.
Another danger associated with taking supplements: many nutrients work synergistically together and most supplements aren’t formulated to keep nutrients in balance in the body.
For example, calcium and magnesium work together. If you take a lot of calcium, it will throw off the balance of magnesium in the body and vice-versa. The same goes for copper and iron, vitamin D and K2, and I could go on and on. I recommend you talk to your nutritionist before consuming specific supplements because they have training on balancing nutrients to work best in our bodies.
As promised, here’s an easy list of some of the best vitamins and supplements:
Vitamin A: Green Pasture Fermented Cod Liver Oil (The livers are fermented, not the oil!) and Vital Proteins Liver Capsules are both great choices.
Vitamin B: Cataplex B from Standard Process is the gold standard.
Vitamin C: My two favorites are Pure Radiance and Cataplex C. Both are whole food forms.
Vitamin D and K2: It’s important to always take Vitamin D3 and K2 together because they work synergistically in the body. My two favorites are Thorne D3 with K2 and D-Synergy Max, which contains all the vitamin D synergists (K2, A, B6, chromium, magnesium, zinc and boron).
Multi Vitamin: Catalyn from Standard Process is a great one and can also be used for children. It contains vitamins A, C, D, thiamine, riboflavin, B6 along with their co-factors and other whole foods-derived nutrients to support the body. You can purchase this at our office. I also highly recommend Biosuperfood F1.
Calcium: Calcium Lactate from Standard Process is the best because it contains the proper 5:1 ratio of calcium to magnesium.
Cod Liver Oil: A high-quality cod liver oil contains vitamins A and D as well as EPA and DHA. This is a great supplement to add in the winter time when we aren’t getting as much sunshine. My two favorite brands are Green Pasture and Standard Process.
HCl: Making sure your stomach produces enough stomach acid is fundamental to good health. Without the right stomach acidity, your body cannot break down your food and utilize the nutrients. My favorite brands: Thorne Betaine HCl & Pepsin or Biotics HCl-Plus. You can also use Moonshine Bitters or apple cider vinegar before each meal to help increase HCl.
Iodine: Iodomere and Promoline Iodine from Standard Process are two of my favorites. Iodomere contains less iodine than Promoline Iodine. You can also get added iodine into your diet with Dr. Cowan’s Sea Vegetables. If you have thyroid disease and are concerned about consuming any form of iodine, watch this video.
Iron: I prefer Vital Proteins Liver capsules, because liver contains not only iron, but also folate and vitamin B12 – these three nutrients work together. Also, remember that grass-fed beef is rich in iron and easy to add to your diet.
Magnesium: One of the cheapest ways to get extra magnesium into our systems is with an Epsom salt bath. Put 1 cup of Epsom salt in a warm bath and soak for 20 minutes. The magnesium will soak into the body via the skin. If you’re looking for extra magnesium in pill form, I recommend Dr. Ron’s Mag Max.
Prenatal: Catalyn, Green Pasture Cod Liver Oil with Butter Oil, and Vital Proteins Liver Capsules together make a nice combination for a wide variety of nutrients needed by mother and baby. Of course, a nutrient-dense diet overall is paramount!
Probiotics: It’s a good idea to rotate between different probiotics each month to get a variety of probiotic strains for immune system support. My favorites: Ther-Biotic Complete, BioKult, Gut Pro, and ChampPro.
Selenium: Se-Zyme Forte from Biotics contains biologically-active selenium.
Thyroid Support: If you’re struggling with thyroid disease, it’s best to get a personalized supplement protocol, but a general supplement I really like and personally use is Thyroid Complex from Standard Process. It contains the synergistic herbs bladderwrack, ashwagandha and bacopa and well as iodine.
Zinc: Biotics Aqueous Zinc is a good choice. Remember, zinc and HCl work synergistically together, so if you find you’re continually deficient in zinc, ensure your body is making enough stomach acid.
One last thing – it’s important to understand that many medications can cause specific nutrient deficiencies. If you’re on any medication, I would check out this site – enter in the name of the medication and see what deficiencies you might experience as a result of taking that drug.
The post The Best Vitamins and Supplements for Optimal Health appeared first on Deliciously Organic.
November 16, 2017
Fermented Sourdough Bread
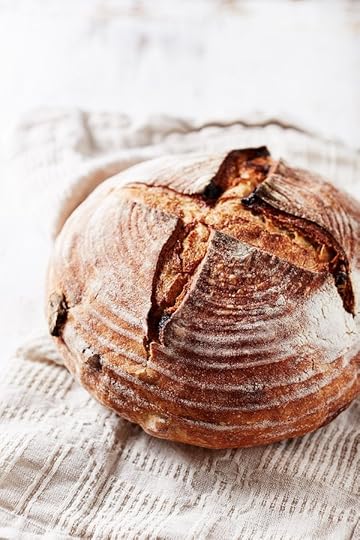
I’ve wanted to share a fermented sourdough bread recipe for a very long time, so I’m thrilled to write this post for you!
As I’ve mentioned before, a grain-free diet isn’t meant to be lifelong. Once you’ve taken the proper steps to heal, you can slowly add properly prepared grains back into your diet with the help of your nutritionist or holistic practitioner. Fermented sourdough bread can often be tolerated by those with gluten sensitivities and can be a good first bread to try after you’ve been avoiding grains for a long period of time.
The process of slow fermentation allows the bacteria to break down the carbohydrates and gluten and also neutralizes the phytic acid, making it easier for the body to digest. And, sourdough bread contains healthy resistant starch and doesn’t raise blood glucose levels as much as conventional wheat bread.
Making a sourdough starter and then a fermented bread can often seem incredibly intimidating, so I hope I can take the fear out of it for you. This week I’ve been showing the step-by-step process over on my Instagram stories, and plan to offer more future IG stories so you can become familiar with the process.
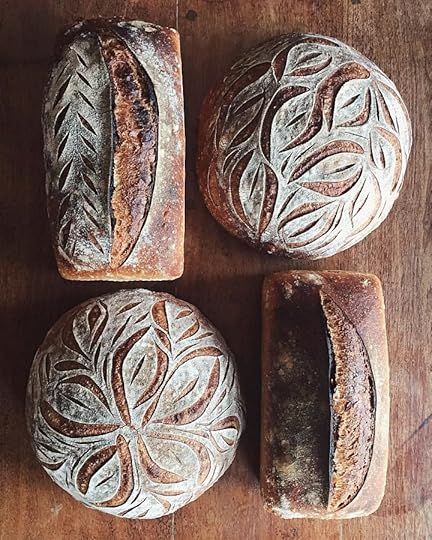
This recipe comes from my friend Min Kim. She’s a master at making gorgeous sourdough loaves – you need to check out her Instagram feed! I first learned how to make sourdough using her recipe and she was kind enough to allow me to publish her recipe here for you.
She has an ebook, True Sourdough Bread, with step-by-step photos and a bonus sourdough pizza recipe. The book is just $4.95, and you can purchase and download here. Min teaches sourdough classes in Solana Beach, CA. So, if you’re in the area, you check out the schedule at Biodynamic Wellness to find out when she’s teaching.
Her sourdough broiche cinnamon rolls are also incredible – and she’ll send you the recipe for free when you click here and fill out the info!

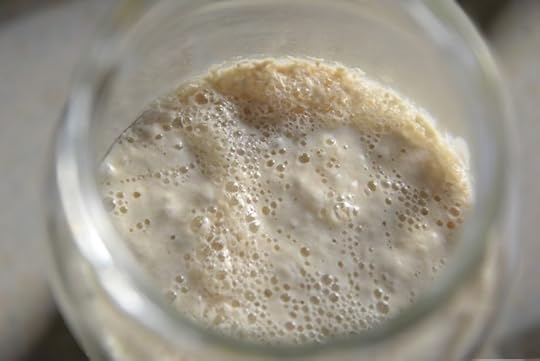
To make a sourdough bread, you’ll need a sourdough starter. I personally used the Culture’s for Health Sourdough Starter and just followed the directions in the box. It’s easy to do, but you can also make the starter with just flour and water. Min explains all of this in her ebook.
Here’s a list of the materials you’ll need to make your sourdough:
16-ounce (or lager) mason jar
Digital scale that measures in grams and can zero out
Large glass or ceramic bowl
Dough whisk
Large wooden spoon
2 Brotform (proofing basket) you can use round or oblong
Dutch oven (at least 5 1/2 quart or larger) or Cast Iron Combo Cooker
Clean, lint-free towels
Oven mitts
Oven thermometer
Scoring tool or razor (optional)
2 large plastic bags (like the kind you can put a turkey in)
All right! Here’s the recipe for fermented sourdough bread!
Makes 2 loaves
Fermented Sourdough BreadSave RecipePrint Recipe
My Recipes
My Lists
My Calendar
Ingredients
For the Levain:25 grams mature starter (I used the Cultures for Health Starter Kit )70 grams purified/spring water70 grams organic all-purpose flour Build the Dough:725 + 50 grams purified/spring water150 grams levain (see above)200 grams organic whole wheat flour 800 grams organic all-purpose flour , divided25 grams Celtic sea salt or Himalayan pink salt Stretching, Folding and Bulk Fermentation:About 1/3 cup of organic white flour for dustingFor the Bake:1/4 cup rice flourInstructions
For the Levain:The evening before you make bread, mix together 25 grams starter, 70 grams water and 70 grams flour in a 16oz mason jar or small bowl with straight sides. Mark the level with tape or a rubber band. Cover the mixture with a clean towel and leave on the counter at room temperature. The mixture will be ready in 10-12 hours and will double or even triple in volume.Note: During hot months, this can take 6-8 hours depending on the temperature of your kitchen. You can use ice water to slow this process in the summer. Using water that is 130ºF will speed this process into 4-5 hours, but for best flavor, I recommend allowing for a longer ferment time.Build the Dough:Pour 725 grams of water into a large glass or ceramic mixing bowl. Drop a tablespoon of levain into the bowl and see if it floats. If it floats, add the rest of the levian to the water and whisk to combine. If it doesn’t float, wait another hour and try again. Add 200 grams of whole wheat flour and 300 grams of organic all-purpose flour to the water mixture and combine with a dough whisk . Add the remaining 500 grams of all-purpose flour and mix with your hands, making sure there are no dry clumps of flour.Note: The temperature of your water in relation to your ambient room temperature is very important. In the wintertime, it’s helpful to use warmer water and in the hottest months, ice water would be appropriate.Cover and autolyse (let sit) for 30 minutes.Add 25 grams Celtic sea salt or Himalayan salt and 50 grams of water and mix by hand until incorporated. Cover the dough with a clean cloth and let rest for 30 minutes.Stretching, Folding and Bulk Fermentation:Stretch and fold the dough four times (watch this video and start at the 1:14 minute mark). Place a clean cloth over the dough and let it sit for 30 minutes. Then, stretch and fold the dough again, place a clean cloth over the dough and let sit for another 30 minutes. Repeat two more times for a total of four times.During the second fold, herbs, olives, nuts, etc. can be added. Cover the dough with a clean cloth and allow it to rest for an hour.Lightly dust a wooden board or a clean counter top with flour. Turn the dough out onto the floured surface. The dough will be sticky, so it helps to have wet hands. Using a bench knife or a large chef’s knife, cut the dough in half and make two rounds of dough. Cover with a clean cloth and let sit for another hour.Dust two brotforms with flour. If you don't have a brotform, you can use a basket lined with a dishtowel (if doing this, make sure the dust the dishtowel with flour). Don’t skimp on the flour or your loaves will become difficult to remove when it’s time to bake them.Now it’s time to shape the dough into a boule. You will do a series of four folds: bottom to top, top to bottom, left to right and right to left, before flipping over and shaping into a round. Then, gather the ball and place it upside down in a brotform (seam side up). (Watch this video and start at minute 1:16).For the Final Rise:Cover the dough loosely with a clean dish towel and allow to sit at room temp for another hour, then lightly tuck dish towel on top of the dough and place in refrigerator.After the dough has been in the fridge for 12 hours (or the next morning), place each of the bowls with dough in a large plastic bag (I use plastic bags that you can bake turkeys in ) to keep the dough from drying out and absorbing flavors from your refrigerator. After placing the loaves in the large plastic bags the loaves will remain in the fridge for another 24 hours for a total of 36-40 hours.For the Bake:Place a Dutch Oven with a lid in a cold oven. Preheat the oven to 500ºF with your pot inside for one hour. Pull a loaf out from the refrigerator. Lightly dust the top (which is actually the bottom) with rice flour. Flip the loaf out onto a small cutting board. You can now score the top with a razor or lame, if desired. Carefully remove the hot pot from the oven, slide the loaf into the pot, place the lid back onto the pot and place in the oven. Be very careful. The pot is very hot!Bake for 20 minutes. Carefully remove the lid (again, be careful because it’s very hot), reduce the temperature to 465ºF and bake for another 10-15 minutes until the bread is golden brown on top. You can also test for doneness with an instant read thermometer. If you put the thermometer in the middle of the loaf and it reads 190º-210ºF then it’s fully cooked. Remove the loaf of bread from the pot and allow the bread to cool for at least one hour. The bread will continue baking during this time.For your second loaf, you will return the pot to the hot oven and raise the temperature back up to 500º and let it heat up for 15 minutes before removing your second loaf from the refrigerator and repeating the process.Note: Because all ovens vary, you will definitely want to purchase an inexpensive oven thermometer and place it in the back to make sure that your oven temperature is consistent and accurate.7.6.44575https://deliciouslyorganic.net/fermented-sourdough-bread/Copyright 2016 Deliciously Organic
The post Fermented Sourdough Bread appeared first on Deliciously Organic.
November 13, 2017
Slow Cooker Spaghetti Squash with Meatballs and Marinara (Grain-Free)

I always have a slow cooker recipe at the top of my list during the holiday season. With everything going on, it’s nice to be able to walk in the door and have dinner ready. I’m a huge fan of slow cooker spaghetti squash and meatballs, but I hate how the squash tends to soak up so much moisture. Do you know what I mean?
I tested different options and found that if I cook the spaghetti squash cut-side up in the slow cooker, it keeps the squash nice and tender with a bit of a crunch and zero sogginess.
You can make the meatballs with beef if you’d like, but I really like the light flavors of turkey. I tried this recipe with chicken meatballs and wasn’t a fan. They were too dry after cooking for four hours in the slow cooker. One added plus – no need to make fancy meatballs, just mash the meat with an egg, salt, and pepper and they’ll be good to go.
Here are some other slow-cooker favs for your dinner list during the holiday season:
Breakfast Sausage Casserole
6-Ingredient Pot Roast
Chicken Fajita Bowl
White Bean and Sausage
Sweet Potato and Beef Stew
Carnitas Tacos
Serves 4
Slow Cooker Spaghetti Squash with Meatballs and Marinara15 minPrep Time
4 hrCook Time
4 hr, 15 Total Time
Save RecipePrint Recipe
My Recipes
My Lists
My Calendar
Ingredients
For the marinara:2 tablespoons olive oil , plus extra for drizzling1 tablespoon Italian seasoning blend 1 (15-ounce) jar crushed tomatoes1 teaspoon Celtic sea salt , plus extra for seasoningThe squash:1 spaghetti squash, cut in half and seeds removedFor the Meatballs:1 pound ground organic turkey1 large egg, beaten1/2 teaspoon Celtic sea salt 1/4 teaspoon freshly ground black pepperParmesan cheese for garnish (optional)Instructions
Place the olive oil and Italian seasoning in a small sauce pan over medium-low heat. Heat for about 1 minute, until the herbs are fragrant, then pour into the slow cooker . Add the crushed tomatoes and 1 teaspoon sea salt and stir together.Place the squash halves into the slow cooker, cut side up, on top of the tomato mixture. Season with sea salt and drizzle with a little olive oil.In a medium bowl, combine the turkey, egg, sea salt and black pepper. Using a spoon, scoop bite-size meatballs and place into the tomato mixture.Place the lid on the crock pot and cook on medium heat for 4 hours. Using a fork, remove the spaghetti squash strands from the skins and serve with meatballs and marinara. I like to throw a little parmesan on top!7.6.44574https://deliciouslyorganic.net/slow-cooker-spaghetti-squash-and-meatballs-grain-free/Copyright 2016 Deliciously Organic
The post Slow Cooker Spaghetti Squash with Meatballs and Marinara (Grain-Free) appeared first on Deliciously Organic.
November 8, 2017
Chocolate Bundt Cake (Grain-Free)
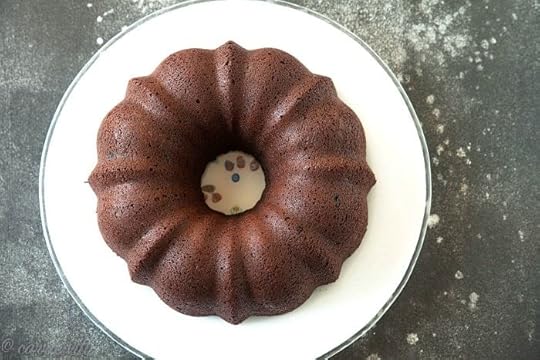
There’s nothing quite like a moist, rich chocolate bundt cake! It can be served alone, or with berries and cream, it handles freezing well and it’s a nice alternative to other pies and cookies during the holidays.
I found a version of this recipe in the Cook’s Illustrated Make Ahead Desserts magazine. Usually when I convert a baking recipe to grain-free it takes many, many tries until it turns out right, but this cake came out perfect on the first try! It’s dense, rich, moist, and sturdy with loads of chocolate flavor. And, just to make sure it wasn’t a fluke, I baked it again the next day and once again, delicious!
Here are some other grain-free holiday dessert recipes I think you’ll enjoy:
Pumpkin Roll Cake
Peppermint Pinwheel Cookies
Pumpkin Spice Donuts with Salted Caramel
Apple Coffee Cake
Pecan Pie without Corn Syrup
The Perfect Molasses Cookies
Serves 12
Chocolate Bundt Cake (Grain-Free)Adapted from Cook's Illustrated Make-Ahead Desserts Magazine.
25 minPrep Time
45 minCook Time
1 hr, 10 Total Time
Save RecipePrint Recipe
My Recipes
My Lists
My Calendar
Ingredients
To coat the bundt pan:1 tablespoon unsweetened cocoa powder 1 tablespoon unsalted butterFor the cake:3/4 cup unsweetened cocoa powder 1 teaspoon instant espresso powder (optional)6 ounces Enjoy Life Chocolate Chips 3/4 cup boiling water1 cup sour cream, room temperature2 cups almond flour 2 tablespoons coconut flour 3 tablespoons arrowroot flour 1/2 teaspoon unflavored grass-fed gelatin 1 teaspoon baking soda1 teaspoon Celtic sea salt12 tablespoons unsalted butter, room temperature1 cup maple sugar or coconut sugar1 tablespoon maple syrup1 tablespoon vanilla extract 5 large eggs, room temperatureInstructions
Preheat the oven to 350ºF and adjust the rack to the middle position. Melt the 1 tablespoon cocoa powder and 1 tablespoon butter in a small saucepan. Using a pastry brush, thoroughly coat the interior of a 12-cup bundt pan.Place the 3/4 cup cocoa powder, espresso powder, and chocolate chips in a mixing bowl. Pour the hot water over top and then cover with foil. Let sit for 5 minutes. Remove the foil and whisk the chocolate mixture until smooth. Whisk in the sour cream.Whisk together the almond flour, coconut flour, arrowroot, gelatin, baking soda and salt in a medium bowl.Place the 12 tablespoons butter, sugar and maple syrup in the bowl of a standing mixer fitted with a paddle. Beat on medium-high for 3 minutes, until light and fluffy. Reduce the mixer to low speed and add the eggs, one at a time, then beat until combined. Add the flour mixture in 3 additions, alternating with the sour cream mixture in 2 additions. Add the chocolate chips {you already added the chocolate chips - they're in the chocolate mixture} and stir to combine. {when do you add the vanilla?}Transfer the batter to the prepared bundt pan and smooth the top with a spatula. Bake for 45-50 minutes, until a cake tester comes out with a few crumbs attached. Cool the cake for 10 minutes and then invert it on to a wire rack.. Let cool completely. Serve.7.6.44573https://deliciouslyorganic.net/chocolate-bundt-cake-grain-free/Copyright 2016 Deliciously Organic
The post Chocolate Bundt Cake (Grain-Free) appeared first on Deliciously Organic.
October 25, 2017
Pumpkin Roll Cake Recipe (Grain-Free)

Pumpkin Roll Cake is a surprisingly easy-to-make classic fall recipe! The key is to make sure the pumpkin cake is just out of the oven when you flip it and roll it into a dishcloth. After the cake completely cools, it will unroll easily so you can spread the cream cheese filling overtop and roll it back up.
In this recipe, I brought the sugar down as low as I could without losing flavor, and of course, it’s grain-free!
 On a different note, I’m thrilled for my brother, Luke Korem. His new film, Dealt, a Sundance Select, just released last week in select theaters and it’s the #1 documentary on iTunes! Dealt has received glowing reviews from The Hollywood Reporter, Variety, and The New York Times, while winning awards at film festivals all over the world. It’s a must-see film (and I’m not just saying that because he’s my brother)!
Dealt is about sixty-two year old Richard Turner, who is renowned as one of the world’s greatest card magicians and also happens to be completely blind. Richard’s blindness is unique, but he doesn’t let it define him. It’s both a tantalizing, up-close look at the secretive world of magic and a candid, awe-inspiring portrait of a man who lives beyond his limitations. If you’ve been looking for an uplifting and inspiring film to watch, Dealt fits the bill!
 Can I make a suggestion? This weekend, make this Pumpkin Roll cake, enjoy a slice with a cup of tea and sit back and watch a good film.
Serves 8-10
Pumpkin Roll Cake Recipe (Grain-Free)30 minPrep Time
12 minCook Time
42 minTotal Time
Save RecipePrint Recipe
My Recipes
My Lists
My Calendar
Ingredients
For the Cake:3 large eggs, room temperature1/2 cup maple or coconut sugar 2/3 cup organic pureed pumpkin1/4 cup coconut flour 1/4 cup tapioca flour 1/4 cup arrowroot flour 1/2 teaspoon baking powder (make sure it’s gf!)1/2 teaspoon baking soda1 1/2 tablespoons pumpkin pie spice 1/8 teaspoon Celtic sea salt For the Filling:1/2 cup maple sugar 2 teaspoons arrowroot flour 8 ounces cream cheese, room temperature2 tablespoons unsalted butter, room temperature1 teaspoon vanilla extractInstructions
Preheat the oven to 350ºF and adjust the rack to the middle position. Using a pastry brush, butter or oil a 13x18-inch cookie sheet and then line it with parchment paper . Place the eggs and sugar in the bowl of a standing mixer with the beater attached. Mix on medium-high for 8 minutes until thick and pale yellow. Fold in the pumpkin.Place the coconut flour, tapioca, arrowroot, baking powder, baking soda, pumpkin pie spice, and sea salt in a medium bowl. Whisk to combine and remove any clumps. Fold the flour mixture into the egg mixture.Pour the cake batter onto the prepared cookie sheet and gently spread the cake batter with a spatula so it’s even across the pan. Bake for 12 minutes. Remove from the oven and let sit for 5 minutes. Sprinkle the cake with a small amount of arrowroot and then place a large dishtowel that covers the entire cake over the cake. Grasp both ends of the pan and dishcloth (make sure to wear oven mitts) and quickly turn the cake upside down onto the dishcloth. Carefully peel off the parchment paper. Roll up the cake and the towel together, starting at one of the narrow edges. Cool completely.Place the ½ cup maple sugar and 2 teaspoons arrowroot flour in a coffee grinder and grind until it’s a fine powder. Place the cream cheese, sugar mixture, butter and vanilla extract in a bowl and beat with a mixer until fluffy, about 2 minutes.Carefully unroll the cake. Using a spatula, spread the cream cheese over the cake and then reroll the cake. Serve immediately, or cover and refrigerate until ready to serve.7.6.44572https://deliciouslyorganic.net/pumpkin-roll-cake-recipe-grain-free/Copyright 2016 Deliciously Organic
The post Pumpkin Roll Cake Recipe (Grain-Free) appeared first on Deliciously Organic.
October 12, 2017
Beef Queso Dip Recipe
 A few weeks ago I arrived home on a late flight after attending the doTERRA annual convention and Abby served me a bowl of warm, homemade beef queso dip with organic potato chips. The queso was absolutely perfect, and contained only real ingredients. I’m telling you, this girl has a knack for creating recipes!
She used a combo of milk, butter, arrowroot, cheddar cheese and spices for the cheese queso and then browned some ground beef, seasoned it with sea salt, and stirred it into the cheesy sauce.
Finally, a real food creamy queso without any processed cheese. I’m definitely adding this recipe to our list of favorite game-day foods!
Here’s a list of our favorites that you might enjoy:
Roasted Chicken Wings
Sausage Balls
Apricot Zingers
Steak and Bacon Bites
Mexican Hot Chocolate Cookies
Fudgy Brownies
Serves 6-8
Beef Queso Dip Recipe10 minPrep Time
10 minCook Time
20 minTotal Time
Save RecipePrint Recipe
My Recipes
My Lists
My Calendar
Ingredients
For the Beef:1 teaspoon unsalted butter1 pound ground beef1/4 teaspoon Celtic sea salt For the Queso:4 tablespoons unsalted butter1/4 cup arrowroot flour 3/4 teaspoon chili powder 1/2 teaspoon Celtic sea salt2 cups whole milk2 cups shredded cheddar cheesePotato, plantain, or any other kind of chip of your choiceInstructions
Melt 1 teaspoon butter in a large skillet over medium heat and swirl to coat. Add the ground beef and cook until browned, breaking the meat up with the back of a wooden spoon. Stir in ¼ teaspoon sea salt. Set aside.Place 4 tablespoons butter and arrowroot, chili powder, and sea salt in a medium saucepan and set over medium-low heat. When the butter melts, whisk constantly for about 1 minute, then very slowly whisk in the milk. It may clump just a little, but keep whisking and it will soon smooth back out. Bring the mixture to a simmer and continue to whisk. When the mixture is beginning to thicken and coats the back of a spoon, immediately start whisking in the cheese. Whisk until all the cheese melts and the sauce becomes smooth. Season to taste with salt if needed. Serve warm with chips.7.6.44570https://deliciouslyorganic.net/beef-queso-dip-recipe-2/Copyright 2016 Deliciously Organic
The post Beef Queso Dip Recipe appeared first on Deliciously Organic.