Carrie Vitt's Blog, page 28
August 15, 2018
Peach Cobbler (Grain-Free, Gluten-Free, Egg-Free)
Peach cobbler is the essence of summer! Sweet juicy peaches topped with a fluffy, buttery, cake-like topping that’s just slightly crisp is one of the best ways I can think of to finish off a meal.

I know that peach season is very short, and finding organic peaches can sometimes be a challenge, so you can make this with either fresh or frozen (and thawed) peaches. I made the topping nut-free and if you’d like to make it egg-free, you can make a double batch of my gelatin egg recipe and add it when you add the eggs in this recipe.
Enjoy!

Serves 6-8
Peach Cobbler (Grain-Free)20 minPrep Time
50 minCook Time
1 hr, 10 Total Time
 Save Recipe
Print Recipe
My Recipes
My Lists
My Calendar
Ingredients
For the peach filling:3 ten-ounce bags of sliced frozen peaches, thawed (or about 10 cups of fresh peaches, peeled and cut into wedges)1/3 cup maple sugar or organic cane sugar2 tablespoons arrowroot flour 1 tablespoon fresh lemon juice1/3 cup waterFor the topping:1/3 cup coconut flour 1/3 cup arrowroot flour 1/3 cup tapioca flour 1/4 teaspoon ground cinnamon1/2 cup plus 1 tablespoon maple sugar or organic cane sugar, divided1 teaspoon baking powder12 tablespoons cold unsalted butter, cut into tablespoons2 large eggs, beaten (or make a double-batch of my gelatin egg recipe . I tested the recipe with the gelatin eggs and it works beautifully!)1 teaspoon vanilla extractInstructions
Preheat the oven to 350ºF and adjust the rack to the middle position. Place the peaches in a large mixing bowl. Remove about one quarter of the peaches and chop them.Combine the chopped peaches, maple sugar, arrowroot flour, lemon juice and water in a medium saucepan and heat over medium, stirring constantly until the liquid begins to thicken. Remove from the heat and pour the hot peach mixture over the remaining cold peaches and stir to combine. Pour the peach mixture into an 8 x 11 x 2-inch baking dish and set aside.Place the coconut flour, arrowroot flour, tapioca flour, cinnamon, 1/2 cup sugar, and baking powder into the bowl of a food processor and pulse to combine. Add the butter and pulse 15-20 times, until it is the size of peas. Add the beaten eggs and vanilla and pulse until the mixture is evenly moistened. Spoon dollops of the dough onto the peaches and sprinkle with the remaining 1 tablespoon of sugar.Bake for 45-50 minutes, until the topping is just turning golden brown. Cool for 20 minutes and then serve.7.8.1.24600https://deliciouslyorganic.net/peach-cobbler-grain-free-gluten-free/Copyright 2016 Deliciously Organic
Photo credit: Becky Winkler
The post Peach Cobbler (Grain-Free, Gluten-Free, Egg-Free) appeared first on Deliciously Organic.


Peach Cobbler (Grain-Free, Gluten-Free)
Peach cobbler is the essence of summer! Sweet juicy peaches topped with a fluffy, buttery, cake-like topping that’s just slightly crisp is one of the best ways I can think of to finish off a meal.
I know that peach season is very short, and finding organic peaches can sometimes be a challenge, so you can make this with either fresh or frozen (and thawed) peaches. I made the topping nut-free and if you’d like to make it egg-free, you can make a double batch of my gelatin egg recipe and add it when you add the eggs in this recipe.
Enjoy!
Serves 6-8
Peach Cobbler (Grain-Free)20 minPrep Time
50 minCook Time
1 hr, 10 Total Time
Save RecipePrint Recipe
My Recipes
My Lists
My Calendar
Ingredients
For the peach filling:3 ten-ounce bags of sliced frozen peaches, thawed (or about 10 cups of fresh peaches, peeled and cut into wedges)1/3 cup maple sugar or organic cane sugar2 tablespoons arrowroot flour 1 tablespoon fresh lemon juice1/3 cup waterFor the topping:1/3 cup coconut flour 1/3 cup arrowroot flour 1/3 cup tapioca flour 1/4 teaspoon ground cinnamon1/2 cup plus 1 tablespoon maple sugar or organic cane sugar, divided1 teaspoon baking powder12 tablespoons cold unsalted butter, cut into tablespoons2 large eggs, beaten1 teaspoon vanilla extractInstructions
Preheat the oven to 350ºF and adjust the rack to the middle position. Place the peaches in a large mixing bowl. Remove about one quarter of the peaches and chop them.Combine the chopped peaches, maple sugar, arrowroot flour, lemon juice and water in a medium saucepan and heat over medium, stirring constantly until the liquid begins to thicken. Remove from the heat and pour the hot peach mixture over the remaining cold peaches and stir to combine. Pour the peach mixture into an 8 x 11 x 2-inch baking dish and set aside.Place the coconut flour, arrowroot flour, tapioca flour, cinnamon, 1/2 cup sugar, and baking powder into the bowl of a food processor and pulse to combine. Add the butter and pulse 15-20 times, until it is the size of peas. Add the beaten eggs and vanilla and pulse until the mixture is evenly moistened. Spoon dollops of the dough onto the peaches and sprinkle with the remaining 1 tablespoon of sugar.Bake for 45-50 minutes, until the topping is just turning golden brown. Cool for 20 minutes and then serve.7.8.1.24600https://deliciouslyorganic.net/peach-cobbler-grain-free-gluten-free/Copyright 2016 Deliciously Organic
Photo credit: Becky Winkler
The post Peach Cobbler (Grain-Free, Gluten-Free) appeared first on Deliciously Organic.
August 7, 2018
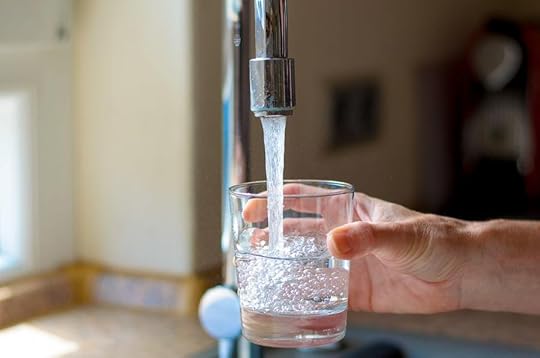
How Swimming Pools, Tap Water, Fluoride and Bromide Effects the Thyroid
Did you know that chlorine found in swimming pools and tap water, fluoride found in tap water and toothpaste and bromide found in baked goods can have a negative effect on the thyroid? I did a quick post on this over on Instagram the other day and didn’t realize it would be such a hot topic, so I thought it would be a good idea to write out some more details so we can all understand how to take the proper steps to protect the thyroid.

Before I get into the details, we first need to understand the importance of iodine.
Iodine and tyrosine are critical for the production of thyroid hormones. When your body sees iodine, it snatches it up and stores it in the thyroid for later use. However, your thyroid has a hard time telling the difference between iodine and other substances that have similar chemical structures.
This is where chlorine, fluorine, and bromine come into play.
Chlorine, fluorine, bromine and iodine are all halogens. Unfortunately, chlorine, fluorine and bromine are similar enough to iodine that they can be absorbed by the thyroid in place of iodine and “displace” the iodine.
The mechanism behind “halogen displacement” was probably best described by J.C. Jarvis, M.D., who wrote: “The clinical activity of any one of these four halogens is in inverse proportion to its atomic weight. This means that any one of the four can displace the element with a higher atomic weight, but cannot displace an element with a lower atomic weight. For example, fluorine can displace chlorine, bromine and iodine because fluorine has a lower atomic weight than the other three. Similarly, chlorine can displace bromine and iodine because they both have a higher atomic weight. Likewise, bromine can displace iodine from the body because iodine has a higher atomic weight.” (Meaning – all of the other halides replace iodine.)
If these other chemicals displace iodine, then your thyroid won’t be able to produce the proper amount of thyroid hormone needed for your body, leading to low thyroid levels, hypothyroidism and possibly goiter, nodules and cysts.
Here are ways iodine can be displaced each day:
When you swim in a swimming pool, or bathe in chlorinated water, the skin soaks up the chlorine and can displace the iodine leading to low thyroid hormone levels.
When you drink chlorinated water, this not only can destroy healthy flora in the gut, but it can also displace iodine.
When you drink fluoridated water, the fluoride can displace the iodine.
Eating baked goods and pasta with potassium bromate added to the flour can displace the iodine as well.
Brominated fire retardants used on clothing, carpets, and mattresses can release vapors that are inhaled.
Brominated vegetable oil is added to some sodas (like Mountain Dew) and can displace iodine.
Now, I know this can be overwhelming. Just remember, it’s all about baby steps! So, here are some steps you can take to start moving in the right direction:
If you swim in a chlorinated pool, I recommend taking an iodine supplement or eating a healthy serving of iodine-rich foods, such as sea vegetables, to provide the body with enough iodine so that the thyroid won’t grab onto chlorine, fluoride or bromine and store it in the thyroid tissues. I personally like to use Iodomere from Standard Process.
Install a shower filter on your shower to reduce your daily exposure to chlorine. The Berkey shower filter is a great option.
Drink filtered water to reduce your exposure to both chlorine and bromide. I recommend the Pelican whole house filtration system, or the table-top Berkey filter.
Avoid using bromated flour or flour that contains potassium bromate. Keep in mind, pastas and baked goods can contain this kind of flour as well. In 1982, researchers in Japan published a series of studies showing that potassium bromate causes cancer in the thyroid in rats and mice. Potassium bromate is illegal in the EU, Canada and Brazil, but is still allowed here in the US.
To reduce your exposure to fire retardants, don’t purchase clothing that is sprayed with them, wash all clothing before wearing and, if possible, choose mattresses and carpets that are free of fire-retardants.
If you can’t purchase any kind of filter for your water right now, it’s a good idea to get 3-4 servings of iodine-rich foods into your diet each week. I really love Dr. Cowen’s sea vegetable powder. You can add it to smoothies, salad dressing, soups, bone broth, etc. to get in an extra dose of iodine.
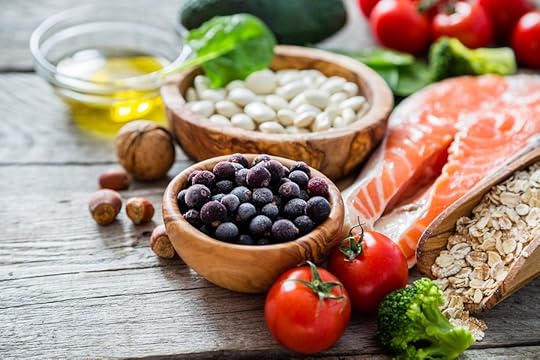
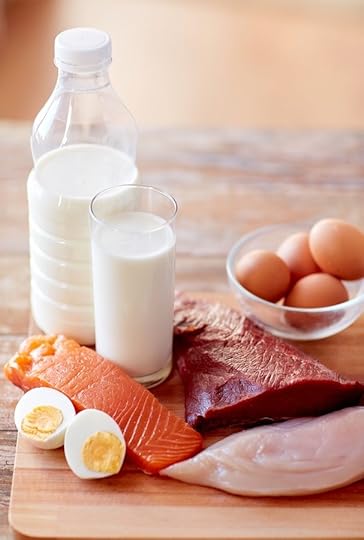 Here’s a list of iodine-rich foods:
Wild Sea Vegetables – such as seaweed and dried kelp
Wild Seafood – such as cod or tuna
Raw Milk or Grass-Fed Yogurt
Pastured Eggs
If you’ve had issues with iodine in the past or have thyroid issues and have been told iodine isn’t healthy, then click here to read an article I wrote on the topic. I think it will clear up the confusion for you.
For further reading:
Interaction of bromine with iodine in the rat thyroid gland at enhanced bromide intake.
Effects of the Environment, Chemicals and Drugs on Thyroid Function
Iodine: Why You Need It, Why You Can’t Live Without It by Dr. Brownstein
https://www.ncbi.nlm.nih.gov/pmc/articles/PMC3890436/
The post How Swimming Pools, Tap Water, Fluoride and Bromide Effects the Thyroid appeared first on Deliciously Organic.
July 31, 2018
Skirt Steak with Green Beans, Tomatoes and Basil Vinaigrette
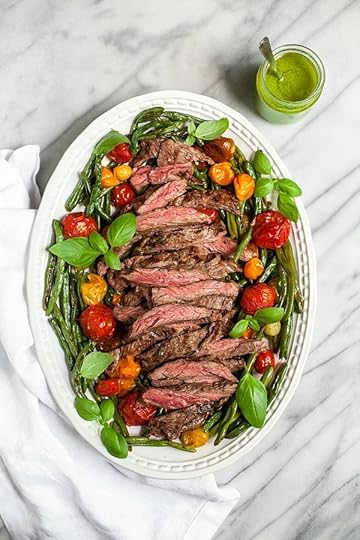 It’s been a long time since I had a meal that I was already craving the next day! This recipe for skirt steak with roasted beans, tomatoes and basil vinaigrette is refreshing, satisfying and such a perfect dinner for the summer months.
You can change up the cut of steak if you’d like, and you can switch out the vegetables for others such as: squash, zucchini, broccoli, eggplant, bell peppers, etc. But I would keep the vinaigrette just as written. And, you’ll probably want to make extra because it tastes good on just about every vegetable and meat in the kitchen.
If you want to make this meal a bit more hearty, or you’re having guests over, I’d serve it with some grain-free cornbread and finish it off with a strawberry meringue cake.
Serves 4
Skirt Steak with Green Beans, Tomatoes and Basil VinaigretteAdapted from Bon Appetit.
10 minPrep Time
30 minCook Time
40 minTotal Time
Save RecipePrint Recipe
My Recipes
My Lists
My Calendar
Ingredients
For the Vegetables:1 pound green beans, washed and trimmed2 pints cherry or grape tomatoes1 tablespoon ghee , melted (or tallow for dairy-free)1/4 teaspoon Celtic sea salt For the Steaks:3 skirt steaks (ribeye or sirloin are great substitutions) Celtic sea salt for seasoningFor the Vinaigrette:1 shallot1 clove garlic3 tablespoons red wine vinegar 6 tablespoons extra-virgin olive oil 1 cup fresh basil1/4 teaspoon Celtic sea saltInstructions
Preheat the oven to 425ºF and adjust the rack to the middle position. Place the green beans and tomatoes in a large baking dish. Add the ghee and sea salt and toss to combine. Roast vegetables for 15-20 minutes, until the skins on the tomatoes begin to burst and the green beans are just becoming golden brown on the edges.Preheat a grill pan or grill over medium-high heat. Season both sides of the steaks with sea salt. Grill 2-3 minutes per side until medium-rare (or to your desired doneness). Place steaks on a plate and let rest for 10 minutes.Place the shallot, garlic, red wine vinegar, olive oil, basil and sea salt in a blender and blend until smooth.Cut the steaks, against the grain, into strips and serve with vegetables and basil vinaigrette.7.8.1.24599https://deliciouslyorganic.net/skirt-steak-basil-vinaigrette-recipe/Copyright 2016 Deliciously Organic
Photos by Becky Winkler
The post Skirt Steak with Green Beans, Tomatoes and Basil Vinaigrette appeared first on Deliciously Organic.
July 23, 2018
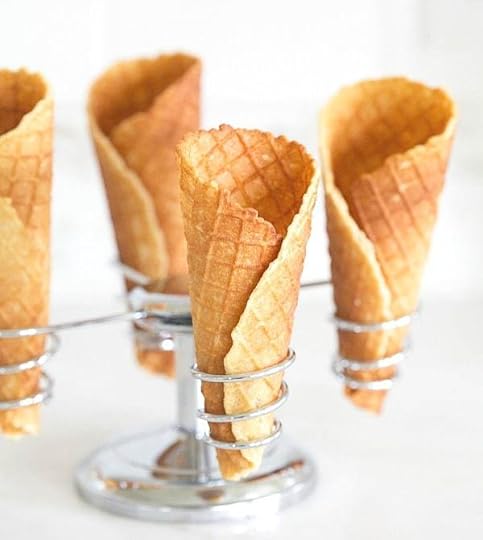
Rum Raisin Ice Cream (Grain-Free, Dairy-Free)
 Haagen-Dazs Rum Raisin Ice Cream was always a favorite flavor in our house growing up. I’d actually never made a homemade version until recently, and since it’s summertime, now is the perfect time to share!
I know many of you are avoiding alcohol right now, so here are a couple of tips if you don’t want to use rum in the ice cream base recipe:
1. Go ahead and plump the raisins in the rum (that’s what gives the raisins that amazing burst of rum flavor, and the amount of alcohol in the end recipe is minimal).
2. Drain the raisins as recommended in the recipe, but substitute the 3 tablespoons of rum for 1 tablespoon of good vanilla extract. You won’t have as much of the rum flavor, but the added vanilla along with those plumped raisins will make the ice cream really flavorful.
3. If you absolutely don’t want any rum in the recipe (even to plump the raisins) you can plump them with 1/3 cup of water plus 1 tablespoon of vanilla extract. Then, instead of adding the 3 tablespoons rum to the custard mixture, you can add 1 tablespoon of vanilla extract.
If you’re looking for a good ice cream maker, I highly recommend the Cuisinart. I’ve had one for over 20 years and it’s still running strong! And, for the picture above, I used a gluten-free ice cream cone, but if you’re looking for a grain-free ice cream cone recipe, check out the waffle cone recipe in my cookbook!
Here are some additional summertime ice cream recipes you might enjoy:
Paleo Chocolate Chip Cookie Dough Ice Cream
Chocolate Peanut Butter Ice Cream
Apricot Ice Cream
Dairy-Free Vanilla Ice Cream
Almond Butter Chocolate Fudge Chunk Ice Cream
Makes about 1 quart
Rum Raisin Ice Cream (Grain-Free, Dairy-Free)Adapted from The Perfect Scoop .
Save RecipePrint Recipe
My Recipes
My Lists
My Calendar
Ingredients
For the Ice Cream:1/2 cup raisins1/3 cup rum (see notes in above post to reduce the rum in the recipe if needed)1 1/2 cups coconut milk (or raw cream)1/2 cup coconut cream (or raw milk)1/2 cup maple syrup4 egg yolksInstructions
Place the raisins and rum in a small saucepan and bring to a simmer over low heat. Remove from the heat and let the mixture stand for 1 hour. (You can do this step one day in advance.)Place the milk, cream, maple syrup and egg yolks in a medium saucepan and whisk until combined. Heat over medium-low and whisk constantly, until the mixture thickens and coats a wooden spoon when dipped into the mixture. Pour the mixture through a stainer and cool over an ice bath. Cover and place in the refrigerator until throughly chilled, about 3-4 hours. When you're ready to freeze the ice cream, drain the raisins over a bowl and measure the drained rum. You'll want a total of 3 tablespoons of rum, so add more rum if needed. Stir the rum into the milk mixture.Freeze the mixture according to your ice cream maker manufacturer's instructions. During the last few minutes of churning, add the rum-soaked raisins.7.8.1.24597https://deliciouslyorganic.net/rum-raisin-ice-cream-recipe/Copyright 2016 Deliciously Organic
The post Rum Raisin Ice Cream (Grain-Free, Dairy-Free) appeared first on Deliciously Organic.
July 11, 2018
Shrimp and Grits (Paleo, Grain-Free)

My mom grew up in Louisiana and learned how to cook all of the Southern and Cajun classics, so dishes like Crawfish Etouffee, Gumbo, Jambalaya and Shrimp and Grits were served up often. I’m so thankful she taught me how to make all of the classics so I can now pass those recipes on to my daughters.
Shrimp and Grits has always been a favorite of mine, and I’ve really missed it since I still avoid corn. So, I decided to get in the kitchen and cook up my version of Grain-Free Shrimp and Grits.
I first tried simmering the cauliflower, but the grits came out way too watery. So, that’s why in this recipe we start with sautéed “riced” cauliflower and then add the liquid afterwards. While it’s still not a corn-based grits dish, it comes pretty darn close!
Serves 4
Shrimp and Grits (Grain-Free, Paleo)10 minPrep Time
25 minCook Time
35 minTotal Time
Save RecipePrint Recipe
My Recipes
My Lists
My Calendar
Ingredients
For the grits:4 tablespoons unsalted butter (or 3 tablespoons tallow or palm shortening for dairy-free)1 head cauliflower, riced1/2 cup onions, chopped3 heads garlic, chopped1/2 teaspoon Celtic sea salt2 tablespoons raw cream or coconut cream For the Shrimp and Sauce:2 tablespoons unsalted butter (or 1 tablespoon tallow or palm shortening for dairy-free)1/2 cup chopped onions8 ounces mushrooms, chopped2 cups spinach1 cup chicken broth 2 tablespoons heavy cream or coconut cream 1 pound wild shrimp, peeled and deveined1/2 teaspoon Herbamare 1/4 teaspoon paprika Dash of cayenne1/2 teaspoon garlic powderInstructions
Melt the butter over medium heat in a large skillet and add the cauliflower, onions, garlic and sea salt. Sauté for about 10 minutes until the cauliflower is softened. Pour the cauliflower mixture into a food processor and add the cream. Pulse for ten 1-second pulses, until the mixture is the consistency of grits.Wipe out the skillet that was used for the grits, and melt 2 tablespoons of butter over medium heat. Add the onions and mushrooms and cook for 10 minutes, until softened and just turning golden brown on the edges. Add the spinach and cook until wilted, about 3-4 minutes. Add the broth and cream and simmer until the sauce reduces by half and begins to thicken.Toss the shrimp, herbamare , paprika, cayenne and garlic powder in a small bowl. Add the seasoned shrimp to the mushroom sauce. Cook for 5-7 minutes until shrimp is cooked through, stirring occasionally.To serve, spoon some of the grits into a bowl and top with the shrimp and mushroom sauce.7.8.1.24598https://deliciouslyorganic.net/grain-free-shrimp-and-grits-paleo/Copyright 2016 Deliciously Organic
The post Shrimp and Grits (Paleo, Grain-Free) appeared first on Deliciously Organic.
June 25, 2018
How to do a Thyroid Self-Exam
Most of us are aware of the need to do a breast self-exam each month, but did you know you should also do a thyroid self-exam? This easy neck exam can help you identify thyroid issues such as thyroid cancer, cysts, nodules or goiter early and the self-exam only takes about 60 seconds to do.

Your thyroid is on your neck just below your Adam’s apple and above your collarbones, and spreads across your neck like a butterfly.
Here’s how you do a thyroid self-exam:
Stand in front of a mirror, or hold a mirror so you can see your lower neck.
Tip your head back and take a drink of water and swallow.
As you swallow, look at your neck and check for any bulges or protrusions in the area where you swallow. Remember, don’t confuse your Adam’s apple with the thyroid.
Next, using your hands, slowly feel the area over your thyroid and see if there are any lumps or bulges. You can do this with or without a mirror.
If you find any lumps or bulges, make an appointment with your practitioner.
Thyroid nodules are usually round and will move with the gland when you swallow. You might also be able to feel the nodule rolling underneath your fingers or see it when you swallow. Thyroid nodules can come and go, so don’t panic, but it is important to make an appointment with your practitioner.
Goiter will feel like swelling or a bulge. Sometimes it’s on just one side of the thyroid, but it can also be felt on both sides.
It’s good to keep in mind that finding a lump or nodule does not always mean you have a serious issue with your thyroid.
Here are some at-home therapies you can talk to your practitioner about for thyroid nodules, cysts and goiter:
We’ve found in our practice that iodine is very helpful for almost all thyroid issues, but it’s important to take a look at your TSH and T4 levels before deciding how much iodine to take. Getting 3-4 servings of sea vegetables, wild seafood, pastured eggs, and fish are great natural sources of iodine. If you’re concerned about eating iodine-rich foods or taking an iodine supplement when you have thyroid disease, read this article.
Use unrefined Celtic sea salt in your cooking throughout the day because it contains over 80 different minerals that are nourishing to the thyroid.
Stay away from all processed foods and eat a nutrient-dense diet. Click here for lots of recipes!
Avoid bromines found in breads, pasta, refined cereals, pool treatments and pesticides. Bromine interferes with the utilization of iodine in the body and will compete with iodine receptors, displacing the iodine.
Castor oil packs done for 10-15 minutes over the thyroid daily can have a profound effect on cysts, nodules and goiter. One of my clients came to me last year with a thyroid cyst that was documented by her doctor, so she was diligent with her diet, took the proper amount of iodine supplementation for her body and did daily castor oil packs. When she went back for her follow-up appointment, the doctor was happy to inform her that the cyst had shrunk!If you would like to do castor oil packs over the thyroid, I highly recommend you first do them over the liver daily for 3-4 weeks first, and then try doing a pack over the thyroid for 10-15 minutes at time. If you get any kind of rash or your neck starts to itch, this is a sign that you liver still needs some detox. So, do the castor oil packs over the liver for an additional 3-4 weeks and then try again over the thyroid.
The post How to do a Thyroid Self-Exam appeared first on Deliciously Organic.
June 18, 2018
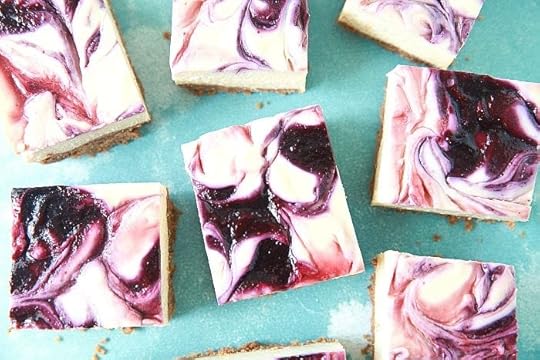
Red, White and Blue Cheesecake Bars (Grain-Free, Gluten-Free)
Fourth of July is right around the corner, so I’ve got a fun recipe for Red, White and Blue Cheesecake bars for you. They are grain-free, gluten-free and super festive!
Whenever I post something with cream cheese I get asked if it’s healthy for you. The short answer is “yes!” If it comes from a good source. The key is you want to avoid cream cheese that contains fillers and preservatives and, if you prefer, you can even make it homemade.
When I make cheesecake (which isn’t very often) I’ll purchase an organic cream cheese without fillers. I recently found a lactose-free cream cheese from Green Valley that tastes fabulous and is a good choice if you need to avoid lactose. And, if you need to avoid dairy completely, I recommend making my dairy-free cheesecake from The Grain-Free Family Table, and swirling in the berry syrups to get that fun red, white and blue effect.
When I tested this recipe, I really wanted the red to be a stronger color, so I did add a touch of all-natural food coloring to the strawberry syrup, but this is something you can omit if you prefer. Just keep in mind the red will look a bit more pink in color.
Here are some additional 4th of July recipes you might enjoy!
Corn Dog Muffins (fun for the kids!)
Pulled Pork with “Cornbread” Topping
Tomato, Blueberry and Burrata Salad
Fermented Salsa
Homemade Firecracker Pops
Smore Bars
Grain-Free Hamburger Buns
Grilled Hamburgers with Sour Cream and Herbs
Serves 12
Red, White and Blue Cheesecake Bars (Grain-Free, Gluten-Free)Save RecipePrint Recipe
My Recipes
My Lists
My Calendar
Ingredients
For the crust:1 recipe grain-free graham crackers or 2 boxes of Simple Mills Pecan Cookies 6 tablespoons unsalted butter or 4 tablespoons coconut oil For the cheesecake:1 cup strawberries2 teaspoons honey , divided1 cup blueberries1/4 teaspoon all-natural red food coloring (optional - see above post for info)3 (8-ounce) packages organic cream cheese, room temperature2/3 cup maple sugar (if you prefer a recipe with honey as the sweetener, see page ?? in my cookbook )2 large eggs, room temperature1/4 teaspoon Celtic sea salt1/4 cup sour cream2 tablespoons fresh lemon juice1 tablespoon vanilla extractInstructions
Preheat the oven to 350ºF and adjust the rack to the middle position. Line an 8x8” baking pan with parchment paper. Place the graham crackers in the bowl of a food processor and process until finely ground. Add the butter and pulse until all of the crumbs are moist. Pour the crumb mixture into the pan and press evenly. Bake for 12 minutes.Meanwhile, place the strawberries and 1 teaspoon of honey in a small saucepan and place the blueberries and 1 teaspoon of honey in another saucepan. Heat each over medium heat until bubbling and simmer, pressing the berries with the back of a fork to release the juice, for 5-6 minutes until both berry mixtures are thick. Pour the strawberry mixture through a fine mesh sieve , pressing on the solids to release any additional juice. Repeat with the blueberries. Set aside.Place the cream cheese and sugar in a mixing bowl and beat for 1-2 minutes until creamy and there are no lumps remaining. With the mixer on low, add each egg, one at a time. Combine the salt, sour cream, lemon juice and vanilla in a small measuring cup and slowly mix into the cream cheese mixture.Pour the cream cheese mixture on top of the cookie crust. Then, pour small dots of both berry syrups on the top of the cheesecake mixture. Using a paring knife, swirl the berry syrups on top. Bake for 25-28 minutes until set on the edges, but when you gently shake it, the middle jiggles a bit. Cool completely, cover and then chill for 6-8 hours. Cut into squares and serve cold.#search_tags {
margin-left: -20px;
margin-top: 25px;
text-align: left;
}
#search_tags .tags dt {
line-height: 23px;
font-size: 12px !important;
}
#search_tags .tags span {
background: #a1a1a1;
color: #fff;
height: 22px;
margin: 0 6px 0.375rem 0;
padding: 0 6px;
text-transform: uppercase;
display: inline-block;
}
#search_tags .tags {
display: -webkit-inline-box;
width: 100%;
}
#search_tags .tags .tag {
display: inline-block;
}
#search_tags .tags .highlighted {
background: #01a64f;
}
Tags
Diet : vegetarian pescetarian grain free Allergy : soy free peanut free seafood free treenut free sesame free mustard free Gluten-Free 7.8.1.04596https://deliciouslyorganic.net/red-white-and-blue-cheesecake-bars-grain-free/Copyright 2016 Deliciously Organic
The post Red, White and Blue Cheesecake Bars (Grain-Free, Gluten-Free) appeared first on Deliciously Organic.
June 11, 2018
Strawberry Lemonade Muffins
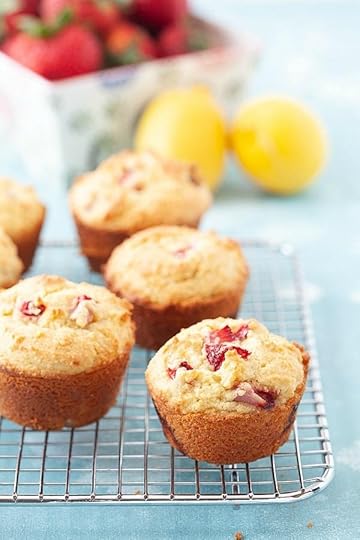
Strawberries and lemons are such a fun summer combo, so I thought it would be fun to give you a recipe for strawberry lemonade muffins! These muffins have a strong lemon flavor with fresh chopped strawberries throughout.
Here are some muffin tips for you:
If you’d like you can switch out the strawberries for blueberries or even raspberries!. Whichever berries you choose, I would use fresh berries and not frozen.
Make the muffins ahead of time, freeze them, and then reheat in a 300ºF oven for about 20 minutes and they will taste like you just baked them! This is really helpful if you’ve got house guests.
To prevent any aluminum from leaching into the muffins, use unbleached muffin liners, or use an oiled stainless steel muffin pan.
When baking with honey, I prefer to use a light colored honey such as Really Raw, Y.S. Organic or Tropical Traditions because of its light flavor. In my experience, other wild honey can overpower the flavor of the recipe, but a light honey adds sweetness without any added flowery aromas.
Here are some more naturally sweetened grain-free muffins you might enjoy!
Blueberry Streusel Muffins
Pumpkin Muffins with Chocolate Chips (these are great for travel or camping trips)
Raspberry Chocolate Chip Muffins
Carrot Ginger Muffins
Lemon Poppyseed Muffins
Makes about 18 muffins
Strawberry Lemonade MuffinsSave RecipePrint Recipe
My Recipes
My Lists
My Calendar
Ingredients
2/3 cup raw honey 4 large eggs, room temperature1/2 cup coconut oil , melted1/3 cup whole plain yogurt (you can use a dairy-free yogurt if needed), room temperature1/4 cup fresh lemon juice3 cups almond flour 1/4 cup coconut flour 1/4 cup arrowroot flour 3/4 teaspoon baking soda1 teaspoon baking powder1/2 teaspoon Celtic sea salt Zest of 2 organic lemons2 cups chopped strawberriesInstructions
Preheat the oven to 350ºF and adjust the rack to the middle position.Place the honey and eggs in the bowl of a standing mixer and beat on medium-high for 5 minutes.Combine the coconut oil, yogurt and lemon juice in a medium bowl. Slowly beat in the coconut mixture into the egg mixture.In a large bowl, combine the almond flour, coconut flour, arrowroot flour, baking soda, baking powder, sea salt and lemon zest. Gently fold the flour mixture into the egg and lemon mixture. Gently fold in the strawberries.Spoon the batter into a lined muffin pan . Bake for 16-18 minutes until just turning golden brown. Cool for 10 minutes. Serve.7.7.0.14595https://deliciouslyorganic.net/strawberry-lemonade-muffins/Copyright 2016 Deliciously Organic
The post Strawberry Lemonade Muffins appeared first on Deliciously Organic.
June 5, 2018
8 Ways to Prevent Migraines and Headaches Naturally

Migraines are debilitating, incredibly painful and seem to be almost impossible to get rid of or avoid. I suffered from 24/7 migraines after the birth of my youngest child 16 years ago. The specialist put me on three daily medications and I was still getting migraines 3-4 times a week.
Thankfully, I was able to figure out that my trigger was the pesticides, herbicides and synthetic chemicals in our food. About two months after switching to an all-organic diet, I was able to get off of my medications and reduce the frequency of migraines to about once a month.
This was without going on any kind of special diet like gluten-free, Paleo, etc! I simply just changed the foods I was regularly eating to organic. I think this goes to show the importance of figuring out the root cause of your health issue!
Over the years, I’ve learned about other triggers, and how to reduce even my previous monthly migraine, and have had success helping my Nutritional Therapy clients do the same. So, today, I want to share with you what I’ve learned.
A holistic practitioner shared with me many years ago that a migraine is a severe form of inflammation. And, if you think about it, that makes sense. When you get a migraine, the blood vessels in the head are inflamed. When the blood passes through, it pulses and causes extreme pain. This is why taking caffeine helps, because it restricts the blood vessels.
So, if migraines are a form of inflammation, then taking the next step to figure out what triggers that inflammation can be incredibly helpful!
Here are my top 8 ways to prevent migraines and headaches naturally:
Do a castor oil pack over the liver once a day for two months and then three times a week for maintenance. Many times, a migraine is triggered because one has come in contact with an environmental toxin (think fumes, perfume, conventional cleaning products, etc.) and the liver is congested and can’t filter out the toxin quickly enough. So, doing a detox therapy like the castor oil pack can gently decongest the liver and reduce the frequency or intensity of the migraine. Migraines closely associated with a woman’s menstrual cycle are also often tied to liver congestion. During this time of the month, the body creates excess hormones that the liver needs to filter out. If the liver is congested, then this can trigger migraines, hormonal breakouts, PMS, etc. during those times during the month.
Eat an organic, unprocessed diet. The amount of pesticides, herbicides, etc. that one is exposed to overall when they eat conventional food really adds up! By reducing the toxins in your body, you can possibly reduce the amount of migraines you get. This was the key for me! And, I wasn’t even on any kind of special dietary protocol, I simply just switched to organic and it made the world of difference.
 3. If your migraines are triggered by bright lights, being in the sunlight or heat, or you wake up with them, then these migraines are often rooted in adrenal fatigue. Read this article and start taking the steps listed.
4. Remove sugar from the diet that doesn’t come from a fruit or vegetable. Sugar causes inflammation in the body, especially when eaten in excess, so reducing your total sugar intake (including sugars from fruits and carbohydrates) to around 30-40 grams a day can make a significant difference.
5. Reduce your stress to keep your blood sugar levels even. Stress plays just as much of a part in blood sugar balance as eating sugar. Large fluctuations in blood sugar can trigger migraines, so it’s very important to take steps to spend time taking care of yourself each day. Exercising outdoors, not spending too much time on electronics, letting go of anger, etc. can all have a profound affect on blood sugar and the frequency of migraines.
6. Keep a regular sleep schedule. Sleep gives your body time to heal, restore, rest, and also detoxify. A lack of sufficient sleep taxes the adrenals and causes blood sugar imbalance, causes inflammation in the body, and can trigger migraines. Aim to get at least 7-9 hours of sleep each night, and stick to a regular schedule.
7.Take daily epsom salt baths to replenish magnesium. Magnesium helps relax the body and may be effective at reducing or preventing migraines. When the body is under stress, the first mineral it burns through is magnesium, so following #5 and replenishing magnesium stores is very helpful. Simply pour a cup of Epsom salts in a bath and soak for 20 minutes. If you still find you need an additional magnesium supplement, Mag Max is the one I recommend for my clients.
8. Walk for 30 minutes daily. This isn’t a speed walk, but a slow stroll to help reduce cortisol levels, calm the body and reduce inflammation to reduce migraines.

If you do get a migraine, here are some remedies that I’ve found beneficial:
Because we are each bioindividual, it’s hard to say exactly how much of these remedies to use, so either talk to your holistic practitioner about the best dosage, or book an appointment with me at Biodynamic Wellness.
Taking a therapeutic dose of magnesium can be very helpful. MagMax is one of my favorites.
If your migraine is most likely from liver congestion (maybe you drank too much the night before, or you’re doing a detox) then Livaplex and AF Betafood can help relieve the pain.
If your migraine is most likely from stress, then taking a therapeutic dose of Cataplex B can help. Sometimes I’ve found that combining Cataplex B with MagMax is also effective.
An epsom salt bath with extra epsom salts (2 cups instead of 1) can relax the body, replenish magnesium stores and aid in pain reduction.
To alleviate the extreme tension, the combination of Deep Blue, Frankincense and Basila essential oils applied over the area of concern may provide relief.
Have you found any natural ways to reduce the frequency of your migraines or remedies to reduce the pain? Please share in the comments below so we can all learn from you!
The post 8 Ways to Prevent Migraines and Headaches Naturally appeared first on Deliciously Organic.