Carrie Vitt's Blog, page 43
April 16, 2015
S’more Bars (Grain-Free, Paleo)

There’s not many things that come close to the indulgence of chocolate, graham cracker and marshmallow. It’s an iconic classic and today we’re going to take it up a notch with homemade S’more Bars.
The recipe takes a few extra steps, but it’s totally worth it! The bars have a grain-free graham cracker cookie crust, fudgy chocolate brownie middle and are topped with homemade marshmallow fluff. These S’more Bars are incredibly rich and can be cut into 16 squares for the perfect sweet bite.

Print Recipe
S’more Bars
The marshmallow fluff is adapted from Shauna’s recipe.
Serves 16
For the crust:
1/2 recipe of grain-free graham crackers
4 tablespoons coconut oil, melted
For the brownie layer:
1 recipe of fudgy brownies
For the marshmallow layer:
1 1/4 cups maple syrup
1/8 teaspoon Celtic sea salt
2 large egg whites
1/4 teaspoon cream of tartar
Preheat the oven to 350 degrees F and adjust the rack to the middle position. Line an 8×8″ baking pan with two pieces of parchment paper (place two sheets of parchment paper perpendicular to each other in pan, pushing paper into the corners).
Place the graham crackers and melted coconut oil in the bowl of a food processor. Pulse until crackers are finely ground and are moist. Pour the cracker mixture into the prepared pan. Using your hands, press the crumbs to make an even layer. Bake for 10 minutes.
Spoon fudgy brownie batter over graham cracker crust and bake for 25 minutes. Cool completely.
Place the maple syrup and the salt in a medium sauce pan and bring to a boil over high heat. Continue boiling until the mixture reaches 240°F on a candy thermometer. While maple syrup is boiling, place the egg whites and cream of tartar in the bowl of a stand mixer fitted with a whisk attachment. Whip the egg whites to soft peaks on medium speed. (You should have the egg whites whipped and ready, waiting for your syrup to be drizzled in. If they’re whipping faster than your syrup is coming to temperature, just stop the mixer until the syrup is ready.)
When the syrup reaches 240°F, reduce the mixer speed to low and slowly drizzle about 2 tablespoons of syrup into the egg whites to warm them. Slowly pour in the rest of the syrup (it should take about 1 1/2 minutes to add all of the syrup). Increase the speed to medium-high and whip for 7 minutes, until the marshmallow crème is stiff and glossy. Add the vanilla and whip an additional 2 minutes.
After bars have baked and cooled, hold onto the overhanging parchment paper and gently lift the brownies out of the pan. Place them to a cutting board. Pour the marshmallow fluff on top of brownies and spread evenly. To cut, dip a knife in hot water, wipe with a clean cloth and then slice. Repeat. Serve.
Note: I only test the recipes on my site with the listed ingredients and measurements. If you would like to try a substitution, you are welcome to share what you used and how it turned out in the comments below. Thanks!
Posts may contain affiliate links. If you purchase a product through an affiliate link, your costs will be the same but Deliciously Organic will receive a small commission. This helps cover some of the costs for this site. We appreciate your support!
The post S’more Bars (Grain-Free, Paleo) appeared first on Deliciously Organic.


April 9, 2015
How to Replace Paper with Cloth in the Kitchen and a Giveaway
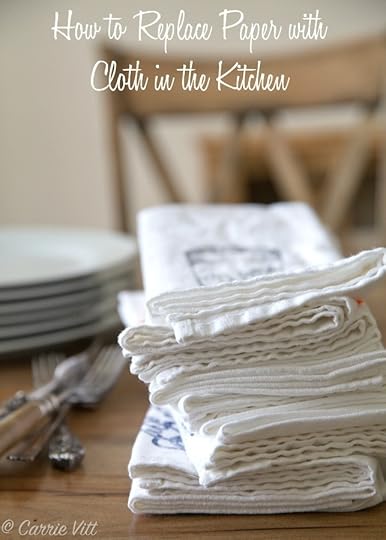
Replacing paper towels and napkins with cloth is an economical way to eliminate waste in the kitchen.
Almost 10 years ago, we gave up paper and purchased two dozen cloth napkins and about ten dish towels. The cost of an average paper towel roll is $1.30 and most families will go through at least one roll a week. That’s $67.60 a year just for paper towels! Napkins are a bit cheaper and average around $.02 per napkin. If you have a family of four and you each use three napkins per day, that equals $87.62 a year. So, if you replace cloth with paper, in 5 years you’ll save around $776.00. Over time, it really adds up!

I’ve always been a fan of slow and steady changes in the kitchen to avoid getting overwhelmed. To get started, I recommend purchasing twelve cloth napkins to start and just throwing them in the wash along with your other laundry. Then, you can make the transition to removing the paper towels by purchasing a few dish cloths. I tend to prefer white cloth napkins because you can bleach them if they get dirty. We’ve used some of our cloth napkins for at least 10 years now, so you can expect to get your money’s worth!
You can feel like a bit odd at first when you’re used to grabbing a paper towel for a spill or a mess on the counter, but you’ll get used to it over time and start reaching for a dish cloth instead.
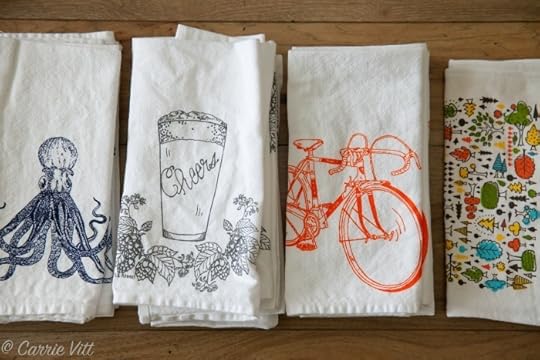
Mighty Nest has been a sponsor of this blog for a while and I love their selection of napkins and dish cloths. Their organic cotton dish towels are super absorbent and don’t leave lint on the counter when you’re wiping things up. Small changes can make a big difference!
Join me in making a simple change for the health of our planet (and your pocketbook!). Mighty Nest is offering a $100 cloth napkin and dishcloth giveaway plus a $100 cash donation to your school. The giveaway is for 2 weeks – April 9-23rd. See the widget below to enter. Good luck!
The post How to Replace Paper with Cloth in the Kitchen and a Giveaway appeared first on Deliciously Organic.
April 6, 2015
[Video] How to Make French Toast (Grain-Free, Paleo)
Click here to view the embedded video.
I’ve got a new cooking video for you today – How to Make French Toast.
This recipe can be made with any sort of dense bread, so you can choose between gluten-free, grain-free, Paleo, etc. I like to serve the french toast with maple syrup, berries and whipped cream.
Print Recipe
How to Make French Toast
To keep the video on the shorter side, I only used 4 pieces of bread, but the recipe calls for 8 pieces.
Serves 4
For the French Toast:
1 cup whole milk (or coconut milk for dairy-free/Paleo)
2 large egg yolks
1 tablespoon maple syrup
1/4 teaspoon ground cinnamon
Pinch of Celtic sea salt
1 teaspoon vanilla extract
1 tablespoon ghee, leaf lard, duck fat, etc. (any heat that can be used at a high heat)
8 thick slices dense of stale bread (I used my grain-free banana bread)*
For the Topping:
1/2 cup maple syrup
Fresh Berries
1 cup whipped cream (optional)
Whisk together the milk, egg yolks, maple syrup, cinnamon, salt and vanilla extract in an 8×8″ baking dish. Heat a large sauté pan over medium heat for 2 minutes.
Place each piece of bread into the milk mixture. Let the each side of the bread sit for 20 seconds. Using a pair of tongs, transfer the soaked bread over to the hot pan. Let the bread cook for 1-2 minutes until the bottom side is golden brown. Using a spatula, flip the bread and continue cooking an additional 1-2 minutes until the second side is golden brown.
Serve immediately with maple syrup, berries and whipped cream (if using).
*I like to place the bread on a cooling rack that has been set over a baking sheet and leave it out overnight so the bread gets stale. If you forgot to do this step, you can put the bread in a 300 degree F oven for about 10 minutes, until stale.
Note: I only test the recipes on my site with the listed ingredients and measurements. If you would like to try a substitution, you are welcome to share what you used and how it turned out in the comments below. Thanks!
Posts may contain affiliate links. If you purchase a product through an affiliate link, your costs will be the same but Deliciously Organic will receive a small commission. This helps cover some of the costs for this site. We appreciate your support!
The post [Video] How to Make French Toast (Grain-Free, Paleo) appeared first on Deliciously Organic.
March 31, 2015
Roast Leg of Lamb

Roast leg of lamb is a simple spring classic main dish that’s perfect for Easter. I don’t like to make a big fuss when preparing meat, so I simply marinate the meat for an hour, place it on a roasting pan along with Yukon potatoes and onions and roast until medium-rare.
If you add a salad and maybe a nice chocolate pie, this Easter dinner won’t take too much prep, leaving you more time to relax and enjoy your loved ones.

Print Recipe
Roast Leg of Lamb with Potatoes and Onions
I chose palm shortening instead of olive oil because olive oil can oxidize at higher heats. Palm shortening is flavorless and is a healthy fat rich in omega-3 fatty acids. Serves 6
For the Lamb:
1 (5-6 pound) boneless leg of lamb
6 cloves garlic
1/4 cup chopped rosemary
1 tablespoon Celtic sea salt
1 teaspoon Freshly ground black pepper
2 tablespoons palm shortening
For the vegetables:
6 large Yukon potatoes, cut into 1-inch pieces
1 large yellow onion, cut into wedges
1 tablespoon palm shortening
1 teaspoon Celtic sea salt
Set lamb in a large roasting dish. Combine garlic, rosemary, salt, pepper and palm shortening in a small bowl. Using your hands, thoroughly coat the garlic mixture all over the meat. Let the roast sit for 1 hour (this will marinate the meat a bit and also bring it to room temperature to ensure even cooking).
Preheat the oven to 400 degrees F. Adjust the rack to the middle position. Place the potatoes, onion, palm shortening and salt in a large bowl and toss until incorporated. Pour the potato mixture around the lamb in the roasting pan. Roast for about 1 1/4 hours for medium rare, or 1 1/2 hours for medium, or or or until the internal temperature of the lamb is 135 degrees – rare, or 145 degrees – medium (I prefer medium-rare). Remove from the oven and put the lamb on a platter; cover tightly with aluminum foil. Allow the lamb to rest for about 20 minutes. If the potatoes aren’t golden brown yet, you can put them back in the oven and roast until to your liking, or you can turn the oven off and keep them warm until the lamb is ready to serve. Slice the lamb and serve with potatoes and onion.
Note: I only test the recipes on my site with the listed ingredients and measurements. If you would like to try a substitution, you are welcome to share what you used and how it turned out in the comments below. Thanks!
Posts may contain affiliate links. If you purchase a product through an affiliate link, your costs will be the same but Deliciously Organic will receive a small commission. This helps cover some of the costs for this site. We appreciate your support!
The post Roast Leg of Lamb appeared first on Deliciously Organic.
March 26, 2015
5 Health Benefits of Near Infrared Sauna Therapy – Plus a SaunaSpace Giveaway
 Never before in history have people been exposed to such a great variety of toxic chemicals. More than 80,000 available in the U.S. have never been fully tested for their effects on our health. According to the EPA, toxic chemicals are responsible for up to 80% of cancer deaths. In my opinion, it’s important to reduce the toxic load on our bodies. A great way to do this is with near infrared sauna therapy.
I used Sauna therapy when battling Hashimoto’s – it was very important to my detox routine. Basically, infrared sauna heats the body temperature several degrees above normal and the body attempts to reduce its temperature by driving blood to the surface and sweating. The heating, and the body’s response to heating, can produce many beneficial physiological effects.
Just last month a study from Finland found that those who used saunas on a regular basis reduced their risk of heart failure, coronary heart disease and had longer lifespans. They tracked more than 2,000 Finnish men for nearly 20 years on average and also found that more sessions per week provided more health benefits.
 This is a picture of the SaunaSpace Pocket Sauna at my house.
1. Detoxification
Sweating can help flush toxins from the body. Did you know that prescription and over-the-counter drugs may remain in the body for 30 years or more? According to Lawrence Wilson, M.D., “Heating the body helps destroy bacteria, viruses and tumors. Sweating promotes the elimination of toxic chemicals, radioactive particles and other toxins. It also increases the skin’s ability to eliminate poisons.”
2. Exercise Benefits
Infrared sauna therapy can provide many of the benefits of exercise with less expenditure of energy. This can be especially helpful if you’re struggling with a disease and don’t have much energy to exercise. Sauna therapy can increase circulation, lower elevated blood pressure and improve oxidation of the tissues.
3. Fewer Abnormal Cells
Many of us have damaged or mutated DNA due to the effects of toxic chemicals and ionizing radiation. Heating the body using infrared sauna therapy can help kill weaker mutated cells and help prevent their reproduction – slowly improving the ratio of healthy cells to genetically damaged cells. For those of you interested in the MTHFR mutations, this could be a key piece of information to help you improve your circumstances.
Hyperthermia is a well-researched therapy for cancer according to the National Cancer Institute and American Cancer Society. Dr. Wilson explains that tumors don’t tolerate heat well, so raising the body temperature may hasten their death.
4. Pain Relief
Infrared light therapy can help reduce pain and other symptoms of rheumatic disease. It’s also been shown to help reduce chronic back pain. “Studies indicate it may have direct effects on peripheral nerves and it may modulate the levels of prostaglandins in inflammatory conditions such as arthritis.” Dr. Wilson
5. Relaxation
Sweating helps stimulate blood flow and circulation throughout the body (just like exercise does). Increased circulation helps relax the body. I’ve personally experienced this and can’t even tell you how much the sauna helps my stress level. Remember, stress is like gasoline on a fire for almost all diseases, so reducing stress can play a huge role in the healing process.
 Why choose a Near Infrared Sauna instead of a Regular Sauna?
1. Infrared light is uniquely beneficial as it is 600nm – 950nm. The phototherapy benefits it provides are totally unique to this narrow band of the sunlight’s spectrum.
2. We only have any photoreceptors near infrared and visible red. The NIR (near infrared) light directly activates various cellular processes that promote cellular healing, detoxification, increased metabolism, and more.
3. NIR light is safe for the eyes and can heal cellular damage in the eyes.
4. Here are some of the healing benefits of NIR: alkalinization of the cells, nerve tissue regeneration, wound healing, increased collagen production, relaxation of the central nervous system, activation of heat-shock proteins, a newly recognized class of proteins that act as chaperones for immune bodies in the cells, bringing them to the toxin sites, so toxin elimination is more effective.
5. Ultra-low EMF.
6. Provides sufficient heat for effective hyperthermic therapy.

Until recently, I thought of a sauna as a huge cedar room – usually at a health club or gym. I thought they occupy tons of space and cost several thousand dollars, too. I’m excited to share with you that SaunaSpace makes a wonderful near infrared sauna that costs much less than competitors’ and takes up only a fraction of the space! Their “Pocket Sauna” can be set up in the corner of a room in about 45 minutes, without tools. It can be easily broken down and set back up if you want to travel with it or if you move often. We set ours up in a walk-in attic space in our house. We use it daily and have seen some wonderful health benefits.
How do you use the sauna? Here’s a post from SaunaSpace that includes all the instructions you need.
I’m thrilled SaunaSpace agreed to give away one of their Hypoallergenic Pocket Saunas! This sauna is valued at $1,308.00! Their infrared saunas are hand-made and all materials are sourced in the U.S. See the widget below to enter. Good luck!
The post 5 Health Benefits of Near Infrared Sauna Therapy – Plus a SaunaSpace Giveaway appeared first on Deliciously Organic.
March 19, 2015
How to Make Marinara Sauce
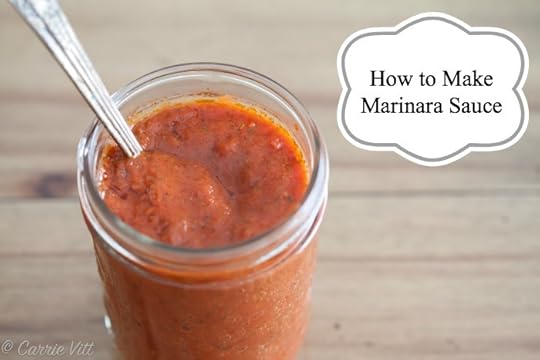
I’m excited to share with you the first-ever Deliciously Organic cooking video! I want to teach some of the basics with these videos and help arm you with delicious and simple recipes for your kitchen. We’ll have 2-3 new videos each month, so make sure to subscribe to the Deliciously Organic Channel on YouTube so you’ll get updates as soon as they’re posted. If you have ideas for recipes you’d like to see in future videos, please leave your suggestions in the comments below.
Today’s video – How to Make Marinara Sauce. Our family has used this recipe for years. It’s quick, only requires a few ingredients, and is absolutely delicious!
PrintMarinara Sauce Recipe
Yield: Makes about 3 cups
Ingredients
3 tablespoons extra-virgin olive oil2 cloves garlic
1 tablespoon Italian Seasoning Blend
1 (24-ounce) jar crushed tomatoes
1 teaspoon Celtic sea salt
Instructions
Place olive oil, garlic and Italian seasoning blend in a cold saucepan. Turn the heat to medium and heat until garlic starts to sizzle, about 1 minute. Pour in crushed tomatoes and sea salt. Bring to a low simmer. Season with additional sea salt to taste (if desired). Store in an airtight container in the fridge for 5 days, or freeze in an airtight container for up to 3 months.
3.1Copyright 2013 Deliciously OrganicPosts may contain affiliate links. If you purchase a product through an affiliate link, your costs will be the same but Deliciously Organic will receive a small commission. This helps cover some of the costs for this site. We appreciate your support!
The post How to Make Marinara Sauce appeared first on Deliciously Organic.
March 16, 2015
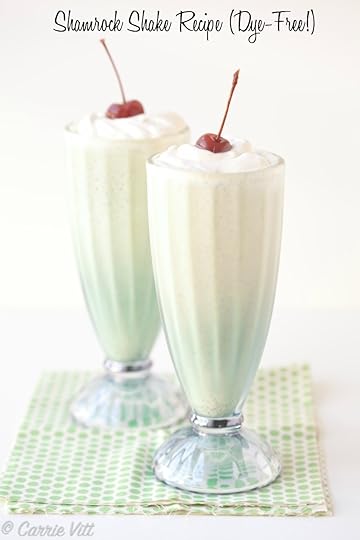
Shamrock Shake Recipe

The idea of a Shamrock Shake sounds nice, but I’m not a huge fan of the ingredients. Here is some of what you’ll find in the McDonald’s Shamrock Shake: Nonfat Milk Solids, Corn Syrup, Dextrose, Artificial Vanilla Flavor, Sodium Phosphate, Carrageenan, Yellow 5, Blue 1, and Red 40.
Recreating American favorites with unprocessed ingredients in a little hobby of mine. This weekend Jenna and her family came for dinner and as Jenna shared a few weeks back, her daughter Sam is very sensitive to food dyes. I was pretty sure she’d never had a Shamrock Shake, so I put homemade, dye-free shakes on the menu. Instead of the processed ingredients listed above, we used organic ice cream, fresh mint, vanilla extract, peppermint oil, whipped cream and dye-free maraschino cherries. I wish I cold have captured the look of joy on her face!

If you like to make fun green foods for the kids on Saint Patrick’s Day, there’s no need for food dyes if you put in a little creativity. I hope you enjoy this shake recipes as much as we did!
Here are some more green St. Patrick’s Day recipes you might enjoy:
Zucchini Fritters (on page 124 of The Grain-Free Family Table)
Greensicles – The Paleo Mom
Roasted Green Beans – Nom Nom Paleo
Green Eggs – Elana’s Pantry
PrintShamrock Shake Recipe
Yield: Makes 2 shakes
The dye-free cherries I used contain a bit of cane sugar. While this isn't an ingredient I normally use, I figured one cherry to top everyone's shake was OK for a fun treat.
Ingredients
For the Shake:2/3 cup whole milk (or canned coconut milk for dairy-free option)
4 cups homemade vanilla ice cream (or your favorite dairy-free vanilla ice cream)
3 large handfuls of fresh mint leaves
1 teaspoon vanilla extract
2 drops peppermint oil
For the Topping:
1/4 cup whipped cream (or whipped coconut cream using this method)
Dye-free maraschino cherries
Instructions
Place all shake ingredients in a blender and blend until smooth. Top with whipped cream and a cherry. Serve immediately.
Note: I only test the recipes on my site with the listed ingredients and measurements. If you would like to try a substitution, you are welcome to share what you used and how it turned out in the comments below. Thanks!
3.1Copyright 2013 Deliciously OrganicPosts may contain affiliate links. If you purchase a product through an affiliate link, your costs will be the same but Deliciously Organic will receive a small commission. This helps cover some of the costs for this site. We appreciate your support!
The post Shamrock Shake Recipe appeared first on Deliciously Organic.
March 9, 2015
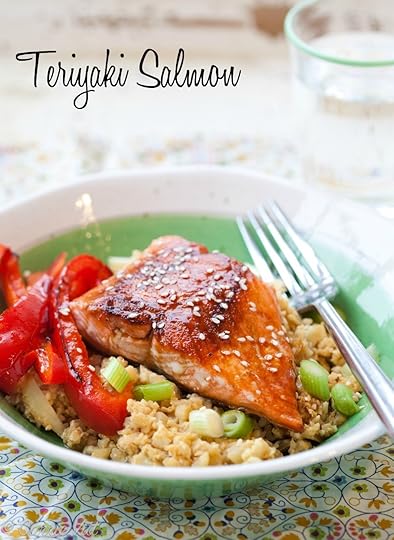
Teriyaki Salmon Recipe (Grain-Free, Paleo)
 I favor salmon recipes because they’re quick to prepare and salmon is rich in omega-3 fatty acids which can help reduce inflammation.
Wild salmon is preferable to farm-raised because of the fish meal often given to fish raised on farms. The fish meal is often made of ingredients like animal by-products from the milling and food processing industries or contains additives to color the salmon flesh.
When shopping for salmon, look for a fish that was caught in the wild and is free of preservatives. Marketers like to try and trick you, so always look for the word “wild” as opposed to “Atlantic” or “Pacific”. Naming the waters they were raised in can be a way to trick you into thinking the fish is wild. For more information on shopping for fish, check out my friend Lisa’s article, “How to Select Real Seafood.”
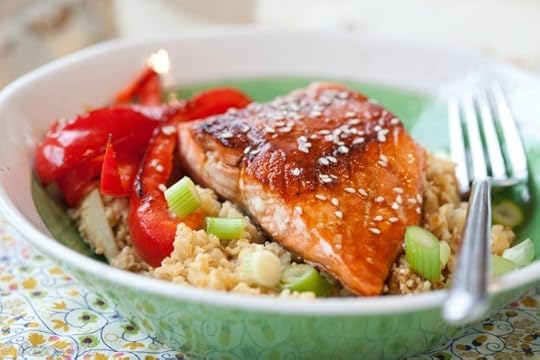
Delicious Teriyaki Salmon comes together in a matter of minutes. I like to serve it with Cauliflower Fried “Rice”, or I sometimes chop up extra vegetables with the bell pepper for a more colorful meal.
PrintTeriyaki Salmon Recipe (Grain-Free, Paleo)
Serving Size: Serves 4
Ingredients
For the Sauce:1/3 cup fermented gluten-free tamari sauce (or coconut aminos for a Paleo option)
1/4 cup raw honey
2 tablespoons coconut vinegar
1 1/2 teaspoons arrowroot flour
For the Fish and Vegetables:
2 tablespoons coconut oil, divided
2 bell peppers, seeded and sliced thin
16 ounces wild salmon, cut into four pieces
5 green onions, chopped
1 tablespoon sesame seeds (optional)
Instructions
Whisk together all of the sauce ingredients in a small saucepan. Set over low heat and stir occasionally until thickened, about 5 minutes.
Meanwhile, heat a large sauté pan over medium heat for 2 minutes. Add 1 tablespoon coconut oil and swirl to coat. Add bell peppers to pan and cook, stirring occasionally, until spotty brown on the edges, about 5-7 minutes. Remove peppers from pan and set aside. Add remaining 1 tablespoon coconut oil to the pan and swirl to coat. Place salmon skin-side down on the skillet and let cook (without moving) until bottom is golden brown on the edges, about 3-4 minutes. Using a spatula, flip each piece of salmon over and cook (without moving) until second side is golden brown on the edges, about 3 minutes. Place each piece of salmon on a plate and drizzle with teriyaki sauce. Serve with bell peppers, cauliflower rice (if using), green onions, and sesame seeds.
3.1Copyright 2013 Deliciously OrganicPosts may contain affiliate links. If you purchase a product through an affiliate link, your costs will be the same but Deliciously Organic will receive a small commission. This helps cover some of the costs for this site. We appreciate your support!
The post Teriyaki Salmon Recipe (Grain-Free, Paleo) appeared first on Deliciously Organic.
March 5, 2015
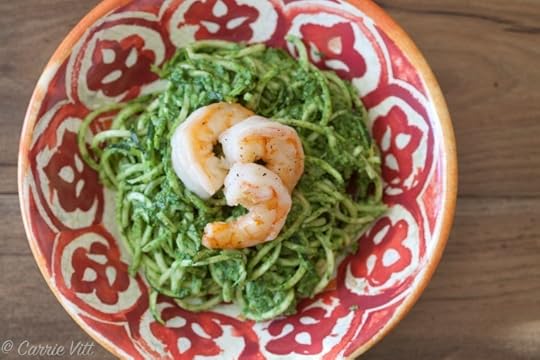
Kale Pesto with Zucchini Noodles and Sautéed Shrimp

Every kitchen must have a solid recipe for pesto! The sauce works wonderfully over vegetables, grilled meats, or fish; combined with sour cream for a creamy dip; and even stirred into soups for an extra depth of flavor. Basil pesto is a classic combination, but there are many other combinations you can create. You can replace the basil with equal amounts of kale, olives, roasted bell peppers, collard greens, sun-dried tomatoes, peas, etc.
Pesto freezes very well – I freeze small portions in an ice cube tray so I can thaw and use the pesto when I’m short on time. Traditional pesto uses pine nuts, but I like to use walnuts because they’re more economical and easier to find at the store.
Here’s my basic recipe for pesto:
Print Recipe
Basic Pesto Recipe
Makes about 2 cups
2 cups basil leaves (or olives, sun-dried tomatoes, etc.)
1 cup soaked and dehydrated walnuts (I use this recipe minus the maple syrup)
1 cup Pecorino Romano cheese (you can omit this if diary-free and reduce the olive oil by 1/2 cup)
2 cloves garlic
1/2 teaspoon Celtic sea salt
3/4 cup extra-virgin olive oil
Place the basil leaves, walnuts, cheese, garlic and salt in the bowl of a food processor. Pulse about 10 times until all ingredients are minced. With the processor on, slowly pour in the olive oil. Adjust salt to taste.
One of my current favorite dishes is Kale Pesto with Zucchini Noodles and Sautéed Shrimp. If you make the pesto ahead of time, this dish can come together in about 15 minutes. You can also serve this dish with sautéed chicken in place of the shrimp.
PrintZucchini Noodles with Kale Pesto and Sautéed Shrimp
Serving Size: Serves 4
It's important to use room temperature zucchini in this recipe. When they are room temperature, the zucchini will heat quickly in the pesto and won't start to release their moisture when served.
Ingredients
2 tablespoons olive oil1 pound shrimp, deveined
1 cup kale pesto, see recipe above (I prefer to boil the kale to reduce goitrogens before making kale pesto)
4 large zucchini, room temperature, cut into noodles with an inspiralizer or julianne peeler
Celtic sea salt and freshly ground black pepper
Instructions
Heat a large skillet over medium heat for 2 minutes. Add olive oil and swirl to coat. Place shrimp in the pan and sauté, without stirring, for 2 minutes or until bottom side is turning golden brown on the edges. Using a pair of tongs, turn over each piece of shrimp and continue to cook until second side is cooked through, about 2 minutes. Remove shrimp from pan and set aside.
Pour remaining olive oil in the pan and swirl to coat. Add pesto to pan and stir until heated, about 1-2 minutes. Add zucchini, toss until incorporated. Top with shrimp, season with sea salt and black pepper and serve immediately.
3.1Copyright 2013 Deliciously OrganicPosts may contain affiliate links. If you purchase a product through an affiliate link, your costs will be the same but Deliciously Organic will receive a small commission. This helps cover some of the costs for this site. We appreciate your support!
The post Kale Pesto with Zucchini Noodles and Sautéed Shrimp appeared first on Deliciously Organic.
February 26, 2015
Food Dye and Mental Health – One Mother’s Story
 Today, my friend Jenna shares with you the story of her daughter’s amazing recovery from mental health issues and how they discovered the root cause. It’s an incredible story and one I believe can offer hope and practical help to many of you today. If you know of a child struggling with potentially food-related behavioral problems, I hope you’ll share Jenna’s story with their parents.
______________________________________________________________________________
I usually like to start my daughter’s story from the very beginning, but today I’m going to throw you straight into the deep end. So hold on to your life preserver.
It was 2010 and I was running some errands in town. My four-year-old daughter, Samantha, was along for the ride. Blond hair, bright blue eyes, and sharp as a tack. After several of our errands, we stopped for a quick lunch and then we topped the morning off at a local cupcake shop.
Samantha had chosen a delectable Red Velvet Cupcake and I’m pretty certain I chose one of everything else.
I loaded Samantha back into her booster seat and set her up with the cupcake and a napkin so she could eat it on the way home. I wanted to celebrate Samantha’s very good morning and I wanted to reinforce her excellent (and rare) behavior with something special.

What happened next changed everything for us.
As Samantha ate the Red Velvet Cupcake, it was as if a light switch flipped inside her brain. I first noticed something was wrong when the melody from the song she was singing suddenly fell silent. She dropped the half-eaten cupcake into her lap. Her sweet song was replaced by a low growling noise as she rhythmically rocked back and forth in her seat. She rocked harder and harder until her little head was banging against the back of her booster seat with each impact. Her clenched fists turned white at the knuckles and her feet kicked wildly as she began to scream. She pulled at her hair and grabbed at her skin as though she was being burned alive. I pulled the car over to tend to her and to keep her from hurting herself.
I remember standing on the side of the road yelling through my own tears, “Why does this keep happening to you? I don’t understand what’s wrong and I don’t know how to help you!”
It was a sincere cry from an exhausted mother who’d tried for years to find a cause and solution, but continued to watch her child spiral into emotional and behavioral distress time and time again. A mother who desperately needed answers.

Although this was not an unusual situation for us, this was the most intense reaction I’d seen in a while. I decided to investigate.
I replayed the morning in my mind to see if I could find the trigger. Something. Anything that may be responsible for such a dramatic response.
First we went to Costco. She was fine. Then we went to Target and used the public restroom. She was fine. Sat in some traffic on the way to lunch. Ate a California Roll and drank some water. Fine. Went to the cupcake shop. Ate the cupcake in the car.
That’s it – She was eating the Red Velvet Cupcake.
What’s in a traditional Red Velvet Cupcake? About 2 cups of red food coloring called FD&C Red #40 (Allura Red). Ok, not really two cups but there is a heinous amount. You have to pack quite a punch to turn rich cake from brown to red.
That led me to type the following into my Google search box:

The number of search results that came back was staggering. I was completely in the dark at this point when it came to understanding how artificial ingredients were affecting Samantha so this was like a ray of hope shining into our tantrum-filled darkness.
You have to understand that a week before, I’d stood in our pediatrician’s office trying to decide between a pediatric psychiatry referral and a pediatric neurology referral because we’d reached the point where we needed some more intensive support. You have not lived until you have researched pediatric neurologists in your local area, let me tell you.
Discovering this possible food sensitivity came at just the right time. Samantha had already been medicated once for her extreme mood swings, raging tantrums and dysfunctional sleep patterns and we were at a crossroads in terms of determining where to turn next for answers.
Naturally the next step was to remove Red 40 from Samantha’s diet and watch to see if we noticed any difference in her moods and sleep patterns. Jackpot.
Within 24 hours of removing Red 40 from Samantha’s system she slept through the night for the first time in years and she completely stopped having extreme episodes like the one I described earlier with the Red Velvet Cupcake. It was immediate and it was undeniable.
Here are a few of the items we removed from our home that day because they contained Red 40:

Do you see a pattern? We were infusing Samantha morning, noon and night with Red 40 because we were simply unaware of its existence, let alone the impact it was having on her.
We just didn’t know.
I thought back to all of the pink antibiotics she’d been on for reoccurring ear infections since she was an infant and all of the red children’s medication we’d given her to reduce fever and pain over the years. We potty trained her with M&M’s. We rewarded her for a good day with jellybeans. Trick-or-treating. Easter candy. Gingerbread houses. Birthday cakes and ice cream trucks. It was like her whole life flashed before my eyes and it brought me to tears.
We were causing the very problem that we were so desperate to solve.

I’d like to say that’s the end of the story but it wasn’t that simple. It was just the beginning of truly understanding Samantha’s sensitivities. Once we removed the biggest offender, Red 40, from her diet we noticed that she was still struggling with her moods. It was less dramatic, but something was still not right. Over the next year we continued to carefully monitor her diet and we got a better picture of her triggers.
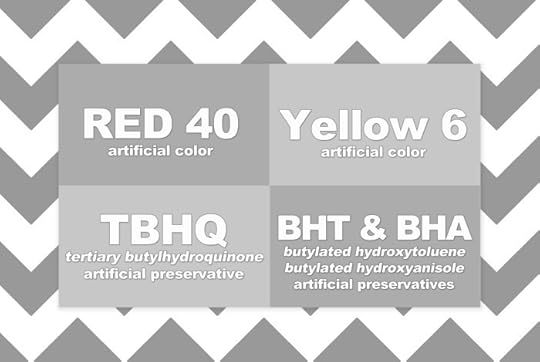
Red 40, Yellow 6, TBHQ, BHA and BHT. They may look like a random list but guess what? They are related. If you break them down and take a good look at their chemical make-up you’ll find that they’re all petroleum based.
Even the FDA explains that certain synthetic food dyes are derived primarily from petroleum and coal sources.
You can’t make this stuff up.
So it turns out that we weren’t crazy when we compiled that specific list of triggers because they are related. Samantha did in fact have an extreme sensitivity to petroleum based ingredients. Which explains why she’s triggered by red and yellow dye, but not blue. And why she’s sensitive to the preservative TBHQ but not a non-petroleum based one like Benzoic Acid.
When Samantha avoids all petroleum based ingredients, her moods and her behavior are astronomically better. I know that’s not a scientific measurement but it’s an accurate description. Astronomical improvement.

To understand more about the science behind this phenomenon, we got in touch with a nationally-renowned child psychiatrist in our area who is currently involved in researching how nutrition affects mental health.
We learned a lot about how those ingredients affect her brain function, and we also learned that many kids who have this kind of food sensitivity also have nutritional deficiencies that can drastically alter their moods.
She suggested supplementing Samantha.
So we did.
And that turned out to be one of the final pieces to the puzzle.

So where are we now? Samantha is 8 years old and she’s doing outstanding. She eats a well-balanced, all-natural diet and she is supplemented every morning. She sees a very wonderful psychologist who has helped Samantha learn different techniques to help manage strong feelings when they do arise.
Samantha enjoys working with food in the kitchen and has created several of her own creative and delicious natural recipes. My personal favorite is homemade hot chocolate with Samantha’s signature whipped cream!

Even to this day, if Samantha has as much as a pink Tic-Tac, she’ll decline into an emotional state that we lovingly describe as being ‘on the dye’. But those times are very rare now and we’re enjoying Samantha’s respectful, loving, funny and mellow personality.

She’s a joy for our family and her younger siblings. It gives me chills to think about where we might have been with her in another 5-10 years if we hadn’t made this discovery so early. I have nothing but humble thankfulness in my heart that we’re in such a healthy place.

Jenna is a wife, mother, graphic designer, and photographer. She and her husband, Brian, have 4 beautiful children as she likes to say, “they like chaos and screaming and laundry”.  She has a Masters in Christian Education and enjoys developing children’s curriculum for churches around the country.
For further reading:
Toxic Food Dyes and the Dangers of Artificial Food Coloring
7 Reasons I Hate Artificial Food Dyes
CSPI Says Food Dyes Pose Rainbow of Risks
CSPI Urges FDA to Ban Artificial Food Dyes Linked to Behavior Problems
Why Your Child Is Hyperactive: The bestselling book on how ADHD is caused by artificial food flavors and colors
Posts may contain affiliate links. If you purchase a product through an affiliate link, your costs will be the same but Deliciously Organic will receive a small commission. This helps cover some of the costs for this site. We appreciate your support!
The post Food Dye and Mental Health – One Mother’s Story appeared first on Deliciously Organic.