
David Petersen's Blog, page 17
August 23, 2022
Bricks of the Mouse Guard 3 Kickstarter
 Once again we've partnered with Guy Himber at Crazy Bricks to make more Mouse Guard themed minifigures! The 3rd Kickstarter that blends the worlds of LEGO and Mouse Guard together launched today: https://www.kickstarter.com/projects/crazybricks/bricks-of-the-mouse-guard-3
Please take a look at the campaign for all the new and returning offerings as well as parts like weapons, accessories, and individual mouse heads.
Below are images of the brand new mini figs from the comics we are offering:
 Bilbin from The Owlhen Caregiver
 Farrer the Blacksmith
 The Ivory Lass (from the Ballad of the Ivory Lass song)
 A Mouse Minstrel
 Rand of the Guard
 Rosard of the Guard
 Sienna of the Guard
 Stejpan of the Guard


August 16, 2022
Mouse Insectrist
 I've released a new Mouse Guard sketchbook titled "Alone Together" (https://mouseguard.bigcartel.com/product/alone-together-sketchbook) The majority of that material is inked commissions like this piece. I don't often open up a list for these inked commissions, but when I do and someone requests something properly Mouse Guar-y enough that I could include in the sketchbook it helps fill out the next sketchbook's page count.
To the left you can see one of those pieces finished and colored ready for a page in that sketchbook––and in this blogpost I'll break down the process to get there.
 Layout:
The request for this was a Mouse Insectrist (a skill/profession in the Mouse Guard RPG) vs a weasel. I started with the drawing of the weasel on a sheet of copy paper, and then on a different sheet of paper the mouse. I placed them together in Photoshop and placed in some quick digital color blocking. I printed that out and on yet a third sheet of copy paper I drew in all the insects. This way I could scan them and make subtle changes (rotation, resizing, symetry, etc) as well as micro-adjust their placements. I scanned those and added them to my digital file and blocked them all in with a very visible green.
 Inks:
Inks:
With the above layout finished, I printed it out and taped it to the back of a sheet of Strathmore 300 series bristol. On my Huion Lightpad I was able to use the printout as a guide to ink from. I used Copic Multiliner SP pens. The 0.7 nib did most of the heavy lifting in this piece and I only used the 0.3 for some finer bits like the mouse's face and some of the insect details. The background was a little blank beyond the rocks, so I added in some dots that in the next step will look more like floating dust particles.
 Color Flats:
With the finished inks scanned I could start on the coloring process. The original inked art was shipped off to the new owner and I worked on this piece for my sketchbook. The color flats stage is just coloring in the lines with flat colors, establishing what every major area's base color is––no rendering, no textures, no effects. Some of the colors for the weasel and the Insectrist mouse were chosen when I was blocking in the layout, but I did have to make small adjustments to those colors (value, saturation, etc) when taking into account the sky and rock colors. Then the insect colors were placed in using their real colors in nature filtered through the color palette I'd already gone with for the rest of the piece. The last step in this stage was to establish color flats, areas where I want the lineart to be a color other than black. The dots in the sky were planned to have a hold, then I decided to add a bit of depth and push the weasel's plane back a touch, and lastly the patterns on wings of the grasshopper and the mouse's cloak.
Final Colors:
Using Photoshops's Dodge and Burn tools (as well as a stock textured brush) I added all the shadows and highlights. In some places I shifted colors by selecting areas with a lasso tool and using color balance sliders to get them where I wanted them.
This piece is one of the pieces included in the 2022 Mouse Guard sketchbook 'Alone Together' which is available in my online store: (https://mouseguard.bigcartel.com/product/alone-together-sketchbook)
August 9, 2022
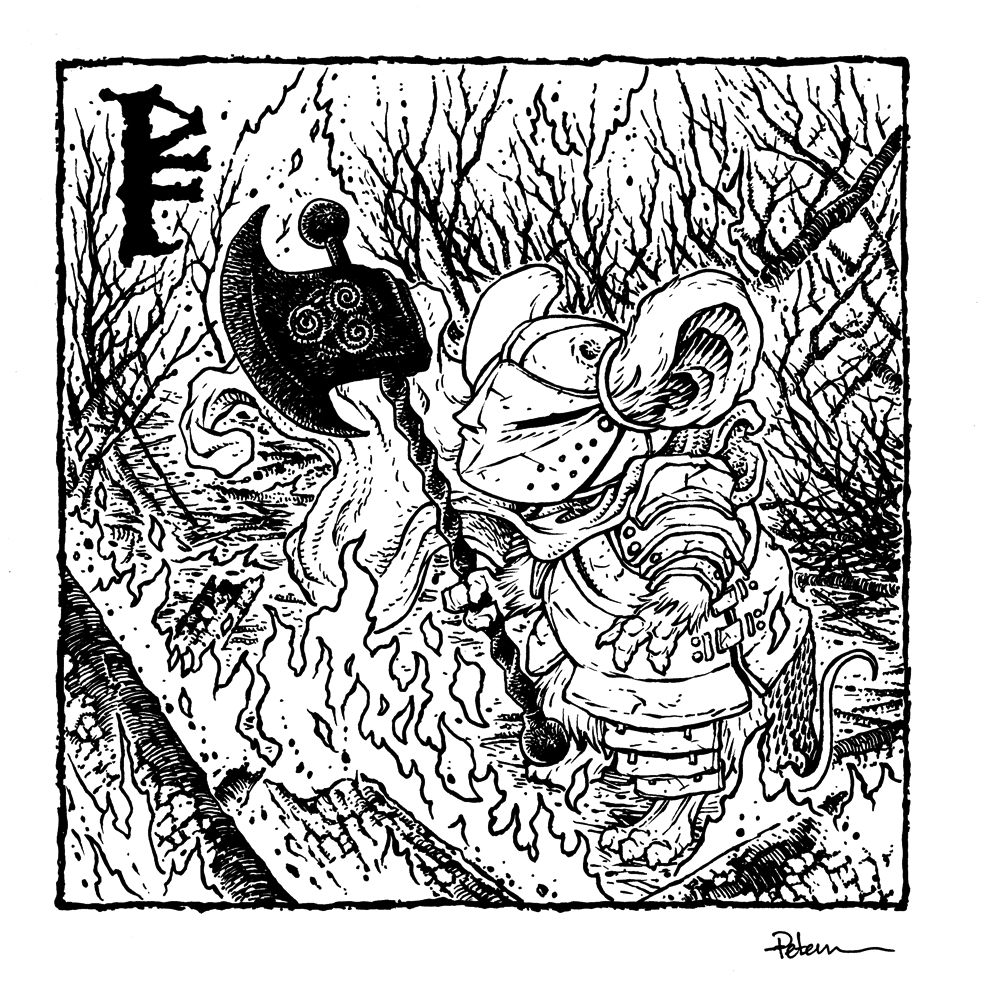
Tynan - 7th of the Black Axes
 For a new 10 piece print set, I illustrated all of the past wielders of the Black Axe from Bardrick to Celanawe. I'd shown and listed the wielders in the Black Axe book--but they were only ever visualized as embroidery details on the Adana Tapestry––and I wanted to give them a more solid design existence. The set of ten 4.75" x 4.75" prints is available for sale in my online store and comes in a vellum envelope:https://mouseguard.bigcartel.com/product/wielders-of-the-black-axe-print-set
To the left you can see the finished art for the Tynan, 7th of the Black Axes print in the set. Below I'm going to go through the process to create the art.

Layout:
I started with a pencil drawing of the armored Tynan thinking I'd place him in the middle of a forest fire. Once I had my pencils drawn, I scanned them into Photoshop and placed in a photo reference that I also digitally painted over to get a sense of placement for the branches and embers as well as the open spots for flame. I blocked in the colors for Tynan to make it easier to see him apart from the environment.
 Inks:
Inks:I printed out the above layout when I was happy with the arrangement and taped that printout to the back of a sheet of Strathmore 300 series bristol. On my Huion Lightpad I'm able to see through the bristol to the the printout to use it as a guide to ink from. I ink with Copic Multiliner SP pens, and I used the 0.7 & 0.3 nibs for this piece.
So much of this piece relied on color that I had to be mindful of what ink shapes and lines were going to be which colors or values.

Color Flats:
When the inks were done, I scanned the art and brought it back into Photoshop to start the coloring process. This is the step where I 'm basically just filling in each area with flat color. But, in this step I also establish the color holds, areas where I want the ink work to be a color other than black. In this piece everything but the border falls into that category: The lineart for the foreground--and lighter yet, the background, the flames, the dots of embers rising up, and the runic numeral '7'. It took a long time to isolate all of that linework and pick colors for them.

Final Colors:
The final colors were rendered by using the dodge and burn tools in Photoshop (and a textured brush) to add shadows, highlights, and textures. I select areas and play with the color balance to shift colors in some areas.
The entire 10 piece print set is available in my online store: https://mouseguard.bigcartel.com/product/wielders-of-the-black-axe-print-set
August 2, 2022
Mouse Guard: King, Knight, Fool Villain Reading
 Yesterday I invited Mr. David Sharp (of SharpBalloons Twitch Channel) to read my latest Mouse Guard short story aloud to my Twitch audience.
 The story is titled 'King, Knight, Fool, Villain' and is a morality tale that has to deal with the notion of curses, fortune telling, and choosing your own destiny.
I've made a recording of Mr. Sharp's reading with the story panels, added some Kevin MacLeod music, and uploaded the entire thing to YouTube for your enjoyment.
Direct link to YouTube:
https://youtu.be/A1lm_necUII
July 26, 2022
Recent Commissions
I've finished all the toned paper commissions from HeroesCon and a few pieces I took to SDCC:

A Mouse Wood Miller
 Steelbeak from Darkwing Duck
 Hellboy
 Chip & Dale
 A Red Panda Sailor
 Undead Opossum Familiar
 Gwendolyn with a sword
 Guinea Pig Adventurer
 Scrooge McDuck
 A Guardmouse
 Lantern Bearing Mouse
 Guardmouse
 Mouse Minstrel
 Veteran Guardmouse
July 19, 2022
San Diego Comic Con 2022!

I will be at SDCC Friday through Sunday, but will not have my own table or booth.
This was a last-minute decision due to my Eisner nomination
You can find me at the BOOM! Studios BoothFriday at 2pm and Sunday at 3pm.I will be signing books & comics
as well as a free poster for the Owlhen Caregiver story (nominated for an Eisner)I'll also have original art with me.
If I can add more signings or stay at the booth for longer, I'll try to share info on Twitter: twitter.com/mouseguard
July 12, 2022
Roger Rabbit charity piece colored
 A few months ago I listened to the audio book 'Who Censored Roger Rabbit' by Gary K. Wolf, and while it's very different from the Robert Zemeckis movie, it got me in the mood to draw some Roger fan-art.
 I auctioned off the original inks for charity (the amazing World Central Kitchen by Chef José Andrés: wck.org) and then just as a coloring demo on my Twitch channel I colored a scan of the art.
To the left you can see the final colored piece, but below I'll go through the steps.
 When the movie came out I played the hell out of the DOS game. For the final level Roger must navigate the ACME warehouse and grab various gags to use to get past obstacles and to force the weasels to laugh themselves to death. The game came with a copy protection item that was a paper acme catalog with all the gags and joke items listed as though they were real (and then after the 1st stage the game would stop and ask you to look up a price or fact on a certain page).
 For the rough for this piece after I'd drawn Roger, I wanted to include a bunch of those gag items from the game like: The boxing glove mallet, shrinking pills, rocket roller skates, portable holes, a screw ball, exploding cigars, extra sticky glue, and I also threw in Marvin Acme's will. These were all composited together with a brick pattern shadow in Photoshop.
 With the pencils/roughs done I printed out the above version and taped it to the back of a sheet of Strathmore 300 series bristol. On my Huion lightpad I was able to see through the surface of the bristol to use the prinout as a pencil guide to ink from. I used Copic Multiliner SP pens (0.3 & 0.7 nibs) to ink the piece.
I wanted the inks to be as clean and readable as possible since they were the item going up for bidding for World Central Kitchen. The brick shadow became such a big and dark shape in ink, I didn't go as far with the texture on Roger as I'd planned, but I think the restraint helps as he's normally so cleanly outlined for animation.

The next step was to get a high res-scan and start the coloring process (though I did the coloring bit months after the auction ended and the recipient had the original in-hand). I didn't want black inklines on this, so I did a color hold for the whole piece (areas where I want the black ink to be a color other than black) to make it more sepia. Then I added in flat colors for Roger and the gag items per their established hues, but I certainly muted them a bit to make it all look a little softer and more old fashioned.
Alternate color holds were also added to glass highlights, labels, and the brick wall shadow.
Here again is the final color art after I'd rendered it:

July 5, 2022
Wooden Mouse Guard Emblem Display
 What started as an idea to dress up my convention table set-up has become a semi-permanent wooden sign attached to the door to my office. I'd recently watched several YouTube videos about making these types of trade signs for businesses or hobbyist workshops. My original plan was to also make each individual letter of the 'Mouse Guard' logo and string them all together on a piece of natural chord that could drape along the front of a convention table. But I abandoned the lettering idea because of the extra work, the fear they would be easily damaged at cons, and the added weight/space to get them all in my luggage.
Below is the process for making the sign (and I'm sorry I don't have more in-process photos)
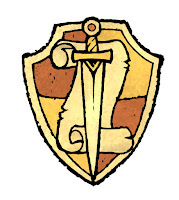
The original emblem design wasn't even created until recently--this didn't exist when I was drawing Fall, Winter, or Black Axe. It came about because when the movie was still in production, I was asked by the director Wes Ball if there was a emblem or sigil the Guardmice could have that would act as a symbol like a sherif's badge that could also double as a stamp for a wax seal. I wanted it to include the 3 tenants of the Guard: Swords, Defense, & Diplomacy (Saxon, Rand, & Kenzie). The outer shield gives the defensive element and forms a nice emblematic silhouette, and the sword & scroll fit inside nicely. I went with Gryffindor hues because they are my go-to most appealing when I started adding color.
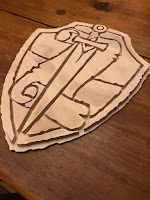 I printed the emblem out at 10.5" wide X 12.5" tall. I had to print it in halves, and then tape the two sheets together to get a full symbol. And I did that process twice so that I had two paper emblems. One was spray mounted to a thin sheet of birch craft plywood and the other to a thicker sheet of 3/8" thick birch plywood. On the thinner sheet, I used the paper to guide me in cutting the outer contour. On the thicker piece, I cut out each section of the design, eliminating every bit of black outline around the shapes.
 When I had every piece cut, I remove the paper printout, sanded it all smooth, and glued the thicker parts to the thinner backing.
 When the glue was all dry, I gave the whole piece several coats of primer. I started with a grey automotive primer that it a little thicker than most. It's good for quickly covering the imperfections in the grain. Of course, I needed to sand in between each coat, so the piece got smoother and smoother as I went. This took enough coats, I lost count how many I did in total.
I do remember that my last two coats of primer were a black primer. I'd run out of the grey primer and the black primer I bought to replace it killed two birds with one stone since it was both a thinner primer AND would provide the darker tone for the gaps in the design.
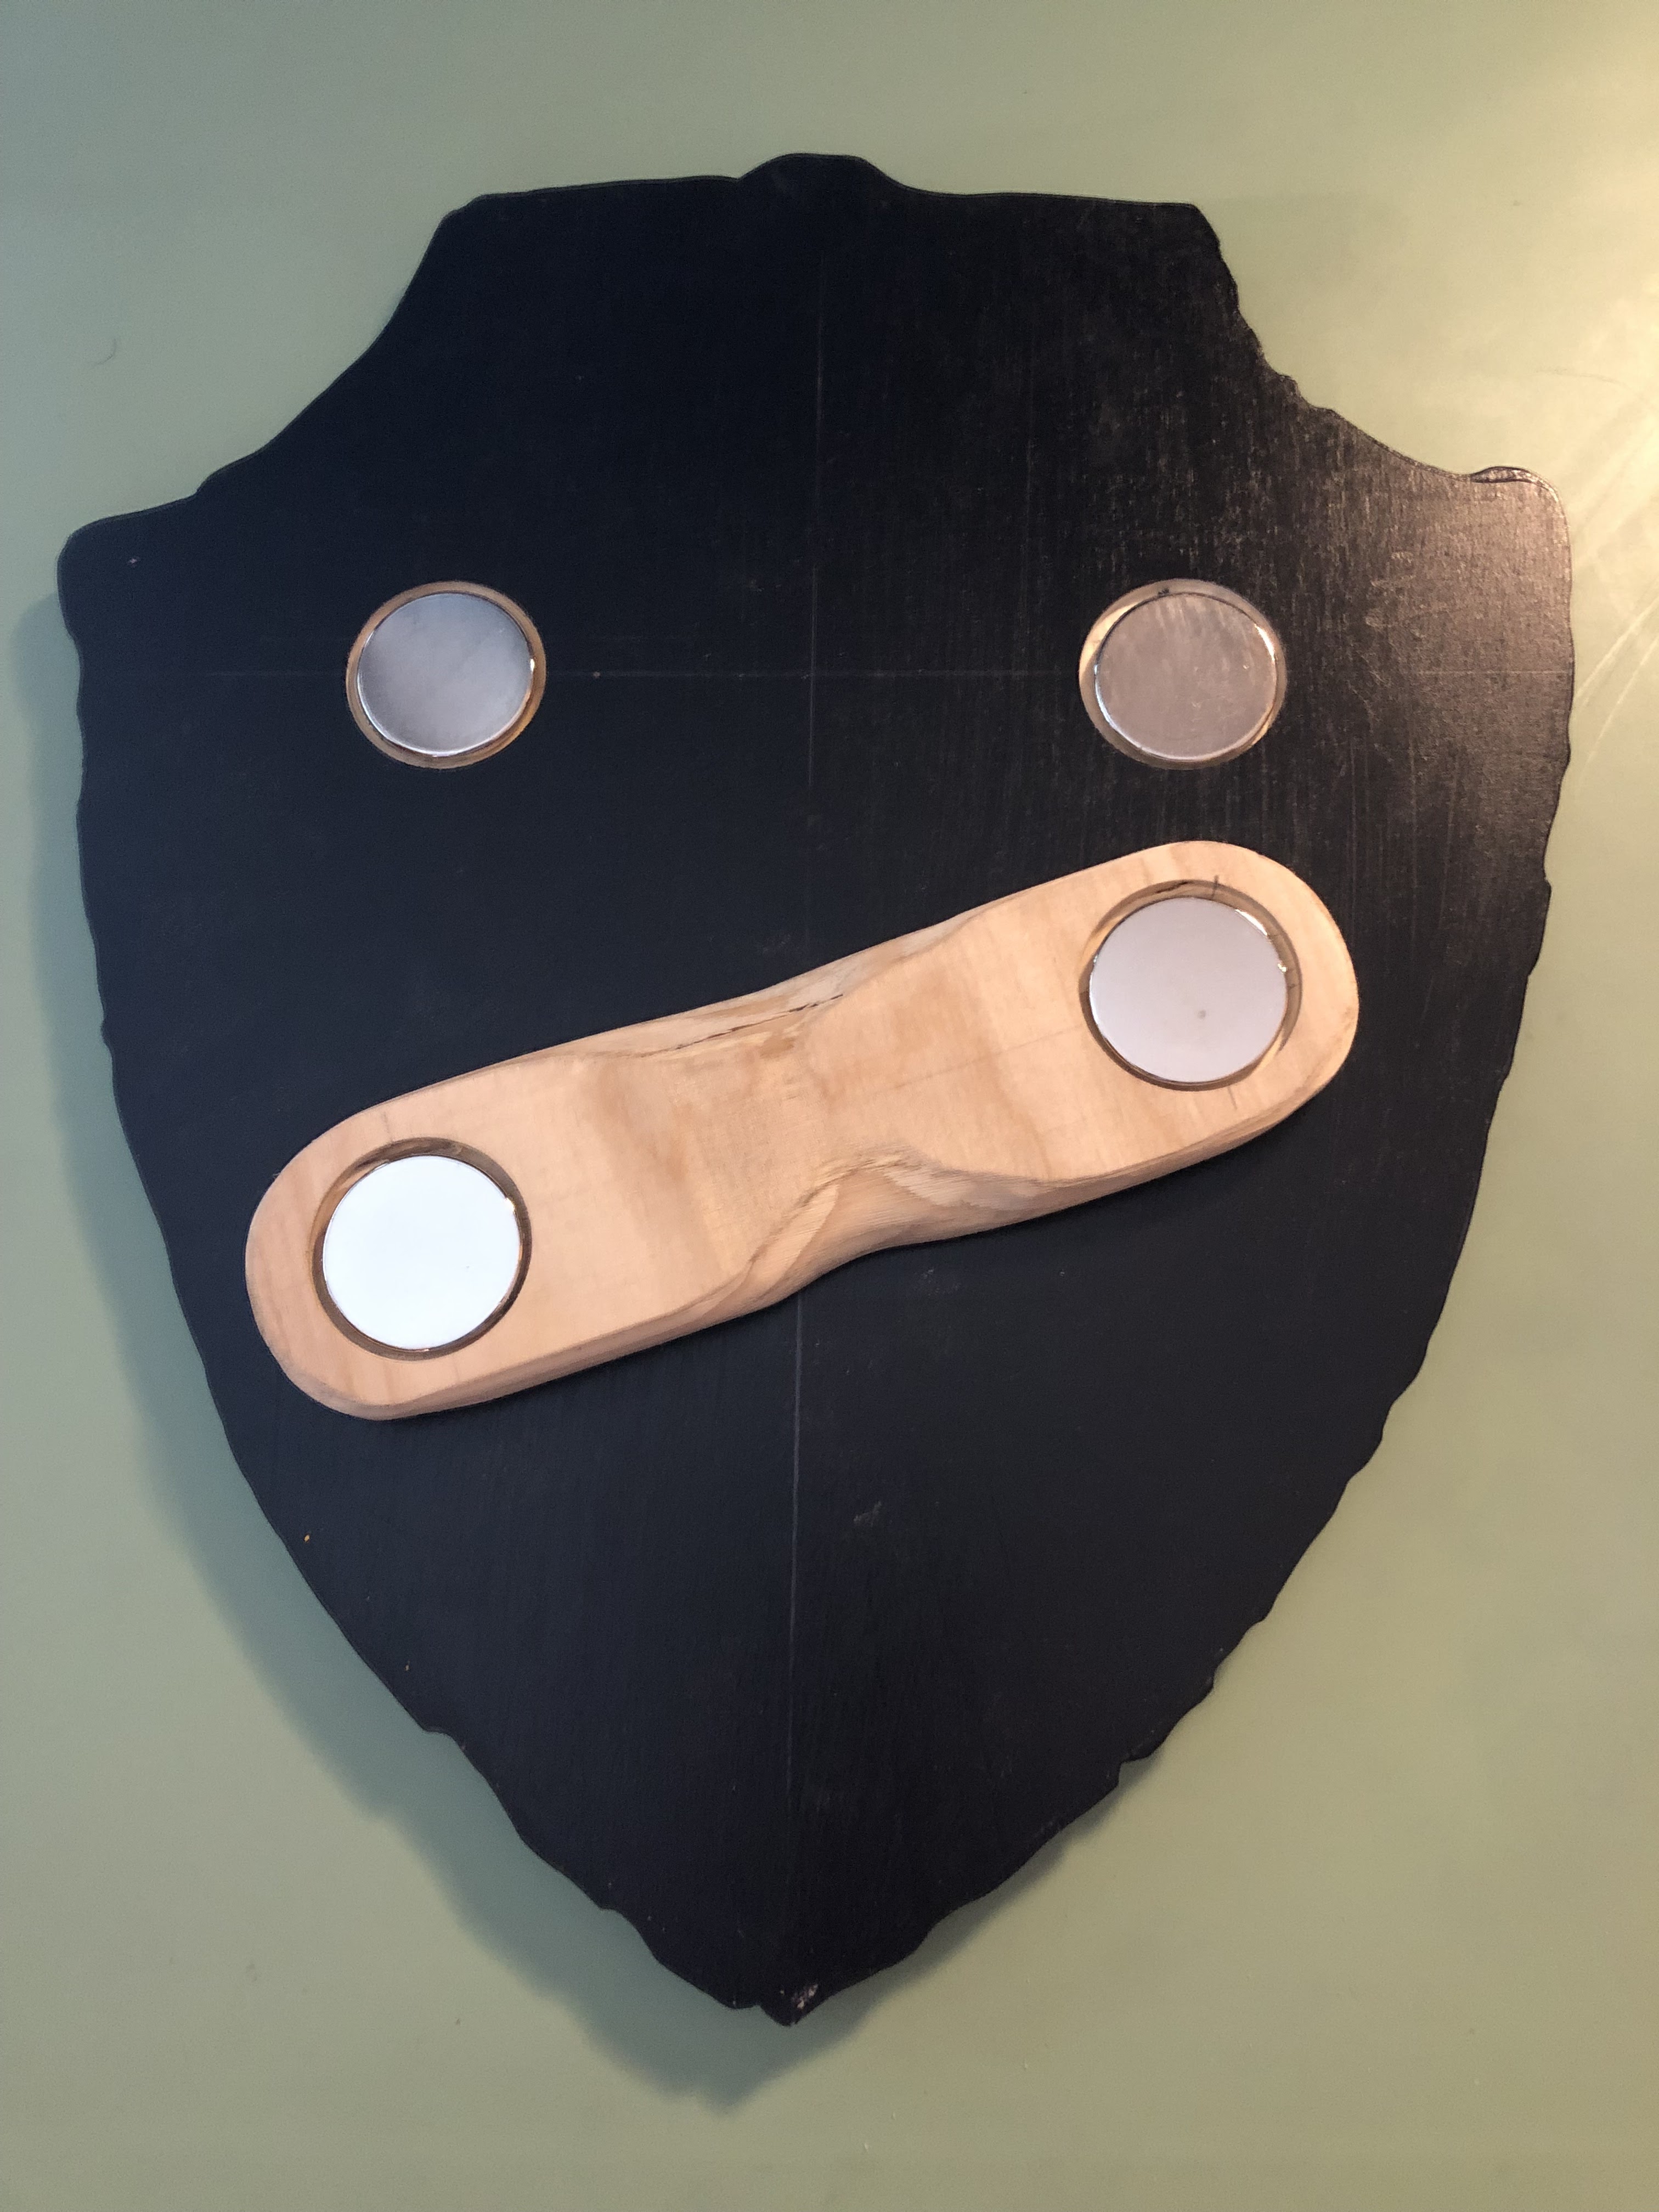
To mount it, I wanted to abandon the string idea and decided instead to employ some large magnets I already had. Using a forsner bit I drilled circular depressions in the backing the same depth as the thickness of the magnets. I then made a corresponding plywood piece to give the same treatment. This way I can essentially clamp the emblem onto the front drape of my convention tablecloth.
The magnets are strong enough they support the emblem to stay up on the thinner panel of my office door already.
The last step was to paint the top flat surfaces of the design the correct colors. I used acrylic paint tubes and a foam chisel brush to slowly apply the paint until I had good coverage without too many brush strokes.

June 28, 2022
Rudyard - 6th of the Black Axe Wieldiers
 For a new 10 piece print set, I illustrated all of the past wielders of the Black Axe from Bardrick to Celanawe. I'd shown and listed the wielders in the Black Axe book--but they were only ever visualized as embroidery details on the Adana Tapestry––and I wanted to give them a more solid design existence. The set of ten 4.75" x 4.75" prints is available for sale in my online store and comes in a vellum envelope:https://mouseguard.bigcartel.com/product/wielders-of-the-black-axe-print-set
To the left you can see the finished art for the Rudyard, Sixth of the Black Axes print in the set. Below I'm going to go through the process to create the art.
 Layout:
I started with the idea of Rudyard interacting with an animal (with the Rudyard Kipling namesake it seemed right) and opted for an owl and baby owl. I drew Rudyard, the baby owl, the nest/branches, and the mother owl all on separate sheets of copy paper. I worked on them a bit overlaid each other on a lightpad and then scanned them all in and assembled them in Photoshop. The checker cape is something not shown in Rudyard's post axe life, but was in the pre-axe version of him––and I liked it enough to incorporate it here. I also like that it's ambiguous if He's there to help or harm the baby owl––reader's choice.
 Inks:
Inks:I printed out the above layout when I was happy with the arrangement and taped that printout to the back of a sheet of Strathmore 300 series bristol. On my Huion Lightpad I'm able to see through the bristol to the the printout to use it as a guide to ink from. I ink with Copic Multiliner SP pens, and I used the 0.7 & 0.3 nibs for this piece.
Most of the inks were straight forward on this one. It was all about the density of lines in the deeper parts of the next, and then leaving a gap between the owl and foreground to push the focal depth.
 Color Flats:
When the inks were done, I scanned the art and brought it back into Photoshop to start the coloring process. This is the step where I 'm basically just filling in each area with flat color. In this step I also establish the color holds, areas where I want the ink work to be a color other than black. Here that's the checked pattern on the cape, the spots on the eggs, the mother owl, and the runic '6'.
I struggled with the colors for the background and owl on this and went back and forth adjusting how light or dark each was and if there should be a low or high contrast between the two or not.

Final Colors:
The final colors were rendered by using the dodge and burn tools in Photoshop (and a textured brush) to add shadows, highlights, and textures. I select areas and play with the color balance to shift colors in some areas.
The entire 10 piece print set is available in my online store: https://mouseguard.bigcartel.com/product/wielders-of-the-black-axe-print-set
June 21, 2022
HEROES CON 2022 Paintings
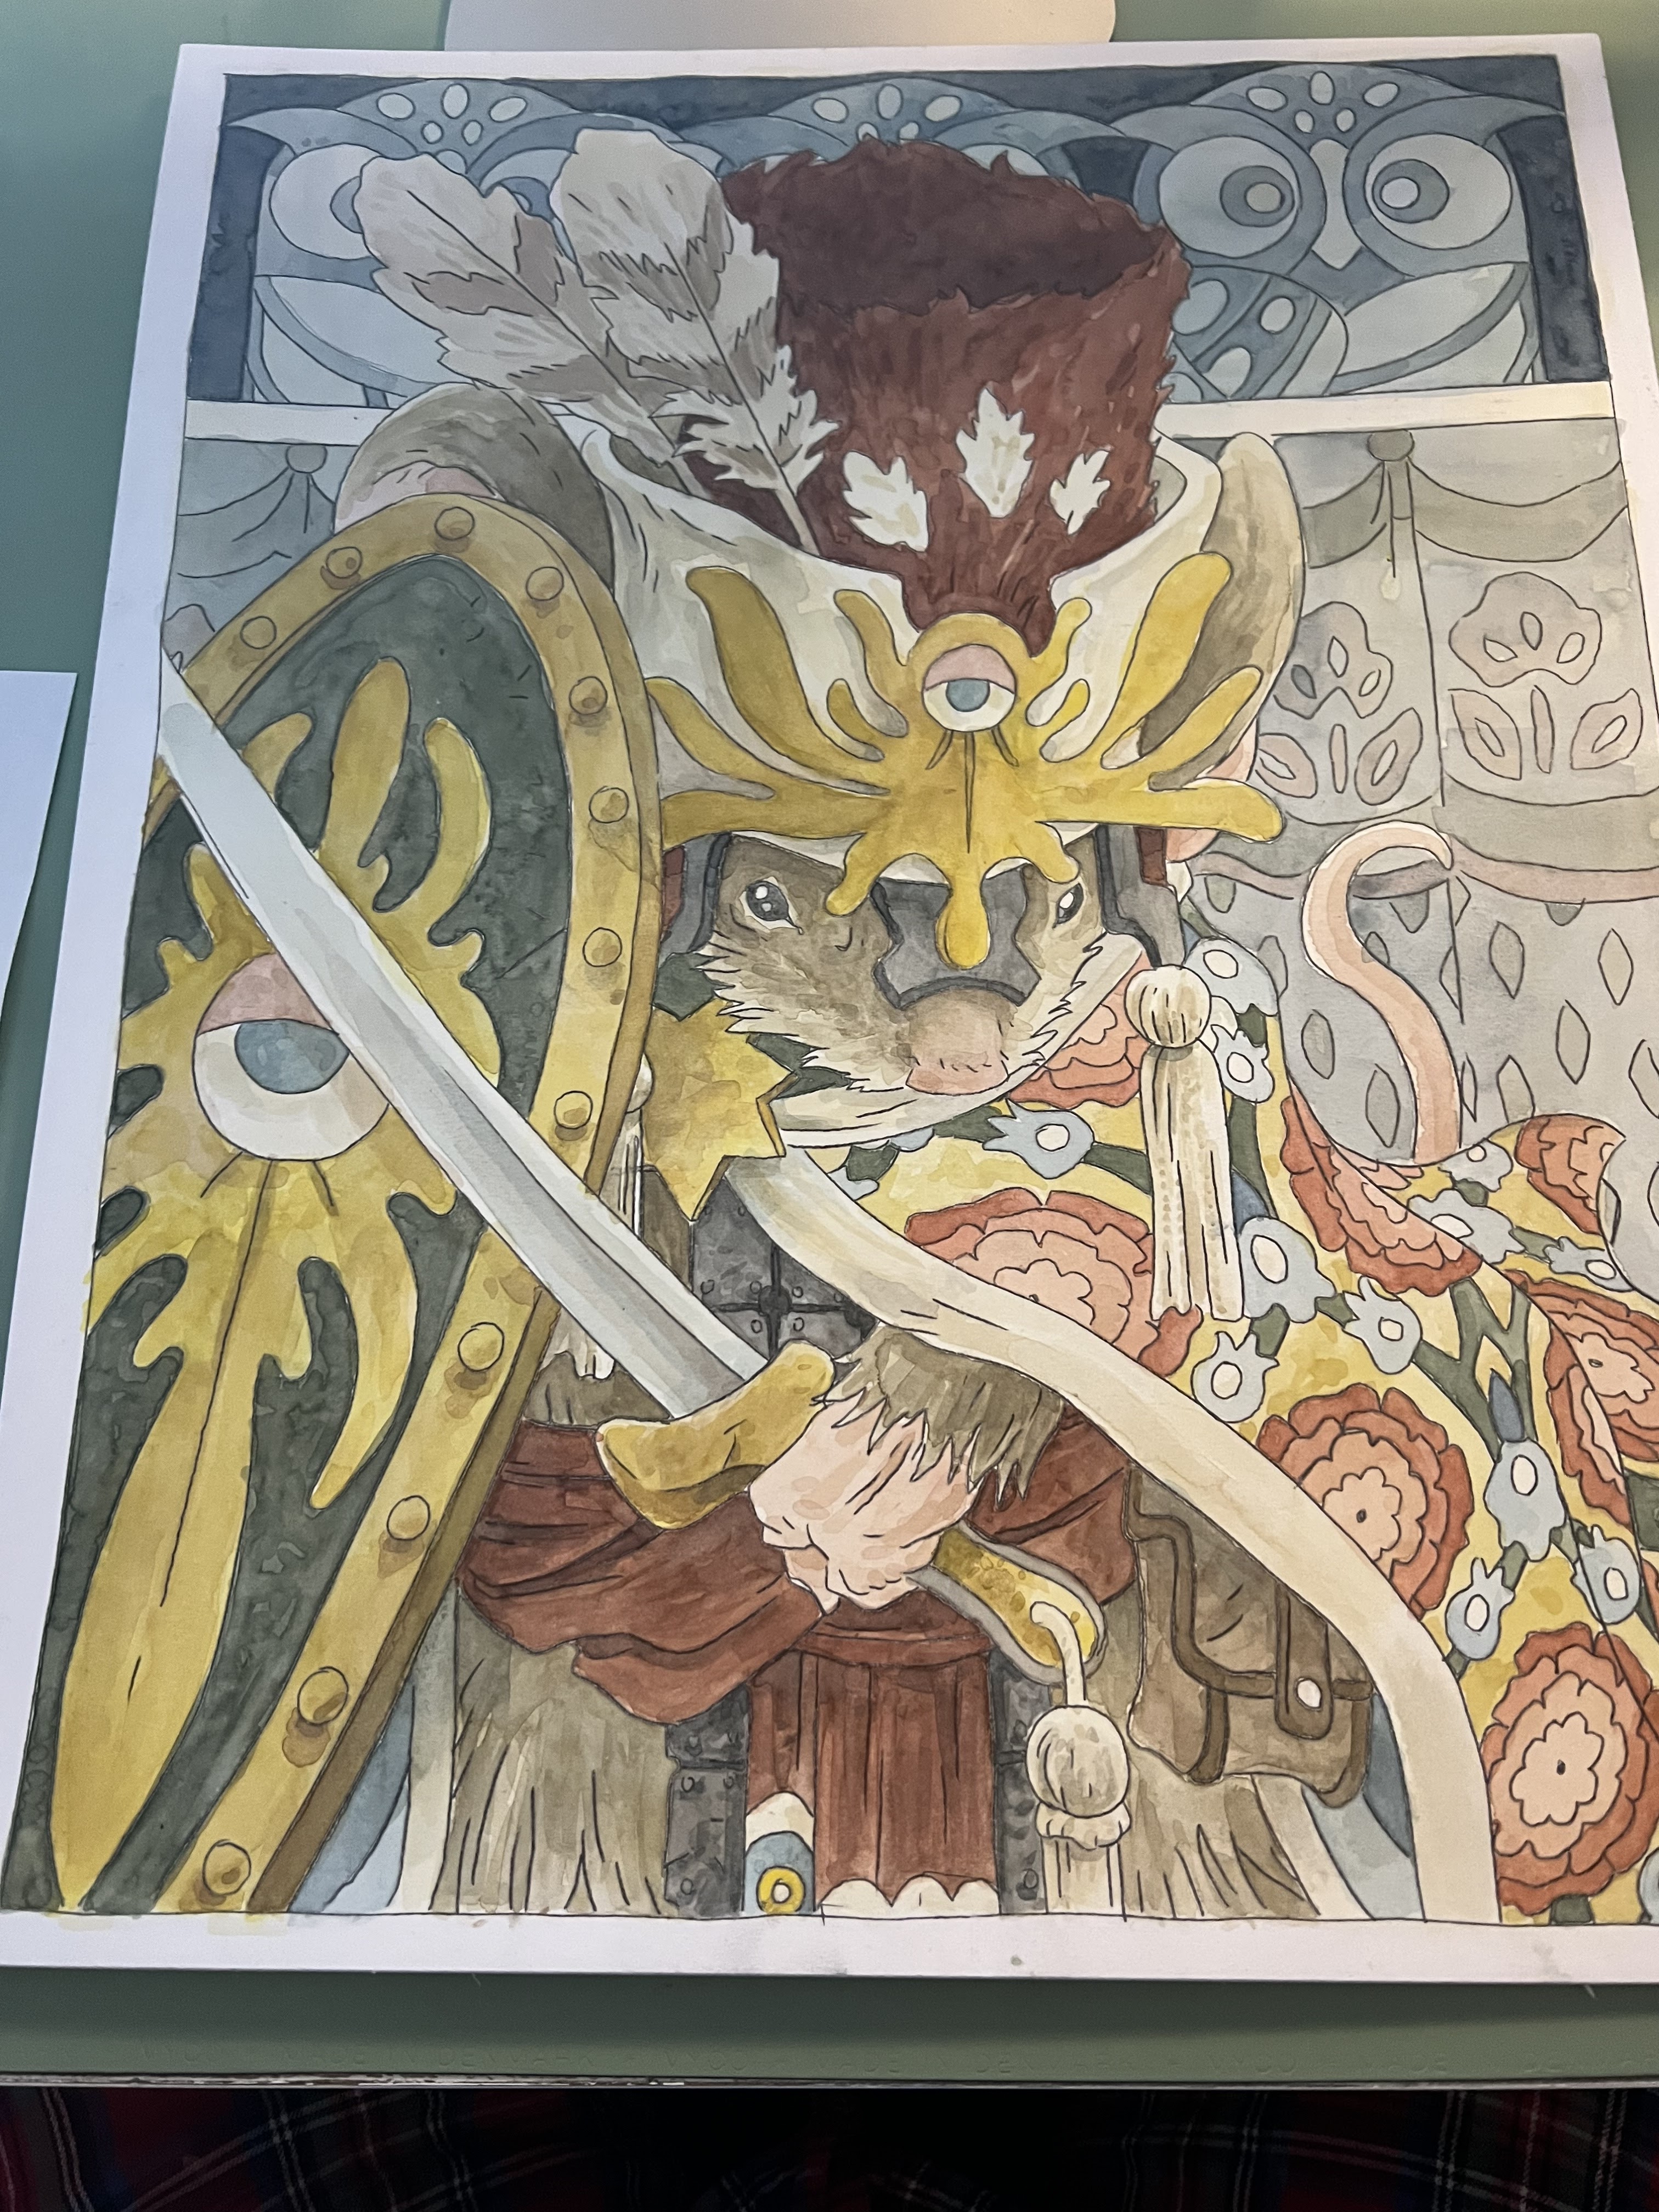
 For my return to Heroes Con this week, I've painted two Mouse Guard pieces. They are each 16" x 20" in Watercolor and color pencil. One of them will be put into the Saturday art auction at the convention. The other will be available at my table the next day with a price set from the winning bid of Saturday's auction.
In this blogpost, I'll go through the steps in making the pieces (or at least as much as I was good about photographing as I painted).
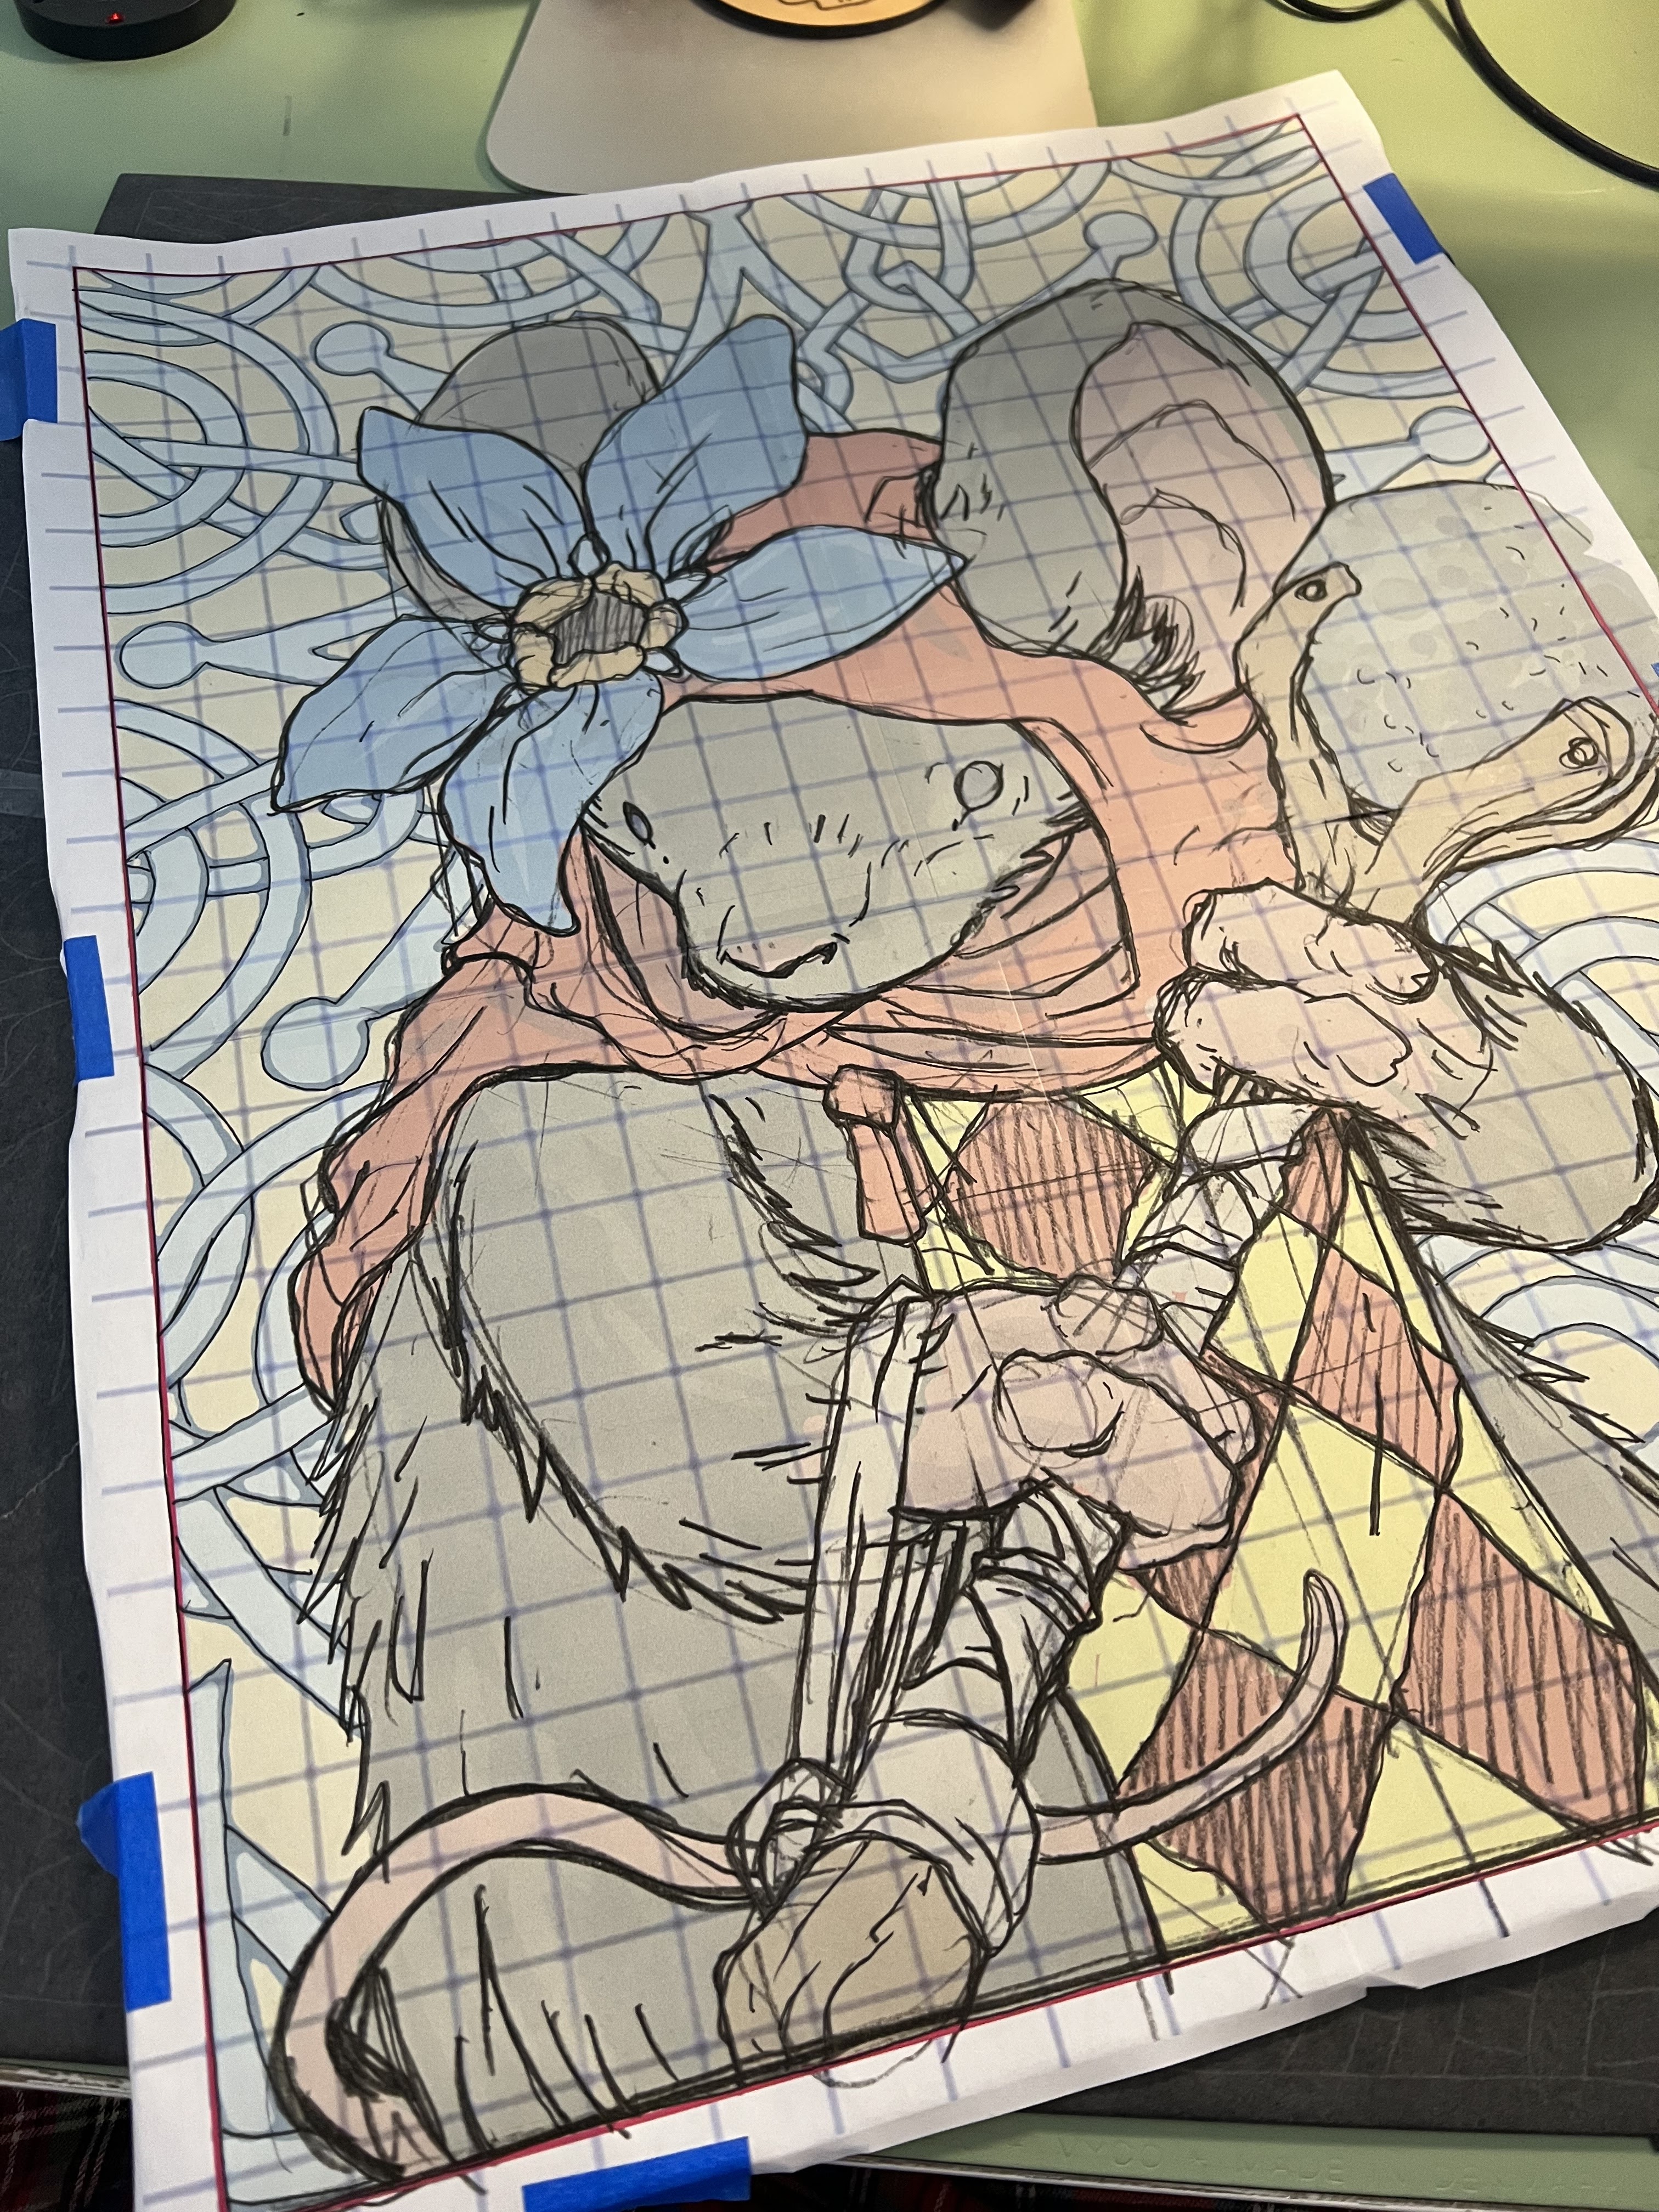
With the Owlhen Caregiver story up for an Eisner and Ruben Award I wanted to do the mouse from that tale who is never named in the story, but I've since called 'Bilbin' after the inspiration for the patterning in the story came from illustrator Ivan Bilbin. I took a drawing that I'd digitally flatted and blew it up to 16" x 20". To print it out at that size, I had to do it in four sheets, and the grid you see is to just help re-align the image when I tape those sheets back together. I then taped a sheet of graphite transfer paper to the final illustration board, and then tape this printout on top of it.

Using a ballpoint pen to go over all of the lineart on the printout, the transfer paper leaves a perfect copy of the art on the illustration board after I peel back the graphite paper and the printout.

For the other piece, I decided to do a painting of Piper the Listener, who also appears in the Owlhen issue. Same as with Bilbin, I drew her, digitally colored a study, and then blew it up to 16" x 20". The method for printing it out at that scale and taping down the transfer paper was the same as before.
Like the Bilbin piece after I traced over the printout with a ballpoint pen (and medium pressure) underneath was revealed a perfect transfer

Time to start light warm washes. Even though the entire image isn't warm colors, I got at least a pale yellow base over everything
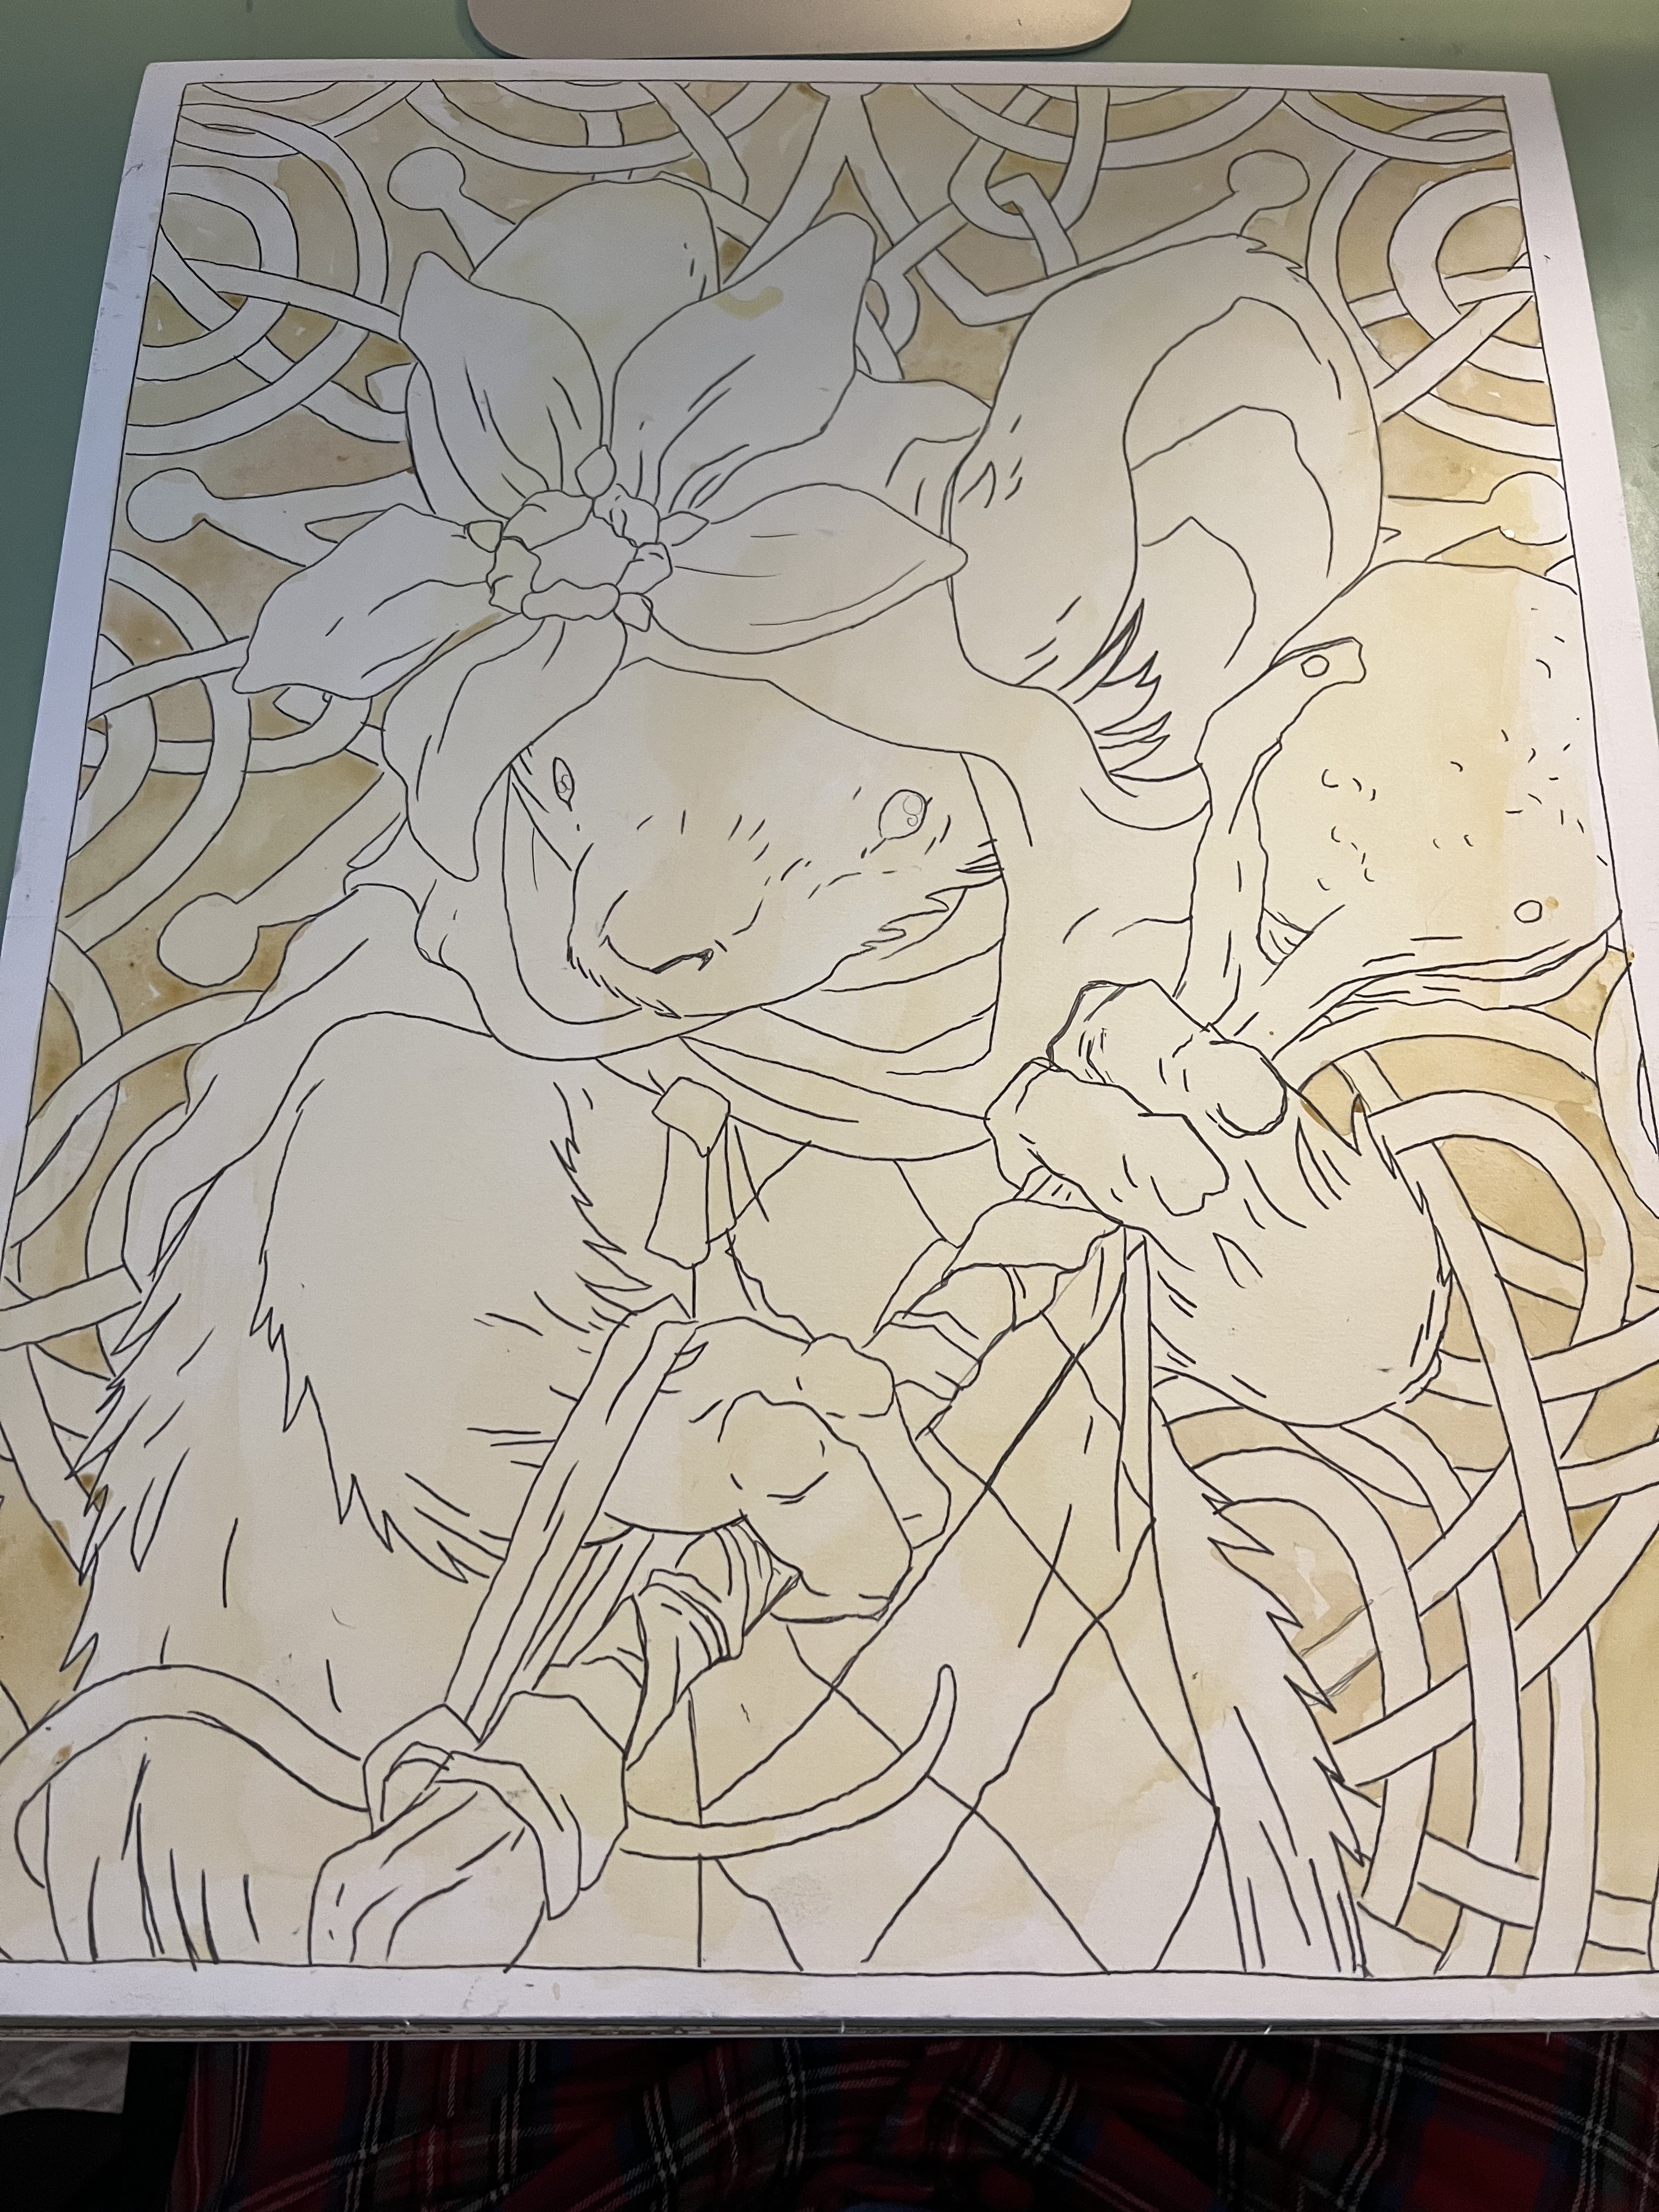
Same treatment for Bilbin. And like Piper piece, I started adding in more density of that color where I knew I needed it. I also added some paynes grey to the top panel

Since I had some yellow going, I deepened the areas that needed the deepest yellows on Bilbin

The pale blue grey of Payne's Grey became the knotwork behind Piper, and the deeper yellows were appropriately added to Piper's flower and tabbard.

Added some more shade & tone to the ywllows and a little bit of pink details on the hat and shield

And it was time to start building up more areas with their warmer base colors.
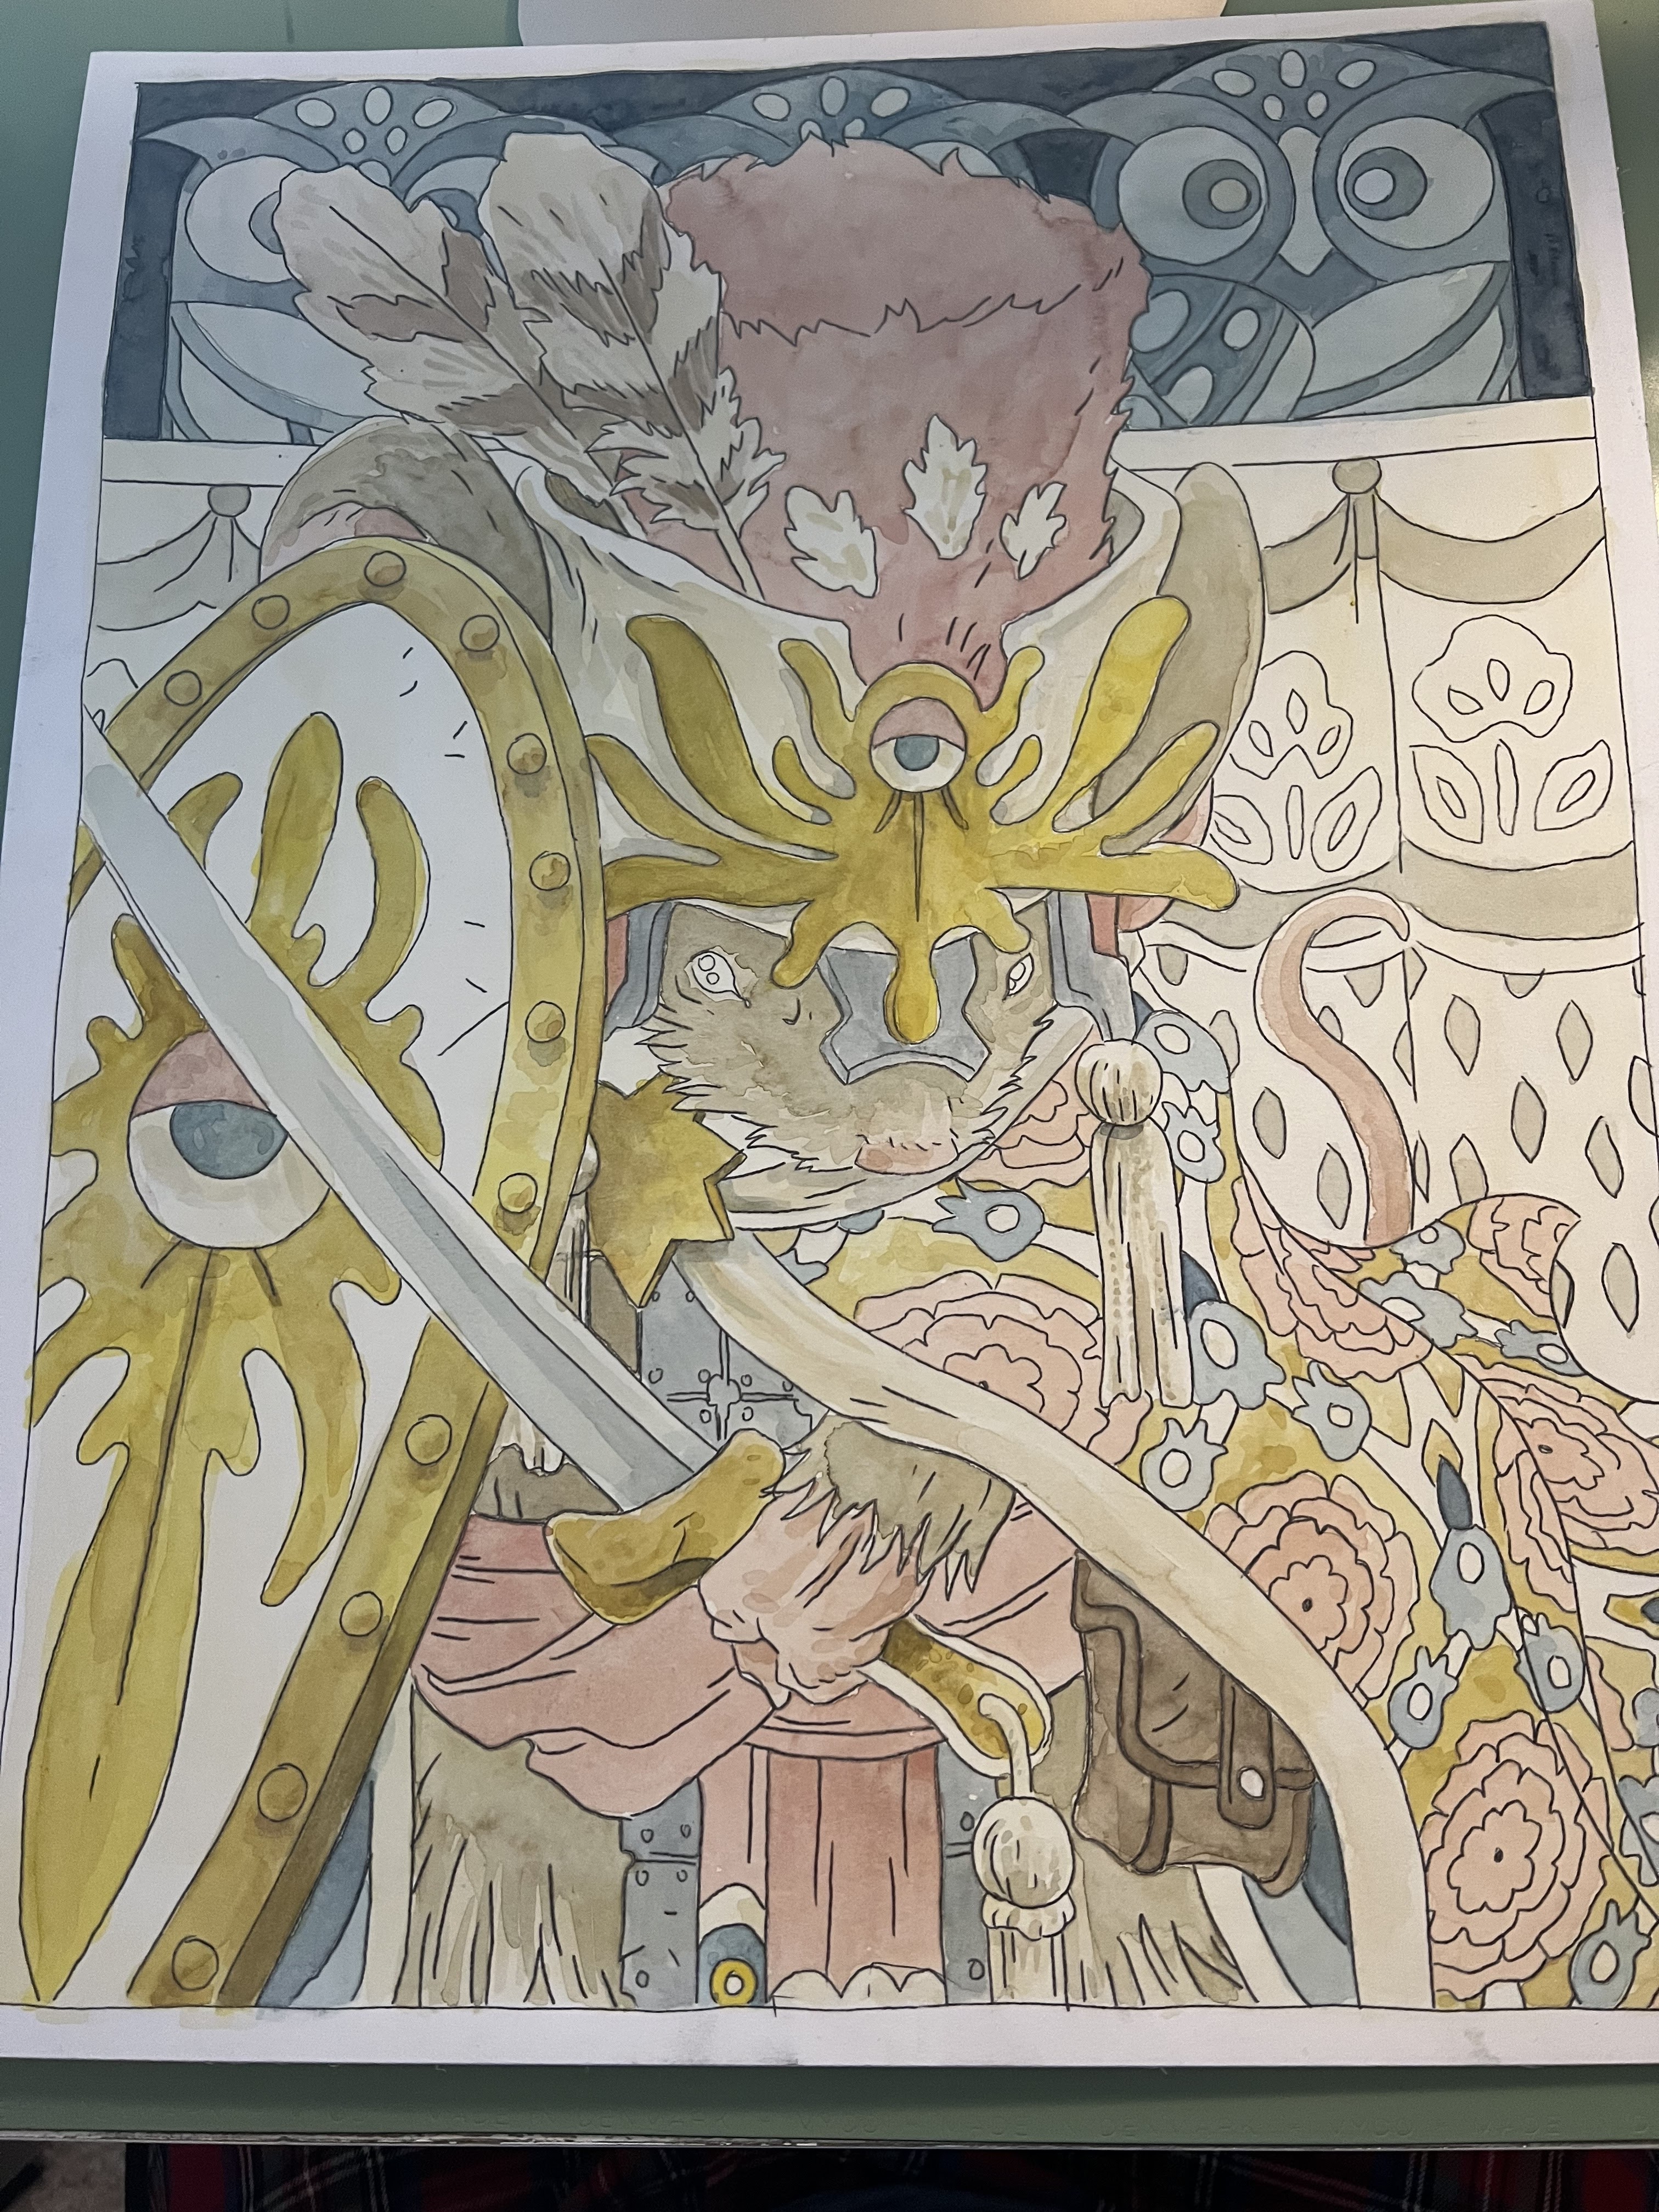
Piper's fur took several passes to build up to the right opacity for a base before adding shading.

More tonal work on Piper's fur and mace and flower

Bilbin's hat and sash also took several layers before the opacity/intensity was right.

Spent some time adding in all the right tones for the cloak design

I should have gotten Piper's cloak in earlier, and it took a while to get it a deep and rich enough color.

More passes at Piper's cloak, adding the mace handle, and her eyes

Final rendering work on Bilbin himself
And then pushing the background tones back to where they needed to be.

Last painted details on Piper

Because I always think my work looks better with line, I went back a day later and 'inked' in the linework with a dark brown color pencil. Using a color pencil means that the linework is softer and not competing against the painterly bits of the watercolor as much.

The same color pencil treatment for Bilbin. It took a lot of sharpening the pencil inbetween strokes because the tooth of the watercolor on illustration board wears down any kind of point on the pencil very quickly.

Hope to see folks bidding on Piper at the auction--and then whoever gets to me at my table first thing on Sunday can purchase Bilbin for the same price.
David Petersen's Blog

- David Petersen's profile
- 339 followers

