
Bakerella's Blog, page 19
June 7, 2015
New York City Sweets
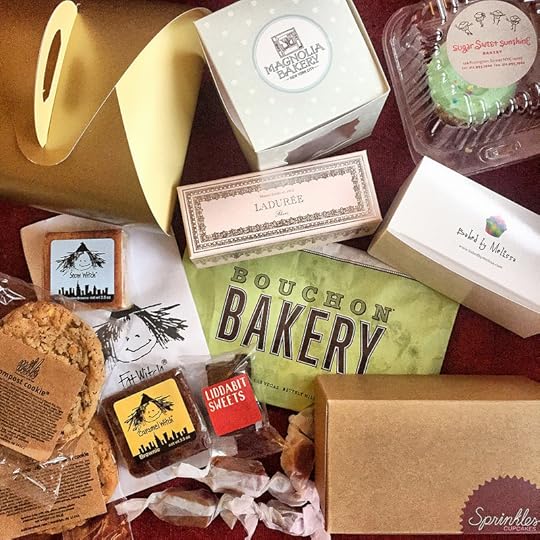
Back in May, I was in New York City to treat Nestle’s Tollhouse Time “Sweetstakes” winner to a sweet tour of the city as one of her prizes. If you follow me on instagram, you may have seen a few of the pics. Well, I took a ton. Too many to even show here, but I thought I’d share all the places we visited in case you’re looking for a sugar-filled way to see the city, too.
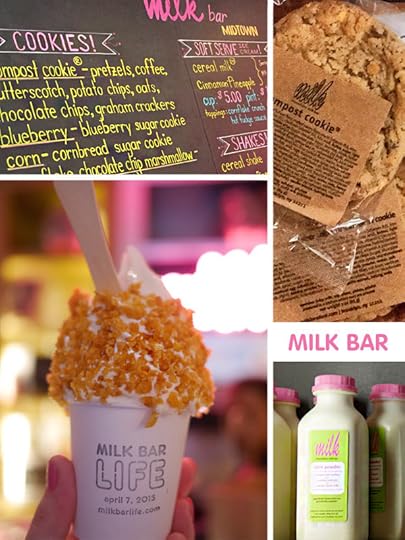
We started out at Milk Bar Midtown. I figured their Cereal Milk soft serve topped with cornflakes would be a great way to start the morning. But we also left with compost cookies, cornflake-marshmallow-chocolate chip cookies and candy bar pie. Stocking up for late night snacks you know.
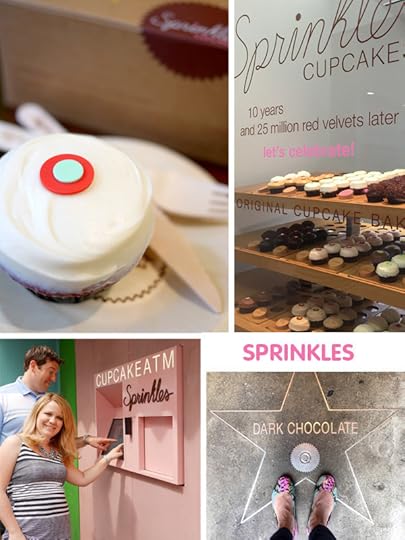
We went to Sprinkles Cupcakes next. This is Angela (the winner) and her husband. It was their first time so we grabbed a few flavors to take home and enjoyed a red velvet cupcake in the shop. It’s my favorite flavor after their black and white cupcake.
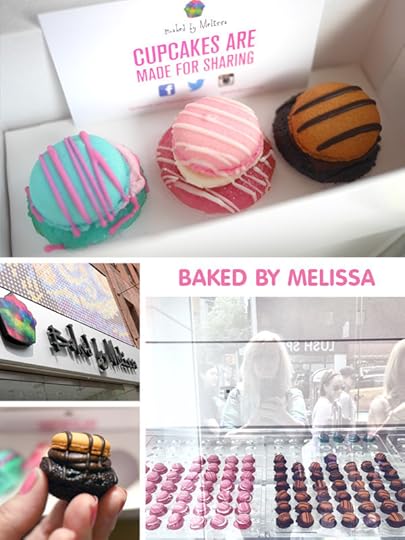
A couple of doors down is Baked by Melissa. These are the teeniest cupcakes. Smaller than mini and perfect for tasting… these one bite babies are just way too fun to eat and because they’re so small, you can try several flavors without feeling bad or full. I tried the PB&J in the store and brought these adorable “cupcarons” – macaron topped cupcakes – for the road.
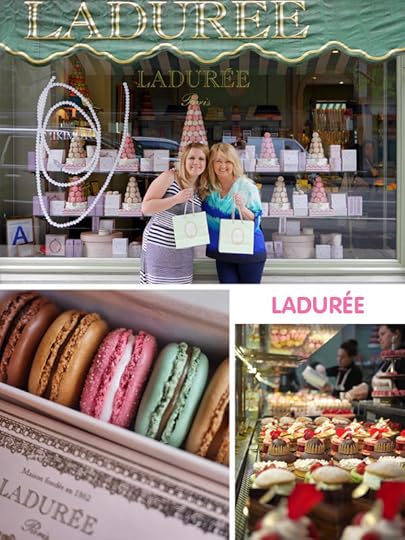
Next we stopped in Ladurée for french macarons. Oh my gosh I loved it inside – so pretty – and I didn’t want to leave. We couldn’t decide between all the beautiful pastries, so we left with just the macs. Sampling would take place in my hotel room later though. I had to pace myself you know.

And also because we were heading to Levain Bakery next and I knew we’d be enjoying their decadent warm chocolate chip cookies on the spot. Head to NYC right now and get one of these. So so good. and big and warm.
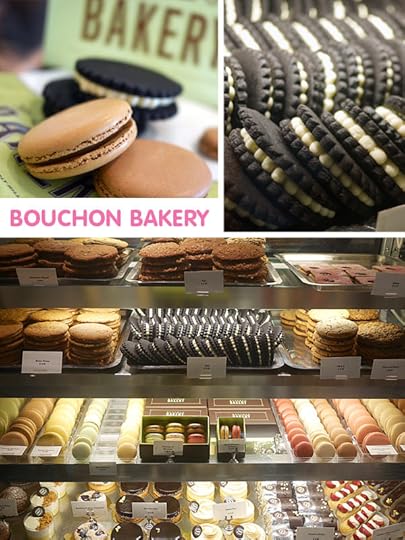
Bouchon Bakery was next. One of my faves. I absolutely love their macarons (get the big ones) and TKO cookie sandwiches. Like giant homemade Oreos. But better.
After Bouchon, we headed down to Chelsea Market where we stopped in several shops. As a sidenote, I think the best thing I had here was actually lunch from Los Tacos No. 1. OMG The only mistake I made was only getting one. And I wish I had some right now.
Okay back to sweets.
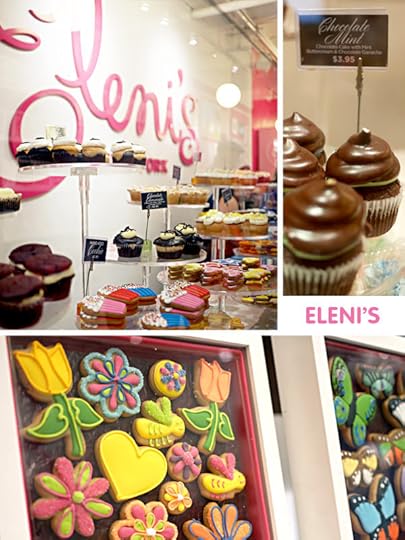
If you like sugar cookies, stop in Eleni’s and treat yourself to one. Or cupcakes, too. So fun!
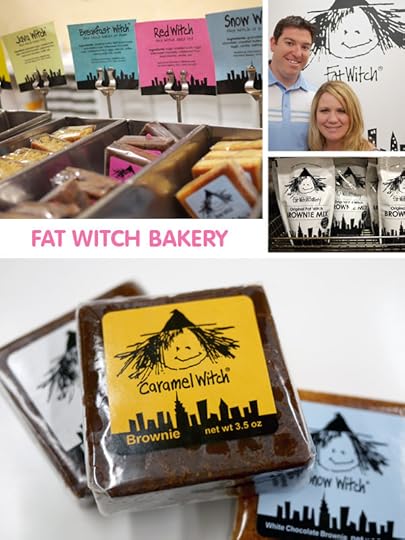
And if you like brownies, you’ll love Fat Witch with all their different flavors. Right about this point, I was super happy that these were packaged and individually wrapped. Easy to grab and save for later because I was still trying to pace myself.
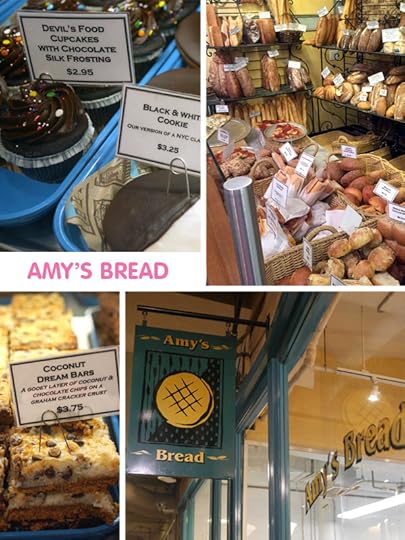
Amy’s Bread has tons of baked goodies to choose from like cupcakes, cookies, bars and breads. Try the Yellow Cake with pink frosting if you get a chance.
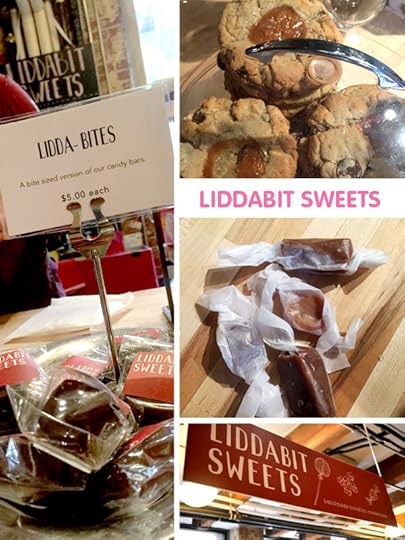
Liddabit Sweets! Caramels, cookies and candy bars. They had a small setup in Chelsea Market and I was glad because we didn’t have time to make it to their shop in Brooklyn.
Ahhh Brooklyn! There are so, so many places I want to visit. The Original Baked, Ovenly, Hay Rosie and much more. I’ll just have to plan another trip for all their tasty treats.
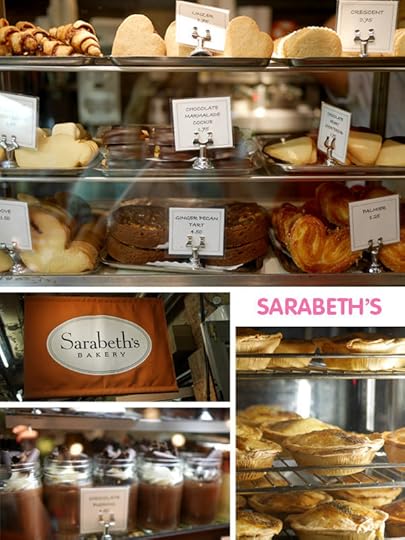
Sarabeth’s – more goodies galore. Buttermilk Biscuits, cookies, tarts, pastries, pies and chocolate pudding, too.
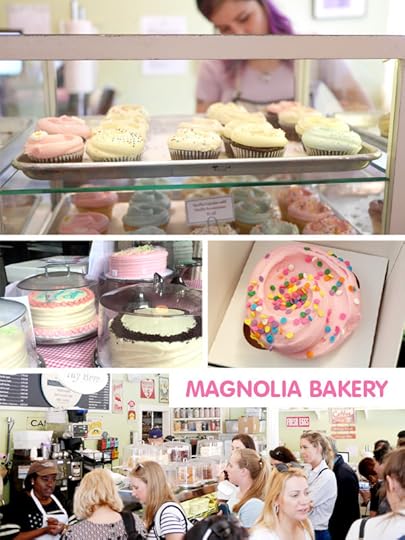
I had to take Angela by Magnolia Bakery to adore their beautifully swirled buttercream frosting. We left with cupcakes and tried the Banana Pudding in the car on our way to our next stop for chocolate.
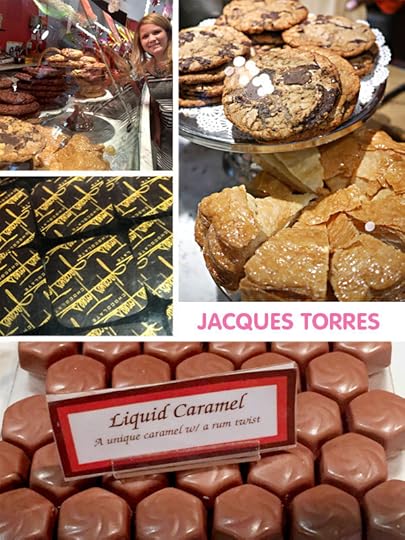
Jacques Torres Chocolate! I don’t remember what flavors I had but one thing I can recommend is his recipe for chocolate chip cookies. I make them often and always with people adoring them!

After chocolate we went to the place known for inventing the Cronut. Of course by the end of the day we had to settle for Dominque Ansel’s other amazing treats. S’mores on a stick, Cookie and milk shooters, Coco the cream puff cat, and the kouign amann… a croissant-like dough with a caramelized crunchy crust. That one was my favorite.
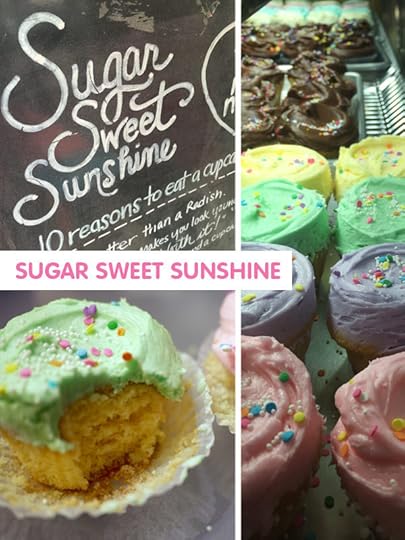
Sugar Sweet Sunshine is another cupcake bakery we stopped in. I enjoyed their vanilla cupcake best, but if I could top it with Magnolia’s frosting, then I think it would be perfect.
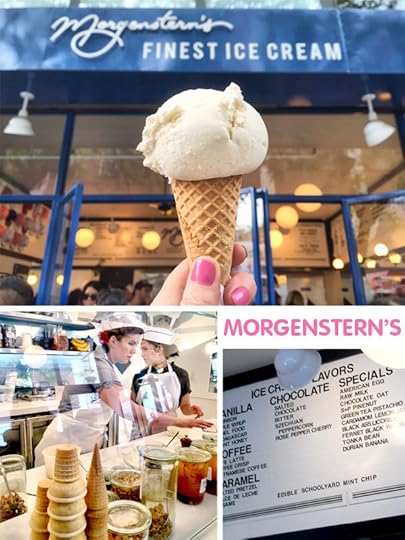
We ended the day with ice cream at Morgenstern’s. The ice cream parlor feel makes you want to hang out while you chill with your ice cream in hand. Such a cool little spot. And I love the paper hats they wear, too.
So that was all done on day one. Angela and her husband were so awesome to hang out with for the day. I hope you guys had a great time and enjoyed the rest of your weekend in the city.
::::::::::::::::::::::::::::::::::::::::::::::::::::::::
The next day… because I obviously didn’t have enough sugar on Saturday, I stopped by a few more places with a friend who lives in the city.

Lady M – Gorgeous cakes and confectionary masterpieces. Try their signature Mille Crêpe Cake. Amazing! I love the simplistic decor. It’s stunning in white and really showcases all of the desserts.
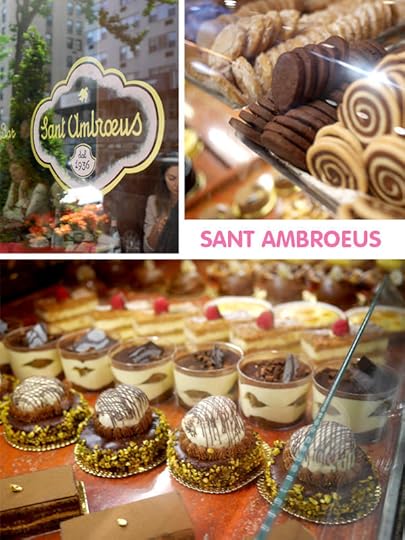
My friend and I stopped in Sant Ambroeus on Madison Avenue. I had a proscioutto sandwich and just adored everything else.
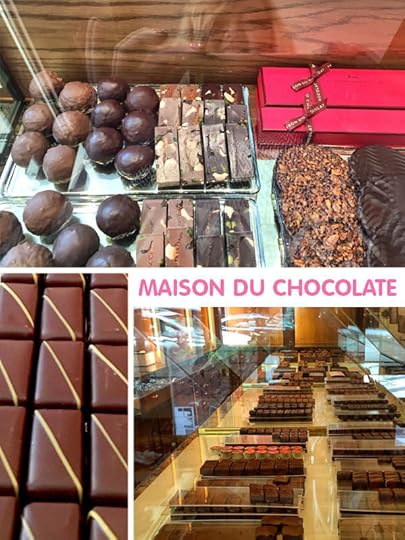
At Maison du Chocolate we enjoyed champagne truffles.
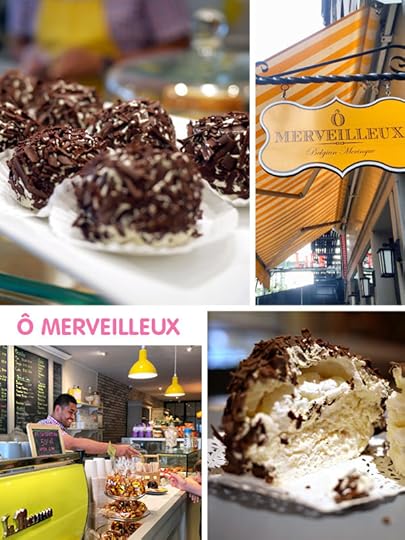
The last place I visited in NYC was Ô Merveilleux. And OMGoodness. It was one of the best things from the entire trip. This ever so light meringue sweetened with whipped cream and covered in belgian dark chocolate shavings. Simply Merveilleux or Marvelous as they say in the shop.
Okay, that’s it. What did I miss out on? What should I try next time? And if you have any Brooklyn recommendations, I love to hear your thoughts on those too.


May 26, 2015
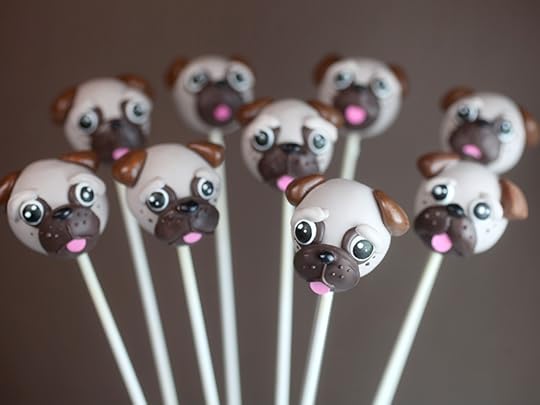
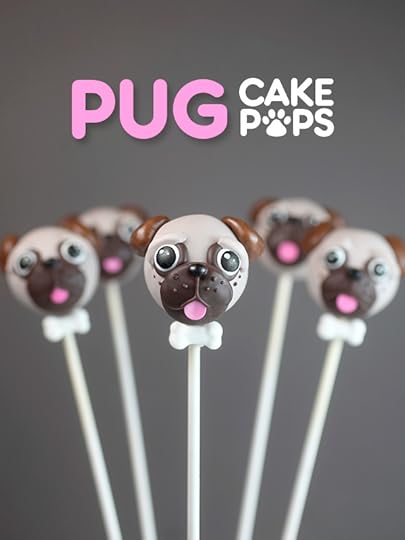
Pugtastic!

I made the cutest chocolate and peanut butter pug cake pops for you. These little guys were inspired by a recipe from Tablespoon.com. I’m working with them to put my spin on one of the sweets from their site. Not that they don’t already have cute covered though. Tablespoon’s community is overflowing with fun recipes, creative ideas for entertaining and more. I love the way they think with categories like rainbow, OMG, party, and mini.
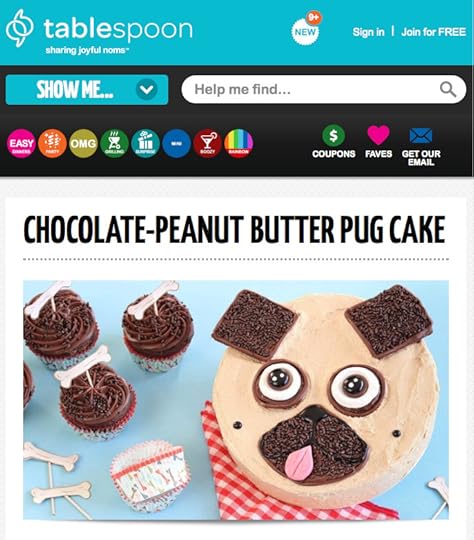
And you guys know it’s no surprise that I love little treats, so when I found this adorable pug cake on their site, I knew I had to down-size it to bite-sized proportions. But the full-size version is just as fun if you want one big cake.
Alright. Let’s get this pug party started.

Here are the goodies you’ll need to make 16 Pug Pops.
4 cups crumbled chocolate cake
1/3 cup buttercream frosting
2 tablespoons peanut butter
White candy wafers
Chocolate candy wafers, reserve 16 wafers for decorating
Medium heatproof bowl, plus two smaller heatproof bowls
Wax paper
Baking sheet
16 lollipop sticks
Cake pop stand
8 Tootsie Rolls
16 black sunflower seeds
32 sugar eyes with black edible ink pen
Pastel confetti sprinkles
Candy Bones
Toothpicks. I can’t live without toothpicks when it comes to decorating cake pops.
Here’s a link to my full instructions for making basic cake pops if you need more help.
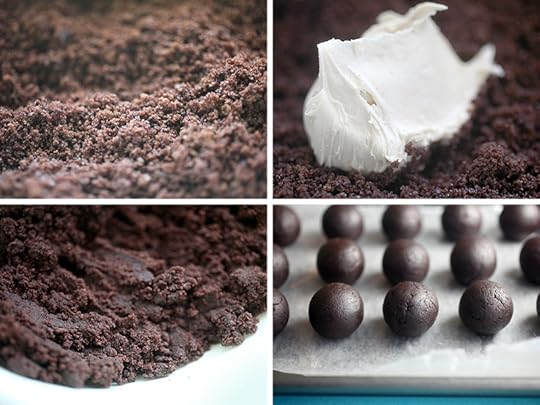
Stir peanut butter and buttercream until mixed together and then incorporate into chocolate cake crumbs until completely combined.
Roll the mixture into 16 balls and place on a wax paper covered baking sheet. Let the rolled cake balls rest for about 30 minutes and then place in the freezer for about 15 minutes to firm up. When firm, transfer them to the fridge to remain chilled (not frozen) for dipping.
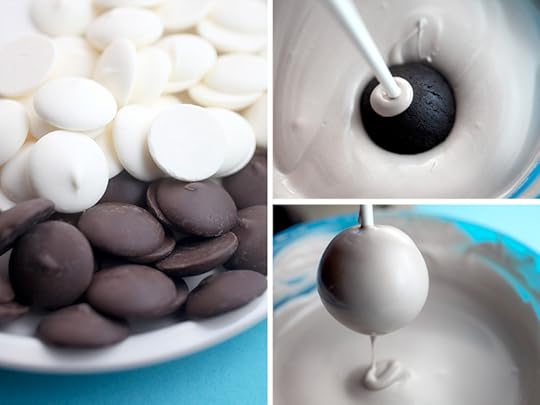
Melt chocolate wafers with vanilla wafers. Start with vanilla and add a few chocolate wafers at a time until you achieve a lighter shade of brown. (Note: You can use peanut butter candy wafers insead of mixing chocolate and vanilla.)
When ready to dip, remove a cake ball from the fridge. Dip the end of a lollipop stick in the melted candy wafers and then into the cake ball and dip.
Make sure the cake ball is completely coated and tap off any excess.
Before the coating sets, place a chocolate candy wafer on the front – towards the bottom half of the pop. Hold in place until the coating dries and place in a cake pop stand until you’re ready to decorate.
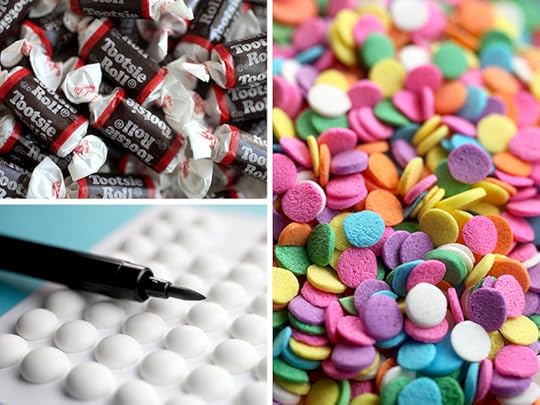
We’re using Tootsie Rolls for ears, confetti sprinkles for tongues, sunflower seeds for noses and sugar eyes for the eyes. But you already guessed that one.
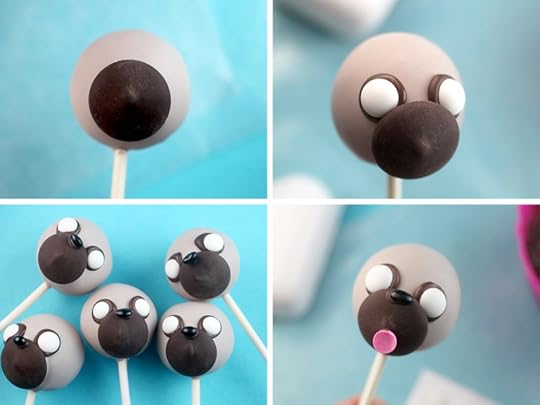
With the candy wafer already in position on the pop, dip a toothpick in melted chocolate and swirl two large dots on the front of the pop in position for eyes. Then gently press the sugar eyes right on top so that the chocolate surrounds the eyes.
Dot on coating in position for the nose and tongue and then attach a sunflower seed and pink confetti sprinkle and let dry.
Then finish the mouths. Use a toothpick dipped in melted chocolate candy wafers to apply coating on top of the already attached wafer … under the sunflower seed nose and down around the sides of the tongue. Make sure to overlap the confetti sprinkle so it looks like a sweet little tongue is sticking out.
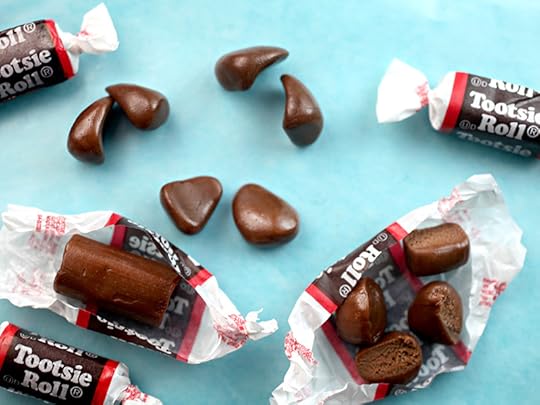
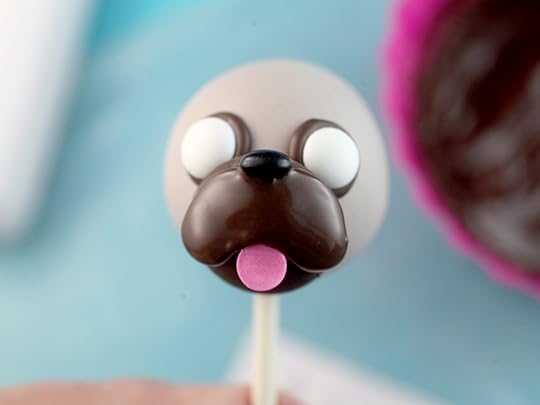
Now for the ears. Cut a tootsie roll candy in four equal parts and hand shape into rounded triangles for ears. Note: microwave the candy for 3-4 seconds to make it easier to shape. Don’t overheat.

Use more melted chocolate to attach the ears and add finishing details to the mouth.
Draw big black pupils on the eyes with the edible ink pen. Feel free to stop here, but if you want to add a few more details, then keep going with me.
Draw on eyebrows with a toothpick dipped in the melted lighter brown candy coating. Then dot tiny dark chocolate freckles on each cheek.
And most important, add a little sparkle to the eyes by dotting on melted white candy wafers.
Adorable!
But let’s dress these doggies up a bit more…
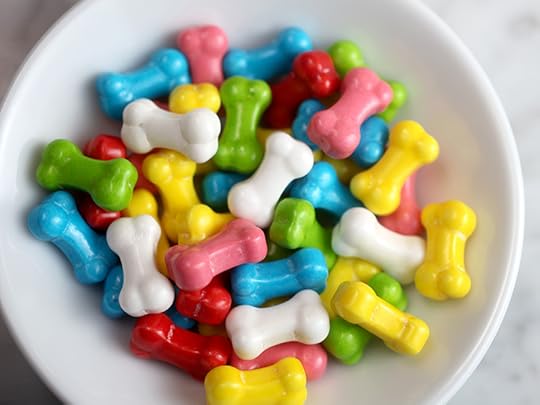
… with candy bones.
Because they make the super cutest bow ties, you know.
Enjoy!
This post is a collaboration with Tablespoon.com.

May 10, 2015
Cotton Candy Oreo Cupcakes
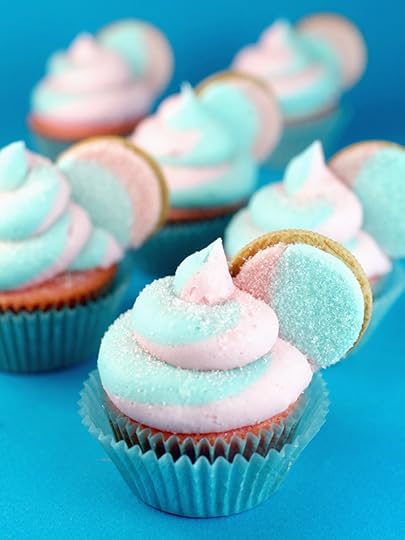
Have you tried the Cotton Candy flavored Oreo cookies yet? They are a new limited edition flavor available exclusively at Target. I had some for the first time a few weeks ago and fell for them right away. I don’t eat the golden Oreos that often because I always gravitate to the original… but these had me going back for more.
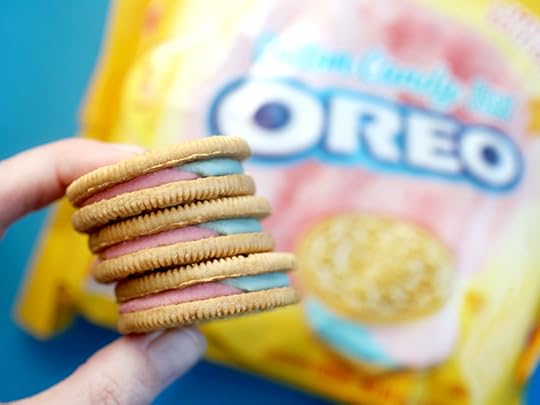
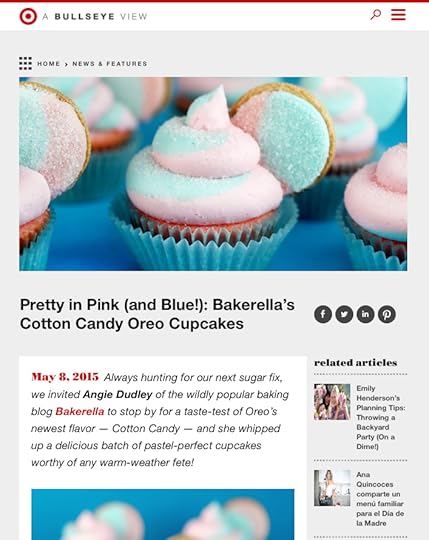
So when Target asked me to create a recipe using the cookies for their blog, A Bullseye View, I was so excited to play with them. I thought showcasing the pink and blue creme centers would be fun for decoration because the colorful insides definitely made them more fun to eat.
Head on over to A Bullseye View for the recipe and links to a few of the other projects I’ve made for them.
Do you have a favorite limited edition Oreo cookie flavor you enjoy? Red Velvet, Green Apple, Gingerbread, Watermelon, Cookie Dough? I’m curious.

May 3, 2015
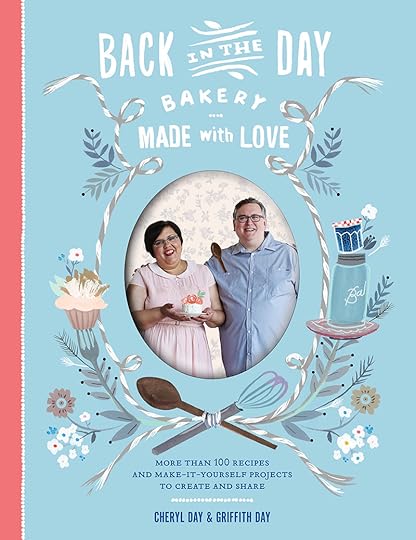
Cocoa-Cola Snack Cake with Back in the Day Bakery
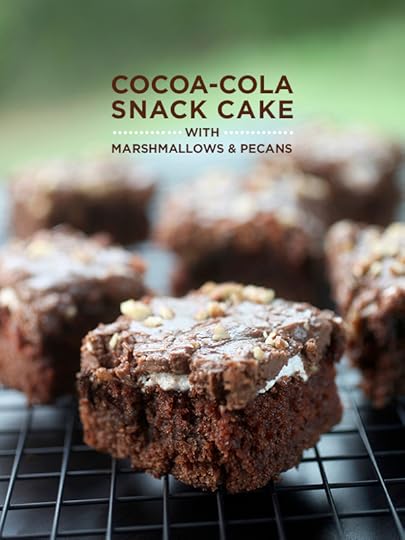
I think I forgot how much I love snack cakes. Easy, single layer cakes that take all the fuss out of cake decorating and throw in all the fun of snacking on sweets. This yummy one is a Cocoa-Cola Cake with Chocolate Icing that I just made from Back in the Day Bakery’s brand new book, Made with Love.
I wanted to try one of their recipes out because this Wednesday, I’m going to be chatting it up with none other than Cheryl and Griff Day… the delightful duo of Back in the Day Bakery. If you are in the Atlanta area, stop by Little Shop of Stories on Wednesday, May 6th at 7 p.m. for the Q&A and book signing. It’s going to be good times. (More info here.)
Okay, let’s make a cake.
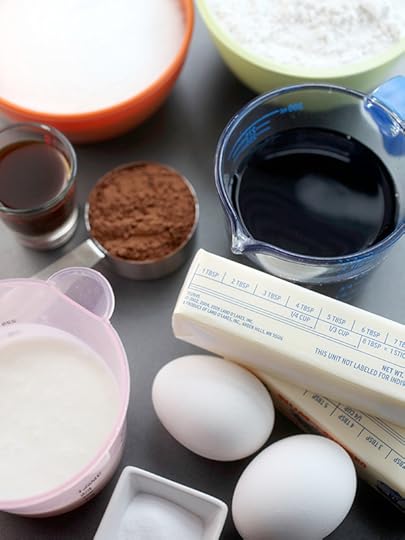
This one calls for easy ingredients including Coca-Cola. Awesome.
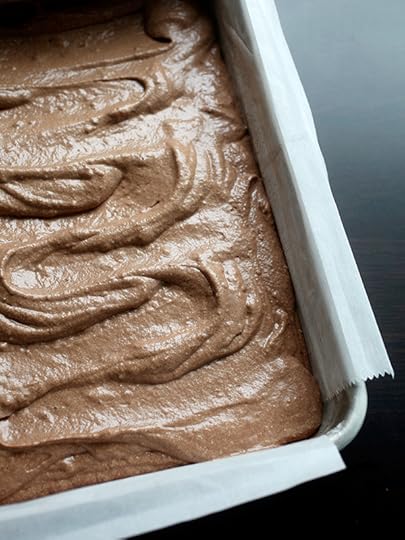
Mix everything up and spread the batter in a baking pan lined with parchment paper.
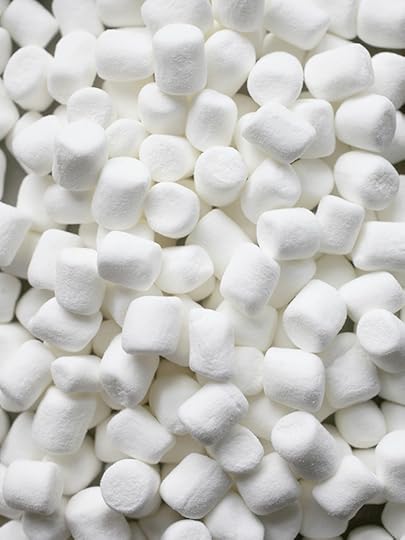
Oh yeah, we’ll me marshmallowing this baby up, too.
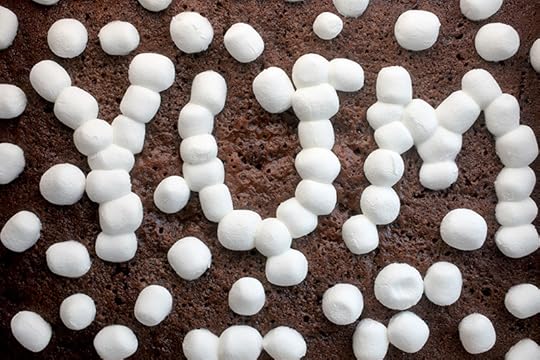
Right after the cake finishes baking, sprinkle mini marshmallows on top and place back in the oven for a couple of minutes to get all melty. Yum!
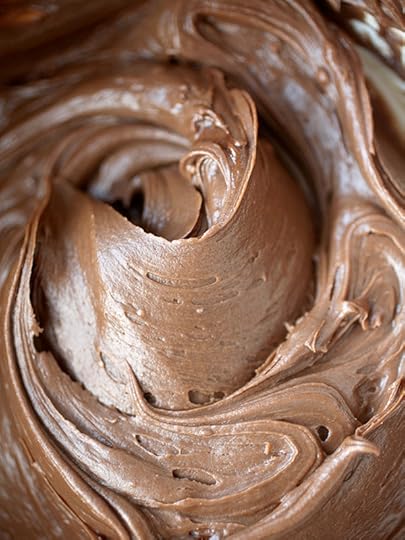
Then whip up the chocolate frosting.
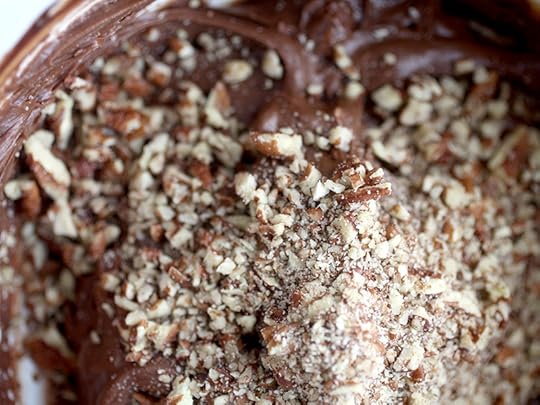
And mix in chopped pecans. This just keeps getting better. 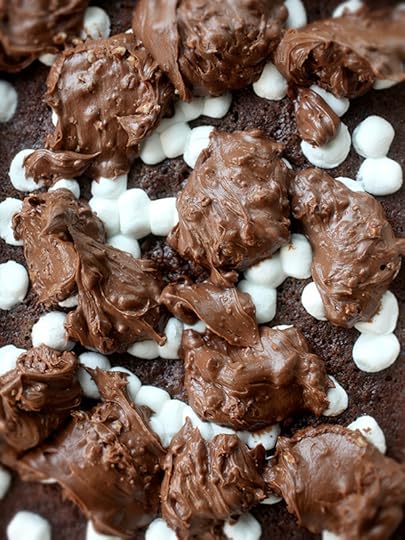
Oh my oh my. Place large spoonfuls of frosting all over the top of the cake to make it easier to spread without messing with the marshmallows underneath too much.
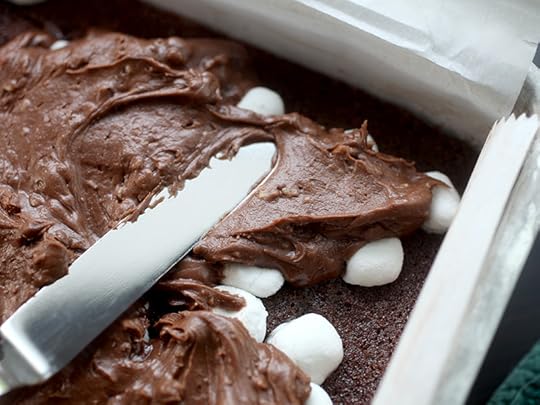
Spread evenly on top.
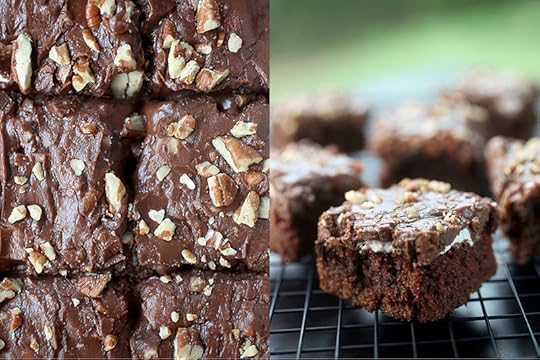
Reserve some of the chopped pecans to sprinkle on top of the cake, too if you like.
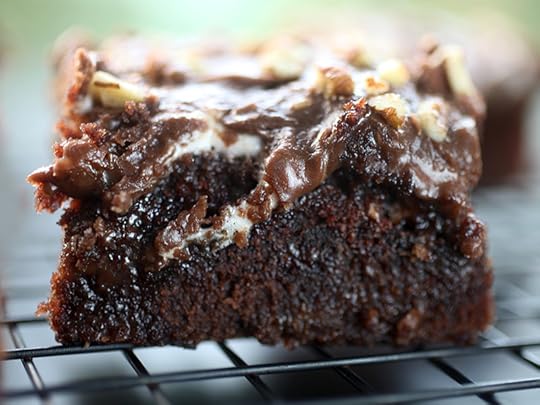
If I had the patience to let this cake cool all the way before I made the first cut, I think it would look a prettier. But, I COULD NOT wait to dive in. Actually, I took a spoon to the corner of the pan before I even cut into it. Highly recommended deliciousness.
P.S. Now I want a whole book on snack cakes.
___________________________________
Cocoa-Cola Snack Cake with Chocolate Icing
2 cups unbleached all-purpose flour
1/4 cup Dutch-processed cocoa powder
1 teaspoon baking powder
1 cup Coca-Cola, room temperature
1/2 cup buttermilk
2 tablespoons pure vanilla extract
1 3/4 cups granulated sugar
1 cup unsalted butter, room temperature
2 large eggs, room temperature
1 1/2 cups mini marshmallows
8 tablespoons unsalted butter, melted
5 tablespoons unsweetened cocoa powder
1/3 cup Coca-Cola
1 teaspoon pure vanilla extract
one 16-ounce box confectioner’s sugar
1 cup chopped pecans
Preheat oven to 350 degrees fahrenheit. Grease 9 X 13 inch baking pan and line with parchment paper, leaving an overhang on two opposite sides.
Sift flour, cocoa and baking soda together and set aside. In a small bowl, mix together the cola, buttermilk and vanilla. Set aside.
In the bowl of a stand mixer, cream the sugar and butter on medium high speed for 4-5 minutes, until light and fluffy. Add the eggs one at a time, mixing well after each addition and scraping down the sides of the bowl with a rubber spatula if necessary.
Turn the mixer to low and add the flour mixture in thirds, alternating with the cola mixture and beginning and ending with the flour. Remove the bowl from the mixer and scrape the bottom with a rubber spatula to make sure everything it incorporated. Spread evenly into prepared pan. Bake for 30-35 minutes, until toothpick comes out clean.
Scatter marshmallows over the top of the hot cake and return to the oven for two more minutes to get melty. Remove from oven and let cool on a wire rack.
Make the chocolate icing: In a medium bowl, combine the melted butter, cocoa, Coca-Cola and vanilla. Mix with a spoon until smooth and creamy. Gradually add the confectioner’s sugar, mixing until the icing is completely smooth. Fold in the pecans. Spread frosting over the warm cake. It will firm up as the cake cools. Store in an airtight container at room temperature for up to 3 days. Note: I added an extra tablespoon of melted butter to my frosting to make creamier. I also reserved some of the chopped pecans to sprinkle on top of the cake.
Hope you enjoy snacking on this cake as much as I did.
Recipe from Back in the Day Bakery Made with Love, © 2015
___________________________________
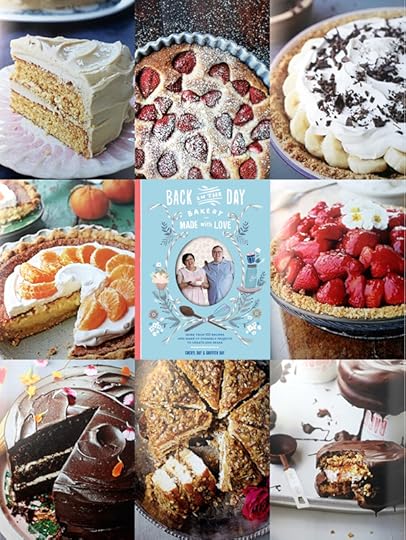
And here’s a little peek at some of the other deliciousness you’ll find inside the book Made with Love. So much yum!
*This post contains Amazon affiliate links.

April 26, 2015
It’s a Spring Bake Giveaway!
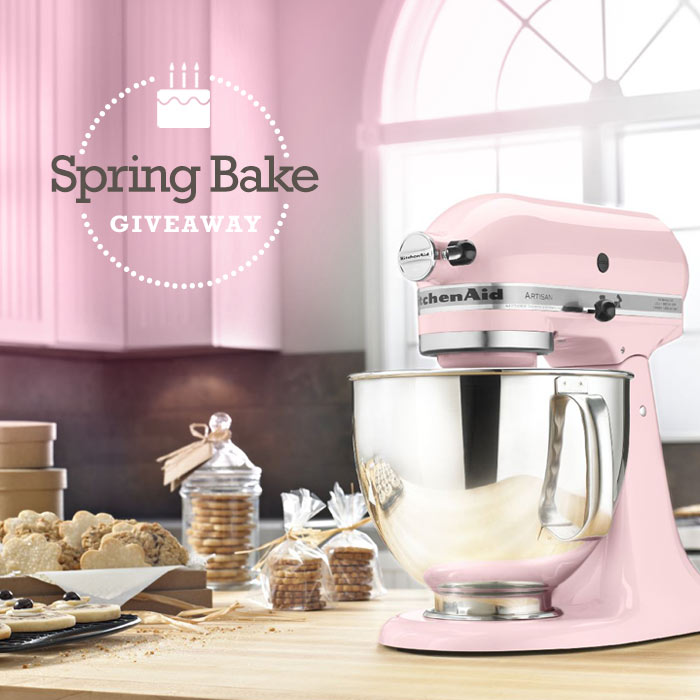
YAY for Spring! I’m so happy to finally break away from all the cold weather and enjoy the warm outdoors. Wouldn’t it be nice if it could stay this way all year long. Minus the pollen.
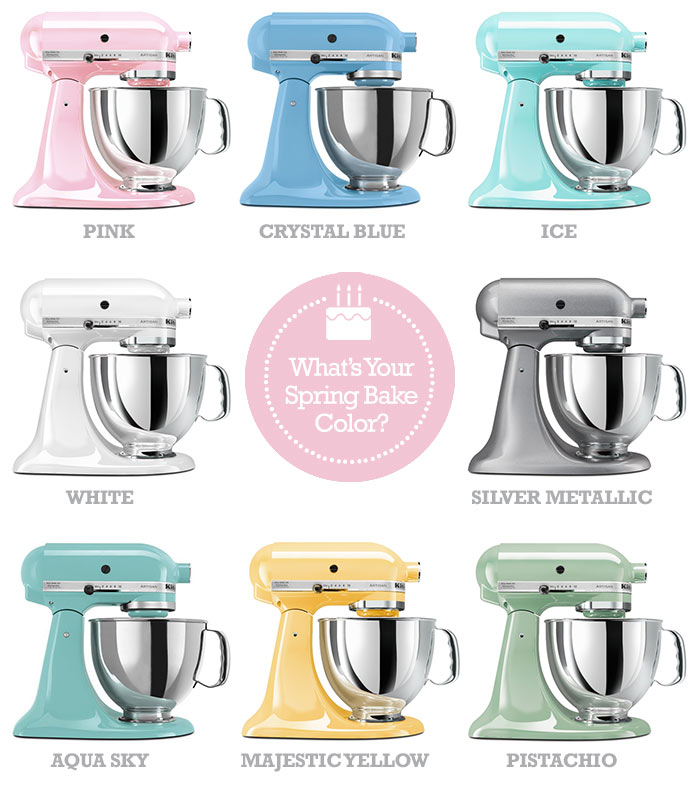
Well, to celebrate the season, I’m having a super Spring Bake Giveaway for a KitchenAid Stand Mixer in one of the lovely colors shown below. The winner gets to pick their favorite! Awesome.
Which color would you want to see on your kitchen counter? Aqua Sky? Ice? Pink? Majestic Yellow?
Enter the Spring Bake Giveaway for a chance to win a KitchenAid 5-quart Artisan Series Stand Mixer:
To enter, just leave a comment on this post answering the following question.
What’s your favorite outdoor activity? Oh and pick your favorite pastel mixer color, too.
Deadline to enter is Thursday, April 30th at 8:00 p.m. ET
One winner will be chosen at random and announced sometime Thursday evening on this post.
Here’s to Happy Baking! Good luck!

April 19, 2015
Ben & Jerry’s: Ice Cream Social
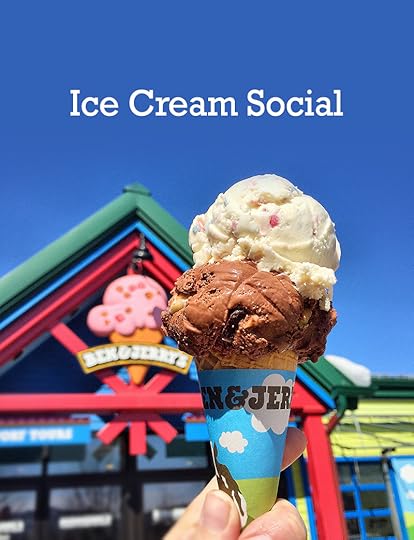
A couple of weeks ago I had the super fun opportunity to travel to Vermont to visit Ben & Jerry’s Headquarters.
Here’s a peek at my adventures in ice cream through photos.
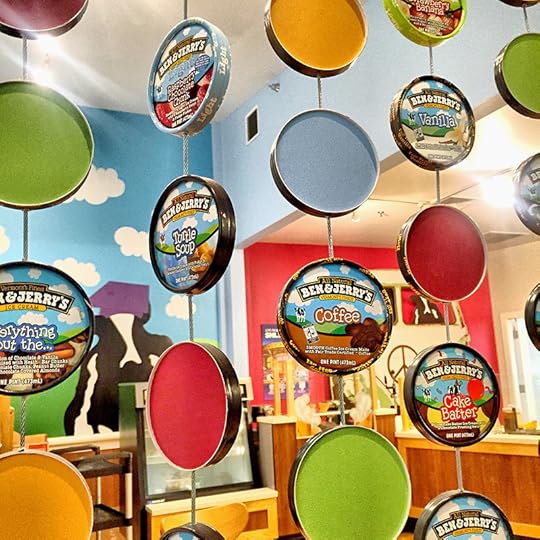
So let’s start by stating the obvious. Ice cream = amazing. I felt like I was in wonderland. By the way, their offices pretty much look like the packaging exploded all over the walls. Such a fun environment. From the indoor slide that greets you in the lobby, to the Cookie Dough Conference Room to an actual on-site ice cream shop in the middle of the building. It was undeniably Ben & Jerry’s at every turn.
Did you know employees can take home three pints of ice cream? EVERY. DAY. Repeat. EVERY. day.
I would be in such big trouble if I worked here.
Oh hey Cakespy. I forgot to mention the ultra adorable Jessie was there. My sweet friend from the days when I first started blogging. It was such a surprise seeing her that we almost fell down from hugging.
And by the way, you can totally stop reading my post right here and visit her blog for the best recap EVER. She basically illustrated all of our adventures in watercolor ice cream characters.
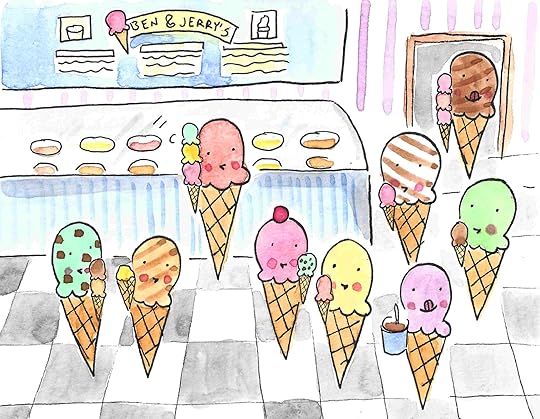
I’m not kidding. It’s awesome.
Okay, back to my less colorful account.
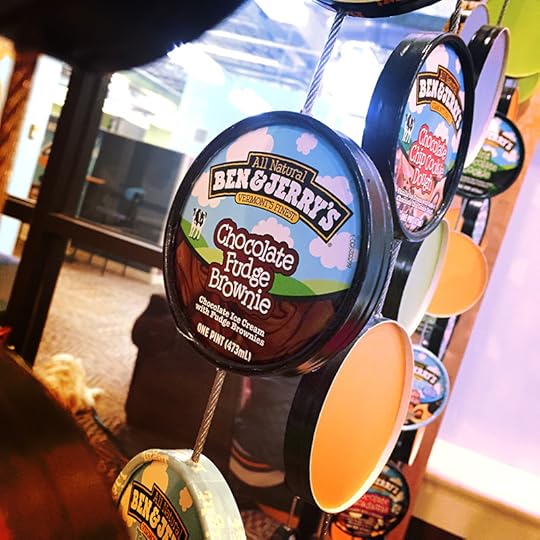
Before the trip, I would have to say that my favorite flavor was Chocolate Fudge Brownie. But that’s because it’s the only one I would repeatedly buy. It was like a dream to be able to try out so many different flavors while I was there.
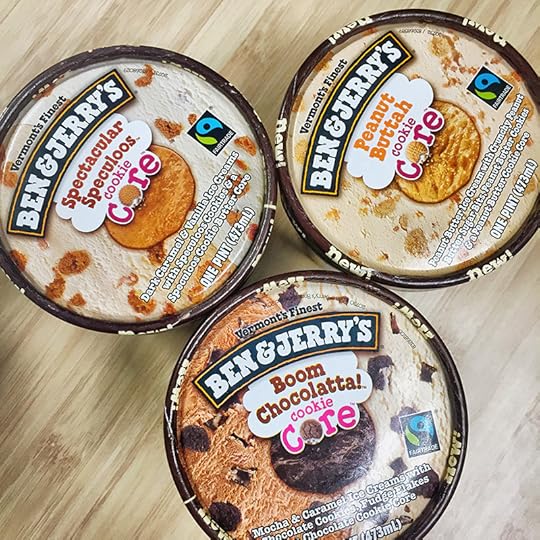
But I still didn’t get anywhere near tasting them all of them so which ones are your favorites at home? I have a few new ones. New York Super Chunk, Cotton Candy, and Chocolate Therapy really got me.
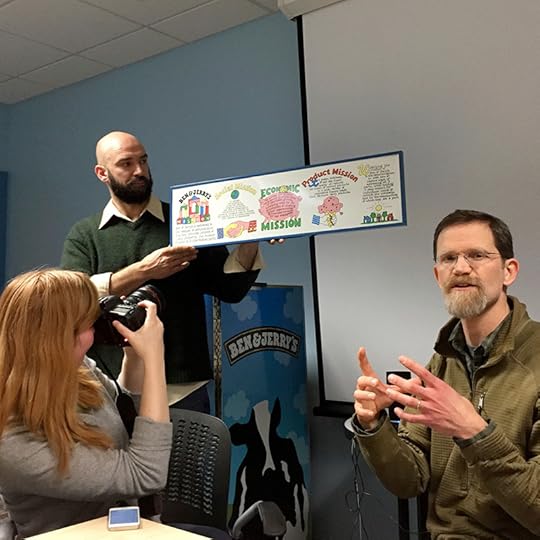
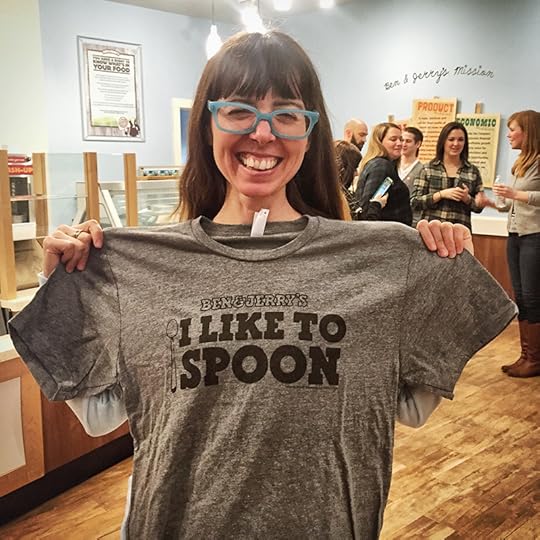
During the event, we learned about the company’s values.
Their Product Mission, Economic Mission and Social Mission, which stood out to me the most because of how focused everyone at the company is to make things better. At first all I wanted to do was eat ice cream, but it was inspiring to learn about all of their initiatives outside of making great flavors.
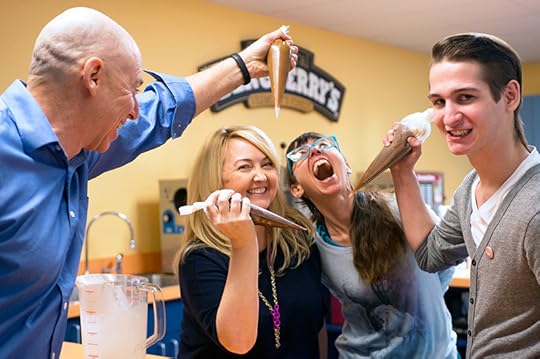
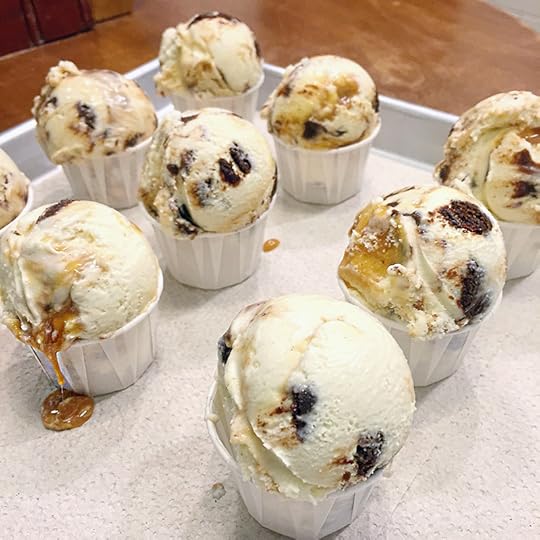
Later in the day, we teamed up with the Ben & Jerry’s Flavor Gurus (real title) to make our own custom ice cream flavors. This photo pretty much sums up how much fun we had working with Peter.
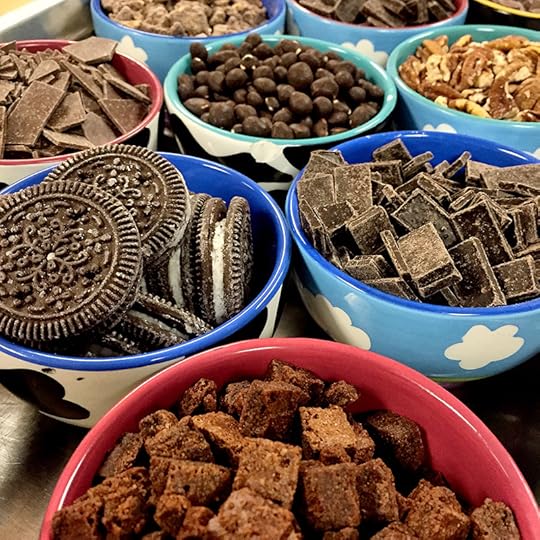
With all the ingredients to choose from, it was hard to decide which way to go at first.
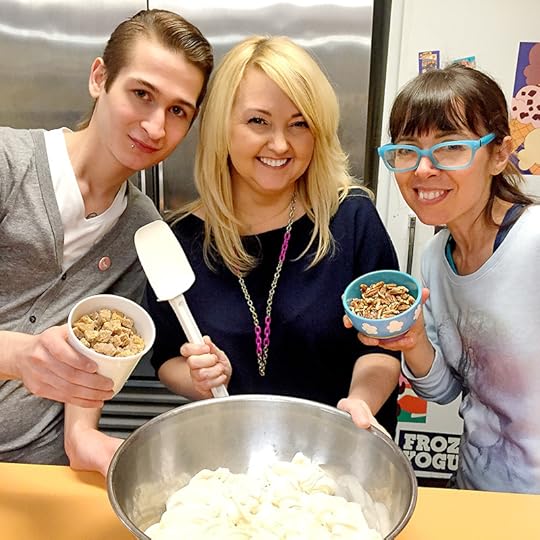
But we started with a really cute name that Jessie came up with and we went with it.
Our team (Me, Jessie and Nick of On Second Scoop) made a peanut butter ice cream with blondies, caramel and pecans.
It was pretty delicious and our flavor gurus loved it, too. Score!
Want to know our flavor name?
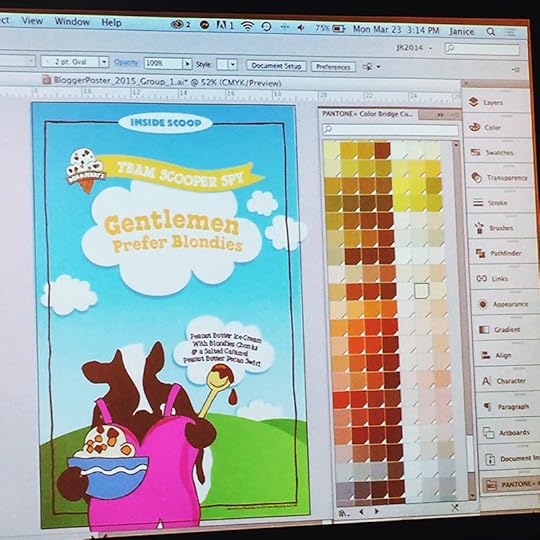
Gentlemen Prefer Blondies! After working out our flavor, we collaborated with one of the designers to create our own poster.
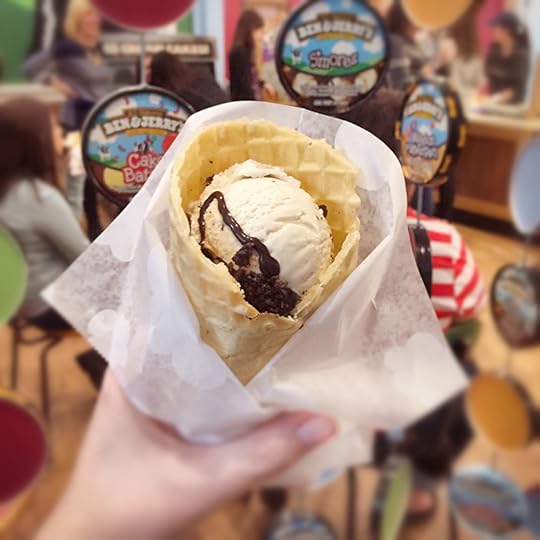
We also got a sneak peek at their brand new BRRR-ito that’s available in scoop shops starting TODAY!
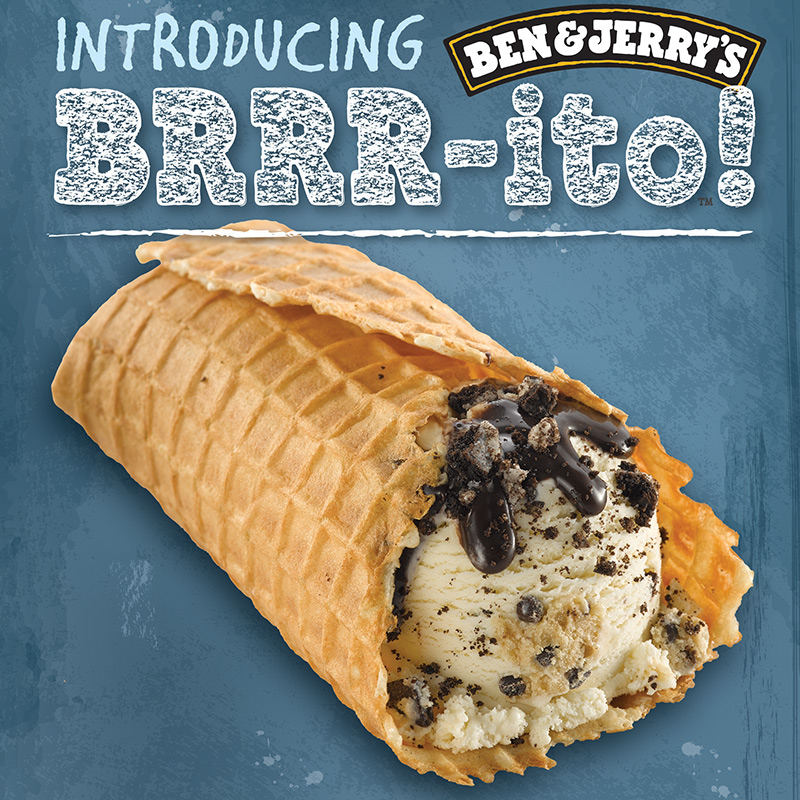
That’s right… your two favorite flavors, topped with a fudge drizzle, cookie crumbs and wrapped up in a soft and chewy waffle wrap.
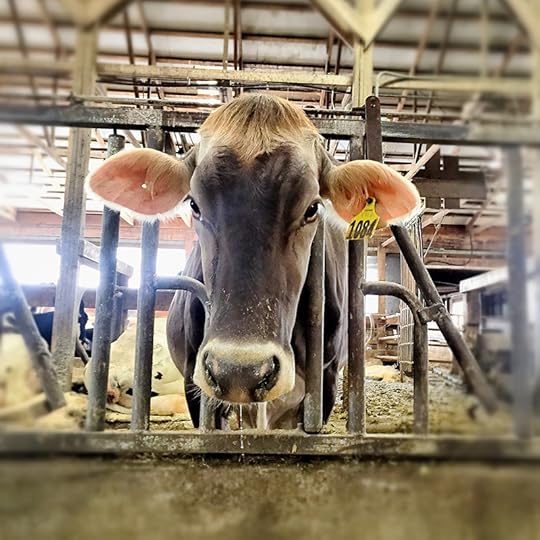
The next morning, we visited a dairy farm and learned more about how their Caring Dairy Program.
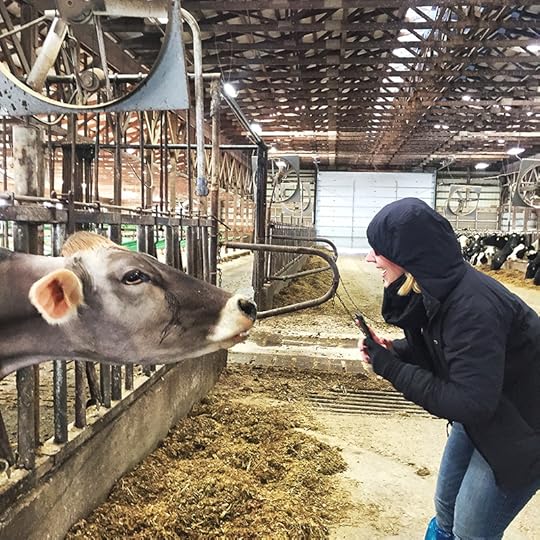
Here’s Stacie from One Hungry Mama making a new friend.
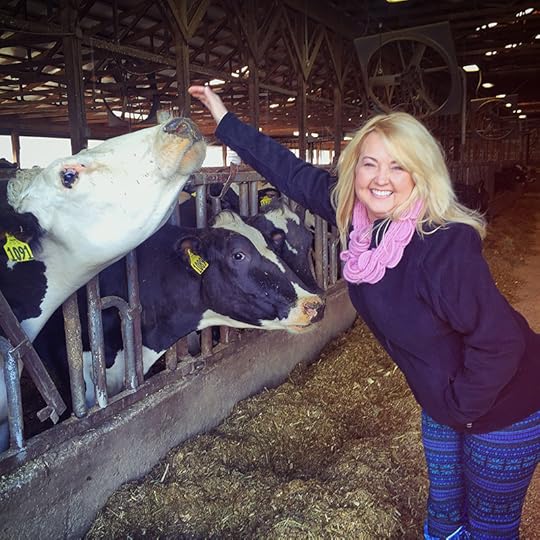
I made a couple, too.
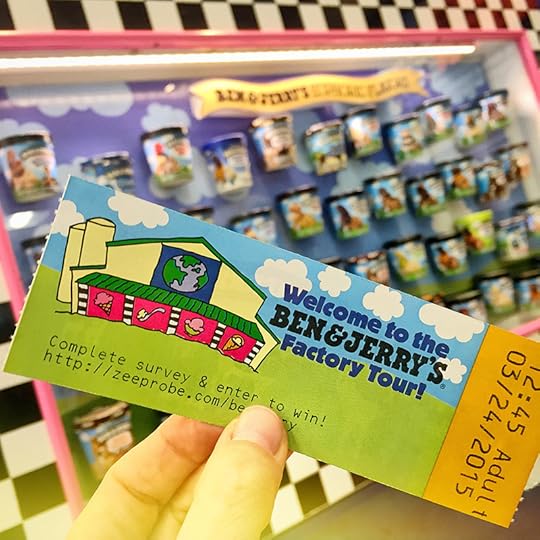
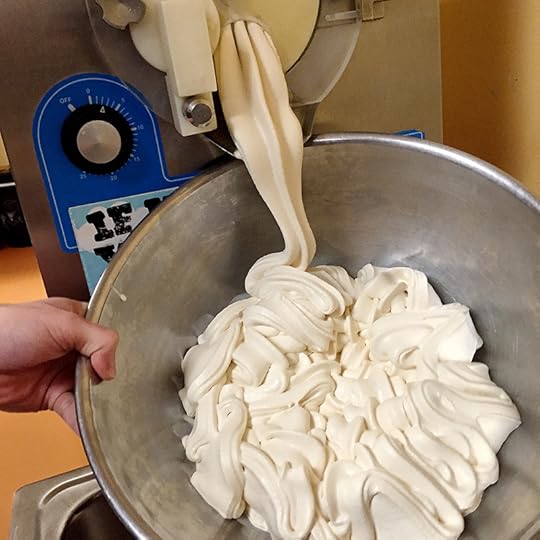
In the afternoon, we went on a factory tour. Eeek!
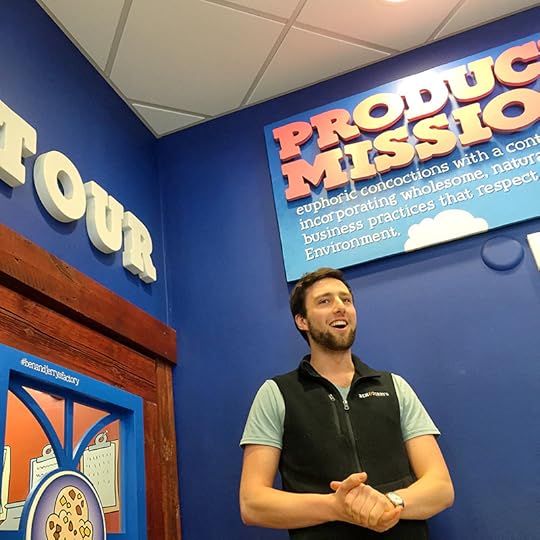
Owen! Our truly awesome tour guide made it memorable.
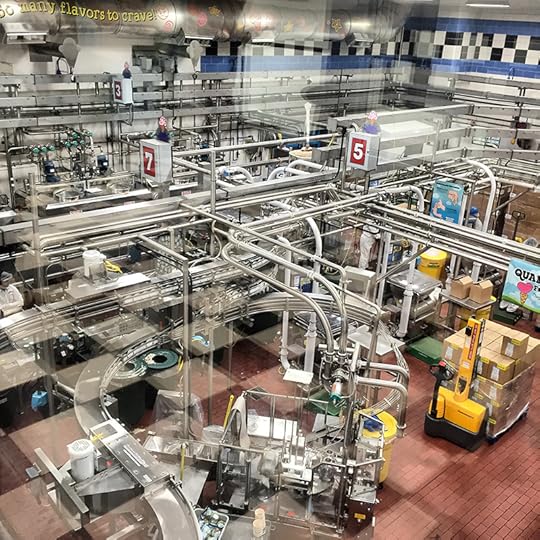

They were making Coffee Toffee at the factory that day and we were able to enjoy it straight from the production line. Soooo good.
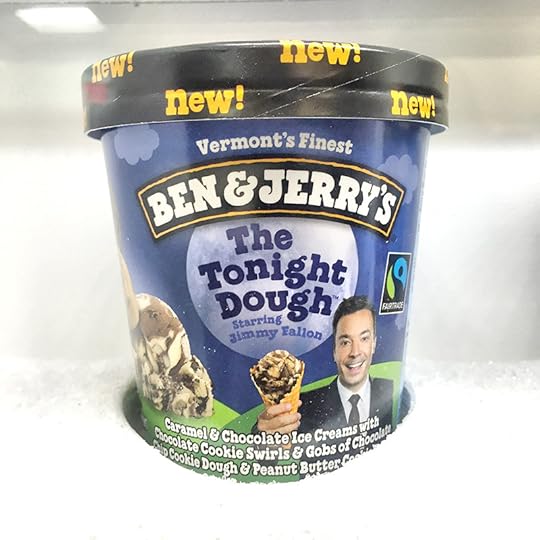 Oh hi Jimmy! You taste great too. : )
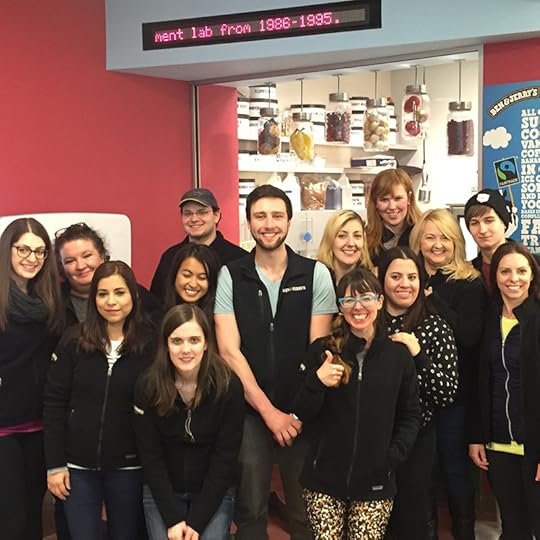
Here’s the whole ice cream loving group.
Amanda Topper, Deanna from Domestic Chicky, Sandra Perez, Colin Pinkham from Jezebel, Gwen Paja of the LA Girl, Kristin Hunt from Thrillist, Owen!, Stacie from One Hungry Mama, Jessie from Cakespy, Nicole from Popsugar, Natalie from NJinLA, Me, Nick from On Second Scoop and Katie from Good Life Eats.
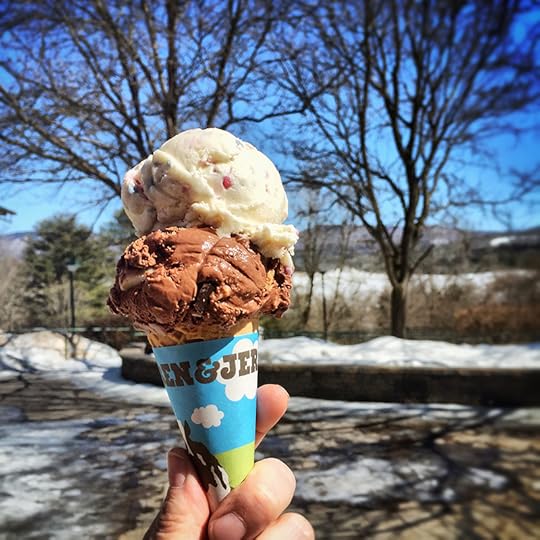
After the tour we tried samples of this Vanilla Brownie Caramel flavor. It’s not sold in pints, but it totally should be.
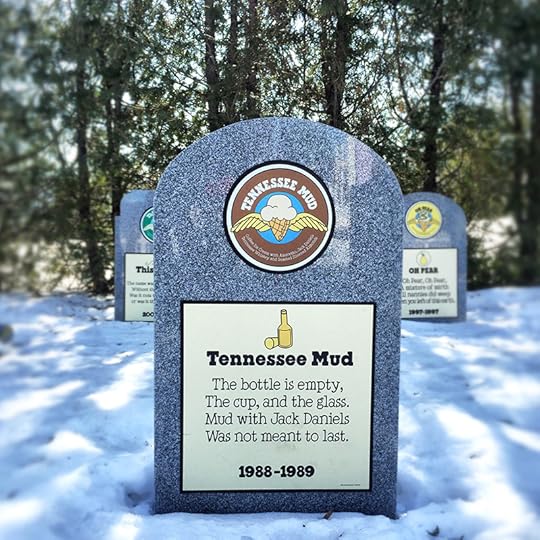
Then in the afternoon, we went snowshoeing around the factory, through the woods and down to the flavor graveyard where people can pay tribute to the “dearly depinted.”

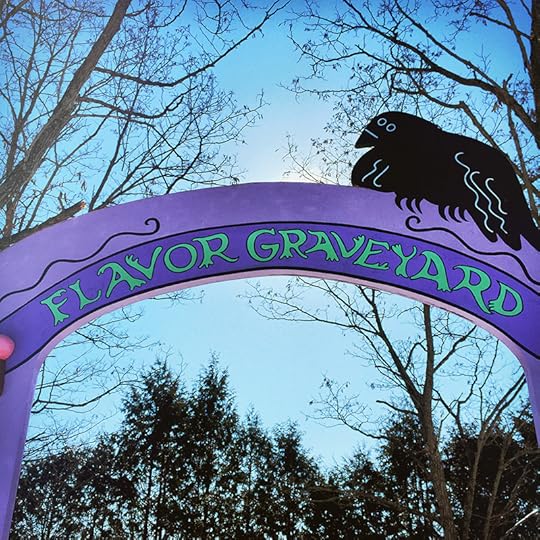
So much fun.
So much ice cream …
Oh and in the end, I even got to meet Ben!
It was a pretty sweet couple of days.

April 12, 2015
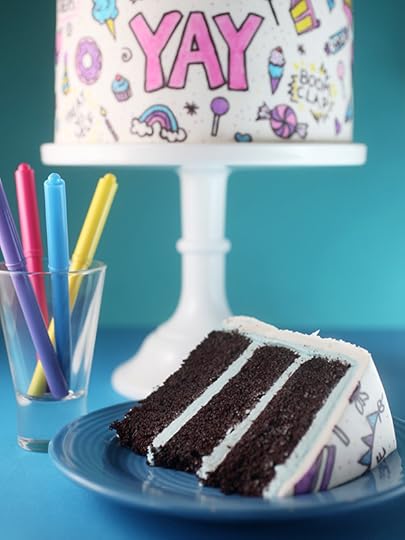
Doodles and Daydreams Cake
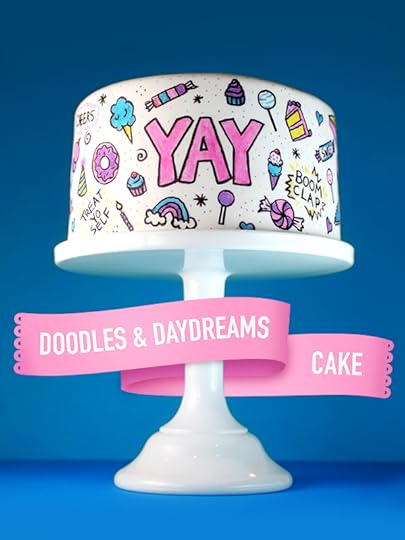
I had the most fun making this layer cake inspired by my blogging friend Sweetapolita’s new book.
Have you seen it yet? It’s full of all kinds of fun and yum. Page after page of recipes for luscious layer cakes and other gorgeous and adorable creations that make me want to get in the kitchen and play.
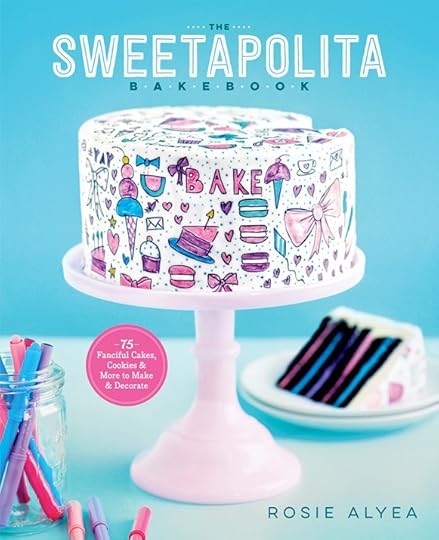
Here it is. The Sweetapolita Bakebook. When I saw the cover for the first time, I fell instantly in love. This cake spoke to me right away with it’s whimsical, playful design and I knew it would have to be one of the first things I tried.
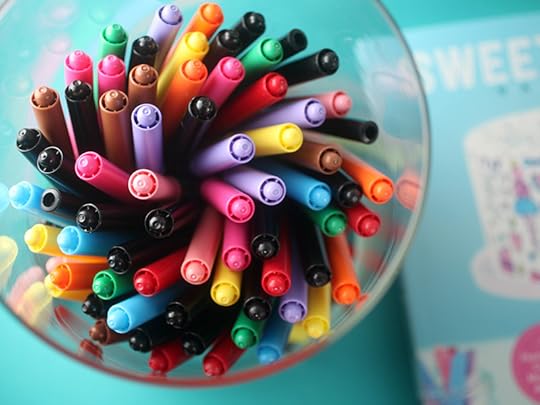
It also didn’t hurt that I already had more than my share of edible ink writing pens on hand so I basically had to make it.
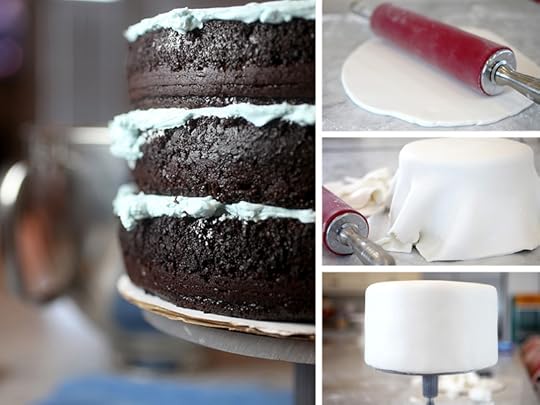
This is a big 8-inch triple layer chocolate cake filled with swiss meringue buttercream and covered in a layer of white fondant.
Basically, a big blank canvas for your creativity.
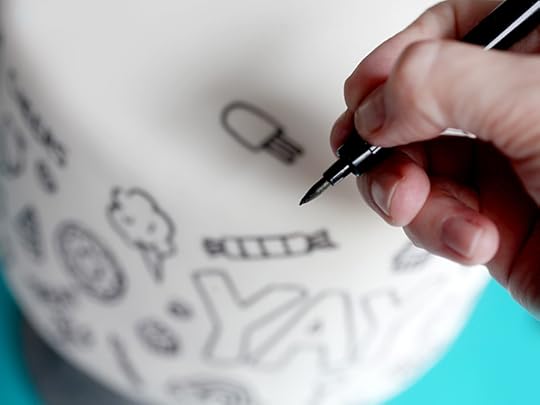
Once the cake is covered in fondant and the exterior has dried out a bit, you can start doodling. Outline or draw illustrations using the black edible ink pen first and let the ink completely dry before coloring in the shapes to help prevent the colors from mixing together.
It also helps to work in one area at a time instead of all over the place to help avoid smearing the black ink. For instance, if you accidentally rest your hand on the surface of the cake. Whoops. Yeah. That’s me. I’m a hand rester when I draw and I quickly realized that drawing at a 90-degree angle and trying not to rest my hand on the surface of the cake was a little harder than I had imagined. That’s ok though because I think some of my slightly wonky drawings add to the wonder and whimsy of this cake.

I drew simple sweets and things using pastel colors, but I could also easily see this transformed into a comic strip cake with words like POW and KABOOM and WHAM, etc. … all drawn in primary colors. It would be too much fun!
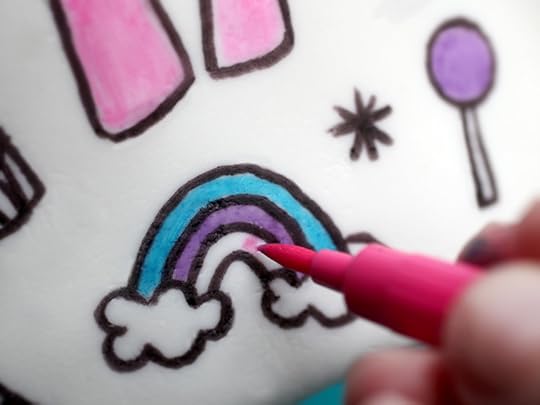
Once the black ink has dried, you can start coloring in the drawings. This was the fun part … to see it all come alive from black and white to bold and bright.
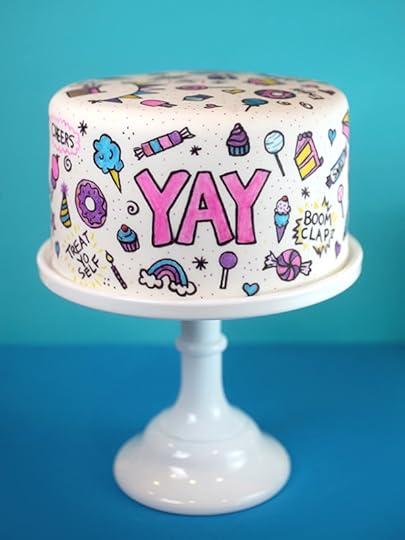
YAY. YAY. YAY. The super cutest cake. I love it. Thanks Rosie. And now, all I can think about is making another one. A fake styrofoam cake that I can cover in fondant to keep on display and look at every single day.
P.S. This cake is totally delicious. The project in the book calls for a black velvet cake recipe, but I switched it up a bit so I could try out Rosie’s Simple & Splendid Chocolate Cake and OMG………
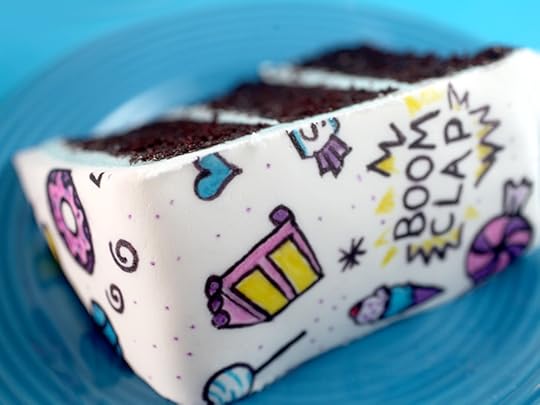
Boom Clap! So. Soooooooo goooood!
Simple and Splendid Chocolate Cake
2 1/2 cups all purpose flour
2 1/2 cups superfine sugar
1 cup dutch process dark cocoa powder
2 teaspoons baking soda
2 teaspoons baking powder
1 teaspoon salt
1 1/2 cups buttermilk
1 cup hot coffee
3/4 cup vegetable oil
3 large eggs, room temperature
1 tablespoon pure vanilla extract
Preheat oven to 350 degrees fahrenheit. Grease the bottoms of three 8 X 2-inch round cake pans and line them with parchment paper.
Sift flour, sugar, cocoa powder, baking soda, baking powder and salt into the bowl of an electric stand mixer.
In a large spouted measuring glass, whisk together buttermilk, coffee, oil followed by the eggs, and vanilla.
With the mixer on low, gradually add the milk mixture and beat until smooth, about a minute. Use a rubber spatular to scrape the sides and bottom of the bowl. Divide batter evenly among prepared pans.
Bake the first two layers in the center of the oven for about 20-25 minutes or until a toothpick inserted comes out with a few crumbs. Repeat with final layer.
Let cakes cool in their pans on a wire rack for ten minutes. Using a knife, loosen the sides of the cakes. Place a large piece of plastic wrap over on top of the cake pan and then place a wire rack on top. Invert holding the cake board and wire rack together and place on the counter. Lift the pan and then peel off parchment paper from the cake. Wrap the cake layer with the plastic wrap and repeat with other two layers. Place layers in the freezer for about 15 minutes or fridge for 30 minutes while you make the frosting.
Swiss Meringue Buttercream
7 large egg whites
1 3/4 cups granulated sugar
2 cups unsalted butter, room temperature and cut into cubes
2 teaspoons pure vanilla extract
pinch of salt
Add egg whites and sugar to the bowl of an electric stand mixer. Make sure it is wiped completely clean and dry first. Place bowl over a pot of simmering water. Cook, whisking gently and continuously until the temperature reaches 130 degrees fahrenheit.
Return the bowl to the mixer and fit it with the whisk attachment. Beat on medium high speed until it reaches the stiff peak stage (thick and glossy) about 2-3 minutes. Decrease the speed to medium and beat until the bottom of the bowl is cool, about 10 minutes.
Switch to the paddle attachment and with the mixer running on low speed, add the butter one piece at a time. Beat until the mixture is silky smooth, about a minute. Add the vanilla and salt, and beat on low speed for three more minutes.
Tint frosting if desired.
To assemble and decorate:
Remove cake layers from the freezer or fridge and level each layer by trimming the tops of the cakes flat with a long serrated knife. Snack on trimmings while you finish the cake. : )
Place a dollop of frosting in the center of a cake board and place the first layer with the cut side down, on the cake board. The frosting will help keep it from sliding around. Place the cake board on a turntable for decorating. Spread frosting on top and then add the second cake layer, cut side down. Spread on more frosting and top with third layer, cut side down.
Apply more frosting on the top layer and down the sides for a crumb coat. The crumb coat is intended to catch any loose crumbs and to keep them from getting in your final layer of frosting. Once covered, you can use a bench scraper to easily smooth the sides.
Place the cake in the refrigerator for about 30 minutes for the frosting to firm up some. Then remove and apply a final coat of fluffy frosting on the top and sides. Make sure the surface is as smooth as possible. When frosted and smooth, return to the refrigerator at least one hour to set up before covering in fondant.
Roll out fondant to almost 1/4 inch thick with a diameter that equals at least the width of the top of the cake plus the height of the sides. In my case the cake was 5 inches tall X 2 plus 8 inches wide. So I rolled the fondant out until it was over 18 inches in total diameter.
Lift the fondant using your rolling pin and carefully unroll it on top of the cake. Smooth the fondant on top of the cake and down the sides with a fondant smoother and trim off the excess around the base.
NOTE: I’d recommend Rosie’s book to get all her tips on working with frosting and fondant to help you out. She has lots of tips and goes into much more detail than I have here.
Place the fondant covered cake back in the fridge for 1-2 hours to dry out before drawing. When firm and the fondant is dry, doodle little drawings with a black edible ink writing pen. Return to the fridge for another 1-2 hours to allow the black ink to dry. Remove and fill in the drawings with the colored edible ink pens of your choosing.
The cake will keep at room temperature for 24 hours and up to 3 days in the refrigerator.
Recipes and project adapted from The Sweetapolita Bakebook by Rosie Alyea, © 2015.
:::::::::::::::::::::::::::::::::::::::::::::::::::
Enjoy!!!
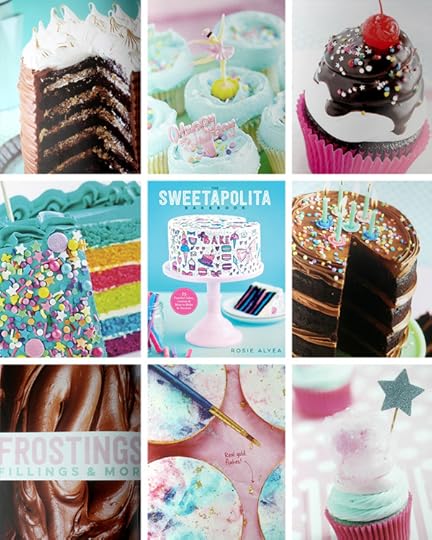
Here’s a peek at some of the other amazingness inside The Sweetapolita Bakebook.
I think you’ll love it.
* This post contains affiliate links to Amazon.

March 29, 2015
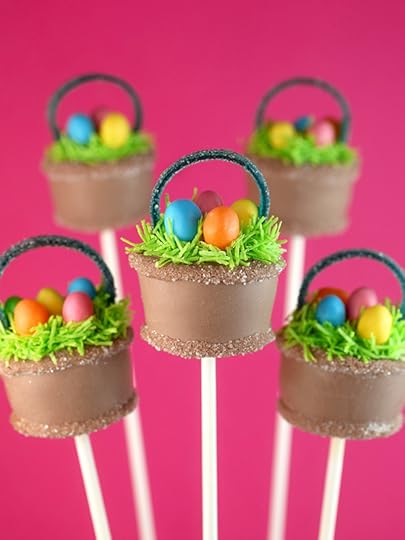
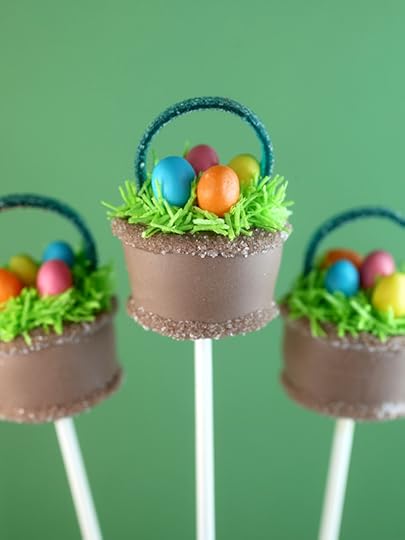
Easter Basket Cake Pops
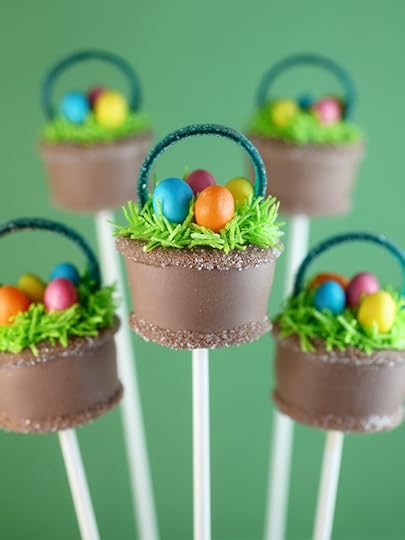
Look what the Easter Bunny brought early… bite-size baskets filled with candy and cake, too.
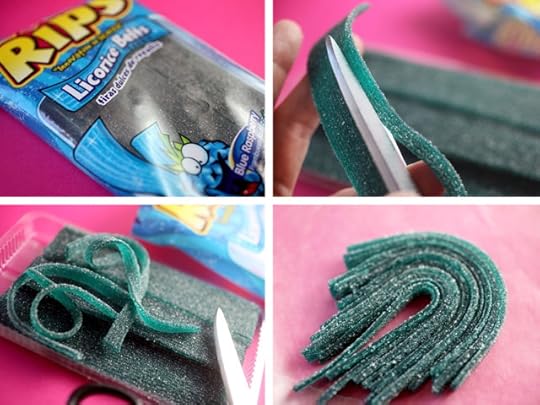
I used licorice belts for the basket handles. Just cut them into 1/4 inch strips that are about 3 1/2 inches long and set aside until you are ready to decorate.
If you cut them too long, they’ll droop on top of the pop.
Okay, now let’s shape the basket bases.
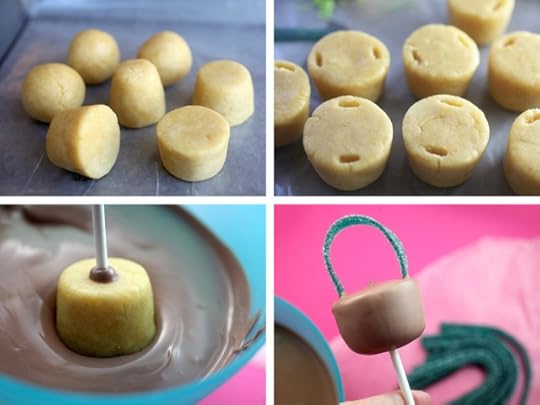
Follow the directions for basic cake pops and then shape the cake and frosting mixture into basket bottoms. Take a look at this post on how I shaped cylinders, but basically I roll them into balls first and then shape by hand as much as possible. When the basket shape starts to form, you can slide it on a wax-paper covered surface to achieve distinct edges.
After you have them shaped, use a toothpick to make two indentions on the top of the base. This is to help the handles have a slightly deeper place to be inserted for stability.
Dip the cake pops into melted chocolate coating and then insert the handles before the coating sets. That’s probably the trickiest part of making these pops.
But, it’s the rest of the decorating that’s the most fun.
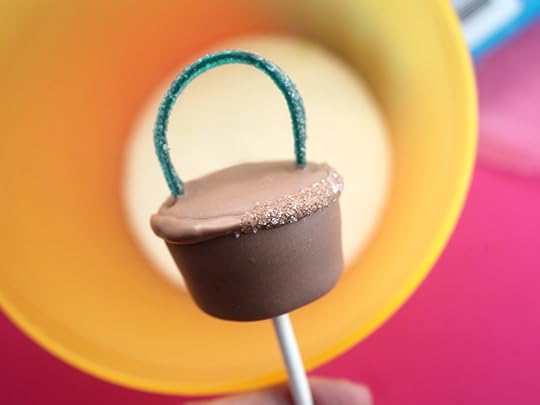
First, draw an outline around the top of the basket with a toothpick dipped in melted candy wafers. Then sprinkle with white sanding sugar before the coating sets. Use a clean toothpick to straighten up any lines.
You can also use an alternating candy wafer color here to jazz them up even more. I went simple on the bases though, so the Easter eggs and grass would stand out.
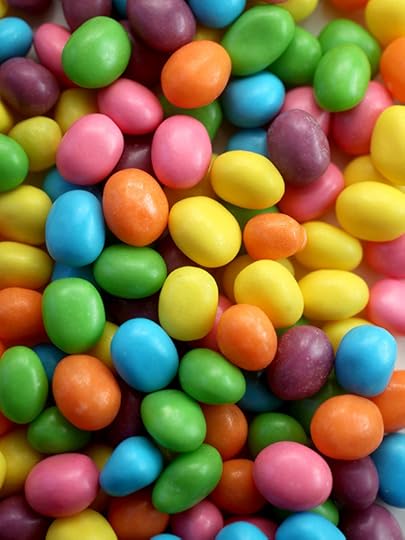
The eggs are Sweetarts jelly beans. I like these because the colors are so vibrant.
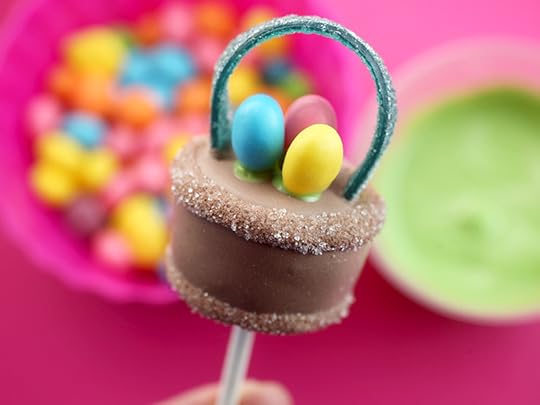
Just dip the ends of the “eggs” in melted green candy wafers and attach to the center, top of the basket and let dry.

Now for the grass. I love this Green Candy Shred from my product line with Make’n Mold.
It’s pretty perfect for Easter grass, but you can also use shredded coconut tinted in pastel colors for a thicker grass.
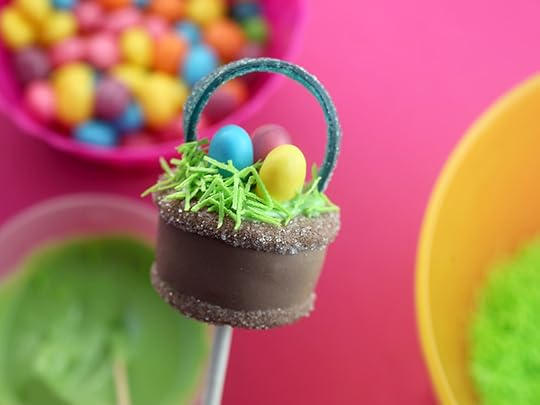
With a toothpick dipped in coating, apply more melted green candy wafers on the top of the basket, around the eggs and in between the handles. Then gently press the green shred into the coating and let dry.
And that’s it!
Now, I did have to stop myself from overdoing these. I thought the baskets might have needed something else, but maybe if the borders were in alternating colors that would be enough for me.
In the meantime, I put a bow on it … with some leftover bows from last weeks bunny cookie pops.
Bow Update: Just went into the kitchen after finishing this post and the bows on the handles aren’t a good idea. They’ll make the handles droop from their weight. Instead try attaching them to the front of the basket if you want to add them. : )
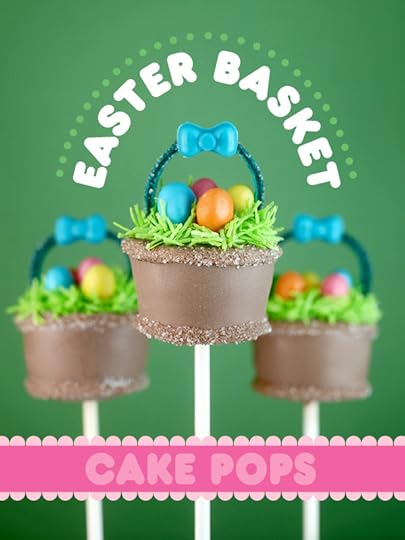
Too cute. Enjoy!!!
March 22, 2015
Bunny Cookie Pops

I decorated some more oreos for you. Moreos. ; ) … I loved the letter cookie pops I posted last week so much that I couldn’t resist making cute cookie bunnies, too! They’re as easy as they are adorable.
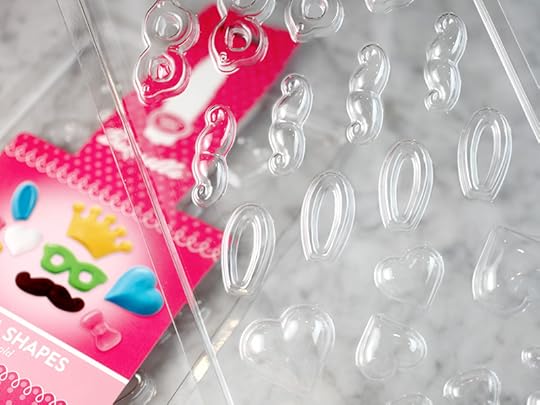
I used my Playful Shapes Mold to make the bunny ears and bow ties. It came in pretty handy for these little hoppers.
P.S. … take a look at these bunny cookies from Cake Pop Crazy on instagram using the mustache and eyeglasses shapes from the same mold … super cute!
You can also use the mold to make flower petals and I’ve seen them used by Stacey’s Cake Pops to make crazy cute turkey feathers, too.
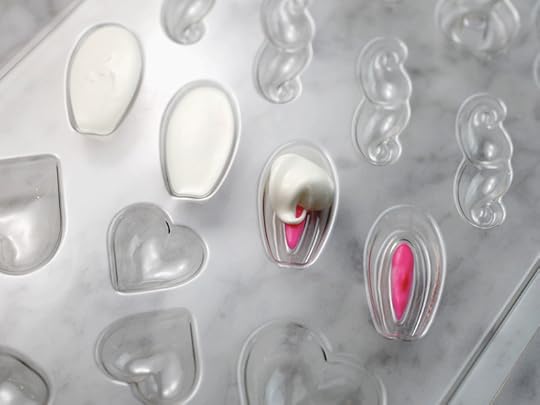
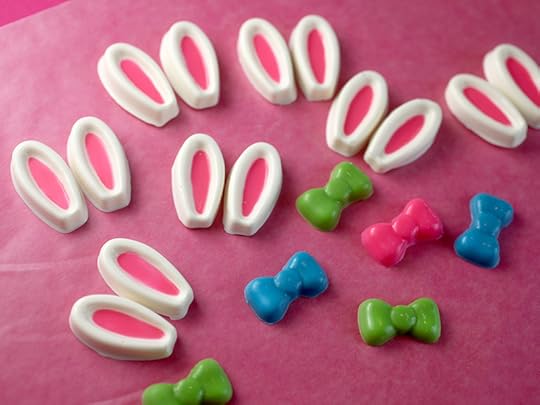
But for bunnies, fill the center of the ear shapes with melted pink candy wafers and let dry. Then fill the rest of the mold cavity with melted white candy wafers. Tap the mold on the counter to even out the coating. Then, place the ears in the fridge for a few minutes to set quickly. Remove the shapes from the mold by pressing on the plastic and twisting the mold over a towel on the counter.
Make the molded shapes ahead so you can save time the day you want to decorate.
Keep in mind: You could also make your own ear shapes if you don’t have a mold. Just pipe melted candy coating on wax paper in the shape you need. If you want a pink center, pipe the pink first, let it dry and then pipe over and around it with white to finish the shape. Use a toothpick to help guide the coating if necessary. When you’re ready to use them, the fronts of the ears will be flat with a pink center… the backs of the ears will probably be a little lumpy though.
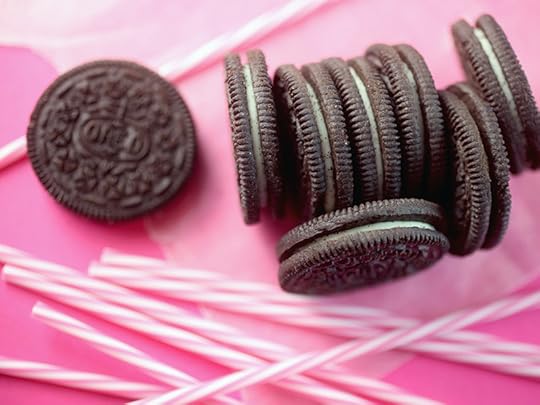
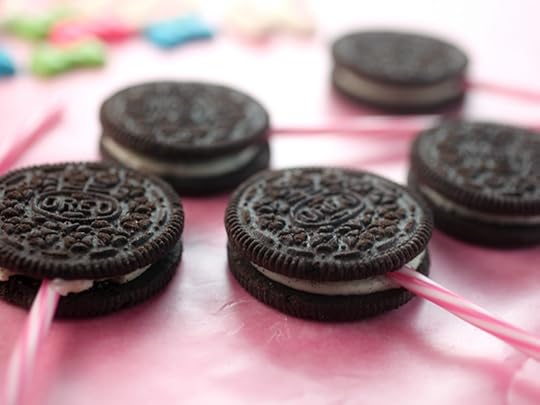
Separate the cookies and dip the end of a pink pop stick in melted candy wafers. Press the stick into the creme center and put the cookies back together. You can also add a little coating around the base of the stick to help keep it from falling off. Let the coating set before dipping.
Take a look at last week’s #YAY cookies to see how.
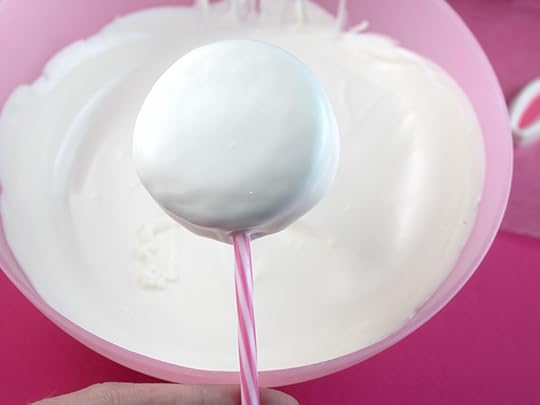
Dip the cookie completely in melted white candy wafers and let the excess fall off.
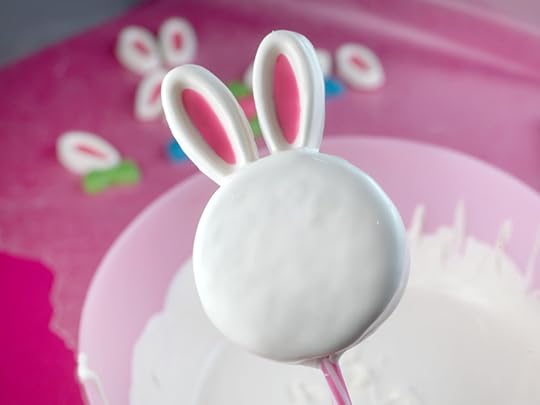
Dip the bottom end of two pre-made ears in coating and position on top of the cookie. You’ll want to do one at a time and hold in place for a bit to keep it from falling off. Take your time. Trust me, I did have a few mess-ups before I got the balancing right. Place in a stand and let dry completely.
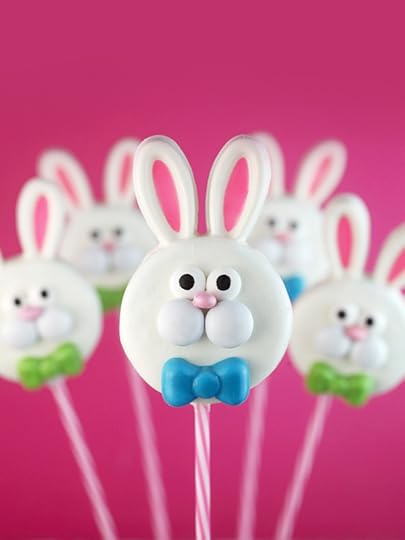
To decorate the faces, I just used a few things.
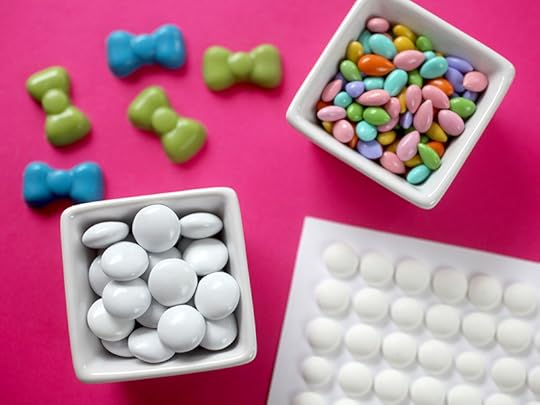
White M&M’s or candy gems for cheeks, pastel sunflower seeds for the pink noses, my DIY Sugar Eyes, and bows I made using the same Playful Shapes Mold.
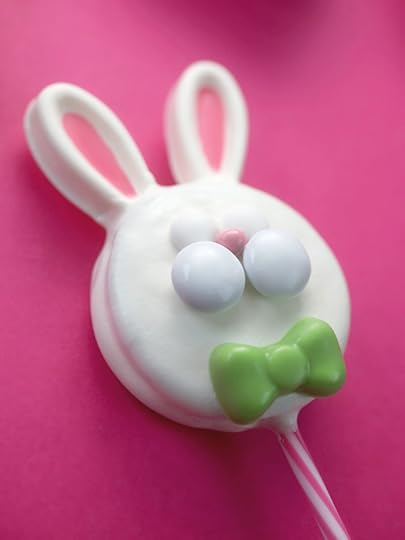
Use melted white coating to attach the individual candies. When it sets, the candies will be glued to the front of the cookie. Then just draw the eyes with a black edible ink pen.
You can find my Playful Shapes Mold, Pop Sticks, Candy Wafers and DIY Sugar Eyes at A.C. Moore Crafts or online directly from Make’n Mold.
But get creative and decorate them in different ways. Once you have ears in place, the front is pretty much a blank canvas. I can see heart sprinkle noses, confetti sprinkle eyes, mini marshmallow cheeks, and more.
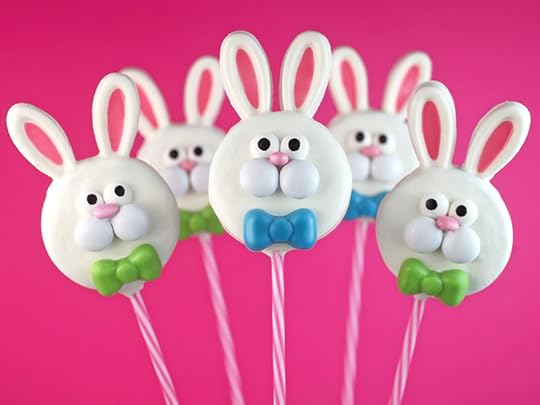
Here’s “hopping” you enjoy these cookie cuties.
March 16, 2015
Easy Oreo Cookie Pops
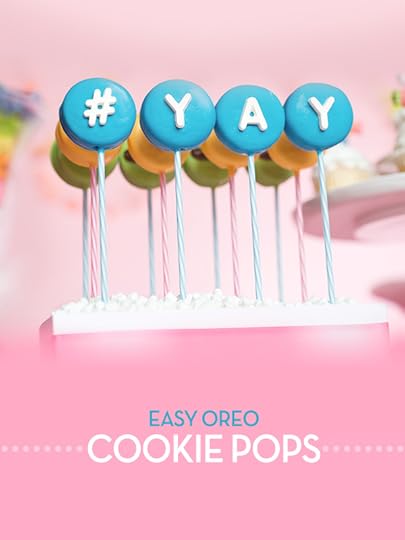
Here’s a quick and cute, no-bake way to say yay with cookies!
Or say anything else sweet for that matter. It’s a totally fun way to make someone eat their words, too.
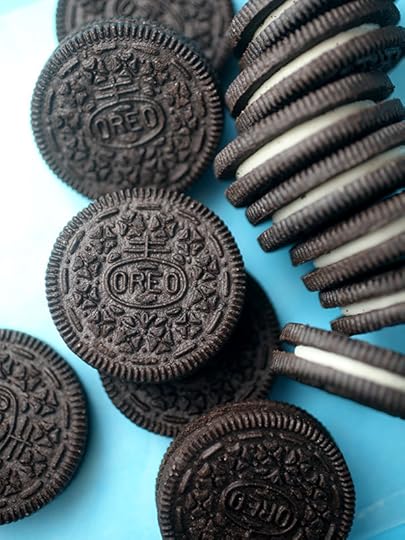
Just start with your favorite sandwich cookies.
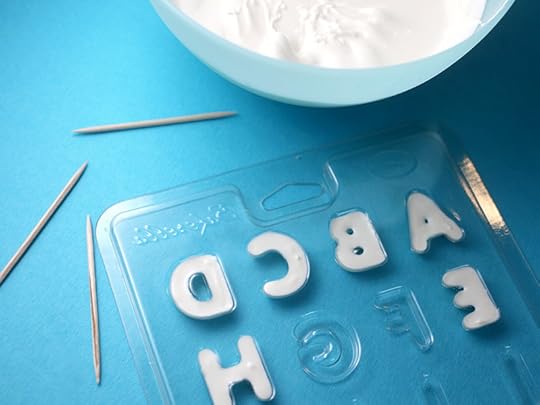
You’ll also need edible letters.
Use a letter candy mold and candy wafers in the color of your choice to make the words.
Fill the mold cavities with melted candy wafers and place the mold in the fridge for a few minutes to set quickly.
Gently twist the mold and/or press the back of the letters to help release them from the mold. Then turn the mold over on a dish towel on the counter so the don’t break when they release.
You can make them ahead of time and save them for when you need them.
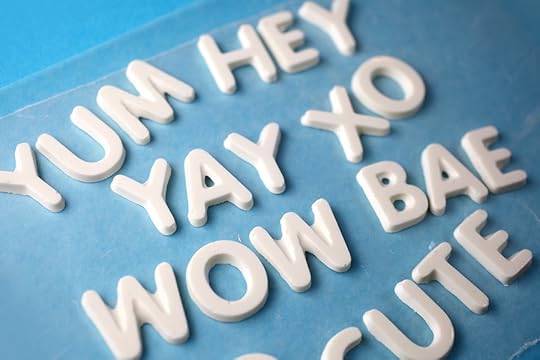
Arrange the letters to say short words like YUM… YAY… HEY… or BAE ; )
Set them aside and then get ready to dip.
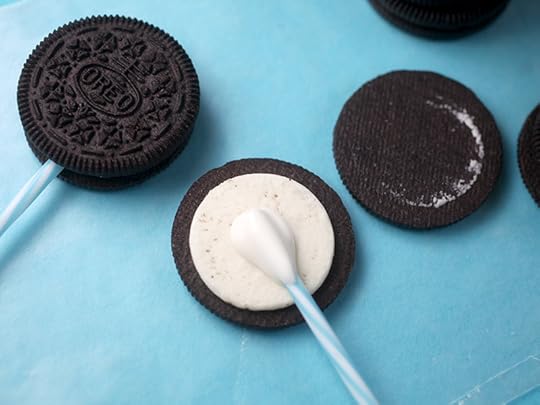
Separate the cookies. Dip the end of a pop stick into melted candy wafers. Press gently into the creme center and then sandwich the cookies back together.
Let the coating set and when dry, dip the cookies into more melted candy wafers.
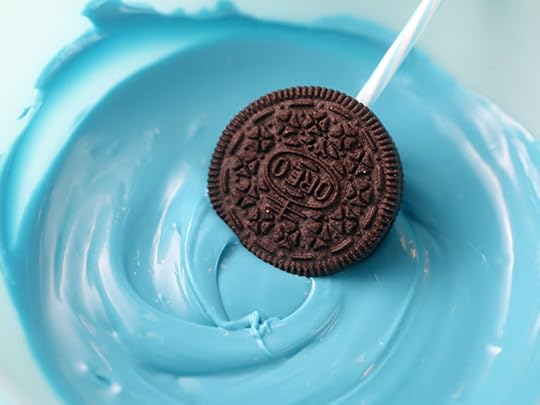
I went with sky blue for these so the white letters would pop off the fronts.

Let the cookie pops dry completely in a cake pop stand or simply lay them flat on a wax paper-covered surface.

Attach the candy letters to the front of the cookie pops with a dot of coating to use as glue.
Then say HEY and give them to someone to brighten their day.
Sweet!
Below are the Bakerella for Make’n Mold Items used in this post. You can find them at A.C. Moore Crafts or you can get them online directly from Make’n Mold at the following links.
Pop Sticks
Letters Candy Mold
Numbers Candy Mold (if you want the hashtag symbol)
Sky Blue Candy Wafers
Marshmallow White Candy Wafers
Bakerella's Blog

- Bakerella's profile
- 9 followers

