
Bakerella's Blog, page 15
October 2, 2016
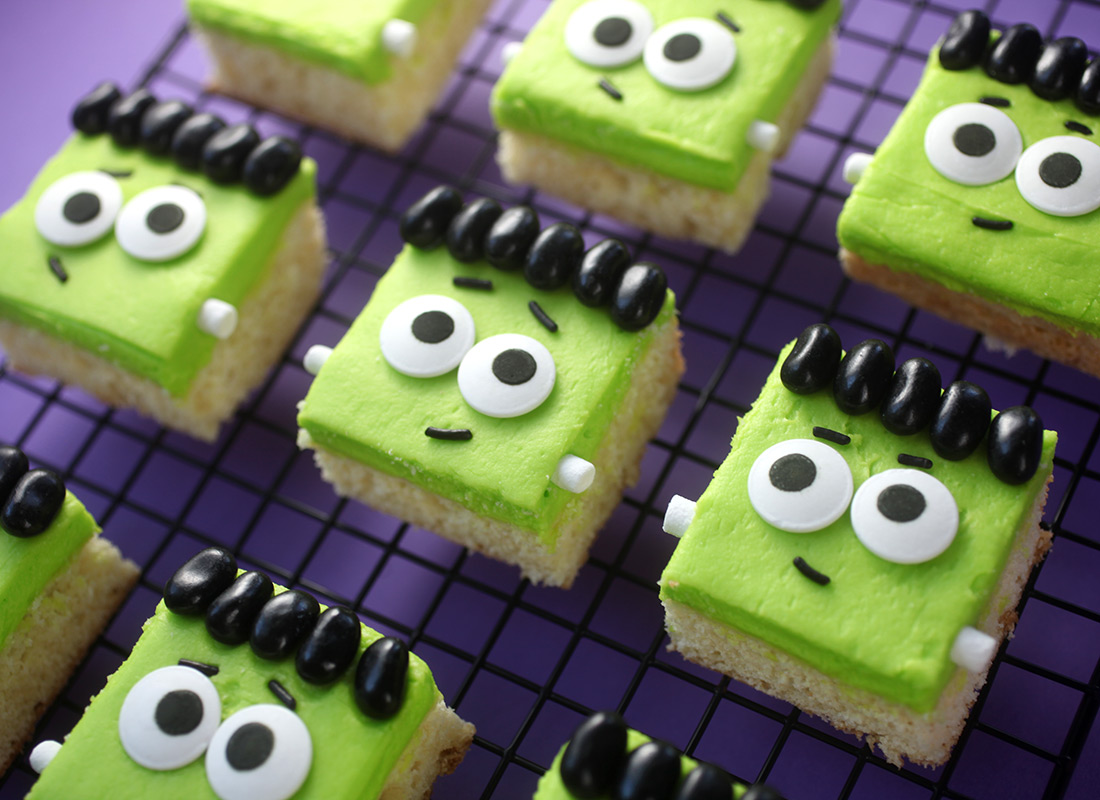
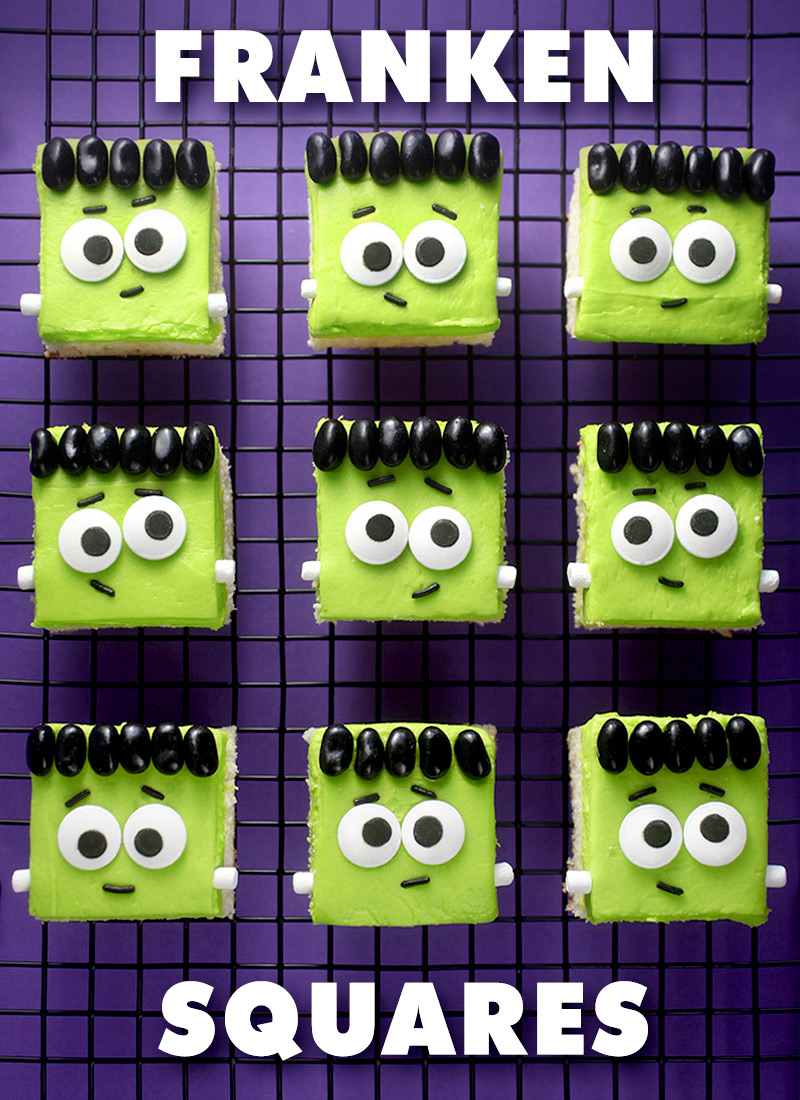
Frankensquares

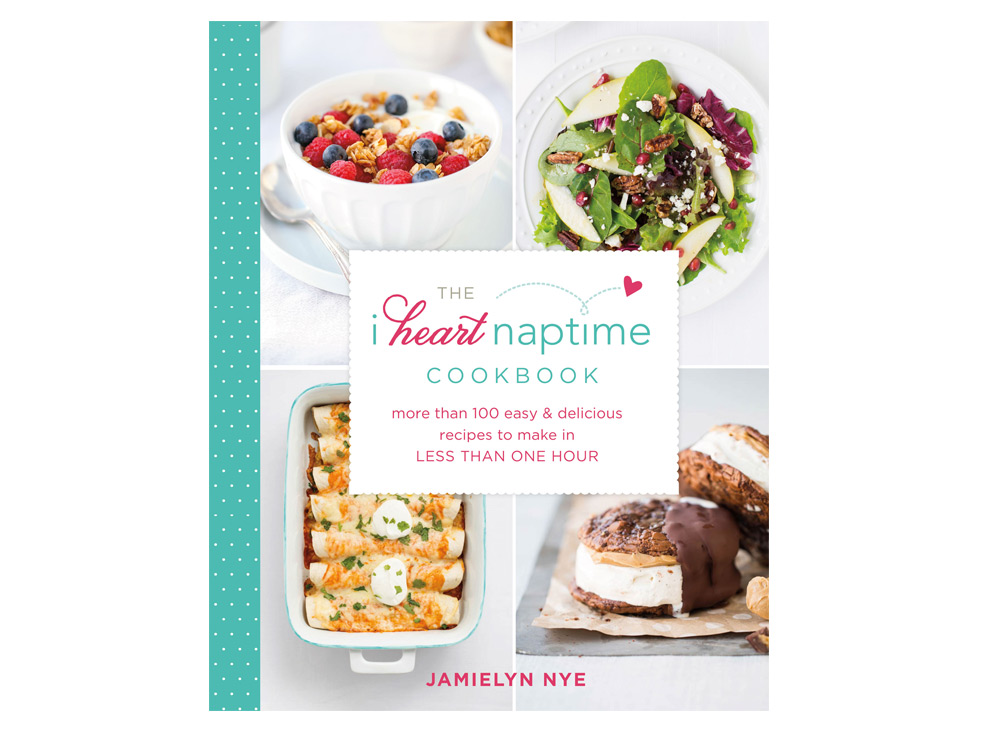
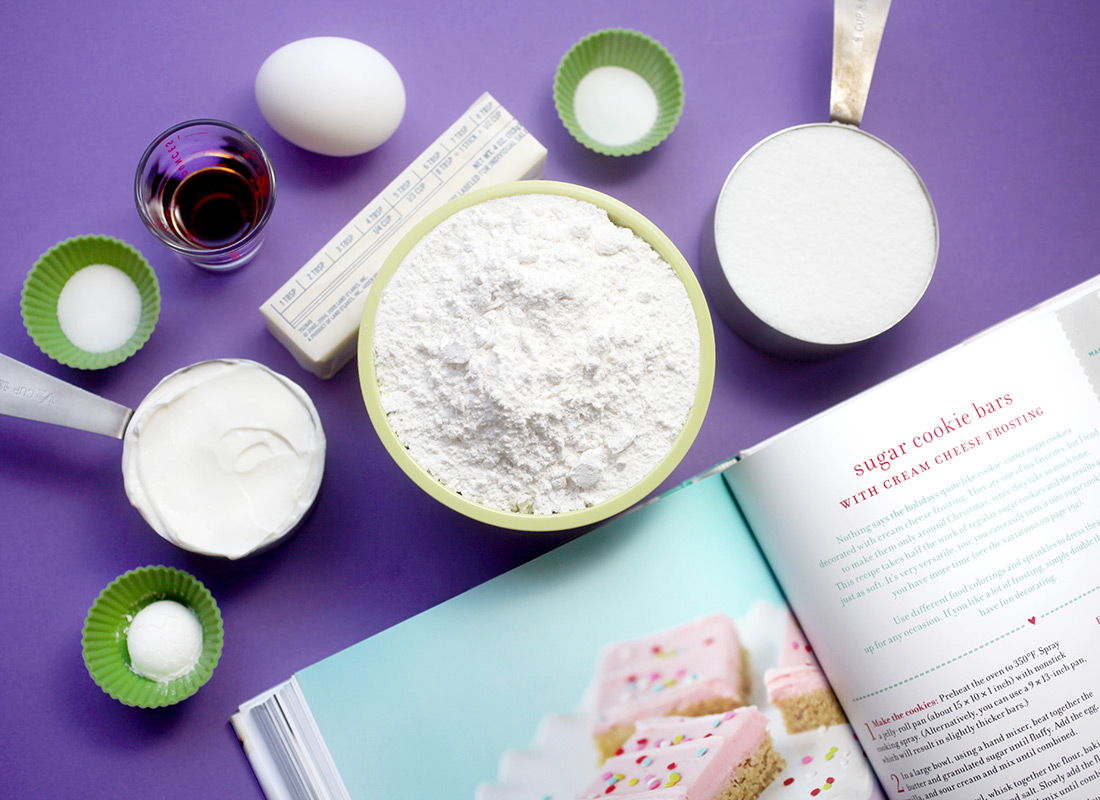
How franken’ cute are these little guys for Halloween?! … And so easy to make which is always awesome. I used a recipe from The I Heart Naptime Cookbook for Sugar Cookie Bars with Cream Cheese Frosting. It’s my food blogging friend, Jamielyn’s first cookbook full of quick and easy recipes perfect to pull off in an hour. Love that!
Instead of the pretty in pink, party-worthy frosting and sprinkles in her book, I took a twist with the tops and turned them into Frankenstein faces. While these are super easy to make, the decorating will take you over the hour mark. But feel free to make them in any frosting and sprinkle color combination that you love. They’ll still be so cute.
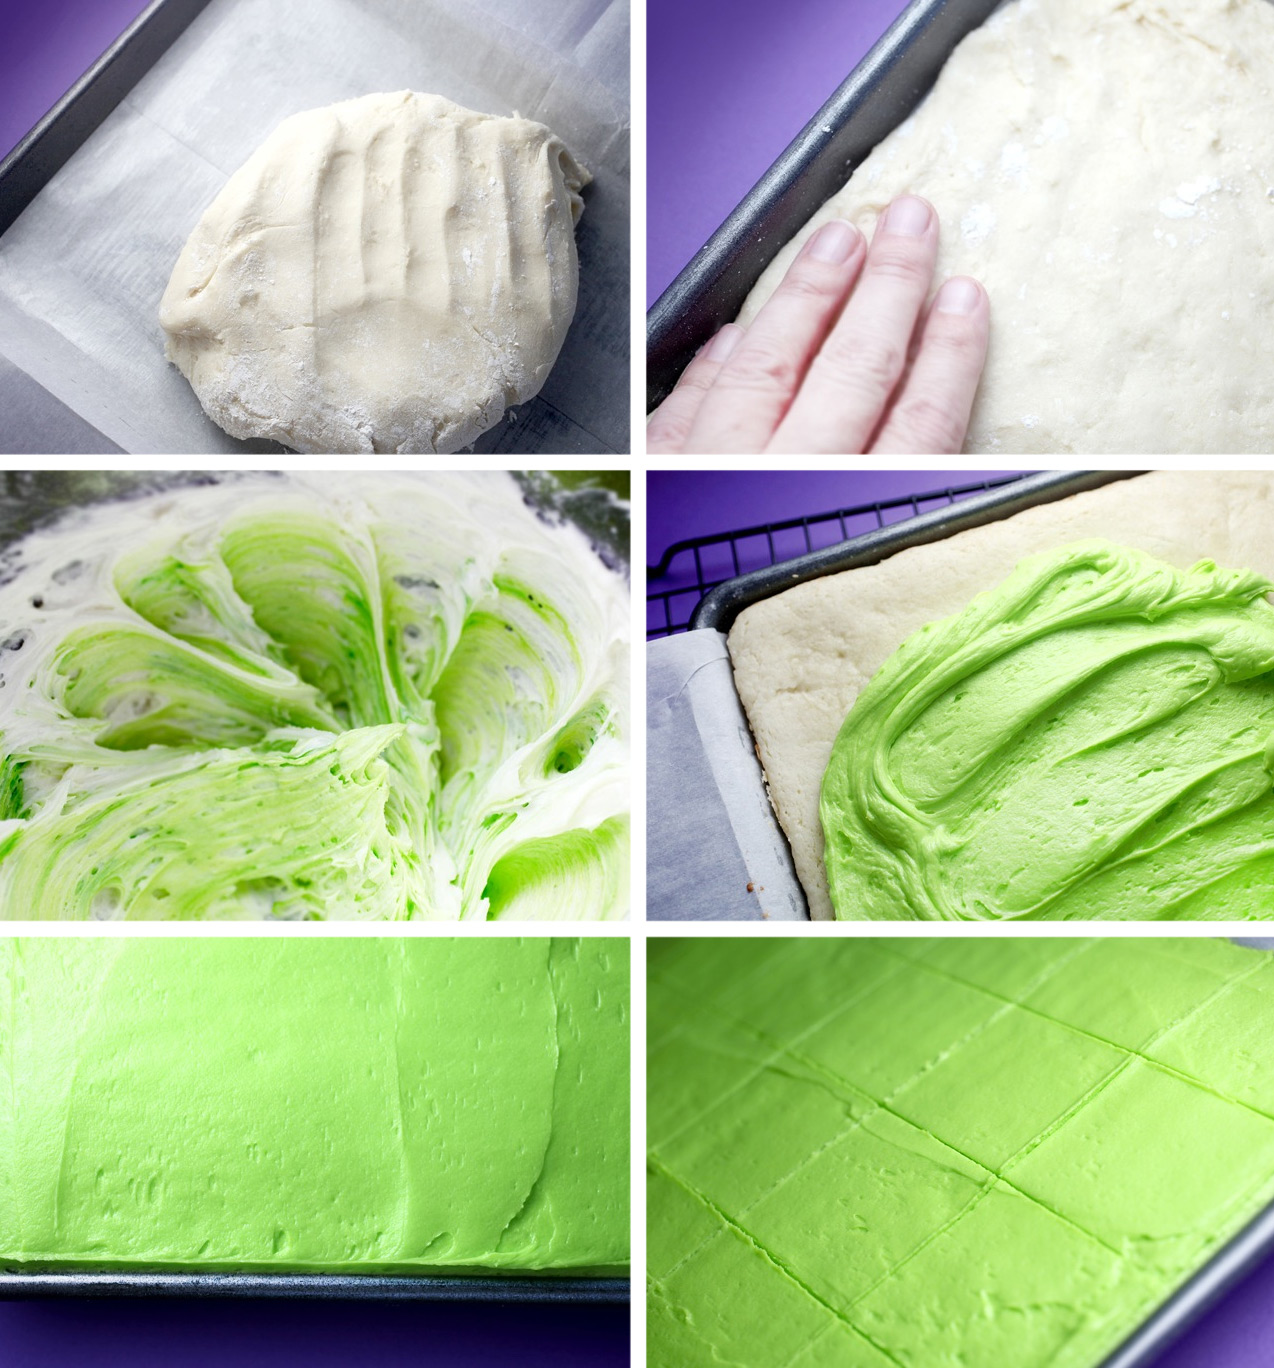
Making the sugar cookie bars is simple … whip up the dough, press into a baking pan, frost and sprinkle when baked and cooled. Cut into bars and done.
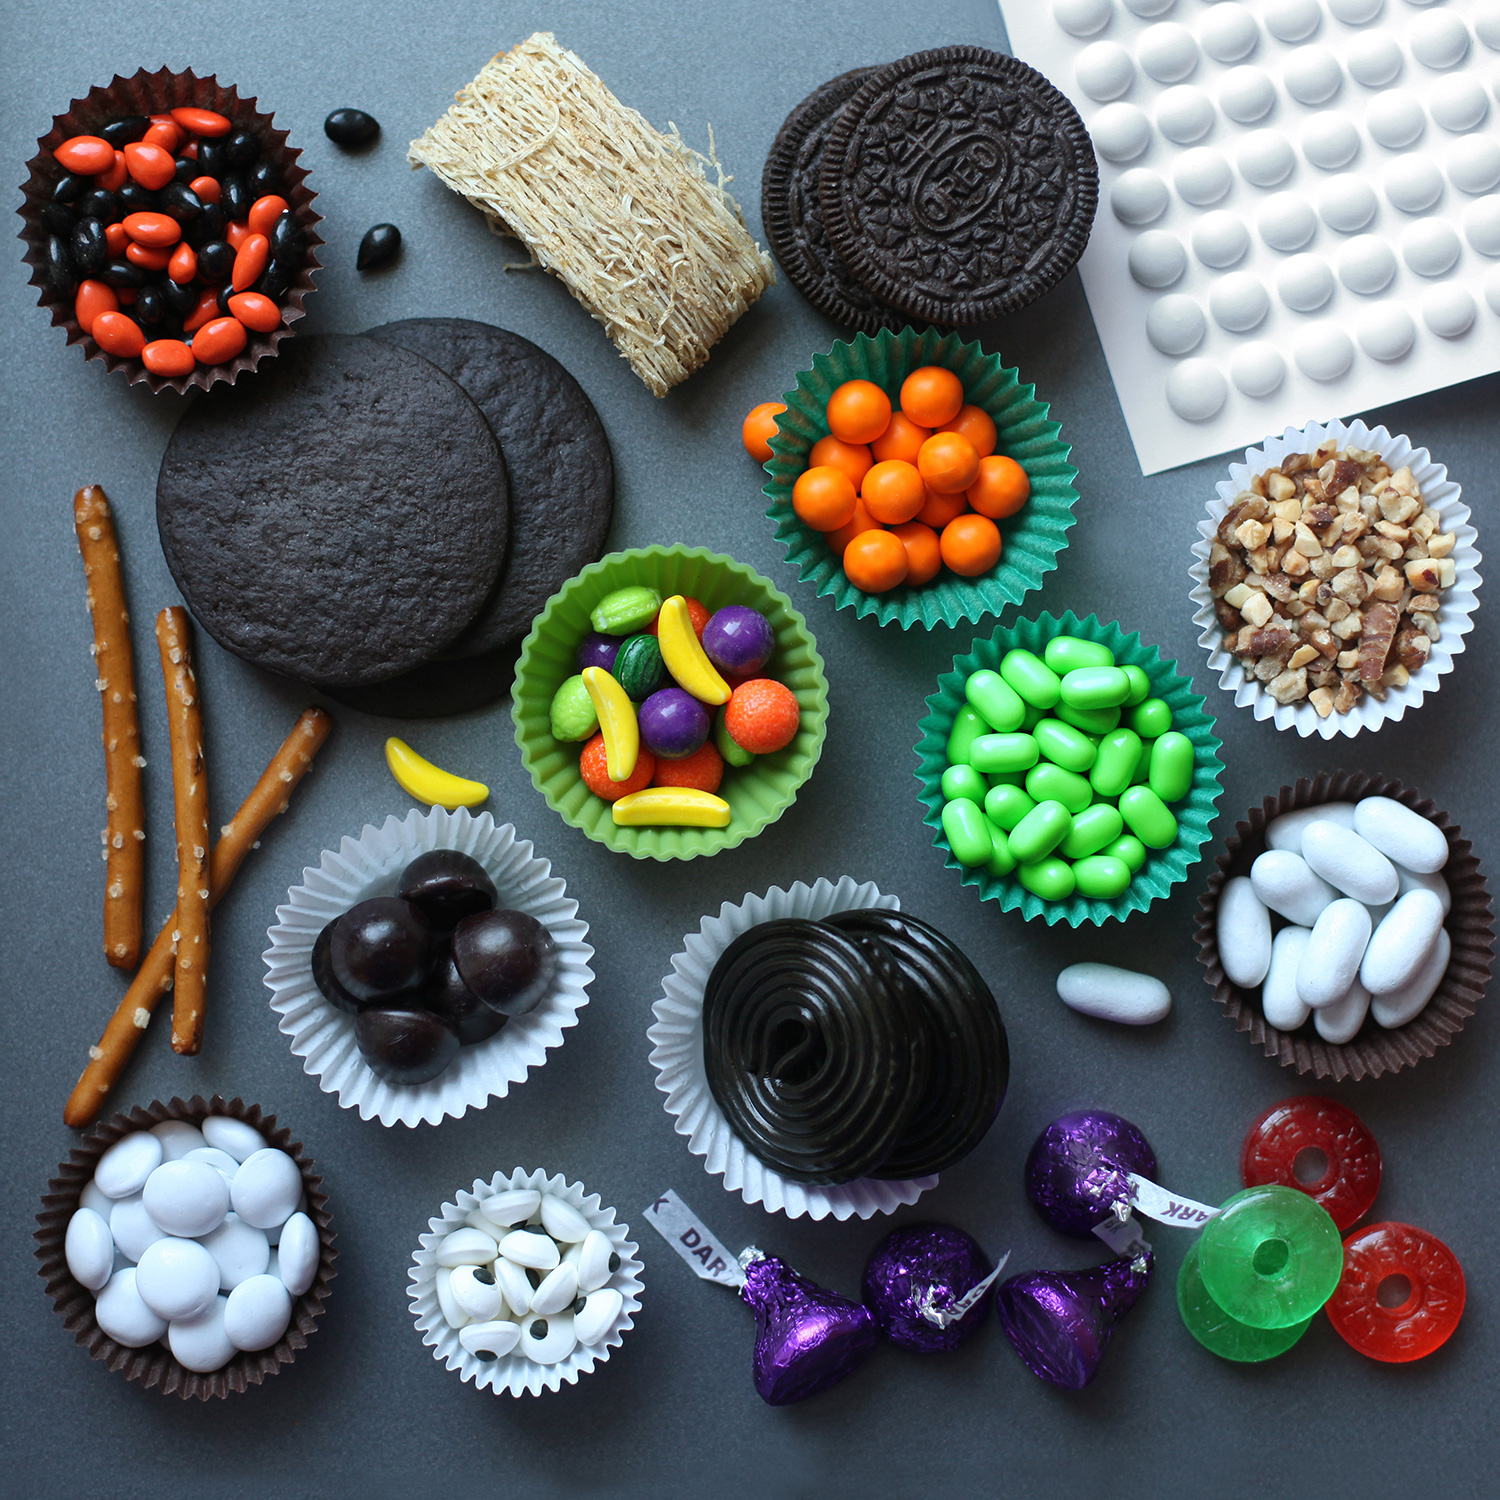
Or break out the extra candies and go full on Frankenstein.
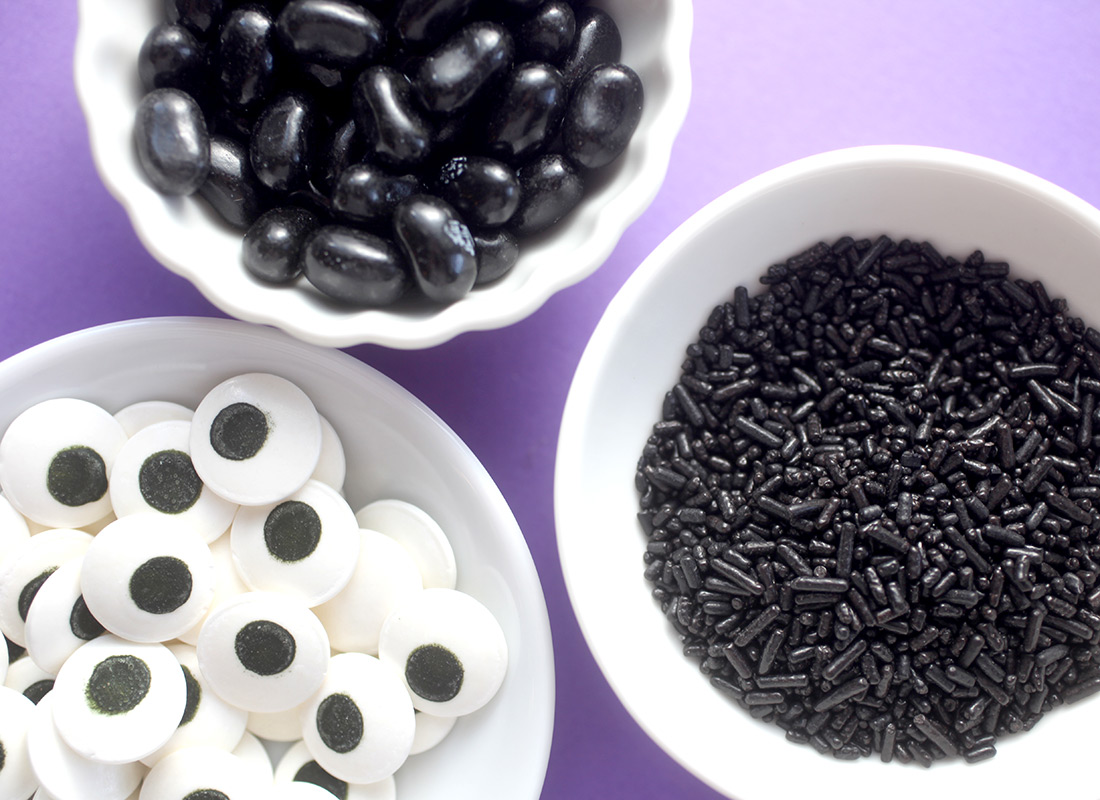
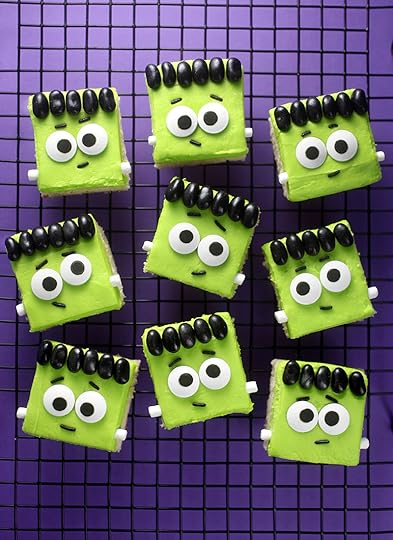
For the faces, I used black jelly beans, black jimmies, and jumbo candy eyes.
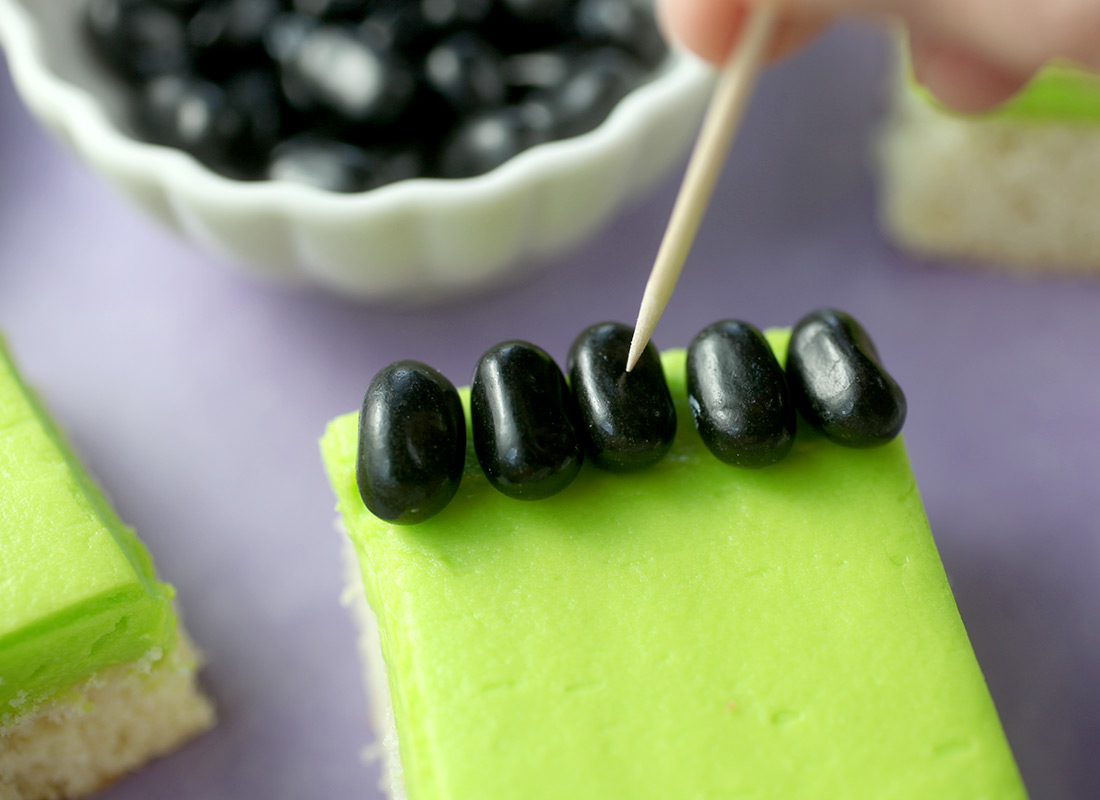
Place 5-6 jelly beans on top of square sugar cookie bar for Frank’s hair. Use a toothpick to position if necessary and when in place, gently press into frosting.
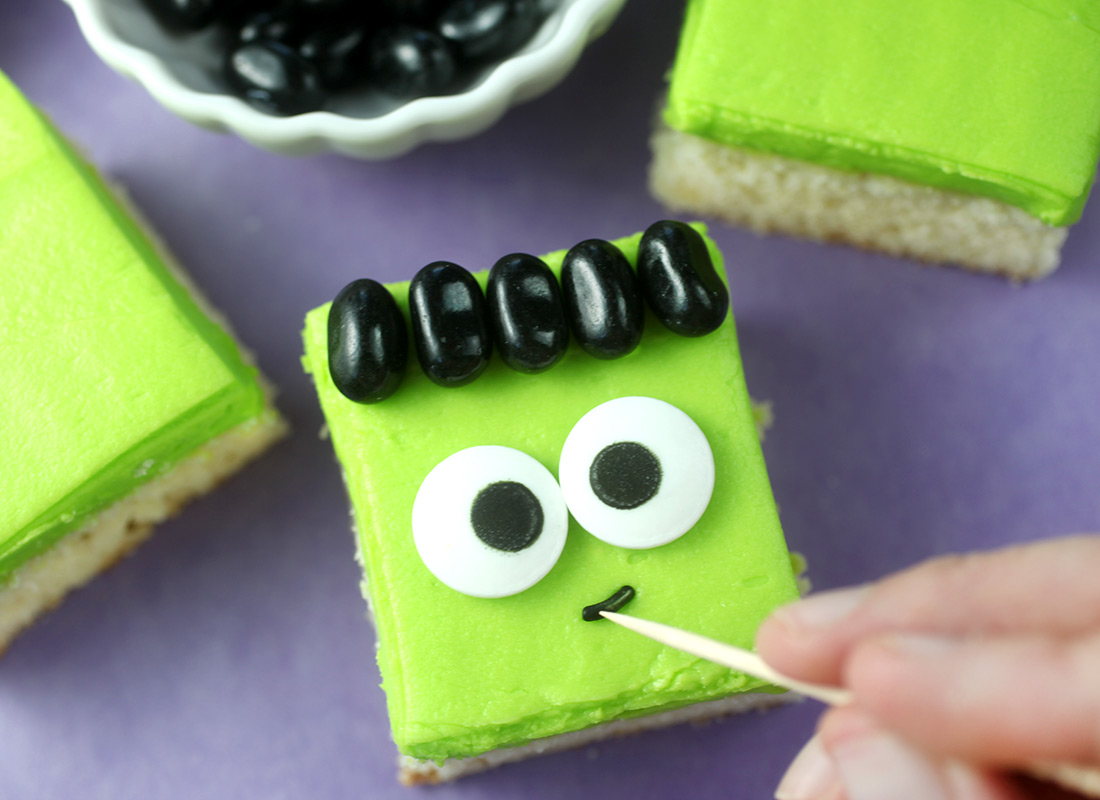
Set the eyes in place and use black jimmies for mouths and eyebrows. Most of the time, there are some curved jimmies in the sprinkle bottle which totally makes a subtle little smirk.
Okay, but now we need some bolts to finish the look.
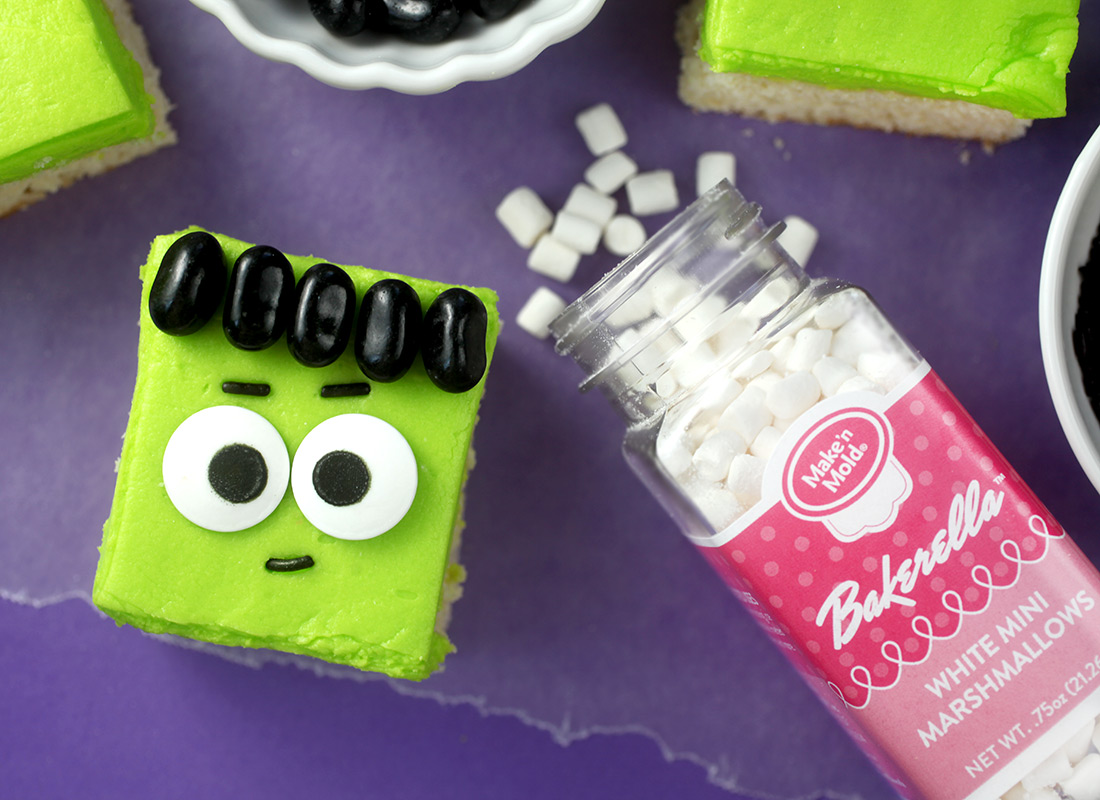
My mini marshmallows worked great to press into the sides of the frosting. Perfect proportions and lightweight enough not to fall off the sides. Win!
Yep, the faces look much cuter with bolts in place.
Sugar Cookie Bars with Cream Cheese Frosting
Sugar Cookie Bars
1 stick unsalted butter, room temperature
1 cup granulated sugar
1 egg
1 1/2 teaspoons vanilla
1/2 cup sour cream
2 1/4 cups all-purpose flour, plus more for dusting
1 teaspoon baking powder
1/2 teaspoon baking soda
1/2 teaspoon salt
Cream Cheese Frosting
(amended slightly from the book)
6 tablespoons unsalted butter, room temperature
8 oz package cream cheese, room temperature
4 cups powdered sugar
1 teaspoon vanilla
pinch of salt
For the cookies: Preheat oven to 350 degrees and spray a 15 X 10 X 1 jelly roll pan with nonstick spray. (Note: I used a 9 X 13 inch pan for thicker bars and greased and lined the pan with parchment paper to easily lift bigger bars out of the pan.)
In a large bowl, beat together sugar and butter using a mixer until light and fluffy. Add egg, vanilla and sour cream and mix until combined.
In a medium bowl, whisk together flour, baking powder, baking soda and salt. Slowly add flour mixture to the sugar mixture until combined. Lightly flour your hands and press dough evenly into baking pan with palms of your hands.
Bake for 15 minutes or until toothpick comes out clean. Don’t let tops brown or over bake.
For the Frosting: In a medium bowl, beat butter and cream cheese using a mixer until fluffy. Slowly add powdered sugar, vanilla and salt. Mix until combined, smooth and creamy. Add any food coloring if desired and frost cooled sugar cookie bars. Top with sprinkles or cut into bars and then decorate into Frankenstein faces with black jelly beans and jimmies, jumbo candy eyes and mini marshmallows.
Recipe adapted slightly from The I Heart Naptime Cookbook by Jamielyn Nye, © 2016
Enjoy!


September 25, 2016
Cake Pops Halloween
October is right around the corner and Fall is finally here. That means it’s the start of the sweet and spooky treat season and one of my favorite times of the year to bake. So, if you’re new around here or didn’t see my Halloween book when it first came out, then here’s a little peek at Cake Pops Halloween and a fun way to help you trick out your treats.
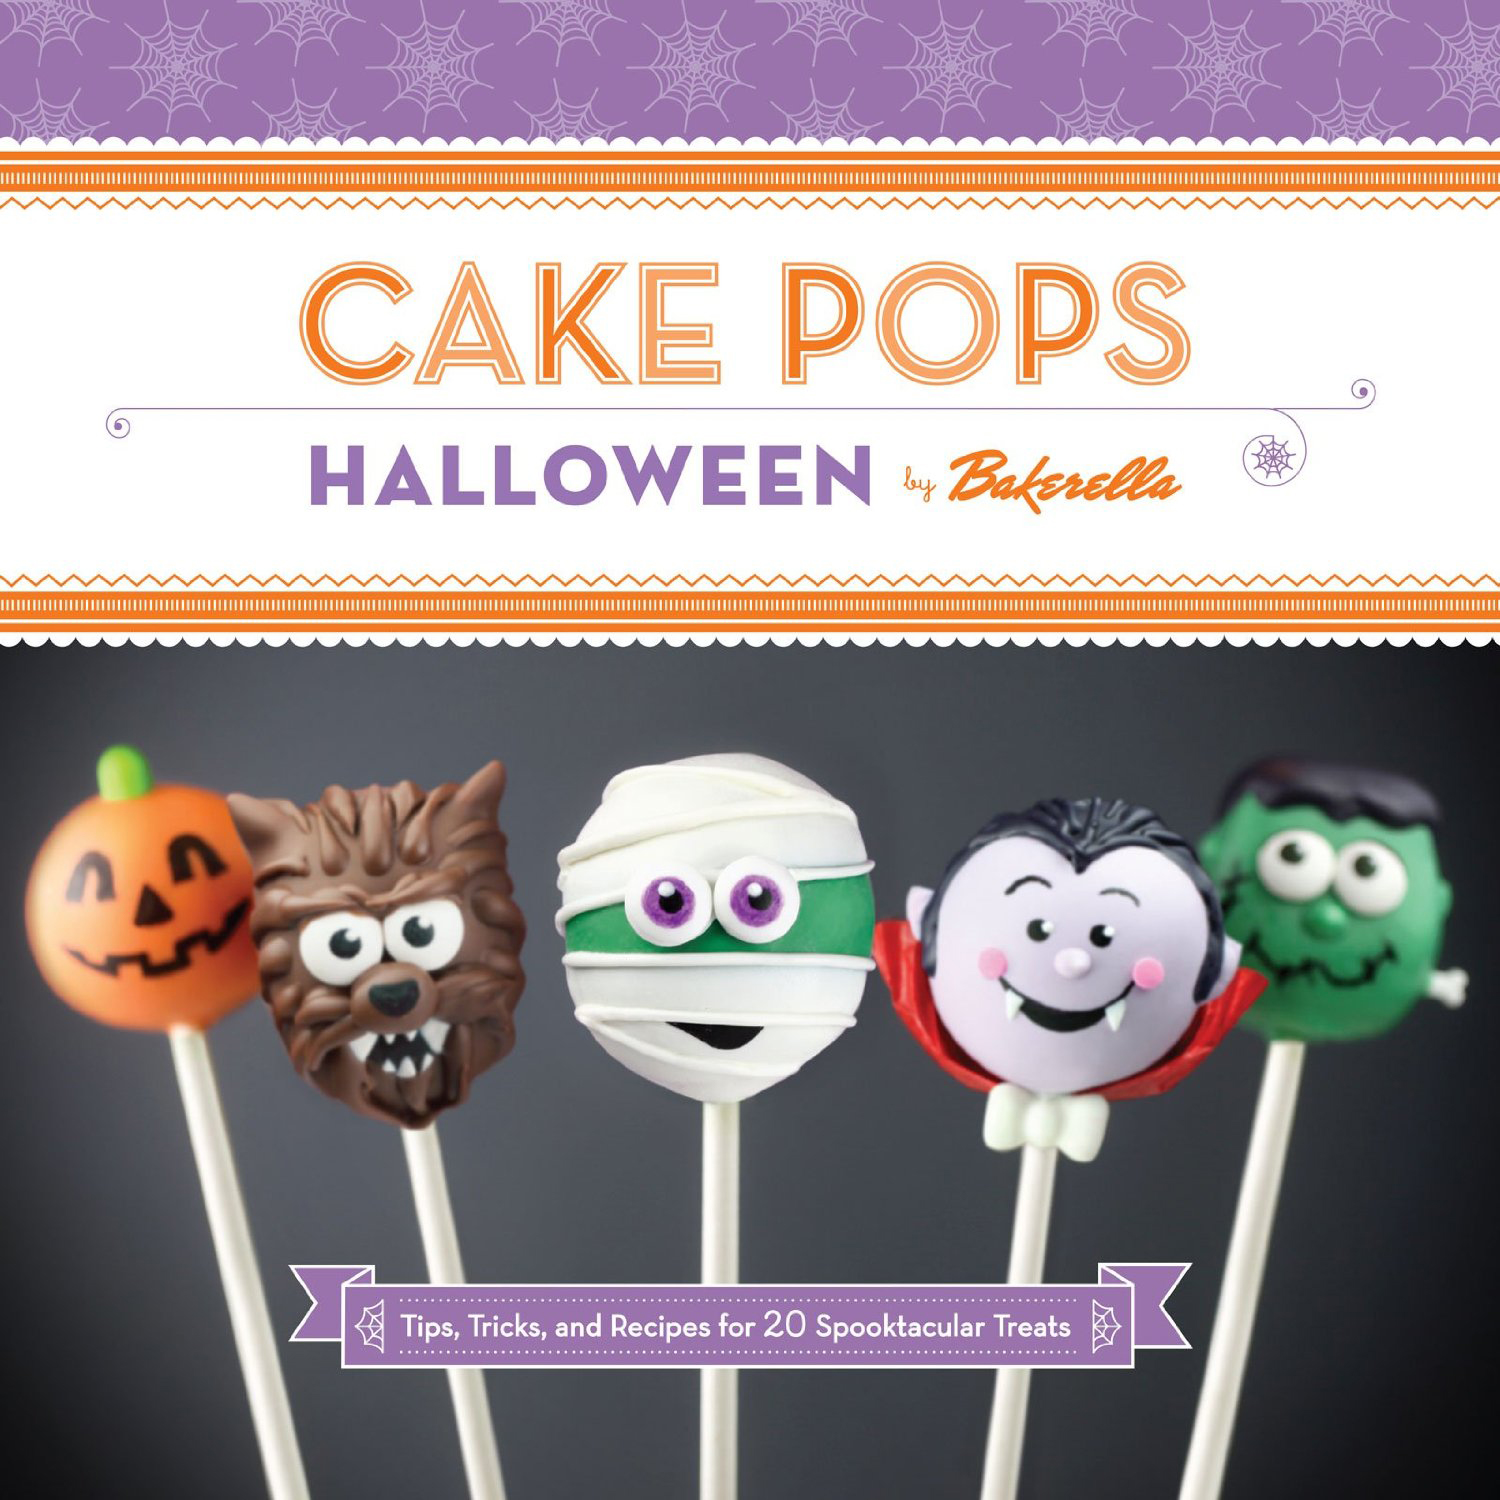
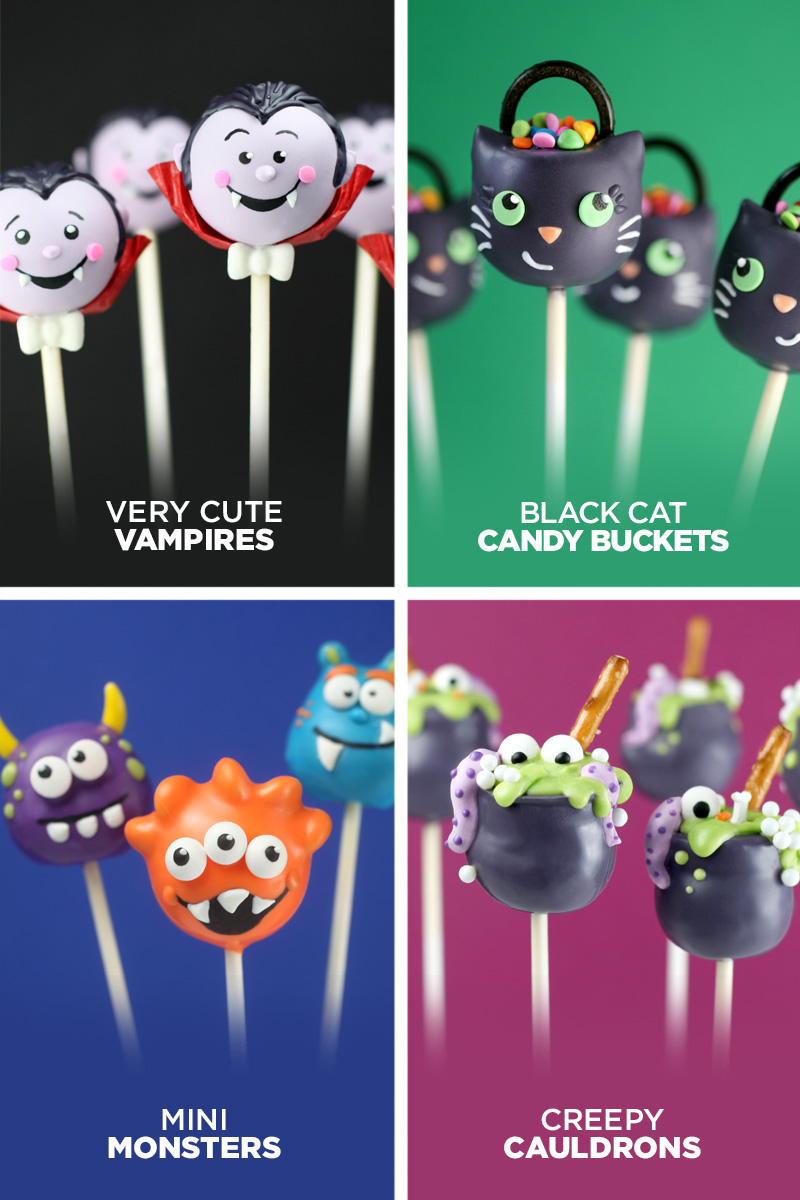
Inside you’ll find some very cute vampires, cute black cat candy buckets, creepy cauldrons, mini monsters and more. But, they’re not all spooky, some are simply fall-inspired like the awfully cute owls, caramel apples, sweet scarecrows, and candy corn cuties.
The idea for the book started out as an ebook only. I had so many Halloween designs already created that I asked my publisher, Chronicle Books if they would want to do an ebook since Halloween has such a short selling period. They jumped on board and I combined some of my favorites from the blog plus cool new designs so you can have and refer to the pops all in one place. But Chronicle is all around awesome and they also created a special print edition for me, offered exclusively from them. You won’t find this one in bookstores so if you want a copy then get one while you can. (Note: Unfortunately, Chronicle only ships in the US.)
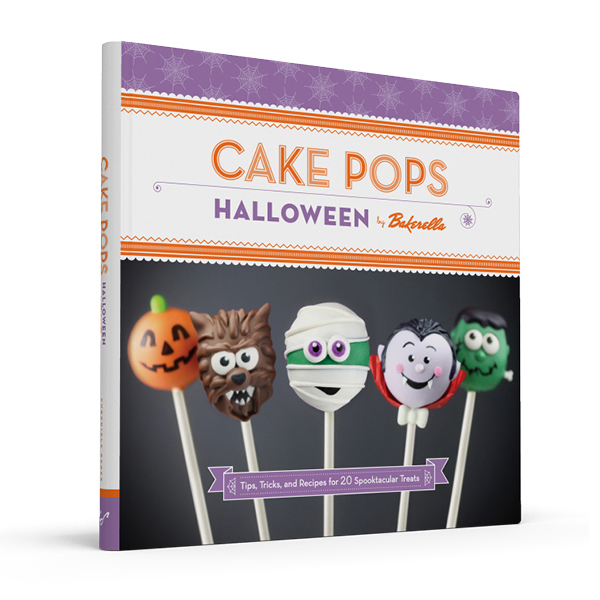
You can get the printed book here from Chronicle Books.
Or get the ebook here on Amazon.
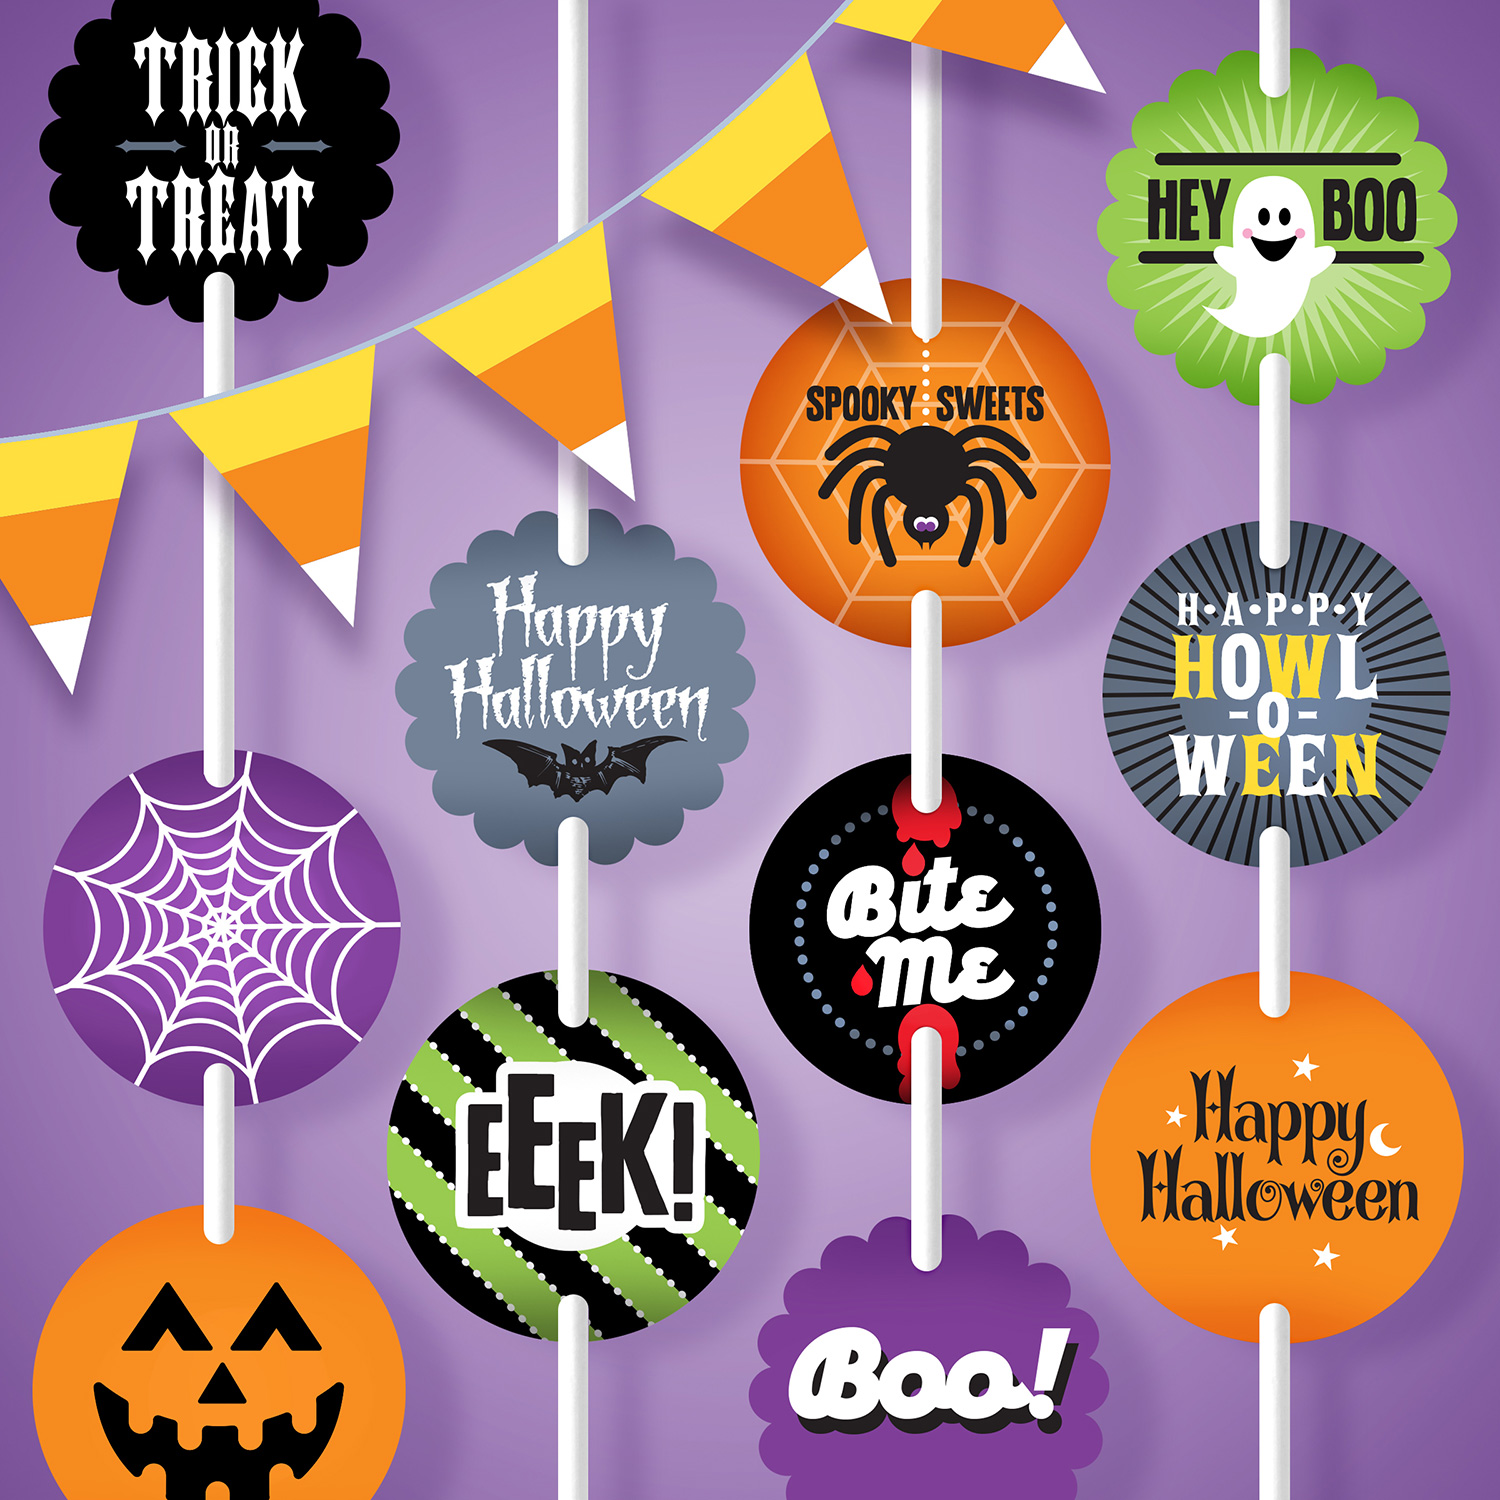
If you don’t need a book, that’s okay, too. I have some free printables you can use for cake pop tags, cupcake toppers or labels that you can download right here. The pdf contains 12 different tag designs in different colors plus… a few templates for projects from the book.
You can download the free printables here.
Enjoy!
And if you make any treats from the book, please tag them with #CakePopsHalloween on Instagram so I can see your spooky sweets, too.

September 18, 2016
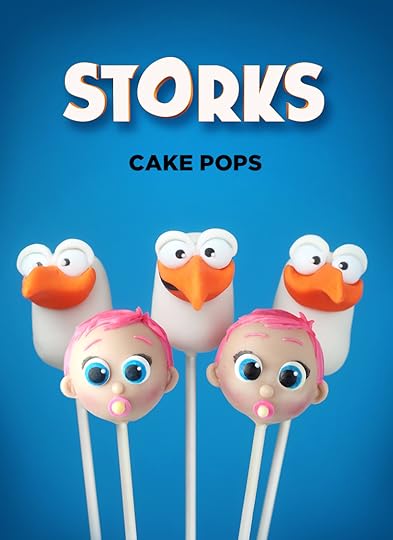
Storks Cake Pops

I made these cake pops for the movie STORKS!!! So much fun. I’m working with Warner Bros. Pictures to help promote the movie hitting theaters this Friday, September 23rd. I love getting the opportunity to work on projects for animated movies and this one looks really good. Plus, what’s sweeter than cake pops to deliver the word.
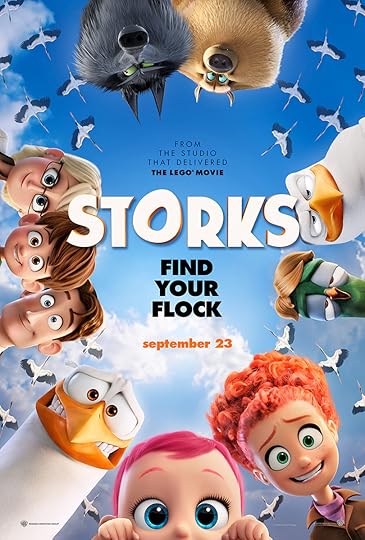
Find your flock this Friday. Check it out.
Or if you’d rather learn how to make some cute Storks Movie cake pops, then keep on reading.
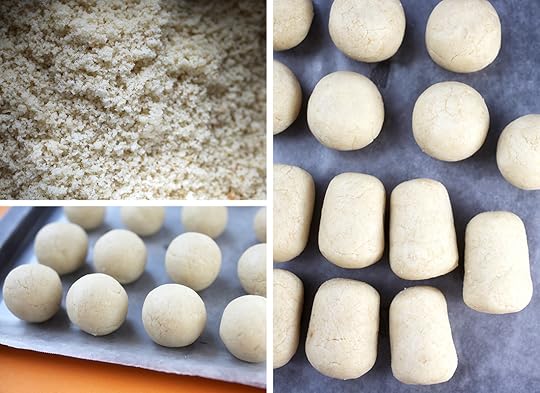
To get started, you will need to make some basic cake pops that you can shape and decorate.
To make Storks Cake Pops:
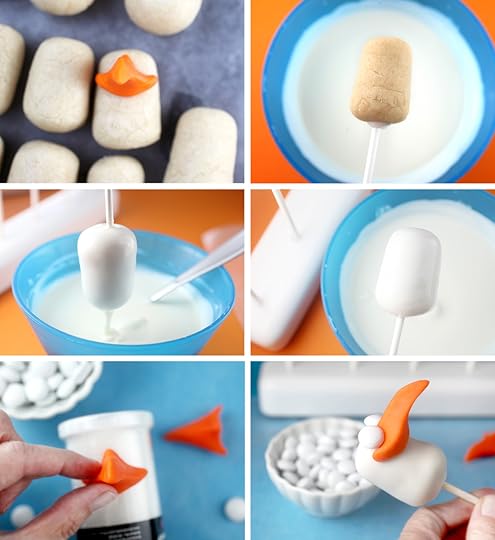
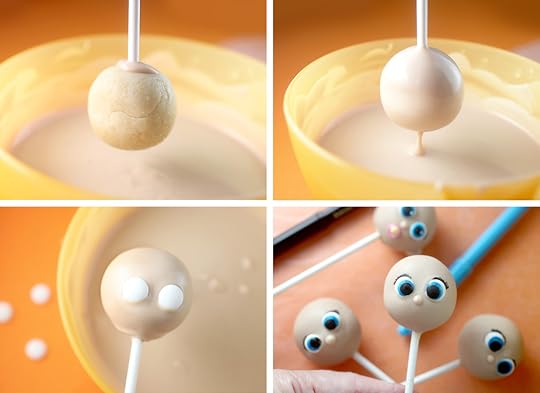
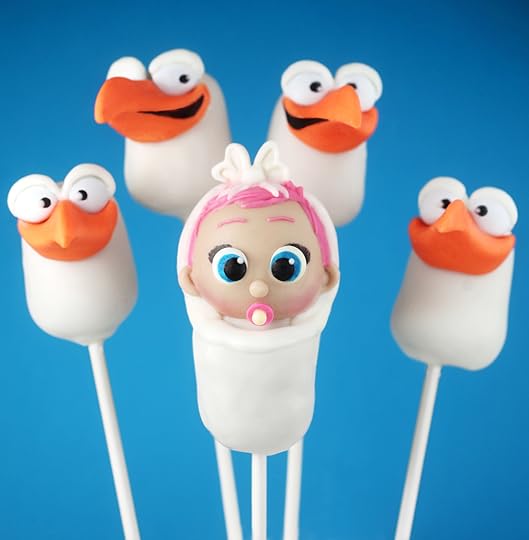
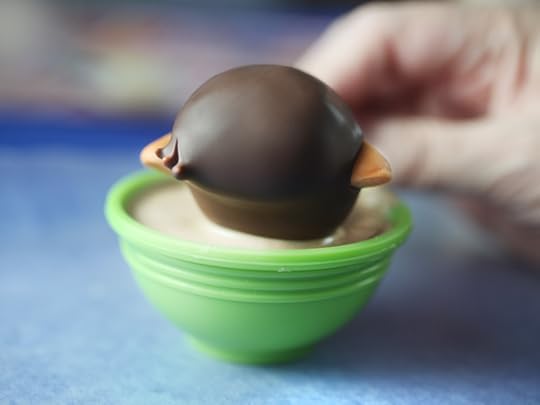
Follow my basic instructions for cake pops and then form into rounded thumbnail shapes. Dip shaped cake balls into melted white candy coating. Allow any excess coating to fall off back into the bowl and then let them dry completely before decorating.
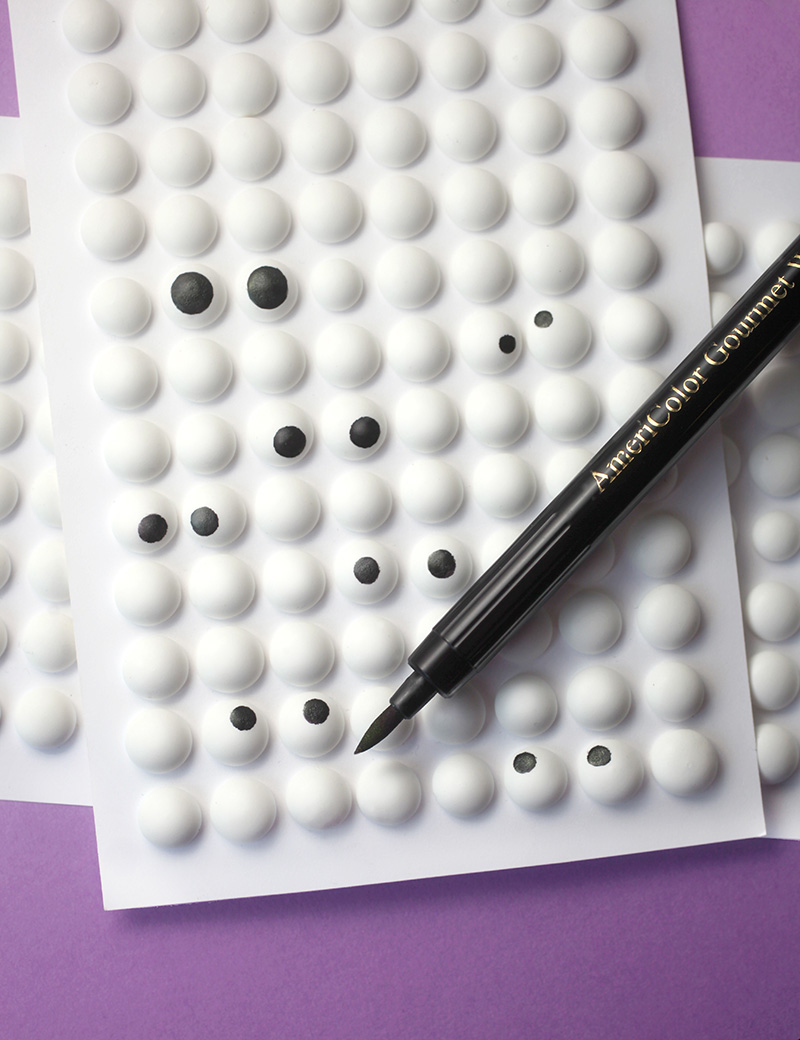
When dry, shape beaks using orange fondant. You can buy small packages of pre-tinted fondant at craft stores. For the beaks to fit against the cake pop, the base needs to be curved to mimic the curve of the cake pop surface. Try using a clean cylinder to shape the beak (I used a sprinkle bottle) so you don’t damage your pops. Then place shaped beak on the pop to make sure you have the correct curve. To attach beaks, paint base with melted candy coating using a toothpick. Press center part of the beak onto cake pop and then attach white candy gems or m&m’s for eyes in position using more melted candy coating. Finally curve the sides of the beak around the eyes and gently press against pop to attach in position.
Let dry completely and then draw the on the candy eyes using a black edible ink pen. To finish the look, apply more melted candy coating over the eyes using a toothpick to make the brows. Using a clean toothpick, make a small dot of candy coating on the pupils of the eyes for a little sparkle. It really helps give them personality.
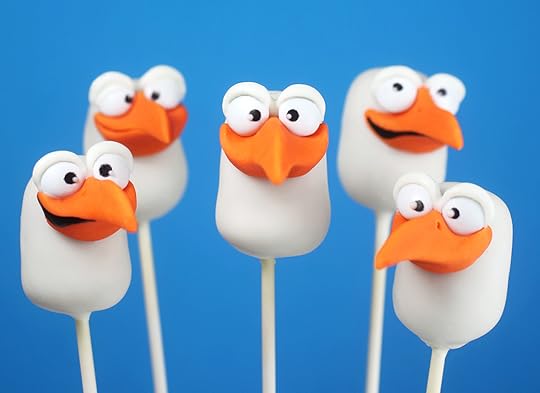
Oh my gosh … who knew storks could be so cute.
Now… who wants to make some babies!
So these are a little more work, but babies usually are. : )
Dip round cake balls into melted candy coating. You can melt and mix white coating with a few wafers of yellow and brown to make your desired flesh color.
After dipping, place two sugar candy eyes (these are smaller and flatter than M&M’s) in position on the center and bottom half of the front of the pop and let dry.
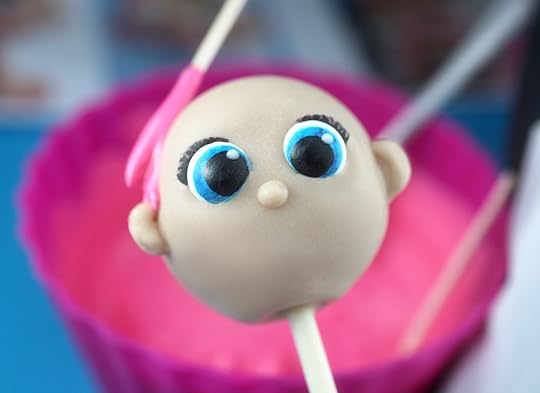
Draw big blue eyes with an edible ink writing pen. When the ink dries, draw on black pupils and eyelashes and place a dot of white candy coating on the pupils.
Dip a toothpick in melted coating and dot on noses.

Don’t worry about making mouths because these babies have tiny little pacifiers.
Attach pink confetti sprinkles to the pop using melted candy coating. Then attach a yellow sugar pearl to the confetti sprinkle.
Oh yeah, to make the hair and eyebrows, dip a toothpick in melted candy coating and use it to draw on the pop. The babies in the movie have bright colors for hair like pink, blue, yellow and purple. So, I used my party pink candy coating to make these after the main baby. As the coating thickens, you can make cute little strands of hair that stick up and stay in place.
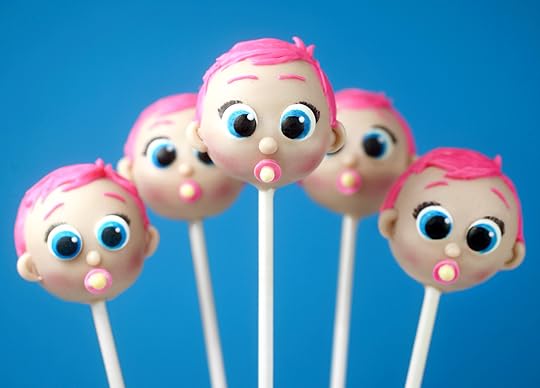
See … so super cute.
For rosy cheeks, you can very lightly brush on pink powdered food color.
Soooo … right about here, I decided I need to add a little more joy.
Make that a bundle of joy.
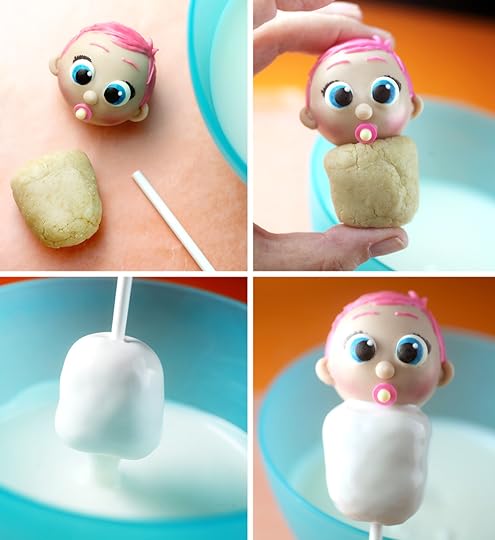
To make little baby bundles, gently twist the baby’s head off the lollipop stick. (I know … that sounds terrible.) Once removed, you’ll use a new stick.
Okay, now take a cake ball and shape into a rounded bundle. Gently press and shape to mimic the bottom of the baby’s head. Then insert the stick into the shaped cake ball and go all the way through, leaving enough to insert back into the baby’s head.
Dip in melted white candy coating, allow any excess to fall off back into the bowl and attach the head before the coating dries. Now, you can leave them like this or add more melted white coating around the head to look like the baby is tied with a bow at the top. The bow was made with two white heart sprinkles.
This post is sponsored by Warner Bros. Pictures.
From the studio that delivered The LEGO Movie. STORKS, in theaters September 23! Storks deliver babies…or at least they used to. Now they deliver packages for global internet giant Cornerstore. Junior, the company’s top delivery stork, is about to be promoted when he accidentally activates the Baby Making Machine, producing an adorable and wholly unauthorized baby girl. Desperate to deliver this bundle of trouble before the boss gets wise, Junior and his friend Tulip, the only human on Stork Mountain, race to make their first-ever baby drop – in a wild and revealing journey that could make more than one family whole and restore the storks’ true mission in the world. | Starring the voices of Andy Samberg, Jennifer Aniston, Ty Burrell, Kelsey Grammer, Keegan-Michael Key, Jordan Peele, Katie Crown, Danny Trejo | Rated PG

September 5, 2016
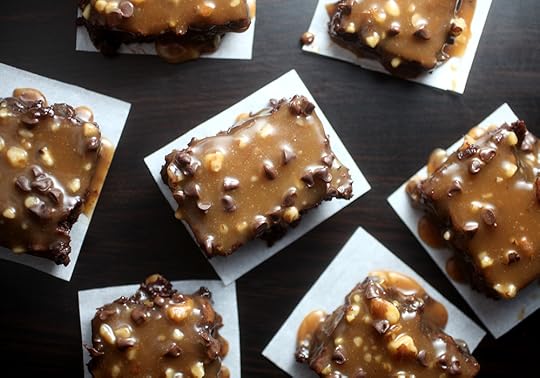
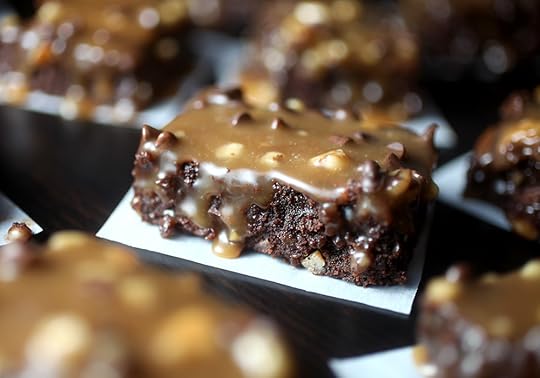
Caramel Crunch Brownies

Get ready to sink your teeth into these decadent chocolate brownies.
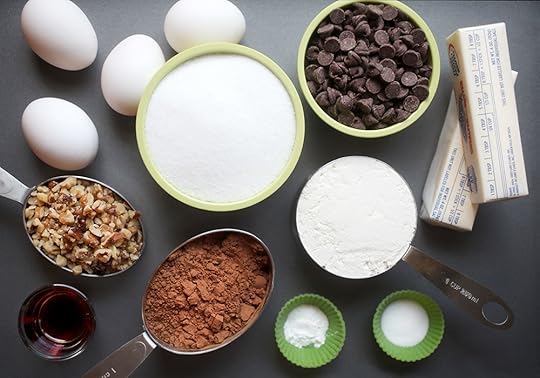
These sweet squares are made with melted chocolate and cocoa and mixed with chopped walnuts inside.

Prepare the brownie batter and bake away.
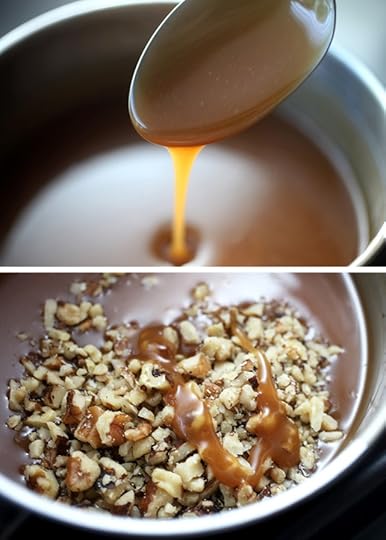
While the brownies are in the oven, whip up some caramel sauce to top them off with and then mix in more chopped walnut pieces for good measure.
Oh yes, very good.
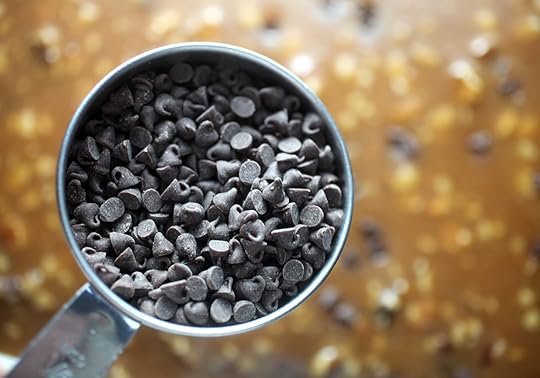
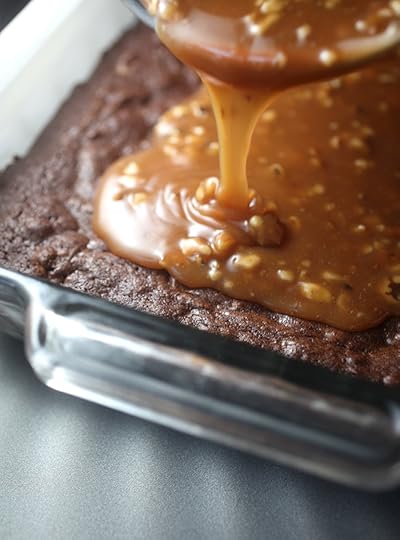
Spread the caramel on top of the brownies. And then, if you happen to have an opened bag of mini chips nearby, let’s just sprinkle a few of those on top too.
Delish!
Caramel Crunch Brownies
1 cup all purpose flour
3/4 cup unsweetened cocoa powder
1 1/2 cups sugar
1 teaspoon salt
1/2 teaspoon baking powder
1 cup unsalted butter
1 1/2 cups semisweet chocolate morsels
2 teaspoons vanilla
4 eggs
1/2 cup chopped walnuts
Caramel Topping
1 1/2 cup sugar
8 tablespoons butter, salted
3/4 cup heavy whipping cream
1/4 cup chopped walnuts
1/4 cup miniature semisweet chocolate morsels
Preheat oven to 350 degrees Fahrenheit. Grease 13 X 9 baking dish and line with parchment paper. Lightly butter parchment paper as well.
In a large bowl, sift together flour, cocoa powder, sugar, salt and baking powder. Set aside.
Melt 1 cup chocolate morsels and butter in microwave on low in 30 second intervals stirring in between until melted and smooth. Allow to cool.
Whisk eggs and vanilla into cooled chocolate mixture until combined.
Add dry ingredients to wet ingredients, stirring until just combined. Stir in remaining 1/2 cup chocolate morsels and chopped walnuts. Pour batter into prepared baking dish. Bake for 22-24 minutes.
While brownies bake, make the caramel topping: Heat sugar in a large pot on medium, stirring constantly with a wire whisk. The sugar will turn clumpy and then melt before turning into a thick amber-colored liquid. As soon as this happens (Be careful not to allow the sugar to burn) immediately add butter, whisking until completely melted. Remove from heat and slowly add cream. Whisk until combined and smooth. Stir in chopped walnuts. Allow topping to cool and thicken slightly before pouring on top of brownies. Sprinkle mini morsels on top.
Enjoy!!!

August 16, 2016
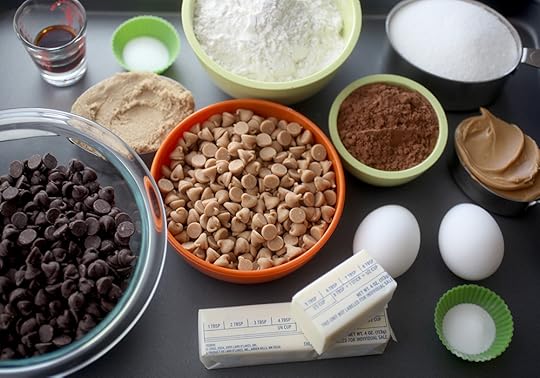
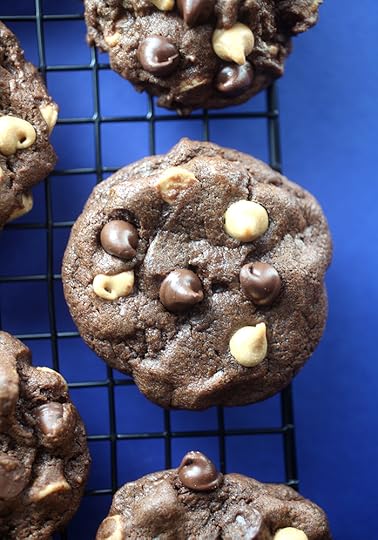
Peanut Butter Chunky Chocolate Cookies
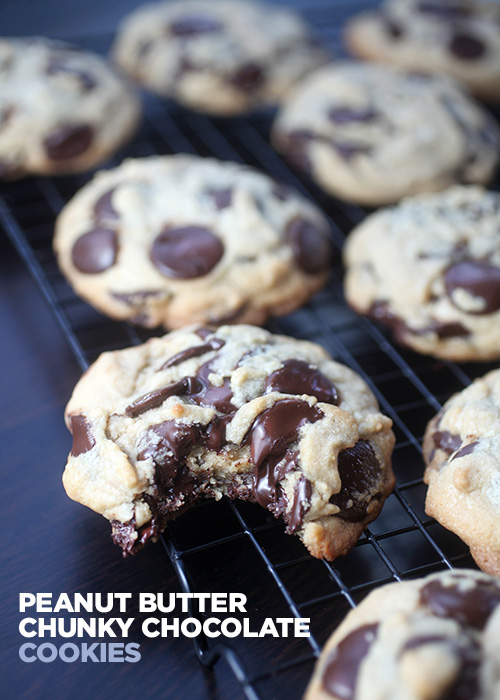
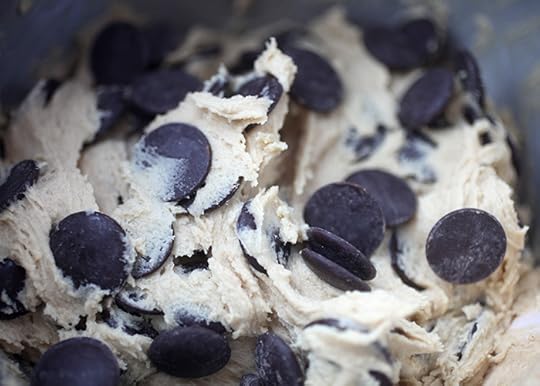
These jumbo cookies delight with big chunks of chocolate in every bite. They’re simple but oh so good.
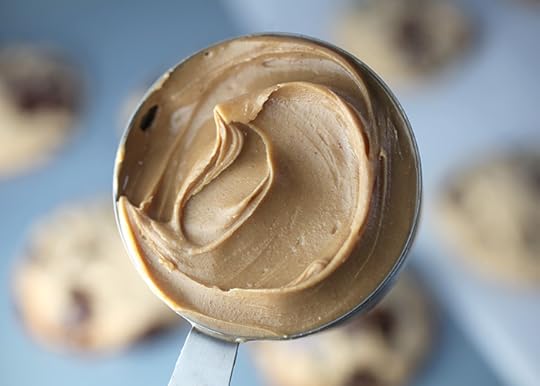
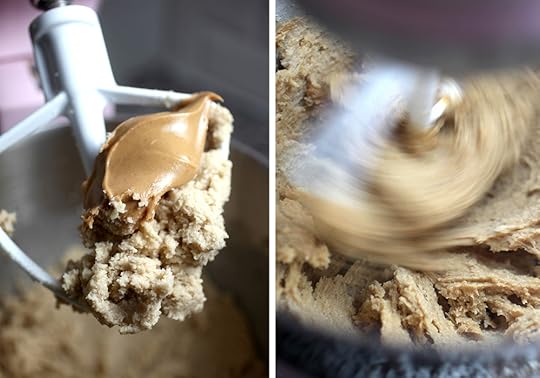
The cookie dough is kissed with creamy peanut butter …
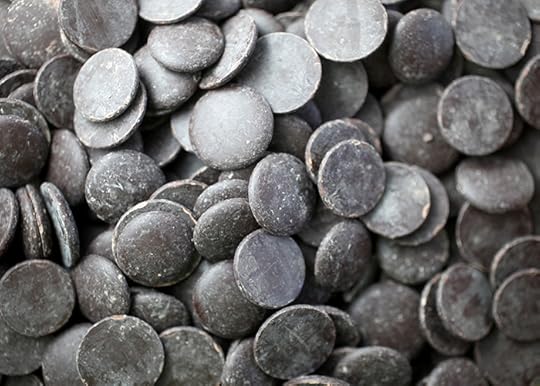
…and hugged by giant chocolate wafers. Oh my… thighs.
I want to go just dive in.
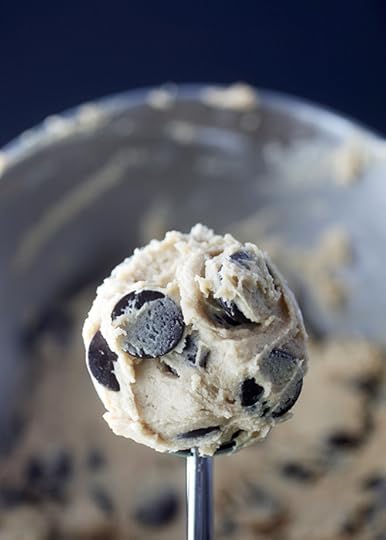
I used a big scoop for these cookies. ?? inches wide that yields 12-13 cookies from the dough. But feel free to use a smaller scoop for more cookies.
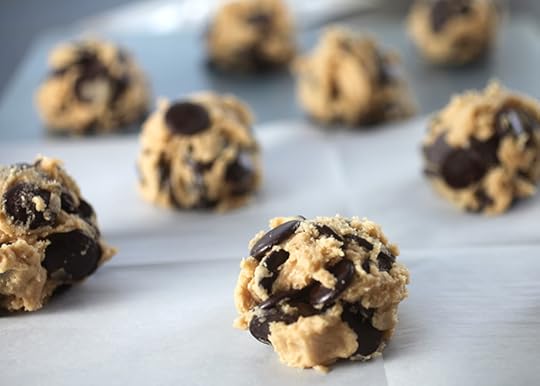
Look at these great big balls of cookie dough though.
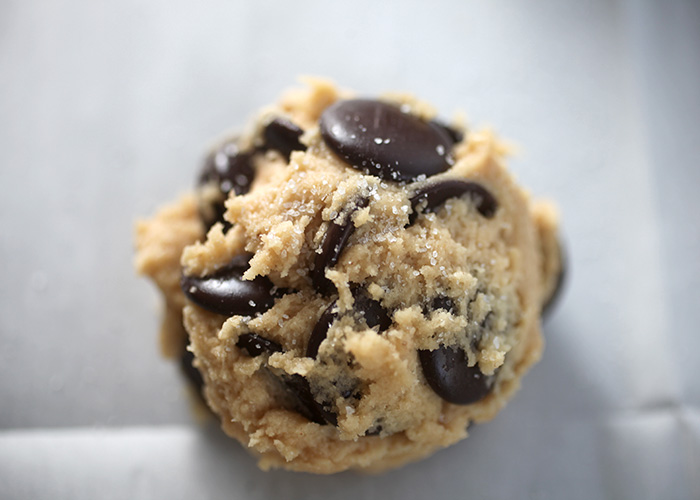
Before baking sprinkle a little sea salt on top to make them taste extra special.
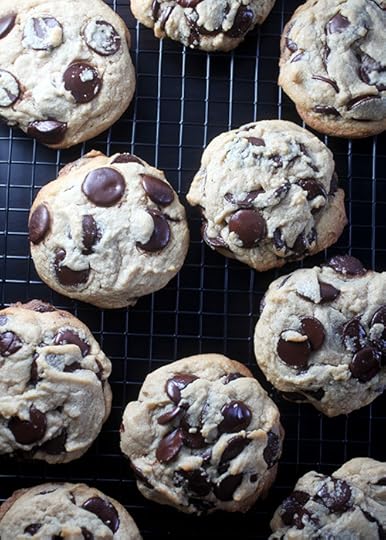
Oh my … so much melty chocolate.
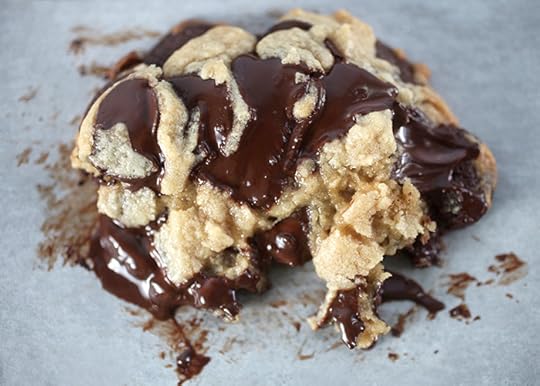
Speaking of melty. If you can’t wait for these to cool like a certain sweets-loving person I know, then be prepared to enjoy puddles of warm chocolate with a tall glass of cold milk.
Peanut Butter Chunky Chocolate Cookies
2 1/4 cup all purpose flour
1 teaspoon baking powder
1 tsp salt
1 1/2 sticks unsalted butter, room temperature
1/2 cup peanut butter
1 cup brown sugar
1/2 cup granulated sugar
2 eggs
2 teaspoons vanilla
12-18 oz semisweet chocolate baking wafers (I used these.)
sea salt
Preheat oven to 375 degrees fahrenheit.
Whisk flour, baking powder and salt together in a medium bowl and set aside.
Using a mixer, cream butter, peanut butter and both sugars together until light and fluffy.
Add eggs one at a time, mixing until incorporated. Add vanilla.
Add flour mixture and slowly mix until combined. Stir in chocolate wafers.
Scoop dough using a large 2-1/2 inch scoop (yields 12-13 cookies) a few inches apart onto a parchment lined baking sheet and sprinkle the tops lightly with sea salt. Bake 14-16 minutes and let cool.
Note: For more cookies, use a smaller scoop and bake for a little less time.
Enjoy!!!

July 25, 2016
Summertime Sweets
Hey guys! I sure have missed you. I’m sorry for not posting as much lately, but I kind of got swept away by summer and some few things going on in real life. I am excited to say that soon, well it’s probably going to be several weeks from now, but soon I’ll have a new site for you. It’s been forever … years even … since I had this little sweet spot redesigned and I can’t wait for you guys to see it. Plus, it will finally be mobile friendly. Hands high in the air …Yay!
So with summer on the brain and my oven off this past weekend, I thought I would feature some of my fave summery sweets. If you’ve been a long-time follower you’ll remember some of these oldies but goodies and if you’re new to the site, then I hope you have fun looking through all the yum.
Let’s get started……
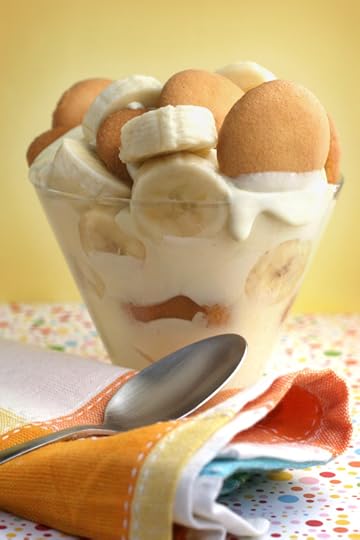
Some Like it Hot…
…and judging by how quickly this dessert disappeared, some like it cold, too. I’m talking about good, old-fashioned banana pudding, of course. Me? I like it cold… okay, and hot, too! My grandmother used to make a homemade one that was served warm and oh, how I wish I had the recipe for it. But, since I don’t and it’s summer… Continue Reading
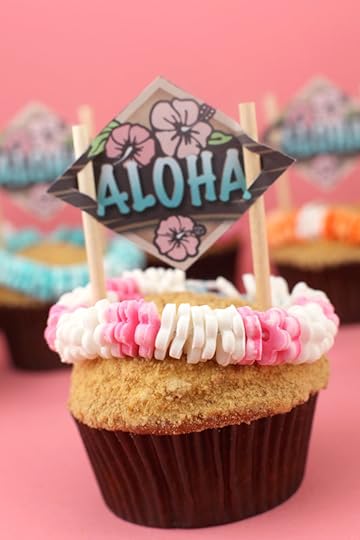
Lei Time
Just thought I’d say hi with a few Aloha Cupcakes. Hi there. Hello. Howdy. How ya doing? These are Pineapple Mango Cupcakes. All tropical like. With graham cracker crumbs for sand and fondant flowers for the leis. They’d be super cute for a luau party. They’re really pretty easy to make once you have all … Continue reading

Butterfinger Crunch Ice Cream
I enjoy ice cream way too much. I think I could eat it every day. And I almost did last week when I was on vacation. Ice cream is my traveling must-have treat above all other sweets. And now that I’m back home, I already feel like I’m having withdrawal. Luckily, this no-churn ice cream … Continue reading
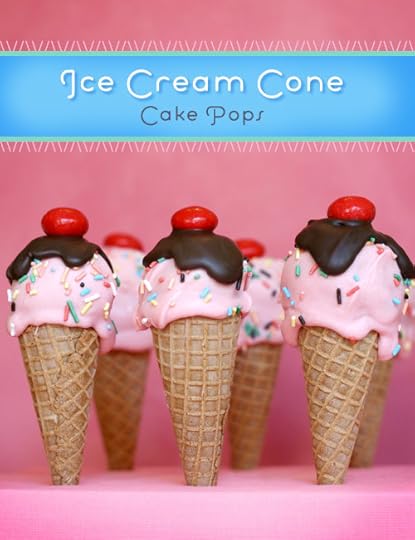
I scream, you scream, we all scream for…
Ice Cream!!!!!!!!! Sorta. Kinda. Okay, not so much. These are all cake and candy impersonating cute little ice cream cones. The cool part is they don’t drip. Their frozen parts are frozen. And unlike the … Continue reading
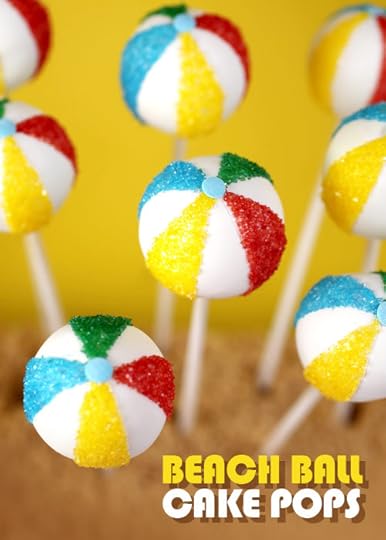
Have a ball
I hope you guys are enjoying the summer so far. Whether you’re heading to the beach, the pool, the sofa or somewhere else, I hope your summer is fun, fun, fun! And these beach ball cake pops are a great way to get in the right mindset. I made them for Target’s blog A Bullseye … Continue reading

Easy Oreo Ice Cream Sandwiches
Okay, I almost feel silly posting this. It’s sooo so easy, but it makes me way happy when I bite into one that I can’t resist. It’s the simple things sometimes you know. I was at Bruster’s the other day getting some ice cream and this poster was staring me back in the face. Umm … Continue reading
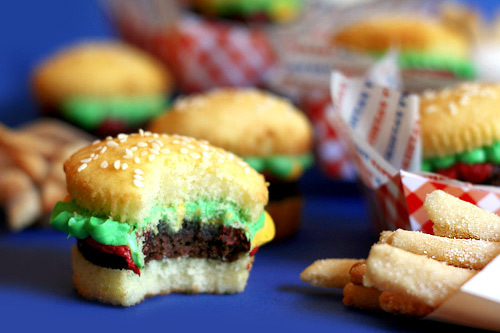
Fast Food Fun
Cupcake Buns + Brownie Burgers + Cookie Fries = One Happy Meal! Or many… I can hardly stand how cute these little guys are … Continue Reading
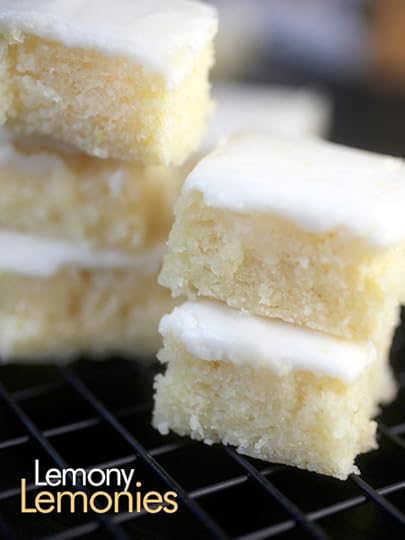
Mom Approved!
These may not look like all that much at first glance, but let me tell you they are fantastic! They’re little lemon brownies or lemonies. My mom found them on Pinterest and said she wanted me to make some for her right away. So I came up with this version to give her on Mother’s … Continue reading
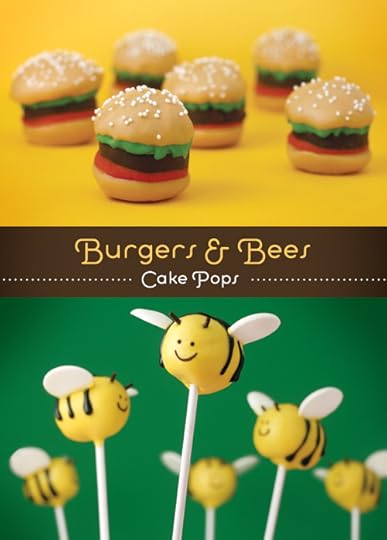
Burgers and Bees
Bzzzzzzzz. Bees first. I did these a while back. They were some of my first attempts at turning cake pops into little creatures. Since doing them, I’ve seen other variations shared by readers that are pretty darn cute, too. Some with smaller wings using jumbo white heart sprinkles that I think are just darling. I’ll … Continue reading
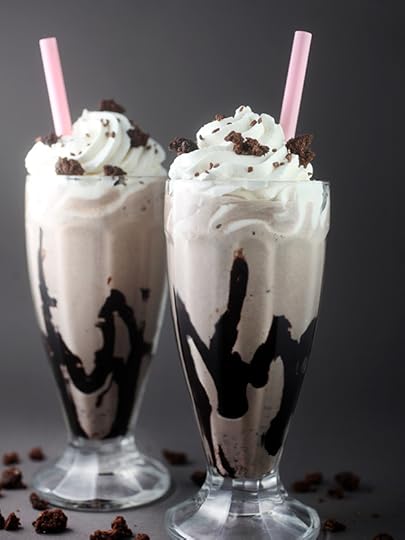
Brownie Mocha Milkshakes
So, I’m kind of in love with this milkshake. Brownies, ice cream, chocolate syrup and a little Kahlua coffee. My Saturday night is to blame for these. With a sudden late night craving for chocolate, I went to the pantry … fingers crossed … that I had a brownie mix (aka my guilty pleasure quick … Continue reading
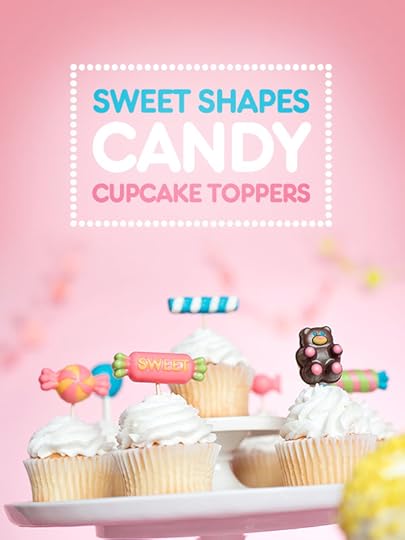
Sweet Shapes Candy Cupcake Toppers
I have another easy little project to share with you today using candy wafers and one of the candy molds in my Bakerella for Make’n Mold line. If you liked the candy jewel pops from a few weeks ago, then I think you’ll enjoy this project too. It’s a fun way to make the cutest …Continue reading
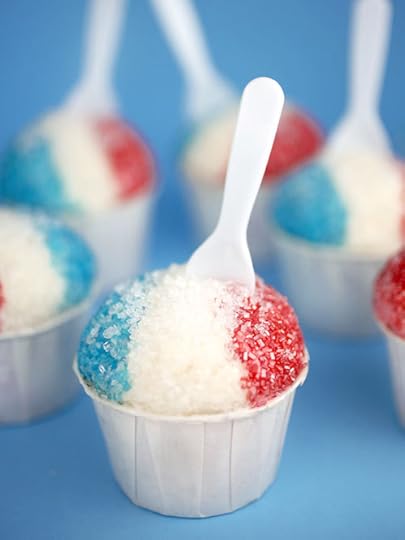
Snow Cones
These snow cones won’t melt. Nope. They’re not icy… but they are frosted. They’re snow cone cupcakes and they were a lot of fun to make. I decorated them in red, white, and blue so you can see how cute they can be for Memorial Day or the Fourth. When I made them, I wanted … Continue reading
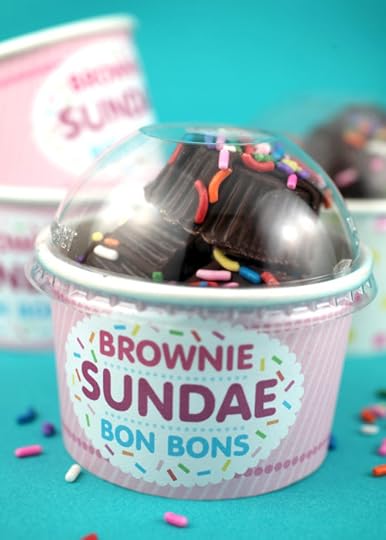
Brownie Sundae Bon Bons
It’s been soooo hot the last few days. Like historically hot with record-breaking temperatures in Georgia. Throw in our humidity and it’s a recipe for staying inside and enjoying the cool breeze of the air conditioner. I’ve lived without one when I was younger, but in the south, the a/c is definitely appreciated. So instead … Continue reading
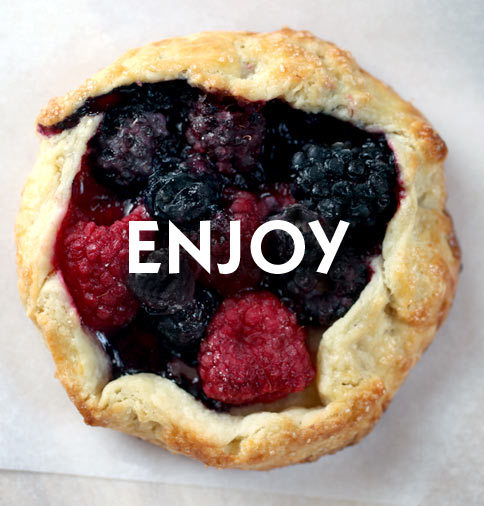
Sweet Tarts
I decided I need to add a little more fruit to my diet. My pie diet, anyway. Berries. Black and blue. And raspberries, too. I think I love you. These are really easy to make. Pie crust, plus berries… Just fold and bake. This one didn’t even make it to the plate. Enjoy them topped … Continue reading
Okay… now I’m seriously craving something sweet. Hope you enjoy these summertime treats. Hugs!

June 19, 2016
Marbled Peanut Butter Skillet Cookie
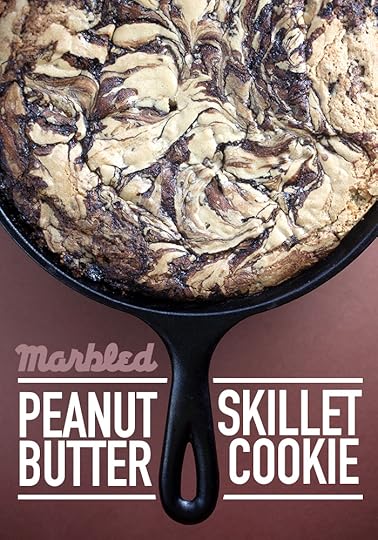
The swirls of chocolate that dance throughout this peanut butter skillet cookie will make you want to dive right in. I know because I could barely wait for a bite once I took this big beauty out of the oven.
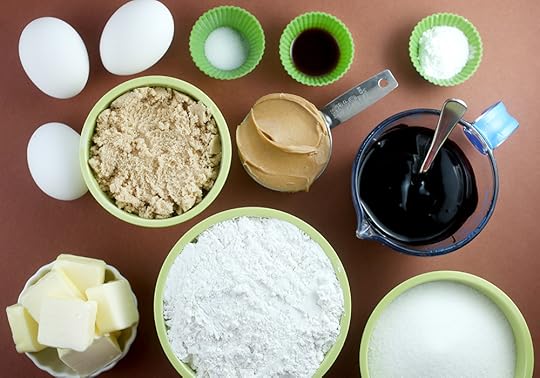
The ingredients you’ll need are: flour, sugar, brown sugar, butter, peanut butter, vanilla, salt, eggs, baking powder, vanilla and chocolate syrup.
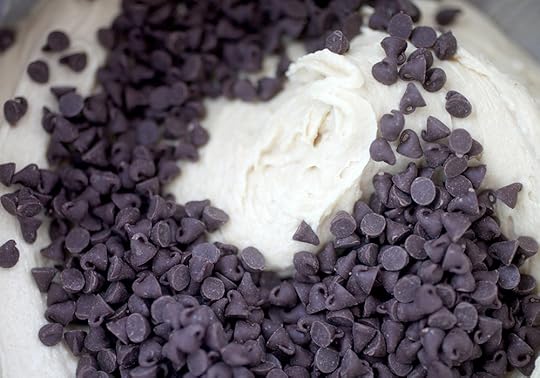
Oh … and some miniature semisweet chocolate chips don’t hurt either. Once the batter is mixed, stir them right in for a double dose of chocolate.
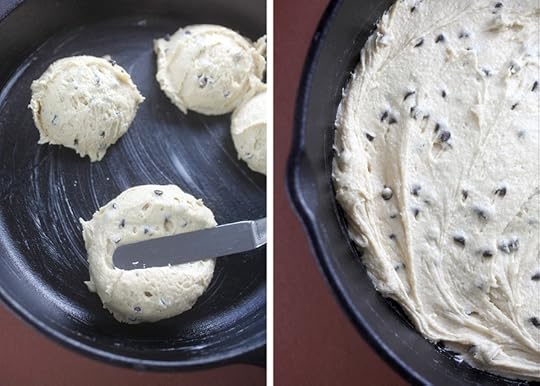
Spread half the batter in the bottom of a greased 10-inch cast iron skillet.
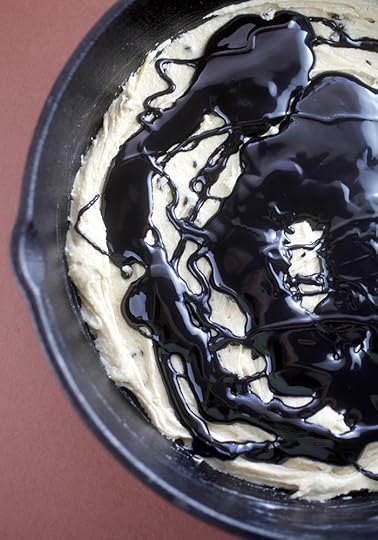
Now … yum … pour some chocolate syrup all over the top.
Good stuff.
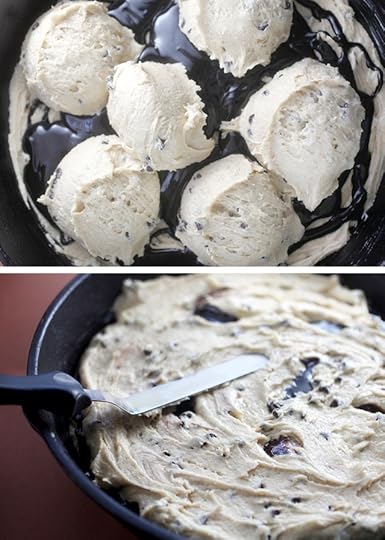
Then spread the rest of the batter on top of the syrup like so.
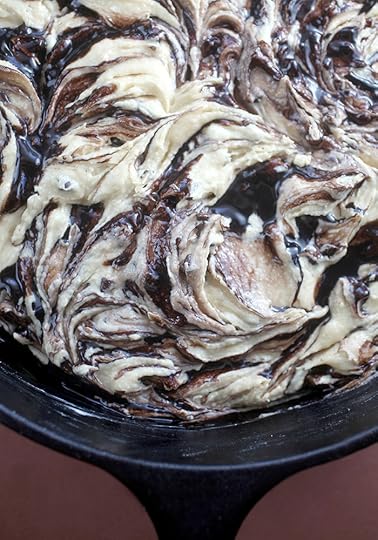
Now, gently swirl a thin knife through the batter several times. Be careful not to over mix or it will lose some of the marbled effect.
Okay, let’s bake this baby.
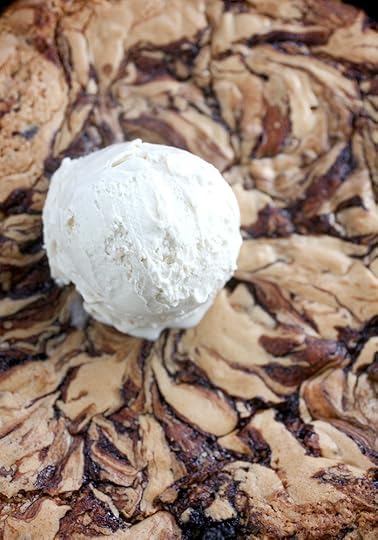
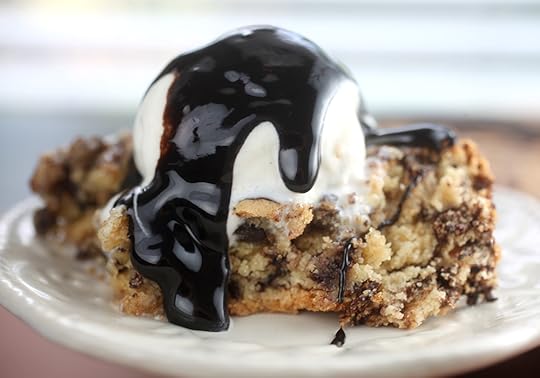
Beautiful. And even better with a big scoop of ice cream on top.

Dig in with friends and several spoons or cut into even slices to serve.
Marbled Peanut Butter Skillet Cookie
2 cups all purpose flour
2 teaspoons baking powder
1/4 teaspoon salt
1/2 cup unsalted butter, softened
1/3 cup creamy peanut butter
1 1/4 cup granulated sugar
3/4 cup packed light brown sugar
3 eggs
1 teaspoon vanilla
1/2 cup miniature semisweet chocolate chips
1/2 – 1/3 cup chocolate syrup
Preheat oven to 350 degrees Fahrenheit.
Generously grease a deep 10-inch cast iron skillet.
Whisk together flour, baking powder and salt in medium bowl and set aside.
Using a mixer, beat butter and peanut butter until combined. Add both sugars and beat until combined. Add eggs one at a time beating between each addition. Then add vanilla and mix.
Add flour mixture to peanut butter mixture and mix until incorporated.
Spread half of batter in bottom of skillet. Pour syrup on top. Gently spread remaining batter on top of syrup. Using a thin knife, gently swirl syrup through batter.
Bake 45-50 minutes. (Note: You can also bake in a 13 X 9 inch pan for 35-40 minutes.)
Enjoy with ice cream and more syrup if desired.

May 15, 2016
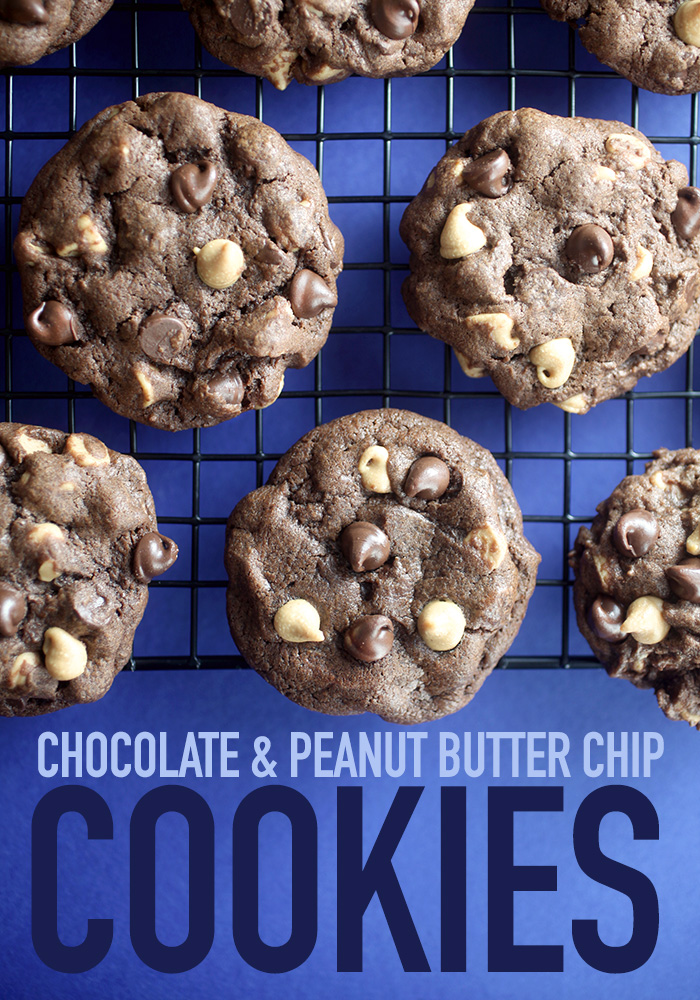
Chocolate and Peanut Butter Chip Cookies
Grab some milk because you’re going to want a big cold glass to go with these chocolatey cookies.
Here are all the ingredients to make your day a little sweeter.
The dough gets off to a delicious start with butter, sugar, brown sugar and creamy peanut butter.
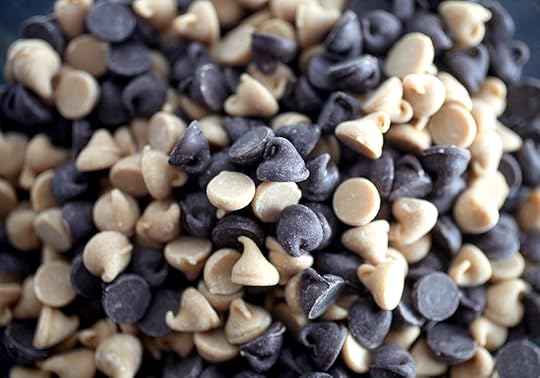
When the dough is ready, these morsels get mixed in for a perfect marriage of peanut butter and chocolate. My favorite.
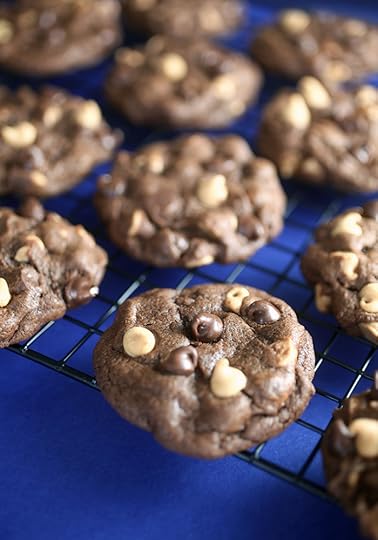
It’s easy to see why.
Chocolate and Peanut Butter Chip Cookies
1 3/4 cup all purpose flour
1/2 cup unsweetened cocoa
1 teaspoon baking soda
1 teaspoon salt
1 1/2 sticks unsalted butter, softened
1 cup sugar
1/2 cup light brown sugar, packed
1/3 cup peanut butter
2 eggs
2 teaspoons vanilla
1 1/2 cups peanut butter morsels*
1 1/2 cups semi-sweet chocolate morsels*
Preheat oven to 350 degrees Fahrenheit and line baking sheet with parchment paper.
In a medium bowl, whisk together flour, cocoa, baking soda and salt and then set aside.
In a large bowl, beat butter, both sugars and peanut butter using a mixer until creamy. Add eggs and then vanilla, beating well until incorporated.
Slowly beat in the flour mixture. Stir in both morsels.
Chill dough for 15-20 minutes and then scoop onto prepared baking sheet placing 2 inches apart using a 1 1/2 inch scoop for evenly sized cookies.
Roll scooped dough into balls and gently flatten the tops of the cookies. * You can reserve some of the morsels to press into the tops of the cookies before baking.
Bake 9-11 minutes. Makes about 32 cookies.
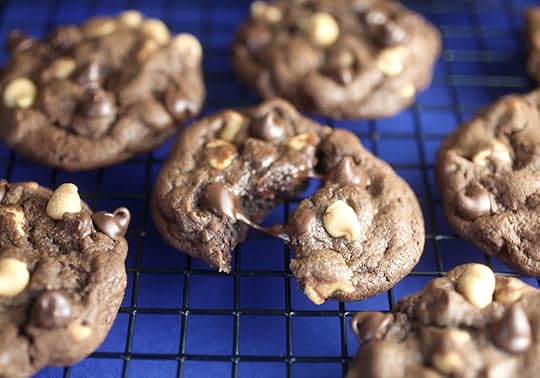
Yummy melty morsels. Enjoy!!!

May 1, 2016
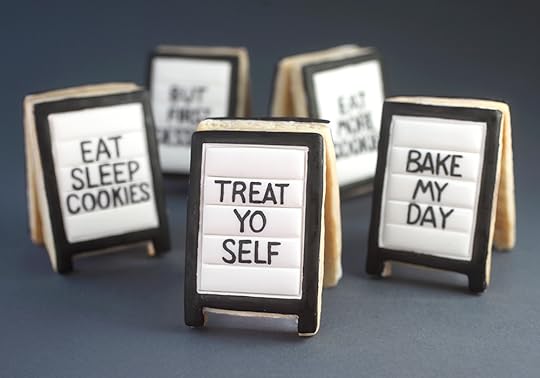
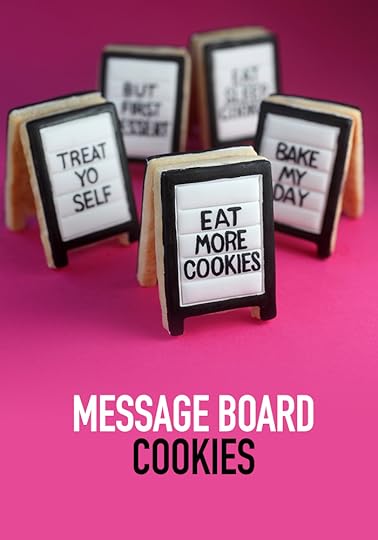
Sweet Talk Cookie Signs
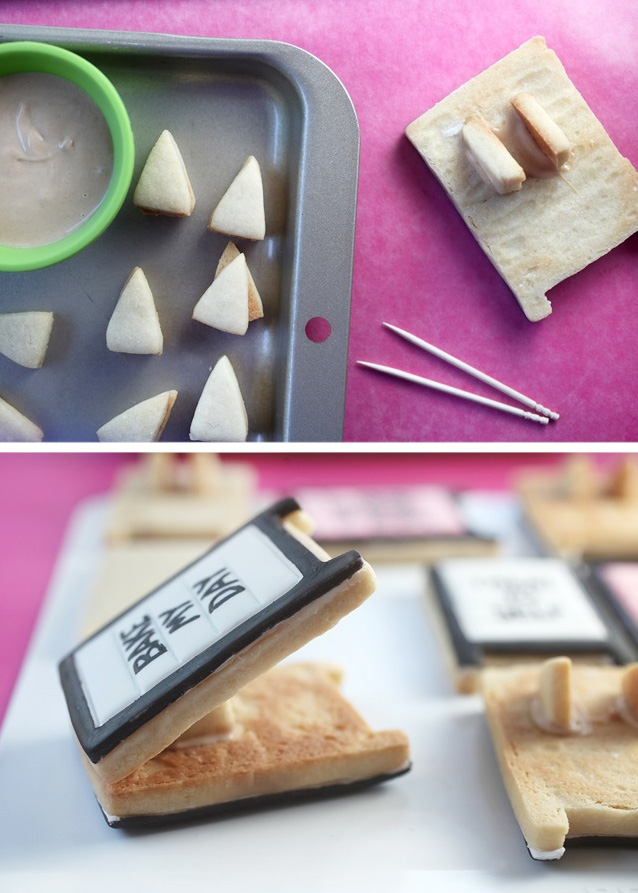
I bought a little lightbox sign the other day that inspired these sweet message board cookies.
A photo posted by @bakerella on May 1, 2016 at 6:16pm PDT
Look how cute. And I’ve been playing around with different sayings to put on display in the kitchen so I thought it would be fun to say things with sugar, too.
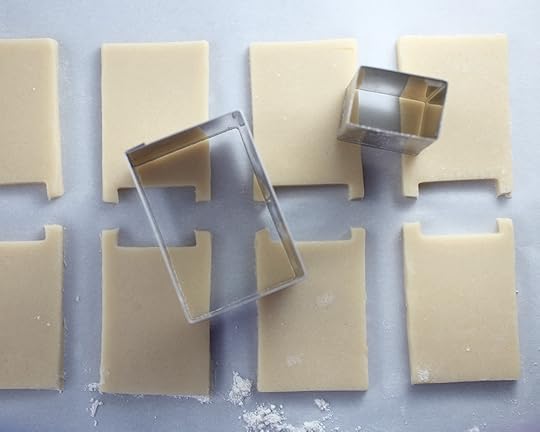
I used this awesome sugar cookie recipe and two rectangular cookie cutters to make the signs.
The big cutter is 2 X 3 inches and the little one is 1 x 1.5 inches.

Once the cookies are baked and cooled, roll out vanilla fondant and you can use the same cutters to cover the cookie tops.
When rolling out fondant, keep your roller and work surface lightly coated in powdered sugar or corn starch so the fondant can be easily lifted and transferred.
Spread a thin layer of frosting on your cookies and then position the fondant in place. Gently press down and smooth out without making indentions in the fondant.
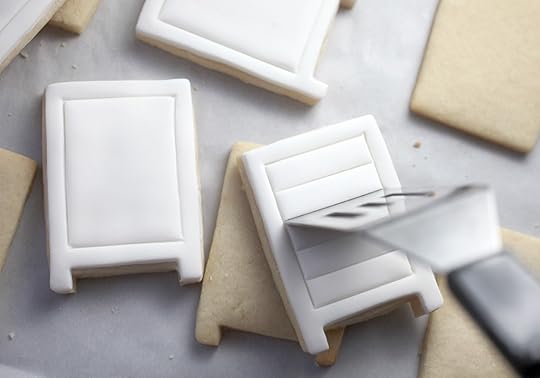
To make the signs, I used a mini spatula to press indentions into the fondant to create a border. The width of the spatula was also perfect for the middle horizontal lines, but you can also use any straight edge that works for you.
BTW, this mini spatula is one of my all-time favorite things in the kitchen. It’s from Pampered Chef if you want to track one down.
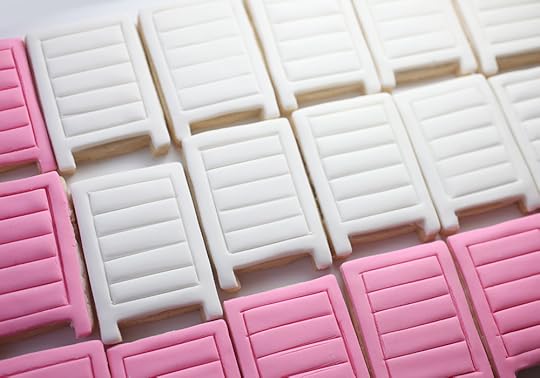
I also tinted some fondant light pink for even cuter signs.
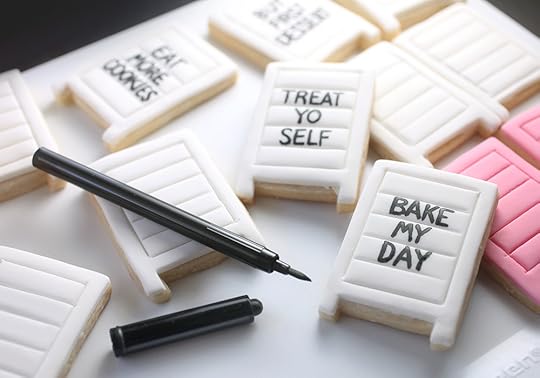
Let the fondant dry out a little and then use a black edible ink pen to write something sweet … or sassy. If you write right away, the pen may make indentions in the fondant.
When done writing your words, use the same edible ink pen to fill in the borders. Indenting with the spatula helps to make sure you stay in the lines.
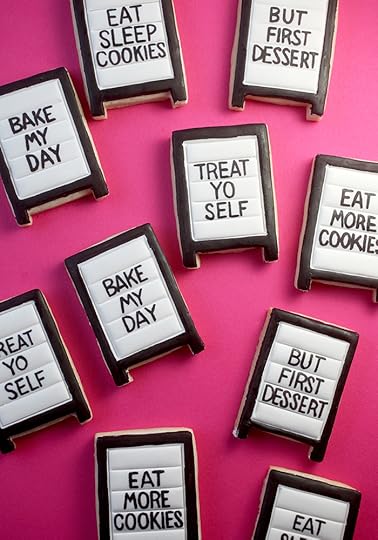
But wait, don’t you think these signs should totally stand up?
I think so, too.
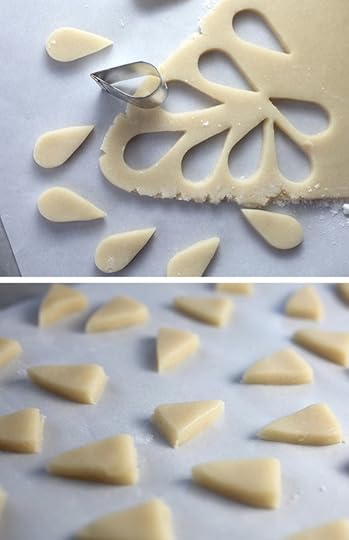
Here, I used a small teardrop cutter to make triangle shapes by cutting off the rounded ends.

Then I attached the triangles to the cookie backs with melted peanut butter candy coating. You can use other colors, but the peanut butter wafers blended in with the cookie color nicely.
The sugar cookie recipe will make 24 cookies or 12 standing signs.
These are so cute… you’ll want to eat your words.
Enjoy!!!

April 17, 2016
Curious George Cake Pops
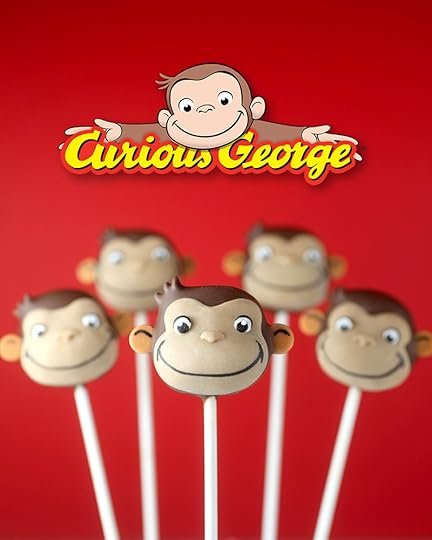
I’ve been monkeying around this weekend and made the sweetest little cake pops in partnership with Hulu to share with you guys. I’m working with them to help celebrate that all nine seasons of Curious George are now streaming only on Hulu and of course I had to explore how my favorite mischievous little monkey would look in cake pop form.
Okay …Who’s curious to find out how to make George and make people smile.
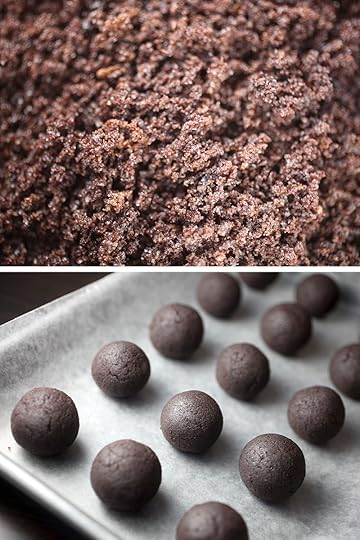
First, we need to mix up some cake and frosting and roll the mixture into balls. You can reference my basic cake pop instructions here for the full how-to and then follow along below to make them into mini monkeys.

Once you have all your balls rolled out, begin to shape the heads. Use a paper lollipop stick to make indentions on the front of the face and then roll it along the sides and surface to help smooth it out.
After shaping, chill the balls until firm.
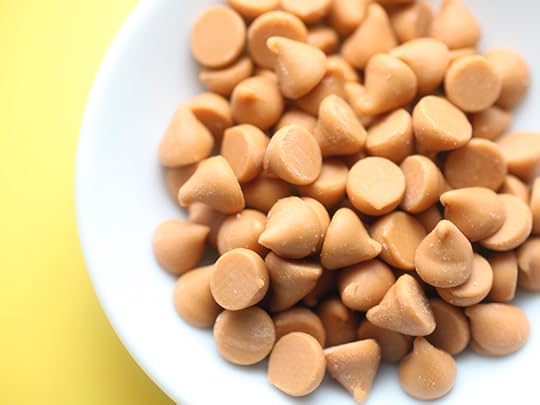
Have some butterscotch or peanut butter morsels handy because they will be our ears.

Okay, first let me say… I really wanted to try and get George’s hair to curl like his cartoon. That said, you can skip this step and then just use a toothpick to swirl on little curls of melted chocolate on top of his head at the end of decorating.
But, if you are up for it… These are Moon and Star Sprinkles and the moons made perfectly proportioned hair. Let’s see.
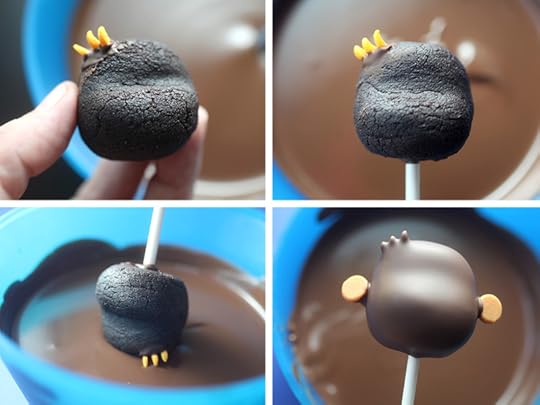
Dip the ends of three moon sprinkles (one at a time) into melted chocolate candy coating and attach to the top and side of George’s head. You can help secure them by adding a little more coating around the base where they are attached. Just smooth it into the surface of the pop. Place shaped balls back in the fridge to chill again before dipping.
Insert a lollipop stick into the shaped ball and carefully dip the entire pop into chocolate candy coating. Remove and gently tap off any excess. Before the coating sets, attach two butterscotch or peanut butter morsels to the side of the head with the bottoms facing forward for ears. Let dry completely.
Voila… now we’re ready to fill in these blank faces.
For the fronts of the faces, you can use peanut butter or butterscotch candy wafers. If you can’t find those flavors, then you can also just make your chocolate candy coating lighter by mixing in white candy coating. Here I placed some peanut butter flavored candy coating in a small container and dipped the front of George’s mouth area into it. Remove and then apply more coating to his eye area using a toothpick. Gently use the toothpick to coerce the coating where you want it. You can also place the melted candy coating in a small squeeze bottle and pipe it quickly on the front.
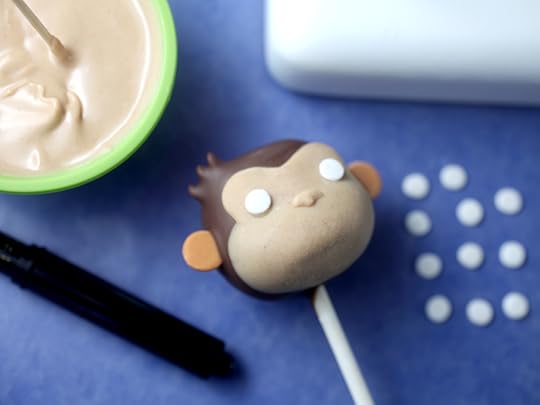
When dry, draw on a nose using a toothpick dipped in melted candy coating and attach the eyes.
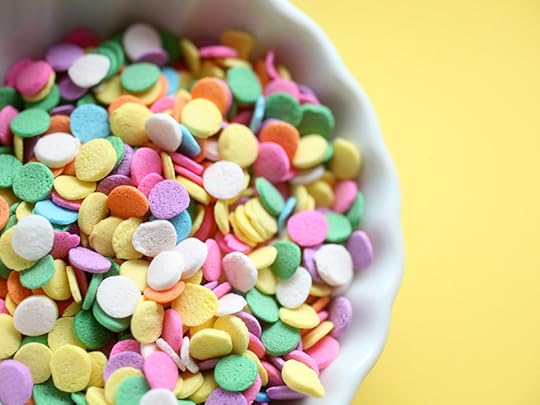
The eyes are white confetti sprinkles.
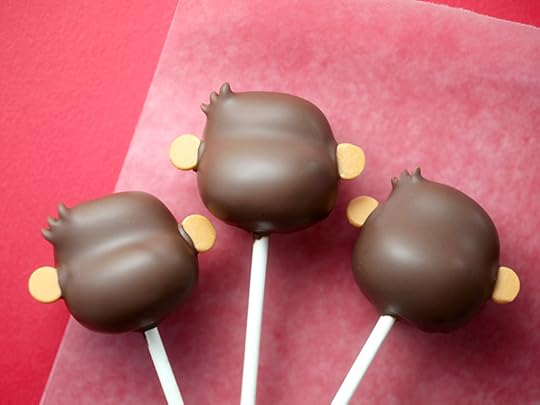
When completely dry, draw on the eyes, ears and a big grin with a black edible-ink writing pen. For the final finish, dot the eyes with melted white candy coating.

Super cute.

But I think we need some balloons.
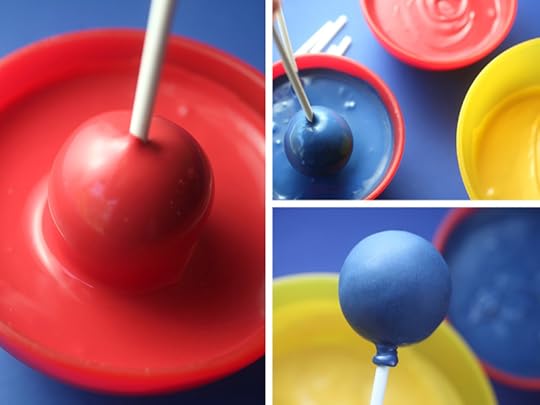
Just dip round cake pops in red, yellow and blue candy coating and let dry. Then use a toothpick to apply coating around the base of the stick for the knot.
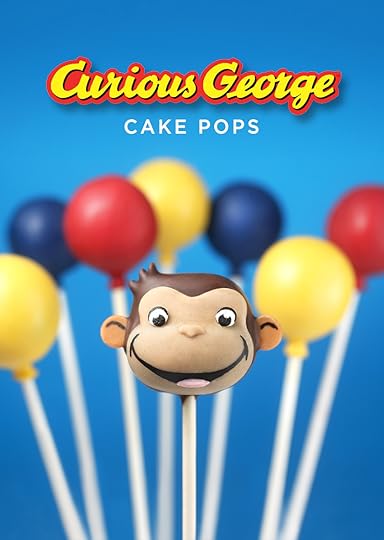
Now it’s a party and I think Curious George agrees.
Enjoy!


Curious George is swinging into your home. Hulu has all 9 seasons (108 episodes) of the animated TV series, as well as the animated film Curious George: Follow That Monkey. Hulu is THE streaming destination for the best of TV, and a great selection of films! Plus, you can stream almost anywhere, on any device, including gaming consoles, set-top boxes, tablets, mobile phones, and more. Visit Hulu.com to start a free 1-month trial.
This post is in partnership with Hulu.

Bakerella's Blog

- Bakerella's profile
- 9 followers

