
Ree Drummond's Blog, page 82
January 5, 2011
Quesadillas de Camarones
 Busily editing new recipe photos and juggling 4,000 other balls today, I'm bringing this, one of my absolute favorite dishes of all time, to the front for those of you who might have missed it the first time. Seriously simple…and so darn delicious! –PW
I have a slight problem when it comes to quesadillas of any kind. The problem is that I pretty much want to eat them all the time. All the all the all the time. It was my number one craving during all four of my pregnancies, and there's no limit to the different combinations and permutations of fillings I'll try.
My quesadilla addiction began in Los Angeles in the late eighties, by the way. Ever have a quesadilla at Del Taco in the late eighties? Then you haven't lived. Forget these modern-day fast food incarnations of quesadillas where they put—gasp—some kind of spicy CREAMY mixture inside? Sacrilege! The Del Taco quesadillas in the late eighties (I haven't been there for awhile, so I can't speak for today. Does Del Taco even exist anymore?) were so pure. Cheese, grilled onions, and green chilies. That's it. I used to eat them till I bloated, then I'd go back and get some more. Then I'd call my mom and say, "MOM! Someone must have vandalized my Guess jeans because they won't zip anymore! Please send money!"
Then she'd tell me to step away from Del Taco.
Anyway, I'm back in 2009. And I'm making shrimp quesadillas today!
They're delicious. Wonderful. Glorious. You need them in your life.
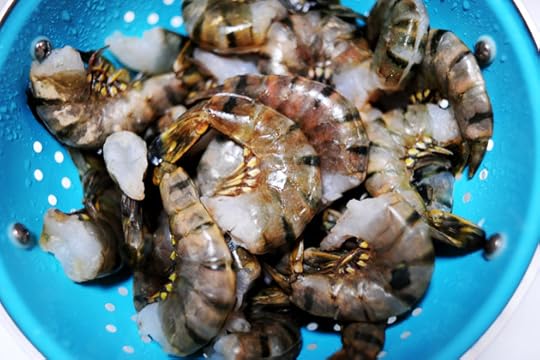 You need raw deveined shrimp. Rinsed clean.
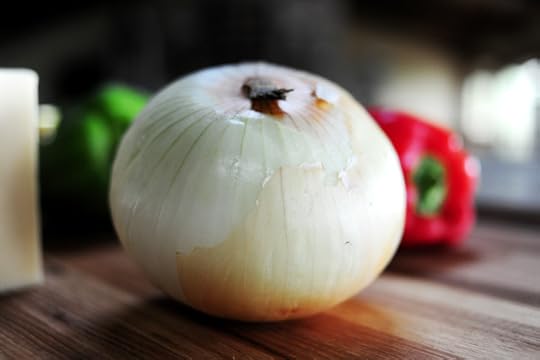 You also need an onion…
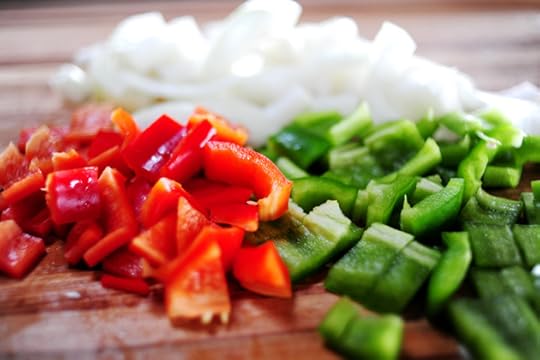
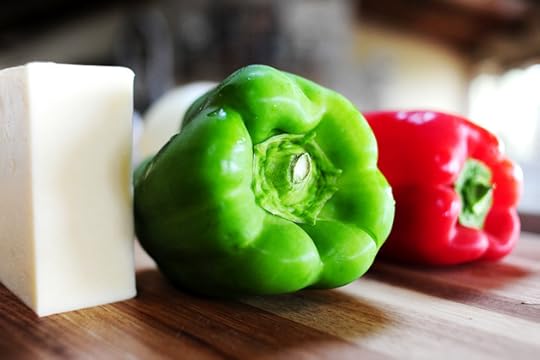 A green bell pepper…
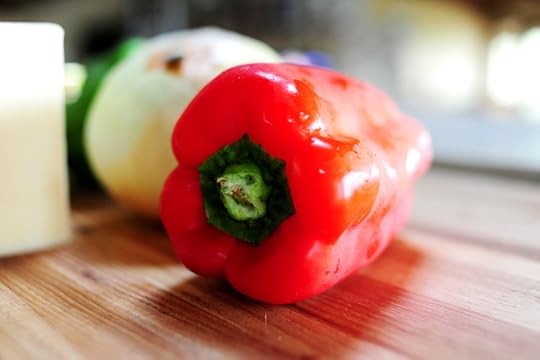 And a red bell pepper.
 You'll need a little Mexican red sauce, enchilada sauce, taco sauce…whatever you can get your hands on. How spicy you go depends on how spicy you like it!
 You'll need Monterey Jack cheese. It's one of the best for quesadillas.
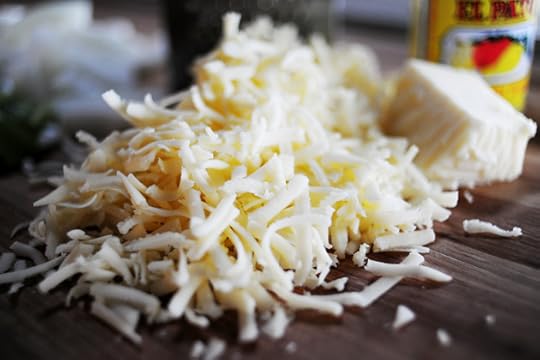 Grate it up!
 And you can use a little of some other kinds of cheese if you'd like. Colby/Jack, Pepper Jack—whatever makes your skirt fly up!
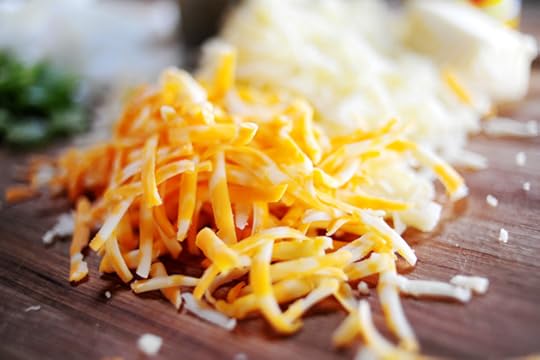
 Whatever cheeses you use, just combine them all in a bowl so it's one gigantic mish mash of deliciousness.
 Peel the shrimp and remove the tails, then place them on a plate. Pour the red sauce over the top.
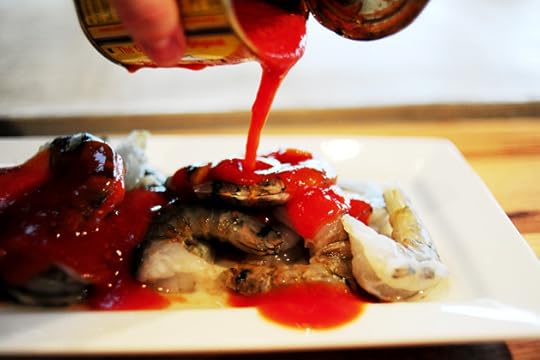
 Just set 'em aside while you get everything else ready.
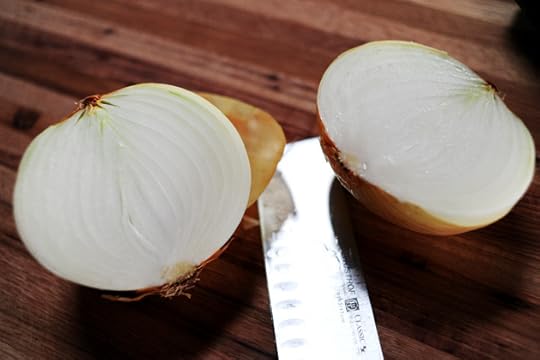 Next, cut the onion in half…
 Then cut off the top, peel off the outer papery layer, and make a single slice down the middle of each half.
 Make slices in the other direction to create large, thick slices.
 Do the same with the green bell pepper…
 And the red one.
 Grab a heavy skillet and put it over high high high high heat.
 Make sure that skillet is HOT. (And either open a window or crank up that ventilation.)
 Then drizzle in a good two tablespoons of olive oil.
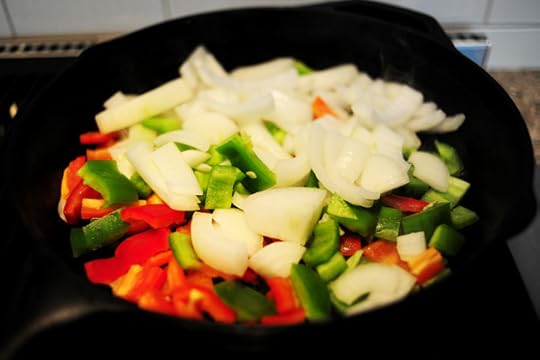 Swirl the pan to coat it, then throw in the vegetables. Let them sit without stirring for a good minute—what we want to do is cook the heck out of them in a short amount of time, so they get brownish/blackish/flavorful without getting too cooked and mushy.
 Stir them after a minute or so, then let them sit on the high heat until they're nice and brown.
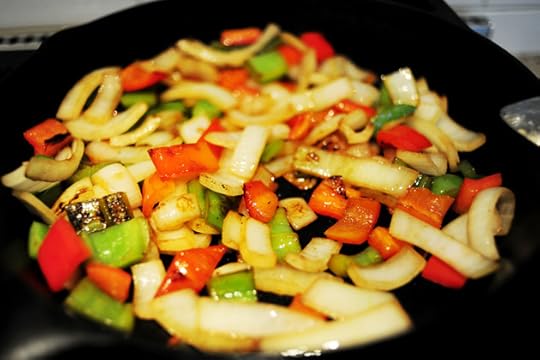
 Remove them from the skillet and set aside.
Your kitchen smells delicious, by the way!
 Keep the skillet on high heat, then pour in the shrimp, the sauce, and all! Just as you did with the onions and peppers, don't stir right off the bat. Just let 'em cook.
 Stir 'em around a minute or two later.
 Cook the little shrimpies until they're opaque, then turn off the heat.
 Then throw 'em on a cutting board…
 …And chop 'em up into smaller pieces.
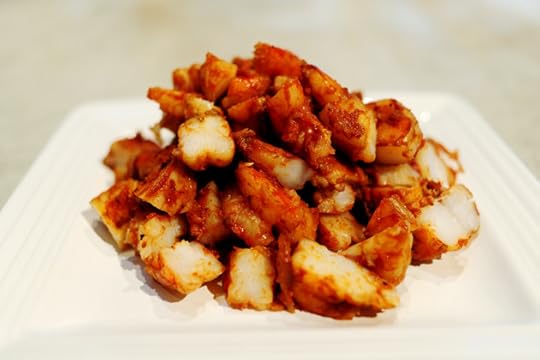 Yum! Shrimp!
 Separate skillet: medium heat. Swirl plenty of melted butter all around.
 Throw a flour tortilla right on top of the butter.
The worst quesadilla atrocity you can commit is to allow the tortilla to get totally dry on the outside.
Blech.
 Throw on a nice layer of cheese, then a generous amount of peppers and shrimpies.
 Sprinkle on a little more cheese for good measure…
 Then plop a second tortilla on the top.
 Before you flip it to the other side, add more butter to the skillet.
 Press down with the spatula after you flip it.
 This is how I like a quesadilla—crispy, flavorful outside; cheesy, delicious inside.
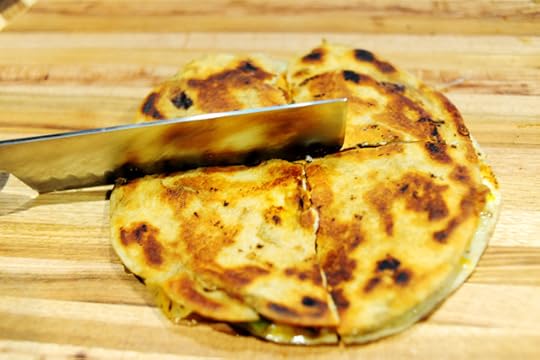 Cut the quesadilla into four wedges.
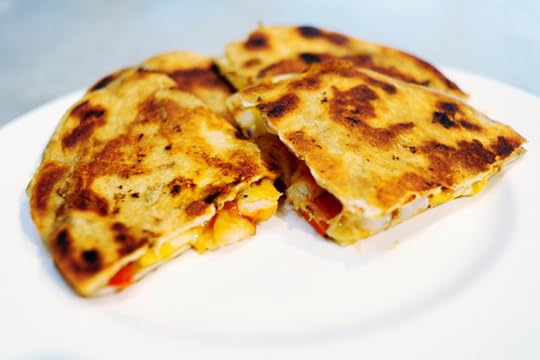 Mmmm. Delicious!
Serve on a plate with whatever you'd like: rice, beans, salad, or just a little bowl of tomatillo salsa.
 Honestly, the quesadillas are so filling, rice and beans are unnecessary!
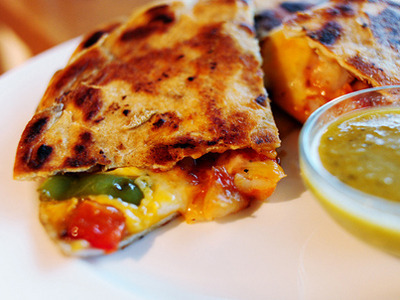
 Here's a closer examination of what happens inside. You'll see that the shrimp actually share a little of their red sauce with the melted cheese—this is exactly what you want. If we'd just grilled the shrimp and put them in there plain, well…they still would have been delicious. But drowning them in red sauce before we cooked them just adds a little something special.
 These are great football appetizers, awesome party food, or a great Wednesday night meal.
Make them soon!
Recipe: Quesadillas de Camarones
Prep Time: 15 Minutes
|
Cook Time: 20 Minutes
|
Difficulty: Easy
|
Servings: 6
Print Recipe
3"x5" Cards
4"x6" Cards
Full Page
 [image error]
');
[image error]
');
Ingredients
Flour Tortillas12 whole Large Shrimp, Peeled And Deveined8 ounces, fluid Mexican Red Sauce1 whole Large Onion1 whole Red Bell Pepper1 whole Green Bell Pepper2 cups Cheese, Grated (Monterey Jack Is Best)2 Tablespoons Olive Oil Salt To Taste Preparation Instructions
Pour red sauce over shrimp. Set aside.
Chop vegetables into large pieces. Heat skillet over high heat and add olive oil. Cook vegetables over high heat until they start to get brown/black. Remove from skillet and set aside.
Return skillet to high heat, then dump in the shrimp with the sauce. Cook, stirring only occasionally, until shrimp is opaque. Add in a little water if the sauce gets dry. Remove from skillet and chop into bite-size pieces.
In a separate skillet, heat butter. Place a tortilla in the skillet, then layer on ingredients: cheese, vegetables, and shrimp. Top with a little more cheese and a second tortilla. Cook on both sides, adding butter before flipping to the other side so the tortilla isn't overly dry.
Remove from skillet and slice into wedges. Serve with rice, beans, salsa, sour cream, guacamole—whatever you'd like!


Recipe Redux: Quesadillas de Camarones
Busily editing new recipe photos and juggling 4,000 other balls today, I'm bringing this, one of my absolute favorite dishes of all time, to the front for those of you who might have missed it the first time. Seriously simple…and so darn delicious! –PW
I have a slight problem when it comes to quesadillas of any kind. The problem is that I pretty much want to eat them all the time. All the all the all the time. It was my number one craving during all four of my pregnancies, and there's no limit to the different combinations and permutations of fillings I'll try.
My quesadilla addiction began in Los Angeles in the late eighties, by the way. Ever have a quesadilla at Del Taco in the late eighties? Then you haven't lived. Forget these modern-day fast food incarnations of quesadillas where they put—gasp—some kind of spicy CREAMY mixture inside? Sacrilege! The Del Taco quesadillas in the late eighties (I haven't been there for awhile, so I can't speak for today. Does Del Taco even exist anymore?) were so pure. Cheese, grilled onions, and green chilies. That's it. I used to eat them till I bloated, then I'd go back and get some more. Then I'd call my mom and say, "MOM! Someone must have vandalized my Guess jeans because they won't zip anymore! Please send money!"
Then she'd tell me to step away from Del Taco.
Anyway, I'm back in 2009. And I'm making shrimp quesadillas today!
They're delicious. Wonderful. Glorious. You need them in your life.
You need raw deveined shrimp. Rinsed clean.
You also need an onion…
A green bell pepper…
And a red bell pepper.
You'll need a little Mexican red sauce, enchilada sauce, taco sauce…whatever you can get your hands on. How spicy you go depends on how spicy you like it!
You'll need Monterey Jack cheese. It's one of the best for quesadillas.
Grate it up!
And you can use a little of some other kinds of cheese if you'd like. Colby/Jack, Pepper Jack—whatever makes your skirt fly up!
Whatever cheeses you use, just combine them all in a bowl so it's one gigantic mish mash of deliciousness.
Peel the shrimp and remove the tails, then place them on a plate. Pour the red sauce over the top.
Just set 'em aside while you get everything else ready.
Next, cut the onion in half…
Then cut off the top, peel off the outer papery layer, and make a single slice down the middle of each half.
Make slices in the other direction to create large, thick slices.
Do the same with the green bell pepper…
And the red one.
Grab a heavy skillet and put it over high high high high heat.
Make sure that skillet is HOT. (And either open a window or crank up that ventilation.)
Then drizzle in a good two tablespoons of olive oil.
Swirl the pan to coat it, then throw in the vegetables. Let them sit without stirring for a good minute—what we want to do is cook the heck out of them in a short amount of time, so they get brownish/blackish/flavorful without getting too cooked and mushy.
Stir them after a minute or so, then let them sit on the high heat until they're nice and brown.
Remove them from the skillet and set aside.
Your kitchen smells delicious, by the way!
Keep the skillet on high heat, then pour in the shrimp, the sauce, and all! Just as you did with the onions and peppers, don't stir right off the bat. Just let 'em cook.
Stir 'em around a minute or two later.
Cook the little shrimpies until they're opaque, then turn off the heat.
Then throw 'em on a cutting board…
…And chop 'em up into smaller pieces.
Yum! Shrimp!
Separate skillet: medium heat. Swirl plenty of melted butter all around.
Throw a flour tortilla right on top of the butter.
The worst quesadilla atrocity you can commit is to allow the tortilla to get totally dry on the outside.
Blech.
Throw on a nice layer of cheese, then a generous amount of peppers and shrimpies.
Sprinkle on a little more cheese for good measure…
Then plop a second tortilla on the top.
Before you flip it to the other side, add more butter to the skillet.
Press down with the spatula after you flip it.
This is how I like a quesadilla—crispy, flavorful outside; cheesy, delicious inside.
Cut the quesadilla into four wedges.
Mmmm. Delicious!
Serve on a plate with whatever you'd like: rice, beans, salad, or just a little bowl of tomatillo salsa.
Honestly, the quesadillas are so filling, rice and beans are unnecessary!
Here's a closer examination of what happens inside. You'll see that the shrimp actually share a little of their red sauce with the melted cheese—this is exactly what you want. If we'd just grilled the shrimp and put them in there plain, well…they still would have been delicious. But drowning them in red sauce before we cooked them just adds a little something special.
These are great football appetizers, awesome party food, or a great Wednesday night meal.
Make them soon!
Recipe: Quesadillas de Camarones
Prep Time: 15 Minutes
|
Cook Time: 20 Minutes
|
Difficulty: Easy
|
Servings: 6
Print Recipe
3"x5" Cards
4"x6" Cards
Full Page
[image error]
');
Ingredients
Flour Tortillas12 whole Large Shrimp, Peeled And Deveined8 ounces, fluid Mexican Red Sauce1 whole Large Onion1 whole Red Bell Pepper1 whole Green Bell Pepper2 cups Cheese, Grated (Monterey Jack Is Best)2 Tablespoons Olive Oil Salt To Taste Preparation Instructions
Pour red sauce over shrimp. Set aside.
Chop vegetables into large pieces. Heat skillet over high heat and add olive oil. Cook vegetables over high heat until they start to get brown/black. Remove from skillet and set aside.
Return skillet to high heat, then dump in the shrimp with the sauce. Cook, stirring only occasionally, until shrimp is opaque. Add in a little water if the sauce gets dry. Remove from skillet and chop into bite-size pieces.
In a separate skillet, heat butter. Place a tortilla in the skillet, then layer on ingredients: cheese, vegetables, and shrimp. Top with a little more cheese and a second tortilla. Cook on both sides, adding butter before flipping to the other side so the tortilla isn't overly dry.
Remove from skillet and slice into wedges. Serve with rice, beans, salsa, sour cream, guacamole—whatever you'd like!
January 4, 2011
Pistachio Cake
 Warning: This is an extremely complicated recipe. Enter only if your skill level in the kitchen is very advanced. You have to forage for native-grown pistachios, then brine them and extract the nutmeat from the shells at just the right time. After that, you have to go through a lengthy process of drawing out the natural oils from the pistachios, which you'll add to the cake, then rub on your wrist for good luck.
Okay, so I'm just kidding.
You don't need native pistachios.
I don't even know what native pistachios are.
You don't even need pistachios at all.
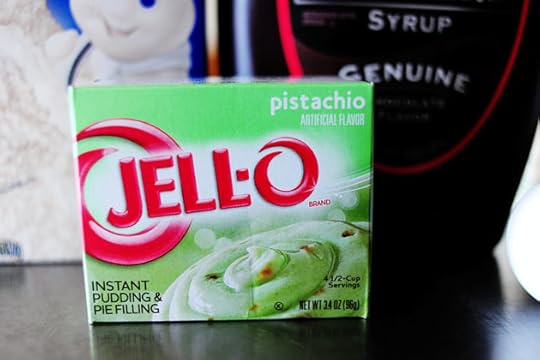 You need this!
Hardee har har!
Har.
This is another potluck-friendly cake—a throwback to the seventies, when my dad had thick sideburns and a pair bicentennial white slacks with grosgrain American flags down the sides of the legs.
Dad, Dad, Dad. We need to talk.
 The complete Cast of Characters: white cake mix, pistachio pudding, orange juice, vegetable oil, eggs, and Hershey's (chocolate) syrup.
Yes, it's true.
 Add the white cake mix to a mixing bowl with the pistachio pudding mix.
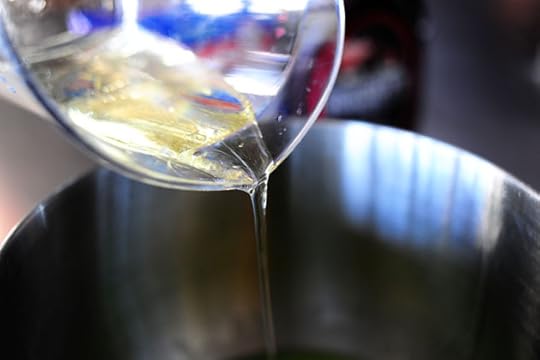 Add oil…
 Water…
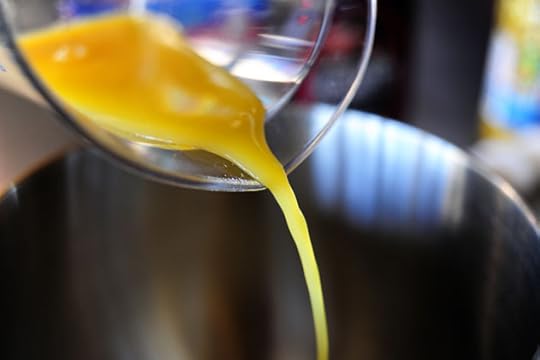 Orange juice…
And four eggs.
 Blend in an electric mixer for two minutes, scraping the sides of the bowl at least once during the process.
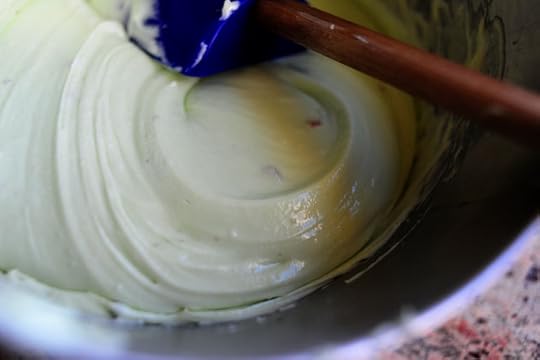 Green!
(And I actually think you add a tiny bit of green gel food coloring if you really wanted to emphasize the color.)
(Don't tell anyone I said that.)
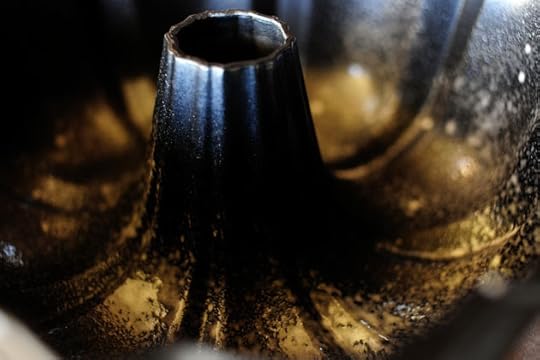 Grease and flour a bundt pan…
 Then pour in 3/4 of the cake batter.
 Return the bowl to the mixer, then pour in some chocolate syrup.
Weird, huh?
 Blend it for a few seconds until it's combined…
 Then pour the chocolate batter over the pistachio batter.
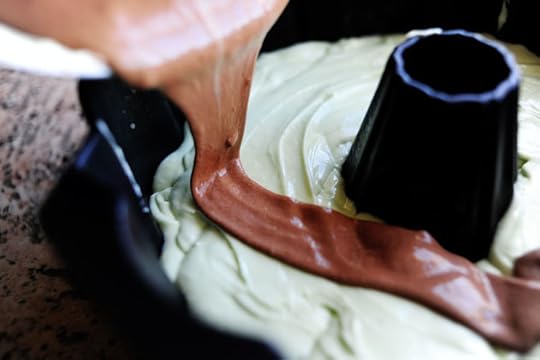 I love the color combo here.
 Bake this for about an hour in the center of the oven, until the cake is no longer jiggly like my arms.
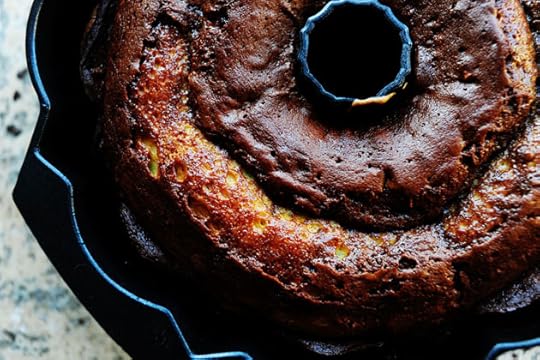 Done!
Done!
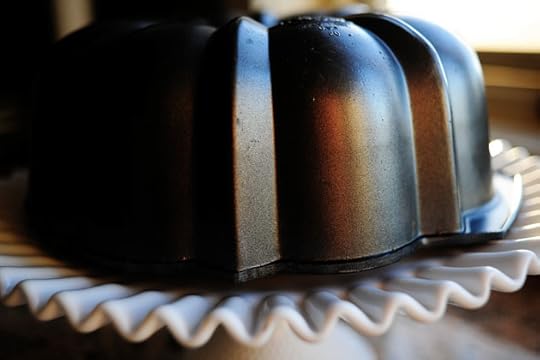
 Now let the cake sit for a few minutes…
 Then invert whatever serving plate you're going to use on top of the bundt pan.
 And turn it upside down.
 Hold your breath, squint, and brace yourself…the carefully lift off the pan.
This can be a triumphant or tragic moment, depending on the outcome.
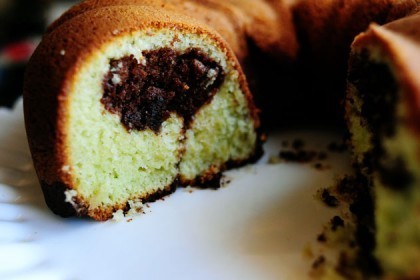
 And that's it! Nothing fancy at all. This makes for a nice, moist bundt cake. I will say that the flavor of the pistachio pudding is quite faint; if I had some pistachio extract, I would have added a drop or two. Still yummy though!
And there are several variations you can make to this cake. First, you can get fancy with the two batters—swirl them around just a bit before baking for more of a marble cake effect. Another thing I wanted to do (but ran out of time) was coat the entire cake with ganache, then sprinkle chopped pistachios all over the top. That would elevate this cake mix delight to another level. Or just serve a slice of the plain cake with a scoop of chocolate or vanilla ice cream, and sprinkle chopped pistachios over the top.
Enjoy, guys!
Salty recipe coming tomorrow, in case your sweet tooth is on overdrive.
Recipe: Pistachio Cake
Prep Time: 10 Minutes
|
Cook Time: 1 Hour
|
Difficulty: Easy
|
Servings: 18
Print Recipe
3"x5" Cards
4"x6" Cards
Full Page
[image error]
');
Ingredients
1 box White Cake Mix1 package (4 Ounce) Pistachio Instant Pudding Mix½ cups Orange Juice½ cups Water½ cups Vegetable Oil4 whole Eggs¾ cups Chocolate Syrup (such As Hershey's) Preparation Instructions
Preheat oven to 350 degrees. Grease and flour bundt pan.
Mix all ingredients but chocolate syrup and beat for two minutes on medium-high. Pour 3/4 of the batter into the bundt pan.
Add chocolate syrup to the remaining batter and mix well. Pour chocolate-laced batter on top of the pistachio batter.
Bake for 1 hour at 350 degrees.
Note: You can use a knife to swirl chocolate batter into the pistachio batter for more of a marbled design.
Variation: Coat cake with chocolate ganache!

January 3, 2011
Pig Cake
 I'm in sort of a potluck mood lately. I can't explain it. I don't know whether it's that we haven't had a potluck meal at our church for awhile…or that I miss all the weird and wonderful and warm foods on a potluck table…or that I'm just ready for things to get back to normal after all the Christmas and New Year rush…or that my fifth grade teacher blamed me for the weekly readers being out of order when it was really Andrew Hill that messed them all up—I don't know.
But I do know this: I have some serious issues and I'm glad I'm a churchgoing woman.
Andrew Hill? Weekly readers? I had no idea I'd been bottling that up all these years.
I feel cleansed.
I also know this: I love this cake! I have no idea why it's called Pig Cake. And I don't really care. I just know that it's a scrumptious potluck-friendly cake that I've seen (and eaten, with enthusiasm) over and over.
Oh, and I also know one more thing:
 The Cast of Characters is back! It's been on sabbatical for many, many months. It went on retreat and found itself. Happy New Year!
And what an intimidating and high-gourmet cast it is. Try not to fear the impressive array. You'll need a yellow cake mix, a can of mandarin oranges, a stick of margarine, four eggs, vanilla extract, vanilla pudding mix, powdered sugar, Cool Whip, and crushed pineapple.
Seriously—I don't even know if you'll be able to find all of this stuff. You might have to mail order it from Soho.
 First, throw the cake mix into the bowl of an electric mixer…
 Throw in a stick of softened margarine.
Not butter…margarine. It brings out the flavor of the cake mix.
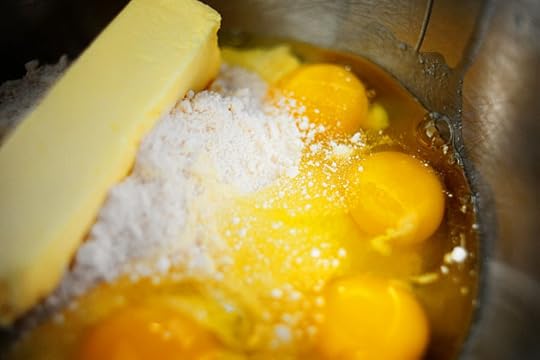 Crack in four eggs and add some vanilla extract.
 I decided to use the Madagascar stuff, just to be ornery.
Brings out the flavor of the cake mix.
 Then crack open the can of mandarin oranges…
 Totally drain the oranges, reserving 1/2 cup of the syrupy juice.
For what it's worth, I bought the mandarin oranges with light syrup.
But only because that's the only kind they had.
 Pour the juice into the mixing bowl…
 Then turn on the mixer and blend up this bizarre combination of ingredients.
 Mix it for four minutes on medium-high…
 Until it's light and very fluffy.
 Next, throw in the drained oranges and blend for several seconds, or until the oranges break into small pieces.
 Next, swipe your index finger along the beater and cover said finger with batter. Lick. Close your eyes. Moan.
Then go wash your hands with soap and water.
Repeat as necessary.
(Note: please don't do the gluttonous finger-swiping-and-licking thing if you're older, or pregnant, or are immuno-compromised. It's a raw egg thing.)
 Spray a 9 x 13 inch baking pan with baking spray (or just grease and flour it the way our grandmothers always did it.)
 Spread the batter evenly in the pan, then bake it for 25 to 30 minutes, or until nice and golden and firm.
 Cool it in the pan or—my preference—turn it out onto a large platter. Let it cool completely.
Photographers of all skill levels: this white platter completely wigged out my white balance and I couldn't be bothered to fix it in Photoshop. Don't be like me.
 While the cake is cooling (or once it's cooled) add the vanilla pudding mix to the (clean, because you made your daughter wash it) mixing bowl.
 Drain a can of crushed pineapple. reserving all of the juice. (You might need to squish your hands in there and force out some of the liquid. It doesn't always go willingly.)
 Add the pineapple juice to the pudding mix…
 Then throw in some powdered sugar.
 Mix it together until combined…
 Then grab some (softened in the fridge) Cool Whip…
 And plop in about half the carton.
 Whip it all together until fluffy, then stir in the drained crushed pineapple.
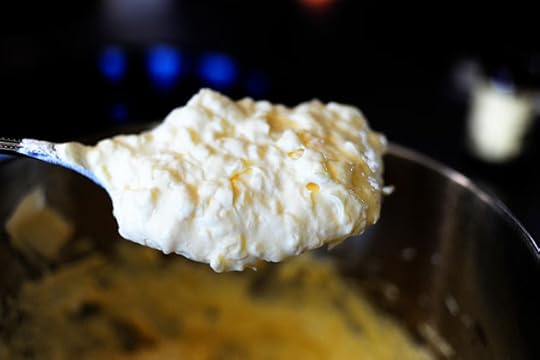 Looks weird, doesn't it?
Yeah, well…it tastes good, man.
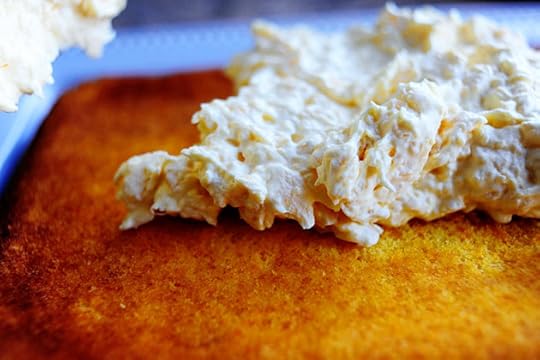 Plop it on top of the cake…
 Then spread it all over the top and sides of the cake.
You can refrigerate it at this point if you'd like! The cake is great after a few hours of refrigeration.
 When you're ready to serve it up, cut the cake into squares…
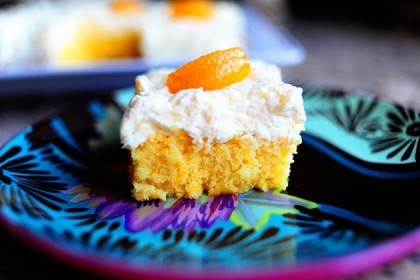
 And if you're feeling cutesy and girlie, lay a mandarin orange slice on the top of each square.
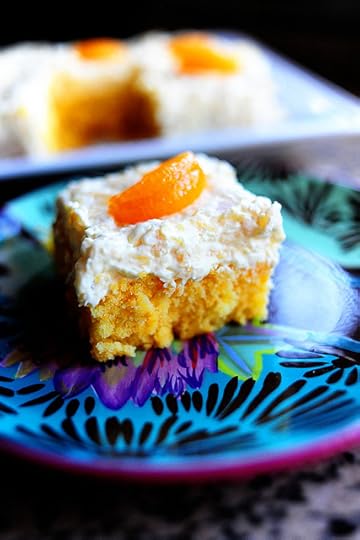 Lovely!
It's enough to make any potluck attendee race to the dessert table.
 I like doctored-up cake mix desserts. I can't promise you this'll be the last one I share here.
But I can promise you it won't.
 This is yummy, guys. It definitely won't win any culinary awards in the pastry arts.
 But it'll make the church ladies love ya.
On a slightly different note: that whole New Year's resolution thing about not eating sugar and flour for thirty days?
 So far it's not going so well.
But there's always tomorrow!
Enjoy, guys. Happy New Year.
Love,
P-Dub
Here's the handy dandy printable:
Recipe: Pig Cake
Prep Time: 10 Minutes
|
Cook Time: 30 Minutes
|
Difficulty: Easy
|
Servings: 16
Print Recipe
3"x5" Cards
4"x6" Cards
Full Page
[image error]
');
Ingredients
FOR THE CAKE:1 box (18.25 Oz. Box) Yellow Cake Mix1 stick Margarine (softened)1 can (14 Oz. Can) Mandarin Oranges, Drained, 1/2 Cup Juice Reserved4 whole Eggs1 teaspoon Vanilla Extract _____ FOR THE TOPPING:1 package (4 Oz. Box) Vanilla Instant Pudding Mix1 can (20 Oz. Can) Crushed Pineapple, Juice Reserved½ cups Powdered Sugar4 ounces, fluid Frozen Whipped Topping (such As Cool Whip) Extra Mandarin Orange Slices, For Garnish Preparation Instructions
Preheat oven to 350 degrees. For the cake, combine cake mix, margarine, 1/2 cup juice from the mandarin oranges, and vanilla. Beat for four minutes on medium-high. Add drained oranges and beat again until pieces are broken up and small. Pour batter into greased and floured 9 x 13 inch baking pan and bake for 25 to 30 minutes, or until golden brown and set. Remove from oven and cool completely. If desired, turn out cake onto a large platter.
Once cake is cool, blend juice from drained pineapples with the vanilla pudding mix. Add powdered sugar and mix, then mix in whipped topping. Stir in drained pineapple. Spread on cooled cake and refrigerate several hours.
To serve, cut cake into squares and top each square with a mandarin orange slice.

December 31, 2010
Zannie's Black-Eyed Pea Dip
 Zannie is my sister.
Well, she's not really my sister. But she's the mother of my two sweet nephews—we had our first babies at the same time—and she'll always be a sister to me. When I was big and enormous and pregnant with my second child, we spent a summer together and she'd bring me cokes on ice because I couldn't get off the couch.
I love you forever, Zannie.
This is a scrumptious recipe Zannie shared with me once—a delicious black-eyed pea dip that's warm, not cold, which ushers in all sorts of interesting texture and flavor. Try it for your New Year's gathering today or tomorrow. It really is yummy.
 You need a can of black-eyed peas. Zannie actually uses the kind that's canned with jalapenos, so if you have those available, grab them.
 I could only get the plain ones, so I also grabbed some jarred jalapenos.
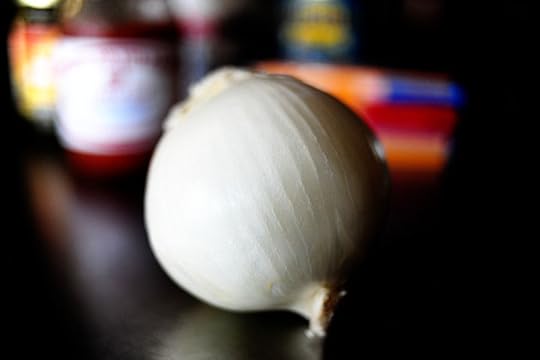 You'll also need an onion…
 Some sour cream…
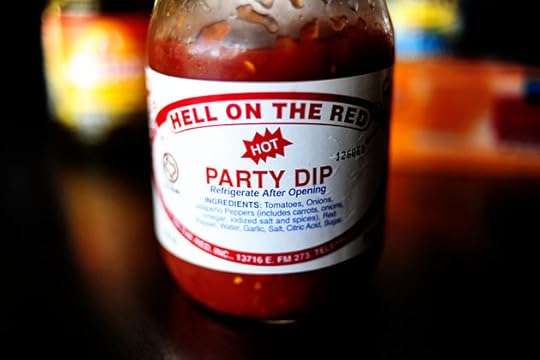 Some jarred salsa…
 Some sharp cheddar…(Important Note: the "reduced fat" version of this was a grievous grocery buying error. Don't make the same mistake I made.)
 Some hot sauce—Choula or Tabasco will do…
And some salt and pepper.
 Begin by draining the black-eye peas…
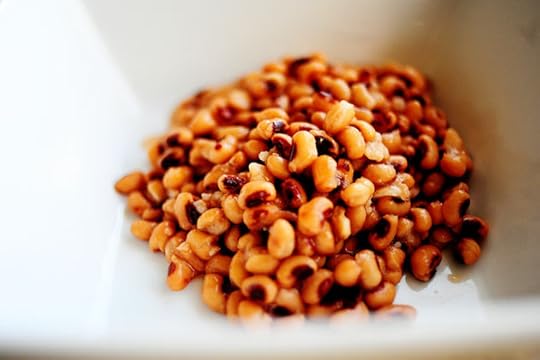 And pouring them into a bowl.
 Next, use a fork to mash them up…
 Leave some chunks here and there for texture.
 Next, chop up some onion really finely…
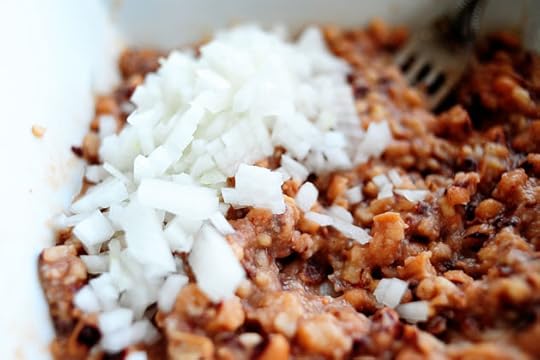 And throw it into the bowl.
 Then add some sour cream. Gives it a nice creaminess.
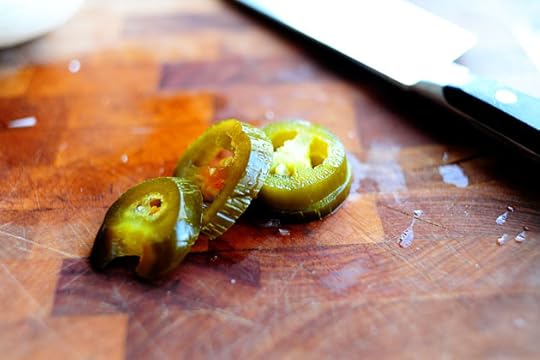 Next, if you're not using the black-eyed peas with jalapenos, throw some jalapeno slices on a cutting board…
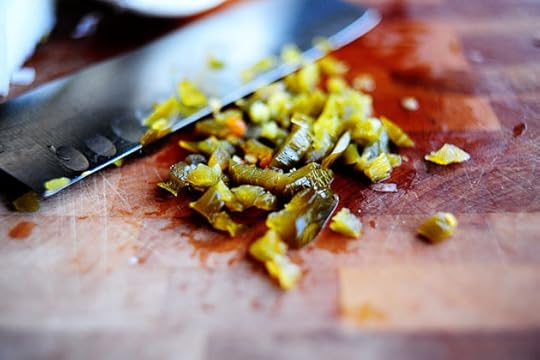 Chop them up…
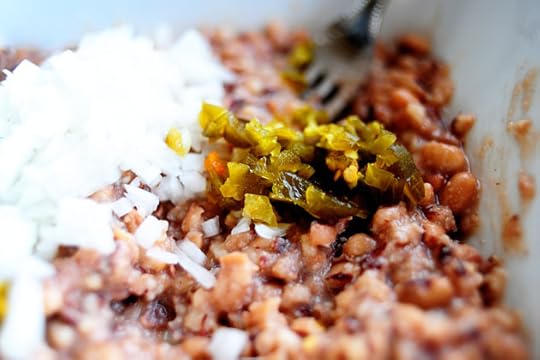 And throw them into the bowl.
 Grate up the cheddar and toss it into the mix…
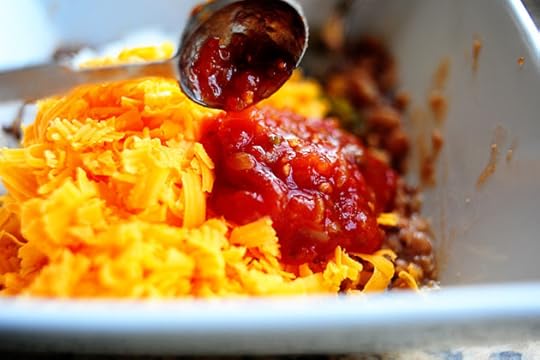 Then add some salsa…
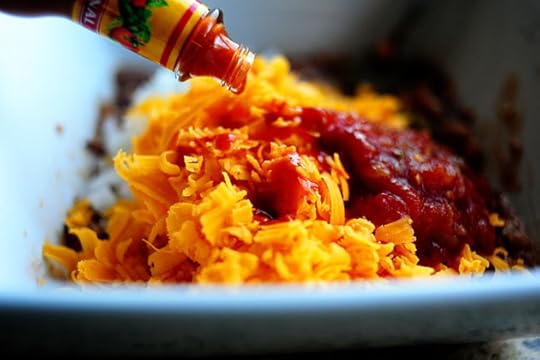 And some hot sauce…
 And plenty of salt and pepper.
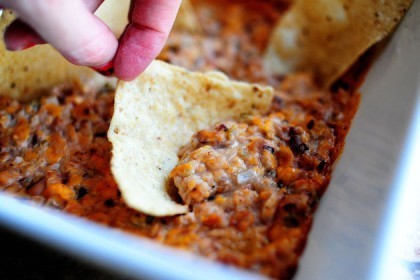
 Stir it to combine, then spread it into a baking dish (which happens to be the bowl in which I mixed it!)
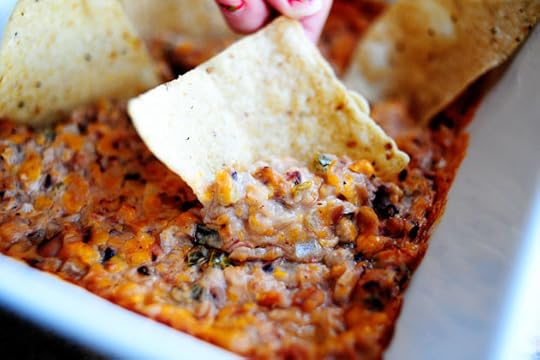
 Bake it for 20 to 30 minutes, or until it's hot and bubbly and golden brown on top.
Serve with tortilla chips!
And yes, I hope to fix my manicure before the New Year. It's just that my girl did my nails…and this polish is a little sentimental to me.
That's my story and I'm sticking to it.
Have a wonderful, celebratory, and safe New Year's Eve, everyone. See you in 2011!
Love,
Pioneer Woman
Recipe: Zannie's Black-Eyed Pea Dip
Prep Time: 10 Minutes
|
Cook Time: 30 Minutes
|
Difficulty: Easy
|
Servings: 12
Print Recipe
3"x5" Cards
4"x6" Cards
Full Page
[image error]
');
Ingredients
1 can (14-ounce) Can Black-eyed Peas¼ whole Onion, Chopped Fine¼ cups Sour Cream8 slices Jarred Jalapenos1 cup Grated Sharp Cheddar Cheese3 Tablespoons Salsa Hot Sauce, to taste Salt And Black Pepper To Taste Preparation Instructions
Preheat oven to 350 degrees. Drain black-eyed peas and partially mash, leaving some whole.
Add all other ingredients, stirring to combine.
Spread into a 1 1/2 quart baking dish and bake for 20 to 30 minutes until hot and bubbly.
Serve with tortilla chips!
*Note: if you have them available, you can use the canned black-eyed peas and jalapenos (they're canned together.) If you do this, you can omit the extra jalapenos.

December 29, 2010
Meatballs with Peppers and Pineapple
 This recipe was adapted from an old recipe in my mother's binder. It came from a church friend of ours named Mary Friley. Mary had beautiful salt-and-pepper hair, a son named Chip, and a daughter named Stephanie who lit up any room she entered.
Recipes are so personal, aren't they?
And I suddenly want a son named Chip. So wonderfully preppy.
These are Asian-inspired meatballs that can be served over rice as a yummy dinner or on an appetizer buffet table with toothpicks. I've switched a few things up from the original and made the dish decidedly spicy, which proves to be a nice contrast to the sweetness of the pineapples and sauce.
Whip it up this week! It's a total cinch to make.
 Chop up some onion really finely.
 Throw it into a bowl with some ground beef.
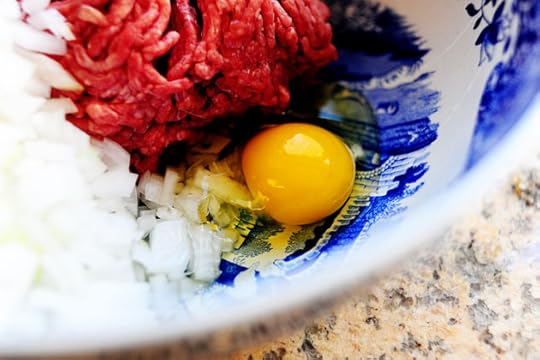 Crack in an egg…
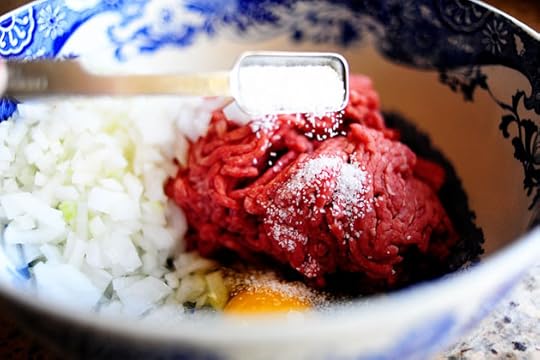 And add some salt…
 Some pepper…
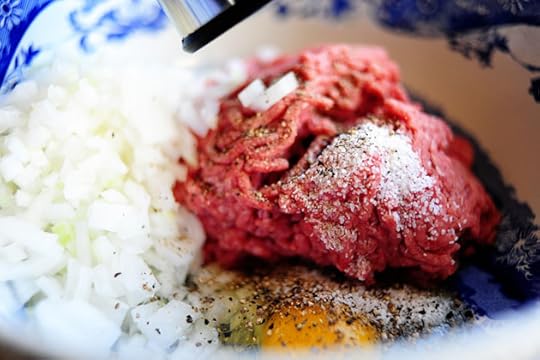
 And some crushed red pepper. This really does add some nice spice to the mix, but if you're averse to much heat, you can leave this out.
You can't HANDLE the heat!
 Finally, to give it a little texture, add some panko breadcrumbs—or any breadcrumbs will do!
 Use your hands to mix/knead it all together.
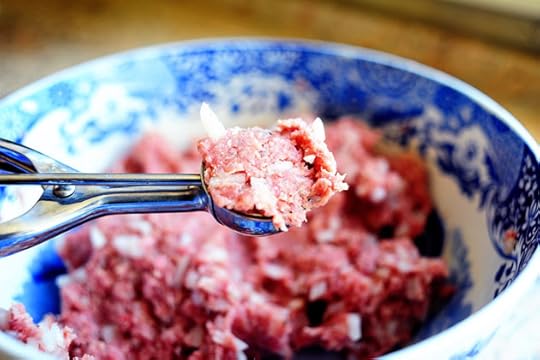 Then scoop out small amounts…
 Roll them into neat little balls, and place them on a cookie sheet. Go small with the meatballs, too. Smaller is better in this dish.
Now, stick the pan of meatballs into the freezer for fifteen minutes or so, just to firm them up and make them easier to fry.
 While they're firming up, get all the other ingredients ready: mix up some beef stock, soy sauce, vinegar (or sherry; either one is fine!), sugar, and cornstarch. Mix it together until well combined.
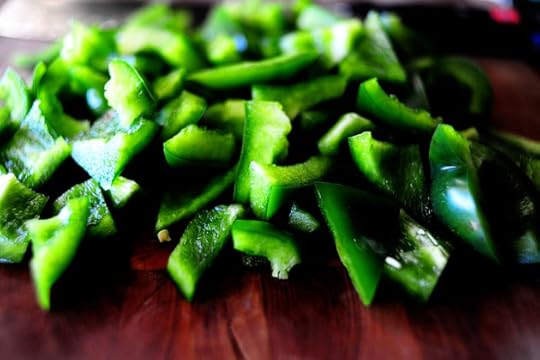
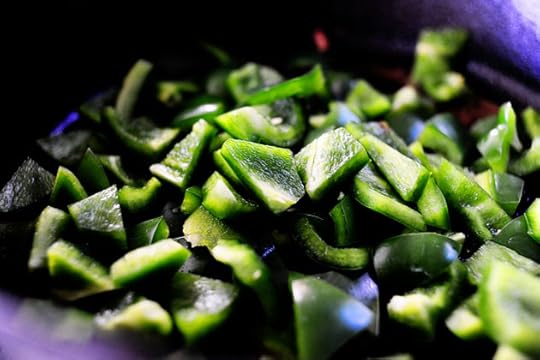
 Chop up some green (and/or) red bell peppers. I like to do sort of a rough chop and make all the chunks different shapes (as opposed to doing a neat, tidy dice).
 Makes me feel like a rebel.
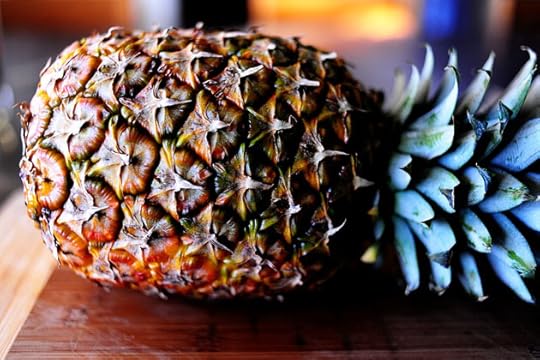 Next, grab a pineapple.
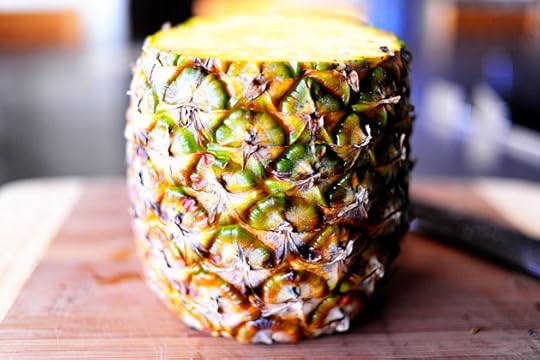 Lop off the top and bottom.
 Next, slice off the skin in six sections.
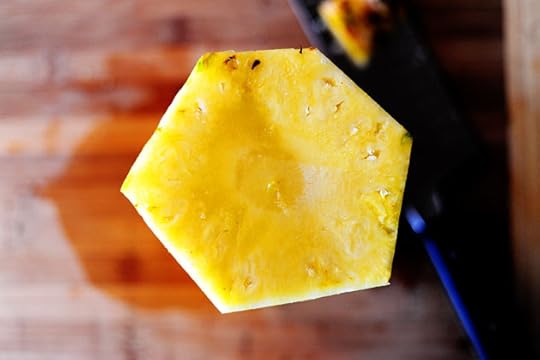 Hexagon!
 Next, use a sharp knife to cut diagonally from point to point. You'll make three cuts.
 Next, slice the hard section off of each wedge.
 Then just slice up the wedges into bite-size pieces.
Done!
 When you're ready, pull the meatballs out of the freezer. They should be firm, but not frozen solid. Throw each meatball into a little flour and roll it around…
 And there you have it! Mexican Wedding Cookies. Enjoy, my friends!
Just kidding.
I will love doing that till the day I die.
 Heat some canola oil over medium-high heat, then fry the meatballs in two or three batches.
 You want to get them nice and brown/crisp on the outside. Don't worry too much about getting them completely done in the middle, as they'll finish cooking in the sauce later.
 Remove the meatballs to a separate plate.
 Pour off all the excess oil from the pan, then return it to medium-high heat on the stove.
 Throw in the green peppers…
 And stir them around for less than a minute. You want them to stay crisp through the whole process.
 Then throw in the pineapple and cook it for about 45 seconds or so.
 Pour in the stock/soy mixture…
 And add in all the meat-a-balls.
 Stir them gently into the sauce, then let the sauce cook gently for a few minutes.
 It will thicken over the course of a few minutes. If it gets too thick, add in a little more stock. If it needs more thickening, mix an additional teaspoon of cornstarch with some stock and pour it in.
 Finally, use your freaky pink alien fingers to add in some more crushed red pepper. Trust me!
Zee spice eez nice.
Also: be sure to taste the sauce and make sure it's salted enough. Thank you for your cooperation.
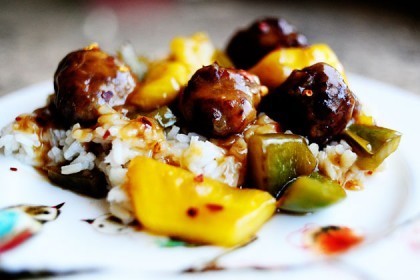
 Serve the loveliness over rice or noodles.
 It's a really nice, satisfying dish. And you can swap out a red bell pepper for one of the green ones to add even more gorgeous color to the mix.
Enjoy this, my friends!
Love,
P-Widdy-Dub-Diddy-Diddy-Dub-Dub
Recipe: Meatballs with Peppers and Pineapple
Prep Time: 20 Minutes
|
Cook Time: 20 Minutes
|
Difficulty: Easy
|
Servings: 8
Print Recipe
3"x5" Cards
4"x6" Cards
Full Page
[image error]
');
Ingredients
1-¼ pound Ground Beef½ whole Onion, Diced Very Finely1 whole Egg½ cups Panko Bread Crumbs (or Regular Breadcrumbs)1 teaspoon Kosher Salt Freshly Ground Black Pepper, To Taste½ teaspoons Crushed Red Pepper, More To Taste¼ cups All-purpose Flour Canola Oil, For Frying2 whole Green Bell Peppers, Seeded And Diced Roughly1-½ cup Fresh Pineapple Chunks2 cups Beef Stock Or Broth2 Tablespoons Soy Sauce½ cups Sherry Or White Wine Vinegar⅓ cups Sugar1 Tablespoon Cornstarch Salt To Taste Crushed Red Pepper, To Taste Extra Beef Stock If Needed Preparation Instructions
Combine ground beef, diced onion, egg, salt, pepper, breadcrumbs, and crushed red pepper. Mix with hands until combined. Roll meat mixture into small balls and place on a cookie sheet. Freeze on the pan for 15 minutes to firm.
Mix together beef stock, soy sauce, sherry (or vinegar), sugar, and cornstarch.
Heat canola oil over medium-high heat. Roll meatballs in flour, then fry in two batches until nice and brown, about two minutes per batch. Remove meatballs and set aside on a separate plate.
Pour off oil from pan and return pan to medium high heat. When pan is hot, throw in the chopped green peppers and cook for one minute. Add pineapple to pan and cook for one minute, stirring gently. Pour in stock/soy sauce mixture, then add meatballs. Stir gently to combine and allow to cook and bubble for a few minutes, or until sauce is thickened. Add salt and crushed red peppers to taste. (Hint: this dish is yummy if it's a little spicy.)
Serve over cooked brown or white rice.

December 27, 2010
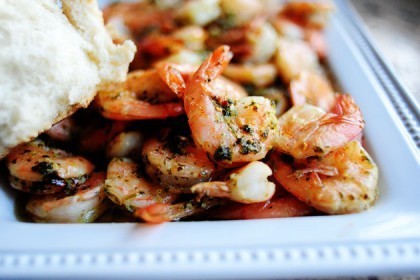
Spicy Lemon Garlic Shrimp
 This is an extremely delectable take on the Spicy Shrimp (a standard southern shrimp dish) I posted here in the early days of The Pioneer Woman Cooks. It's similar to the old standby in that you simply throw a bunch of shrimp onto a baking sheet, top it with a bunch of savory ingredients, and bake it till the shrimp or done…but instead of a spicy, peppery, Tabasco kick, the shrimp are seasoned with garlic…lemon…butter. All the good things in life.
What I love about this dish is that you can pull shrimp straight out of the freezer and bake them without thawing if you're in a rush to fix dinner for guests.
But what I love more about this dish are the heavenly, ridiculously buttery and delightful juices in the pan after the shrimp have cooked.
You have to dip bread in the stuff to believe it.
Serve this on New Year's Eve! Put little bowls around the table for the shells. Everyone will love it.
 Grab some shrimp right out of the freezer. Give it a good rinse under cool water for a few minutes, just to get most of the ice off.
 Arrange the shrimp in a single layer on a baking sheet. Then just set the shrimp aside for a bit.
 Throw cold butter into the food processor.
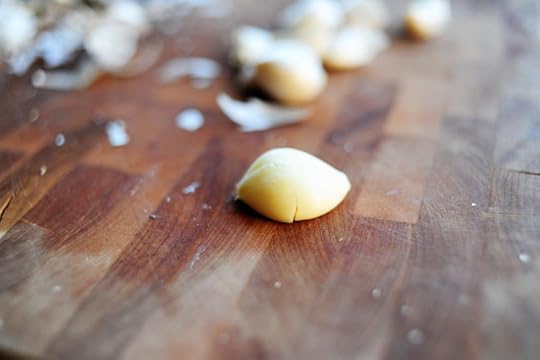 Peel a whole buncha garlic.
 Throw the garlic in with the butter.
 Then toss in some parsley. You'll notice two things about this parsley. No, wait…three things.
Well, maybe more than three.
I'll take it as it comes.
1. It's curly-leaf parsley. I cain't get no flat-leaf parsley at my local grocery store.
1a. I defy anyone to detect the difference in flavor between curly leaf and flat leaf parsley.
2. It's all in a bunch; no chopping necessary.
2b. I'm lazy.
3. It's a little wilted.
3a. And I don't care who knows it.
 Next, squeeze in the juice of one lemon.
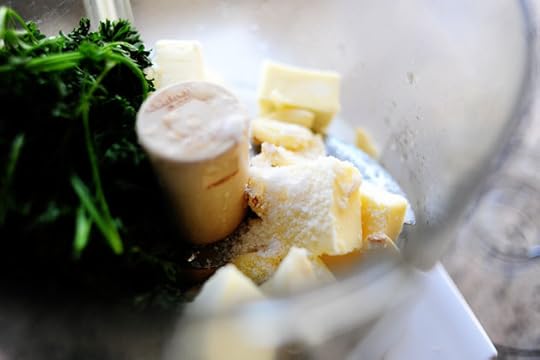 Add a little salt.
 Then add a good amount of crushed red pepper.
 Next, just pulse-pulse-pulse until it all comes together and combines. Because the butter is cold, it'll wind up in nice crumbly clumps.
 Sprinkle the crumbles all over the shrimp.
 Throw the pan into the oven and bake the shrimp for about twenty or thirty minutes.
 The shrimp will be pink and opaque and the butter will be hot and bubbly.
And the world will be a beautiful, wonderful, inviting place.
Amen.
 Serve the shrimp straight from the pan or transfer them to a serving platter. If you do the latter, be sure to pour on all The Wonderfulness.
 The Wonderfulness = This Stuff.
 Yummy. Oh, baby.
 Be sure to serve it with crusty French bread.
 Because otherwise you'd have to eat The Wonderfulness with a spoon.
And that would be a little embarrassing.
Not that I'm above it, though.
Love,
Pioneer Woman
Recipe: Spicy Lemon Garlic Shrimp
Prep Time: 5 Minutes
|
Cook Time: 25 Minutes
|
Difficulty: Easy
|
Servings: 8
Print Recipe
3"x5" Cards
4"x6" Cards
Full Page
[image error]
');
Ingredients
2 pounds Raw Shrimp, Deveined, Shells On2 sticks Cold Unsalted Butter Cut Into Pieces1 teaspoon Kosher Salt4 cloves Garlic, Peeled¼ cups Fresh Parsley½ teaspoons Crushed Red Pepper1 whole Lemon, Juiced Preparation Instructions
Preheat oven to 375 degrees. Rinse frozen shrimp to separate, then arrange in a single layer on a baking sheet.
In the bowl of a food processor, add cold butter, garlic, lemon juice, salt, parsley, and red pepper. Pulse until combined. Sprinkle cold butter crumbles over the shrimp.
Bake until shrimp is opaque and butter is hot and bubbly.
Serve with hot crusty bread. Peel and eat the shrimp, then dip the bread into the butter in the bottom of the pan.

December 24, 2010
From Me to You
I have a category of "PW's Favorites" here on The Pioneer Woman Cooks. It's the designation I assign to those recipes that make my skirt fly up…and then some.
If you're looking to cook a little somethin'-somethin' special this weekend (or next week), you can browse the entire category of my favorite recipes:
Recipes That Make PW's Skirt Fly Up and Then Some
If you're not in the browsing mood, though, here are a few handpicked ones.
Please make these at the earliest possible convenience.
Thank you for your cooperation.
This is a recording.
 Chicken Parmigiana. Children clap. Men rejoice. Hearty, elegant, and satisfying.
 Pasta with Tomato Cream Sauce. It's what I live for. I'm not kidding.
 Chicken Cacciatore. Circa the 1950′s, this yummy dinner is comfort food to the max. And it feeds an army.
 Beef with Snow Peas. I don't necessarily want to play favorites among my favorites, but I will say that I could eat this every day of my life. It's positively perfect.
In fact, I want some now.
Anyone have any flank steak I can borrow? I'm plum out.
 Chicken and Dumplings from last week. I know there was some question as to whether these are true dumplings in the traditional sense (I say they are. Not that I know anything.) but if you just strip away all the labels and preconceived notions…this is just a dang good bowl of yumminess. Give it a shot.
 French Onion Soup Stuffed Mushrooms. All the goodness of French onion soup in a bite-sized appetizer. Perfect for your holiday get-togethers. Or just for you.
 Brandy Snaps. I love these crisp little delights, and they're so much fun to make.
 Burgundy Mushrooms. I would venture a guess that as I write this, my mother-in-law is putting these on the stove for their nine-hour cooking journey, which means in about nine hours I'll be standing over my mother-in-law's stove with a fork, spearing mushrooms and eating them before the rest of the Christmas Eve dinner is ready because they're so delicious, I can't control myself in their presence.
They're really that good.
If you want to make them for dinner tonight, run to the store and get 'em on the stove!
 Filet au Poivre. A triumph. Serve with the Burgundy Mushrooms and choruses of praise will rise from your household.
Lots of good grub!
Have a wonderful day, evening, and night everyone.
Merry Christmas!

December 23, 2010
Christmas Mixer Winners
 Here are the winners of the gorgeous red mixers:
#27952 Elisa Snyder: "I am baking a ham and mashed potatoes and veggies and rolls!"
#19612 David C: "My brother and I took over responsibility for preparing the xmas eve feast from my grandmother a few years ago. We still use her recipes, but she now supervises from the couch. We're making a beef tenderloin with Madeira sauce, Yorkshire pudding, creamed spinach, and a bacon appetizer (bacon shmeared with mustard and brown sugar then baked – trust me, it's insanely delicious). Saturday morning we'll do crepes, ham, probably biscuits with cinnamon apple butter."
#2297 Krista: "I'm making cinnamon rolls and prime rib. I'm an overachiever! Or not."
Congratulations, winners! Contact prizes@thepioneerwoman.com to claim your loot.
STATISTICIAN DON'S RESULTS
The brilliant Statistician Don sent me a chart of the top twenty-five answers to the question "What are you cooking this weekend?"
Here it is!

(Interesting as always, Don! Thanks for sending.)

December 22, 2010
Giveaway Day
Today…
Because Christmas is in three days…
Because my brother ate all my beef stew before I could photograph the final dish for my next recipe…
Because that has nothing to do with anything; I just wanted to give my brother a hard time…
(But now I have to make the stew all over again. It's just like childhood! Always having to remake the stew because of my big lug of a brother…)
And because I love ya…
 I'm giving away three (3) of these gorgeous candy apple red KitchenAid stand mixers.
I love this mixer.
It's red.
It's shiny.
It'll keep you out of trouble.
TO ENTER
To enter the giveaway, just answer the following questions in the Comments section of this post:
What are you cooking this weekend?
Are you making standing rib roast and Yorkshire pudding for Christmas Eve dinner?
Are you making cinnamon rolls for your friends and neighbors?
Are you delivering plates full of Christmas cookies?
Or are you sticking a chicken pot pie in the oven and calling it a day?
No matter what your cooking plans, just share them in the Comments section of this post and you're automatically entered to win a mixer.
THE RULES
One entry per person, please. Strictly enforced with a wire whisk.
No entries after noon Pacific Time Thursday.
Winners will be selected at random and announced Thursday night.
Note: Replies to comments are unable to be counted as entries. Please leave one comment (not a reply) as your entry.
KNIFE GIVEAWAY
 We're also having a special Knife Giveaway over on the Tasty Kitchen Blog today. Head on over and share your weekend plans for a chance to win a set!
Tasty Kitchen Knife Giveaway
(And while you're at it, if you're stuck needing recipe ideas, browse the incredible collection of grub. The recipes that come into Tasty Kitchen every day knock my socks off.)
Tasty Kitchen – Favorite (Awesome) Recipes from Real Cooks
Amen.
PRINTER GIVEAWAY
Finally, there's one week left on my . Just enter your favorite holiday recipe over there and you're entered to win one of their new web-enabled (the printer itself is connected to the web and doesn't need a computer!) printers:
(The printer giveaway is sponsored by HP, but I'll be pulling some names out of the hat for a few surprises myself. *Evil Cackle*)
Good luck with all the giveaways, everyone!
Note: The Comments section of this post is for the red Kitchen Aid mixer only. Follow the links above for both the Knife and the giveaways.
Lots of Love,
P-Dub
____________________________
Mixer and Knife giveaways sponsored by Pioneer Woman. Printer giveaway sponsored by HP. Over and out.

Ree Drummond's Blog

- Ree Drummond's profile
- 2032 followers

